When you click on links to various merchants on this site and make a purchase, this can result in this site earning a commission. Affiliate programs and affiliations include, but are not limited to, the eBay Partner Network.
Jerry - I might have missed some reference to CAD software and NC machine tools, but it seems to me that in addition to many tedious hours of wrestling with, properly setting up, and clamping very large and heavy chunks of metal for milling, you have been using a manual mill to do the work. I can't estimate the number of hours you must have spent so far.
Incredible patience and dedication have to be added to your impressive list of skills.
Thanks RET. You are right in that I have to do all of this machine work by hand. And, ordinarily I too would not be able to estimate how much time I spend doing this; but in this cse I was kind of curious as to how close I was going to come to what I calculated must have been a $1.5 million estimate that Roger found to do these kind of dies some time ago. So I have been keeping careful track of my shop time so far. I'll try to keep that up to the finish, and then I'll know. Even that does not incude the planning and design time I am spending nor time like the trips to retrieve and later deal with the 50 ton press I bought.
Jerry - I should have included some appreciation of design time and effort along with acknowledging the incredible amount of work just fabricating everything so far; and then there are the expenses of buying and retrieving the press, and buying the metal (not cheap!), etc.
I don't doubt that the cost of a stamping or pressing die for metal would exceed a million dollars: in a previous life my company commissioned steel dies for injection molding of fairly small plastic enclosures for the commercial electronic products that we produced. The design costs were minimal, but the cost to produce the molds usually reached $100K. and CAD/CAM automated machinery was extensively used (... and I did not even see a DRO in any of the pictures of your milling machine....).
Keep up the good work, and I hope that you get a lot of satisfaction doing it.
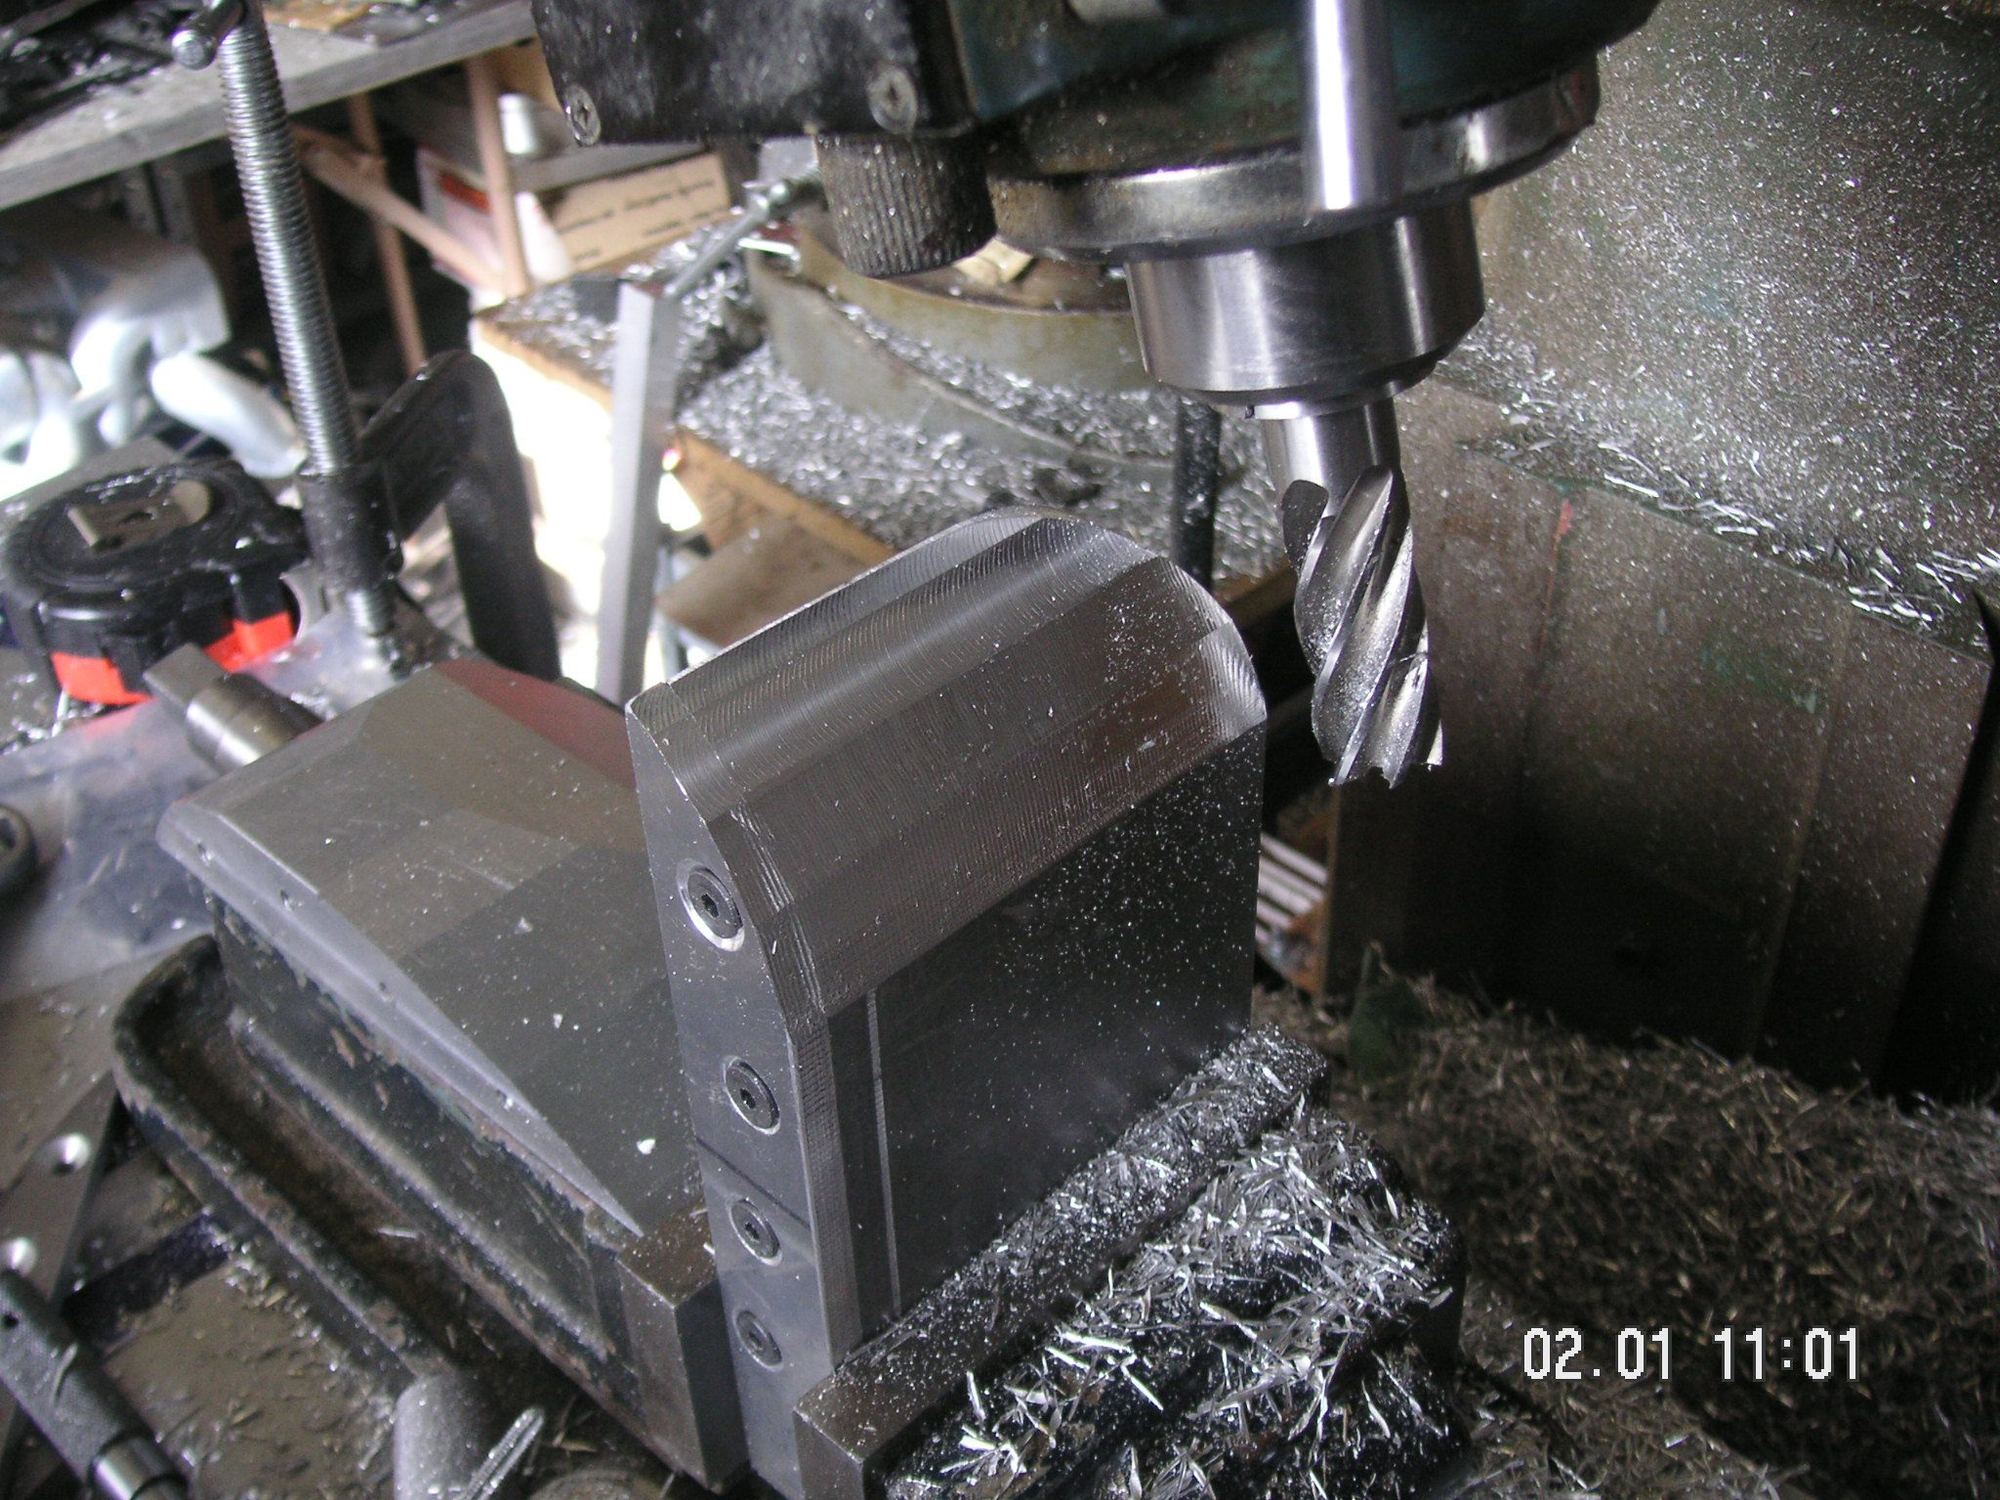
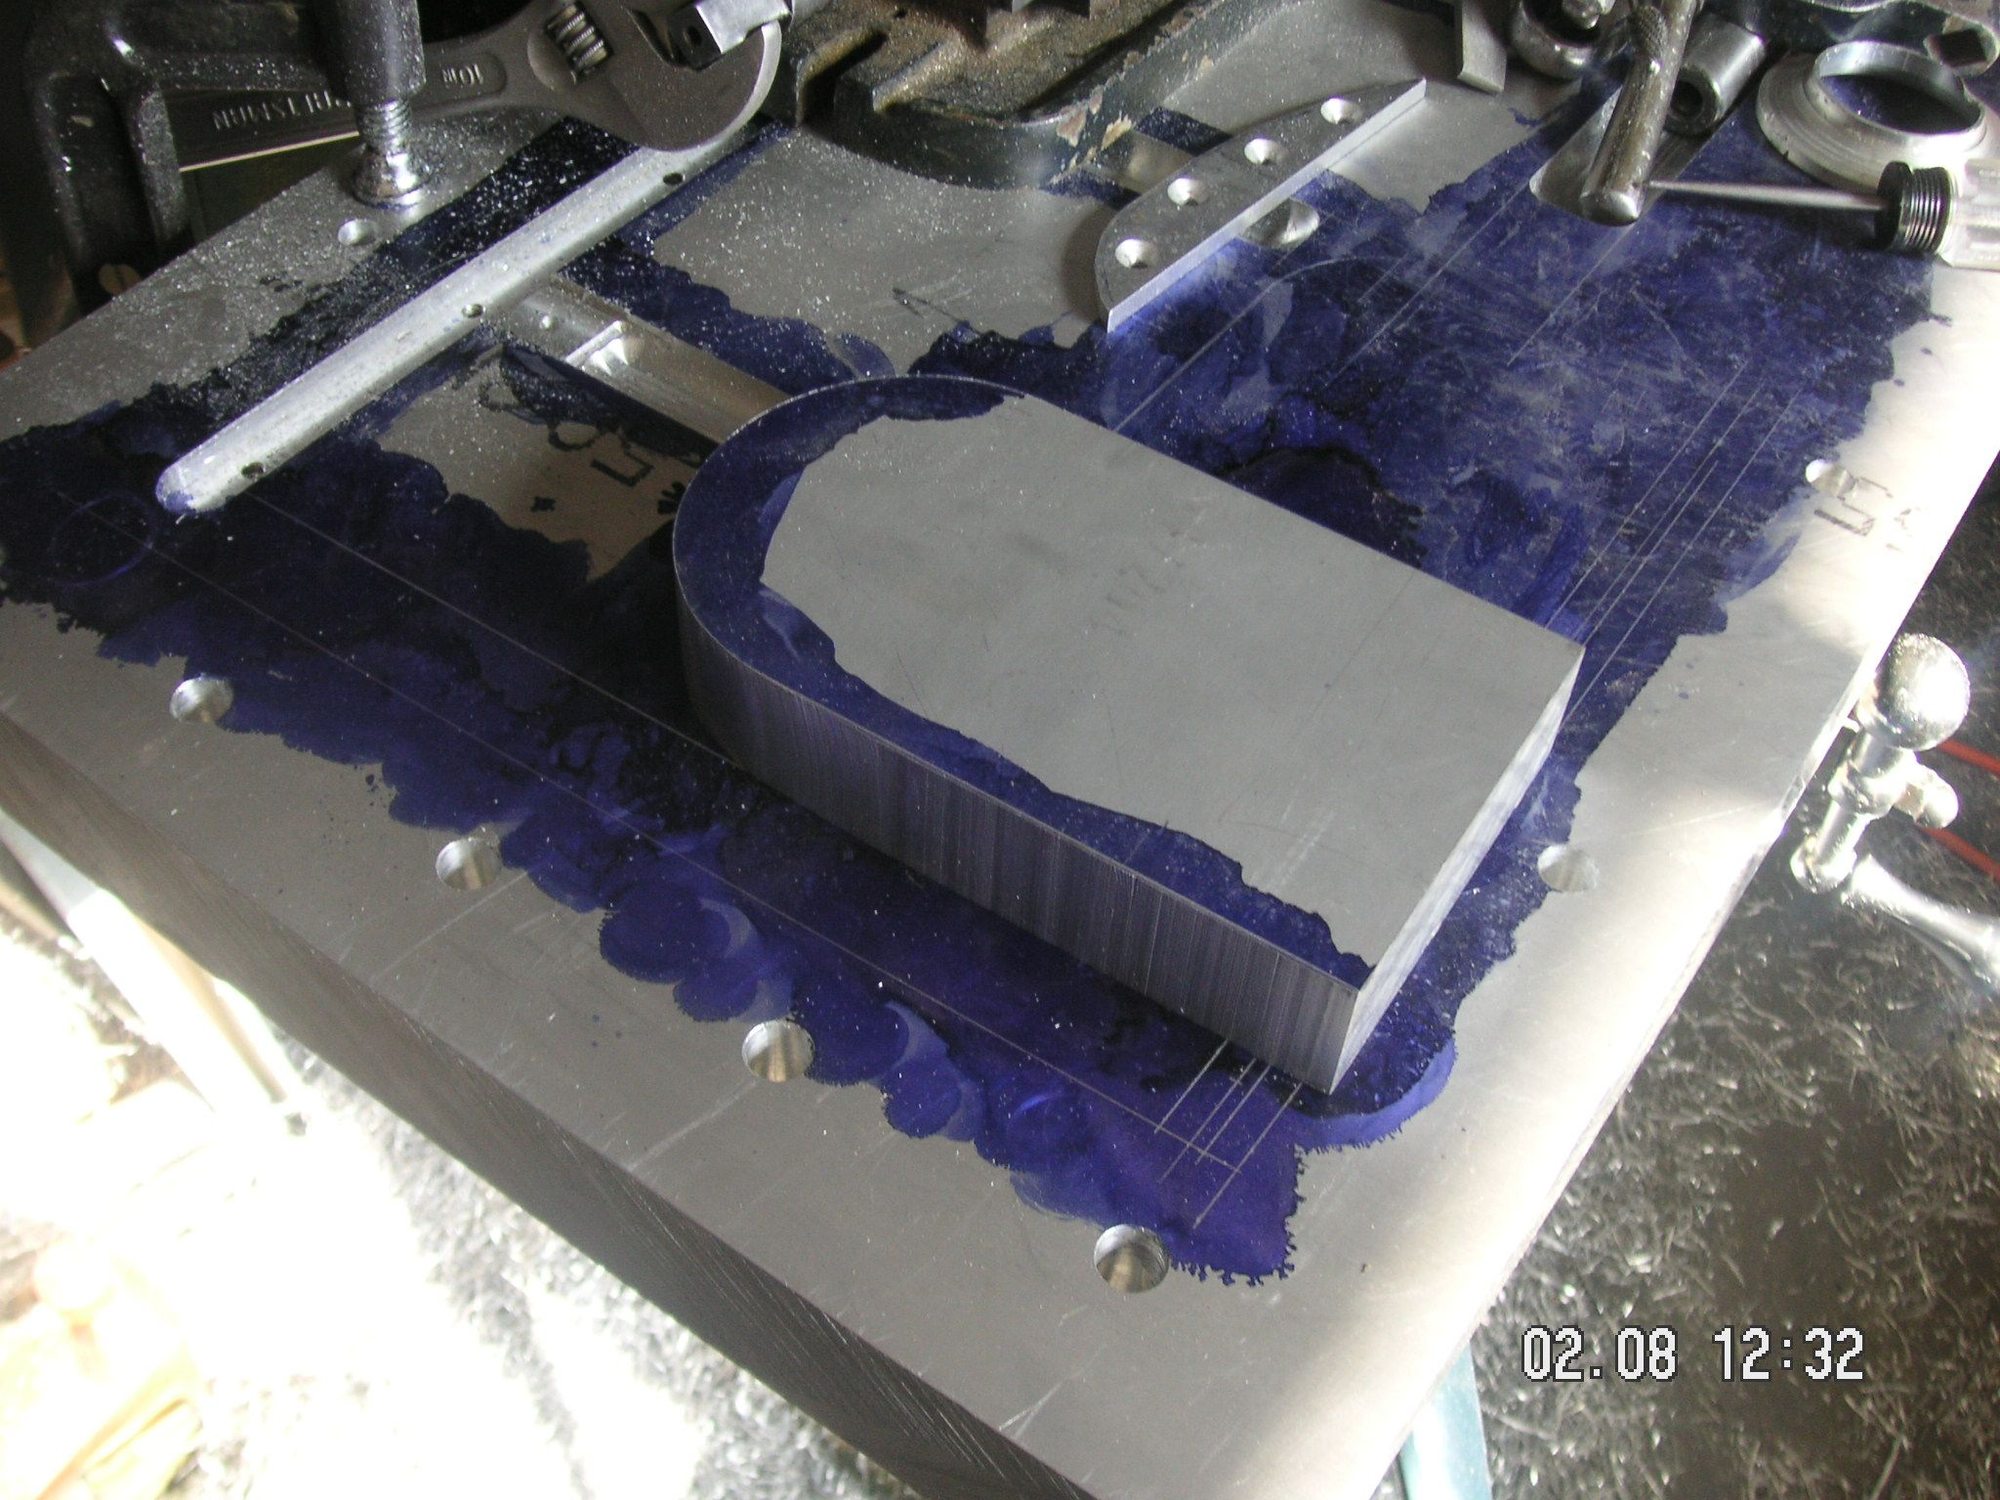
This has been a really busy week at the Law Office, so I haven't gotten much time in the shop. Yesterday I did however get started on remaking the small form for the AC bulge. When I began working up the design and cut angles for the more complex Alternator Bulge I decided that the smaller bulge needs to be a bit different. I have that plug in the mill now and will start shaping it some later this morning. I forgot to take my camera out last evening so didn't get any pictures. I'll take it out this morning and bring you up to date. Then I have to go to the office again later today to finish up an appellate brief that is due about mid week.
I got to spend some time today working on the restart of the small bulge form. I now have it to just about the same point as the first attempt, but now with a little better shape. Next I have to calculate the average angle between the flats and at the corners and then mill them off. That will take a little, but then it ought to go fairly quickly.
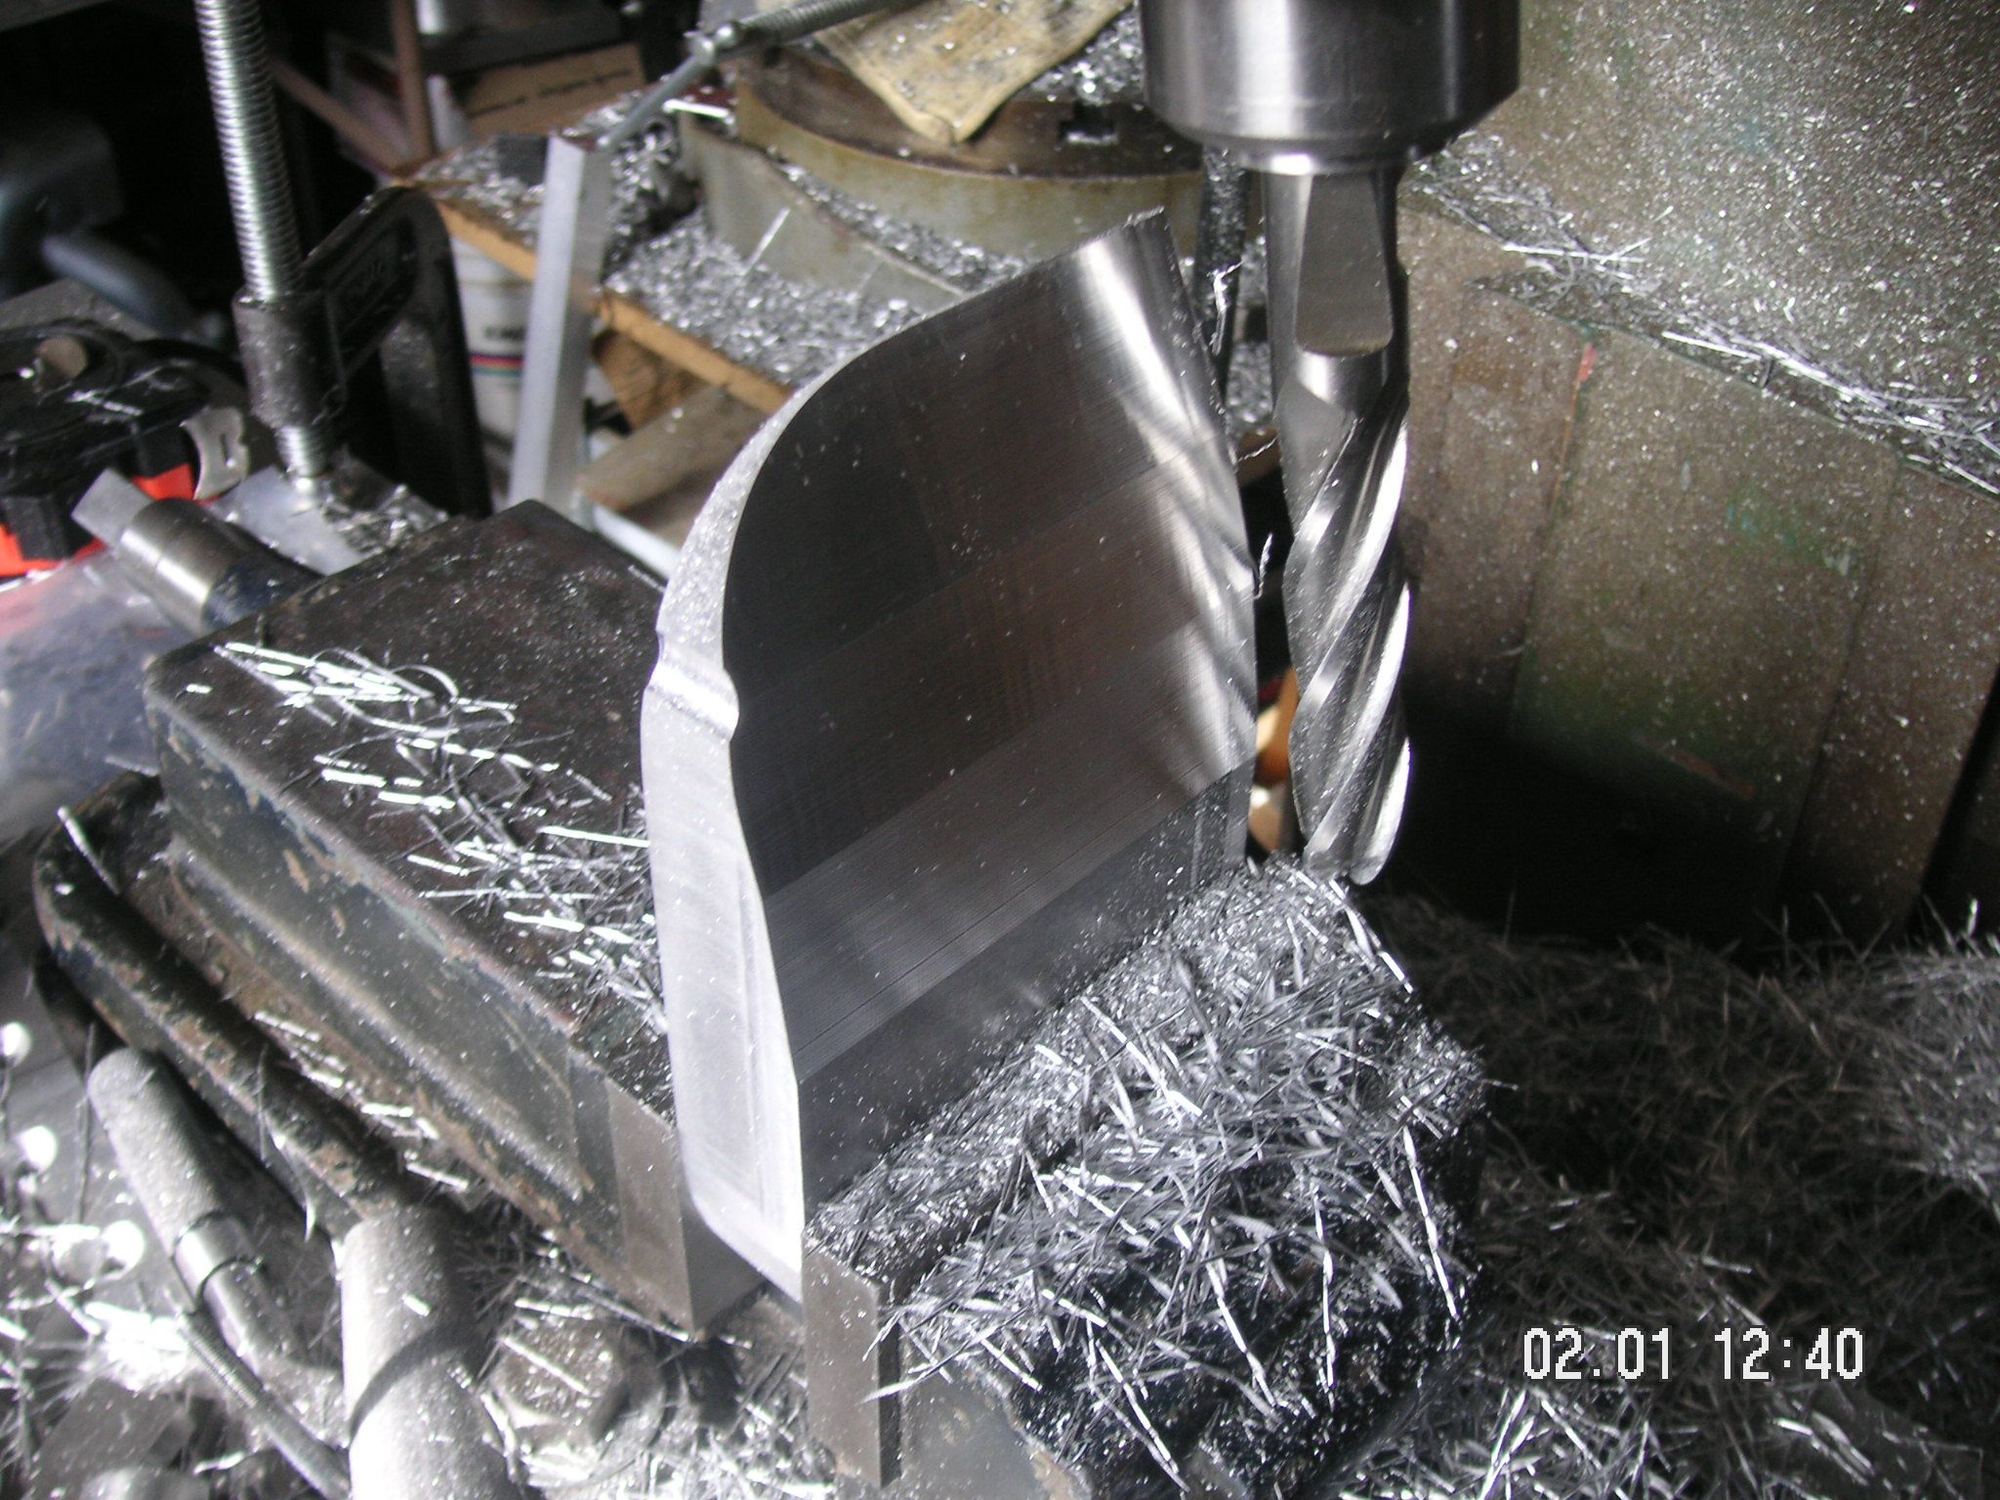
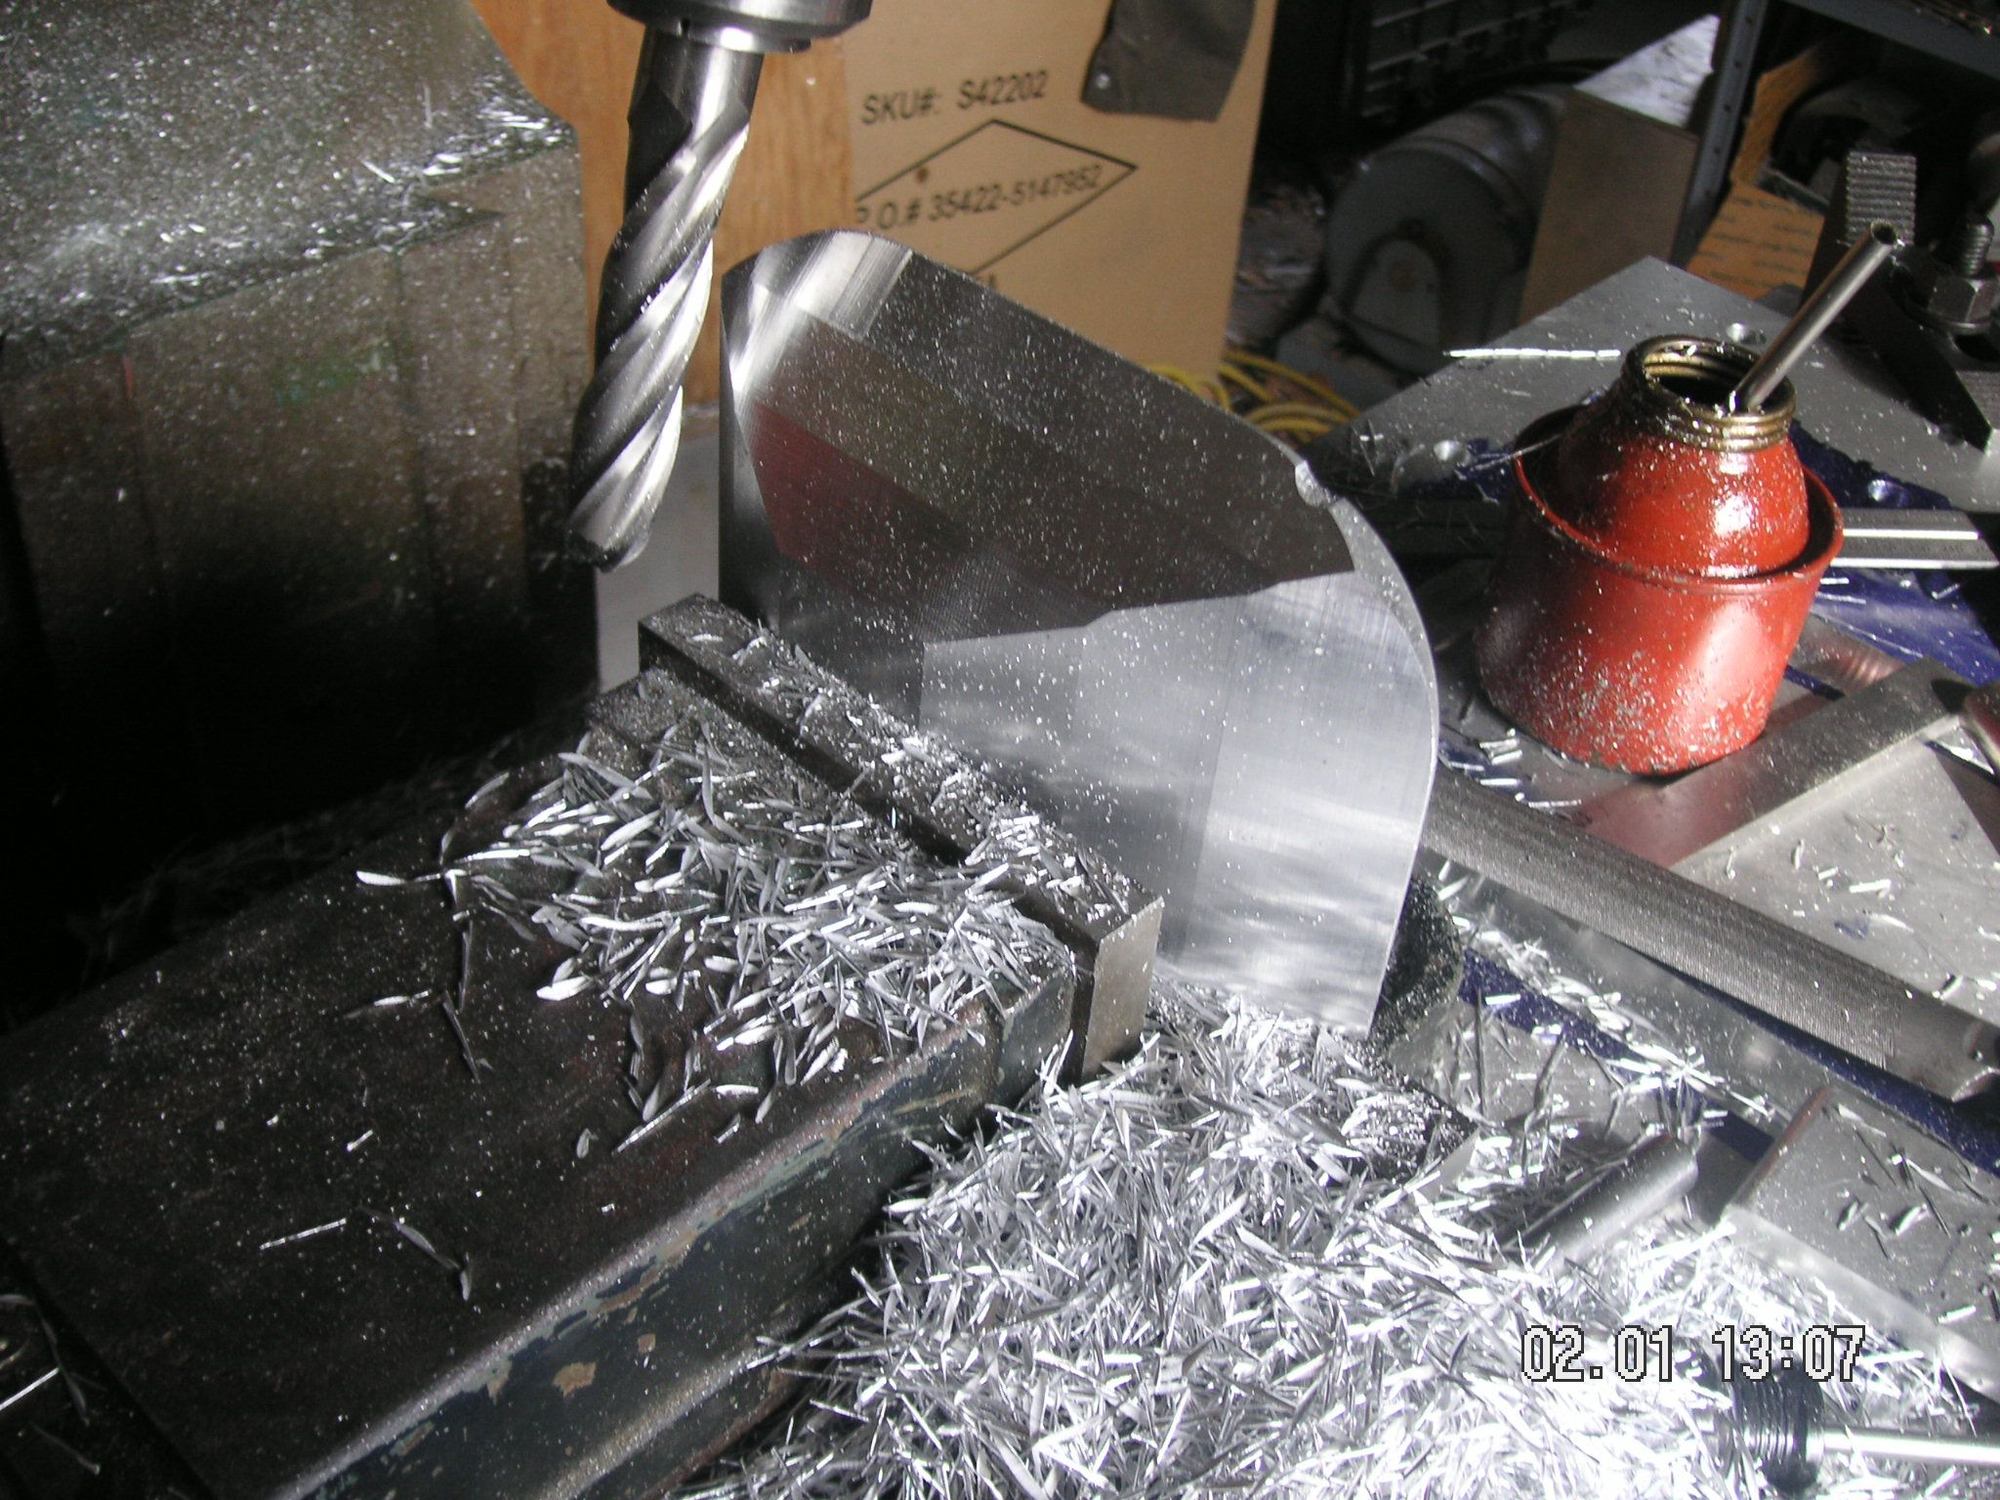
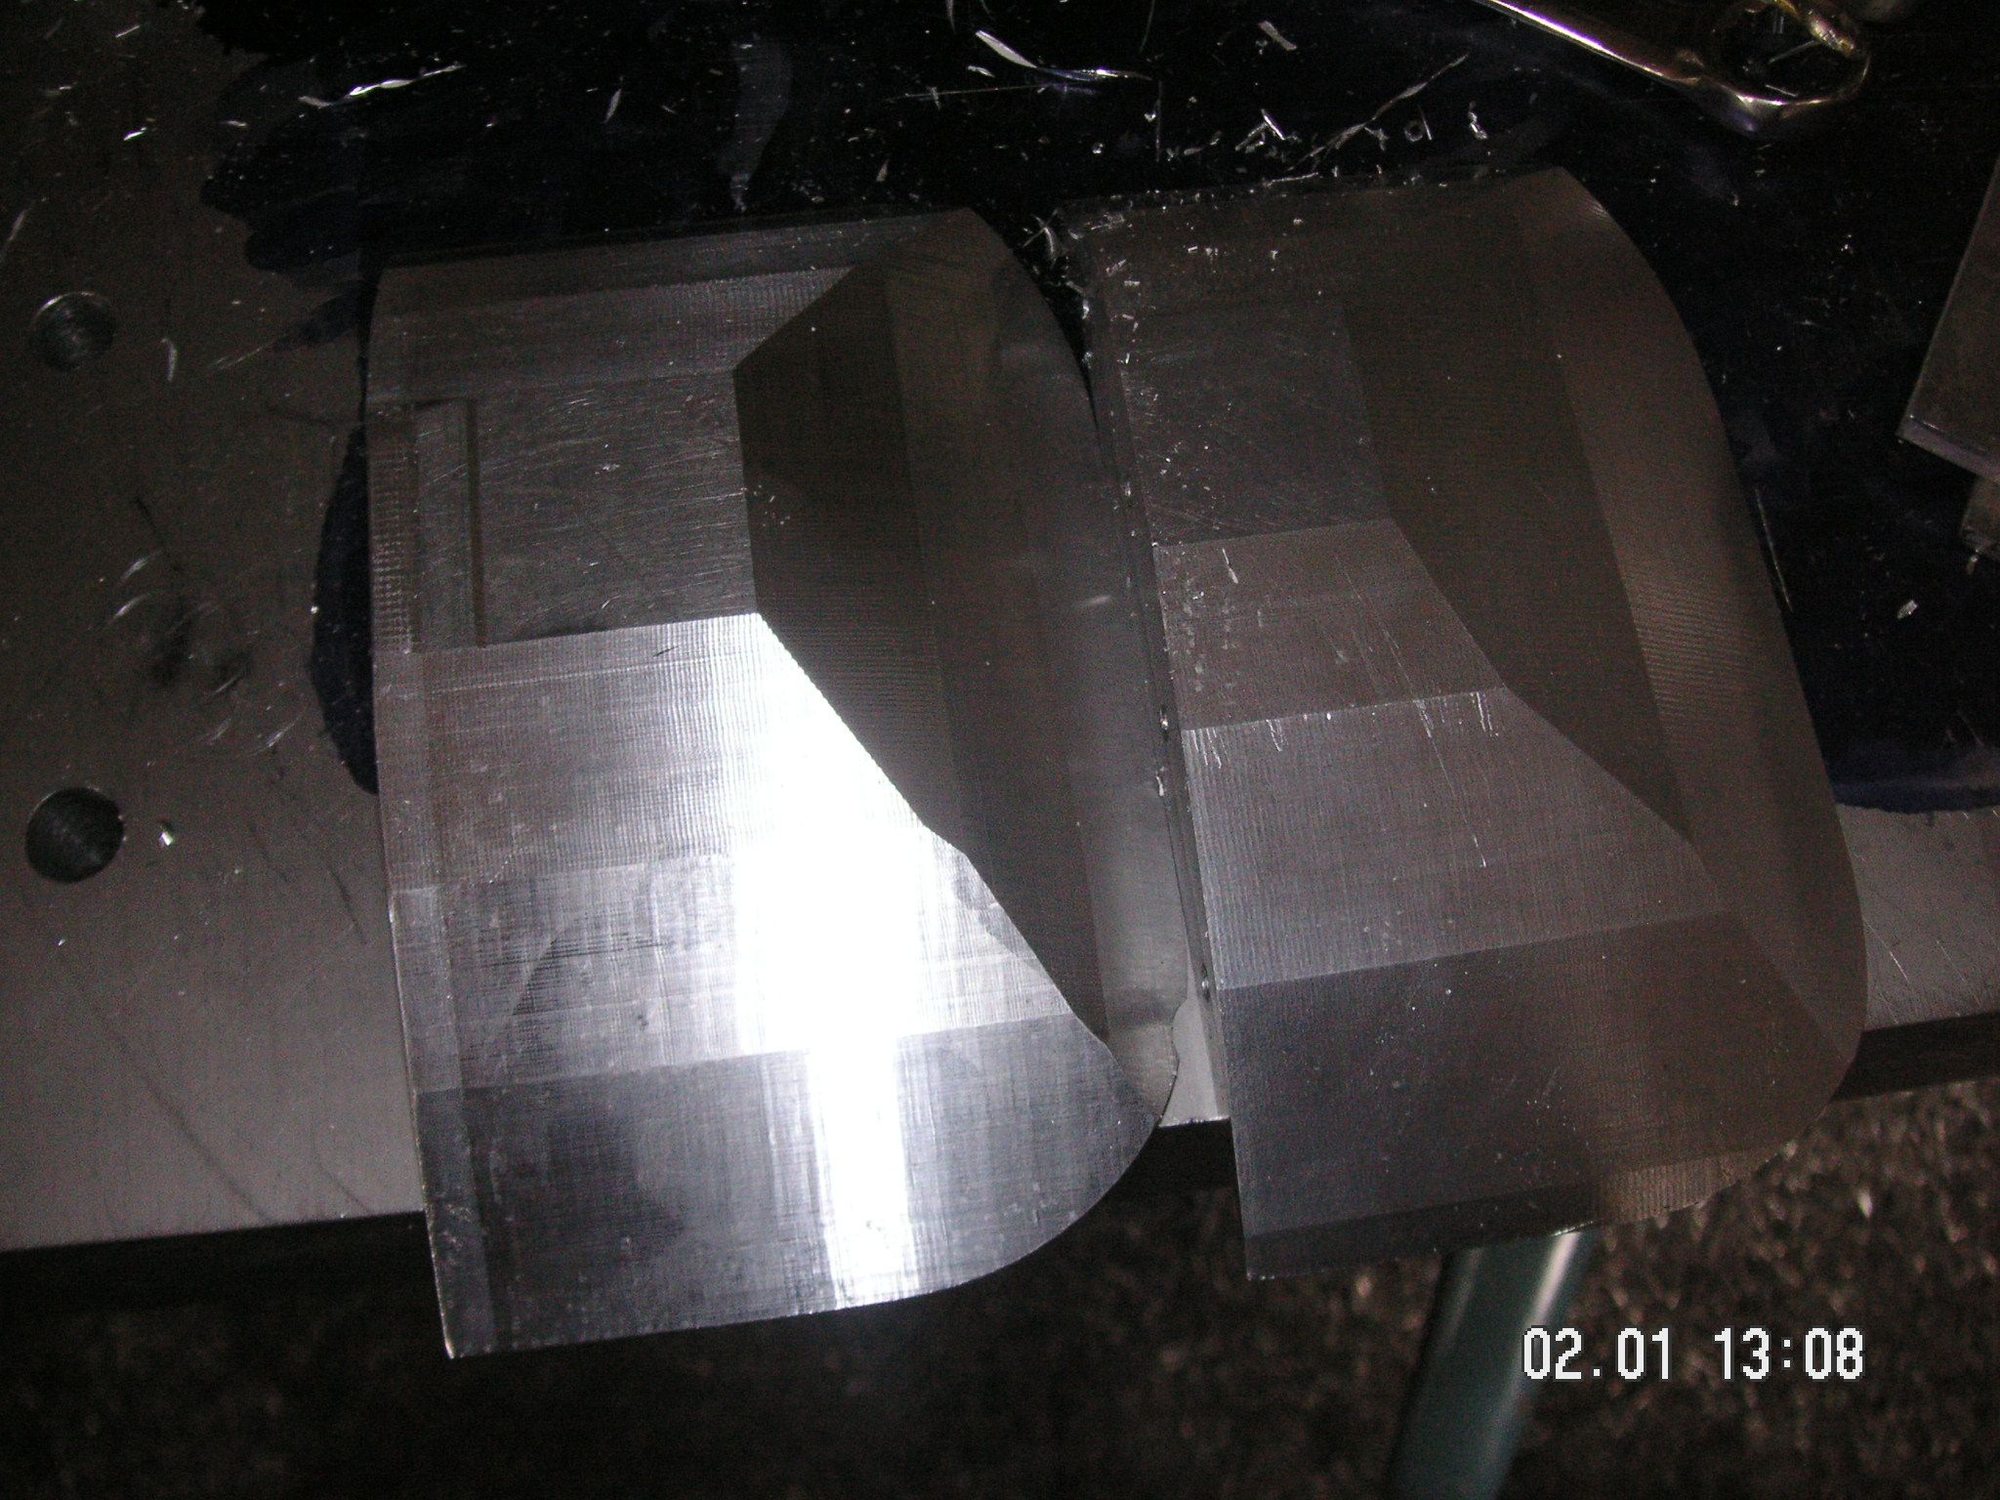
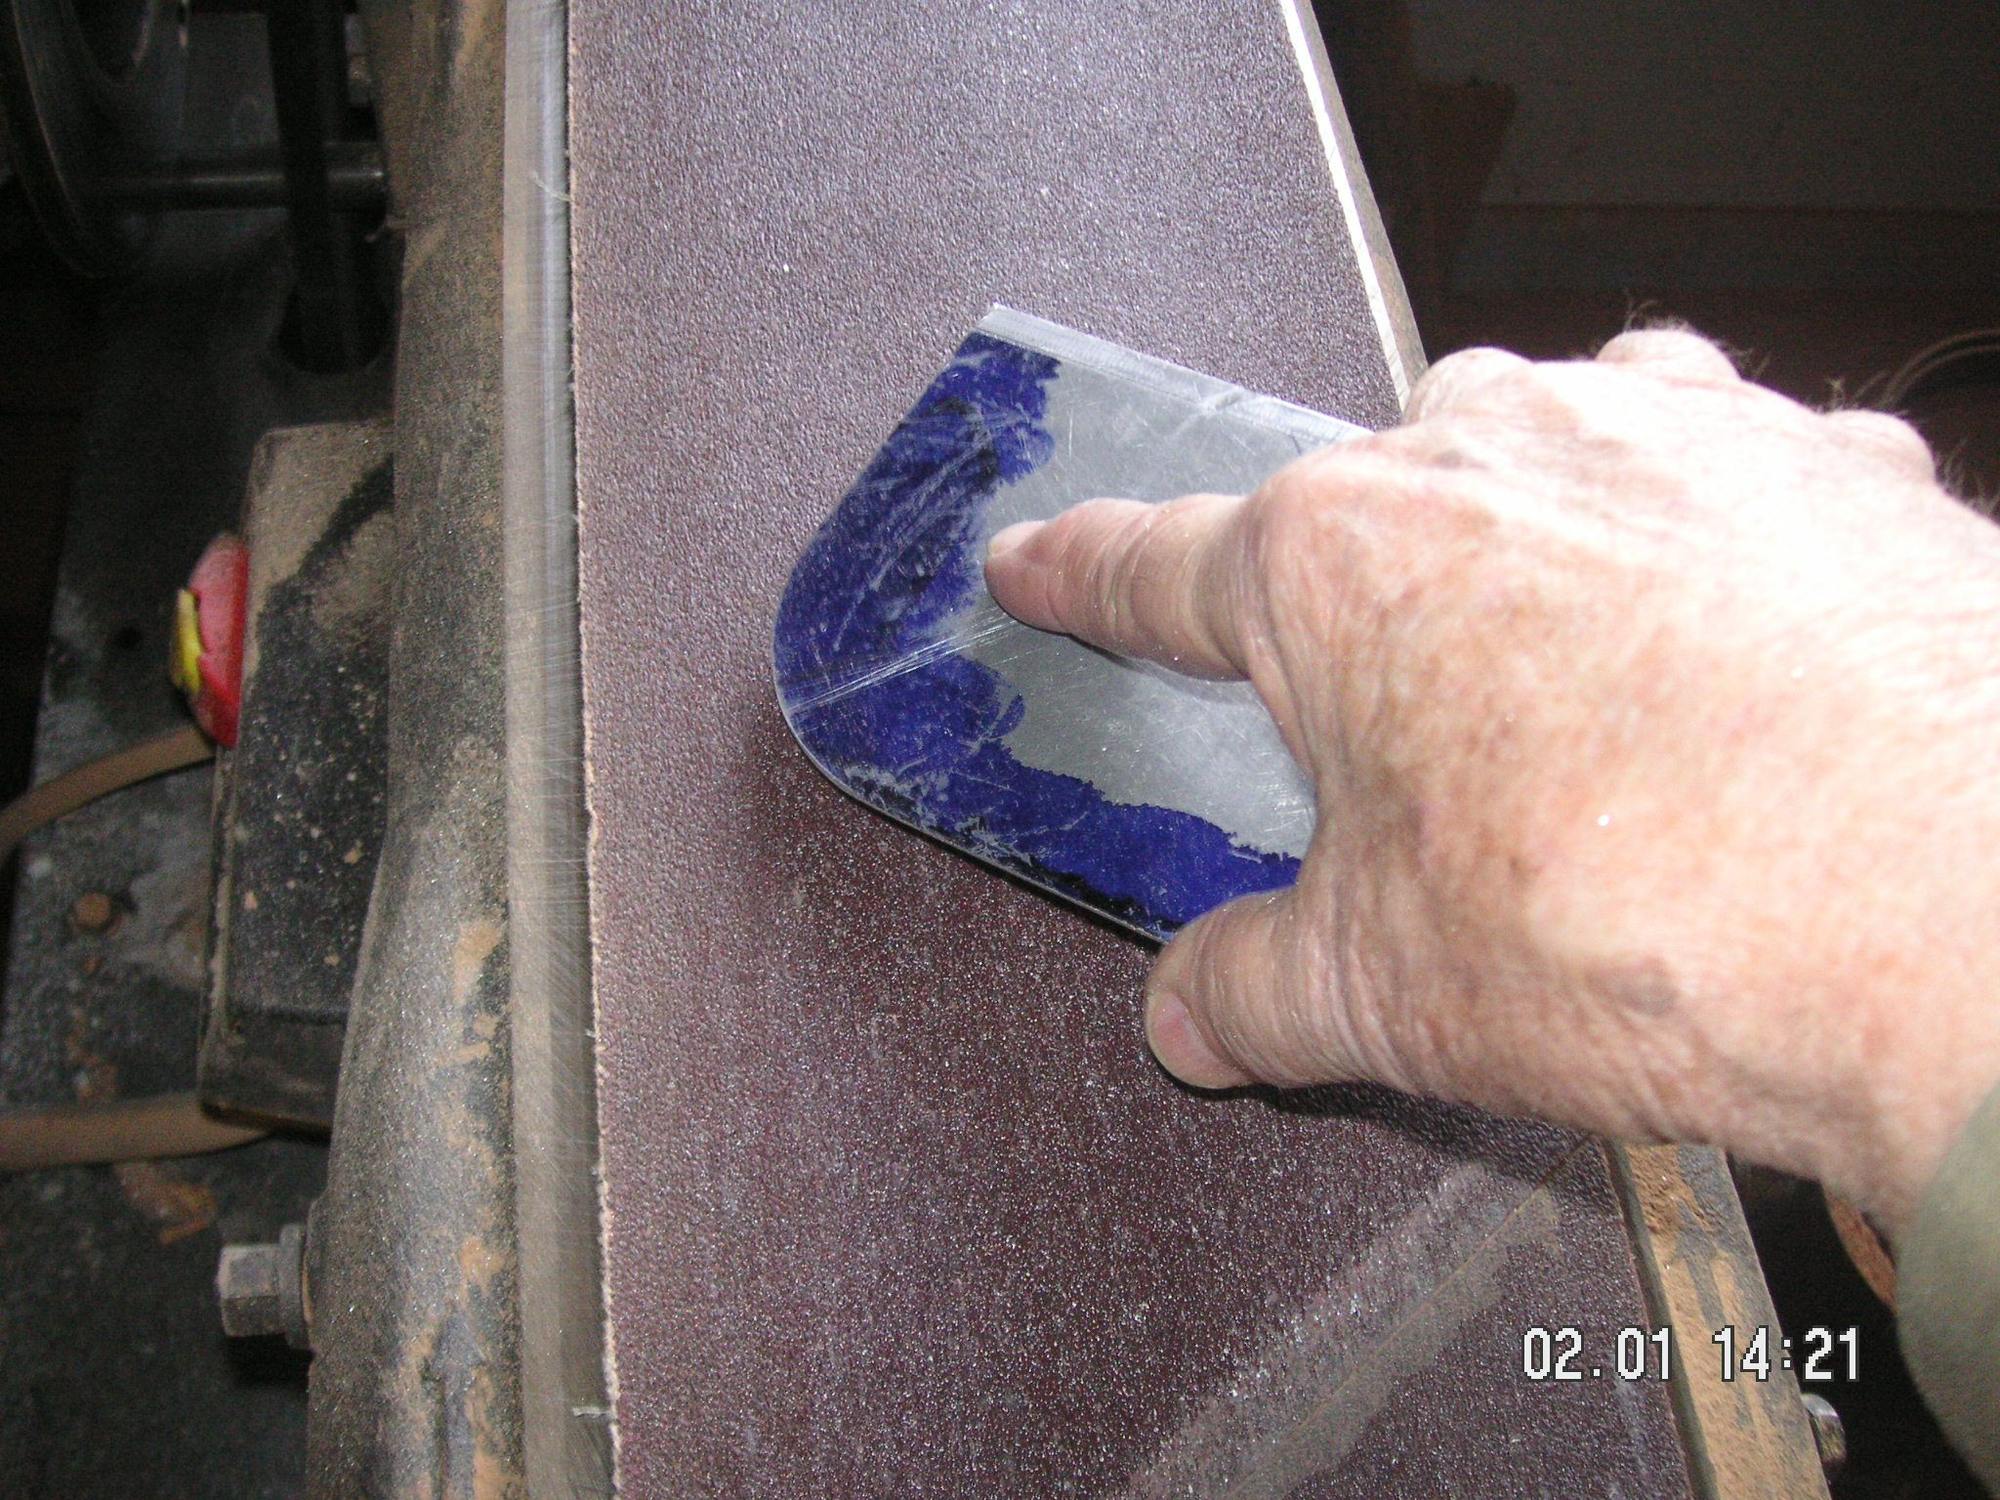
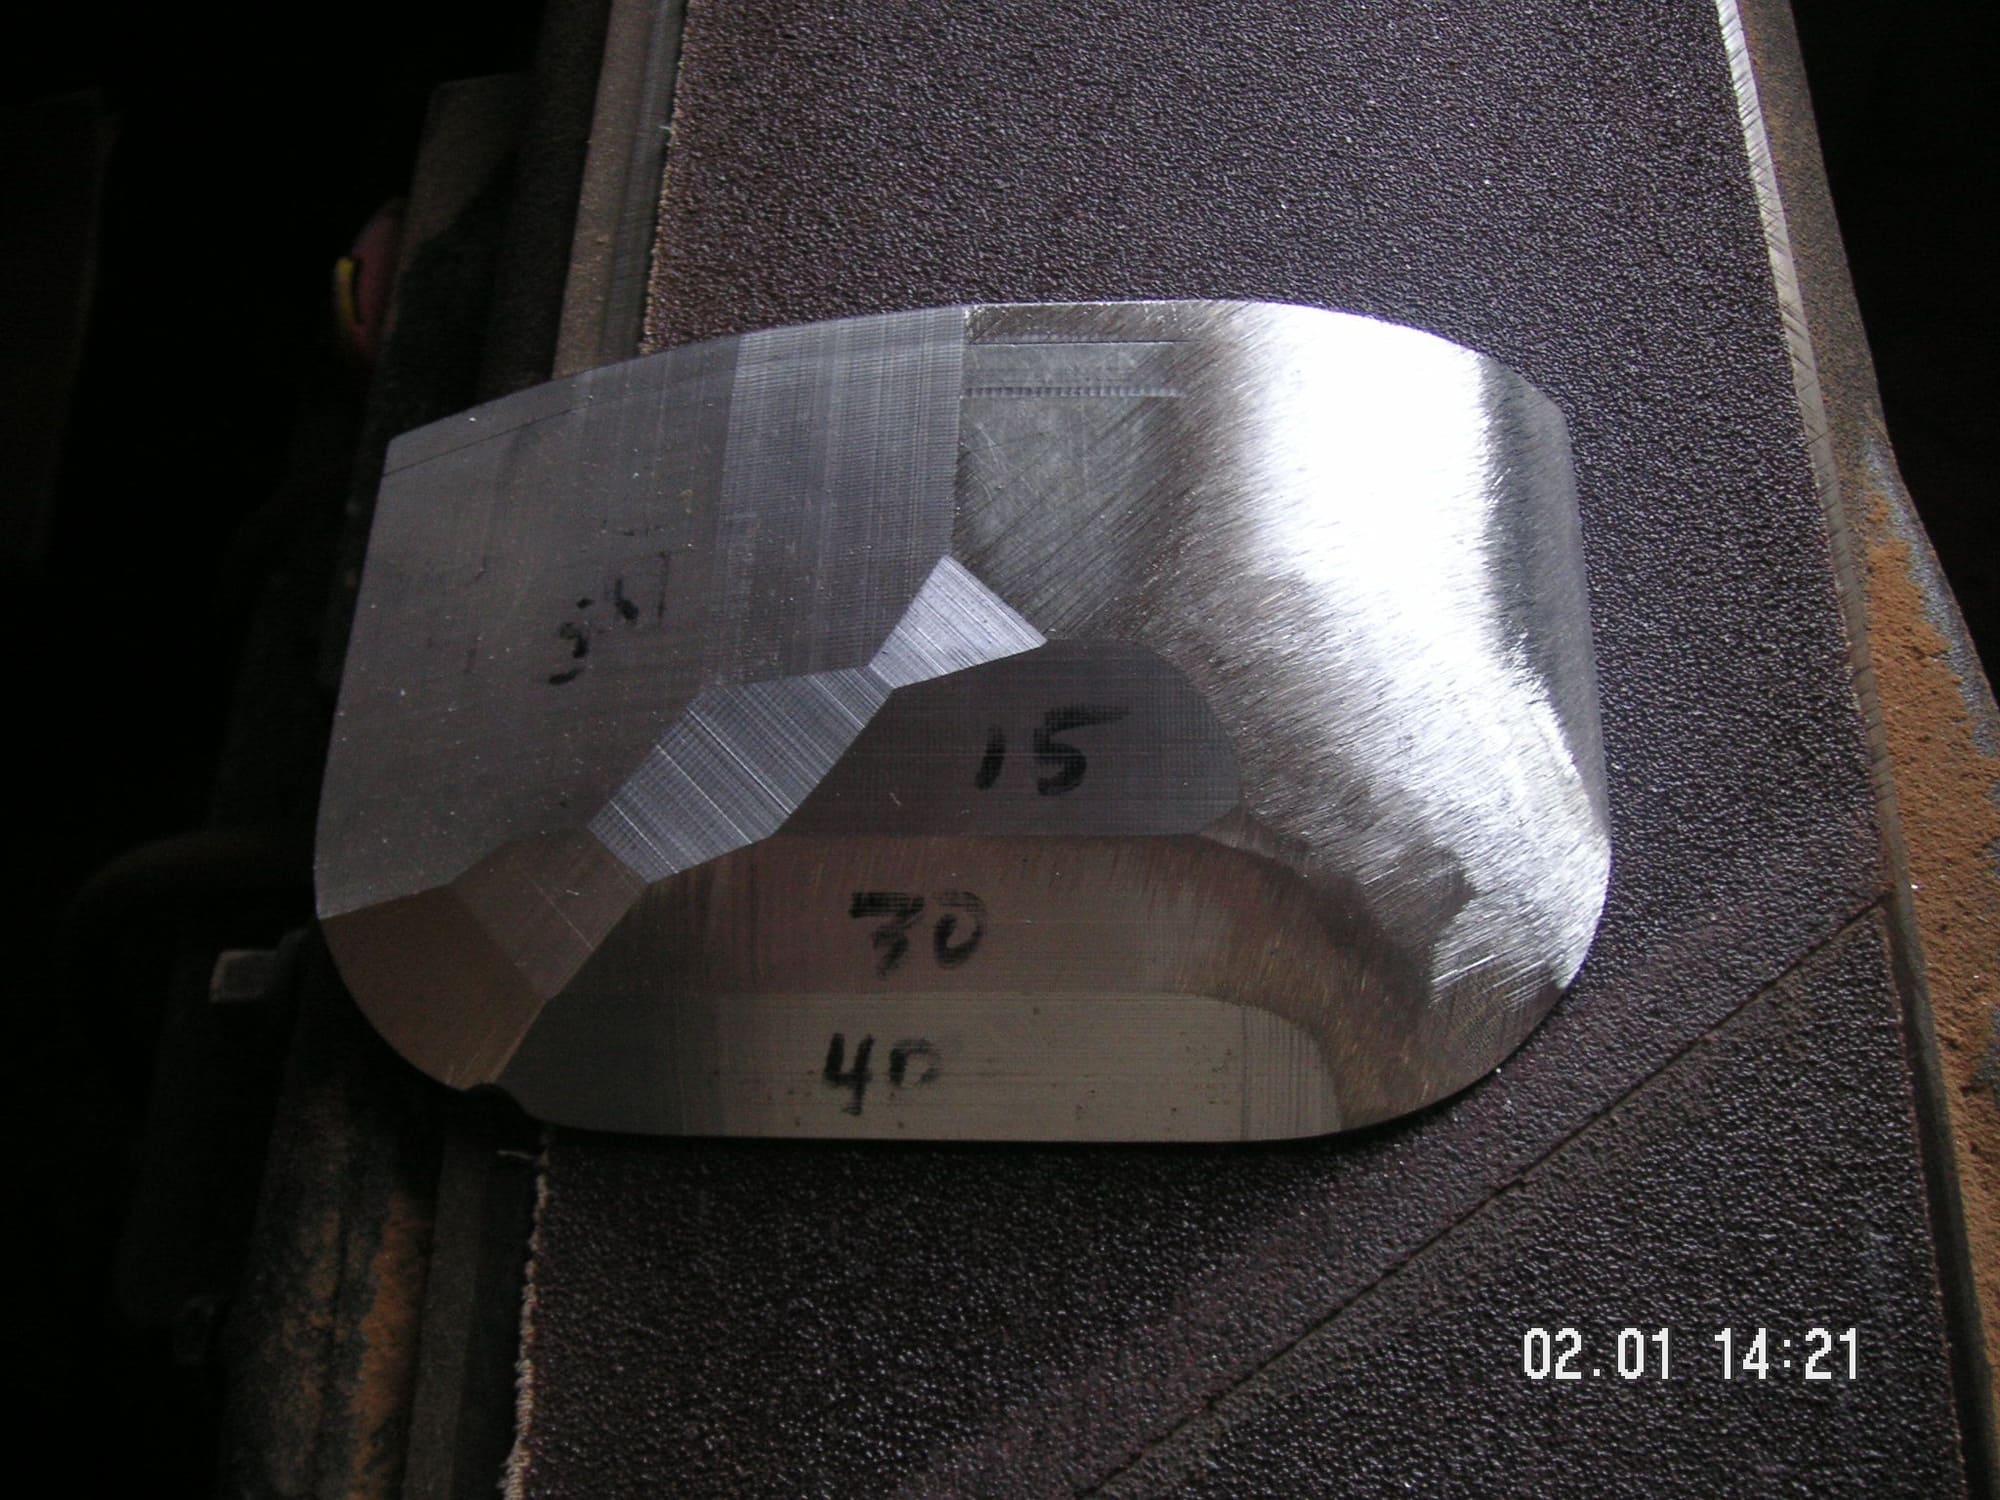
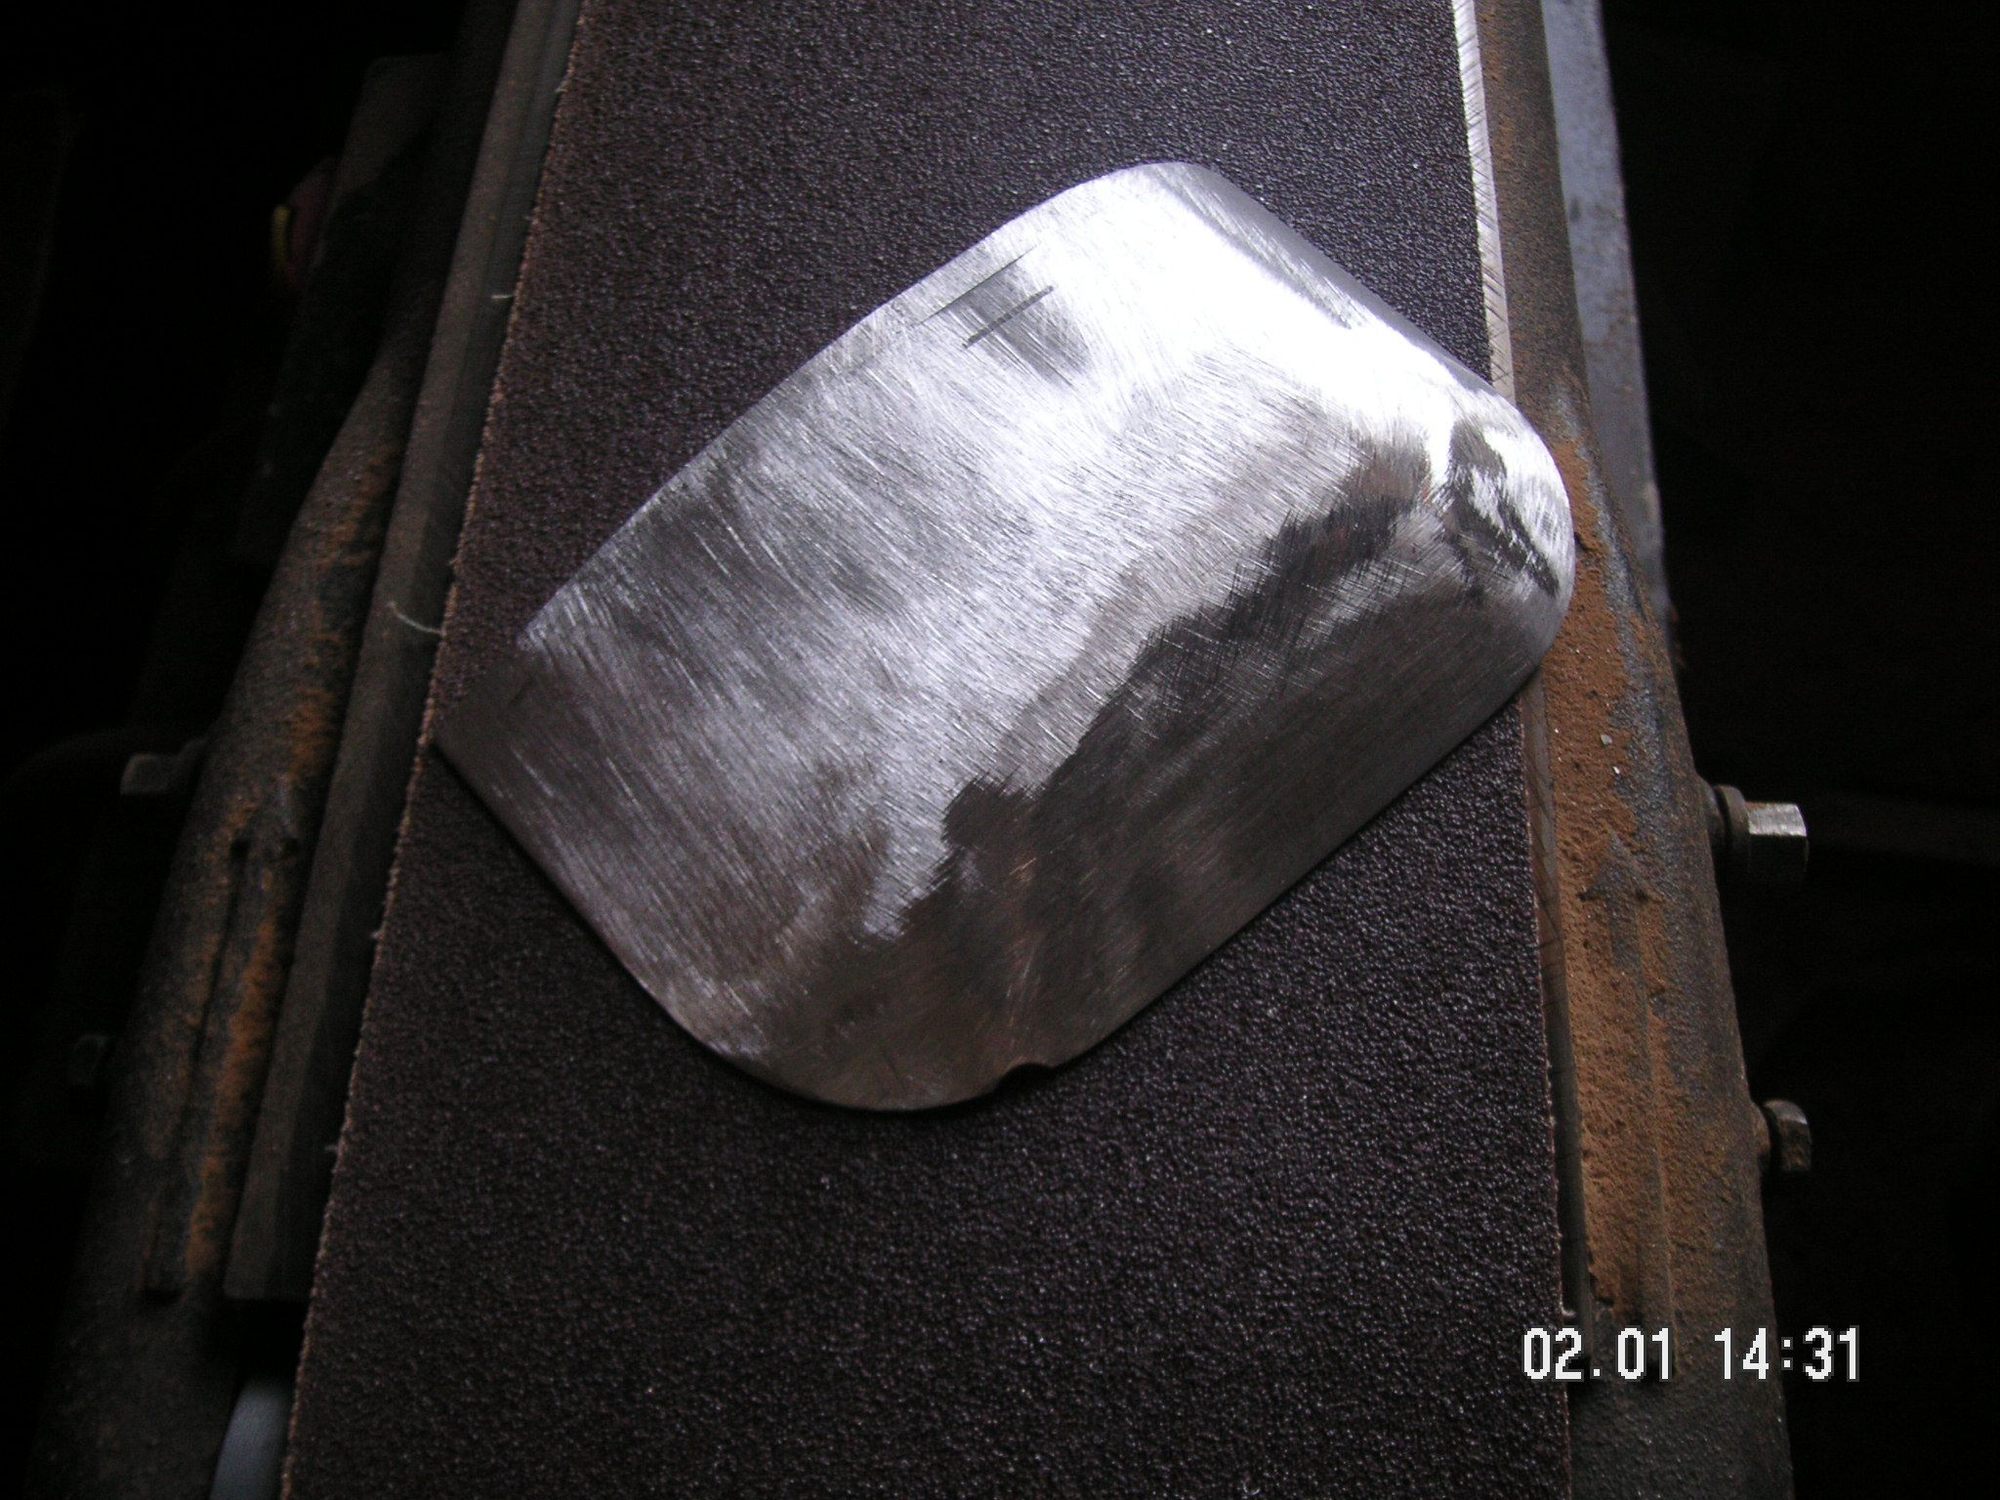
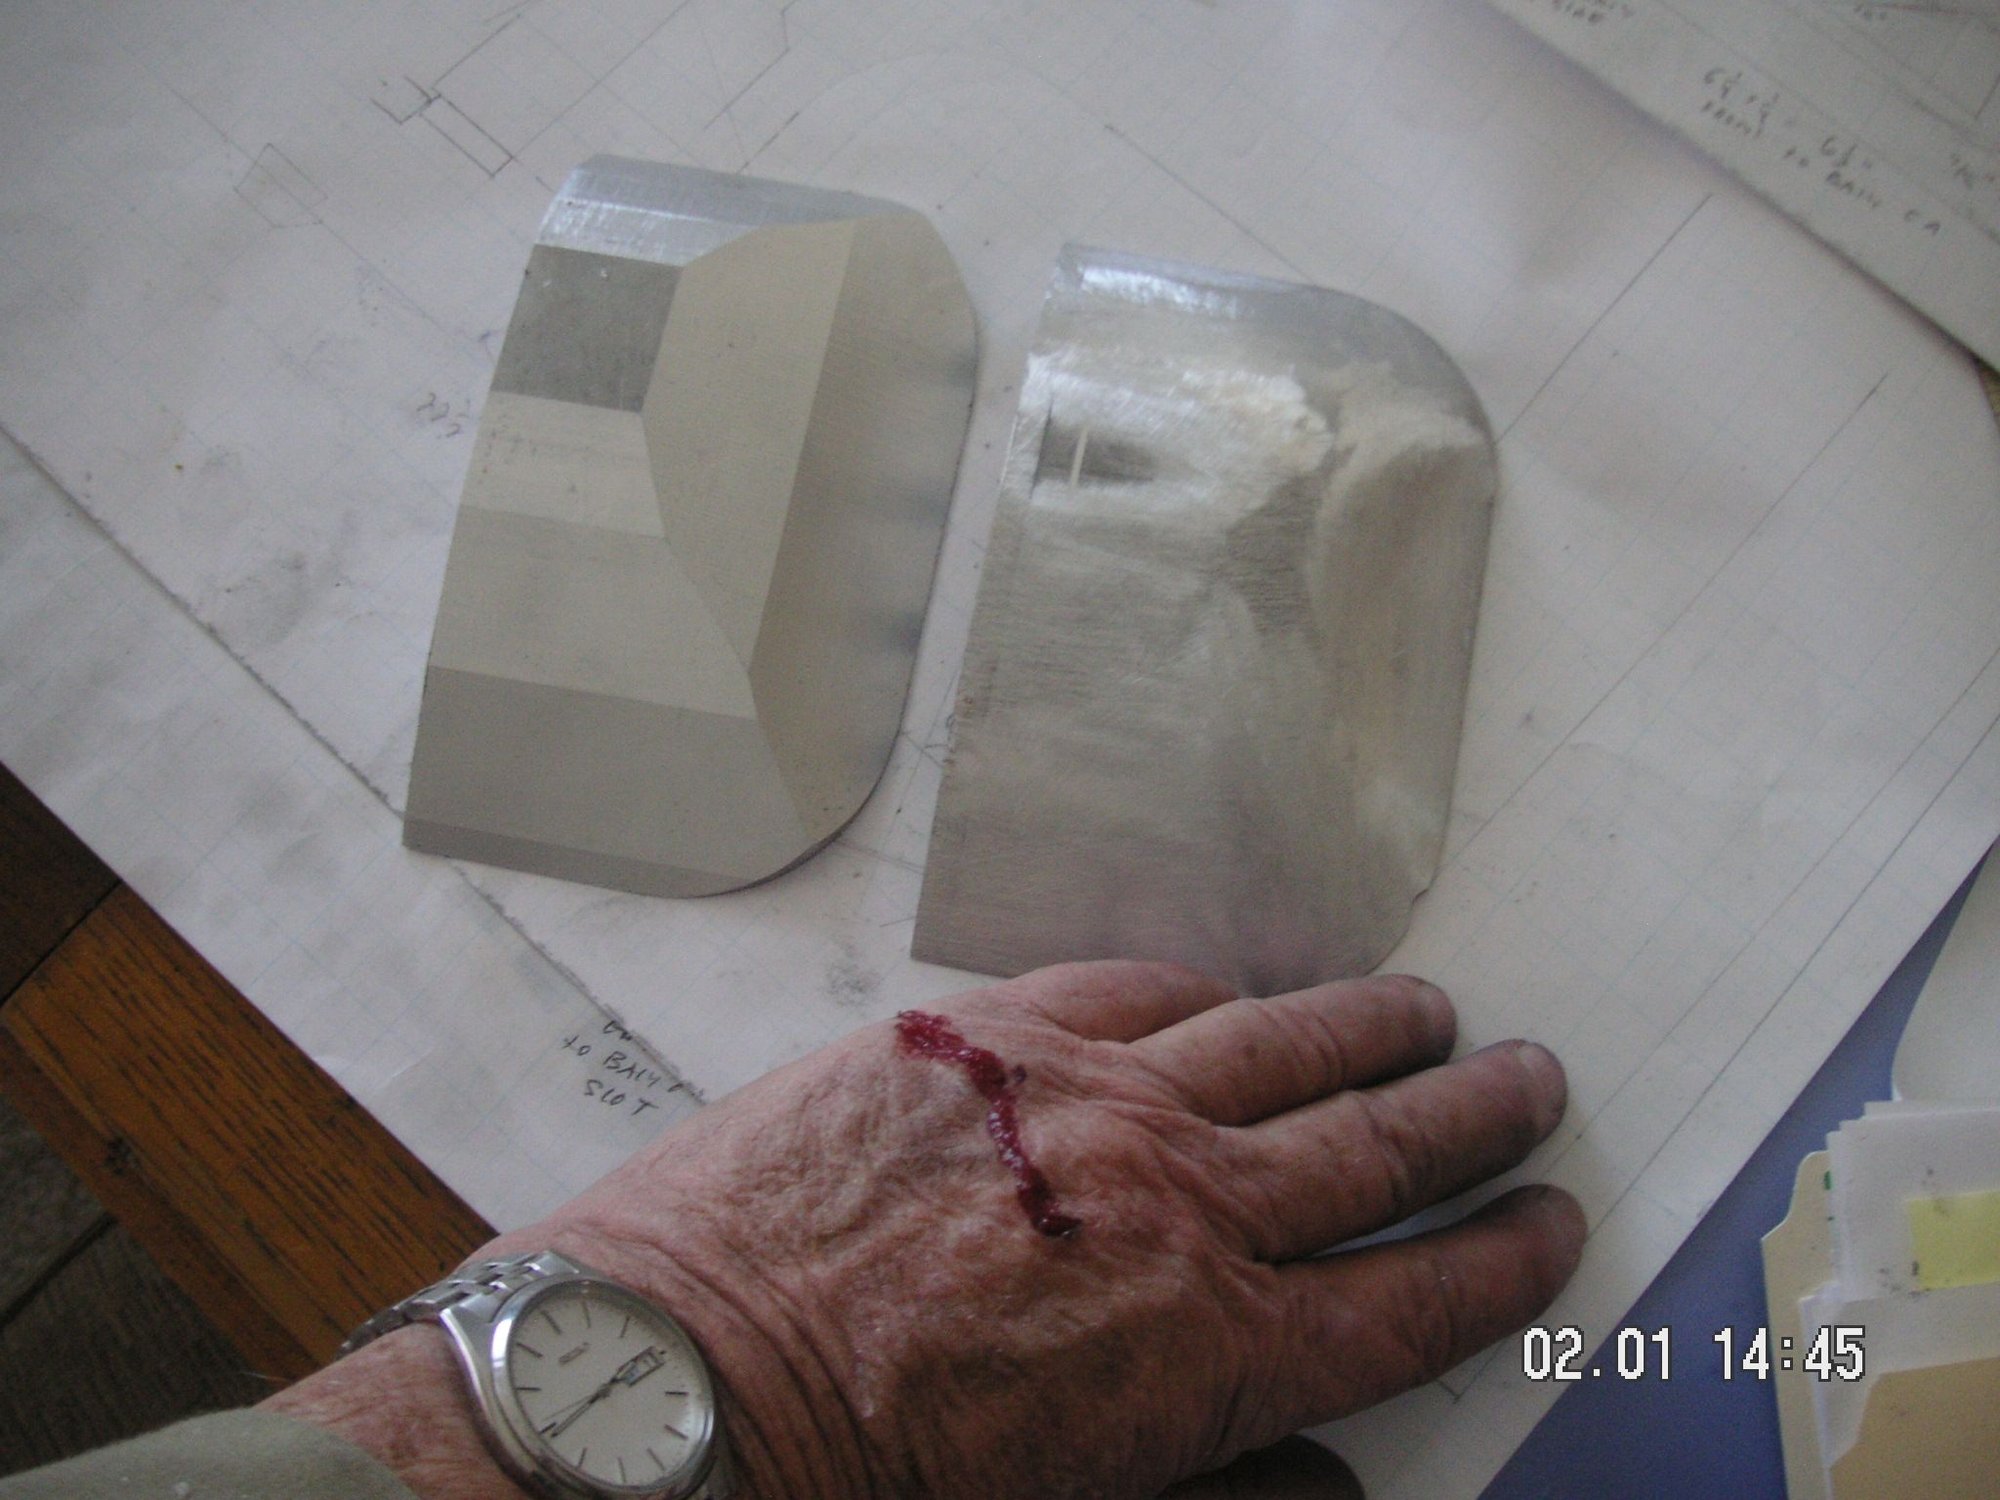
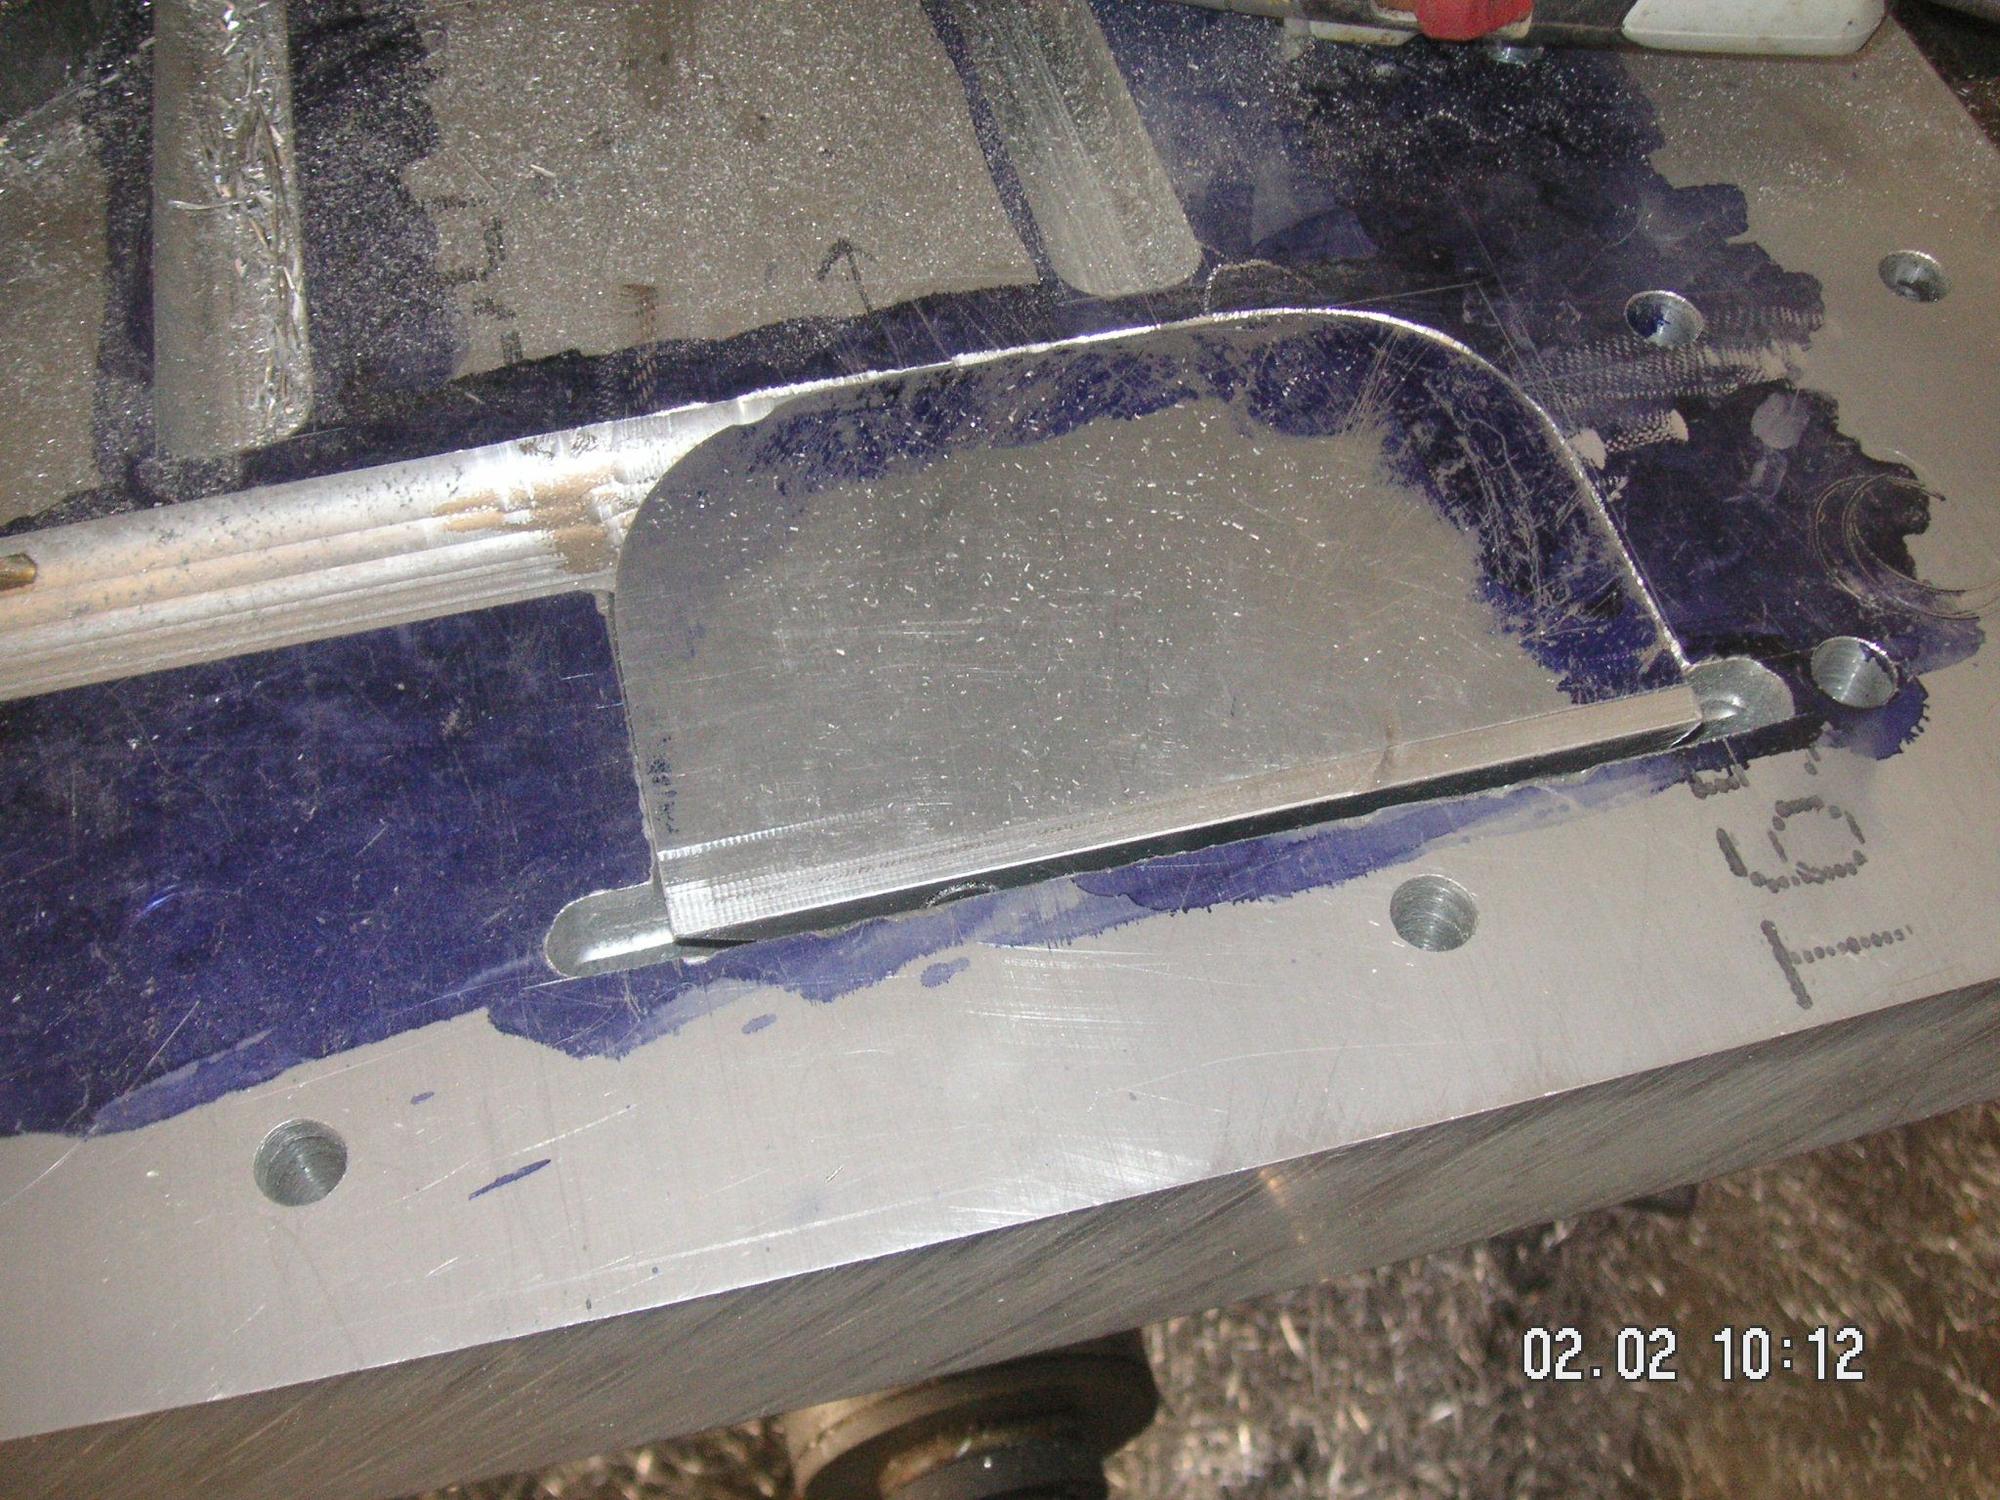
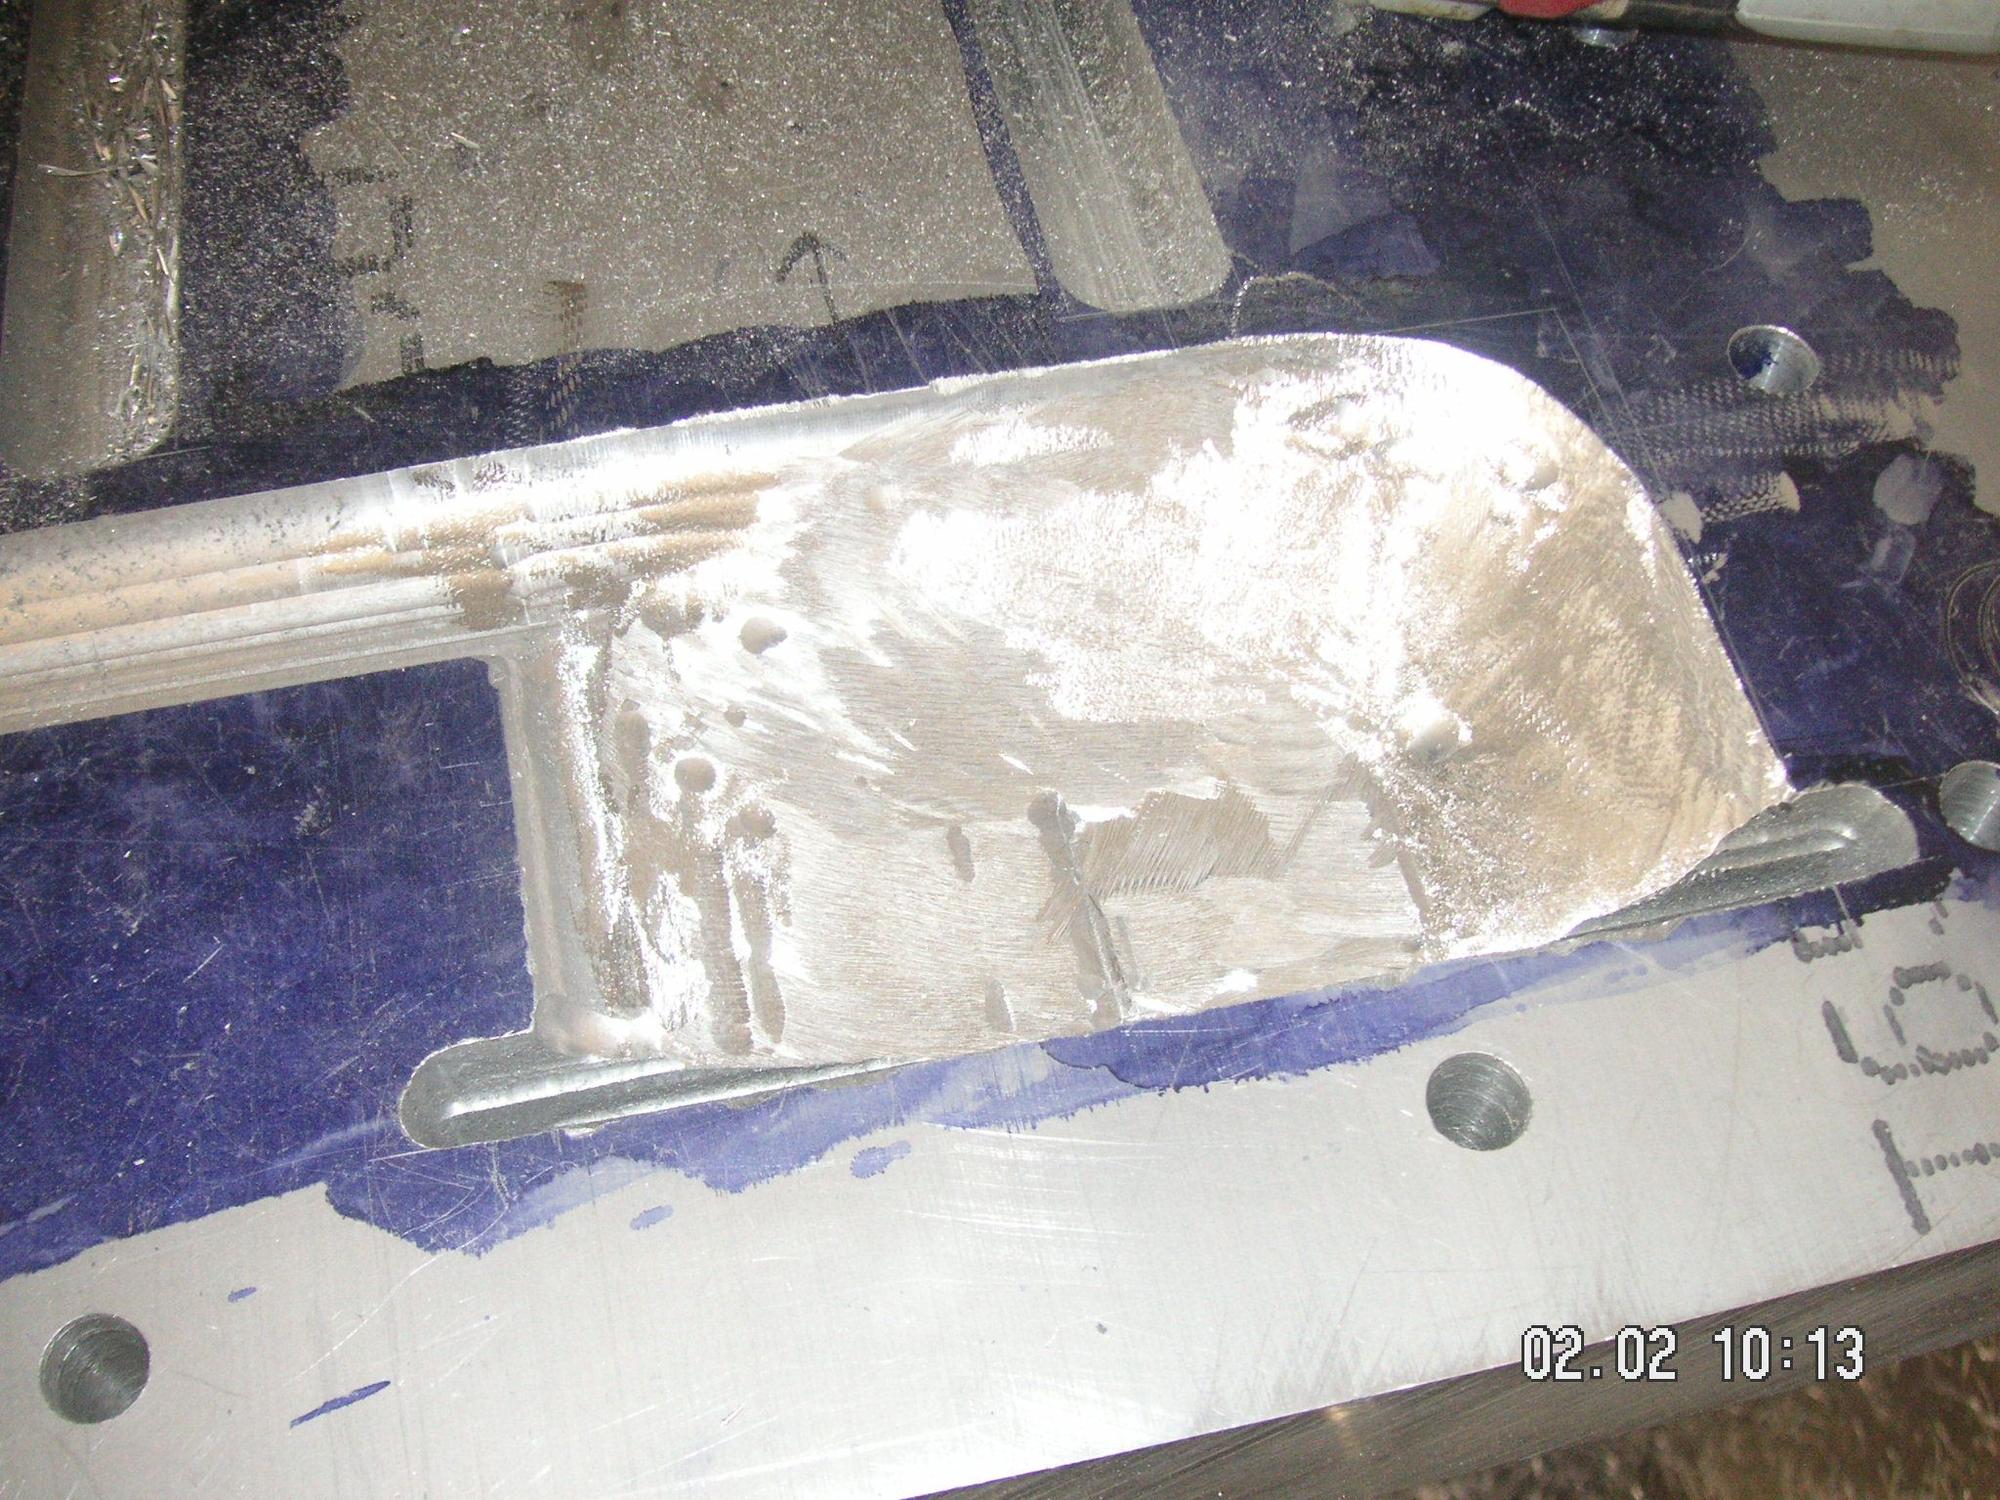
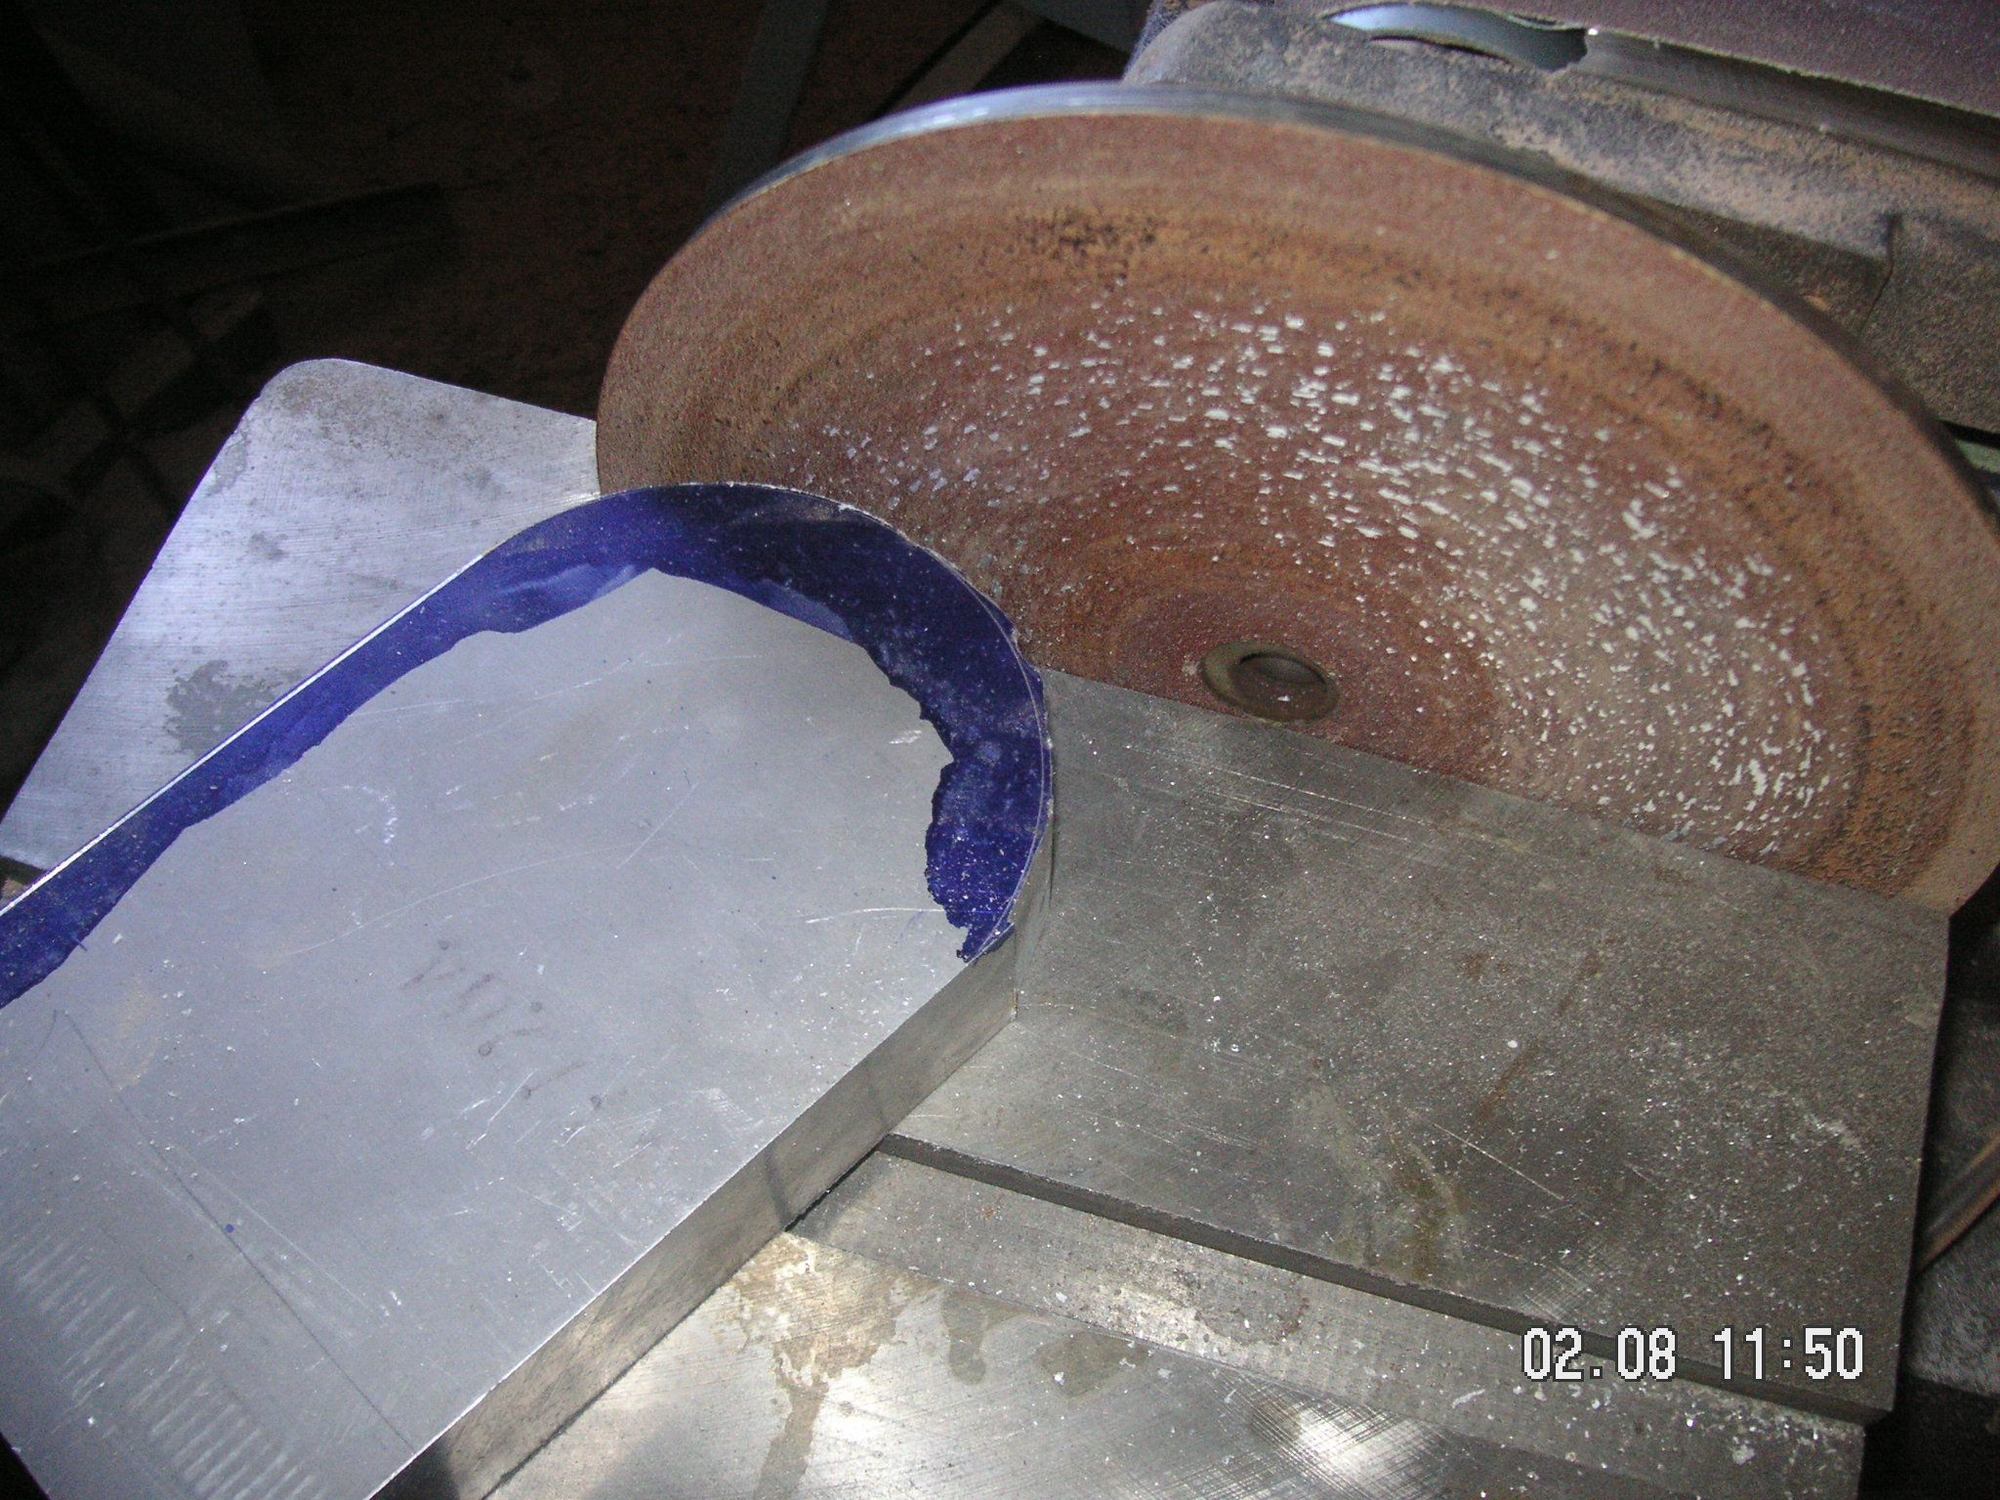
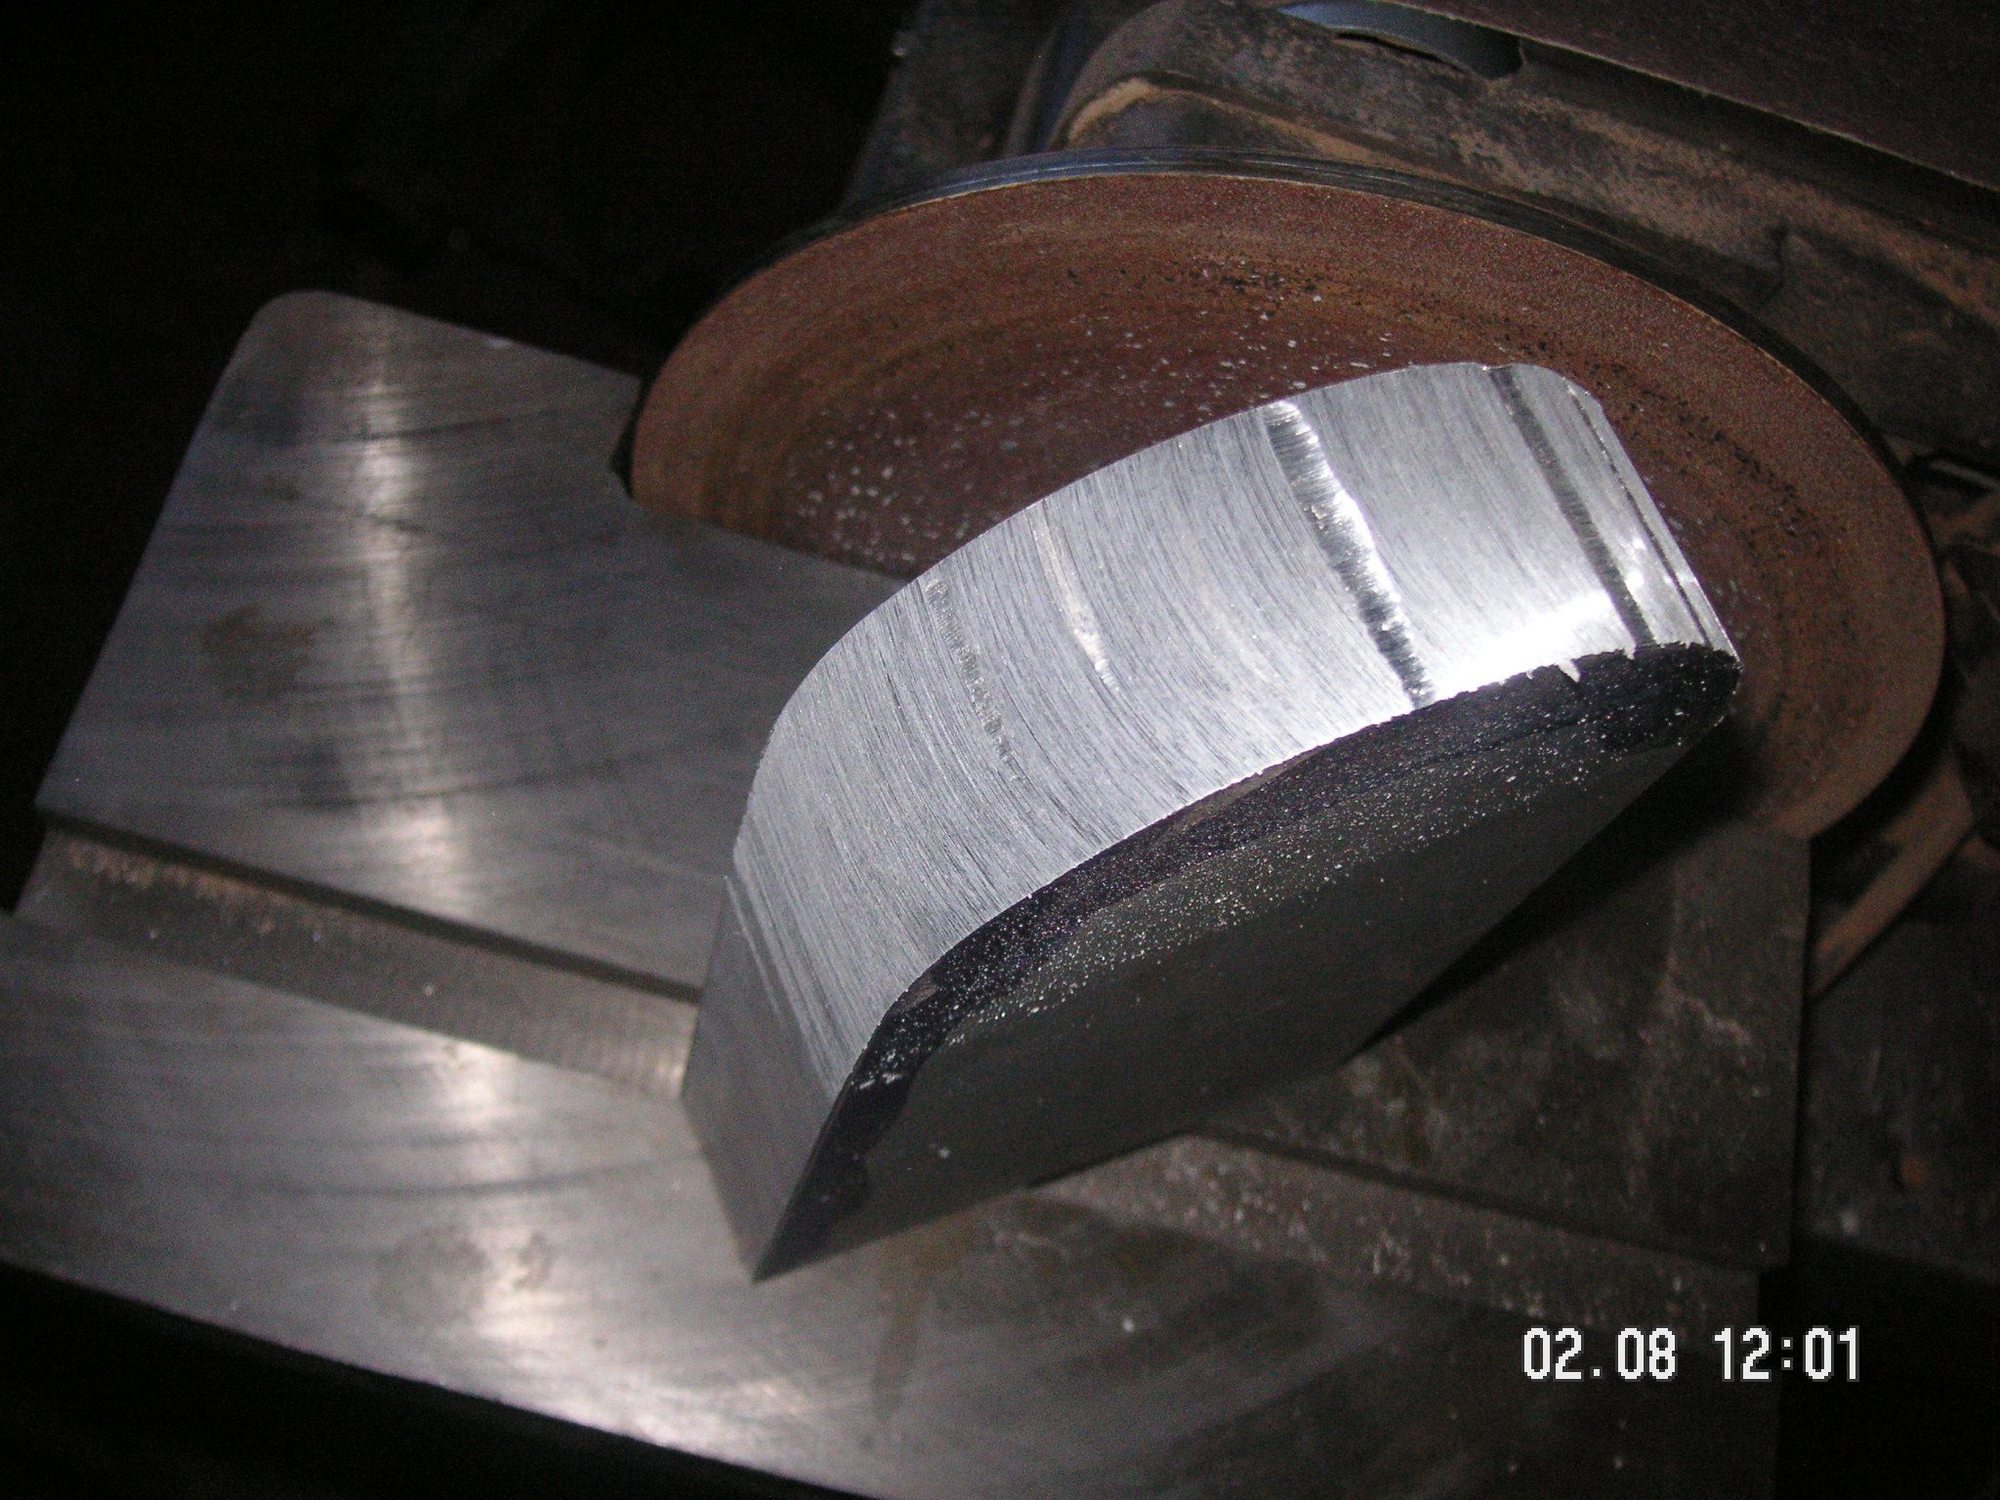
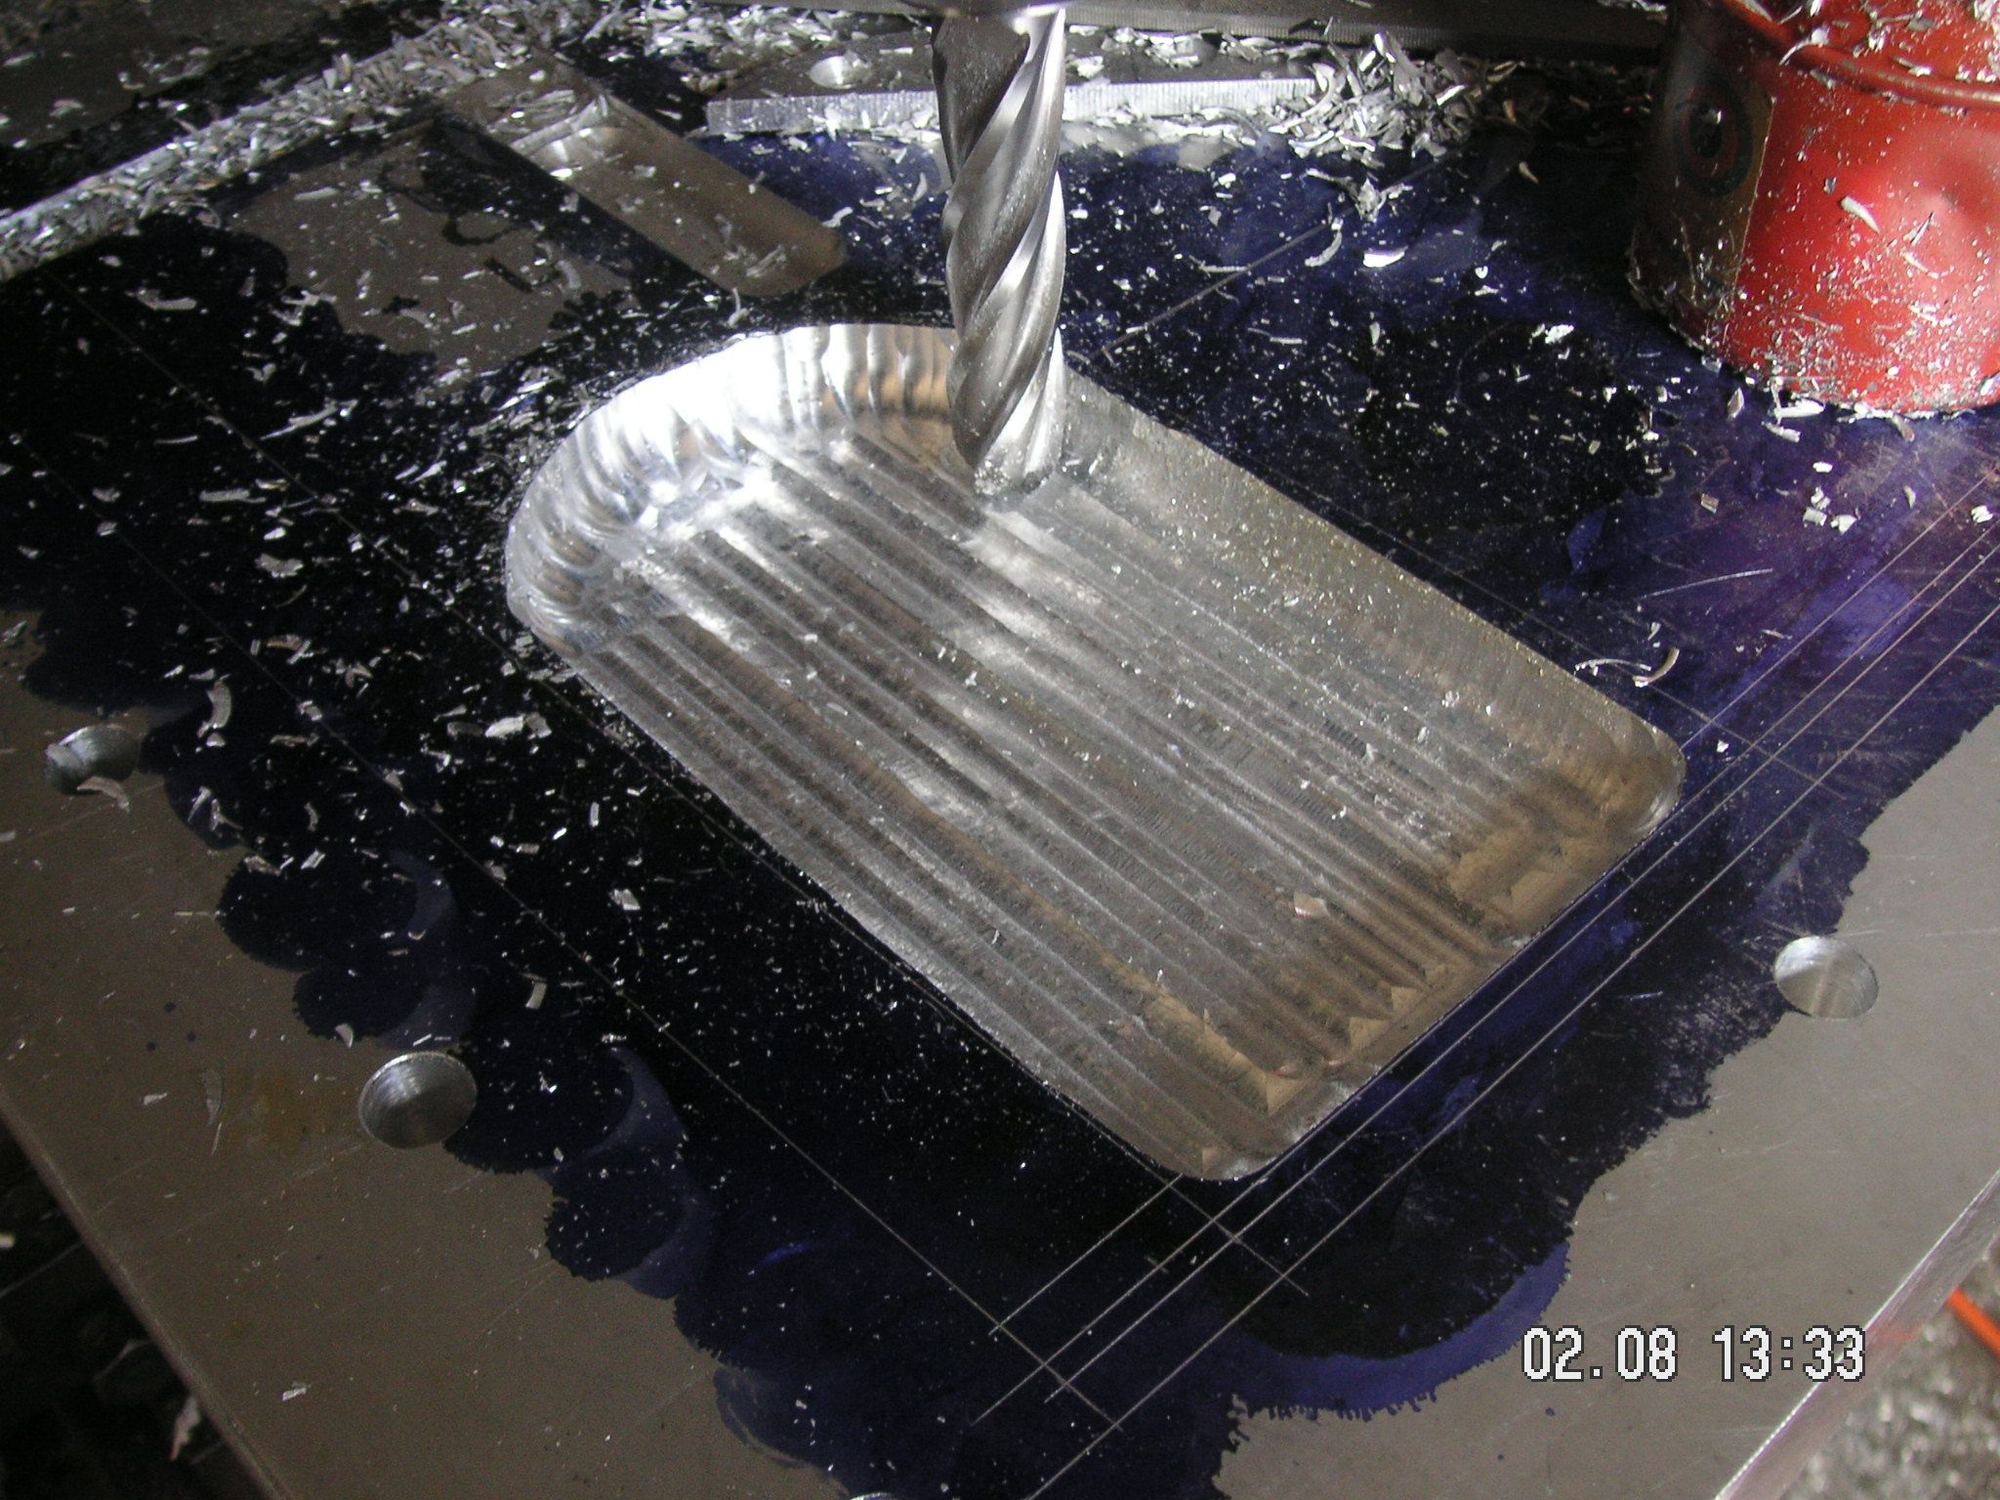
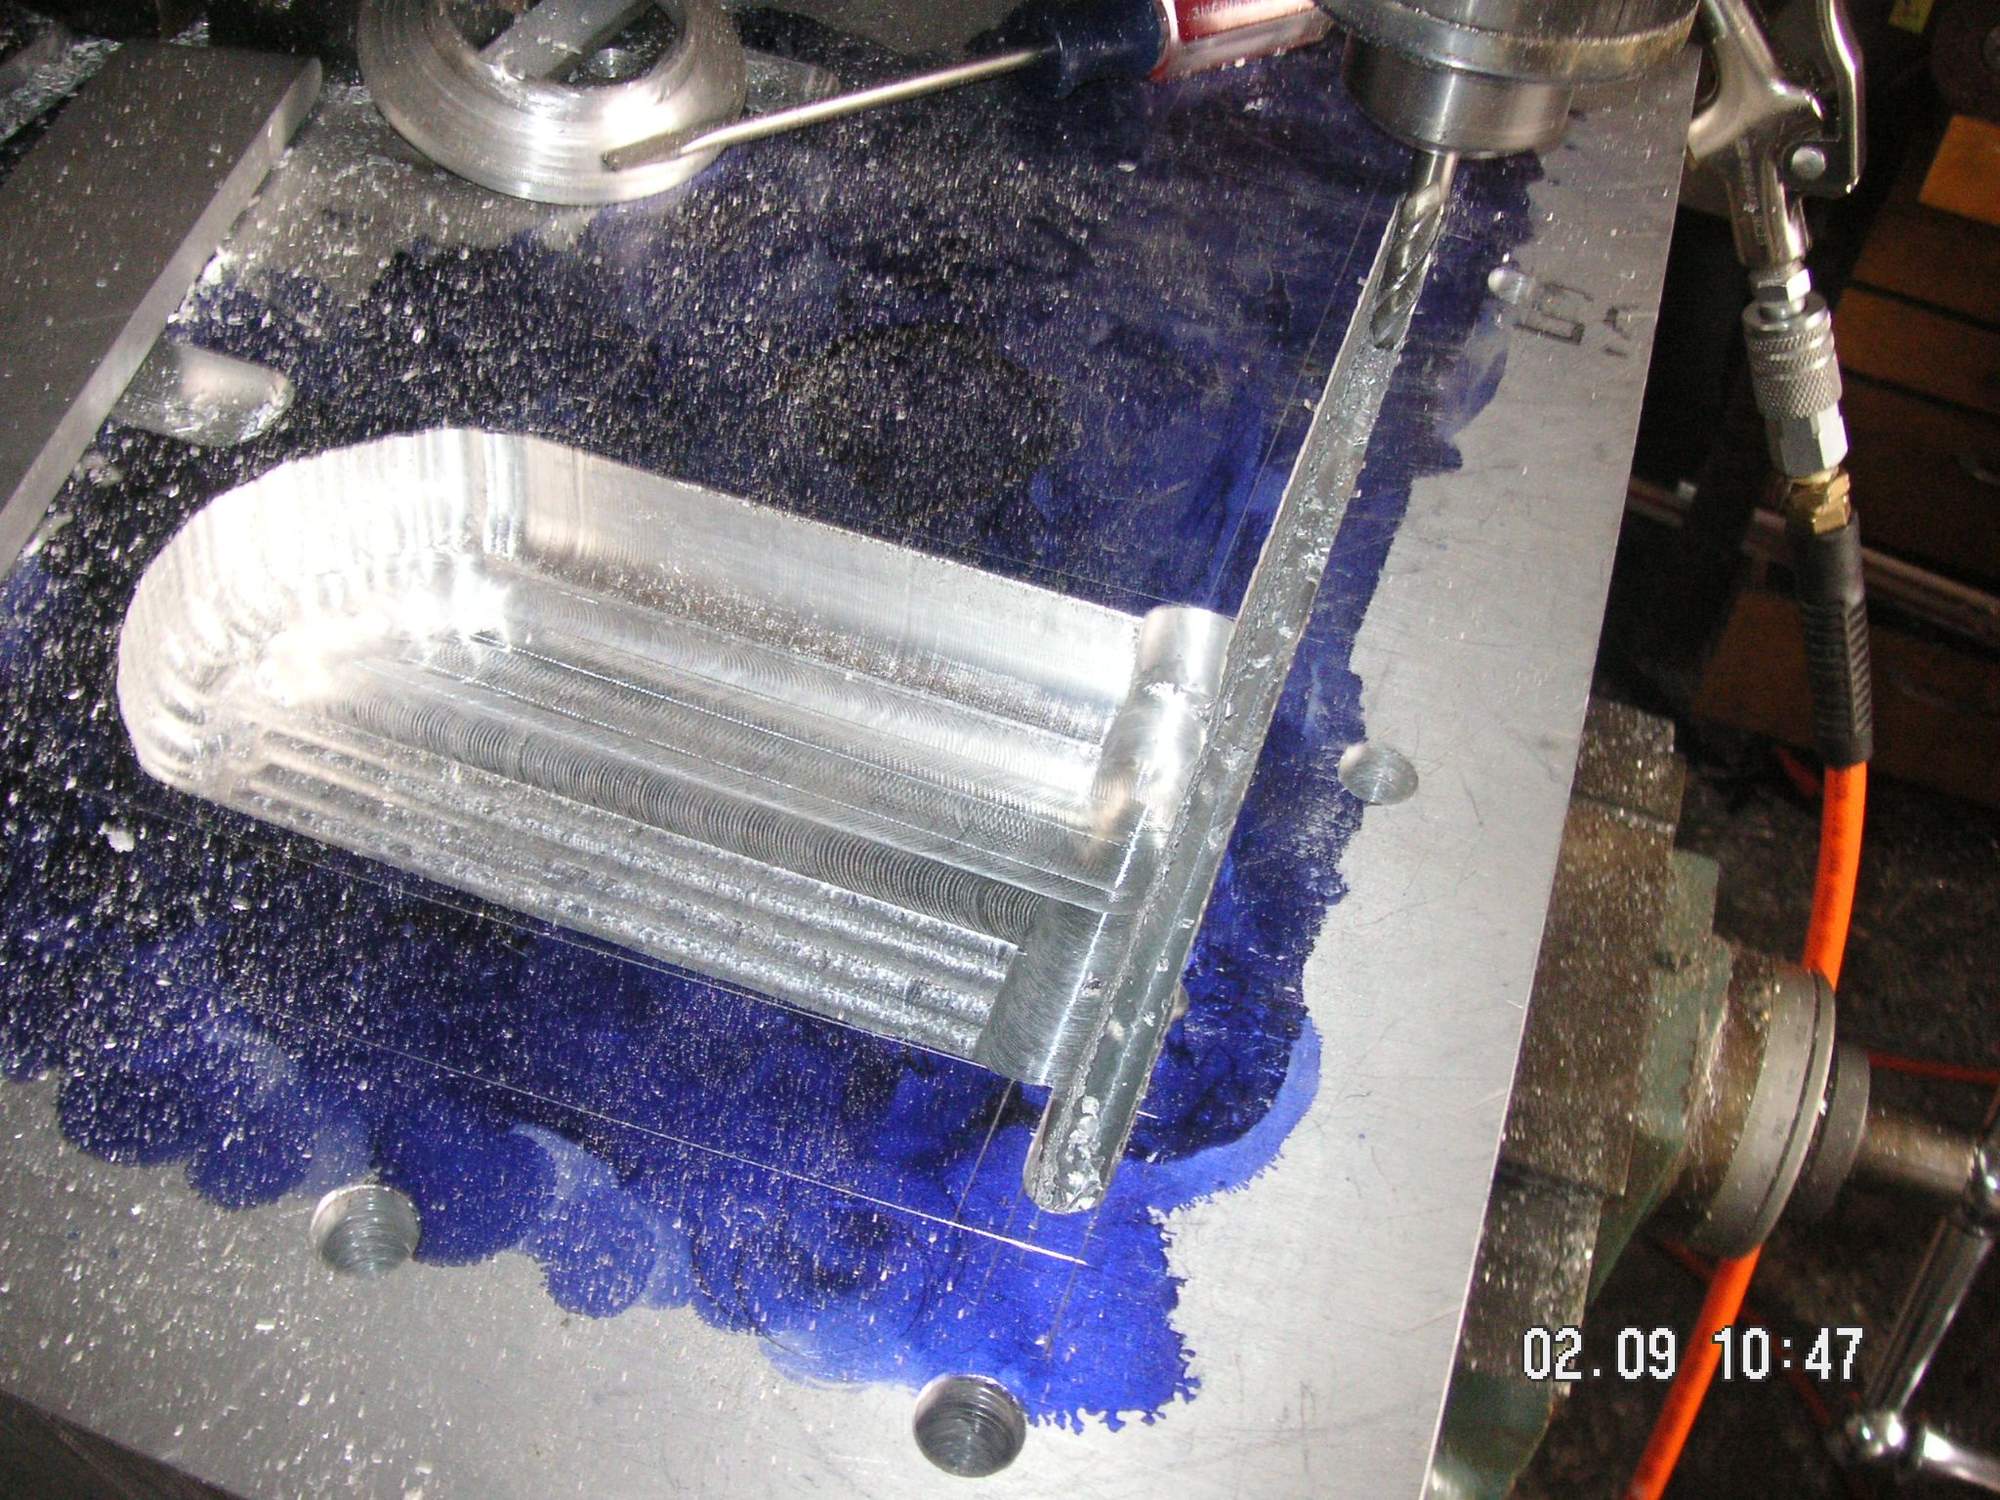
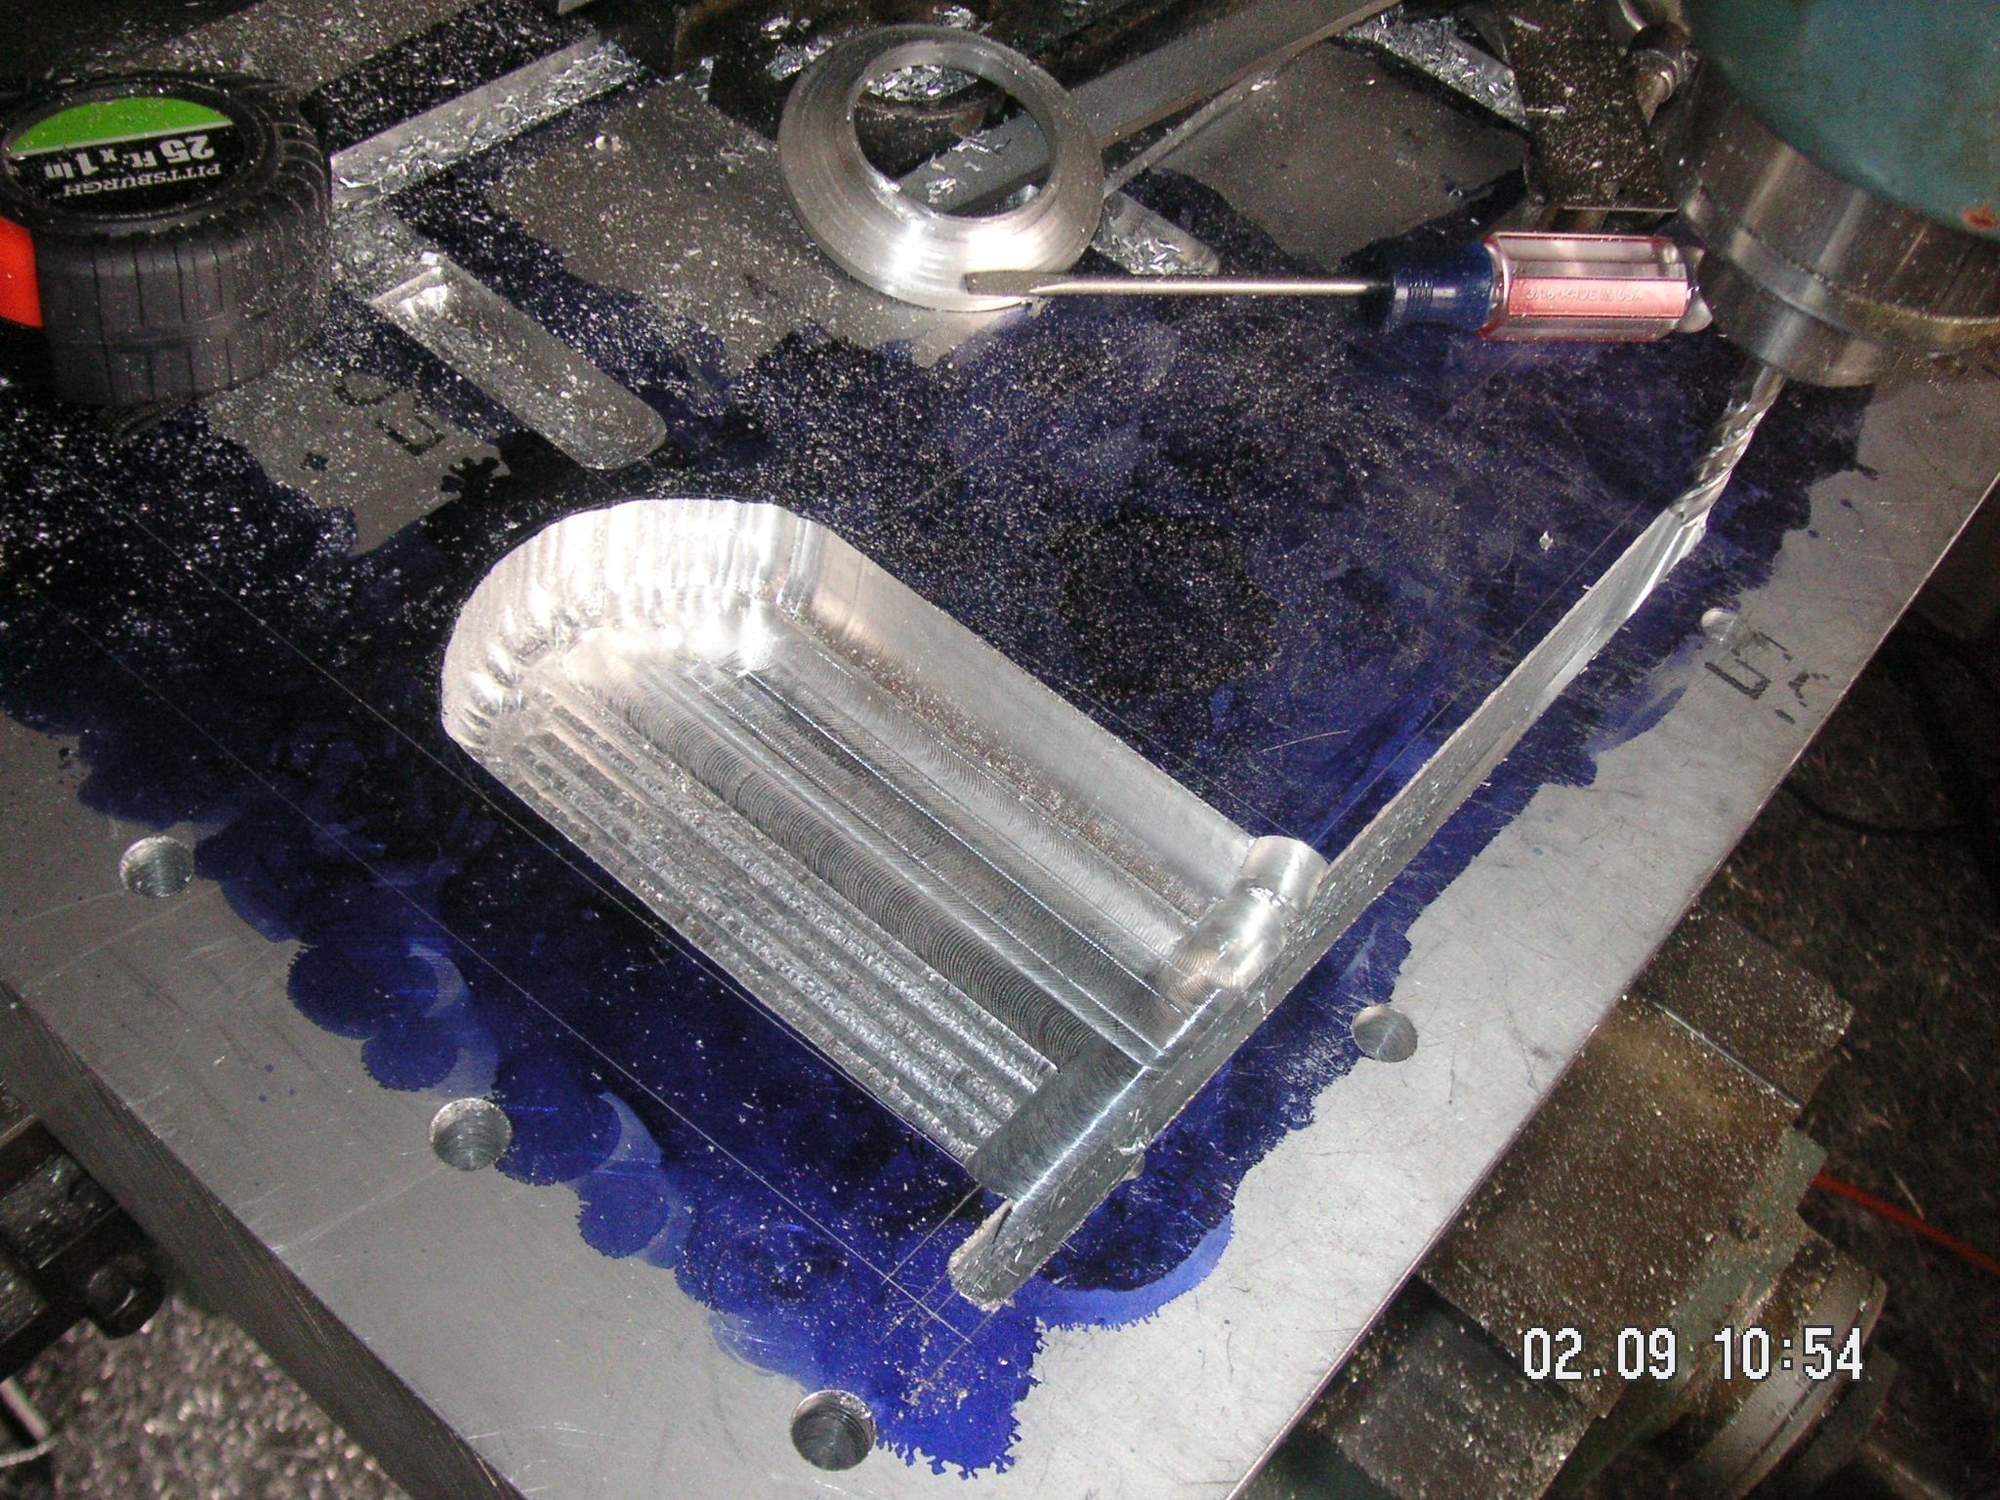
That did go pretty quickly since there was not that much material to remove to kind of cut the corners off. Then I subjected the piece (and my hand) to my belt sander. That too went pretty well, except for my hand, and I have it rounded off pretty close to finish. I'll work it some more with a file by hand so I can see the high spots as I work and then I'll sand it smooth and probably polish it so that it does not grab the material being formed in the final process.
I worked a bit on the form with a file to true it up some and smooth it off. I'll probably do a bit more and then sand and maybe polish it. Then I worked on it's recess in the base plate so that it would set at least flush along the top, but I prefer it acually being a bit low to be sure that the aluminum or steel being stretched into it is not caught between the form and base plate. I have that pretty close now by first using the round nose mill bit, but then I shifted to my disc sander using the edge of a fresh coarse sanding disc, and then I switched to a rotary bit in one of my small drill motors. It is slow progress, but leaves a nice finish.
Last edited by Jerry Feather; 02-02-2020 at 02:28 PM.
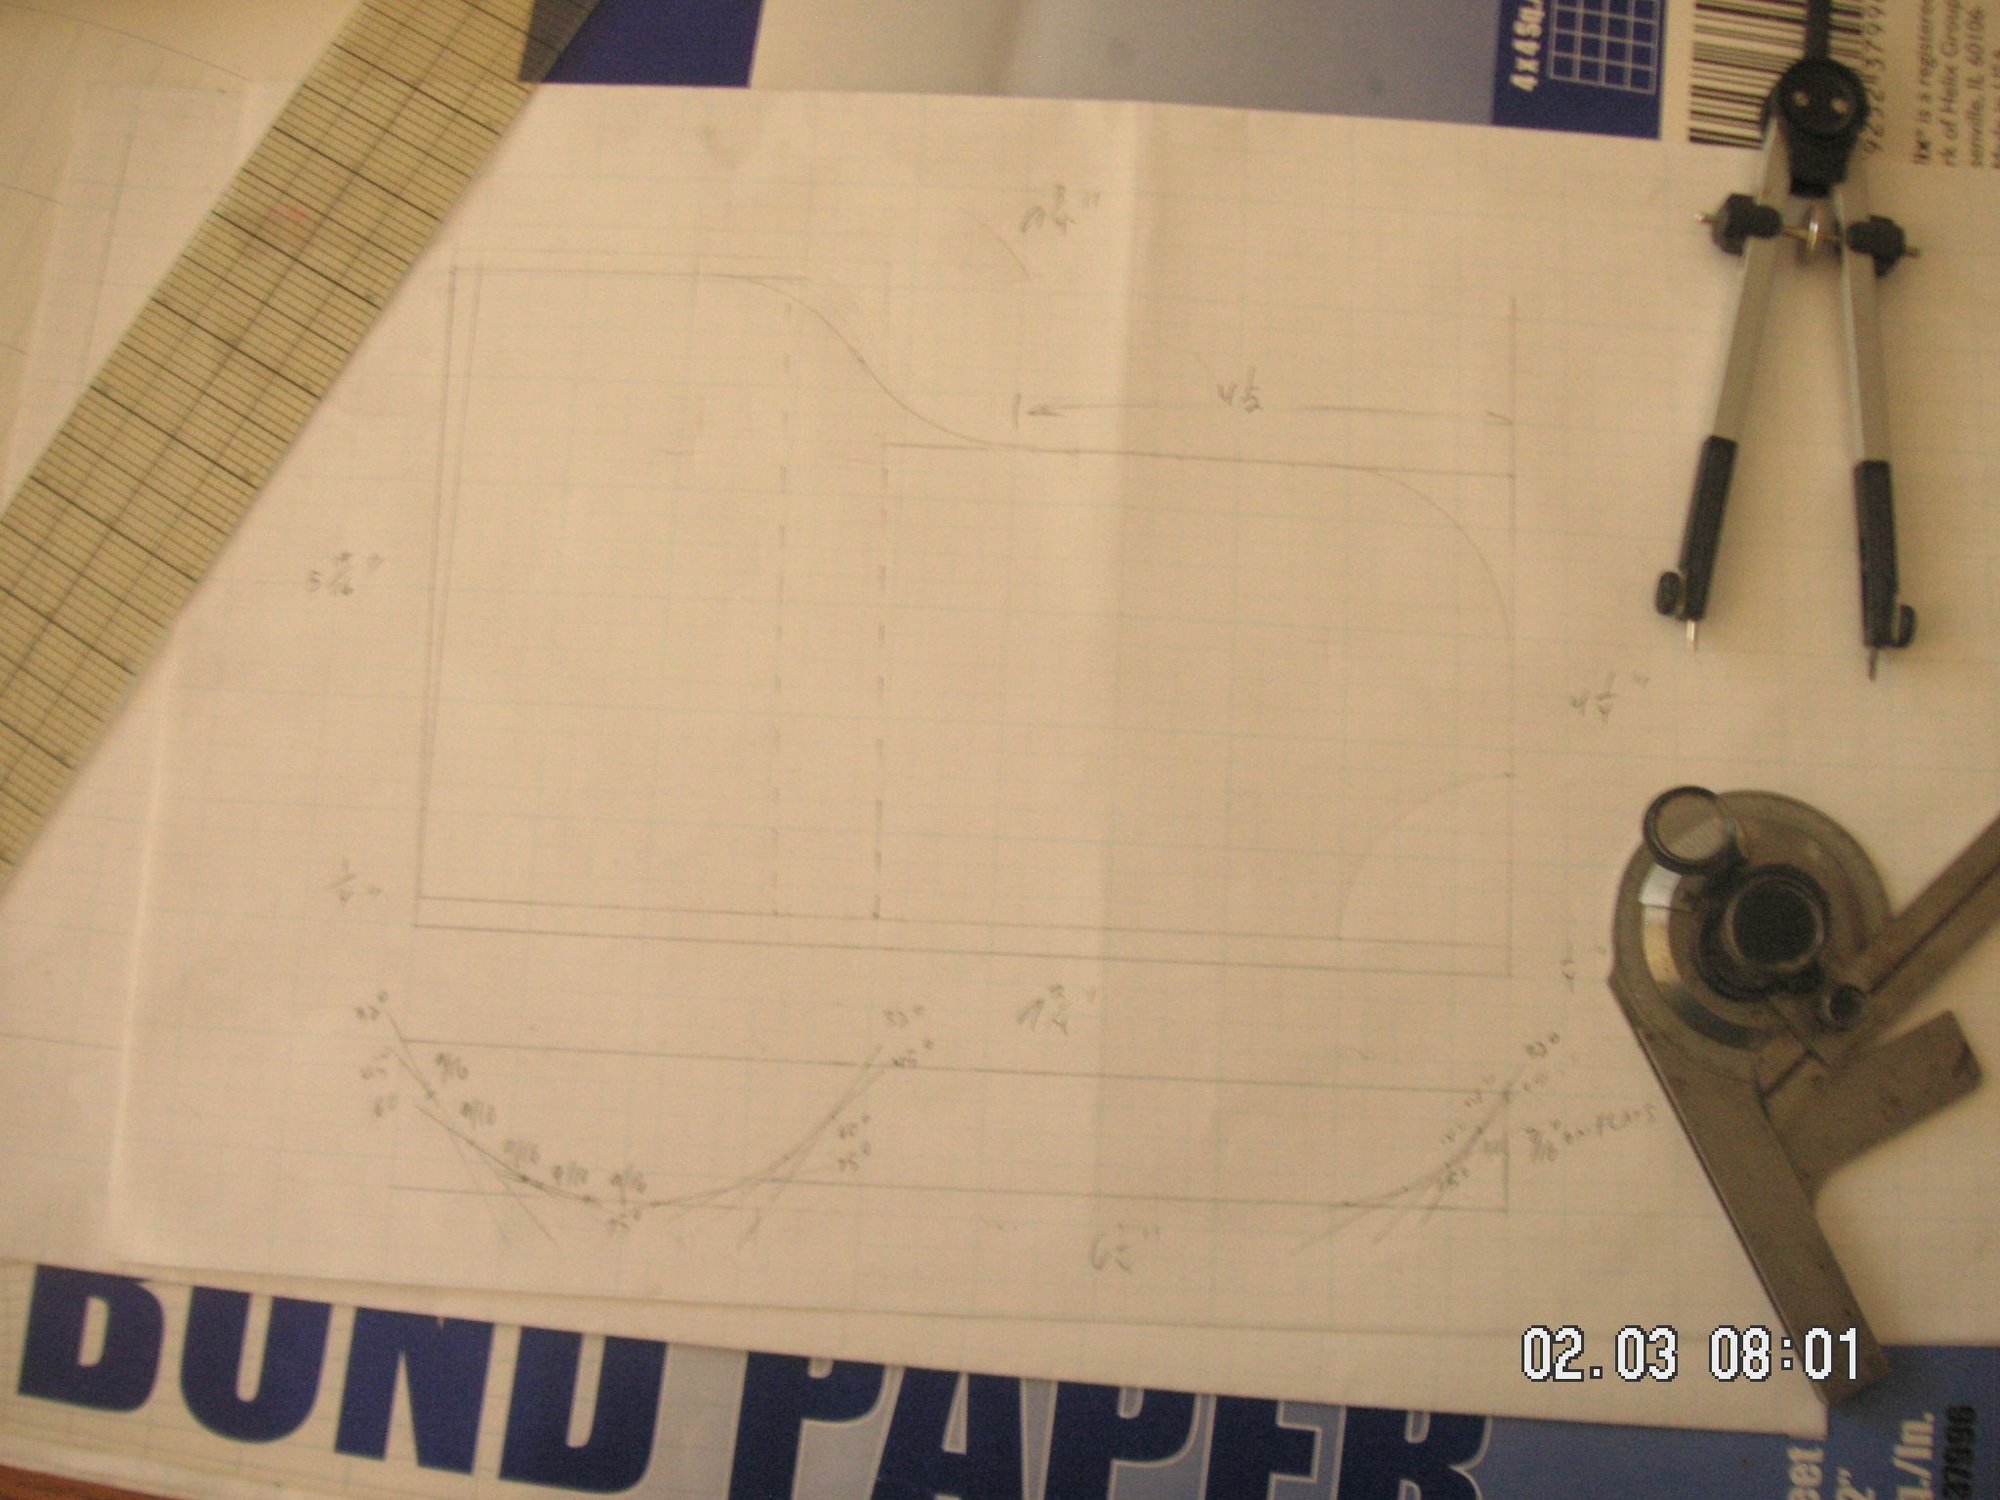
The design of the other bulge form, the one for the alternator and the alternator vent flex tube, had been kind of in flux all this time. I have worked on that design just about every day and now have it where I think it is going to end up. To, I discovered yesterday that I just barely have it to the point of fitting the material I bought to make it out of.
First I have to move the base plate bolted to the mill table to the other end and then mill out the recess in it like I did with the small bulge. Then I have to mark and cut out the profile of the bulge form, and that is going to take some time since the material I'm using is 1 1/4 inch thick and that will cut very slowly in my band saw, although not a slowly in actual tiime as I had previously thought. Then I have all of the angle cuts designed and will figure out how best to hold the piece to cut those.
When I get this next bulge near completed I think I'll be getting to about second base with this project.
Oops, I think I just figured out that the design is still not correct. It needs to be about an inch or inch and a half longer on the left side, the bulge for the vent tube; and now my material is not big enough to make it. Back to the drawing board.
Last edited by Jerry Feather; 02-07-2020 at 10:38 AM.
I think an inch longer on the left side will be sufficient; and now I am thinking that I can make it in two pieces. I am also wondering if this will make it possible to form these in two versions, one for the very early ones and then the later ones with the larger bulge for the later larger alternator.
I have to load up my gas bottles and get some propane for the shop later today, then I think I'll be able to work up the vent tube bulge form this weekend. It has been busy at the office this week and I was a bit under the weather for a day or two, so I haven't been out in the shop, aside from it being cold out there and me being out of gas.
I am now thinking that I can make this next bulge in two pieces and with that be able to form two different versions of this pan. I have another piece of 1 inch plate somewhere, and if I can find that I'll have what I need to do the alternator part of this bulge.
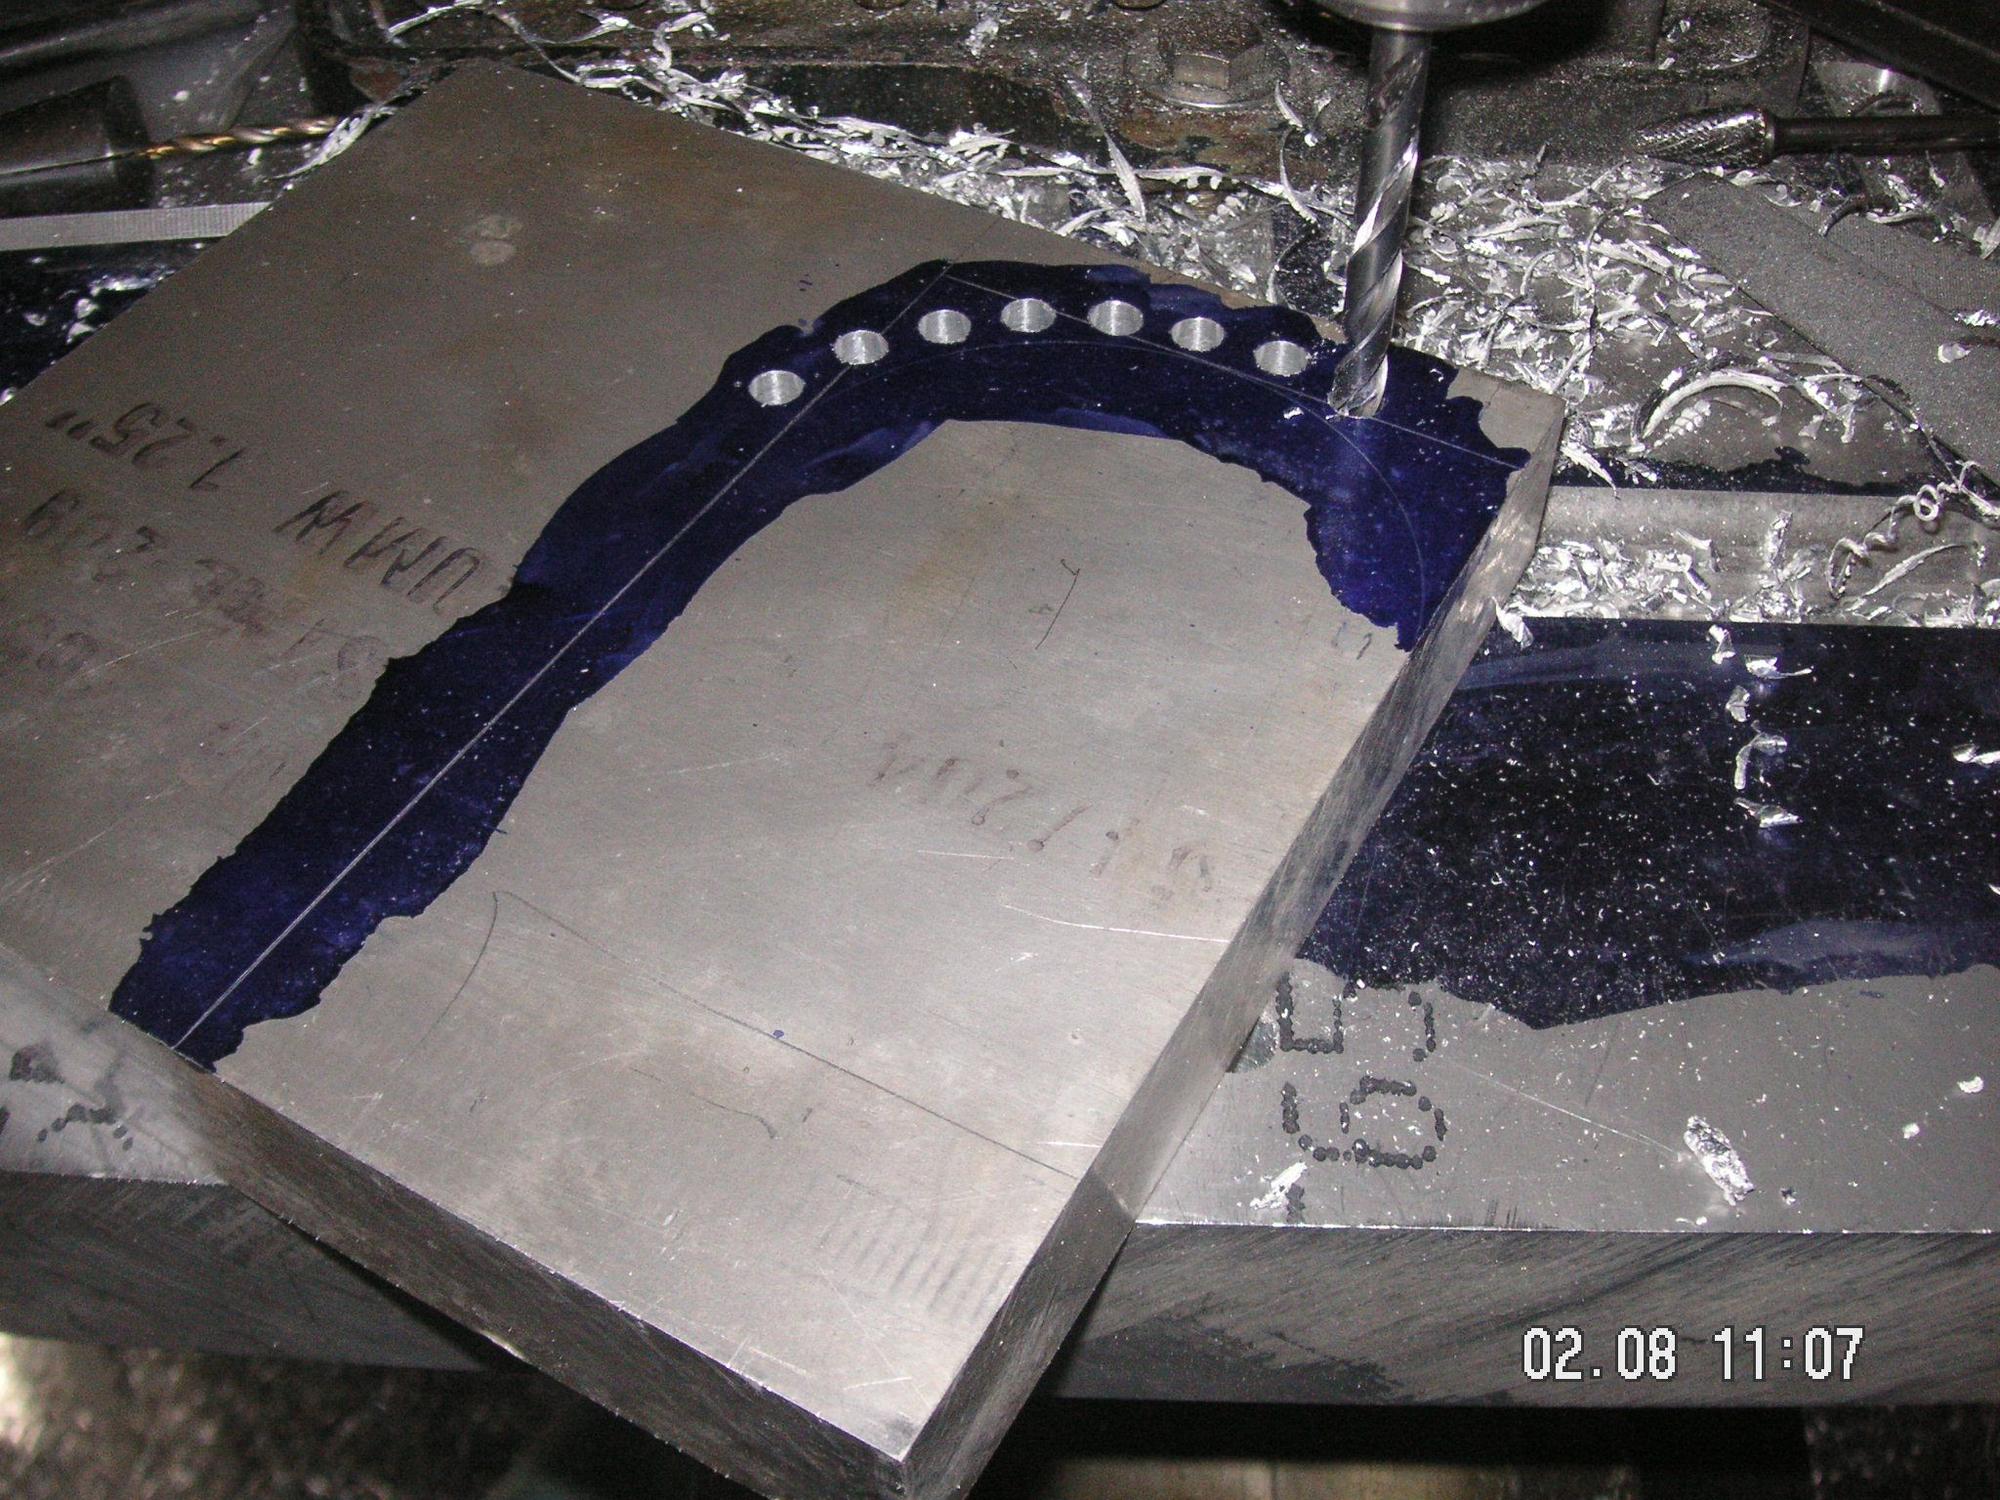
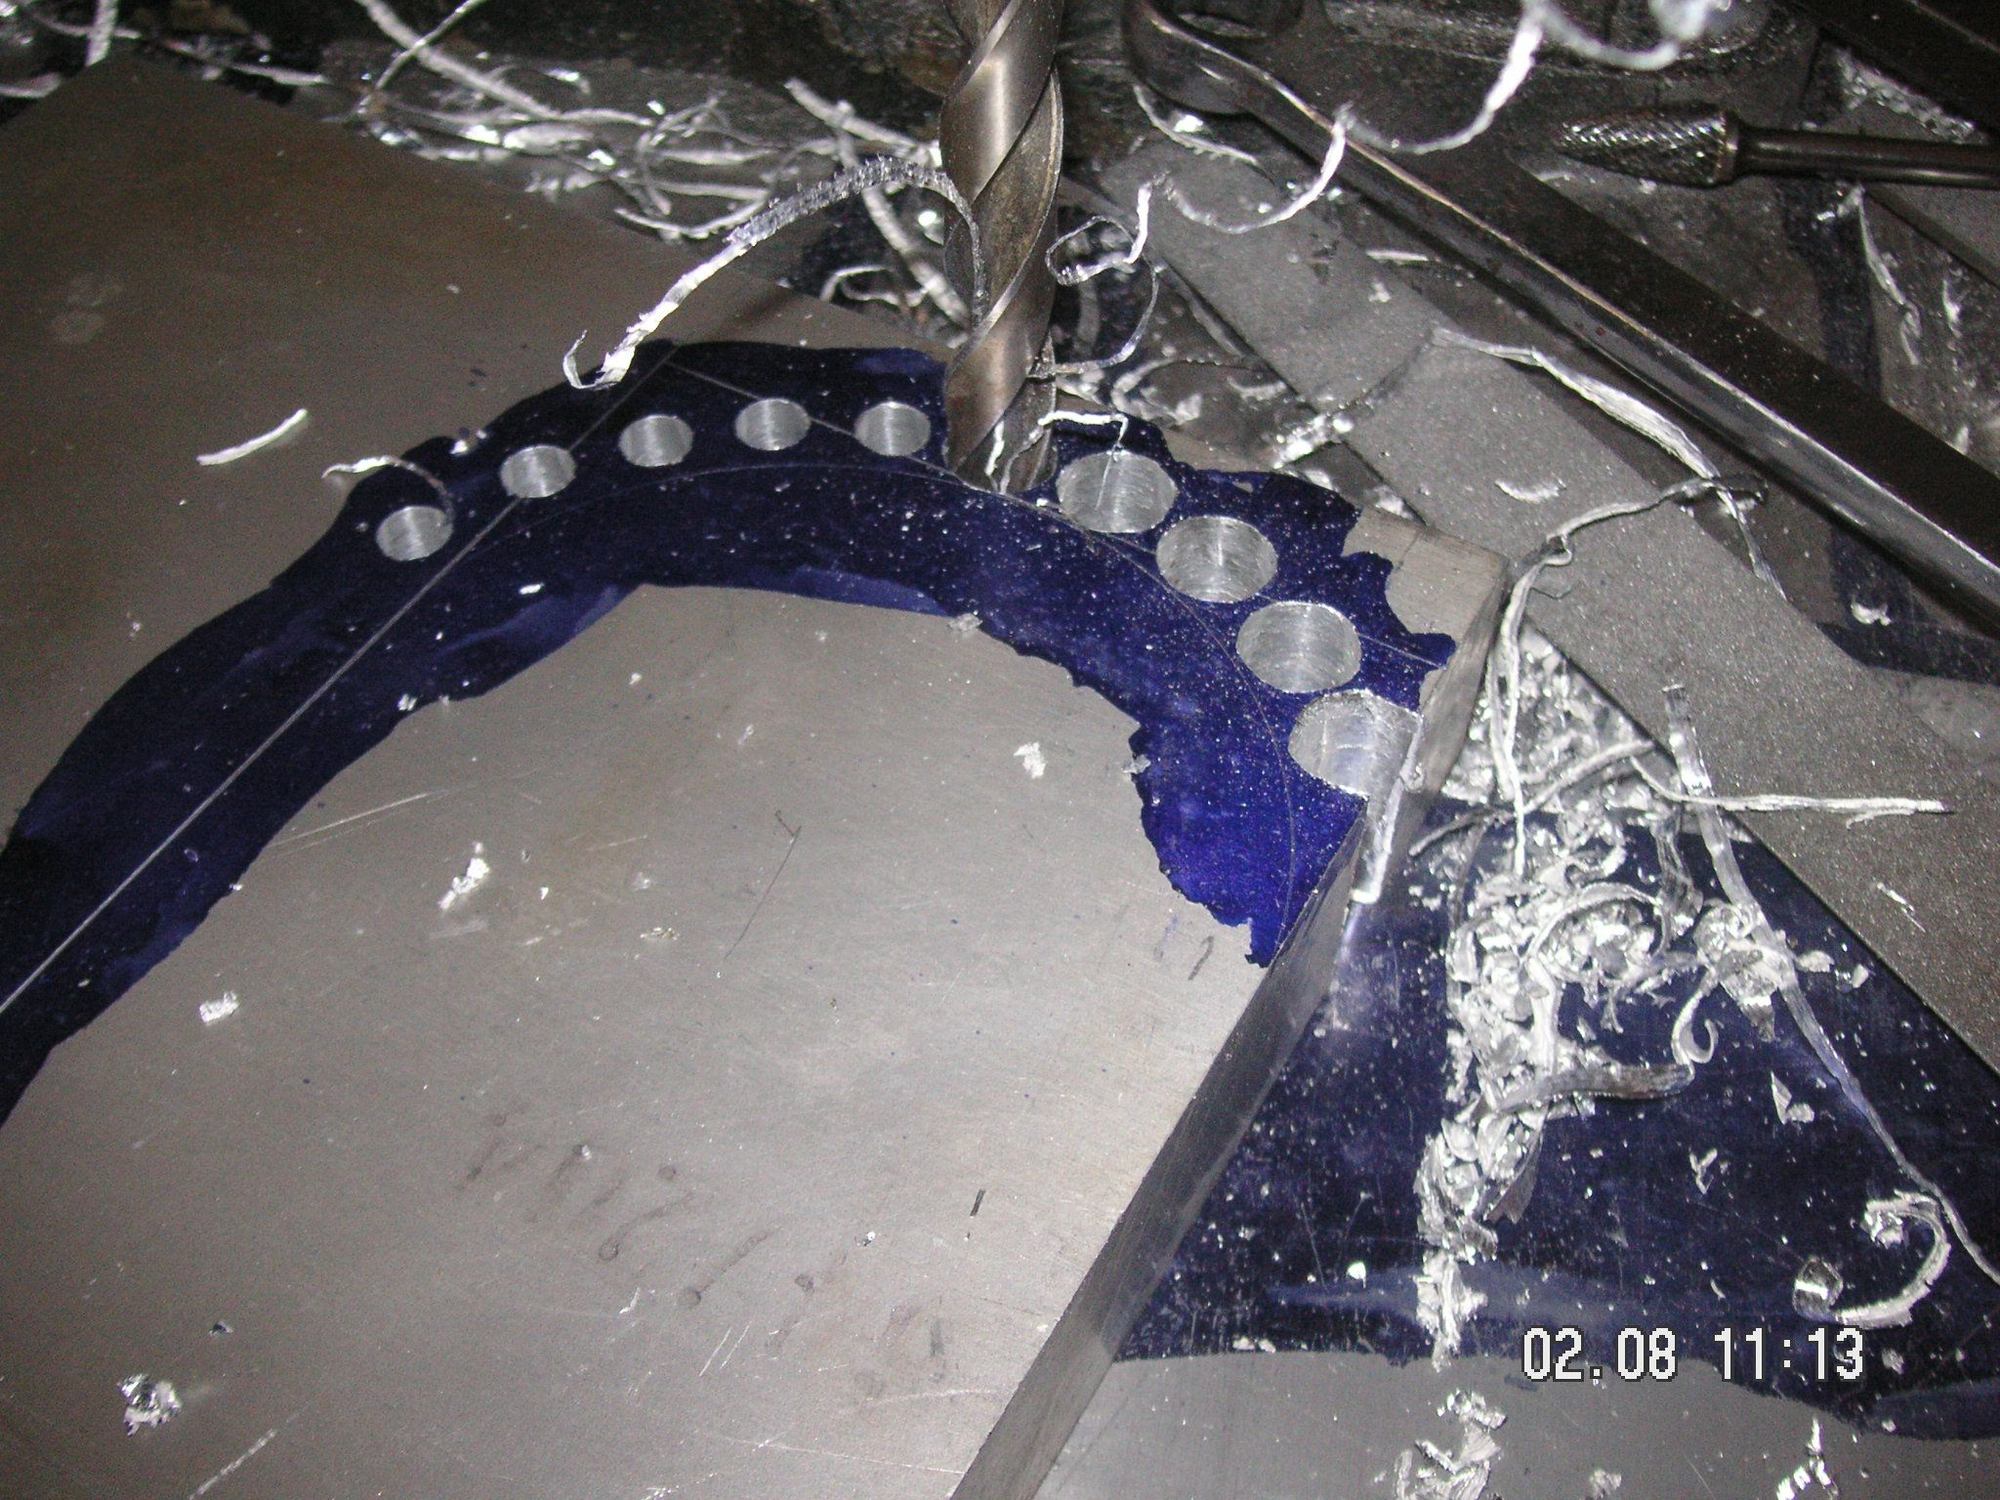
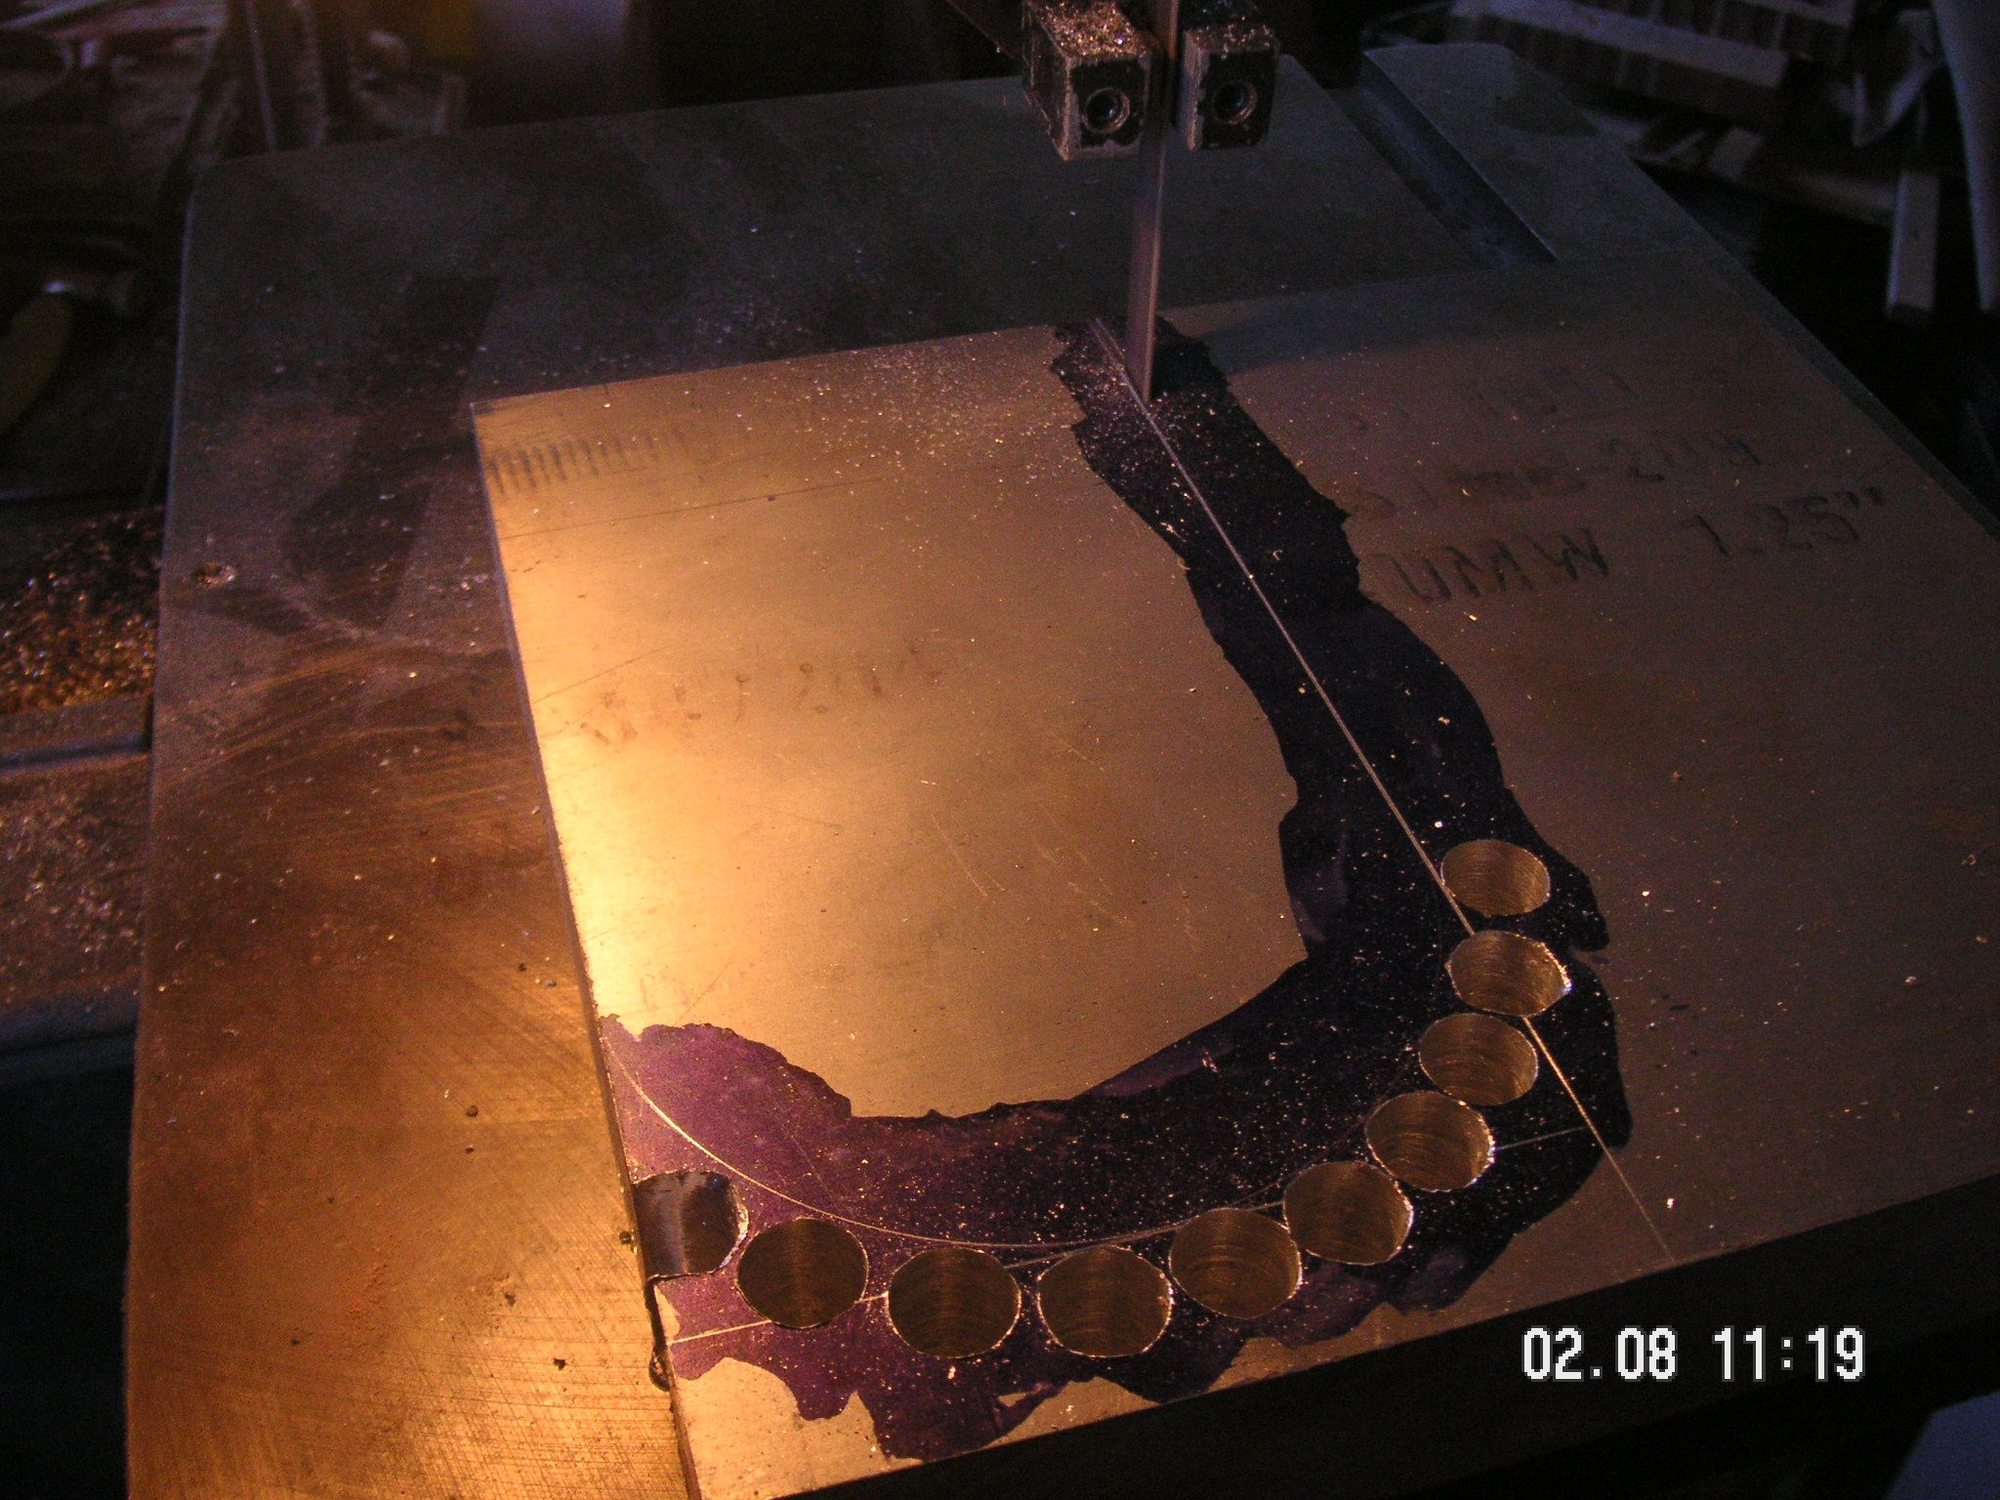
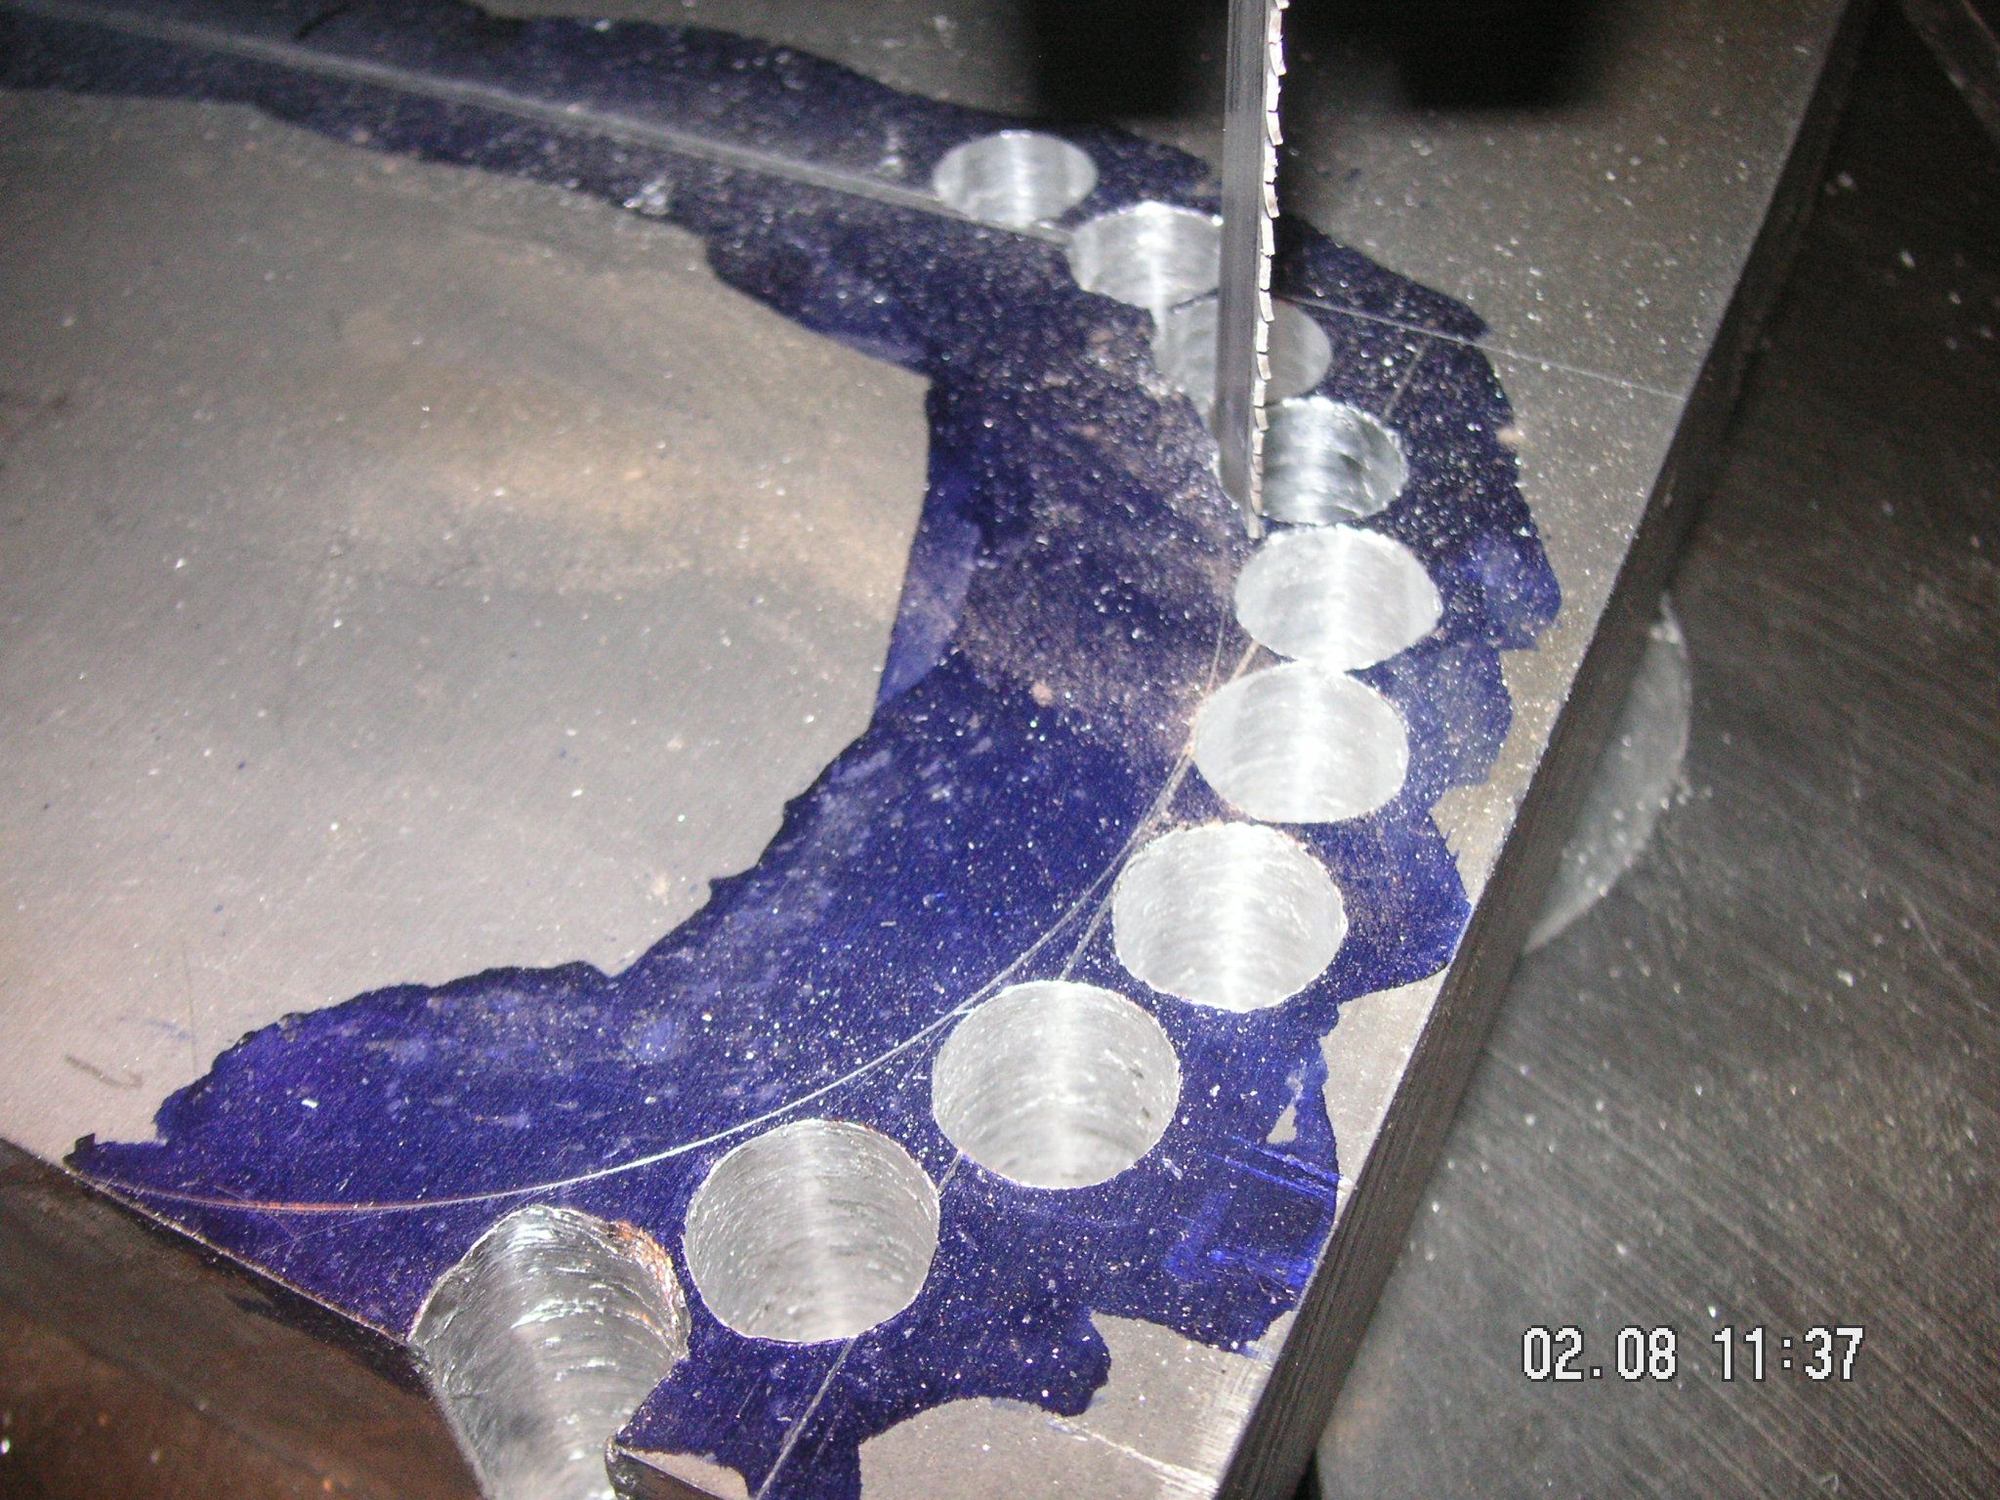
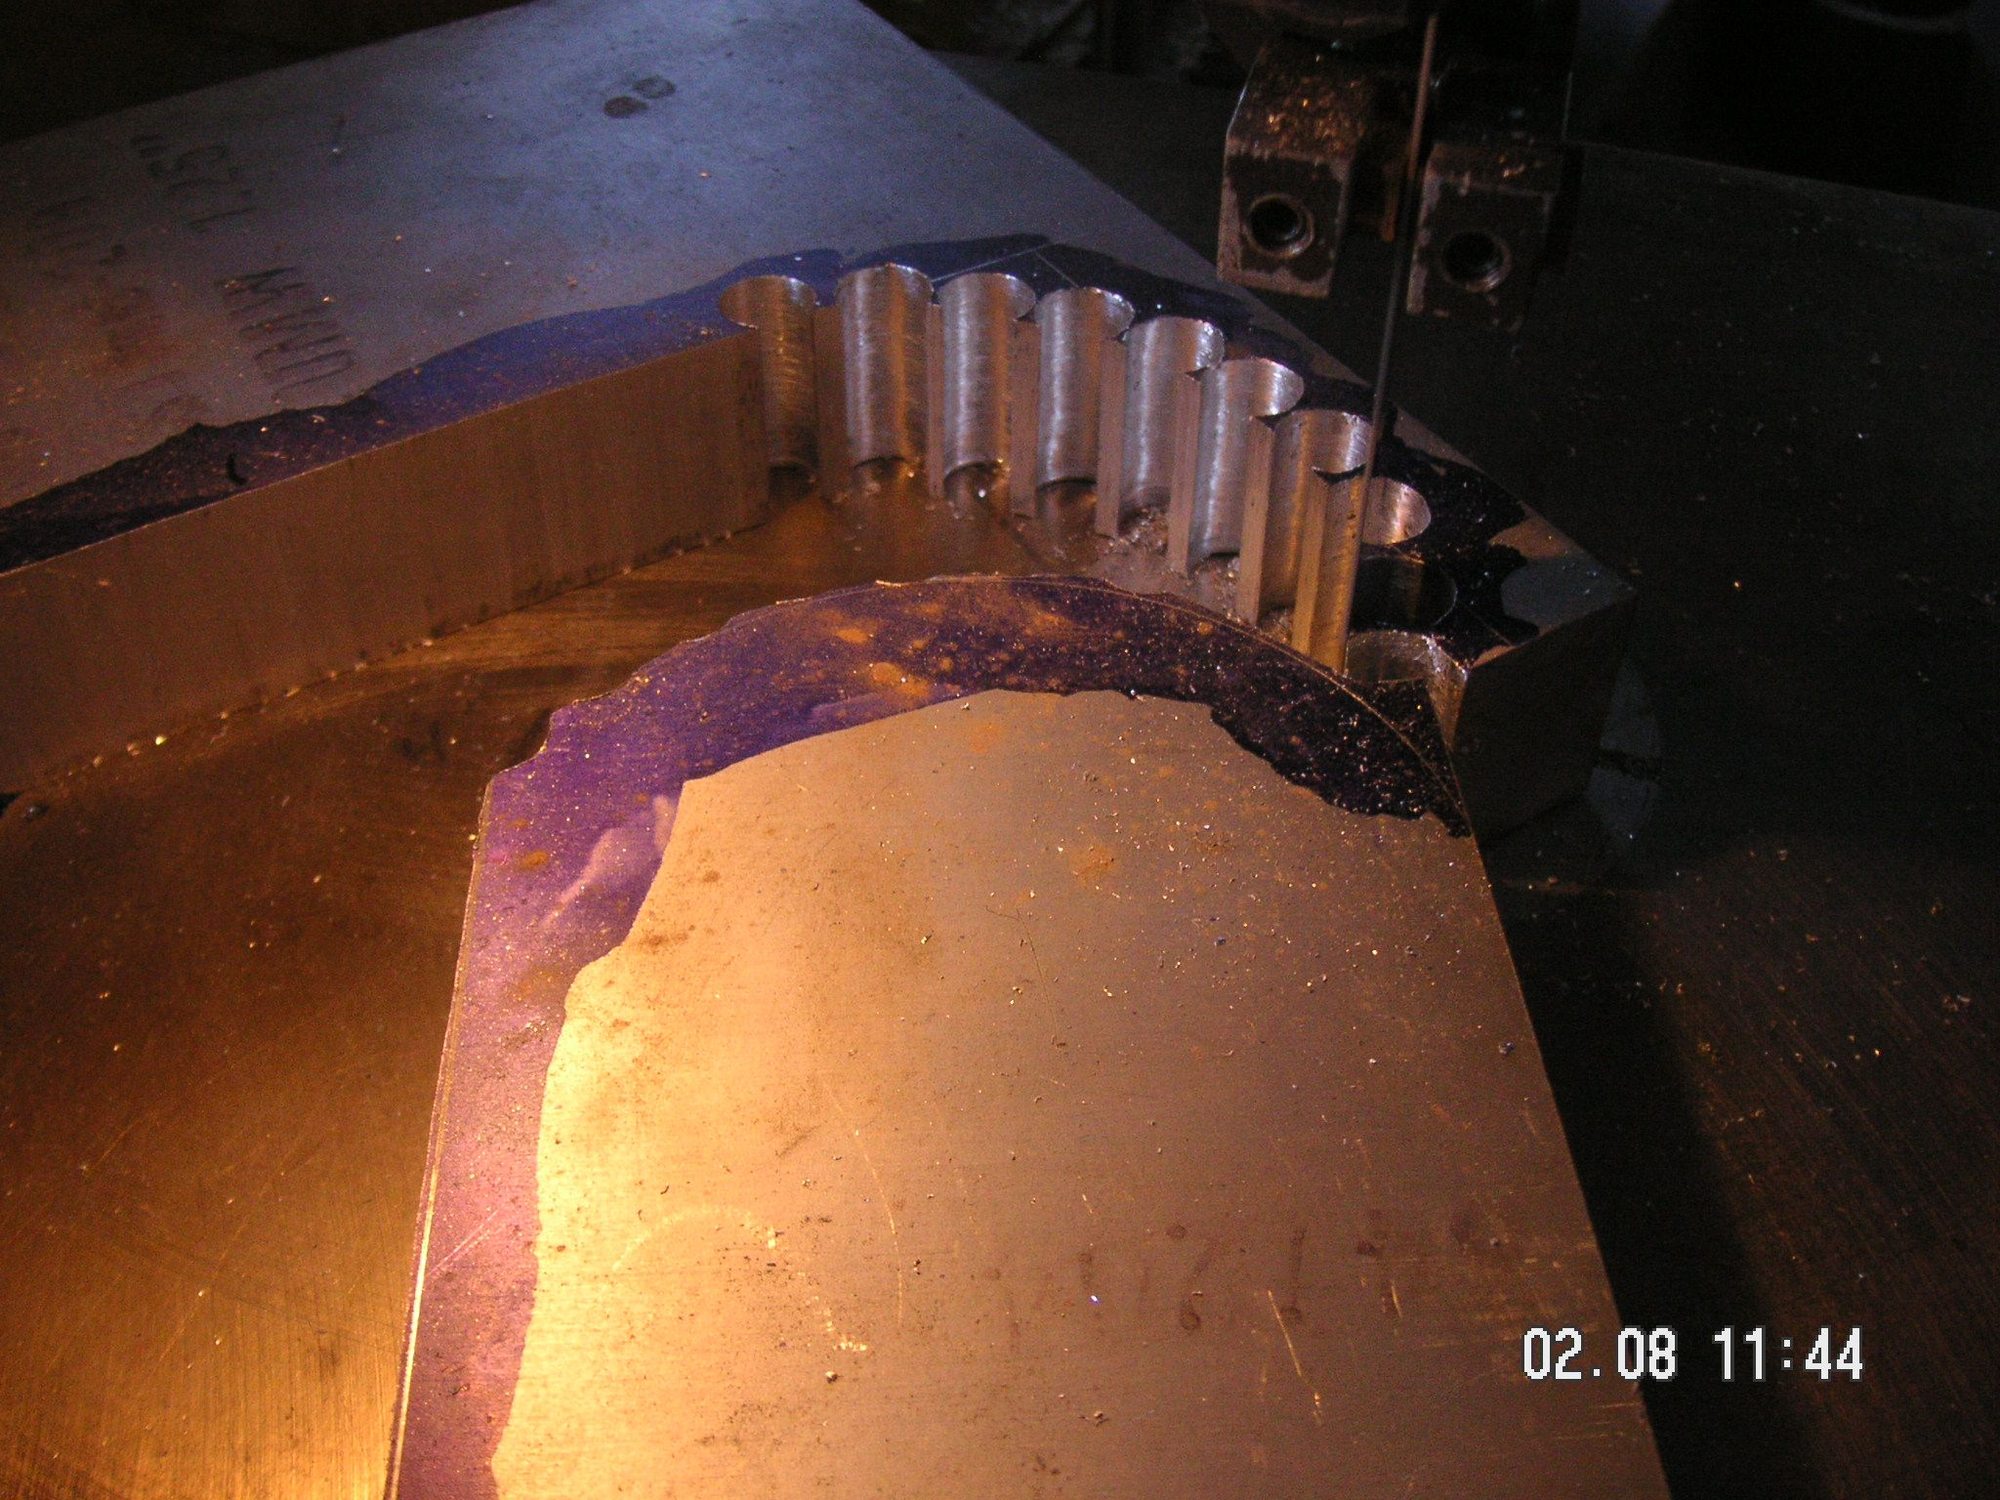
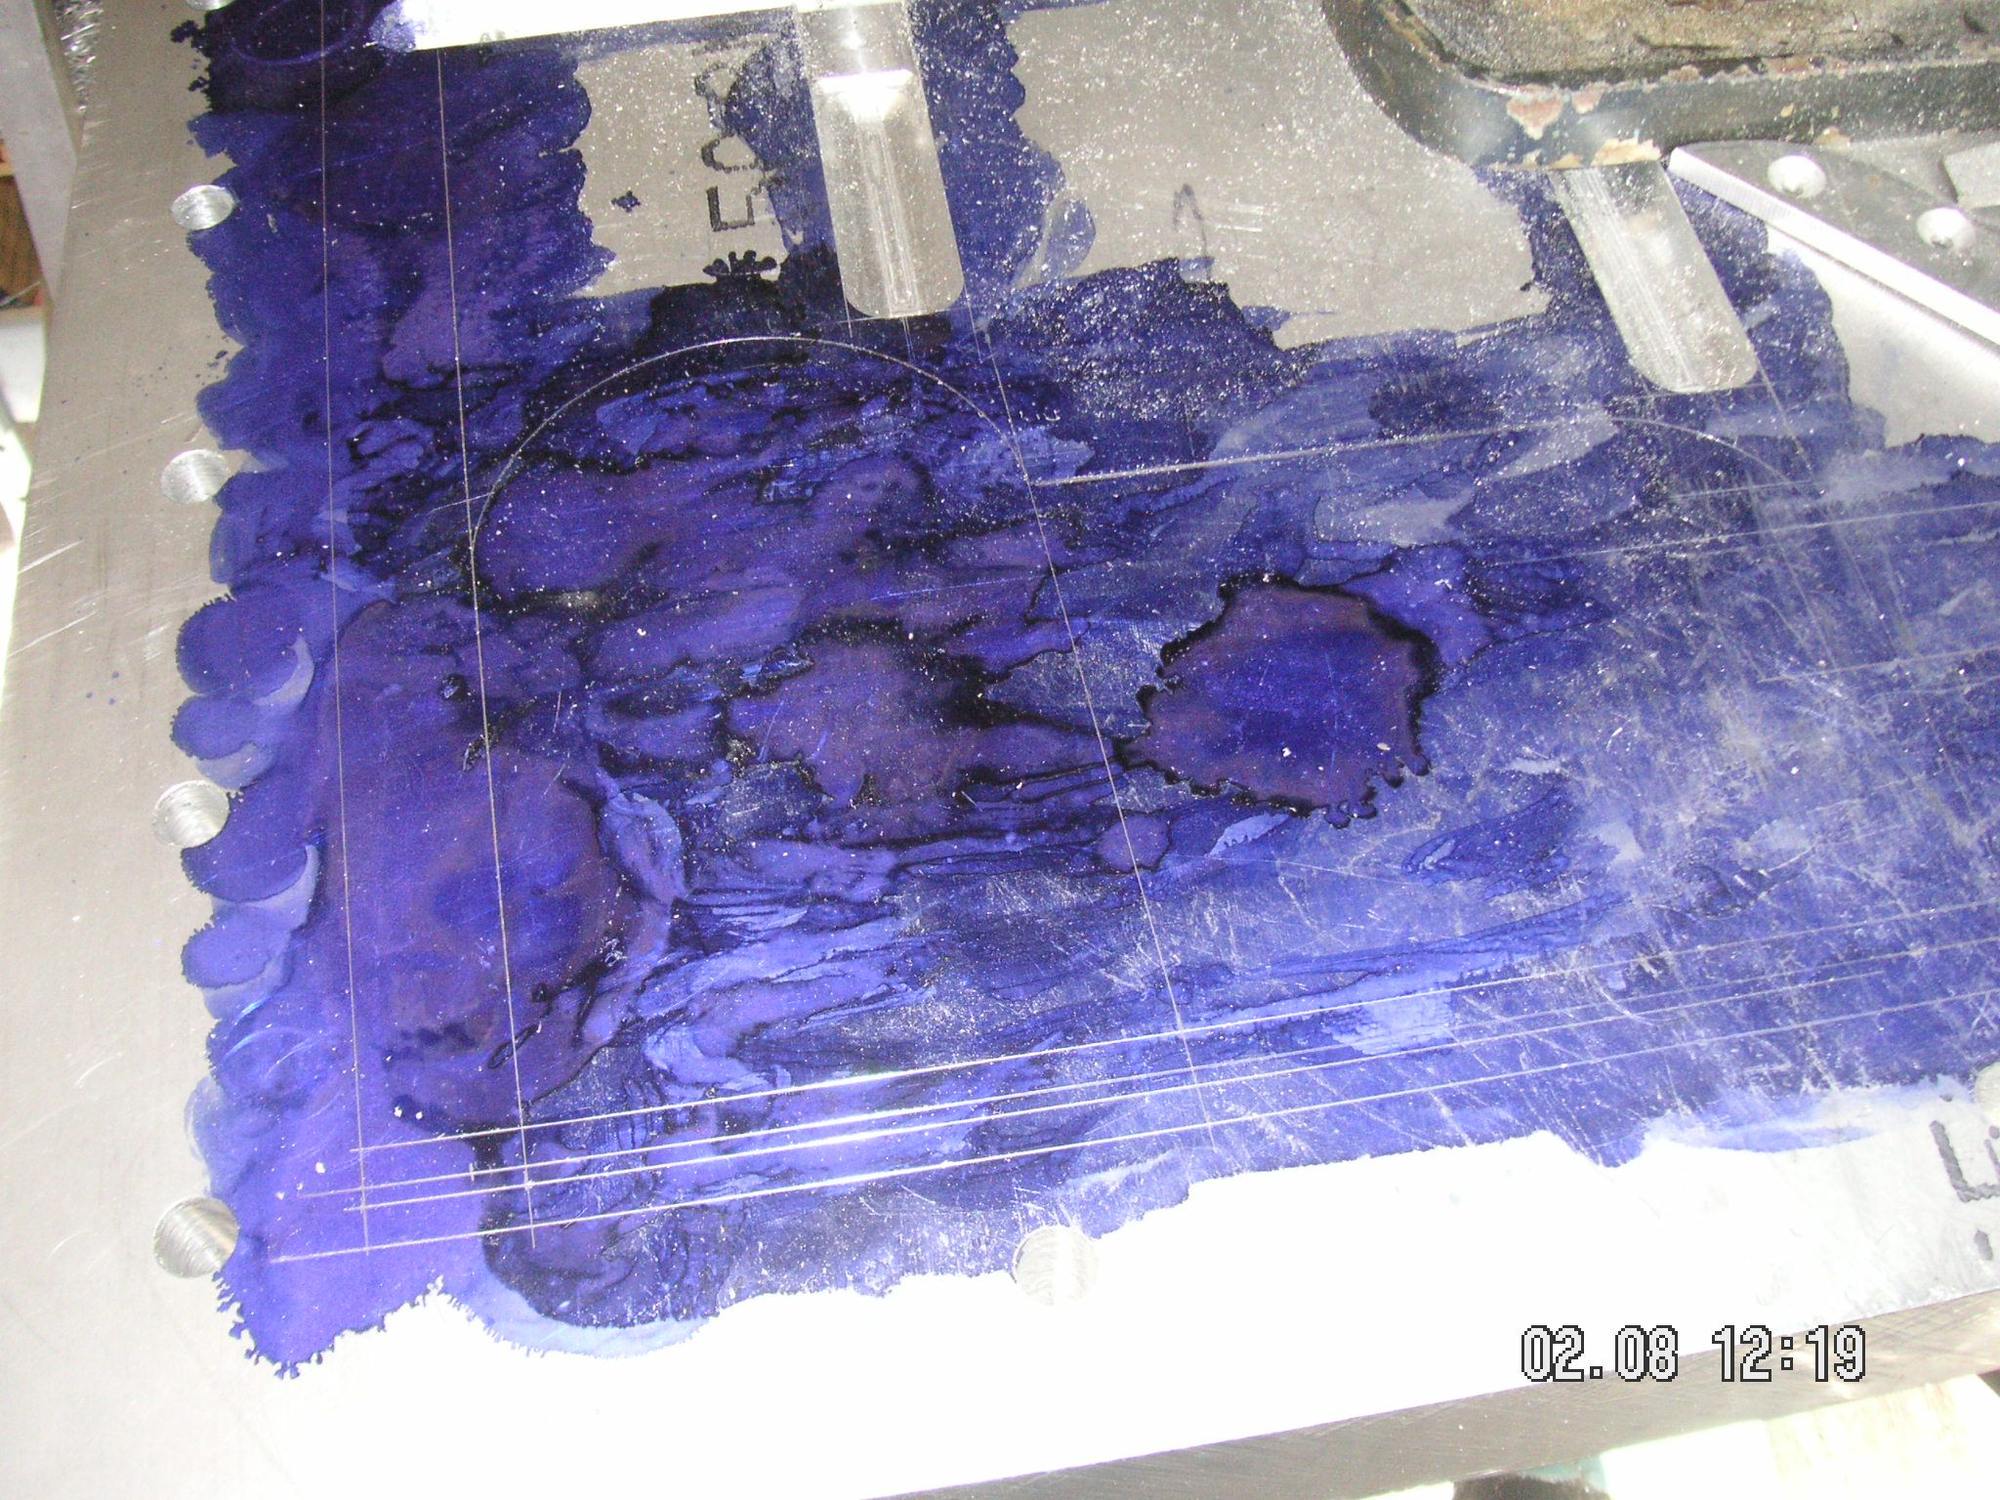
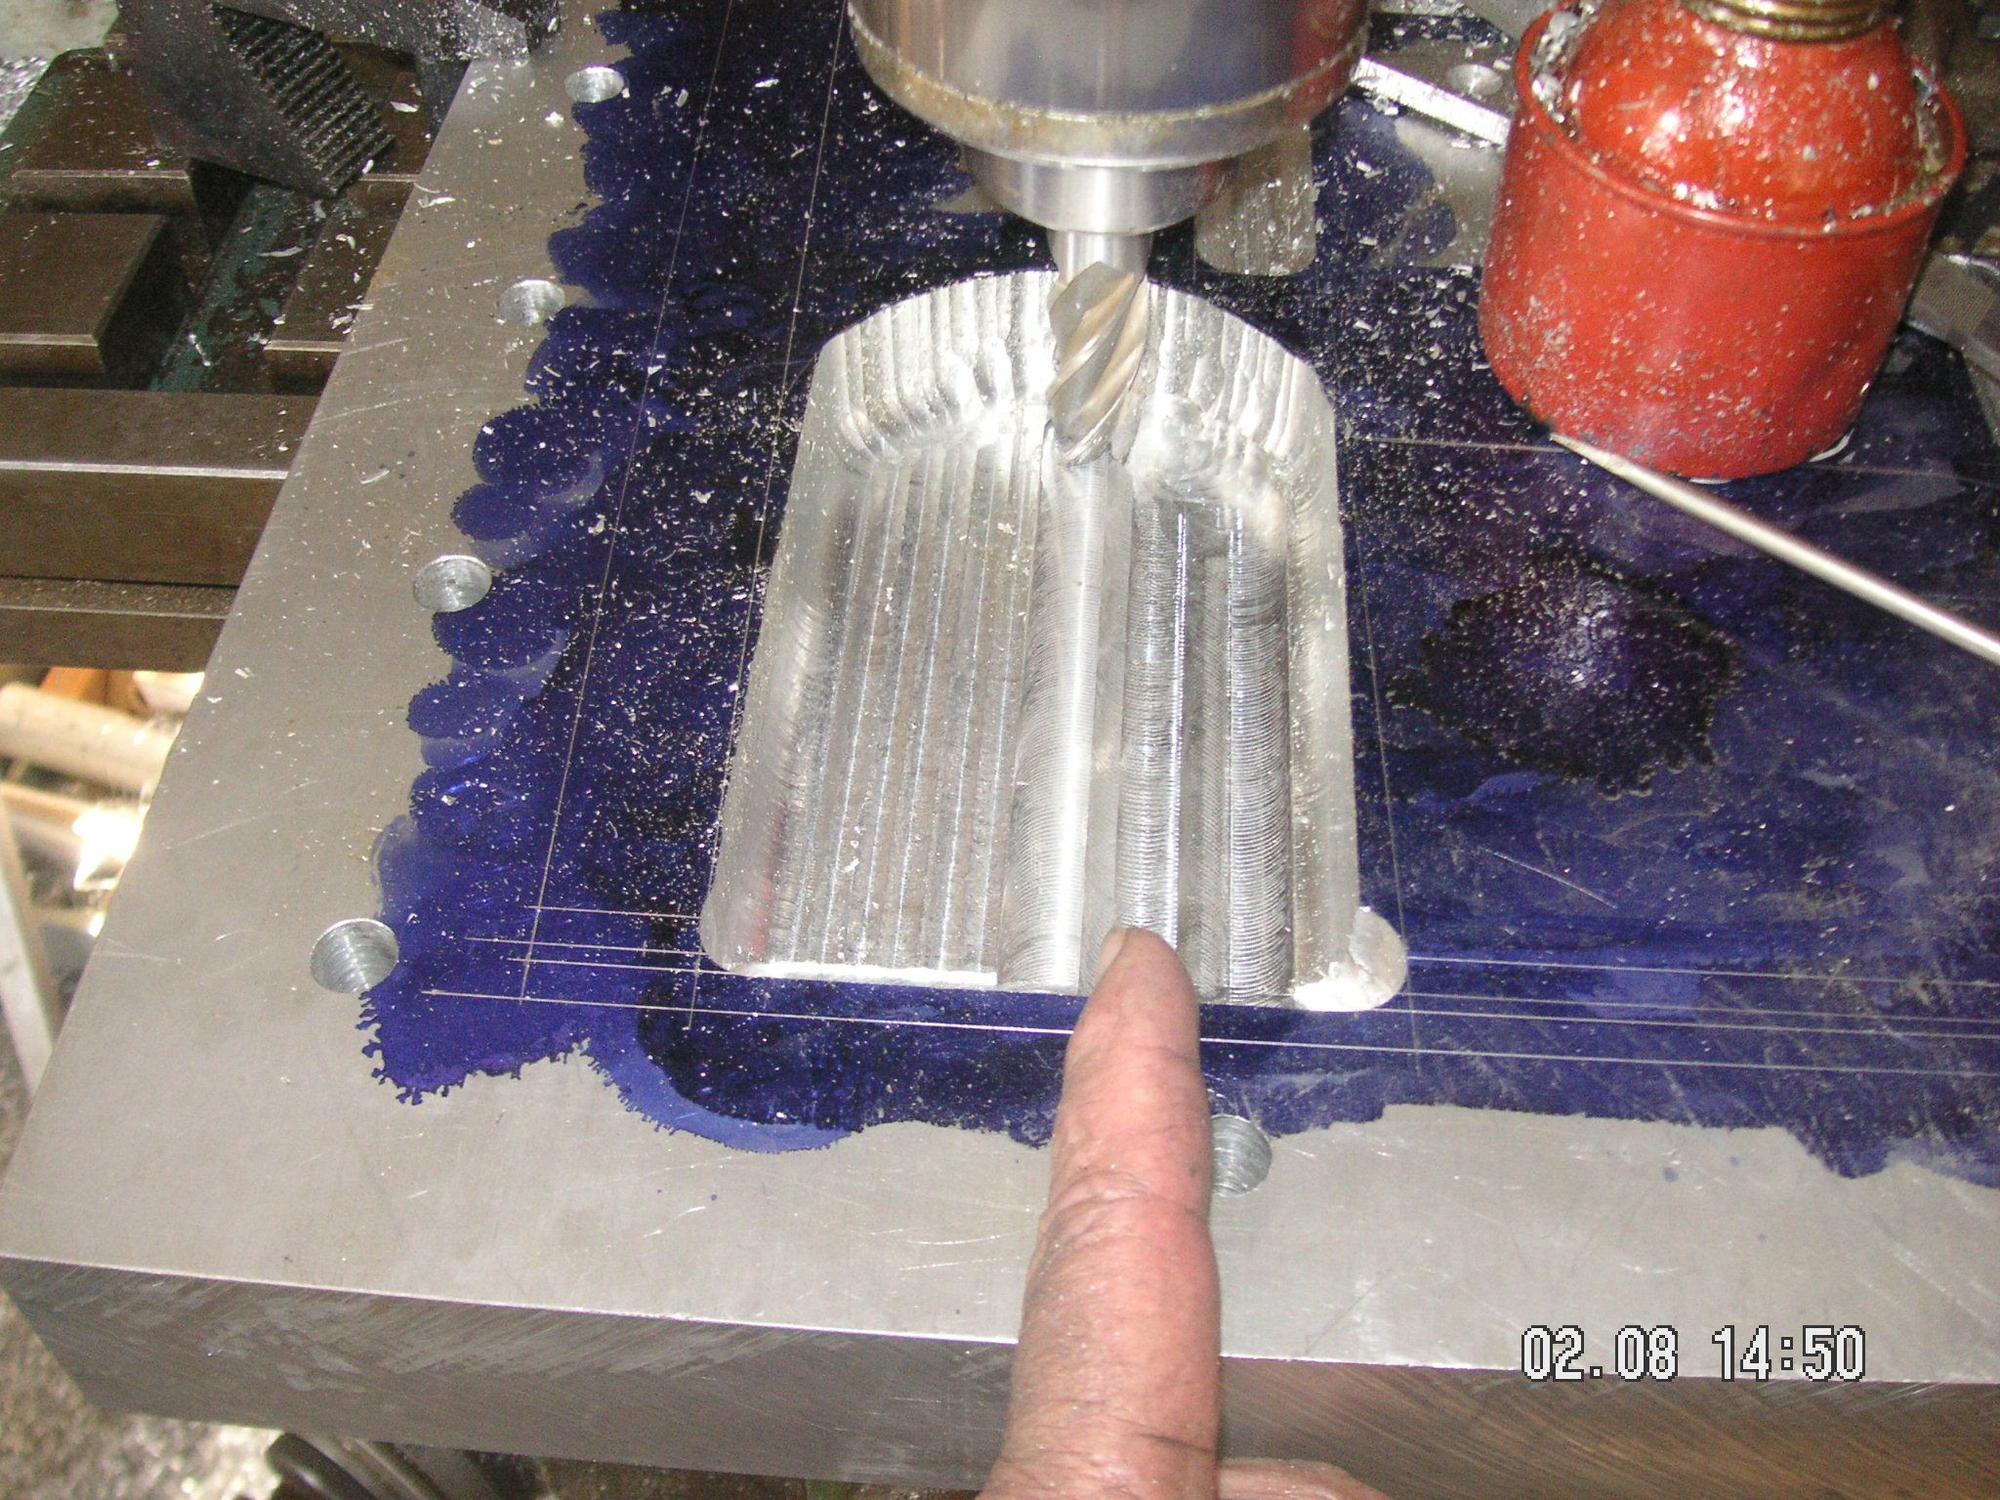
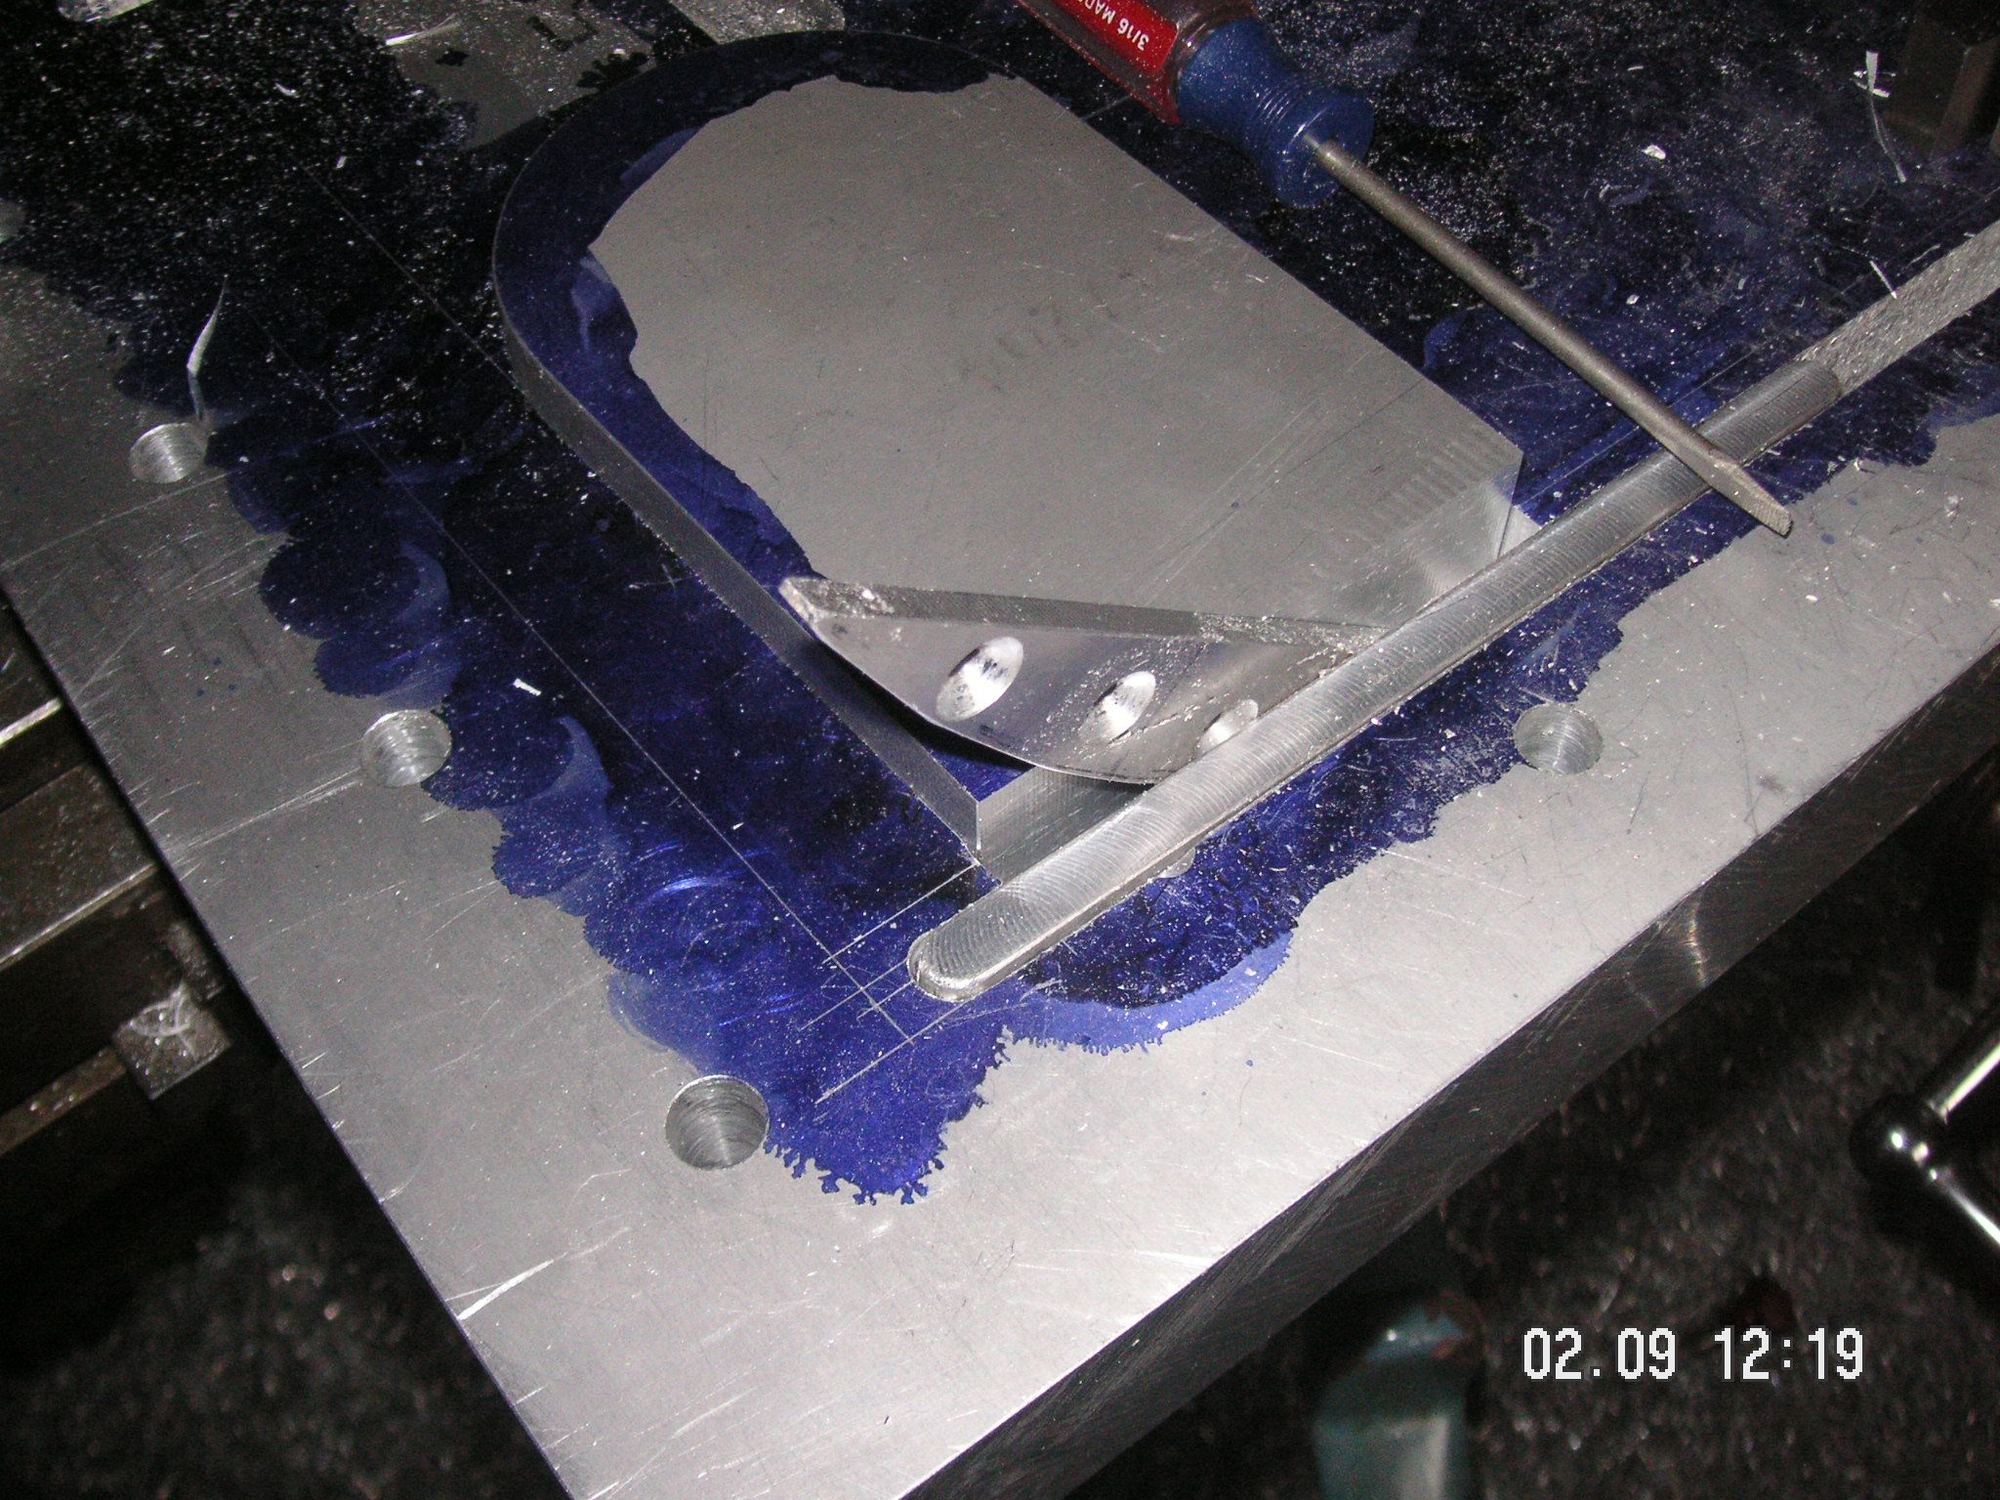
I worked up the basic piece for the part of the left form(s) for the vent duct and then started on the recess for it in the base plate. The recess will need to go a bit deeper because that part of the two piece form is an inch and a quarter while the part for the alternator and its adjustment bracket will be only an inch deep. I will need a ridge in the vent duct recess for the transition of the two pieces of the form and that will be about where one picture shows my finger kind of pointing.
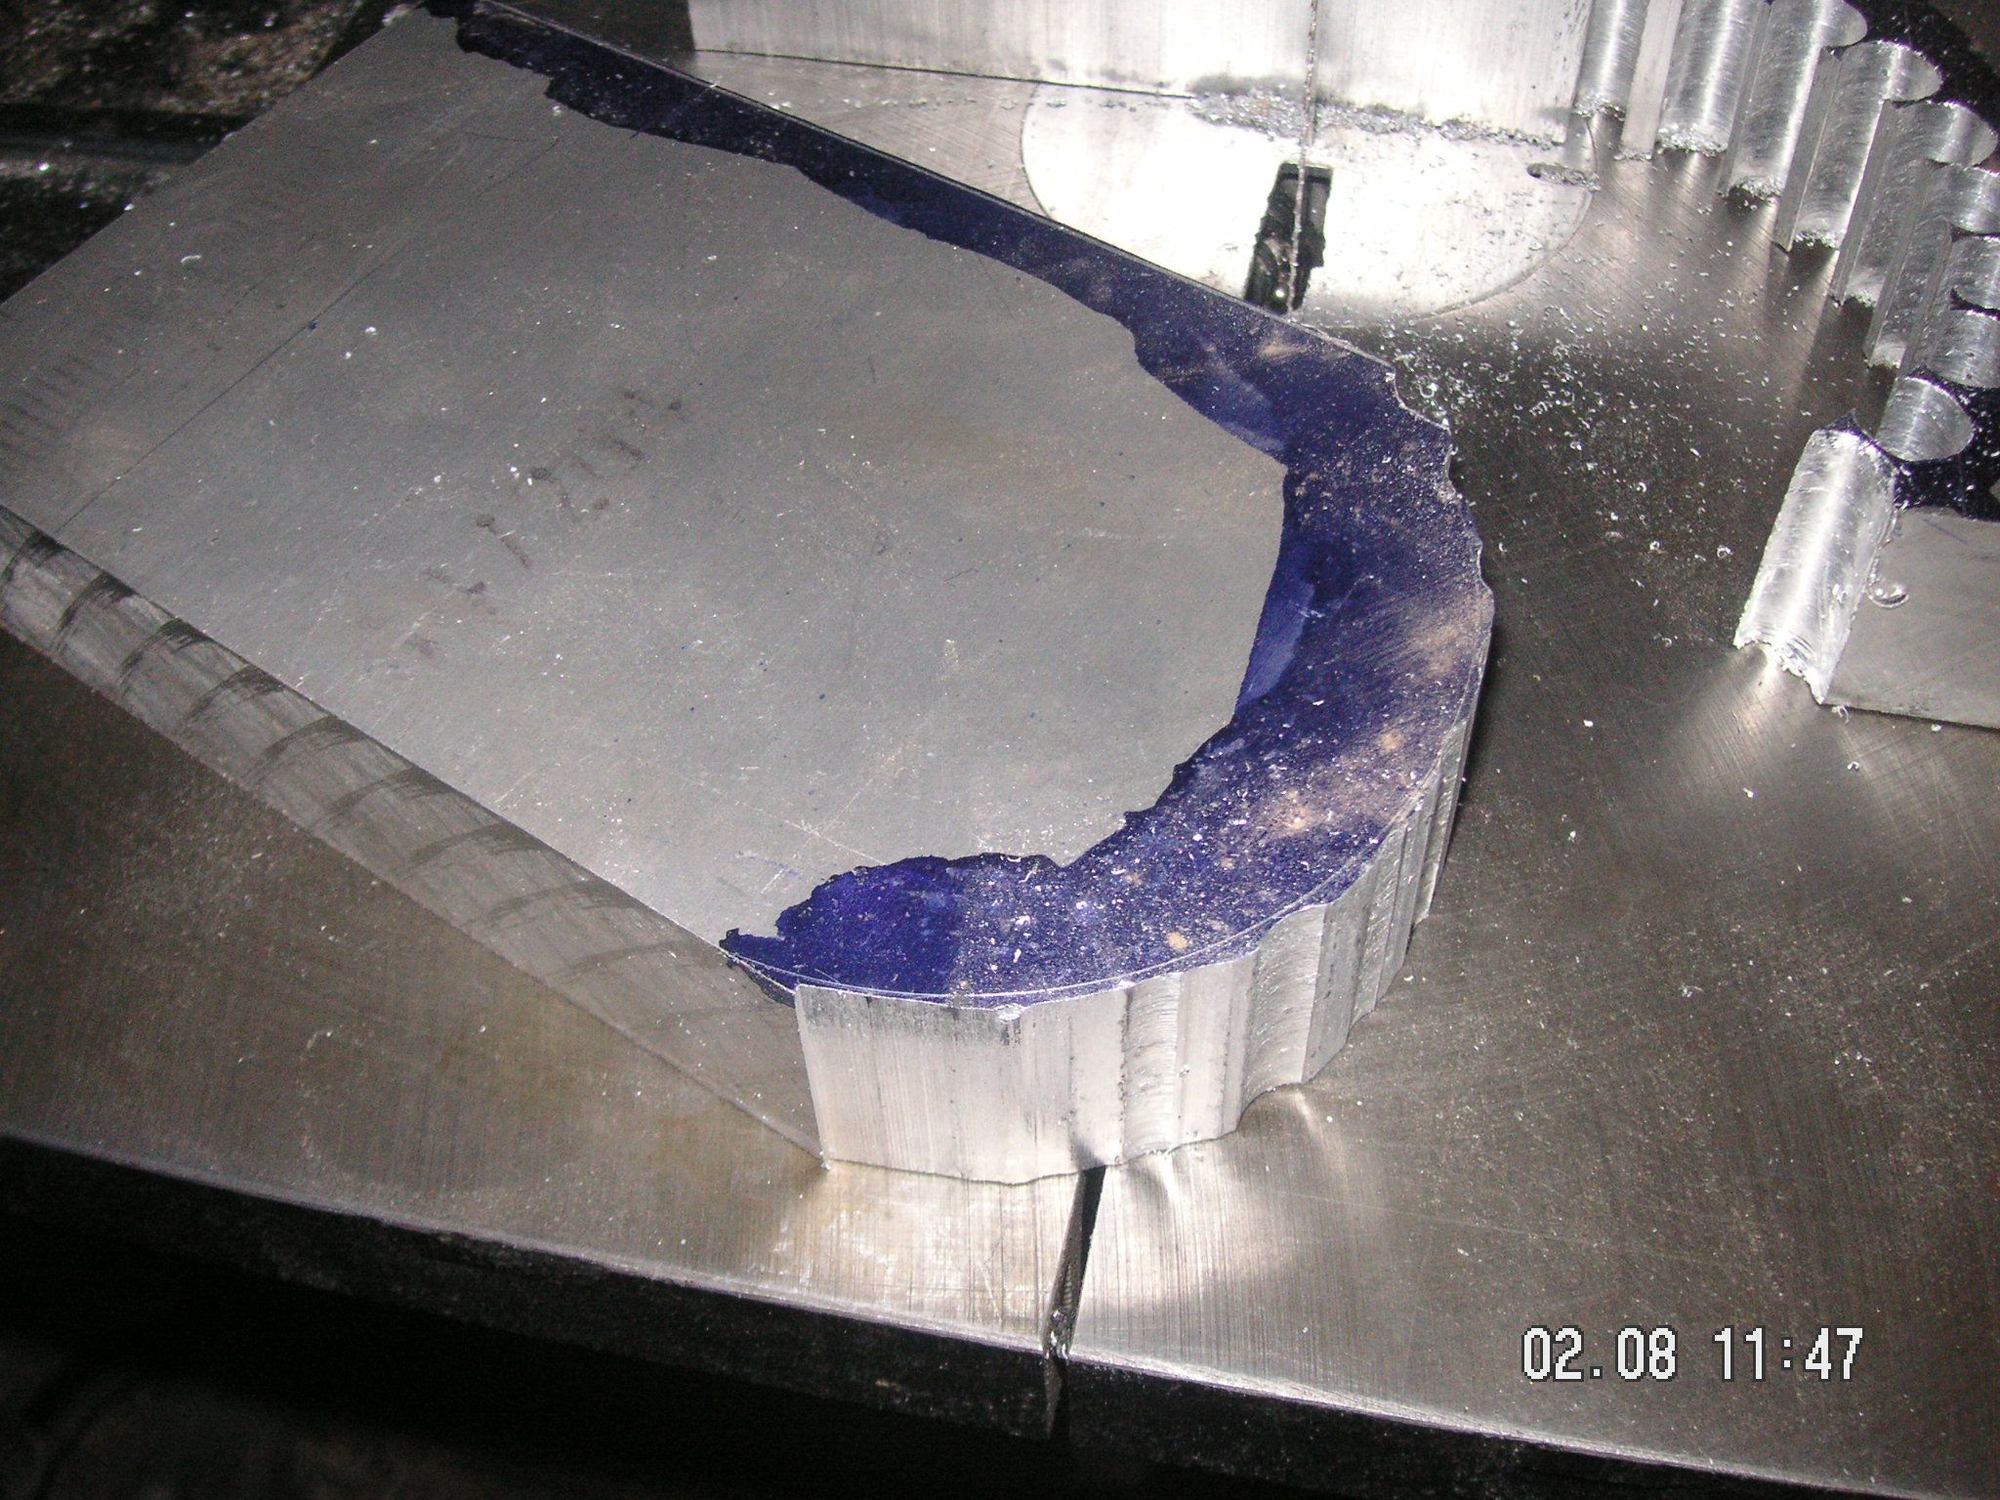
You can tell by the time on the pictures just about how long it took me to cut the form piece out of the blank plate.
Last edited by Jerry Feather; 02-09-2020 at 11:27 AM.
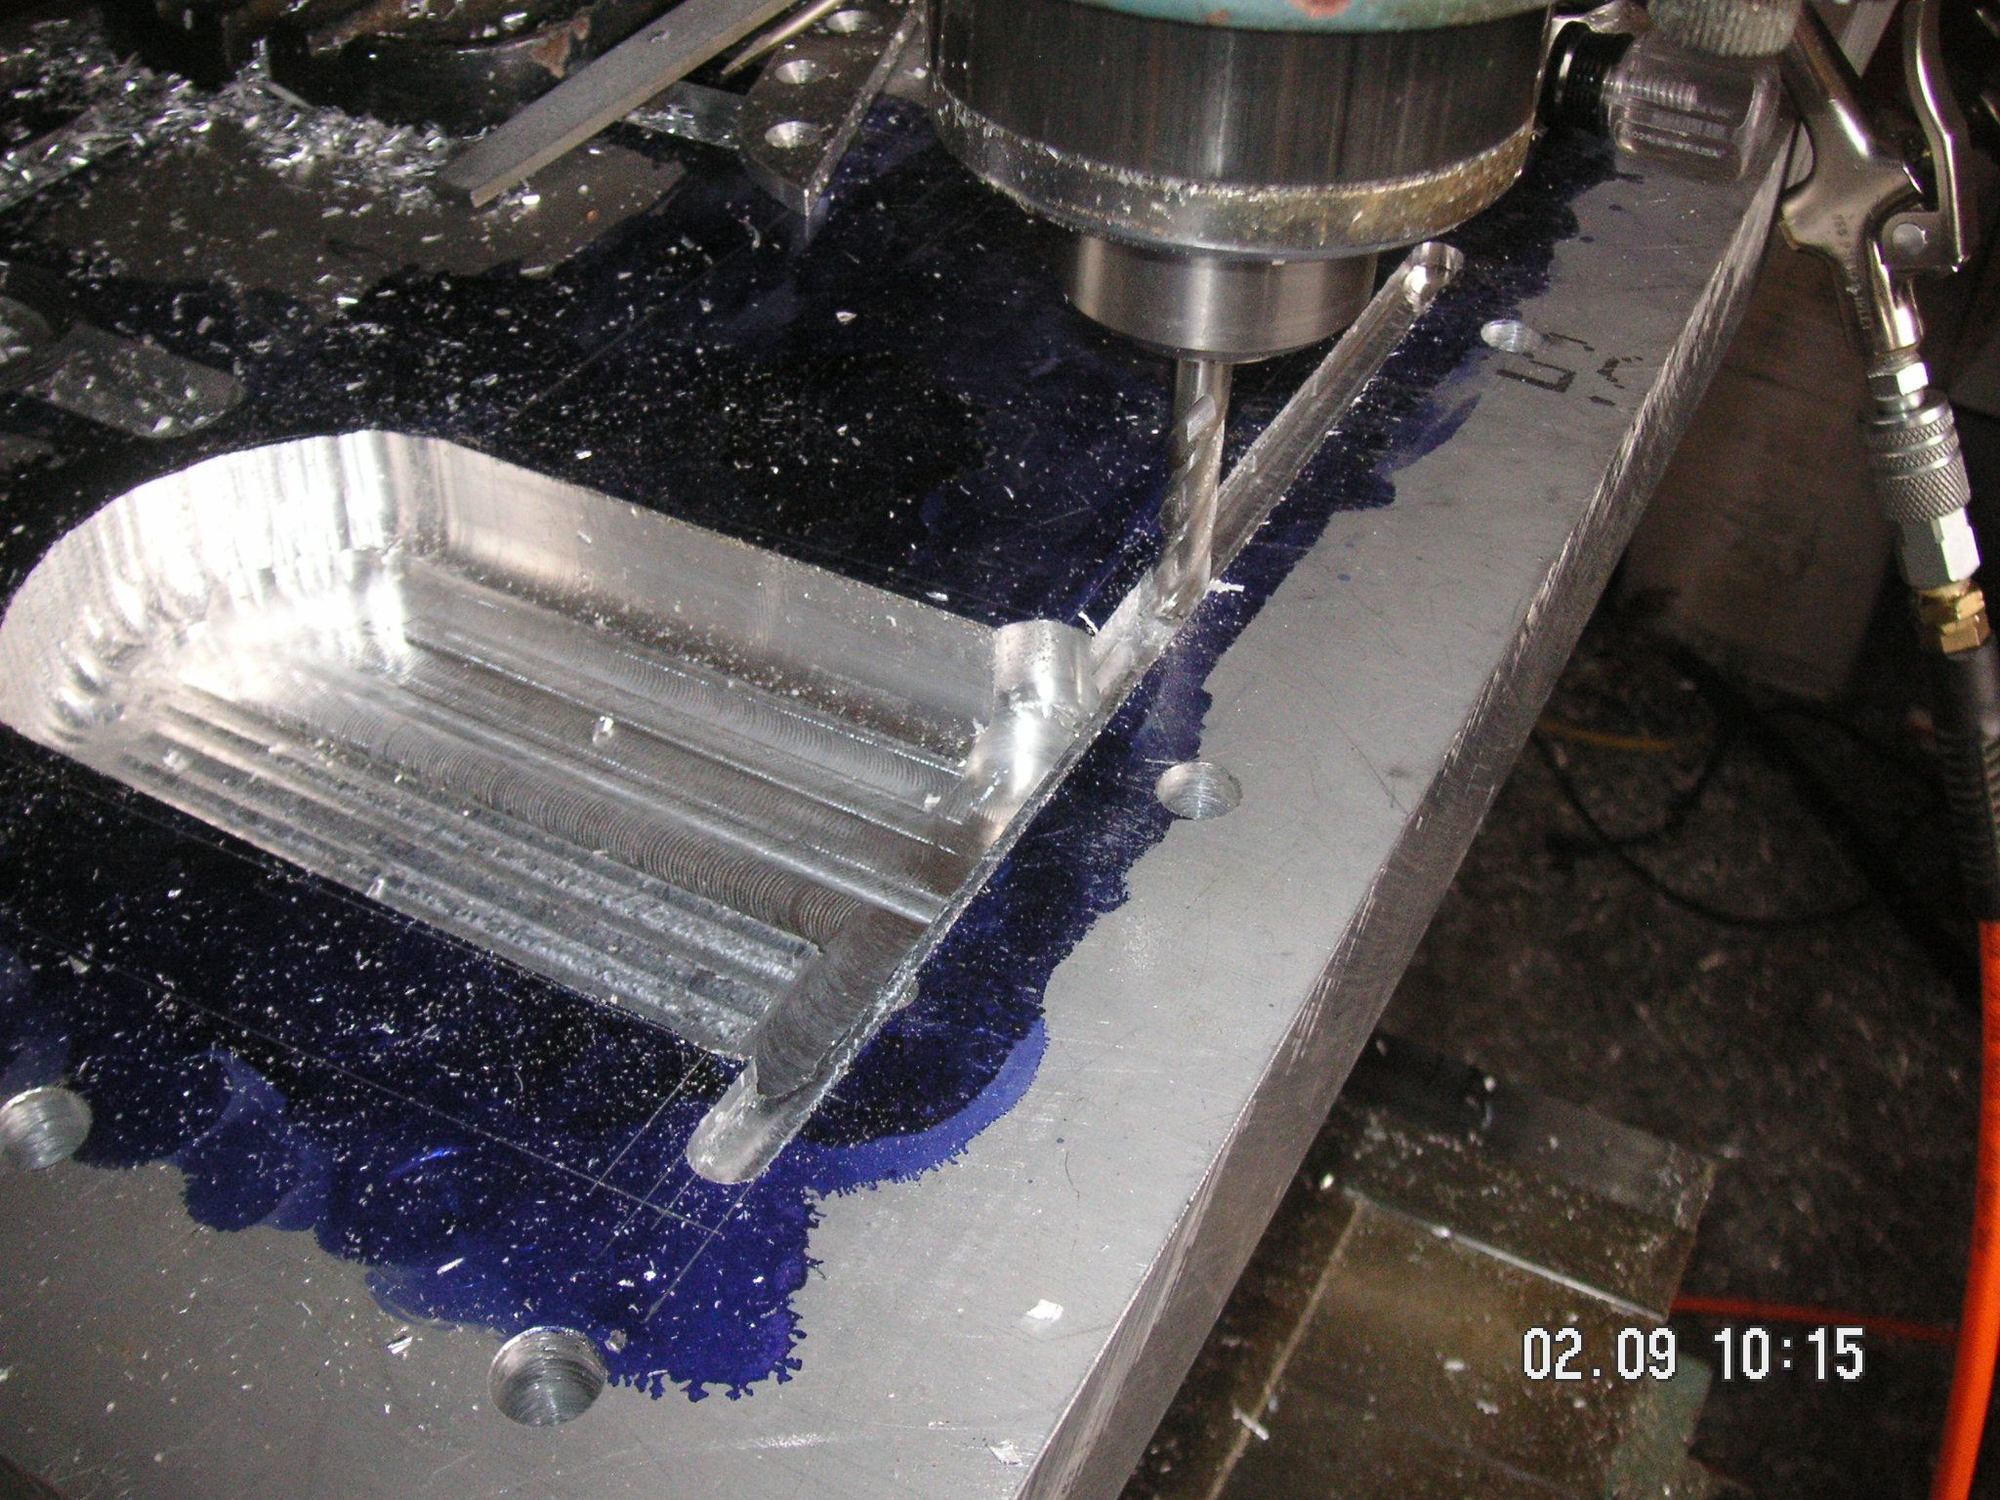
You might notice that the recess so far cut into the base plate does not quite line up with the lines drawn for it. That is because except for the rear edge of it, the body of it is set at an angle equal to the angle that the end pieces of the form are set. I'll have to reset the base plate on the mill table when I get the rear edge cuts made, which I'll do next. Hopefully that will give me a good chance to mill off the bottom of the male form I'm making here to match the angle because the mill vice will be resetting with the base plate and will be at the same angle. Complicated, I know, but a lot of thought has to go into this project.
I spent all day with Dinsdale Pirhana yesterday, and, he has high praise for you Jerry, and I said I sort of know that name...now, after reading this thread, I see what he means! I like this!
This morning and into the afternoon I finished up the recess for the vent ducting form and trimmed off the end of the male form for it. That doesn't sound like much, but every little bit helps.

 01-31-2020, 07:05 PM