When you click on links to various merchants on this site and make a purchase, this can result in this site earning a commission. Affiliate programs and affiliations include, but are not limited to, the eBay Partner Network.
Excellent--thanks for the link.
But you guys are confusing me. I need to repair the mirror-- spring, I'm guessing. Have purchased the connector disassembly tools and am trying to figure out if I'll need/want to put in one of these 6 pin connectors, to do that. Would like to have everything on hand, prior to starting.
Thanks.
Thon
'85
If you do the wiring while the mirror is.off and the door spart, and you do it correctly, you'll be able to remove the mirror from the car at any point in the future without having to push the electrical pins out of the OEM barrel connector and then get them back into the correct ports. Porsche should have used a connector like this that fits through the hole in the door when they manufactured the 928s.
Excellent--thanks for the link.
But you guys are confusing me. I need to repair the mirror-- spring, I'm guessing. Have purchased the connector disassembly tools and am trying to figure out if I'll need/want to put in one of these 6 pin connectors, to do that. Would like to have everything on hand, prior to starting.
Thanks.
Thon
'85
The white plastic connector in post 1 is what should be in there.
It's too big to go through the hole in the base of the mirror, so you have to depin it to get the mirror off the car.
If you are replacing the spring between the mount and the housing, you need to get the mirror off the car.
The smaller connector linked in the later posts is a way to have the mirror removeable without depinning the factory plug.
I got the (apparently too) cheap connector tool set and easily depinned the body side connector. Found that the wobbly mirror is presumably related to the fact that neither of the washers on the ends of the spring are present. Guess the PO thought some wraps of electrical tape between the base and the stalk would do!
Still have some questions though:
1. In looking at the body side wiring, and comparing it to the pic in post #3, mine are not in that place or order. IF i'm reading the diagram correctly, I'm supposed to be looking at the connector FROM the back side/body side? Exactly the way you can't really do it?
2. My mirror wiring and harness wiring don't match up--black to black, white to white, etc. I imagine they ARE supposed to, and that's one reason the mirror doesn't work?
3. As I said, the harness side de-pinned easily. On the mirror side, the colors do not follow either the diagram, OR the harness colors. I tried to de-pin several of them but failed miserably, and bent the tool end. Does it use the same tool? 4. Rather than de-pinning the mirror side connector, it should work to just match the colors in the harness connector to what they are now in the mirror connector, right?
Thanks.
Thon
'85S
I too was only successful in de-pining the Body side, which is fine, as far as the colors go, mine also didn't exactly match that diag. take a pic b4 and after and also connect the ones that do match, which will leave you with the IIRC only one choice.
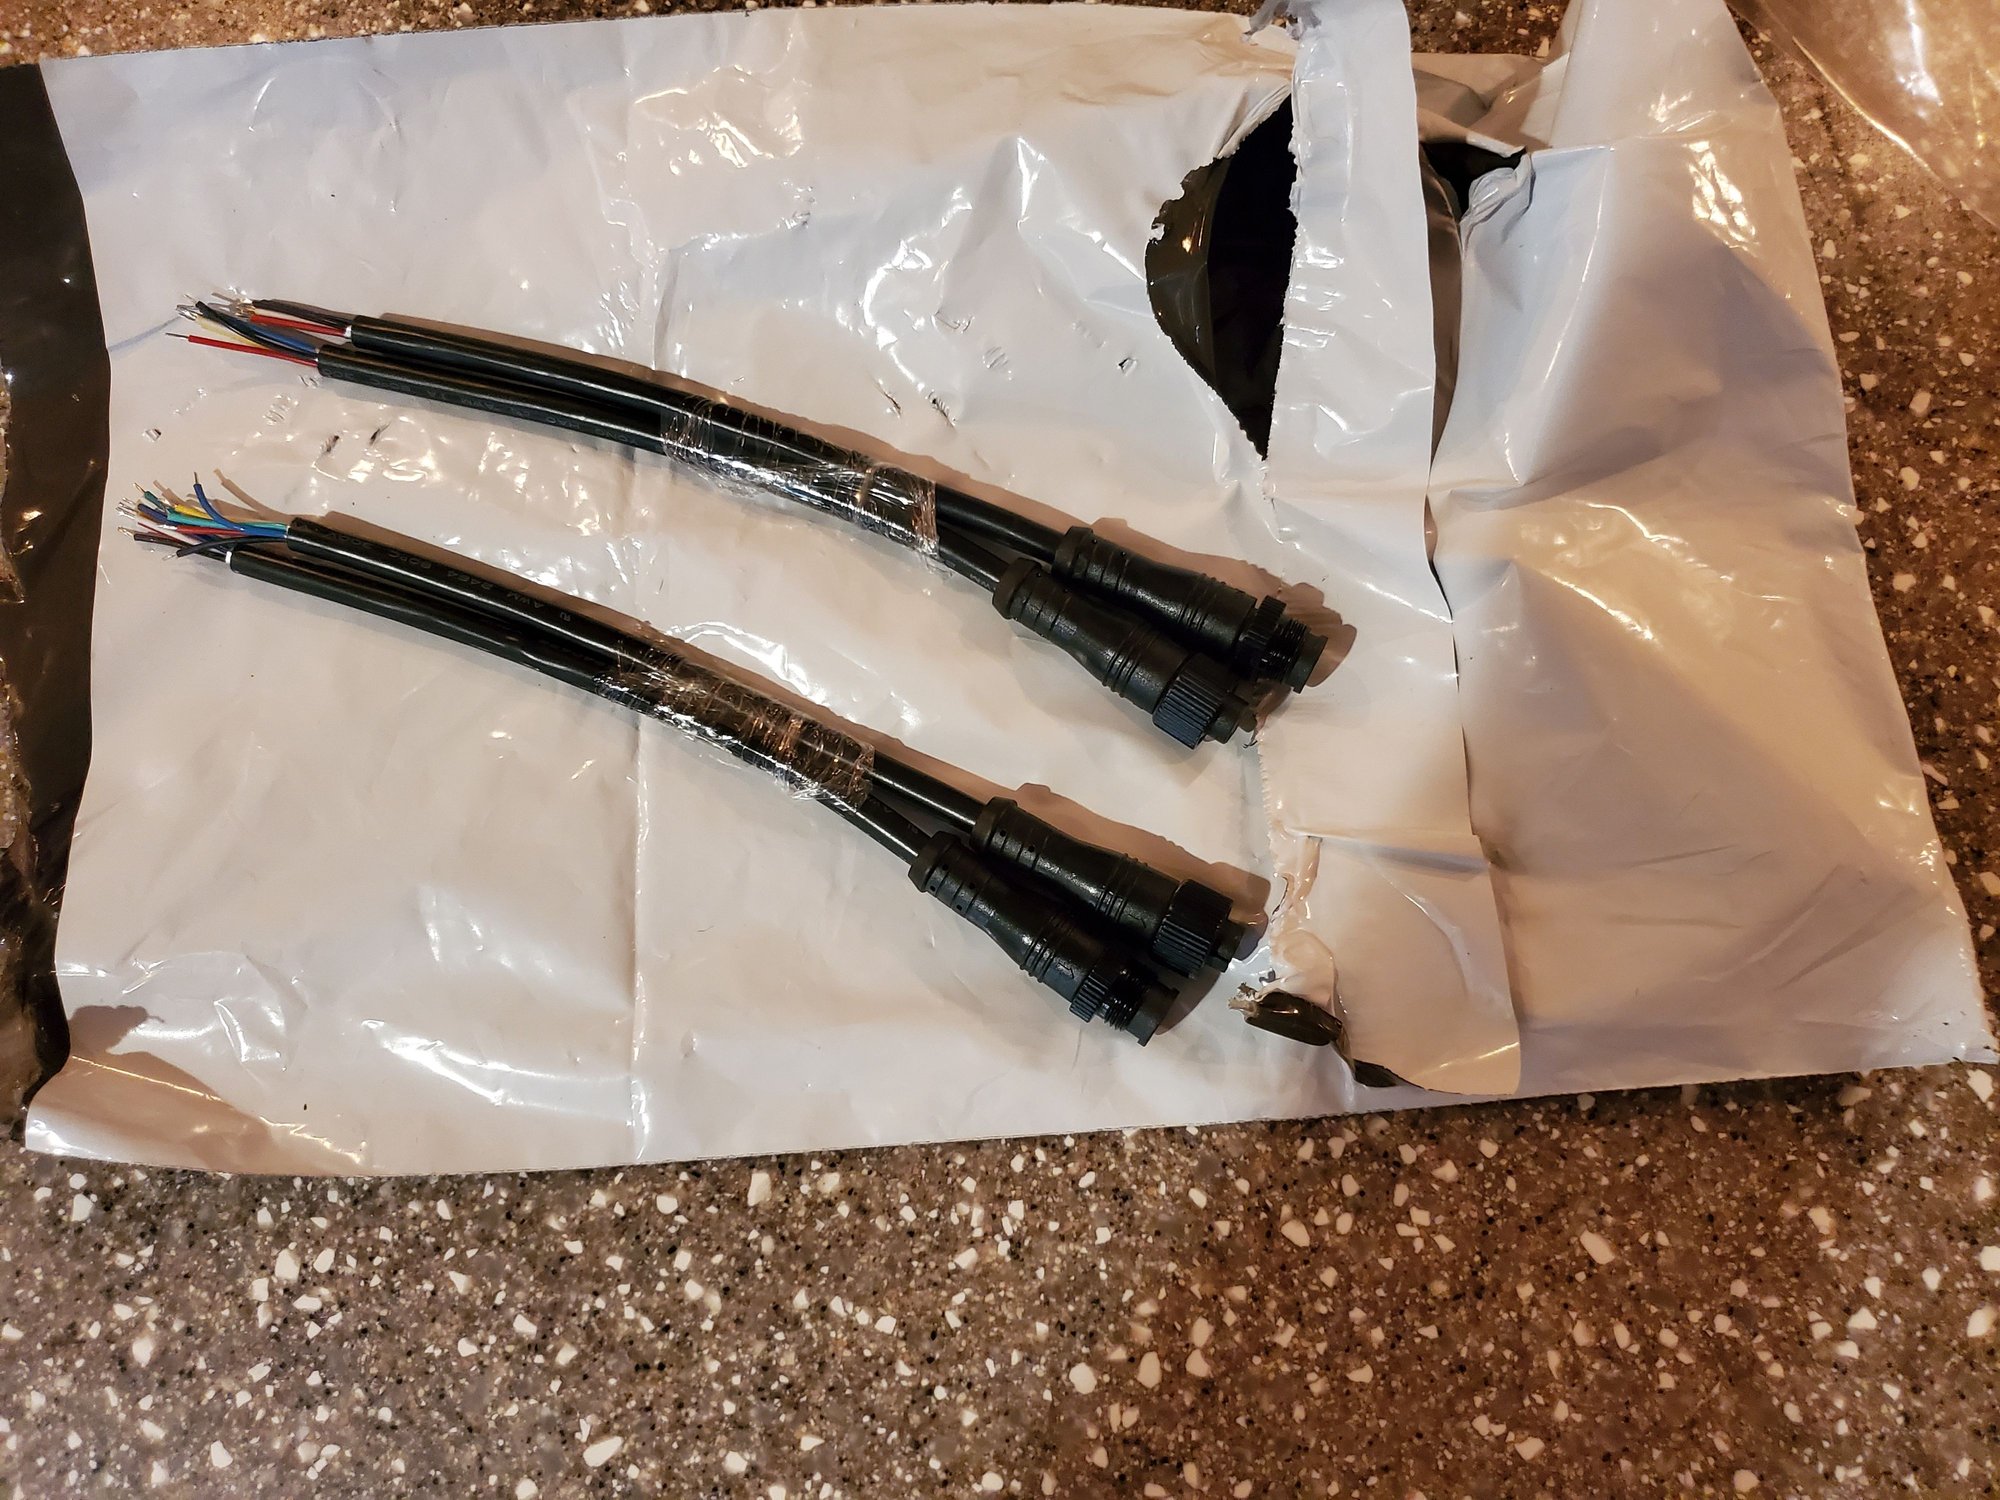
They come in different sizes with different #s of pins for exactly what you need. I had actually used this one, which I remeber being metal, but it's NLA on Amazon - https://www.amazon.com/gp/product/B0...?ie=UTF8&psc=1
I gather this was just an example, as it looks too wide to go through the 'bolt' hole, which I measure at 10mm. The one you DID use, I can't see, as it says page unavailable. What are you using as a search term(s)--maybe knowing what these are called would help me find it.
Thanks.
Thon
I gather this was just an example, as it looks too wide to go through the 'bolt' hole, which I measure at 10mm. The one you DID use, I can't see, as it says page unavailable. What are you using as a search term(s)--maybe knowing what these are called would help me find it.
Thanks.
Thon
The description of the product I used that's NLA was "12.4" LED Strips 6 Pin Male Female Plug Waterproof Connector Cable". Seems like searching for LED, 6 pin, 6 wire, waterproof connector or some combination of those terms results in connectors like those I used.
In reading through this thread again, I think maybe I misunderstood you? At first I thought you were putting the replacement connector in the body of the mirror, where the original was. Now I think you're taking it out of the mirror body and putting it in the door itself? Thanks.
In reading through this thread again, I think maybe I misunderstood you? At first I thought you were putting the replacement connector in the body of the mirror, where the original was. Now I think you're taking it out of the mirror body and putting it in the door itself? Thanks.
Thon
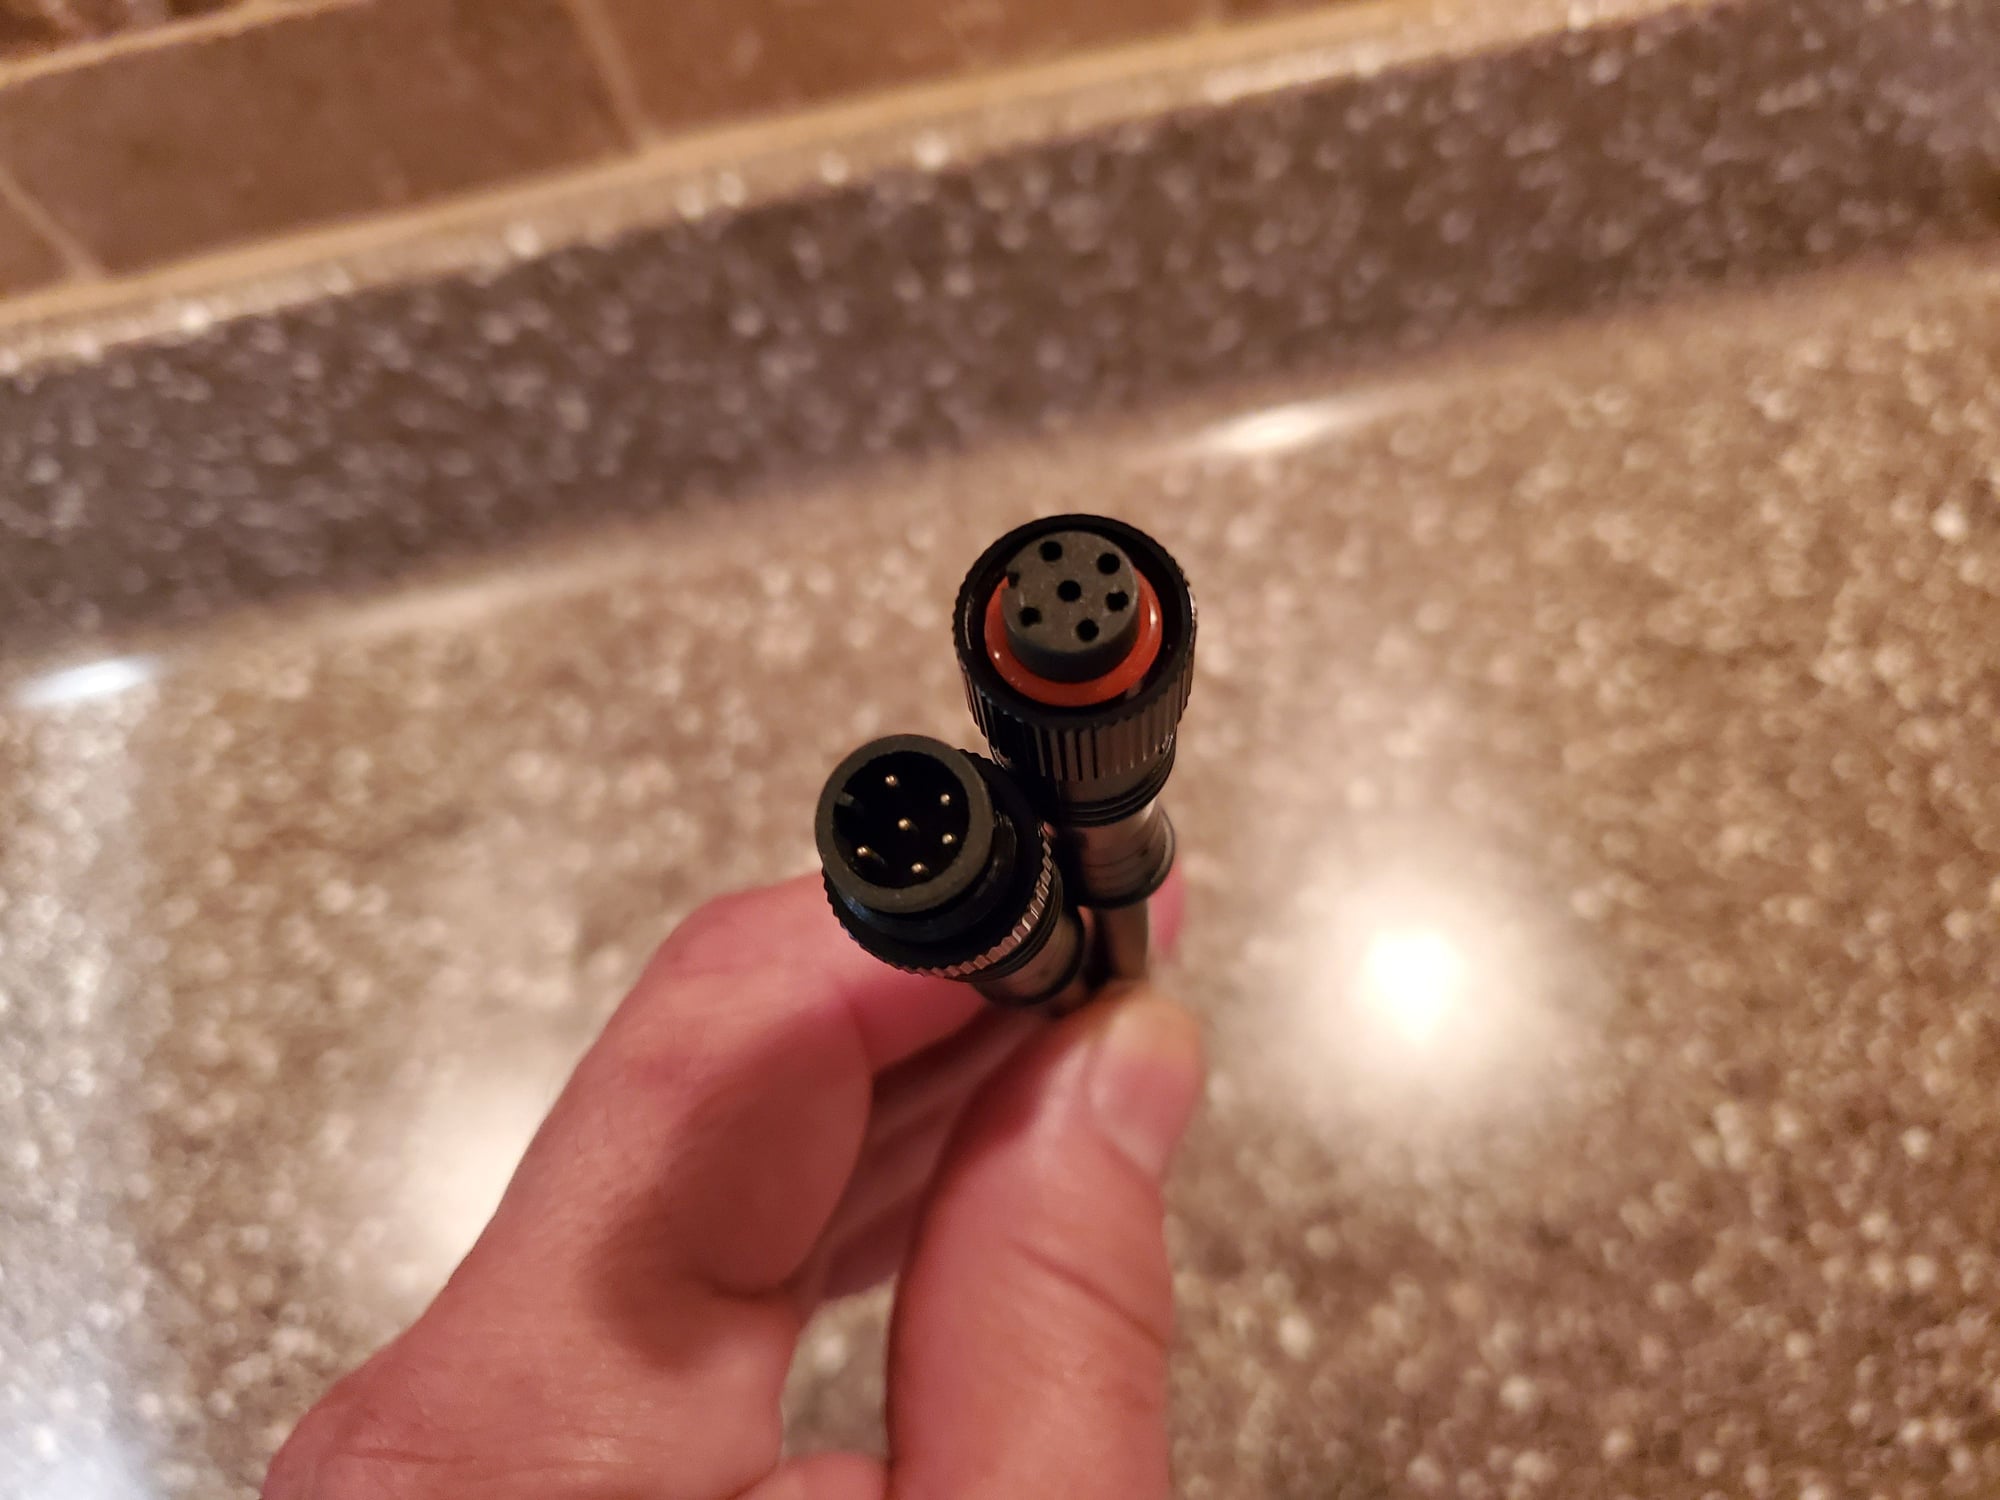
It's in the door, but there is enough length where I could remove the mirror, have the connector come through the mirror mounting hole and unscrew it should I need to do that.
After finding that Walmart link in posted for what looked like the same connectors, that now seem to be hard to find, I ordered a couple to keep in my connectors stash. They arrived yesterday and are the same as what I used.


 09-24-2020, 01:23 PM
 I need to repair the mirror-- spring, I'm guessing. Have purchased the connector disassembly tools and am trying to figure out if I'll need/want to put in one of these 6 pin connectors, to do that. Would like to have everything on hand, prior to starting.