When you click on links to various merchants on this site and make a purchase, this can result in this site earning a commission. Affiliate programs and affiliations include, but are not limited to, the eBay Partner Network.
I found some very small fuel leaks around some fittings, after using the scratch-and-sniff method with fingers at each connection. The leaks were small enough that there was no apparent wetness on initial inspection, but the fragrance on fingers was telling a different story. The rear damper was the main culprit for me, but it could be any connection really.
I found some very small fuel leaks around some fittings, after using the scratch-and-sniff method with fingers at each connection. The leaks were small enough that there was no apparent wetness on initial inspection, but the fragrance on fingers was telling a different story. The rear damper was the main culprit for me, but it could be any connection really.
Thanks Bob, I'll check again using your method. I'll leave the pump run for several minutes.
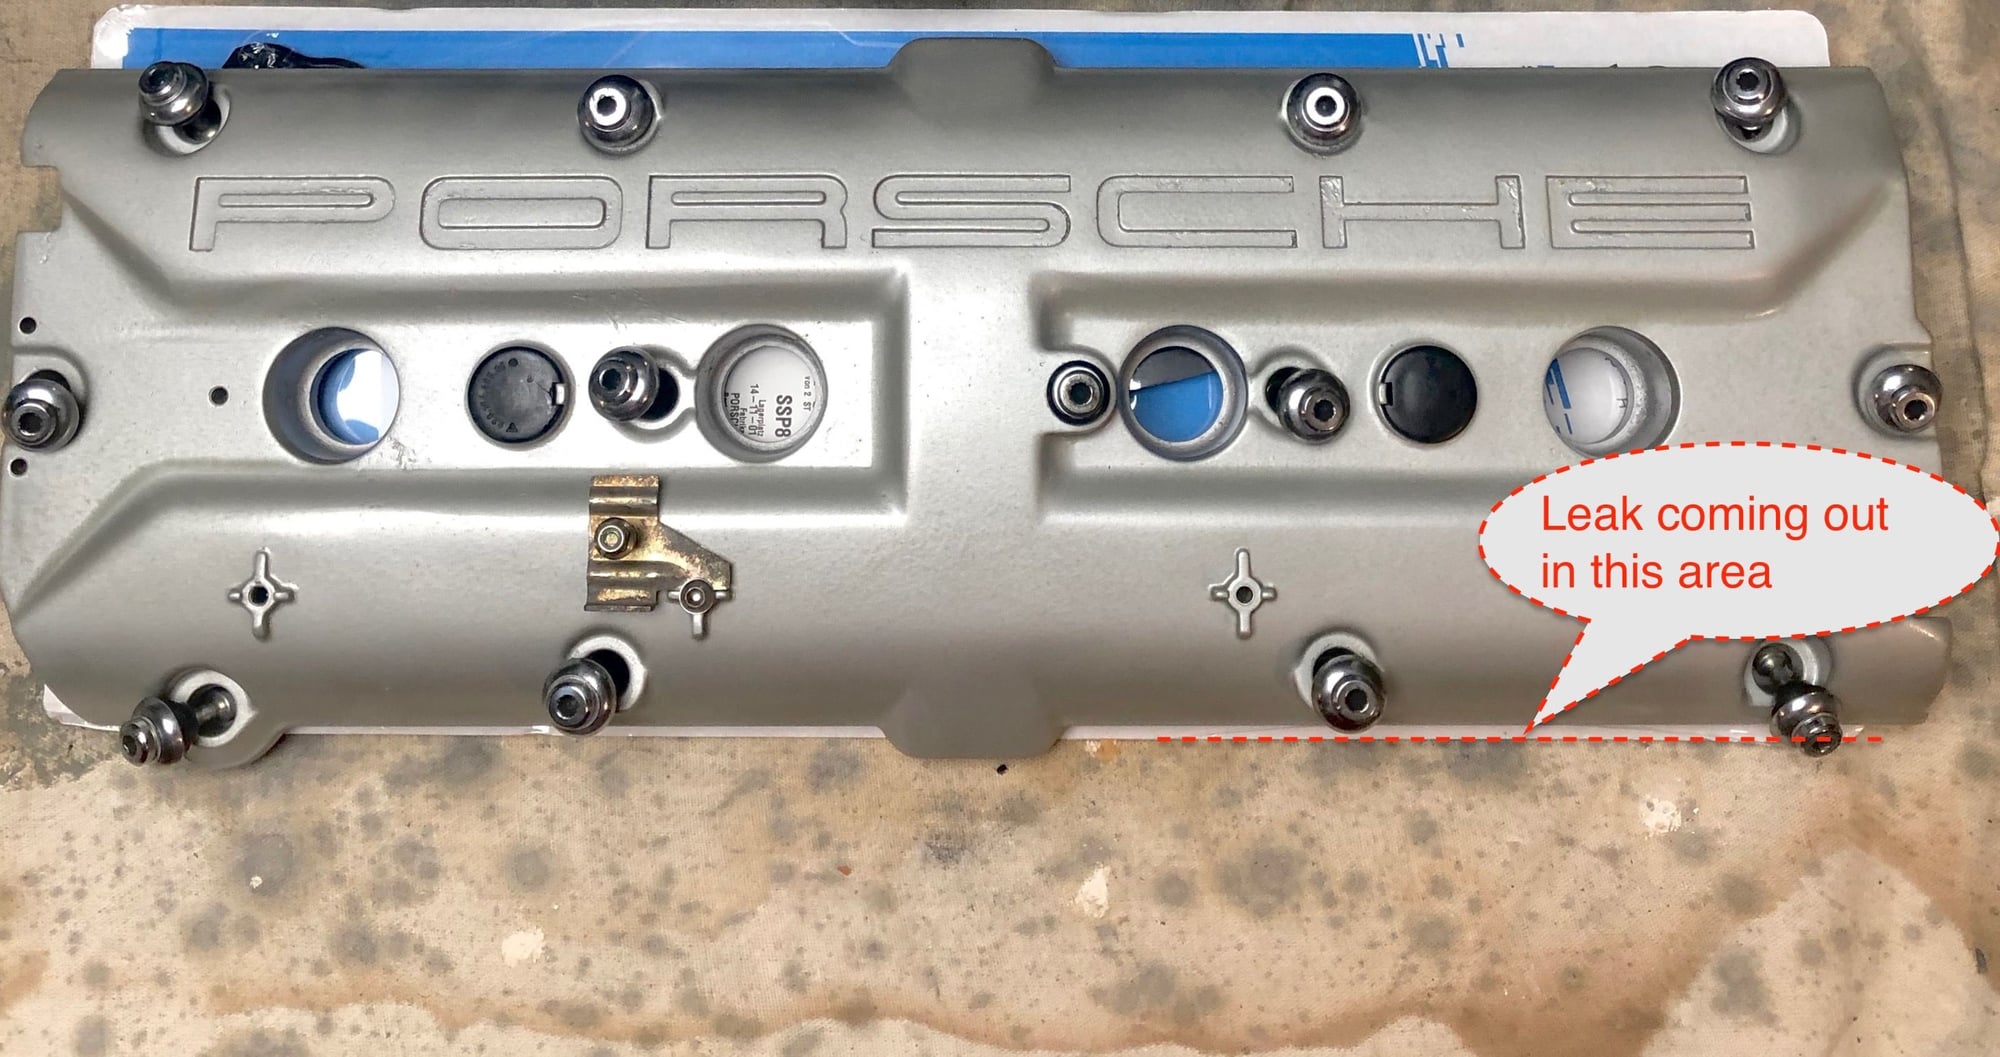
I started it up tonight only to be disappointed by a leaking cam-cover on the left side. Back to the drawing board on that side. The leak was directly above the exhaust manifold.
😭😖
I guess I’ll have to pull the cam-cover and re-seal it. I used a quite a bit of silicone gasket seal as well so I'll need to clean all that off first.
is getting these seals on correctly a tricky ordeal?
Last edited by Michael Benno; 01-23-2019 at 03:32 PM.
i started it up tonight only to be disappointed by a leaking cover on the left side. Back to the drawing board on that side. The leak was directly above the exhaust manifold.
😭😖
I guess I’ll have to pull it and re-seal it after I clean off all that silicon I used
is getting these seals on correctly a tricky ordeal?
Presumably you are talking about the "cam cover" assuming there is no such thing as a "can cove" on your 928!
I have never had any issues sealing the cam covers. I use a bead of high temperature silicon RTV in the cam cover gasket trough, pop the seal into the trough and press by hand into place. I then leave it for about 30 minutes to go off a little so as to help retain the gasket in place when inverted and then promptly place the cover into position. One part of the joint has an abrupt 90 degree square turn- on that part of the face I deposit a little bead of sealant but other than that the rest of the block face is dry. No idea what others do but that procedure works fine for me. Different sealants are used by other folks but "the trick for success" is cleanliness and timing or so I reckon.
I also suspect that when leaks occur they do so due to oil migration between the gasket and the cover given the cover is a little irregular due to it being painted thus the perceived need for some sealant in the gasket trough that also holds it during installation. No need to fill the trough with gasket goo- a small continuous bead is sufficient as the gasket will extrude the goo when it is pressed into place and then bolted down before the sealant goes off. If you see the stuff extruded from the joint face then one has literally used too much.
i started it up tonight only to be disappointed by a leaking cover on the left side. Back to the drawing board on that side. The leak was directly above the exhaust manifold.
😭😖
I guess I’ll have to pull it and re-seal it after I clean off all that silicon I used
is getting these seals on correctly a tricky ordeal?
I had to do my right hand side twice. I was just finishing up the re-assembly and was underneath the car to re-attach the lift hook and noticed that the gasket had moved out of position.
The WSM has pictures showing the dabs of silicone used where the cover meets the joint between intake and head. If your covers were blasted and the groove for the o-ring is pitted now, add a tiny bit of your favorite sealant in the groove before you put the seal in there. The seal-to-head interface is dry. Suggestions from The Group led me use some tiny cable ties through the cover bolt holes to keep the seal in place while I placed the cover. Some suggested fine copper wire for this duty. They get cut and pulled one by one as the bolts go in. The bolts and bolt grommets get a smear of sealant, as do the grommets/rings under the plug wells. I used Hylomar for everything but the head/intake/cover joints, where I used the recommended silicone. The Hylomar never hardens, so has a lot of tolerance for movement later without breaking the seal. Others have recommended Hondabond, Driebond (sp?), etc for the same duty. I have a pretty small inspection mirror on a stick that I used to inspect the seal and the plug well grommets before I put any serious pressure on the cover bolts.
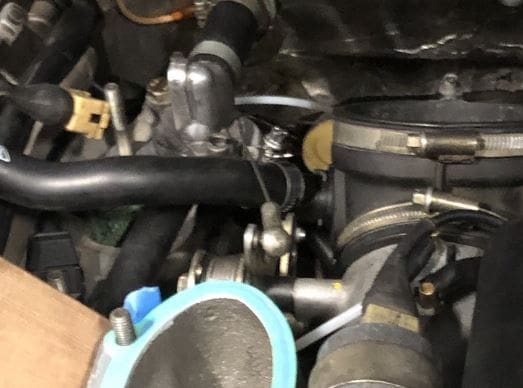
I've been following this thread with great interest. Just an observation - in your picture, the throttle cable looks to be touching the adjacent hose. Perhaps the assembly is not complete yet? I would think that the cable should be oriented close to normal to the throttle plate shaft, not at an angle as shown?
What do you mean, 'all that silicone'? Where exactly is the leak?
Hi Jeff, I used high temp oil resistant silicone on the inside of the valve cover and I used Driebond on the corners marked in the TSB. So I am assuming all that will need to be cleaned and re-applied. The lead was on the outside lower edge near cylinders 6 and 7.
Originally Posted by FredR
I use a bead of high temperature silicon RTV in the cam cover gasket trough, pop the seal into the trough and press by hand into place. I then leave it for about 30 minutes to go off a little so as to help retain the gasket in place when inverted and then promptly place the cover into position. One part of the joint has an abrupt 90 degree square turn- on that part of the face I deposit a little bead of sealant but other than that the rest of the block face is dry. No idea what others do but that procedure works fine for me. Different sealants are used by other folks but "the trick for success" is cleanliness and timing or so I reckon. I also suspect that when leaks occur they do so due to oil migration between the gasket and the cover given the cover is a little irregular due to it being painted thus the perceived need for some sealant in the gasket trough that also holds it during installation. No need to fill the trough with gasket goo- a small continuous bead is sufficient as the gasket will extrude the goo when it is pressed into place and then bolted down before the sealant goes off. If you see the stuff extruded from the joint face then one has literally used too much.
I used the same product and technique. But I didn't do the 30-min cure. So maybe the gasket slipped out as I was installing it. I'll use the 30-min cure rule this time.
Originally Posted by dr bob
... The seal-to-head interface is dry ... Suggestions from The Group led me use some tiny cable ties through the cover bolt holes to keep the seal in place while I placed the cover [great idea!]. Some suggested fine copper wire for this duty. They get cut and pulled one by one as the bolts go in. The bolts and bolt grommets get a smear of sealant, as do the grommets/rings under the plug wells. I used Hylomar for everything but the head/intake/cover joints, where I used the recommended silicone. The Hylomar never hardens, so has a lot of tolerance for movement later without breaking the seal. Others have recommended Hondabond, Driebond (sp?), etc for the same duty. I have a pretty small inspection mirror on a stick that I used to inspect the seal and the plug well grommets before I put any serious pressure on the cover bolts.
Check on the WSM, That is what I did. The covers were not blasted, but I used sealant in the groove anyway. I did put a little silicone layer on the head and I guess that is where I messed up. I will clean that off and put it on dry next time.
Originally Posted by Geza
I've been following this thread with great interest. Just an observation - in your picture, the throttle cable looks to be touching the adjacent hose. Perhaps the assembly is not complete yet? I would think that the cable should be oriented close to normal to the throttle plate shaft, not at an angle as shown?
Yes, incomplete assembly. I fixed all that with the installation of the throttle quadrant.
Thanks all for the feedback and suggestions. I will pull the cover and get to cleaning tonight.
The WSM has pictures showing the dabs of silicone used where the cover meets the joint between intake and head. If your covers were blasted and the groove for the o-ring is pitted now, add a tiny bit of your favorite sealant in the groove before you put the seal in there. The seal-to-head interface is dry. Suggestions from The Group led me use some tiny cable ties through the cover bolt holes to keep the seal in place while I placed the cover. Some suggested fine copper wire for this duty. They get cut and pulled one by one as the bolts go in. The bolts and bolt grommets get a smear of sealant, as do the grommets/rings under the plug wells. I used Hylomar for everything but the head/intake/cover joints, where I used the recommended silicone. The Hylomar never hardens, so has a lot of tolerance for movement later without breaking the seal. Others have recommended Hondabond, Driebond (sp?), etc for the same duty. I have a pretty small inspection mirror on a stick that I used to inspect the seal and the plug well grommets before I put any serious pressure on the cover bolts.
HTH!
I used my favorite rotary engine assembly glue.
Vasoline.
Just a film in the cover groove..a film..will hold it in..hard to even shake out.
Michael,
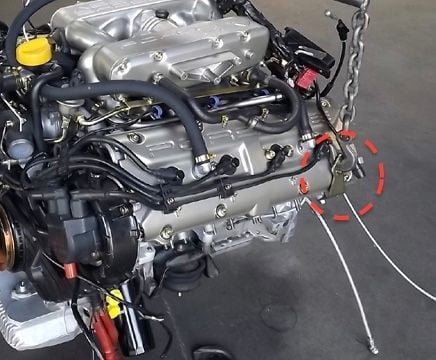
Did Lona mention that they also coat the cam sprockets with a hard ceramic coating to reduce sprocket wear? The sprockets should have the original coating mostly intact without worn through spots with the aluminum tooth worn with the sharp edges. It'll save you a bunch of $$.
Michael,
Did Lona mention that they also coat the cam sprockets with a hard ceramic coating to reduce sprocket wear? The sprockets should have the original coating mostly intact without worn through spots with the aluminum tooth worn with the sharp edges. It'll save you a bunch of $$.
Hi Louie! Are. you getting sales commissions from your sister now?! Just kidding, yes she mentioned that when I was picking up the parts. I'll definitively take them up on that at the next timing belt change. Those guys at Finishline Ceramic Coatings do really cool work.
Hi Louie! Are. you getting sales commissions from your sister now?! Just kidding, yes she mentioned that when I was picking up the parts. I'll definitively take them up on that at the next timing belt change. Those guys at Finishline Ceramic Coatings do really cool work.
Nope. No commission. I just know how expensive those sprockets are and they will coat a worn, but not worn out, one for something like $44. I had them coat the aluminum cylinders of my Corvair with heat shedding coating, and the inside of the combustion chambers with heat insulating material. I sure never had a problem with over heat. The cylinders are actually aftermarket aluminum VW cylinders 92mm. They coat brake rotors, calipers, and all manner of items you want to keep warm or keep cool.
Good news! I successfully resealed the left cam cover and started the car and there were no leaks. The issue is that the seal got bumped out of the channel of the cover on installation because of the tight clearances. I decided the engine hoist hook needed to be removed and that gave me a bit more room to fit and check that the seal was installed properly. If I didn't mention previously, I also moved the coil, the bracket holding the power steering high pressure line, and moved the rubber doughnut on the PS line to get clearance. I did a bunch of test fits to get the best technique is to angle in on the rear lower corner first and then push the power steering line clear as you maneuver the cover onto the sill.
I used the technique described above where I used sealant in the cover and let the seal set up first. That seemed to help a lot with all the seals in the cover.
I was able to start the car and test for various leaks. Everything is looking and sounding good. Have a listen for yourself, here is the fist startup after the repair
There is a lot of injector noise or maybe that is lifter noise since the car has been sitting since October 1. I am continuing to make checks before driving it.
Fuel System: I've checked for fuel leaks about 600 times so far and everything looks solid.
Oil System: no leaks after the longer run today with several revs up to to 4k.
Coolant System: The pressure value is leaking but only after shutdown and not liquid, just air. My plan is replace the sensor with a barb fitting as described in this thread: https://rennlist.com/forums/928-foru...l#post12860463. One question that seems difficult for me to figure out why I was only able to drain 4 gallons of coolant out even though the tech spec says the capacity is 5gallons. I made sure I drained both sides of the block, and the radiator, as well as blowing pressurized air through the heater core and block. I do have the 928 Motorsport radiator, installed by the previous owner, could it be that has a smaller capacity? The old coolant was Porsche green, the new coolant is Porsche Pink. After running the coolant still looks pink so it doesn't seem contaminated. Thoughts?
Vacuum System: Before buttoning up the airbox I want to test the manifold for vacuum leaks and I am looking for suggestions. Is the propane method to unsafe? What about using a smoking Sage bundle as a smoke machine?
What other tests should I do before wheels down? I can't wait to drive it again.
Lastly, should I change the oil? It was last changed in April (20w50) and I only have 2000 miles of old fart driving on it.
Last edited by Michael Benno; 01-29-2019 at 01:02 AM.


 01-22-2019, 06:12 PM