When you click on links to various merchants on this site and make a purchase, this can result in this site earning a commission. Affiliate programs and affiliations include, but are not limited to, the eBay Partner Network.
This is from another thread but most of the PC work applies to all years this is what i have been finding works the best.
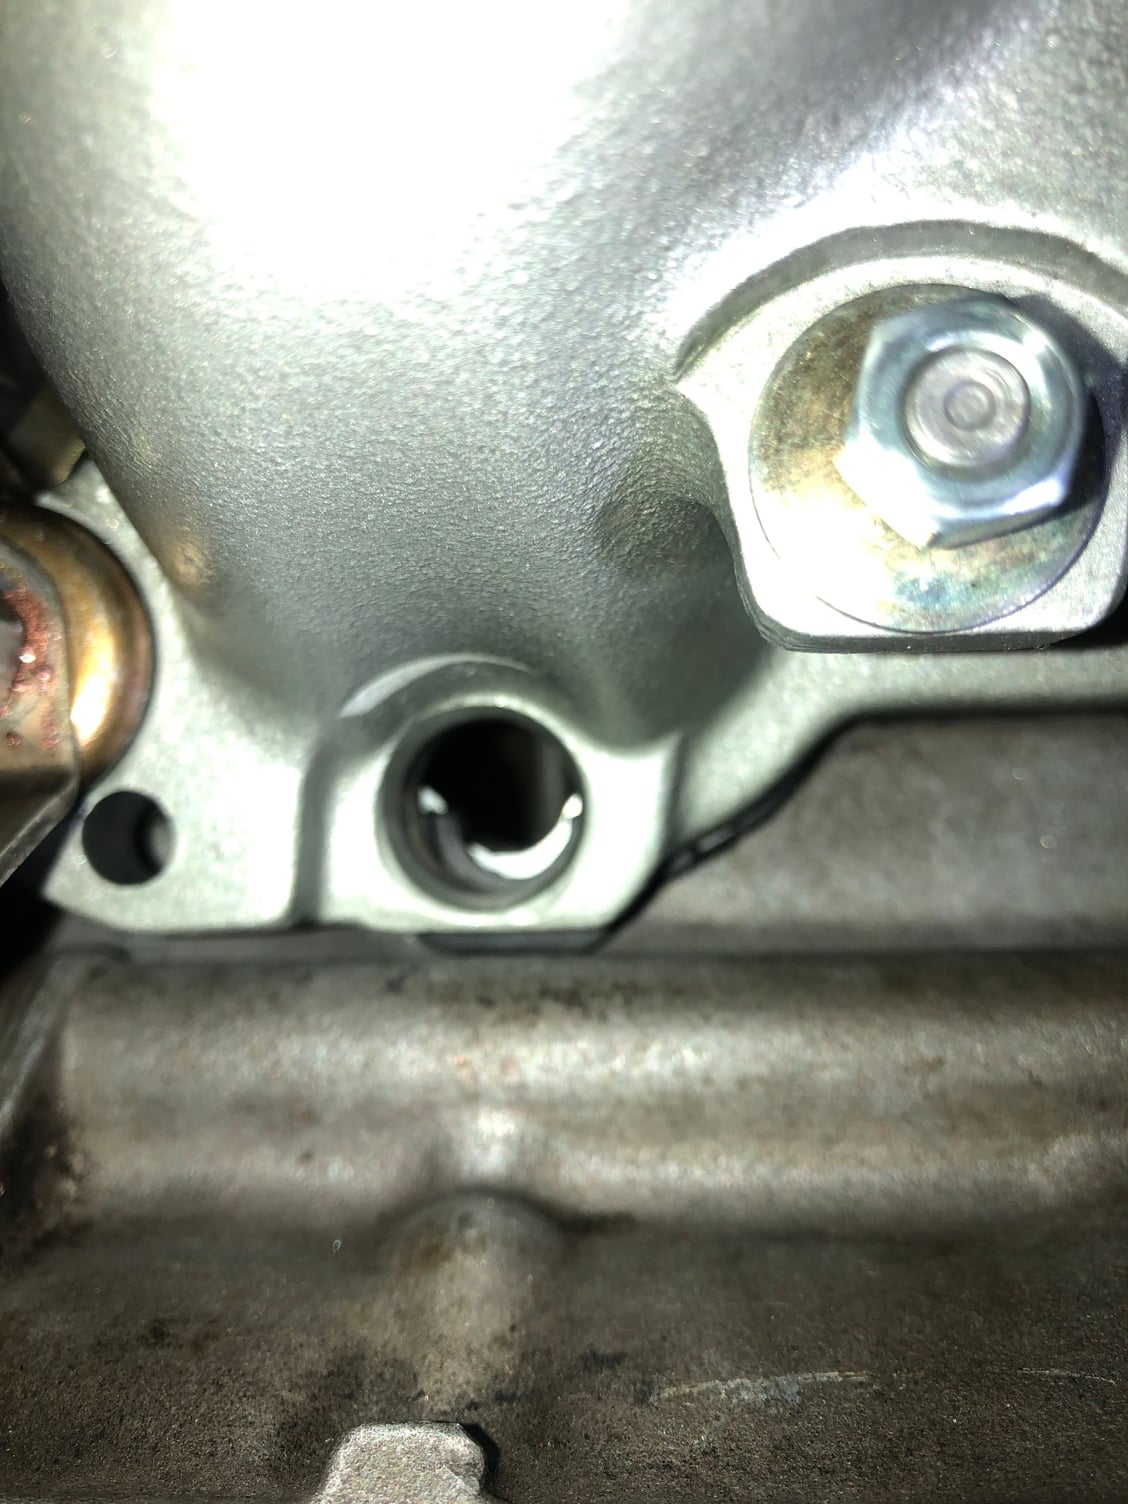
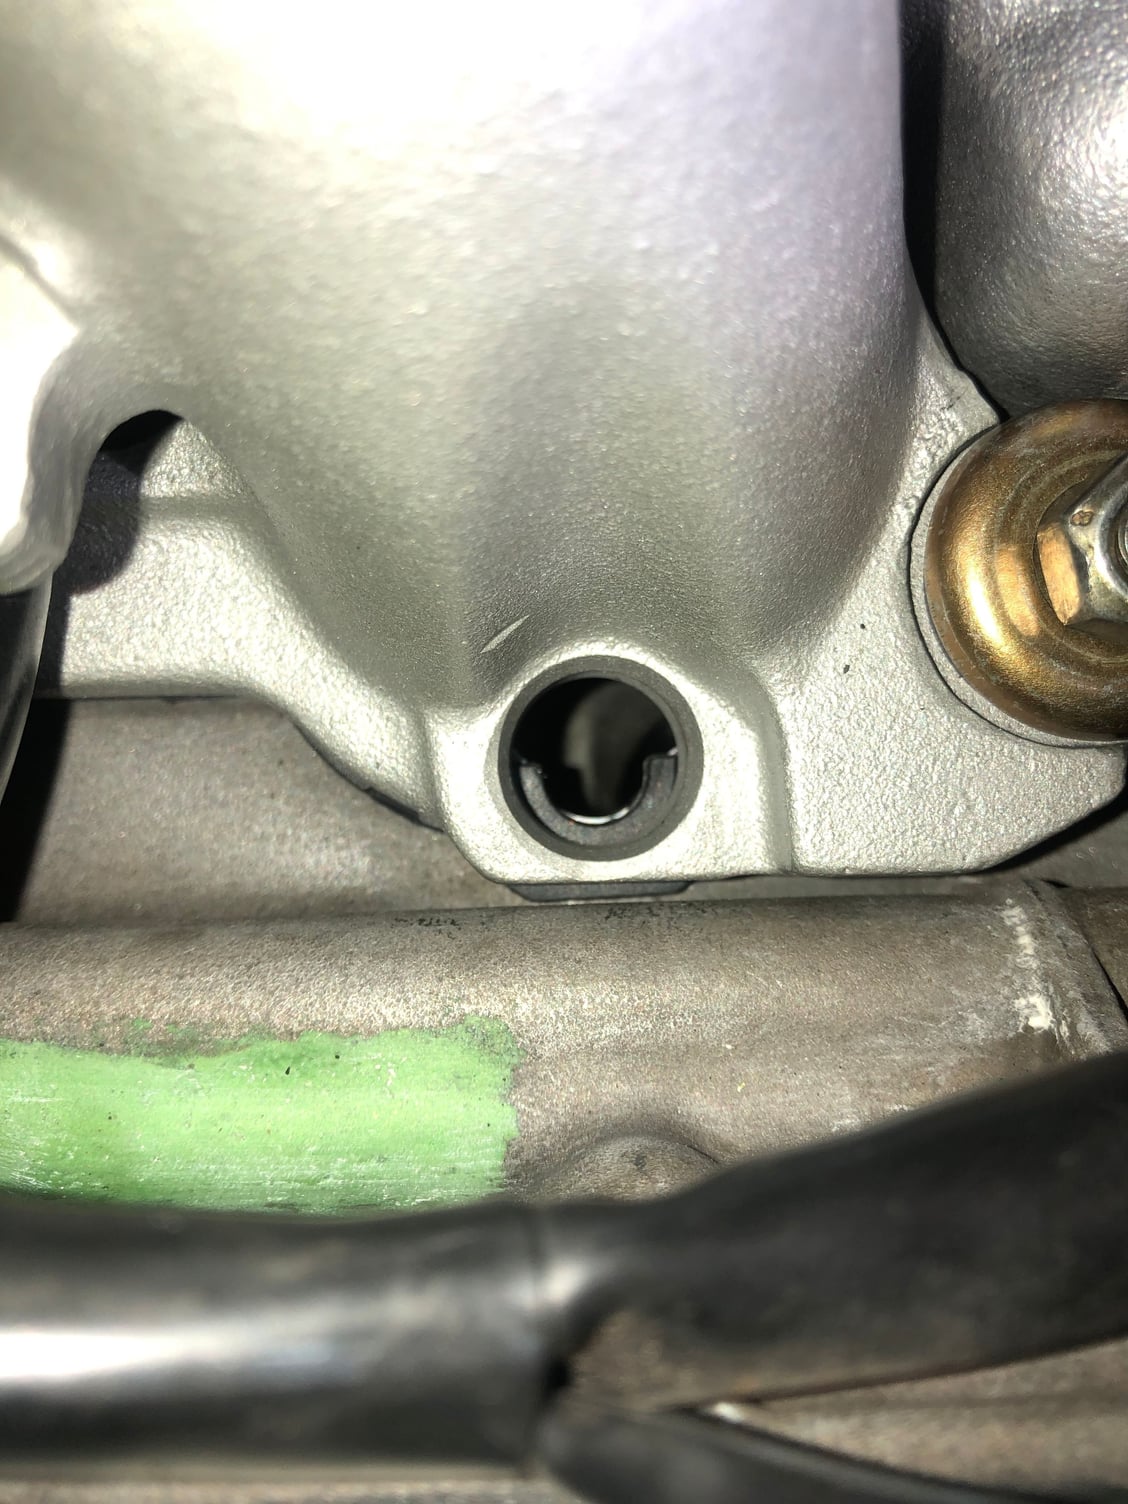
Umm you might be be adding to running issues with your CLEANING of the injector bores.
These areas that the injectors sit in have to be a certain size to properly seal,
if you remove the powder coating then the hole will be bigger and thus the O ring will quite possibly not seal as well as it would into a smaller hole ,
add to that the addition new injectors with O rings that might not be the correct size.
I have have had to fix a few of these intake refreshes to correct this issue after the PO did a great job on the refresh but unwittingly created more problems than he fixed.
At this point i would strongly suggest that you have the intake pieces properly powder coated,
this means the injector bores get coated as does everything else .
NOTE tell the PC guy the less they mask off the better the PC job will be ,
always mask off bolt holes and bearing holes and studs ,
its OK if the collars are coated and some of the over spray PC gets inside.
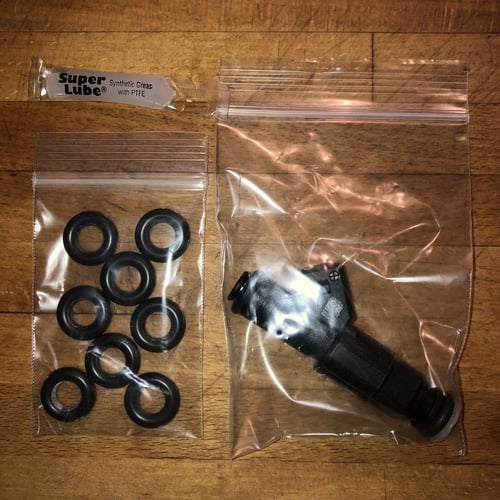
NOTE fit original sized lower O rings to the correct injectors for your year car.
NOTE different years take different impedance injectors so this is a critical item.
you might be be adding to running issues with your CLEANING of the injector bores. These areas that the injectors sit in have to be a certain size to properly seal, if you remove the powder coating then the hole will be bigger and thus the O ring will quite possibly not seal as well as it would into a smaller hole, add to that the addition new injectors with O rings that might not be the correct size. At this point i would strongly suggest that you have the intake pieces properly powder coated, this means the injector bores get coated as does everything else.
NOTE always mask off bolt holes and bearing holes and studs, its OK if the collars are coated and some of the over spray PC gets inside.
NOTE fit original sized lower O rings to the correct injectors for your year car.
NOTE different years take different impedance injectors so this is a critical item.
Hi Stan, thanks for the reminders on the powder coating tips and notes. I've given instructions to the vendor for the proper masking you are recommending which is also consistent with the research I've don on the forum as well. As for replacement injectors, I've made sure I have the correct match impedance and flow rate and I have the proper 16.5mm lower O-ring for my 88 Model year.
Last edited by Michael Benno; 01-09-2019 at 05:54 PM.
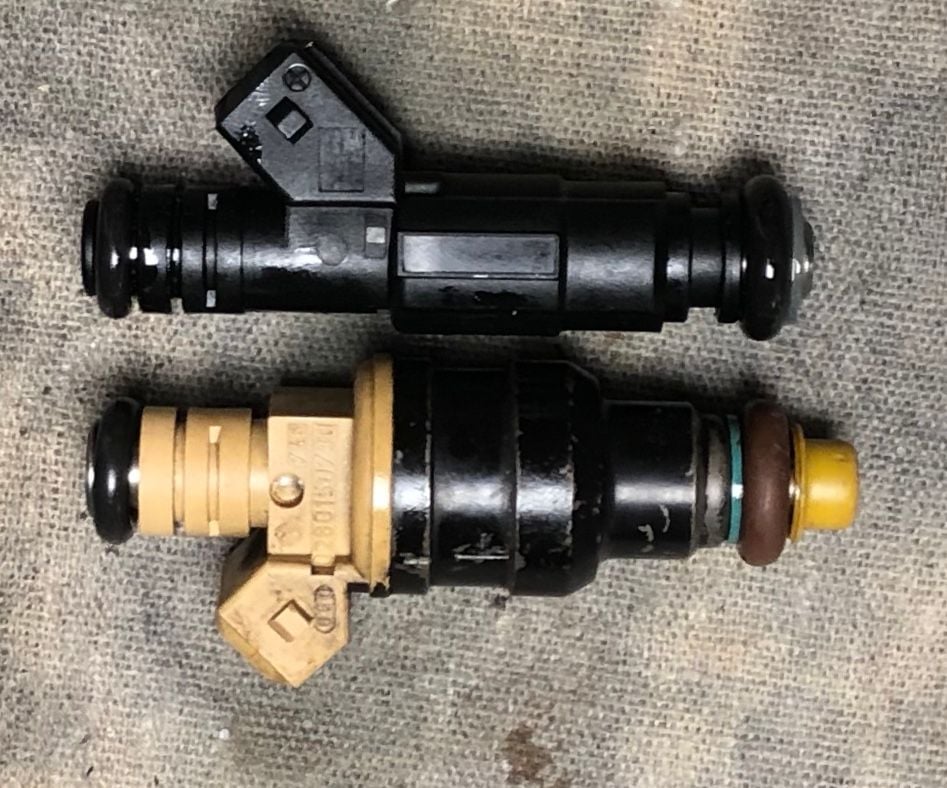
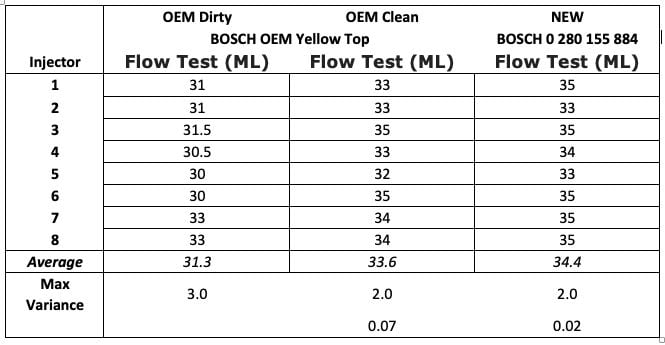
I purchased modern replacement injectors and I thought I would compare the performance of new injectors with the original injectors.
Originally, my plan was to re-use the original injectors after cleaning but was convinced to go with a modern replacement injector with an improved spray pattern and better fuel atomization. (There is some really good research done on injectors which can be found here: Injector Choicesand Injectors - choosing the right Design III (and some II info)).
I decided to stick with the same flow rate injectors (19Lb) since I am not planning in aggressive cams or other upgrades that require more fuel. My performance upgrades have been limited to an X-pipe and exhaust improvements.
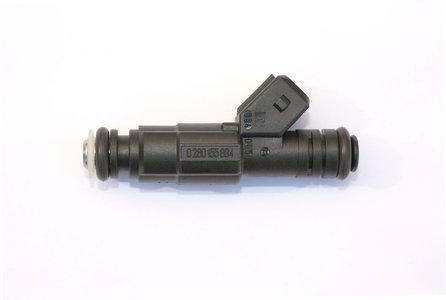
I decided to go with these Bosch 0 280 155 884 Design III injectors which have the proper groove for the 928 injector clip and rail interface, as well as, the correct size lower )-ring seal (16.5mm). I test fit the injectors into the fuel rail to make sure they properly seat.
I compared the new injectors to the old injectors at my friend's repair shop where he has an injector cleaner / tester. Here are the test results:
Some Observations
The original injectors were all pretty well balanced and operating pretty close to specification
Cleaning the injectors improved flow by about 7% and reduced the variance.
The new injectors flow about 2% more than the cleaned injectors with about the same variance.
The new injectors have visibility improved atomization of fuel.
If you are interested here are some videos on the testing process
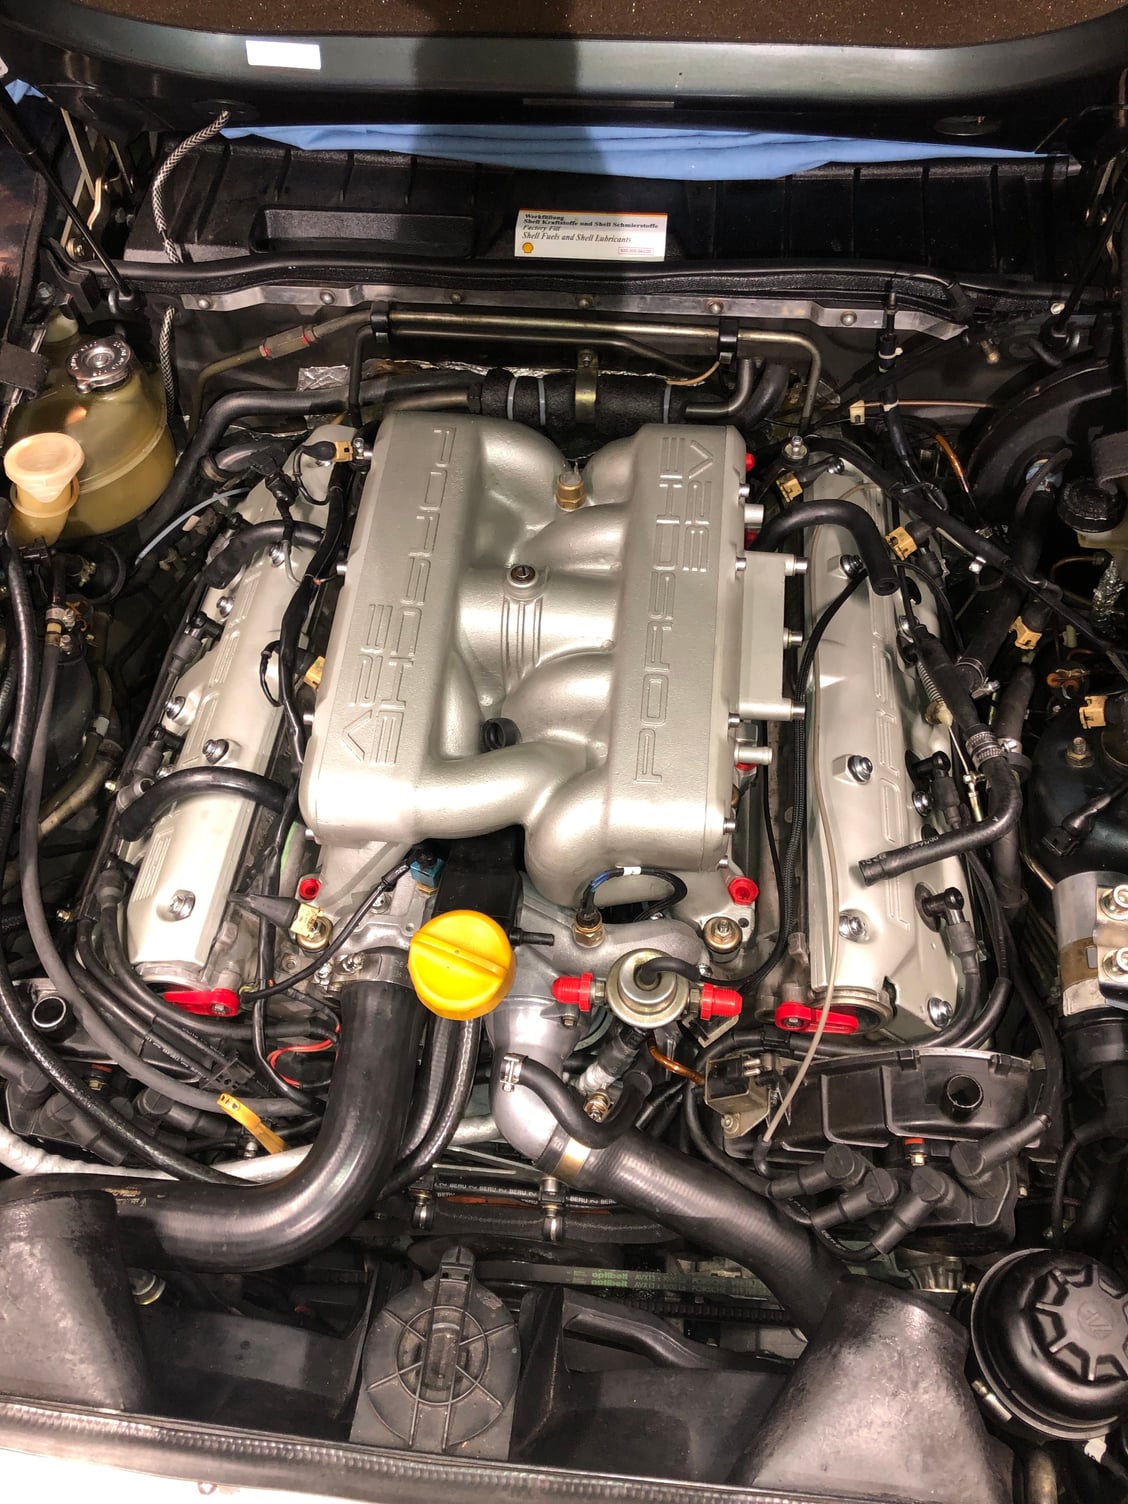
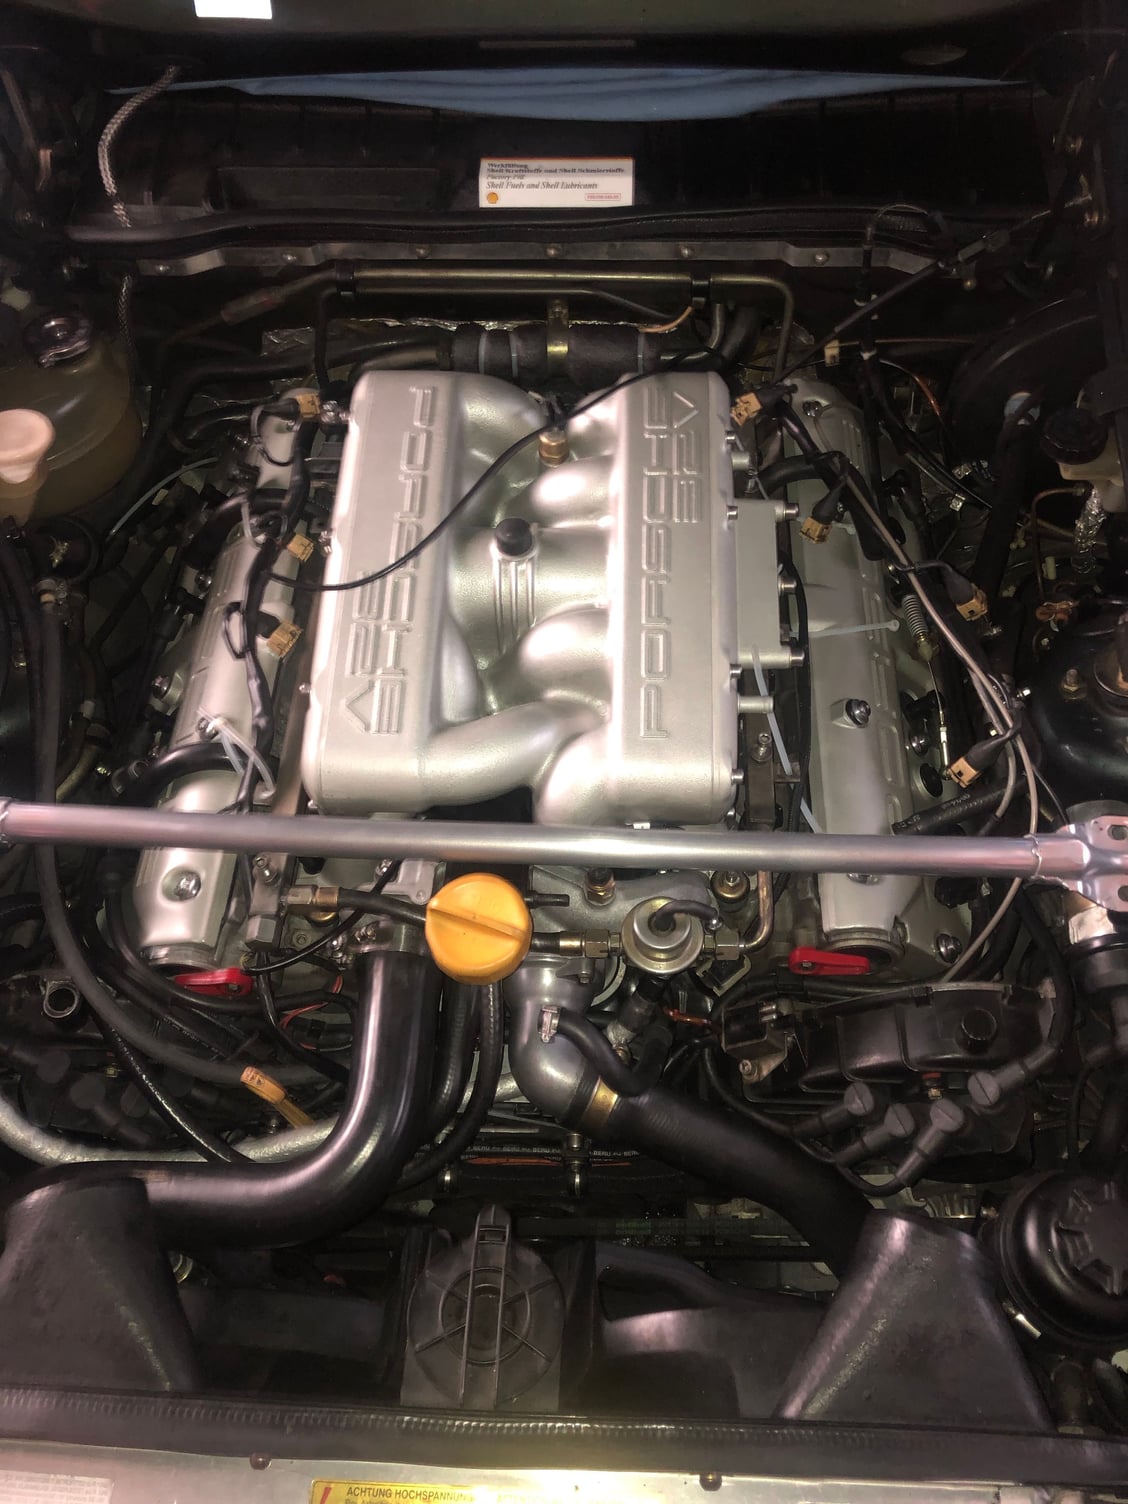
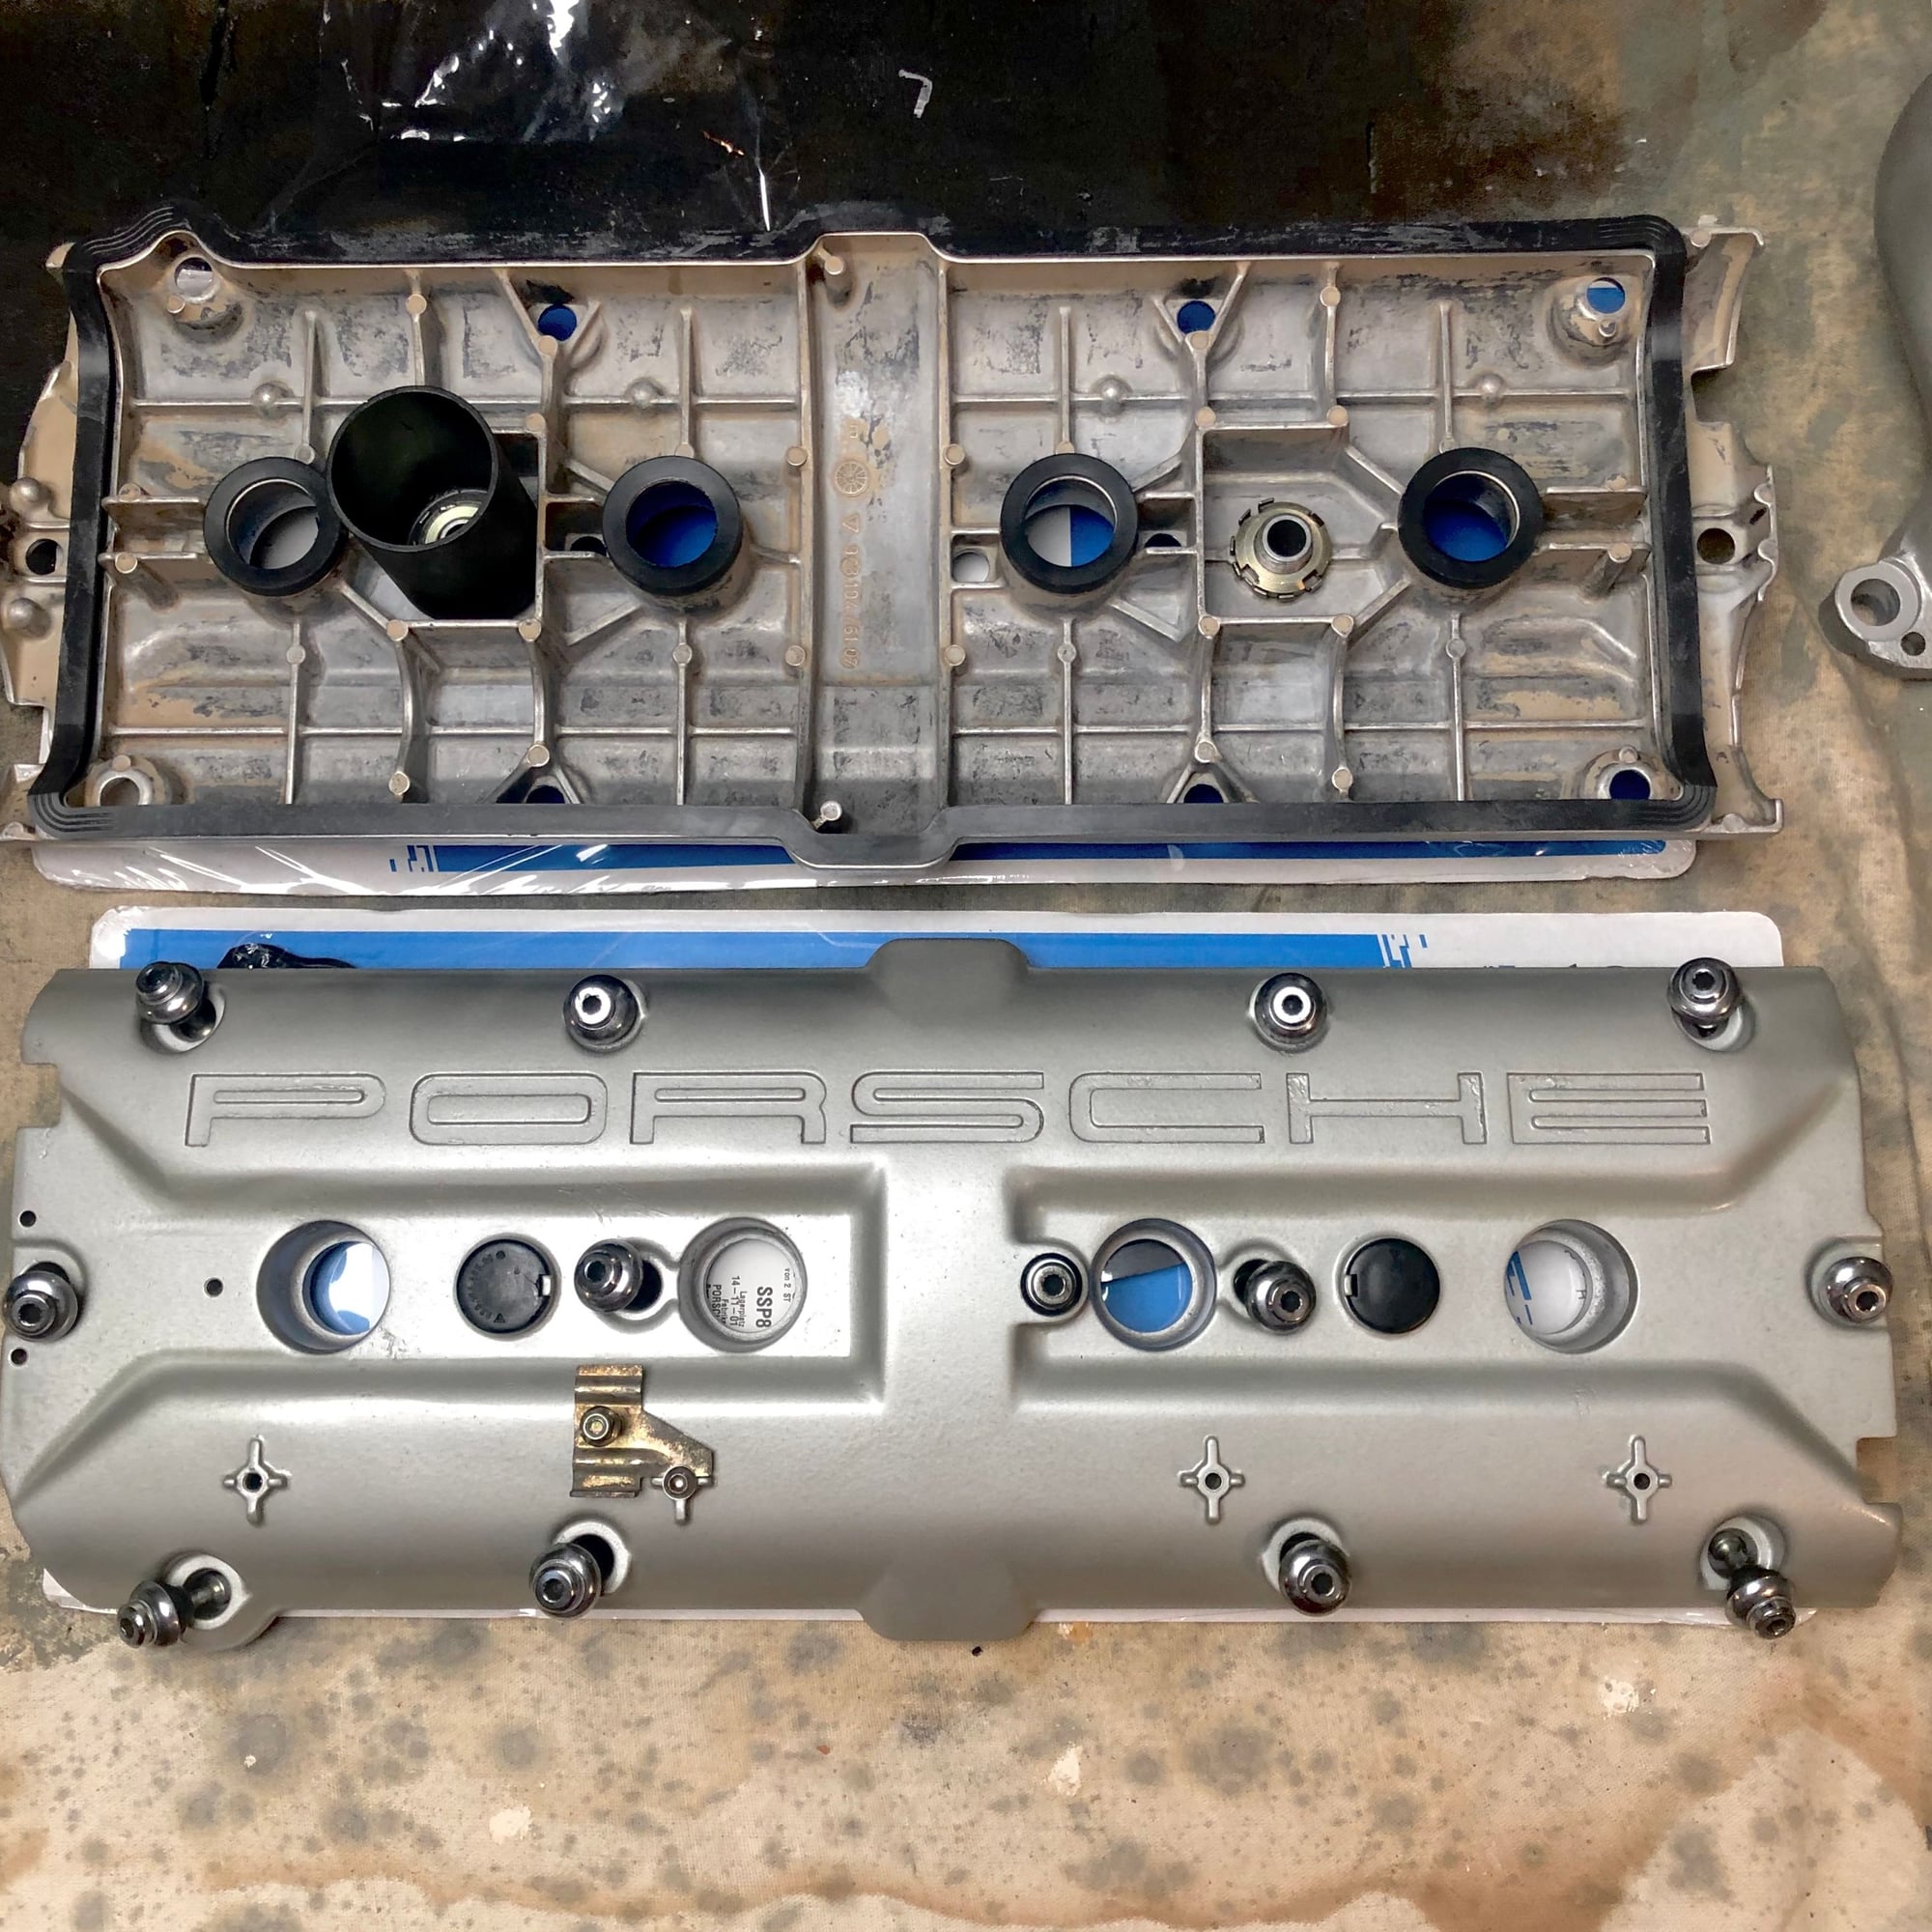
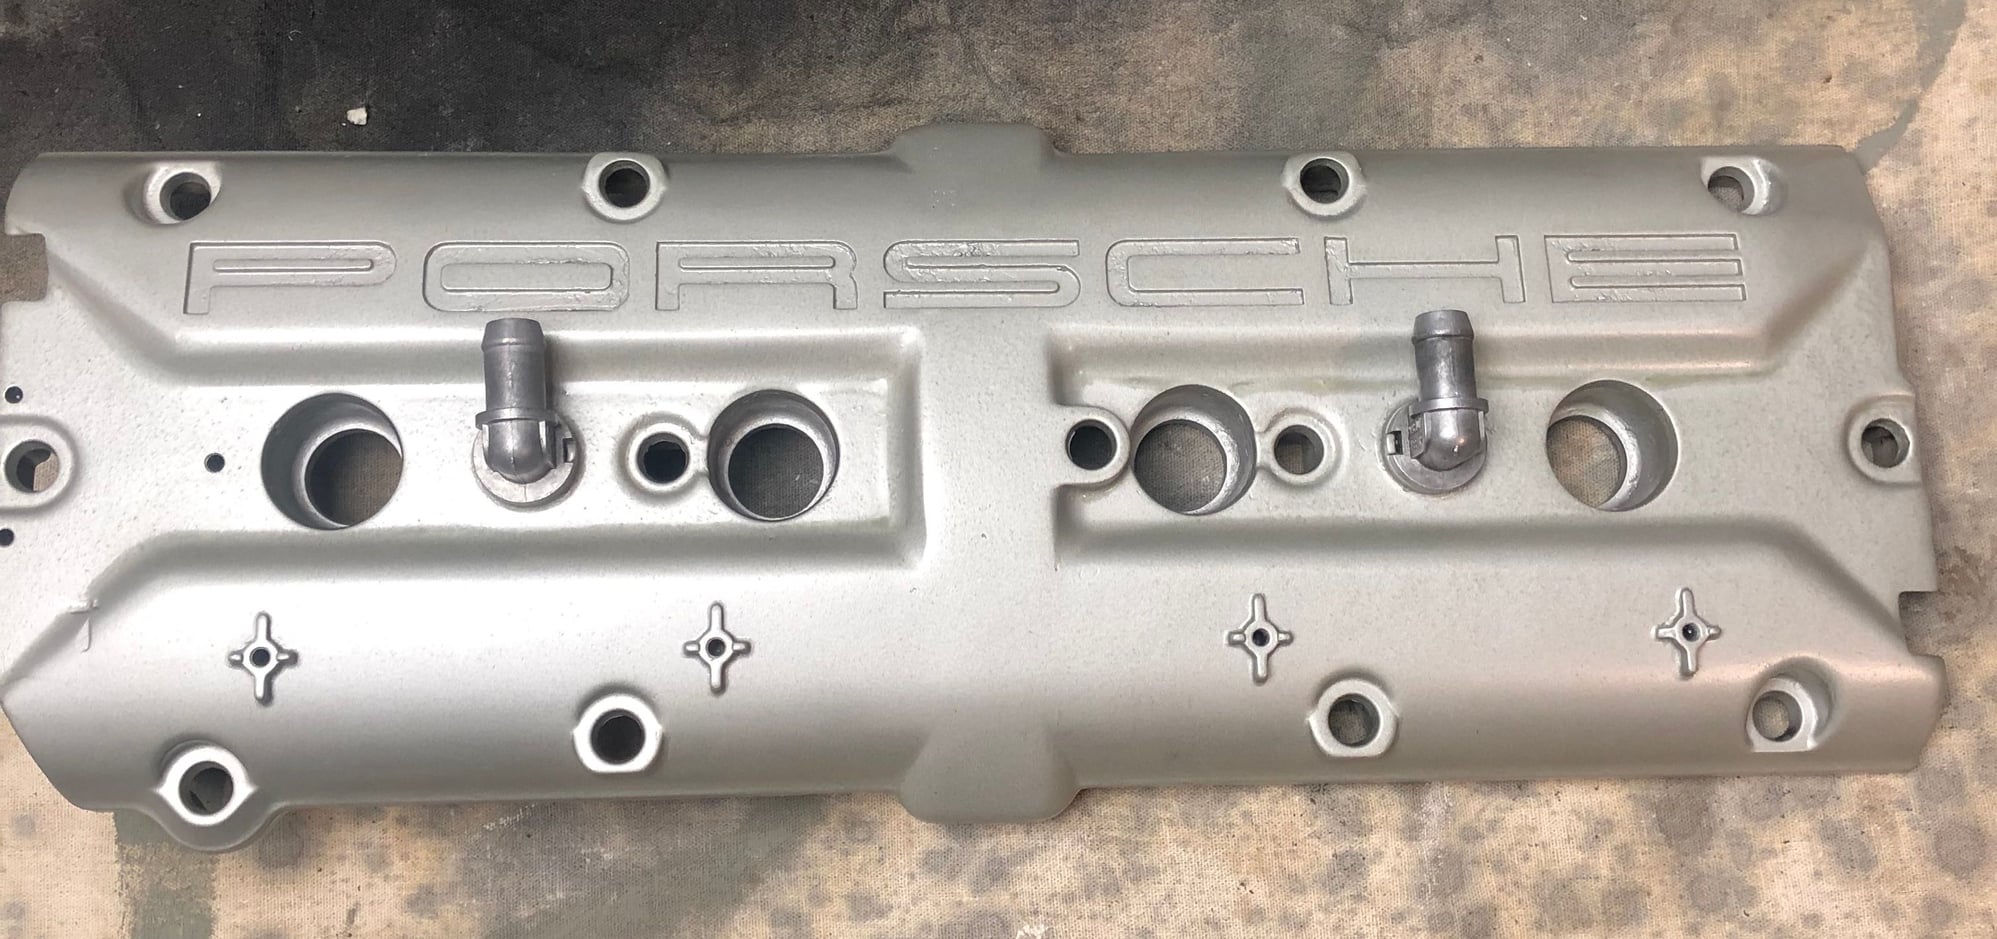
I decided to have the intake and valve cover is coated with a ceramic coating rather than powder coating based on the recommendation of the coating vendor. They do a lot of magnesium wheels and engine cases and mentioned the ceramic coating allows the magnesium to off gas where is the powder coating does not and the prefer the adhesive quality of ceramic over plastic specificity for magnesium. Figured I’d trust them.
Here is the end result I had them put a little gold tint into the coating And I think it looks pretty good. They did a good job following my instructions regarding masking all the appropriate areas too.
On a sidenote, the woman and husband who run this place is actually the sister of Louis Ott. I found out that Louis has sold his car. It sure would be interesting to find out who is the new owner.
Last edited by Michael Benno; 01-13-2019 at 02:29 AM.
Looks great. We could use a coating without the pitfalls of regular powder coating, although some vendors are able to avoid them, or have not yet been humbled by "bad" castings.
The term "ceramic coating" is used for a wide range of coatings, from a paint with clear ceramic particles added to a normal pigment [optional]-binder-vehicle formulation, all the way to something applied by plasma spraying or EB-PVD. Can you tell us more about this version?
^^What Curt said. Seems like everyone kibitzes in intake refinishing.
I used Cerakote C series (ambient temp cure) on mine after soda blasting, wire wheeling, and cursing. I got the look I wanted (see avatar). Not sure how long it will hold up yet but it seems solid after 8 months.
We could use a coating without the pitfalls of regular powder coating, although some vendors are able to avoid them, or have not yet been humbled by "bad" castings. The term "ceramic coating" is used for a wide range of coatings, from a paint with clear ceramic particles added to a normal pigment [optional]-binder-vehicle formulation, all the way to something applied by plasma spraying or EB-PVD. Can you tell us more about this version?
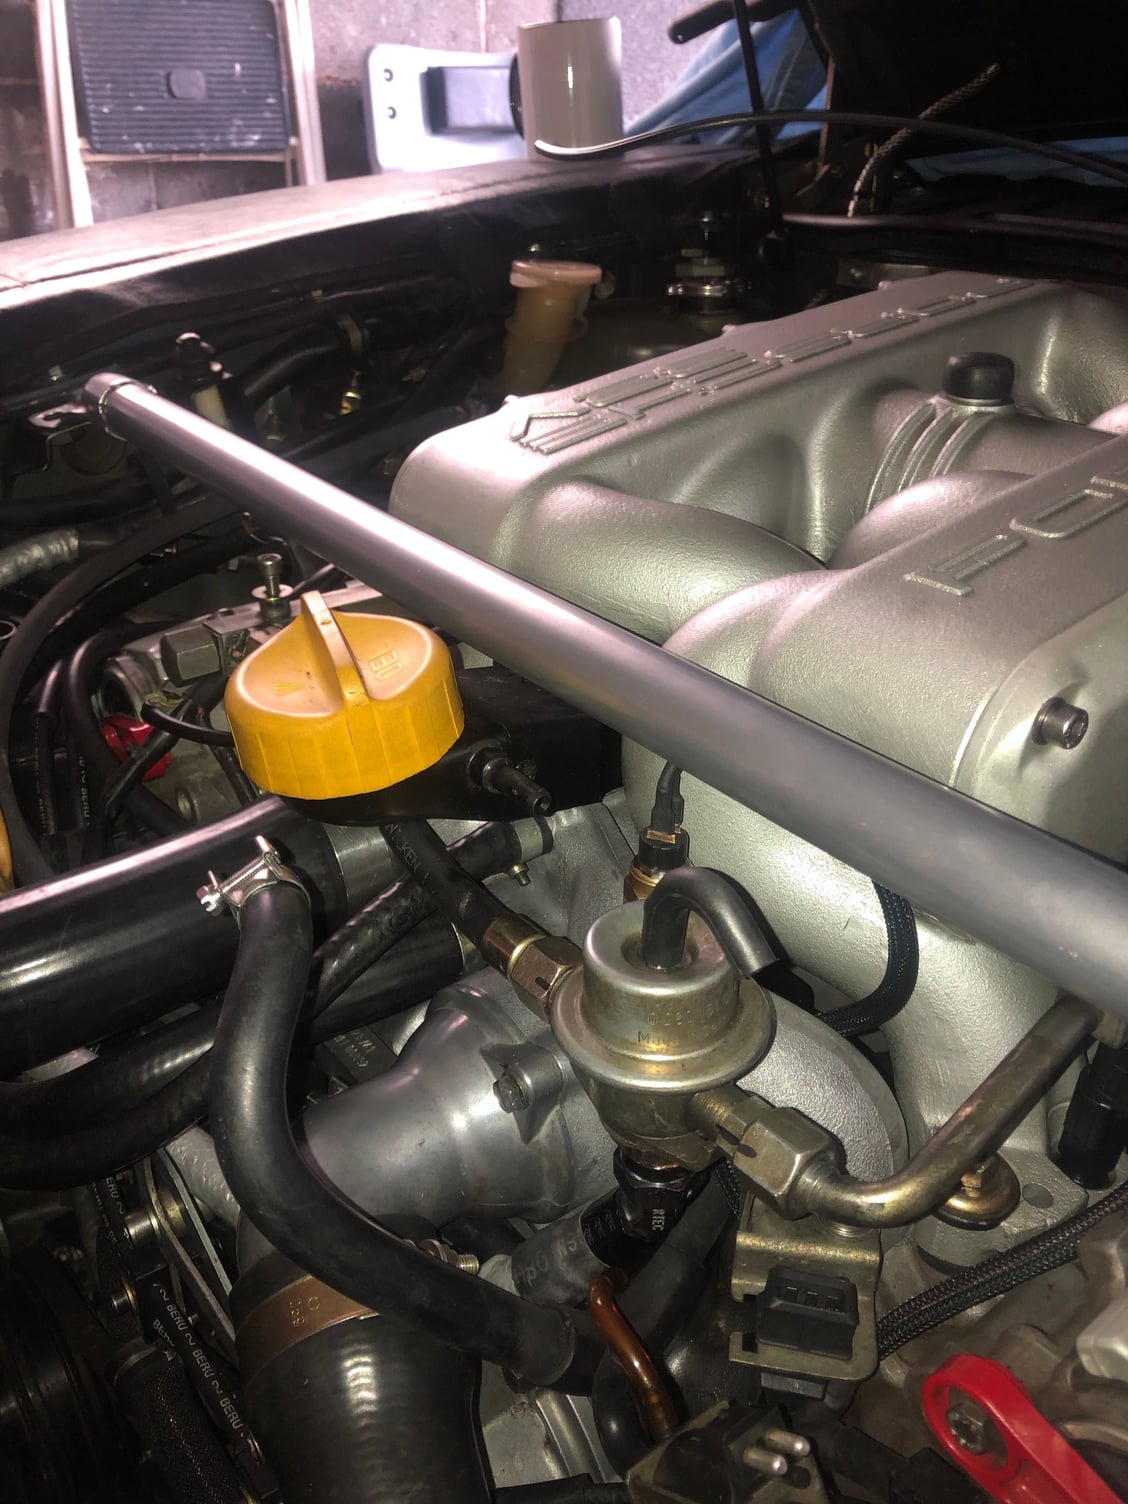
I am not very knowledgeable on coatings. All my insight has come from research on Rennlist and what this vendor, Finishline Coatings told me. Checkout their website, they specialize in motorsport applications of ceramic and other types of coatings. They perform a lot of coatings on magnesium components especially vintage magnesium wheels, as well as engine cases from Porsche and Karman Ghia's. They even do Nikasil plating (928/944 cylinder walls). They recommended a ceramic coating that is primarily clear. Here is a magnesium bell housing with just clear on it. If you look close on the right, you can see the dividing line between coating and uncoated sections.
They can add some degree of color tinting but the coating is still largely translucent. Which is good in that it stays thin but bad if you are trying to cover imperfections or want to do a color change. You can see this coating I chose has some silver and some gold tint in it but is still partially translucent did not cover up some of the casting imperfections but I am totally fine with this.
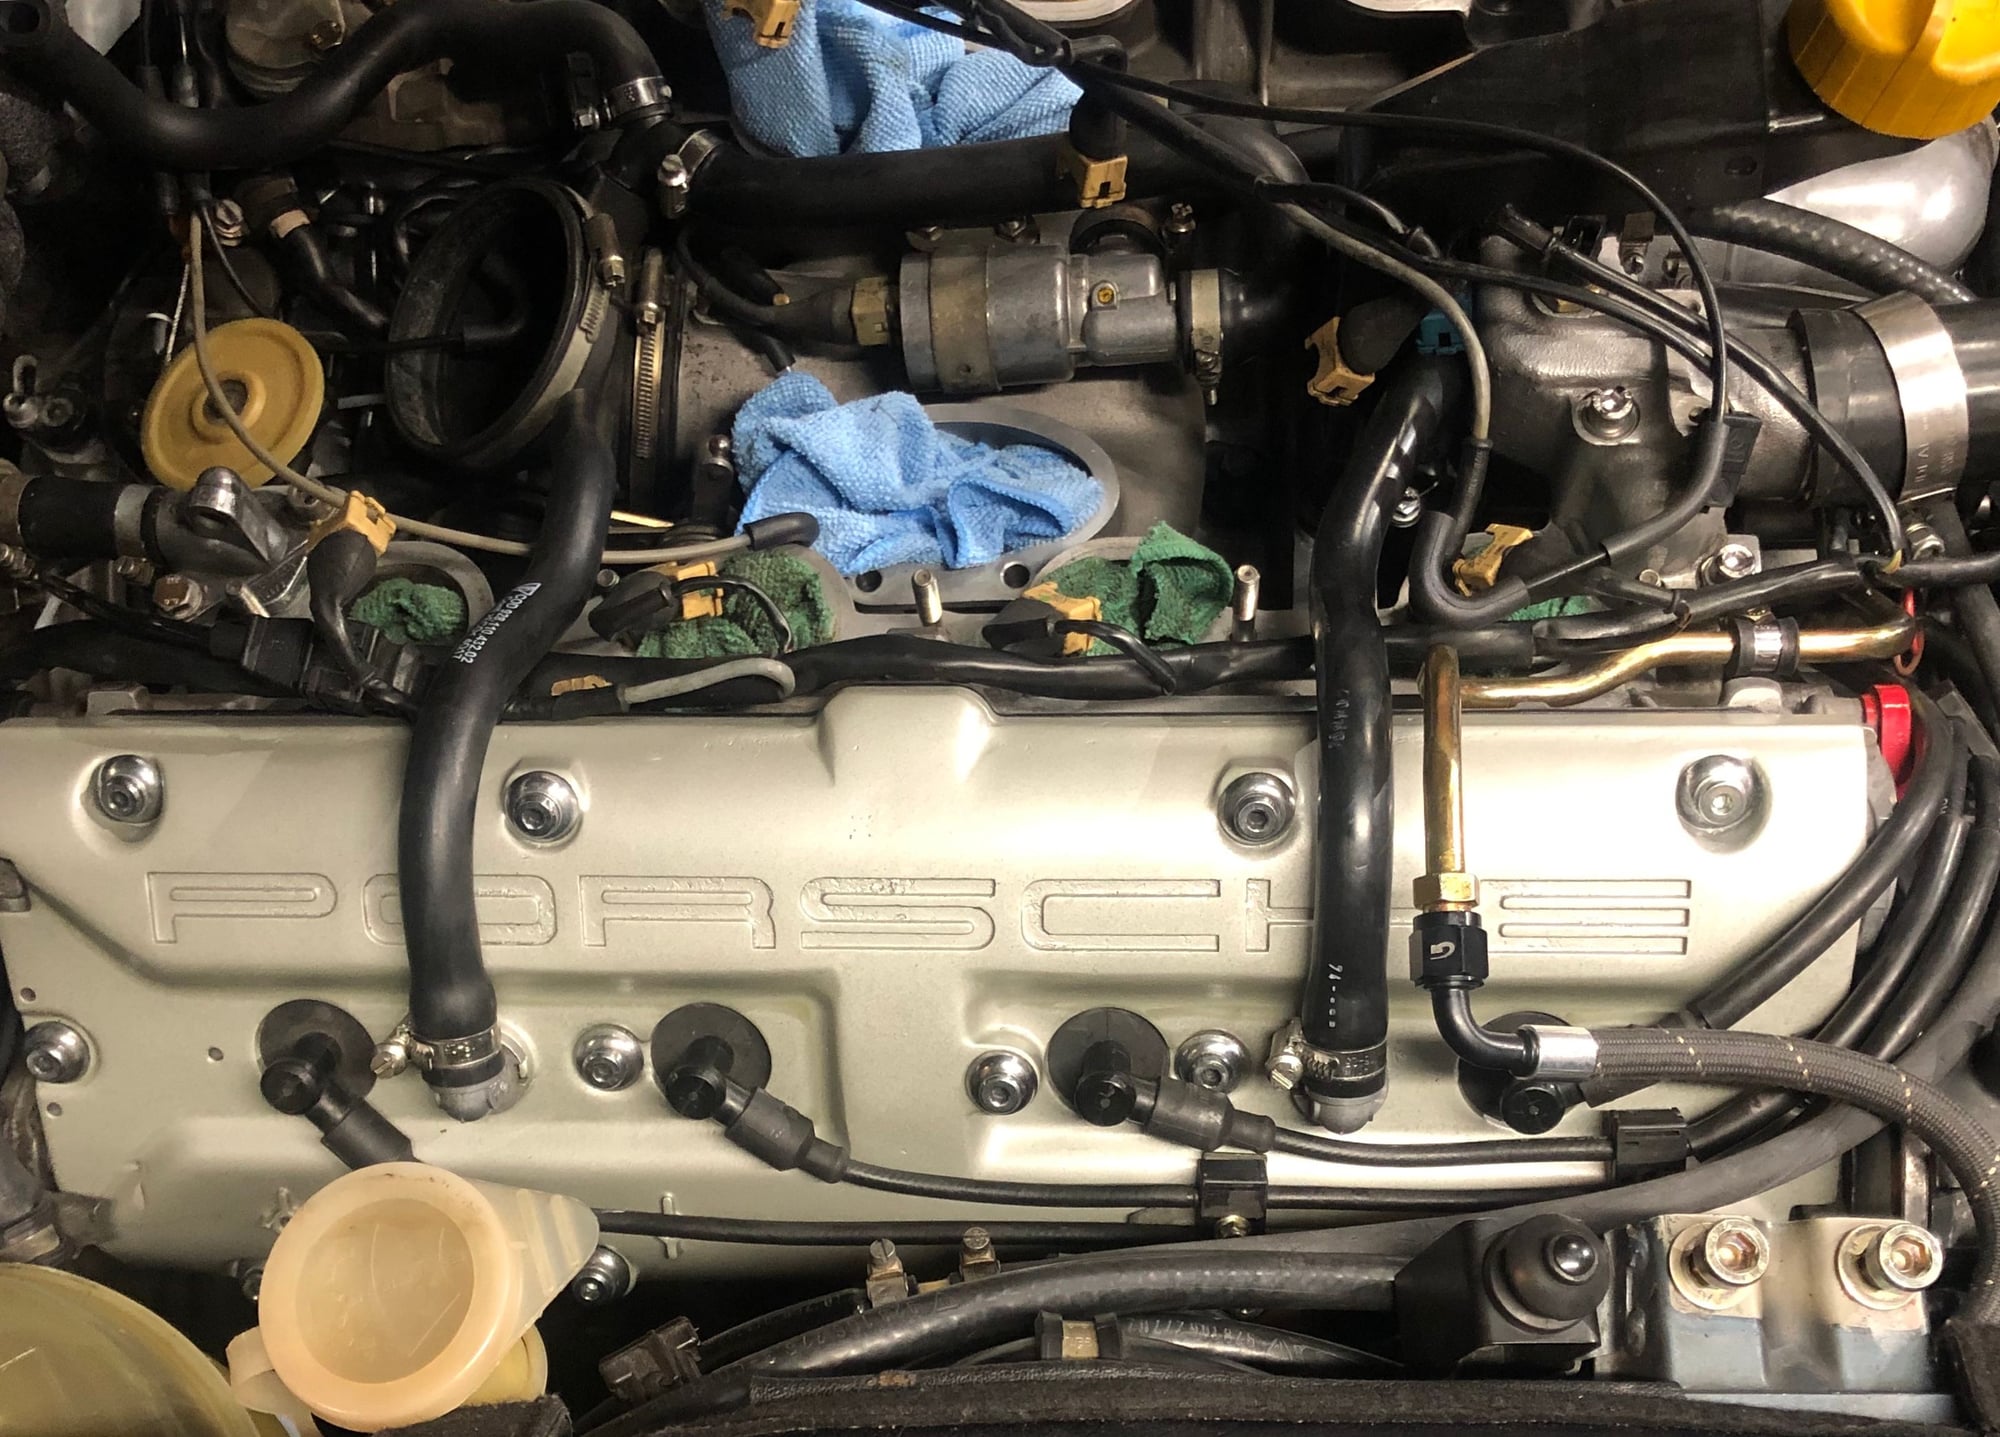
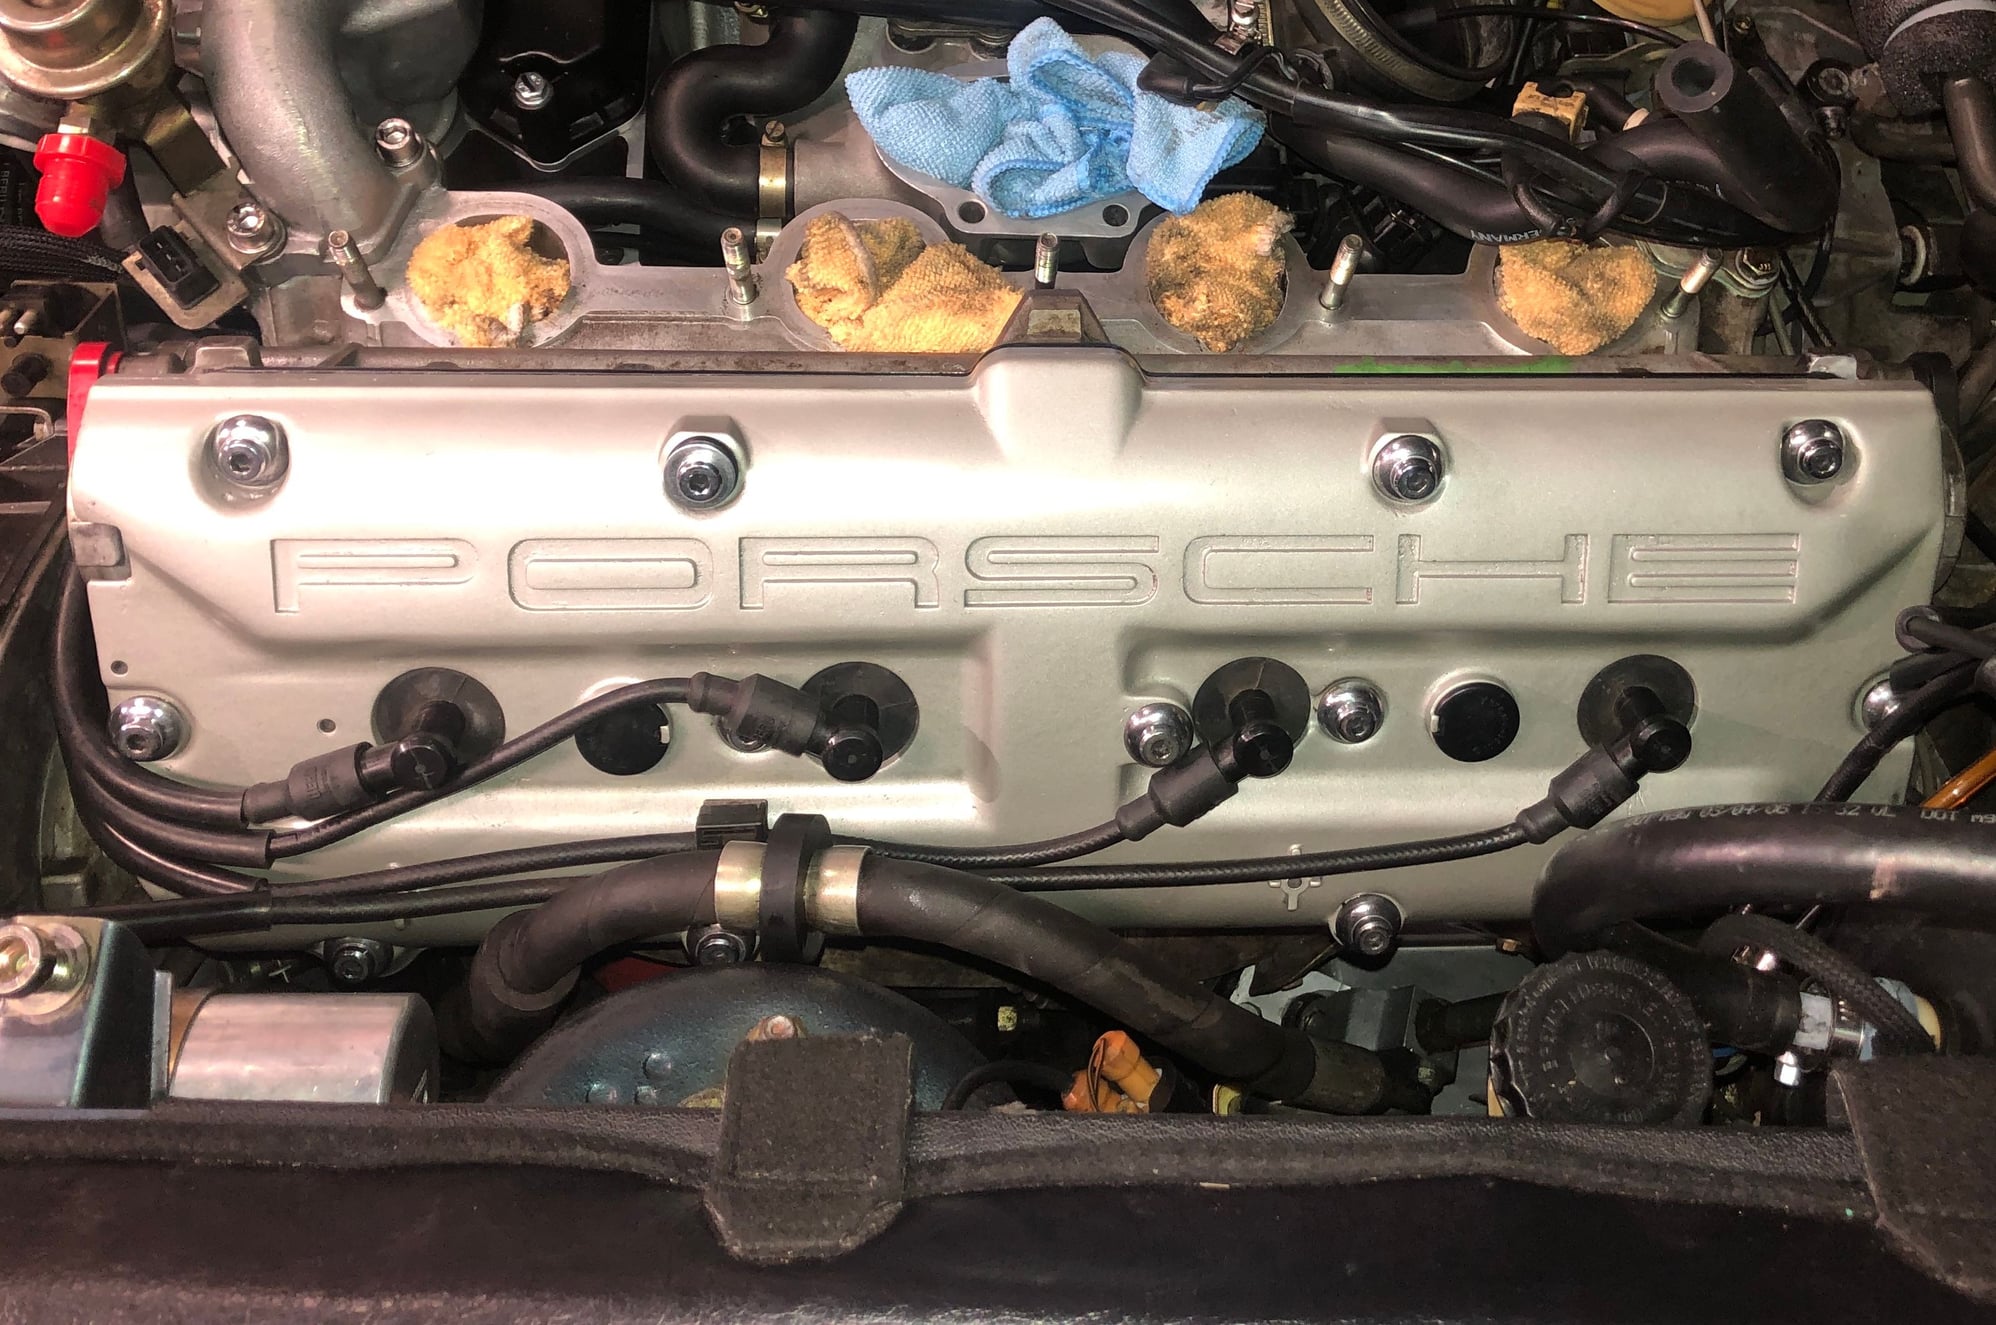
I had a fun weekend prepping and trying to figure out how to install the valve covers. Lots of research and lots of options in products to use as sealant. I got them installed and it all went well. Here are a couple of tips
test fit the covers a couple of times before you start putting sealant down. Both valve cover requires some fiddling to get it installed. It would be ideal if you have a second pair of hands to help pull stuff out of the way. Stuff like the power steering hose, the fuel injection harness, and the main fuel supply line.
lay out all the pieces before putting on the sealant. Than means pre-assembling the bolts with the washers too.
have enough sealant for the both sides to the seal. There is a lot of discussion on which brand to use. My takeaway is to use a high quality silicone that is both oil resistant and high temp tolerant (200-degrees C at least). Also stay away from fast curing silicones. You are going to want something that will be workable for at least 15min which is about what it took me to put down all the silicone and set the cover in place.
I didn't get any pictures of the installation process because I was tight on time.
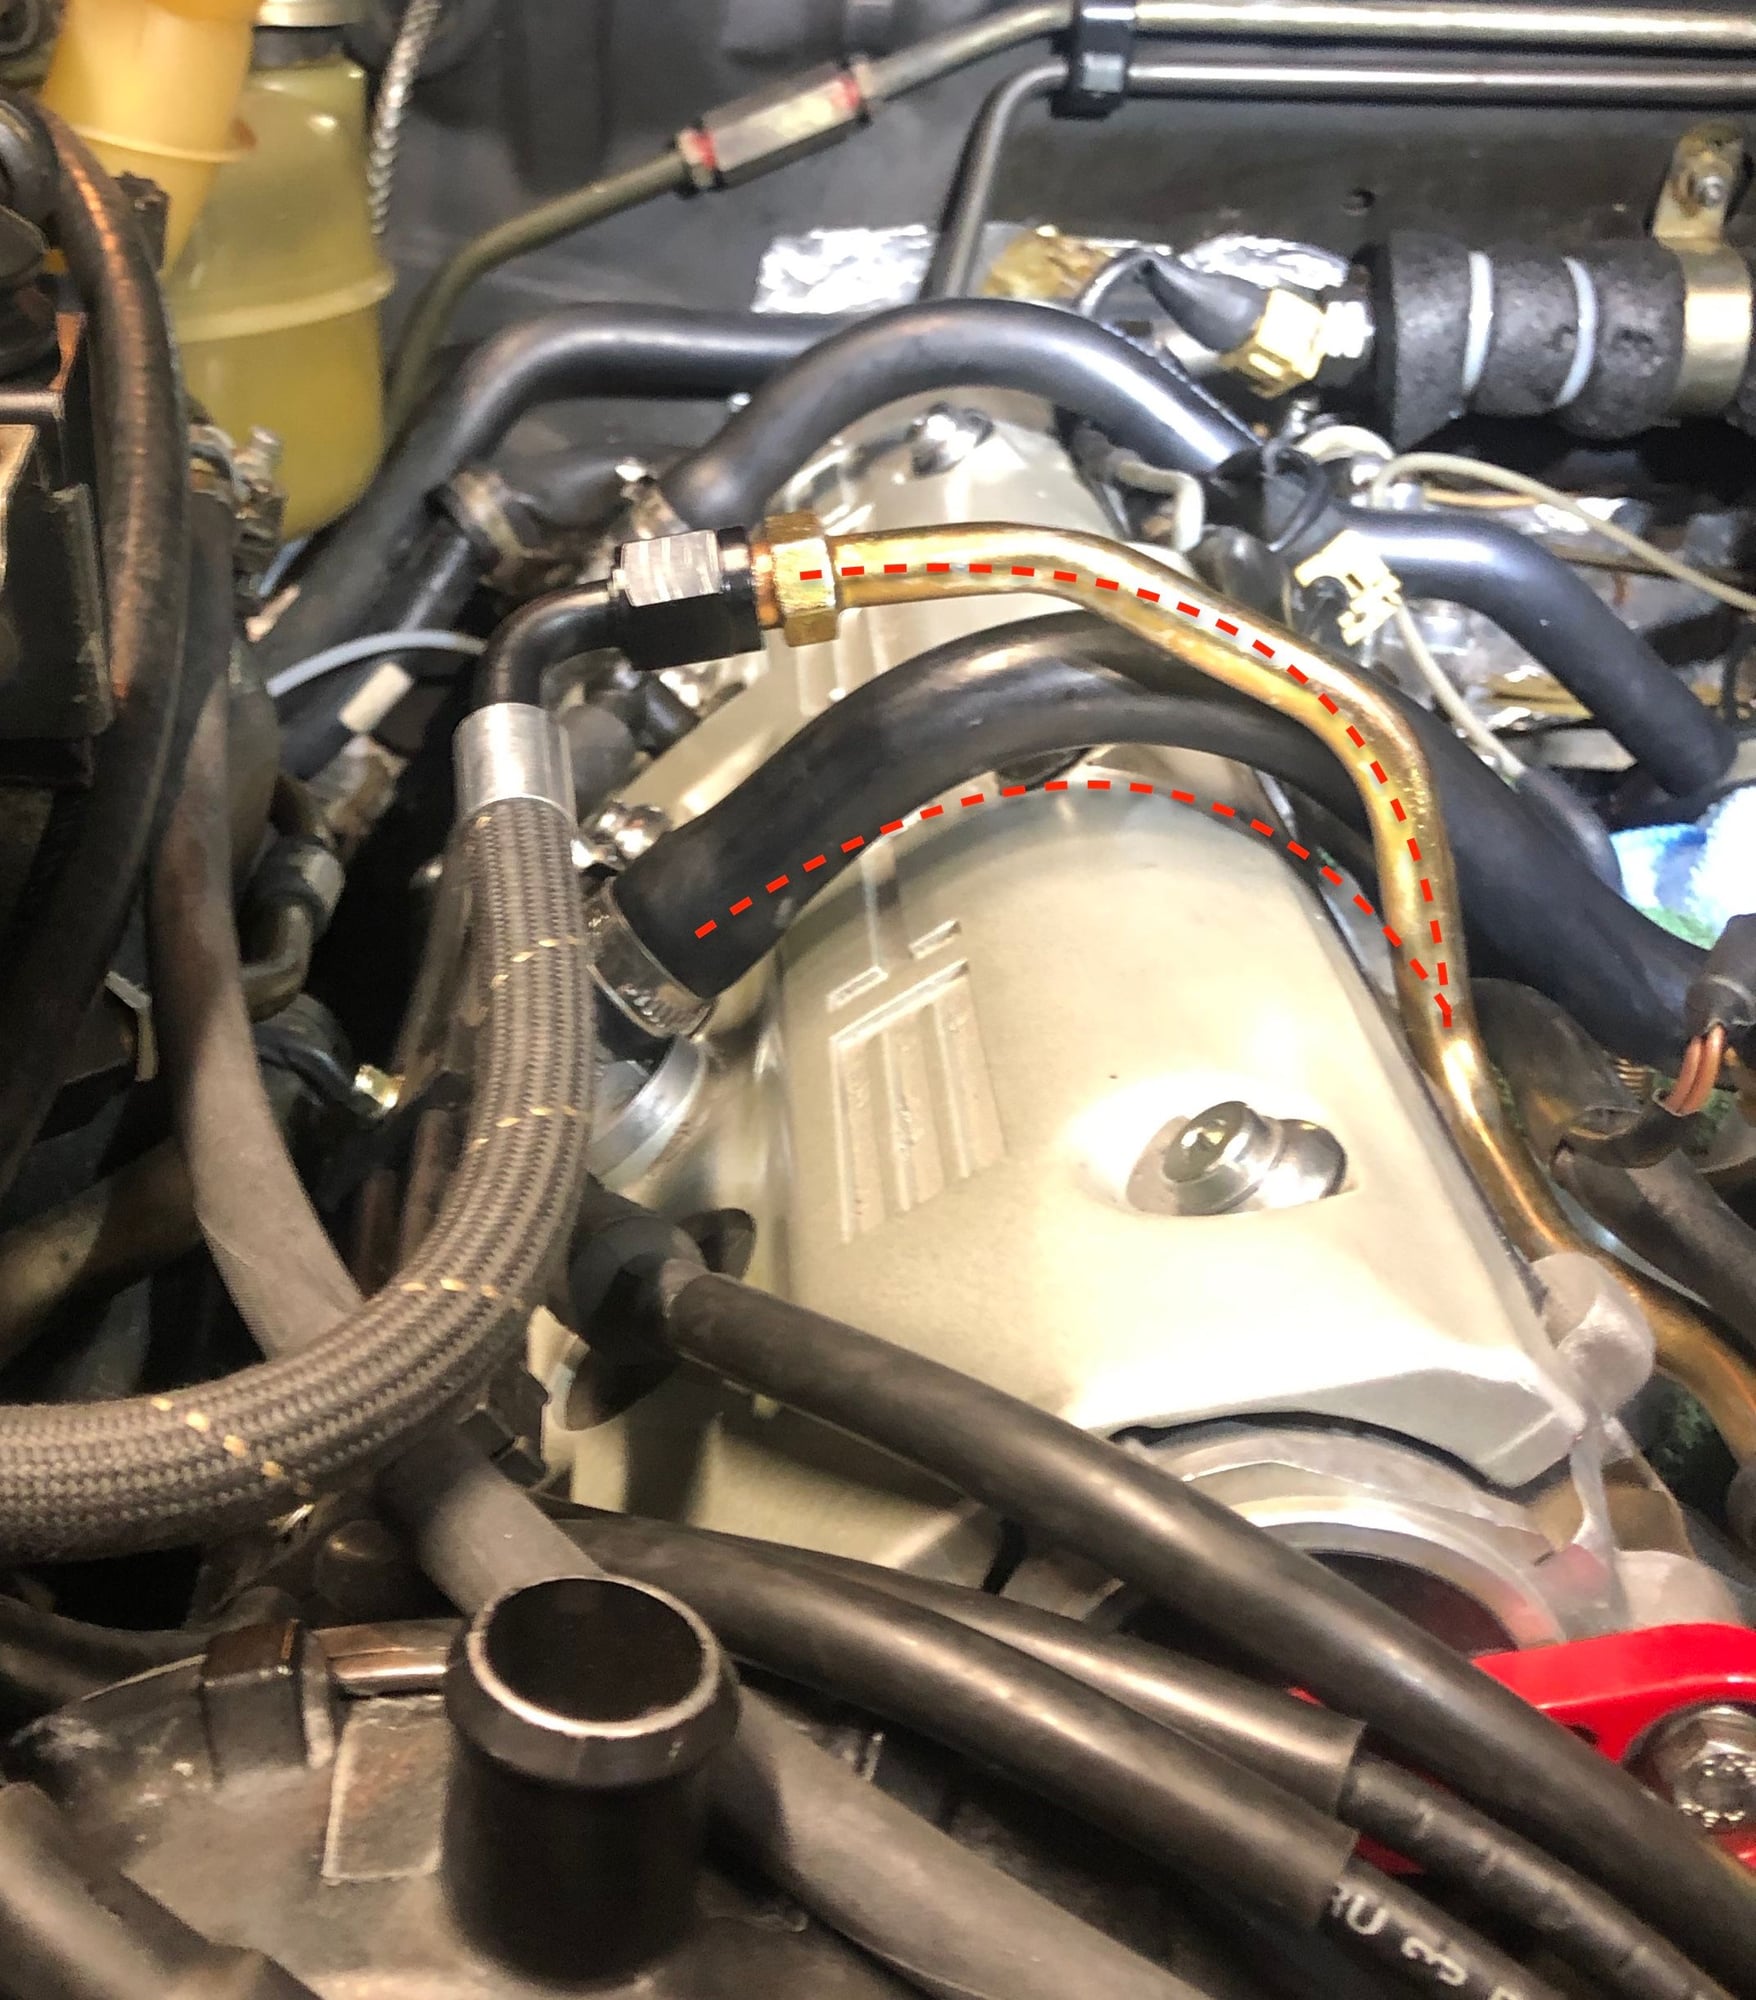
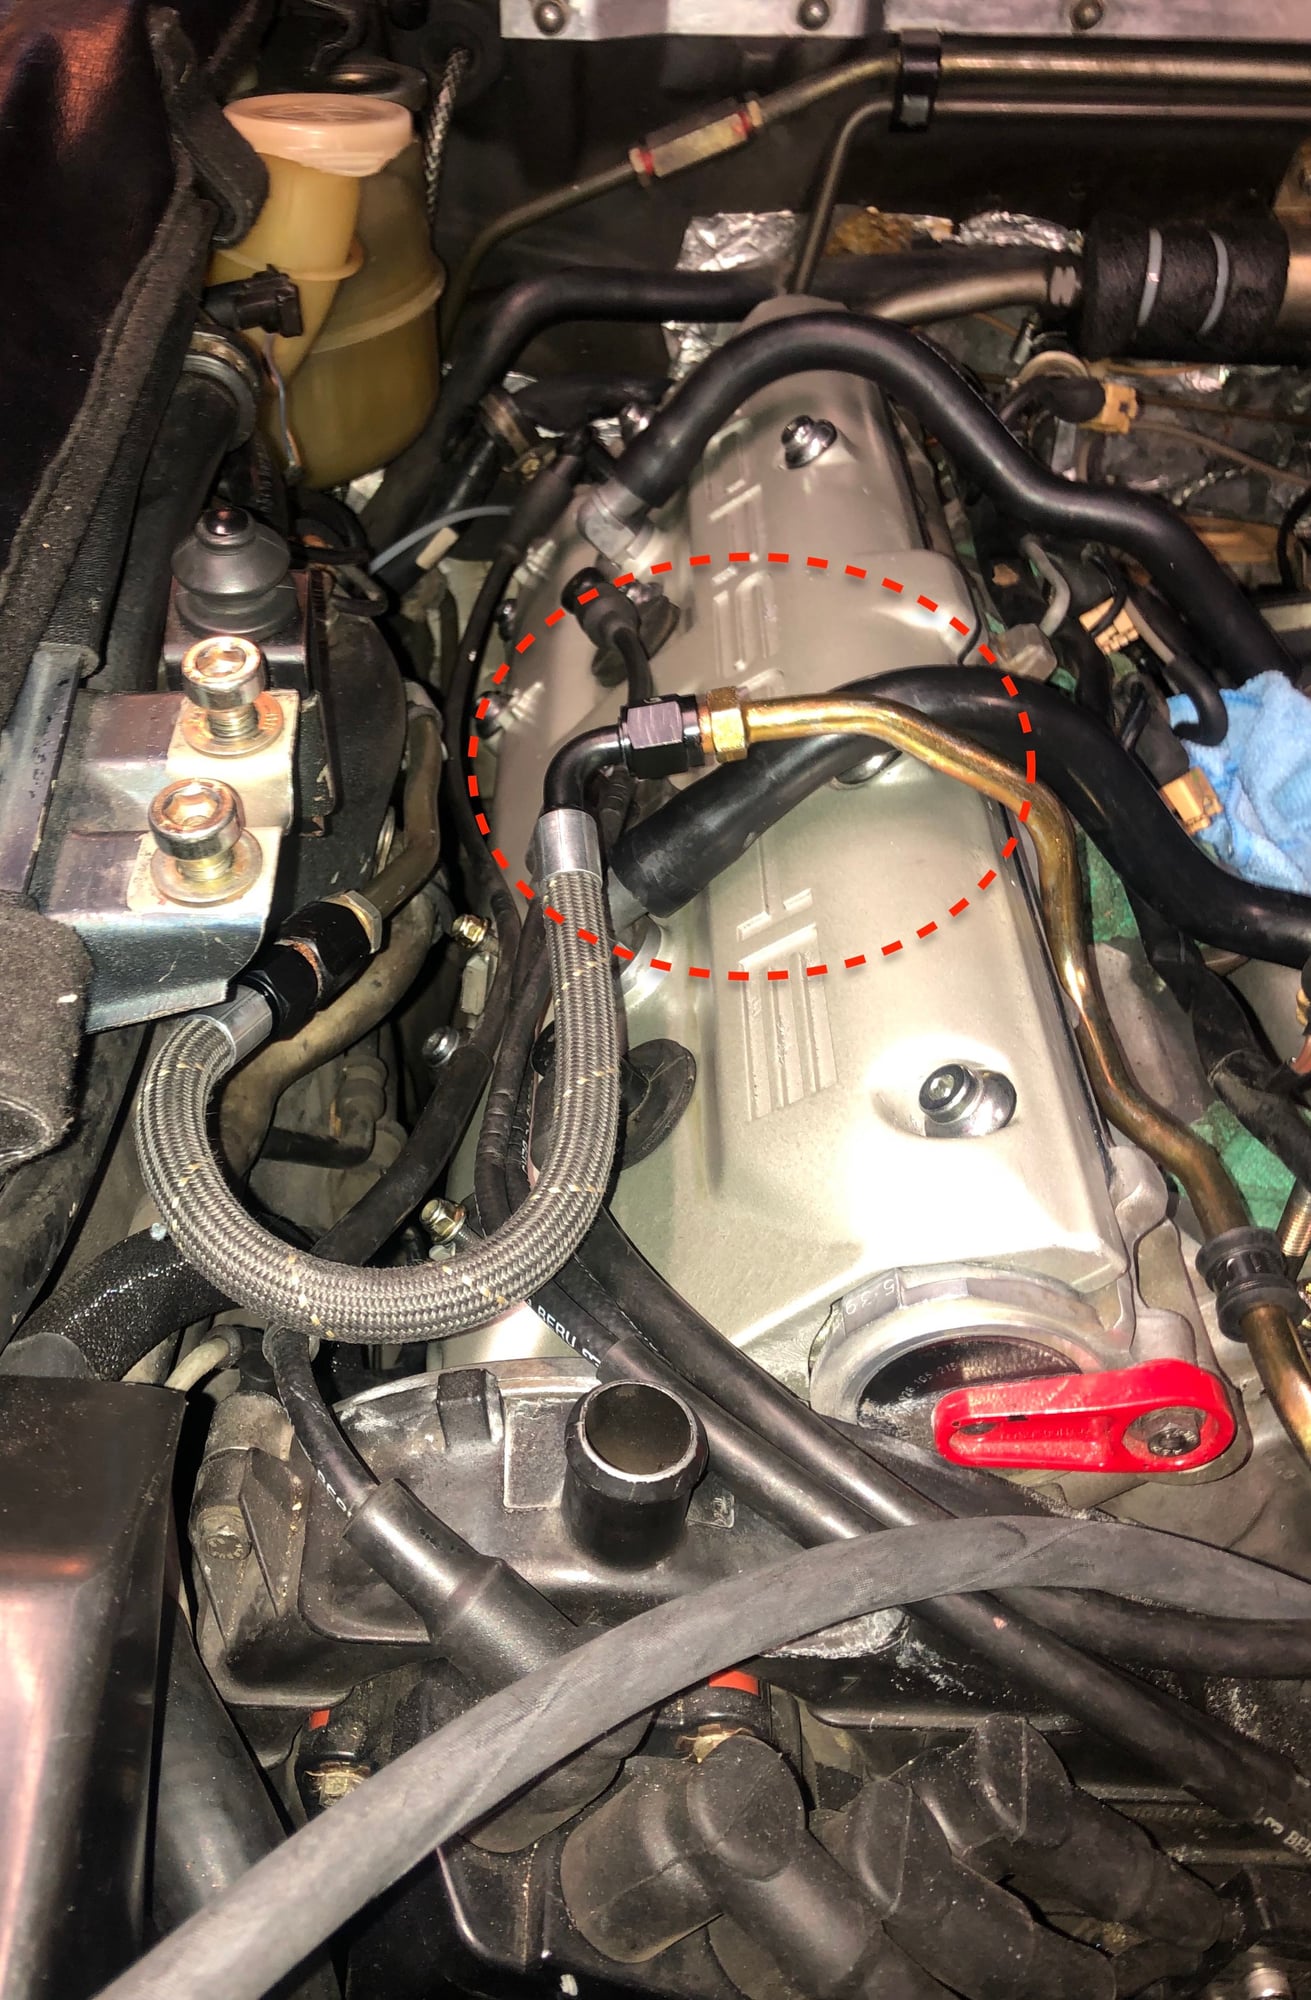
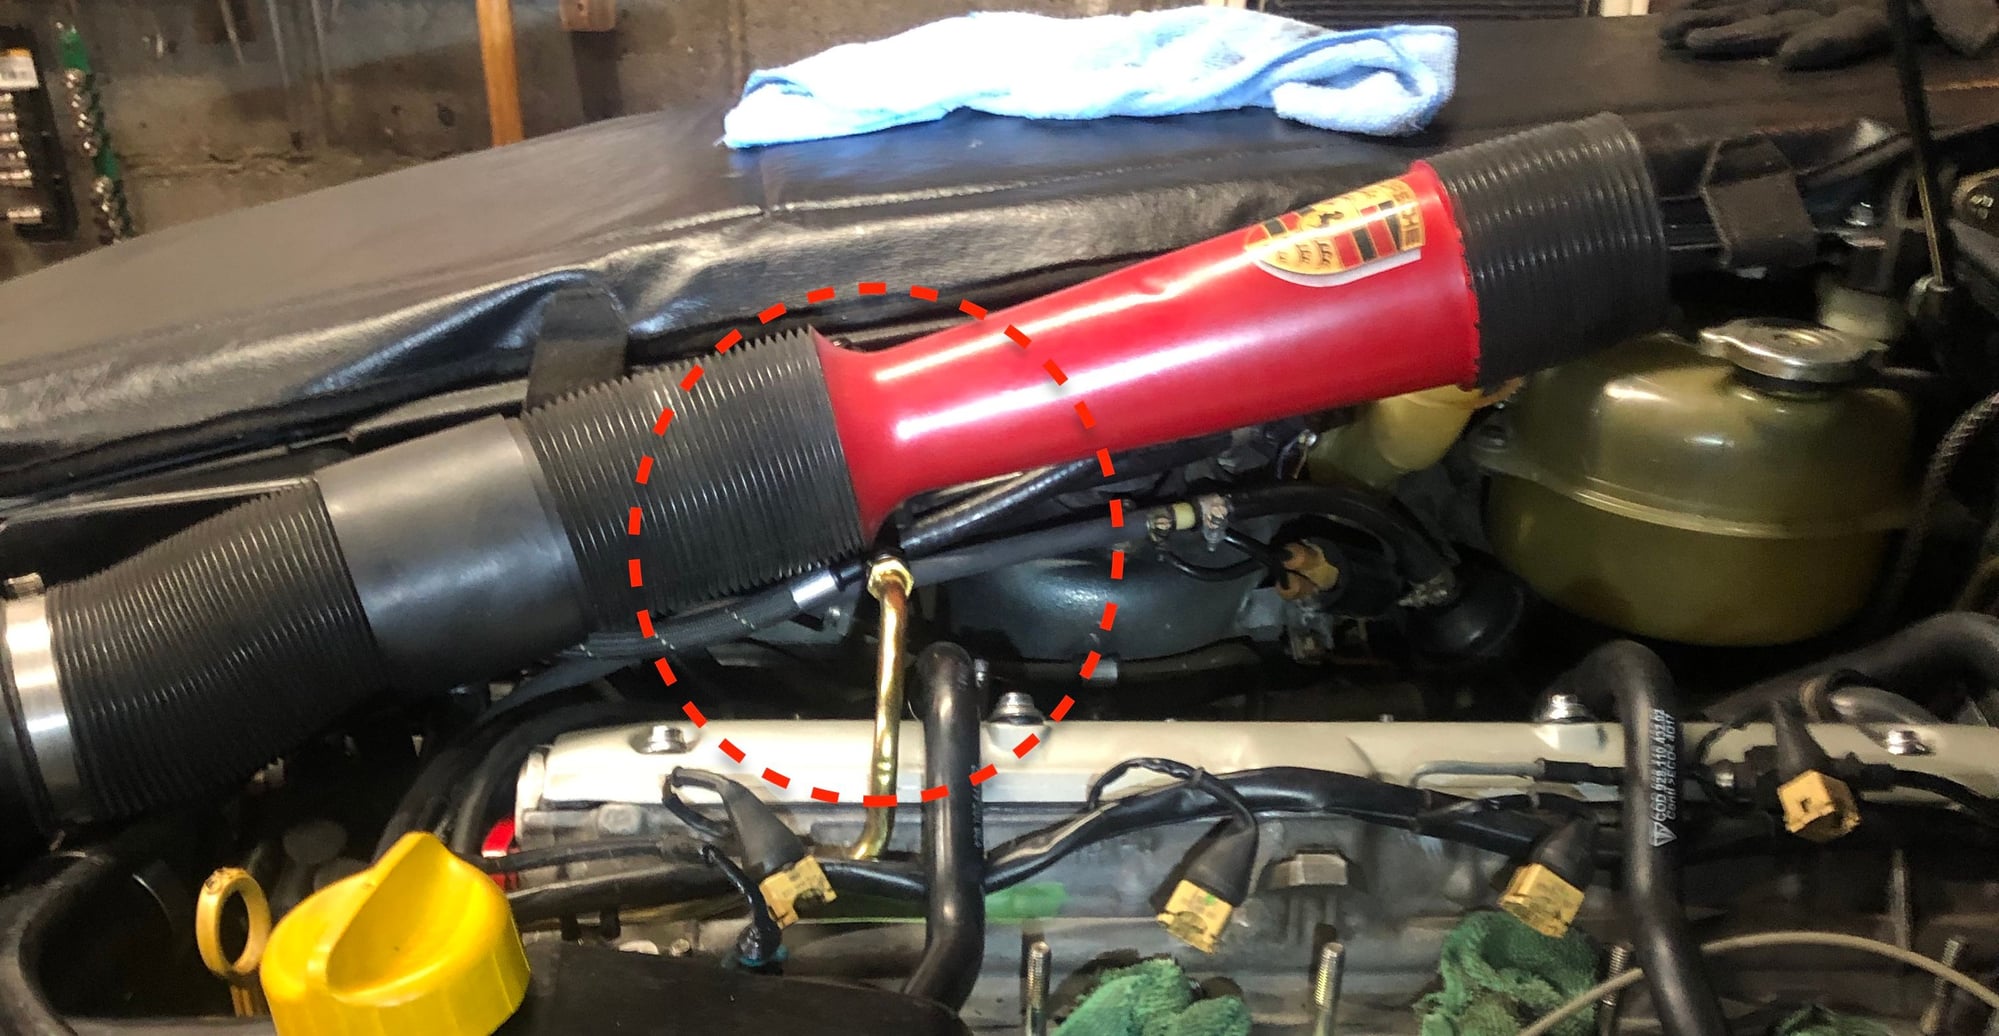
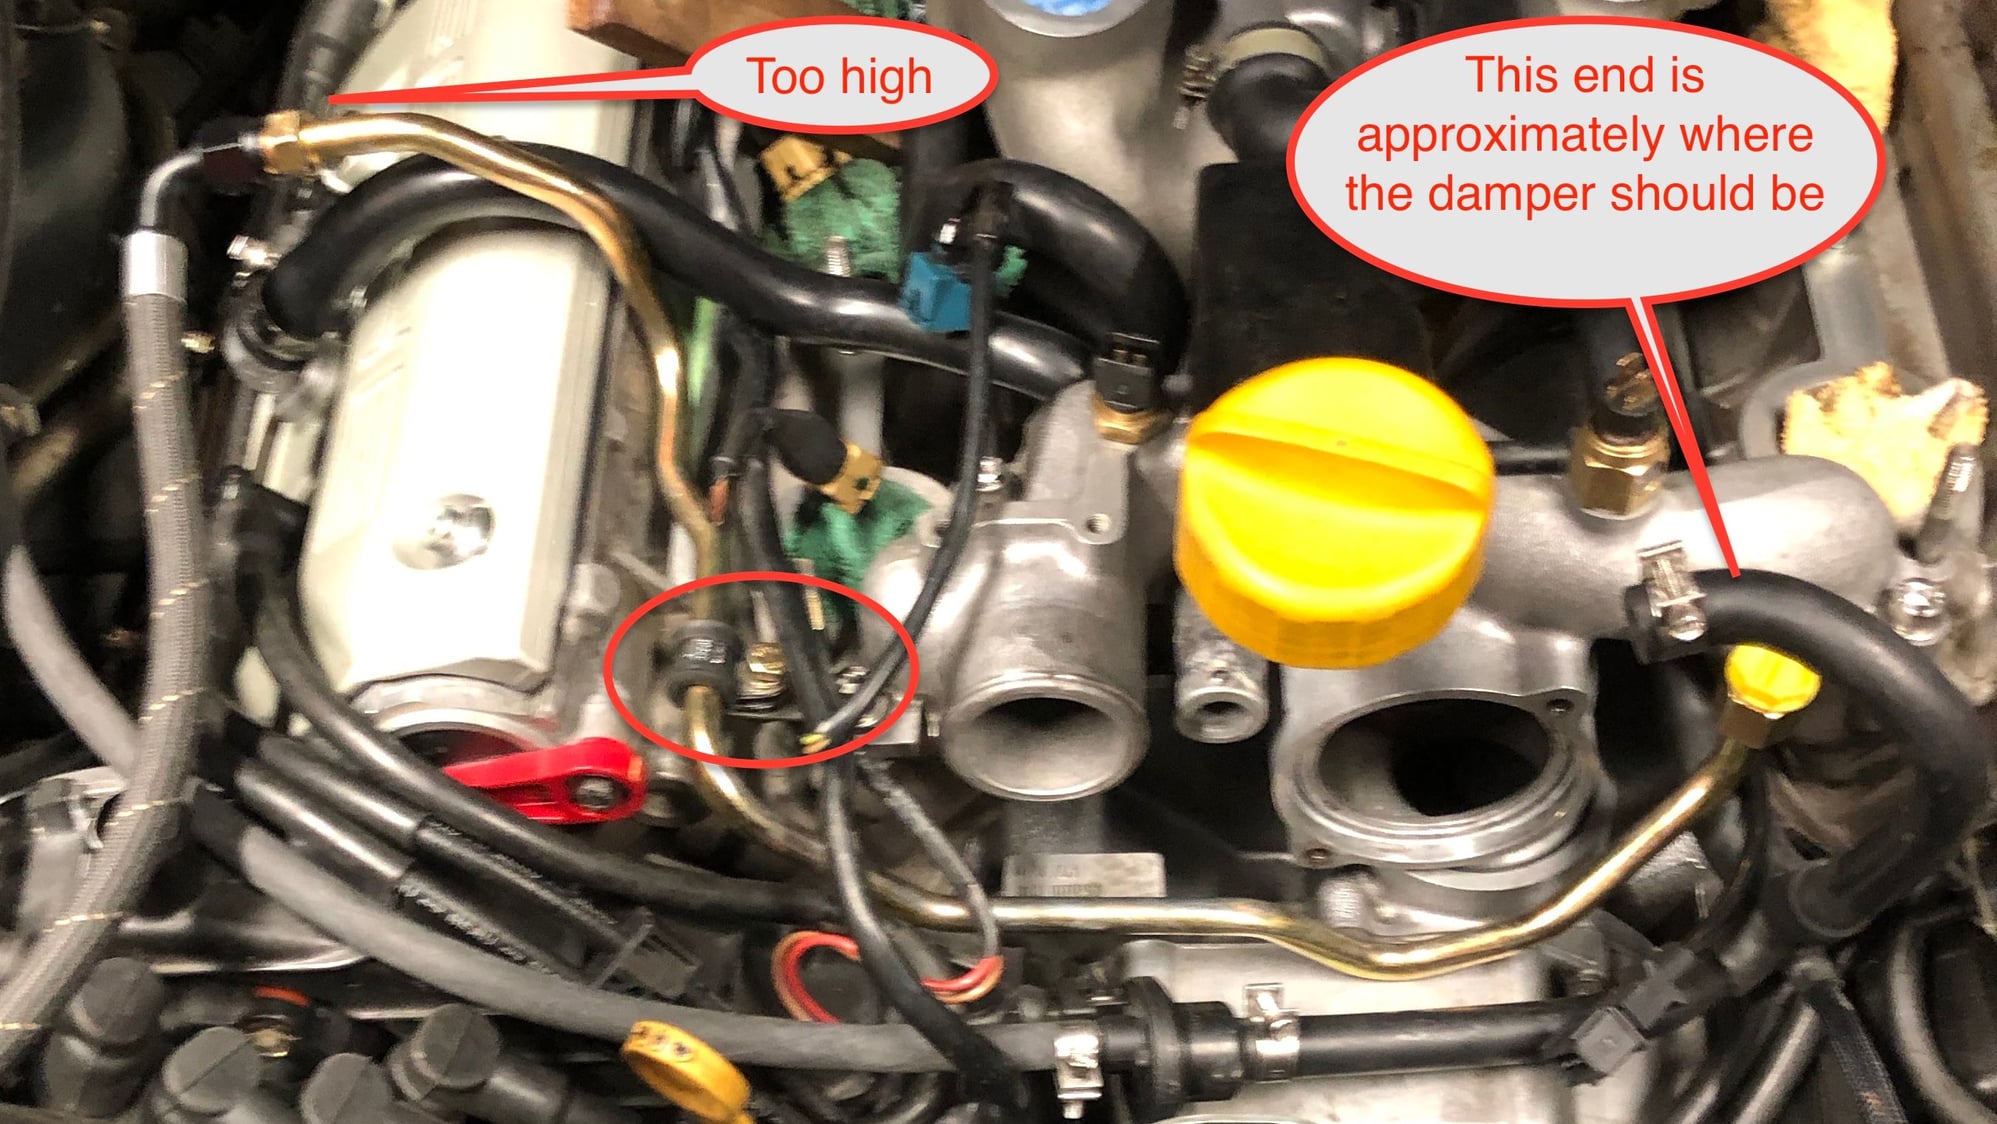
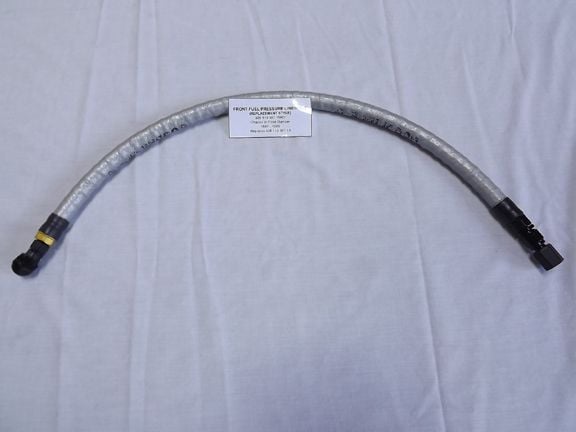
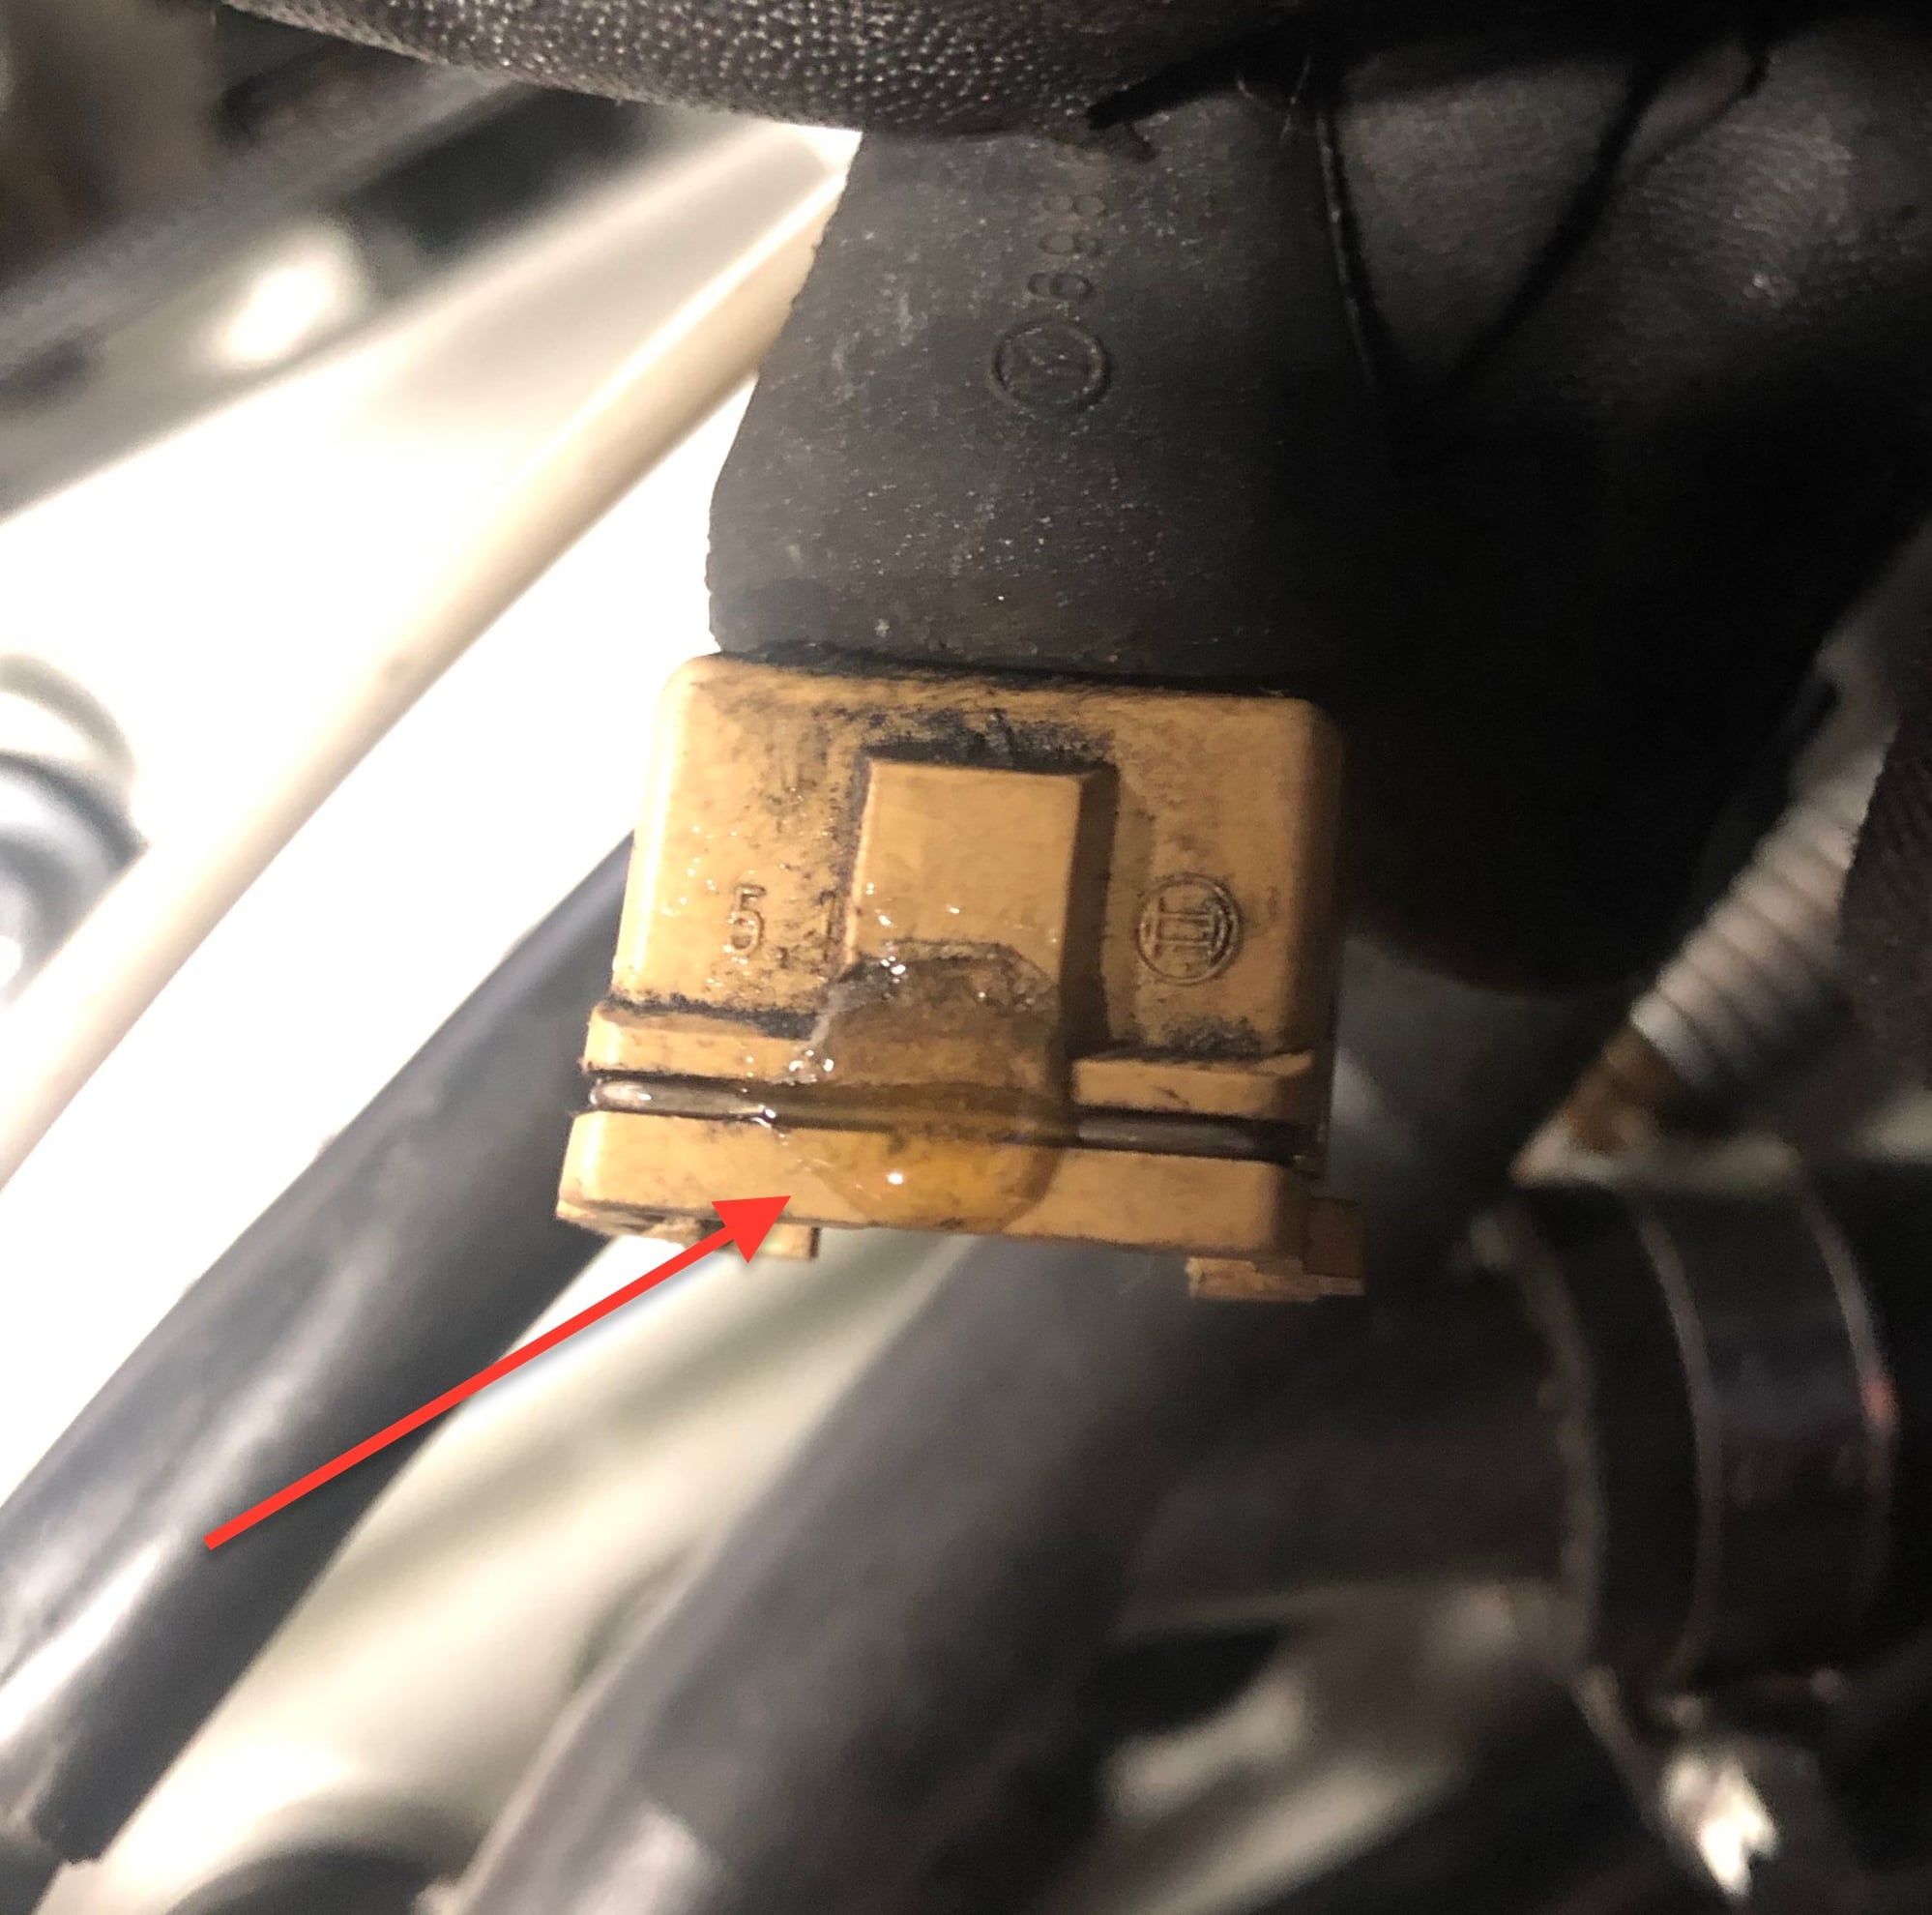
I am having trouble getting the front fuel supply line aligned properly but I can't figure out what I am doing wrong. I am using a refurbished OEM line from Precision Motorwerks (Greg Brown). For some reason I can't get it to hug the valve cover. Do I have something installed wrong? There are two points of mounting contact. The front fuel damper and the mounting tab on the right side of the water bridge. Are do either of those mounting points look screwy? Is there a difference in the fuel line between S3/S4/GTS models? I'm a little stumped as to what I am doing wrong here.
Here is the problem. The fuel line is angled too high. Here is another view. As you can see the intake will not fit with the line up in the air. From the top it looks to be properly aligned with the oil breather. Here is the mounting point at the water bridge. Here is the other mounting point at the damper. I've circled the mounting bracket.
Adjust that front damper to be aligned straight left---right.
The GB hard line...I had to "adjust" mine..my intake tube on that side takes a beating from compromised space there still, but does come in and out easily.
It's been a while since I've updated this thread but there have been a bunch of updates.
Fuel Line Resolution
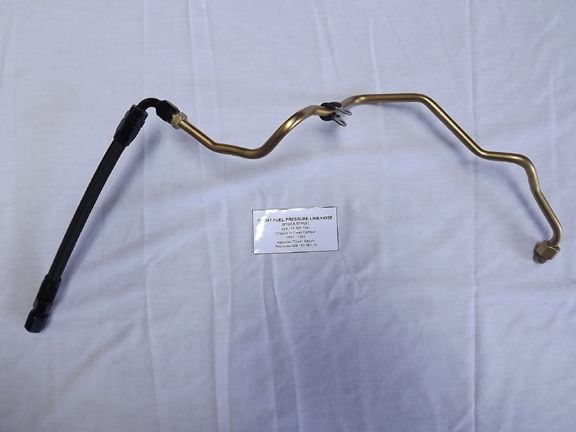
When we last checked in, I was troubleshooting the getting the refurbished OEM fuel line to fit. I removed the thermostat housing and took a good hard look and Roger and I determined the fuel line must be bent out of alignment.
Roger was kind enough to give me the option of bending it myself to fit or sending it back. I didn't want to take the risk of kinking it so I'll send it back and use the Precision Motorwerks Alternate Route fuel line that I had previously been using.
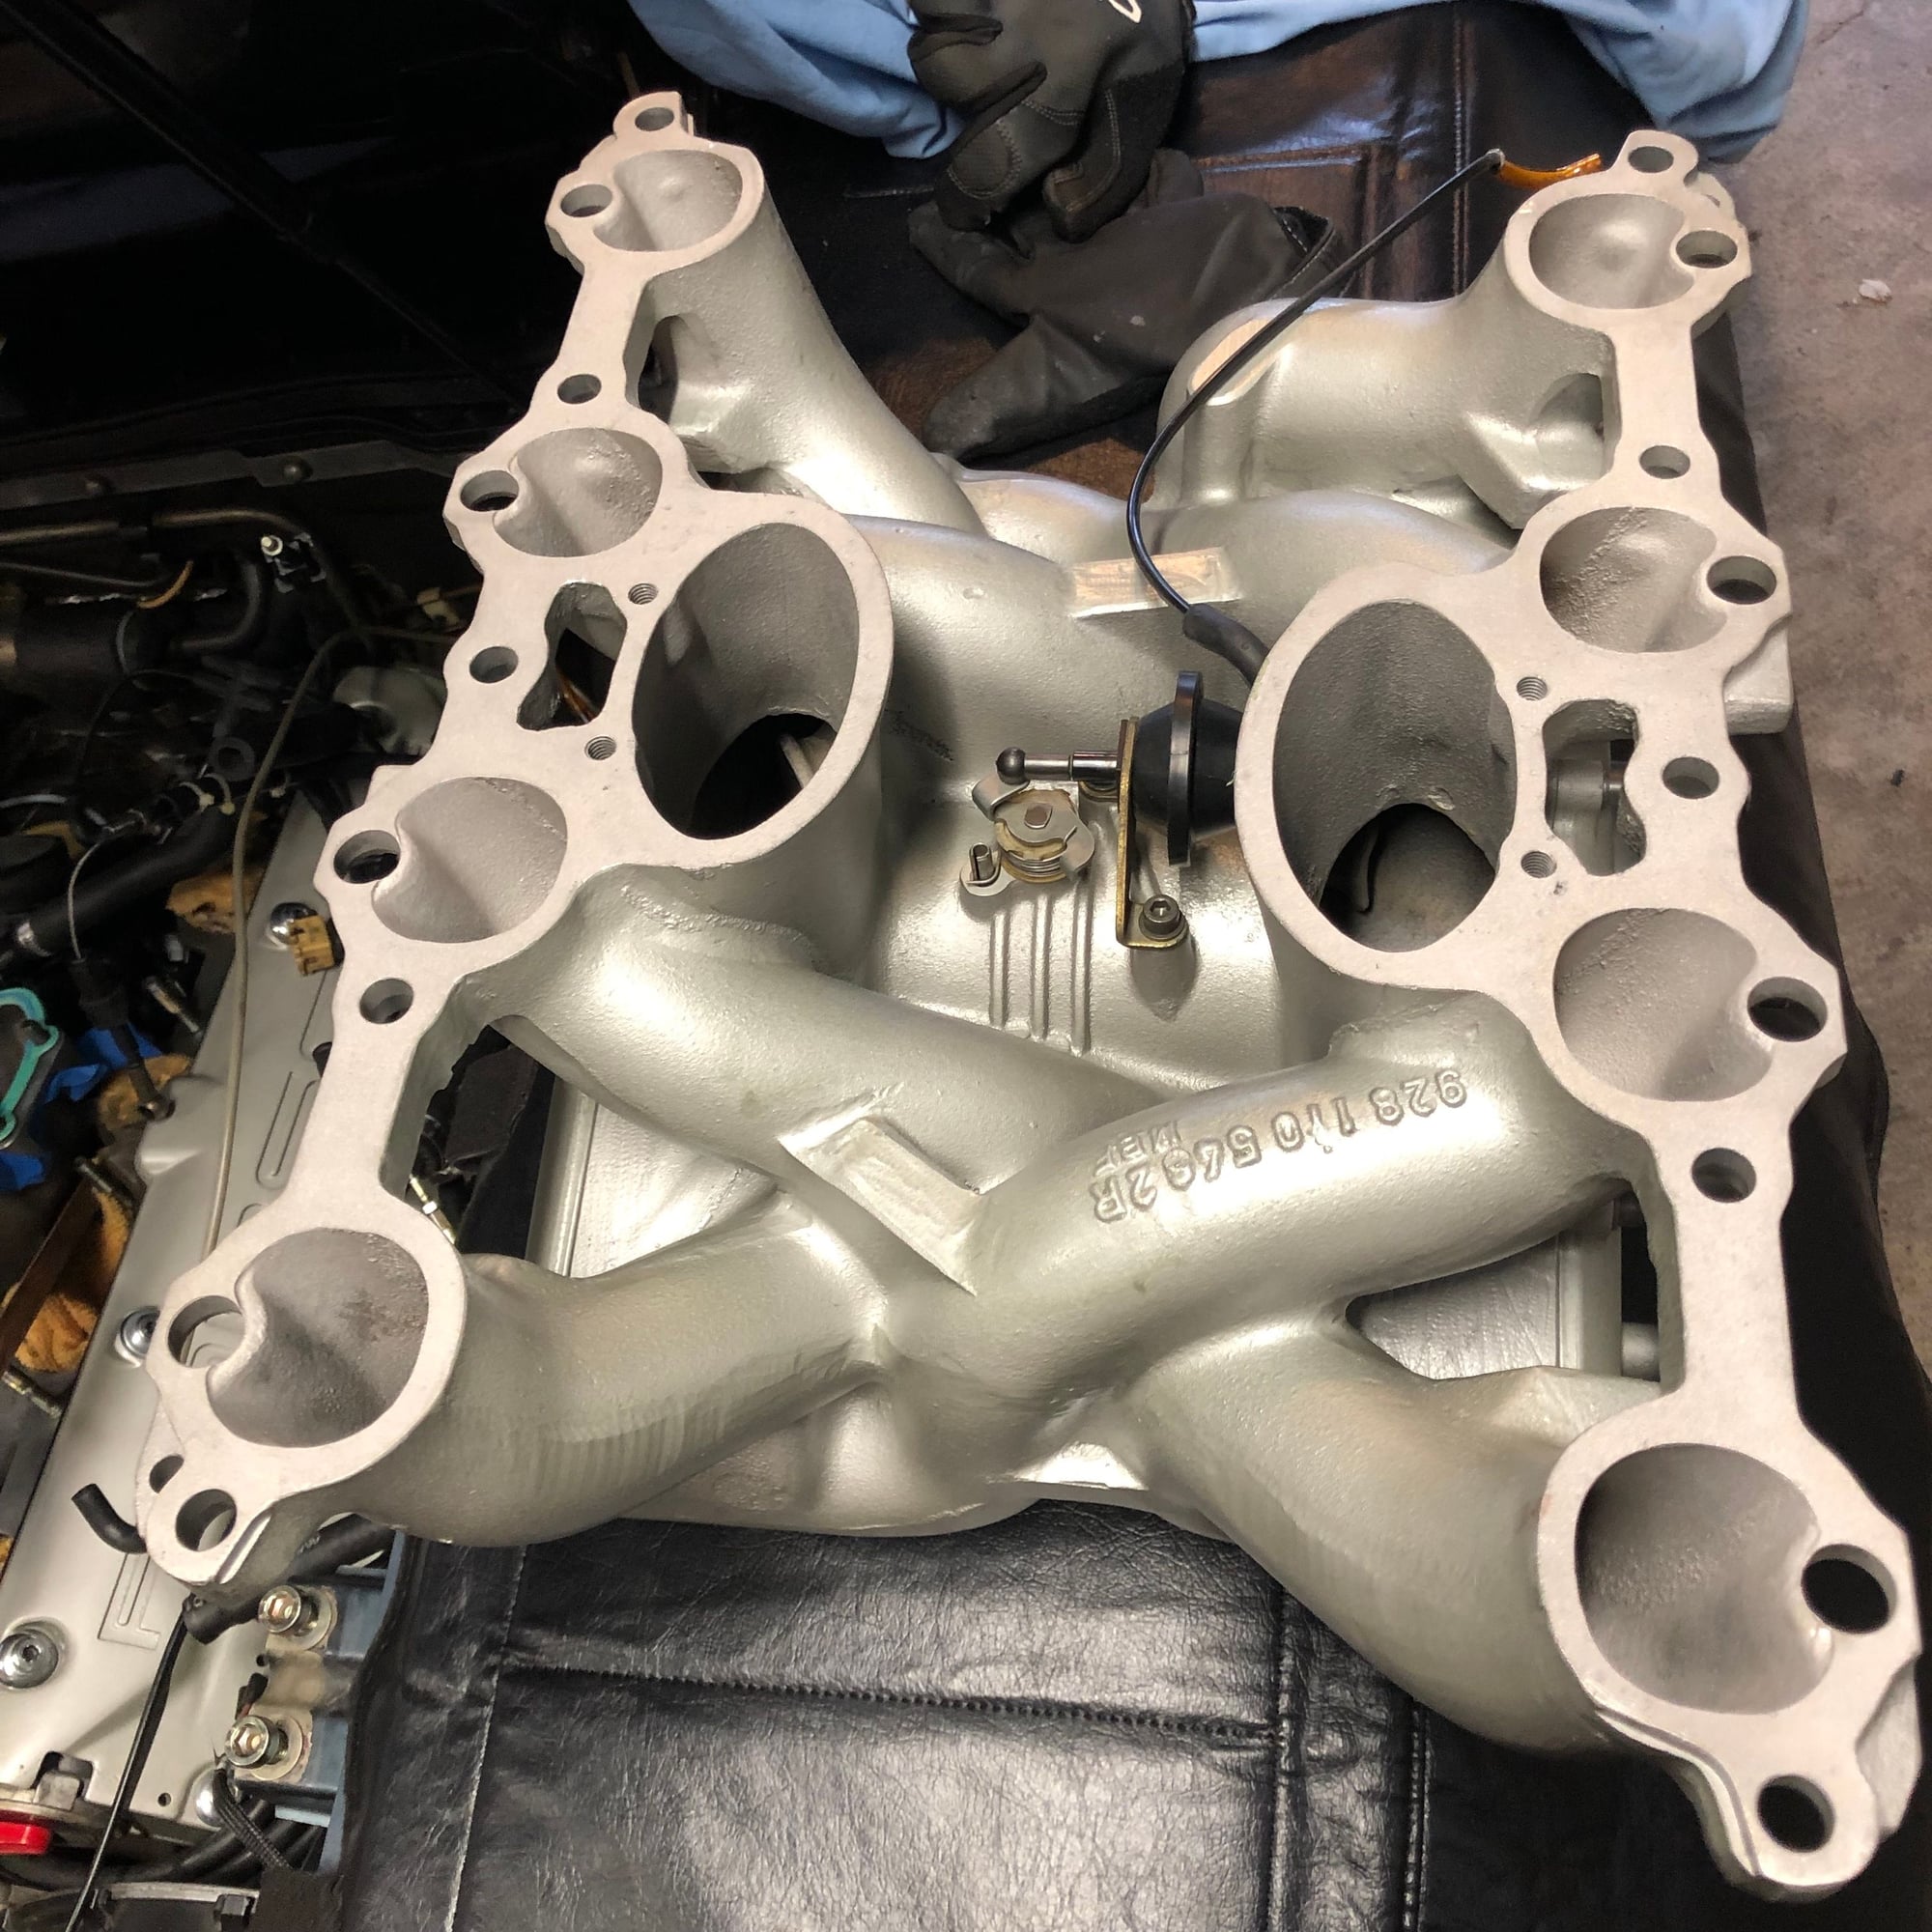
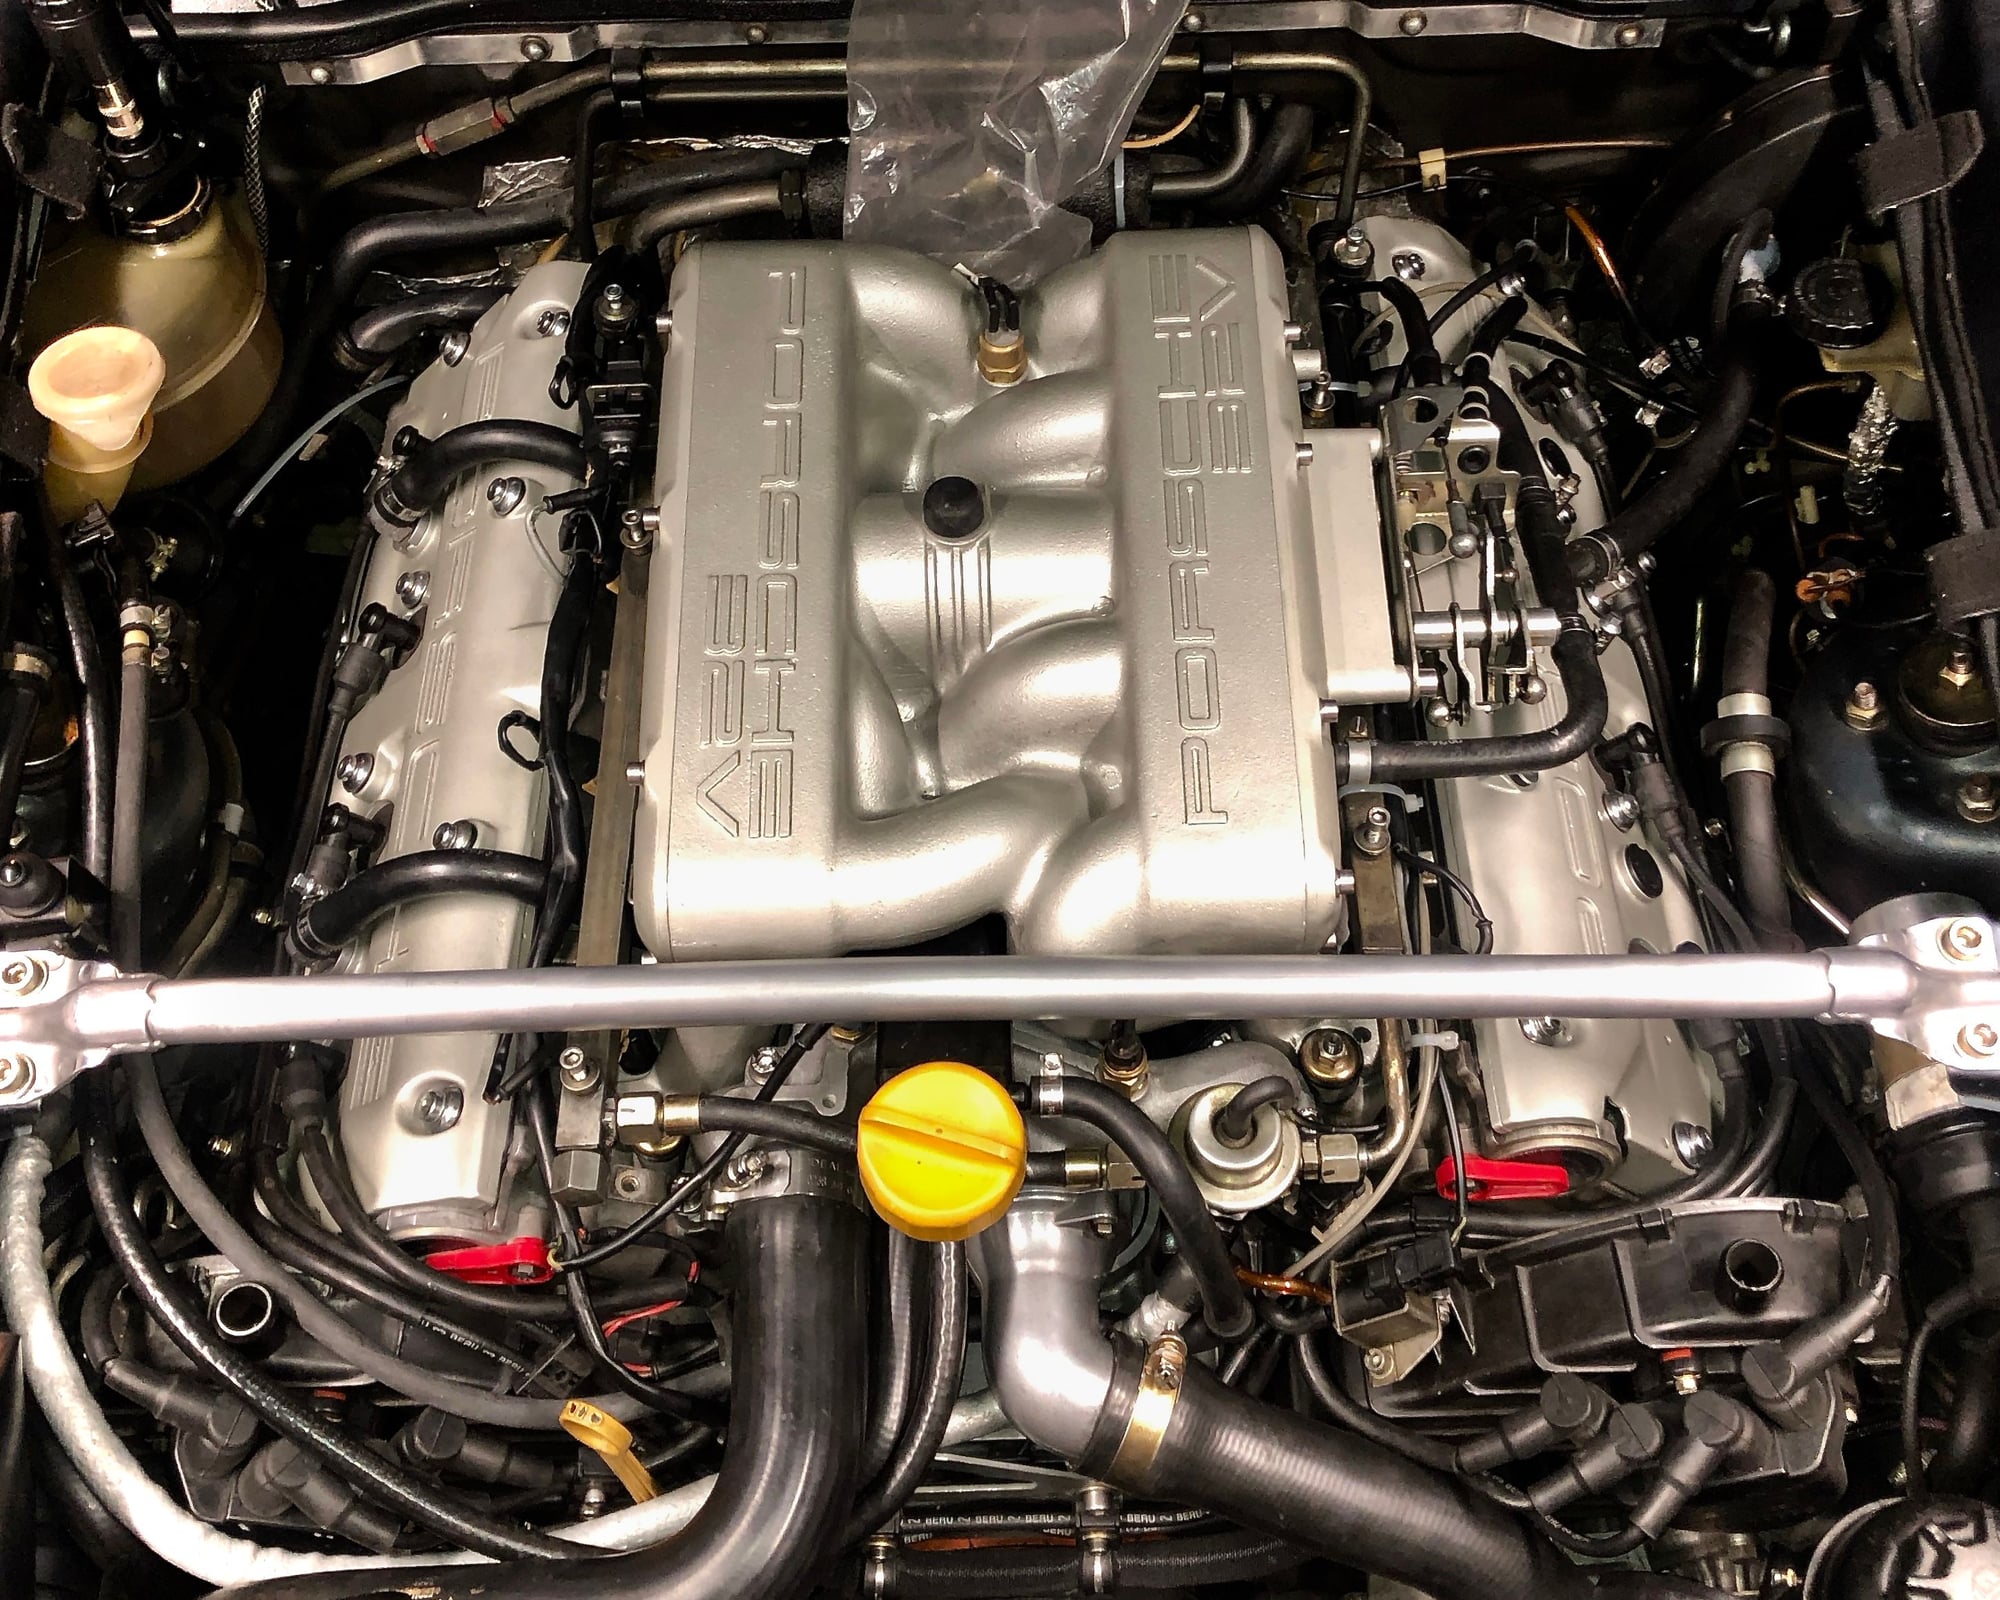
Manifold Installation
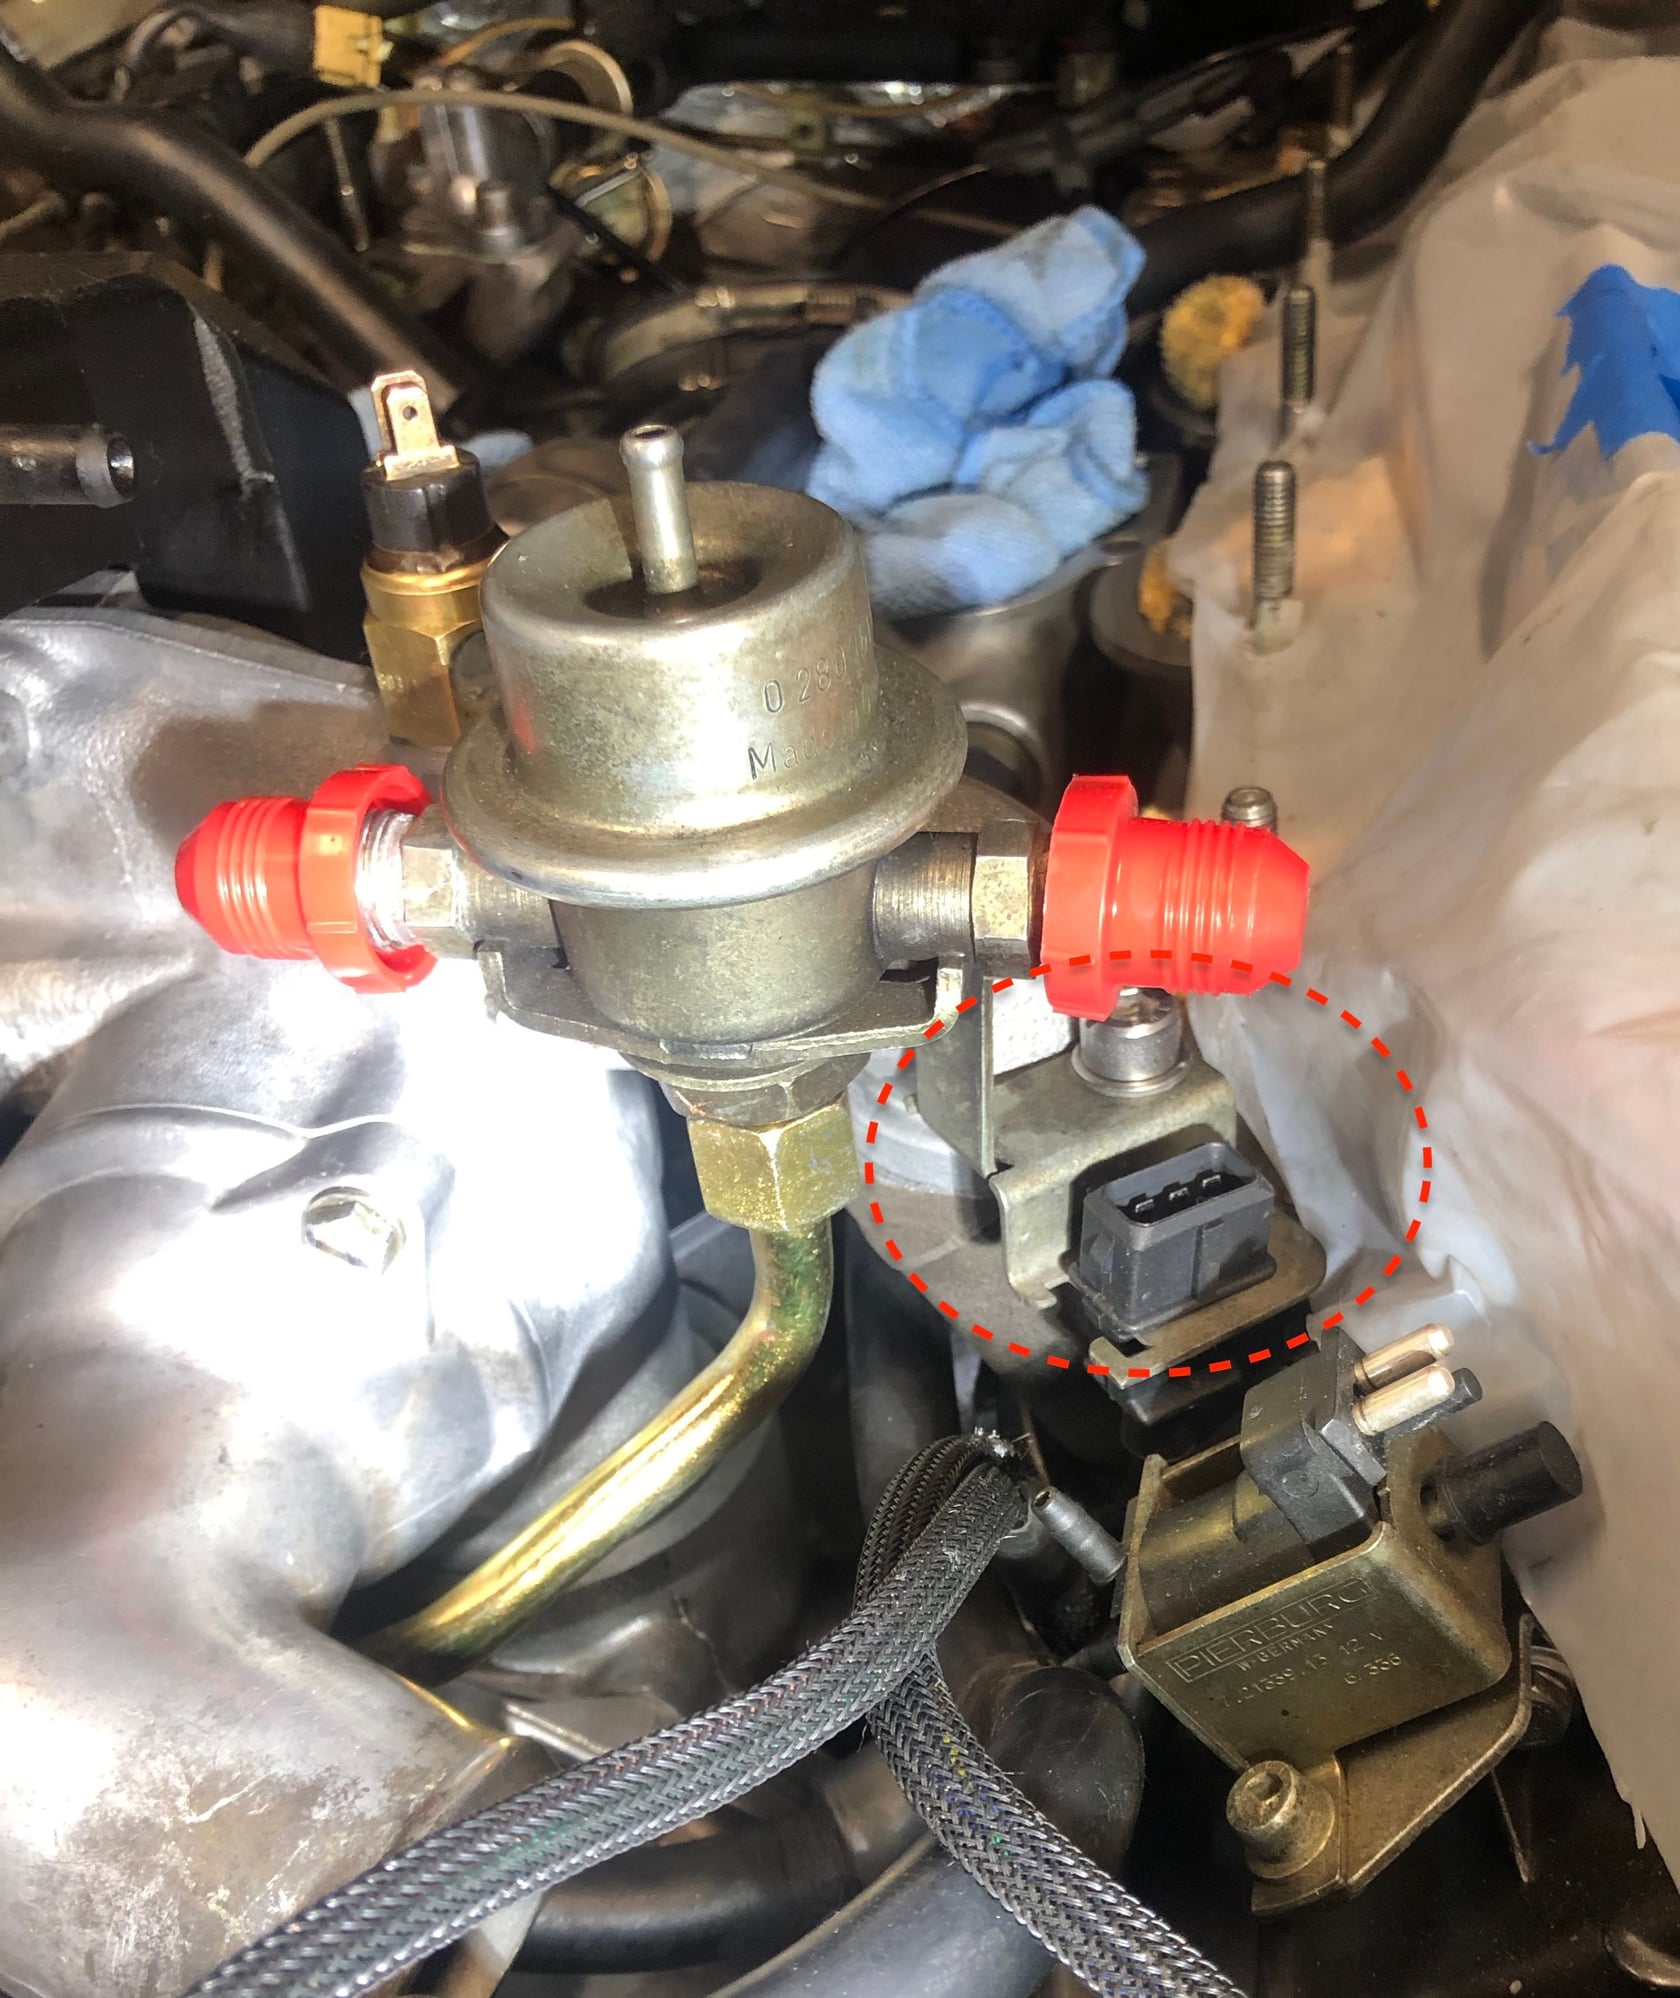
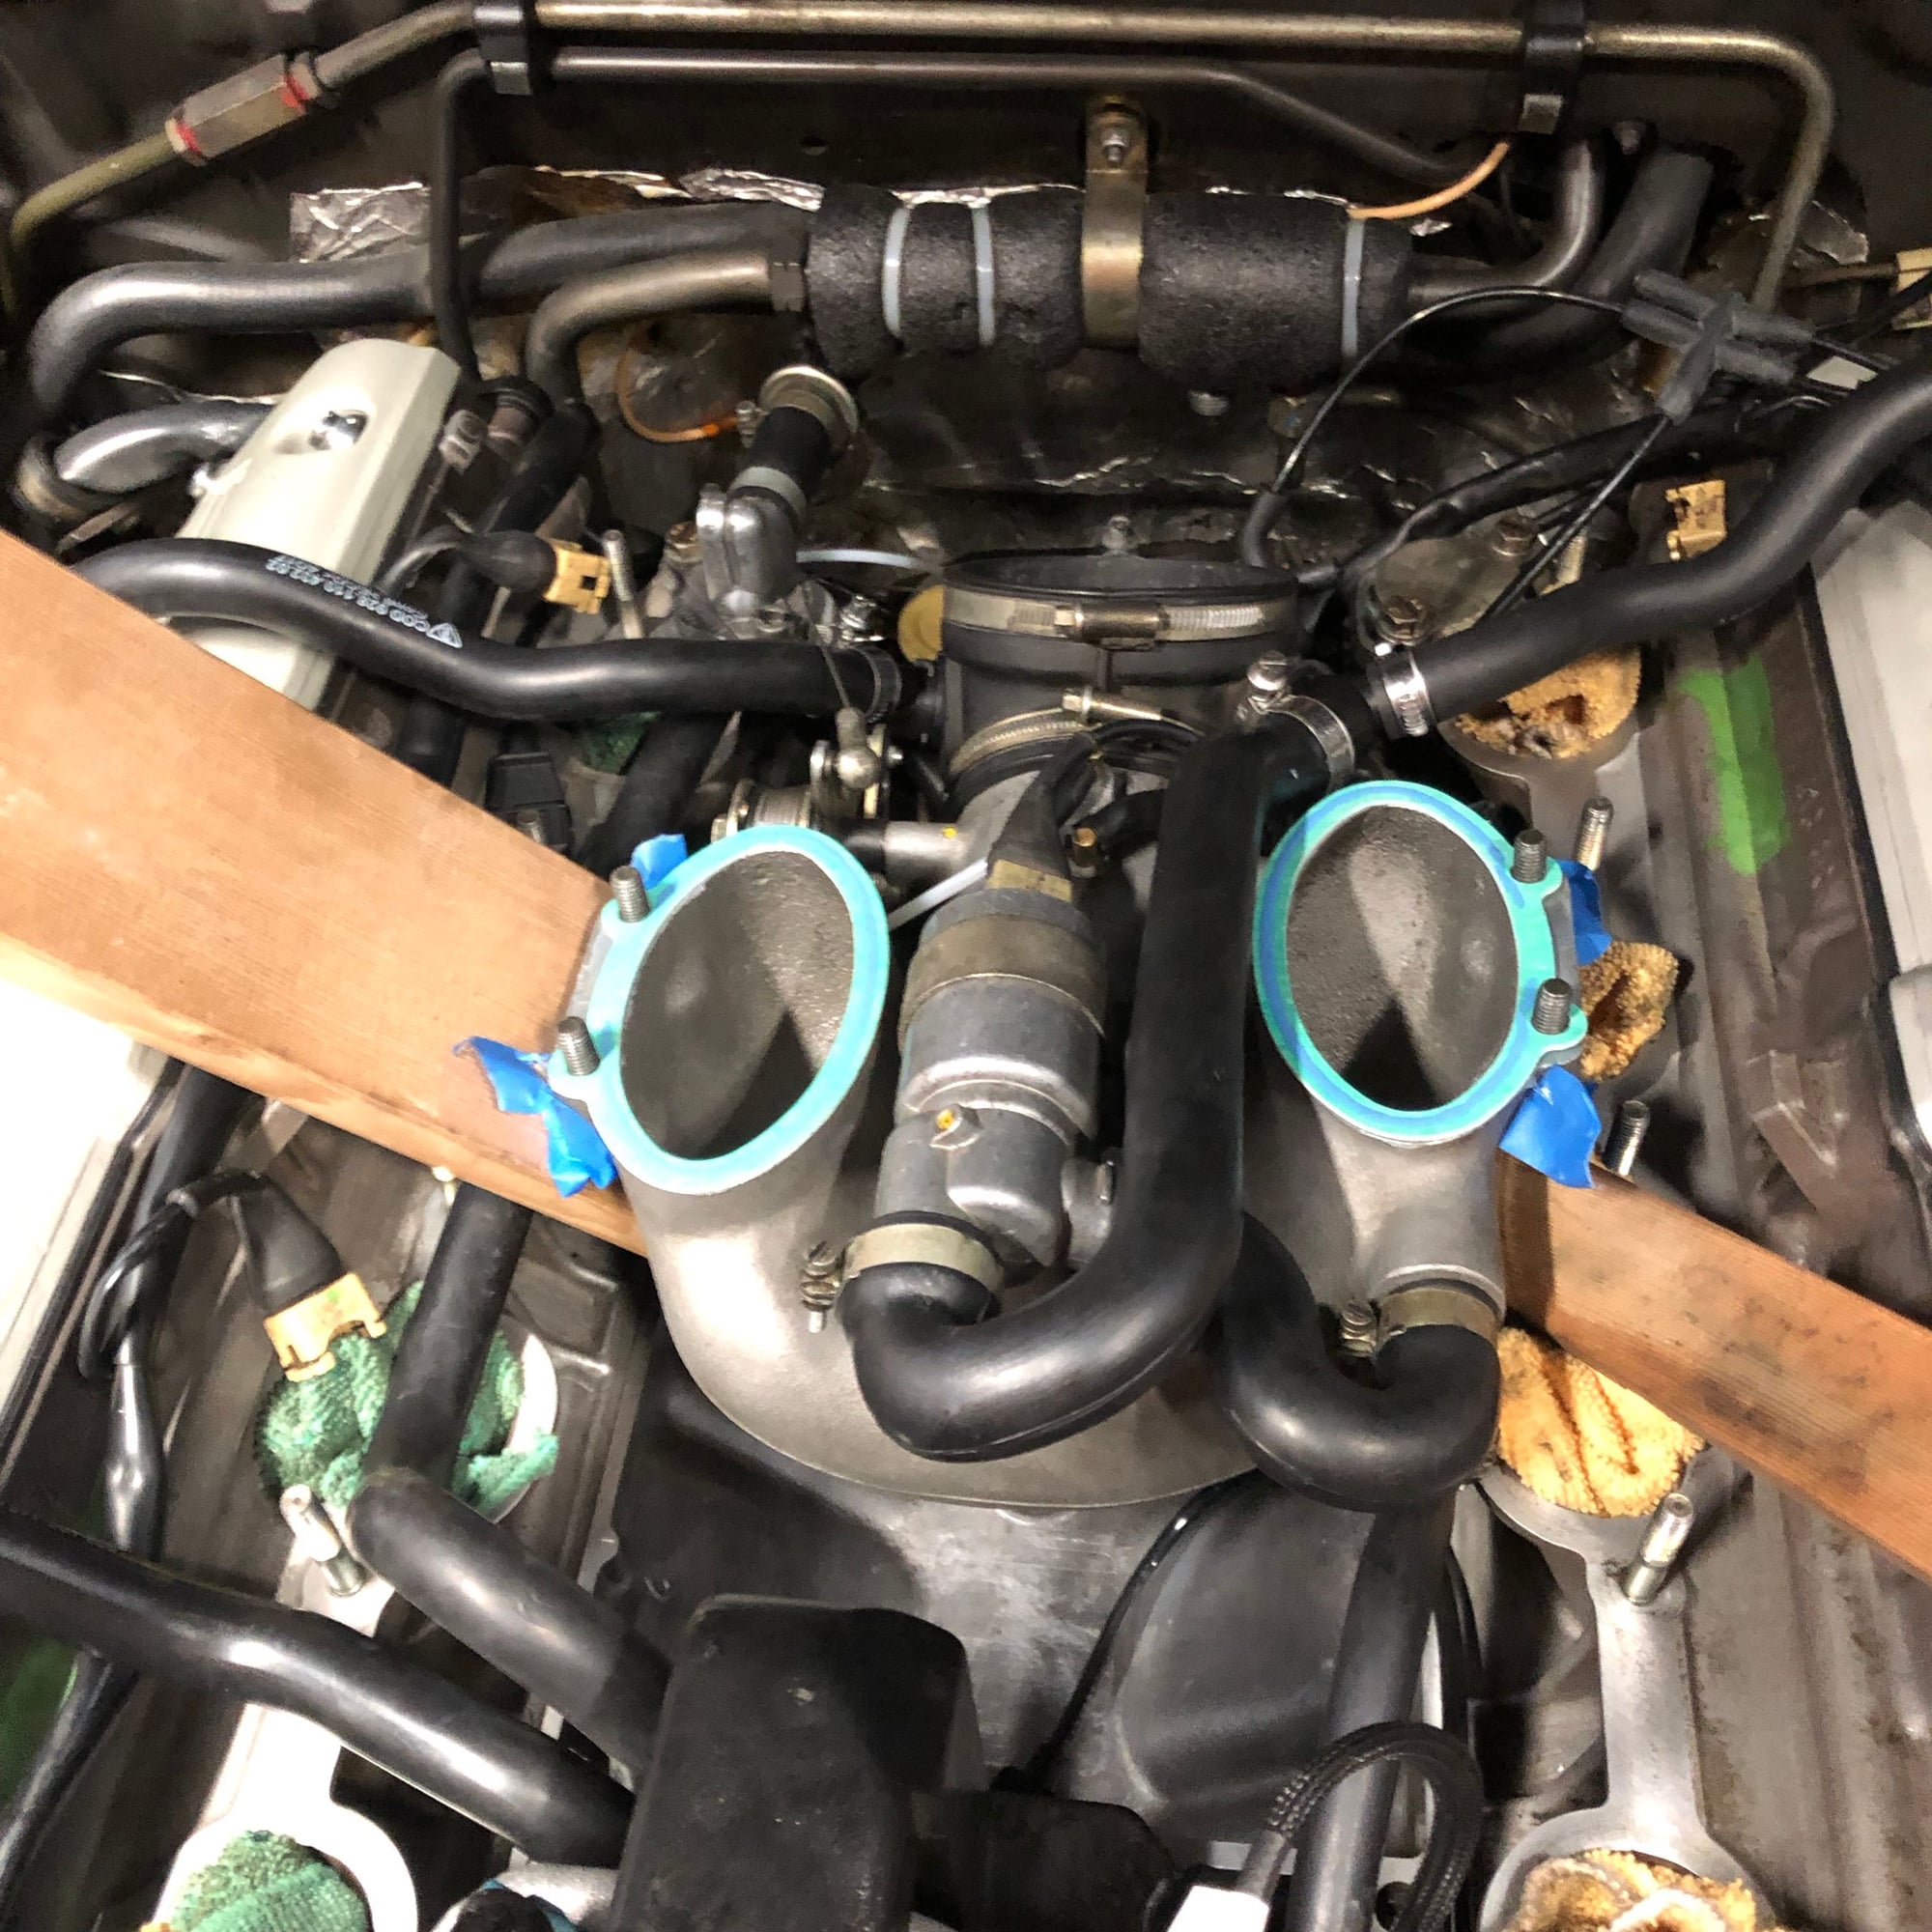
I decided to install the manifold in two piece. First install the lower plenum with the throttle assembly first. This allowed me to get all the the hoses and pesky ISV connections done first. Once all the connections were made I propped up the plenum so I could install the bolts to the upper section.
I used some Driebond silicone sealant on the gasket between the upper and lower sections
I haven't seen anyone doing this manifold assembly in the car, but I would say if was pretty easy and would have been even easier with two people. It was pretty easy to get my 1/4" torque wrench in there to tighten everything together.
Once together I laid the new manifold gaskets down and spent a bunch of time fiddling with it to get it aligned with the injector holes. One question I have is should I have put some product down on the gasket to hold it on place or something?
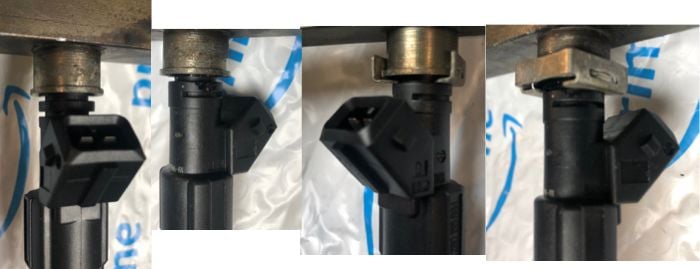
One concern I do have is the depth of the head on my new injectors (black ones pictured below). These are Design III, now that I see the thickness of the manifold gasket, I wonder if the shorter head protrusion of the head on then new injectors is a problem. I wonder if the spray will be impacted by the gasket. I would be interested to hear from anyone who has used these Design II or Design III injectors.
With the manifold gaskets aligned properly at the injector holes, it was time to clamp down the manifold and install the fuel system. I pre-installed the injectors and clips on the fuel rail before installation into the manifold. I also confirmed the fit was exactly the same as with the OEM injectors. I triple checked the clips after installation, as well. No buldging or weirdness.
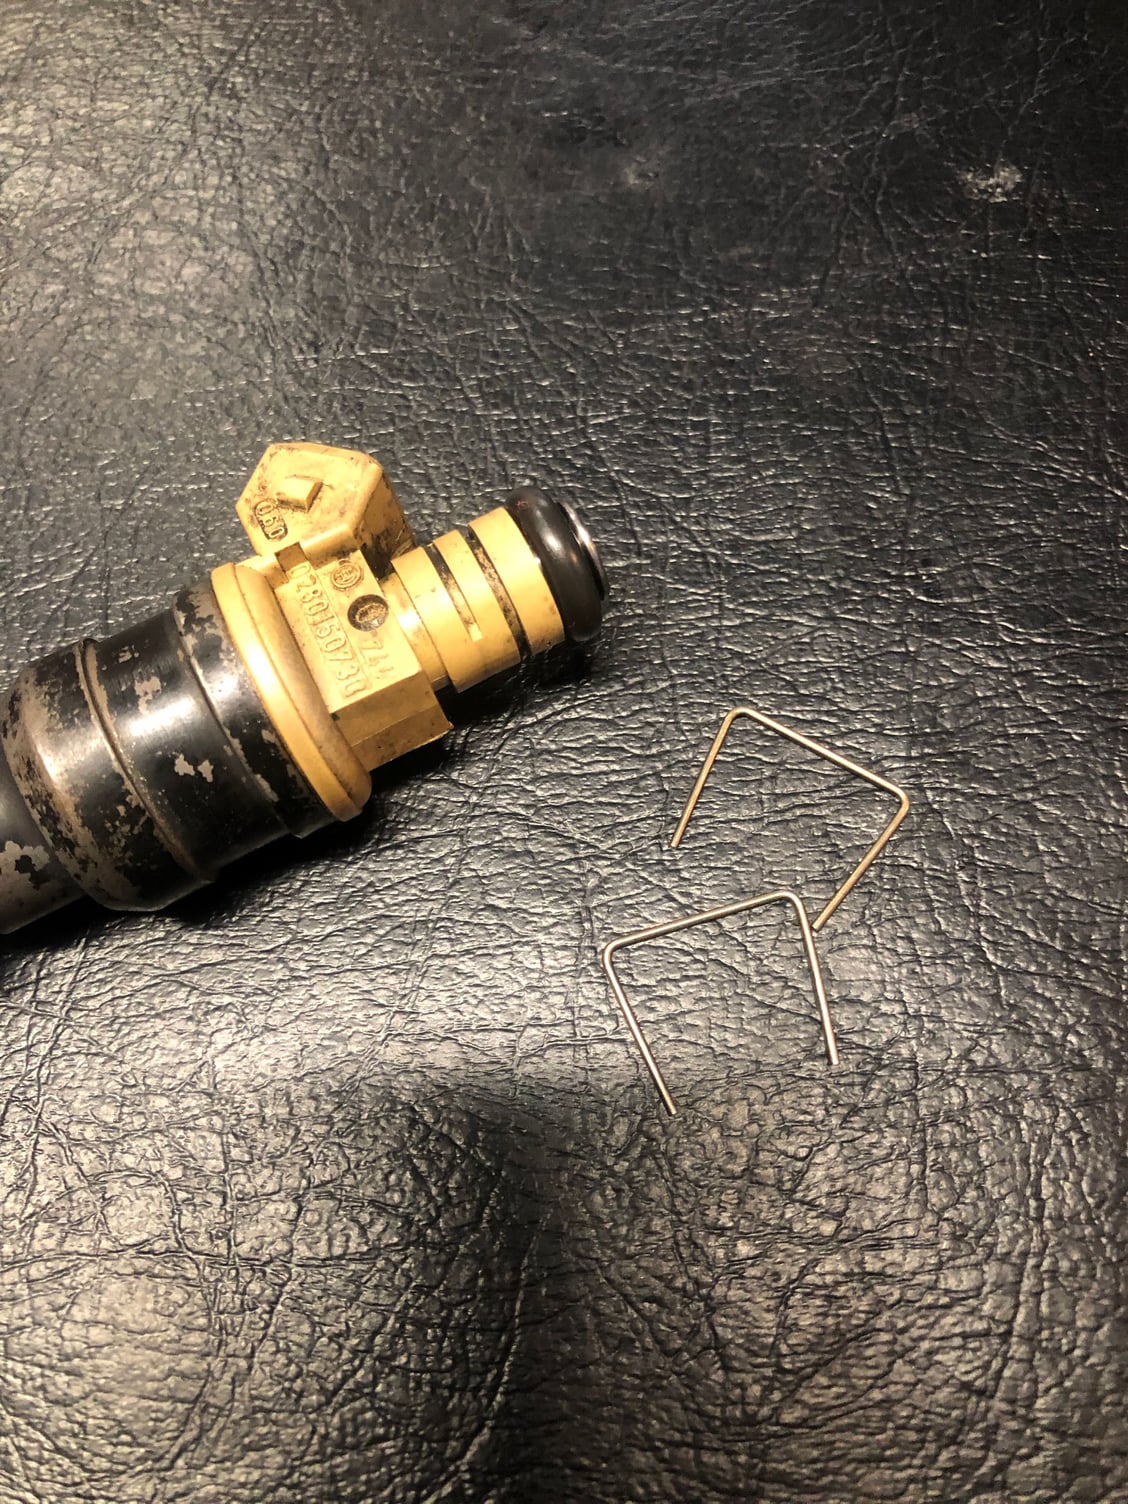
I'm missing 3 of the 8 retaining wires for the harness. Are replacements available? Does anyone have spare ones?
I installed the retaining wires with a dollop of epoxy to hold them in place. Originally they have melted plastic to hold them
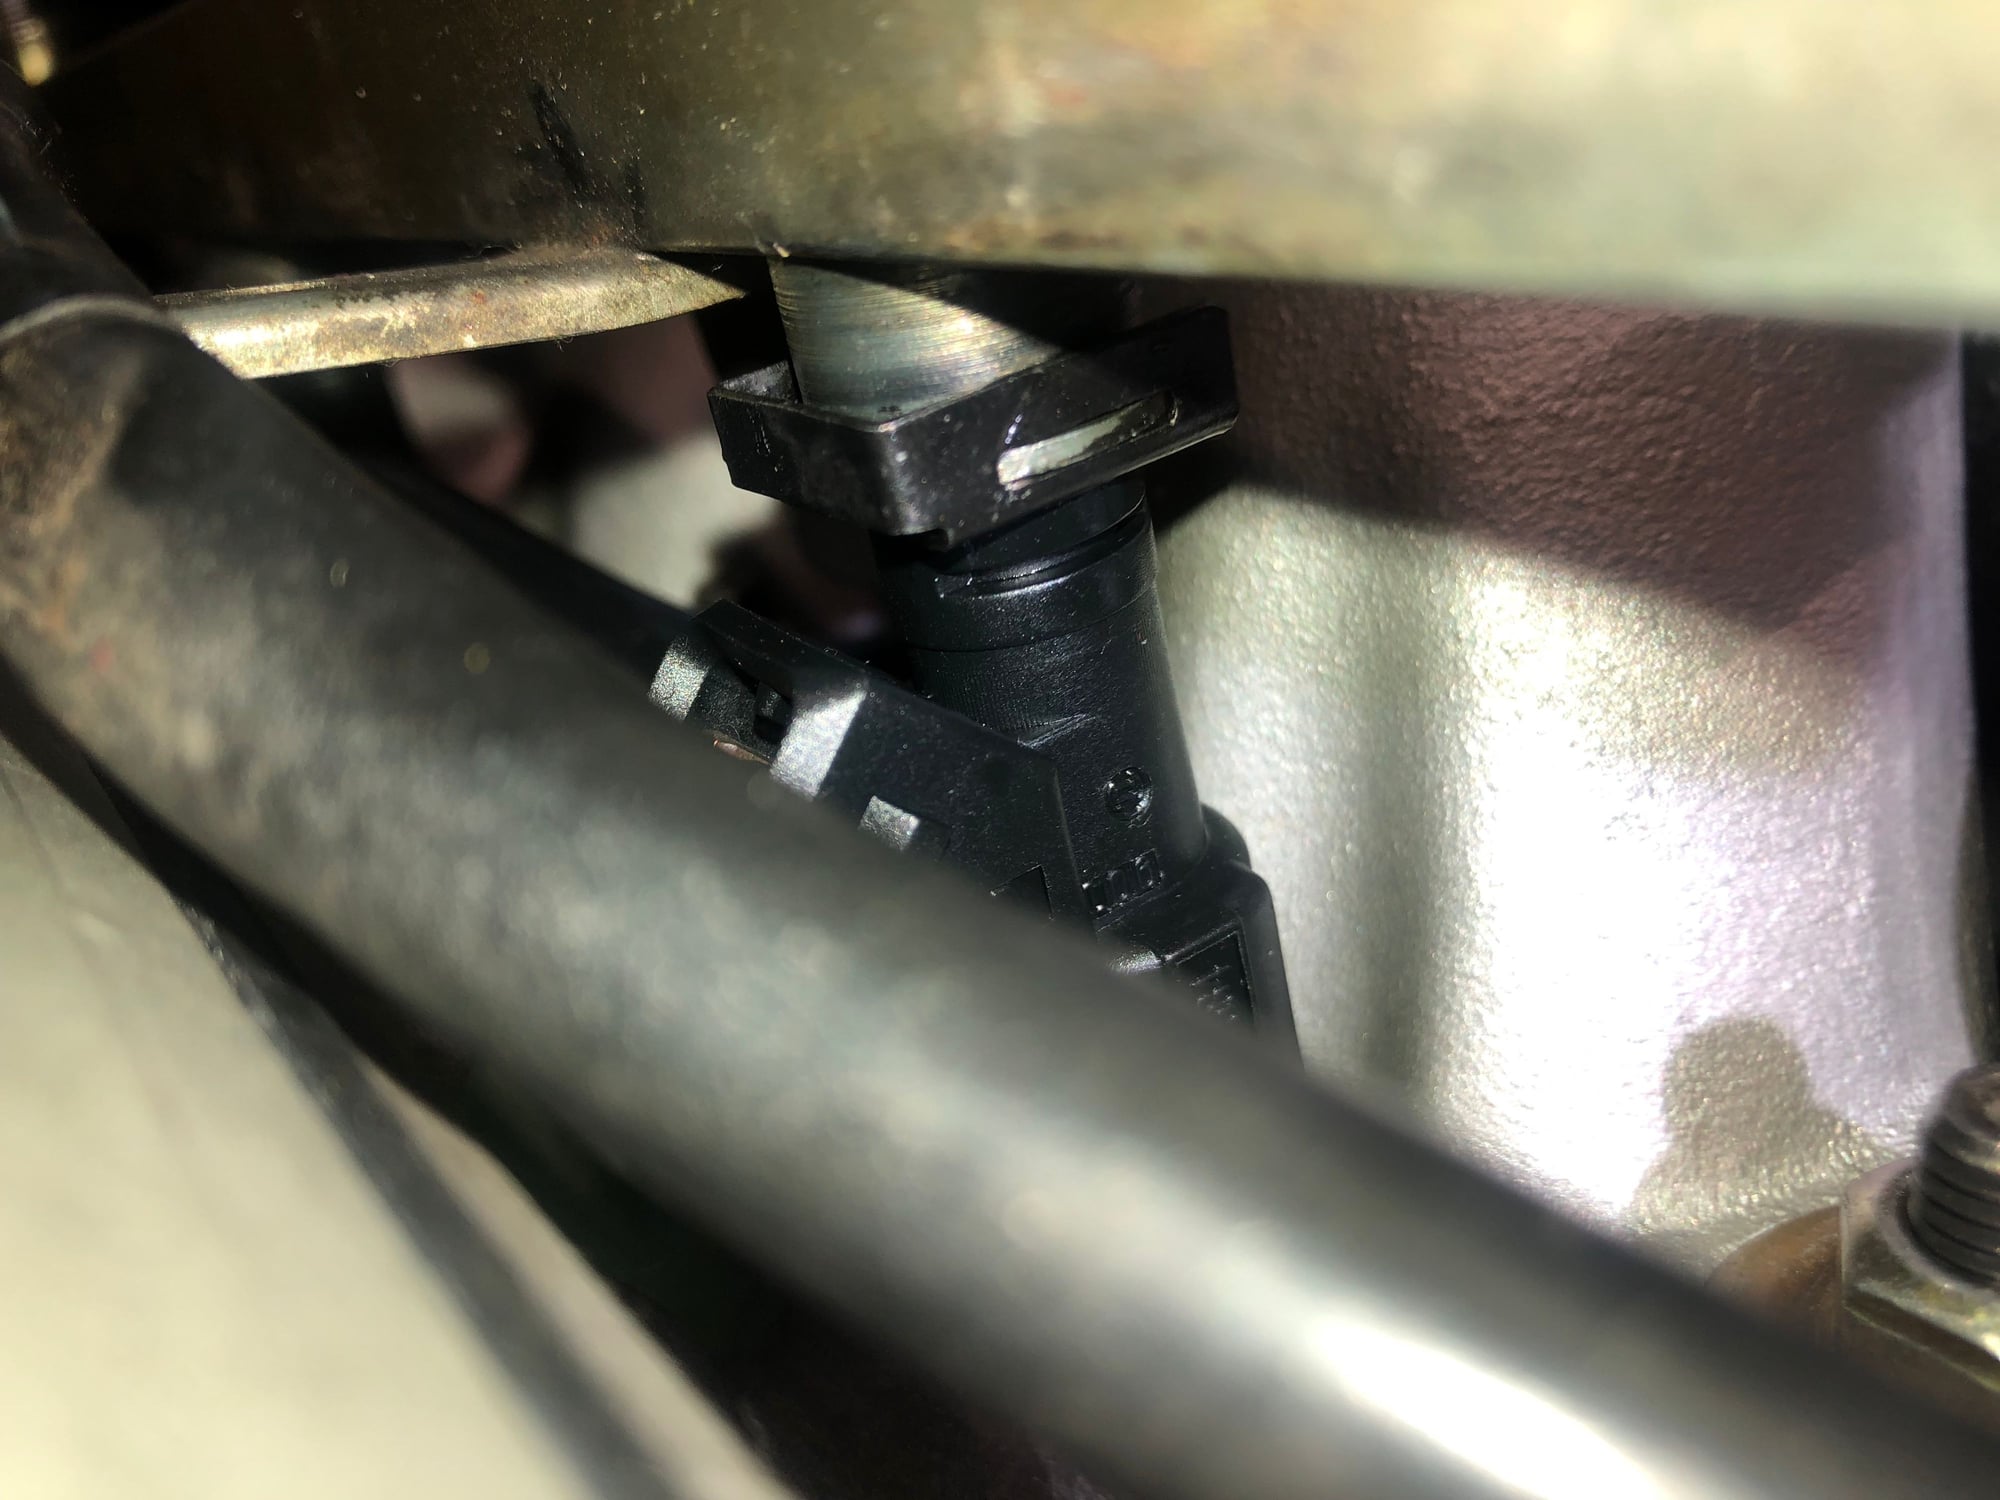
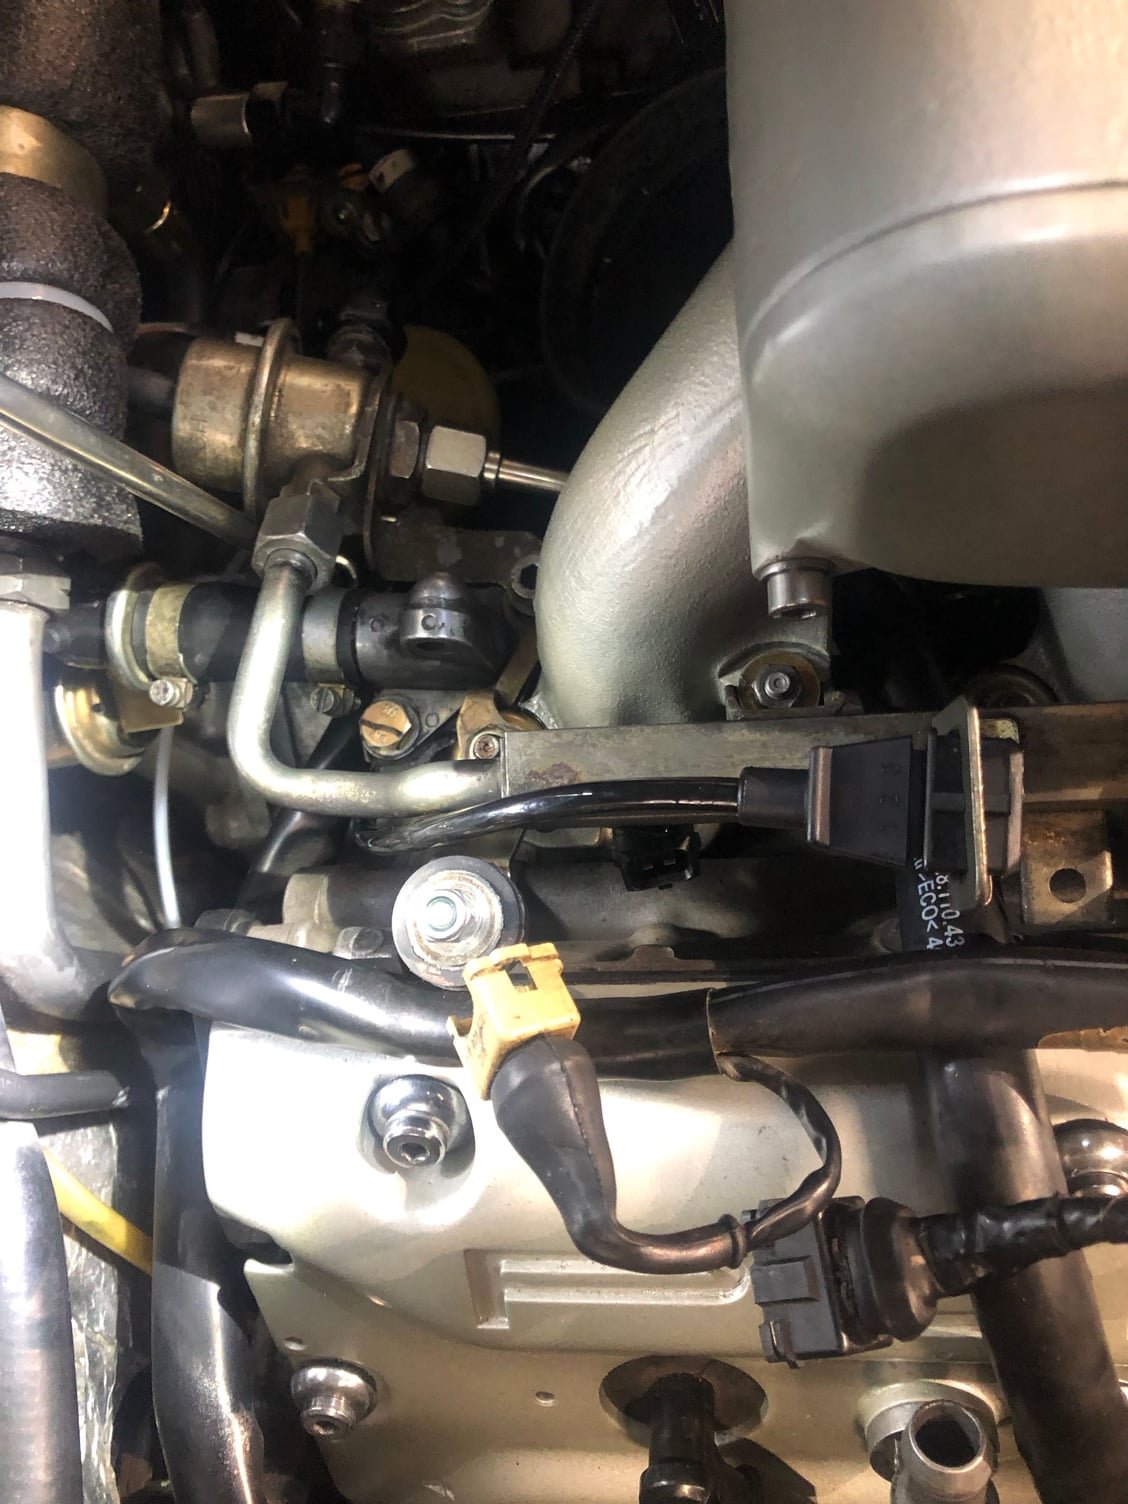
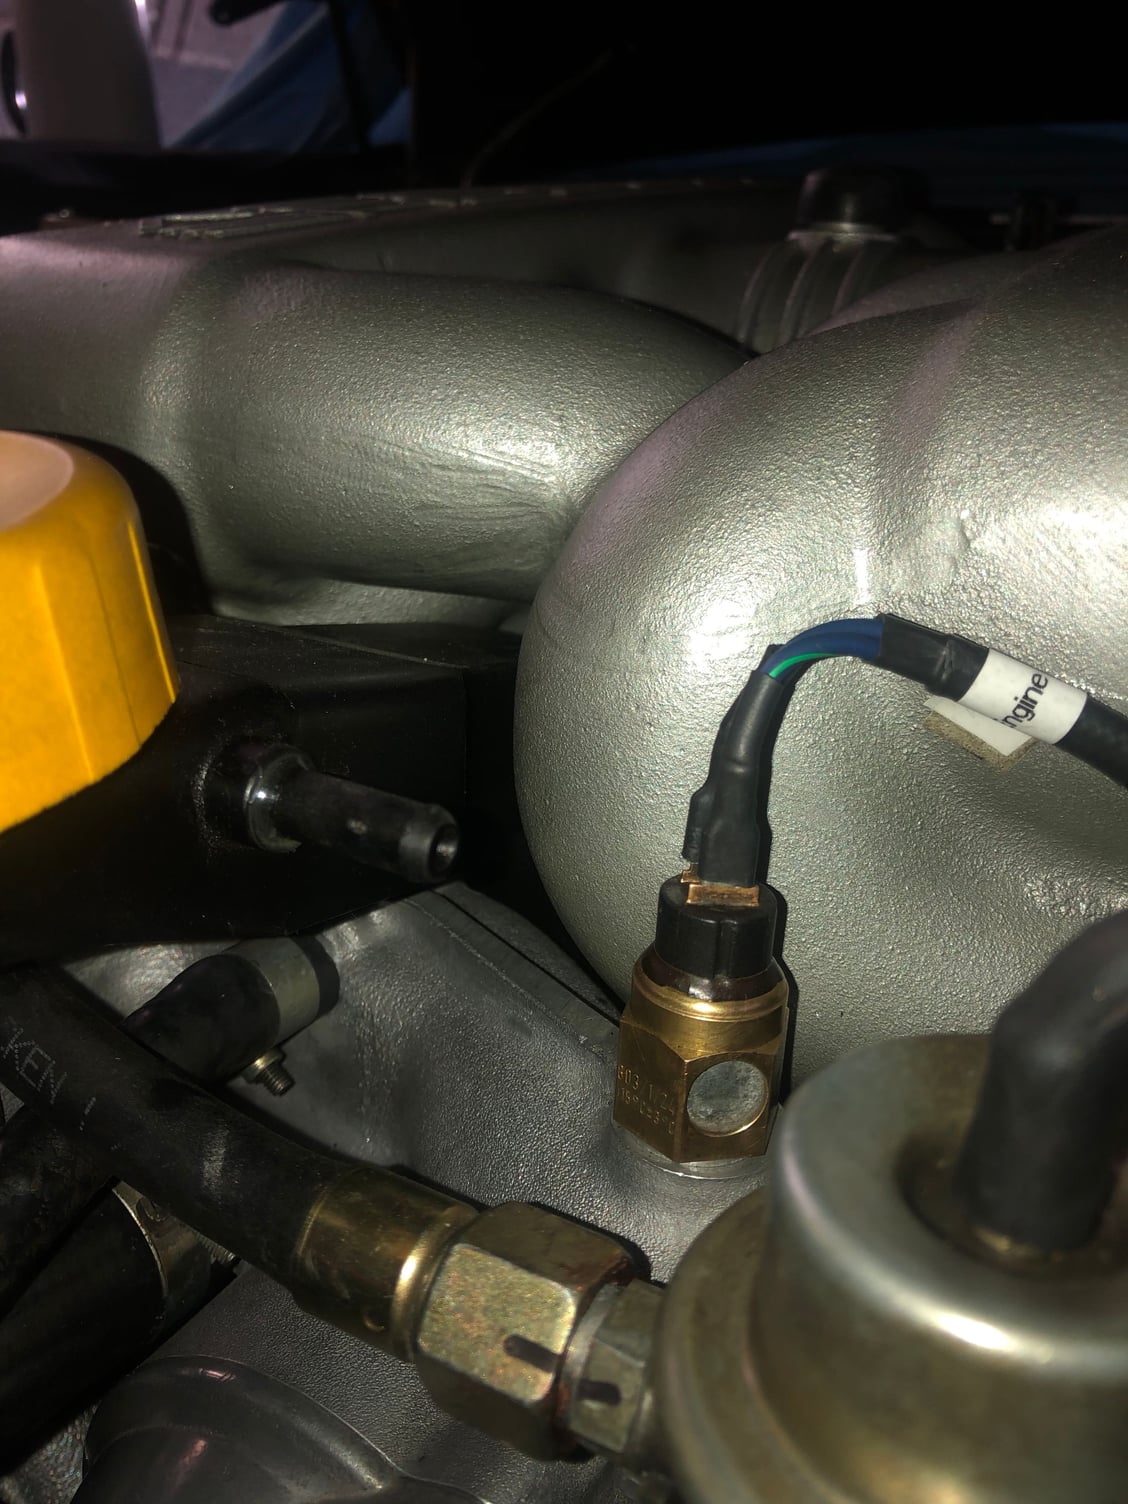
I had a couple rounds of re-work as well. After installing the fuel rail, I realized the rear knock sensor lead did not reach the retaining bracket on the passenger side fuel rail. After much research and a good night sleep I was able to re-route it by removing the throttle wheel bracket. Here you can see the lead does not reach the retainer in the fuel rail. this shows the rerouted path of the lead to get it to reach the fuel rail.
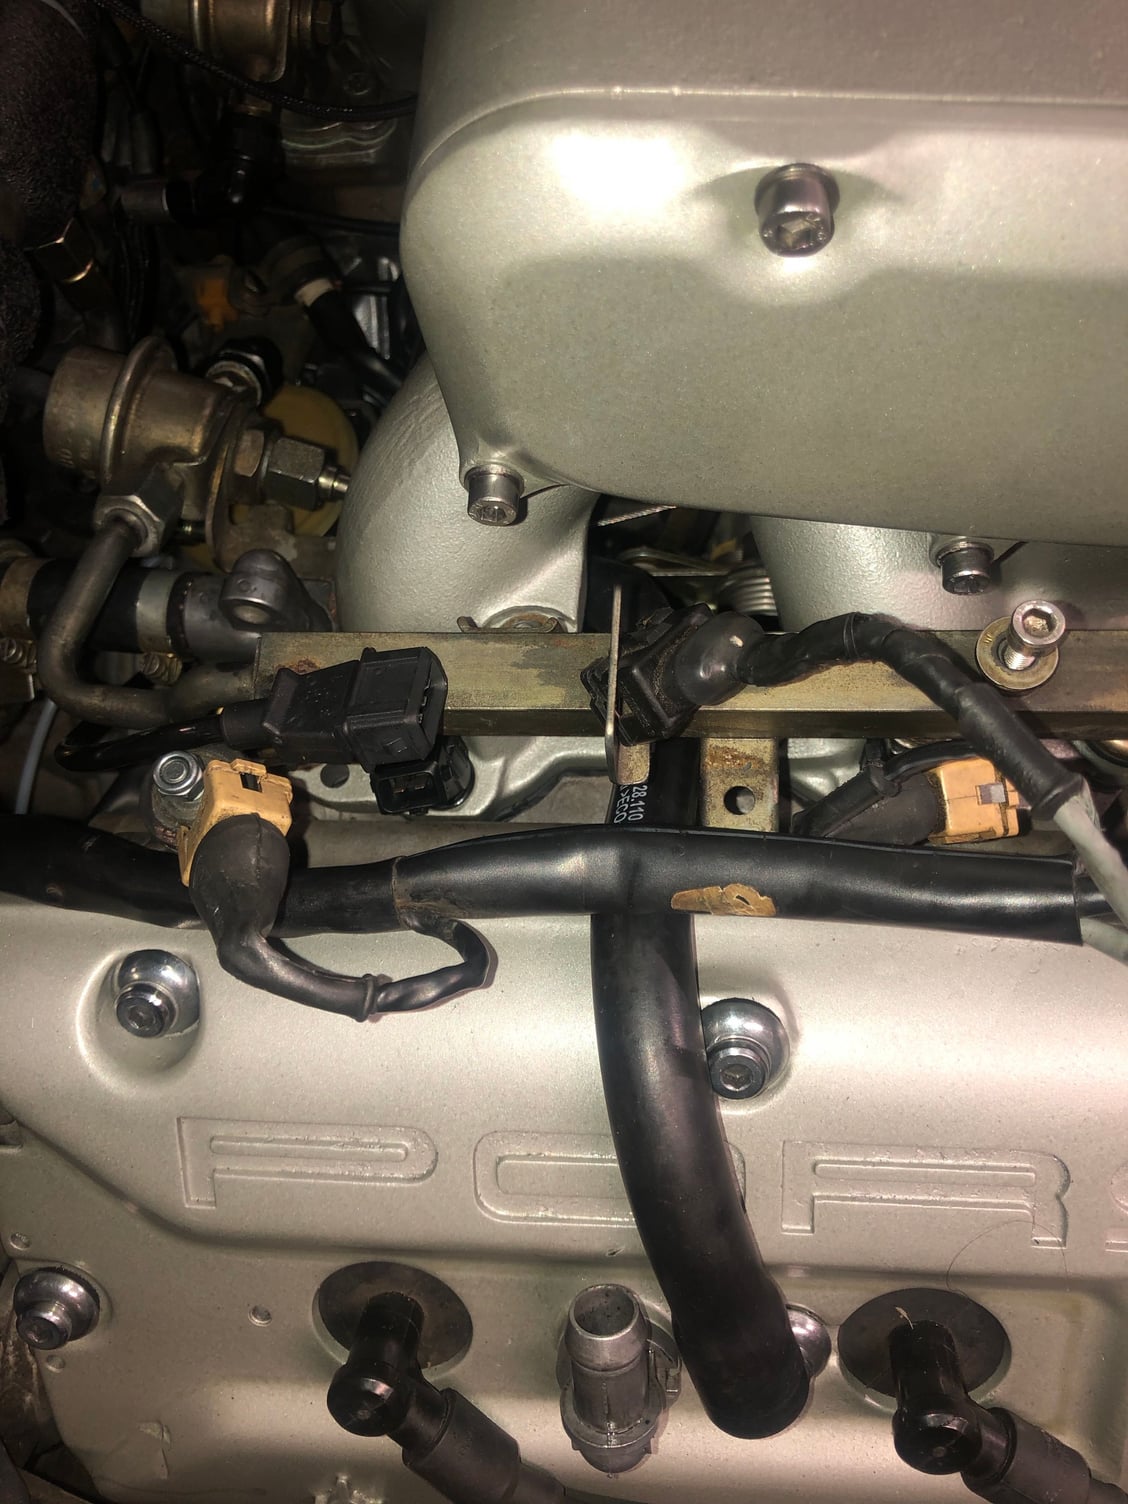
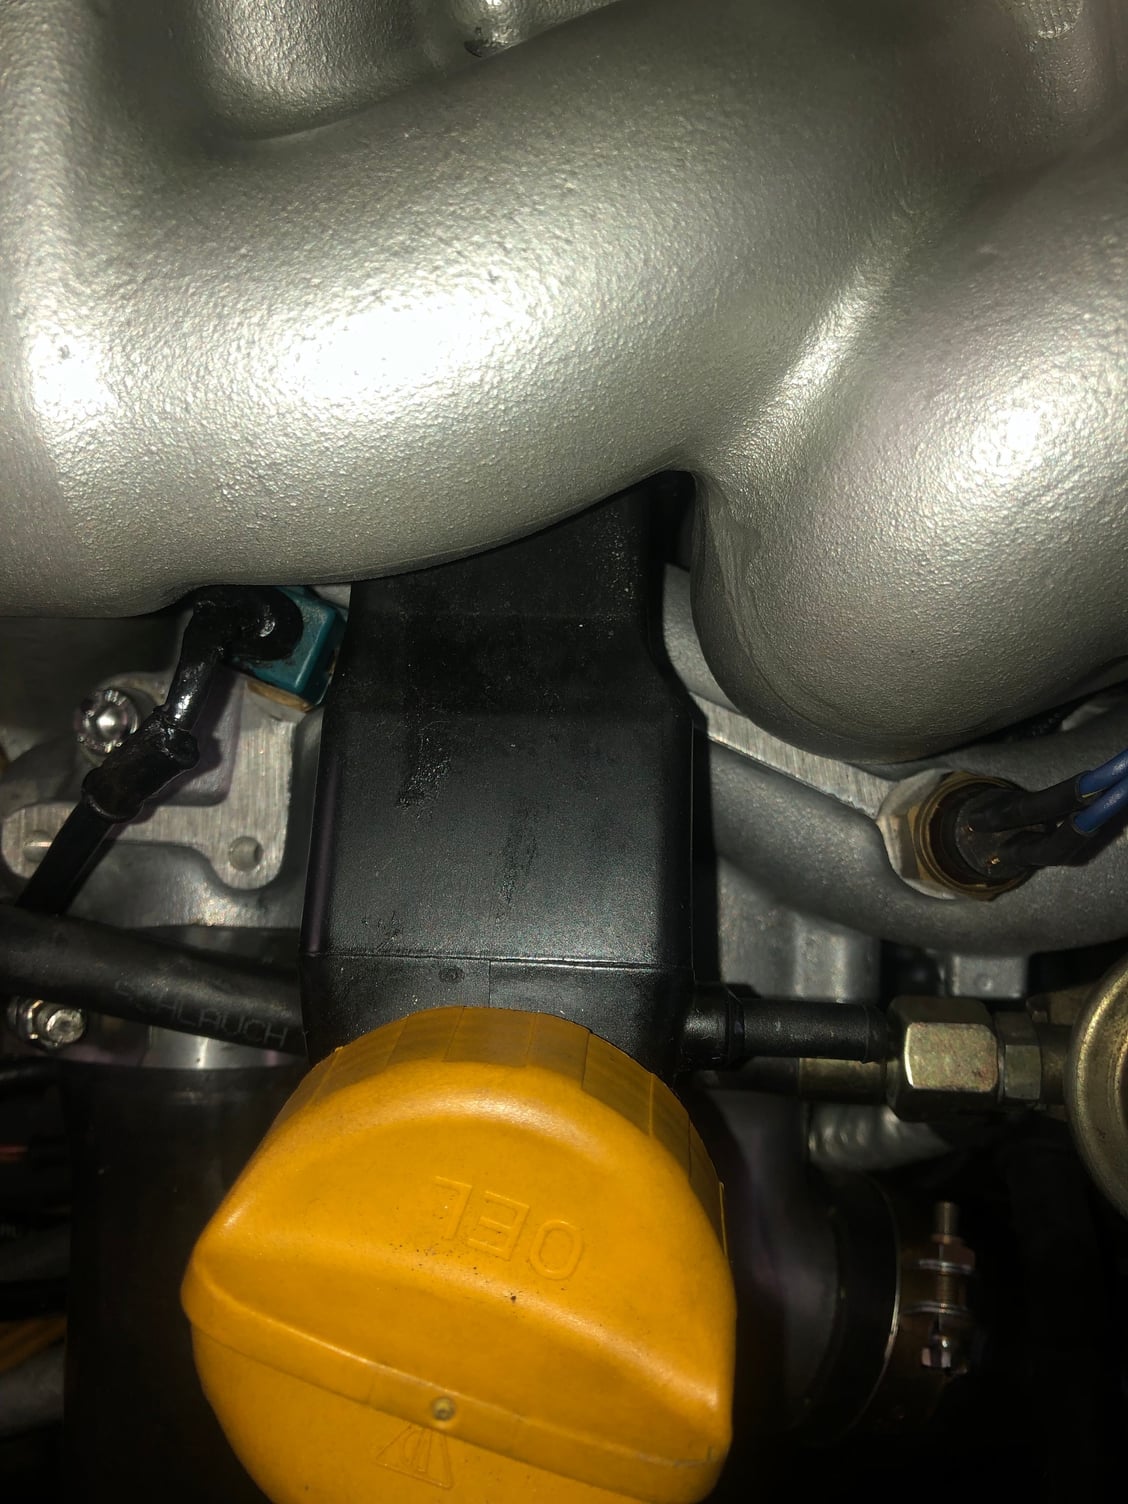
Hans oil baffle fitment. Remember, I am using the Hans oil baffle which stands about 4mm taller. Some people were concerned about clearance with the manifold. As you can see - no issues.
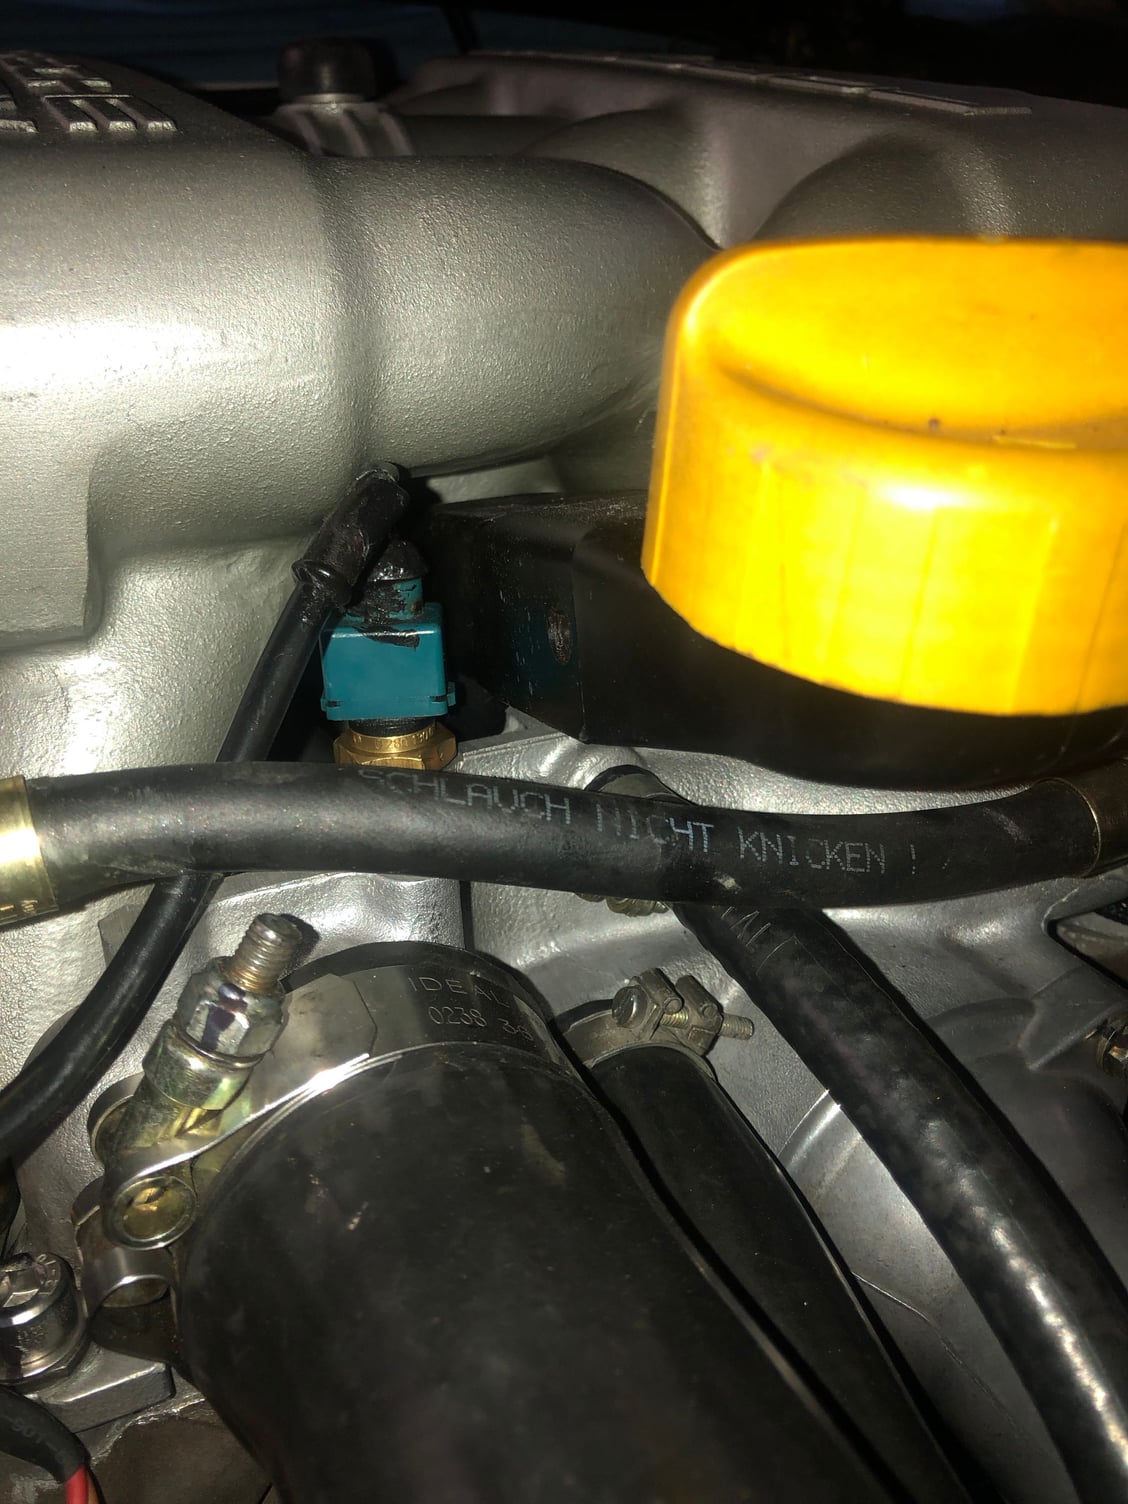
Please ignore the ugly temp sensor harness connector.
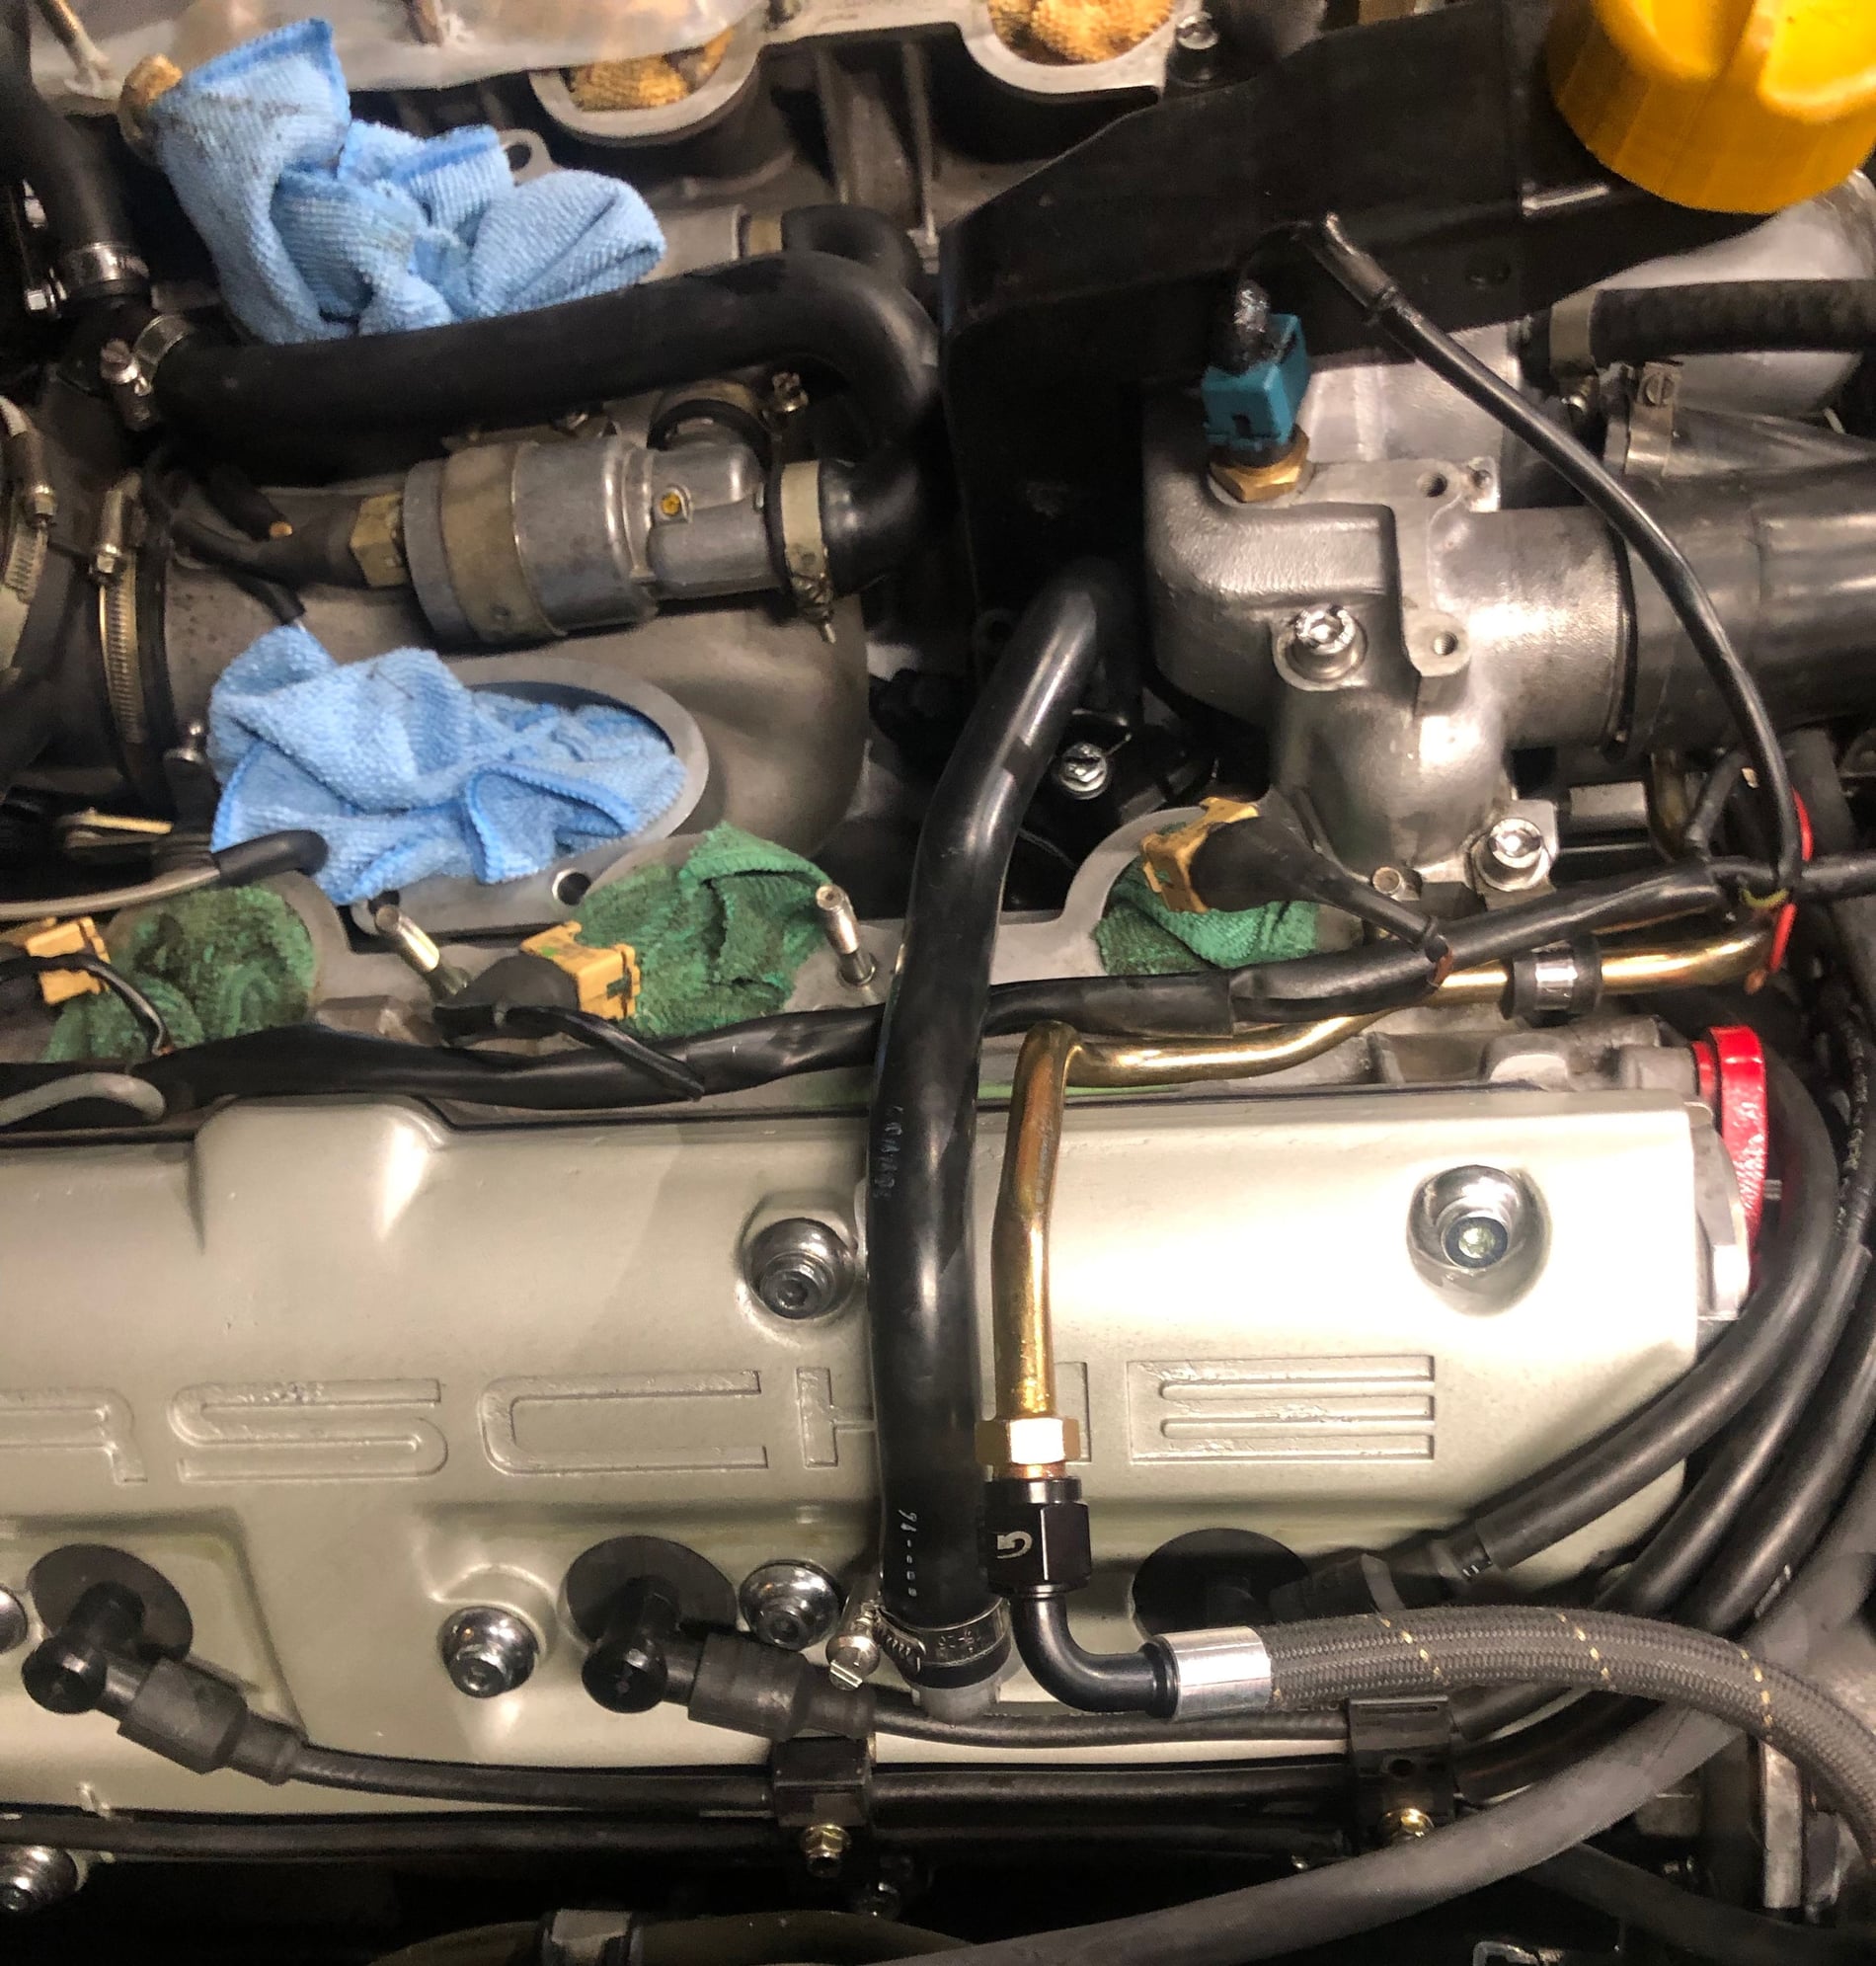
Also note the extra clearance of the fuel line. No more rubbing.
Test fit the cross brace as well. No issues.
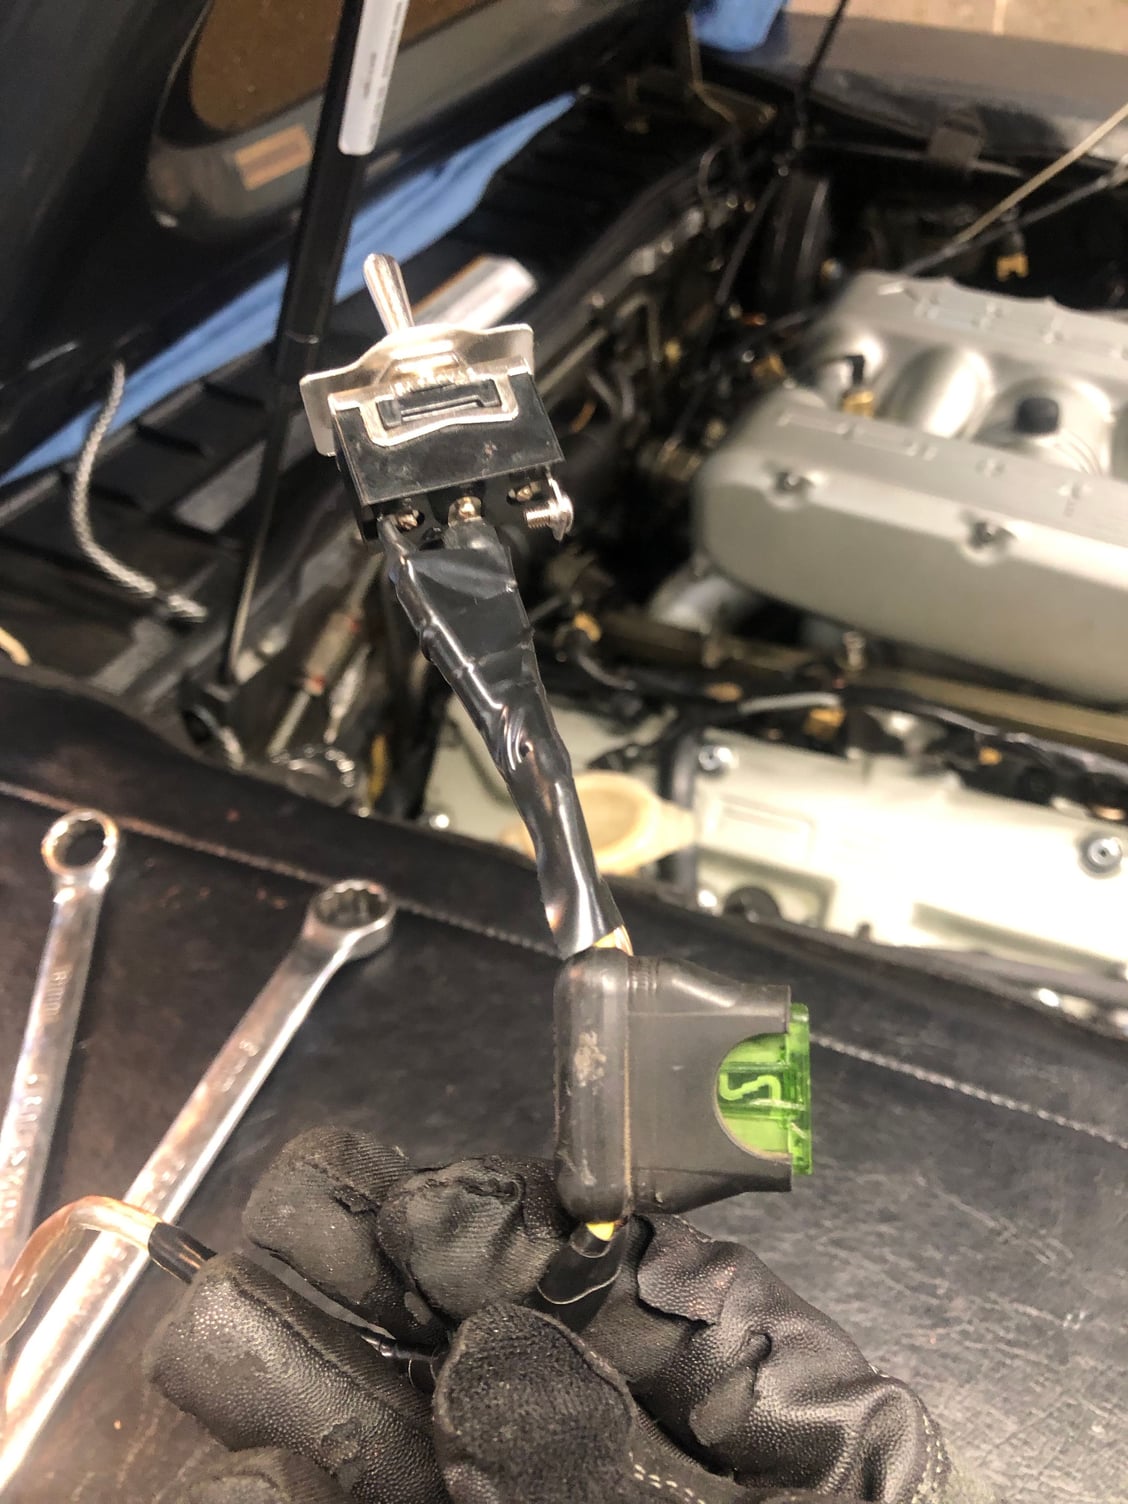
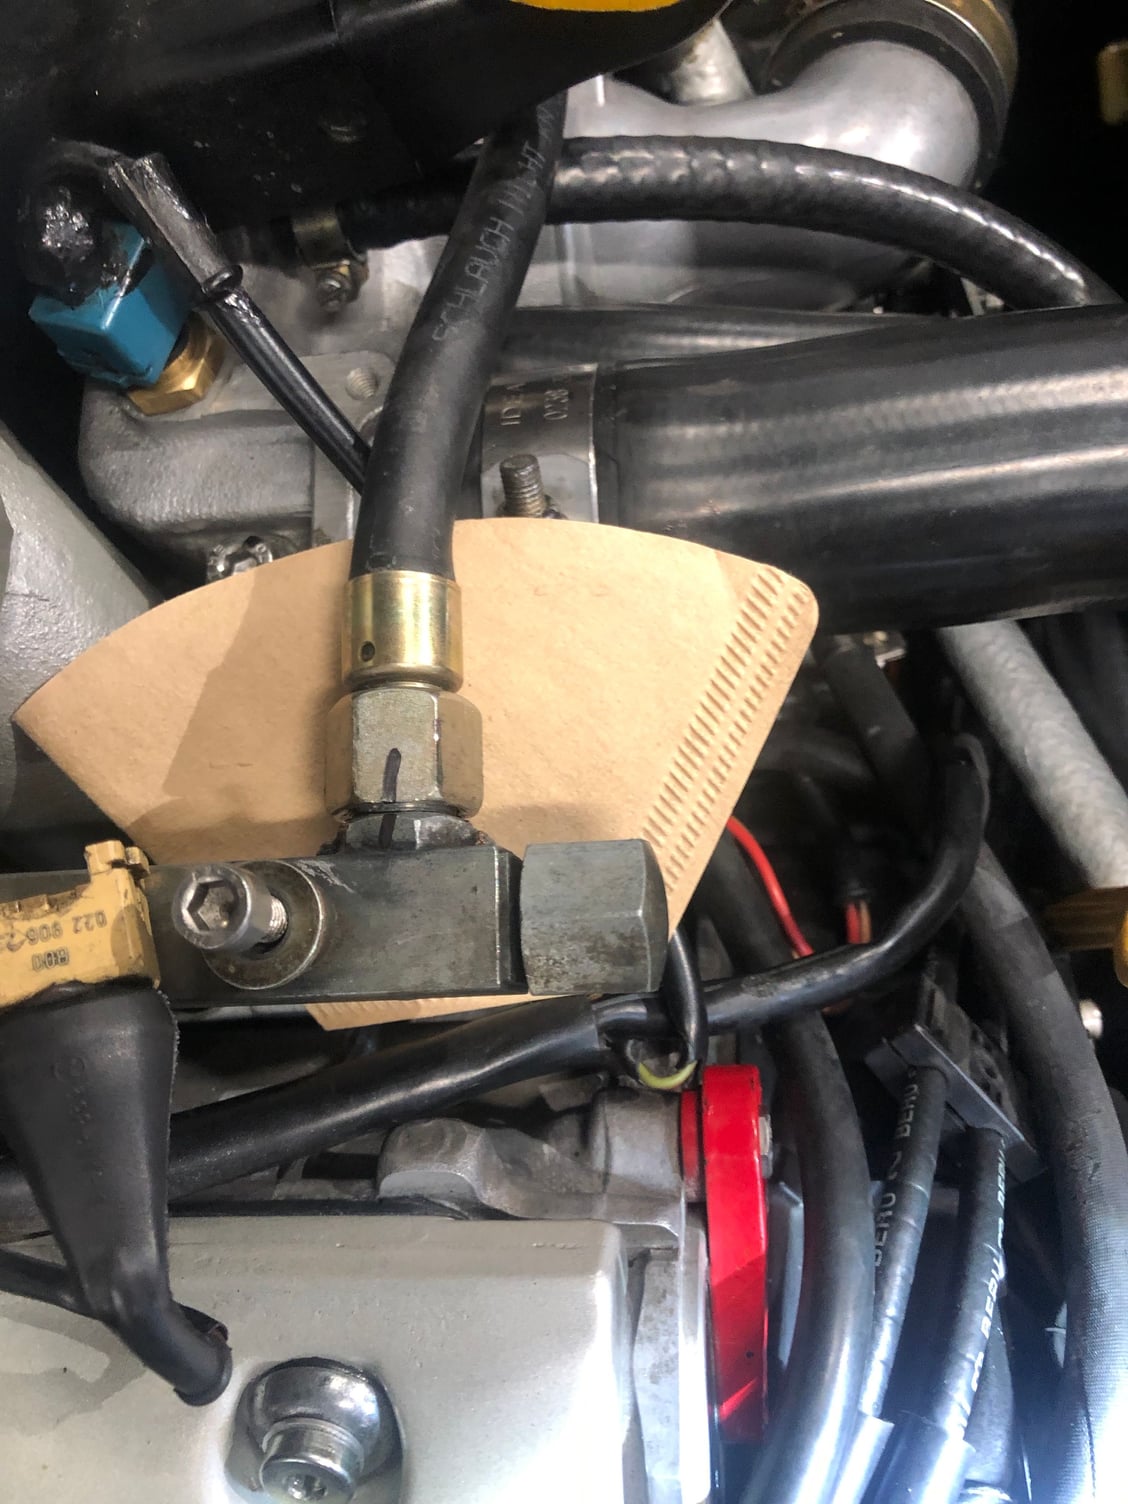
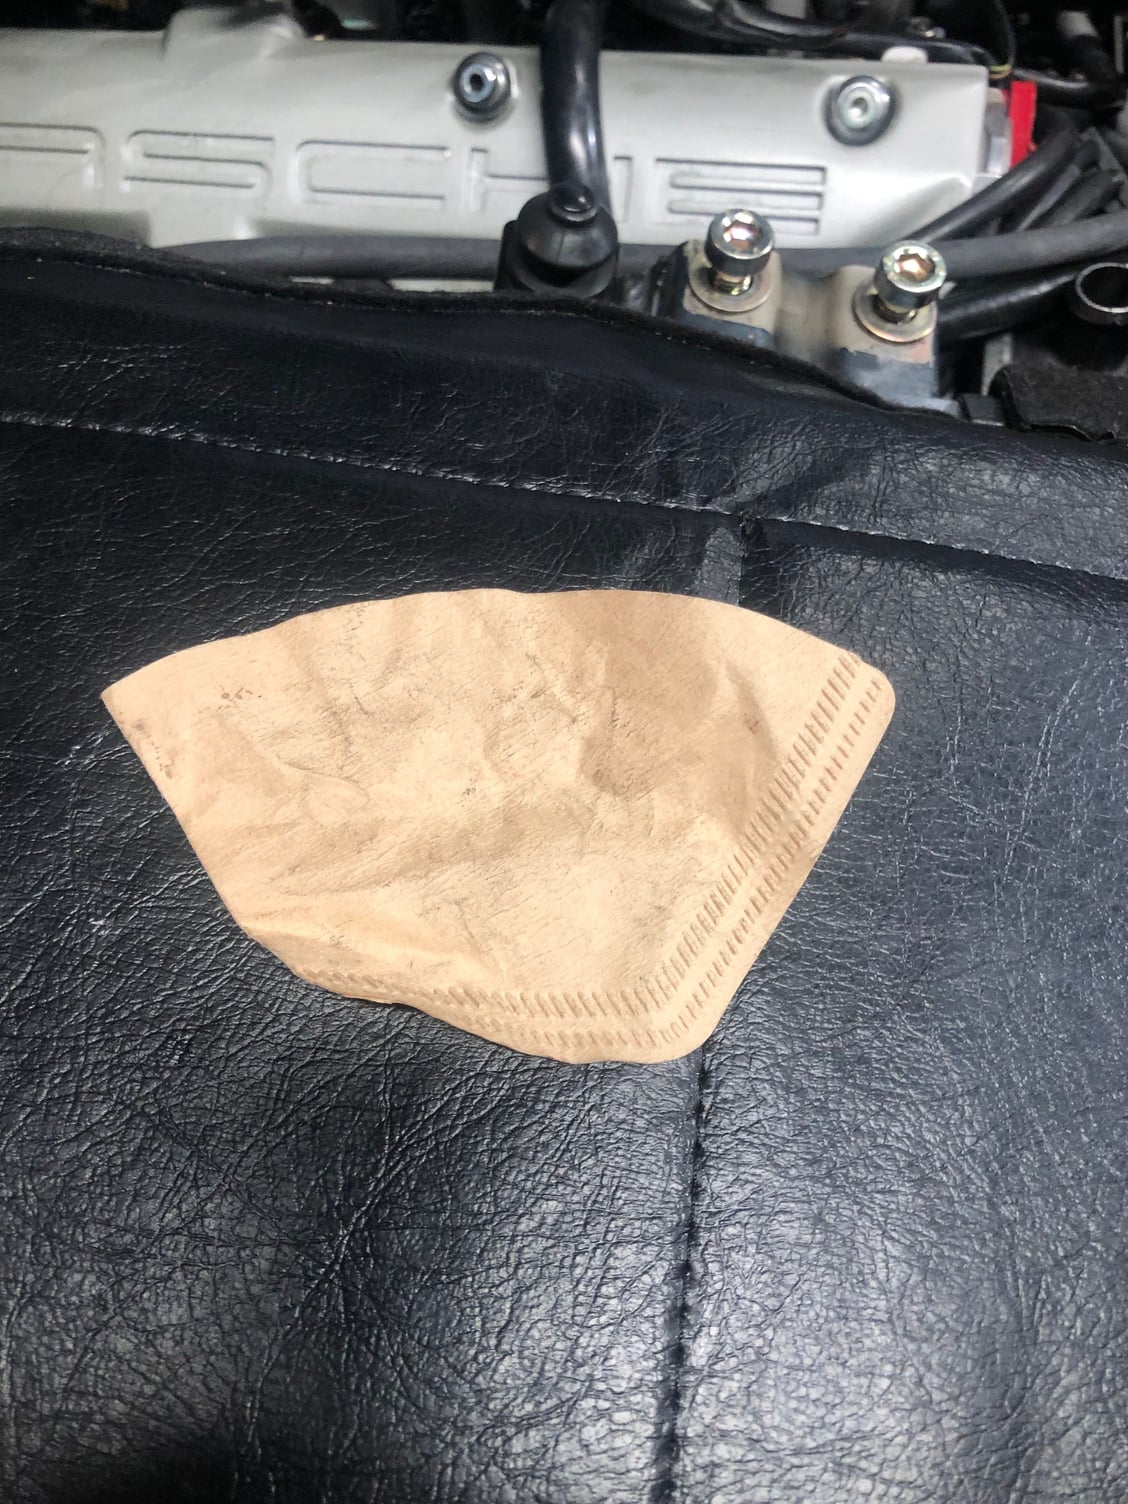
Now it was time to test all the fuel connections. I figured I removed 12 connections plus the 8 fuel injectors in the fuel system. Lots of options for fuel leaks I gave everything a good tightening and marked them with my sharpie as a reminder before testing. I think I checked every connection 5 times before testing. For my test, I have a handy toggle switch with a long lead that is plugged into the fuel pump relay. It's a tried and true Rennlist tool tip. I used a coffee filter and wrapped it around each connection to check for leaks.
Presto! No leaks. I checked every single connection and injector, I even gave every connection a good tug and wiggle to see if it would leak. The proof is in the filter.
Next steps are to continue to put the top end together and add antifreeze and pressure test the system before starting. The end is near!
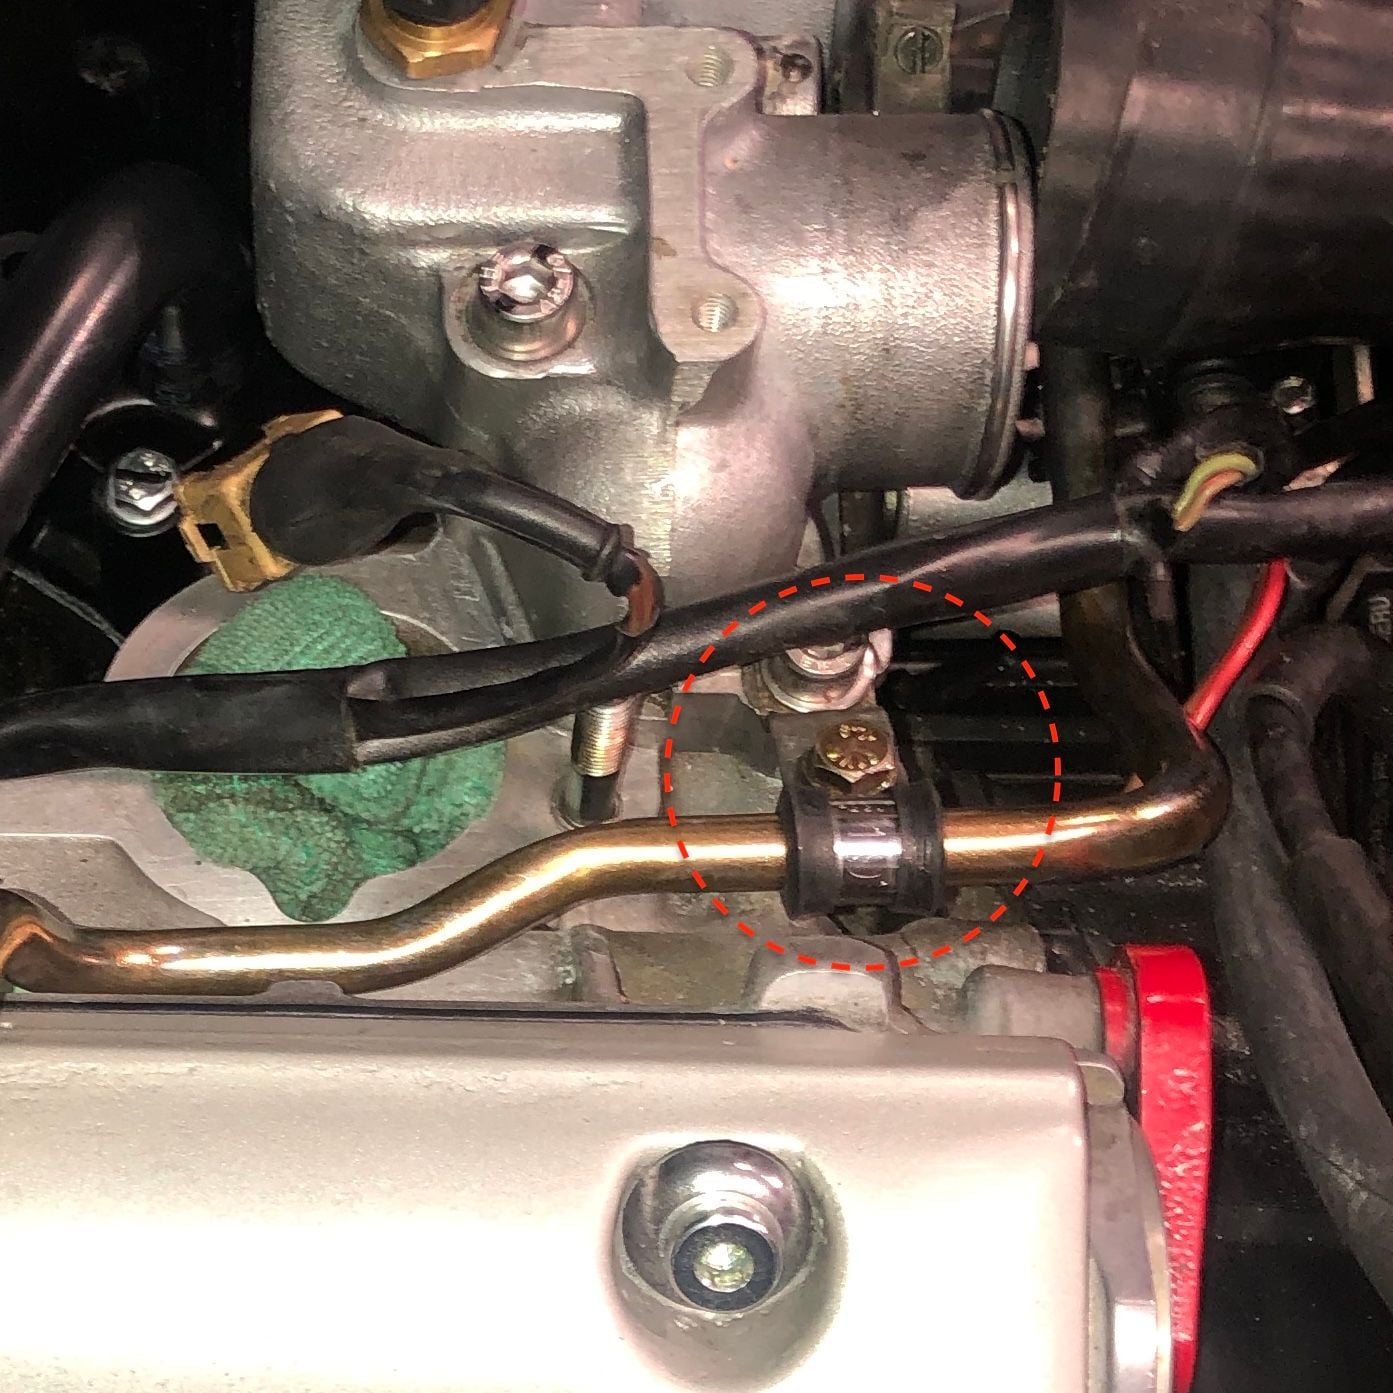
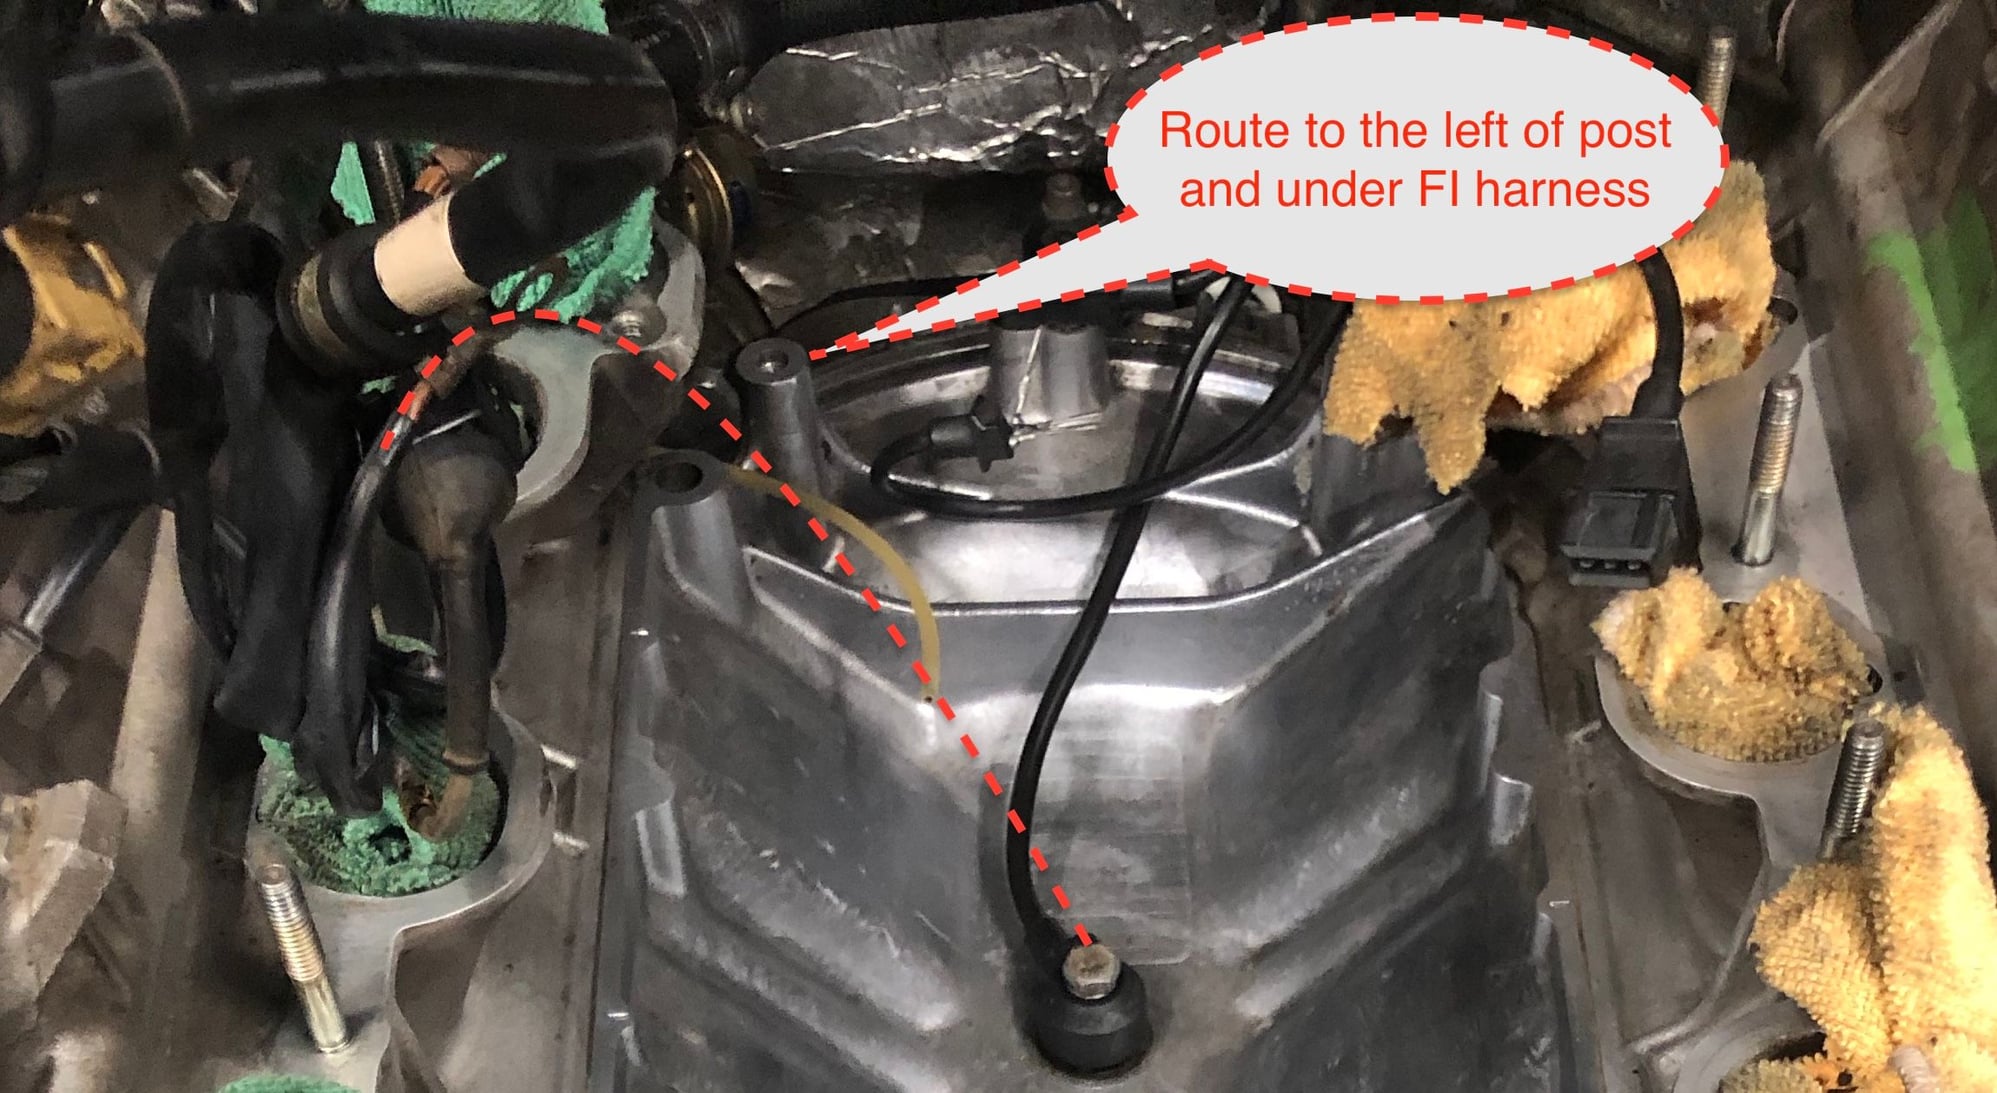
^^^^curious: why did you want to delete the nice GB fuel hose, that you ended up using, in favor of attempting to go back to the original set up?
Good question. Gregg makes two versions of the main supply line. One is this refurbished line that he cuts and welds on a nipple for a loop line and it looks like the original line. The other is the rerouted line.
I have been using the re-routed line for a while now. It's a very high quality line however, I wanted to go back to the original line because the rerouted line has a contact point with the jump post cover, it's in the way in front of the distributor and plug wires and it leans hard on my dip-stick, so much so that the plastic trip that holds the upper O-ring cracked from the force. I wanted to go back to the original routing to free up that space again. Again this is my own personal preference, both products a really great. I just thought I wanted to go back, but that is really moot at this point. I want to get the car back together so I used the other line.
Ok so I think I have everything ready to try starting again. I am super nervous that I forgot something.
I am running through pre-checks and tests to help make sure I have everything covered. Please feel free to make suggestions on other pre-checks. Here is what I have done so far....
- pressure tested the cooling system (no leaks)
- pressure tested the fueling system (no leaks)
- triple checked all torques.
My plan is to start the car for a couple seconds and let it idle up to temp and then re-check the coolant.

 01-07-2019, 08:55 PM


 T
T