When you click on links to various merchants on this site and make a purchase, this can result in this site earning a commission. Affiliate programs and affiliations include, but are not limited to, the eBay Partner Network.
Boy, you dove in with both feet! Front, top, and bottom refresh, and maybe an engine pull. And after that, you only have to do int, paint, brakes, clutch and suspension. At least you started right, with a low price, and a runner. I'm not sure of the value of the engine pull. Unless you really want to do the head gaskets without any indication of failure mode. Water in the oil? Oil in the water? Dark or light spark plug? Hmmmm.
Keep us informed, and ask questions as needed. Love to see another bottom feeder save. I've started a movement! muuuaaahahhahahhahahaaaa
Both feet is an understatement and this is slippery ground. You know you are in over your head when you get the intake off, front off, steering rack off get ready to do the mounts, run out of time, go home and research some more before falling asleep only to find out that the cam bolts could snap. Next thing you know you are pulling up Amazon and looking at Irwin left handed drill bits.
Deciding to pull the motor becuase it has so much oil caked everywhere that I just cant handle it. I know what it could and should look like so that is how I approach things. Also the head has oil, dry almost burnt looking at the bottom of the head where it meets the short block. This is in a couple spots where the cam cover looks to not be leaking so I'm just not sure. I have been needing to take a picture and post here but haven't been able to work on the car all this week.
Havent pulled the plugs yet. Would seem this would be the first thing to do really but it ran pretty good so I'm not terribly concerned there is anything major. Coolant was as fresh as I could imagine, only thing there was it went from very green to dark right at the end of the drain.
Oil looks perfect. No milky appearance at all. Car had regular oil changes every 6k, i have records from the time it was new until around 80k. then it had them a bit less frequent but more based on not driving the car if that makes sense.
If the cam covers dont kill me then I am going to clean the **** out of this thing and likely put it back in with the new mm's, rebuilt steering rack, rebuilt ps pump, roger sold me every seal under the sun, intake refresh the right way with the correct parts, opg, tune up parts - new beru wires, rotor and caps, maf from injection labs, new crank gear etc................
Then I am going to hopefully reinstall engine and smile! I will be leaning on the folks here pretty hard but am also more than willing to buy the beers : )
There is some logic to the 'all in' mode with the engine out. I found that 928s very rarely leak from the head gasket to block. They might leave a residual stain a bit, but not an actual leak that needs to be repaired. Most of the oil is coming from the cam towers, and the exhaust that heats the seal deforms and shrinks. But if the engine is out, and you want to do the heads, it's a semi-free country. Also give a chance to put a kiddie pool under the engine bay, and go to work with the brush and simple green, followed up by the pressure washer. Do the fuel lines while you are standing in there. Also get the crossmember, and PS lines. In aviation we call this the 'firewall forward' project.
Don't give up. You are going to be bummed about the length of time it takes to do all this but keep plugging.
Both feet is an understatement and this is slippery ground. You know you are in over your head when you get the intake off, front off, steering rack off get ready to do the mounts, run out of time, go home and research some more before falling asleep only to find out that the cam bolts could snap. Next thing you know you are pulling up Amazon and looking at Irwin left handed drill bits.
Deciding to pull the motor becuase it has so much oil caked everywhere that I just cant handle it. I know what it could and should look like so that is how I approach things. Also the head has oil, dry almost burnt looking at the bottom of the head where it meets the short block. This is in a couple spots where the cam cover looks to not be leaking so I'm just not sure. I have been needing to take a picture and post here but haven't been able to work on the car all this week.
Havent pulled the plugs yet. Would seem this would be the first thing to do really but it ran pretty good so I'm not terribly concerned there is anything major. Coolant was as fresh as I could imagine, only thing there was it went from very green to dark right at the end of the drain.
Oil looks perfect. No milky appearance at all. Car had regular oil changes every 6k, i have records from the time it was new until around 80k. then it had them a bit less frequent but more based on not driving the car if that makes sense.
If the cam covers dont kill me then I am going to clean the **** out of this thing and likely put it back in with the new mm's, rebuilt steering rack, rebuilt ps pump, roger sold me every seal under the sun, intake refresh the right way with the correct parts, opg, tune up parts - new beru wires, rotor and caps, maf from injection labs, new crank gear etc................
Then I am going to hopefully reinstall engine and smile! I will be leaning on the folks here pretty hard but am also more than willing to buy the beers : )
Thanks : )
Anyone that digs this deep into an S3 and make it work, automatically earns my respect.
These are tough engines to do, with many tricks that have to be performed to make one work.
Thanks for sharing the story and pics. I am on the same journey with my s3, started 15 months ago, Done all the things that you can see, like interior, exterior, S4 brakes and now I am just finishing up the last paint work, after that, engine. Funny that you also have a taped up sensor connector just like I did right next to the yellow oil cap. Changed my steering rack and had my 14 year old girl help me with the hard to get to nuts, tiny hands are a good tool sometimes...
Got mine for 2800 on ebay, driveable but not nice to drive.
So here is my current little problem, some PO decided to put on a S4 rear spoiler, I like mine original so that is going back, but I can't find the speed nuts that hooks into the thin spoiler "arms" they are NLA so I have no good way to attach the spoiler, I have to get creative but sometimes others have been better at this than I am but I could not find anything on the forum so I try here.
Can I ask a question regarding the intake manifold, I’m making a custom manifold and I’m interested in the rubbers that join the plenums to the runners. The reason being my manifold and plenum is bigger in diameter and as such the existing S rubbers are quite tight. I think the S3 rubbers are bigger in diameter. If you have these pieces apart can you tell me the outside diameter of the runners or the plenum? Thanks!
I don't have a great amount of mechanical skill but I have just been through all of this. With the knowledge base you'll be fine. My car was running on six cylinders when I bought it. Now it lights the tyres in 2nd. I done everything with the engine in. Also broke cam cover bolts. You can use S4 cam cover bolts and washers with no leaks at all.
Hello Anders congrats on your journey as well. It's overwhelming at times but eventually for me everything will be off the car and then the progress to getting back in it and driving it will be underway. I don't know about your speed nuts and hooks but maybe someone can chime in here.
Hey DeWolf I think mine is just too far gone to not pull the engine. Trust me I dont want to but also know that if I dont there is no possible way I can get it to the state I'm looking for as there just would not be enough room to do the "firewall forward" approach. Let alone the engine is just caked with oil on every angle.
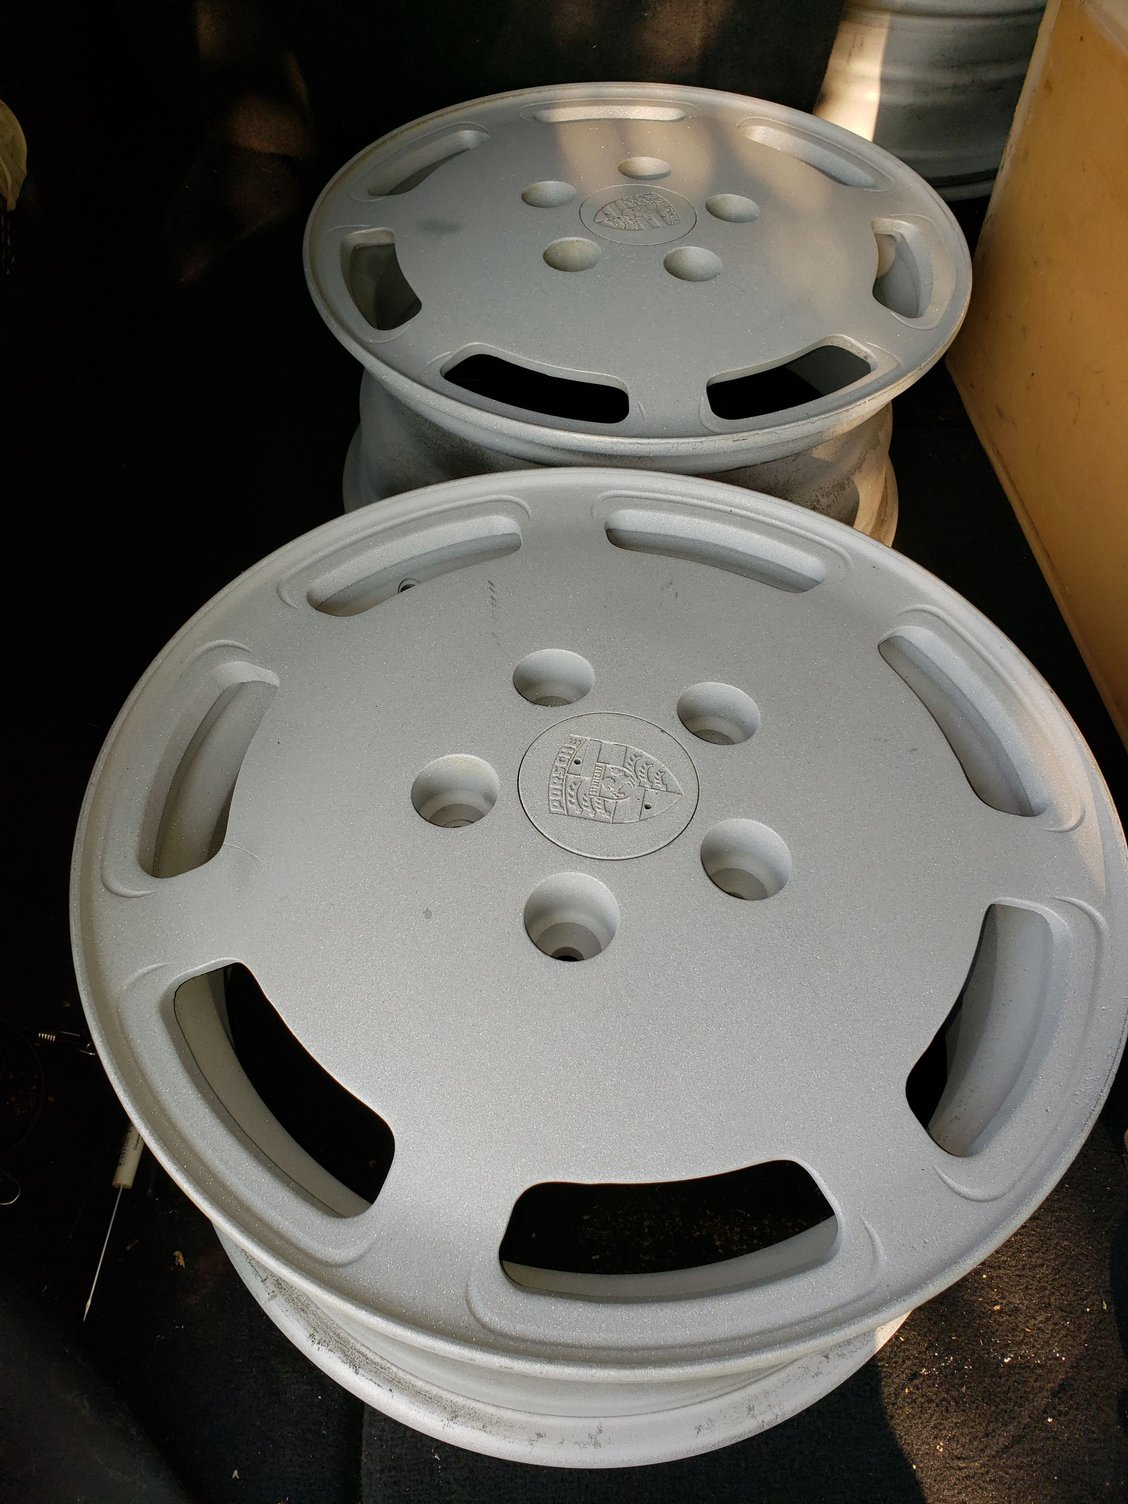
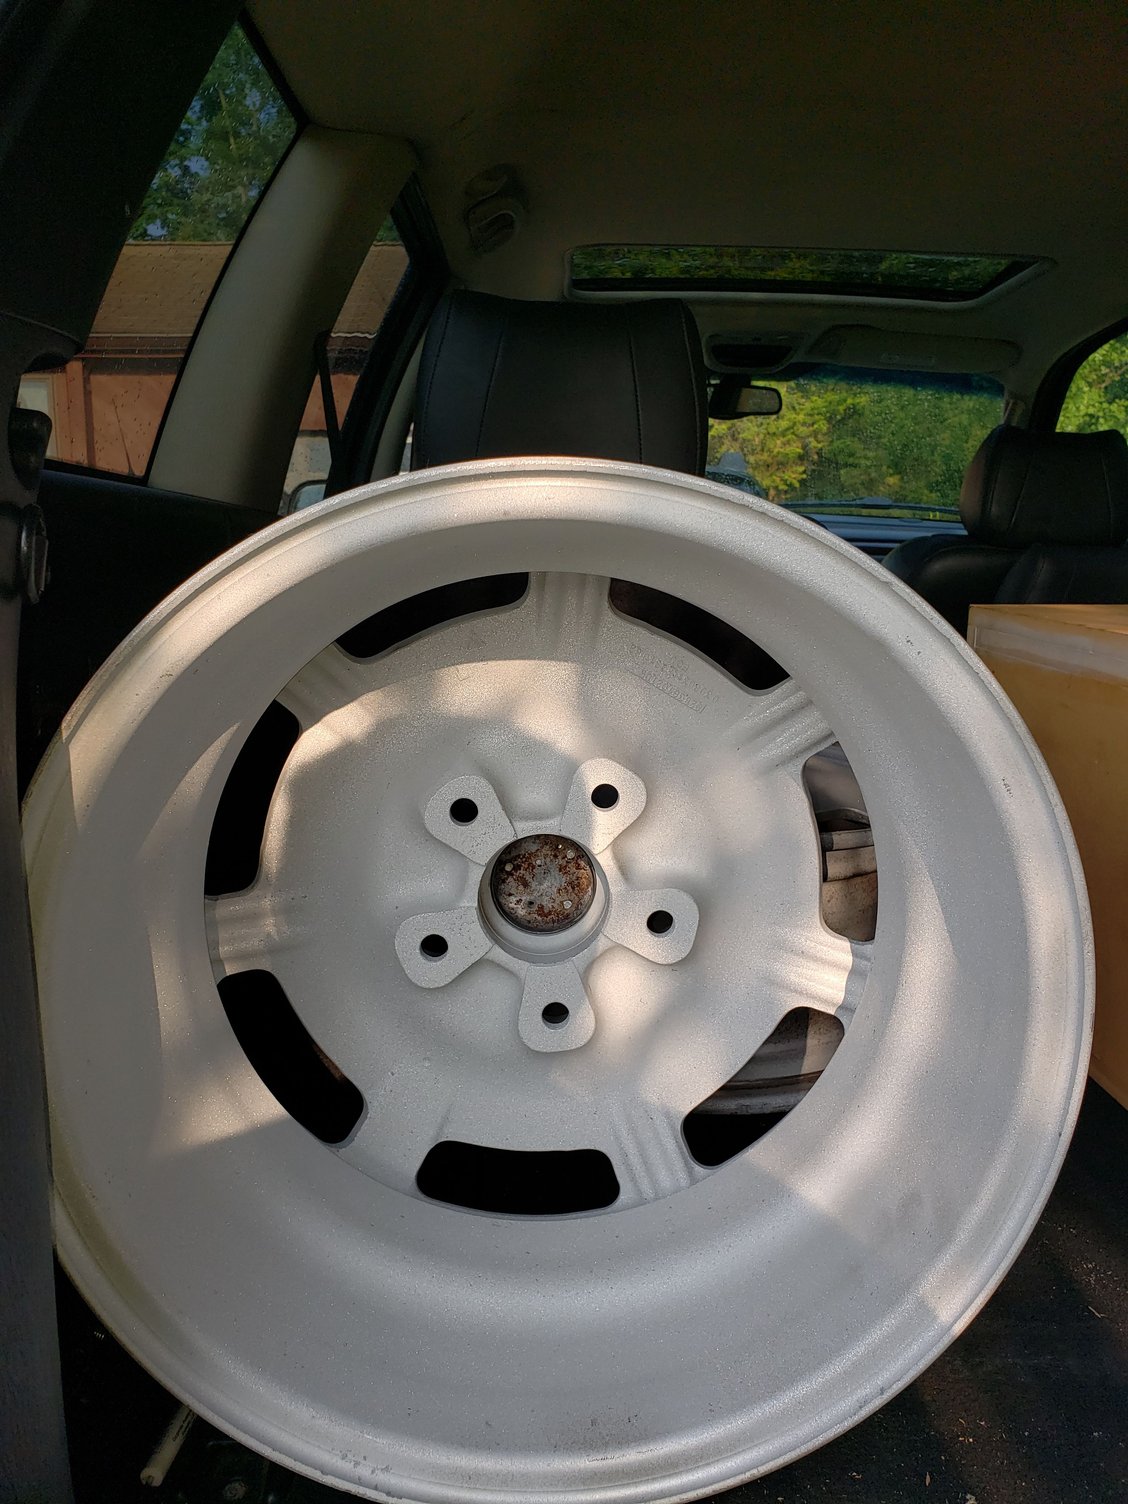
I went down to the garage today to pic up my recently blasted flat 7 wheels. Will sand these down and paint/clear them. Was going to polish them but that is over and above what is required for this car at this time.
Blasted with Corn
Lots of work to do on these!
And of course I'm going to remember where all this goes! Rule number 1 when starting a project like this, Don't forget your baggies and sharpie!
This was fun
There is no way this is causing rough idle
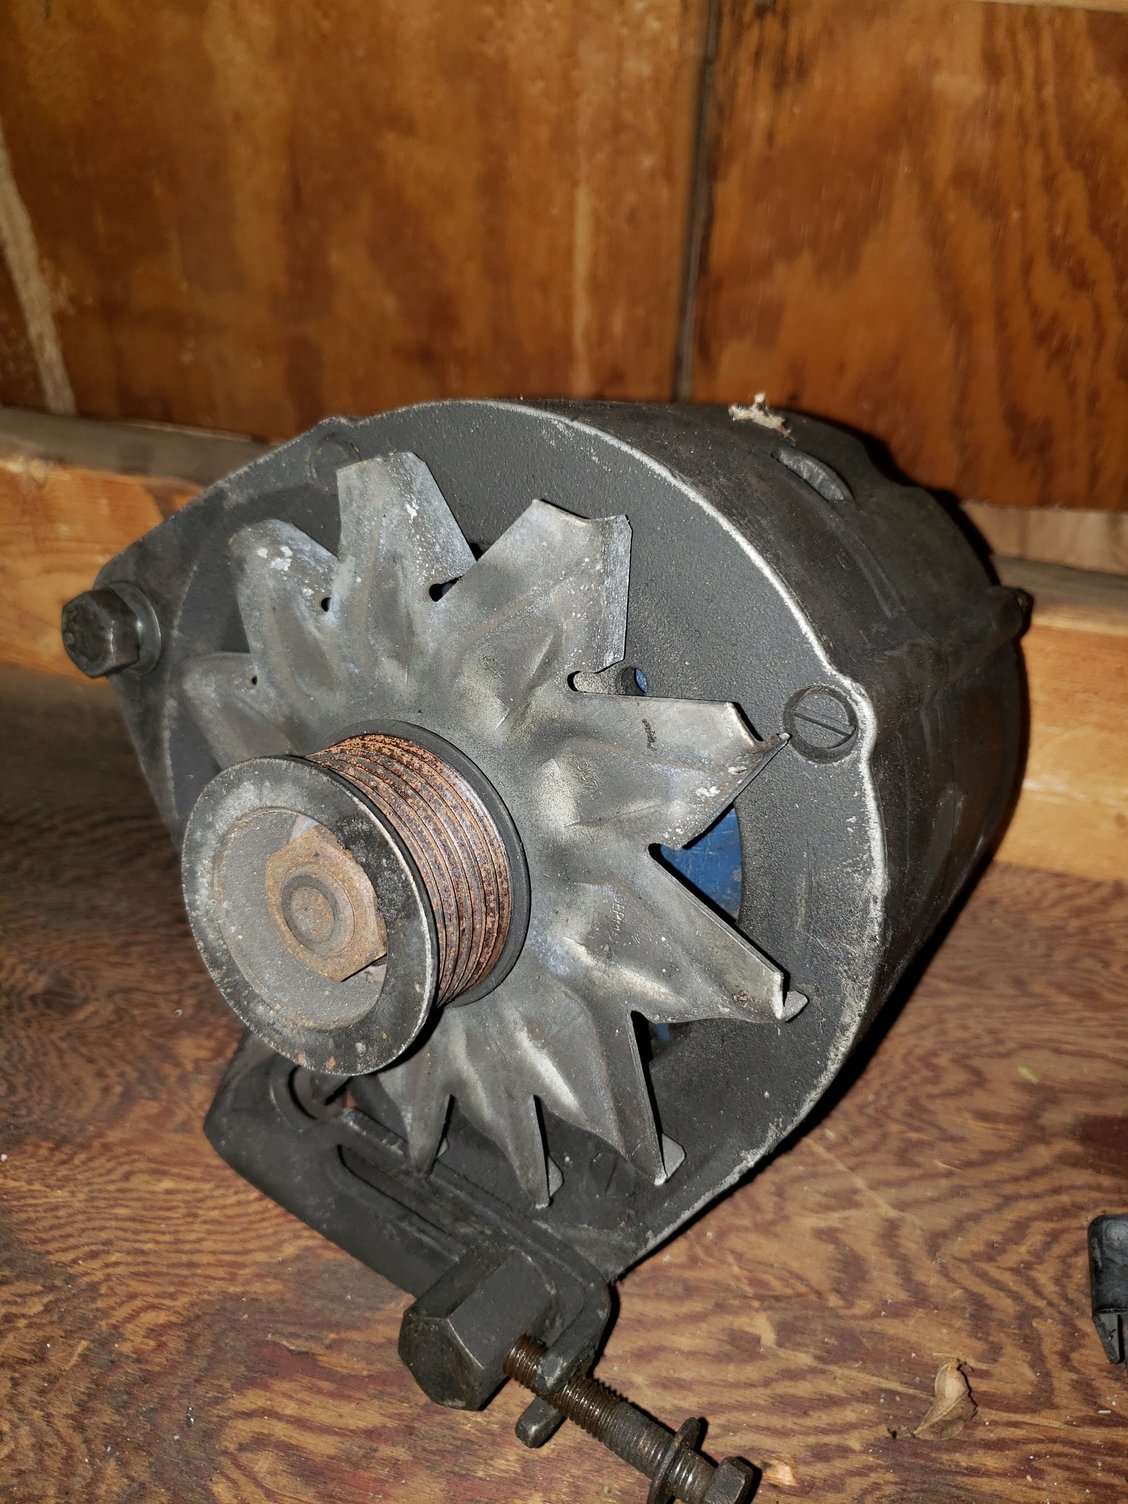
And when I look at this one Led Zeppelin pops into my head, Lying, Cheating, Hurting thats all you seem to do. Cannot wait until my Greg Brown Alternator gets here.
Your time is gonna come!
And this will be my new best friend
Watching me work
And finally I cracked the cam bolts loose one by one, almost all of them, ran out of time on the hard to reach lower ones. What I learned from my dad when I was young and we used to work on my sisters cars, she like to wreck them alot as well as blow motors. My dad would always look at her and say,
Ya that temp and oil gauge were pegged huh? That means the car is runnin hoooottttt, oil pumpin goooood!"
What he taught me on those sessions was to put light pressure on the bolt, if it doesn't loosen, then tighten it ever so slightly. then loosen until it gets tight again and then tighten it. repeat process until it loosens easily. I can say with confidence that it saved a couple cam bolts from snapping yesterday.
Can someone point me in the correct direction on the order of removing the strut bar as it relates to pulling the engine. Car is up on stands right now and WSM states to have it on the ground, i read that it pulls the towers apart possibly cracking the windshield. Seems very counter intuitive to put it on the ground when I need to do everything underneath. Any insight on what other have done would be appreciated : )
You can pull it while it is up on the stands. I did. No issues.
The big problem comes with trying to lift or lower the car without it in place. Then you can torque the unibody, flex the car and crack the windshield.
If you are still apprehensive (which is understandable), loosen the bolts on the brace (don't remove them). You should find that there's no tension on it. You should be able to wiggle it around with loose bolts.
Thanks for that info it makes sense. Now i would just need to see how high my lift goes. I have the car lifted at 20" at the lift points. Very unlikelly i could get the engine high enough, nor would i want it that high to pull it out.
Time for some planning.In the meantime I pulled my records together finally and created an excel sheet. Looks like the oil/filters timing belt were well taken care of. While I dont have all the records, the ones I do have show very good oil change intervals. Now nothing says a PO didn't redline it but it's the best I can go with for now. I dont know what the gap from 2007 to 2015 was and why there are no records but it was the same owner since I believe 96 so no reason they would not have continued maintenance the same way they had previously. I counted at least 21 oil changes since new.
Try not to open the doors with the center brace out and up on stands. As mentioned, don't move it on, or off the stands with the center brace off to avoid twisting.

 08-24-2018, 02:36 PM