
I might have a problem

 12-30-2019, 10:16 AM
#257
Burning Brakes
Thread Starter
I still need to figure out why my sunroof moves so slow (needs helped along some even). The tracks are all lubricated. I sprayed some wd40 into the cable guides, but maybe it's still getting caught up in there. I might take the motor apart and make sure it's all good internally too.
12-31-2019, 05:06 PM
#258
Burning Brakes
Thread Starter
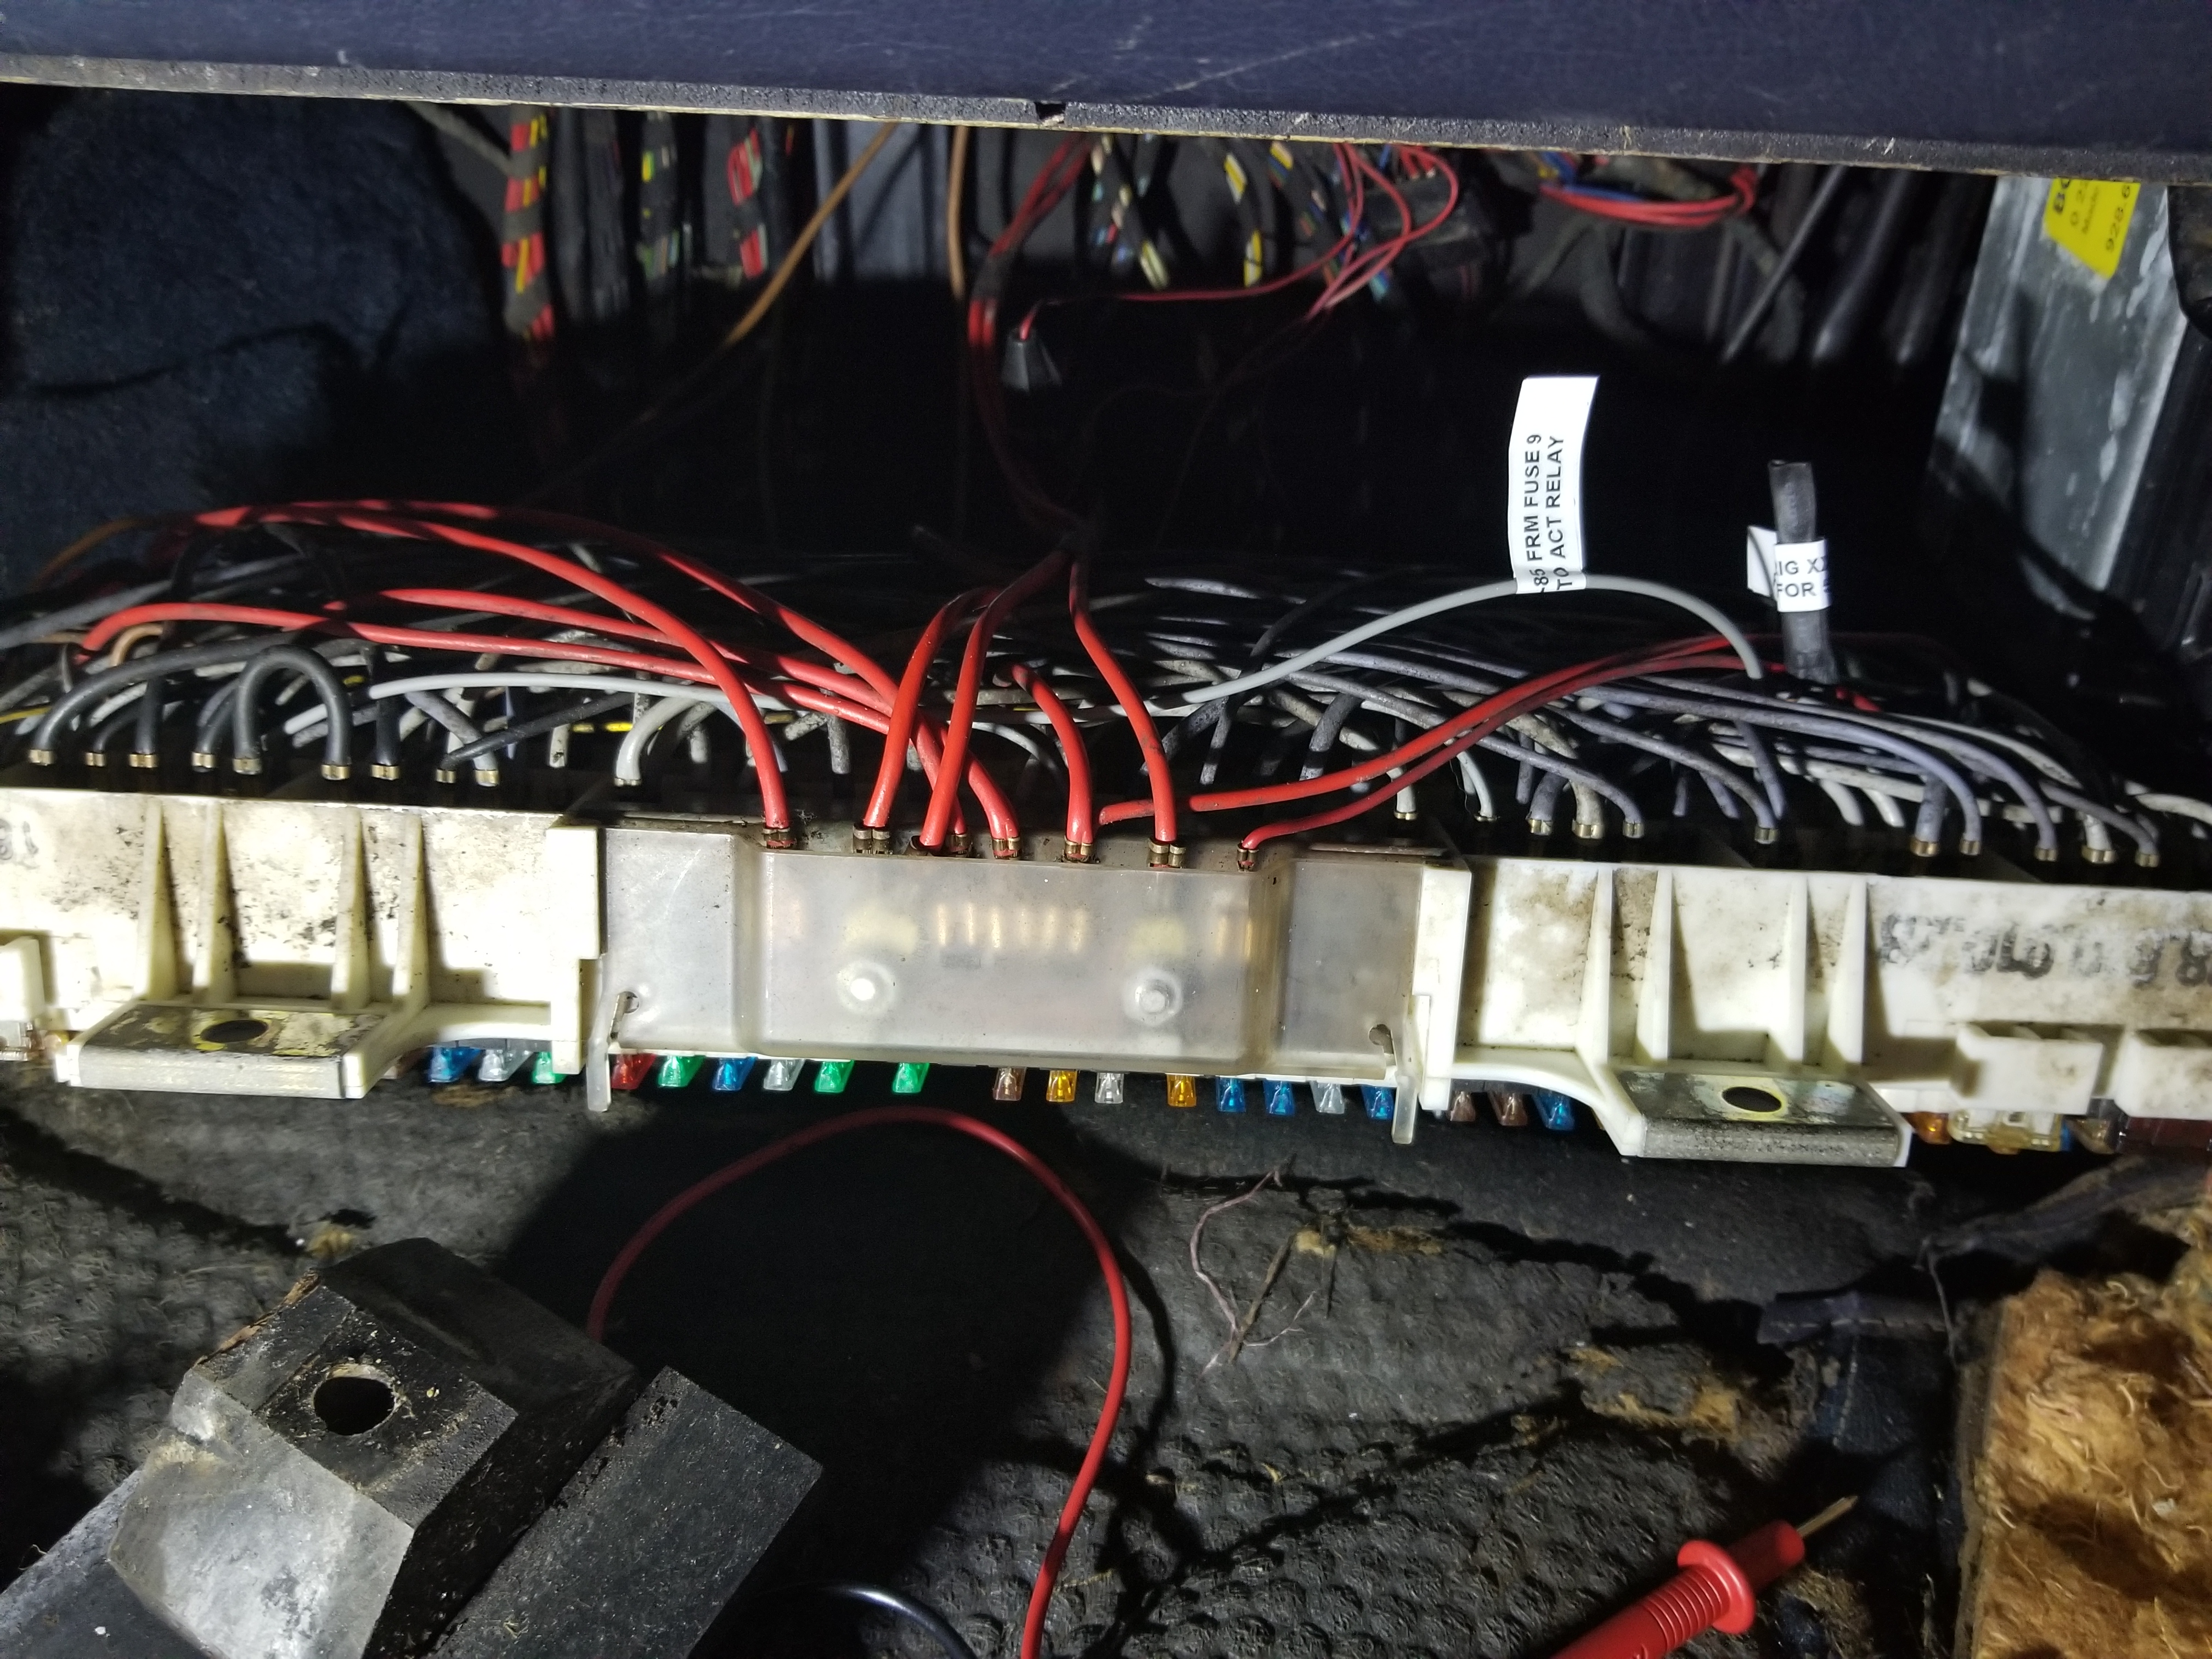
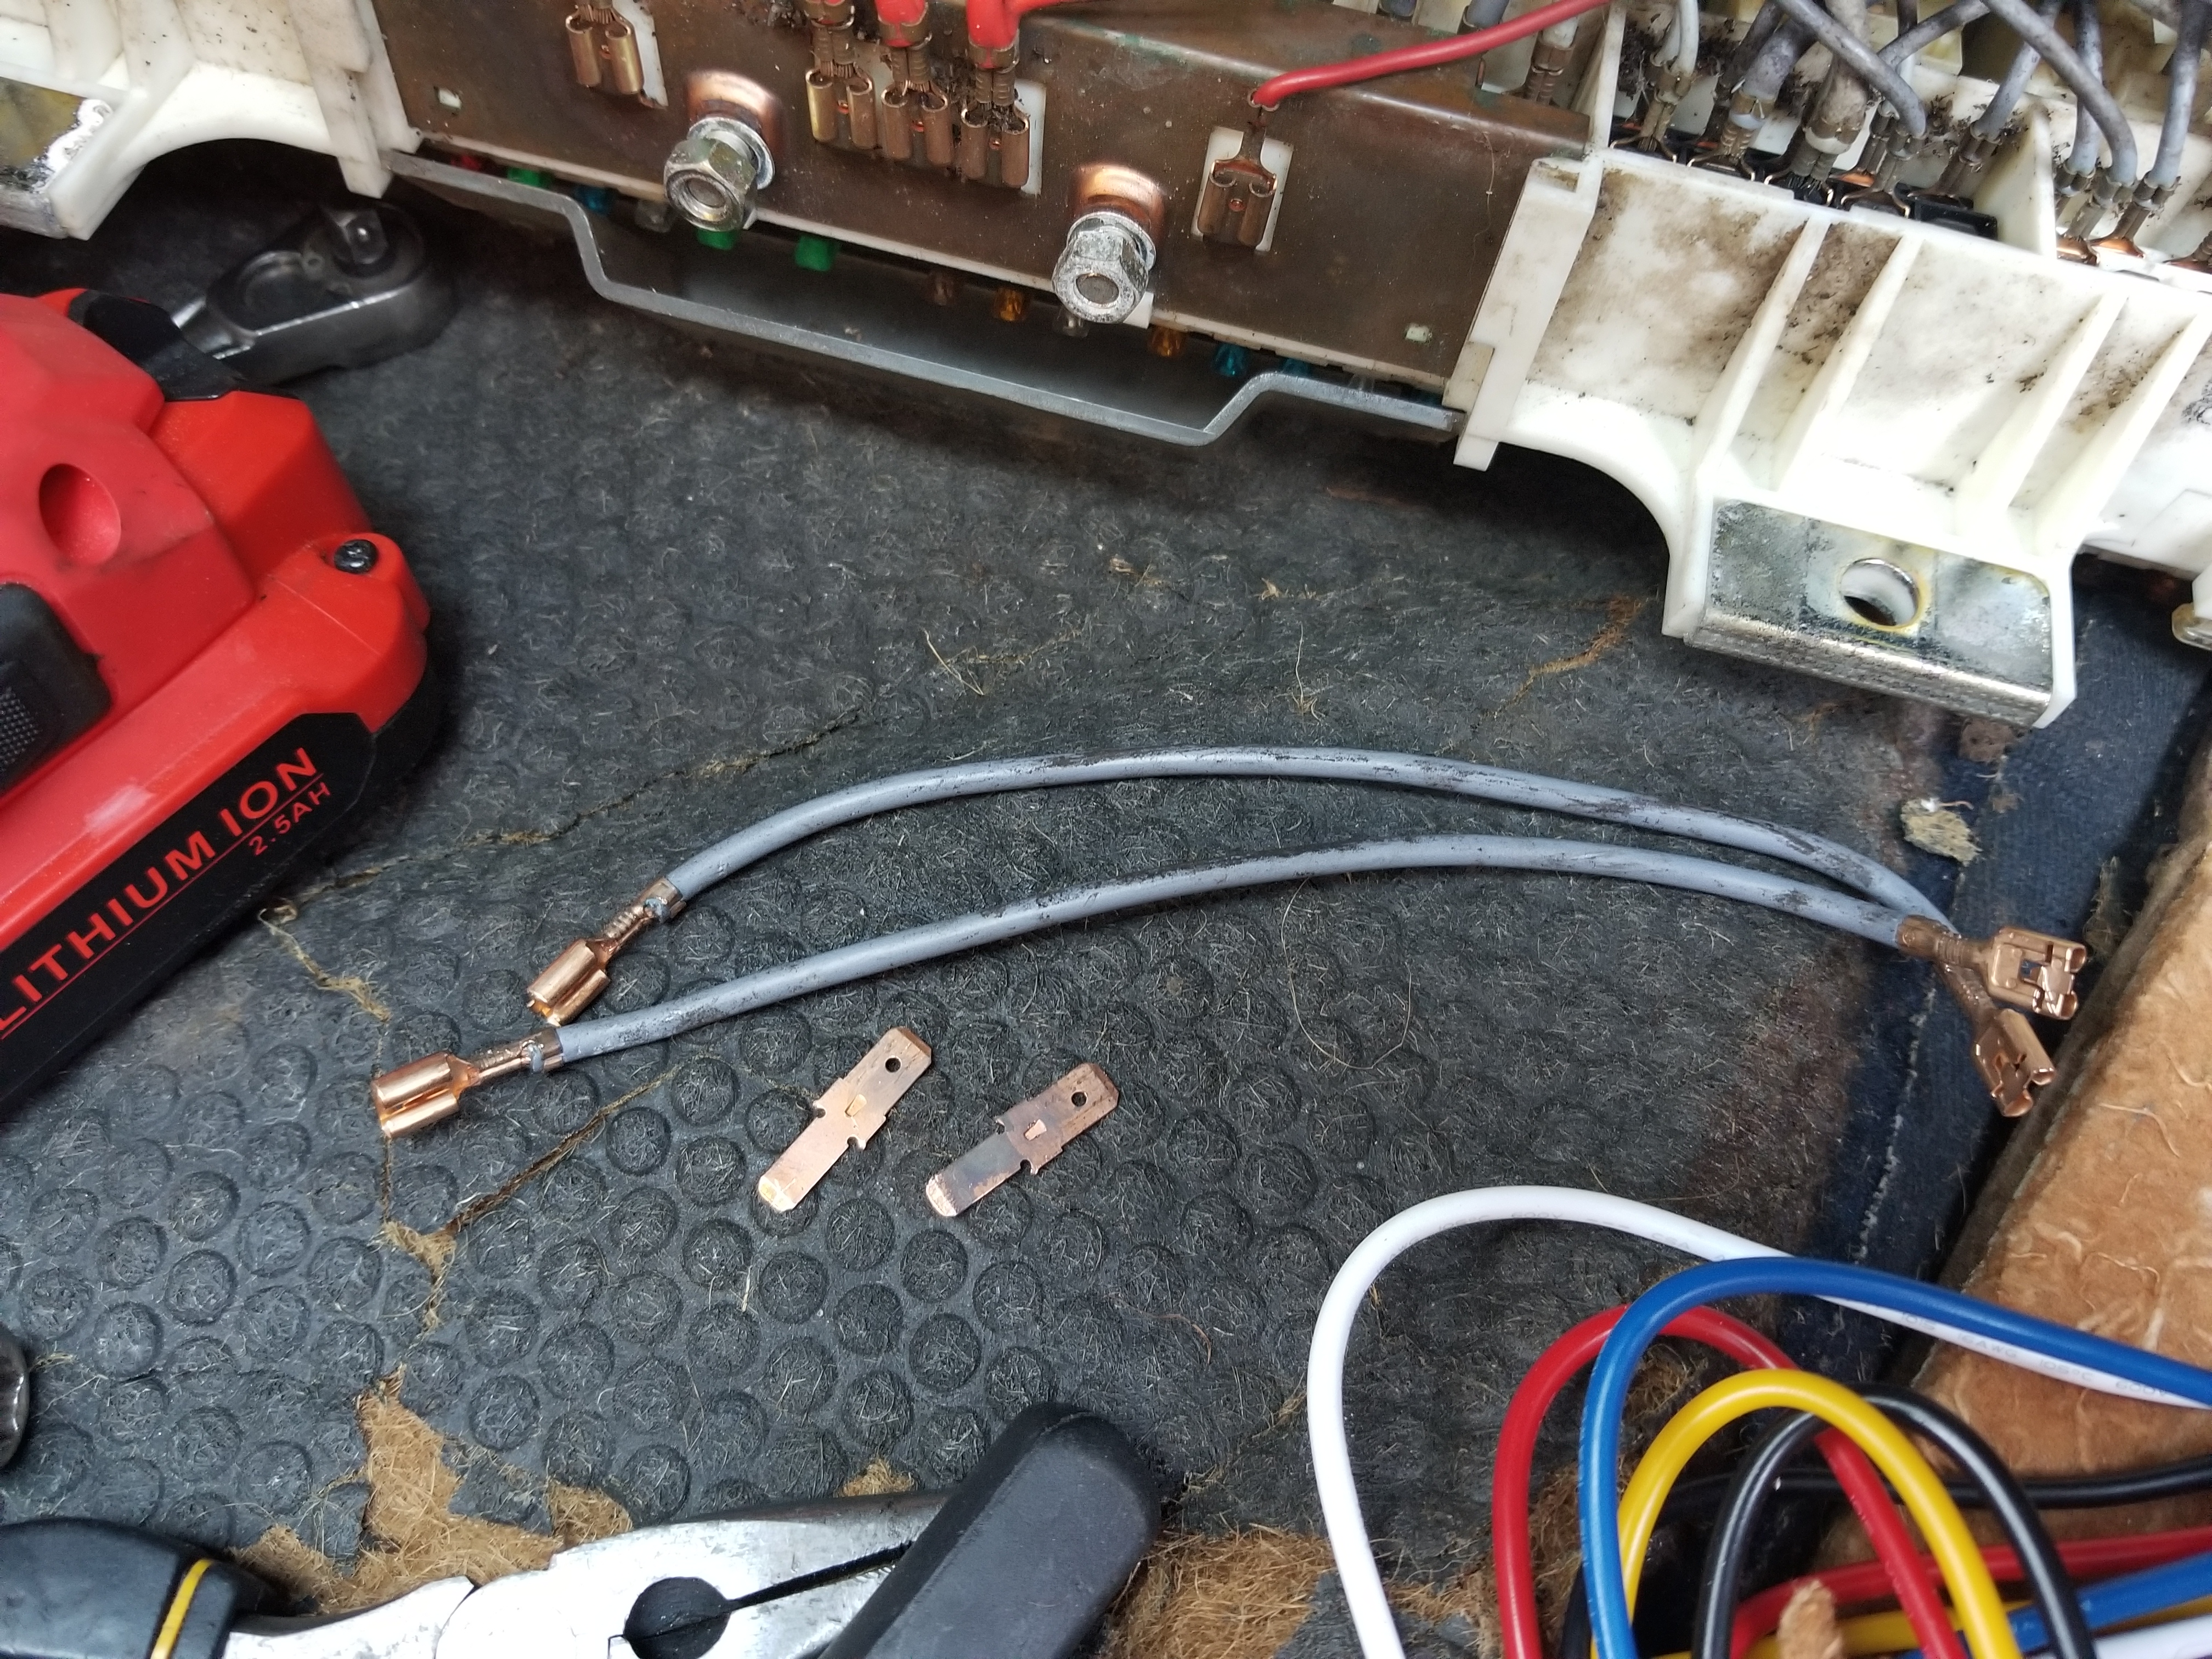
So after swapping over to the 5 speed tach without the range indicator my reverse lights quit working. Turns out that the supply to the reverse light switch that the auto uses comes from the range indicator, which of course doesn't work when it isn't there anymore. The wiring for the reverse lights is a bit different in the auto beyond just the relay being replaced by a jumper.
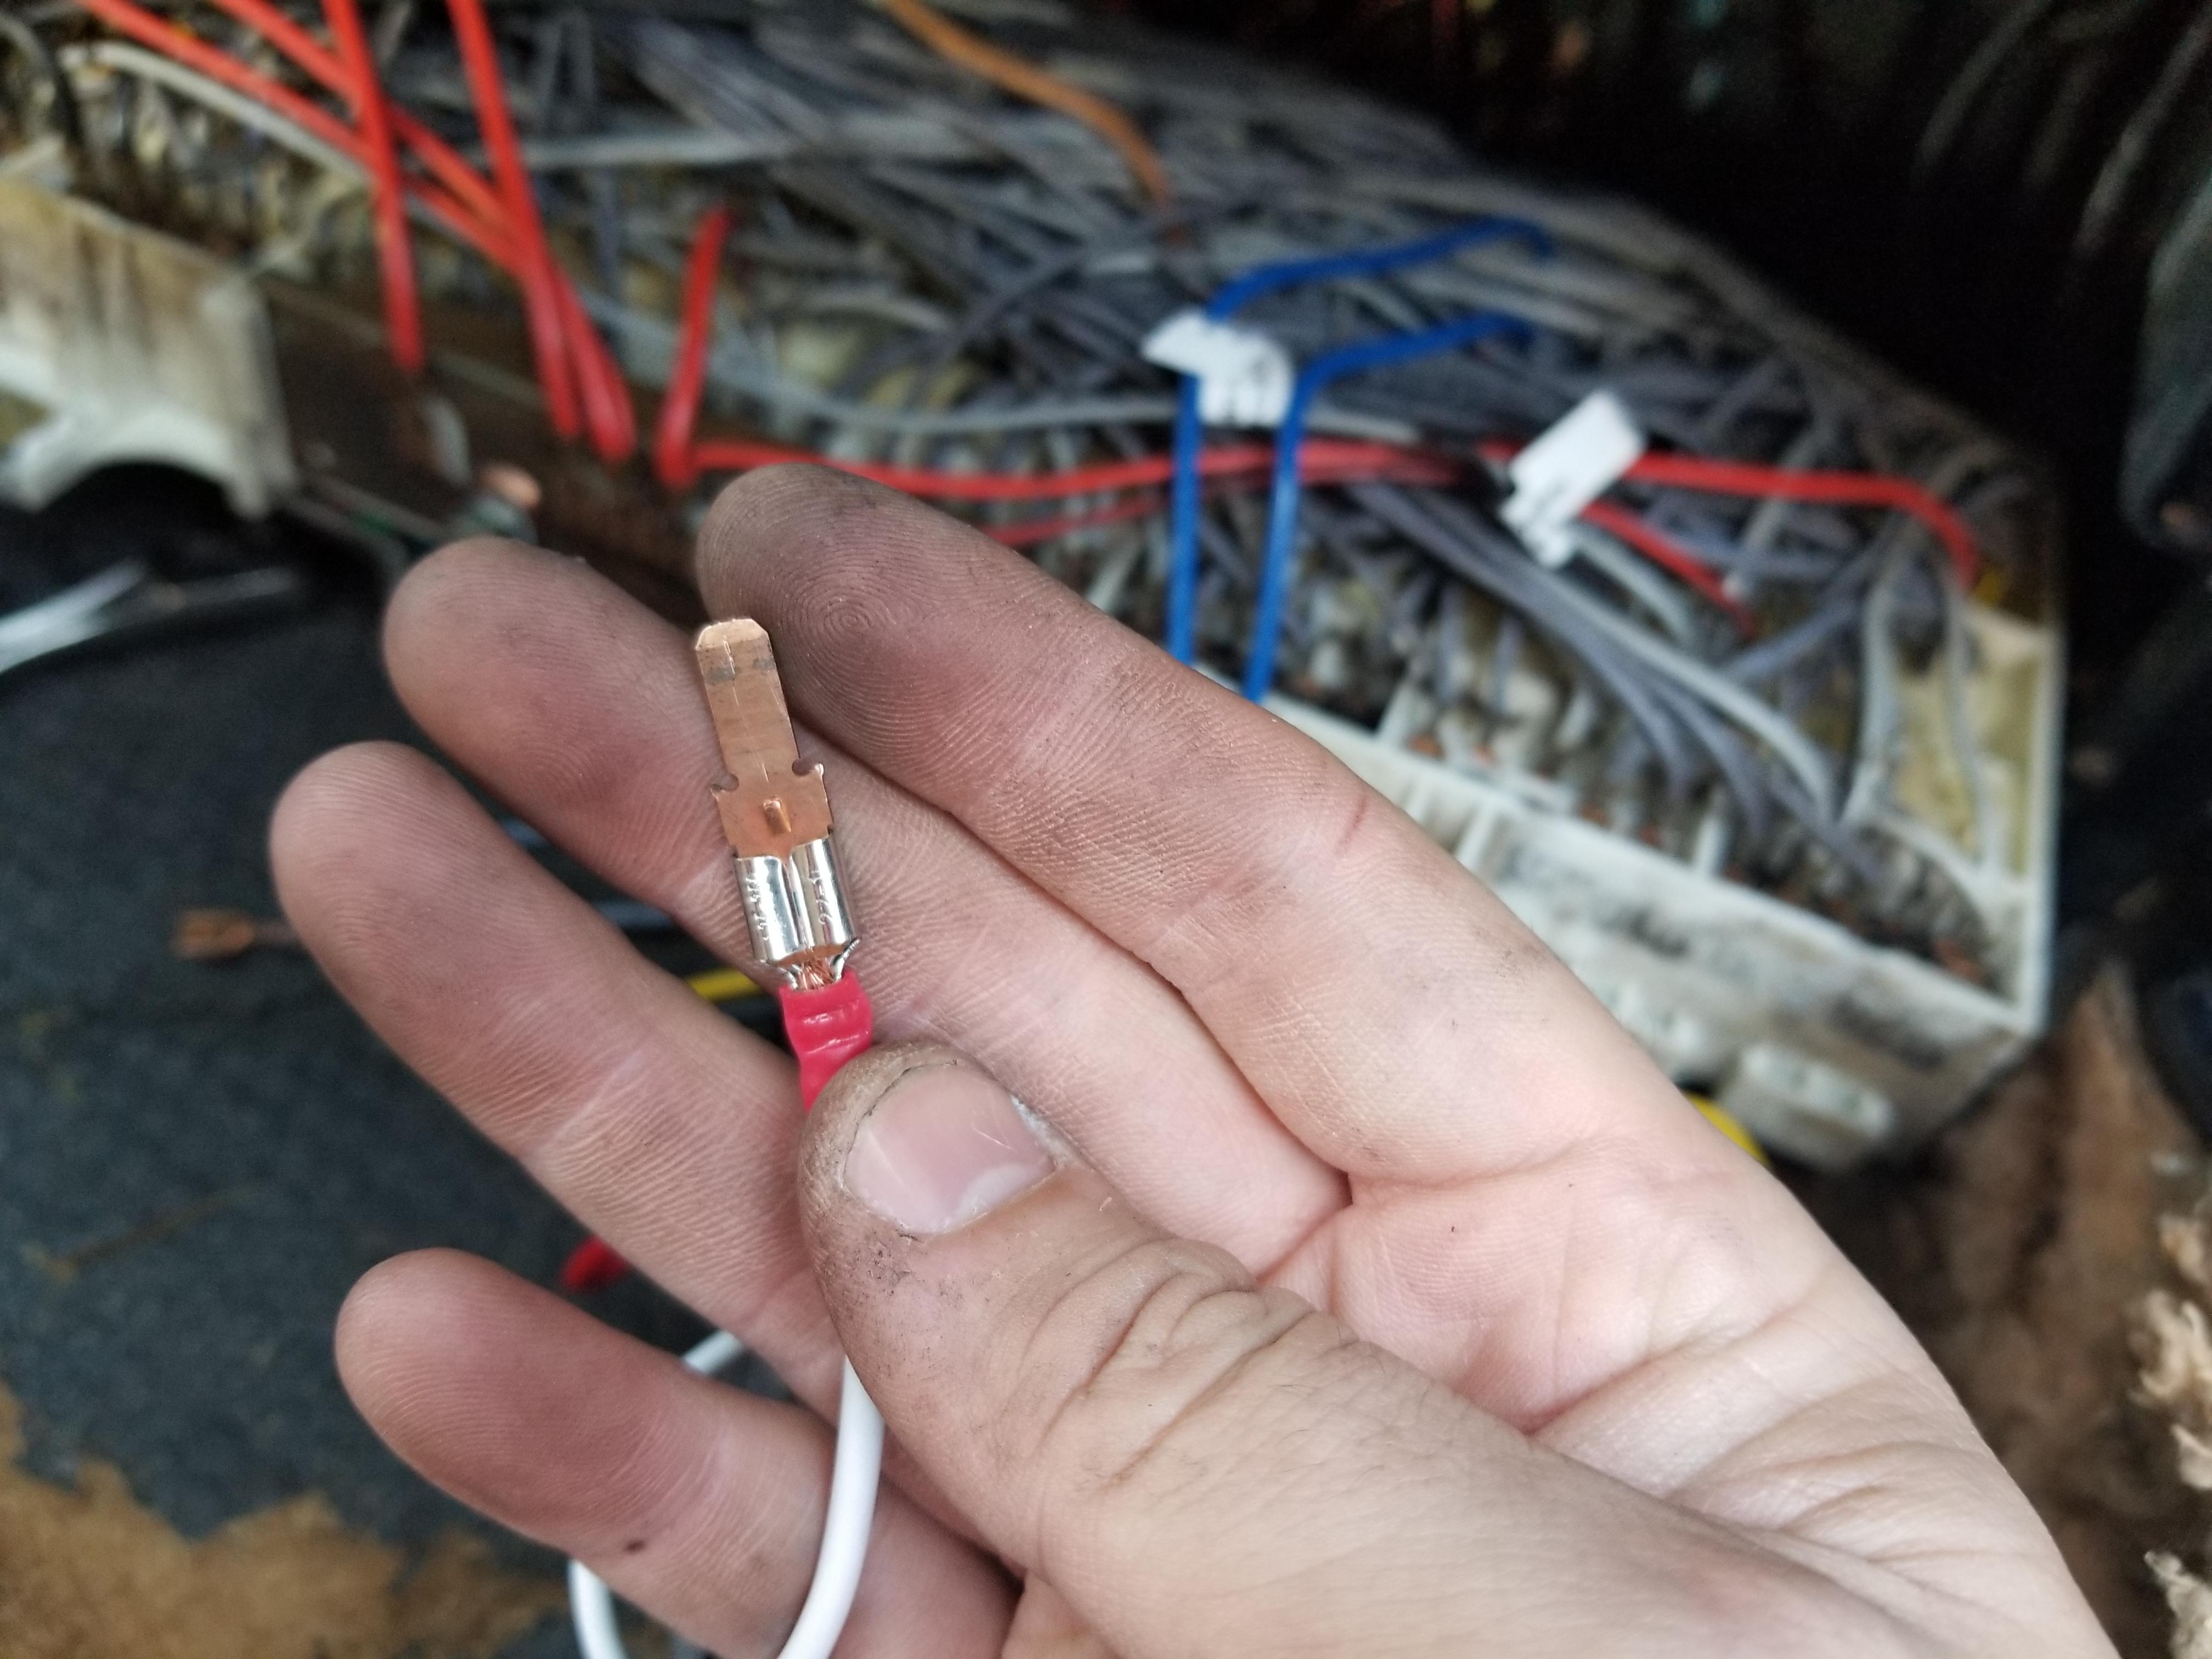
This is how the reverse light switch was originally wired after the 5 speed swap. (I still need to go get the correct connector for this.)
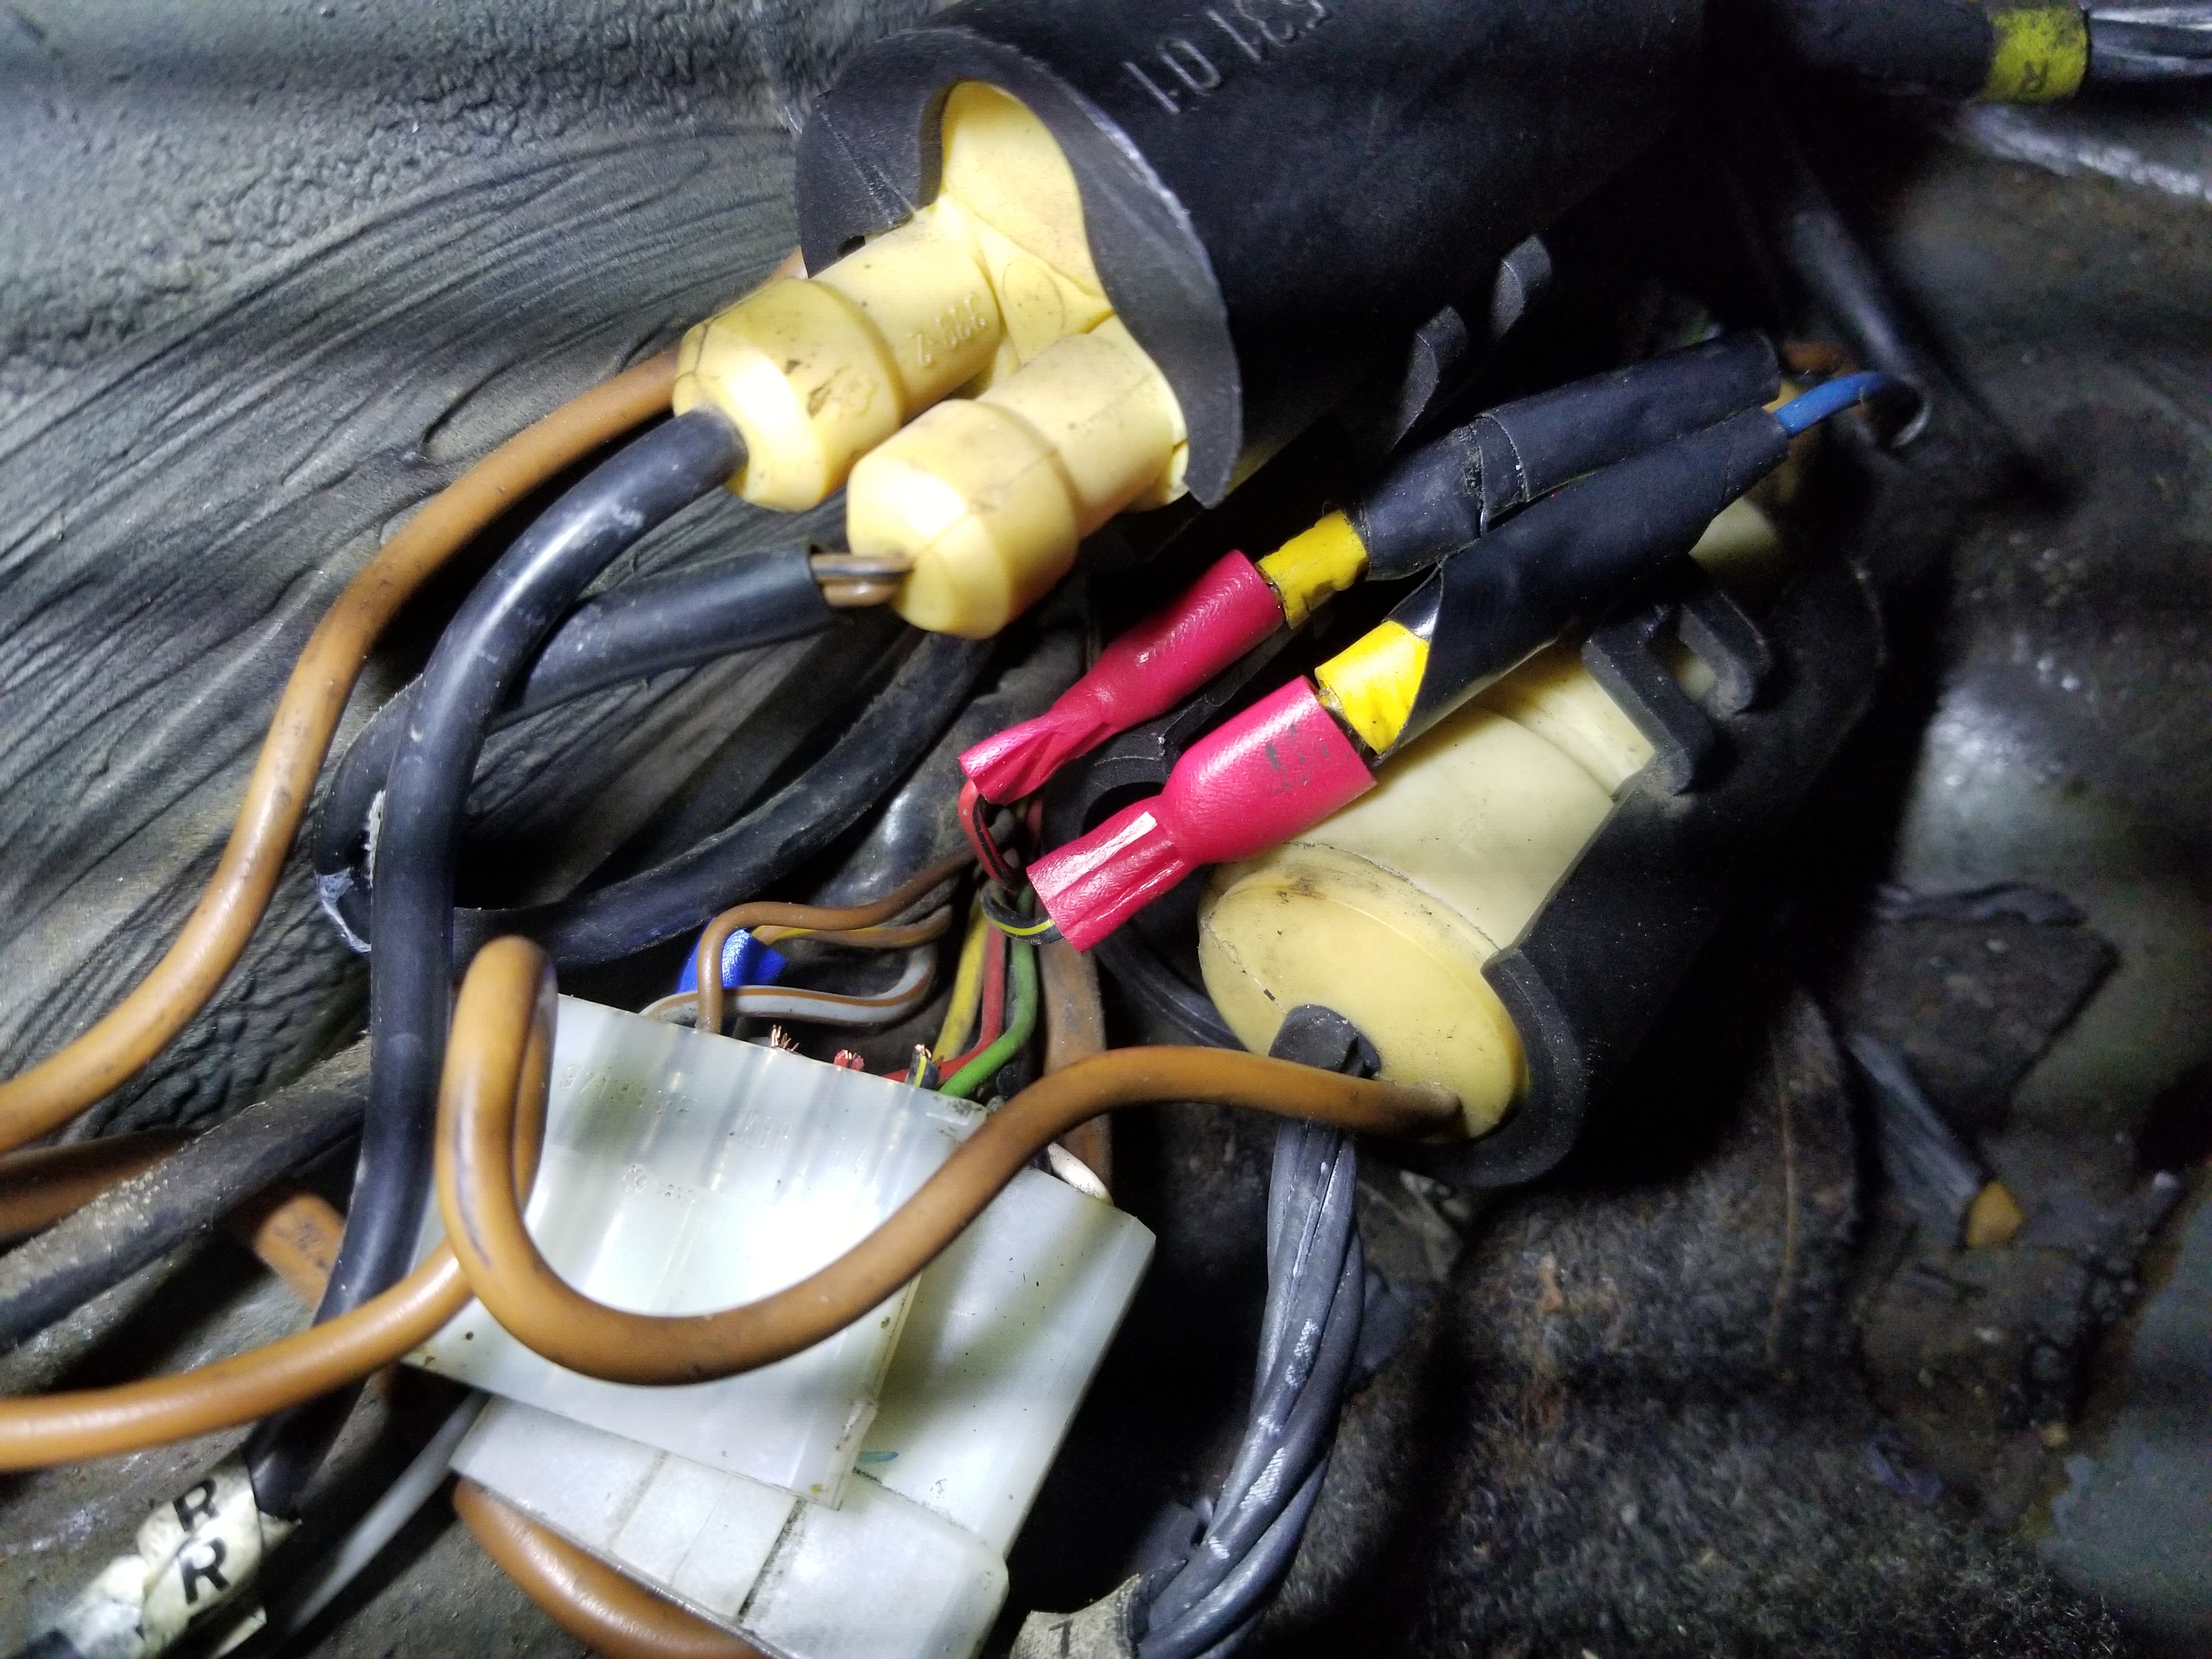
Just like with the auto, the 5 speed switch just jumped those two wires and everything else worked as is. Power came from the range indicator to the reverse light switch.
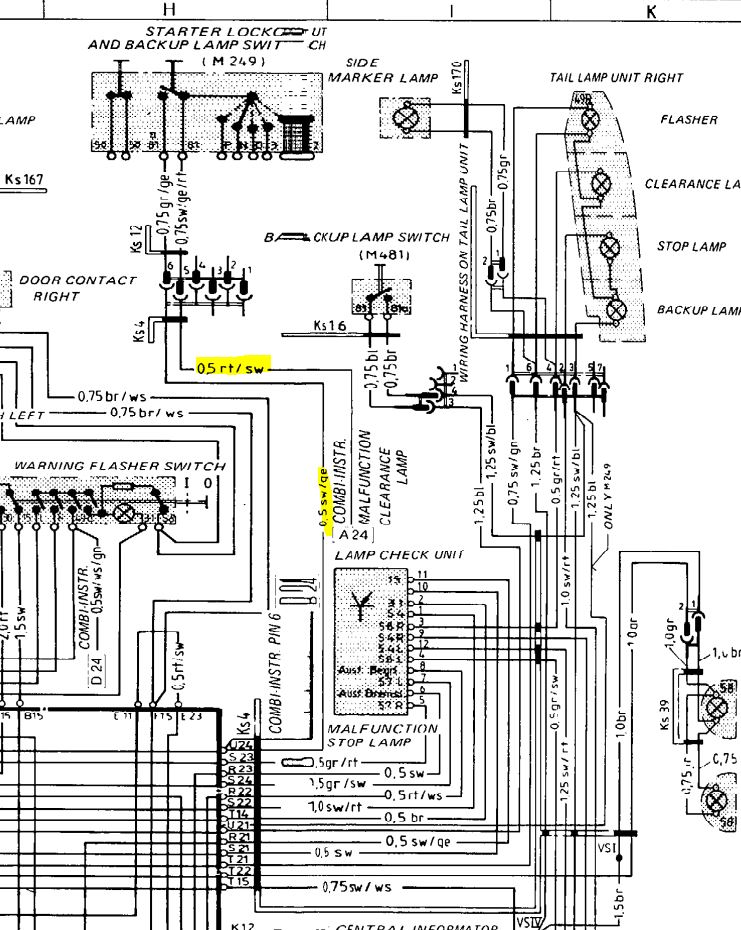
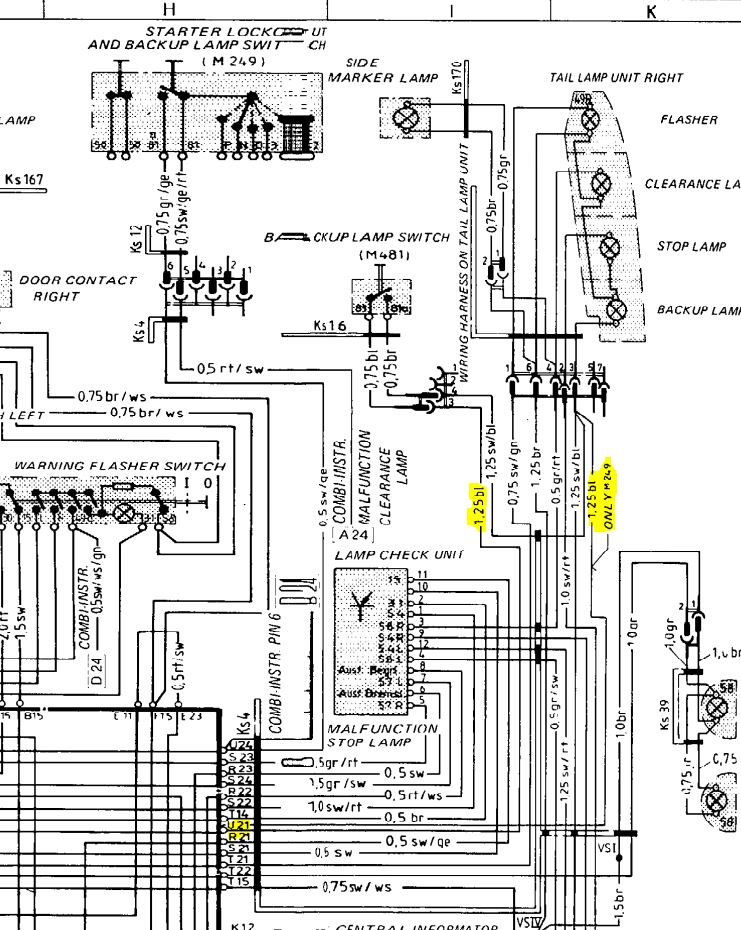
Power then came back from the reverse light switch into pin 86 on the relay solenoid. It then grounded through the headlight relay and the lamp warning system according to the wiring diagram.

The relay then would send power out pin 87, through CE U21, and to the reverse lights. The wiring diagram indicates this is only true on auto cars. On 5 speed cars it looks like this blue wire runs to the reverse light switch, then to the reverse lights, so the reverse light switch is directly switching the power to the lights.
Not wanting to pull apart and rewire the back end of the car I decided to take a different approach.
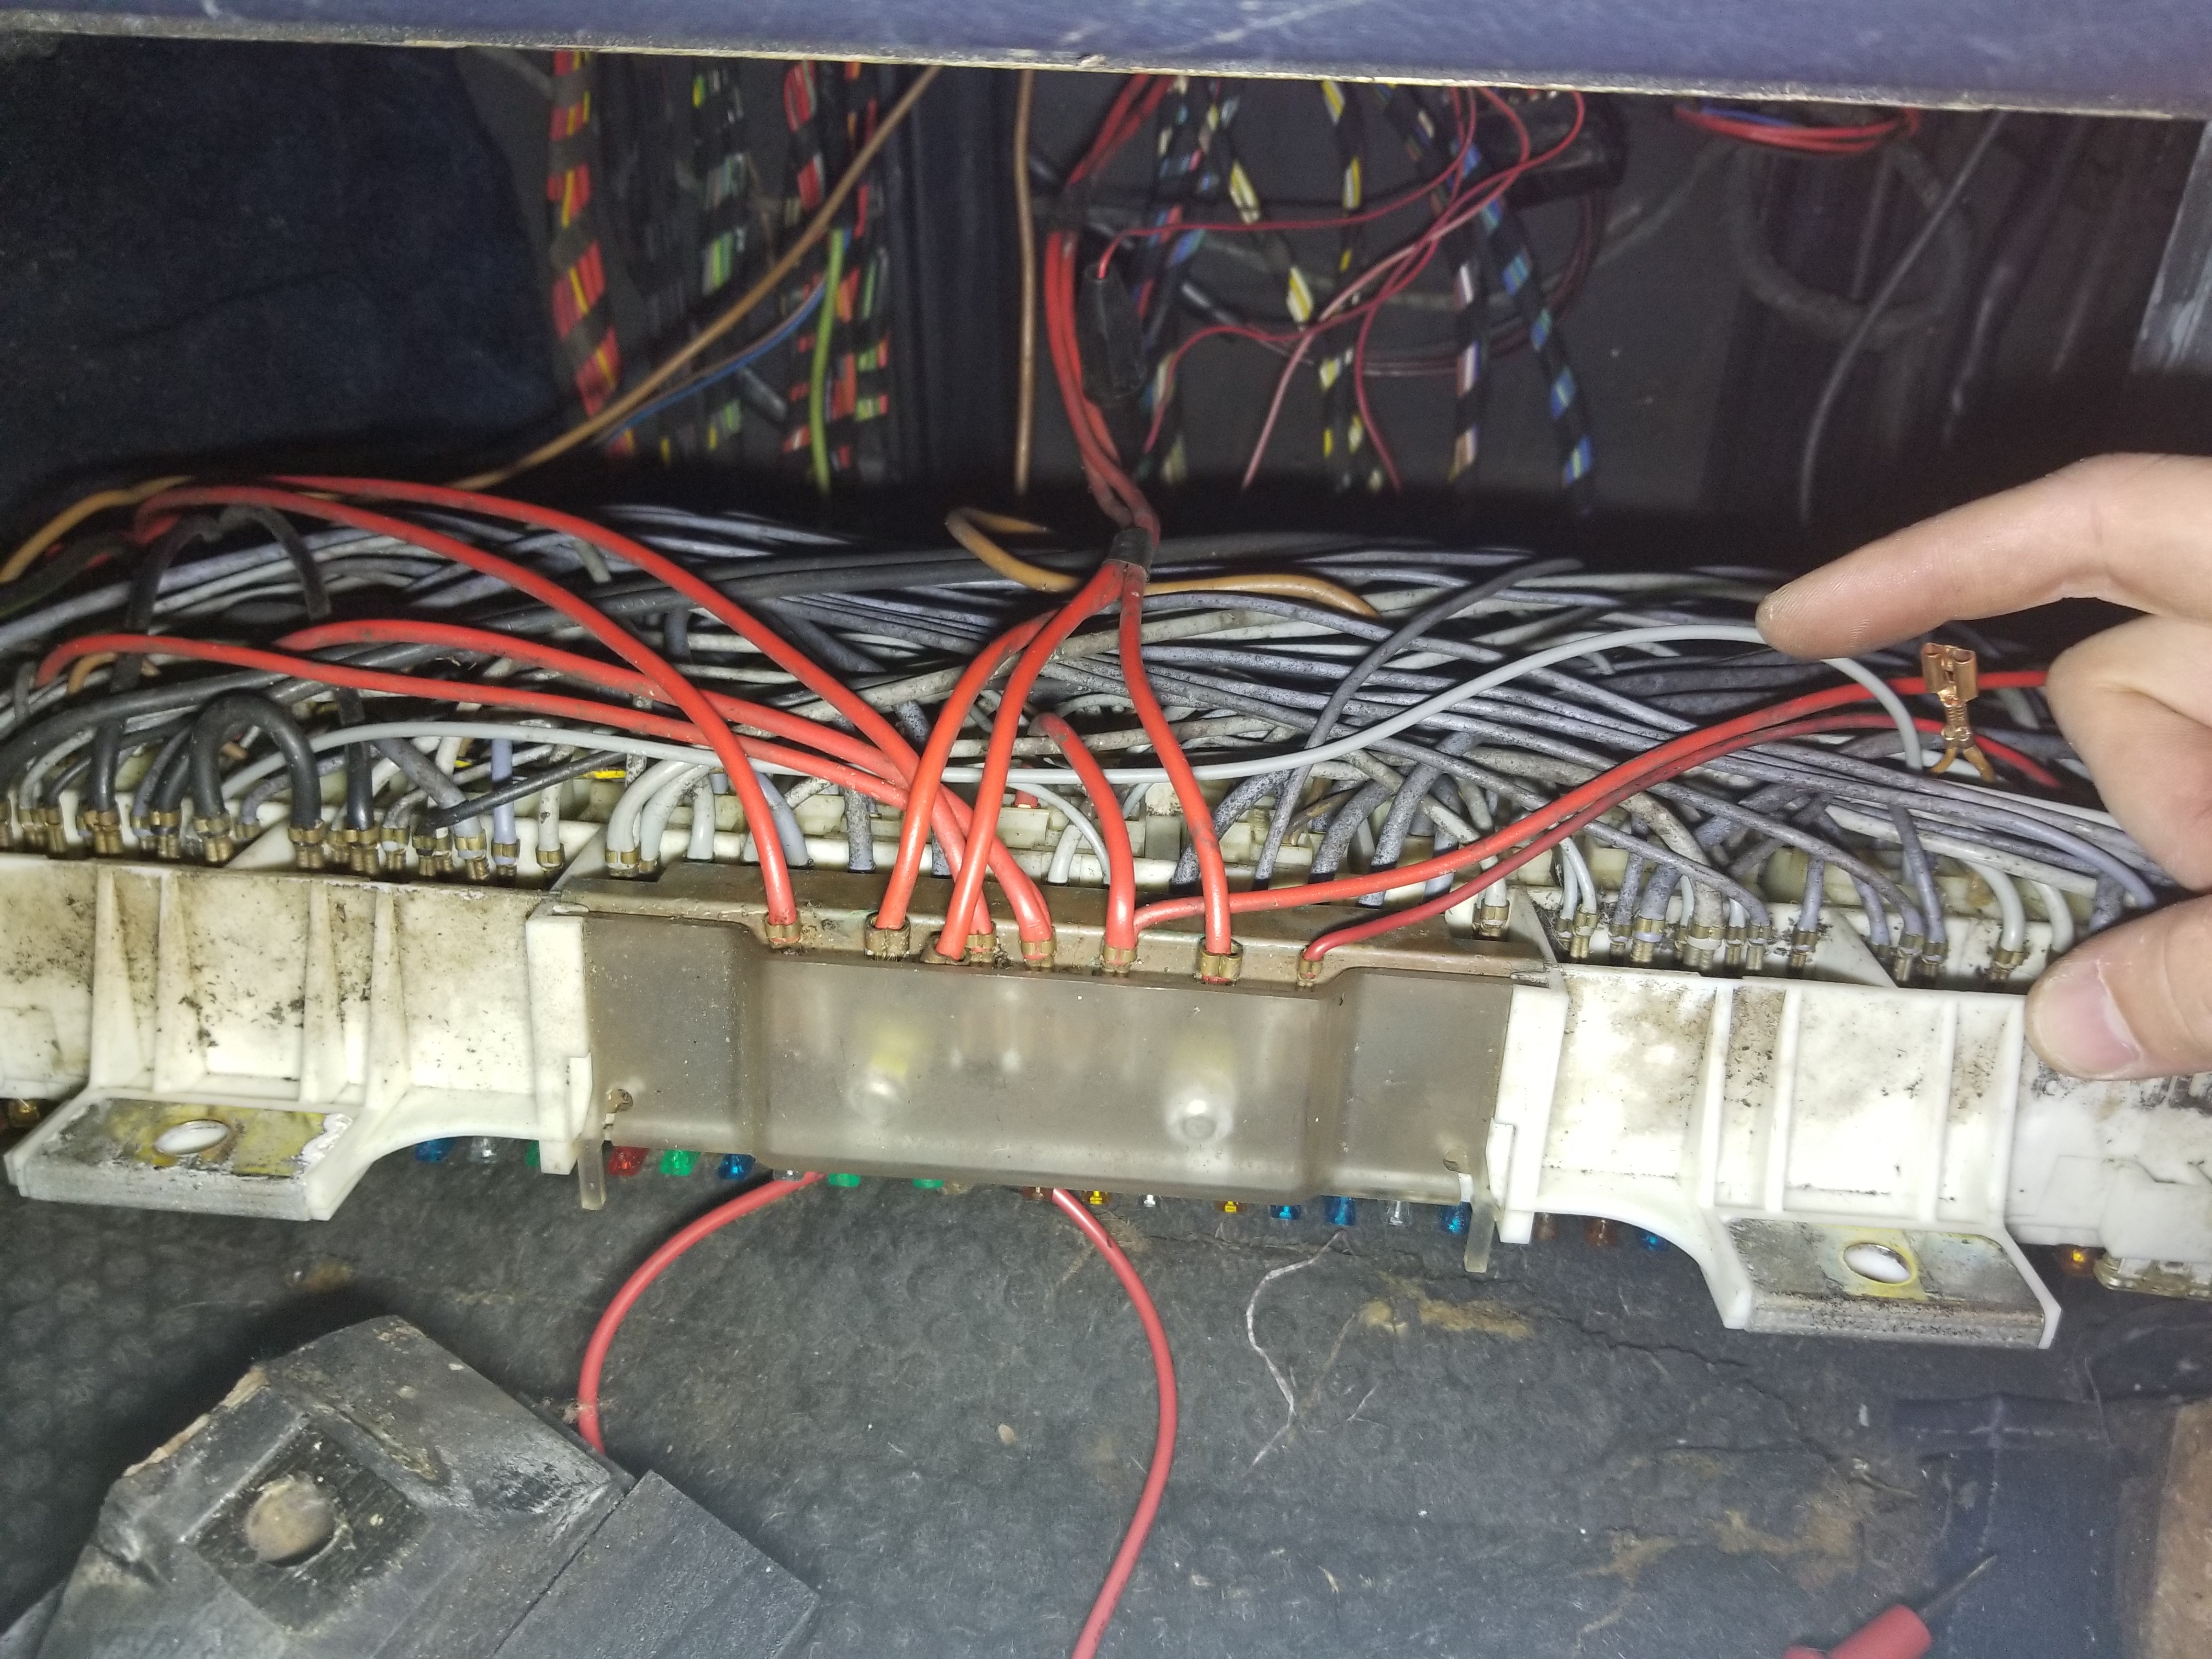
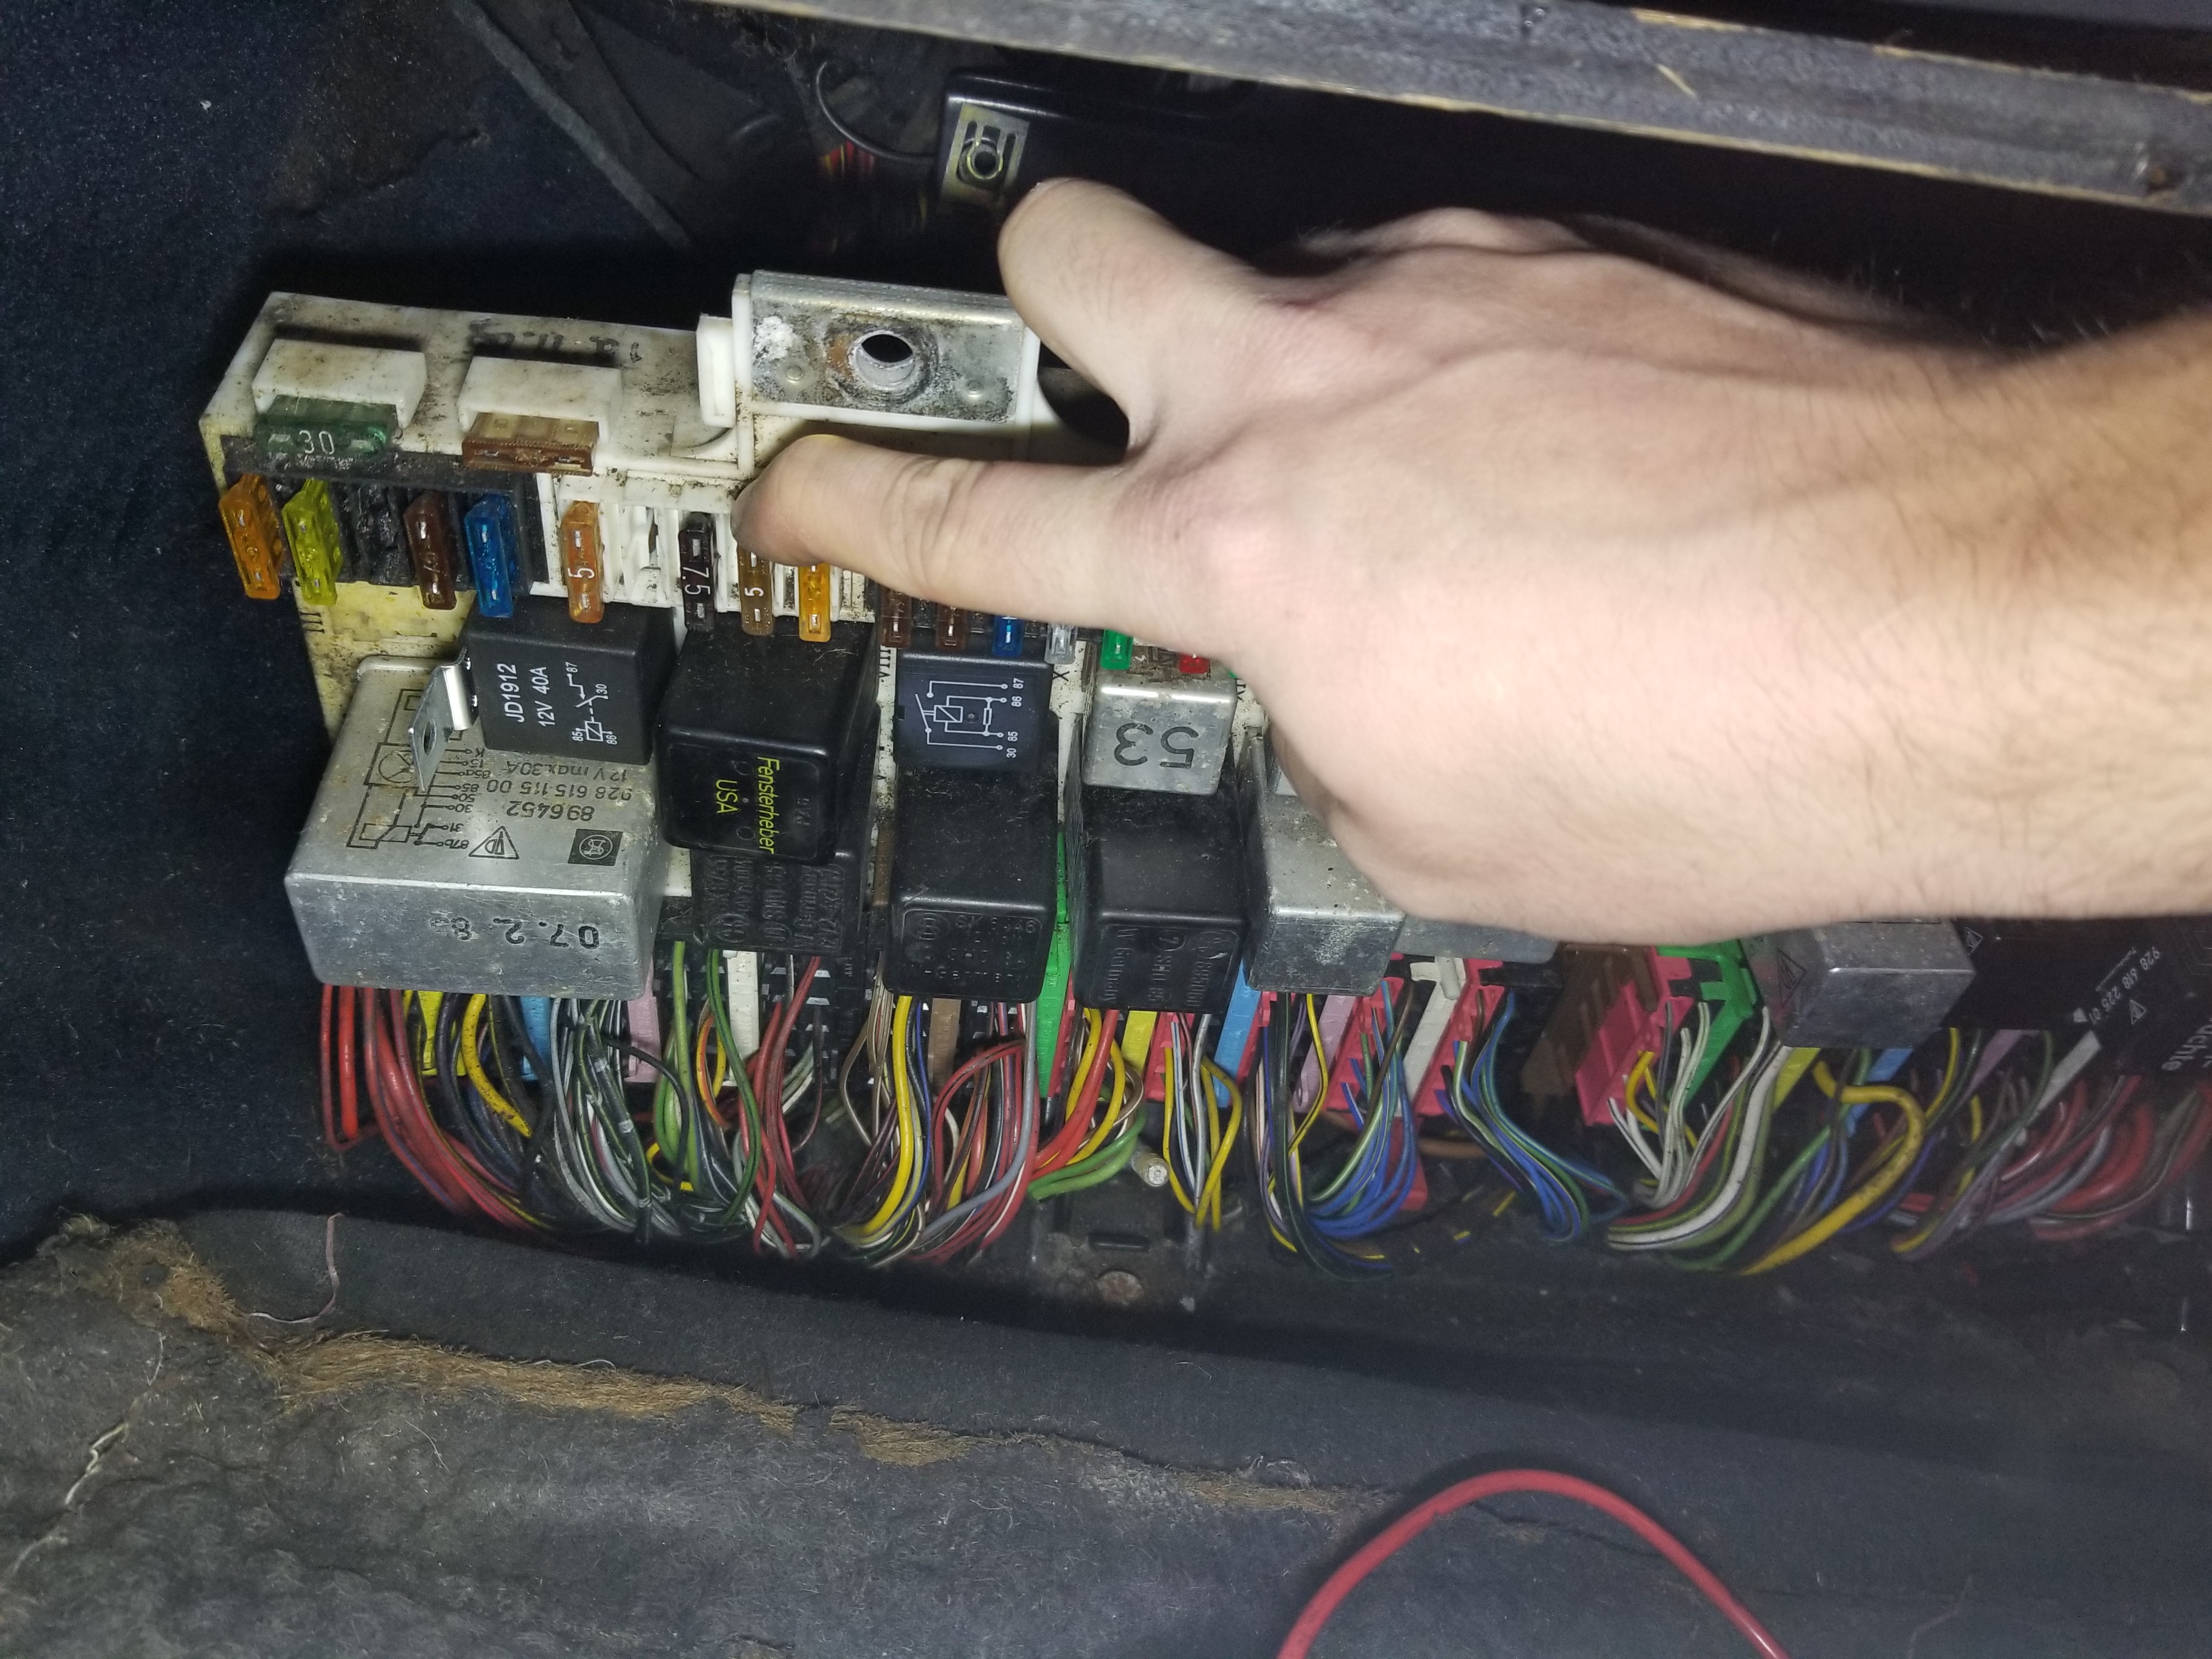
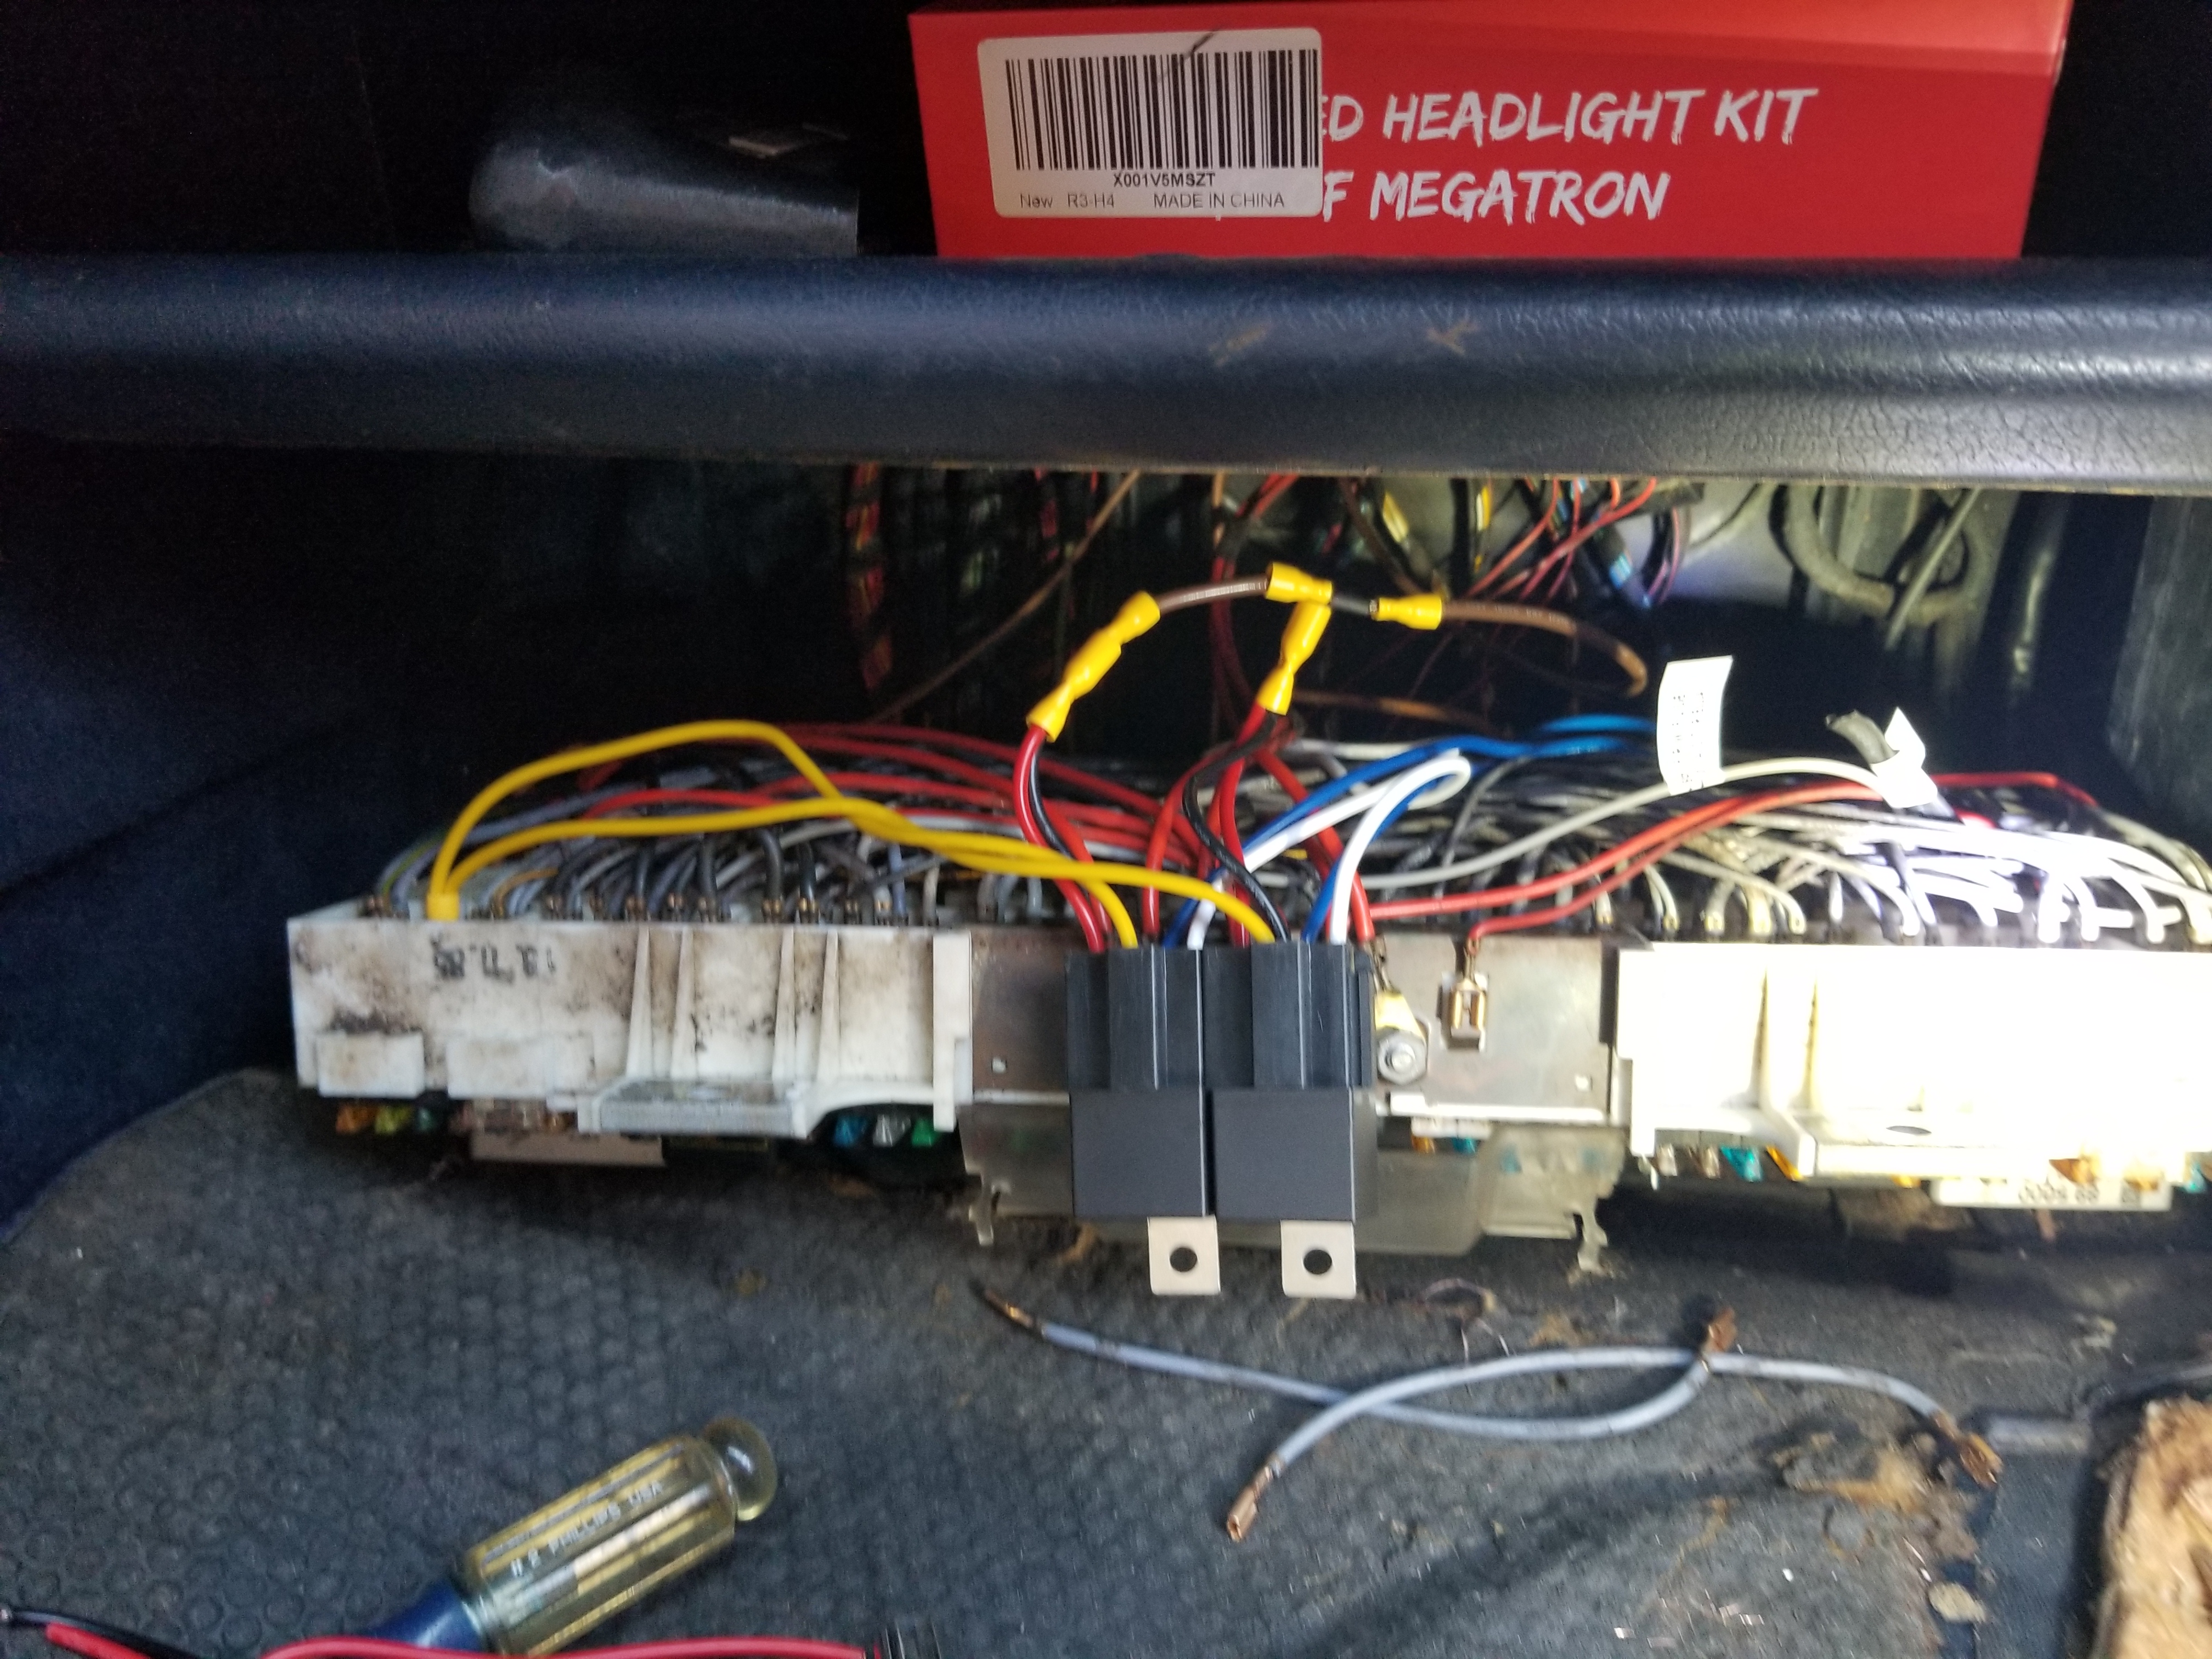
Now instead of pin 85 on the reverse light relay being grounded by the headlight relay/bulb warning system, it now is supplied switched ignition power by the previously unused fuse 9 for the in car phone.
I just put some heat shrink over the old spade terminal I pulled out. I labelled both it and the new wire so that don't the road I won't be wondering what the hell I was doing.
The smallest fuse I had on hand was a 5amp, but realistically I should swap it out with a 1amp or smaller.
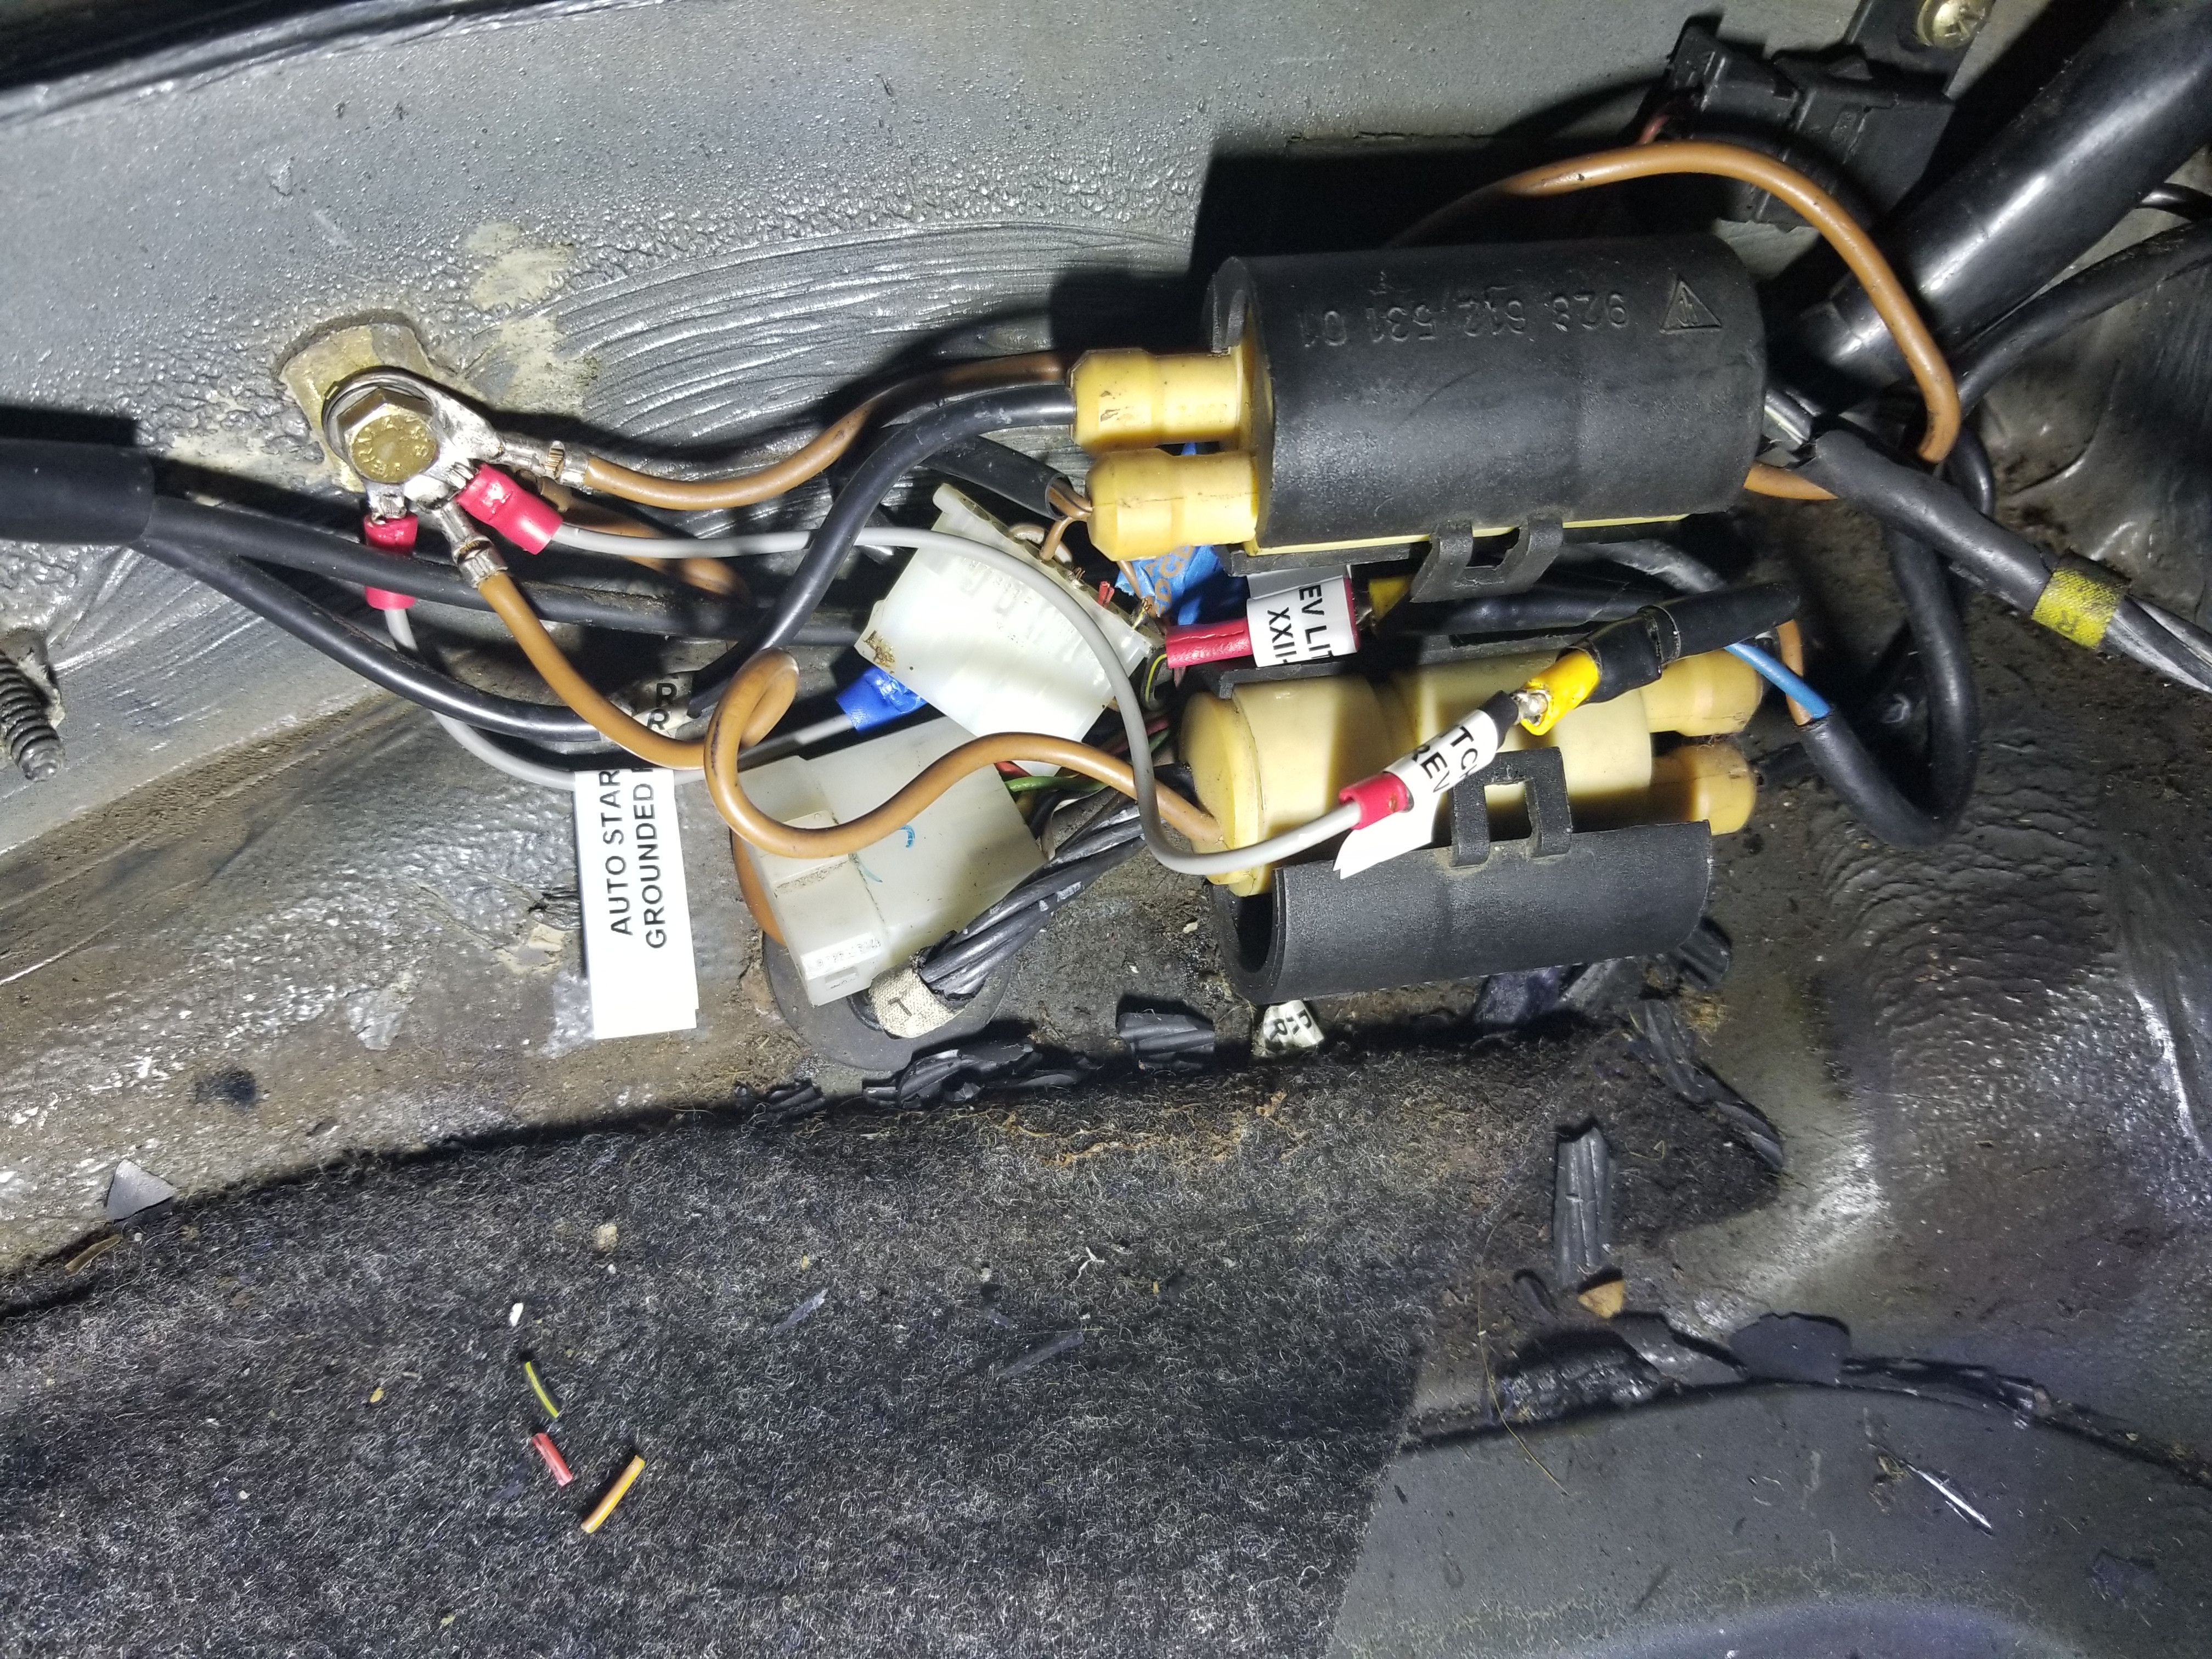
At the back I just hooked the other side of the reverse light switch to a chassis ground. Also labelled it and the wire I had to ground that used to go to the neutral safety switch.
So now instead of the reverse light switch providing power to the solenoid on the relay as before, now the relay solenoid has a 12v supply and the switch just grounds the other side to activate the relay. The lights wiring remains the same. This seemed like the least invasive way of going about things.
I'm not sure what the reasoning for the solenoid being previously grounded through the bulb warning system was, but seeing as the manual cars completely bypass that from factory anyway, I don't think that should be an issue having it out of the picture as far as the reverse lights go now.
Anyway, I now have reverse lights again.
This is how the reverse light switch was originally wired after the 5 speed swap. (I still need to go get the correct connector for this.)
Just like with the auto, the 5 speed switch just jumped those two wires and everything else worked as is. Power came from the range indicator to the reverse light switch.
Power then came back from the reverse light switch into pin 86 on the relay solenoid. It then grounded through the headlight relay and the lamp warning system according to the wiring diagram.
The relay then would send power out pin 87, through CE U21, and to the reverse lights. The wiring diagram indicates this is only true on auto cars. On 5 speed cars it looks like this blue wire runs to the reverse light switch, then to the reverse lights, so the reverse light switch is directly switching the power to the lights.
Not wanting to pull apart and rewire the back end of the car I decided to take a different approach.
Now instead of pin 85 on the reverse light relay being grounded by the headlight relay/bulb warning system, it now is supplied switched ignition power by the previously unused fuse 9 for the in car phone.
I just put some heat shrink over the old spade terminal I pulled out. I labelled both it and the new wire so that don't the road I won't be wondering what the hell I was doing.
The smallest fuse I had on hand was a 5amp, but realistically I should swap it out with a 1amp or smaller.
At the back I just hooked the other side of the reverse light switch to a chassis ground. Also labelled it and the wire I had to ground that used to go to the neutral safety switch.
So now instead of the reverse light switch providing power to the solenoid on the relay as before, now the relay solenoid has a 12v supply and the switch just grounds the other side to activate the relay. The lights wiring remains the same. This seemed like the least invasive way of going about things.
I'm not sure what the reasoning for the solenoid being previously grounded through the bulb warning system was, but seeing as the manual cars completely bypass that from factory anyway, I don't think that should be an issue having it out of the picture as far as the reverse lights go now.
Anyway, I now have reverse lights again.
01-30-2020, 06:57 PM
#259
Burning Brakes
Thread Starter
So I monkeyed with the sunroof a bit more over the past week or two. When hooking up 12v directly to the motor it ran great, but it was still so slow it couldn't shut when going through the switch, even after cleaning the contacts. I couldn't find any issues with any of the connections at the ce or anywhere else either.
Cables and tracks got cleaned again.
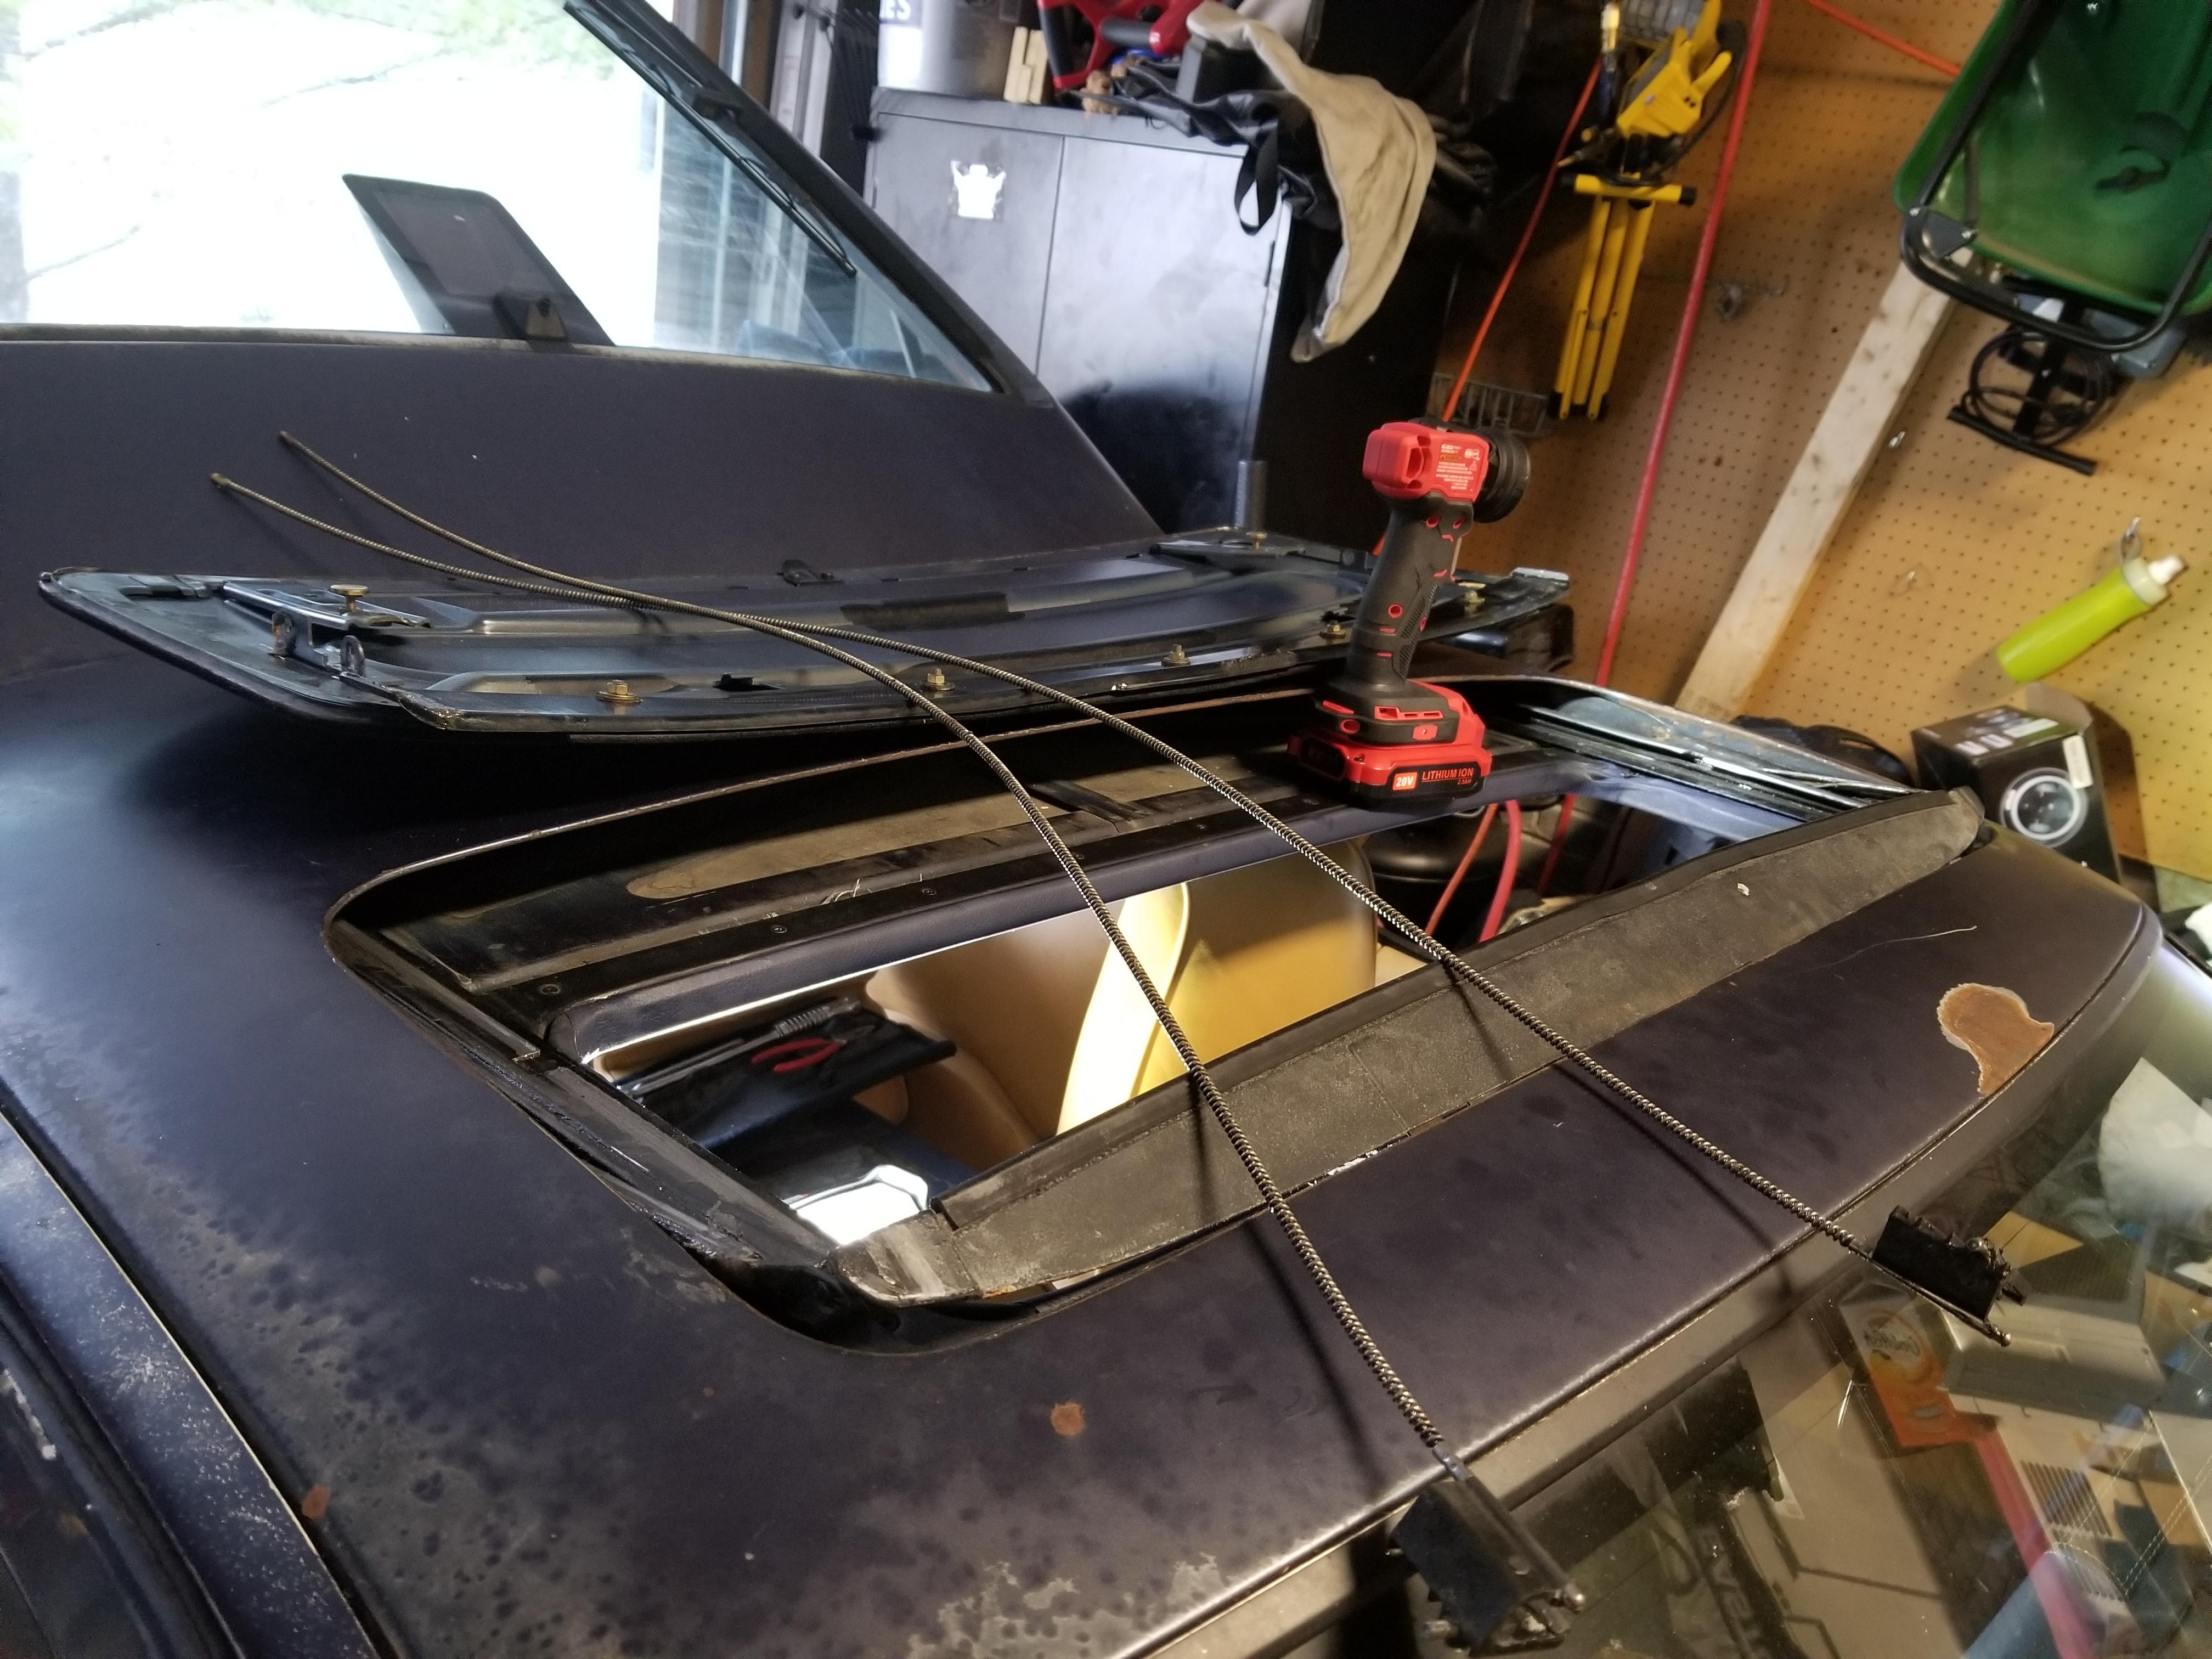
Front rail guides are a little worn, but ok.
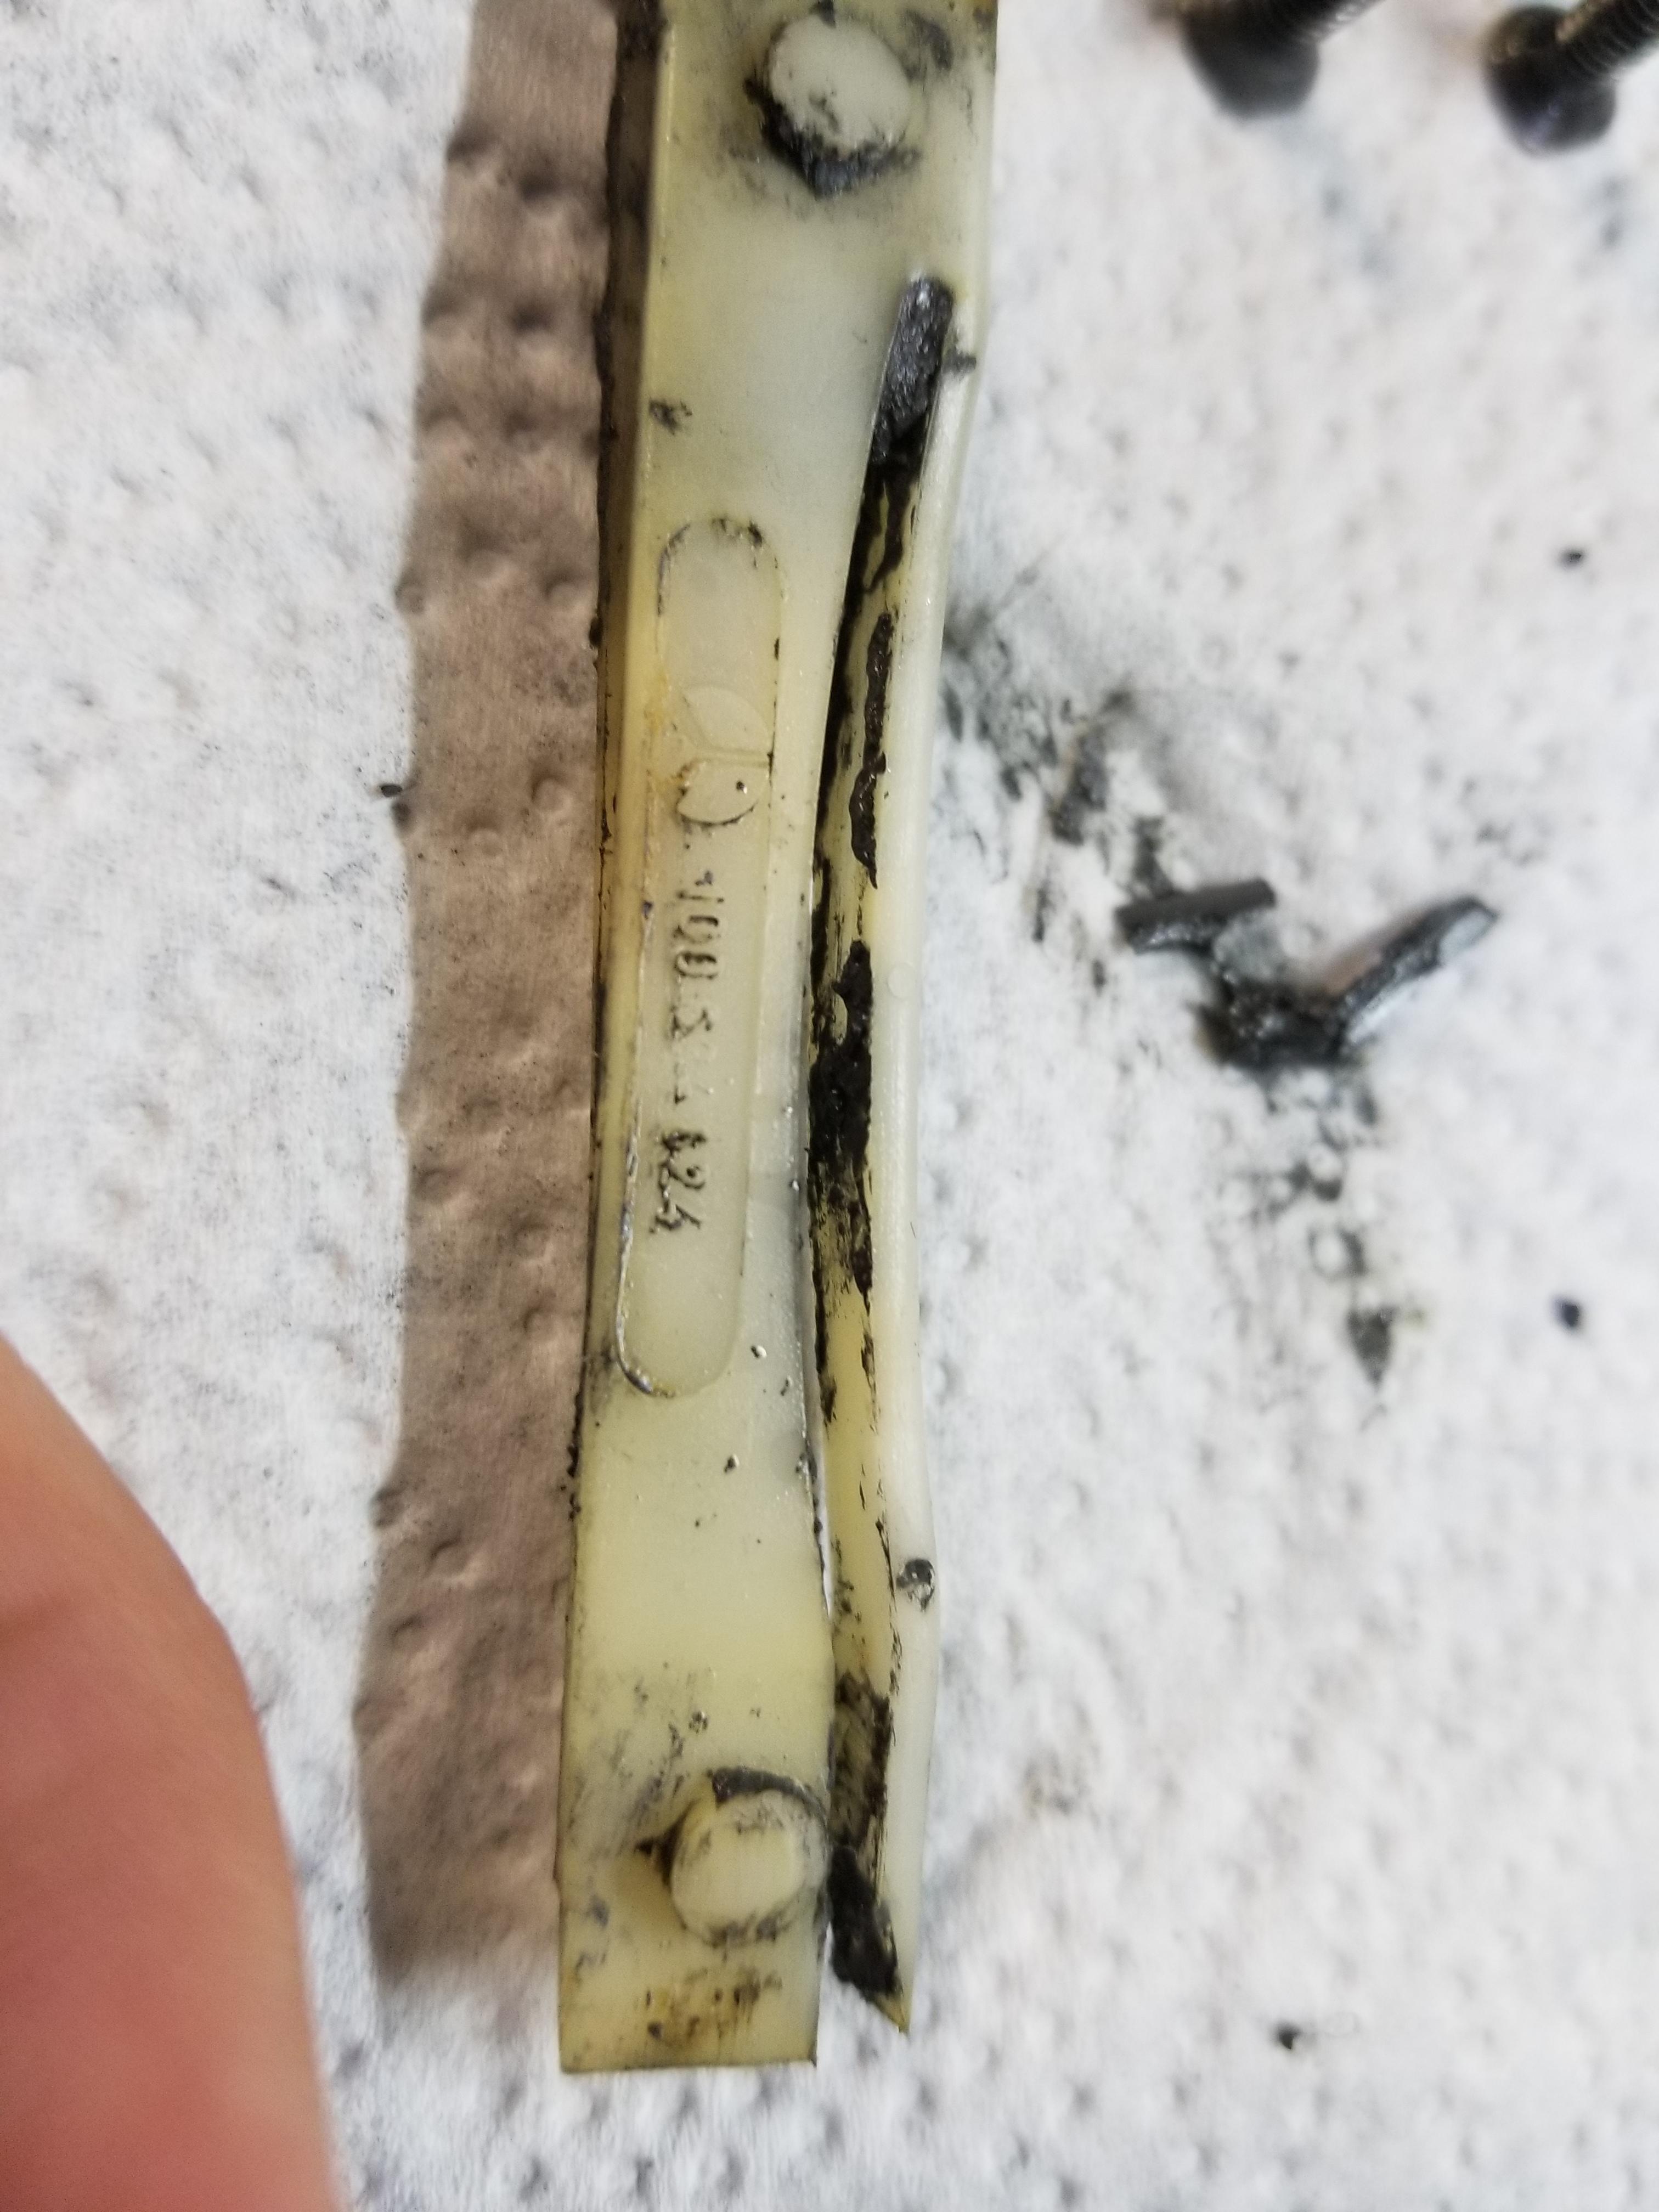
I did break one of the little feet that hit the air dam and they were worn too, so I printed some new ones.
For now my solution to make the roof work was to just let the switch operate a couple of relays so the current of the motor isn't going through those contacts.
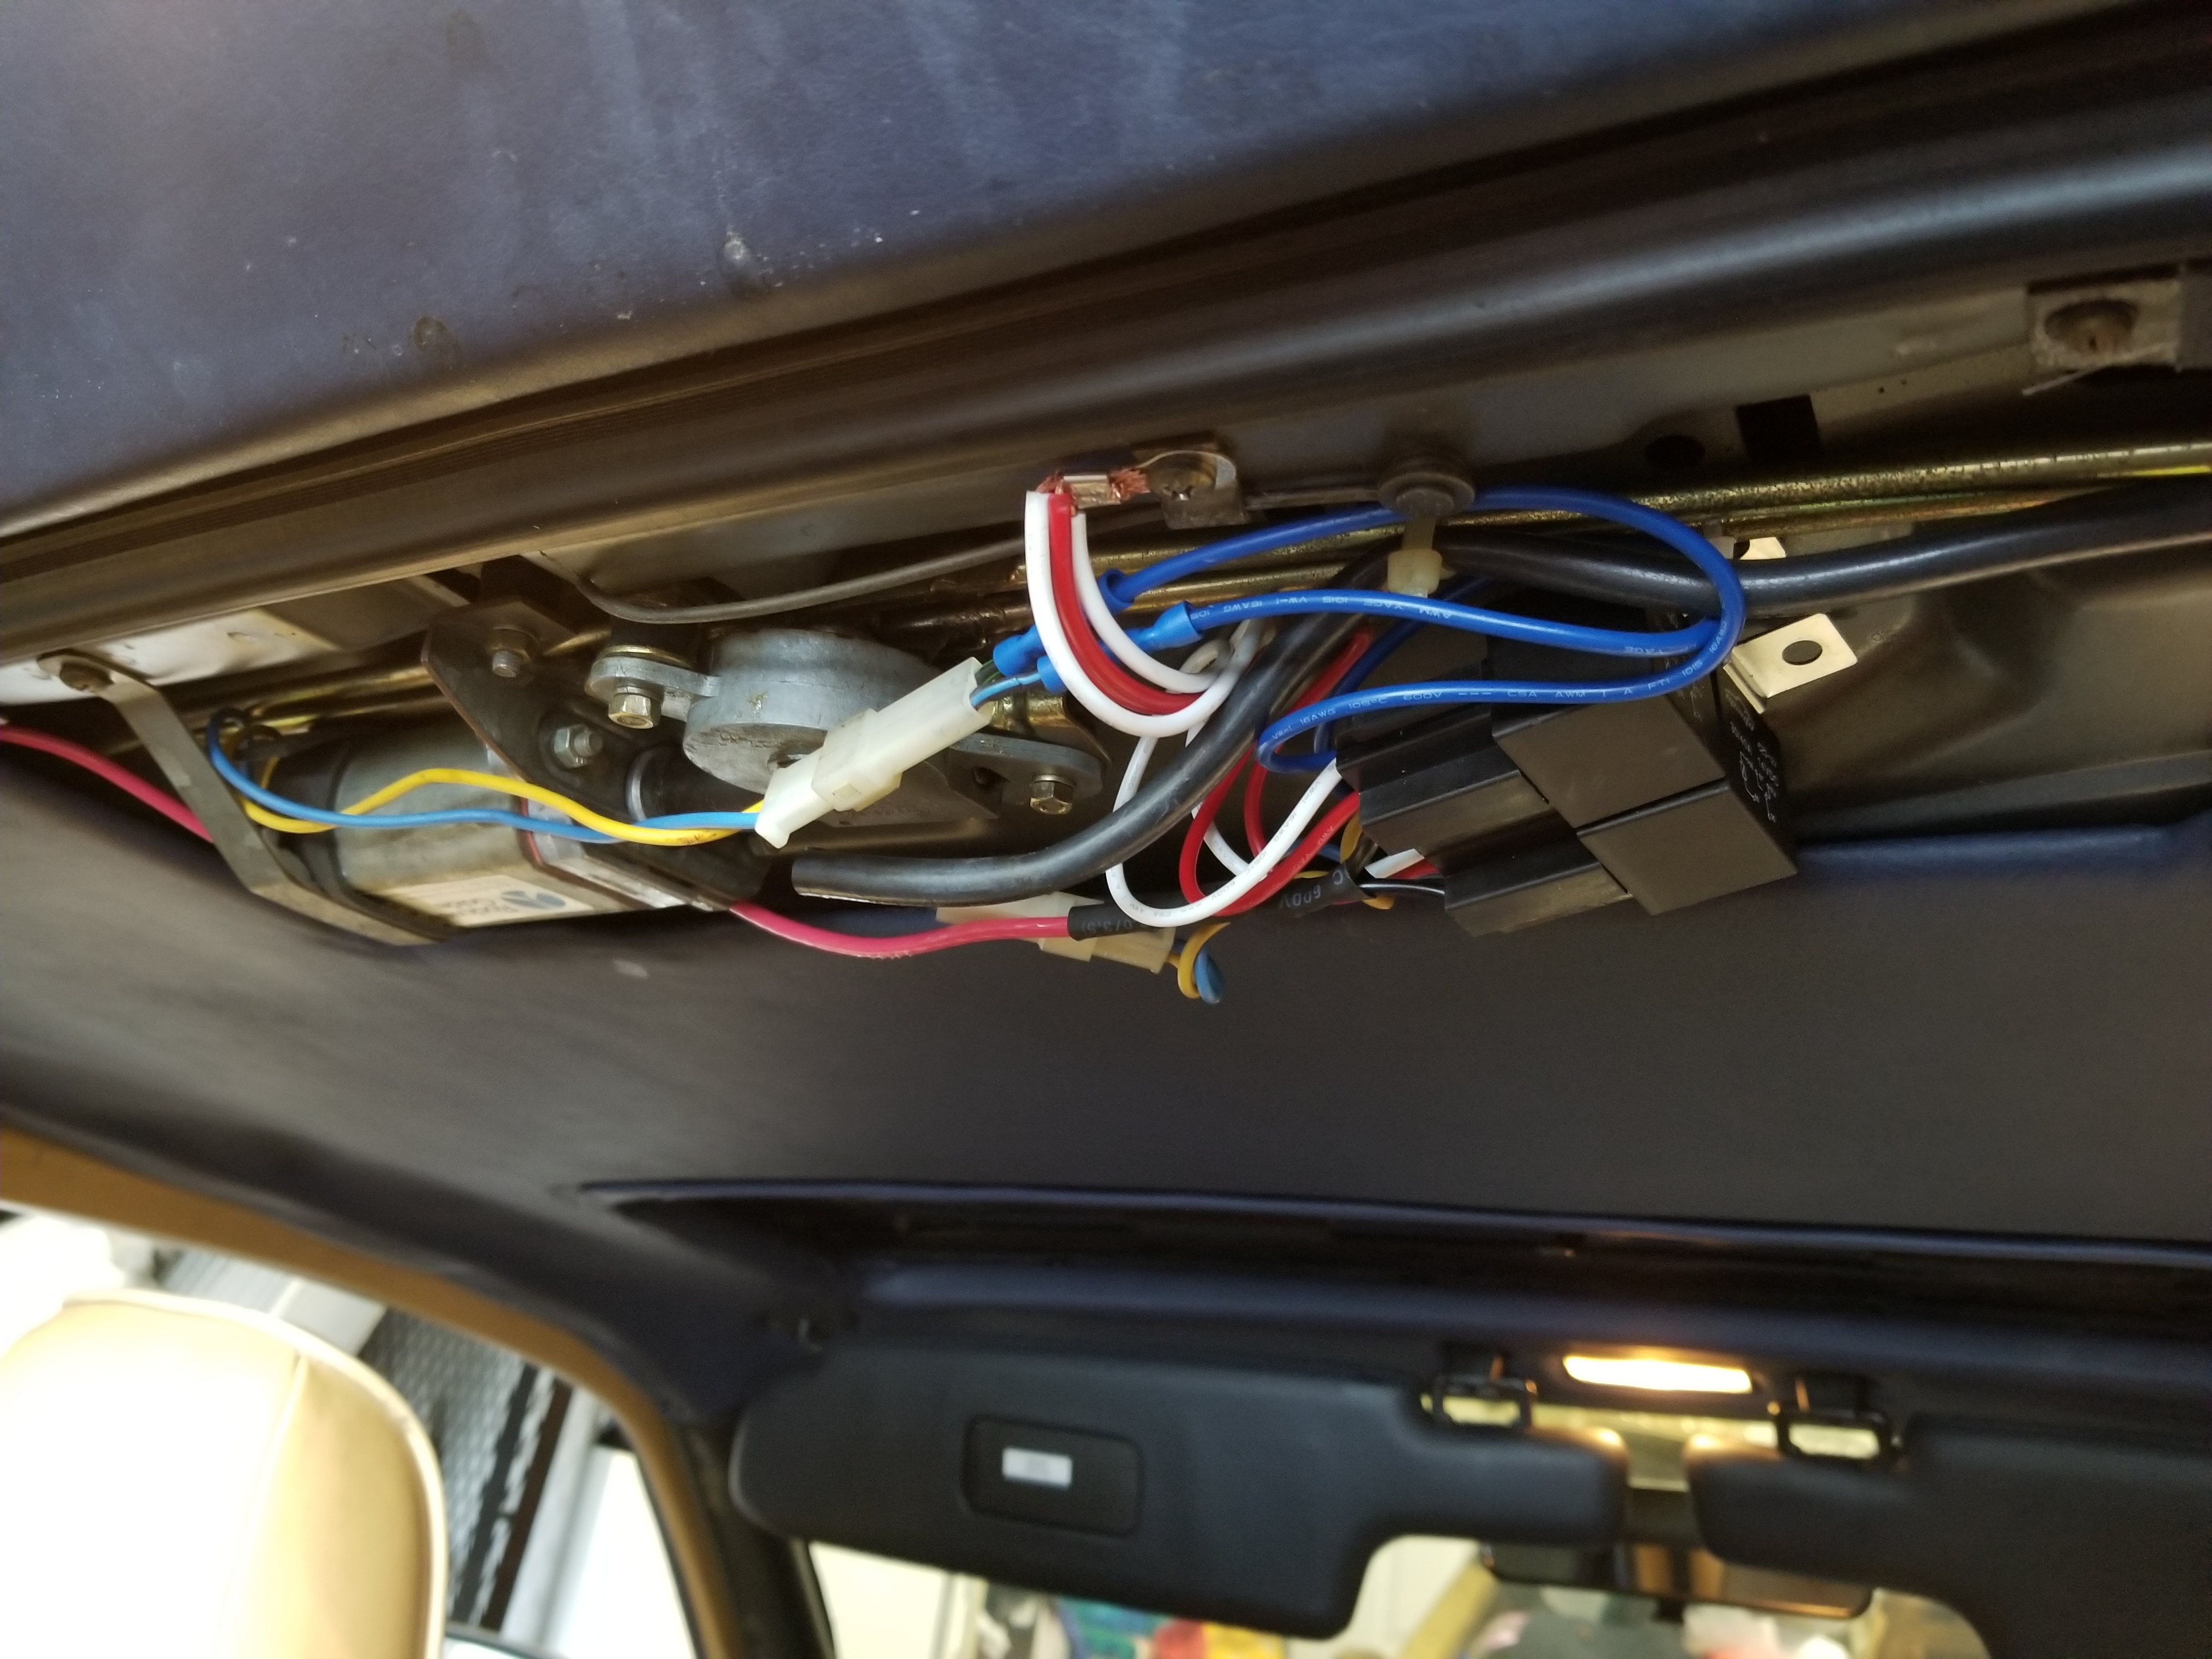
Immediately after putting those relays up there I realized I could have put them behind the CE and used the original wiring from there up to the sunroof motor since it's pretty beefy, so that's on my list to do. But for now it at least operates.
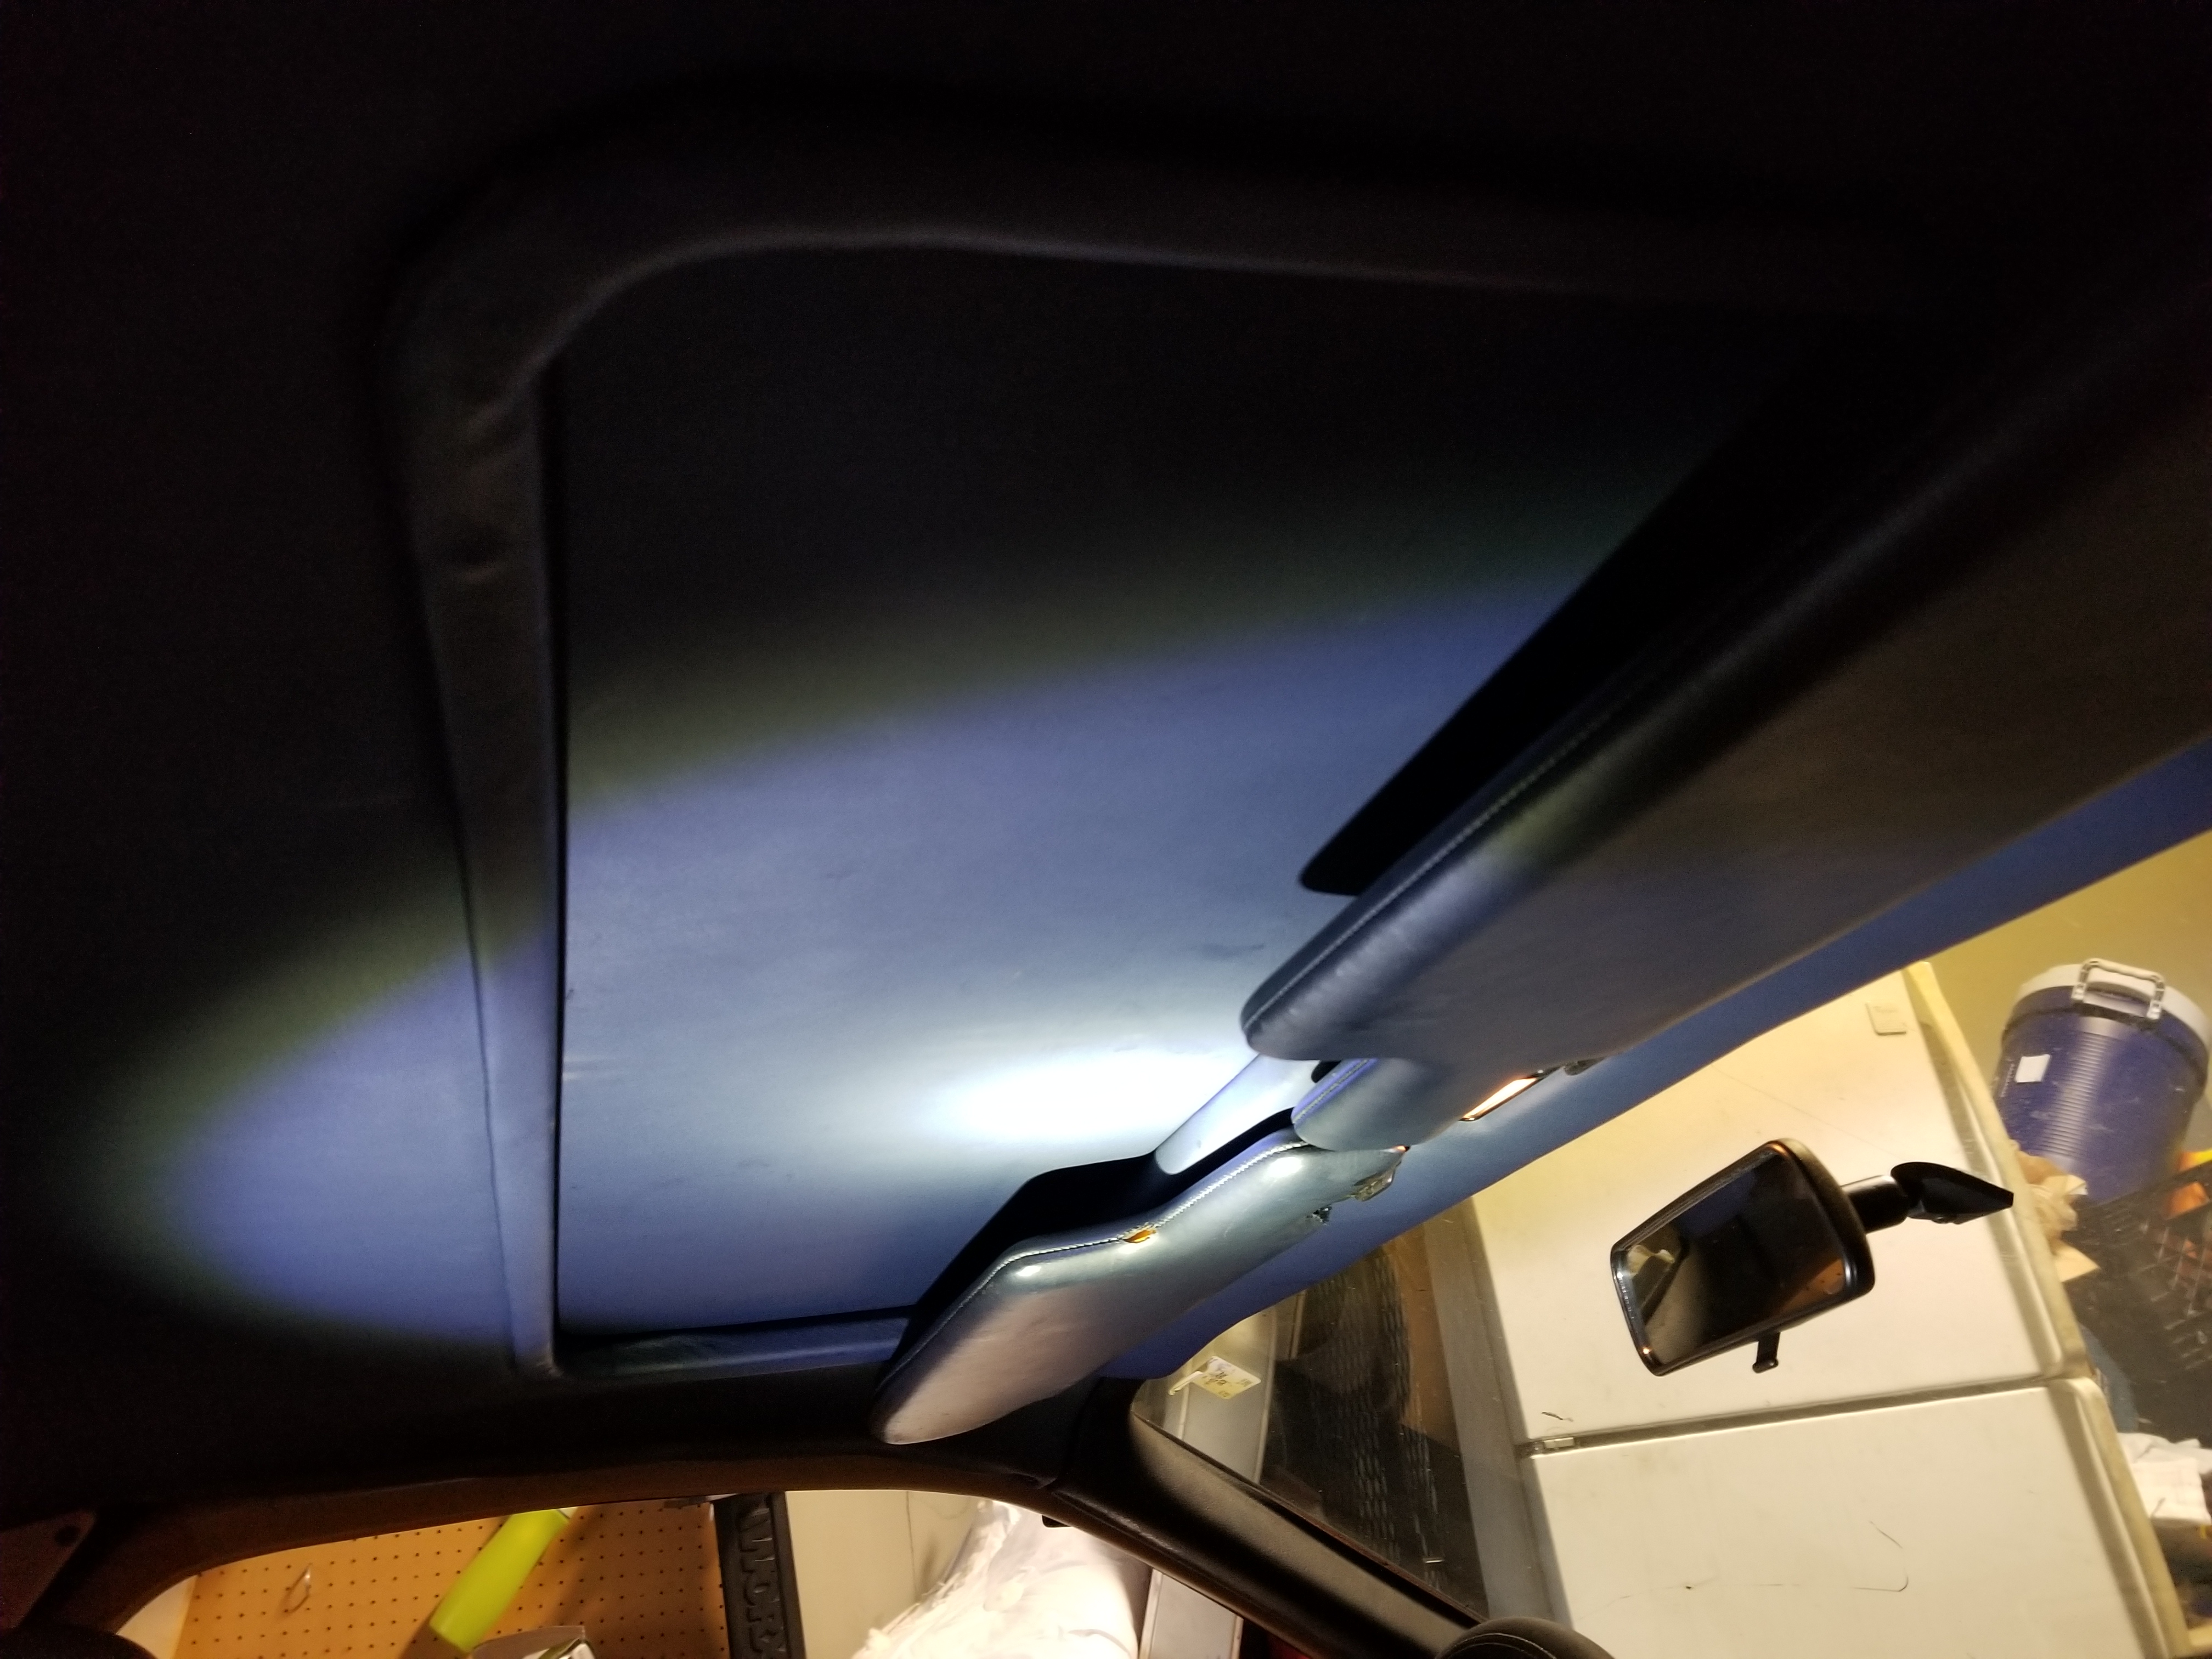
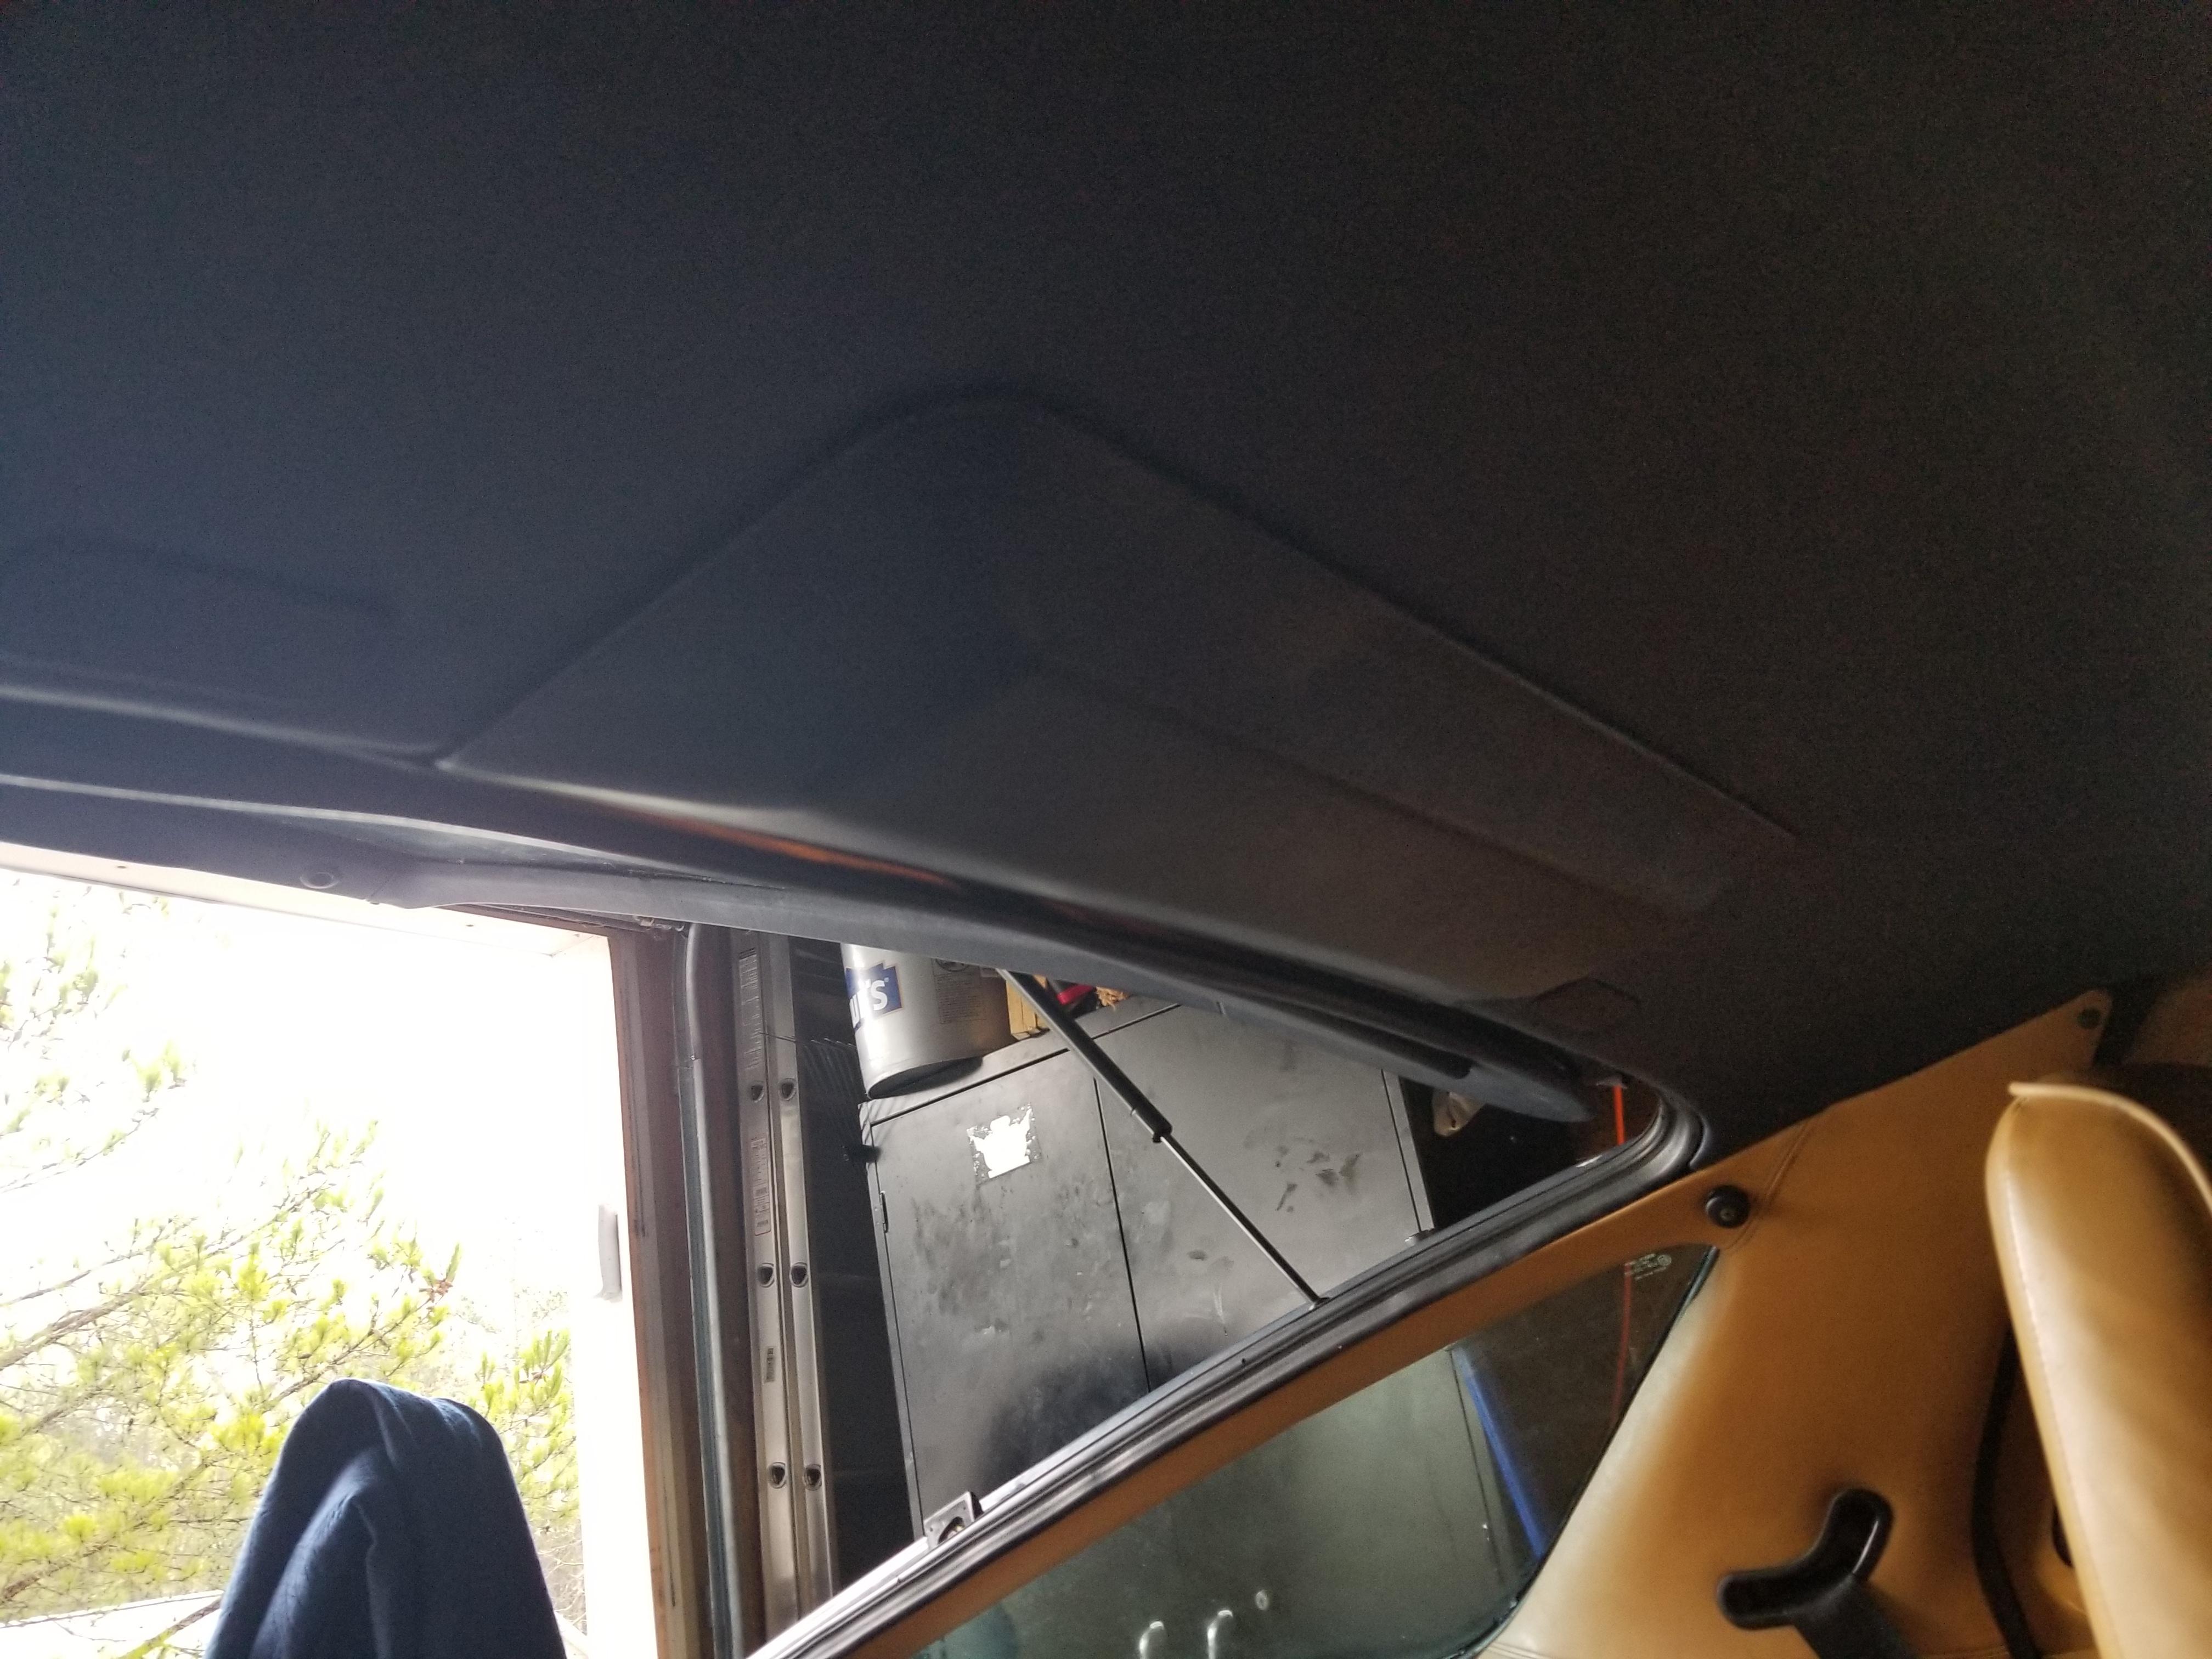
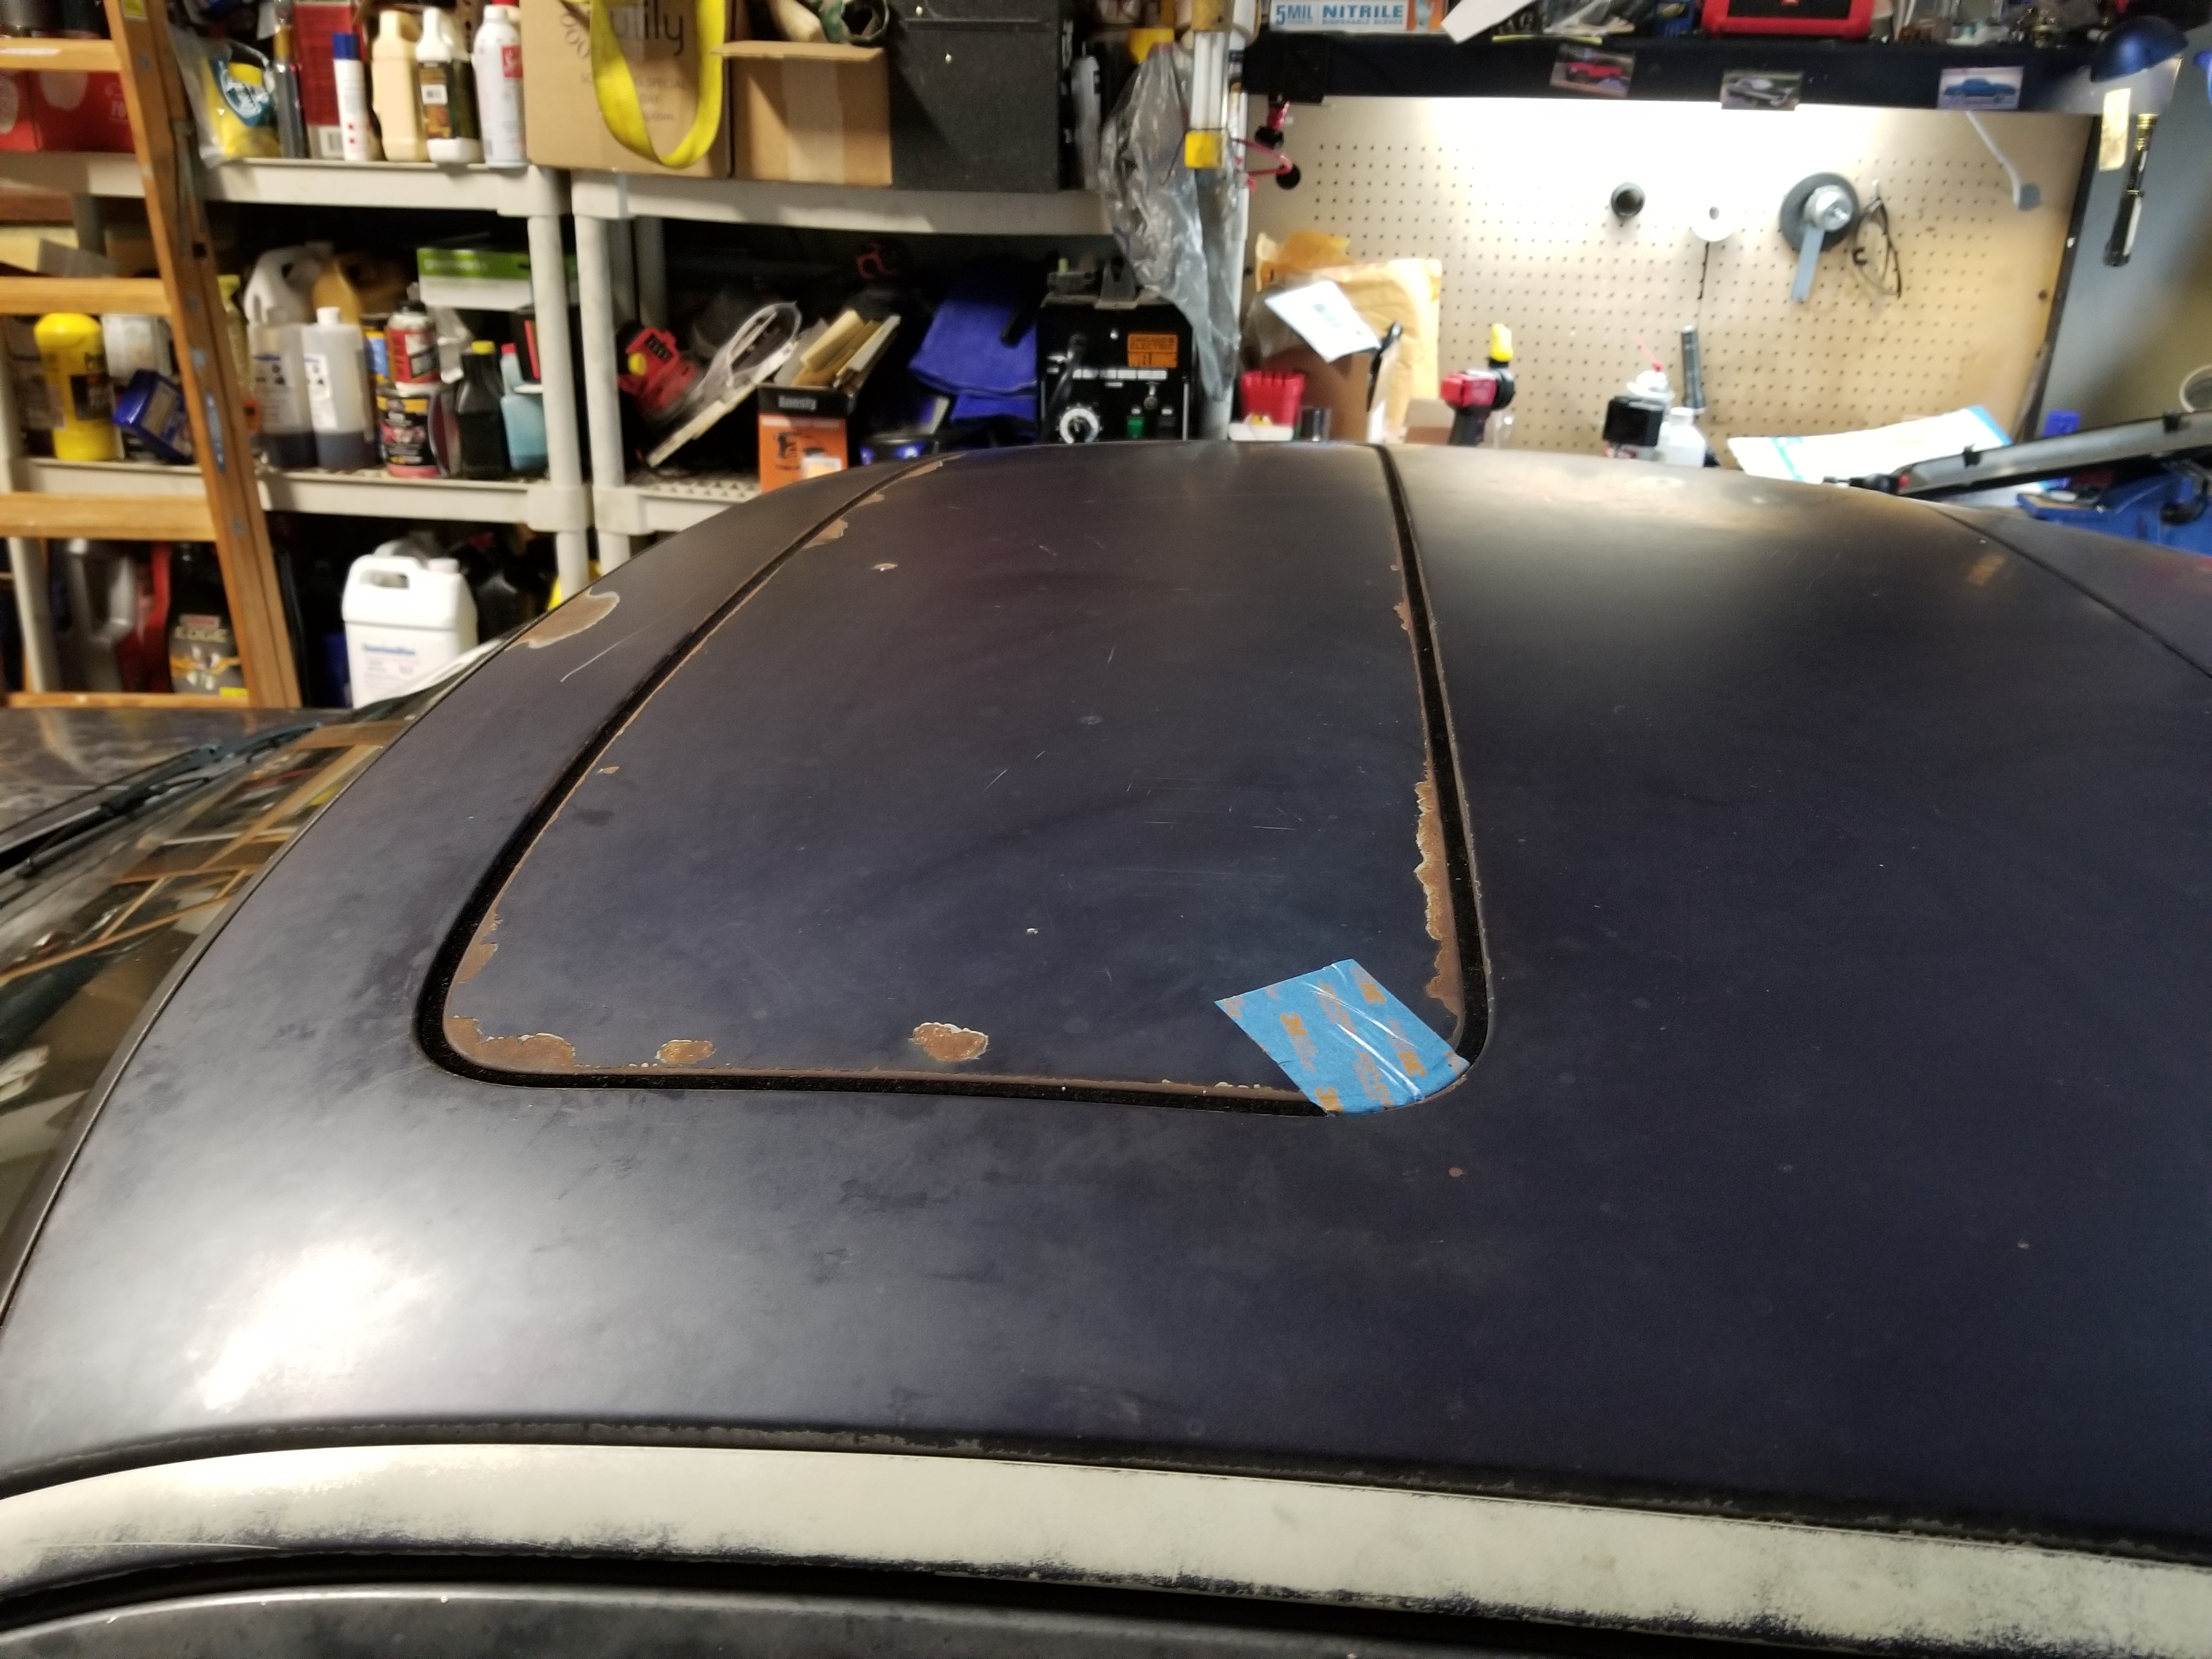
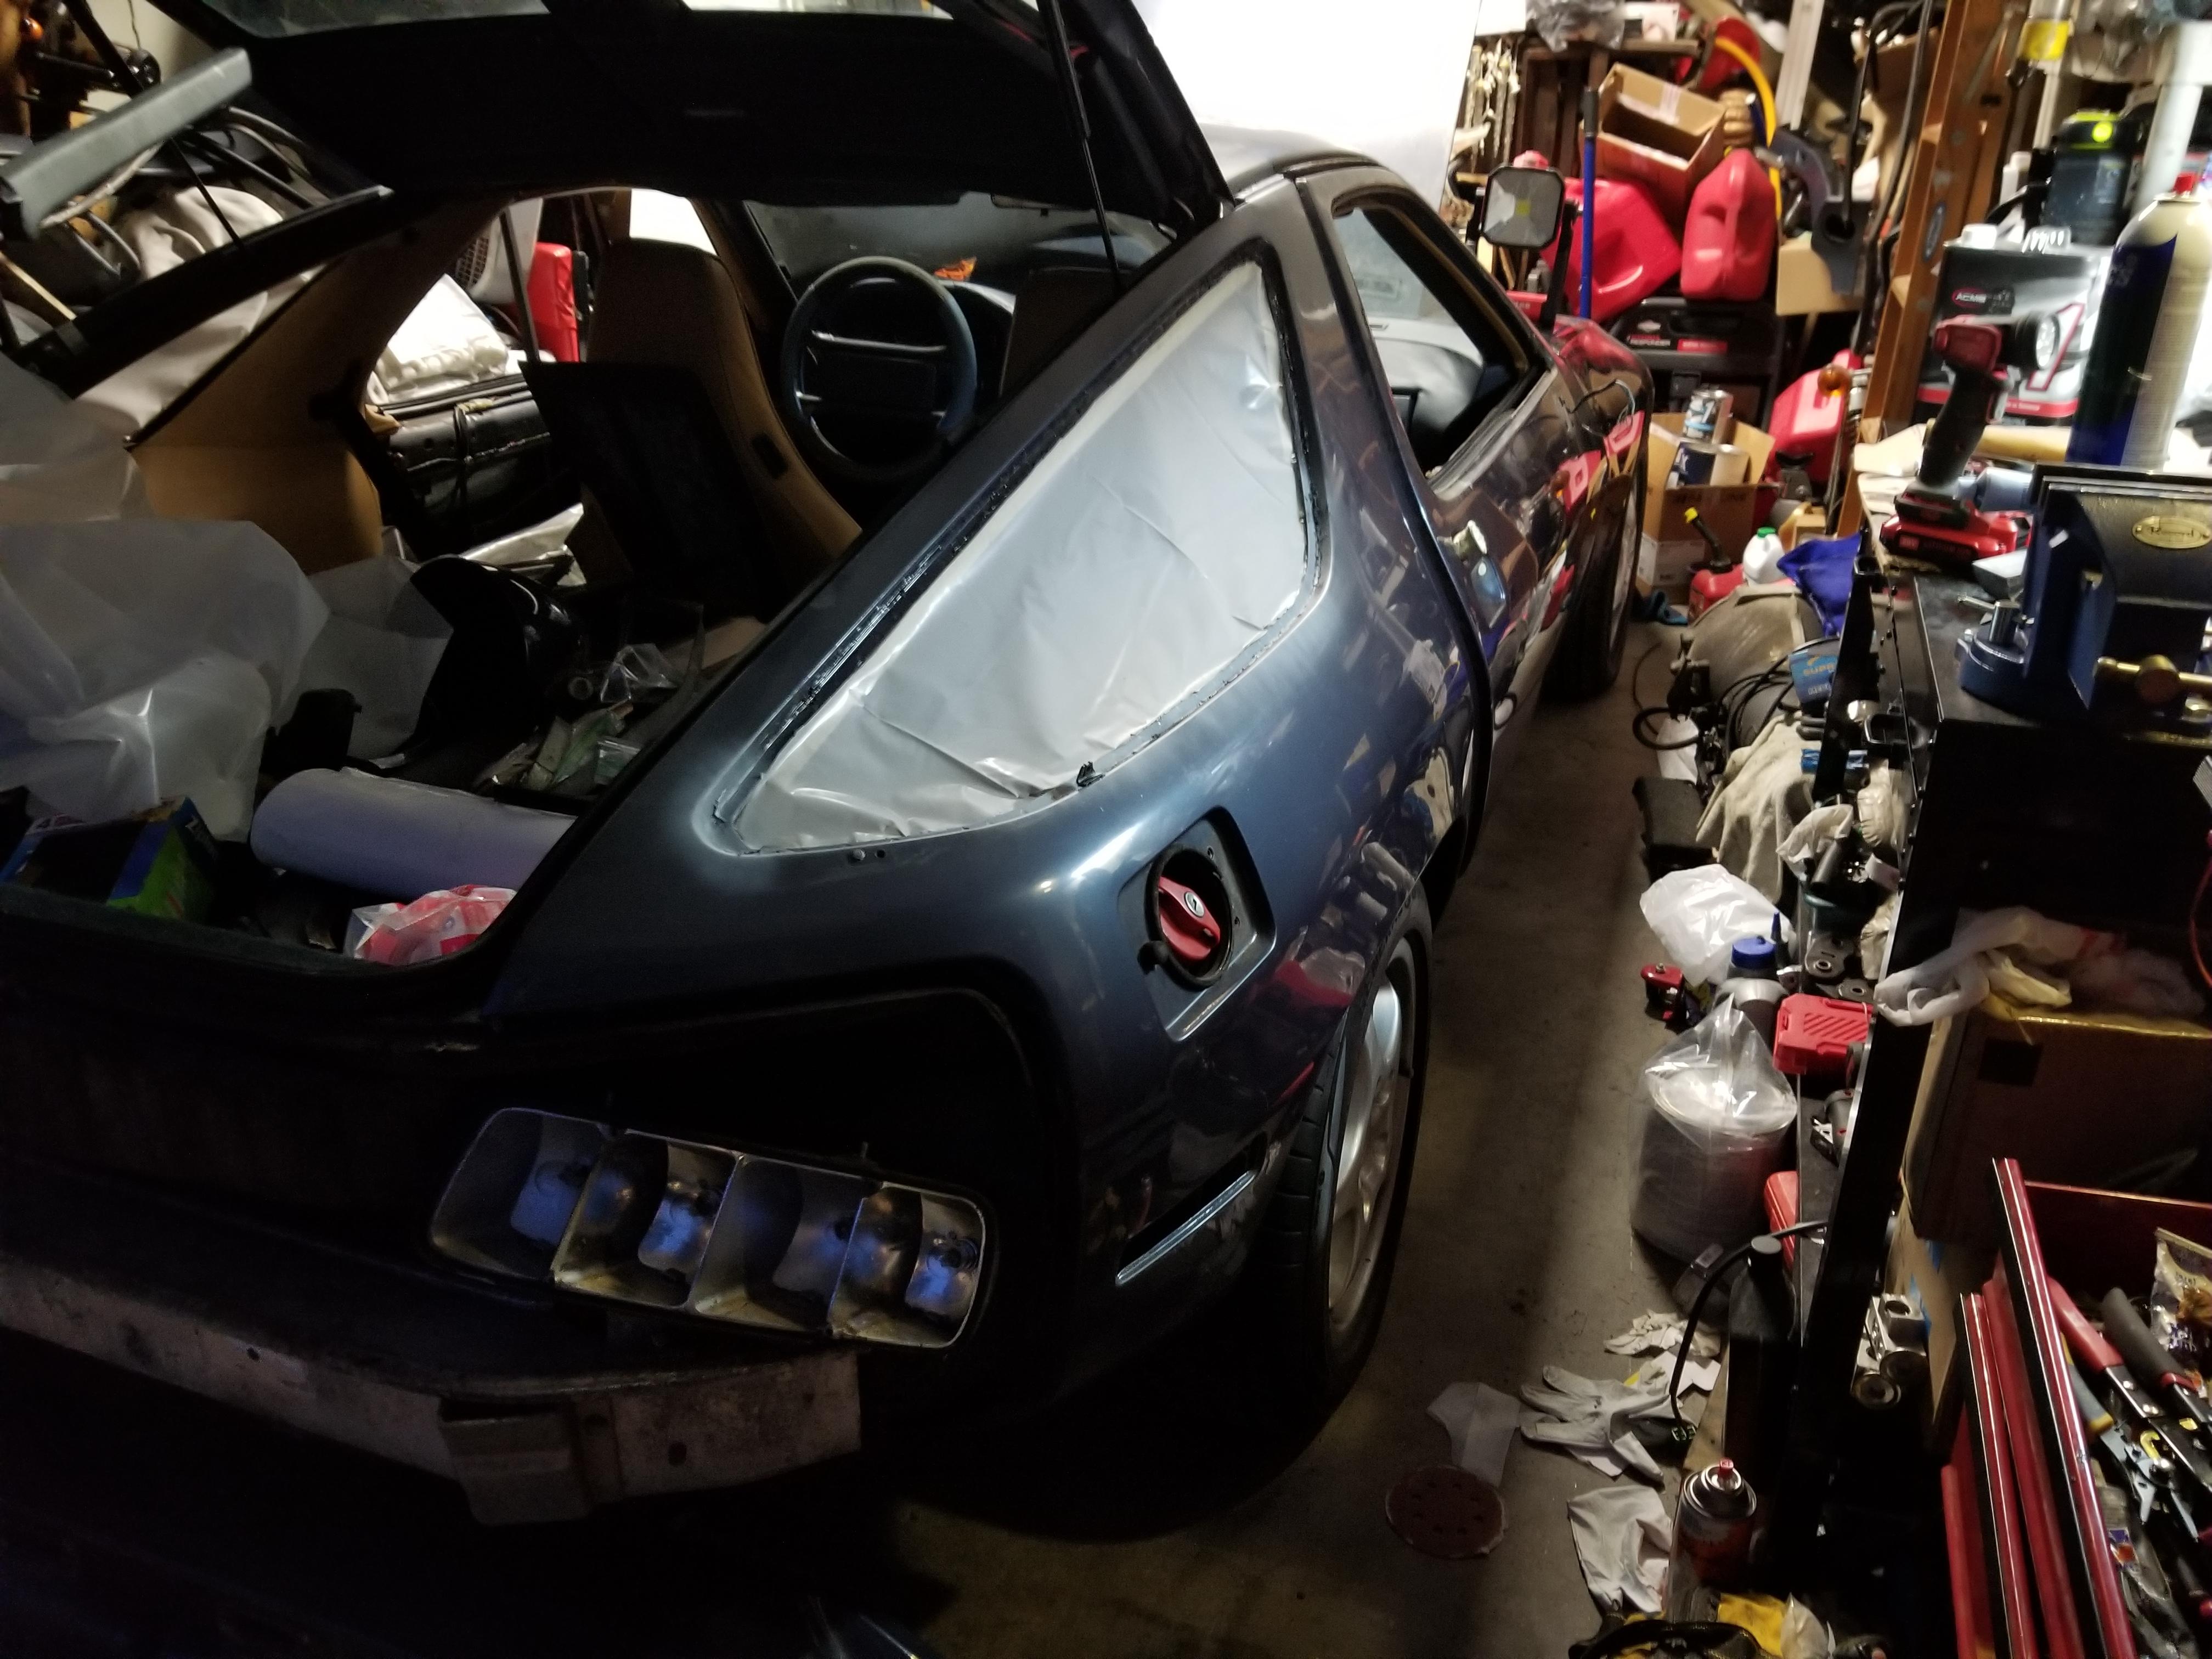
A couple pieces of masking tape are helping hold the seal compressed a bit since it's too cold to put it out in the sun and let it form. Shutting it was making the seal try and roll down some.
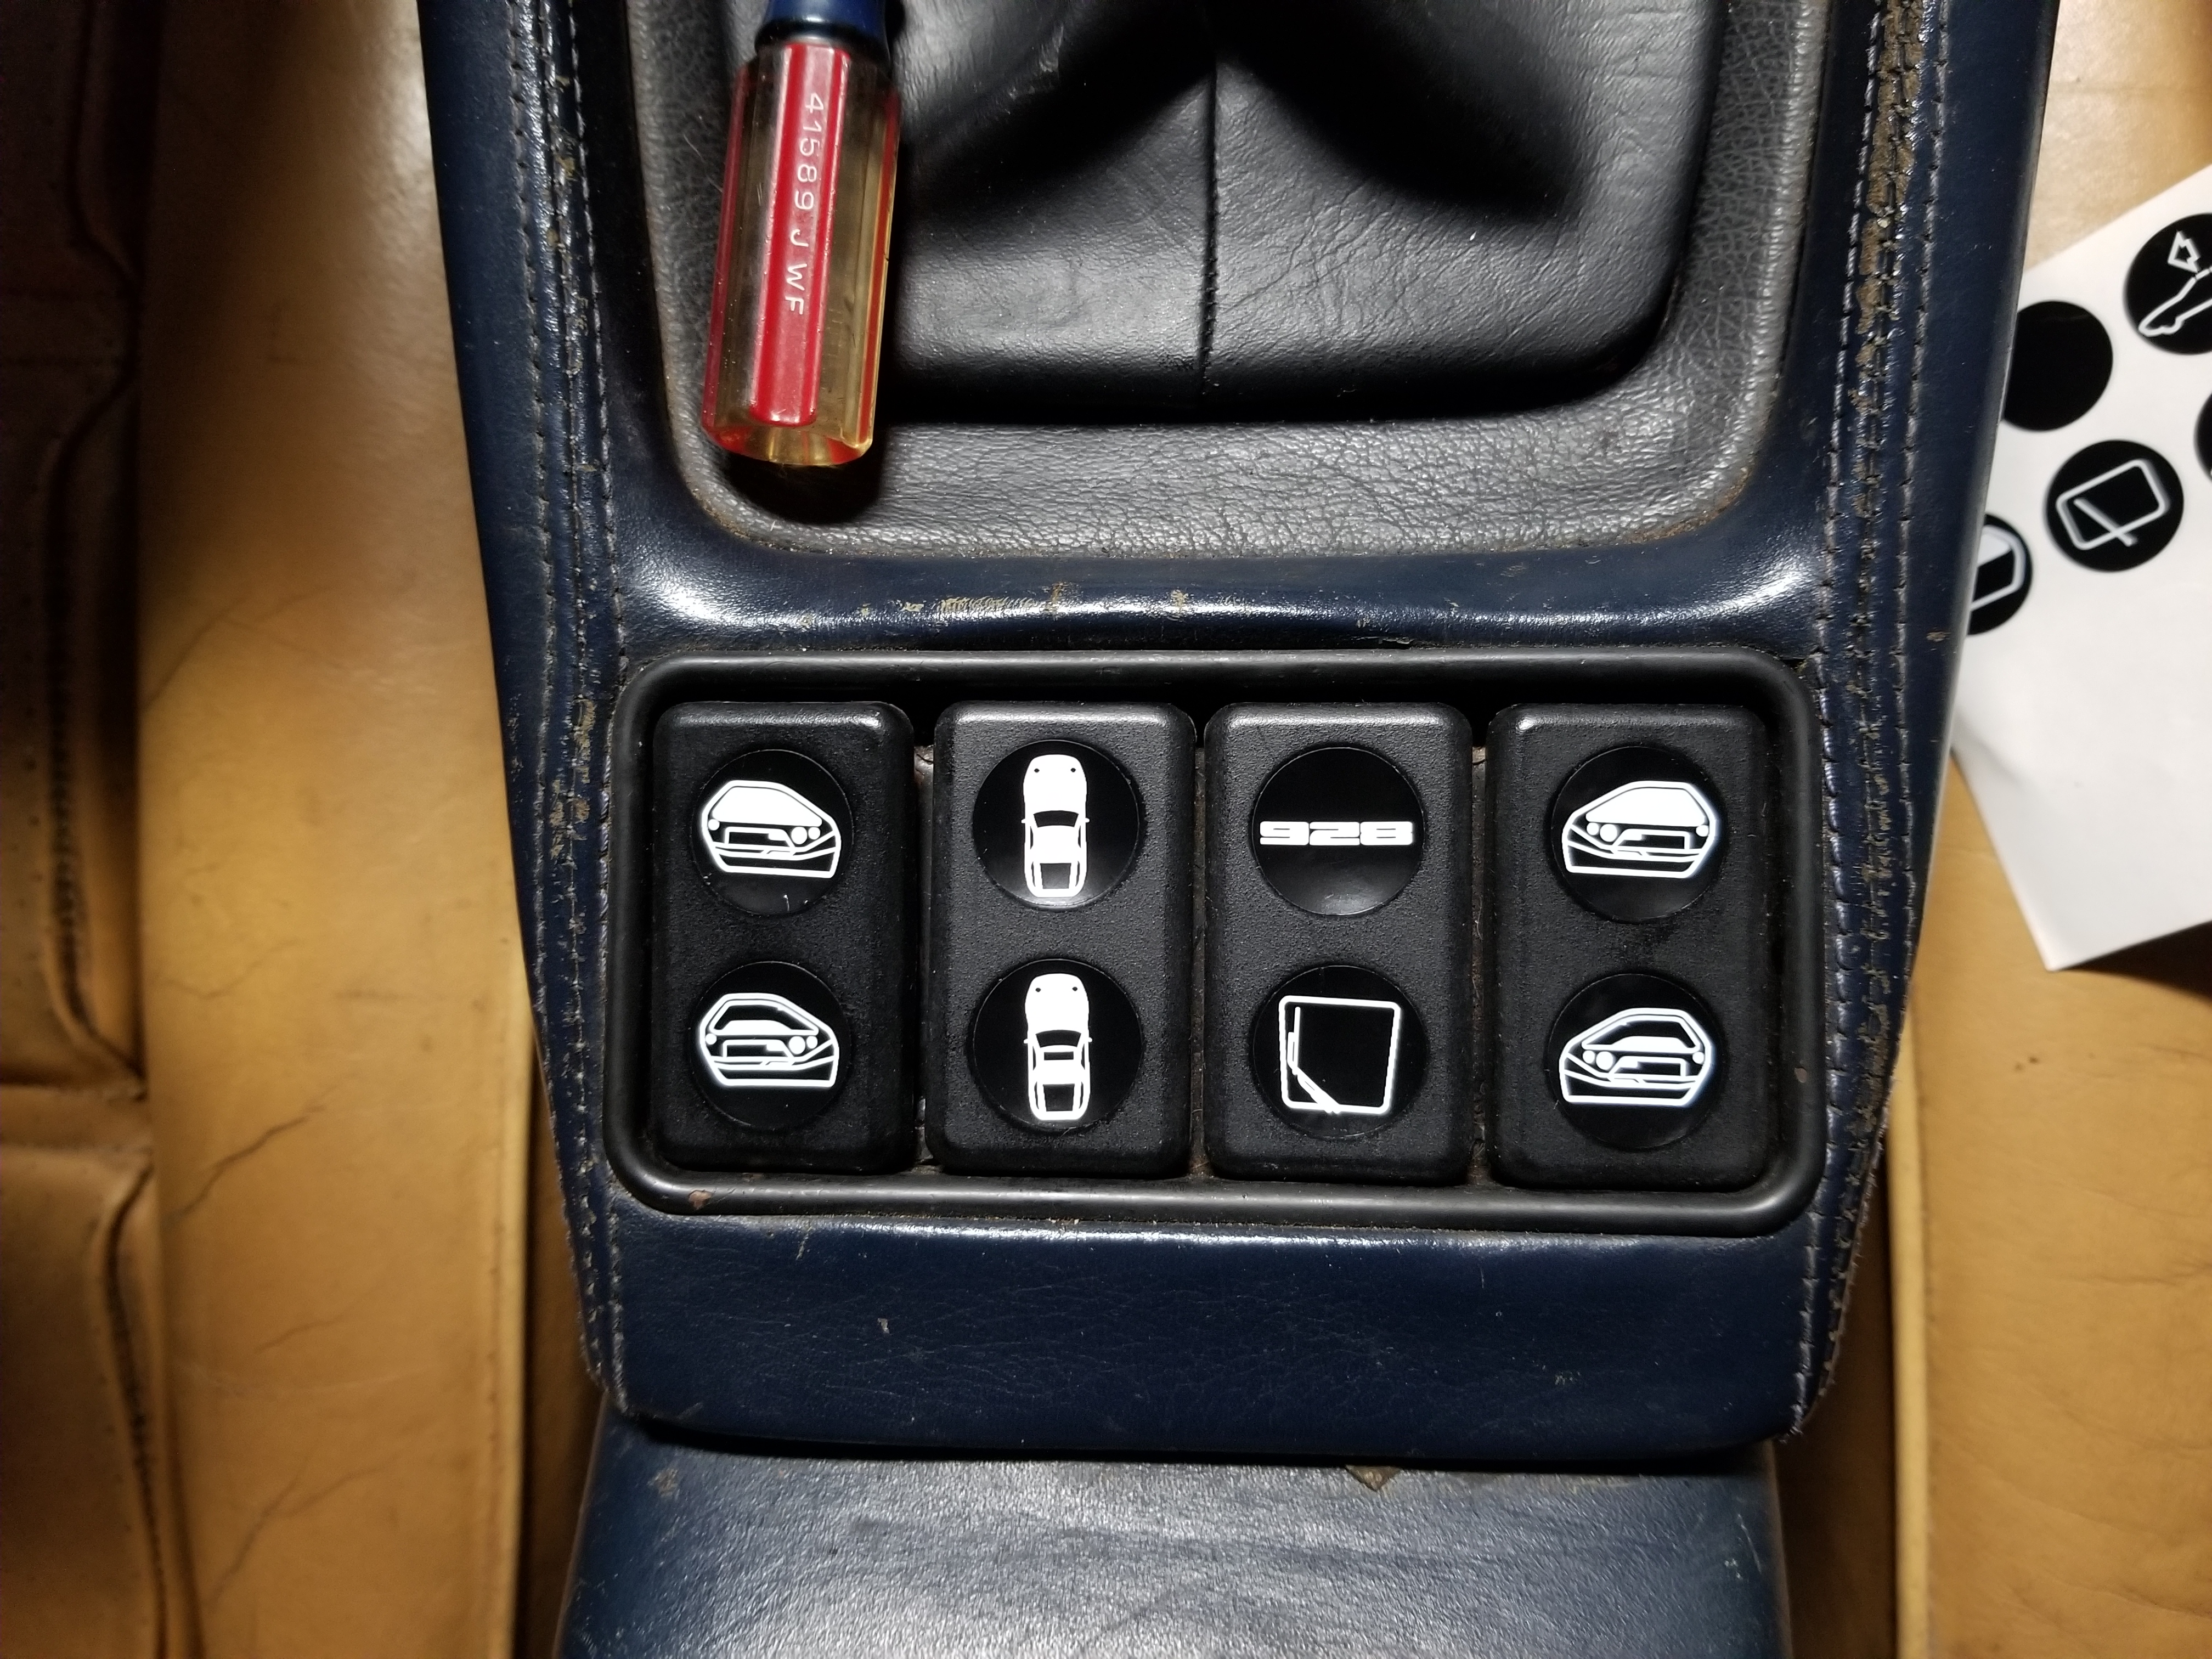
Also got some new decals for the buttons. Yes the wiper one is getting fixed to not be crooked.
Cables and tracks got cleaned again.
Front rail guides are a little worn, but ok.
I did break one of the little feet that hit the air dam and they were worn too, so I printed some new ones.
For now my solution to make the roof work was to just let the switch operate a couple of relays so the current of the motor isn't going through those contacts.
Immediately after putting those relays up there I realized I could have put them behind the CE and used the original wiring from there up to the sunroof motor since it's pretty beefy, so that's on my list to do. But for now it at least operates.
A couple pieces of masking tape are helping hold the seal compressed a bit since it's too cold to put it out in the sun and let it form. Shutting it was making the seal try and roll down some.
Also got some new decals for the buttons. Yes the wiper one is getting fixed to not be crooked.
Last edited by captainOCD; 01-30-2020 at 07:20 PM.
03-09-2020, 08:12 PM
#260
Burning Brakes
Thread Starter
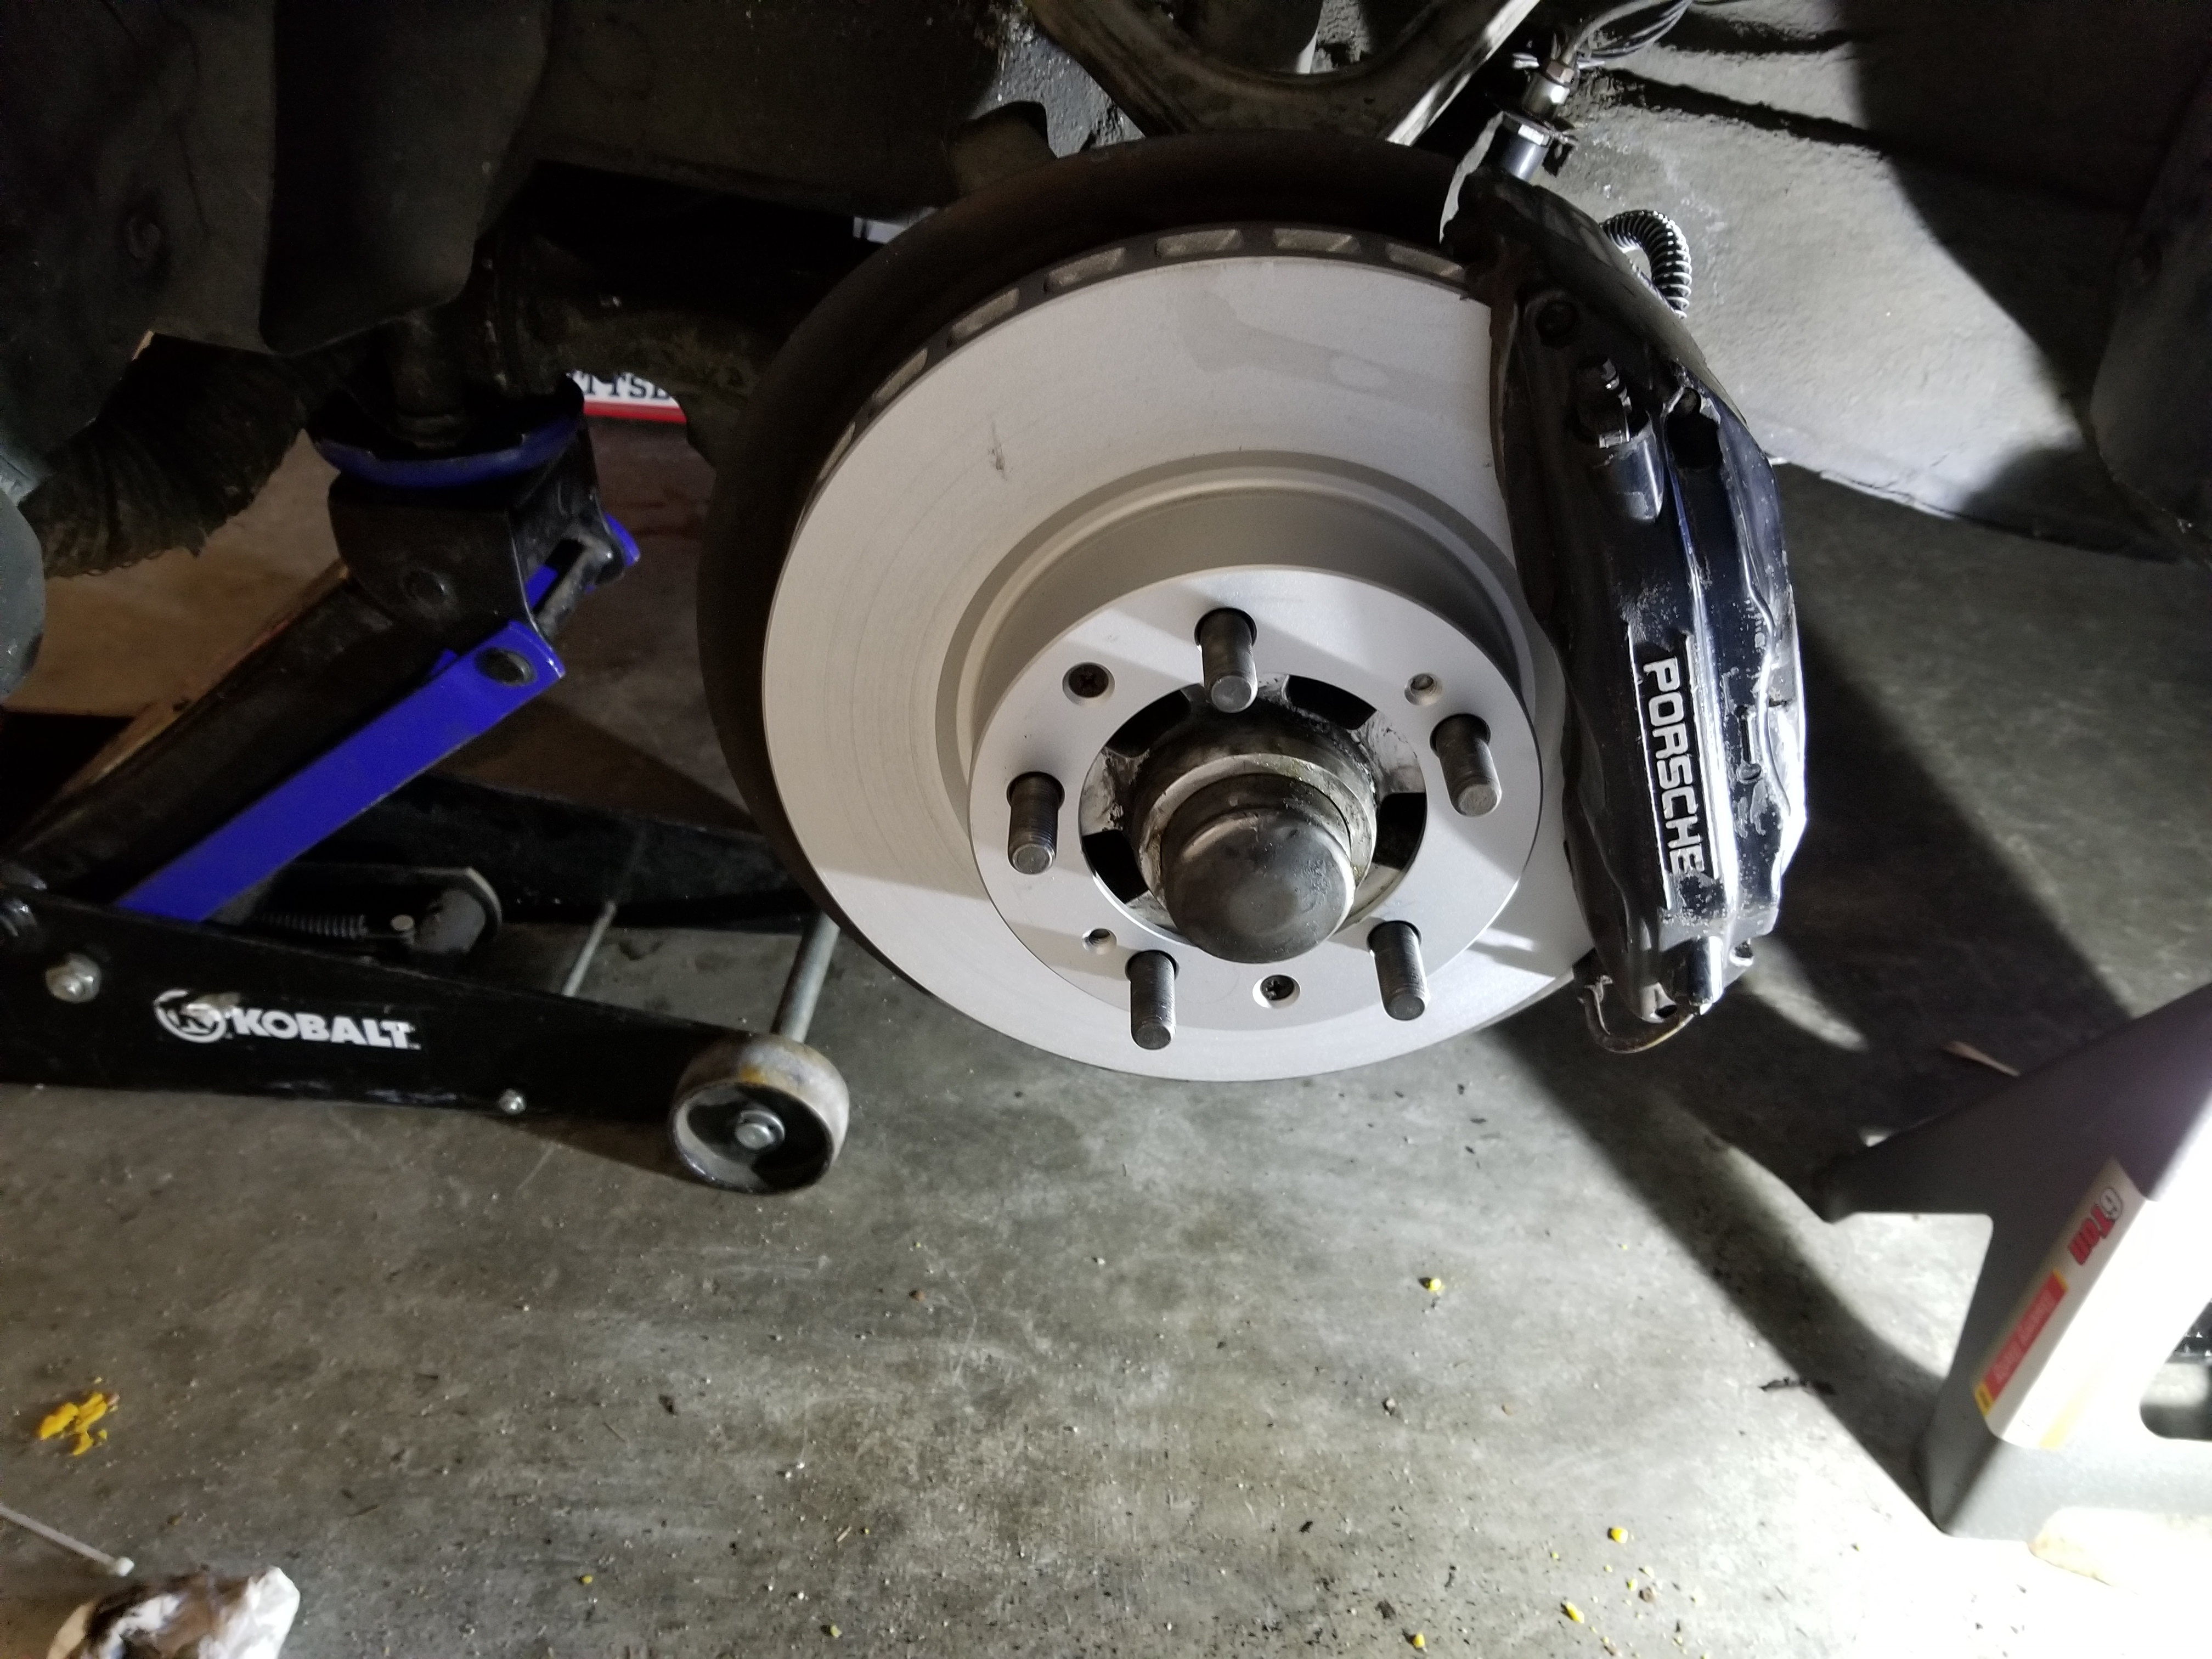
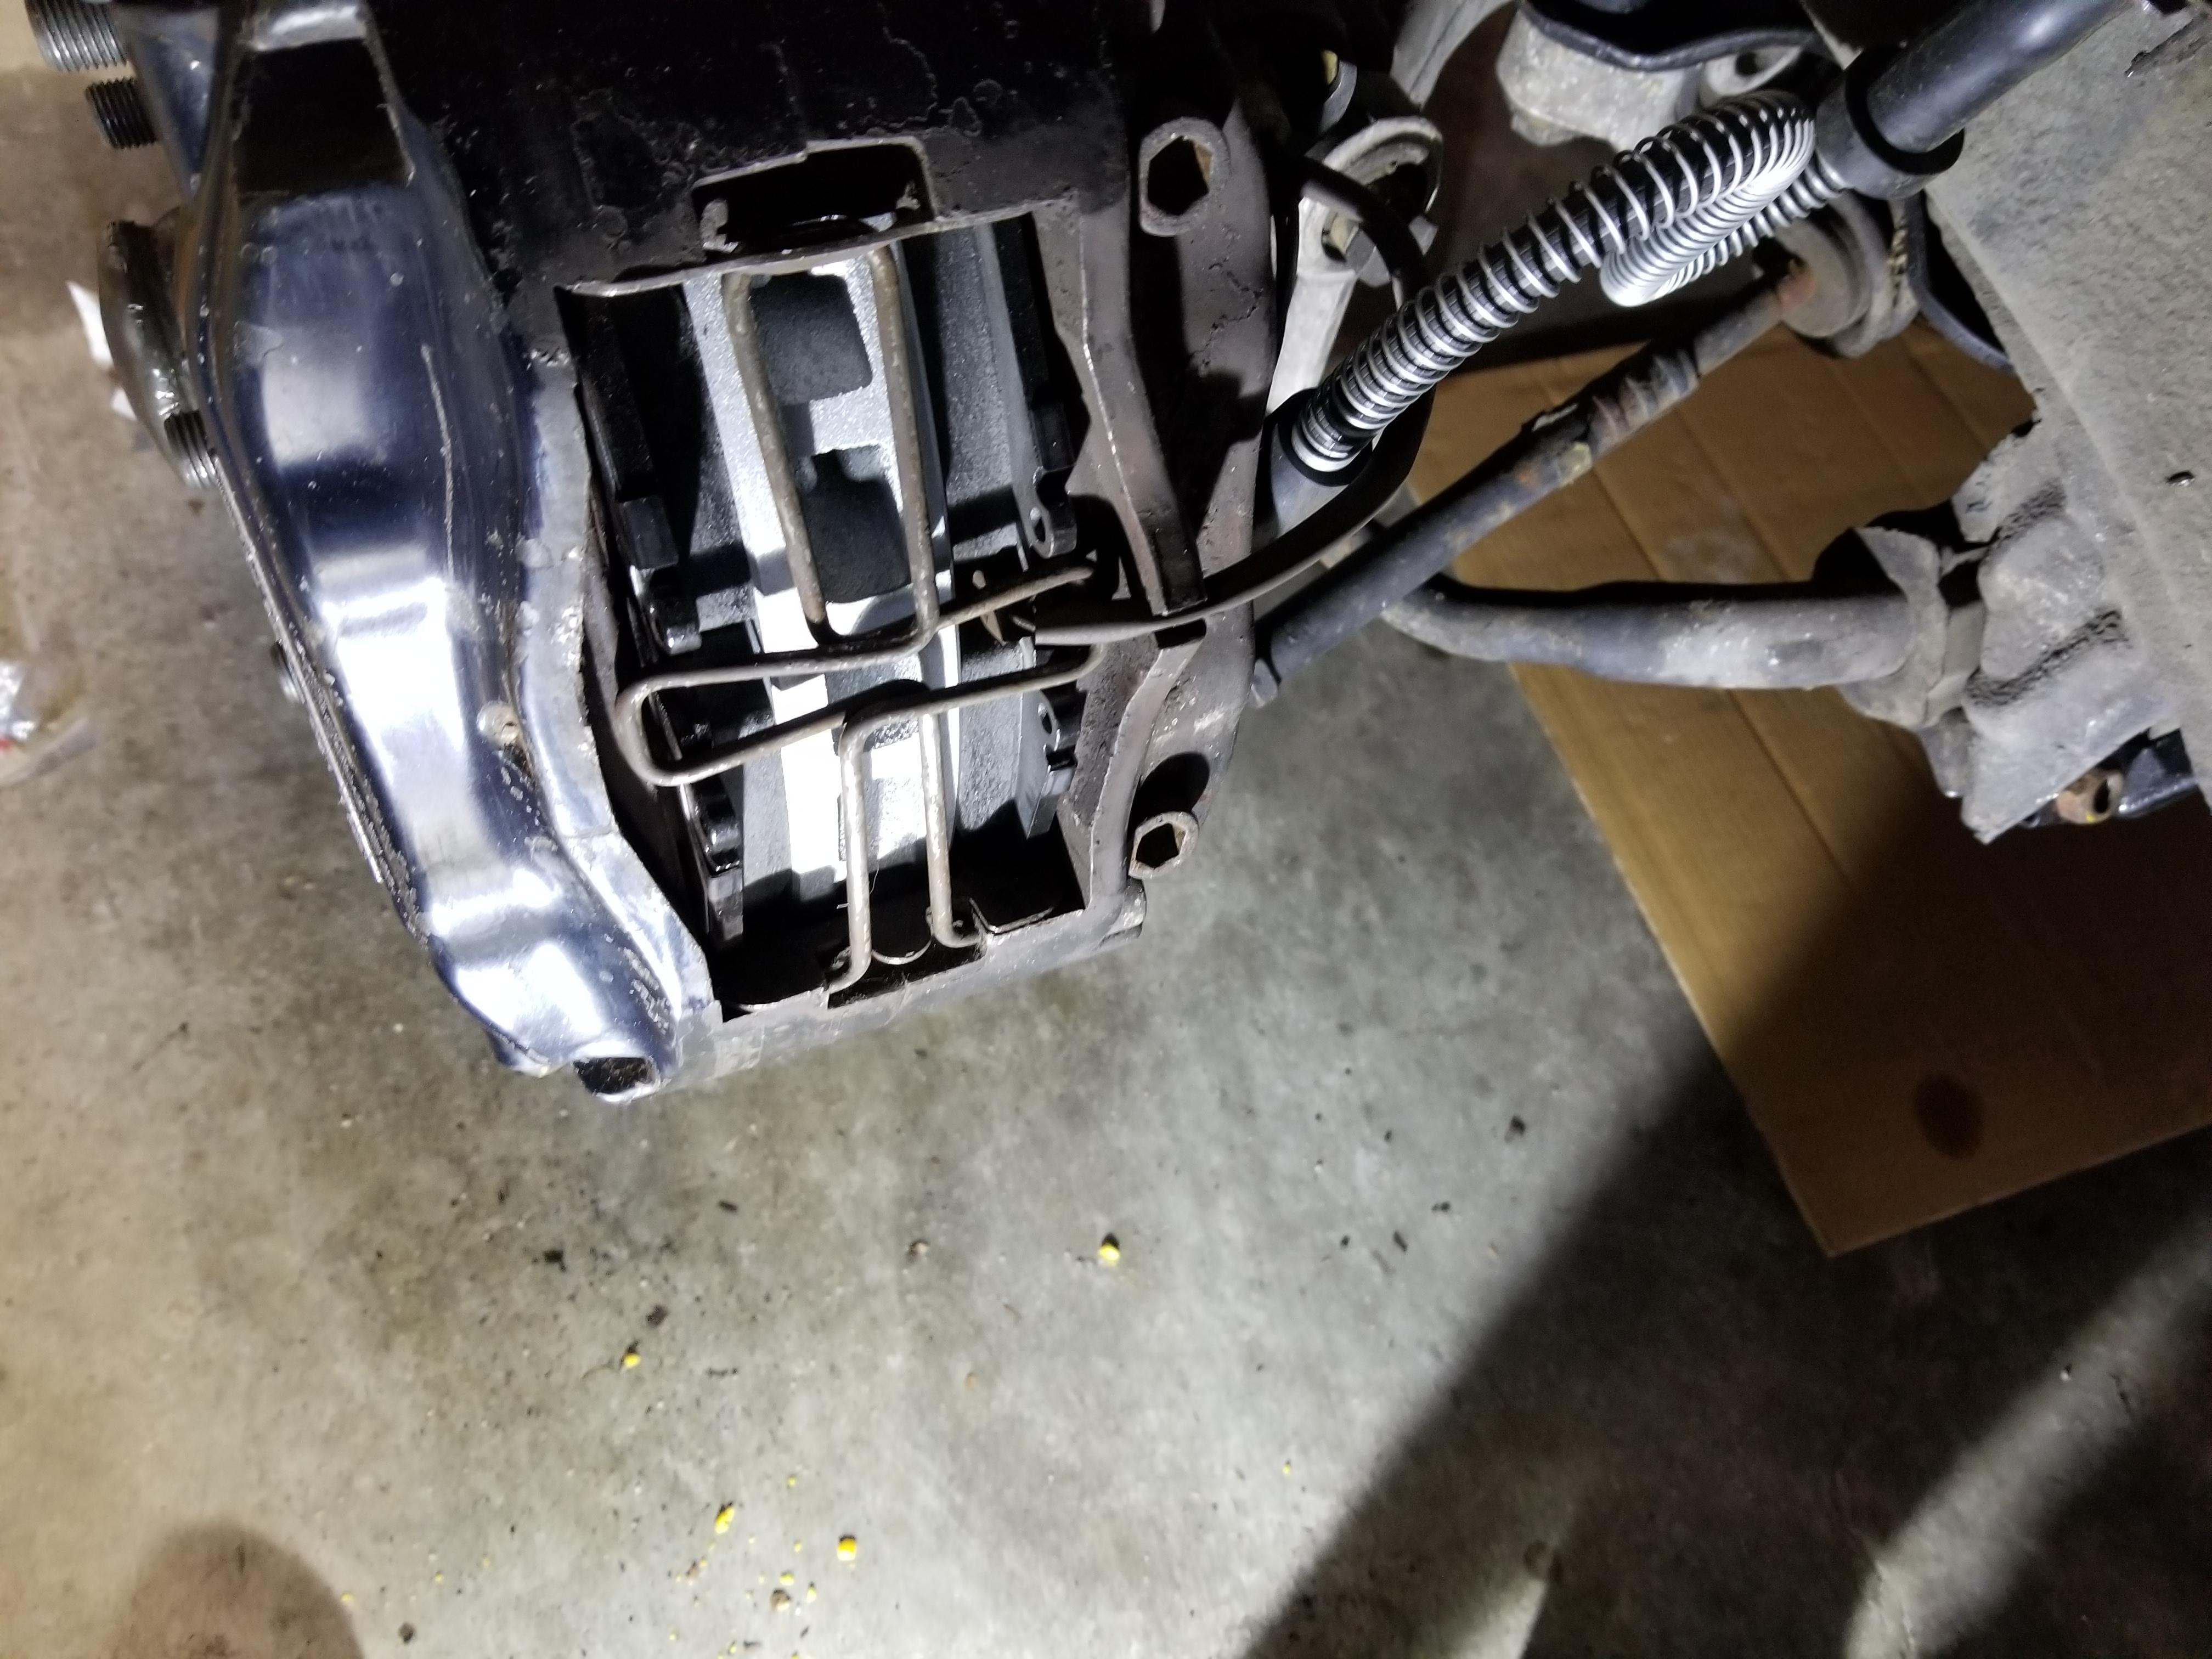
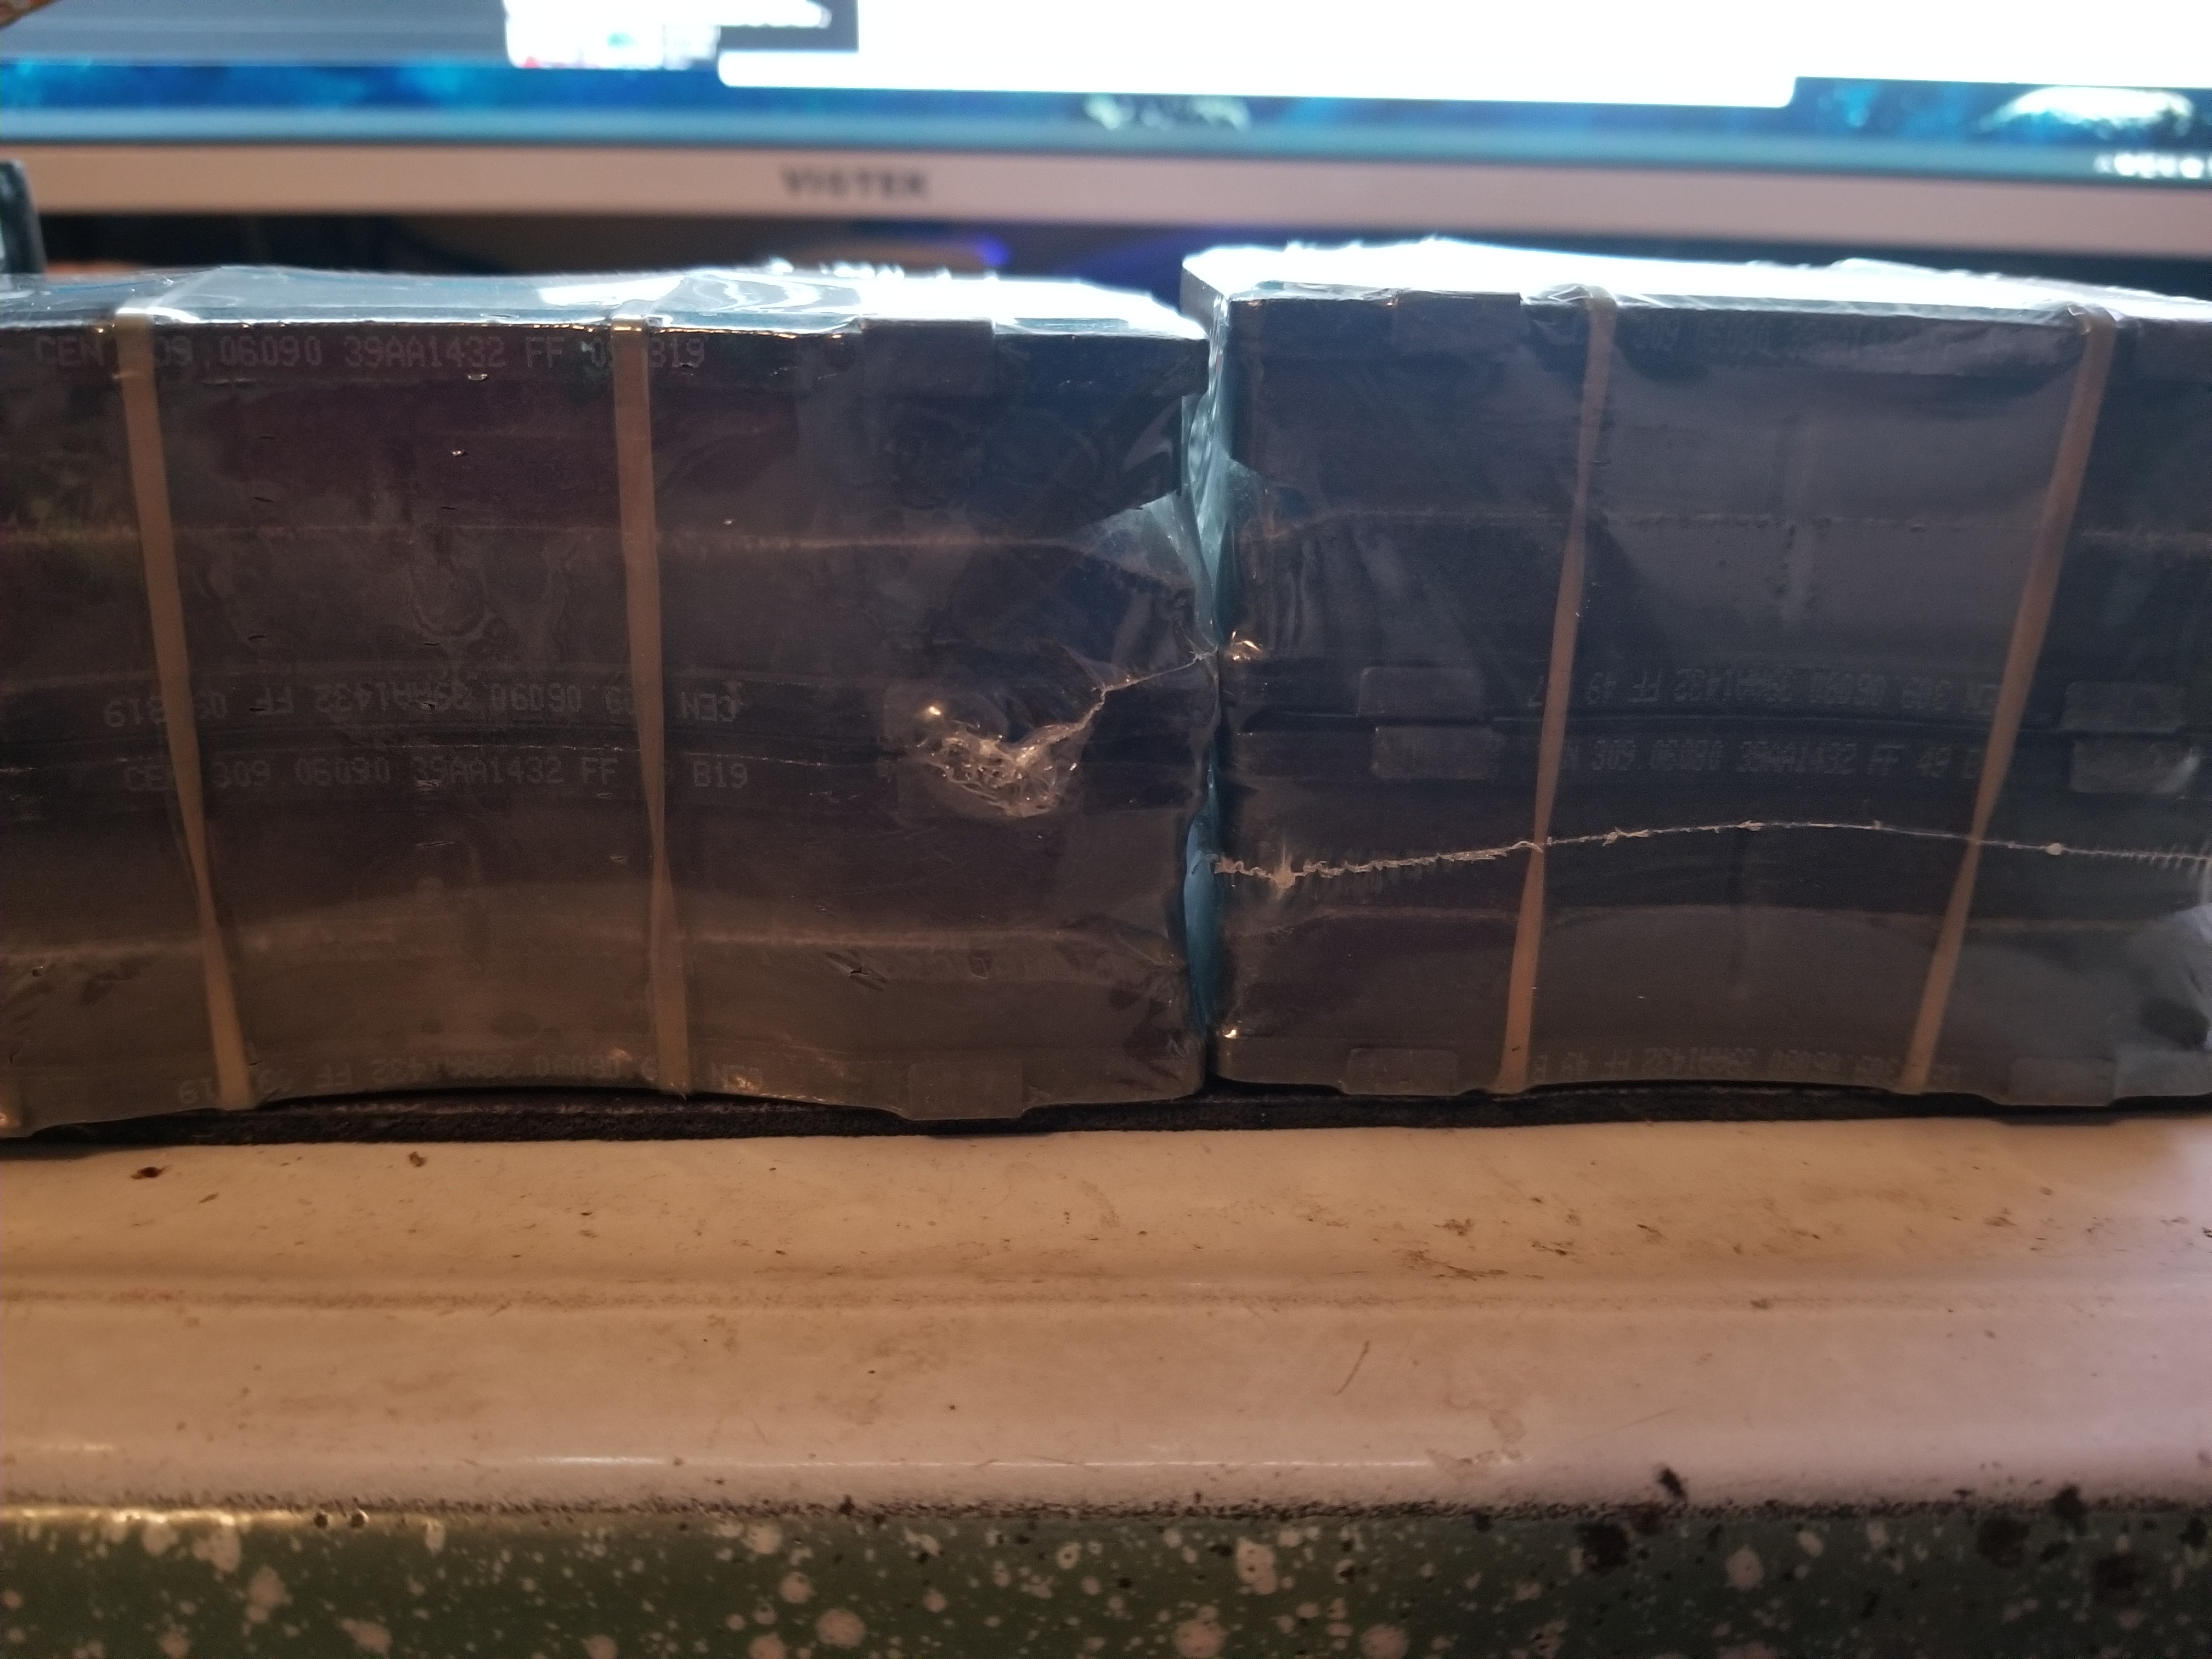
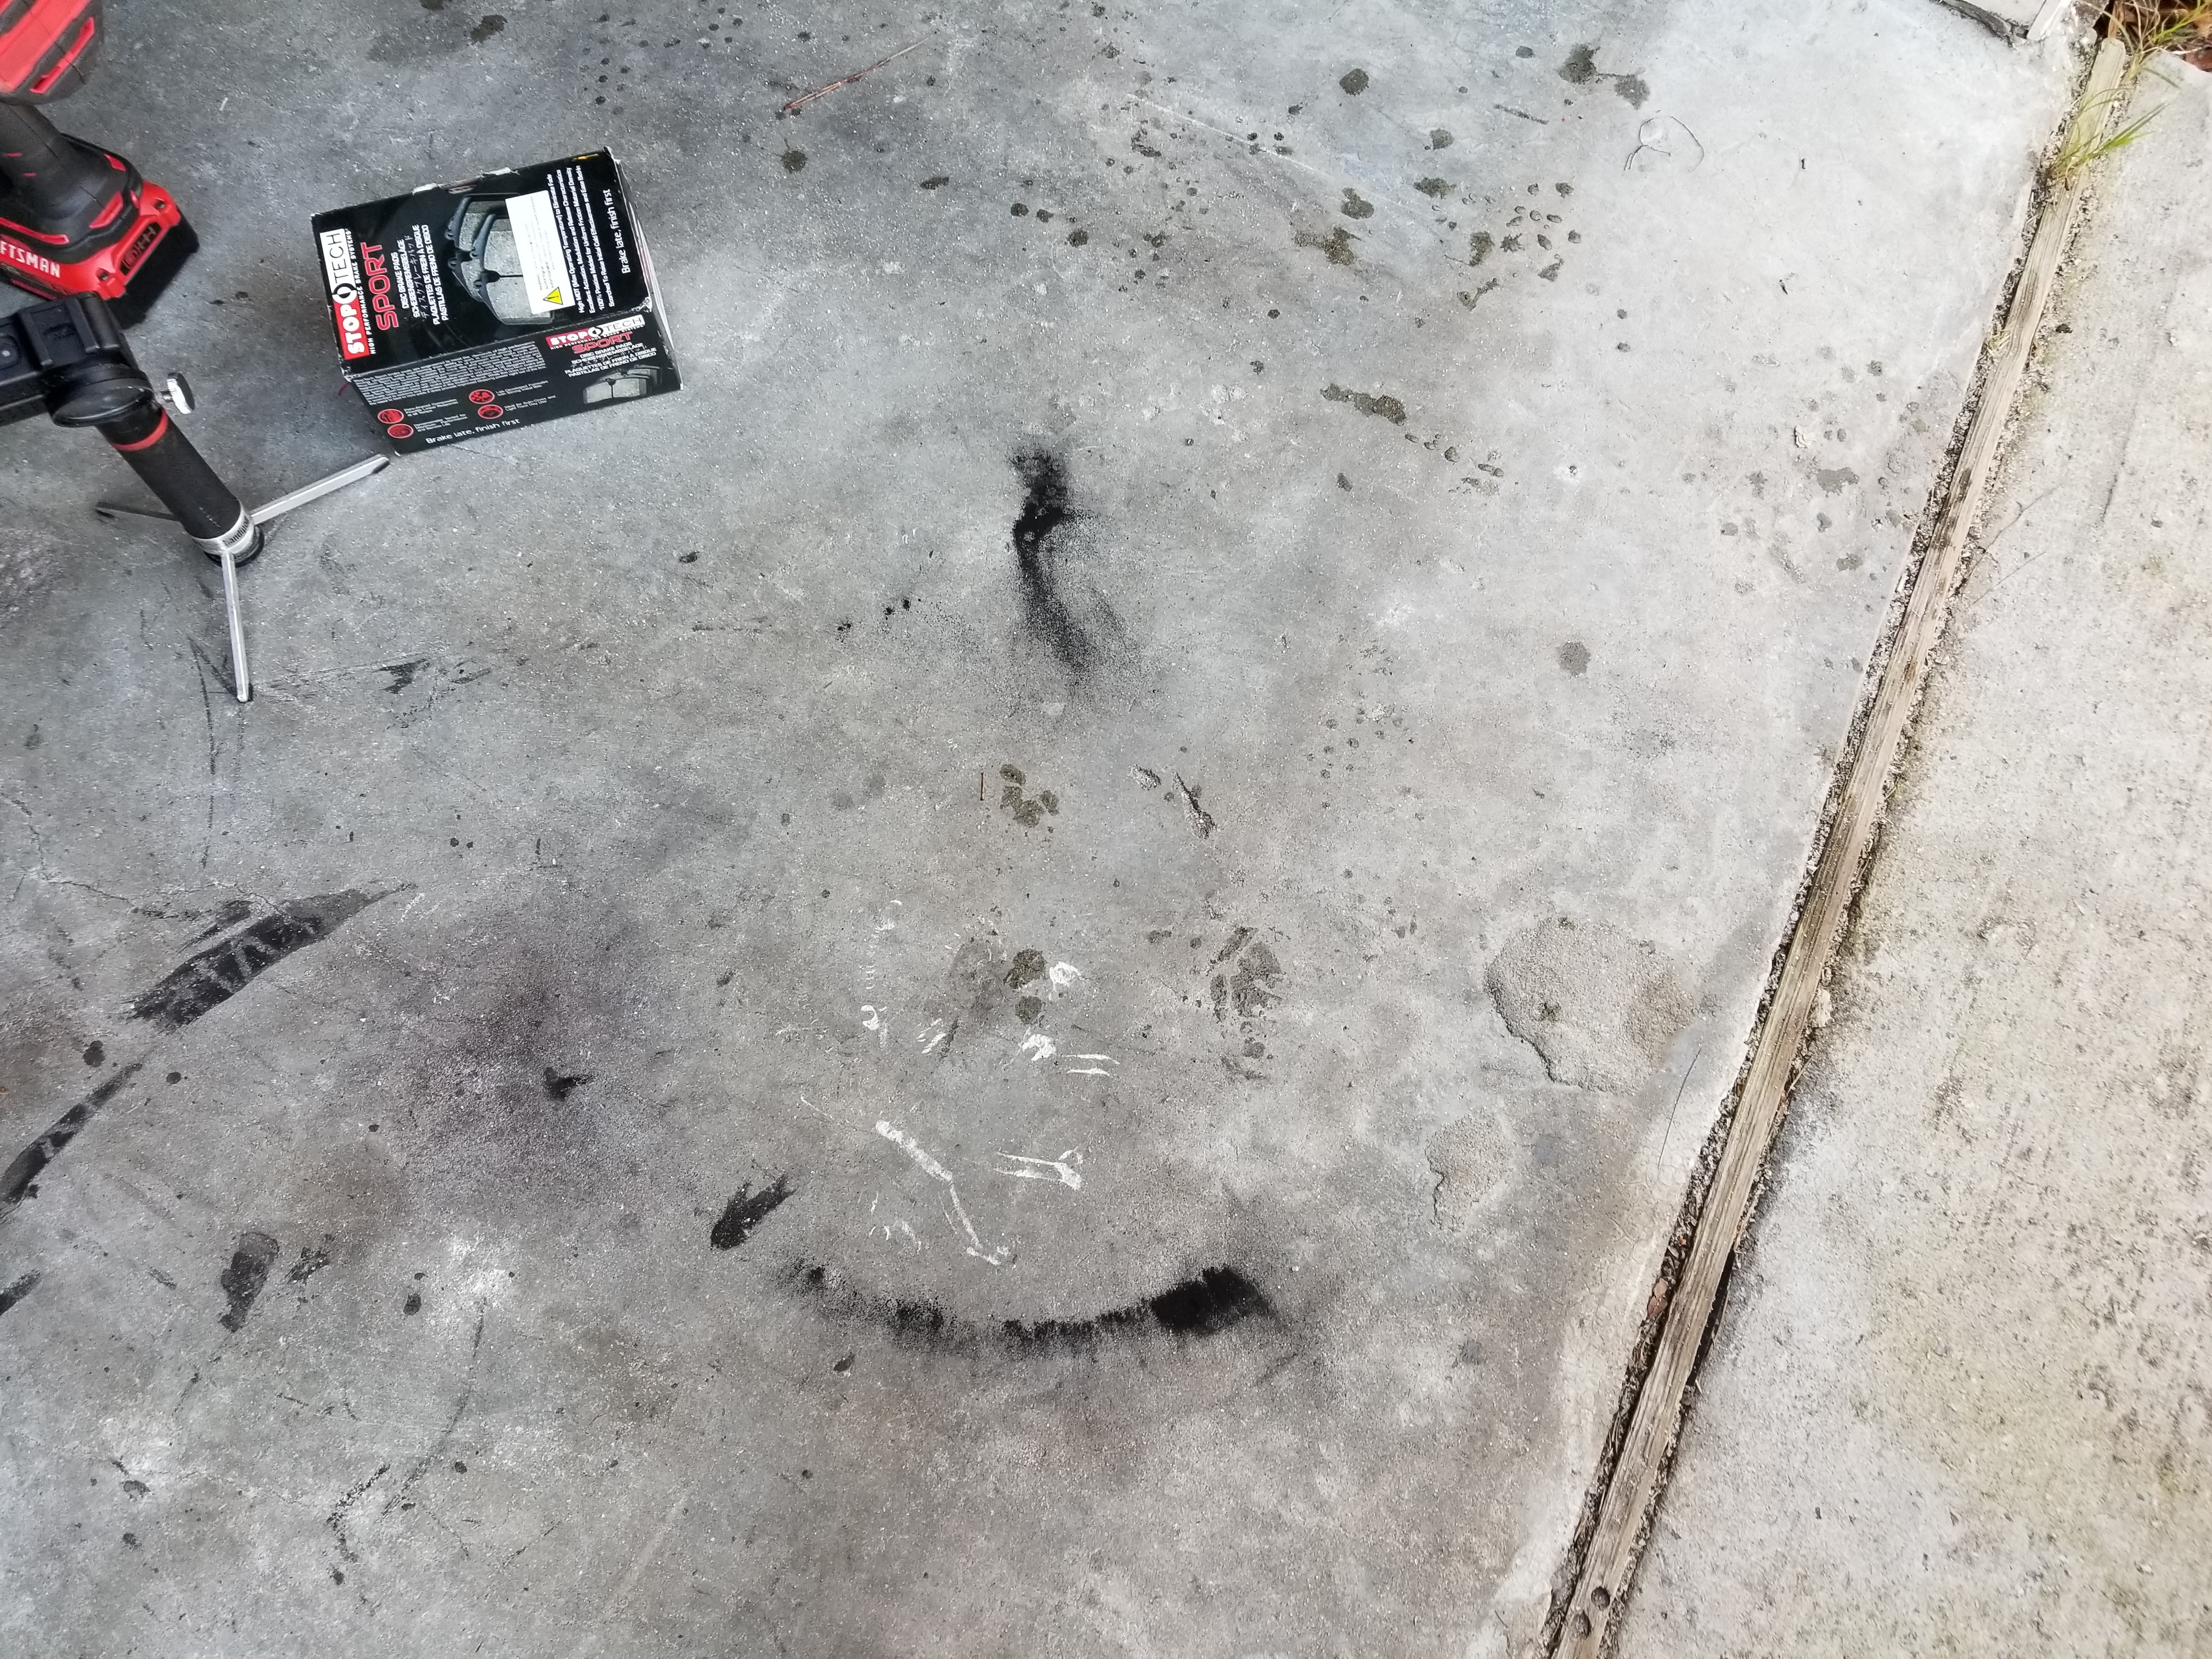
I finally got sick of the oil pads making so much dust so I got some new stoptech sport pads all around. Also tossed some new coated rotors on the front to match the rears. I'll have to do some more driving to see how they feel, but after bedding them in some yesterday they seem much better than the old pads. These are FF rated (GF if you believe stoptech that they haven't changed the compound and the dot tests just vary). The old pads up front (couldn't make out the brand) were EE, so cheese. The rears were pagid marked FG. They were horrifically dusty though, more than any brakes I've ever seen.
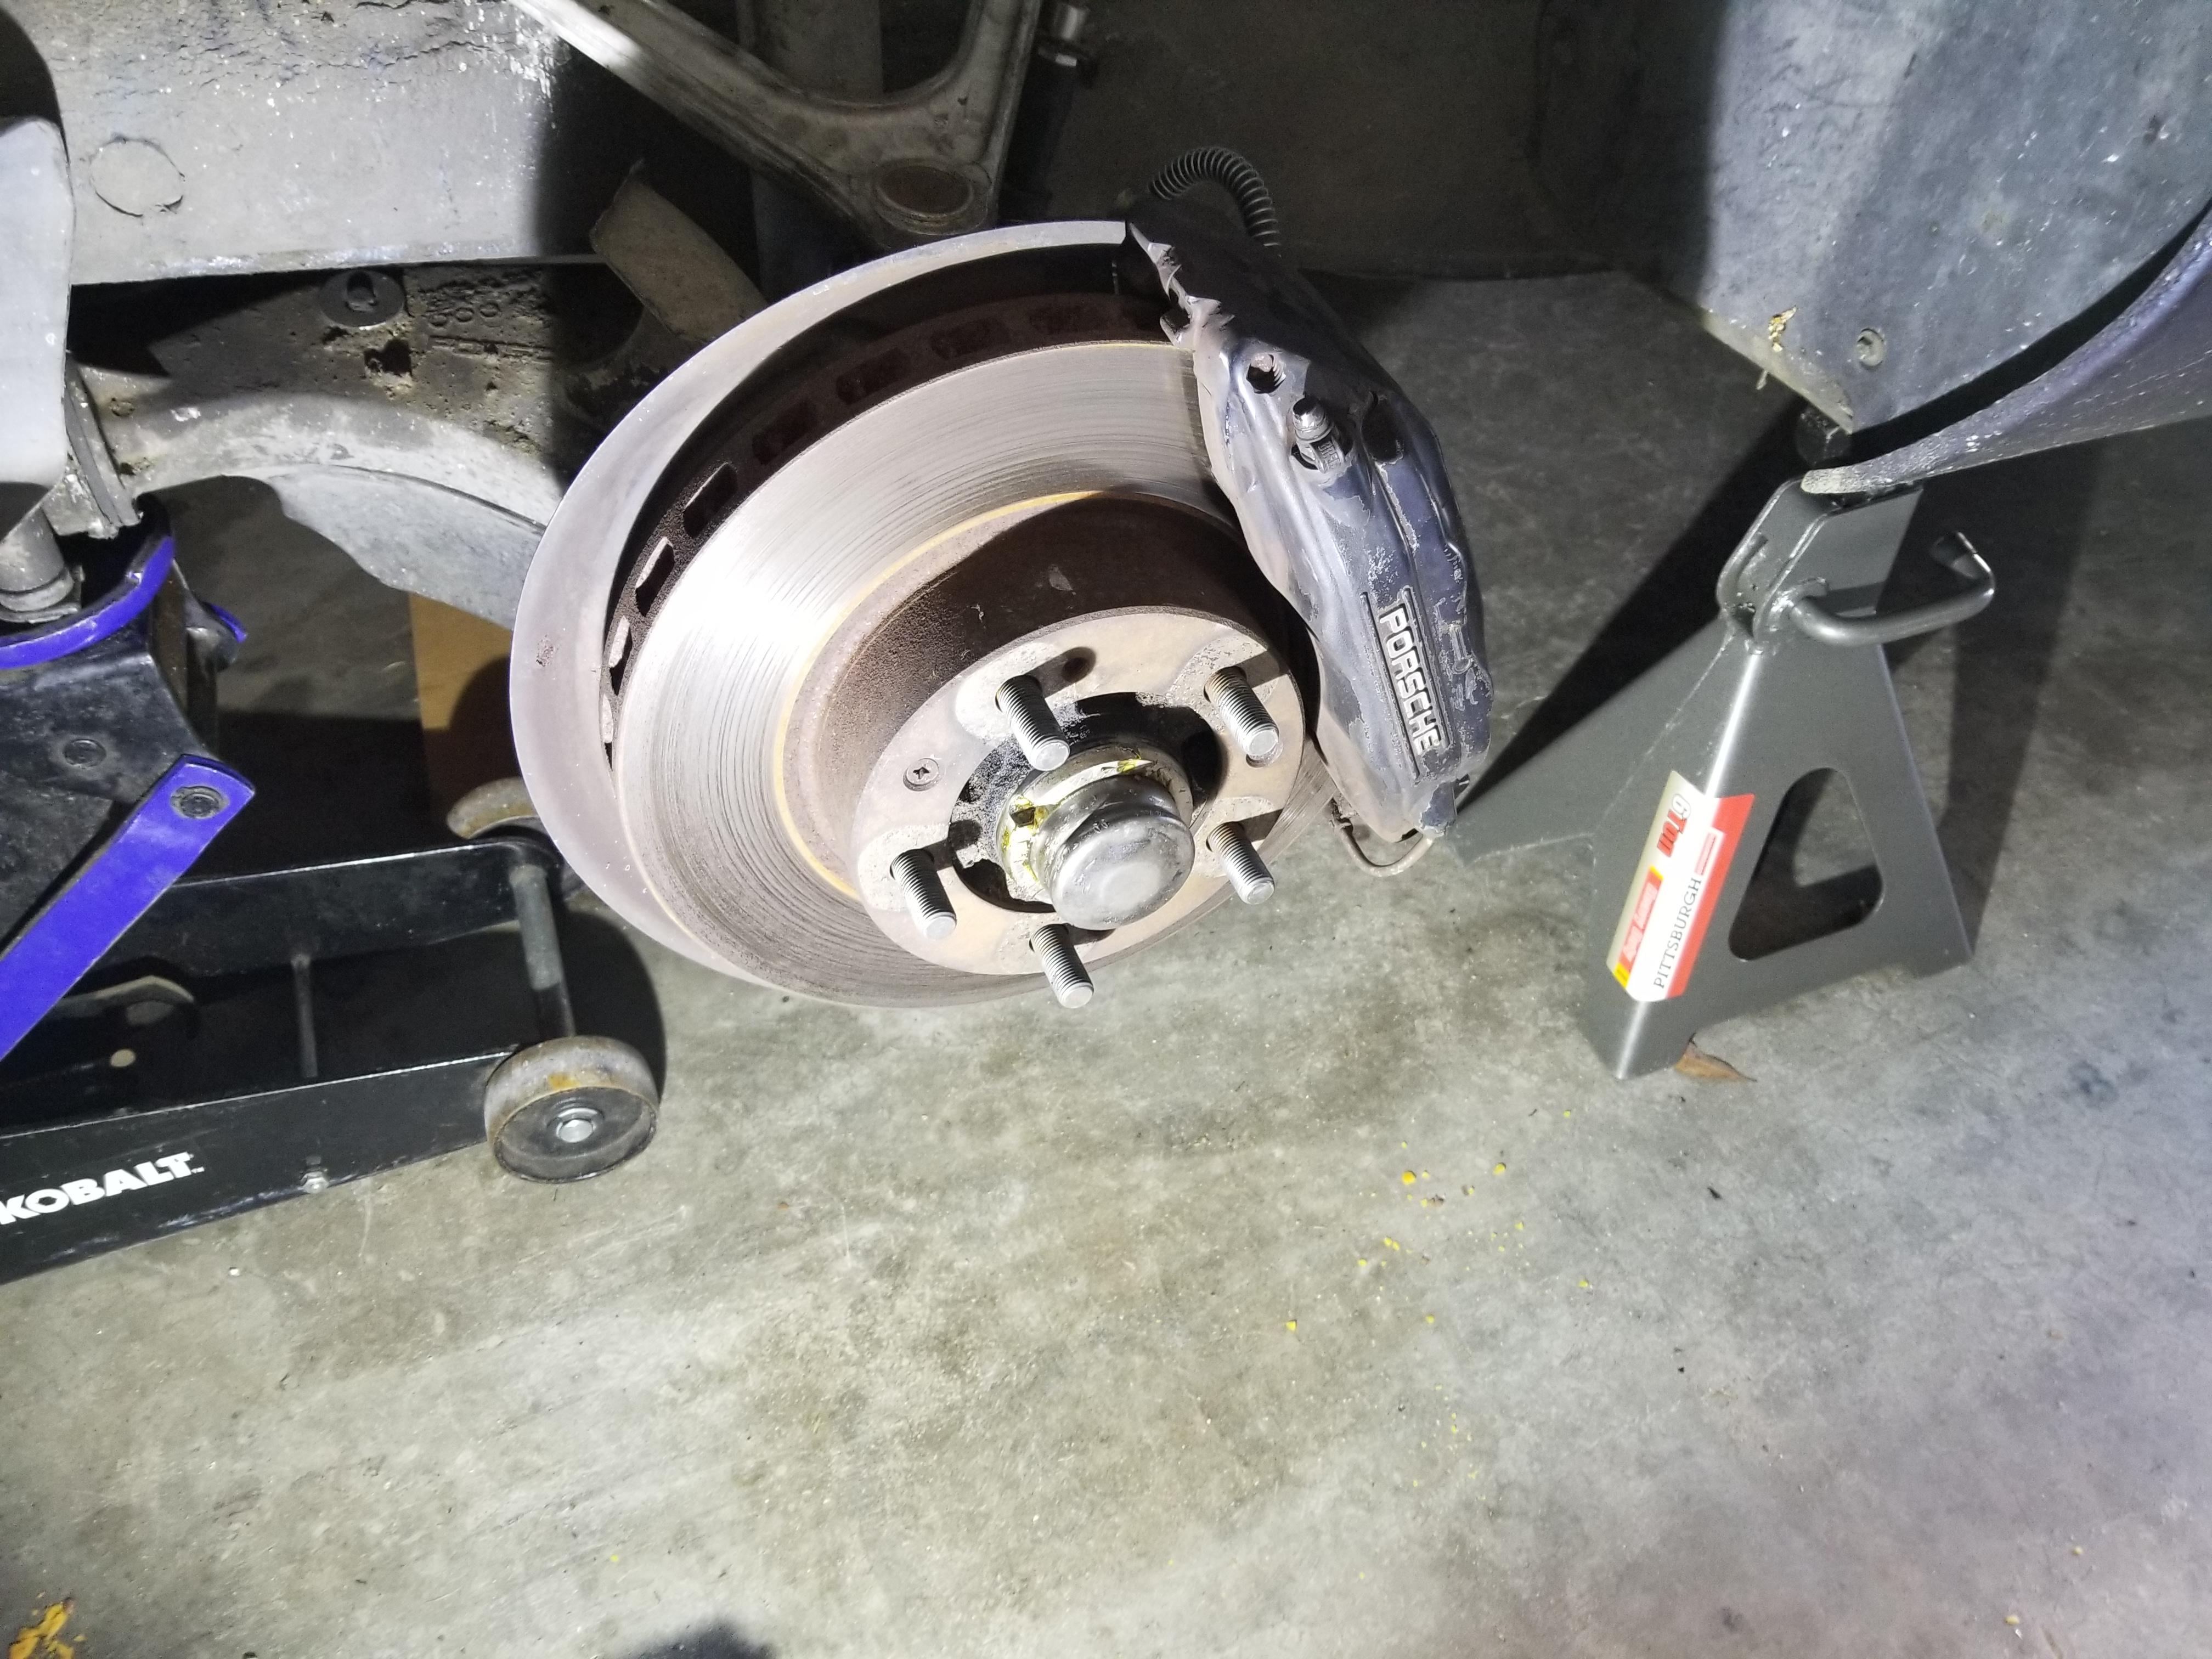
Looking much better now.
This is all the dust that fell out of the rear wheel barrels when laying them down on the floor. This was only a couple hundred miles of normal driving too.
Looking much better now.
This is all the dust that fell out of the rear wheel barrels when laying them down on the floor. This was only a couple hundred miles of normal driving too.
03-24-2020, 12:39 AM
#261
Burning Brakes
Thread Starter
I got bored this weekend so I decided to move the relays I added for the sunroof to the CE panel and get rid of the extra power wire I ran from the battery to the sunroof motor. The wiring is still the same, just now using the existing wiring from the CE up to the motor.
The switch is normally connected directly to the motor wires via jumpers between the K and R blocks on the CE panel. I just removed those and put the relays in their place.
Again, everything was done such that it could be easily undone later if need be. Roof still operates normally (maybe a bit slower) compared to it getting stopped when running just through the switch.
04-05-2020, 03:40 PM
#262
Burning Brakes
Thread Starter
I'm gonna start this off by saying that I discovered after dropping the gas tank that I probably didn't need to. But either way I did and at least it's clean now.
A couple weeks ago I filled up the tank (as I have done many times), but this time after leaving the car in the garage overnight I could smell gas. Started looking around and found drips down the side of the tank.
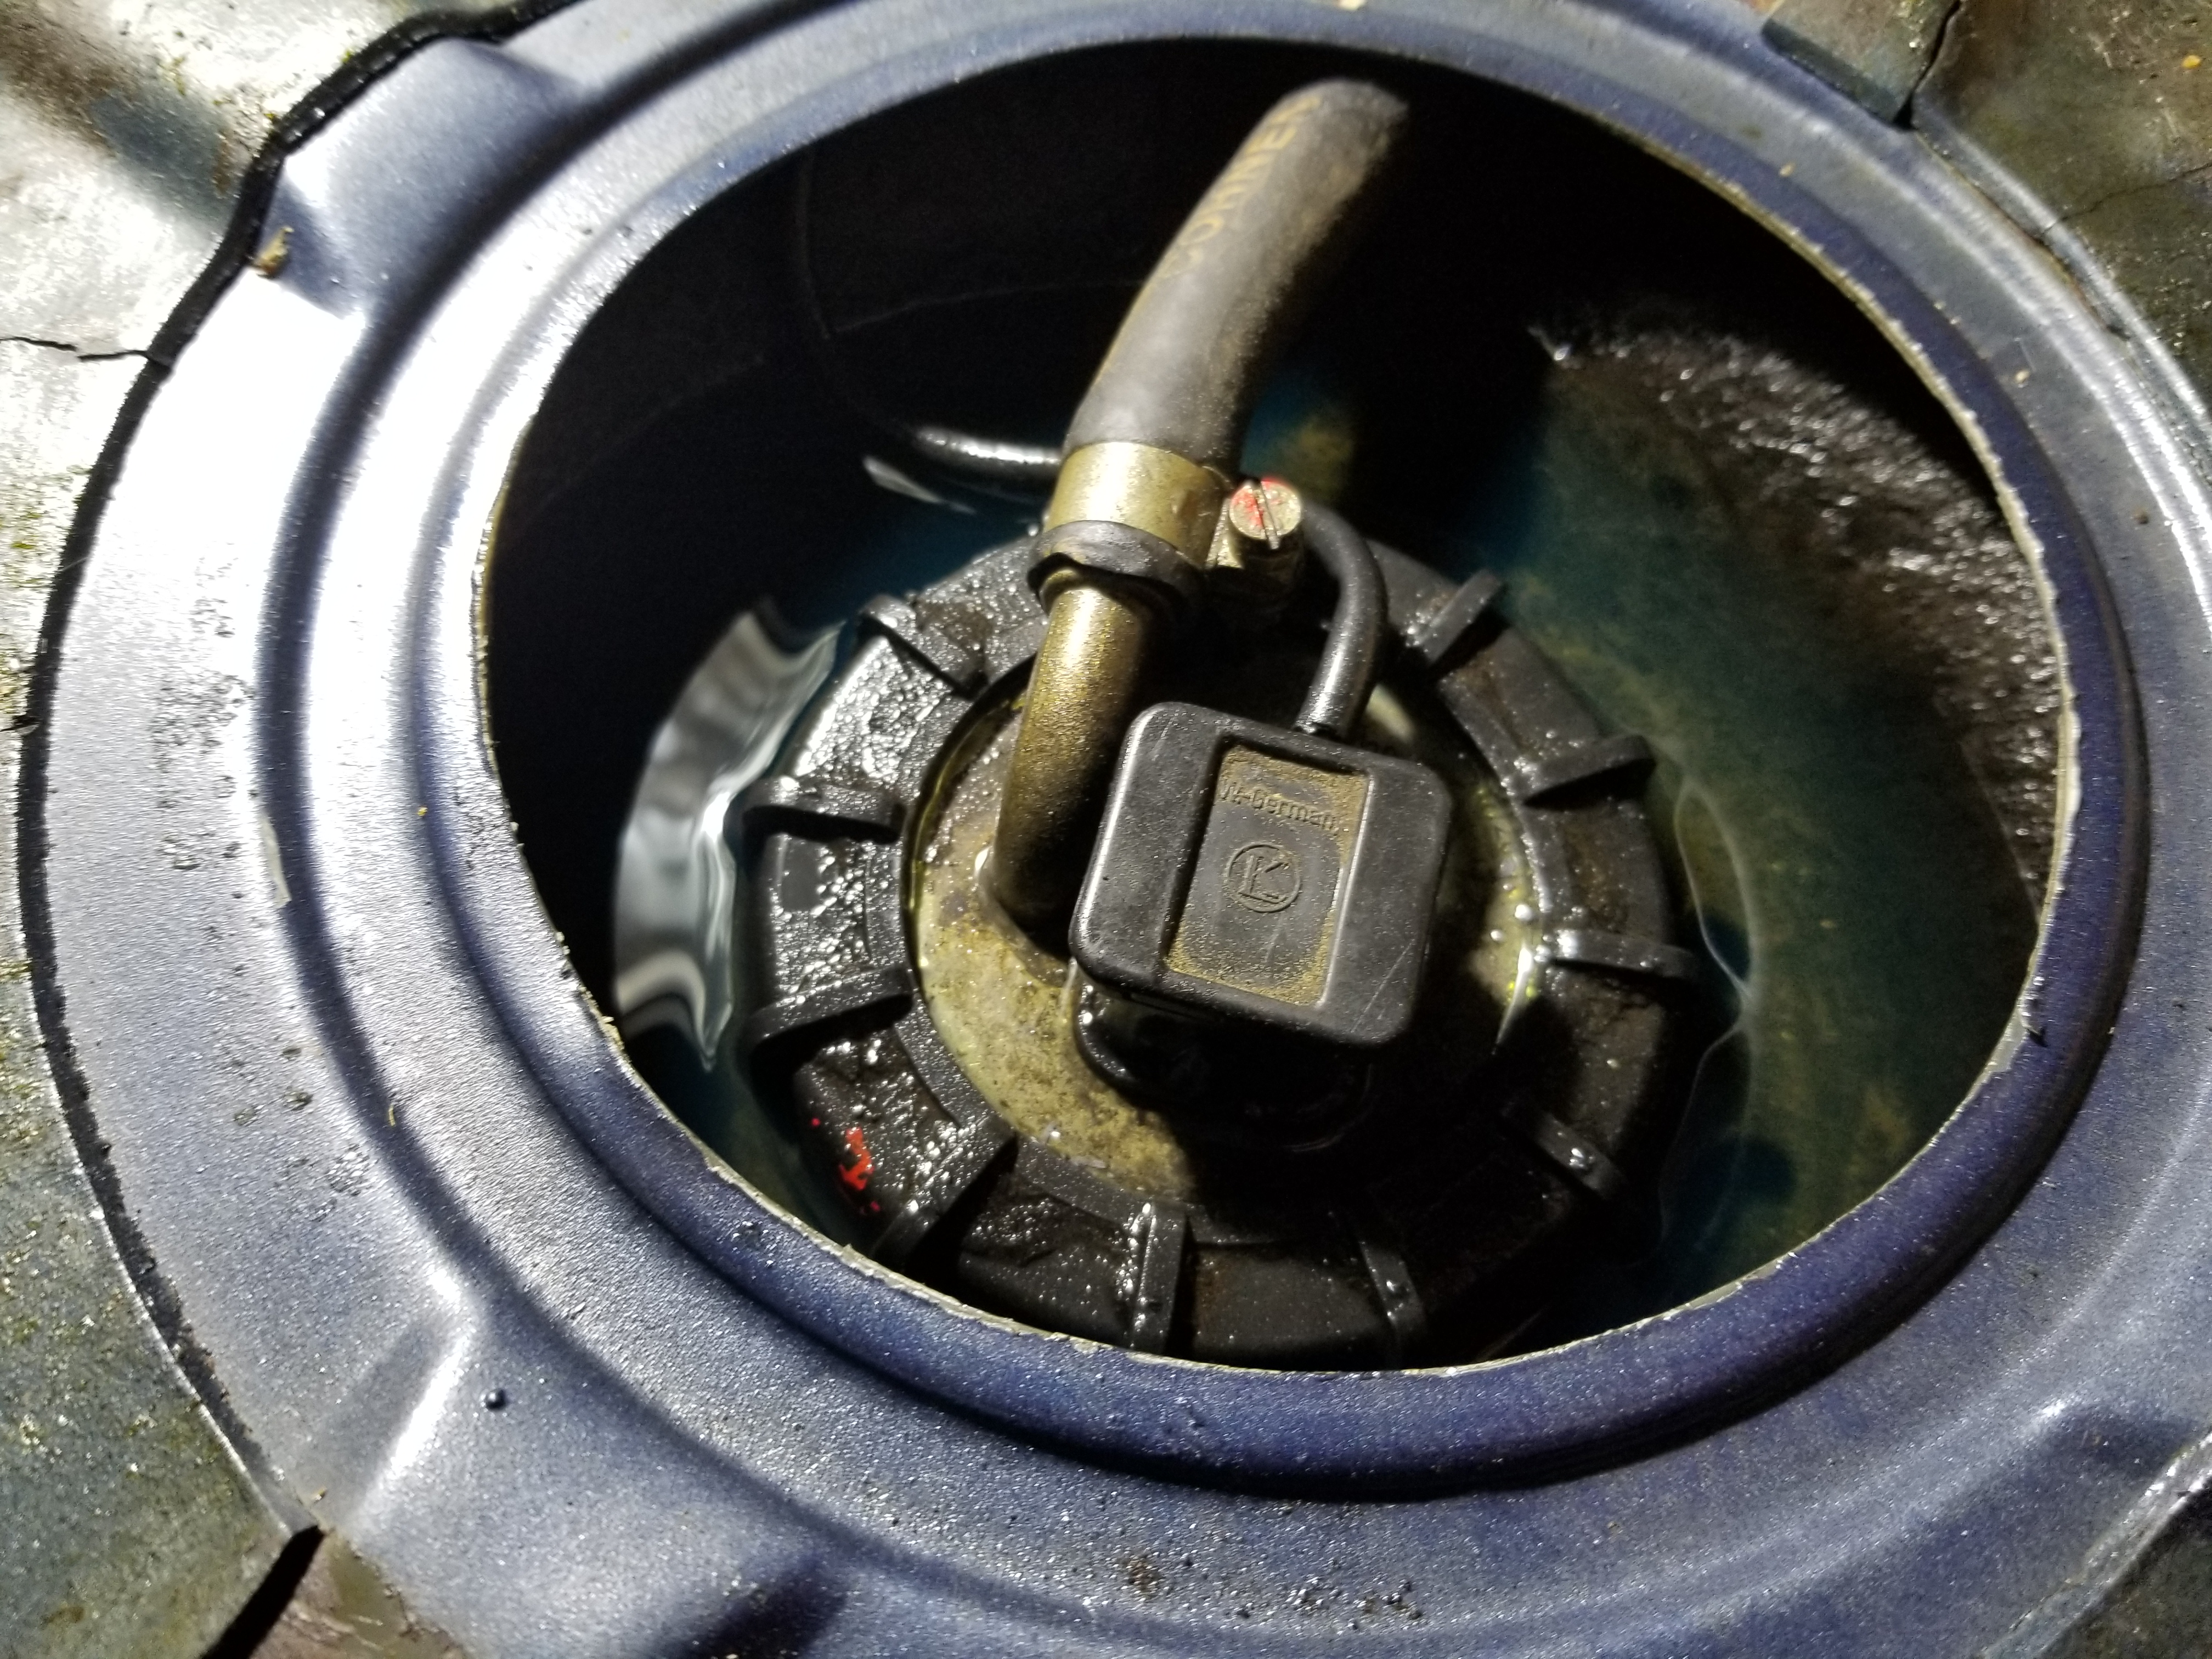
Removing the access cover to the sender revealed a puddle around the sender. The retaining nut was a but loose, so I snugged it up and cleaned up the fuel.
I cleaned off as much as I could reach on the side of the tank and drove the car again around the block a bit to go to the grocery store, but the drips on the side of the tank kept coming back, even with no fuel on top of the tank. I couldn't see anything obvious around the sides or the filler neck, so I wound up taking the tank out.
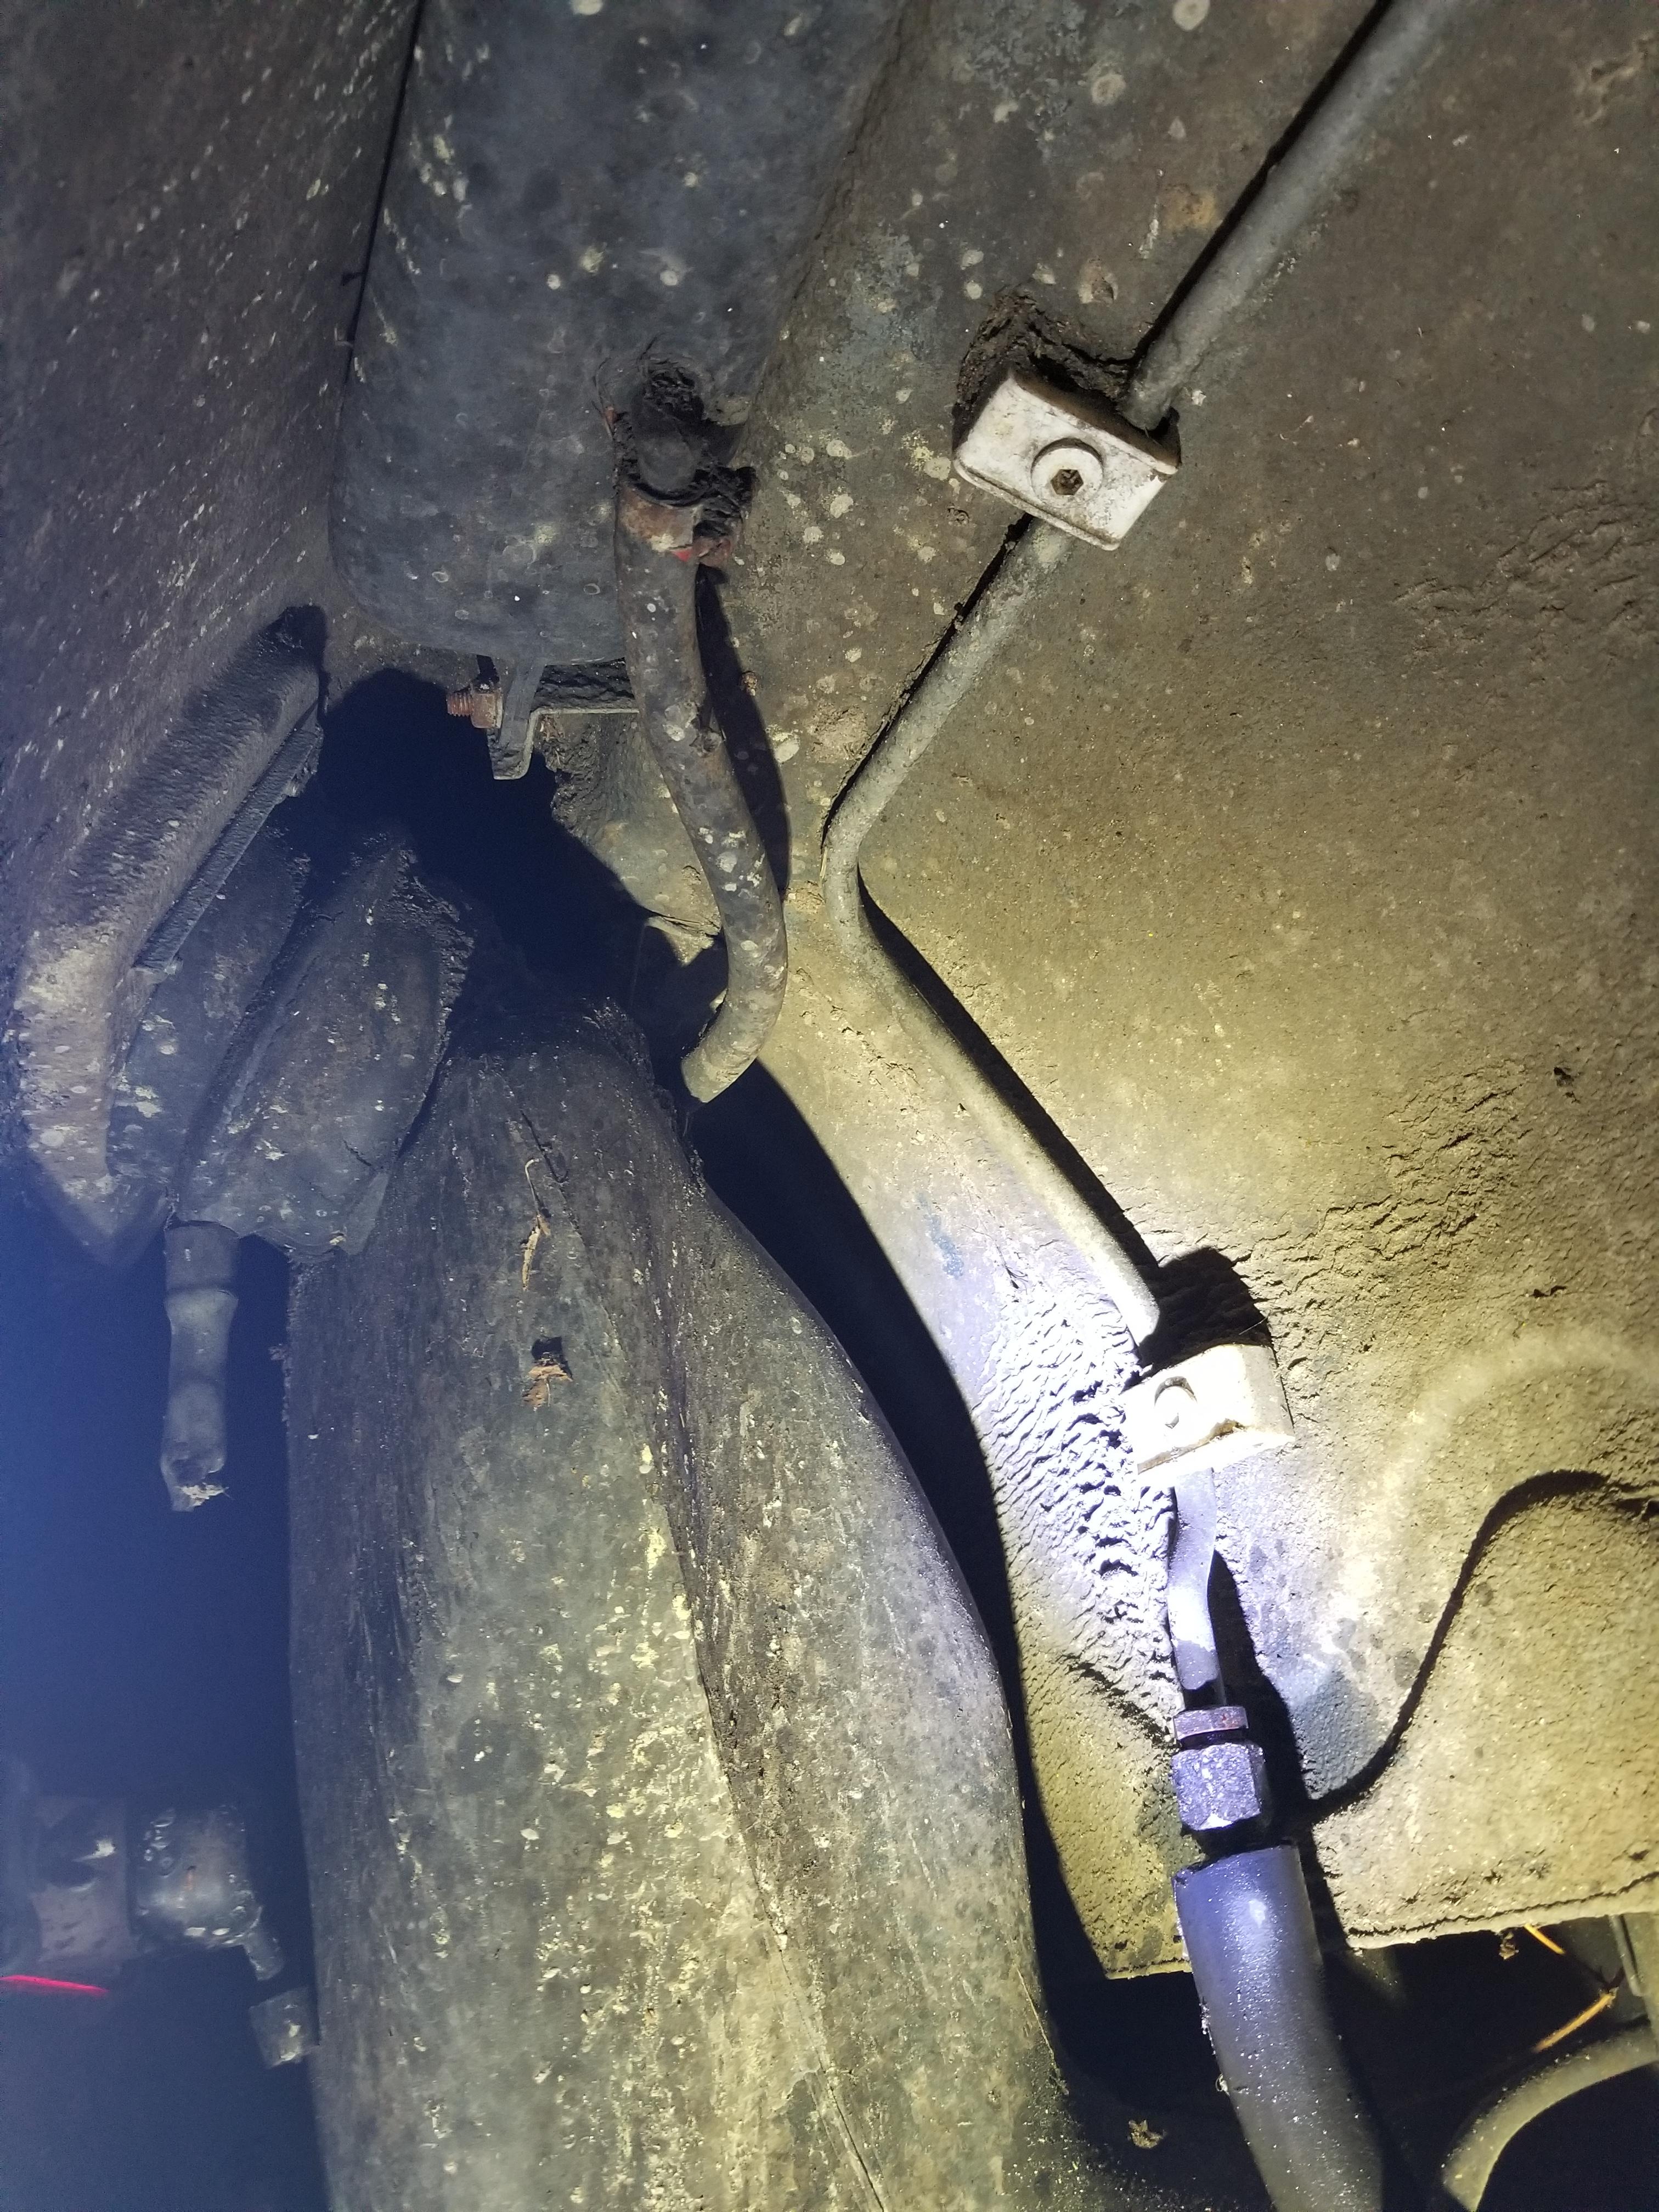
This didn't really reveal anything as to the source of the fuel either (the wet spot on the filler neck was from spraying kroil on hose clamps). Finding nothing obvious I was scrutinizing the seam. I could see the fuel running along it with the tank still in the car, but couldn't tell if that was the source, or if it was just collecting in it.
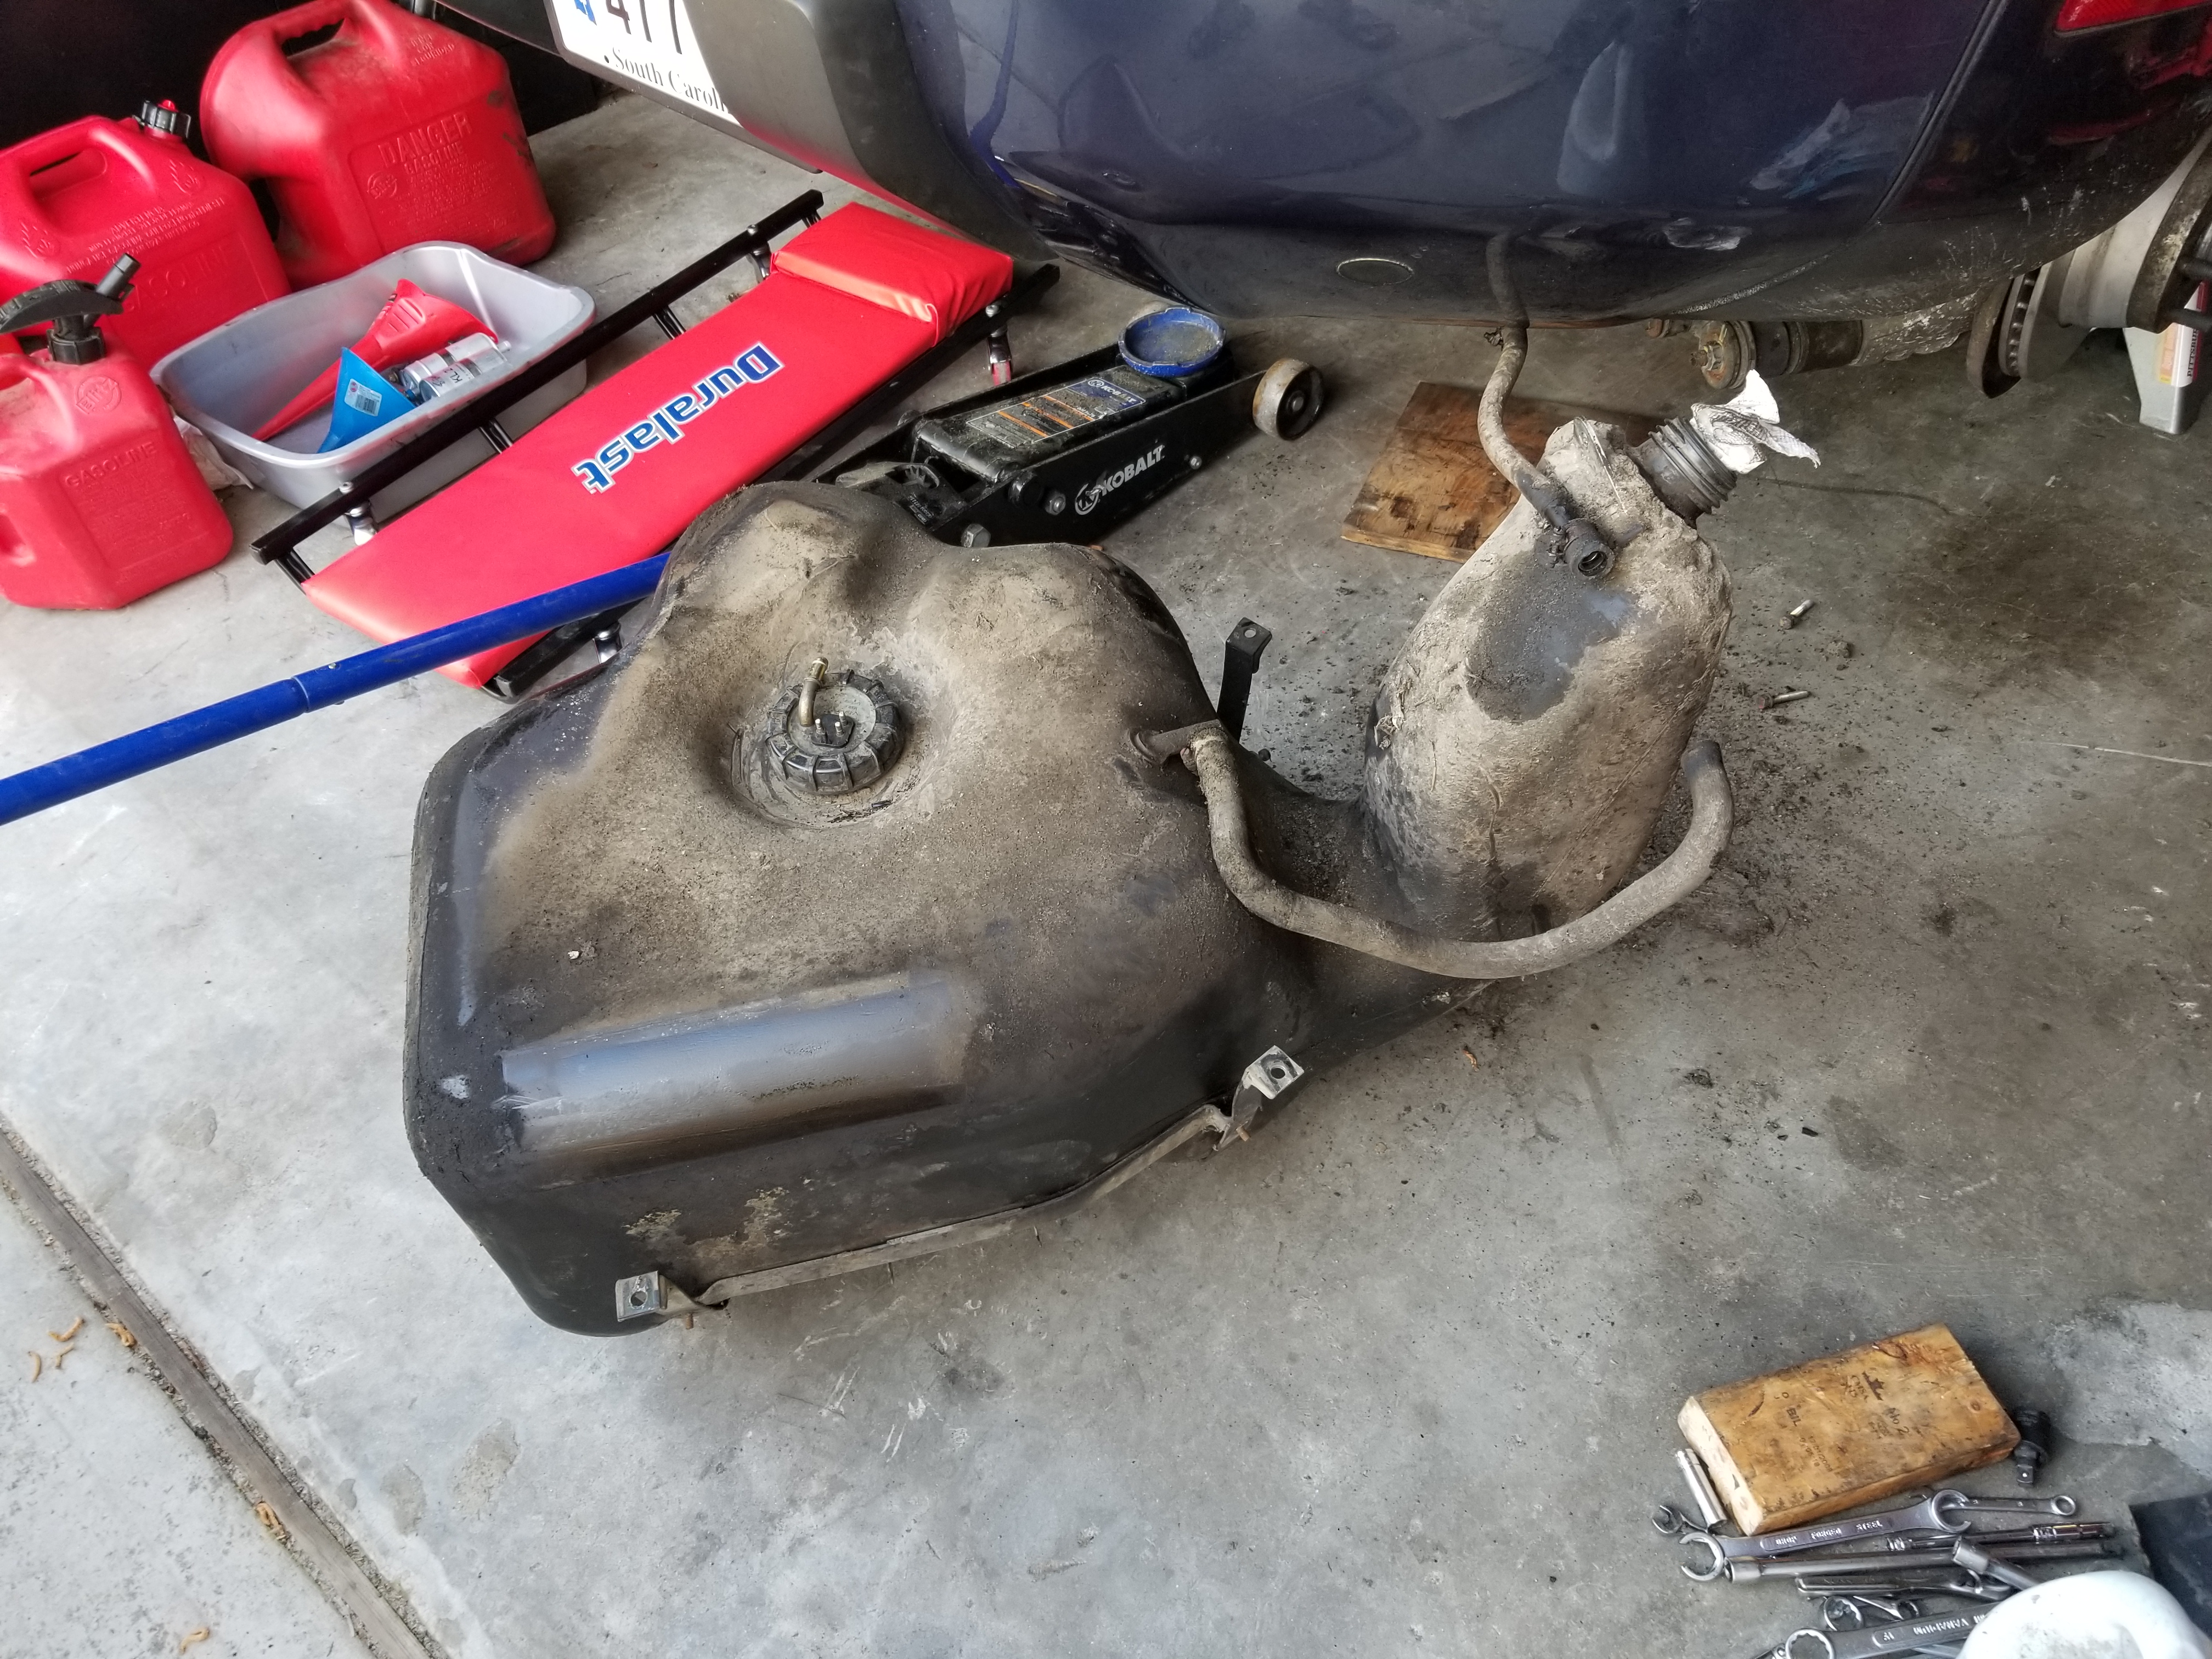

I took the tank out back and scrubbed it off well with some soapy water so that I could see if anything else would show itself, and had no luck. Just to be safe I put some putty around the seam of the two tank halves and where the hose nipples connect.
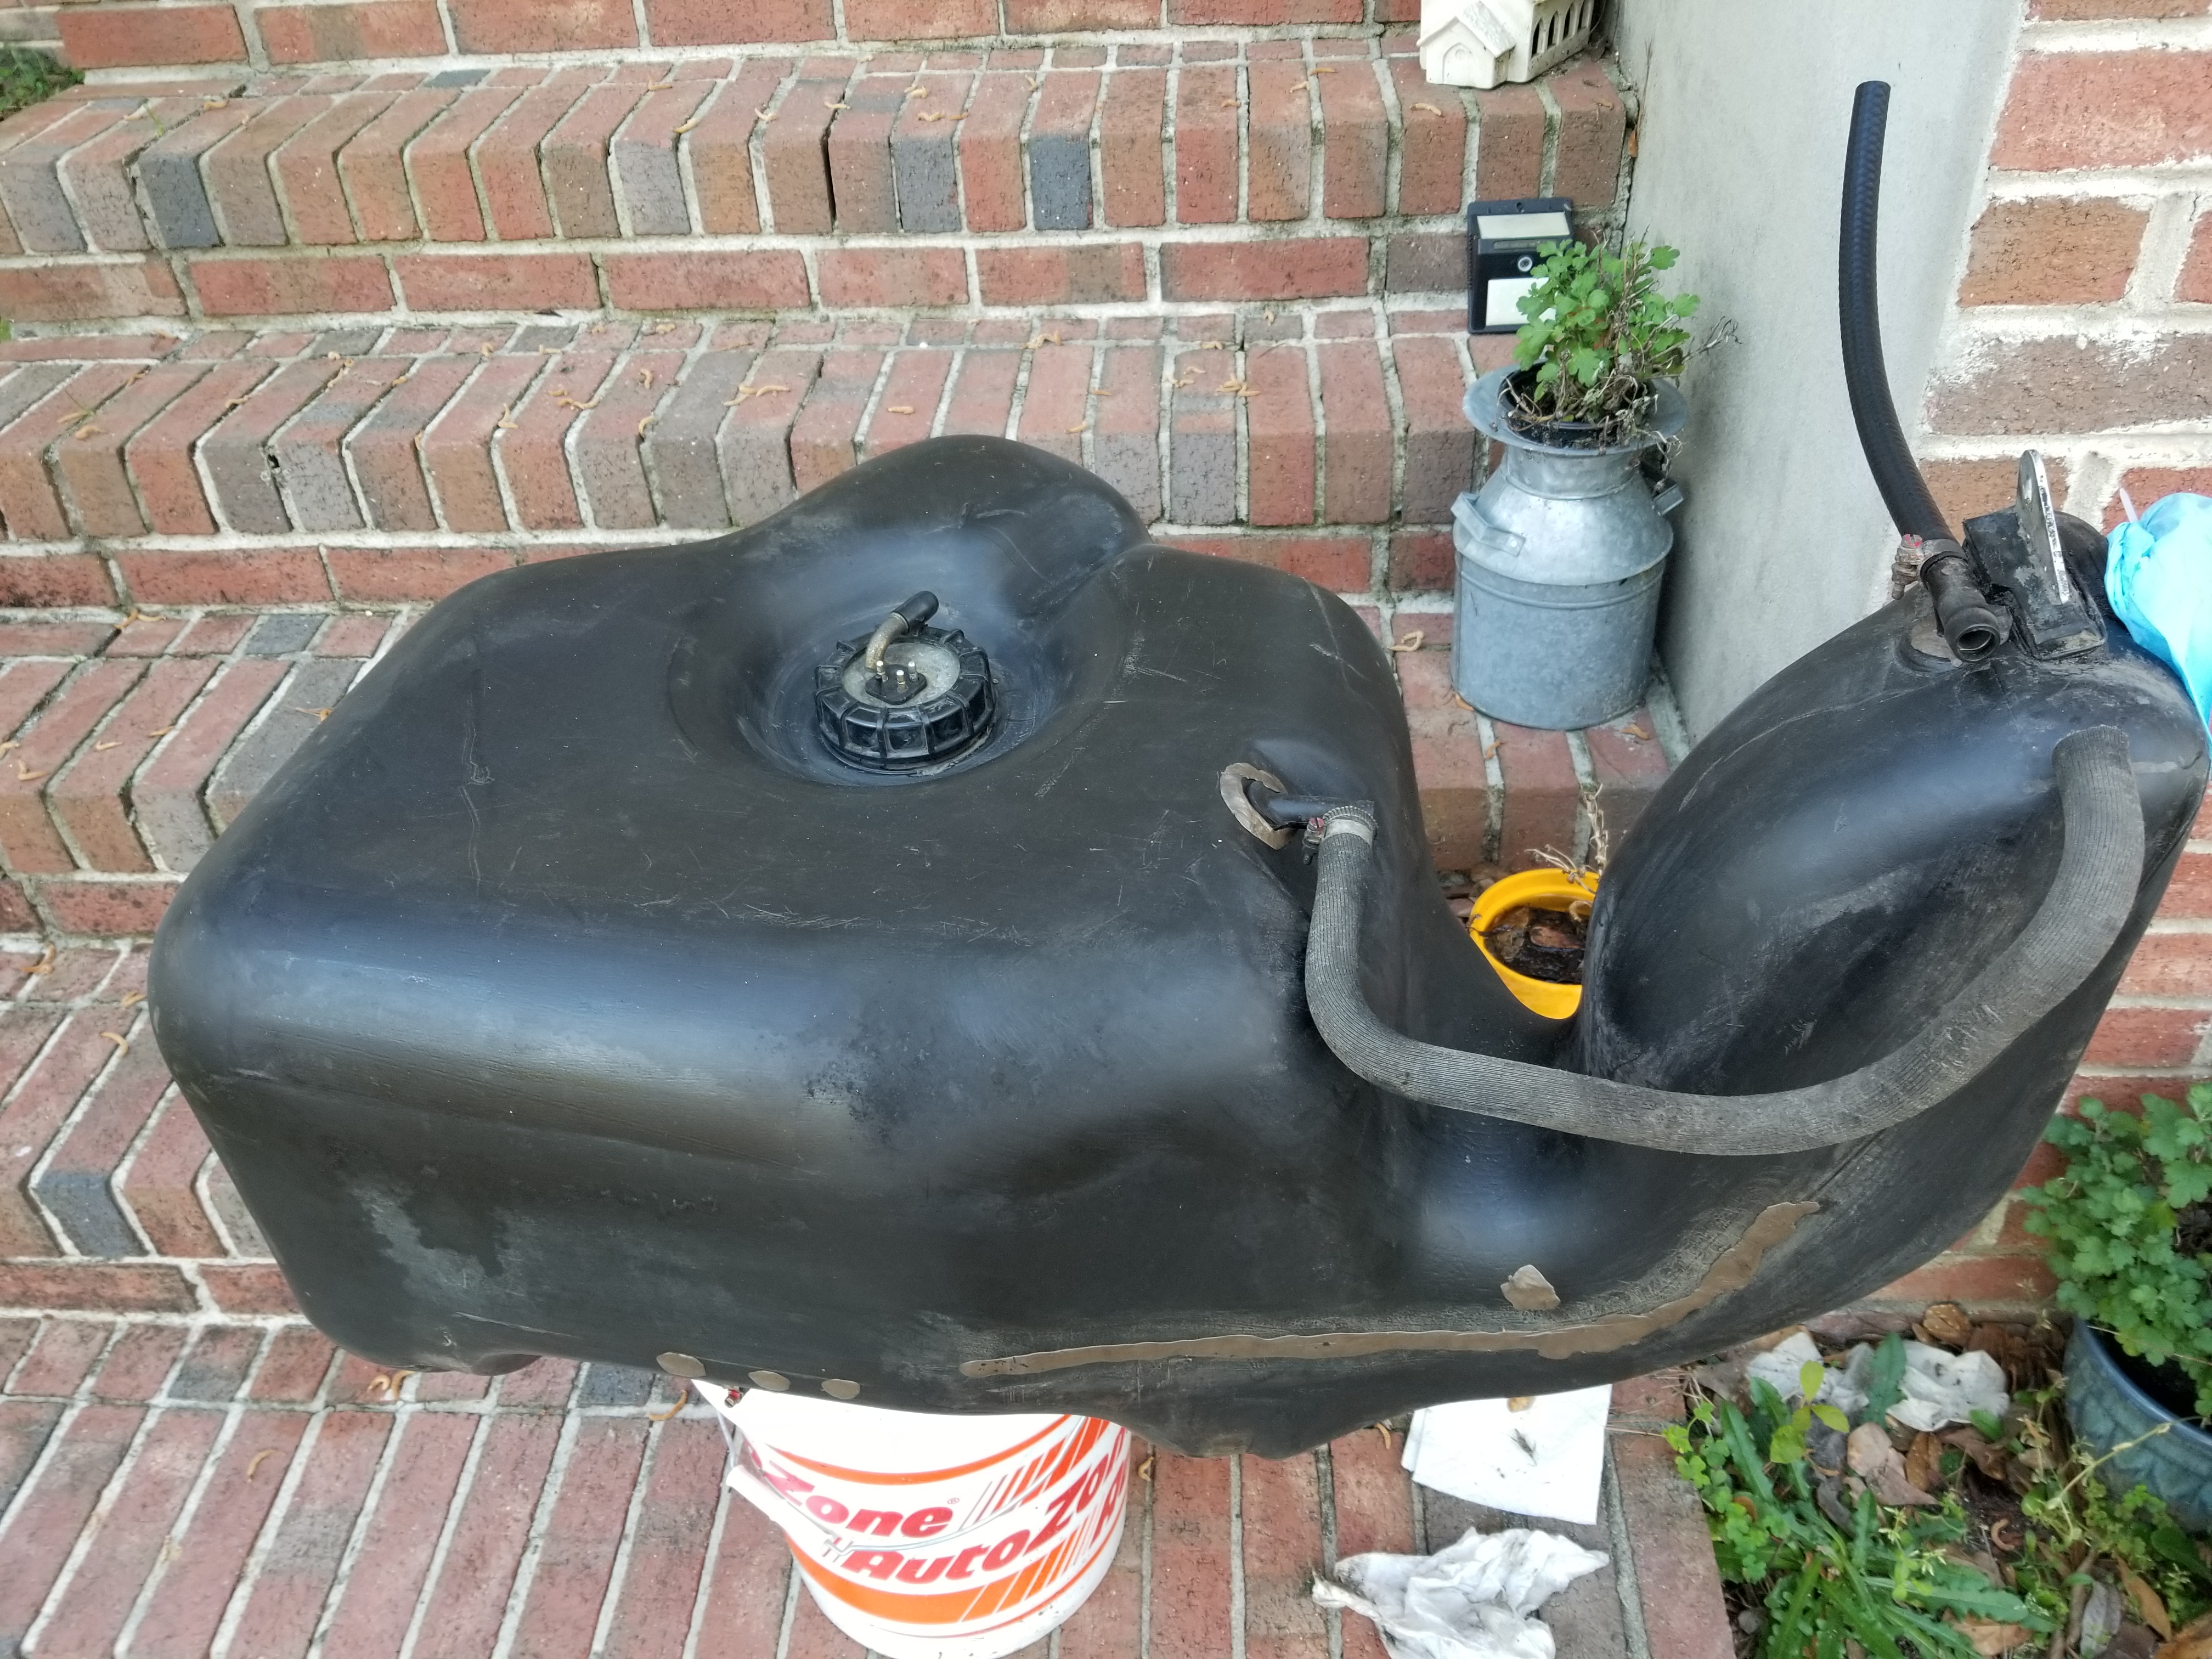
About at this point I was getting ready to put the tank back in and noticed this small split in the hose going from the neck to the over flow tank. I remembered some gas running out of the overflow tank when I took the hose off, so there could have been some coming from that. I got some new hose from the parts store and replaced it.
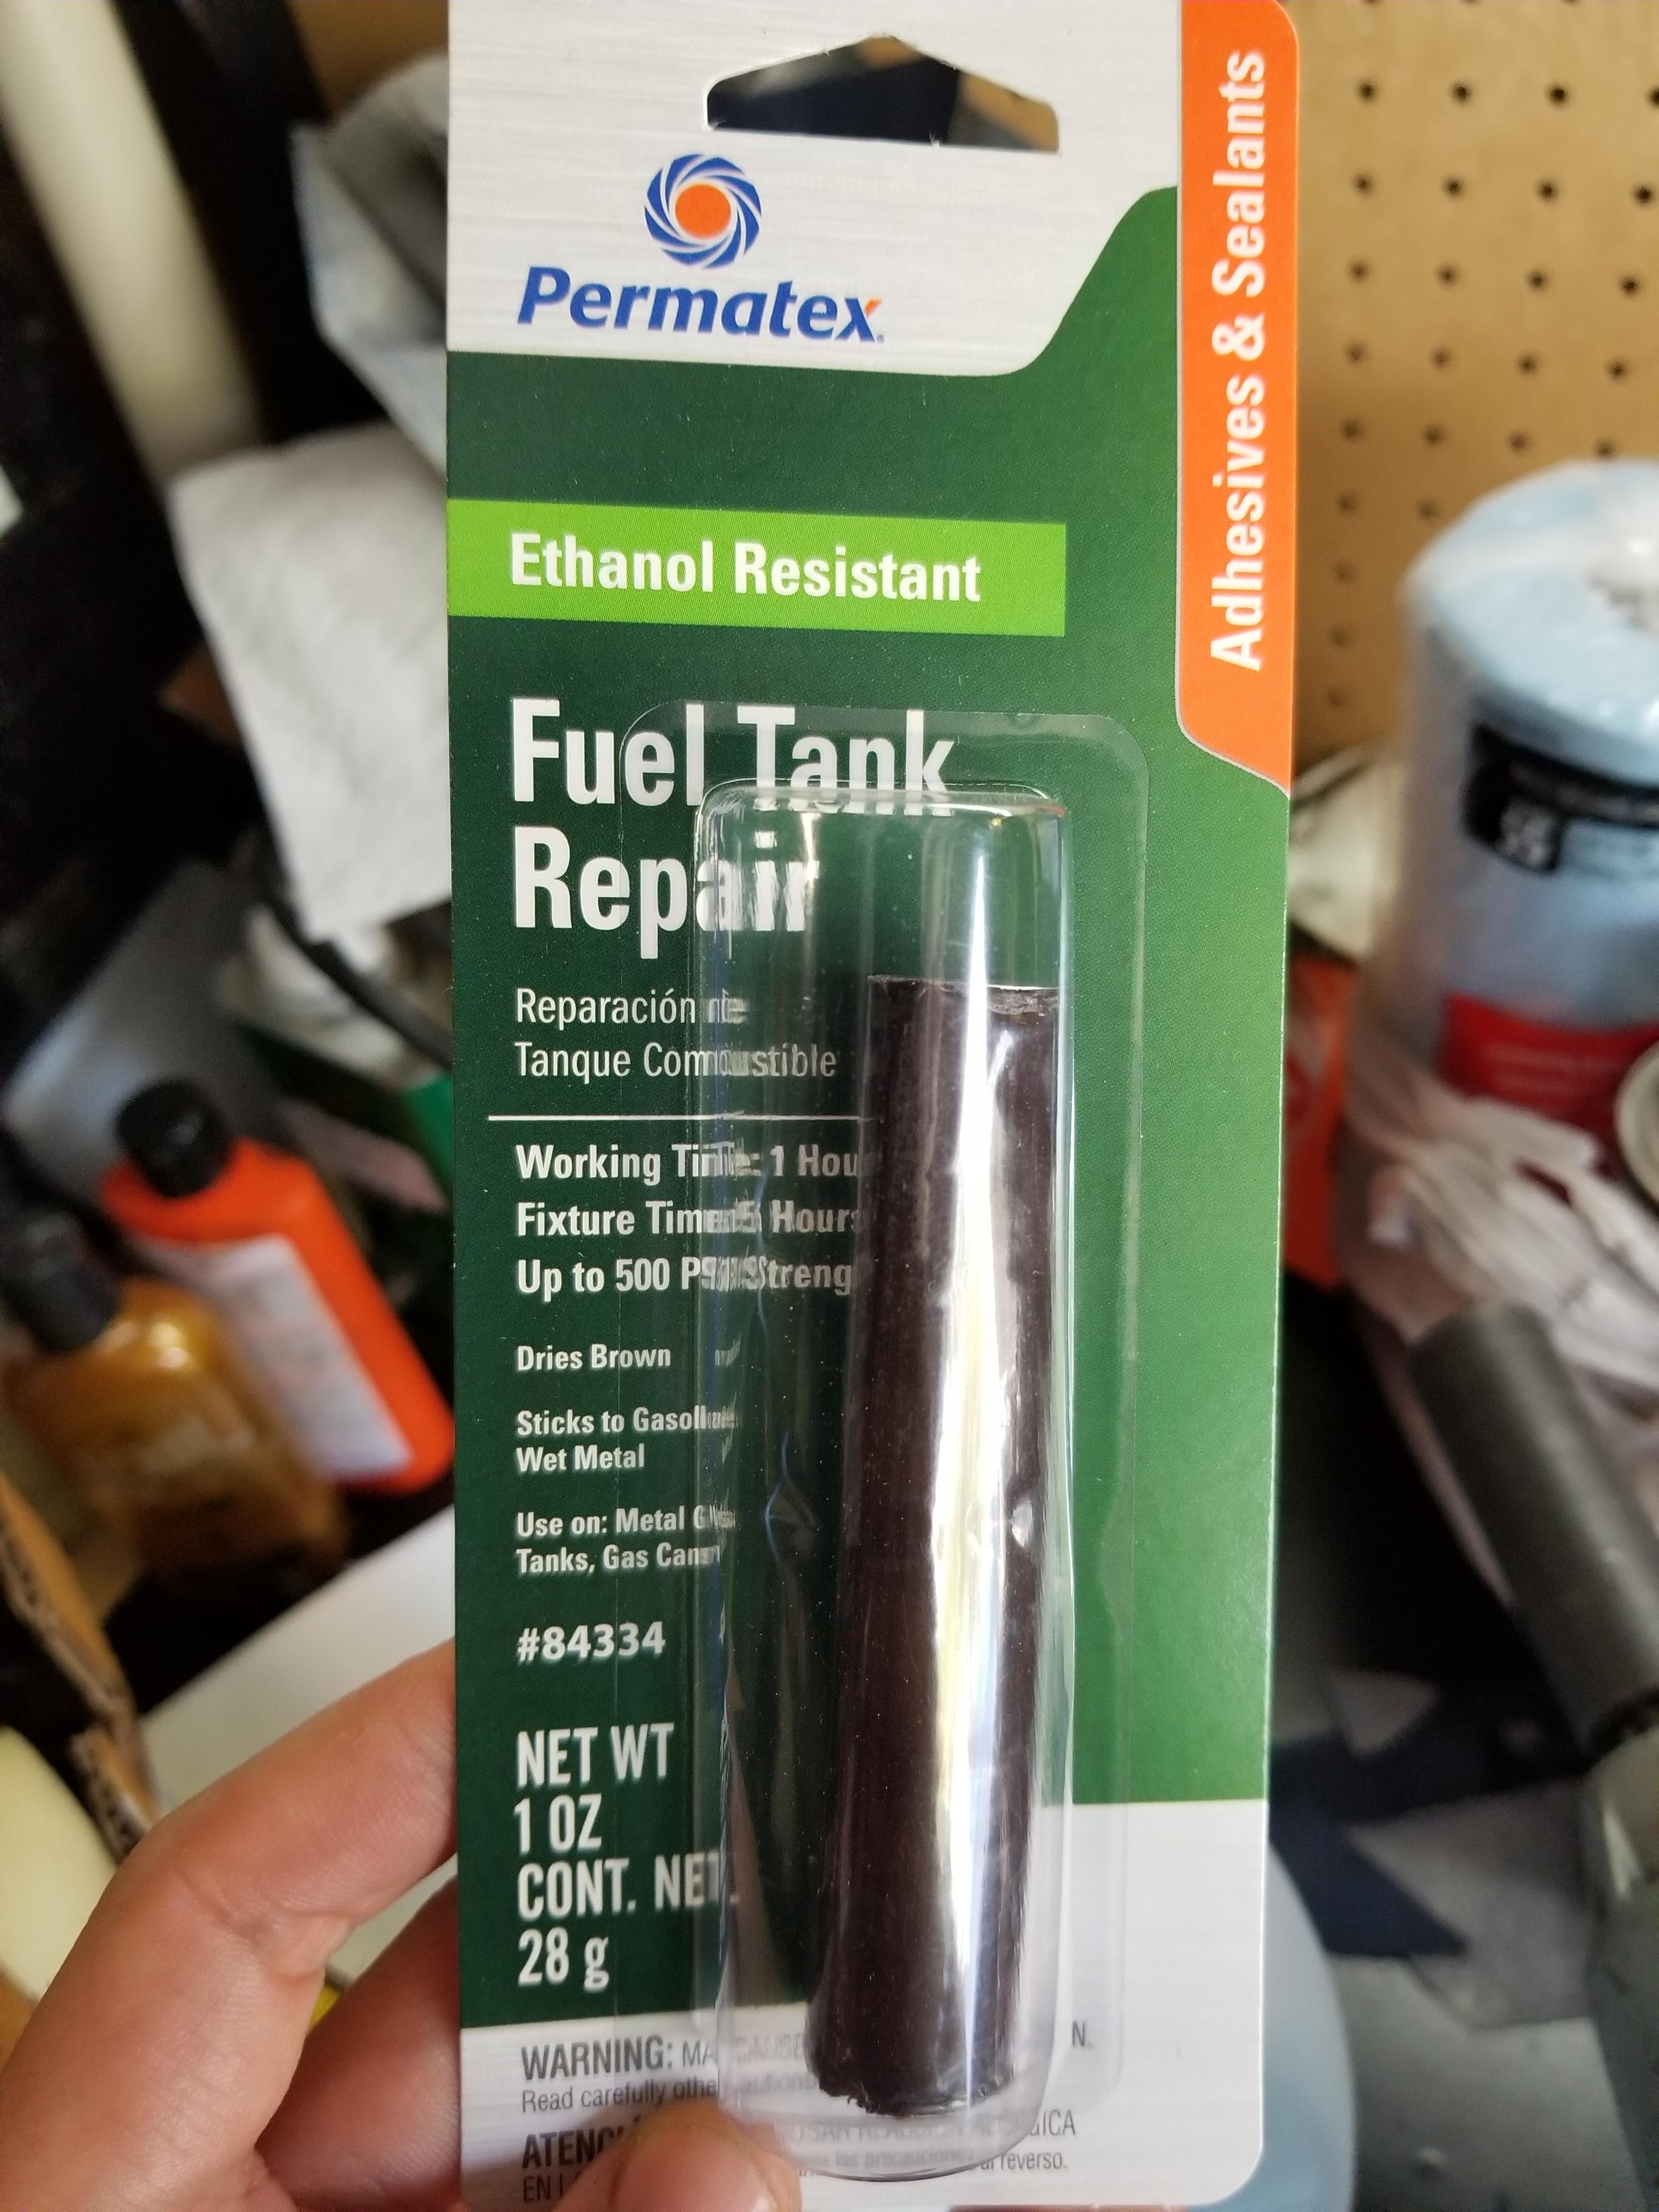
So I'm figuring that hose was probably my leak the whole time and was just running down the tank and collecting in the seam. But at least my seam is reinforced now I suppose.
I did make a video of this for those crazy enough to want to watch me fumble around with everything.
A couple weeks ago I filled up the tank (as I have done many times), but this time after leaving the car in the garage overnight I could smell gas. Started looking around and found drips down the side of the tank.
Removing the access cover to the sender revealed a puddle around the sender. The retaining nut was a but loose, so I snugged it up and cleaned up the fuel.
I cleaned off as much as I could reach on the side of the tank and drove the car again around the block a bit to go to the grocery store, but the drips on the side of the tank kept coming back, even with no fuel on top of the tank. I couldn't see anything obvious around the sides or the filler neck, so I wound up taking the tank out.
This didn't really reveal anything as to the source of the fuel either (the wet spot on the filler neck was from spraying kroil on hose clamps). Finding nothing obvious I was scrutinizing the seam. I could see the fuel running along it with the tank still in the car, but couldn't tell if that was the source, or if it was just collecting in it.
I took the tank out back and scrubbed it off well with some soapy water so that I could see if anything else would show itself, and had no luck. Just to be safe I put some putty around the seam of the two tank halves and where the hose nipples connect.
About at this point I was getting ready to put the tank back in and noticed this small split in the hose going from the neck to the over flow tank. I remembered some gas running out of the overflow tank when I took the hose off, so there could have been some coming from that. I got some new hose from the parts store and replaced it.
So I'm figuring that hose was probably my leak the whole time and was just running down the tank and collecting in the seam. But at least my seam is reinforced now I suppose.
I did make a video of this for those crazy enough to want to watch me fumble around with everything.
04-05-2020, 03:48 PM
#263
Burning Brakes
Thread Starter
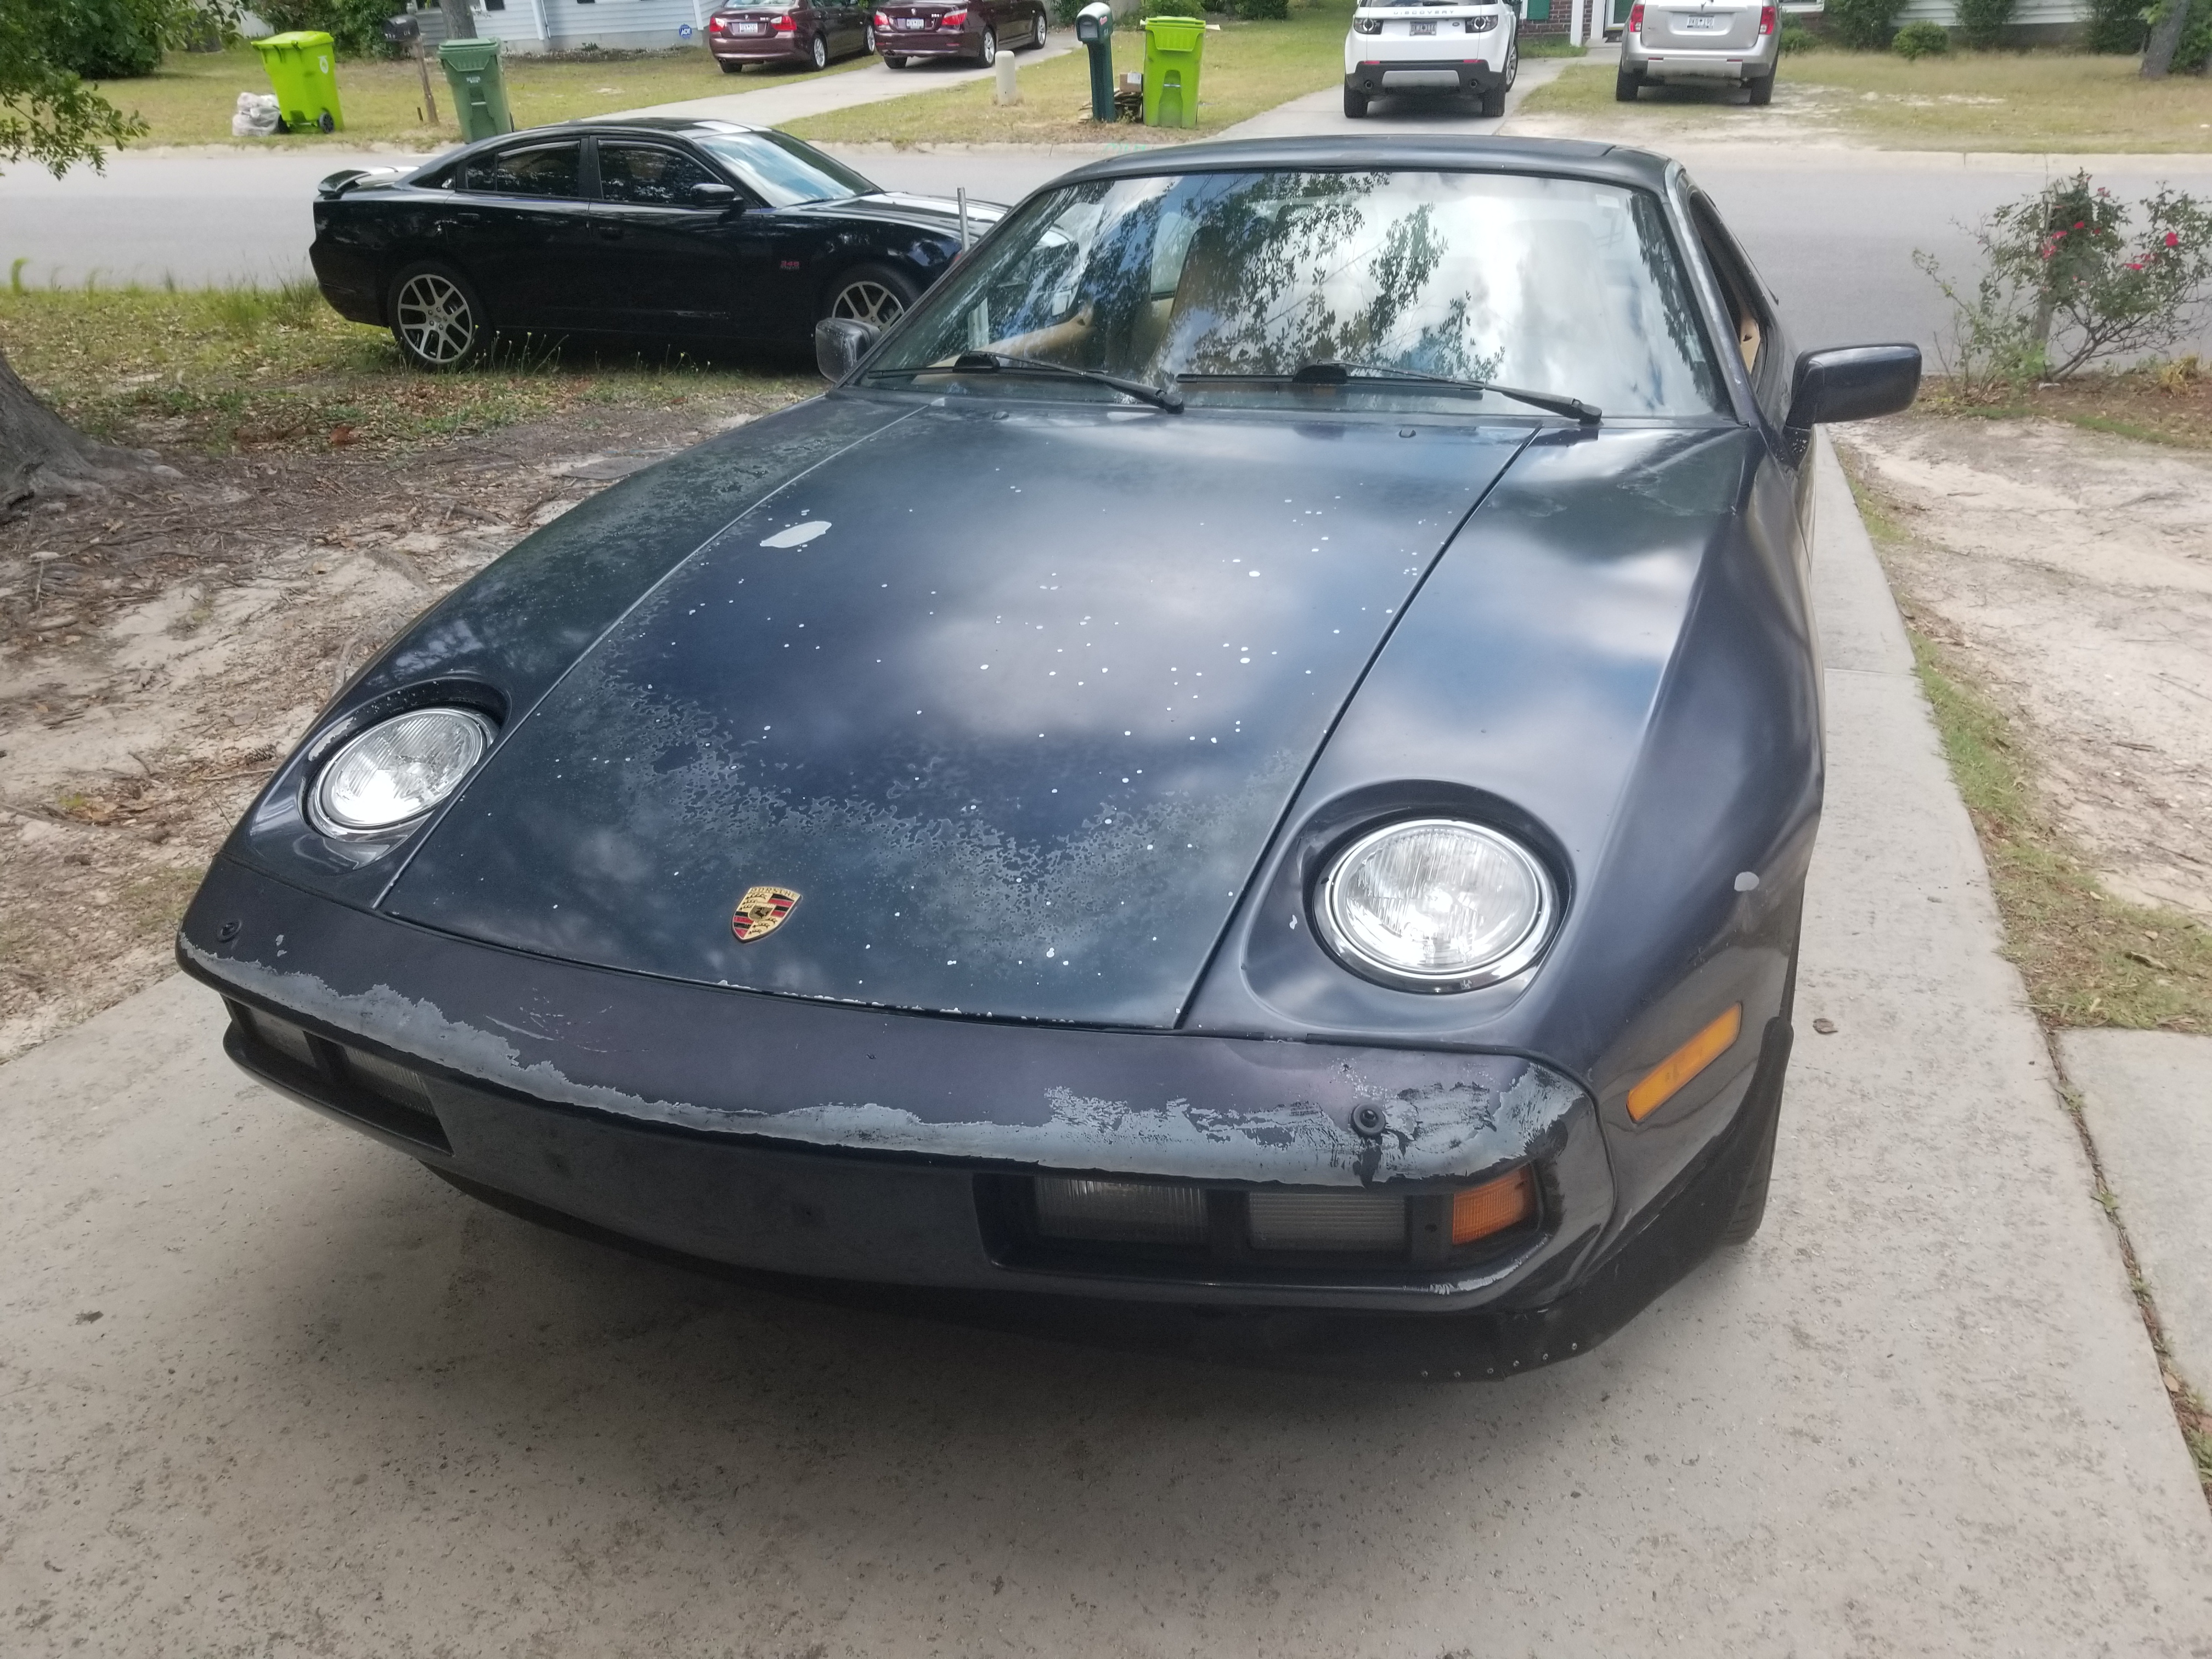
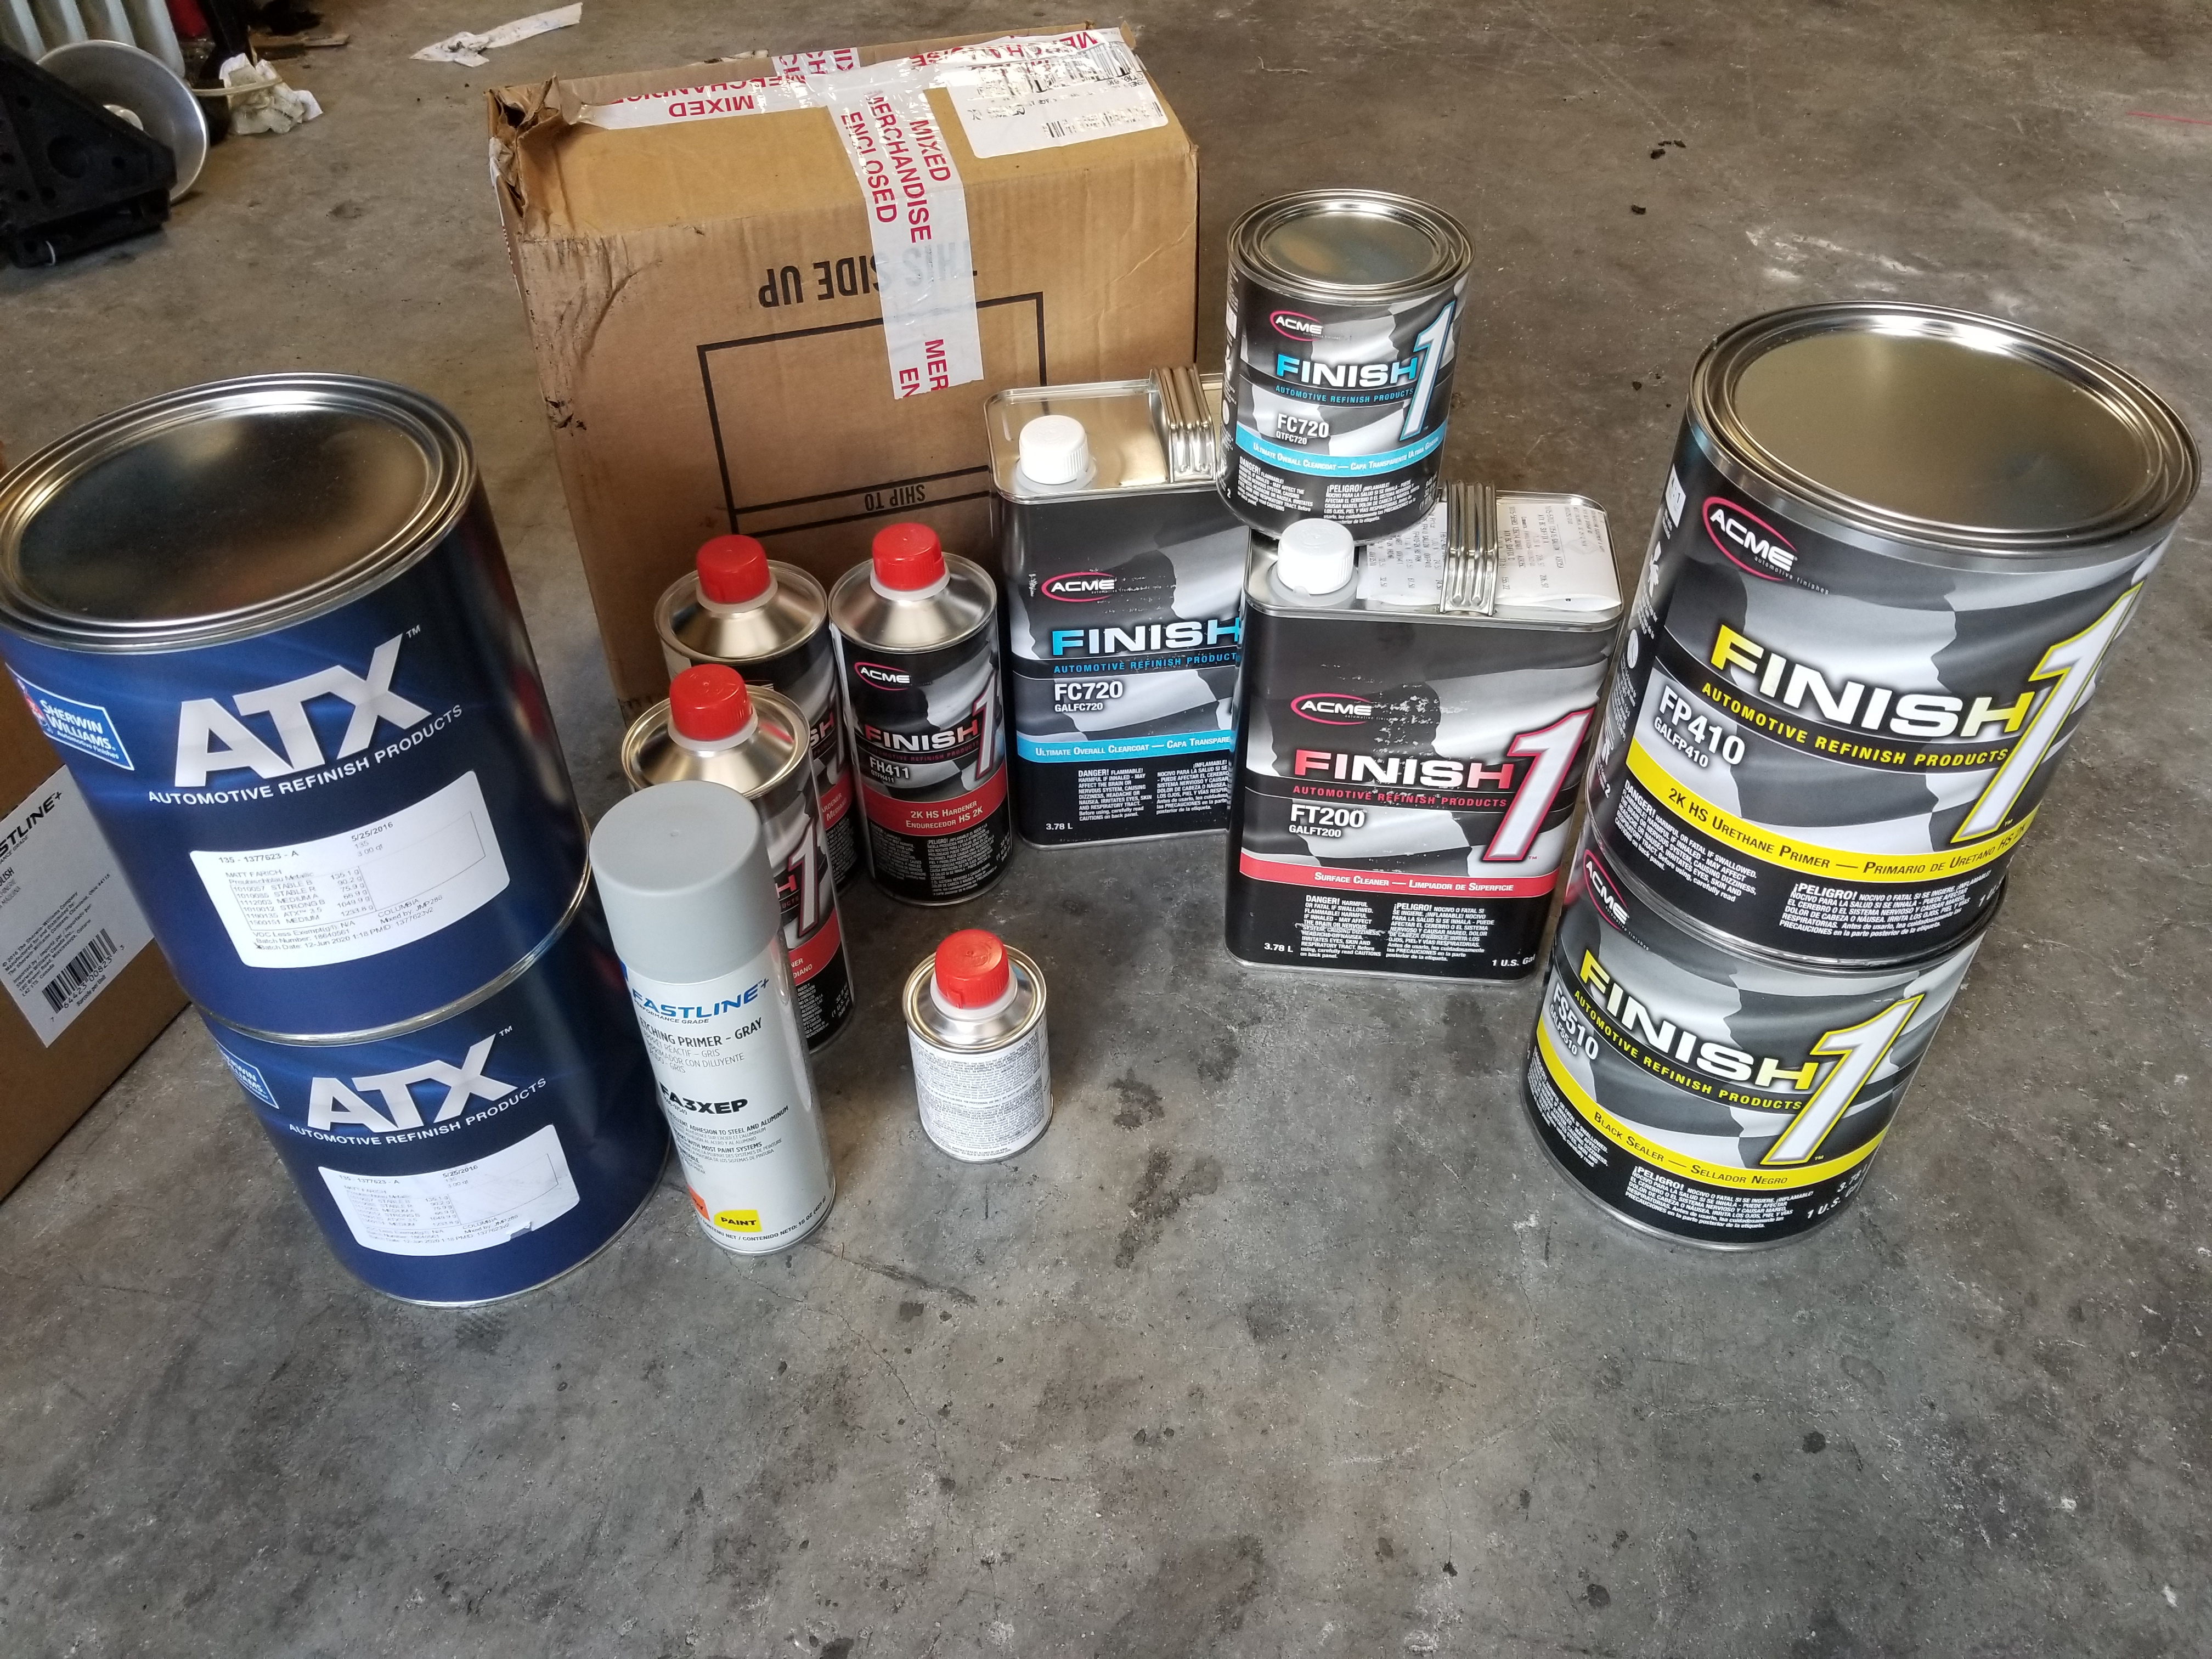
Also while I'm stuck at home looking for things to do, I'm thinking about getting stuff together and painting the car this summer. I've never painted with more than a rattle can, but it's something I want to learn how to do. Figure I can practice on the 84 parts car too.
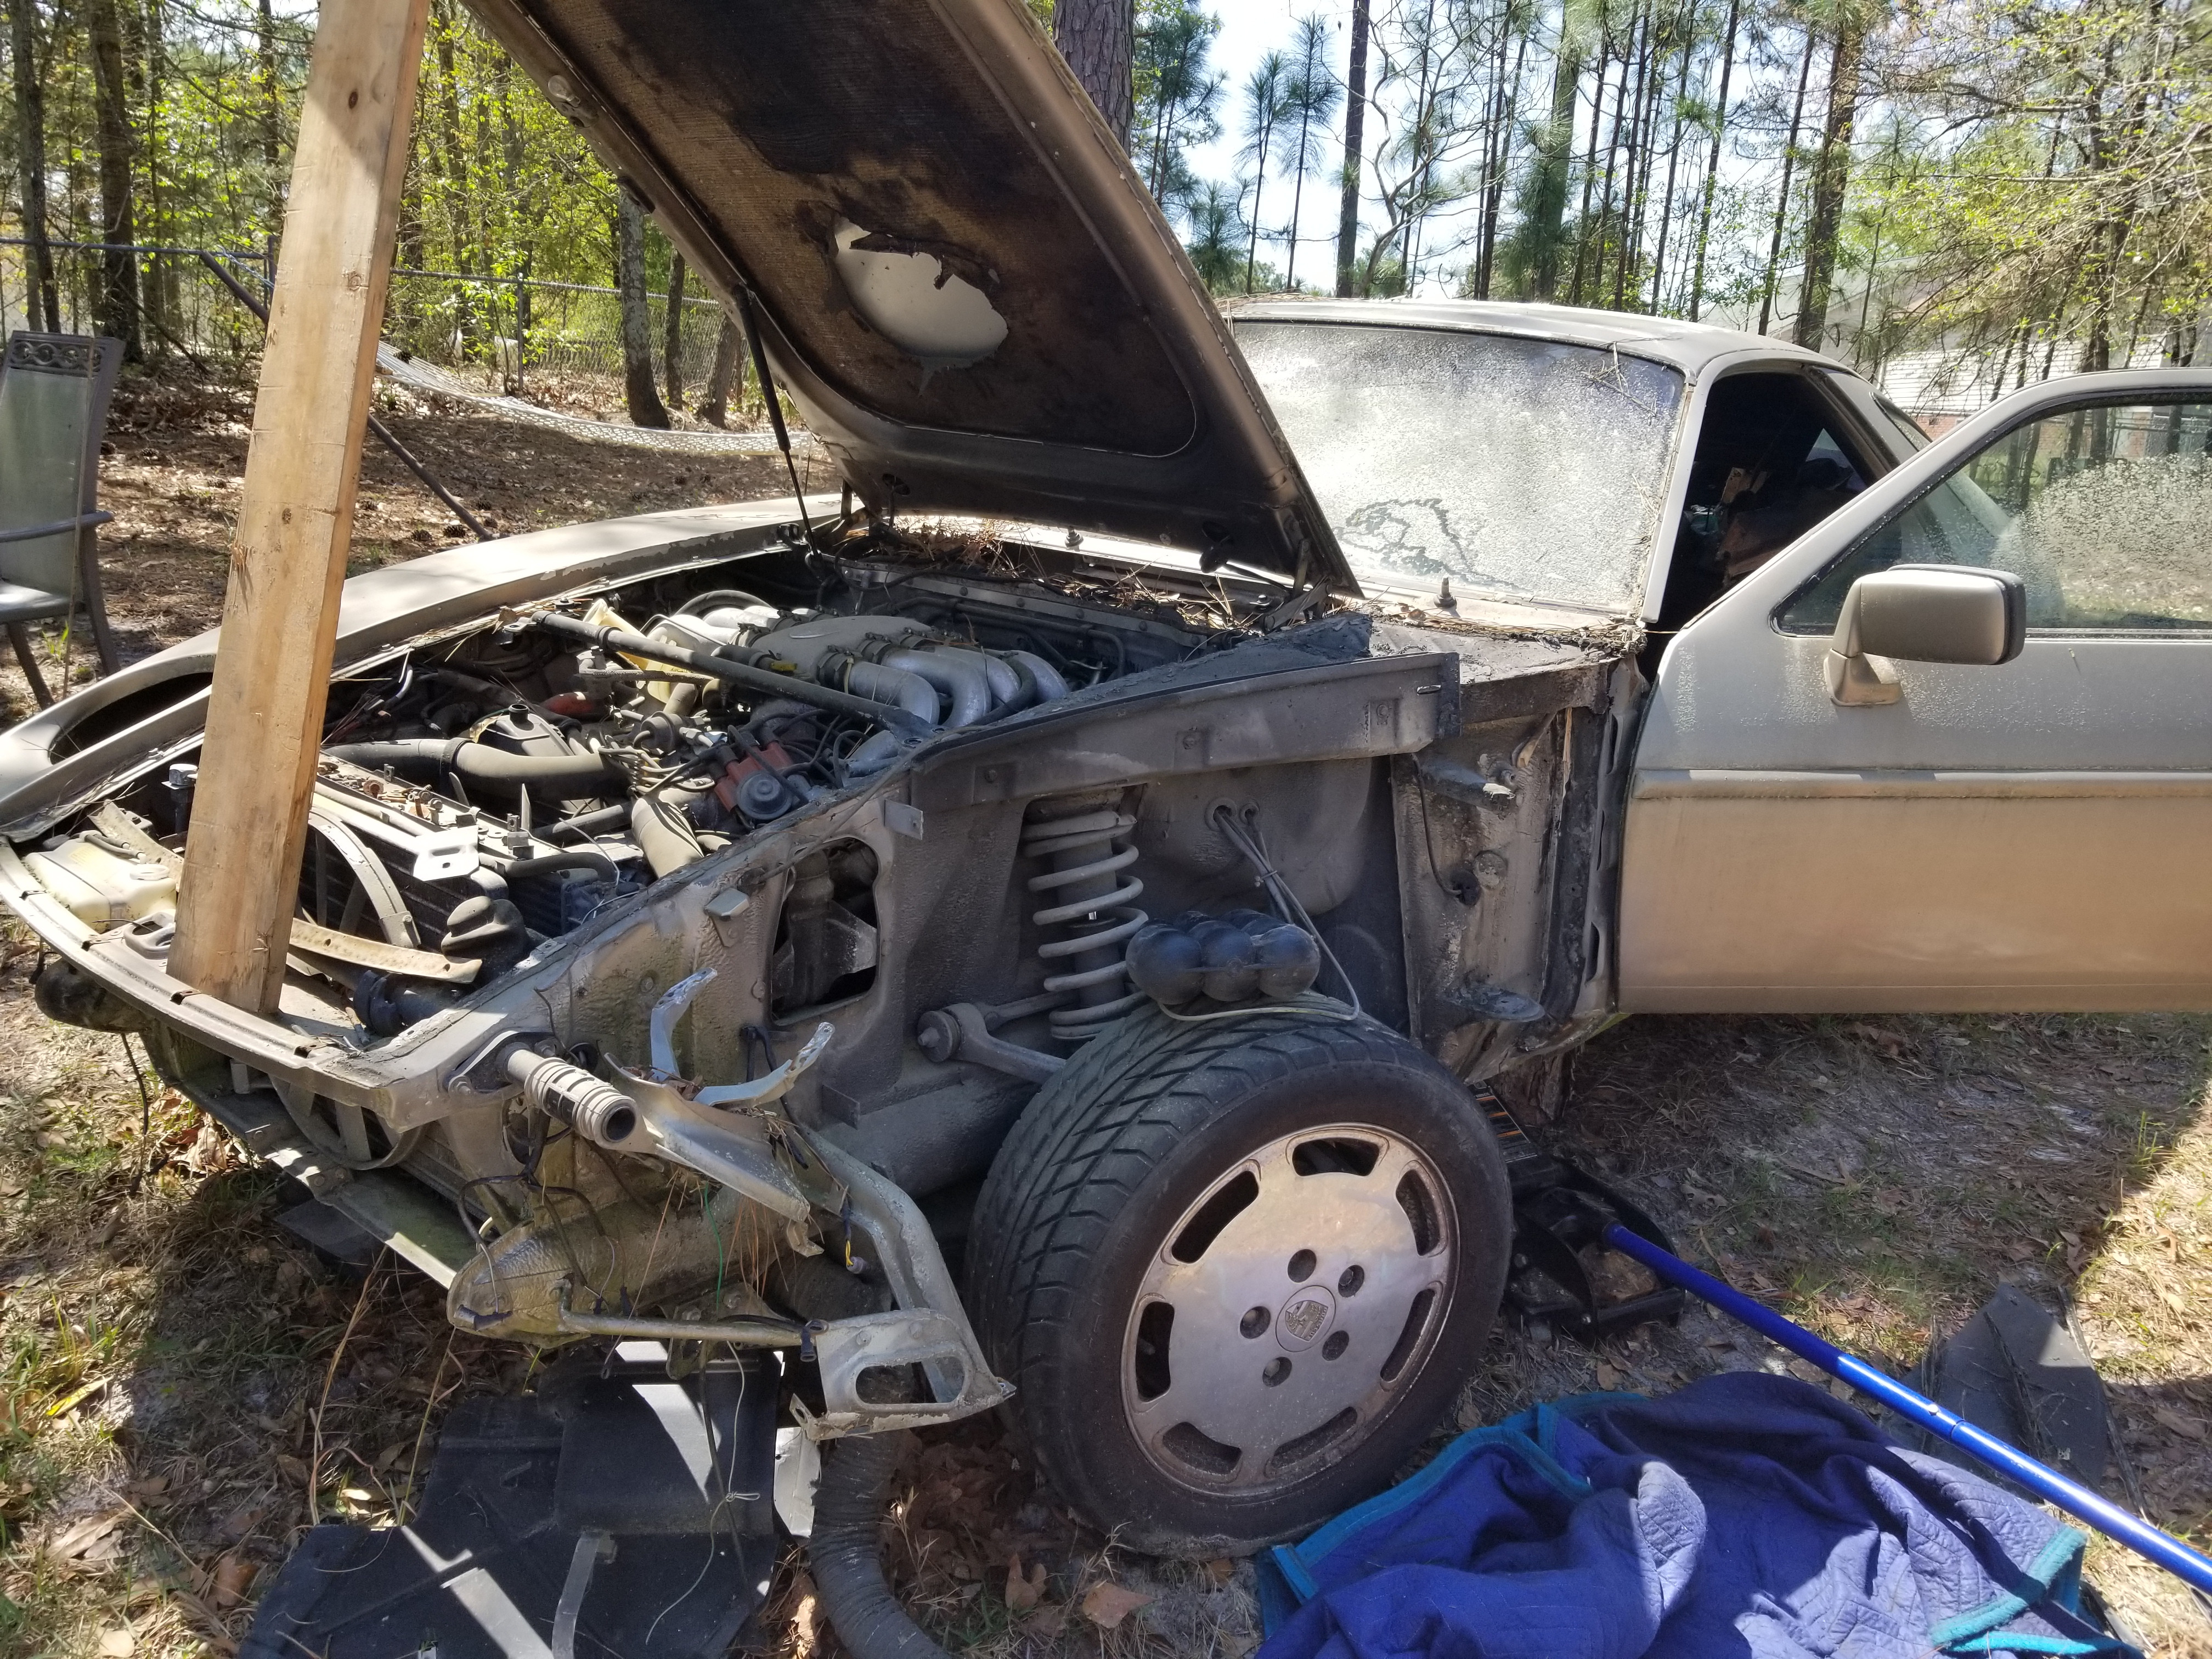
Anyway, the fender on the blue car is kinked from a front end impact in its past. I've pulled it out some, but it's gonna be a pain to get it straight again. The front bumper cover already doesn't line up great, and neither does the (albeit janky) front spoiler. So I figured I'd use the fender from the parts that that's good when the time comes for that. Finally got around to pulling that off today.
I had the front bumper cover off from taking the bumper shocks from it in the past, so I pretty much had access to everything.
Some of those bolts at the back were annoying to get off with the butyl crap on them, but I was able to get the wire wheel in to some of them to help.
It seems like this fender is pretty straight. I'll have to fill in the holes from the side moldings since the blue car doesn't have them, but other wise should just need sanded and painted along with the rest of the car.
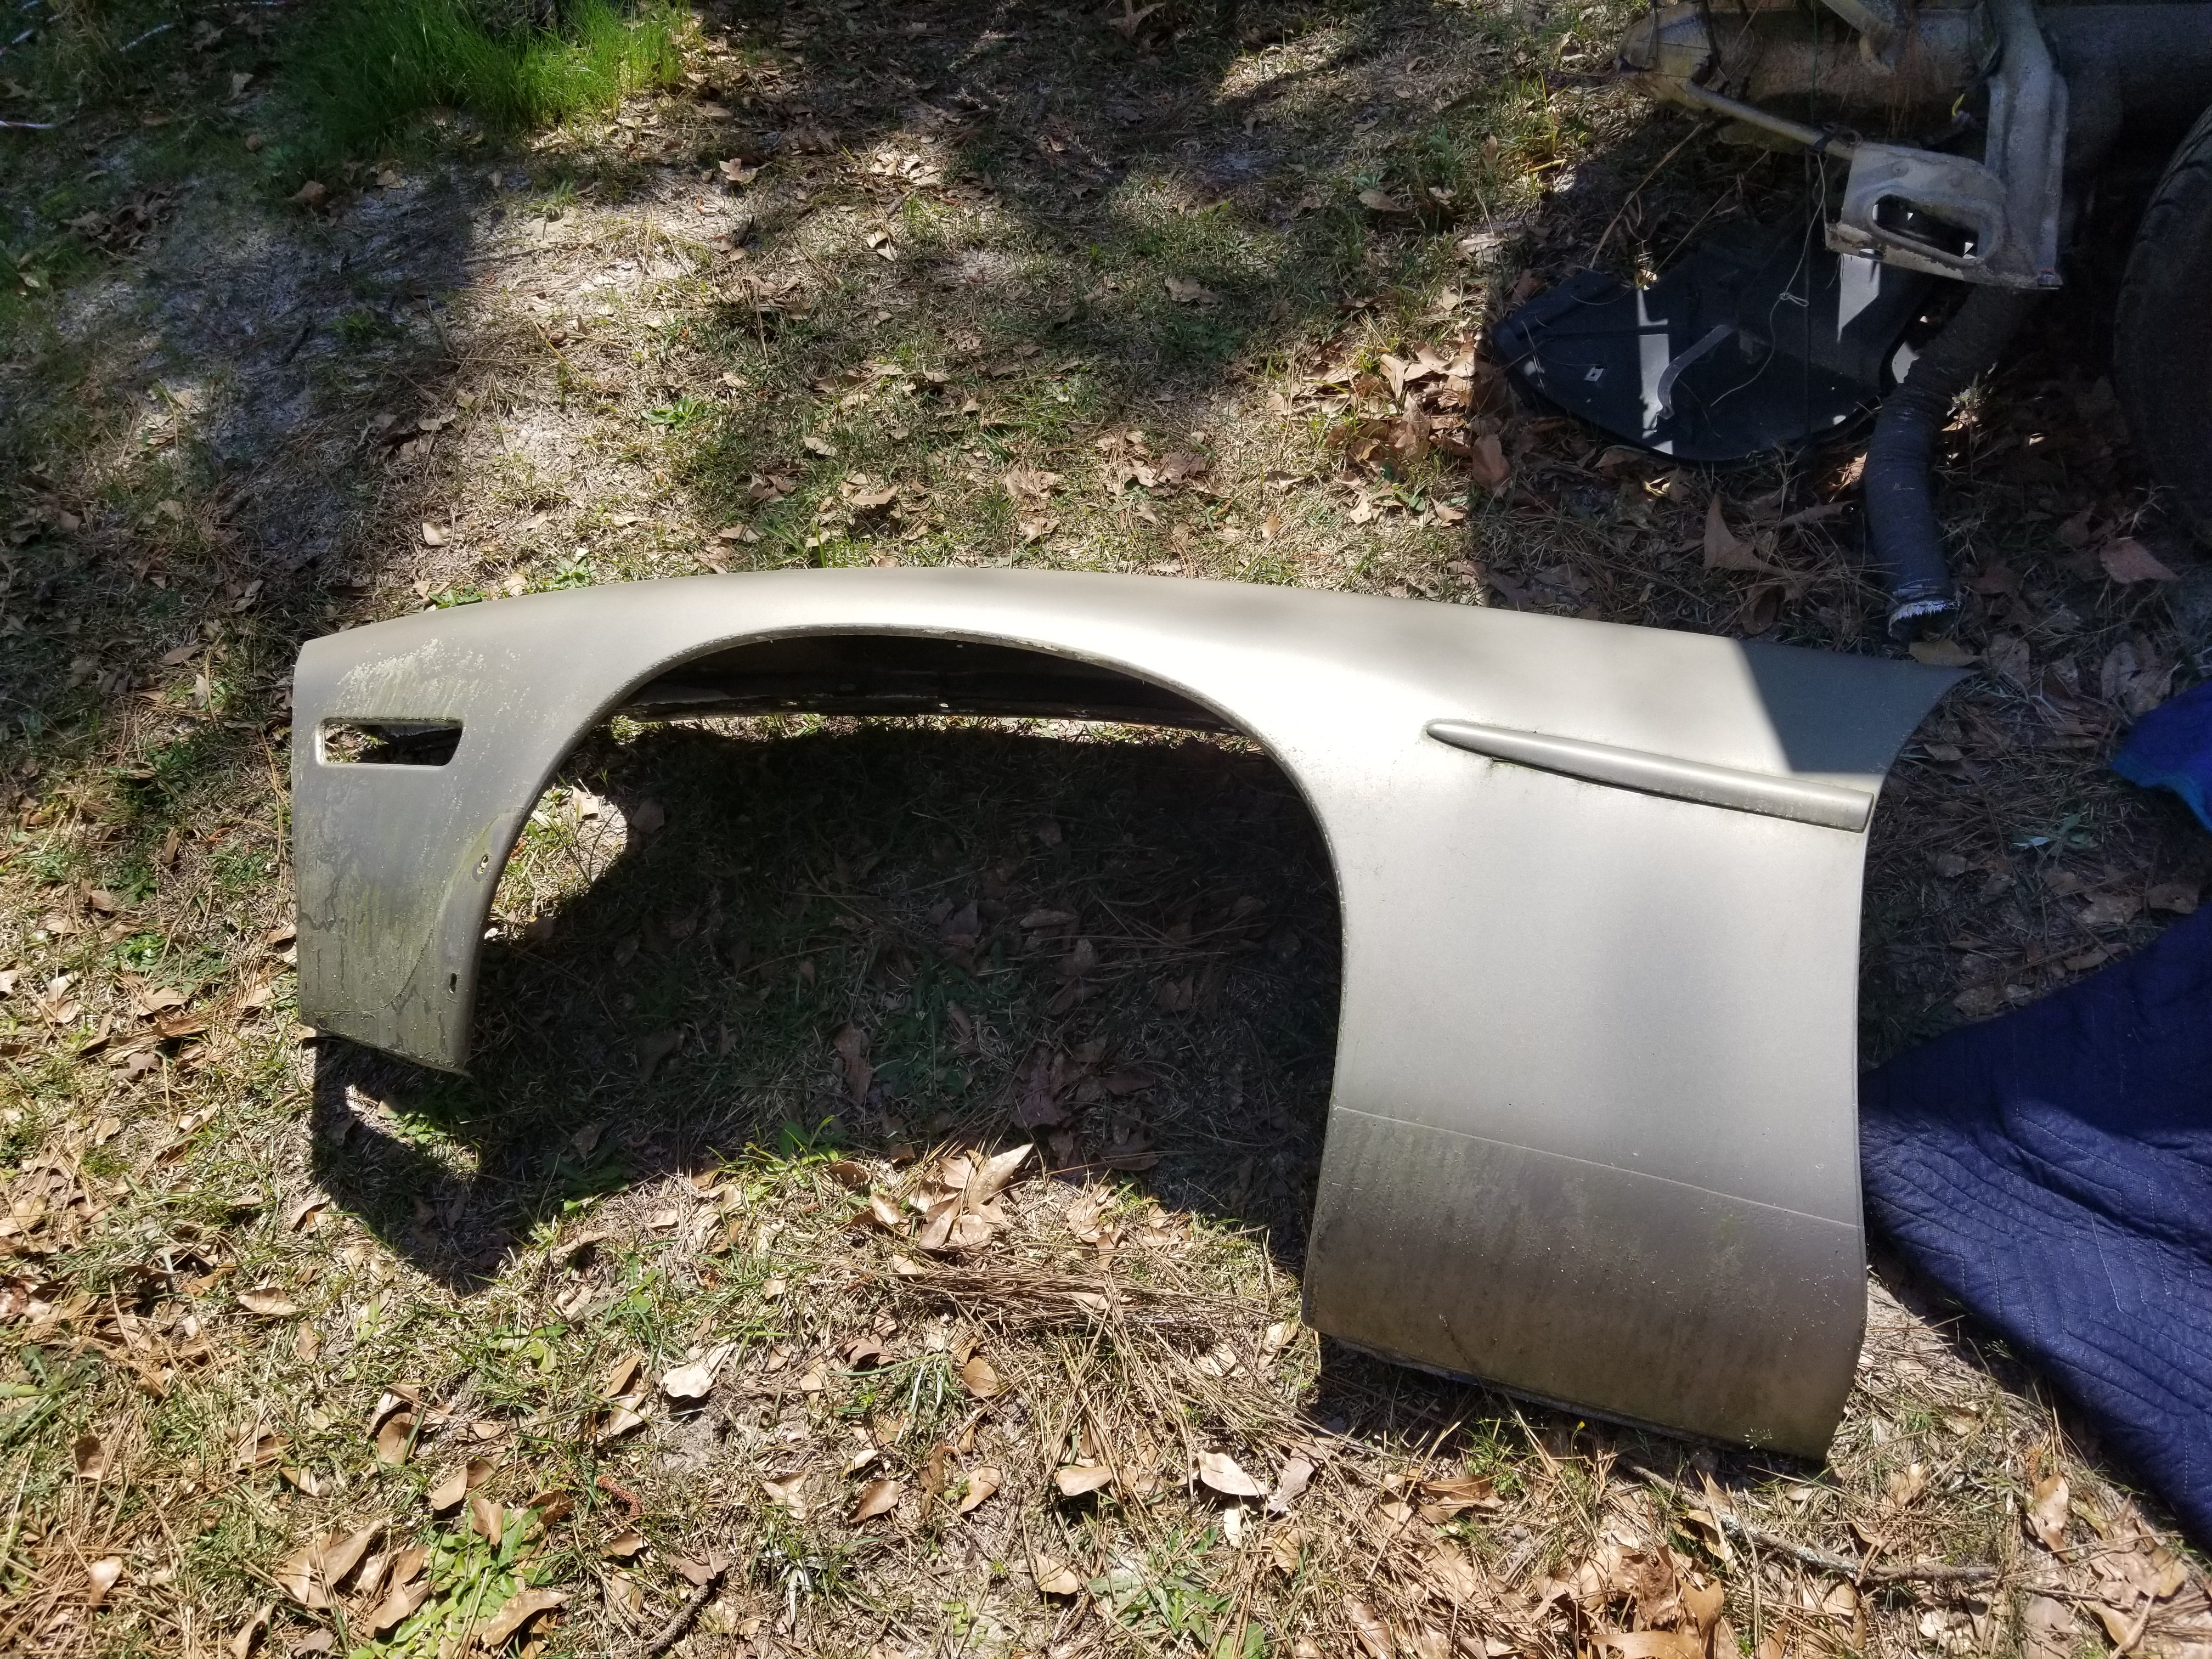
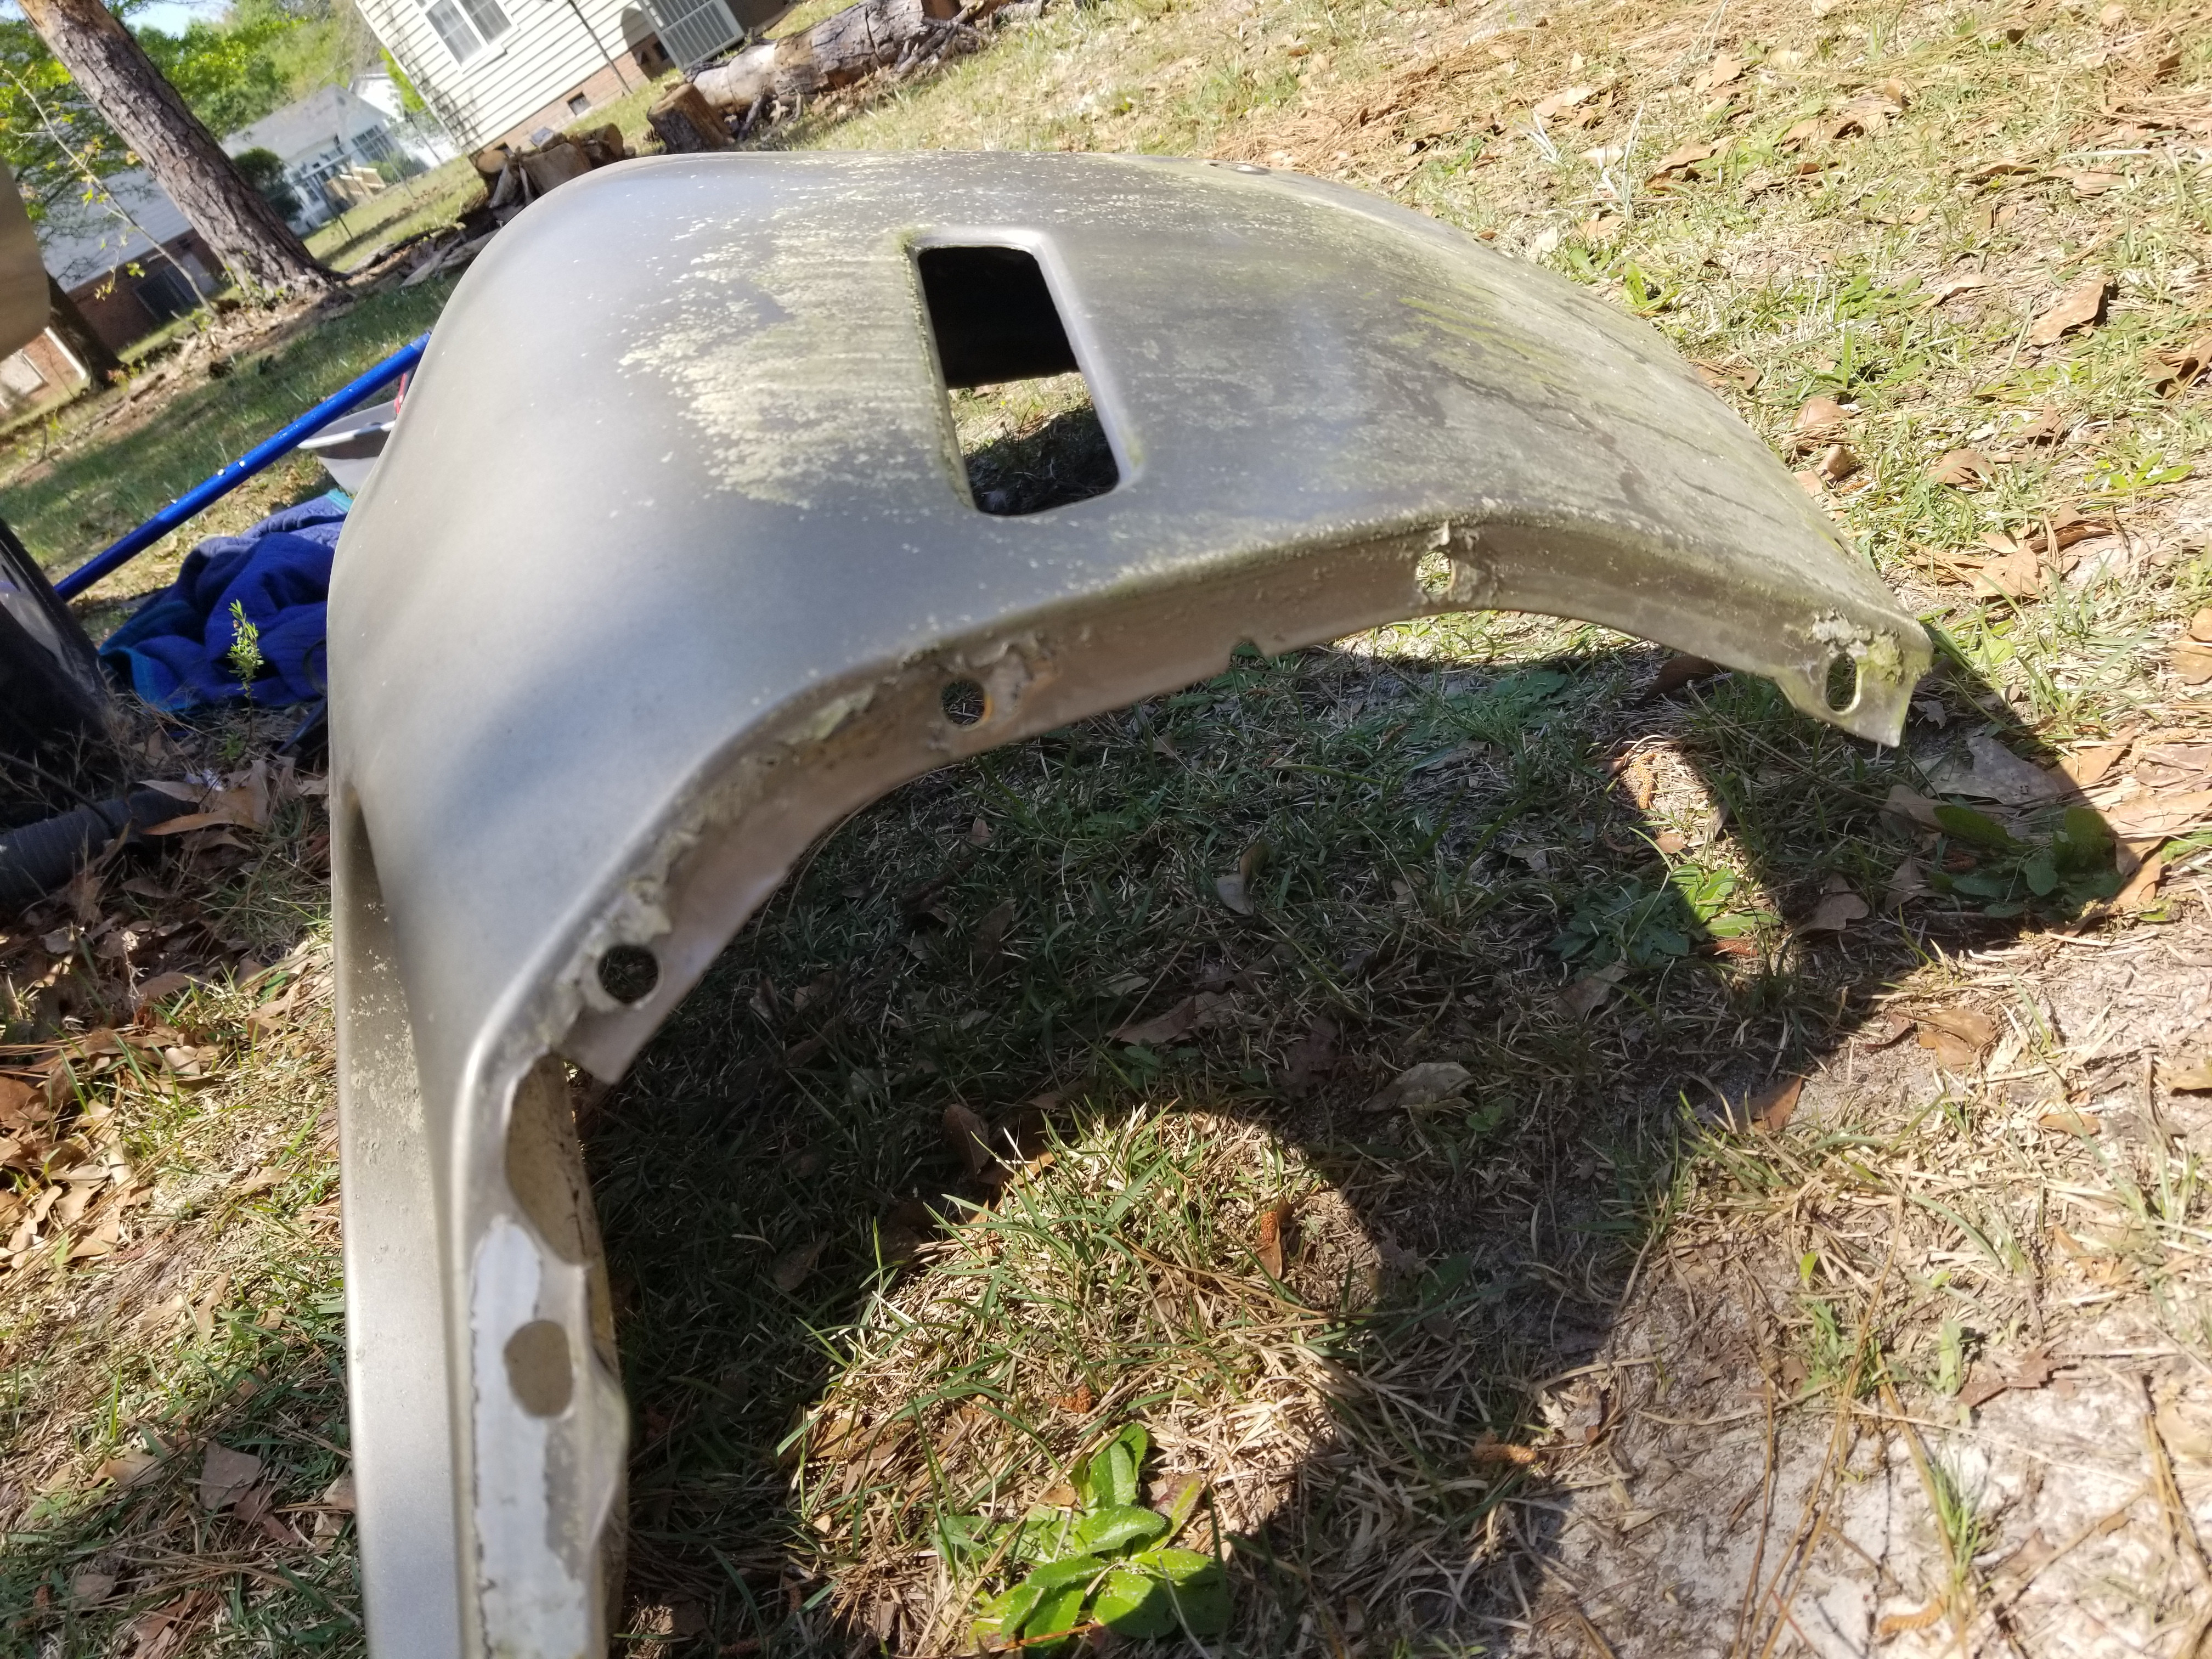
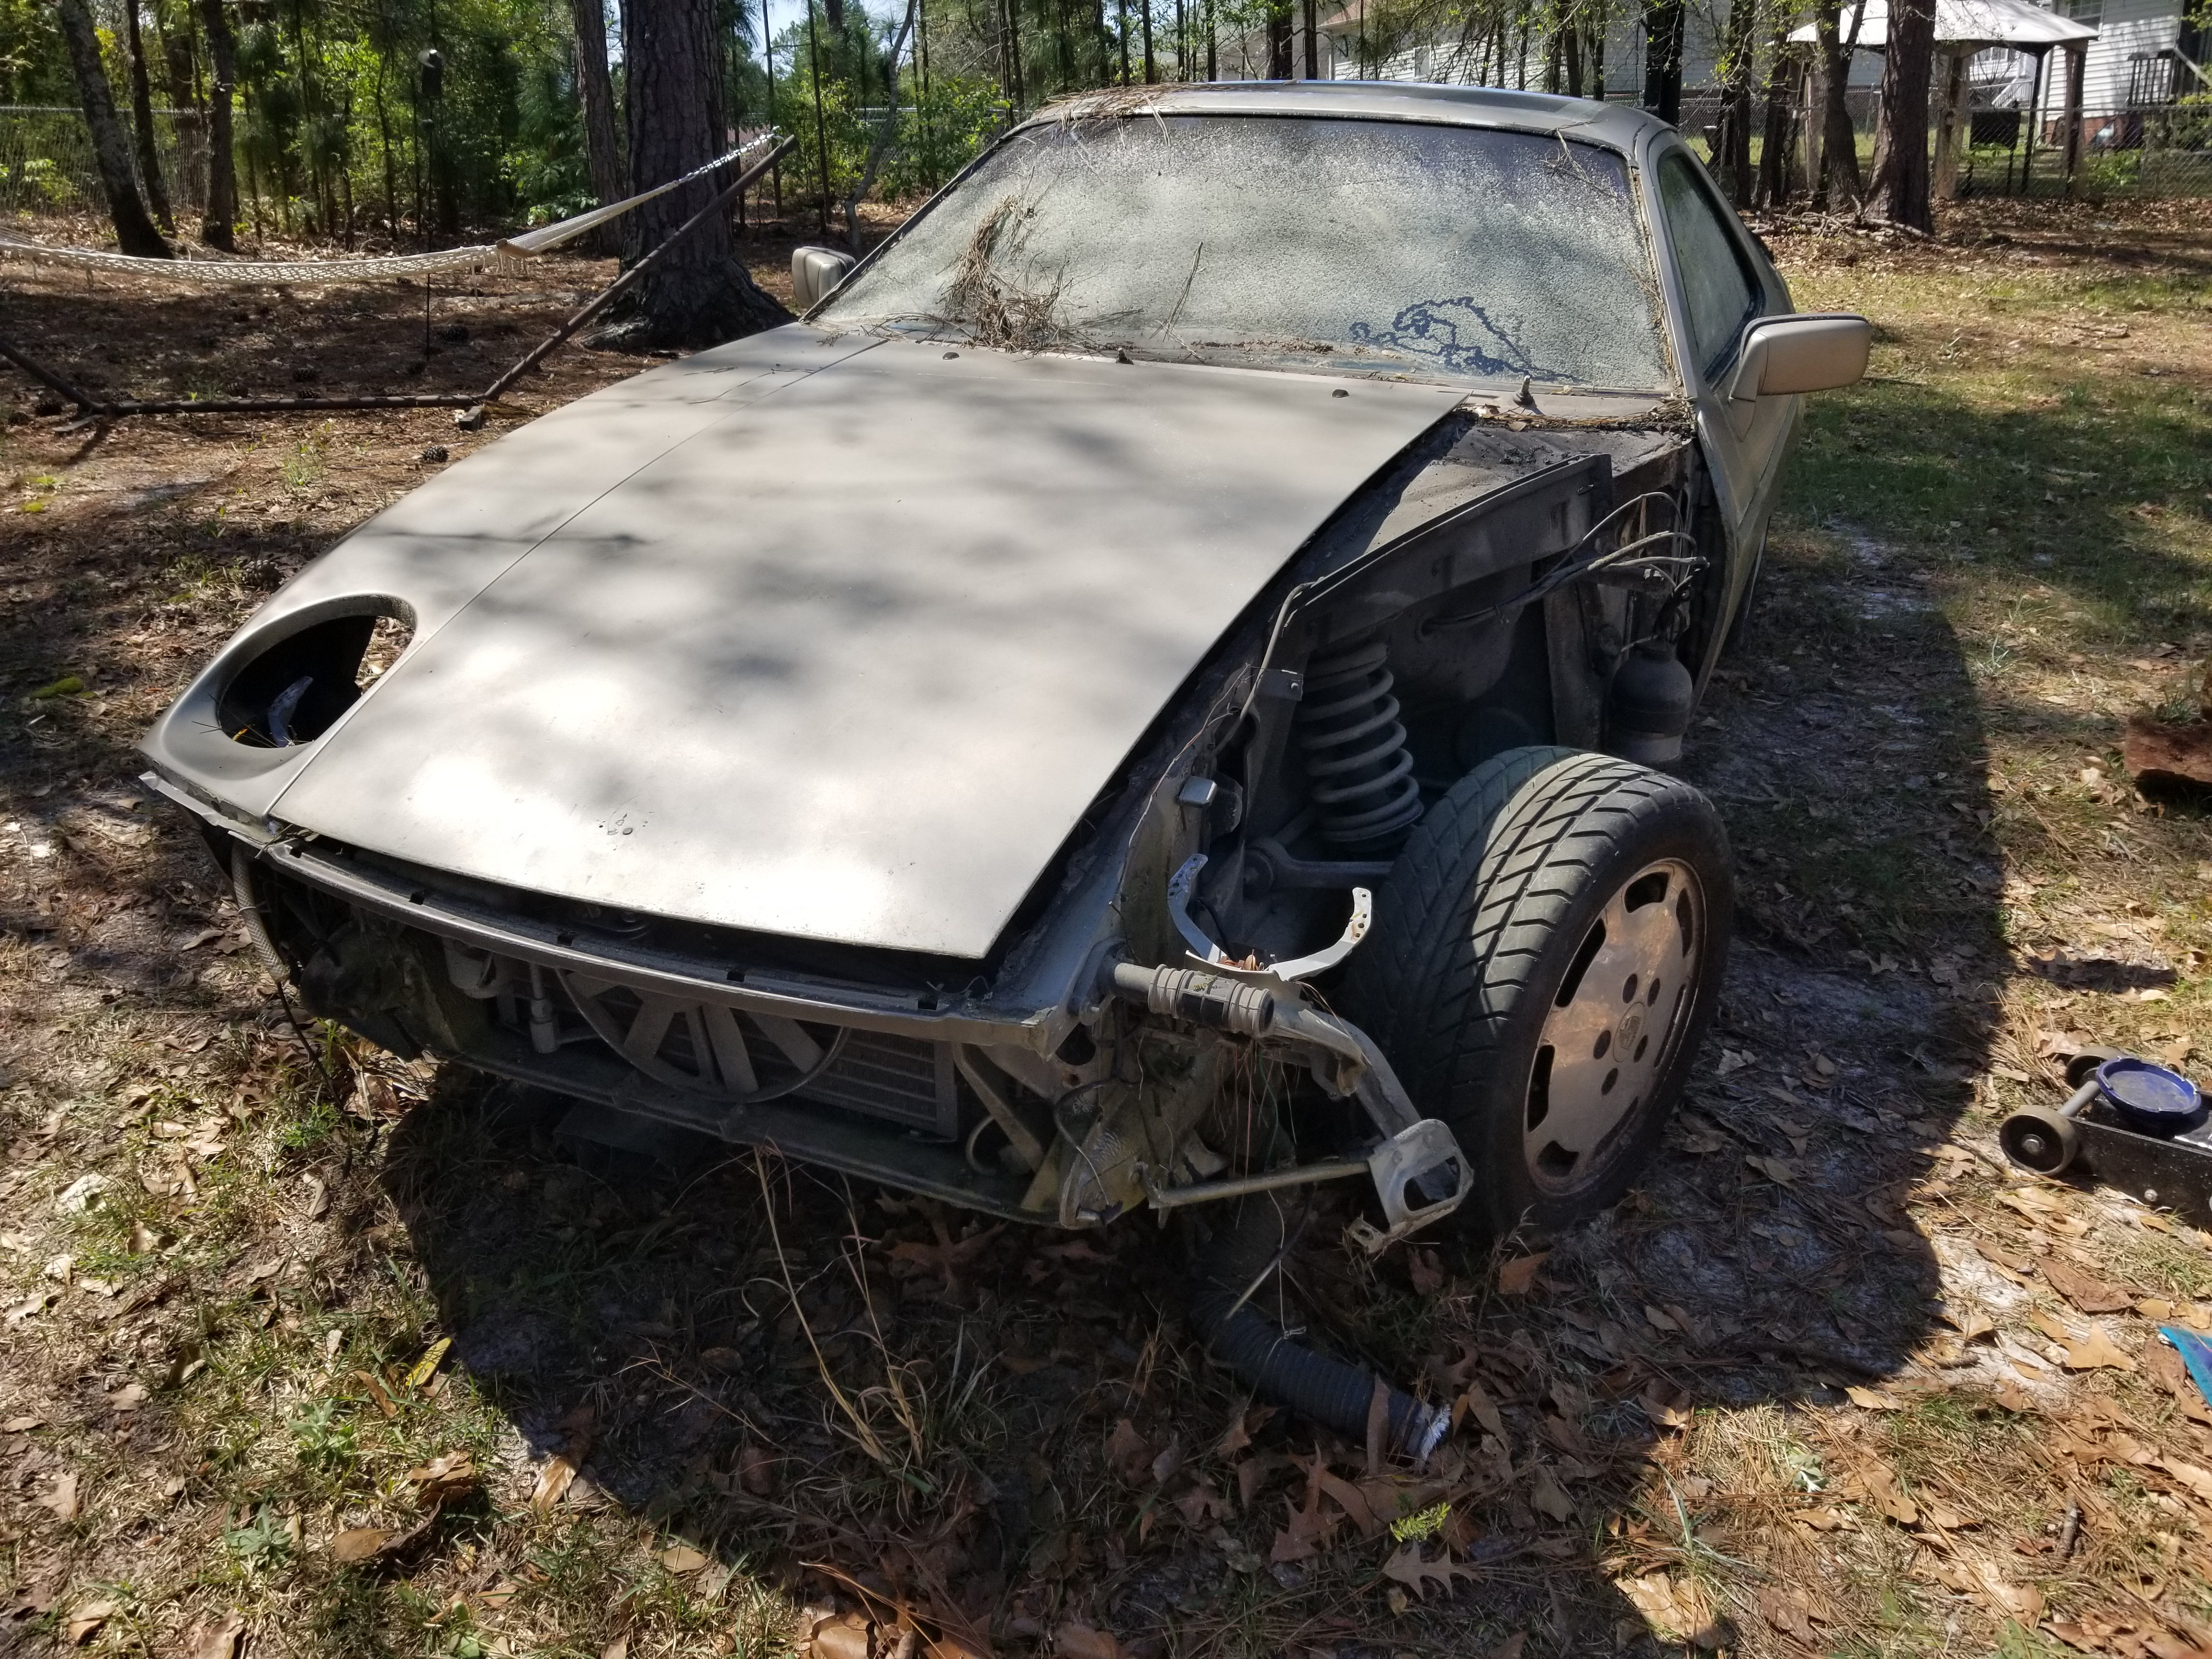
It looks like a prowler now.
Anyway, the fender on the blue car is kinked from a front end impact in its past. I've pulled it out some, but it's gonna be a pain to get it straight again. The front bumper cover already doesn't line up great, and neither does the (albeit janky) front spoiler. So I figured I'd use the fender from the parts that that's good when the time comes for that. Finally got around to pulling that off today.
I had the front bumper cover off from taking the bumper shocks from it in the past, so I pretty much had access to everything.
Some of those bolts at the back were annoying to get off with the butyl crap on them, but I was able to get the wire wheel in to some of them to help.
It seems like this fender is pretty straight. I'll have to fill in the holes from the side moldings since the blue car doesn't have them, but other wise should just need sanded and painted along with the rest of the car.
It looks like a prowler now.
05-07-2020, 12:52 AM
#264
Burning Brakes
Thread Starter
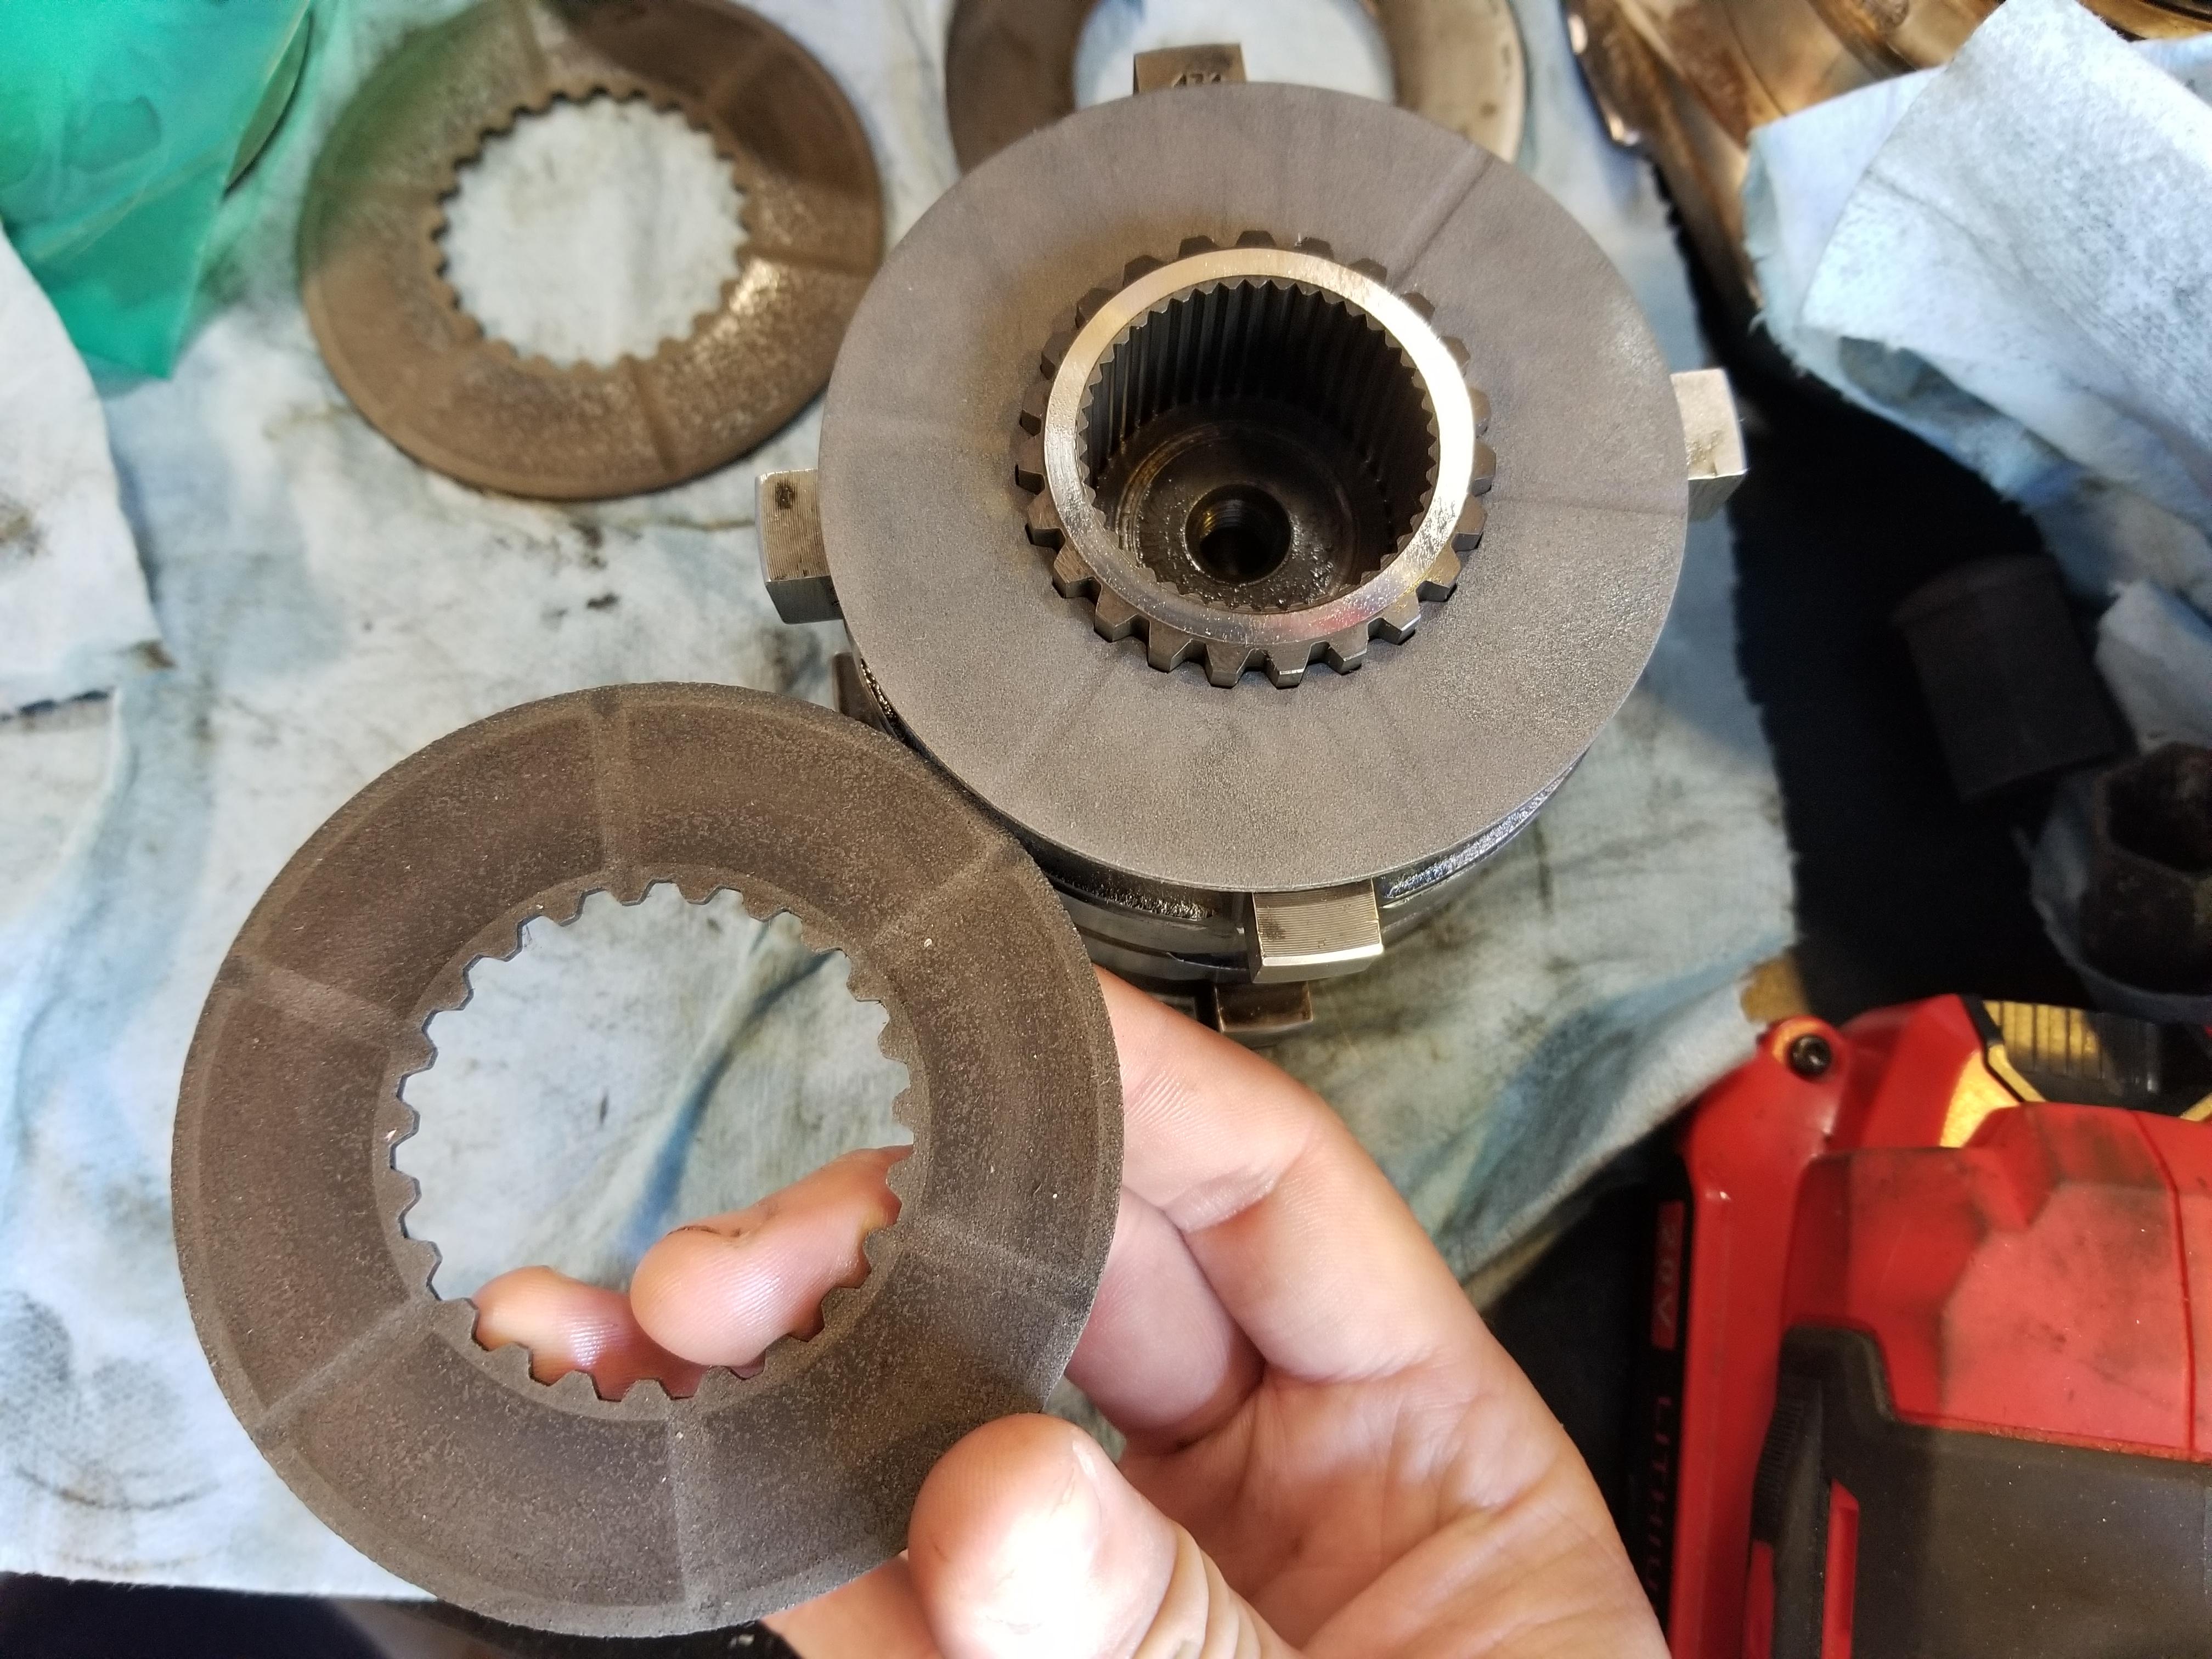
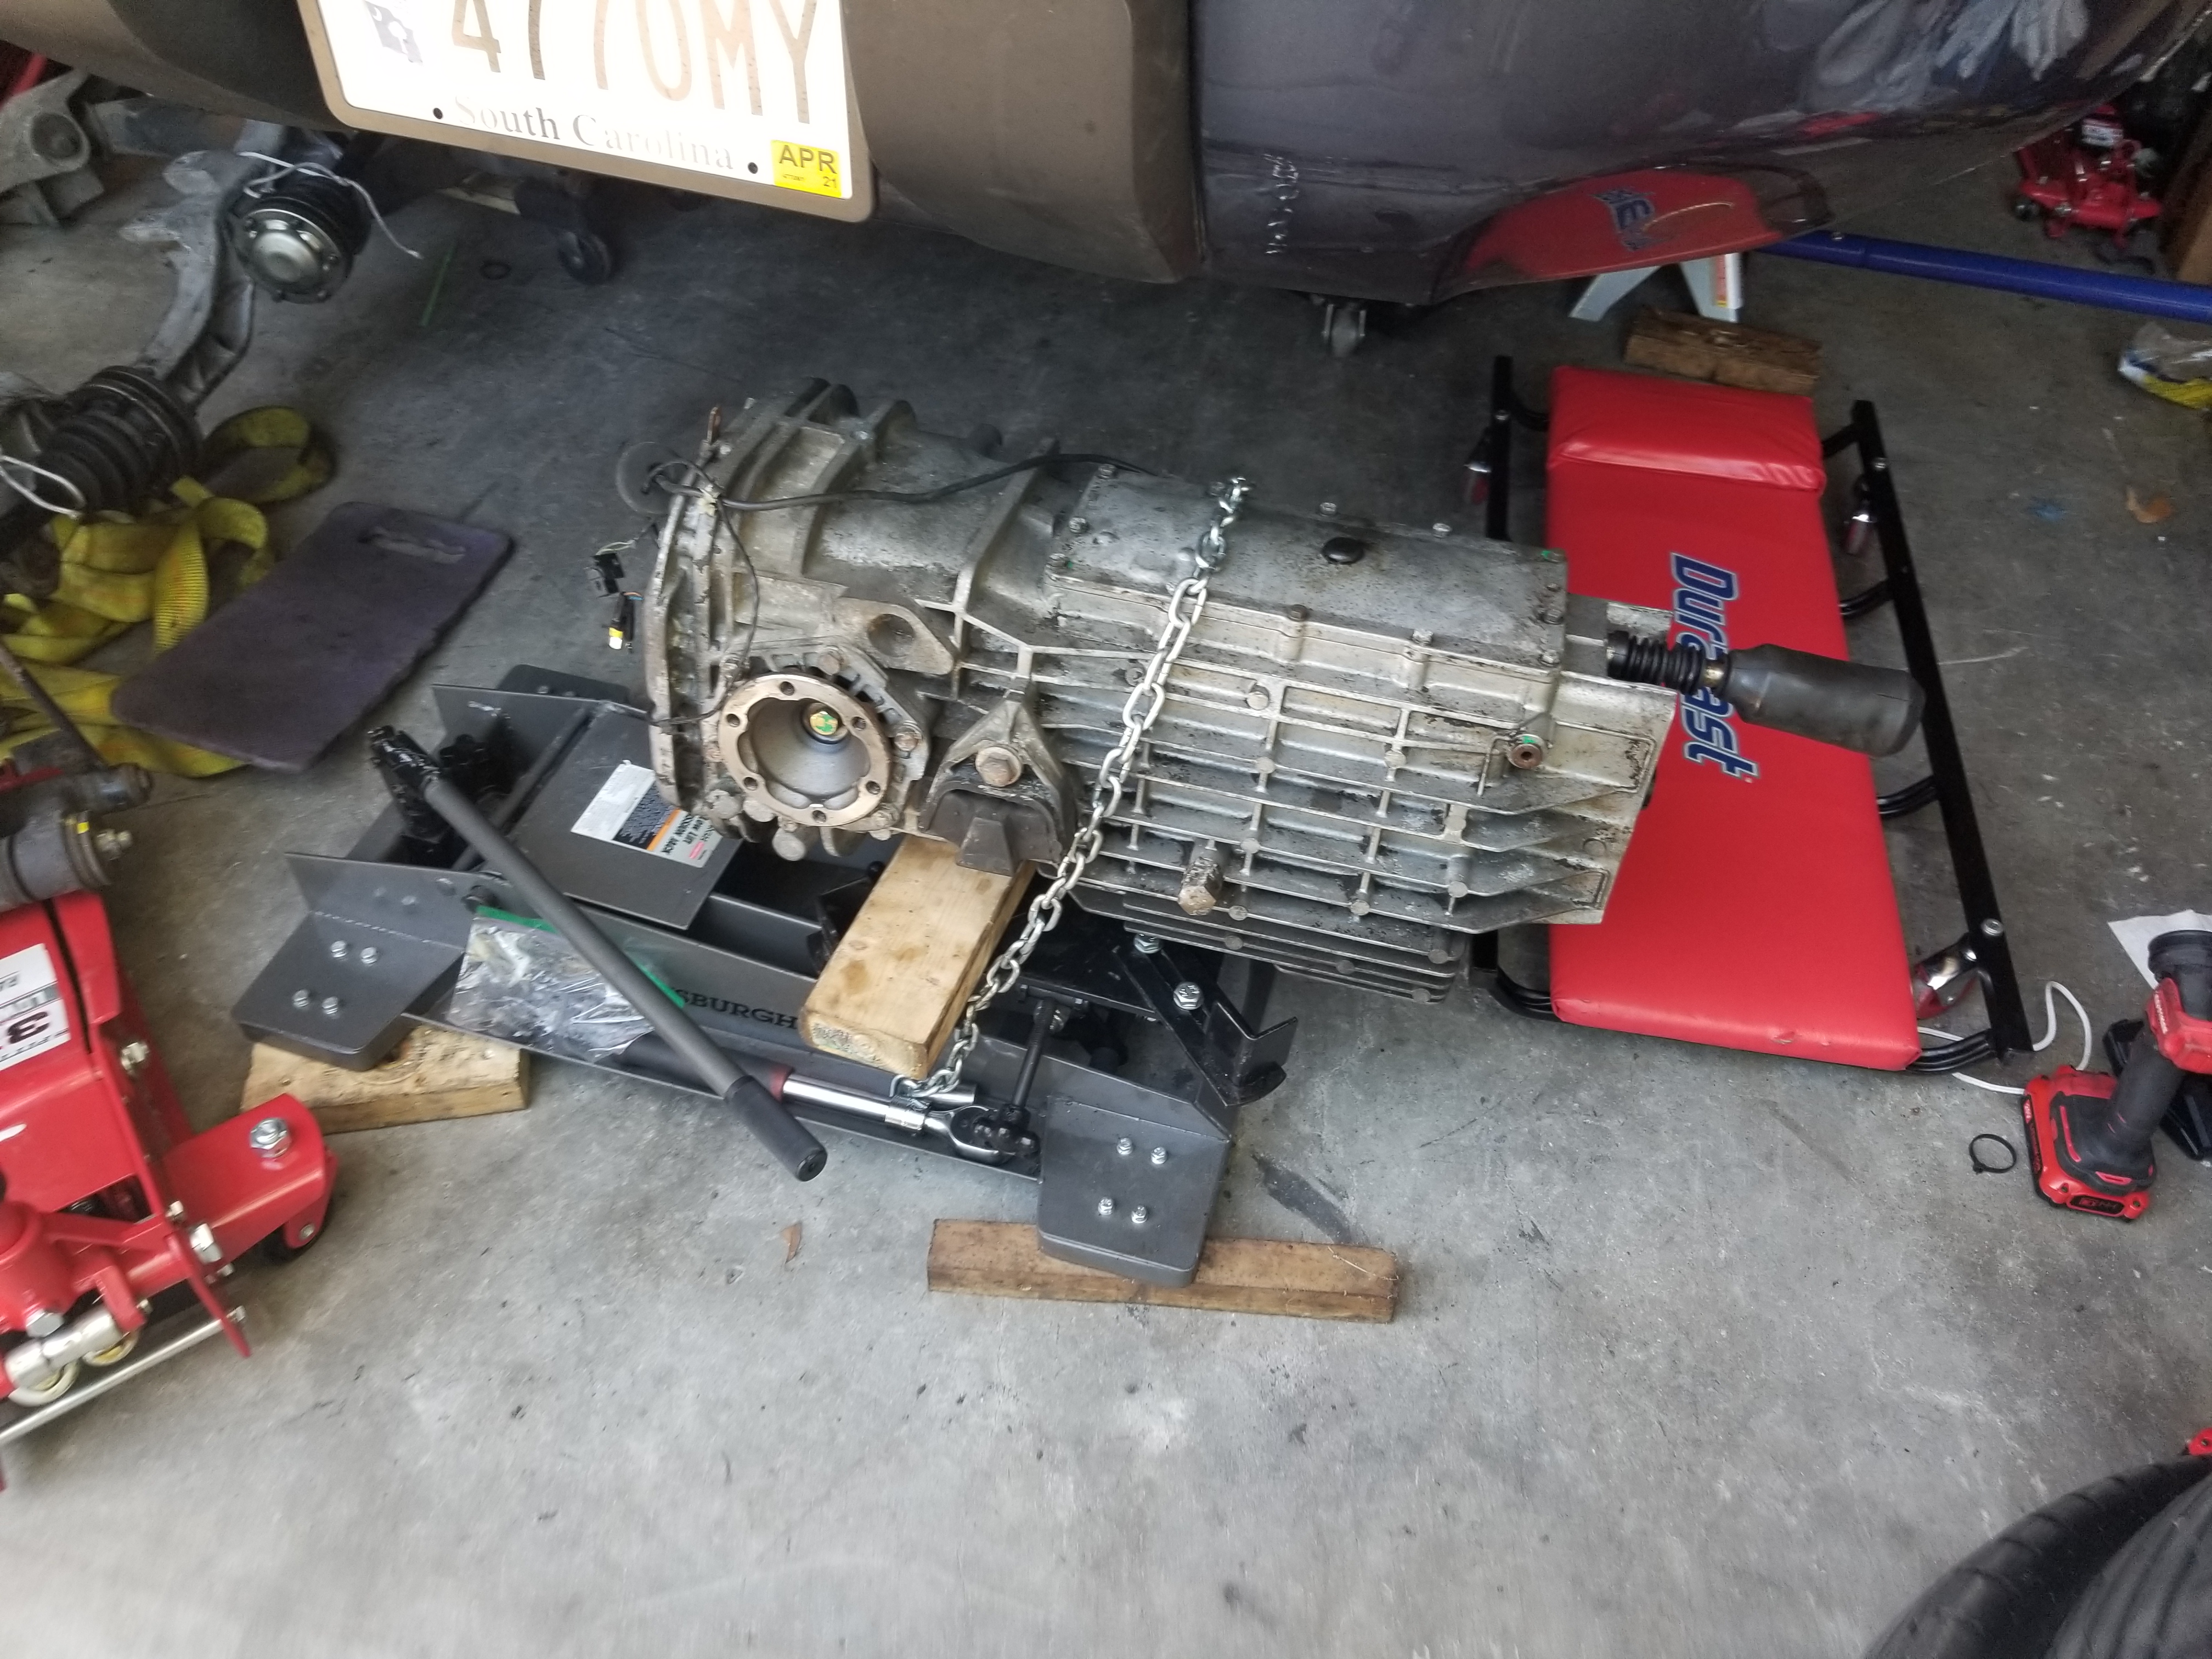
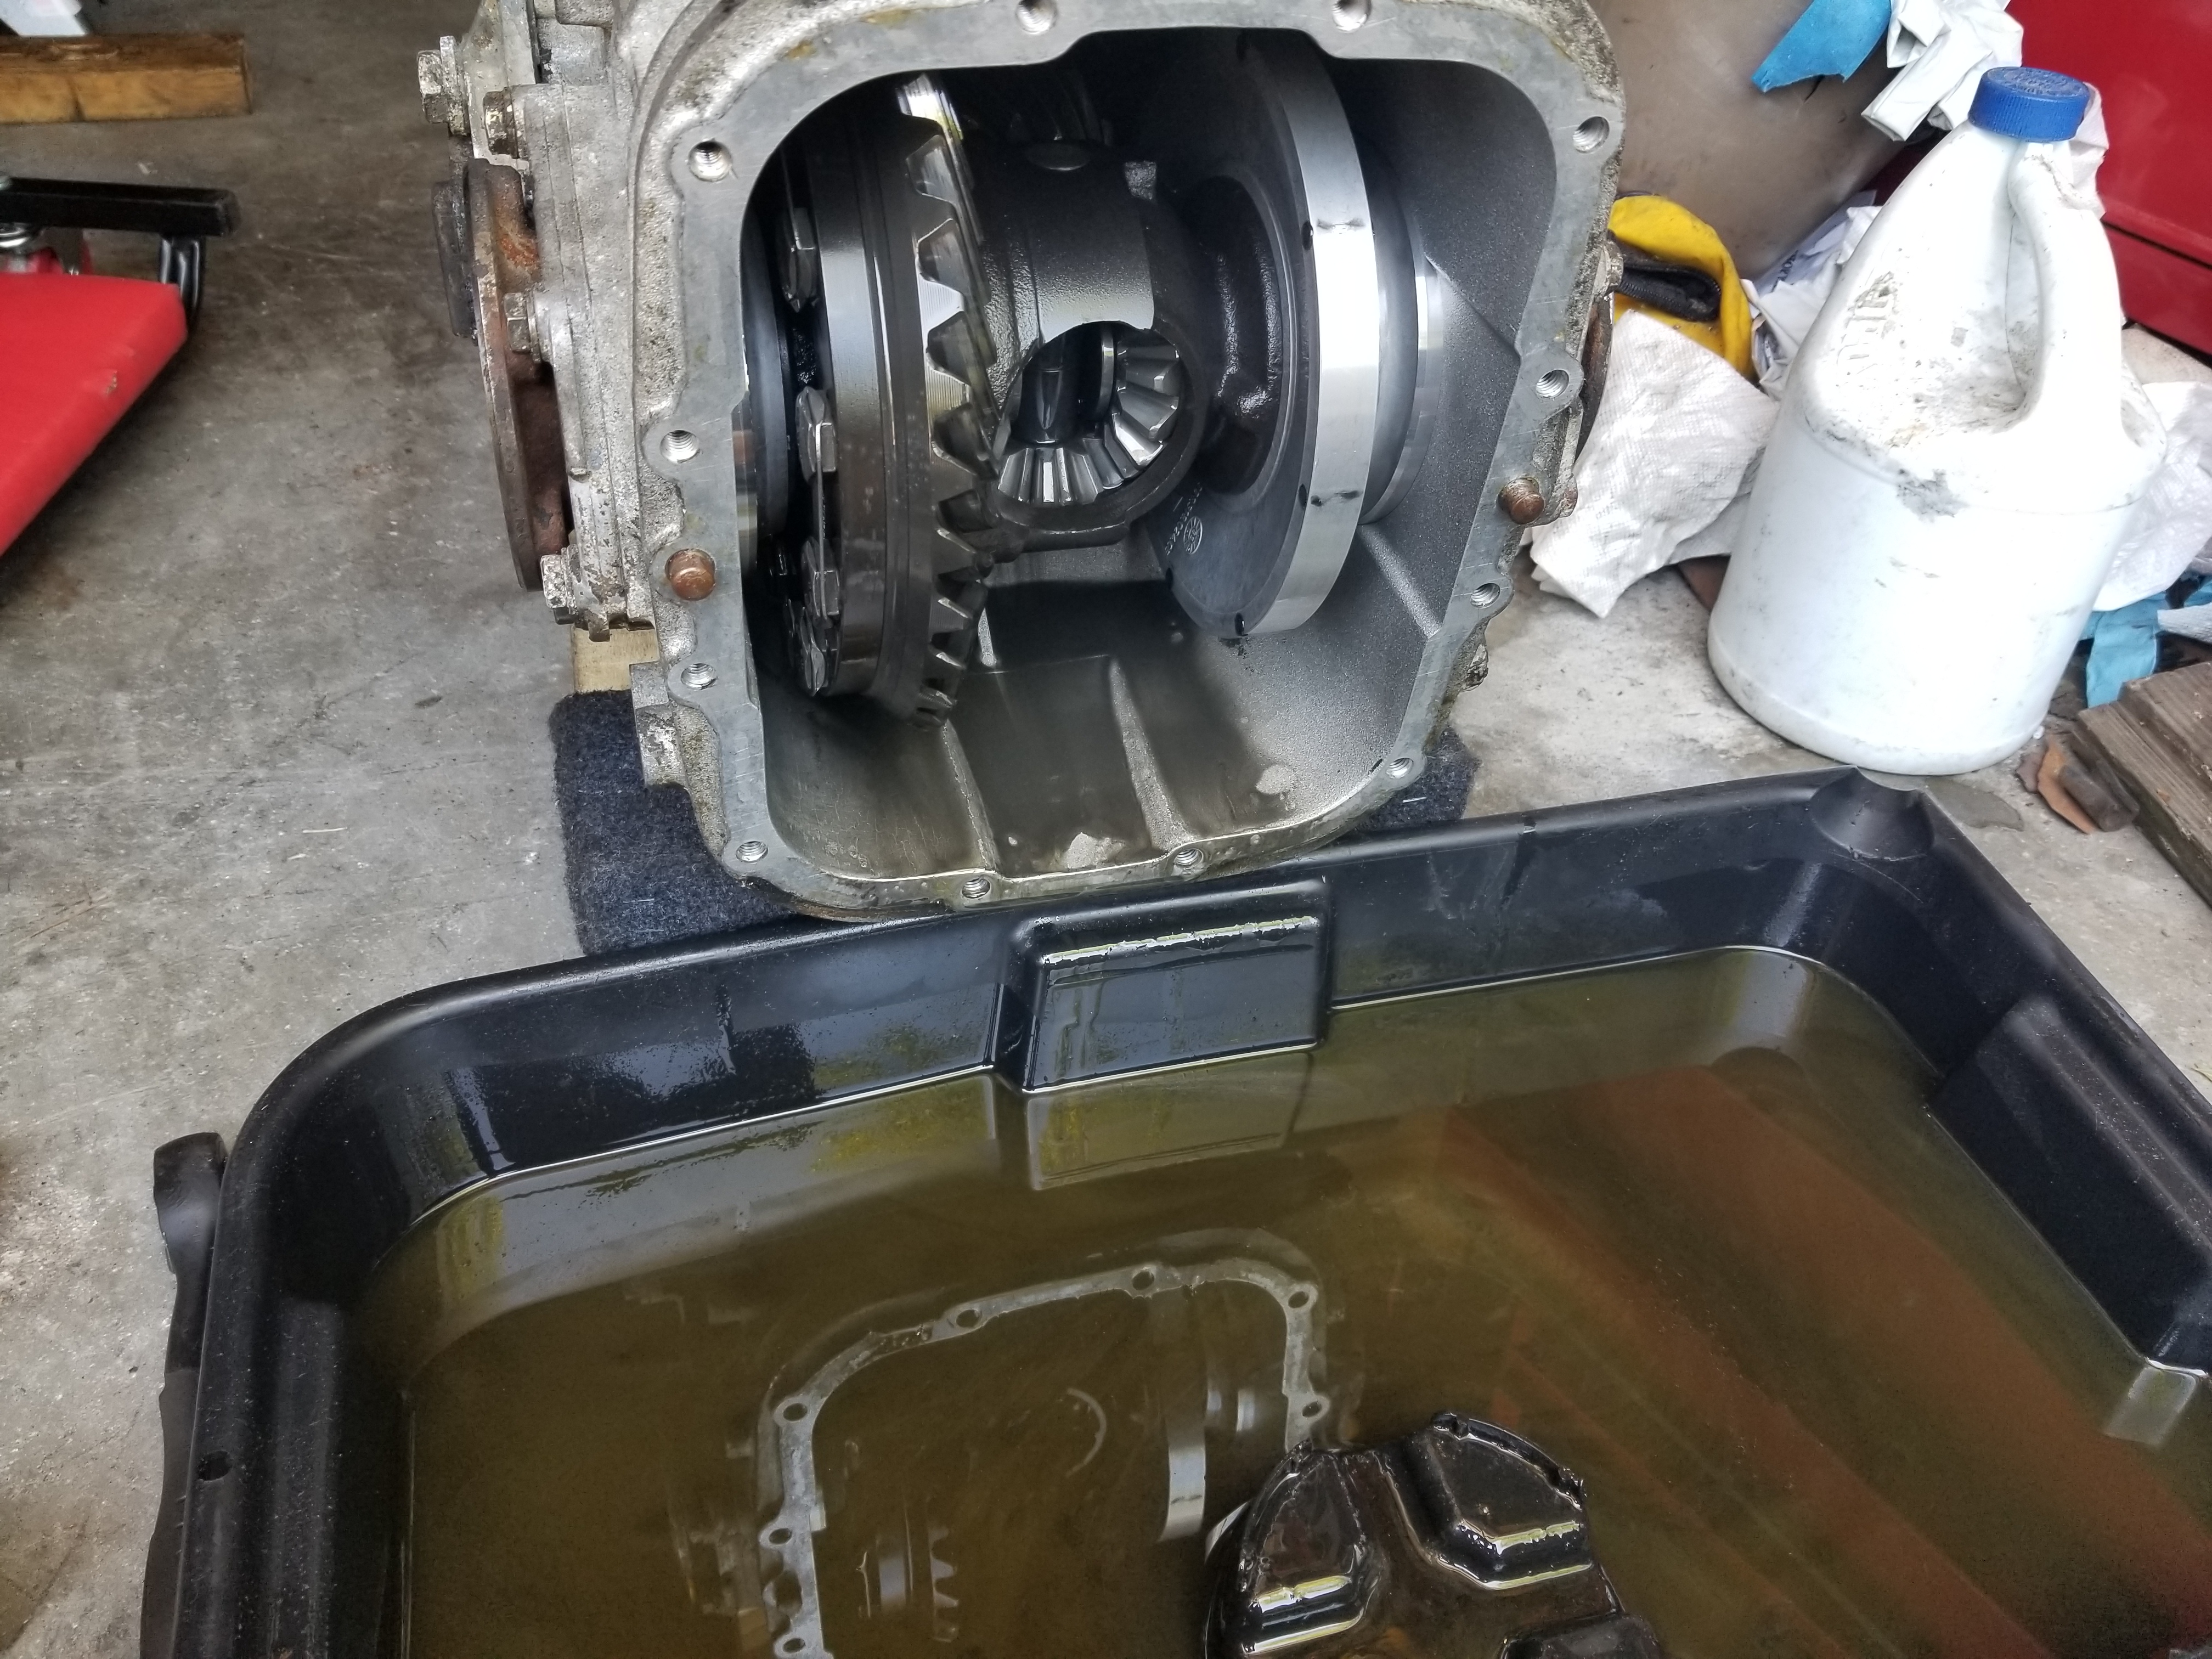
I had still been having bearing noise that was coming from the trans since installing it in September. Since I knew it wasn't the torque tube or the needle bearings inside the input shaft, that just left the big input ball bearing. I also got my hands on a used automatic lsd differential a few months ago too. I finally got all the parts in to swap the lsd carrier into my trans and all the various seals and gaskets (and a press) to change it out and the input shaft bearing.
Auto lsd
Attachment 1342782
Got some new clutches for the lsd.
Trans out again
Fluid looked ok
Got the input shaft out after pulling the countershaft.
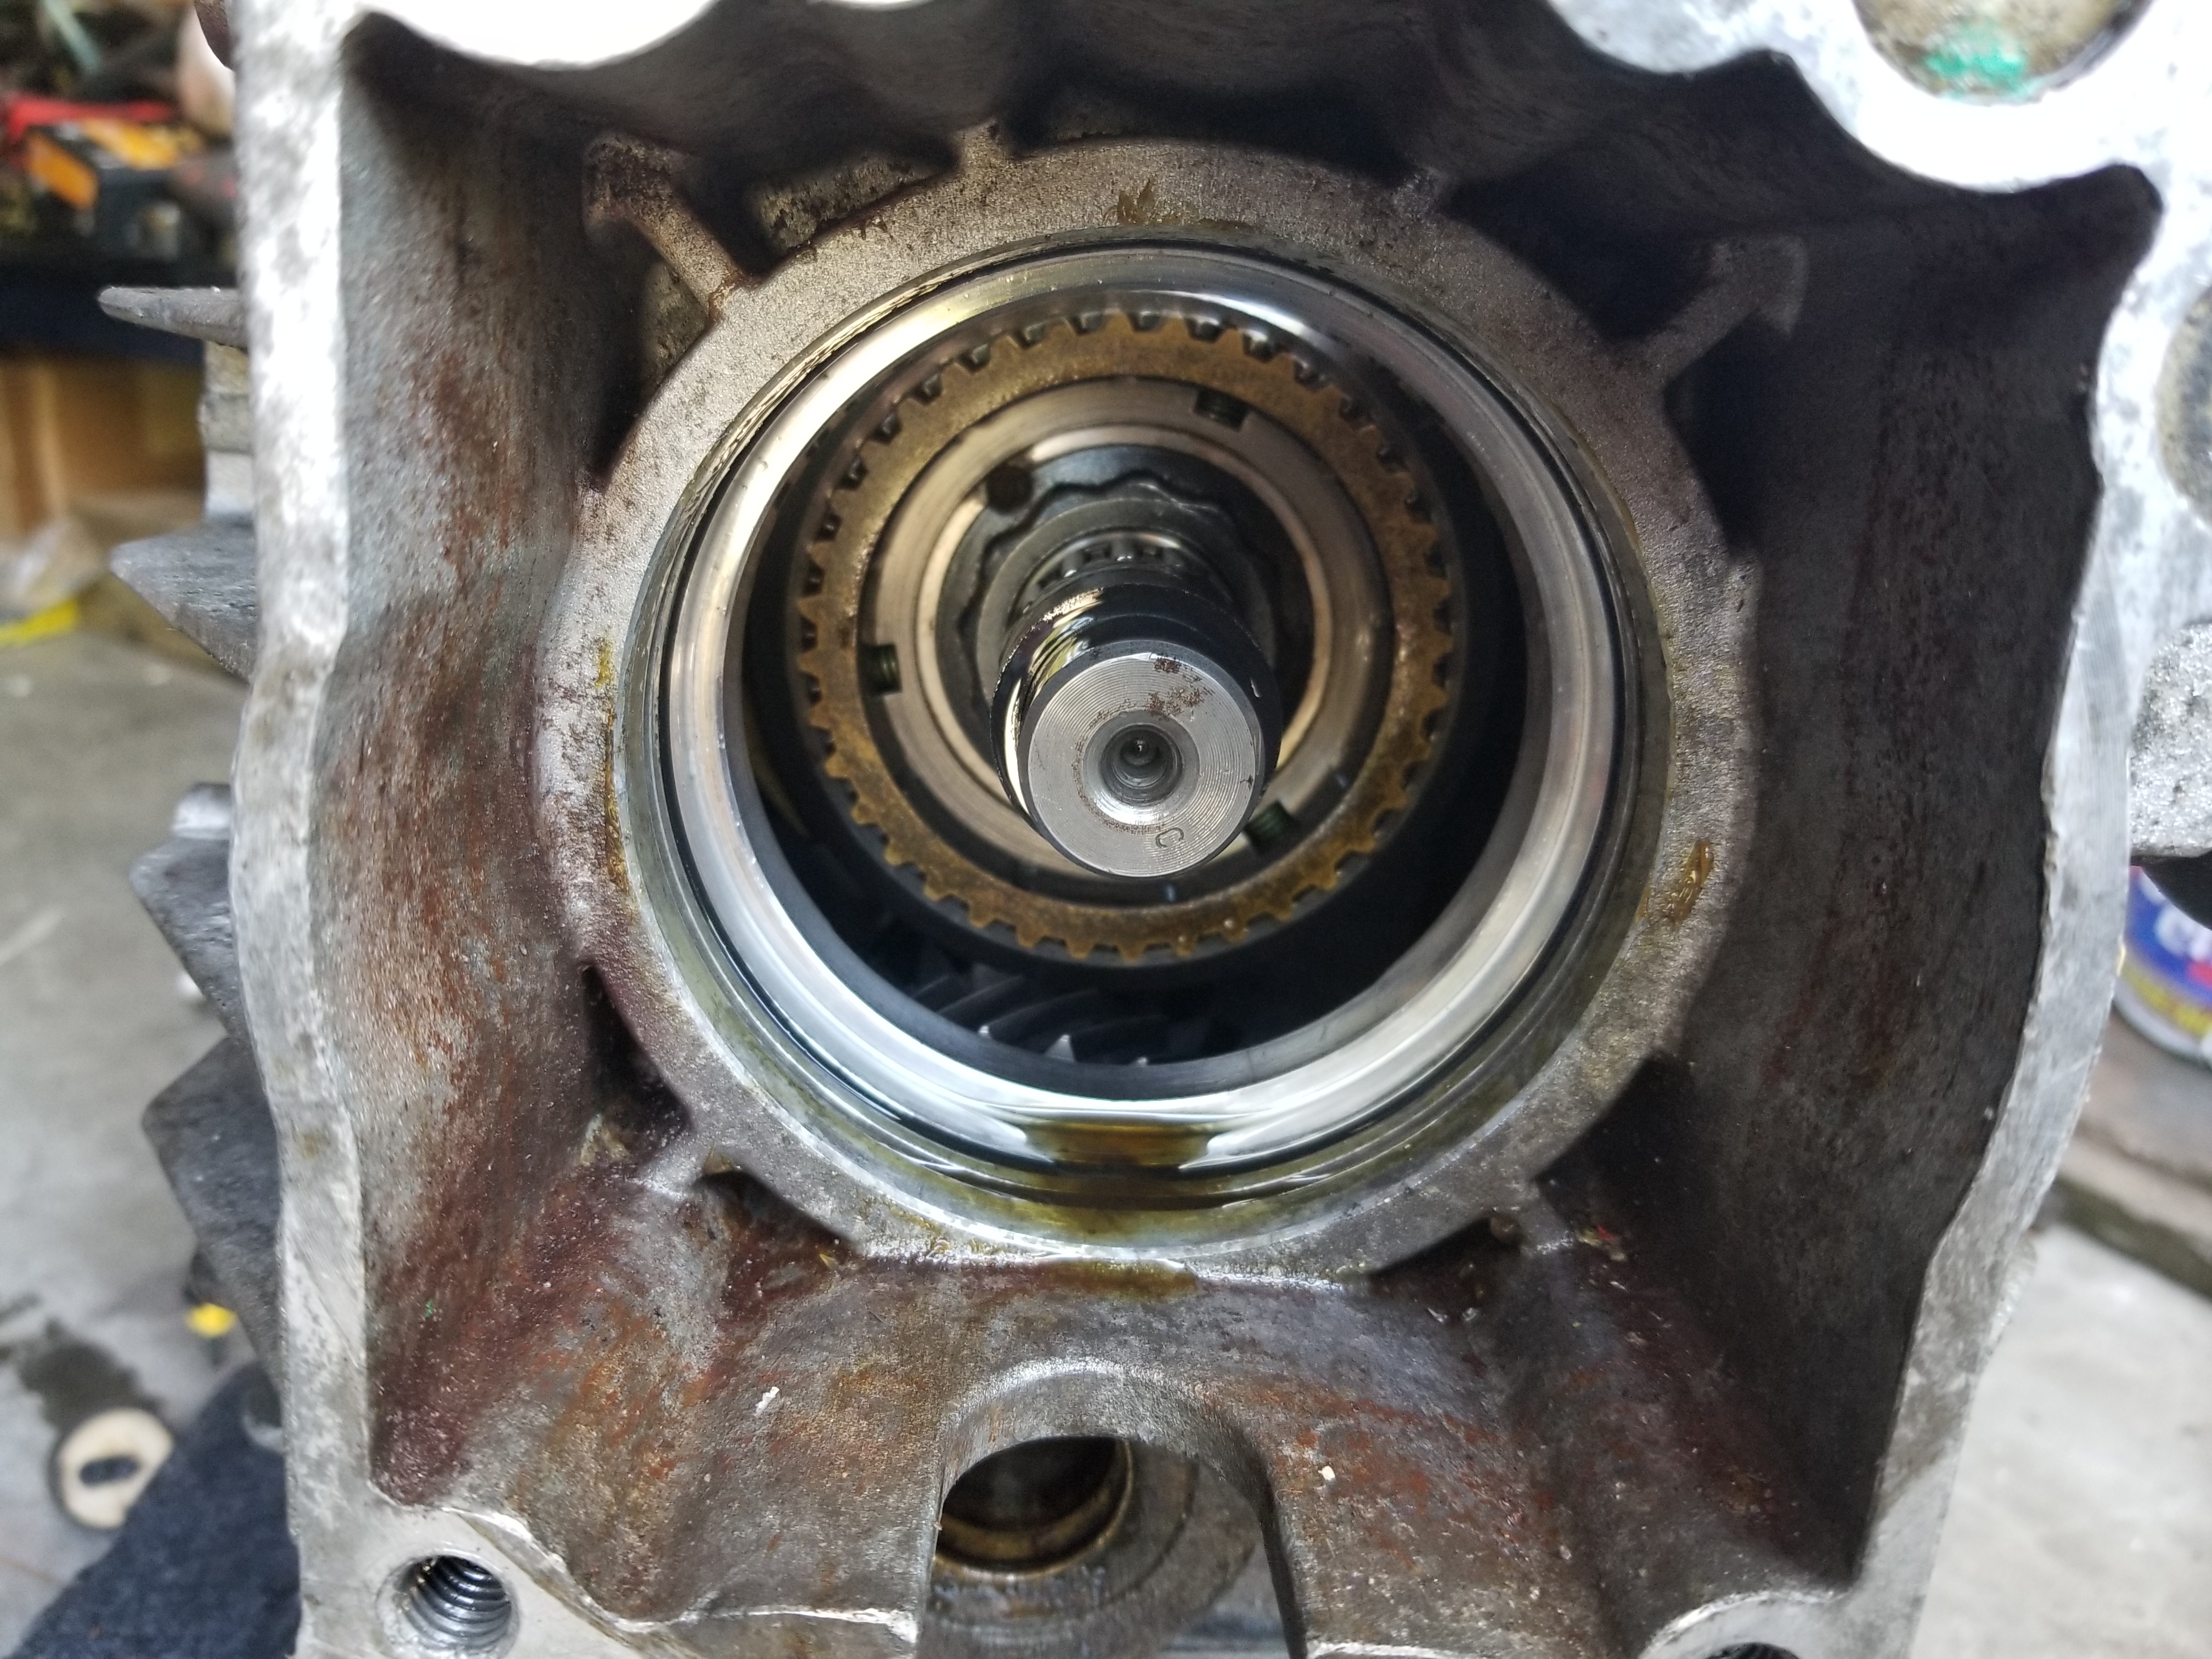
Definitely wasn't getting that bearing off without pushing on the outer race.
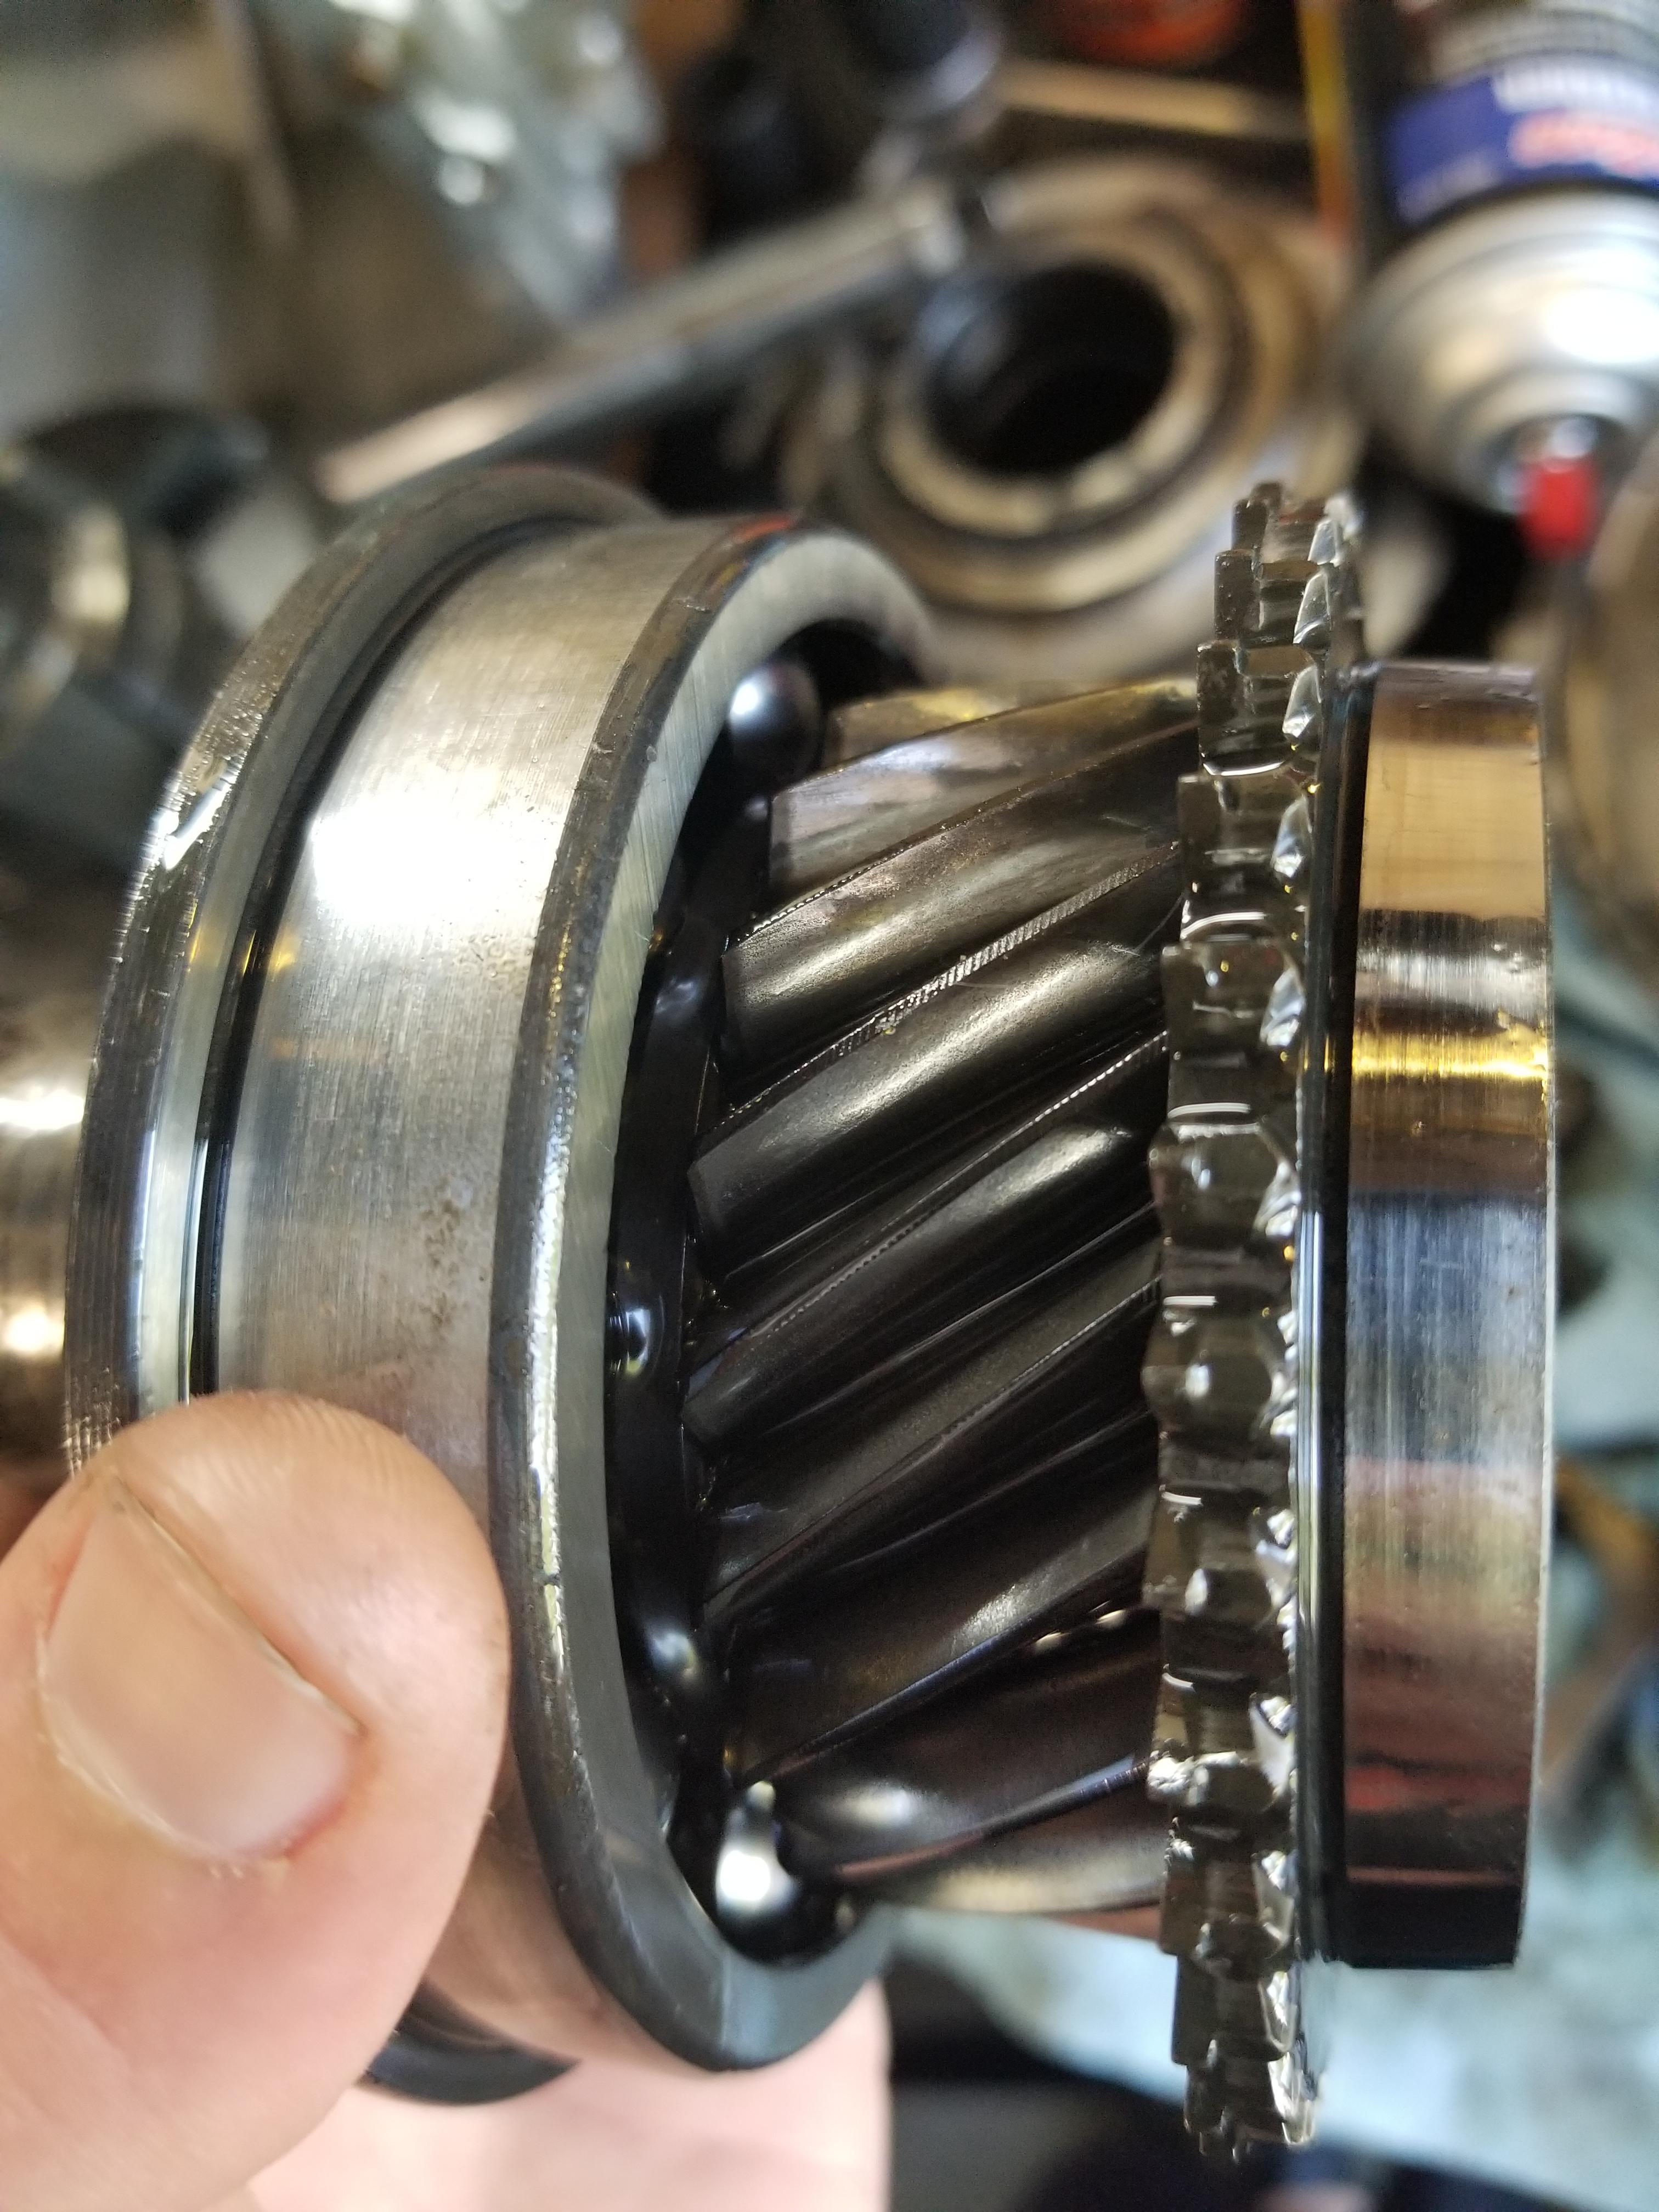
The old bearing definitely felt a bit sloppy and made a bit of noise when turned in hand. The new one was dead smooth and silent.
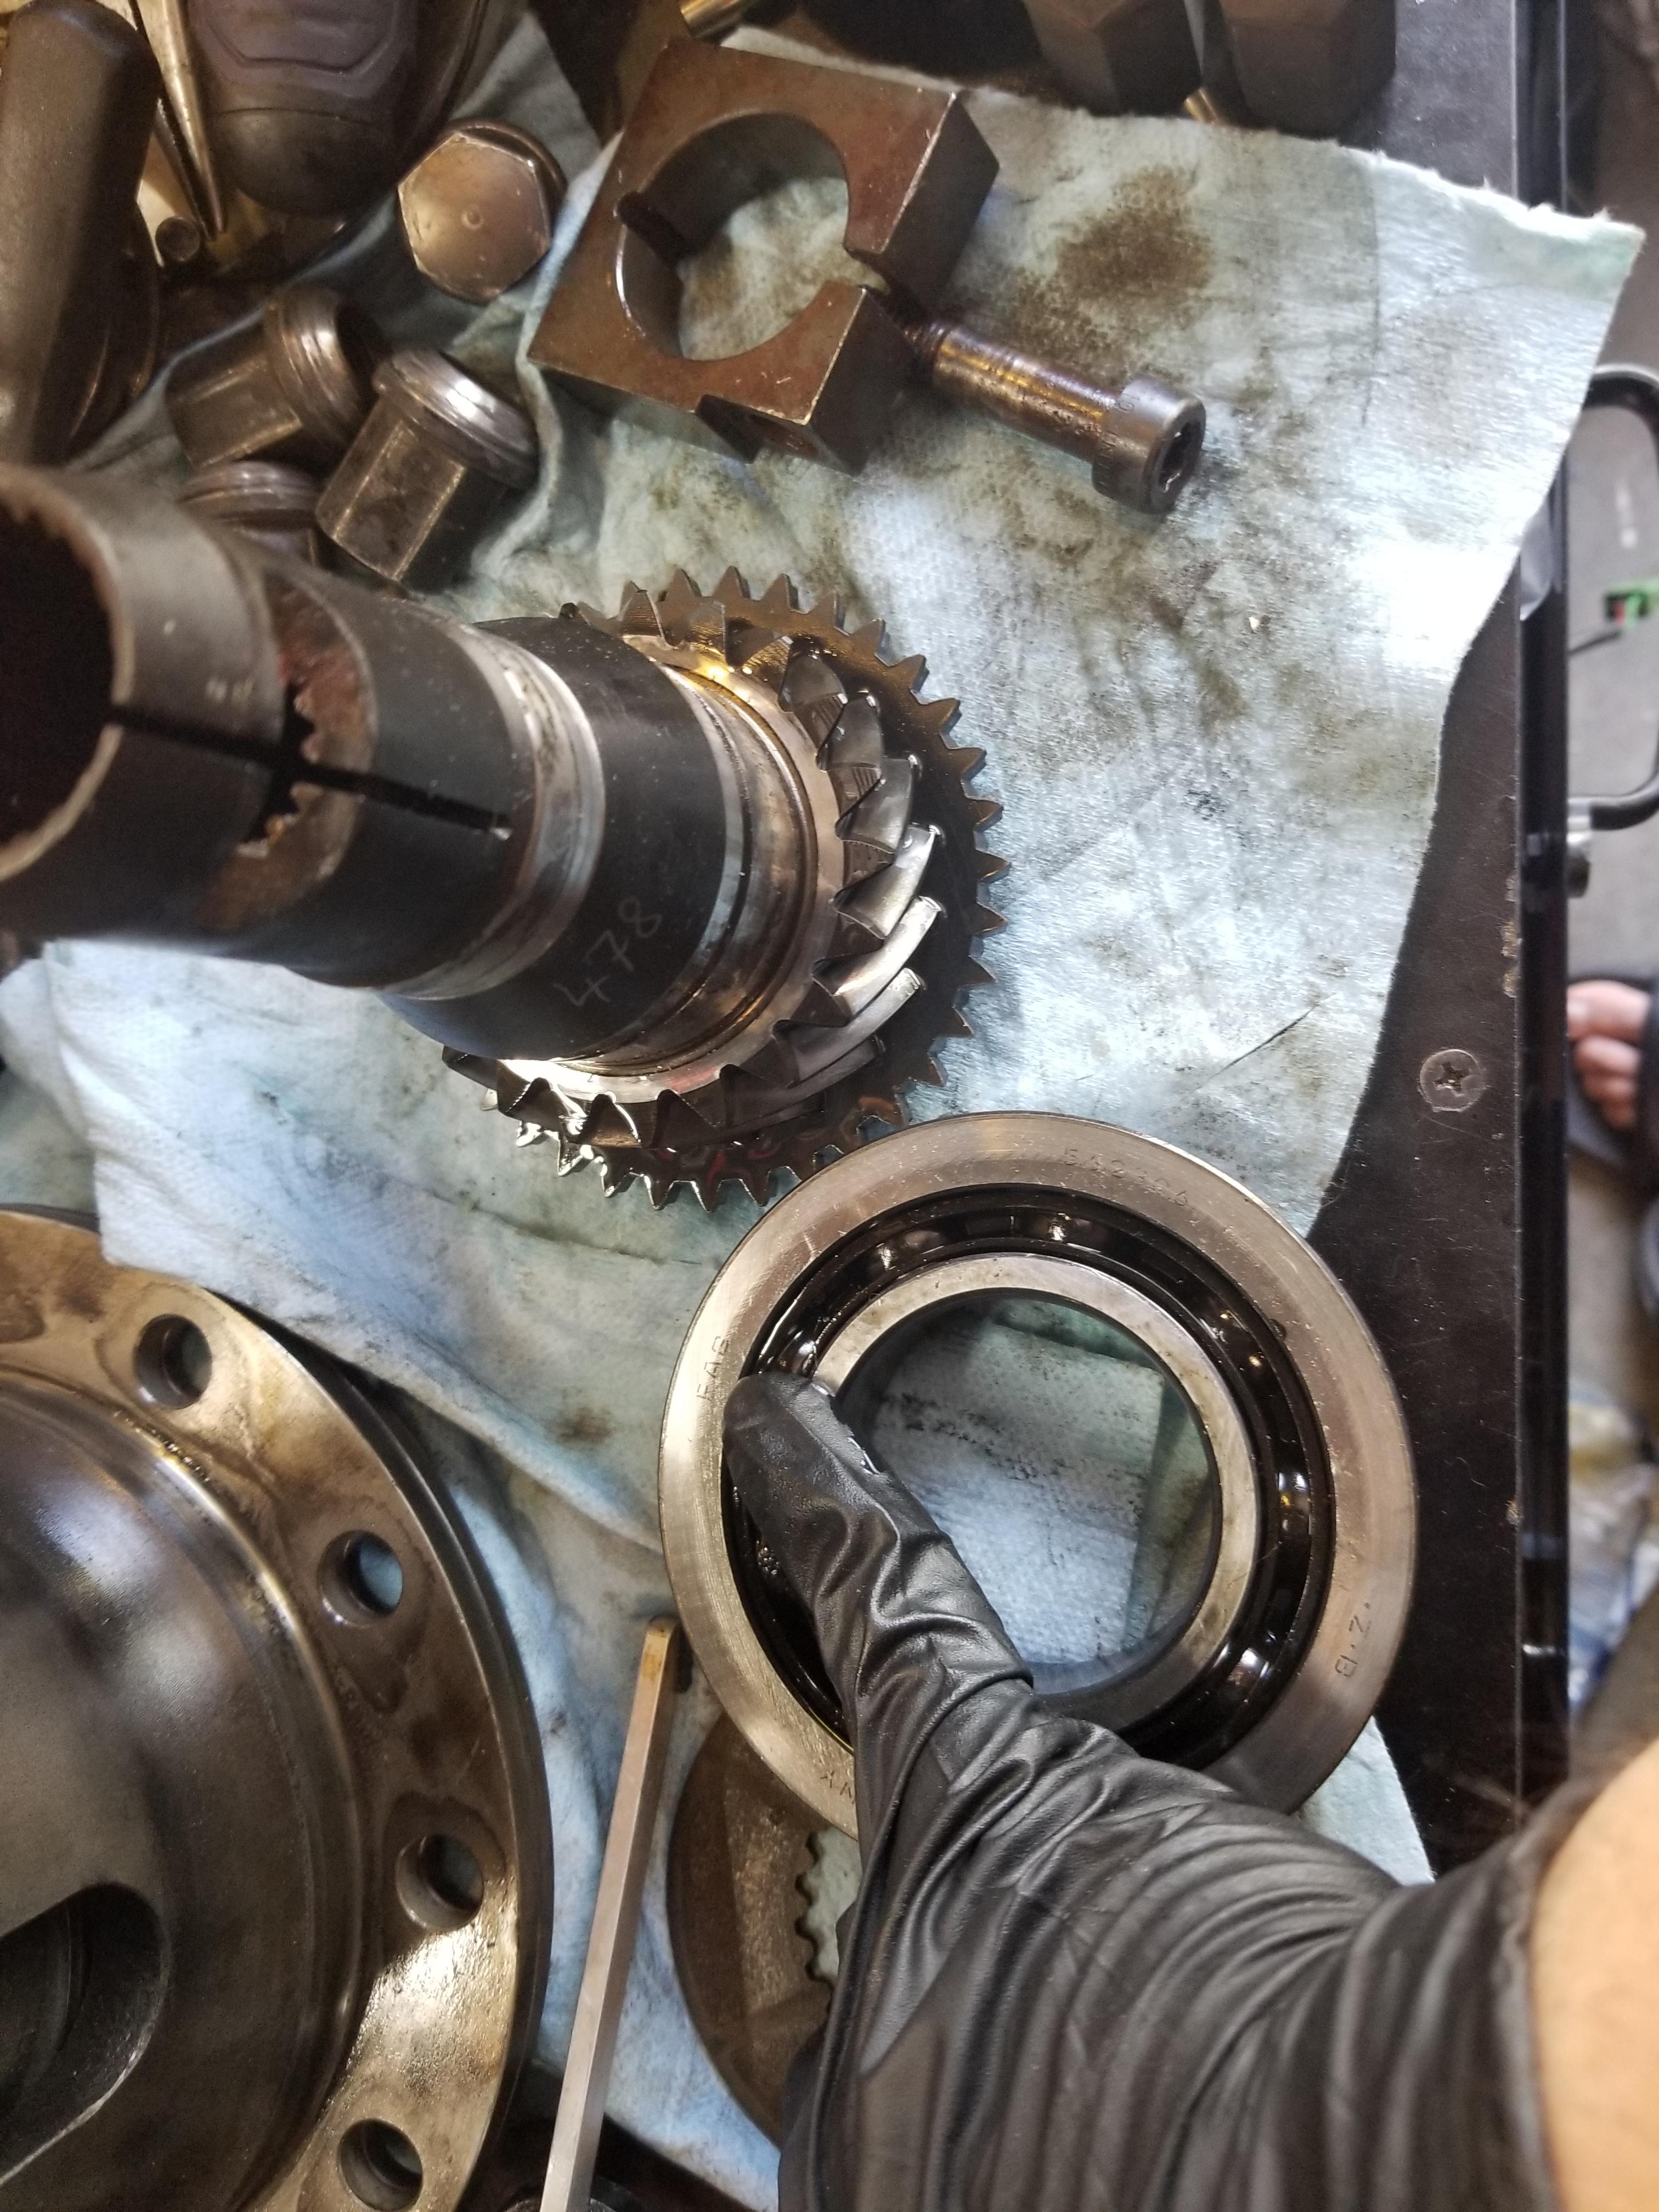
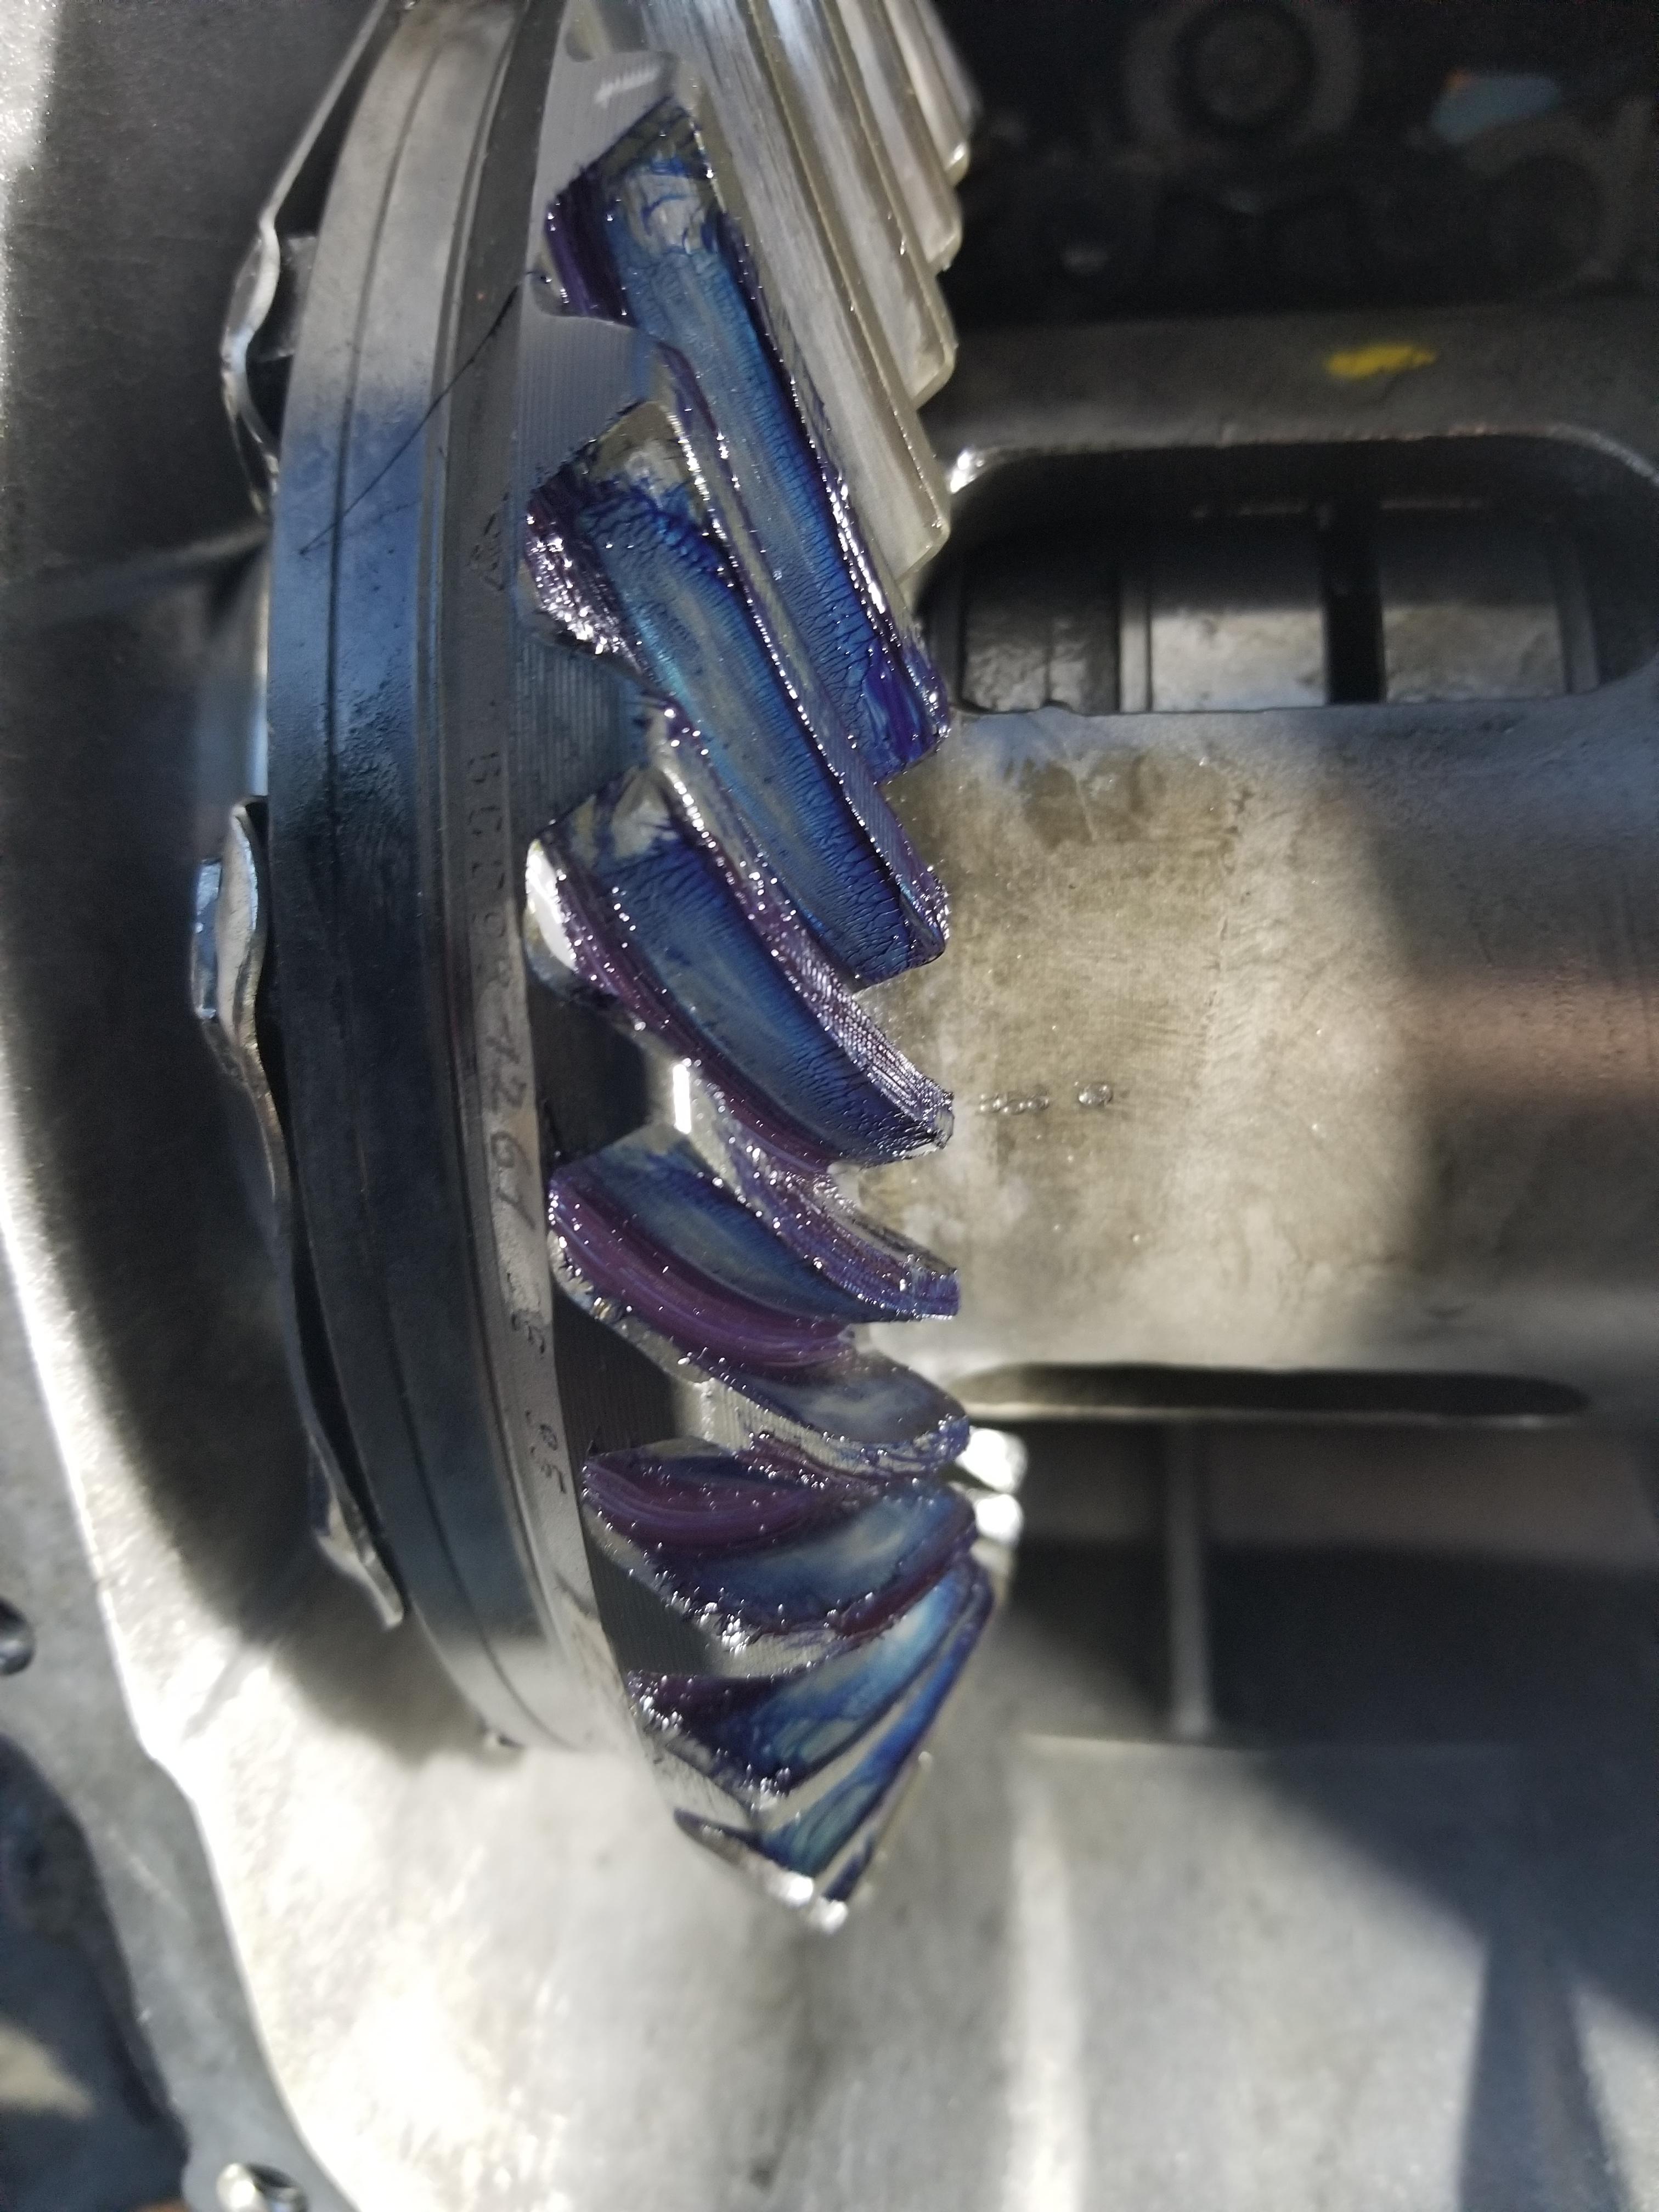
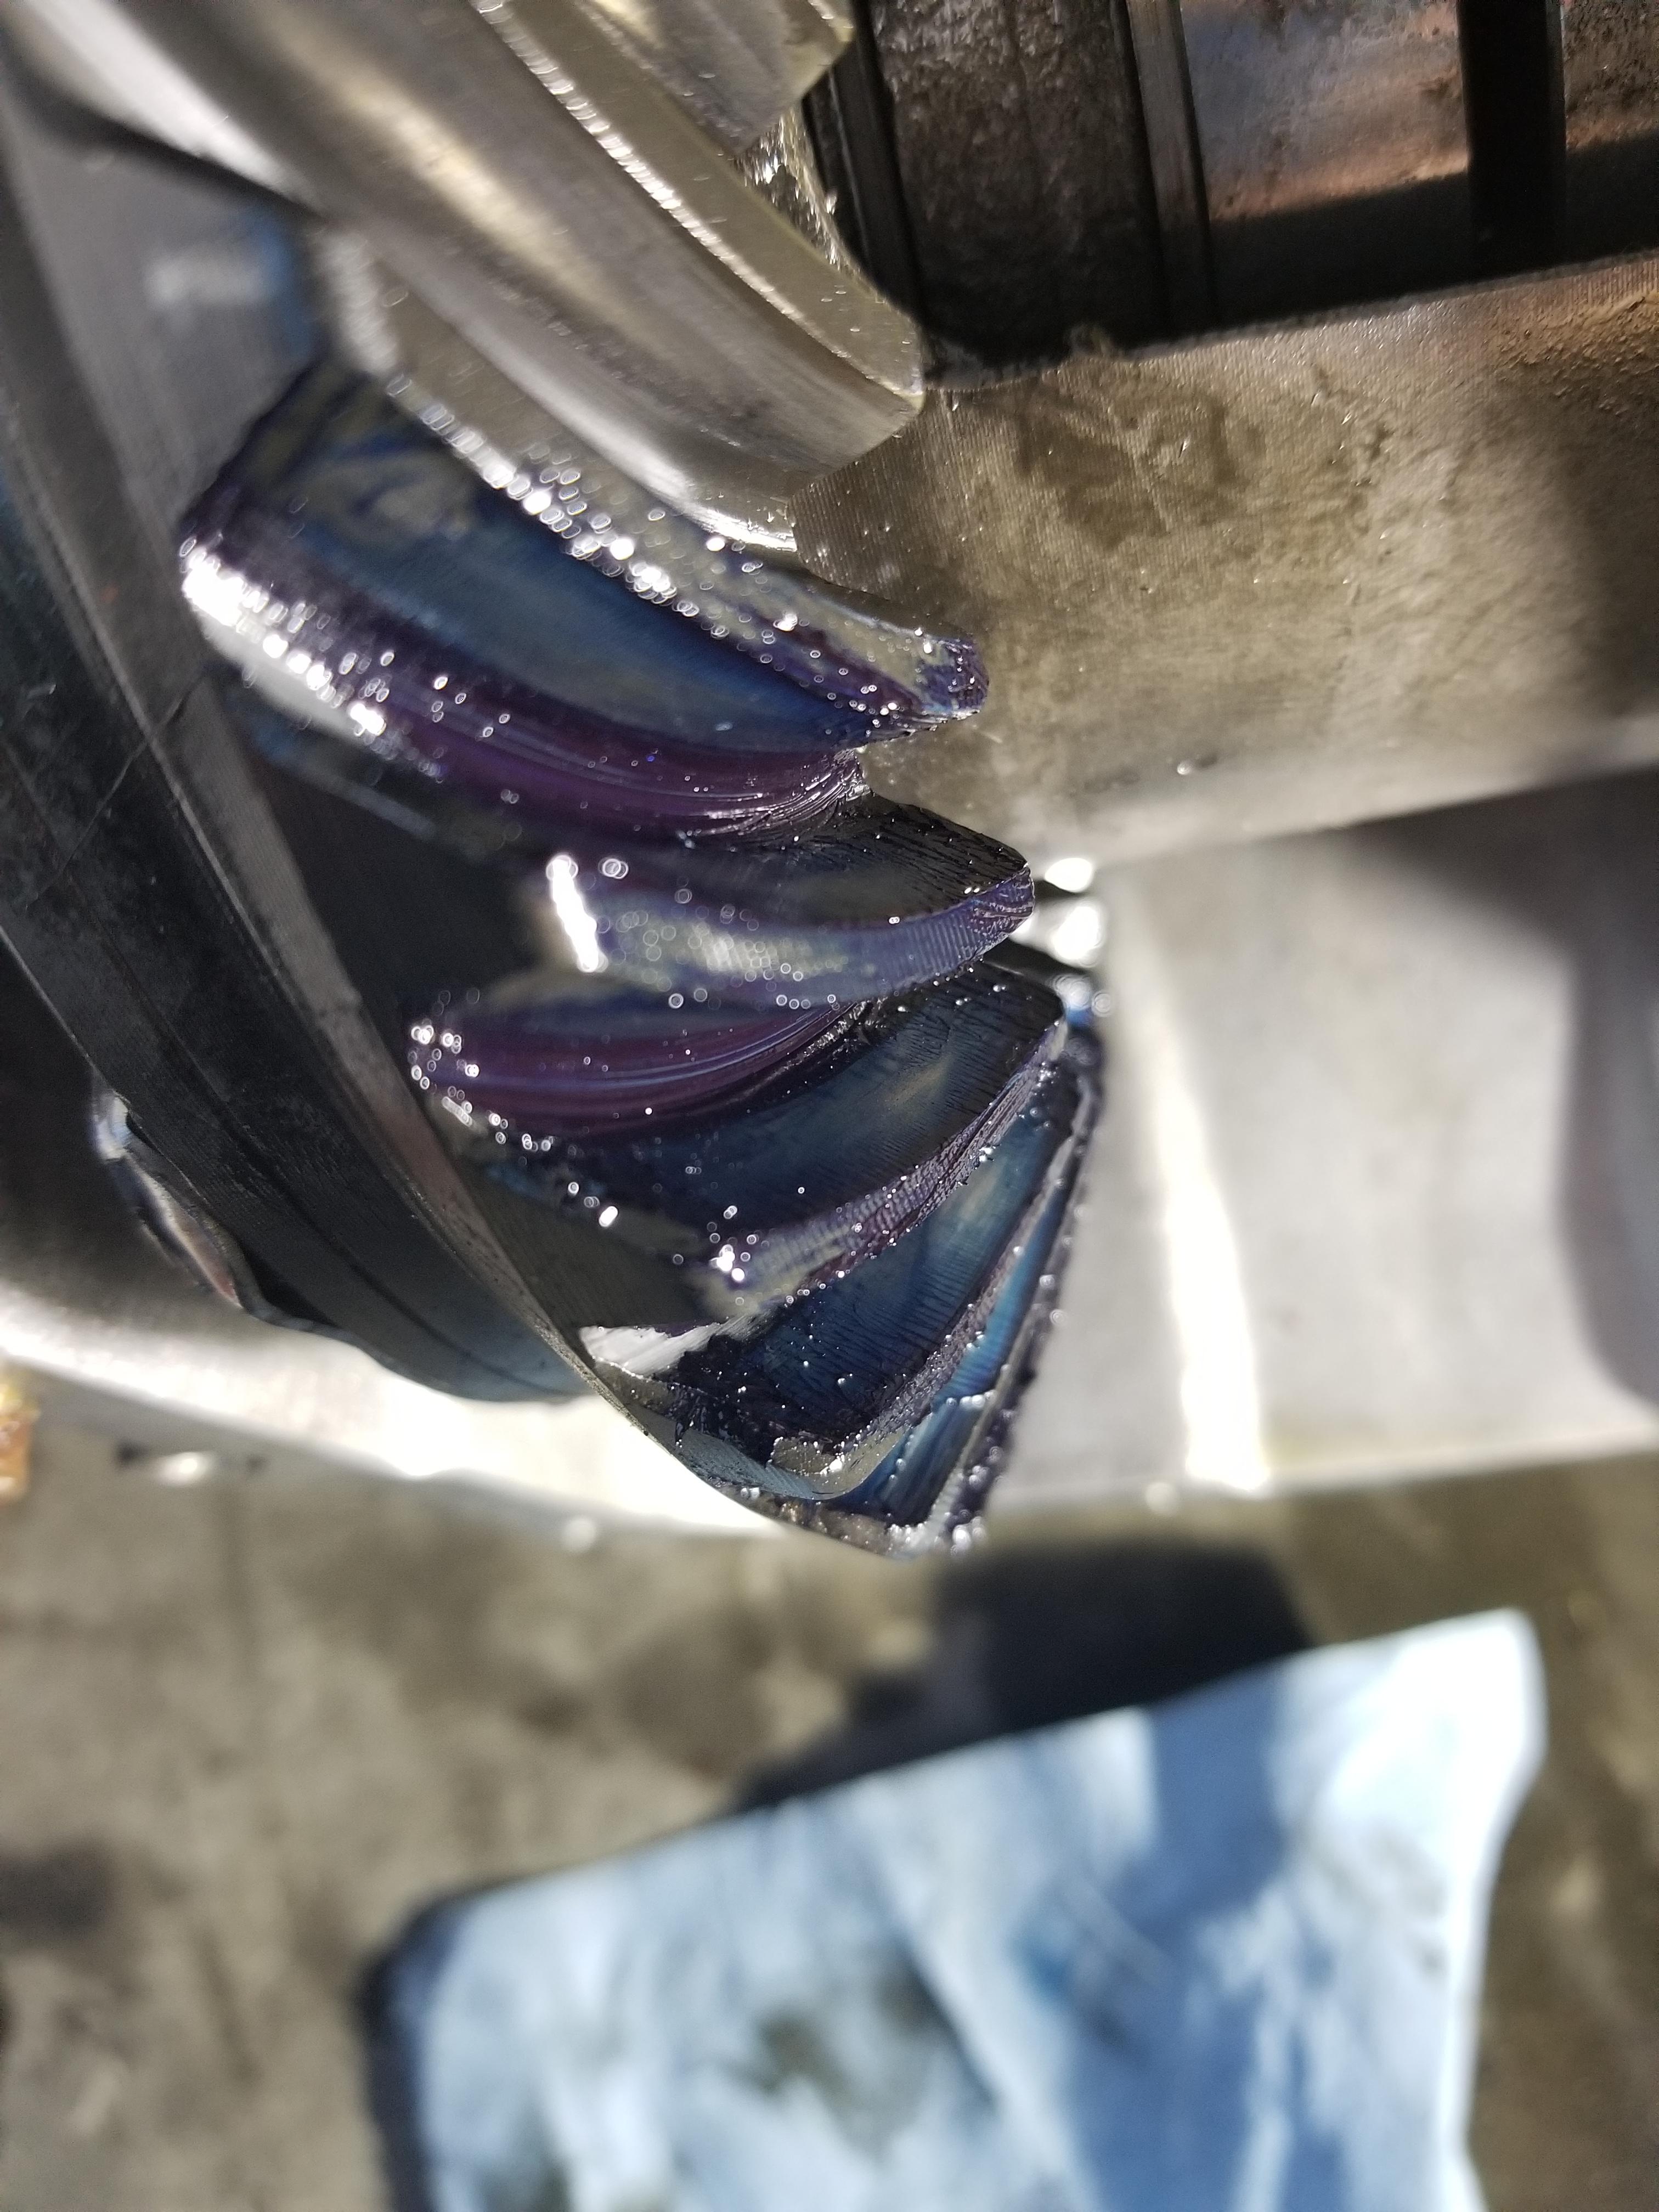
Anyway, I got the shims figured out to set the bearing preload and the backlash set right. I forgot to check the backlash before taking out the open carrier, so I went with the original spec (.17mm/.0066") and went up by 20% to .008". Checking the pattern it looked all good.
Finally got the car out for a ride tonight. You can definitely hear some rotation noise when you have the clutch out in neutral, but not anywhere near as loud as with that old bearing. Even turning the ac on is enough to not hear it now. I used stalube 75w90 limited slip per Greg's recommendation. Shifts are fine and the diff seems happy. I got on it a bit pulling out of a side street and it easily stepped the back end out instead of just spinning the inside tire, so that's definitely an improvement.
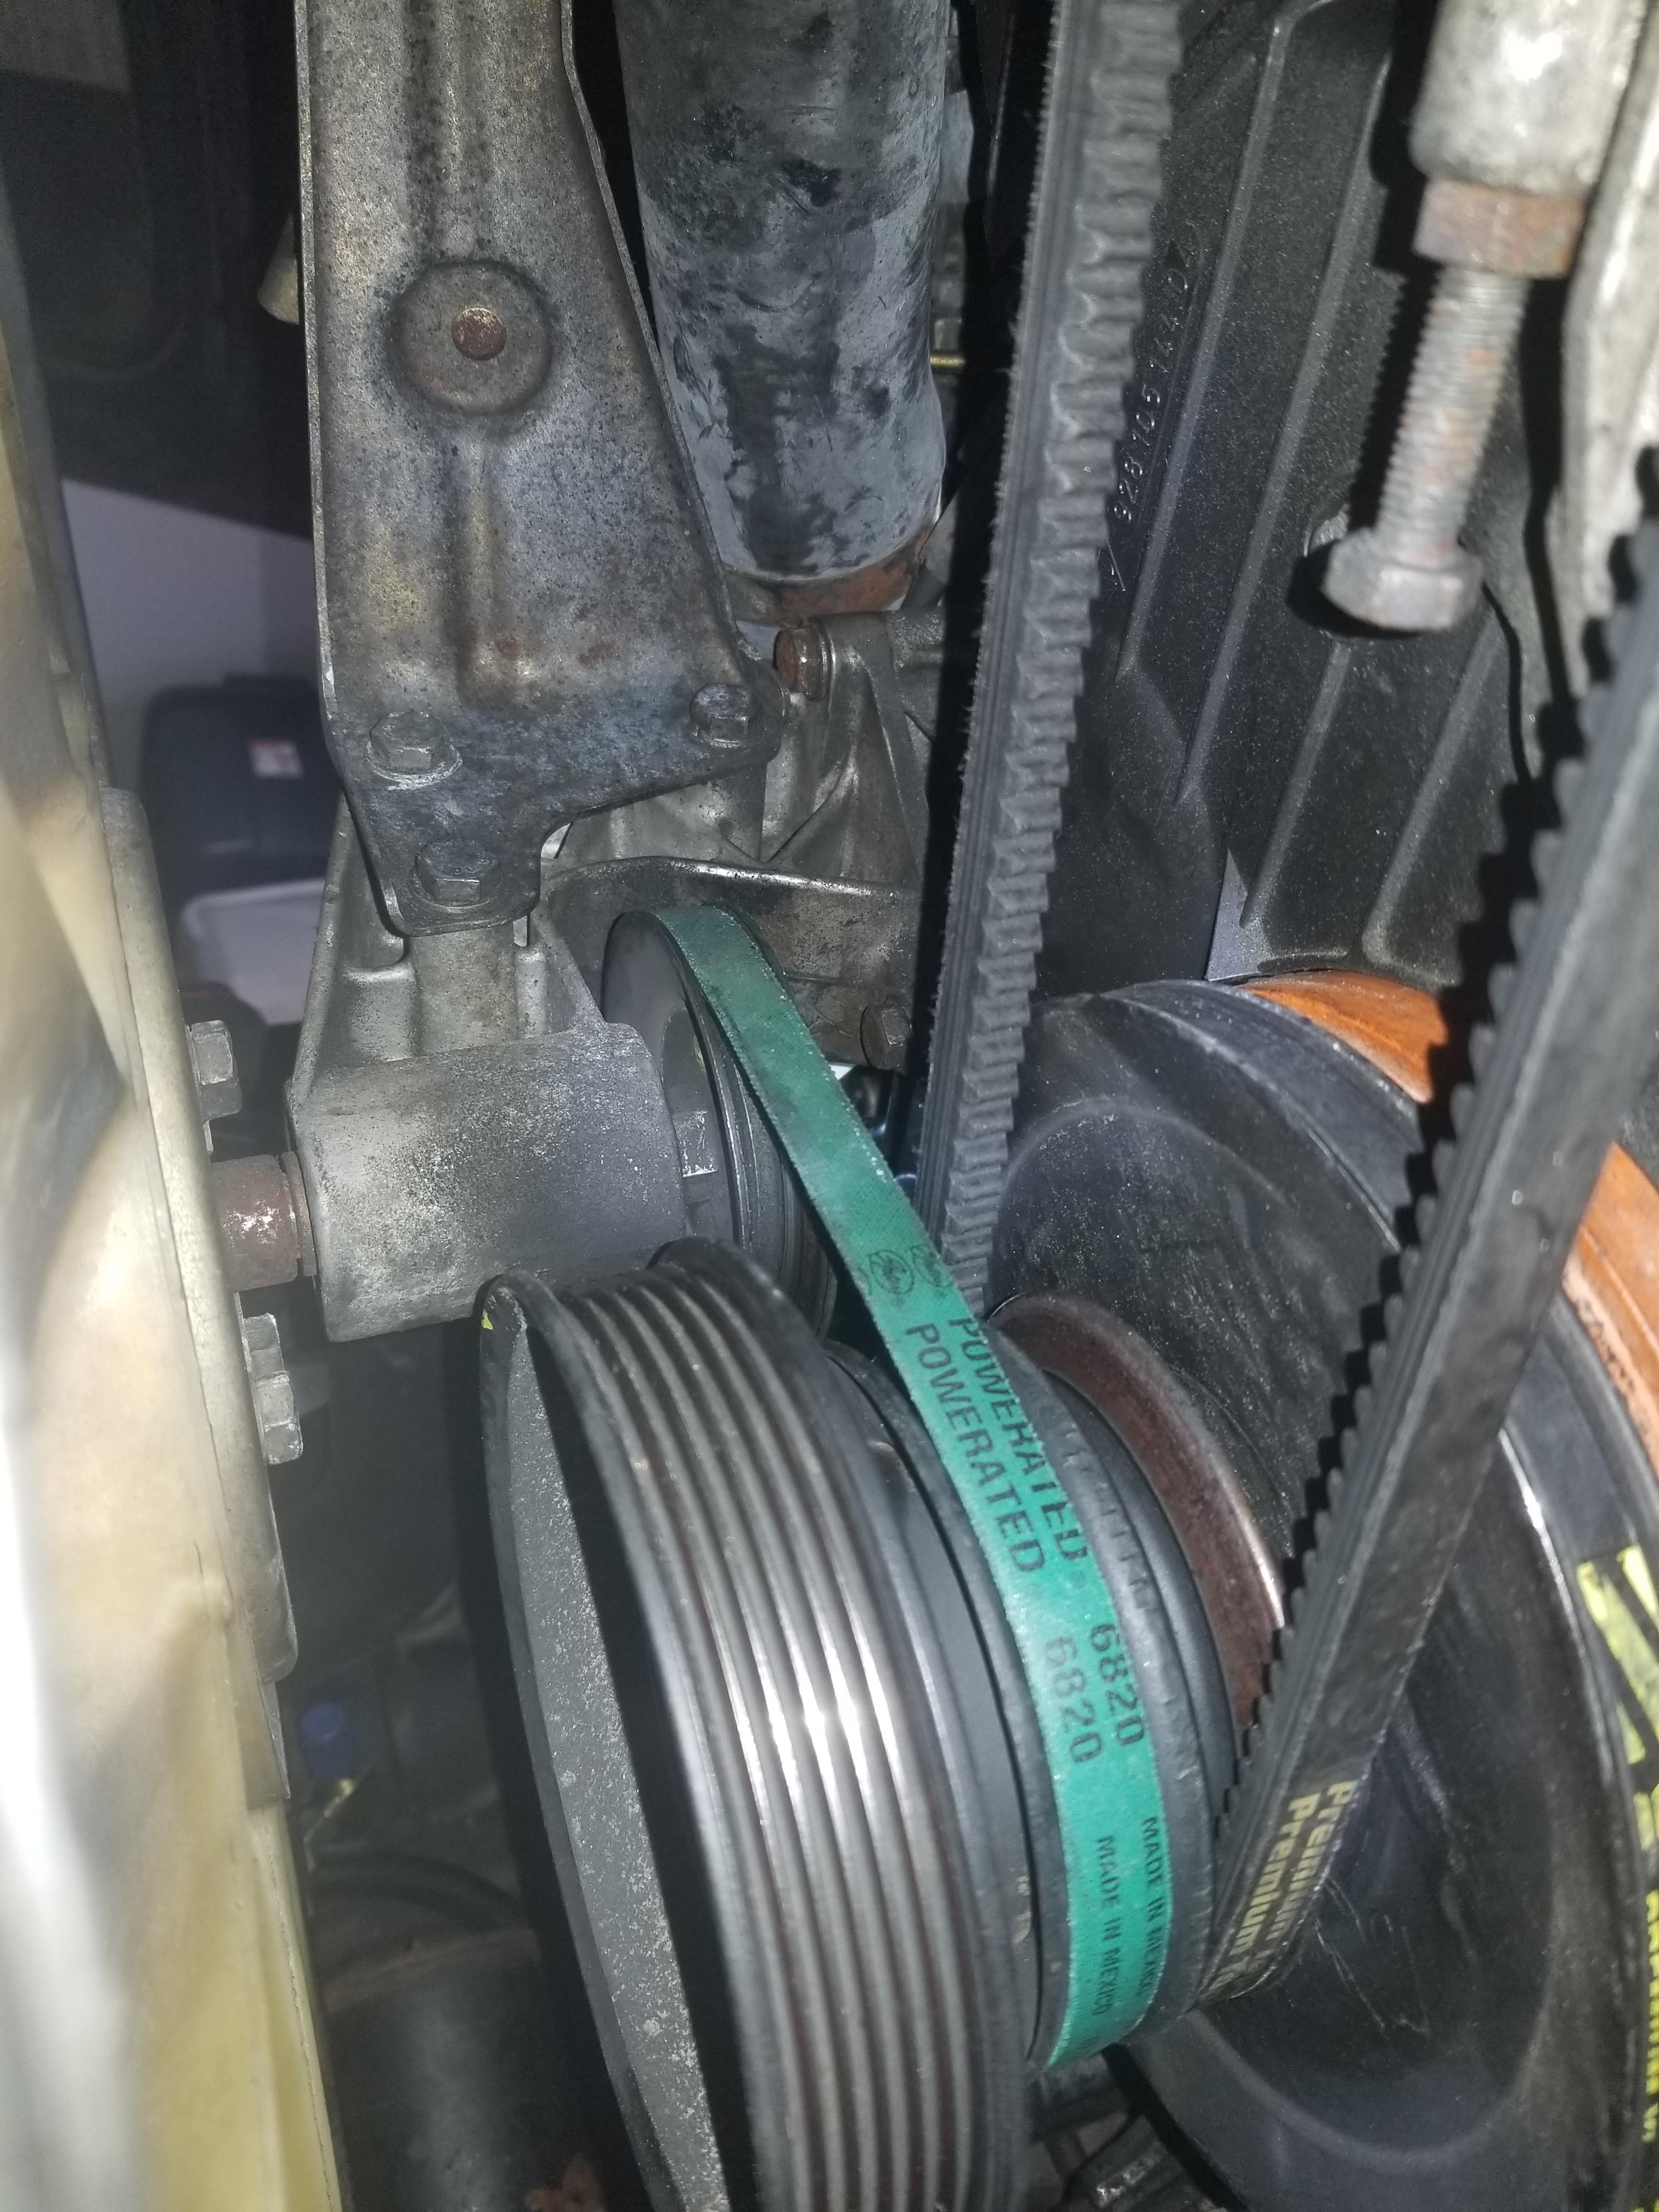
Aside from that I noticed that the air pump bearings seemed noisy. Taking off the belt confirmed that they don't feel great either. Since the air pump is serving absolutely no purpose given that the cats have long since Chernobyled I just went for the short belt to run just the fan for now. Wound up needing a 20" belt.
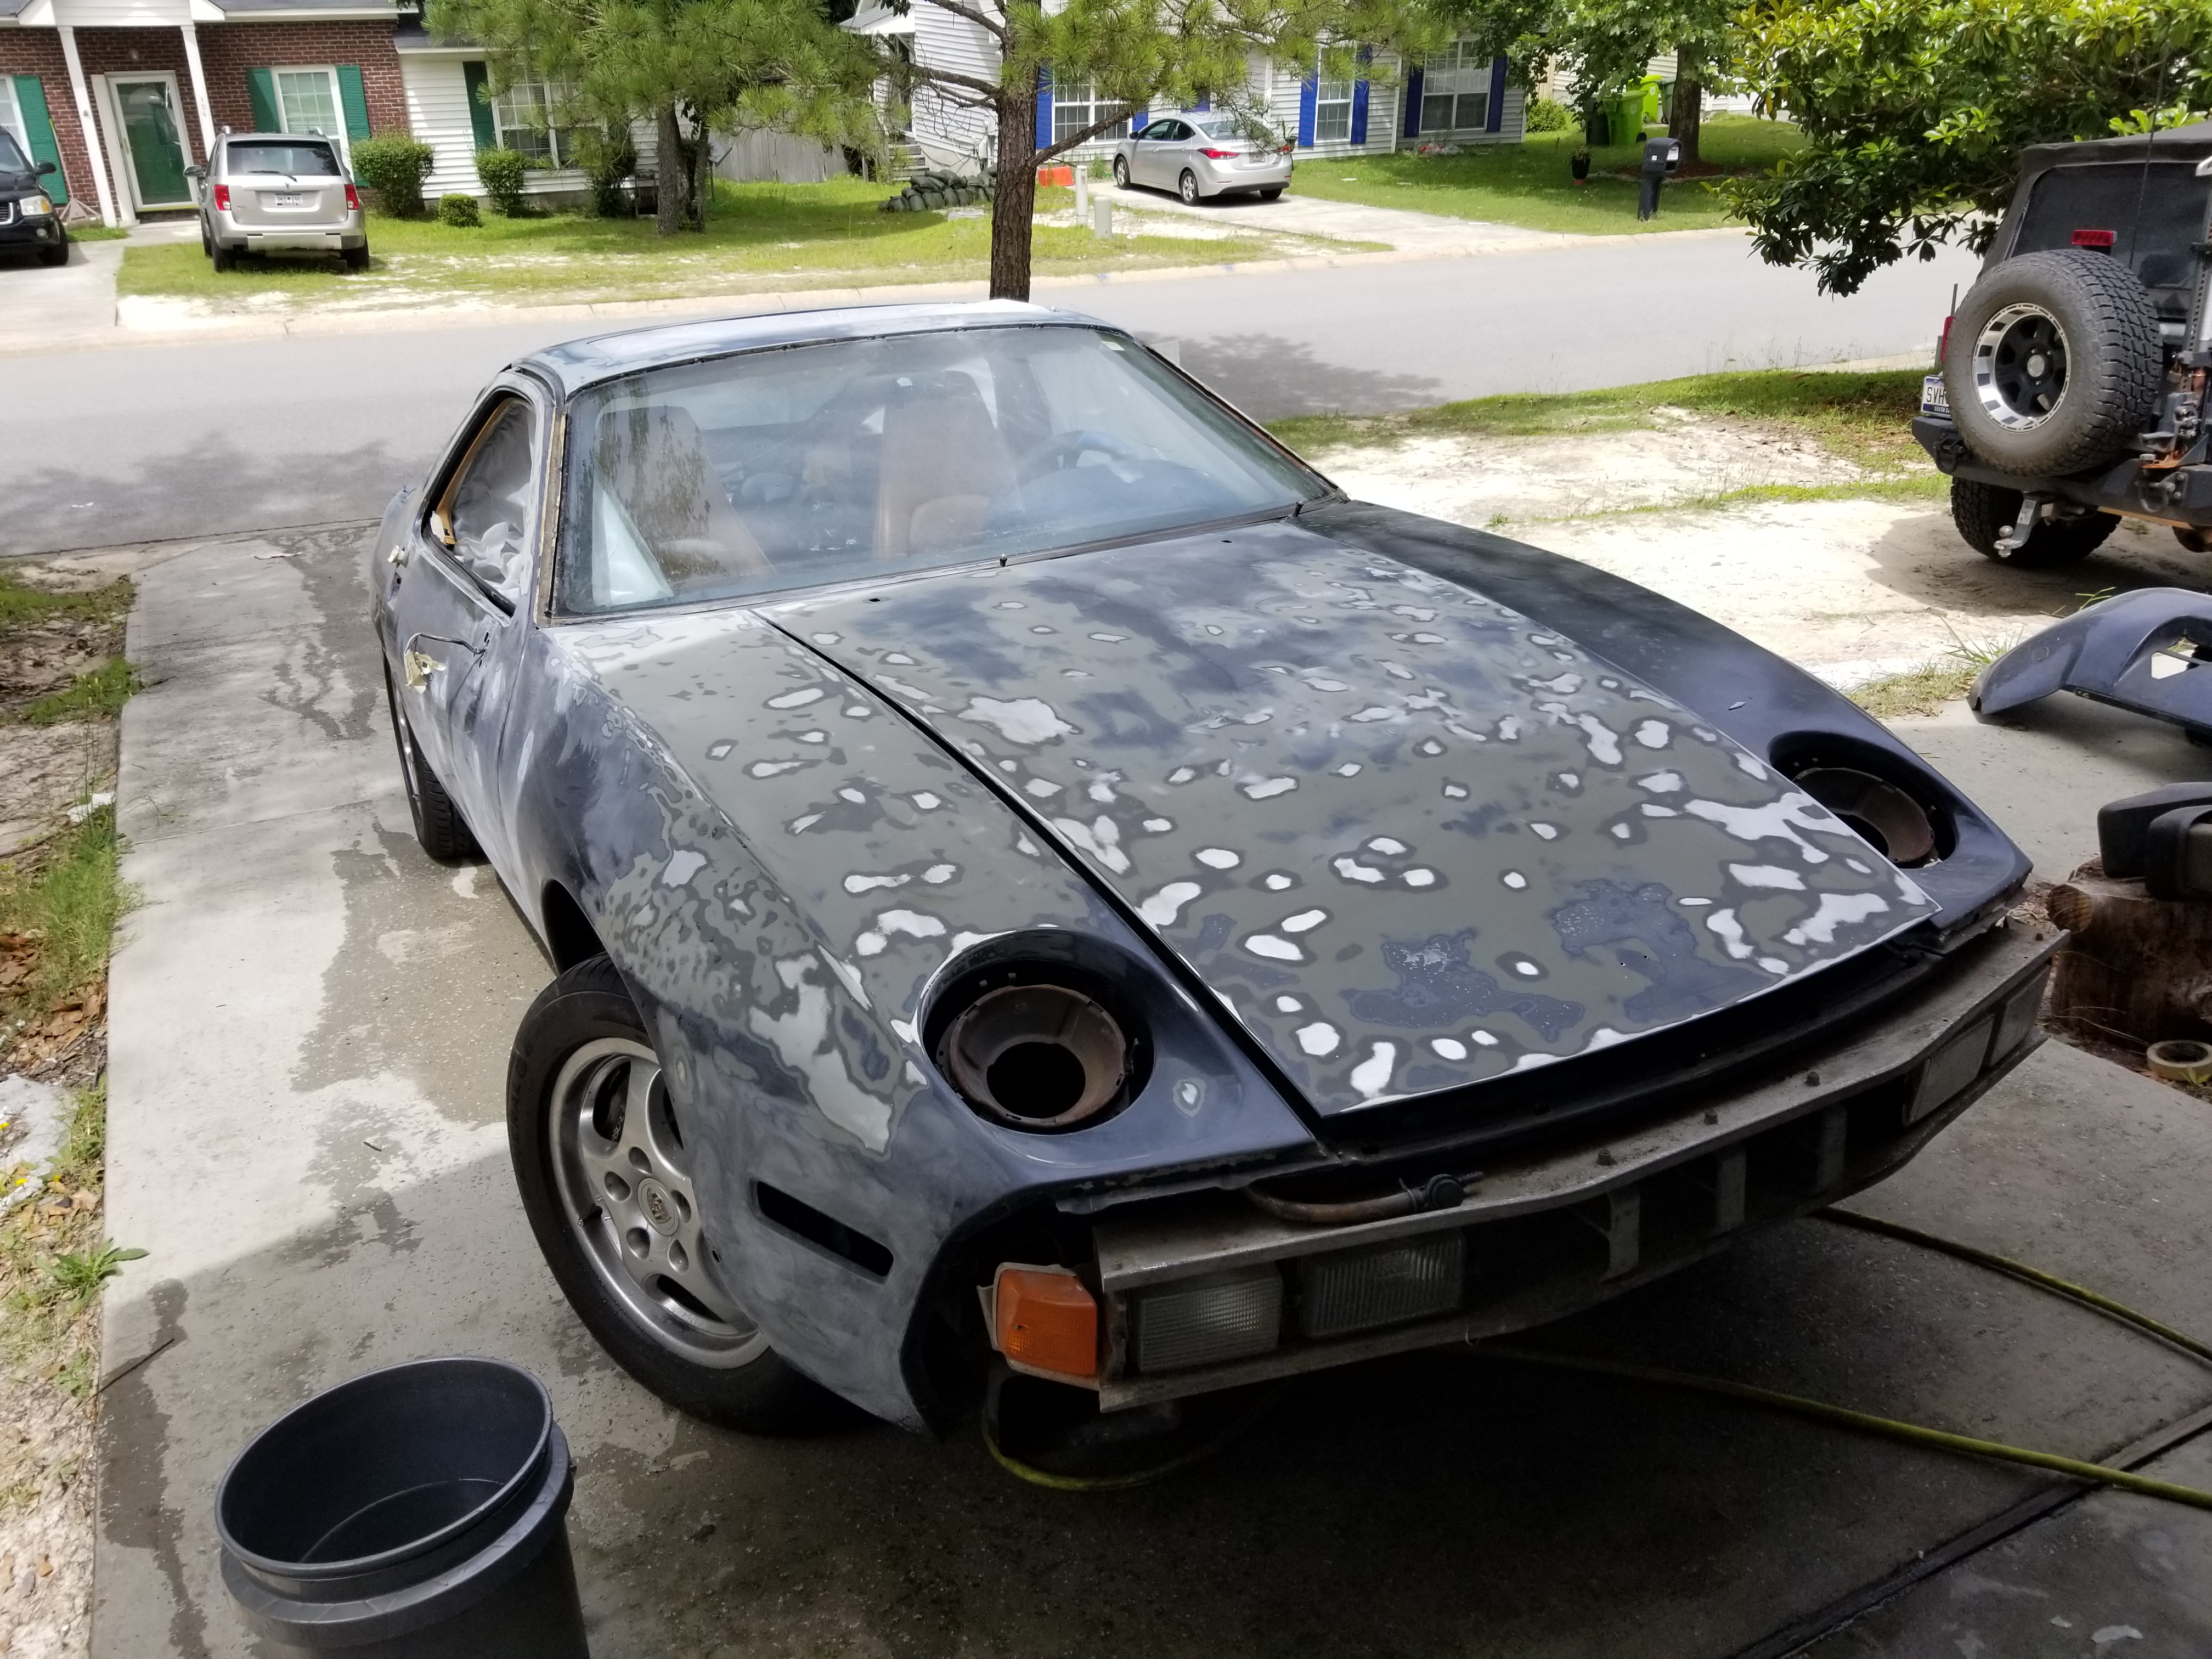
I got a da on sale at harbor freight last week and figured what could I mess up on already ruined paint. Paint is still pretty dull, but it's a bit more blue looking now.
Auto lsd
Attachment 1342782
Got some new clutches for the lsd.
Trans out again
Fluid looked ok
Got the input shaft out after pulling the countershaft.
Definitely wasn't getting that bearing off without pushing on the outer race.
The old bearing definitely felt a bit sloppy and made a bit of noise when turned in hand. The new one was dead smooth and silent.
Anyway, I got the shims figured out to set the bearing preload and the backlash set right. I forgot to check the backlash before taking out the open carrier, so I went with the original spec (.17mm/.0066") and went up by 20% to .008". Checking the pattern it looked all good.
Finally got the car out for a ride tonight. You can definitely hear some rotation noise when you have the clutch out in neutral, but not anywhere near as loud as with that old bearing. Even turning the ac on is enough to not hear it now. I used stalube 75w90 limited slip per Greg's recommendation. Shifts are fine and the diff seems happy. I got on it a bit pulling out of a side street and it easily stepped the back end out instead of just spinning the inside tire, so that's definitely an improvement.
Aside from that I noticed that the air pump bearings seemed noisy. Taking off the belt confirmed that they don't feel great either. Since the air pump is serving absolutely no purpose given that the cats have long since Chernobyled I just went for the short belt to run just the fan for now. Wound up needing a 20" belt.
I got a da on sale at harbor freight last week and figured what could I mess up on already ruined paint. Paint is still pretty dull, but it's a bit more blue looking now.
The following users liked this post:
AirtekHVAC (06-14-2020)
06-22-2020, 08:48 PM
#266
Burning Brakes
Thread Starter
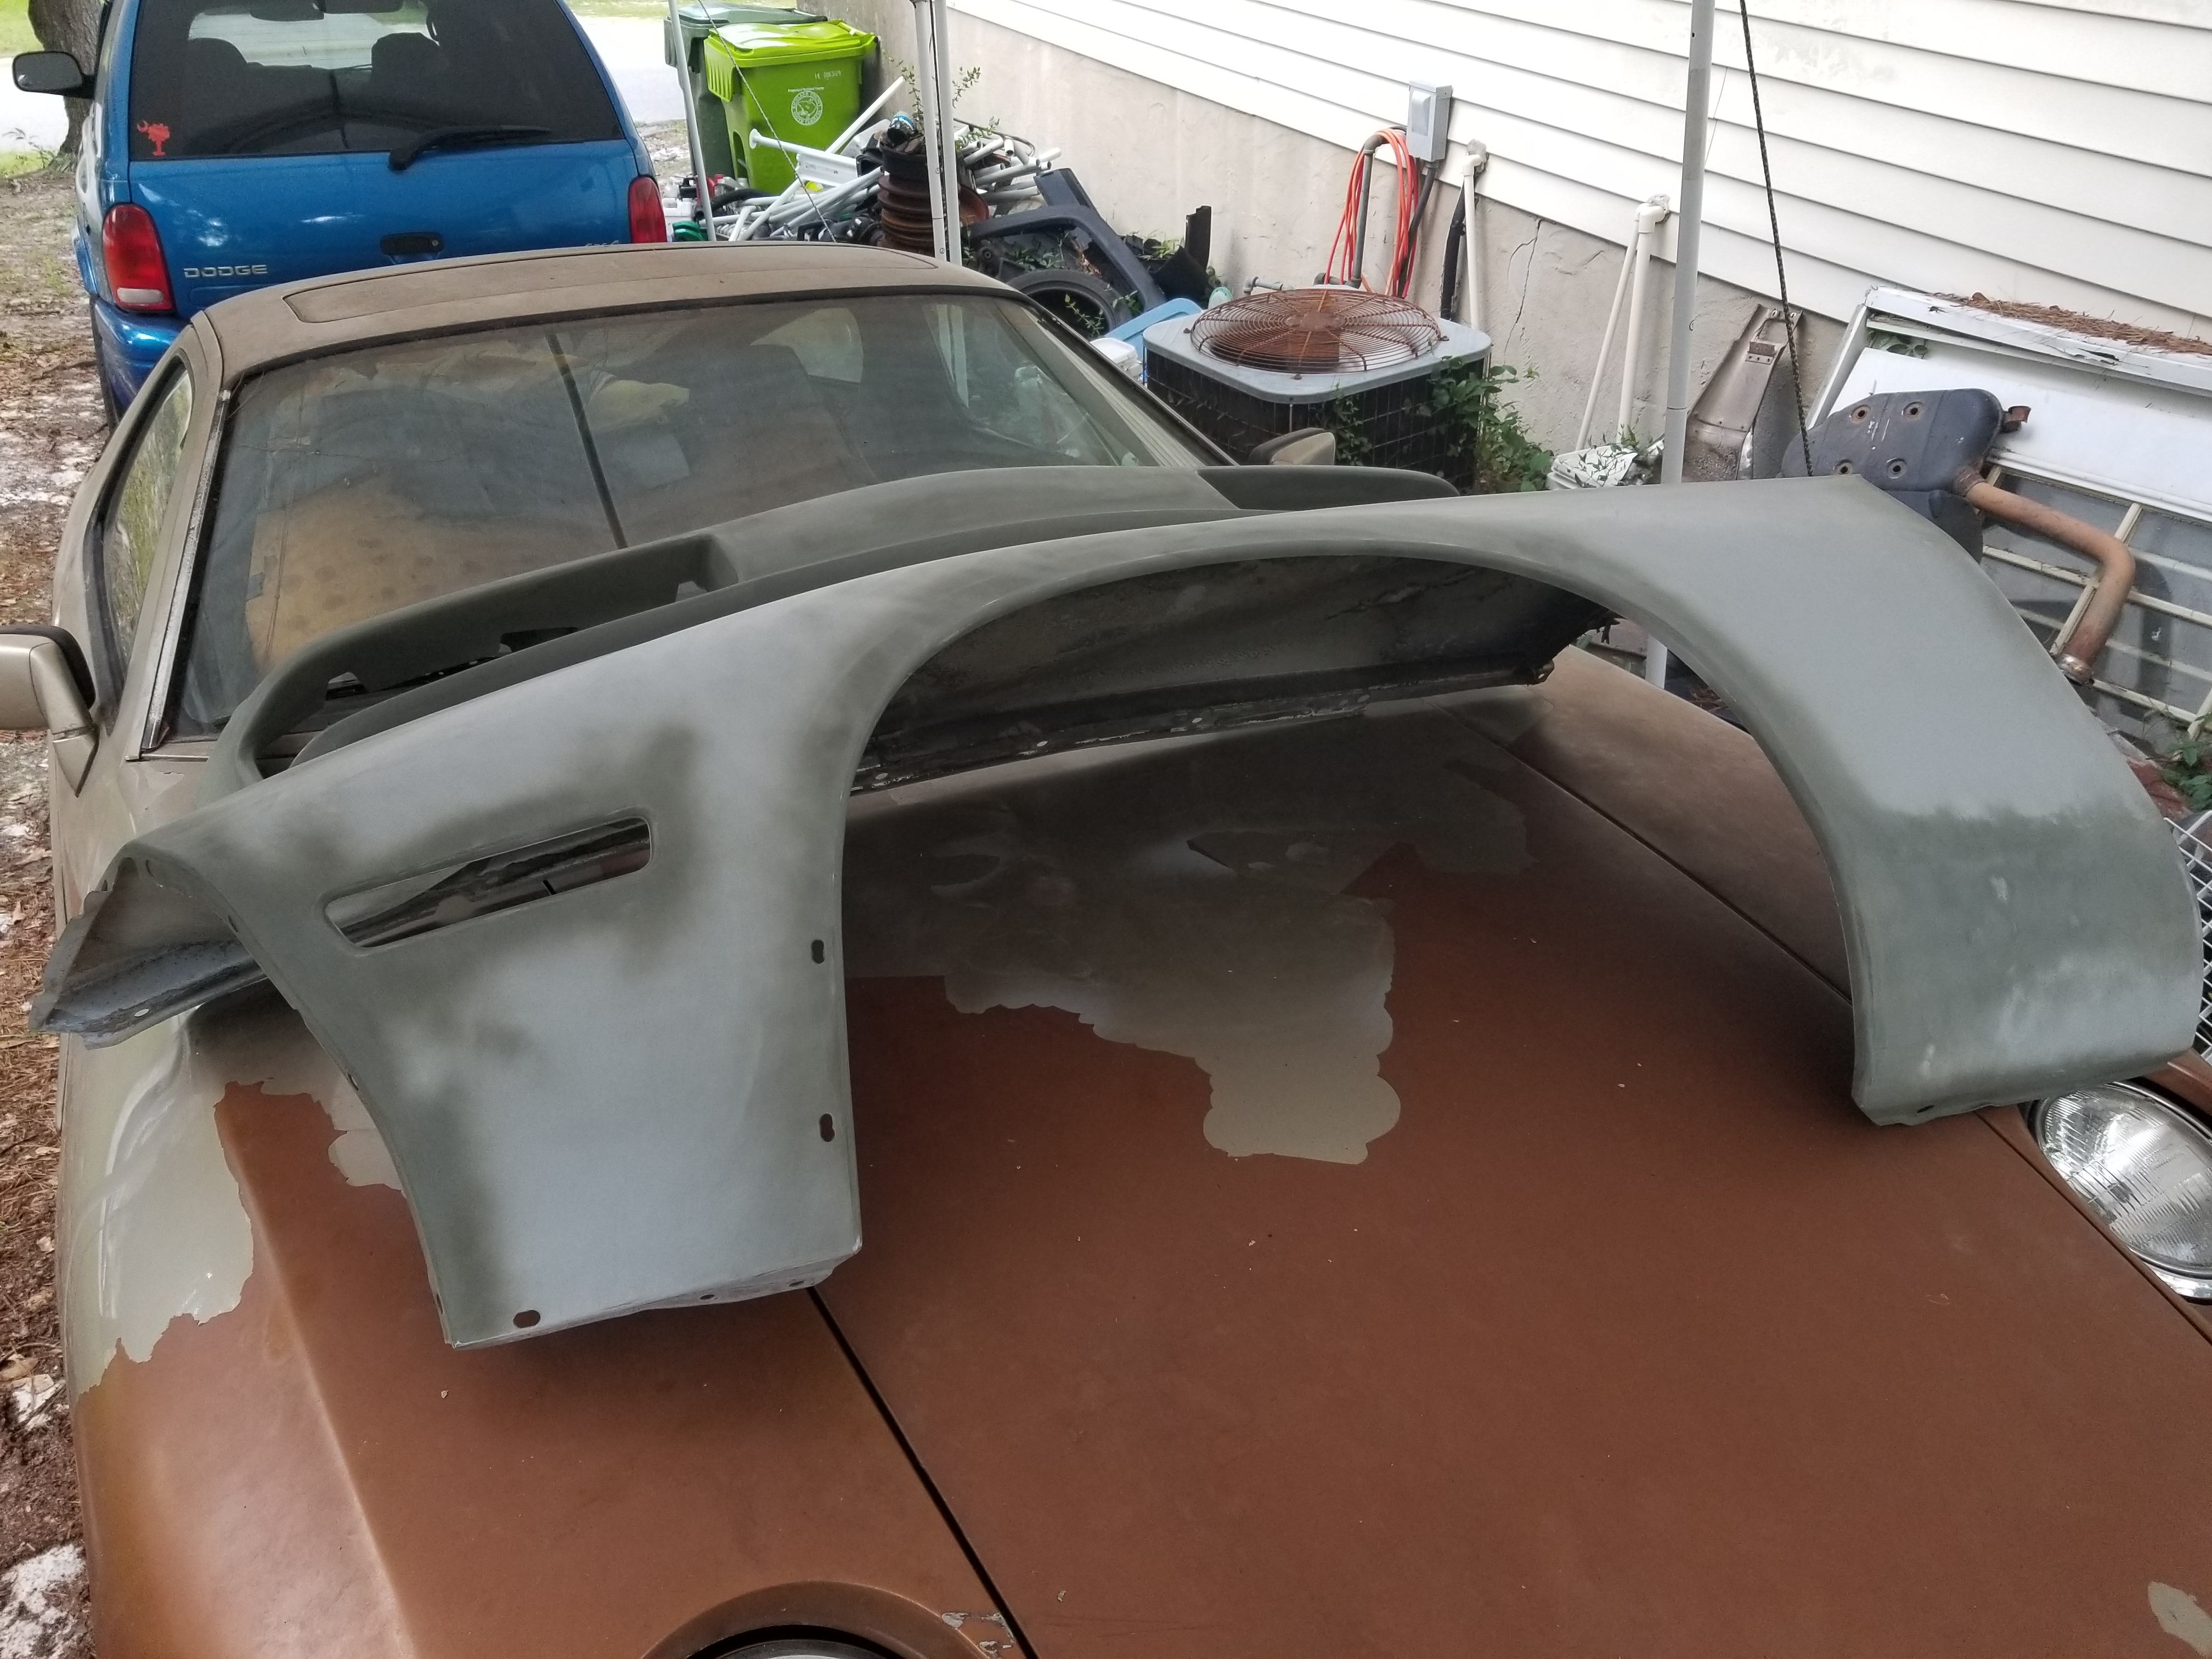
Over the past couple weeks I got the driver's side fender and bumper cover from the parts car cleaned up and more or less ready to get painted and put on my car. I did have to fill in the holes for the side moldings since my blue car doesn't have them. I do still need to find some kind of textured undercoating to replicate the factory stone guard as well. Either that or sand it down on the rest of the car as well and go with a vinyl paint protection film. That stuff was a bastard to sand down though.
On a side note that tan 86.5 moves and stops on it's own now. It was serving as a good place to let those parts sit though since it's under the carport.
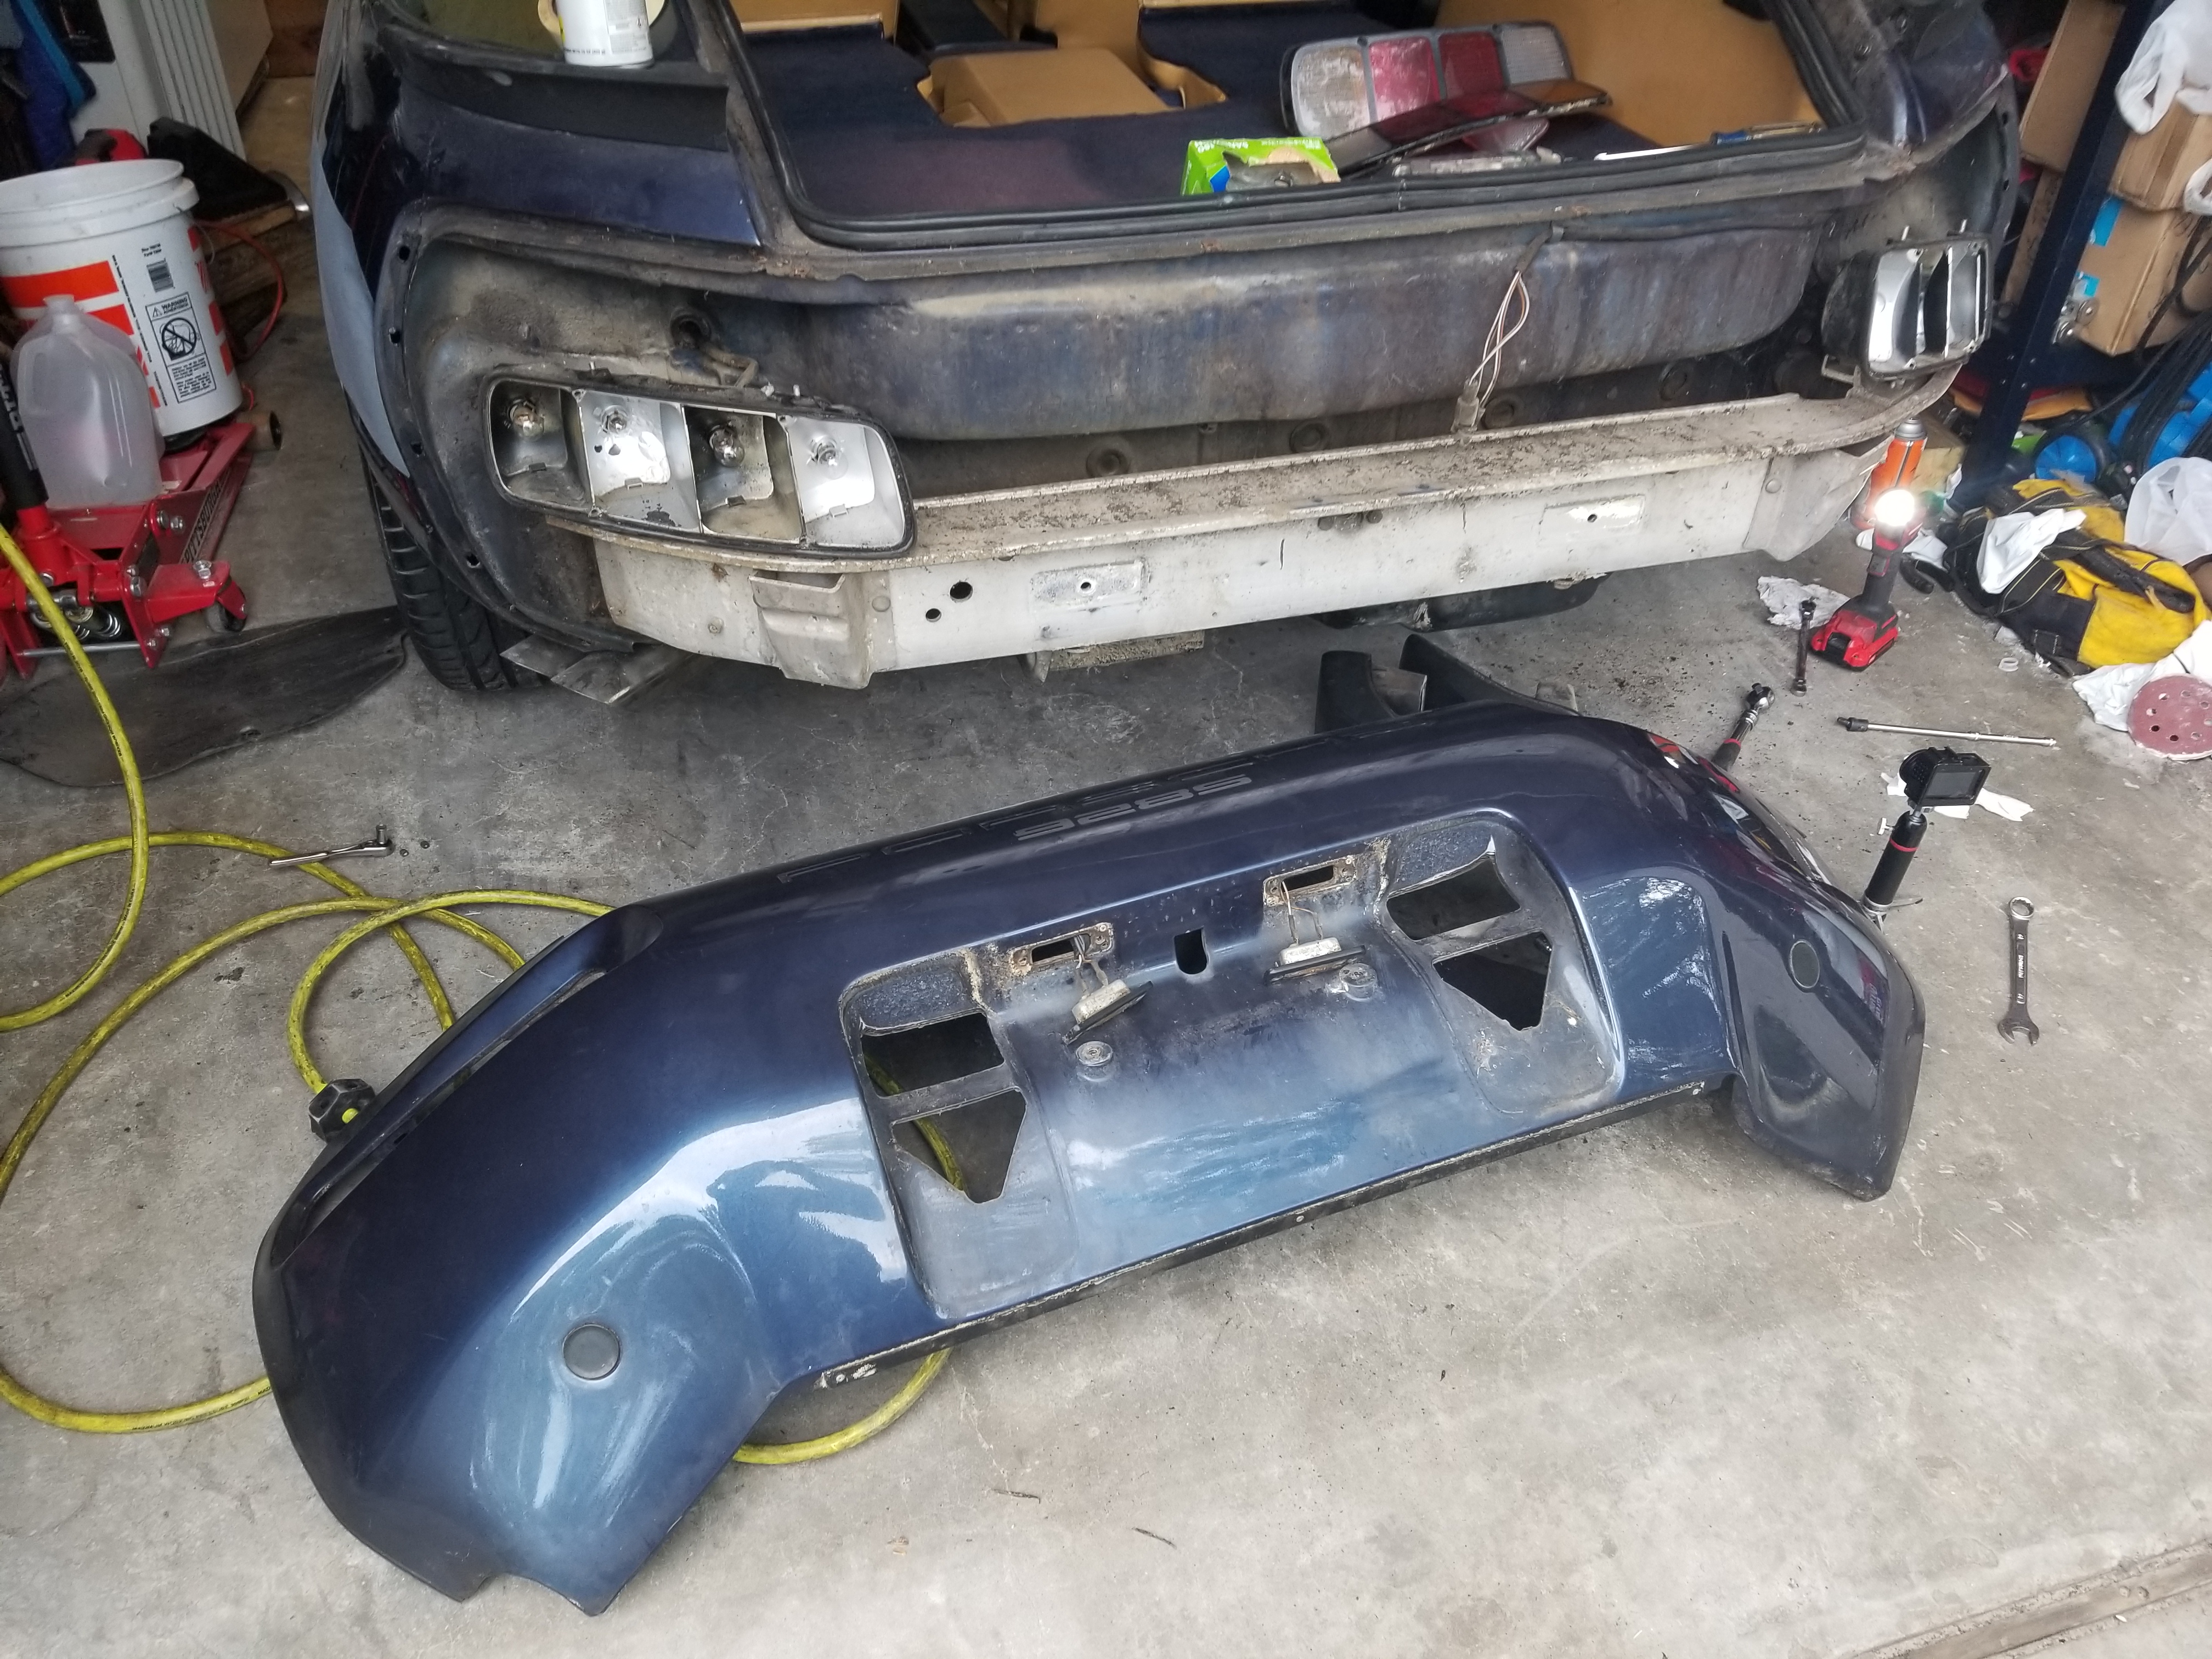
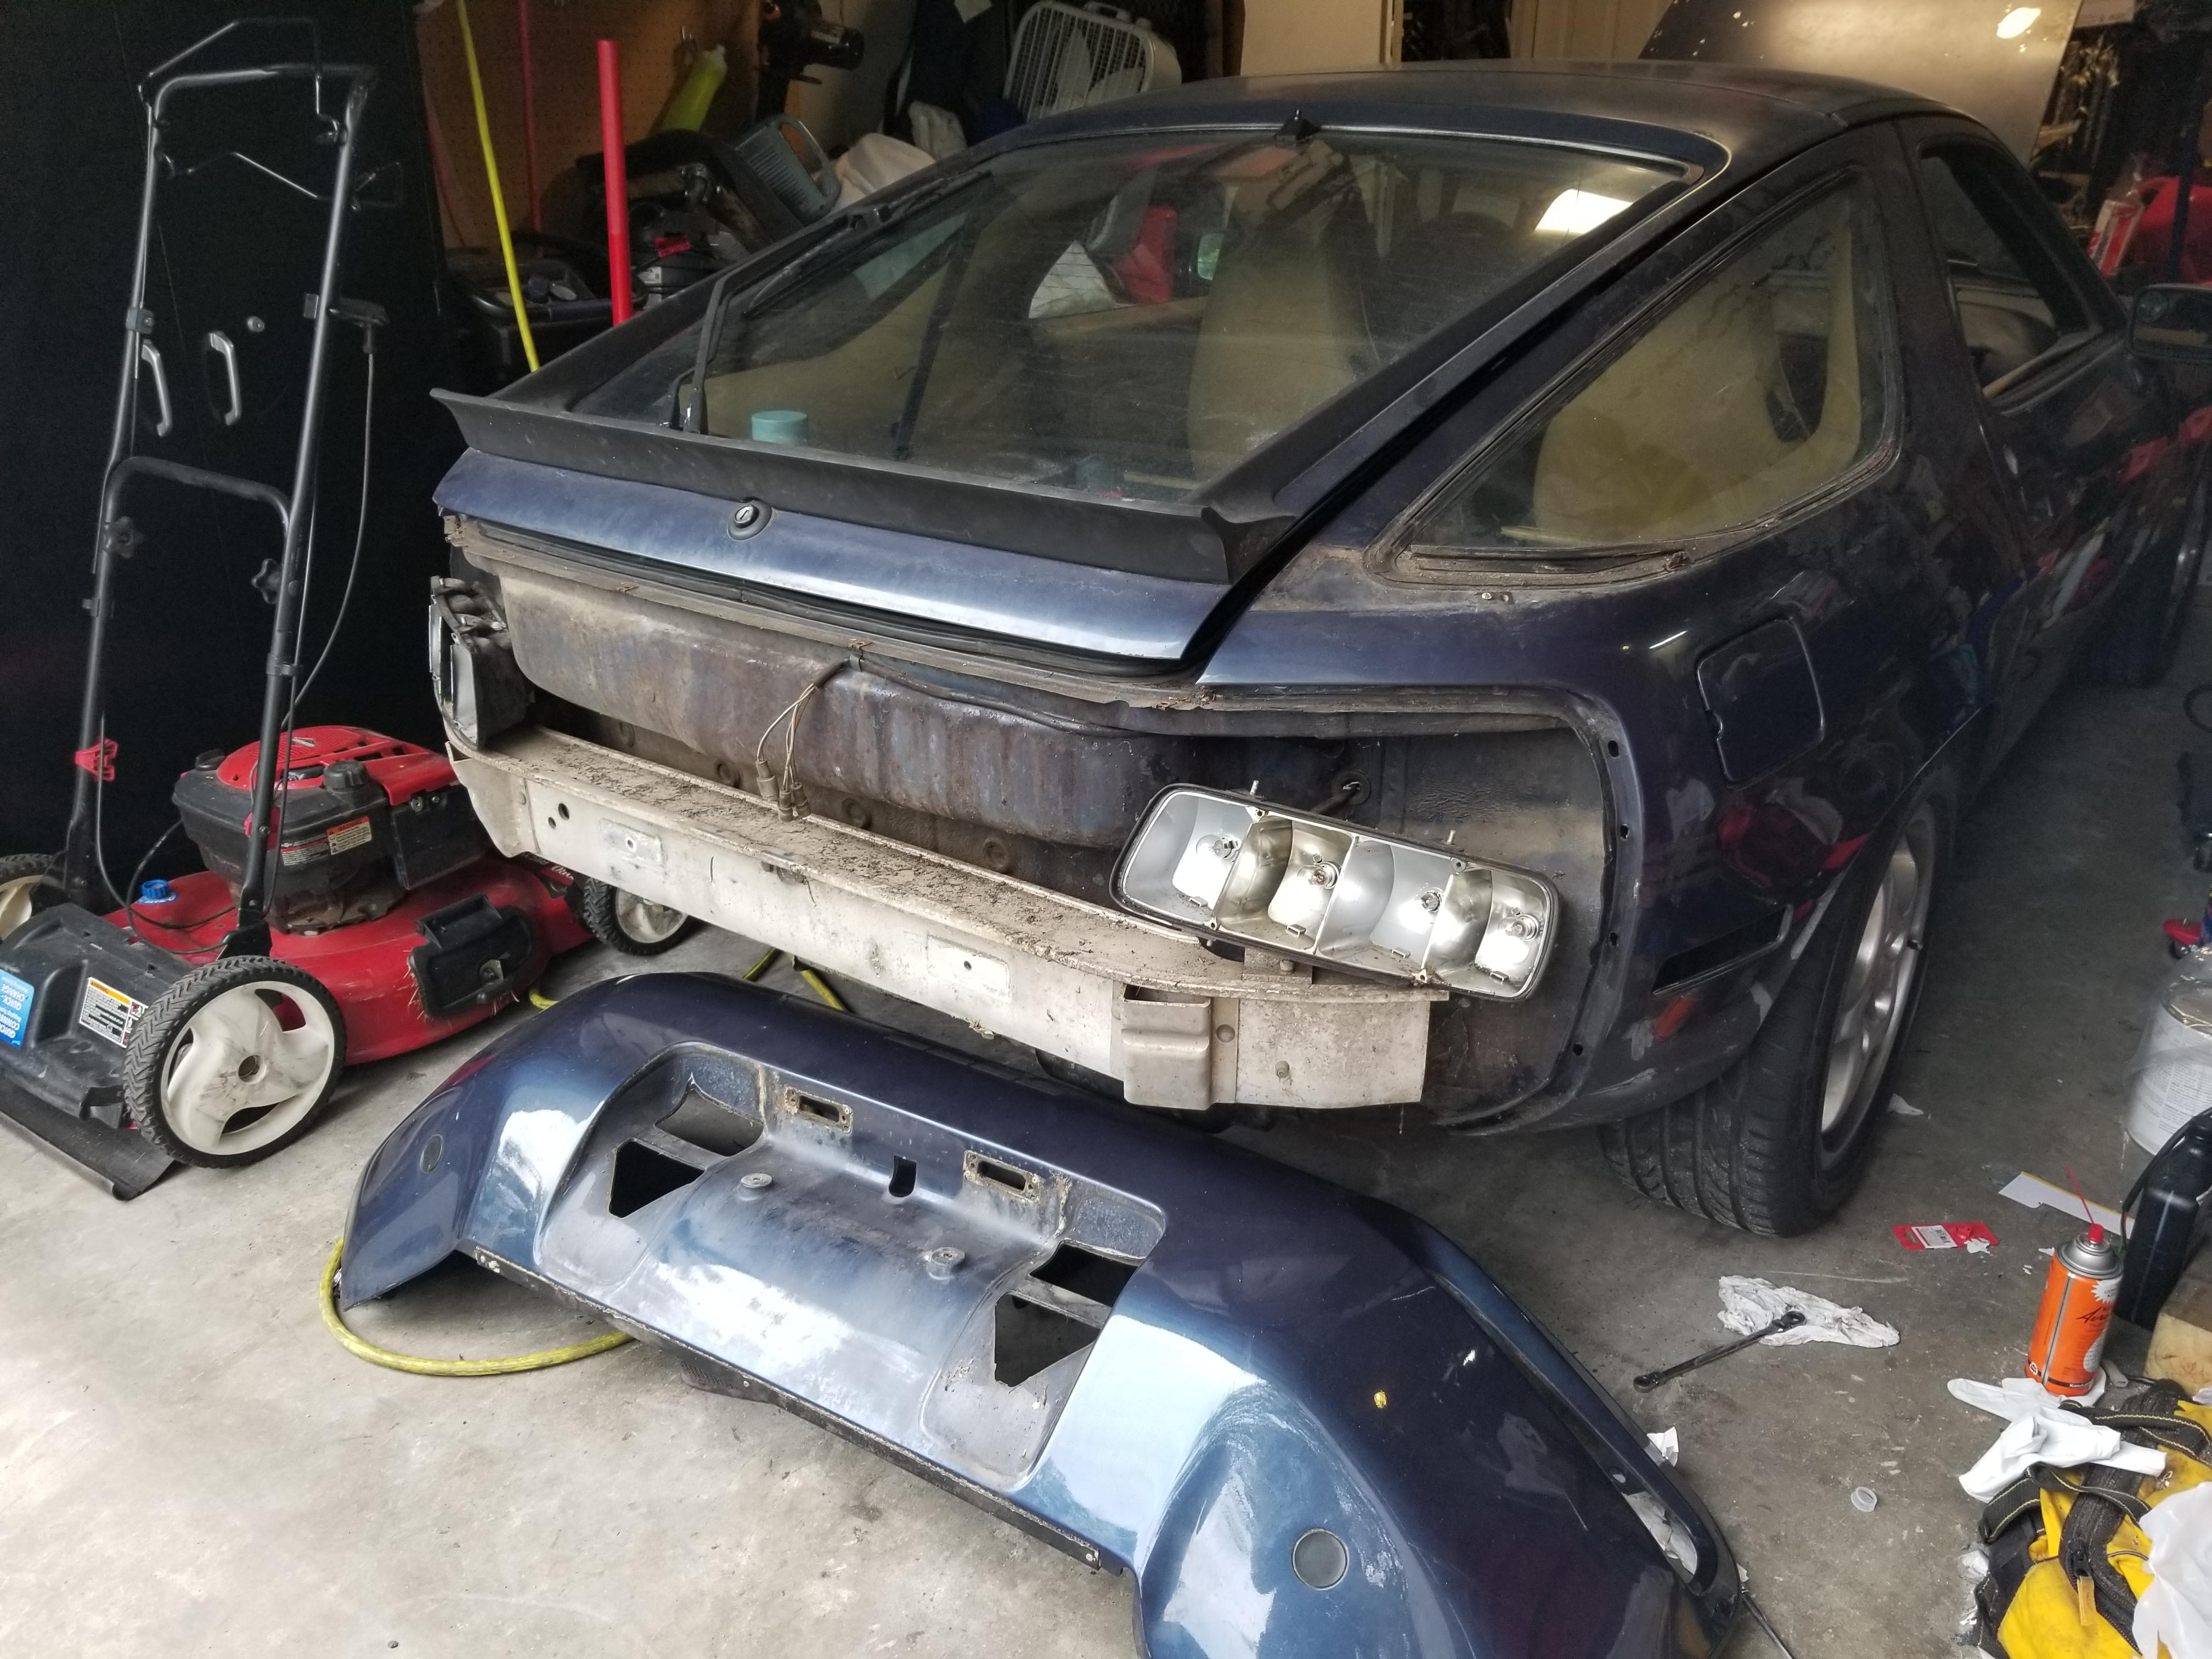
Tonight I took the bumper off the back and started taking the rear spoilers off before getting chased inside by thunderstorms.
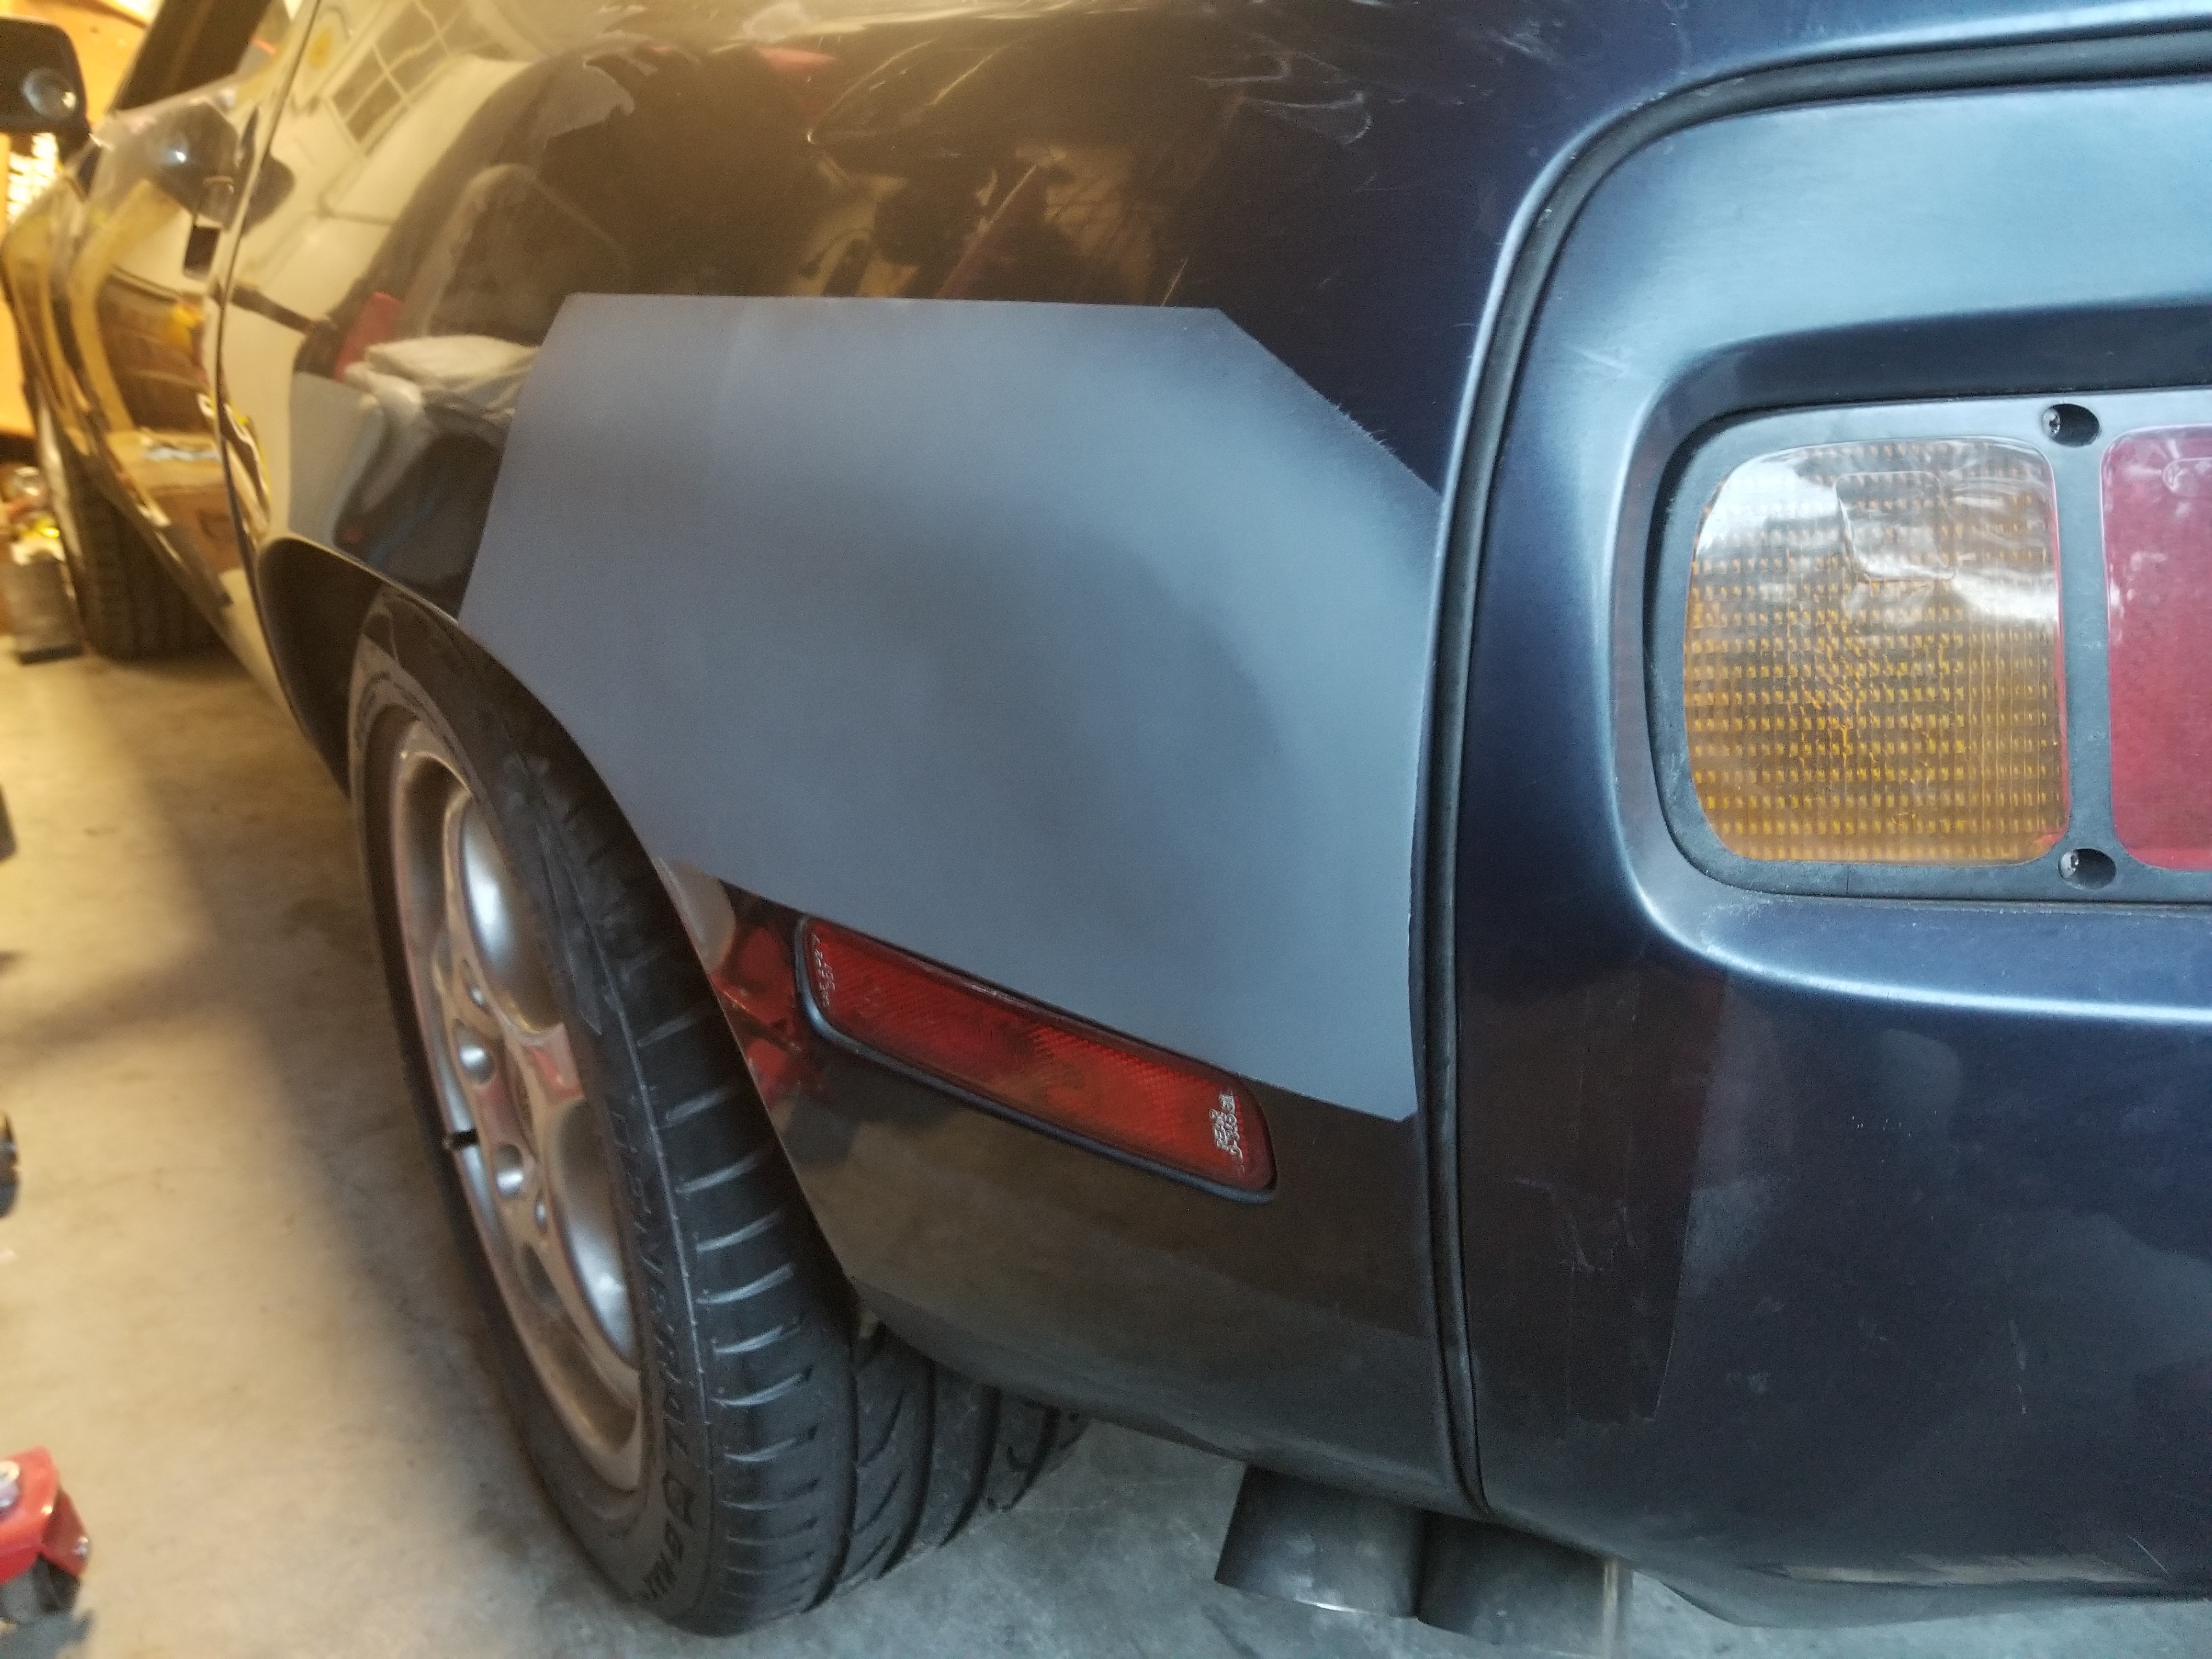
I did fix a scrape on the drivers side quarter panel over the weekend. It still needs a bit more work to make it just right. Being that it's curved in multiple directions there it's really hard to get perfect and blocks actually seem to make it worse there. Some of it is the light playing tricks on you, but you can feel part of the downward slope from the body line there. Before priming the whole car I'll sand that down some more and try and get the curve just right.
I was having to spray on some primer to be able to clearly see how it was shaping up. It's also protecting the area between me getting chances to work on it.
Other than the two quarter panels having some scrapes there really isn't much more serious body work on the car. Mostly just places where the clear and paint have flaked off, in some places to metal. I'll have to take time and sand all of those areas to make sure no more flaking will happen, then use some thin glaze to even it out. Then it's just a matter of taking everything apart that needs to come apart and getting everything masked off.
On a side note that tan 86.5 moves and stops on it's own now. It was serving as a good place to let those parts sit though since it's under the carport.
Tonight I took the bumper off the back and started taking the rear spoilers off before getting chased inside by thunderstorms.
I did fix a scrape on the drivers side quarter panel over the weekend. It still needs a bit more work to make it just right. Being that it's curved in multiple directions there it's really hard to get perfect and blocks actually seem to make it worse there. Some of it is the light playing tricks on you, but you can feel part of the downward slope from the body line there. Before priming the whole car I'll sand that down some more and try and get the curve just right.
I was having to spray on some primer to be able to clearly see how it was shaping up. It's also protecting the area between me getting chances to work on it.
Other than the two quarter panels having some scrapes there really isn't much more serious body work on the car. Mostly just places where the clear and paint have flaked off, in some places to metal. I'll have to take time and sand all of those areas to make sure no more flaking will happen, then use some thin glaze to even it out. Then it's just a matter of taking everything apart that needs to come apart and getting everything masked off.
06-26-2020, 10:52 PM
#267
Burning Brakes
Thread Starter
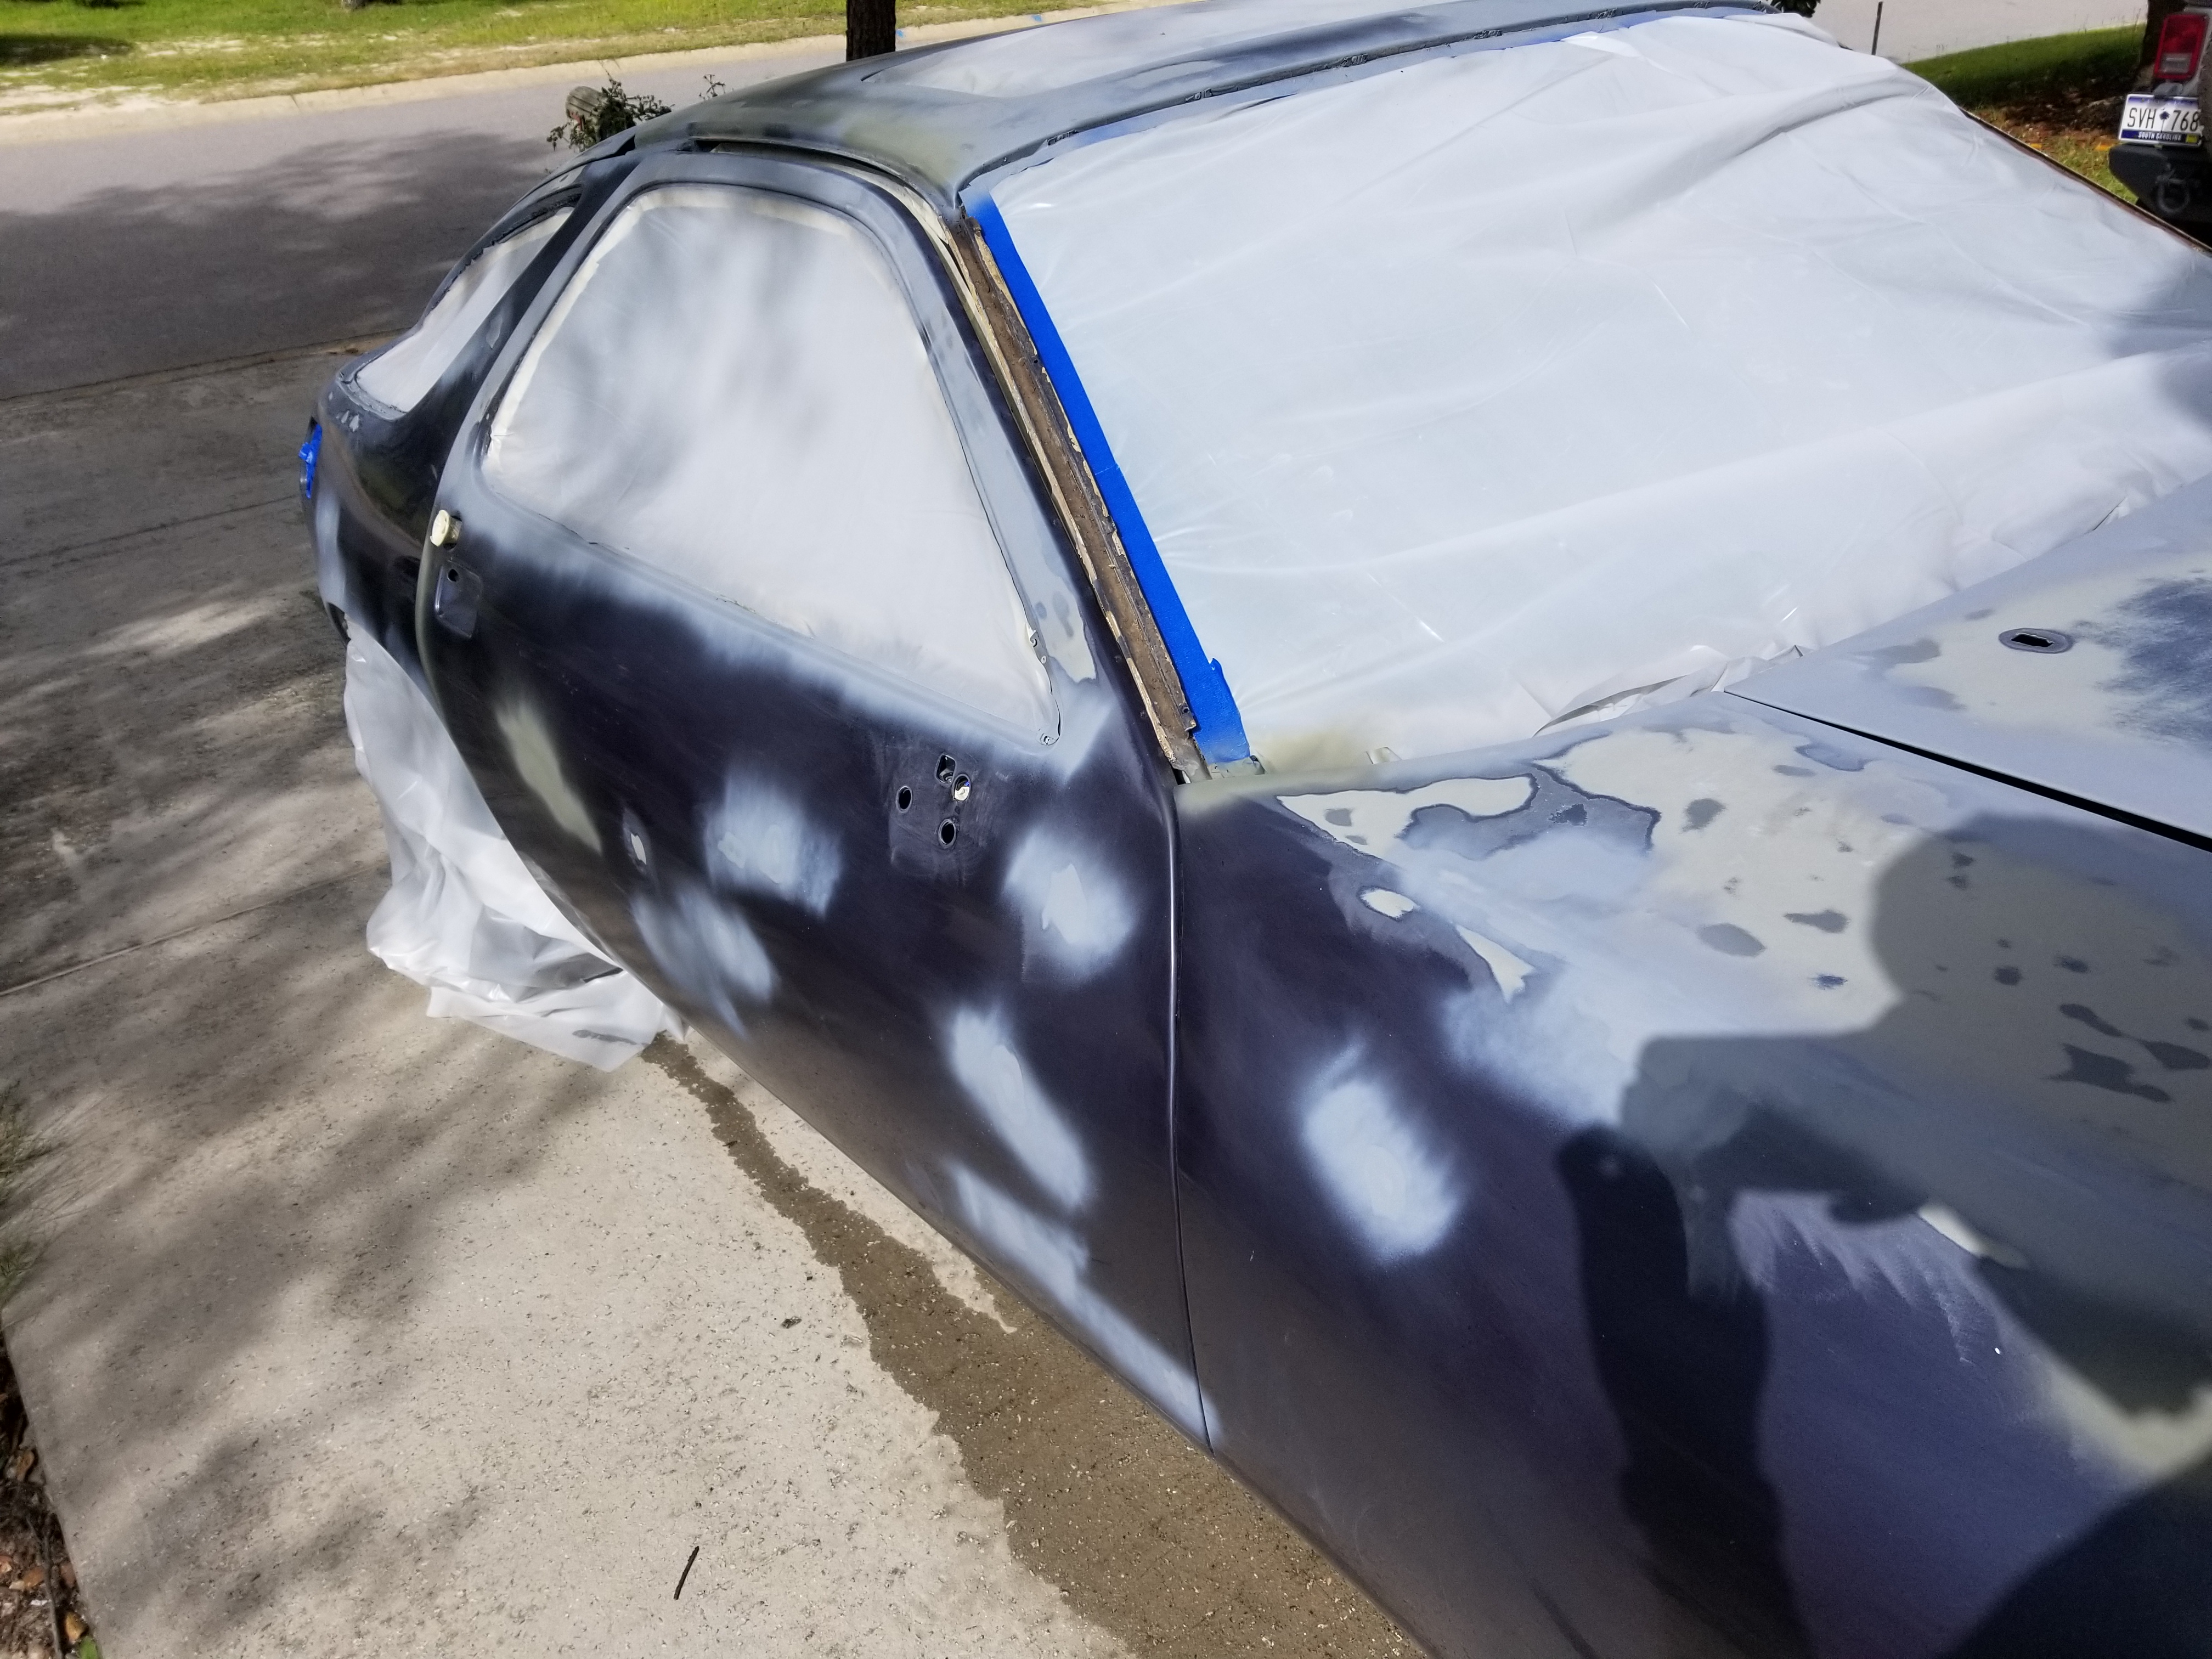
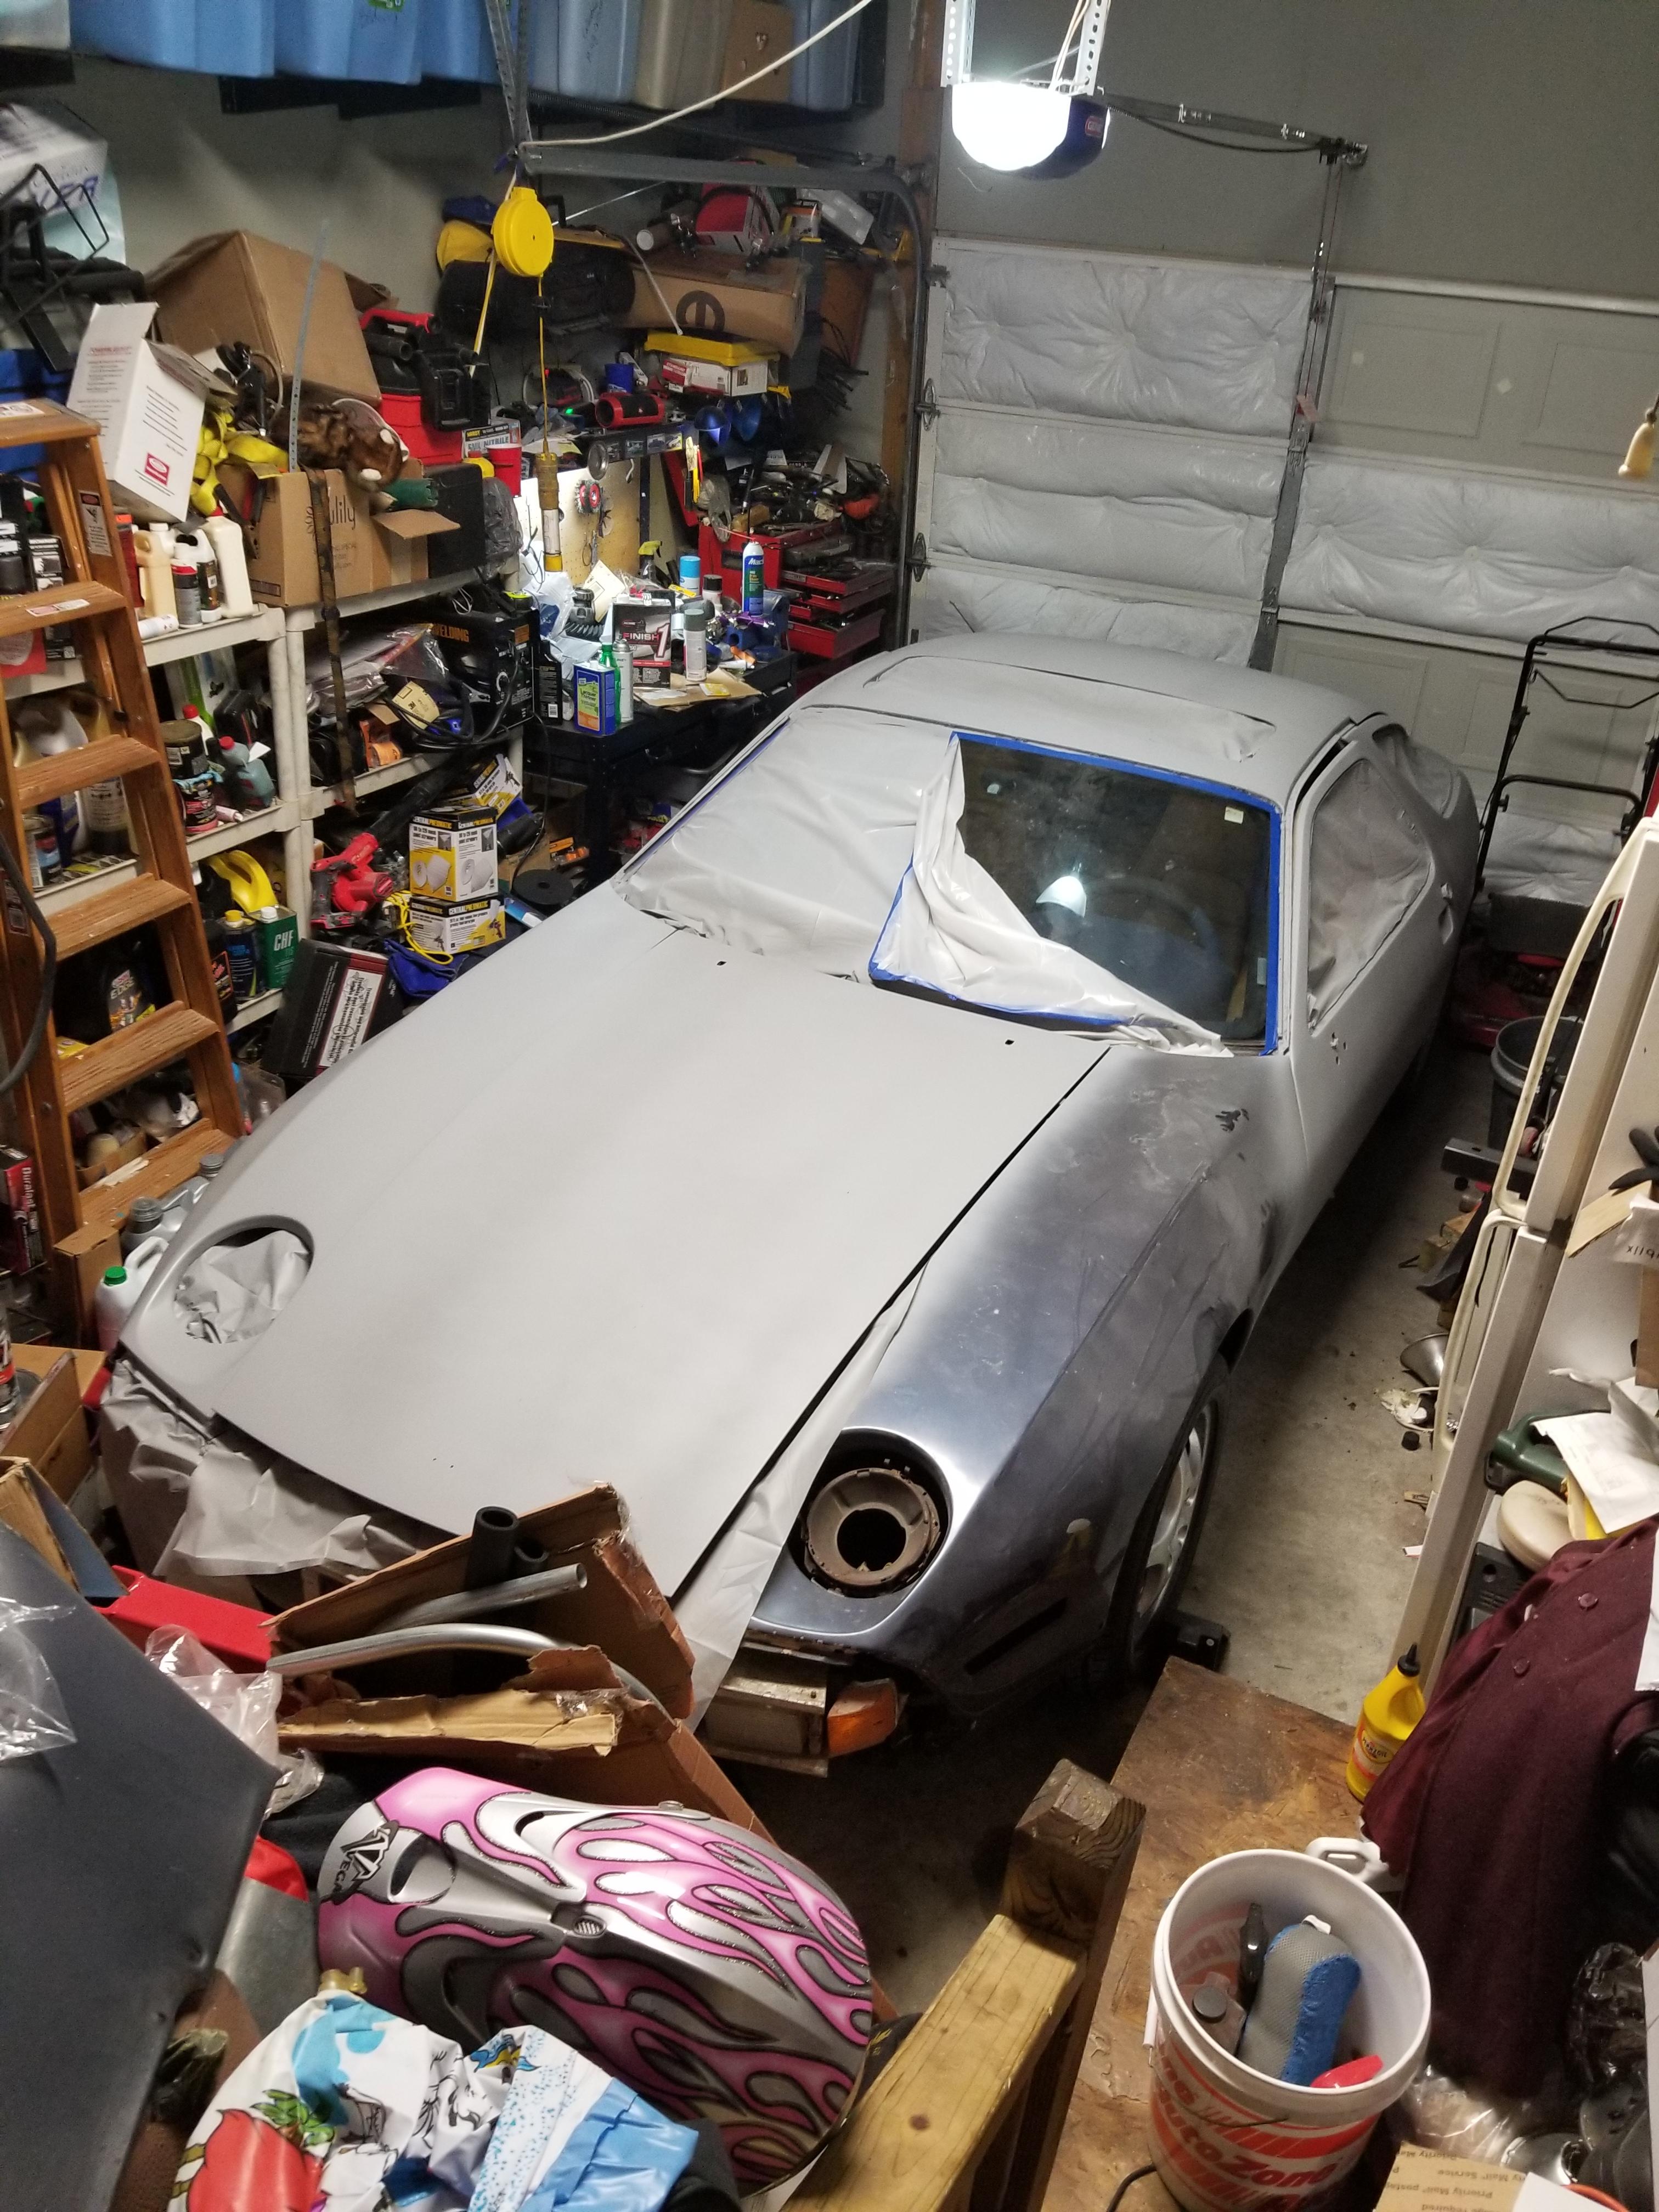
Apart from the washer nozzles and the hood emblem the car is all apart now.
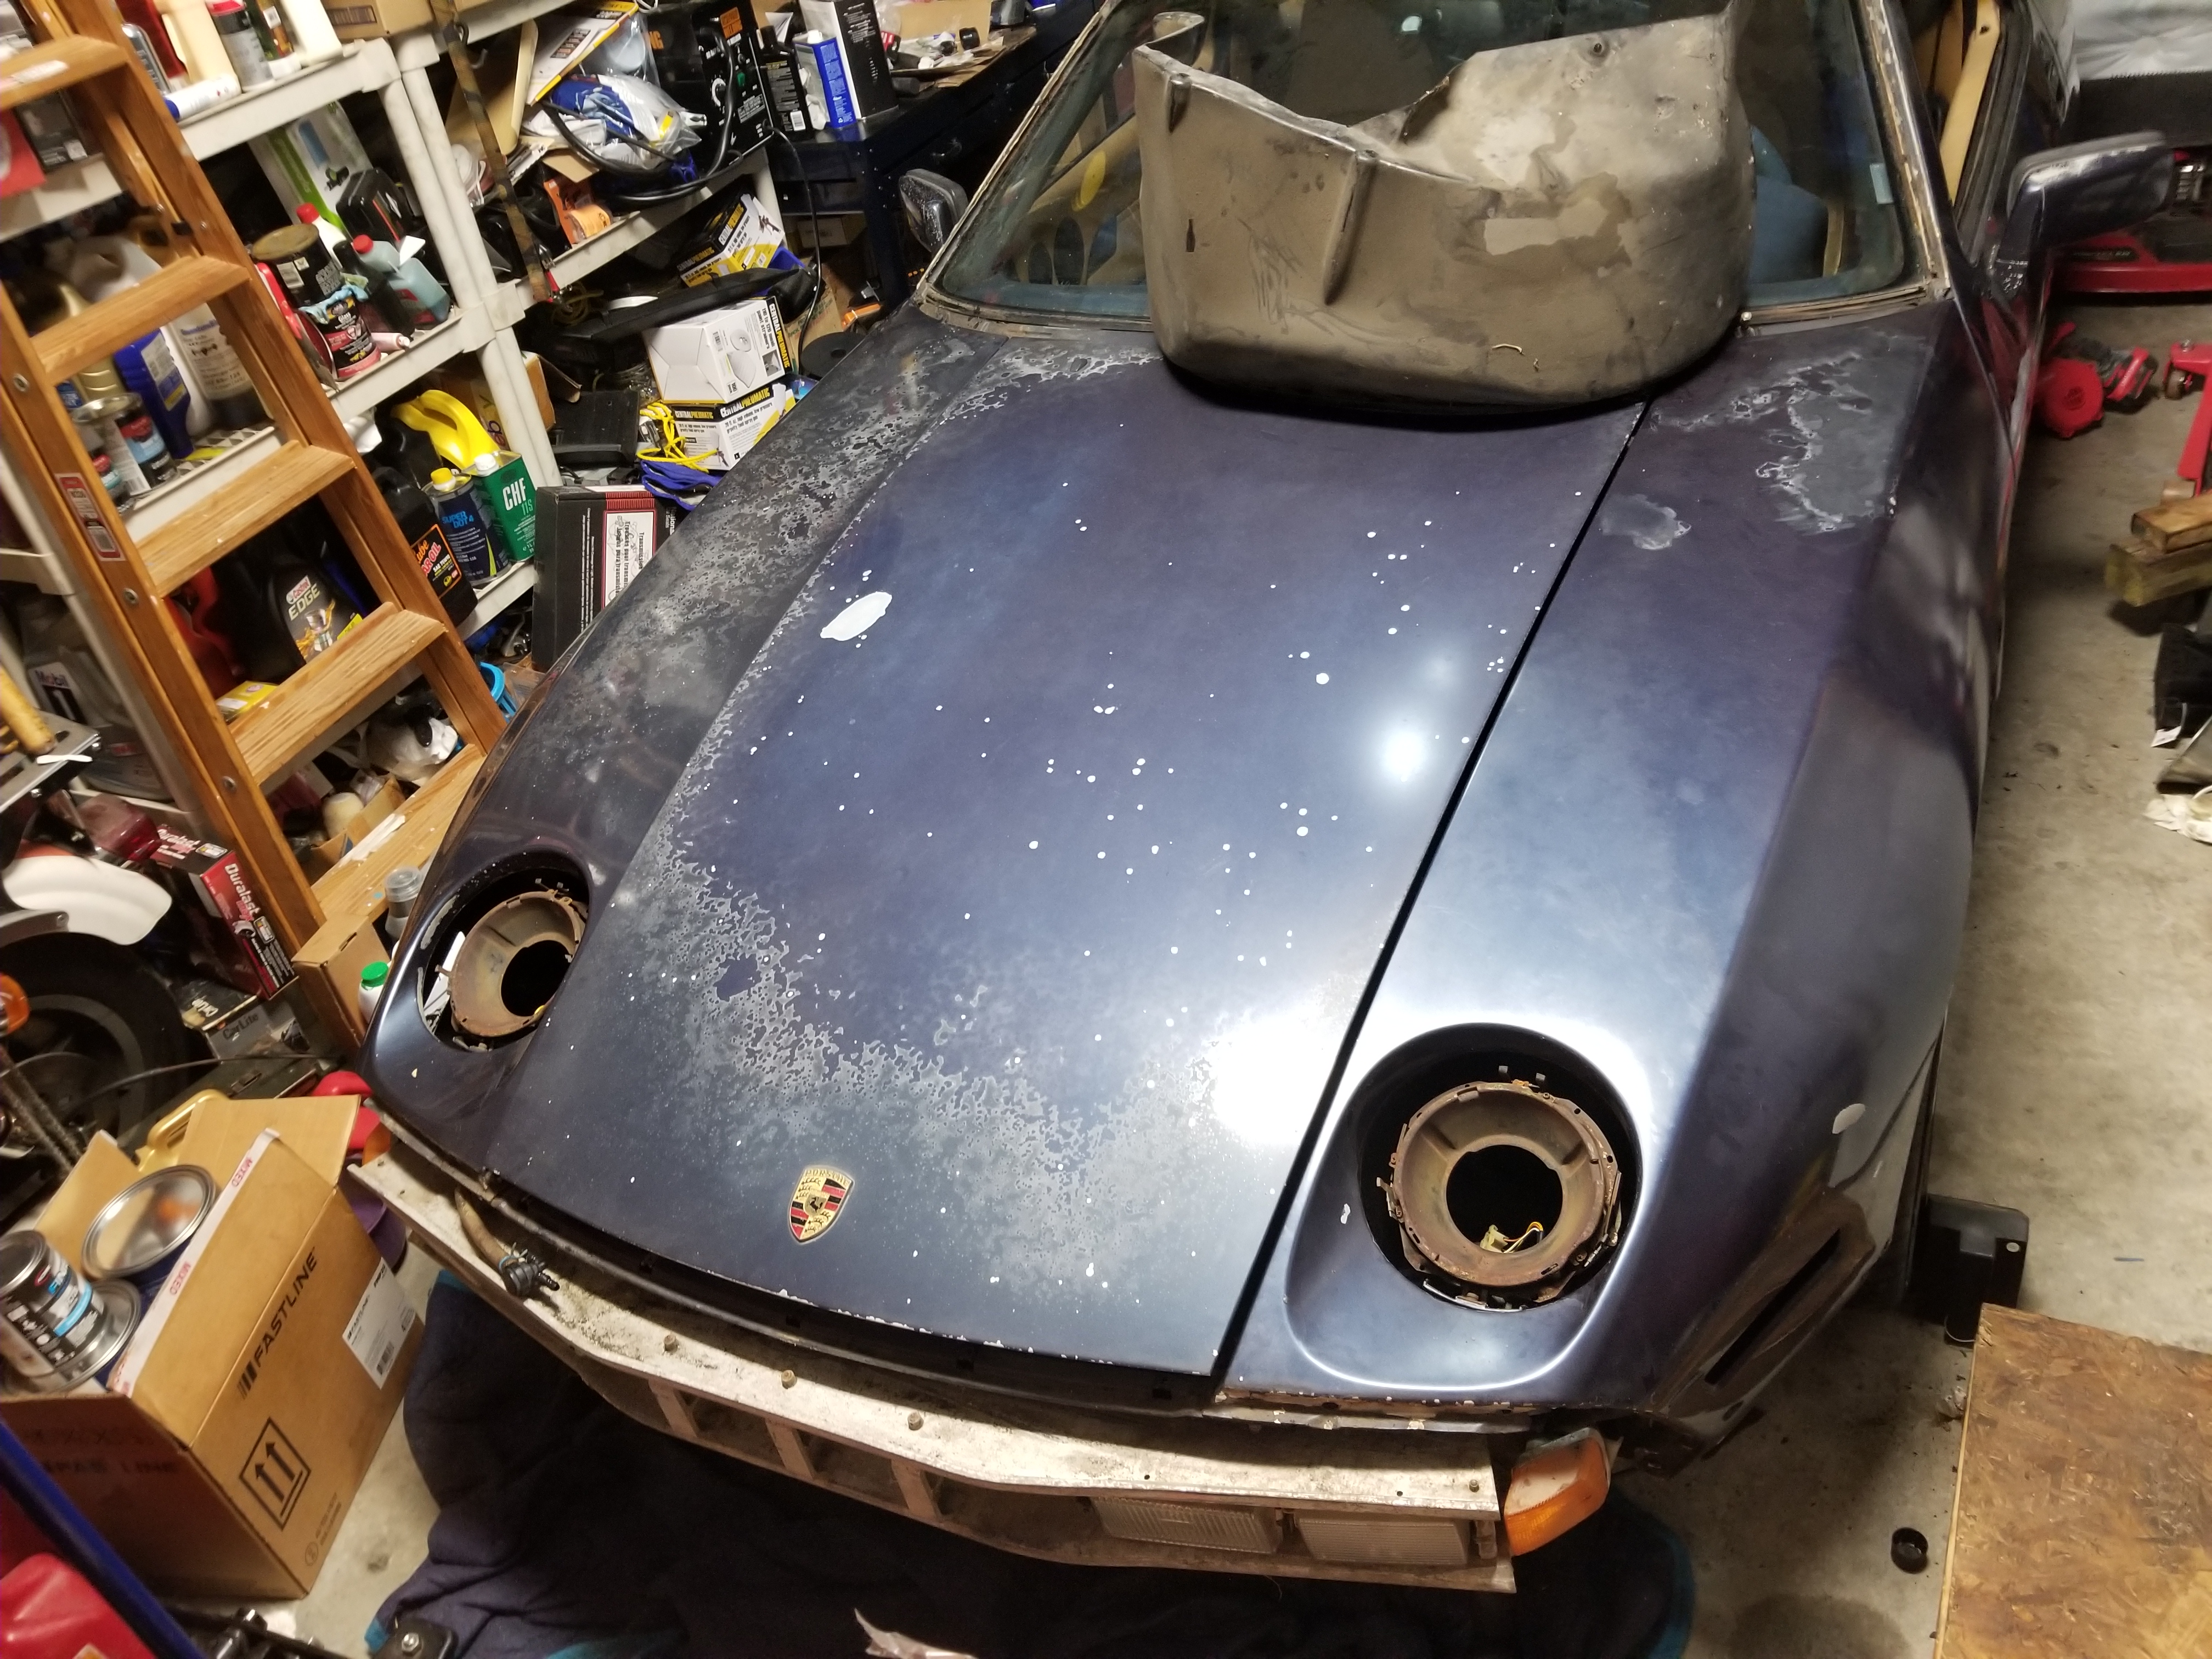
I didn't completely take the lock out. I took the screw out of the side of it and that gave it enough room to pull away from the door while still attached to all of the mechanism. I'll have plenty of room to sand and spray around it.
So my plan for tomorrow is to hopefully get those last few things off the hood, then get the rest of the body/prep work knocked out. Still have to fix the small dent on the passengers side quarterpanel. Also need to remove the driver's side fender at some point since I'll be putting on the other one. Then it's mostly down to sanding down what's flaking, smoothing out everything with some glaze, and them priming the whole car. If that all goes well tomorrow I'm hoping that sunday I can spray the sealer, color, and clear onto the car.
06-29-2020, 10:26 PM
#268
Burning Brakes
Thread Starter
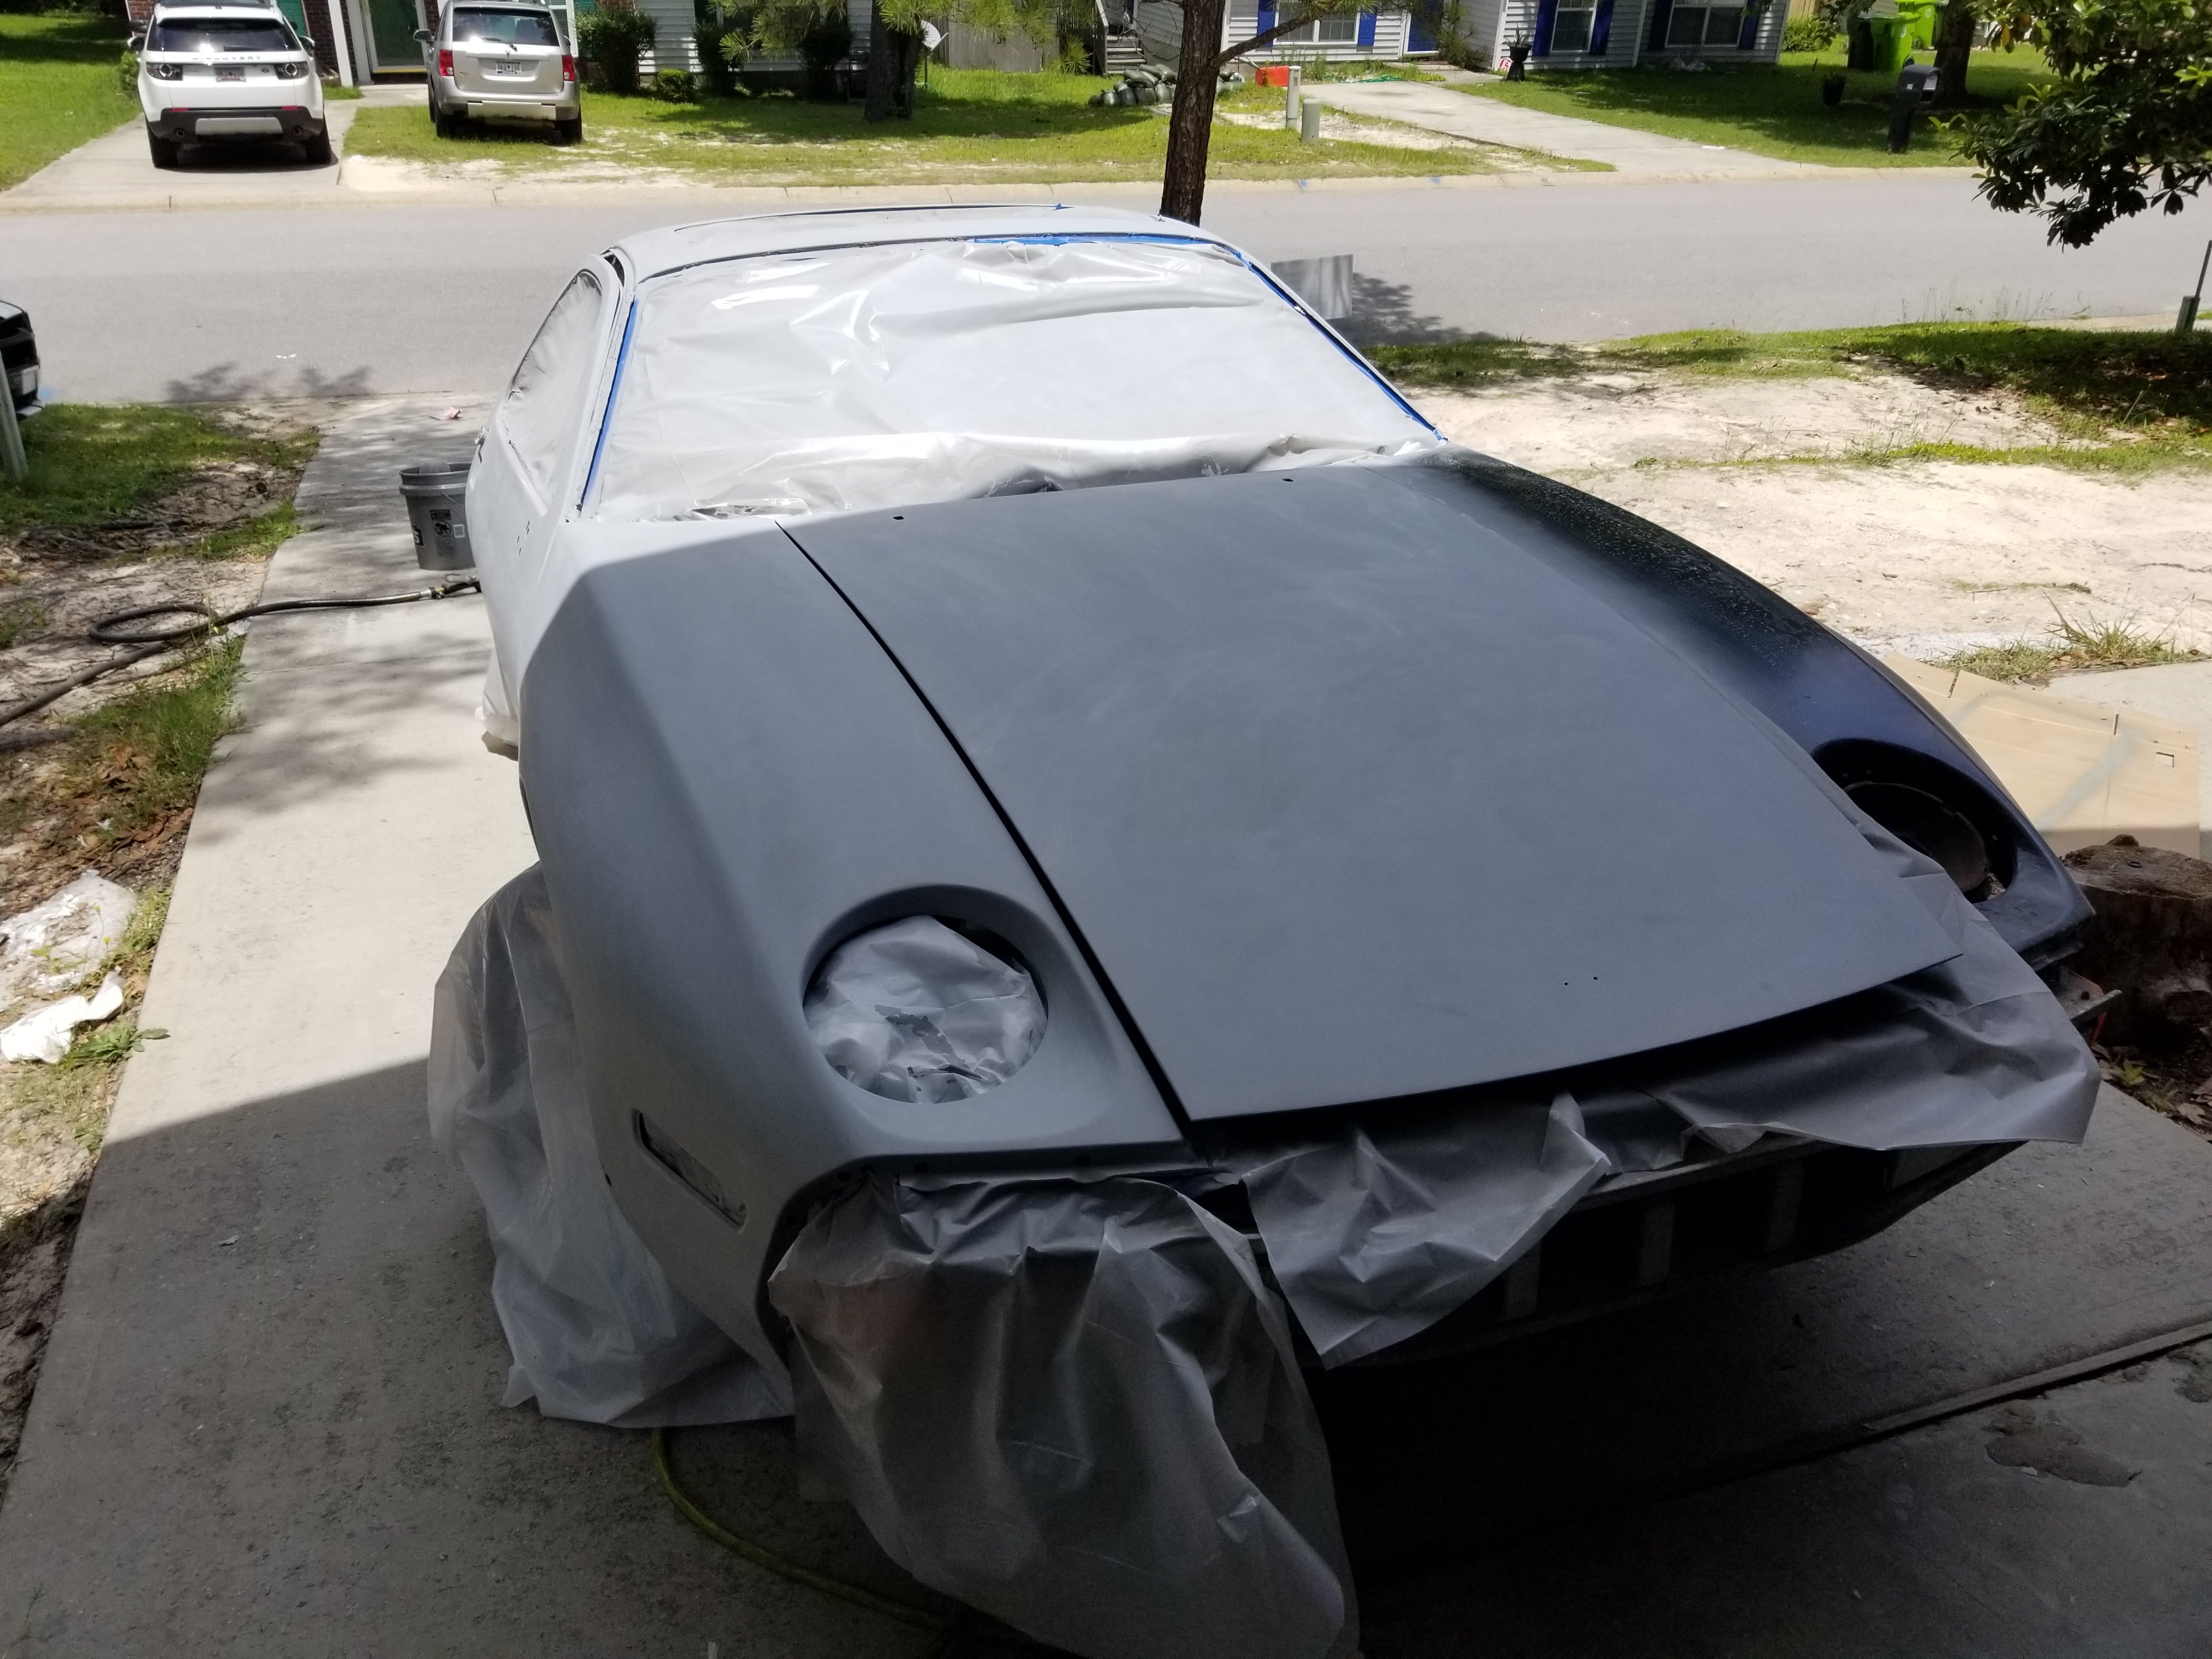
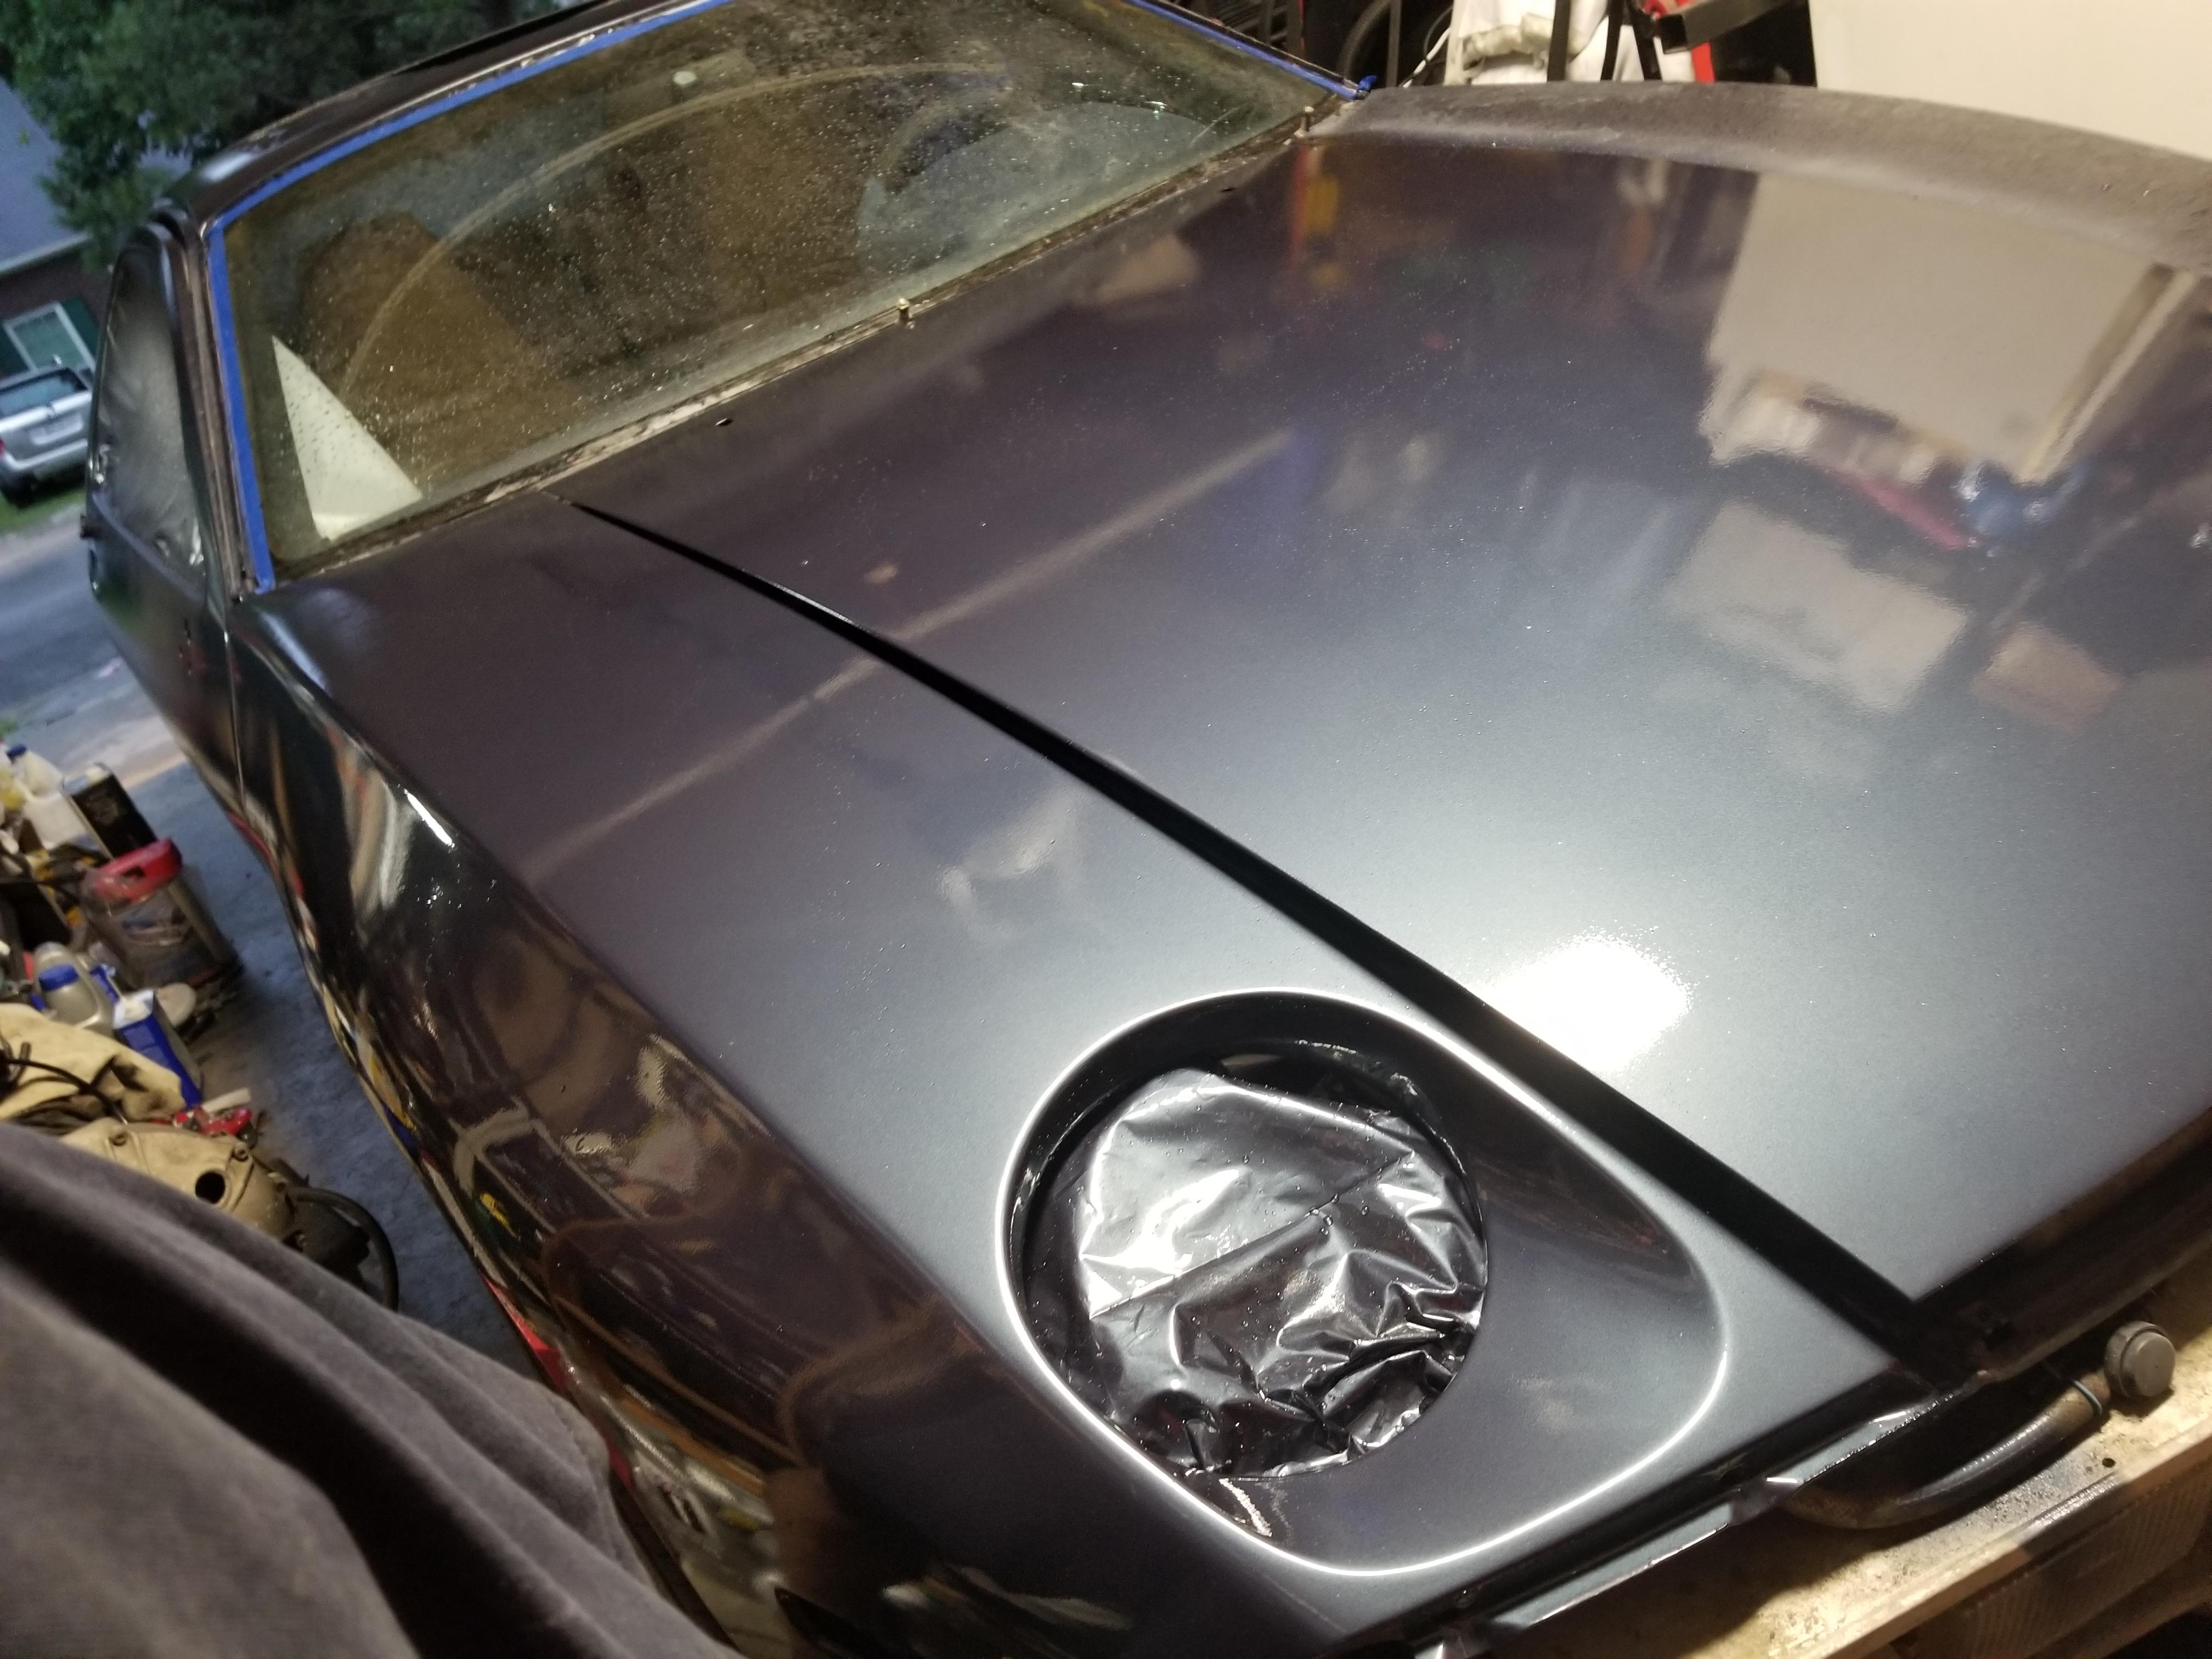
Got the car painted this weekend. I'm gonna have to at least sand and reclear the bumpers and fender that were separate from the car. A surprise storm got them before they were dry. Anyway, continuing from last time. I forgot to take pictures at some points along the way due to time constraints, fatigue, and general incompetence.
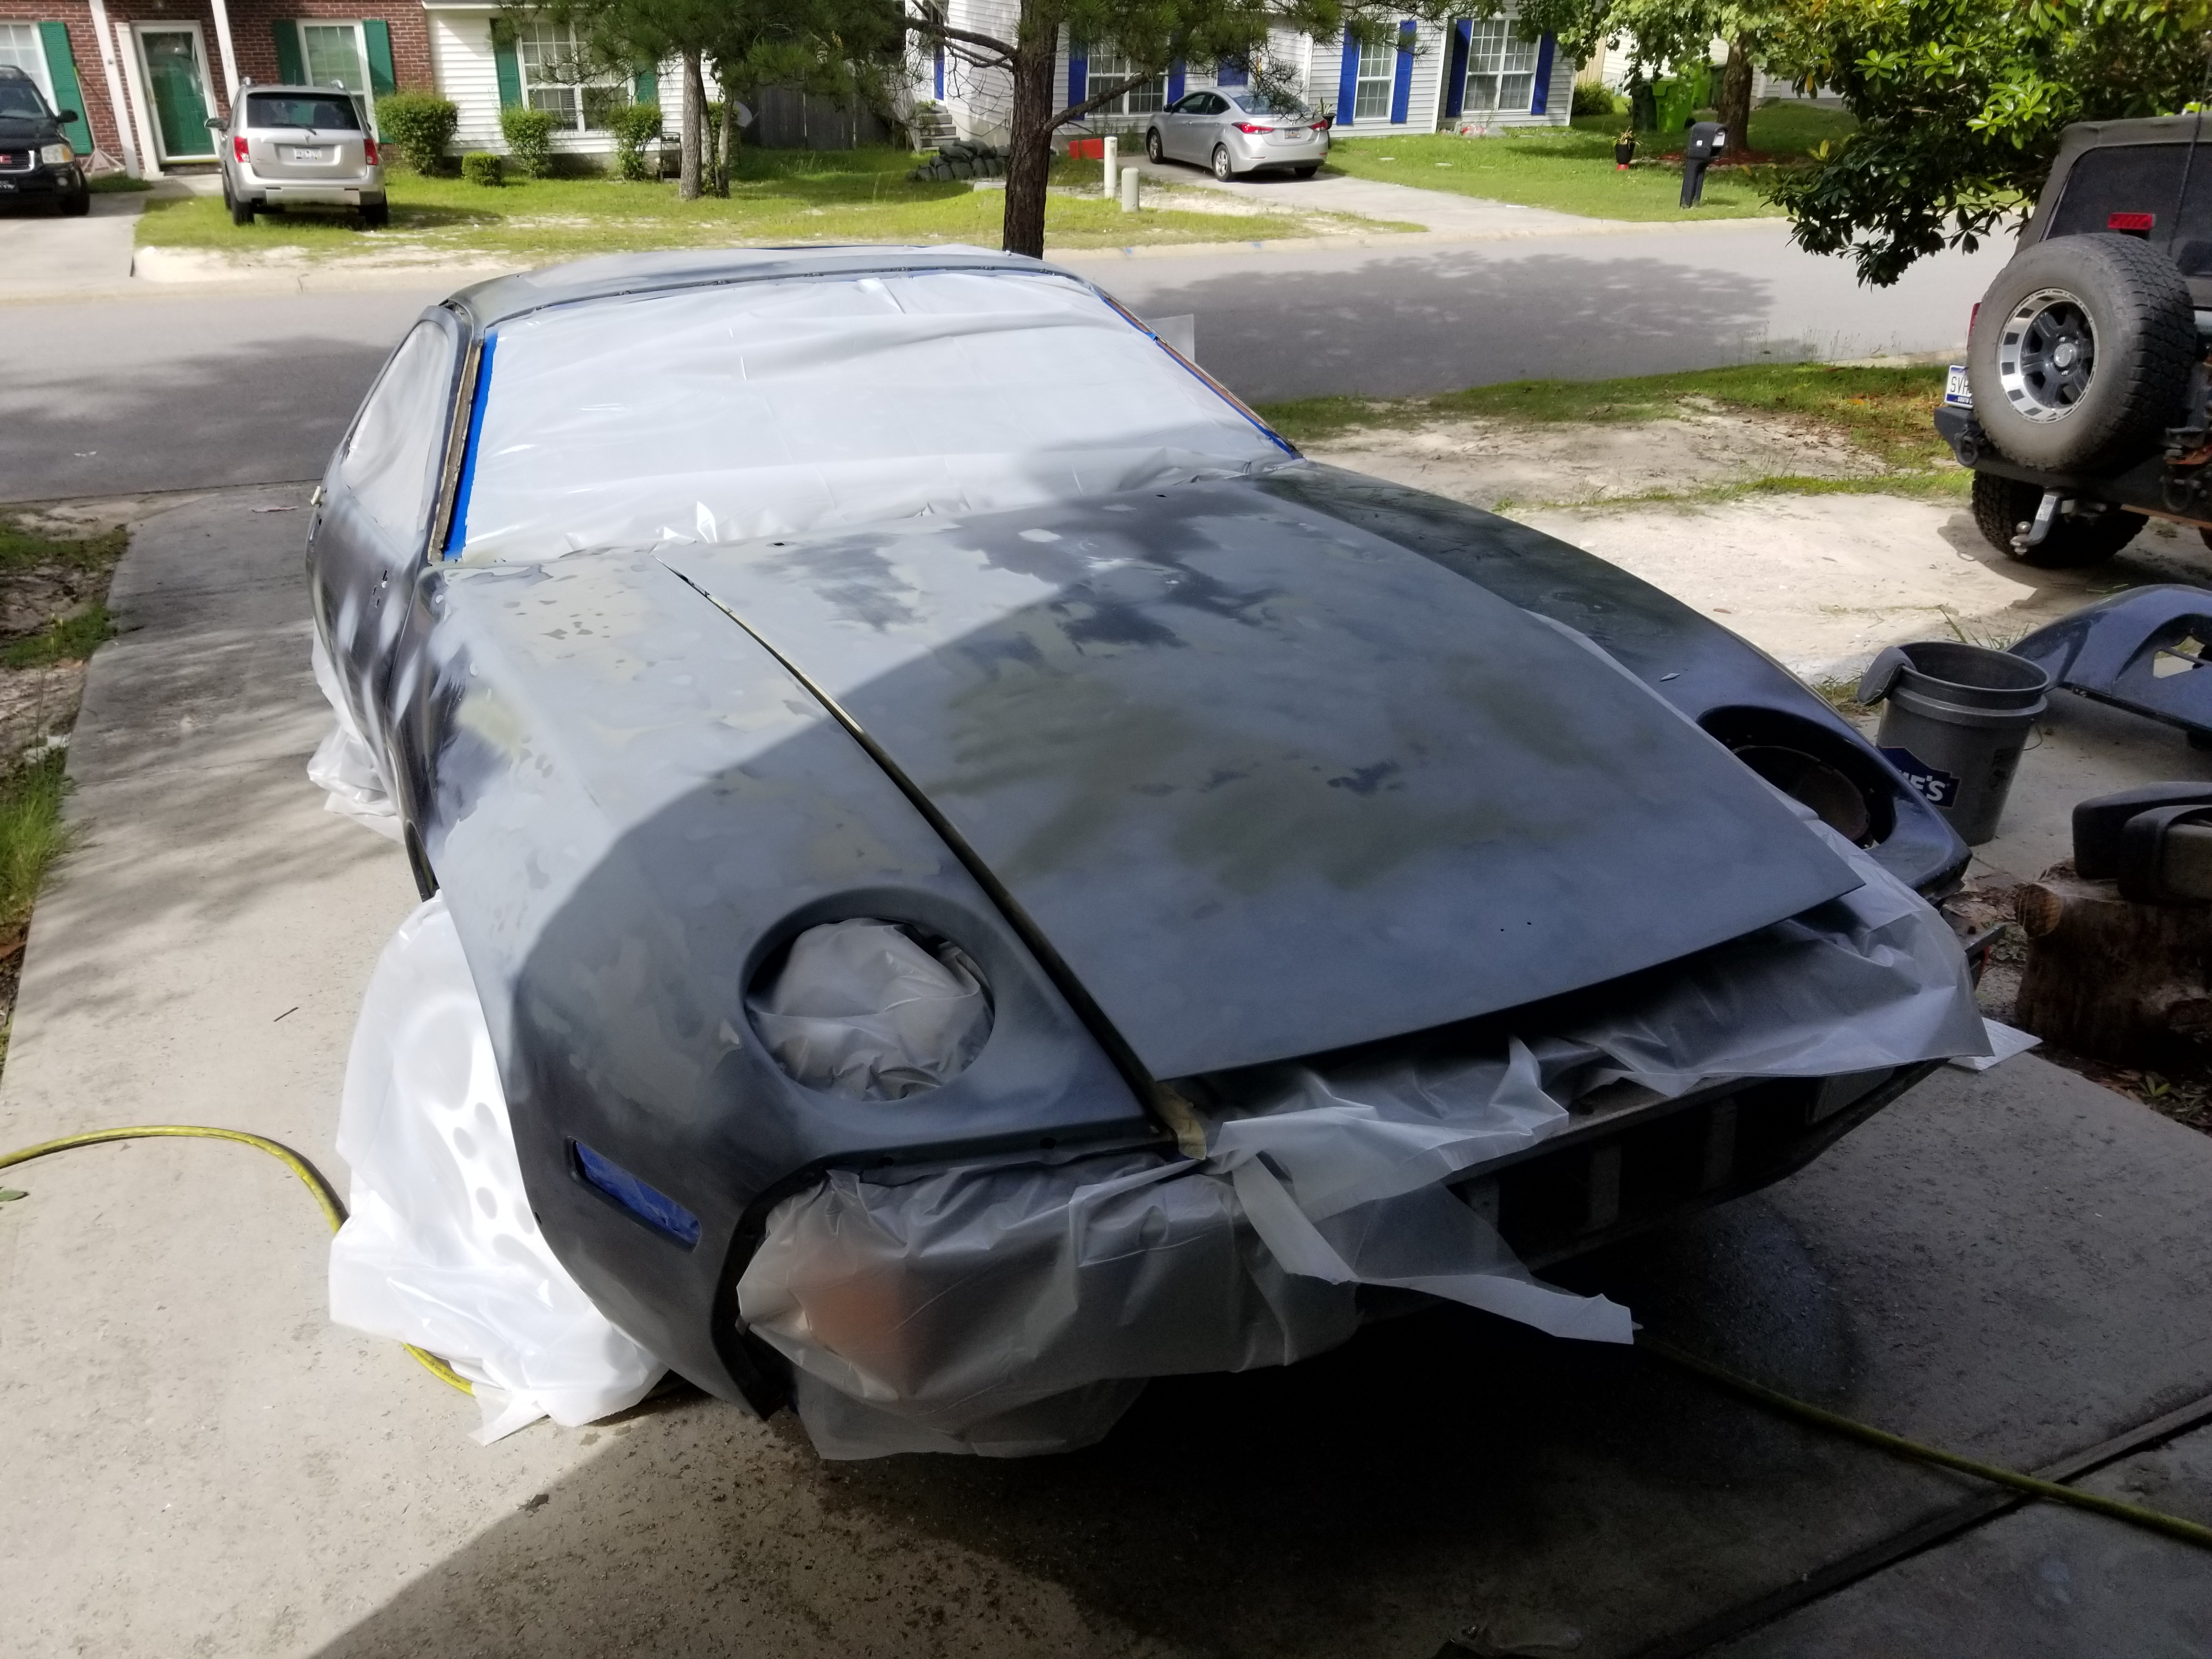
Here's getting the chips that were down to metal (mainly on the hood and fender) on the car.
And getting it masked off.
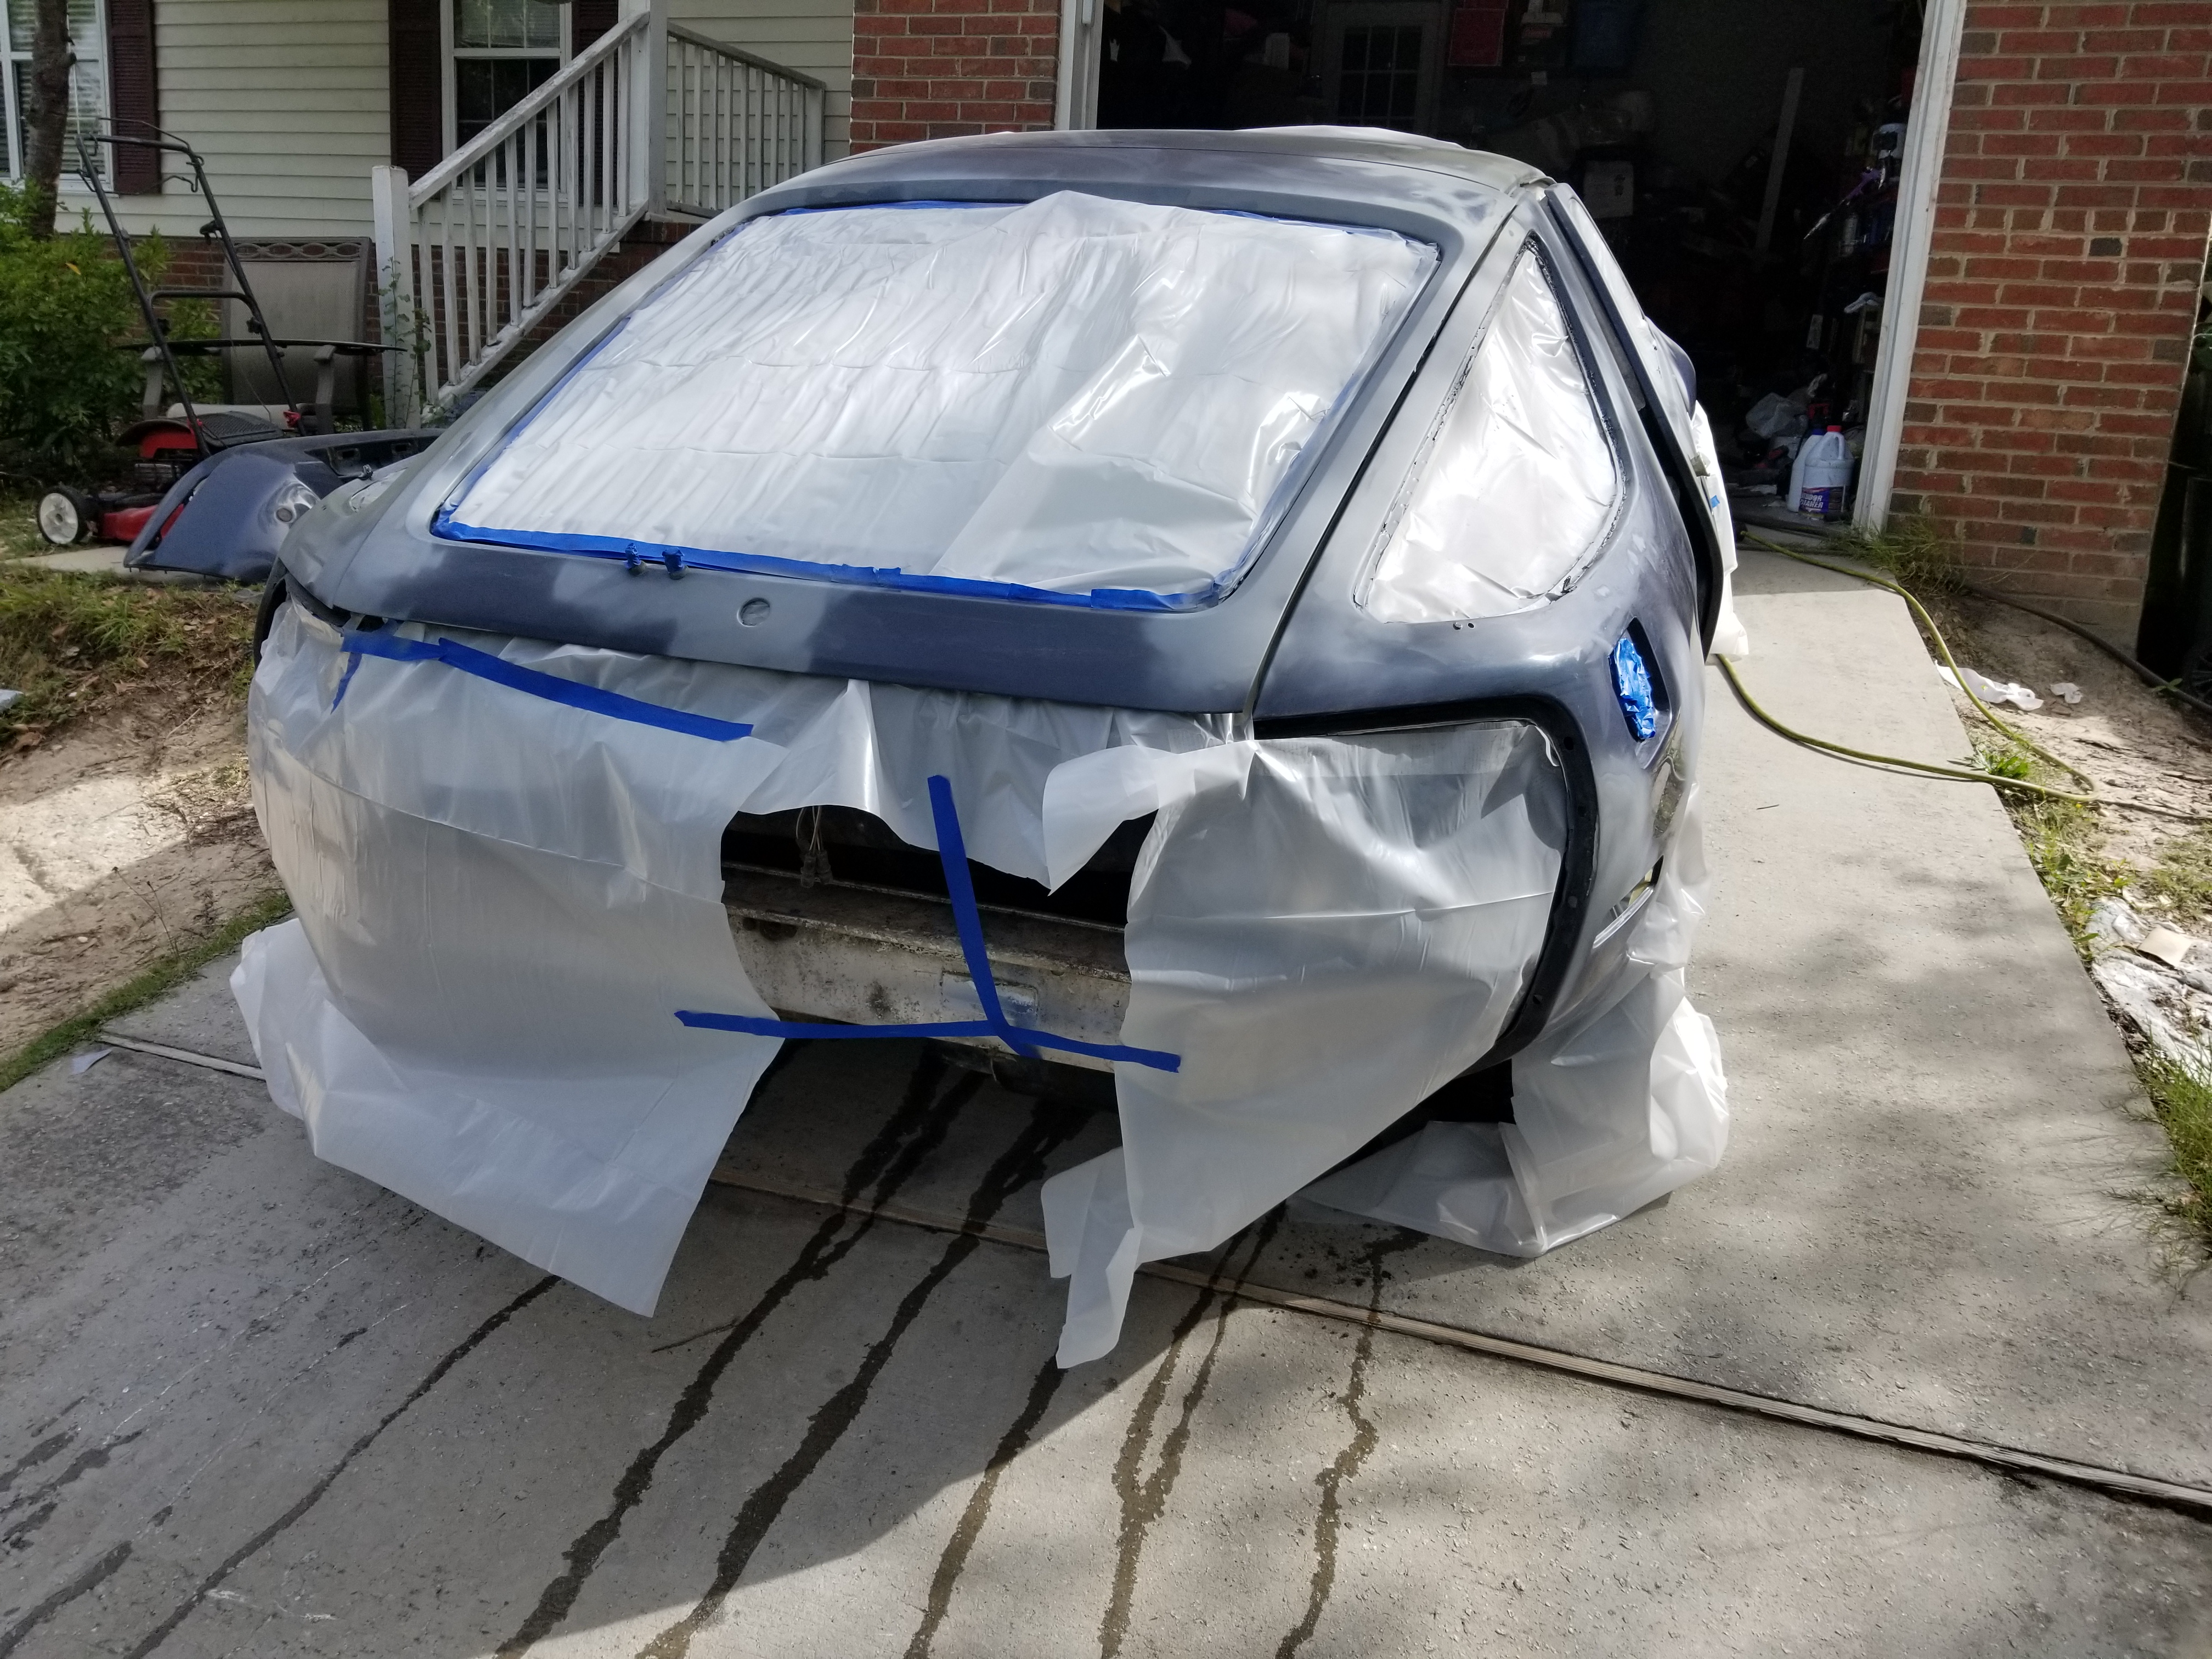
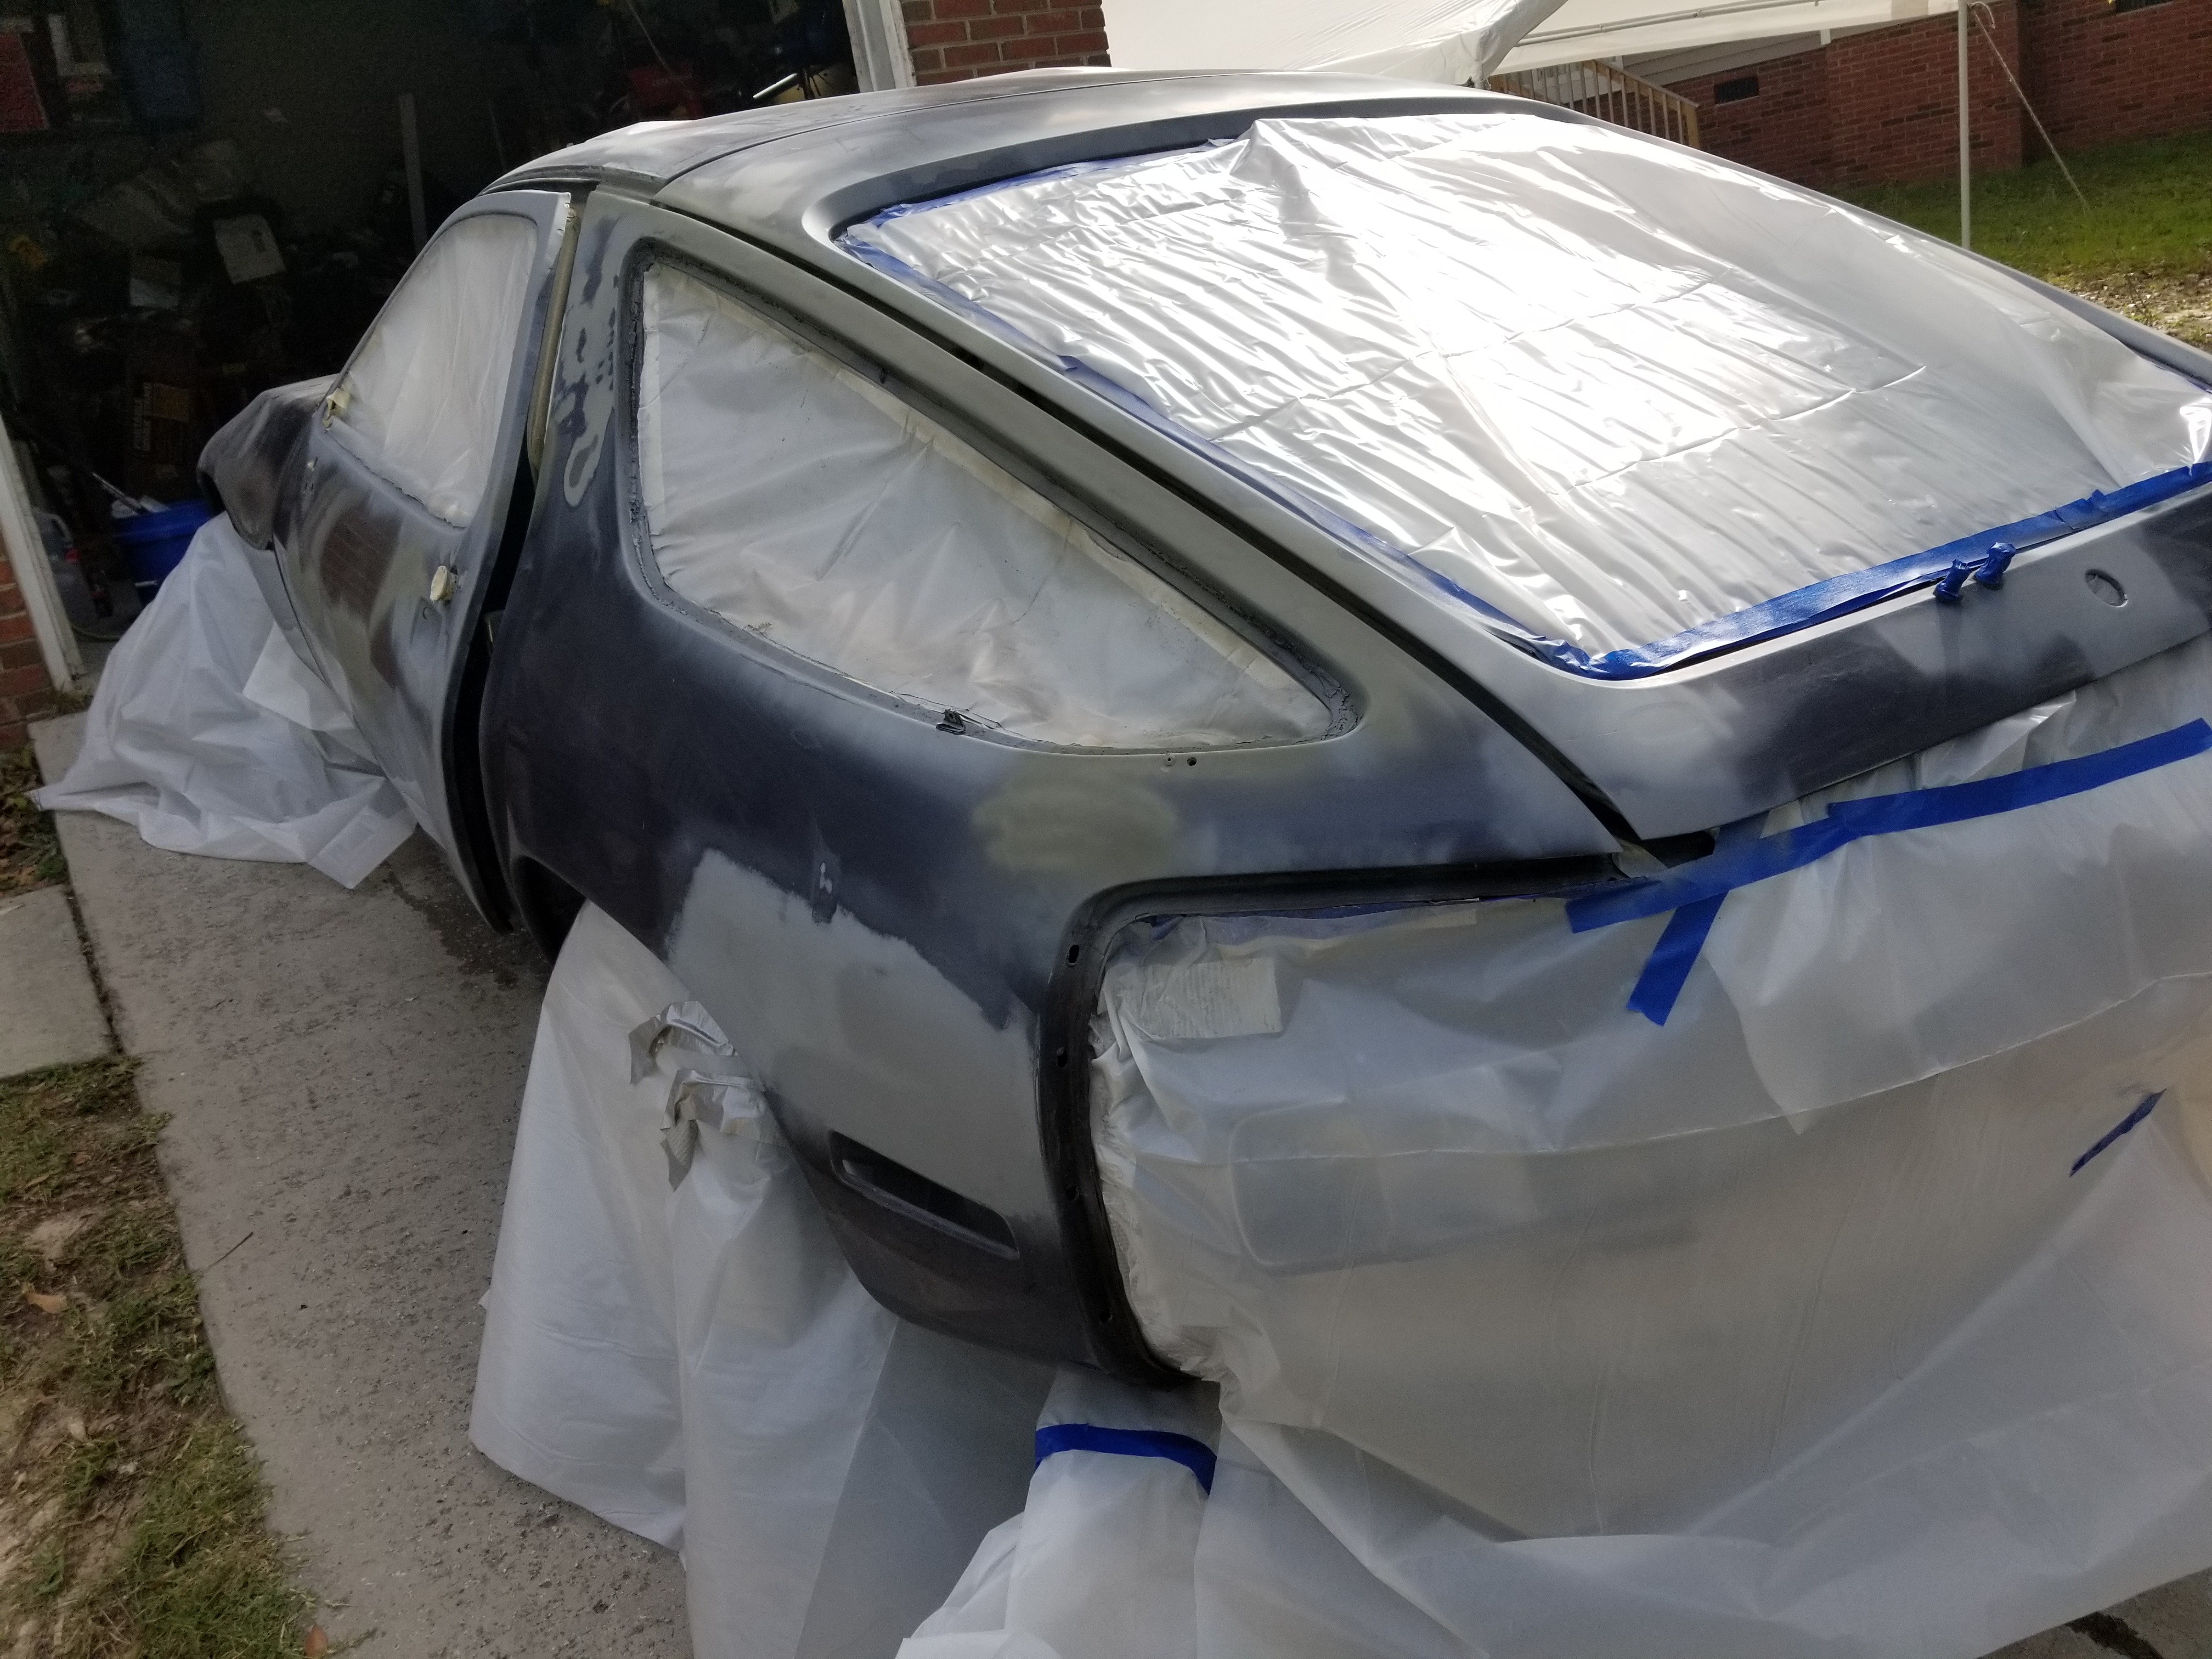
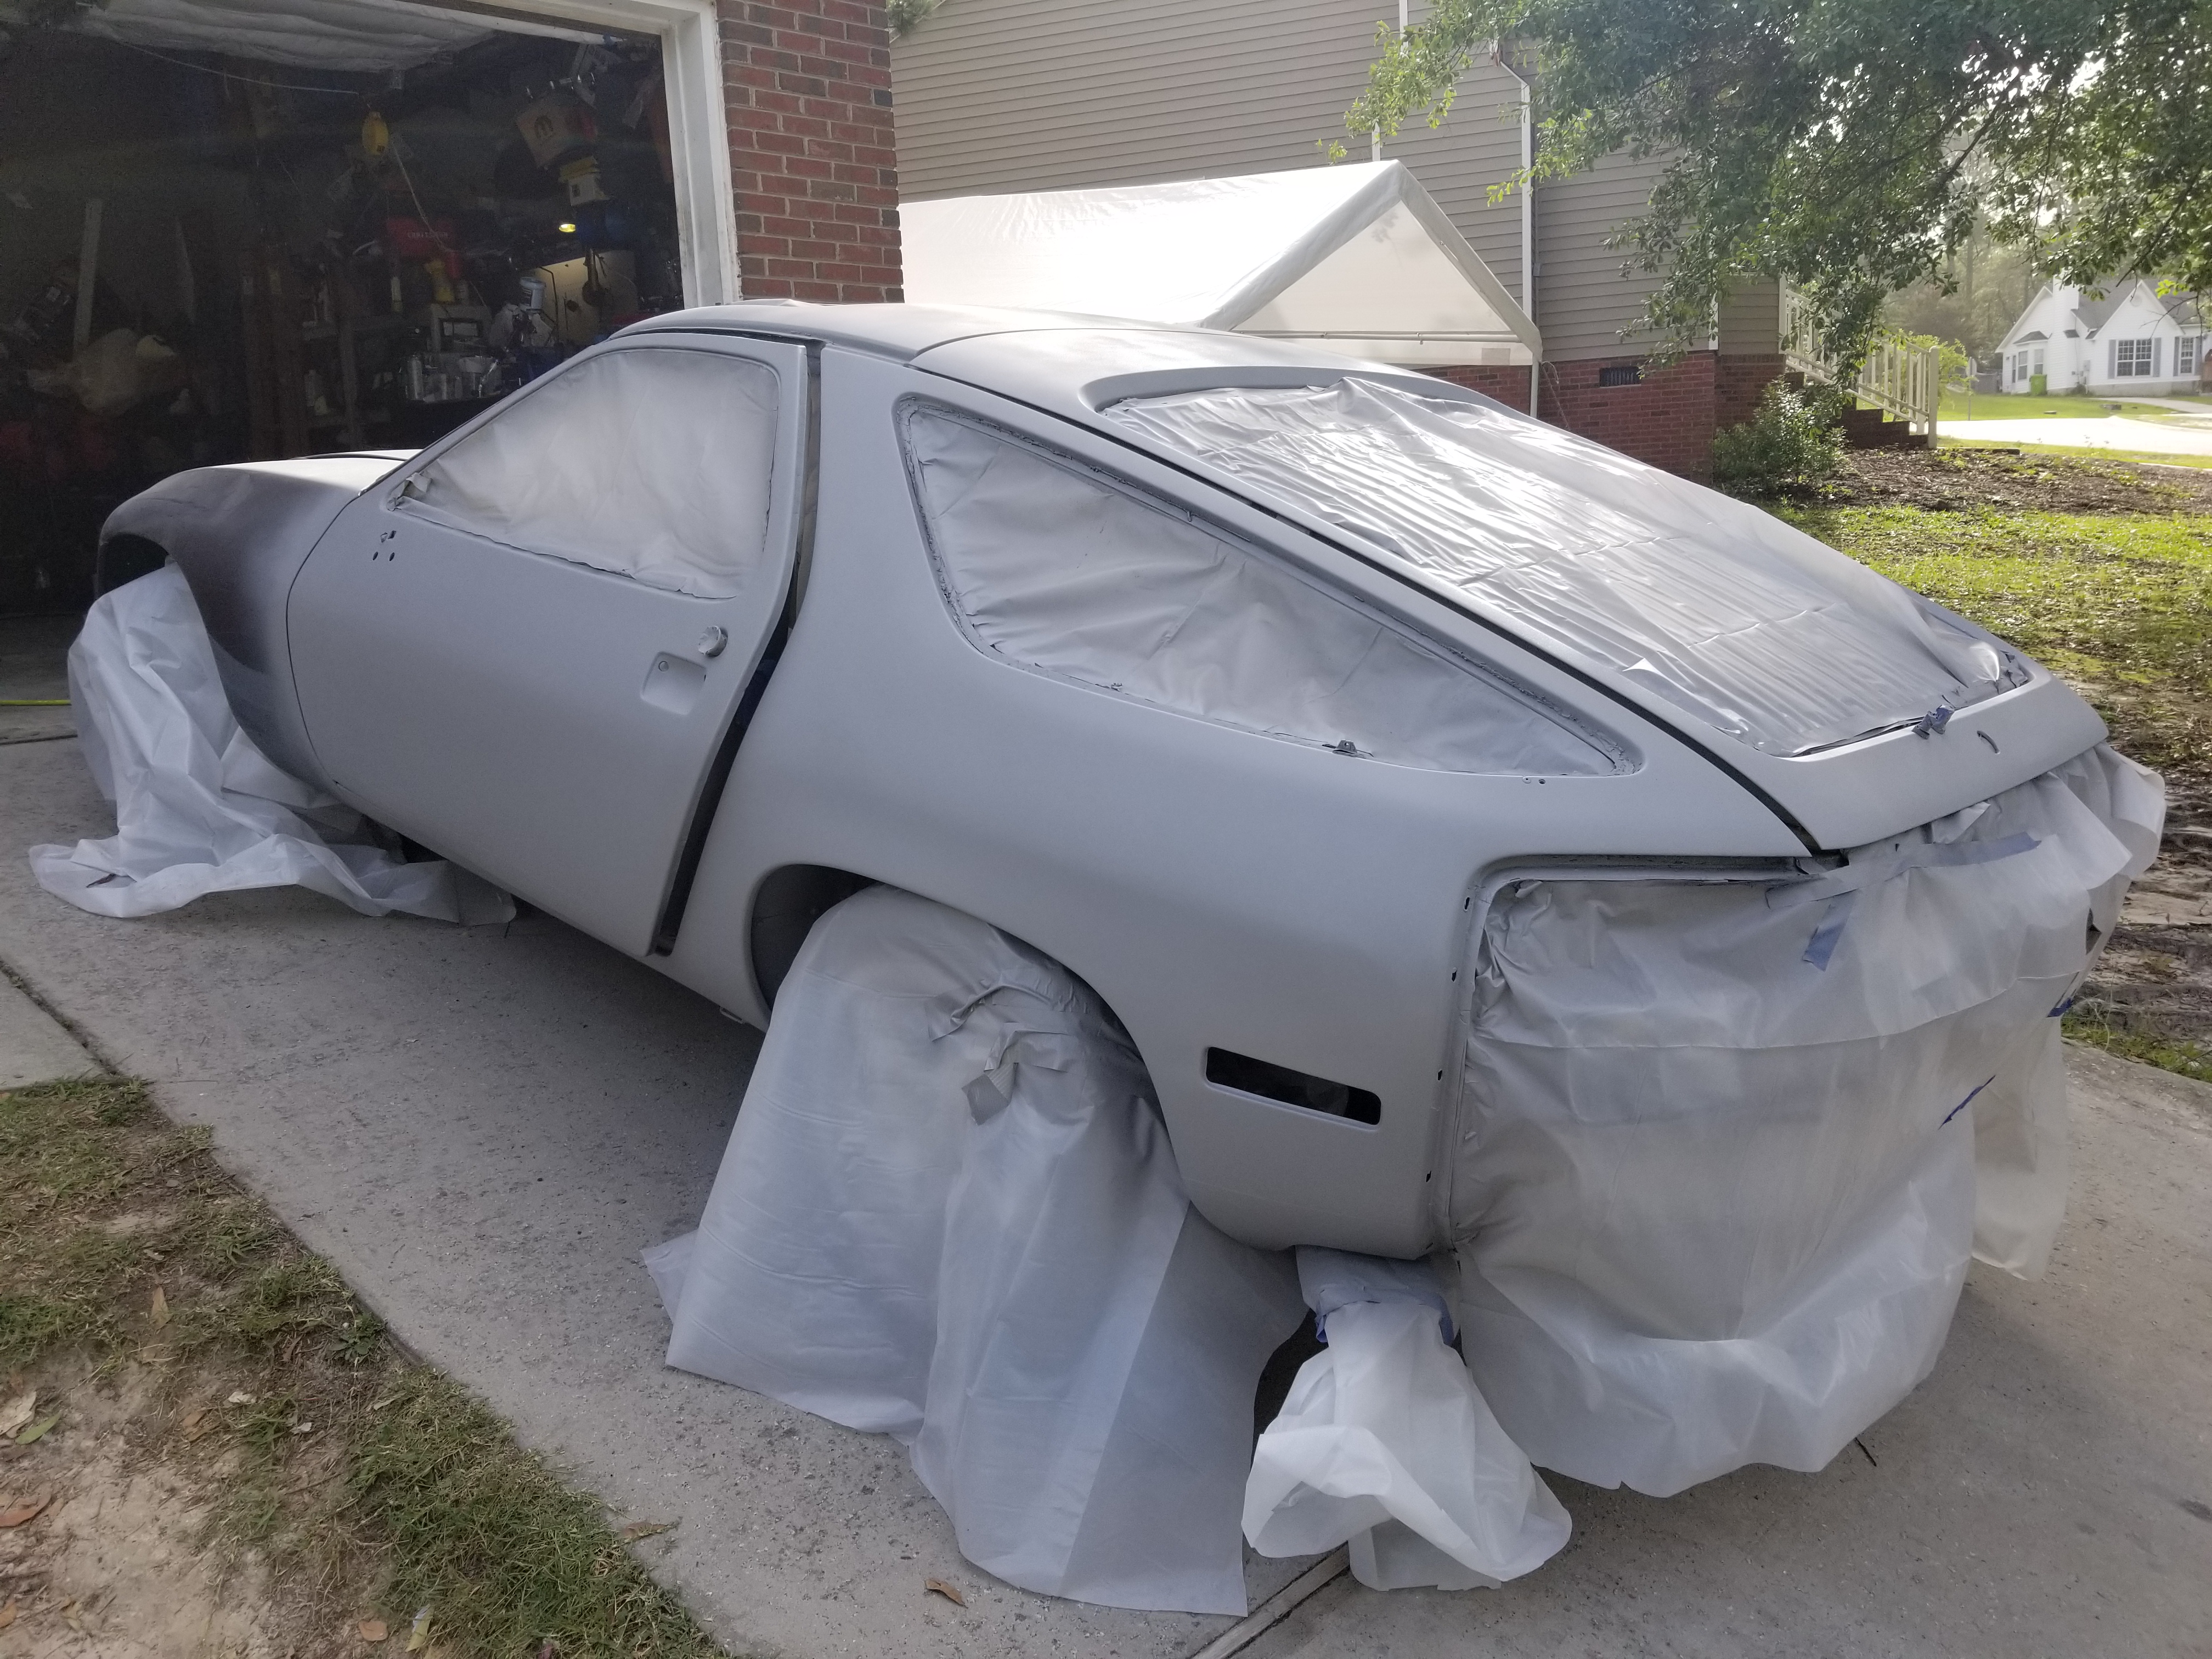
Here's after priming.

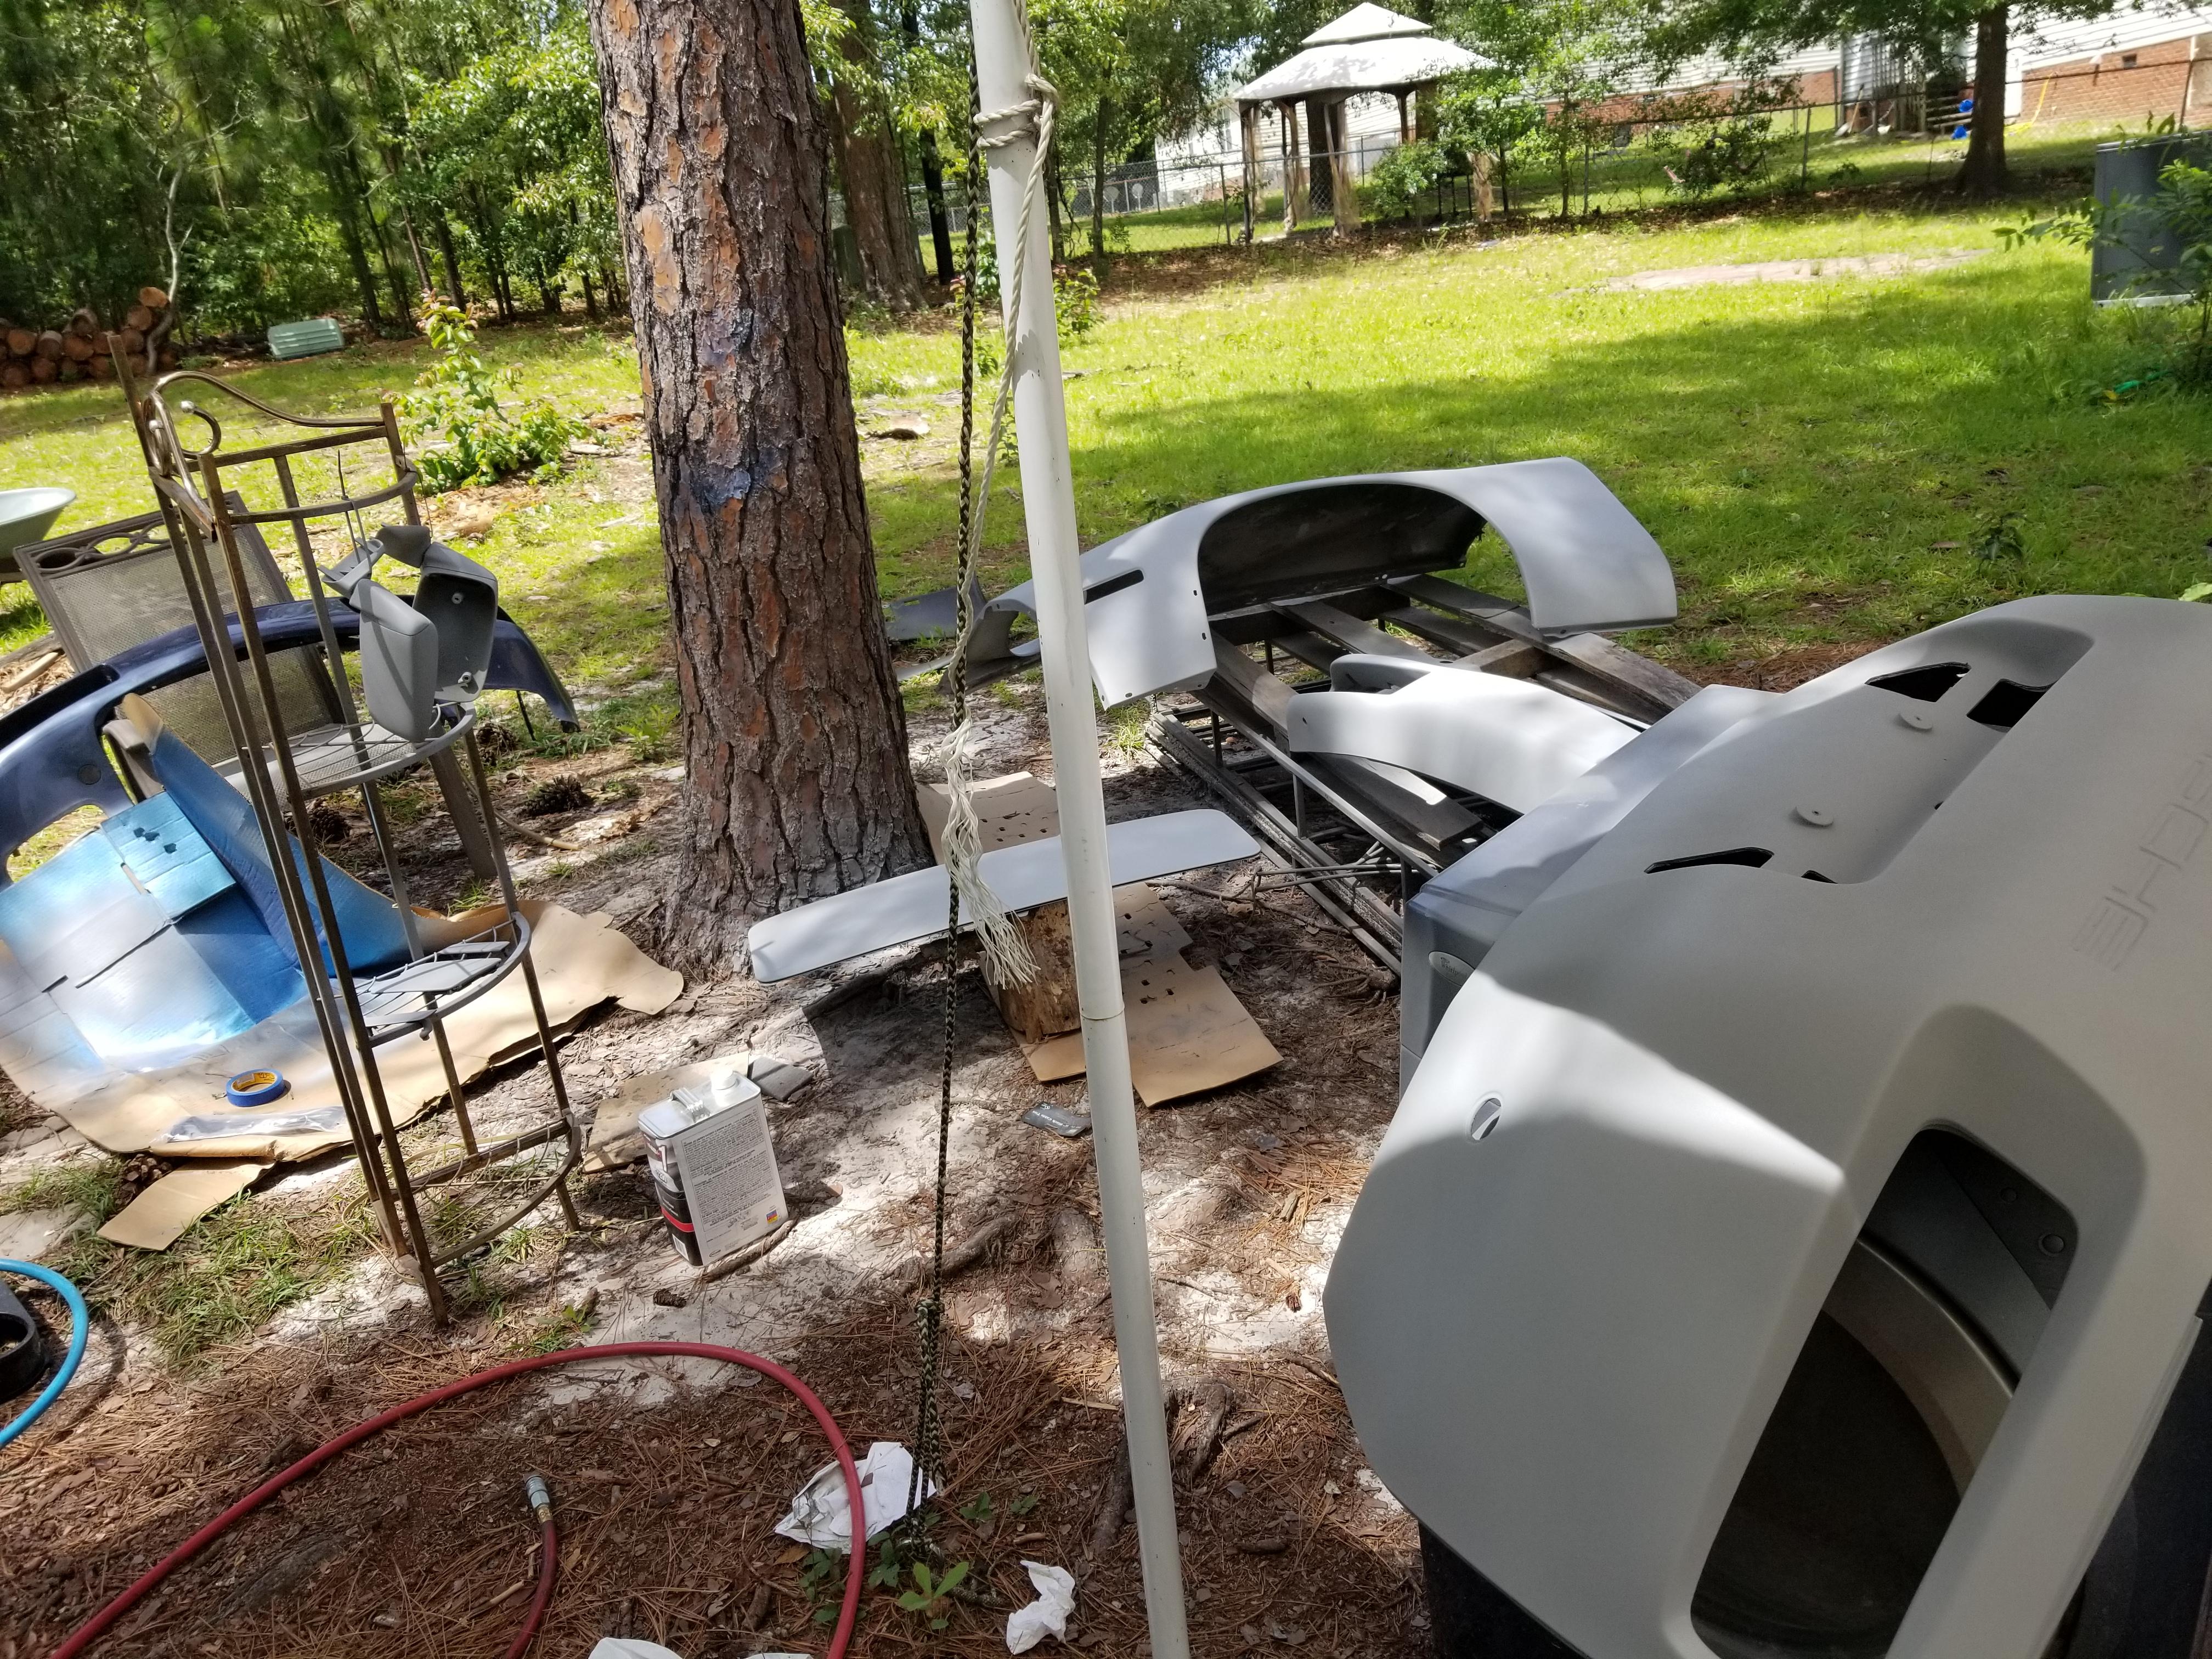
And the separate parts. Yes they're near the tree, but also were shielded by the carport (which turned out not to be adequate for 30 mph wind gusts).
And the car back in the garage for the night.
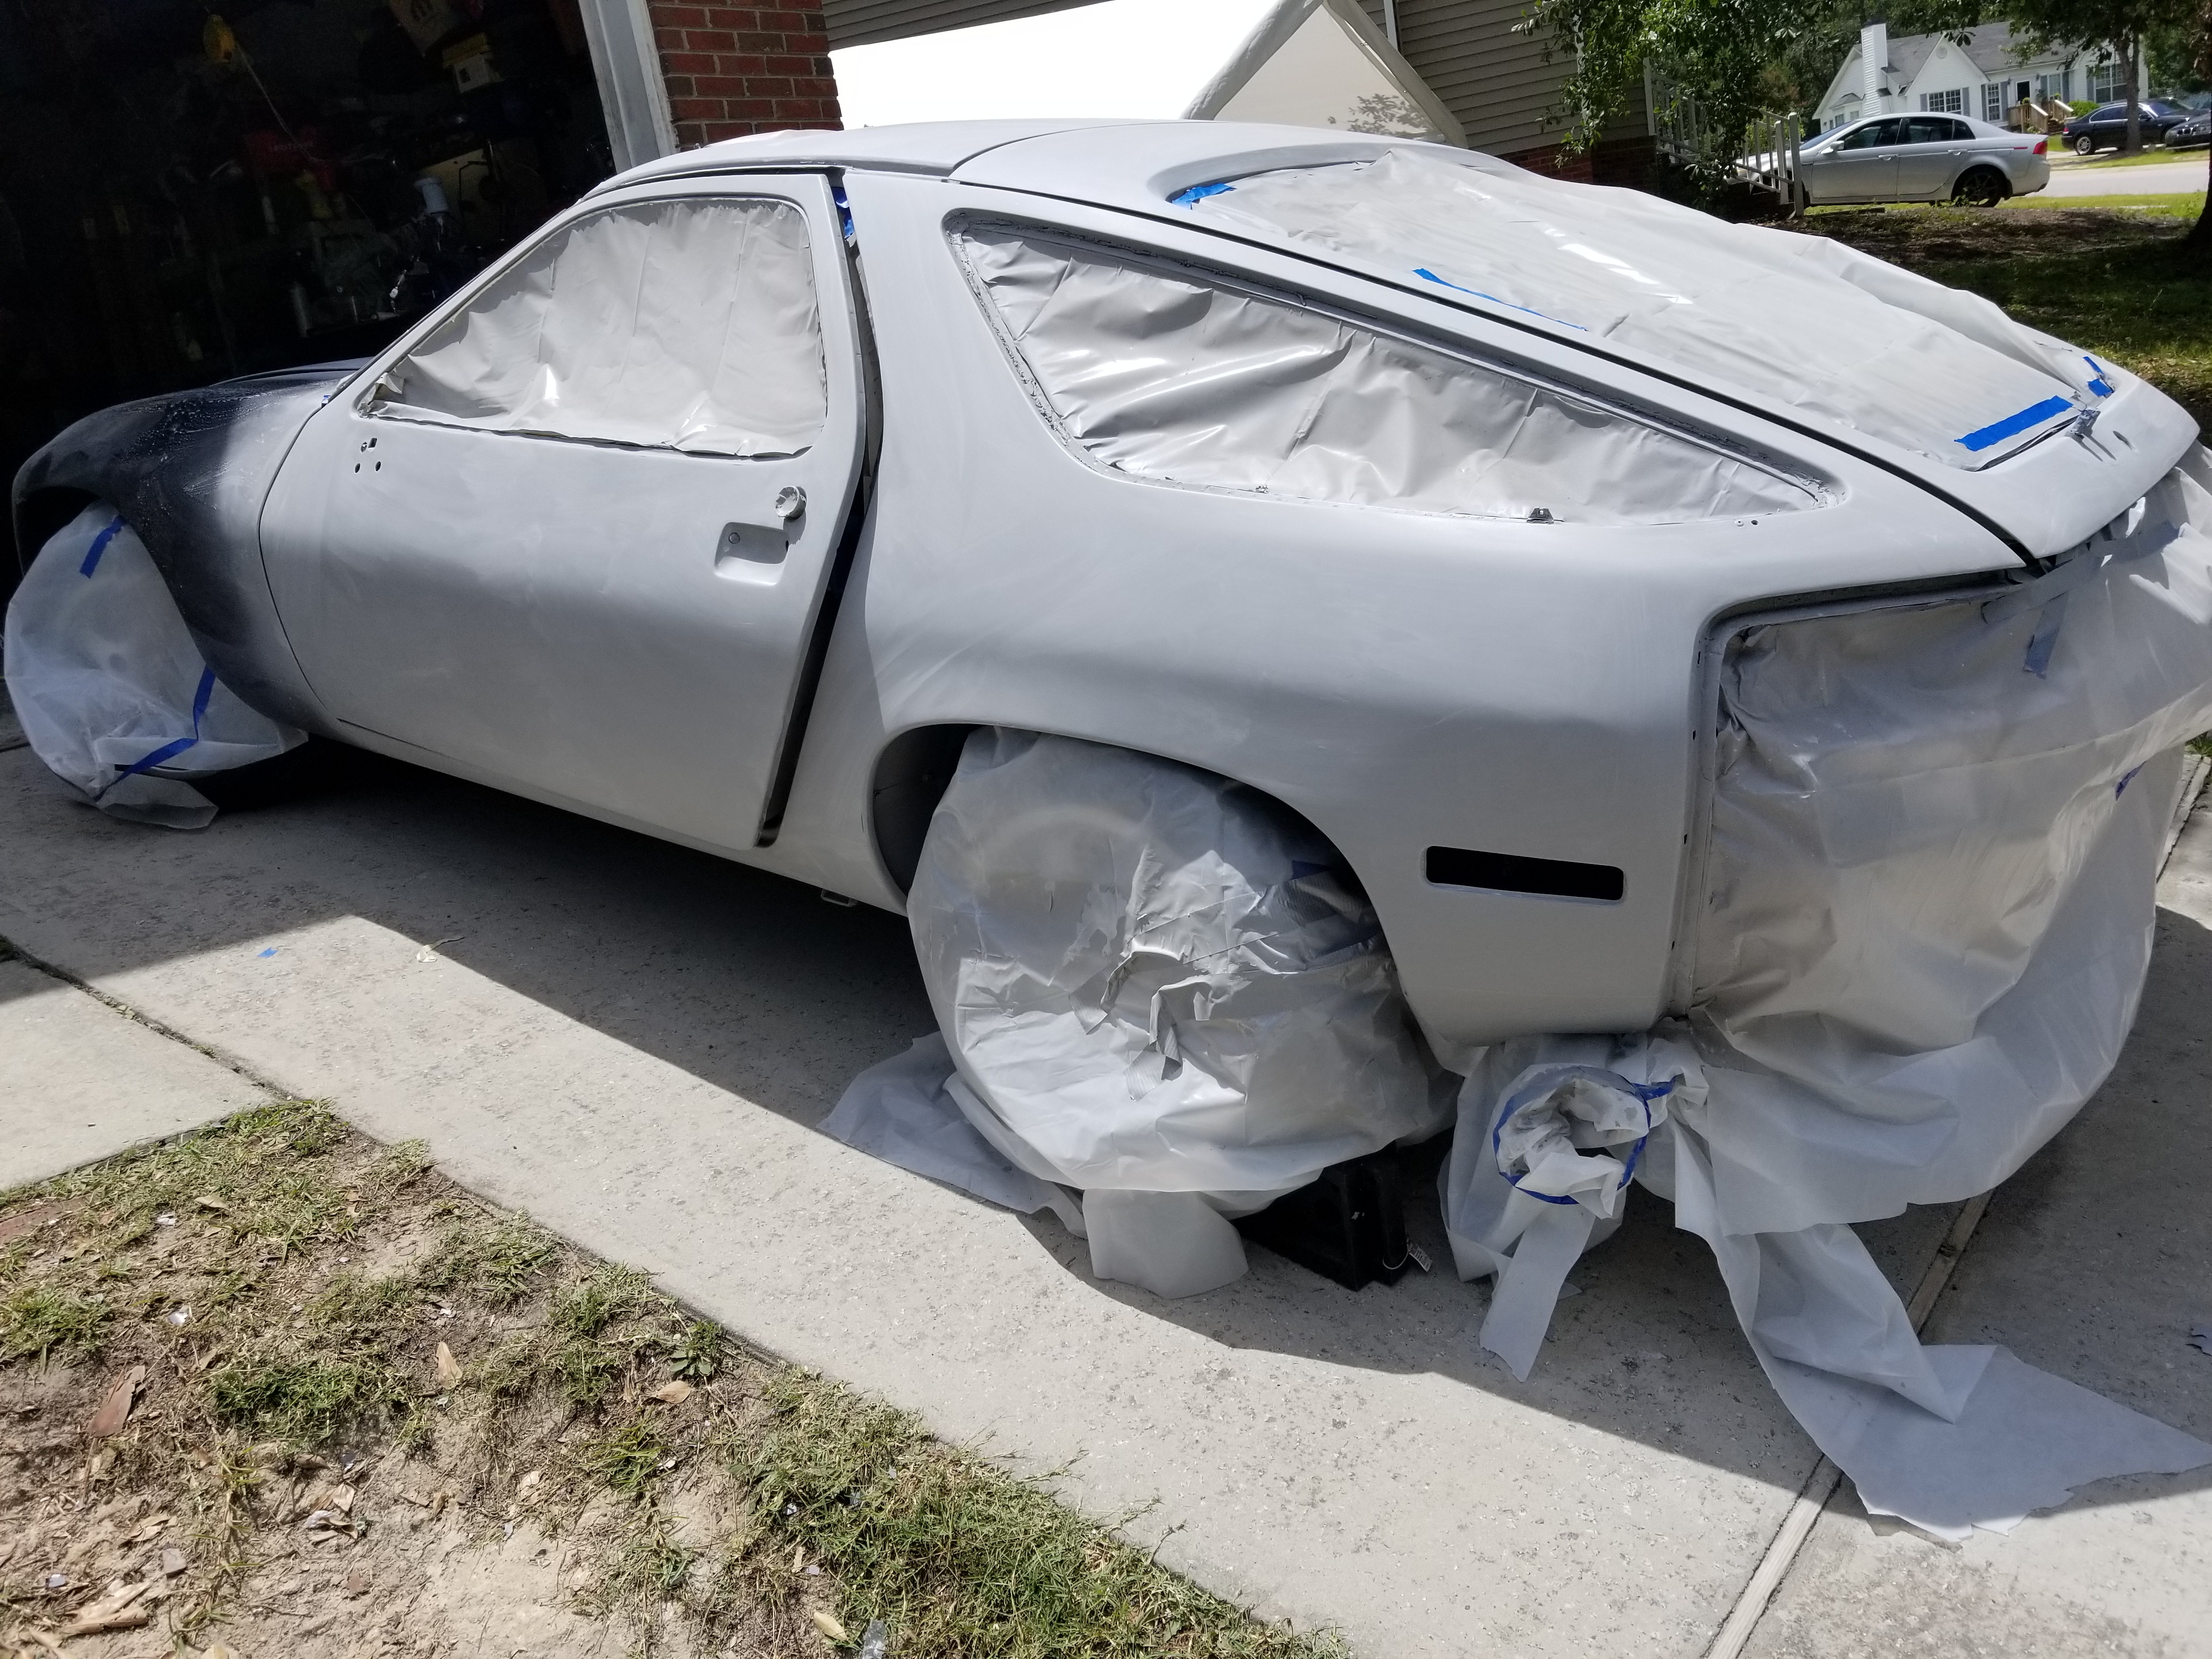
After block sanding the primer the next day.
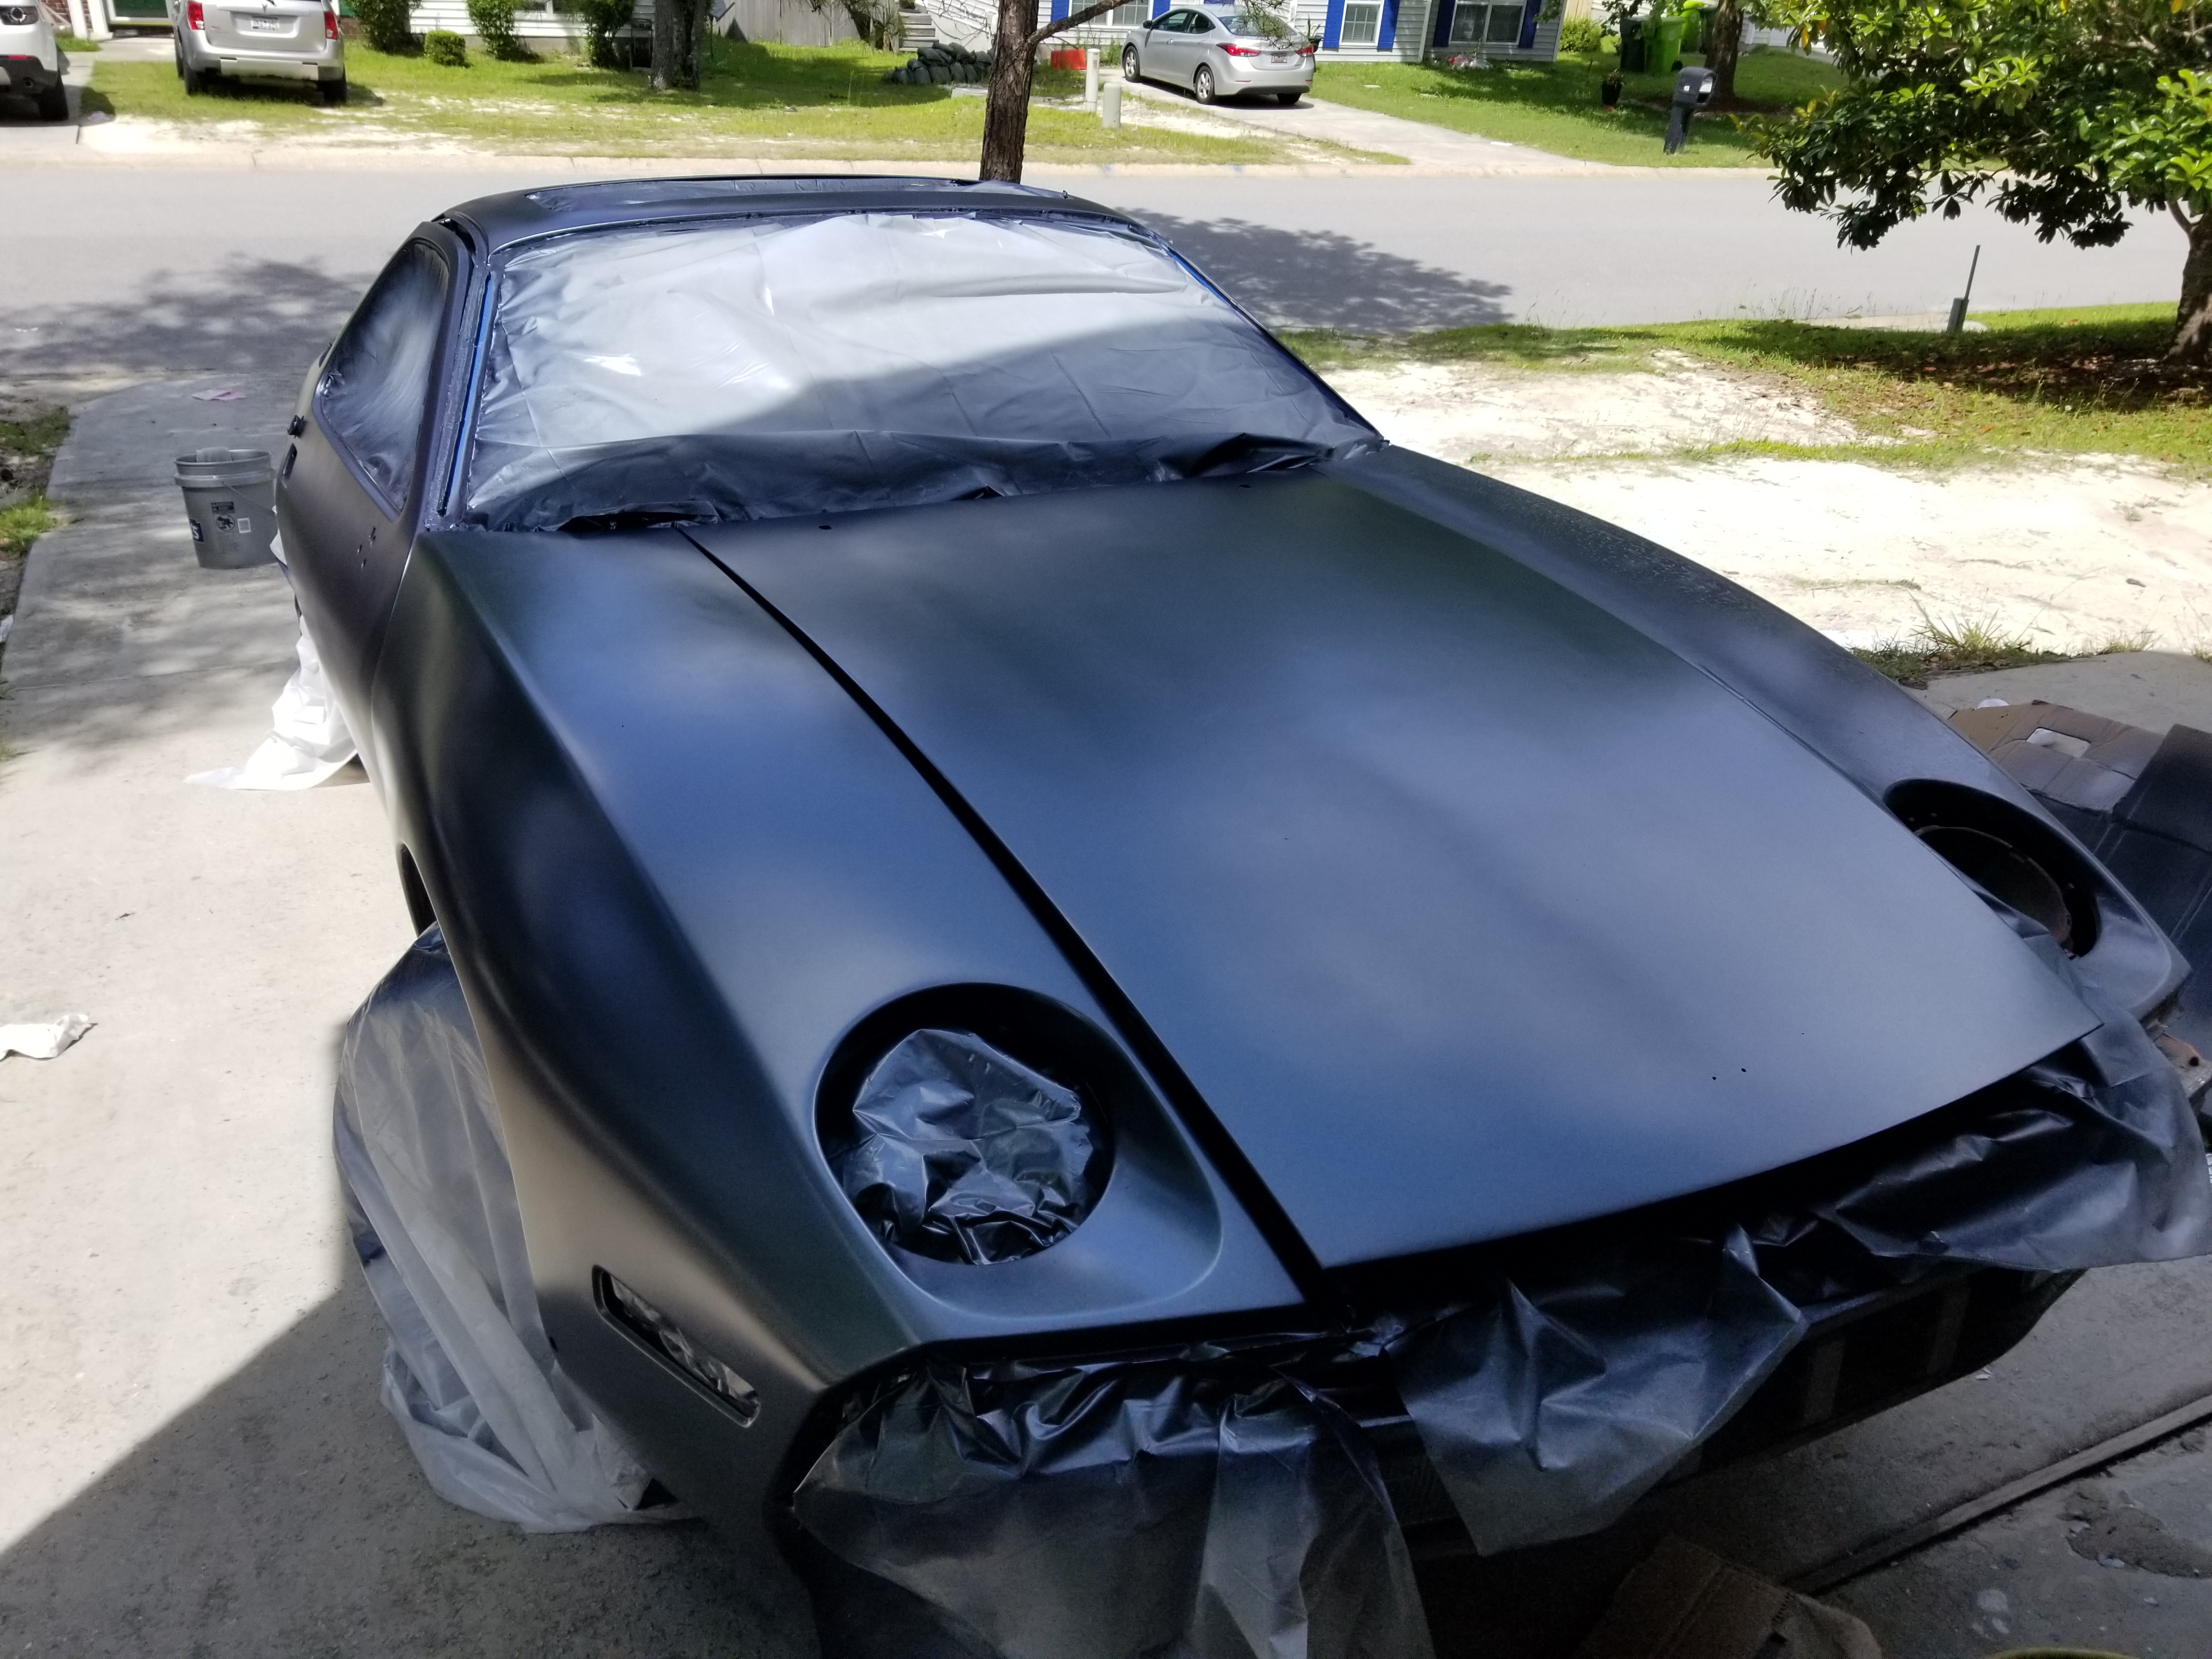
Didn't get a picture of just the sealer due to time, but shot it with sealer then 3 coats of color, then 3 coats of clear.
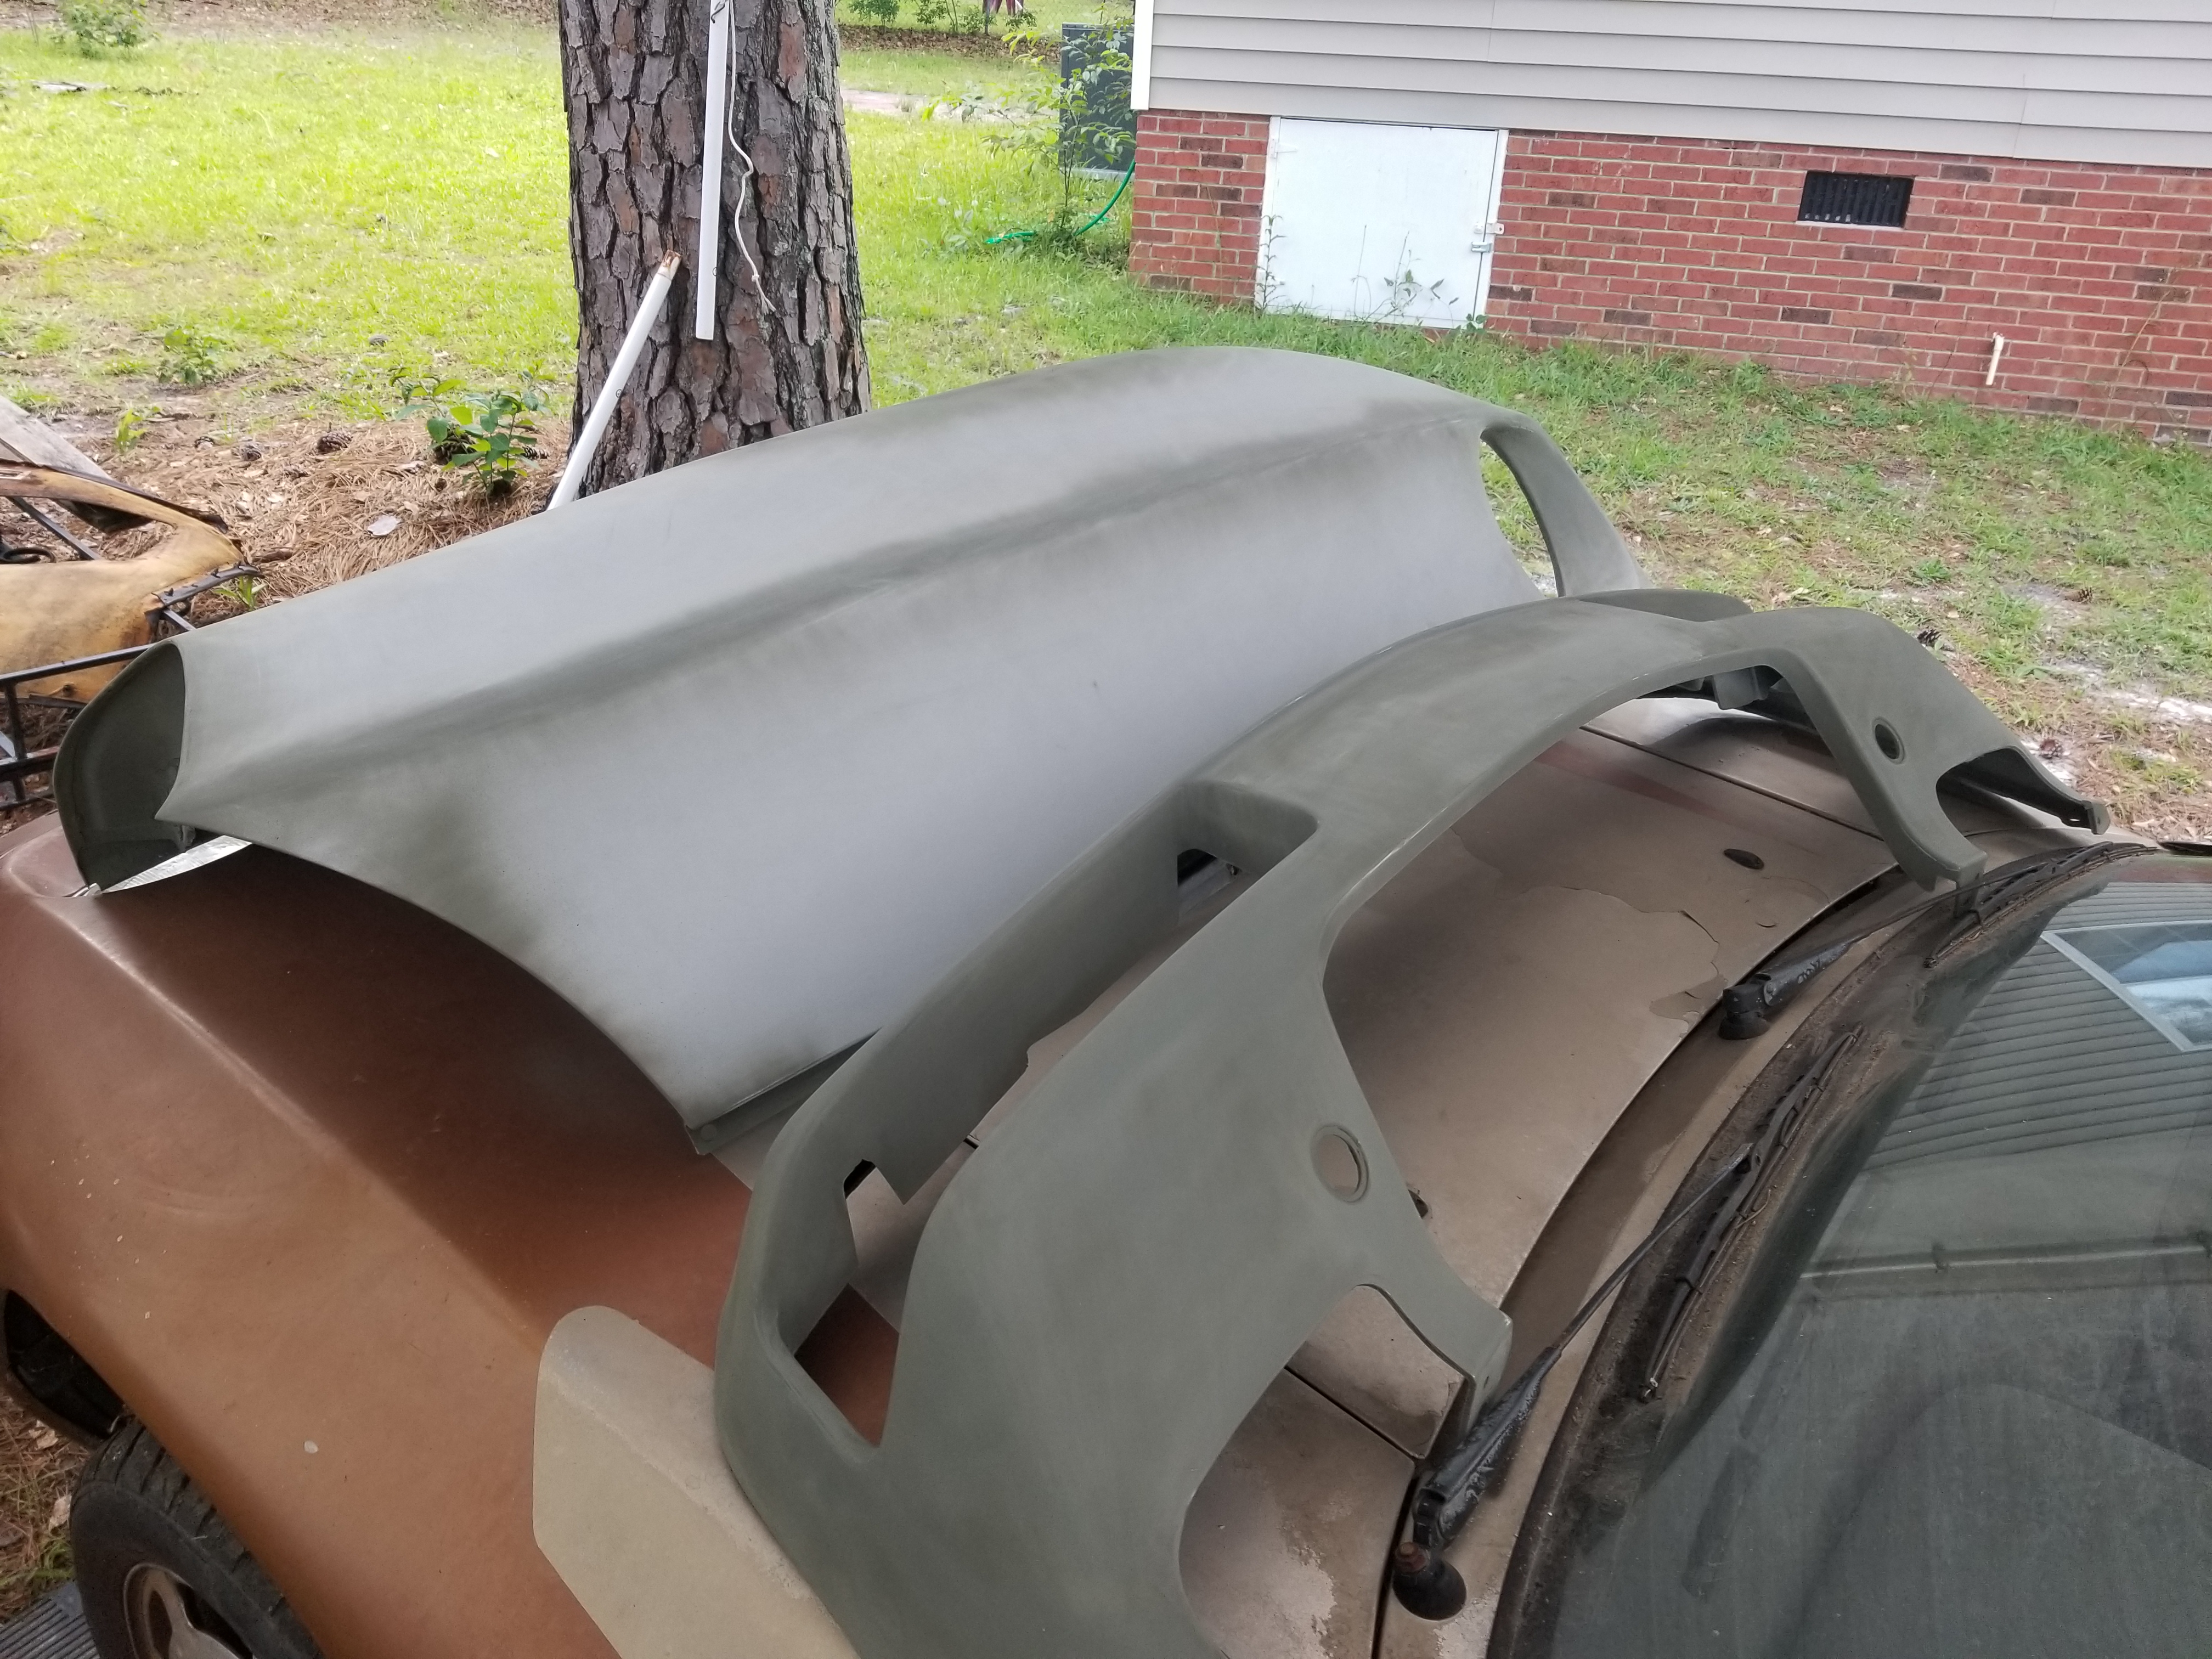
After taking an hour or so break because painting in 90 degree heat is exhausting, I went and got the separate panels blocked and sprayed them down with color.
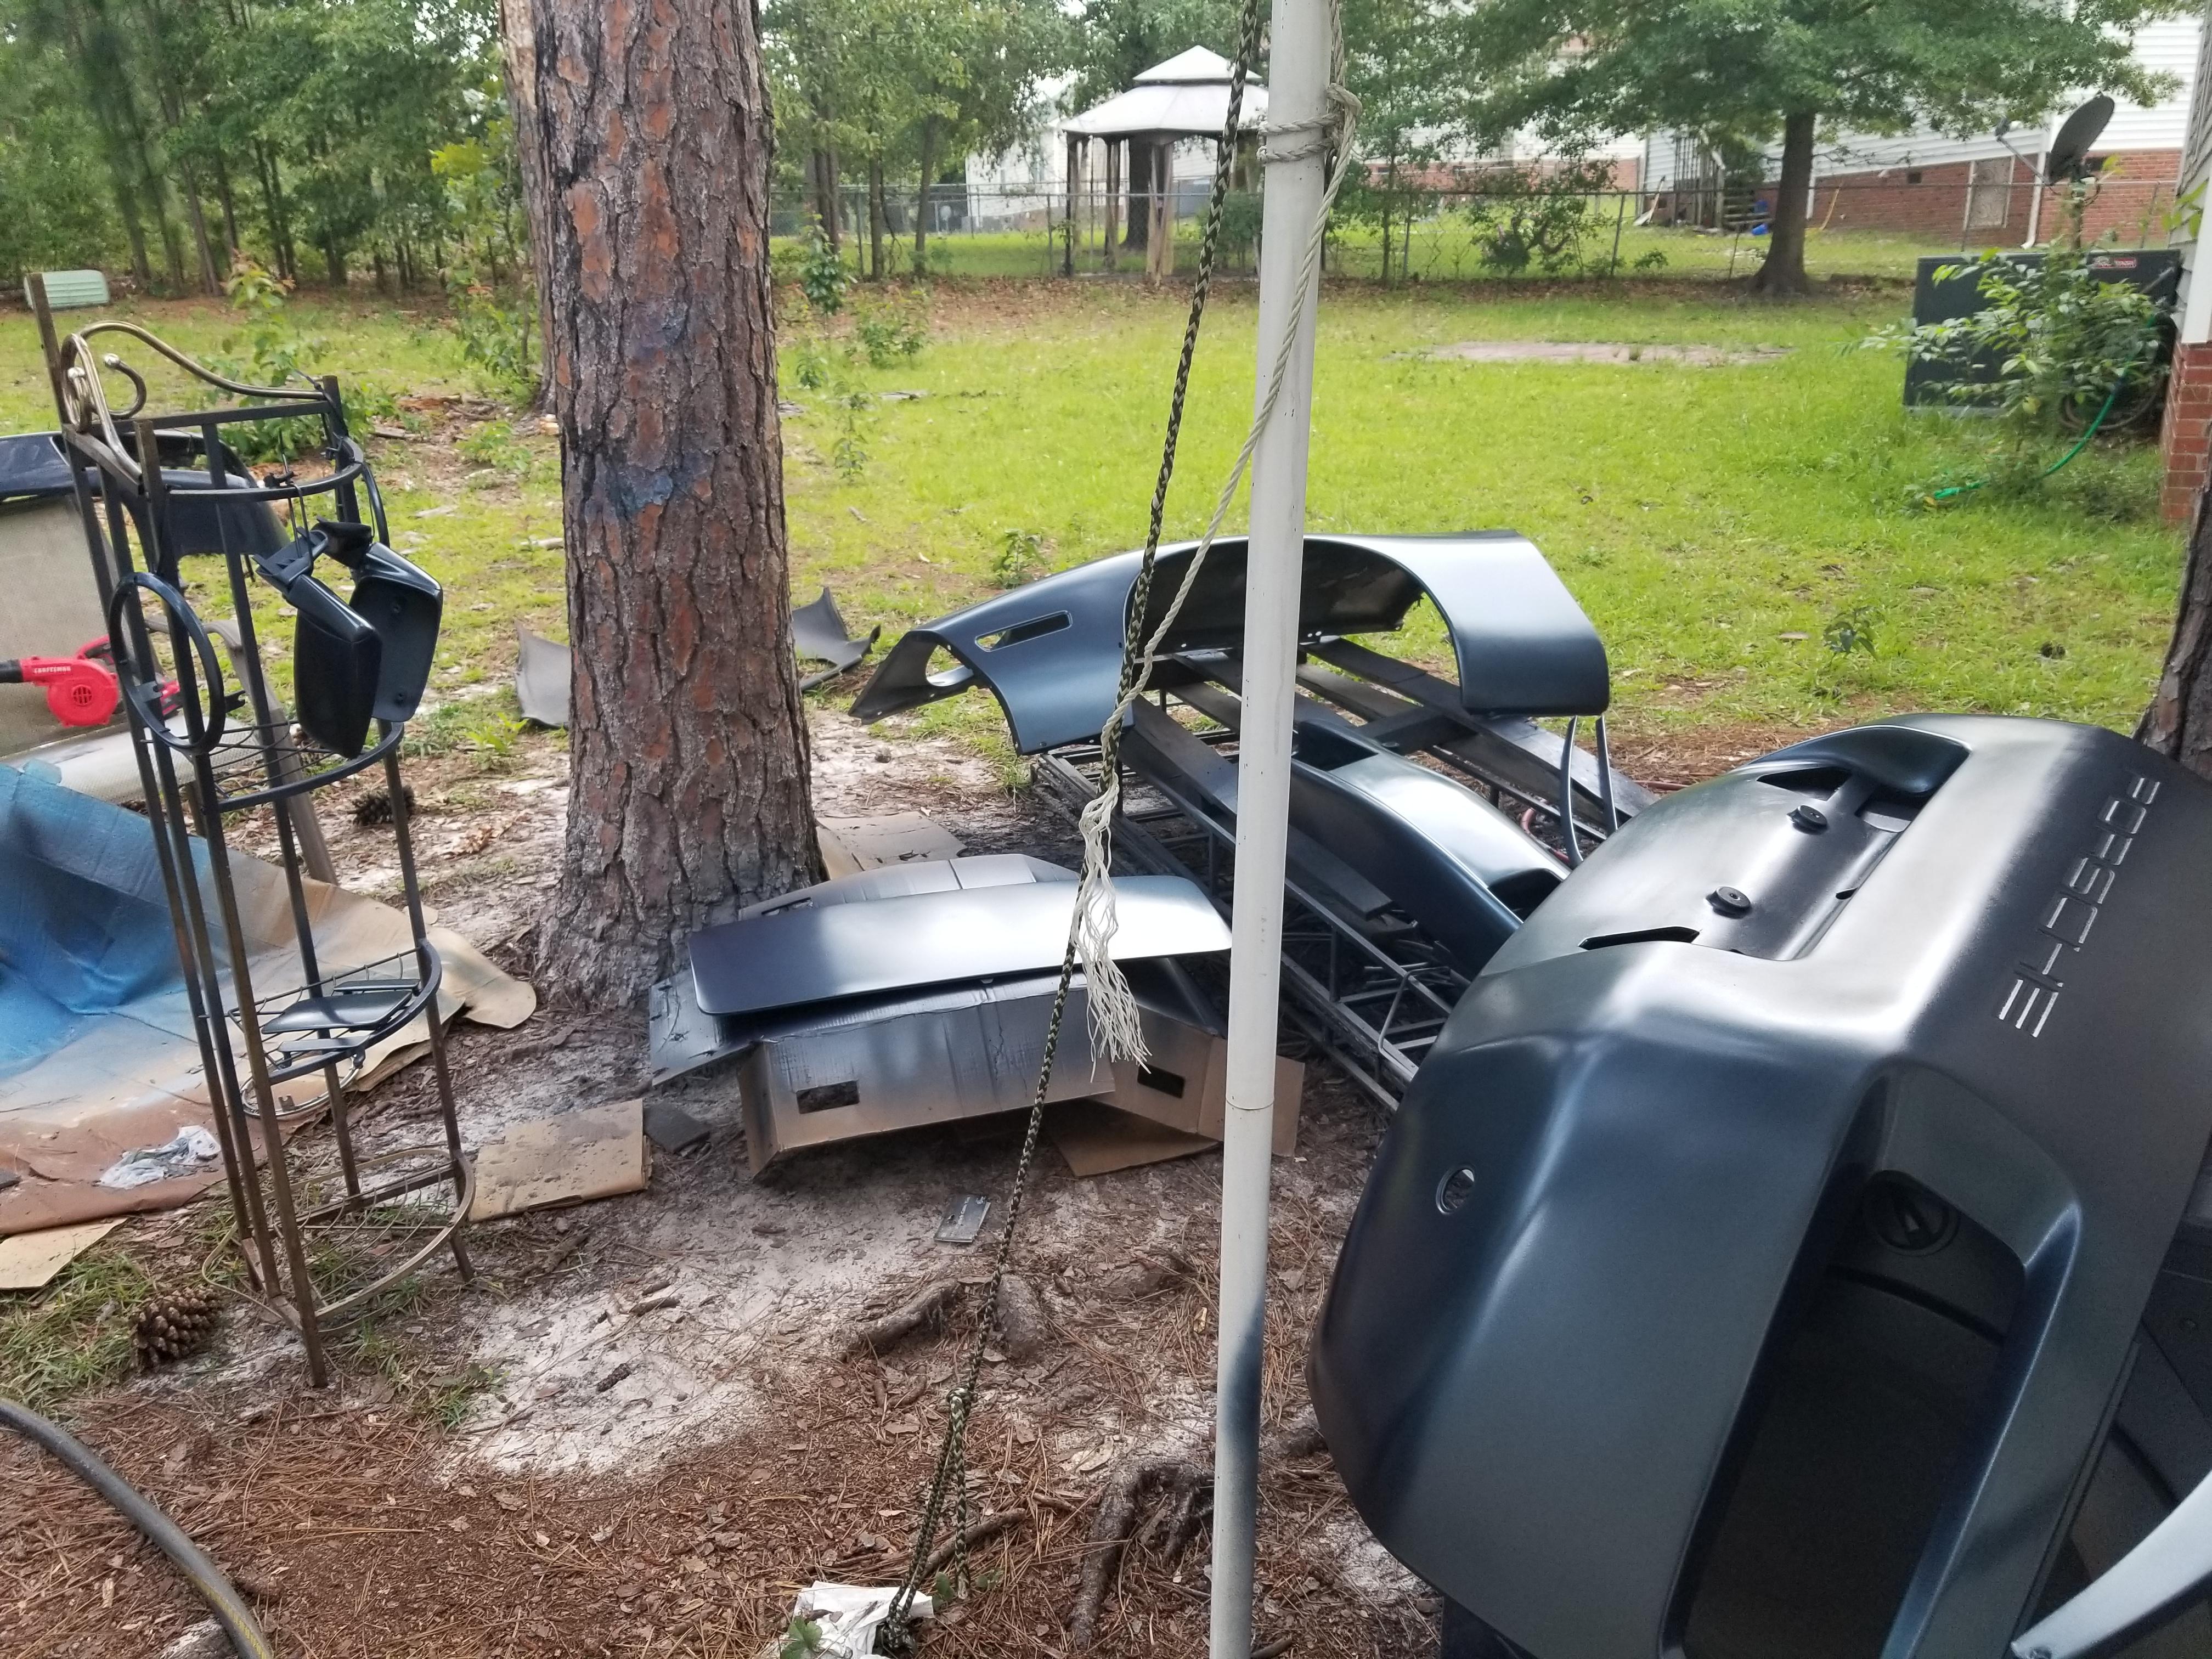
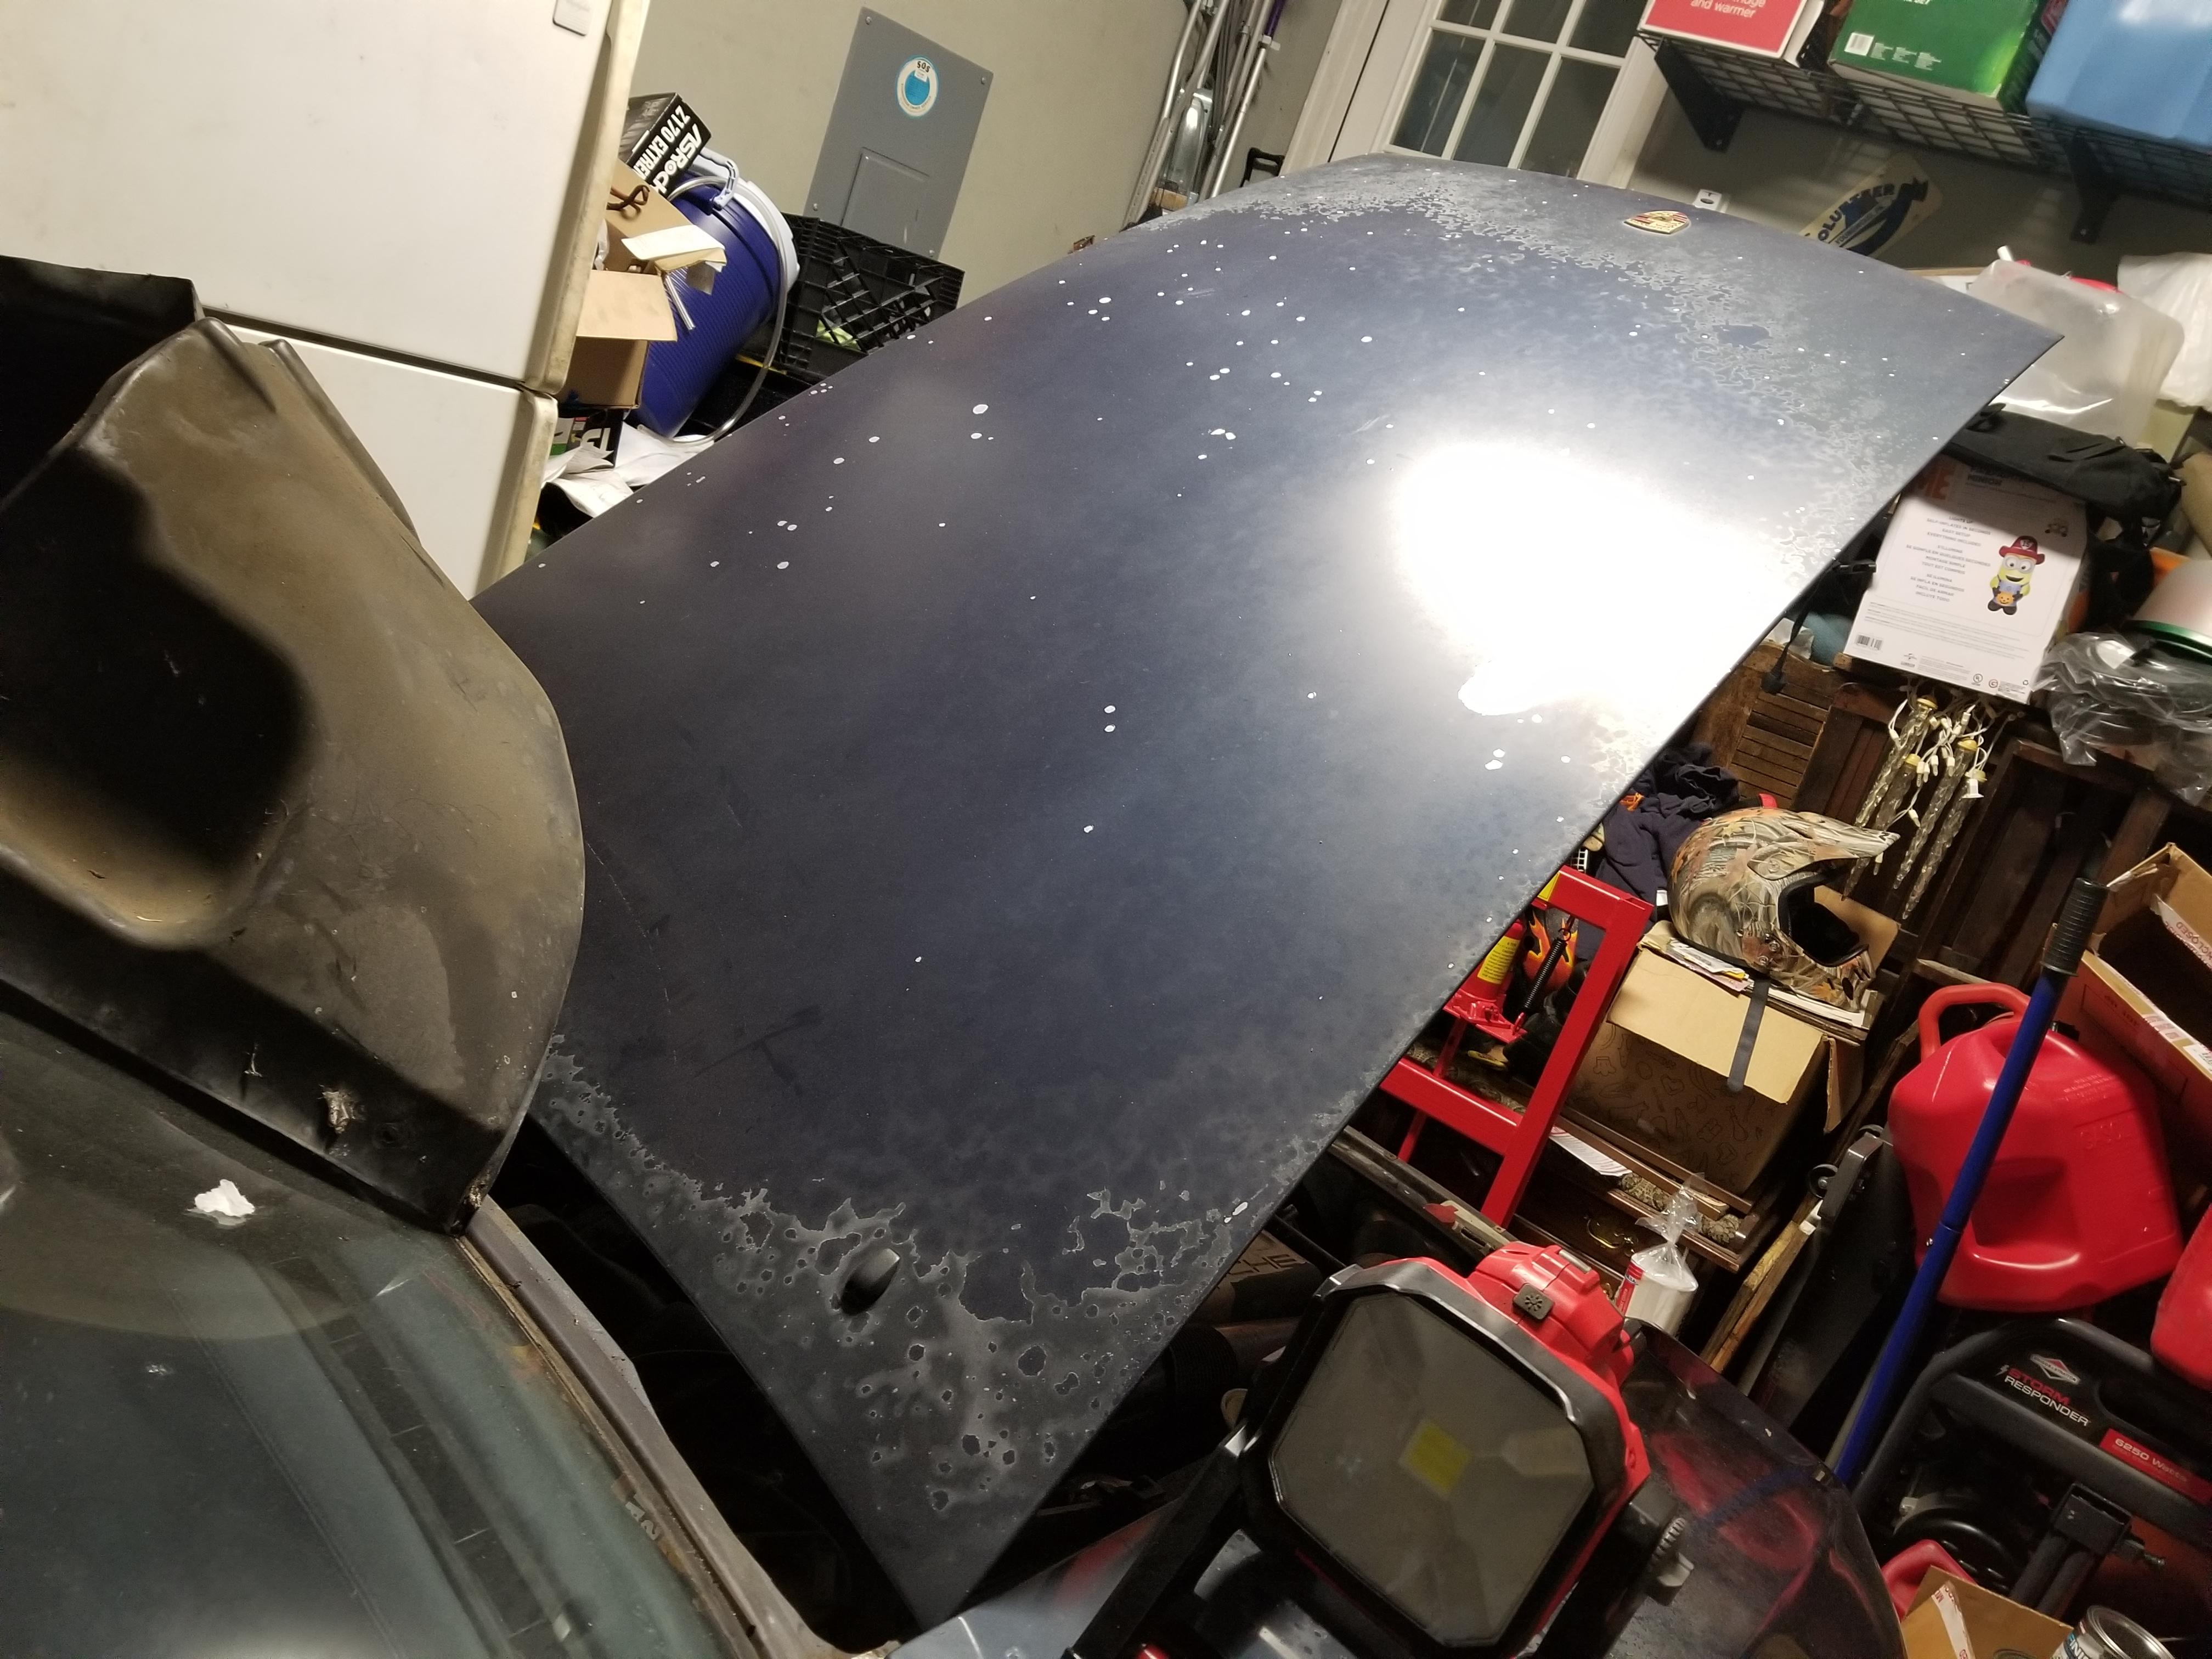
Now is where bad stuff started happening. Right as I was spraying down the last coat of clear the wind started gusting up to 30mph+, bear in mind it was supposed to be sunny all day. I hurried up and got the freshly cleared pieces all the way under the carport (on top of the tan 86.5). Thought I was fine until it started raining, while still blowing with 30mph winds. Needless to say some water got on those pieces.
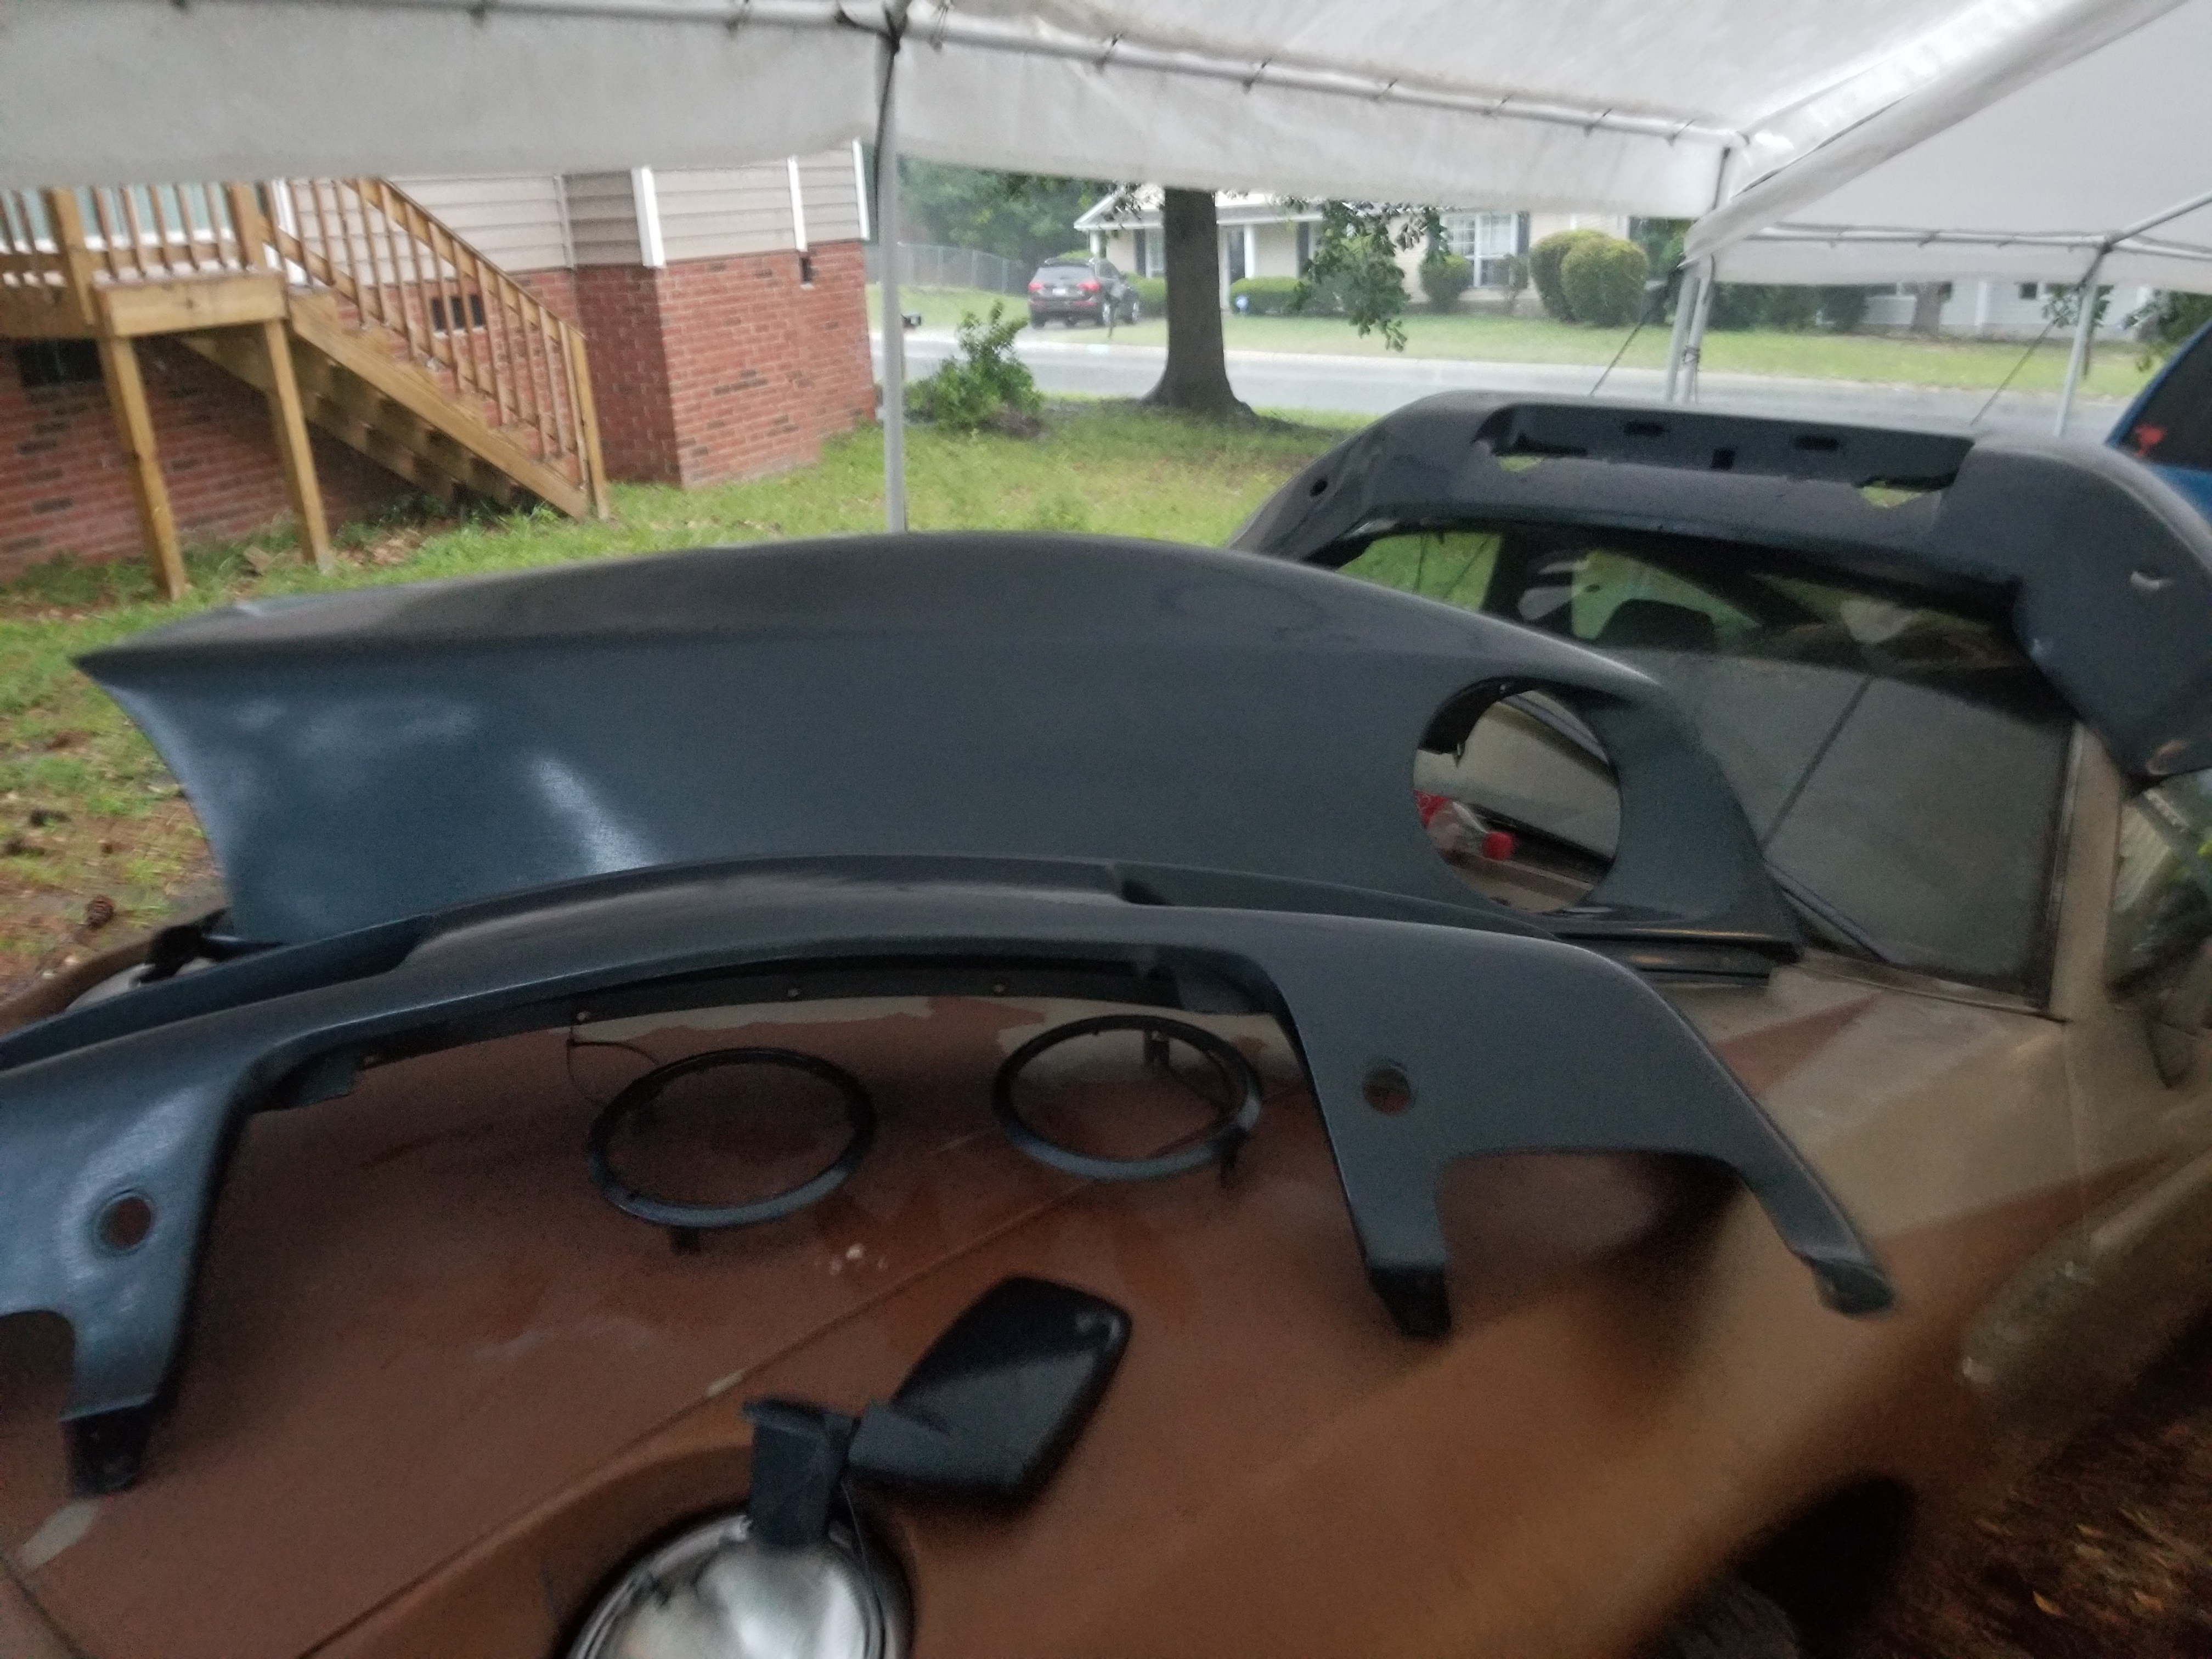
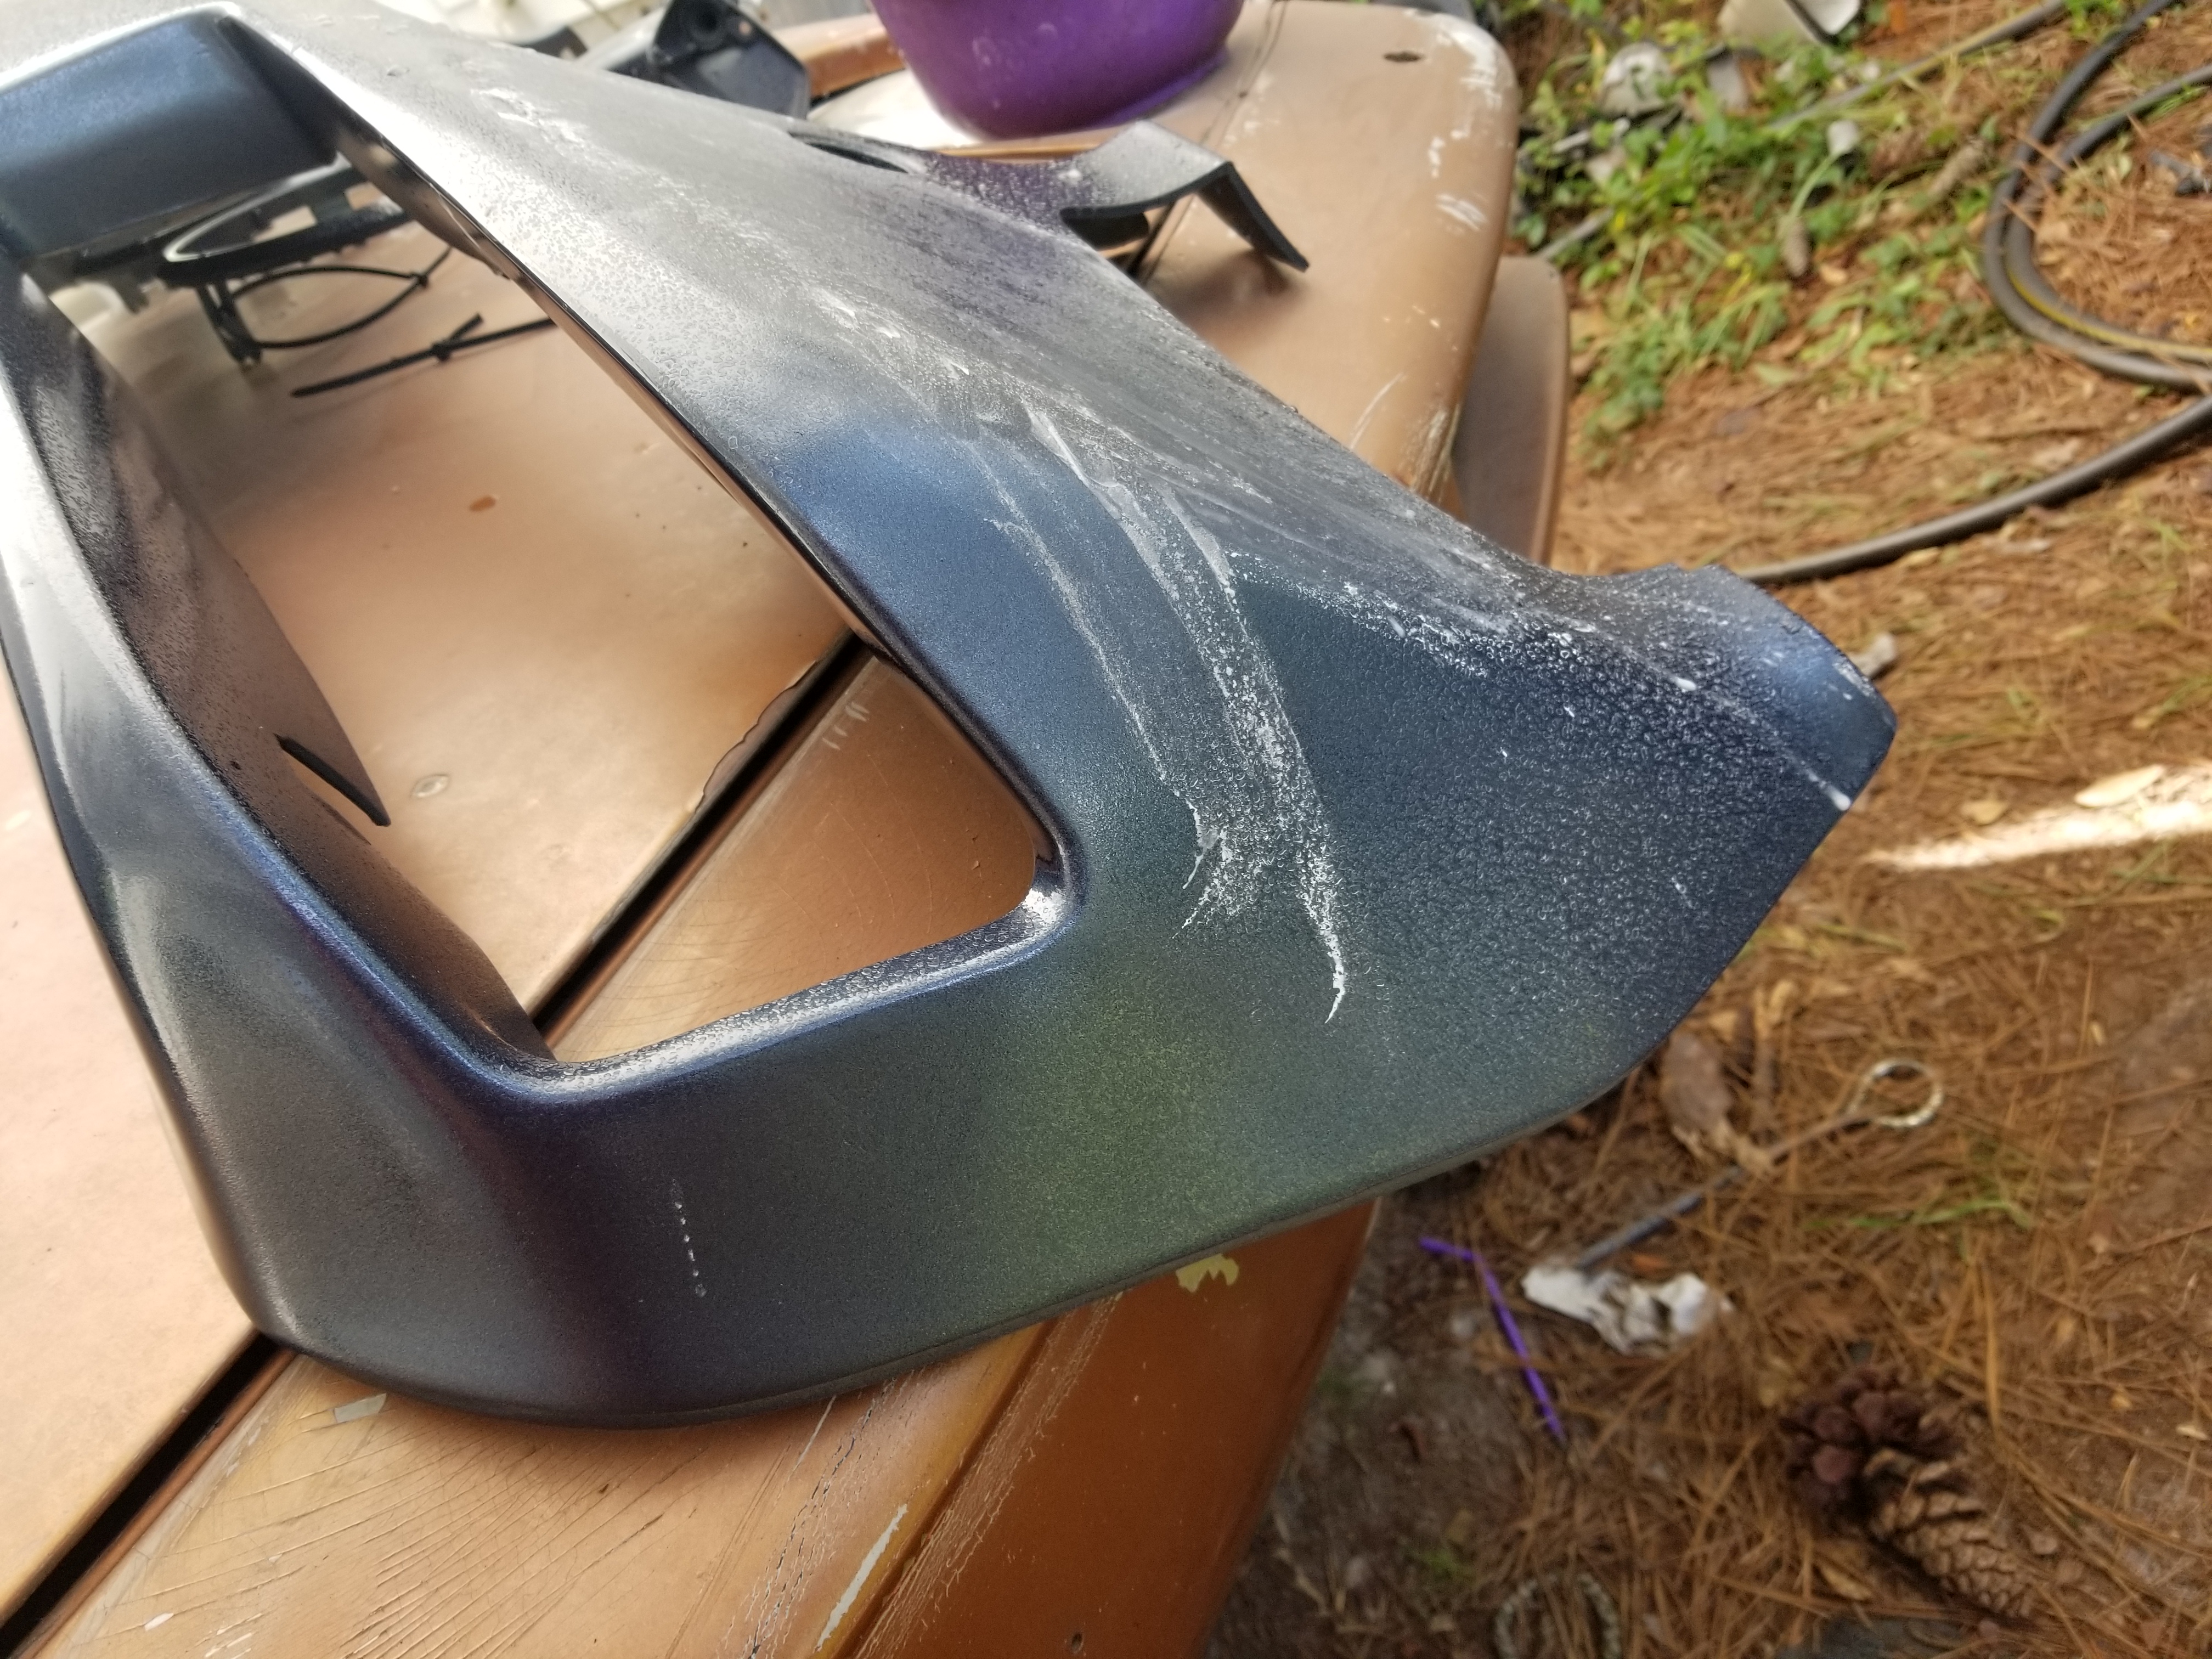
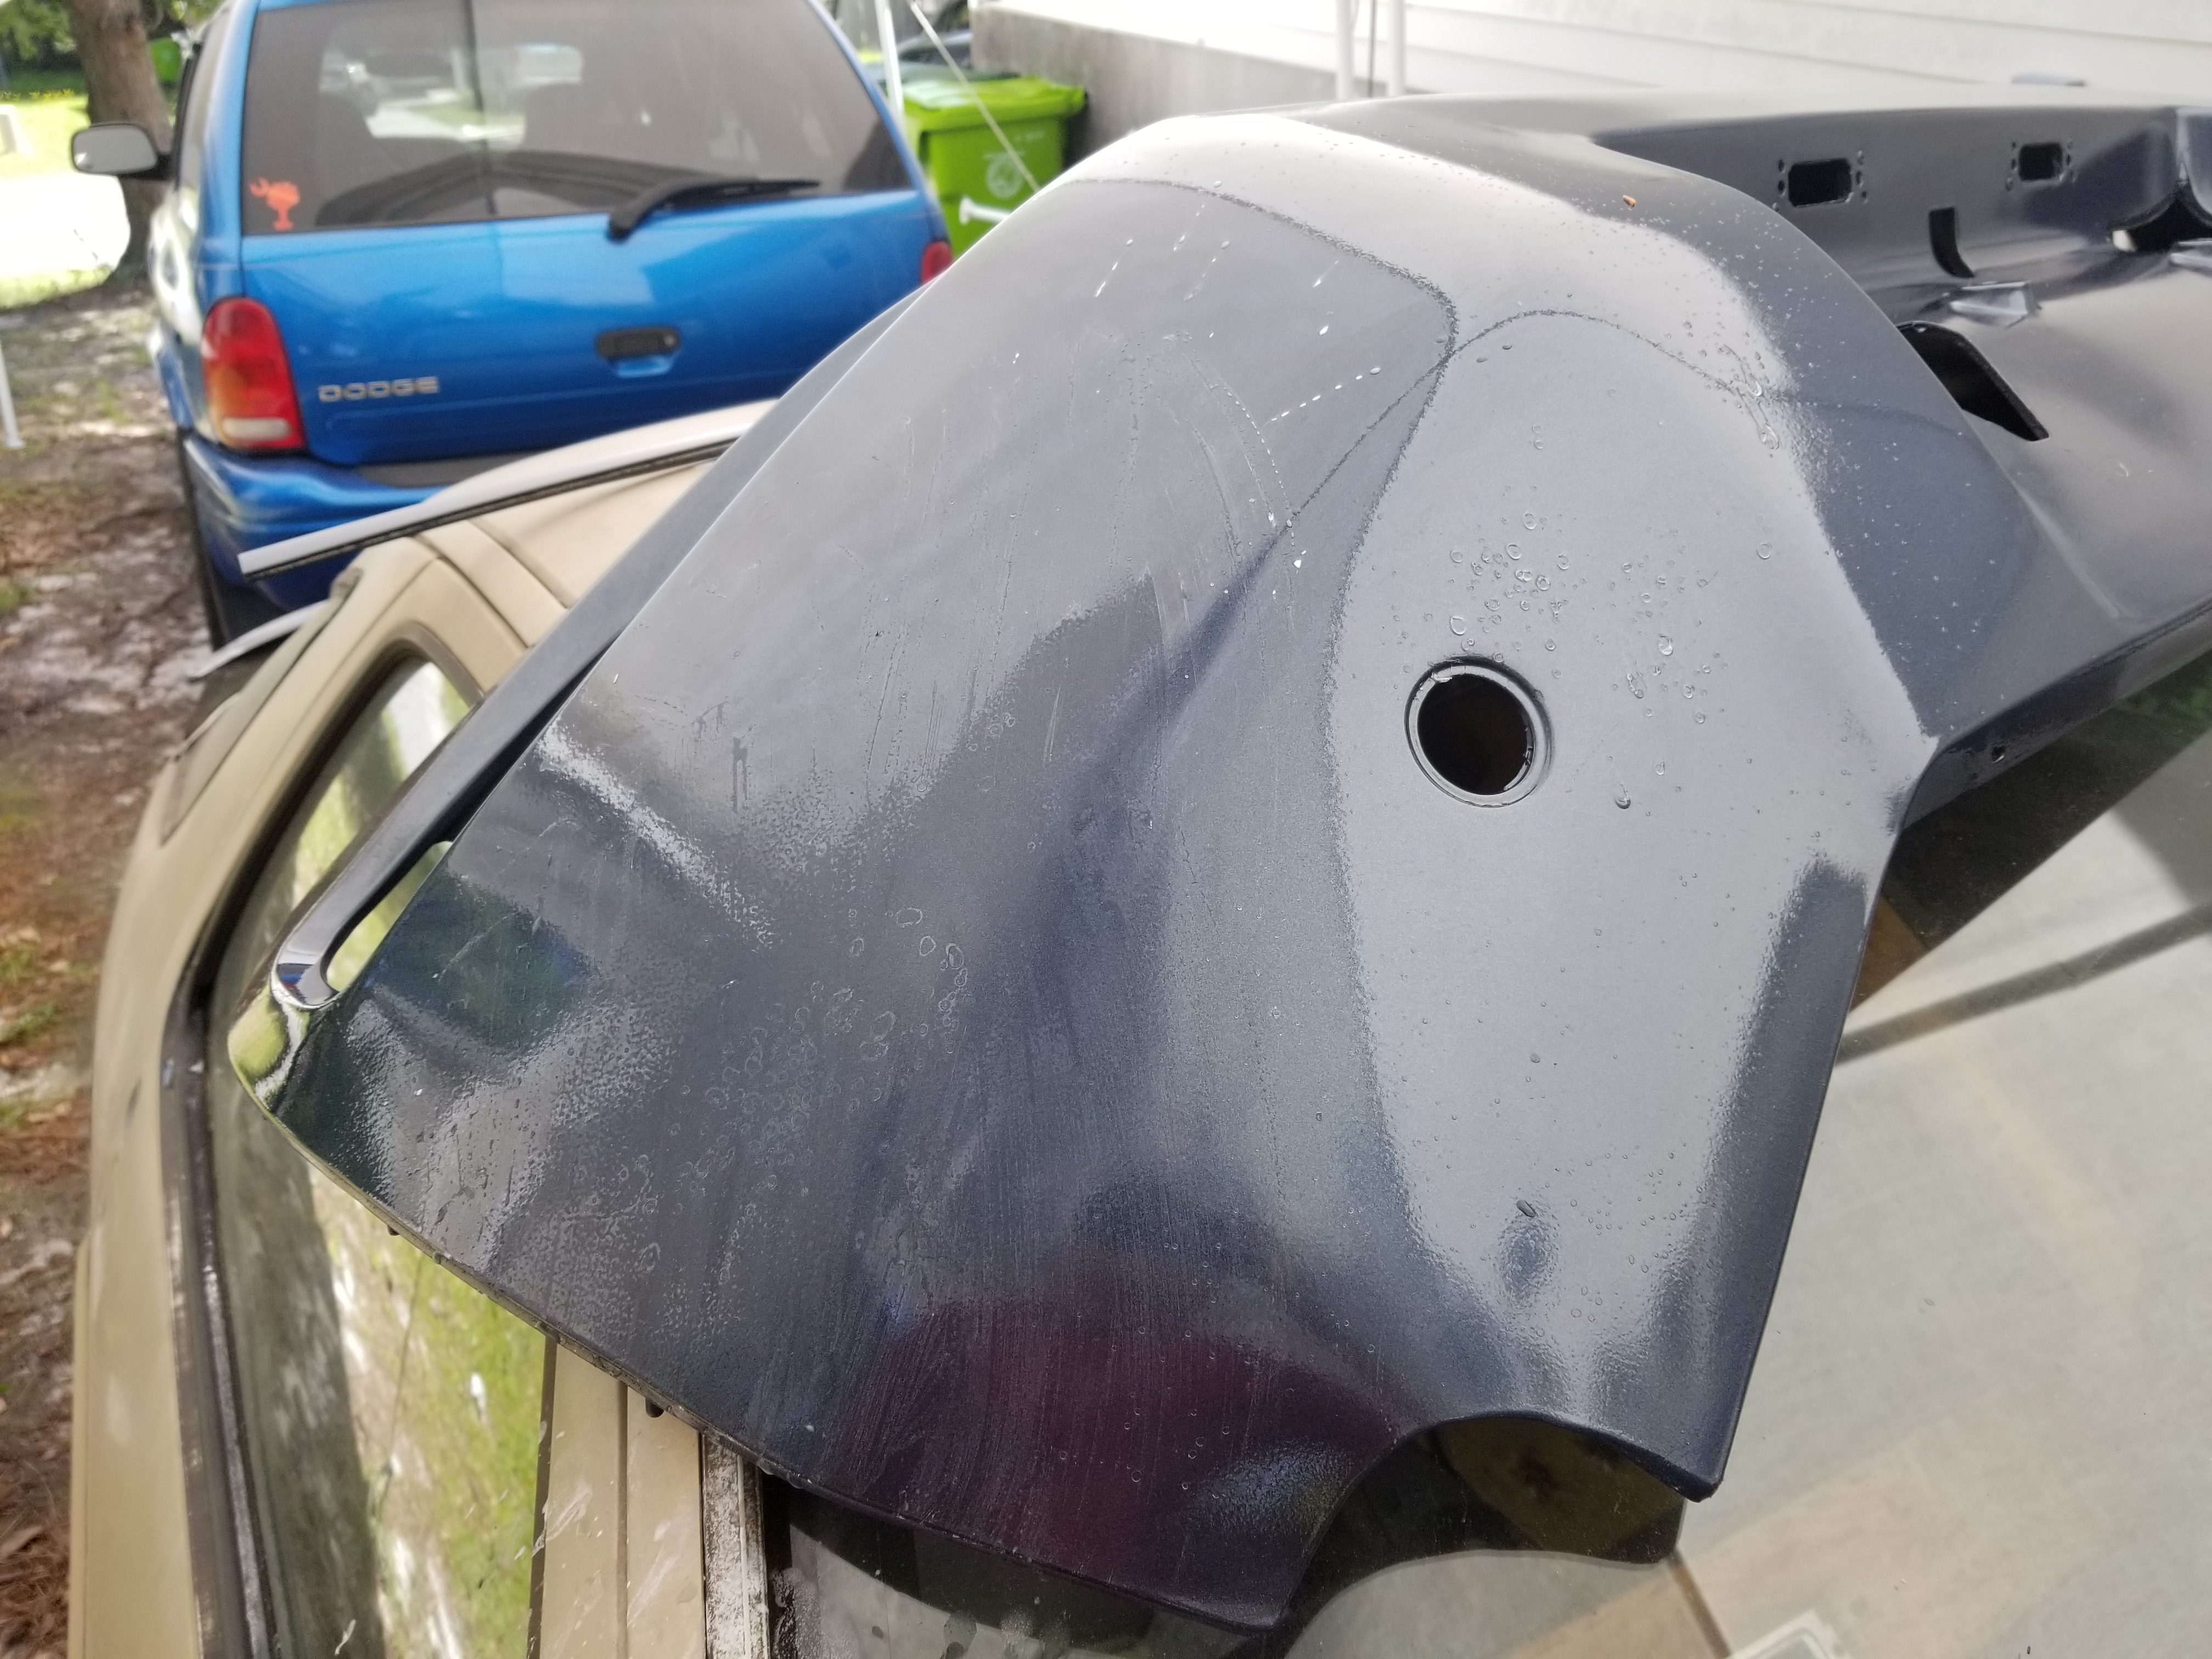
The bumpers are both going to need sanded down and most likely reshot with color and clear (ignore the couple spots where I fooled around with some sanding).
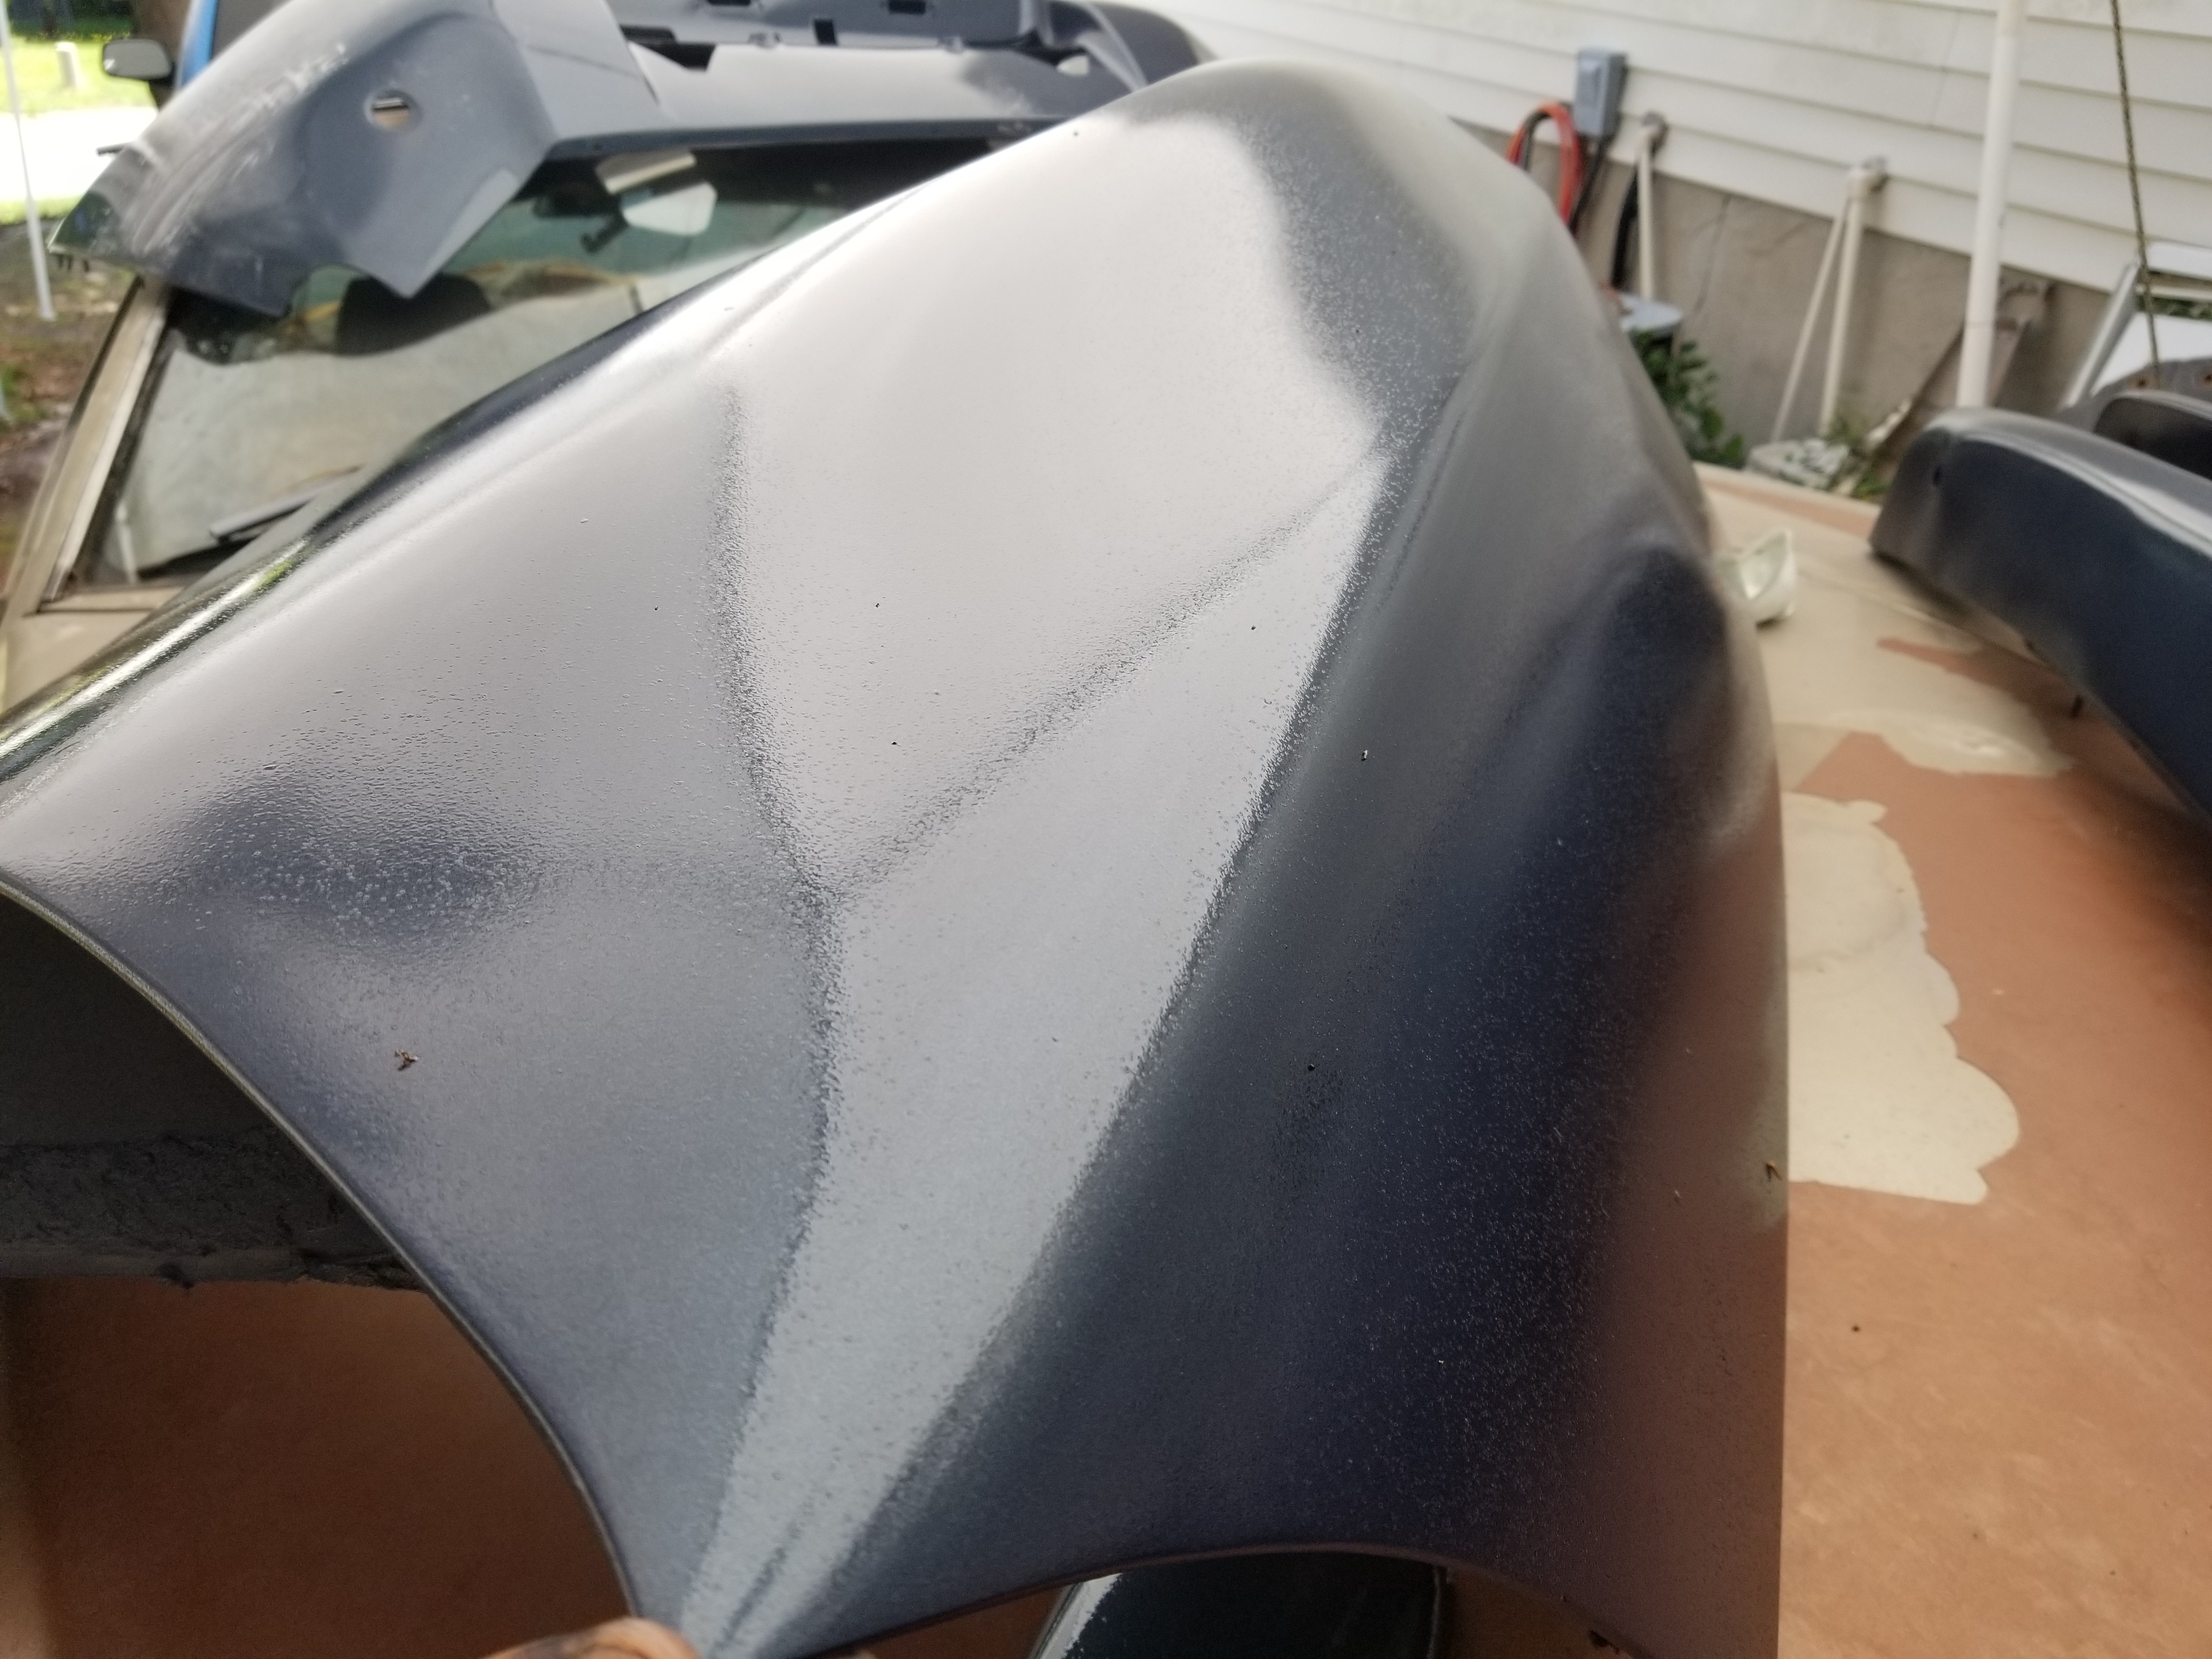
The fender didn't get it so bad. I've been working on seeing if I can save it. Maybe it'll still need a fresh couple coats of clear applied after sanding.
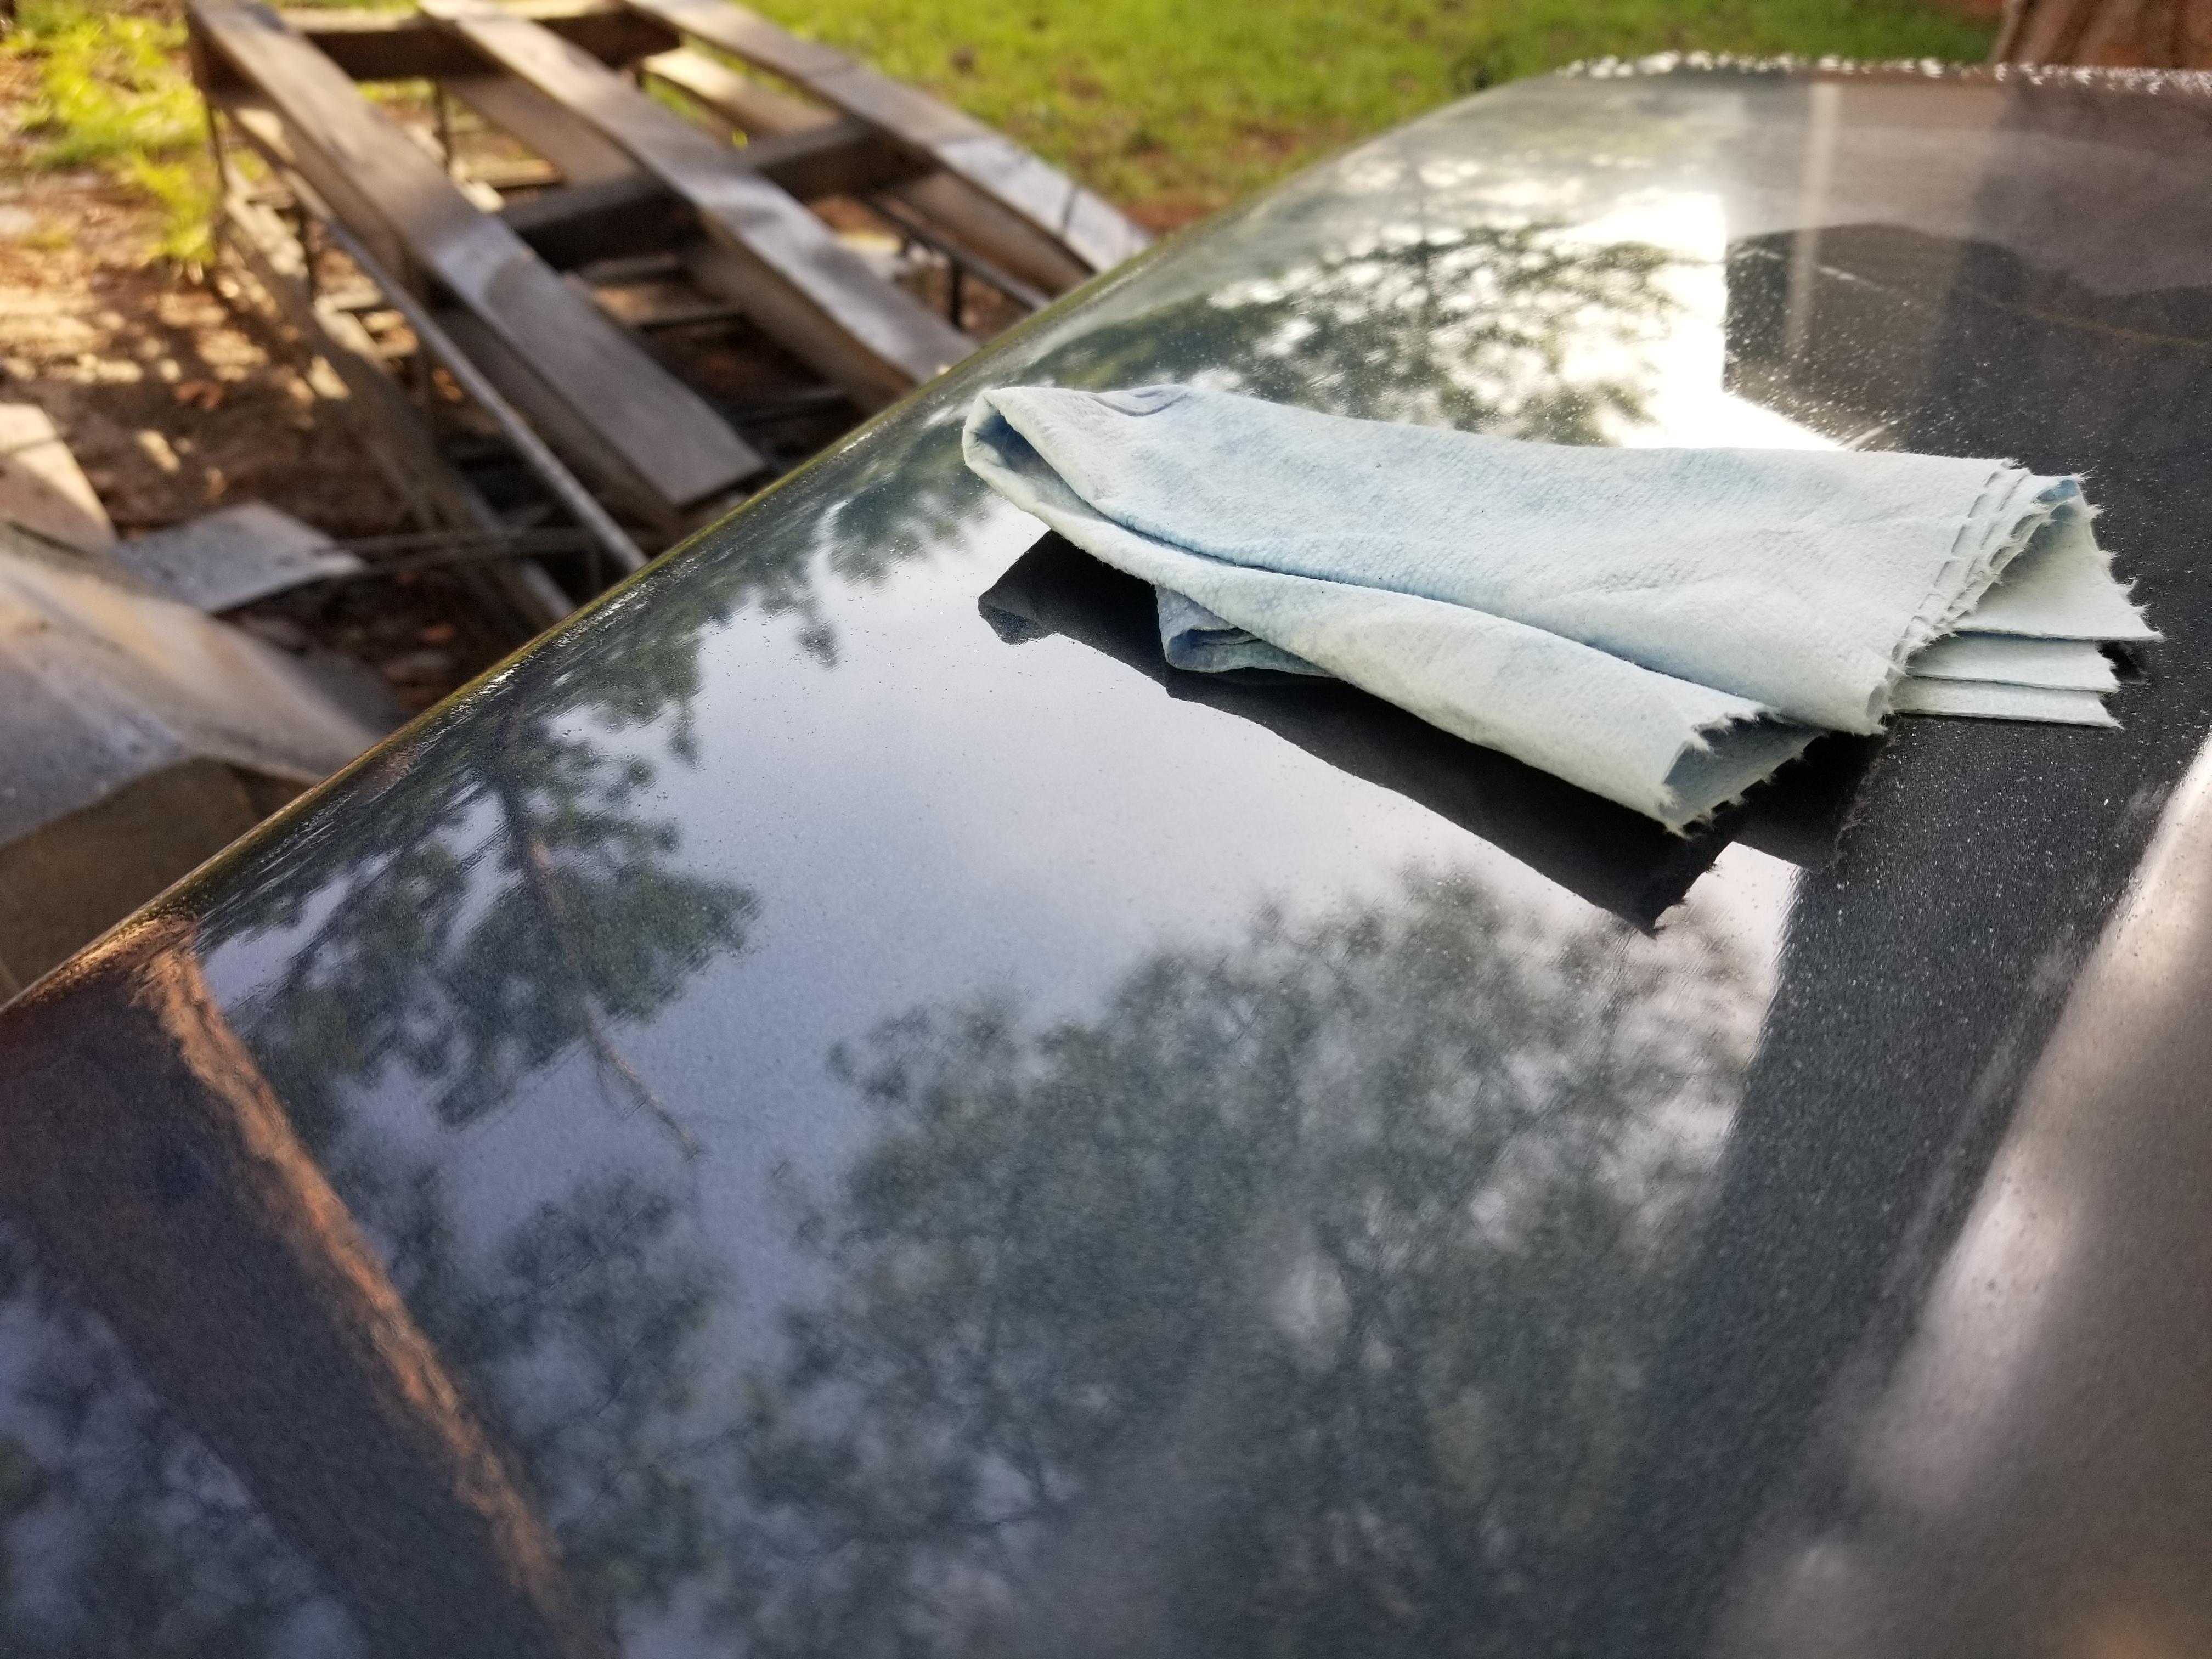
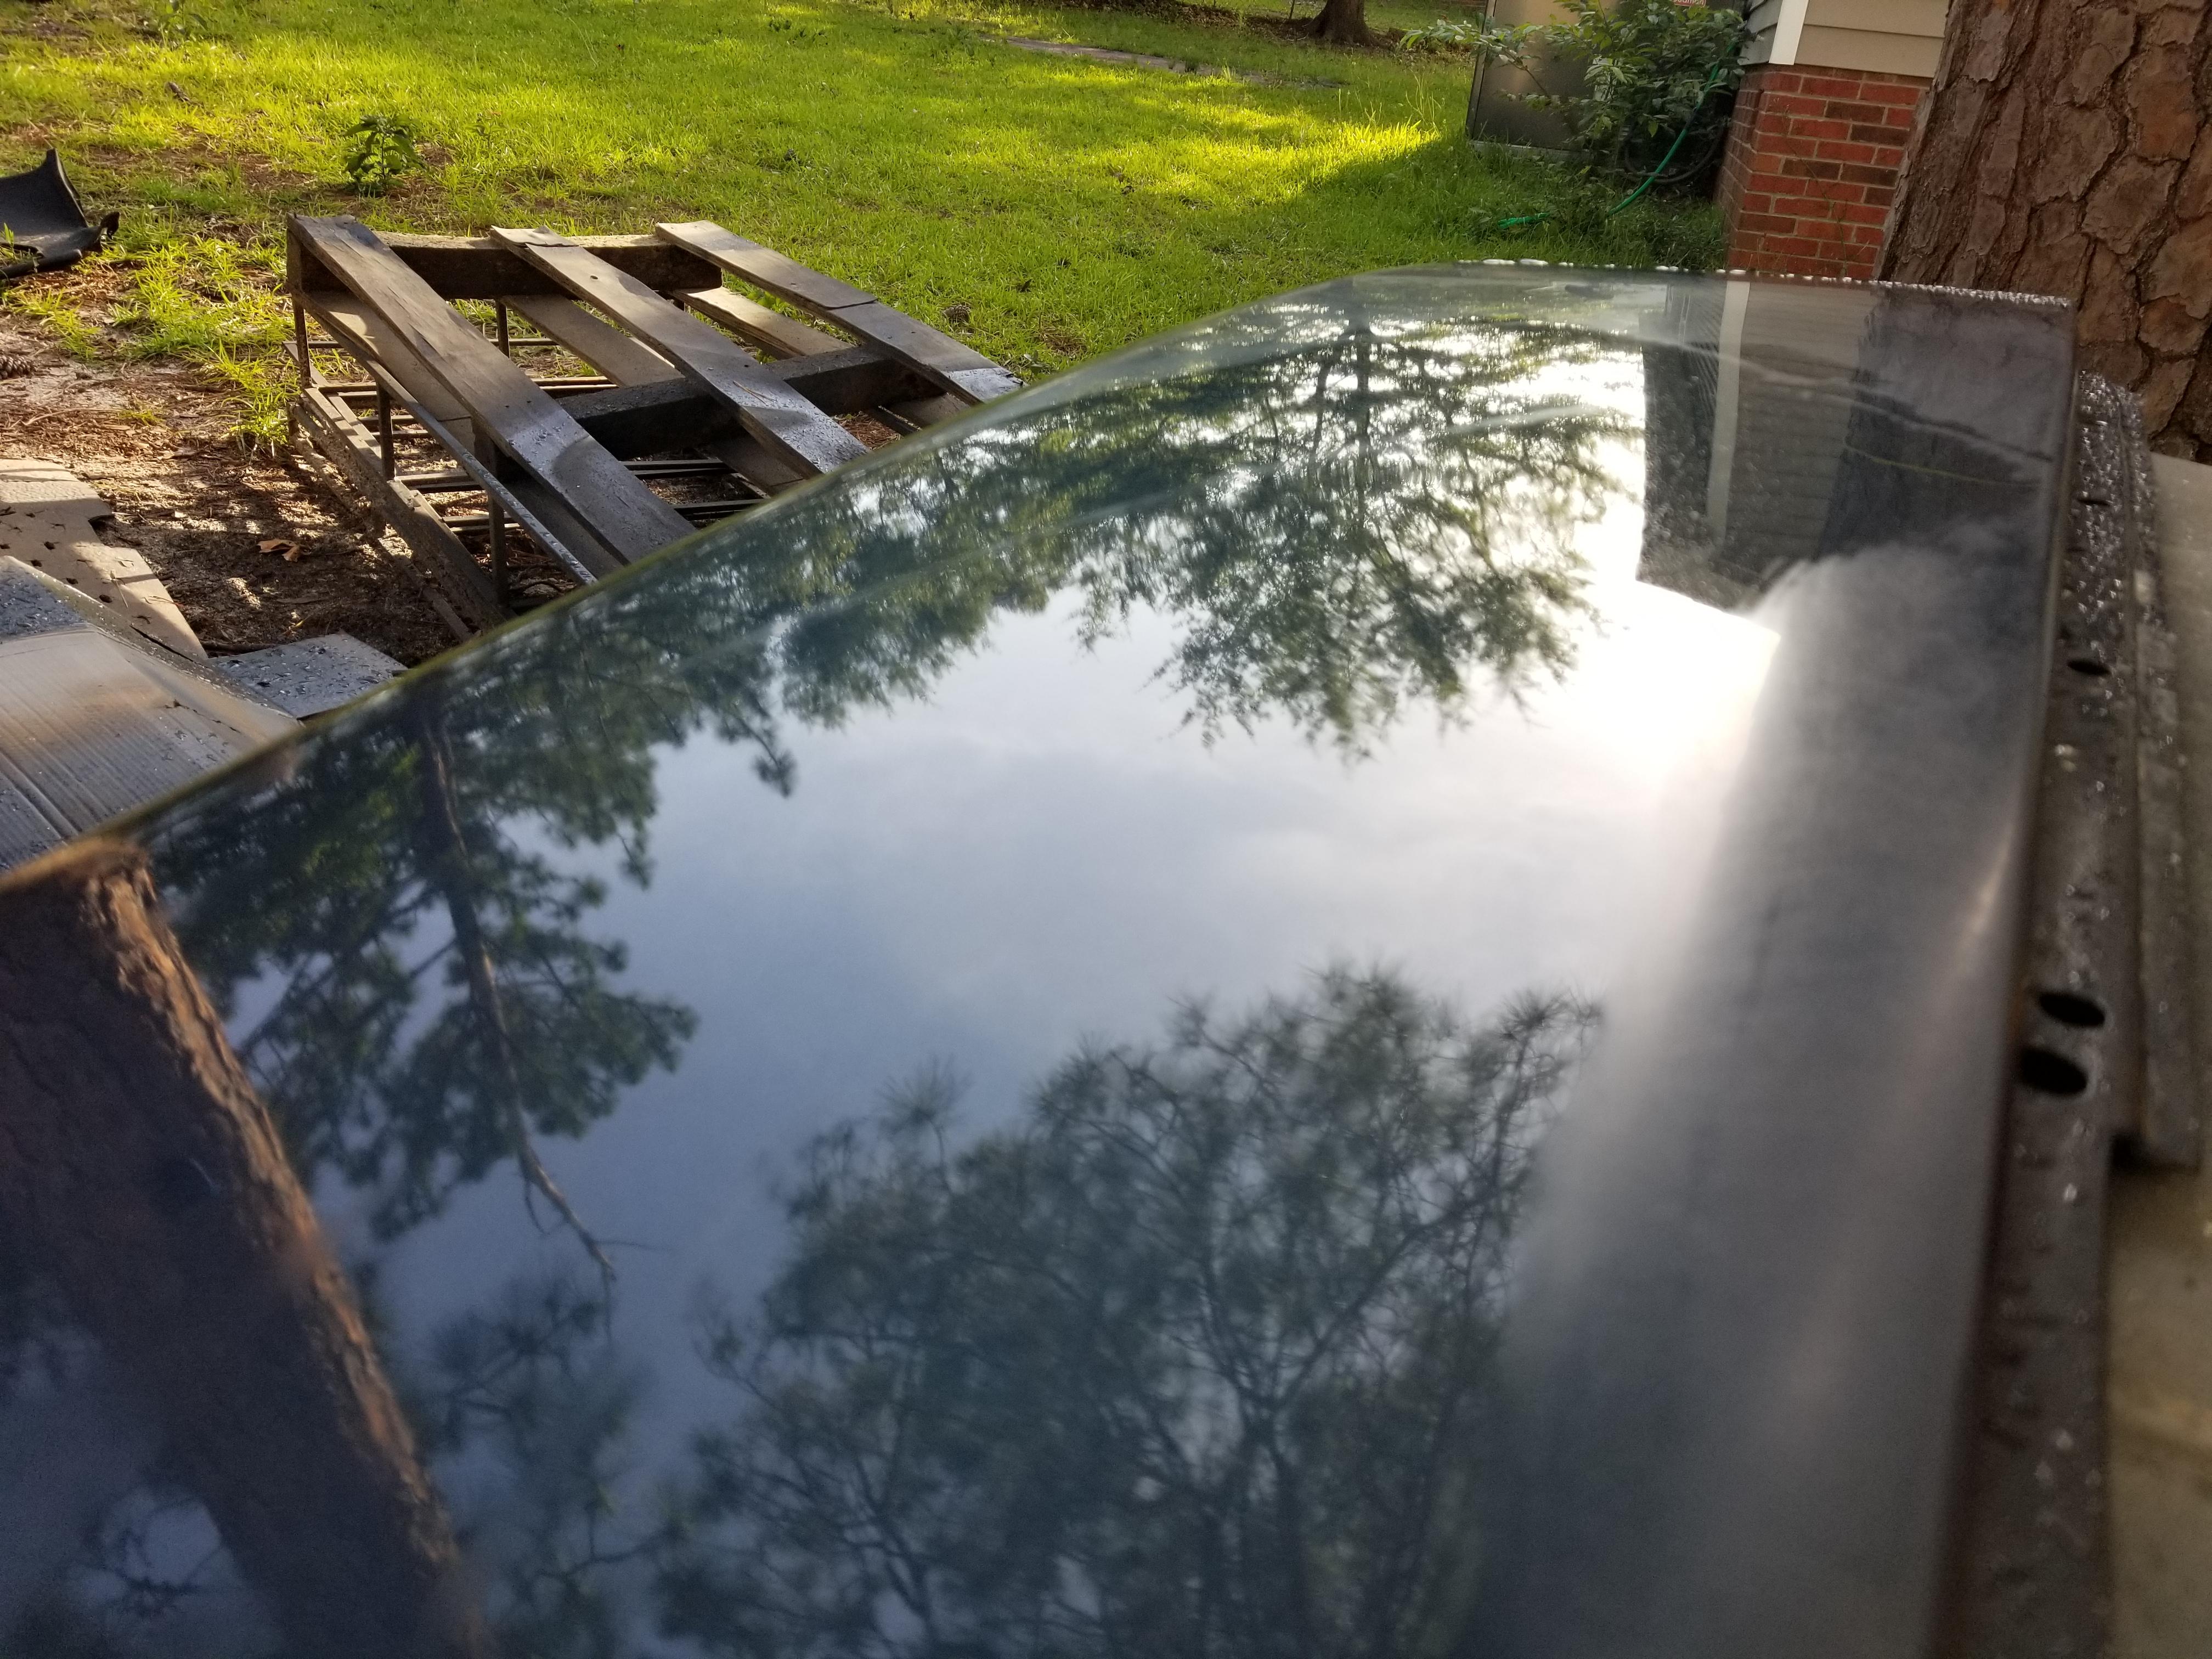
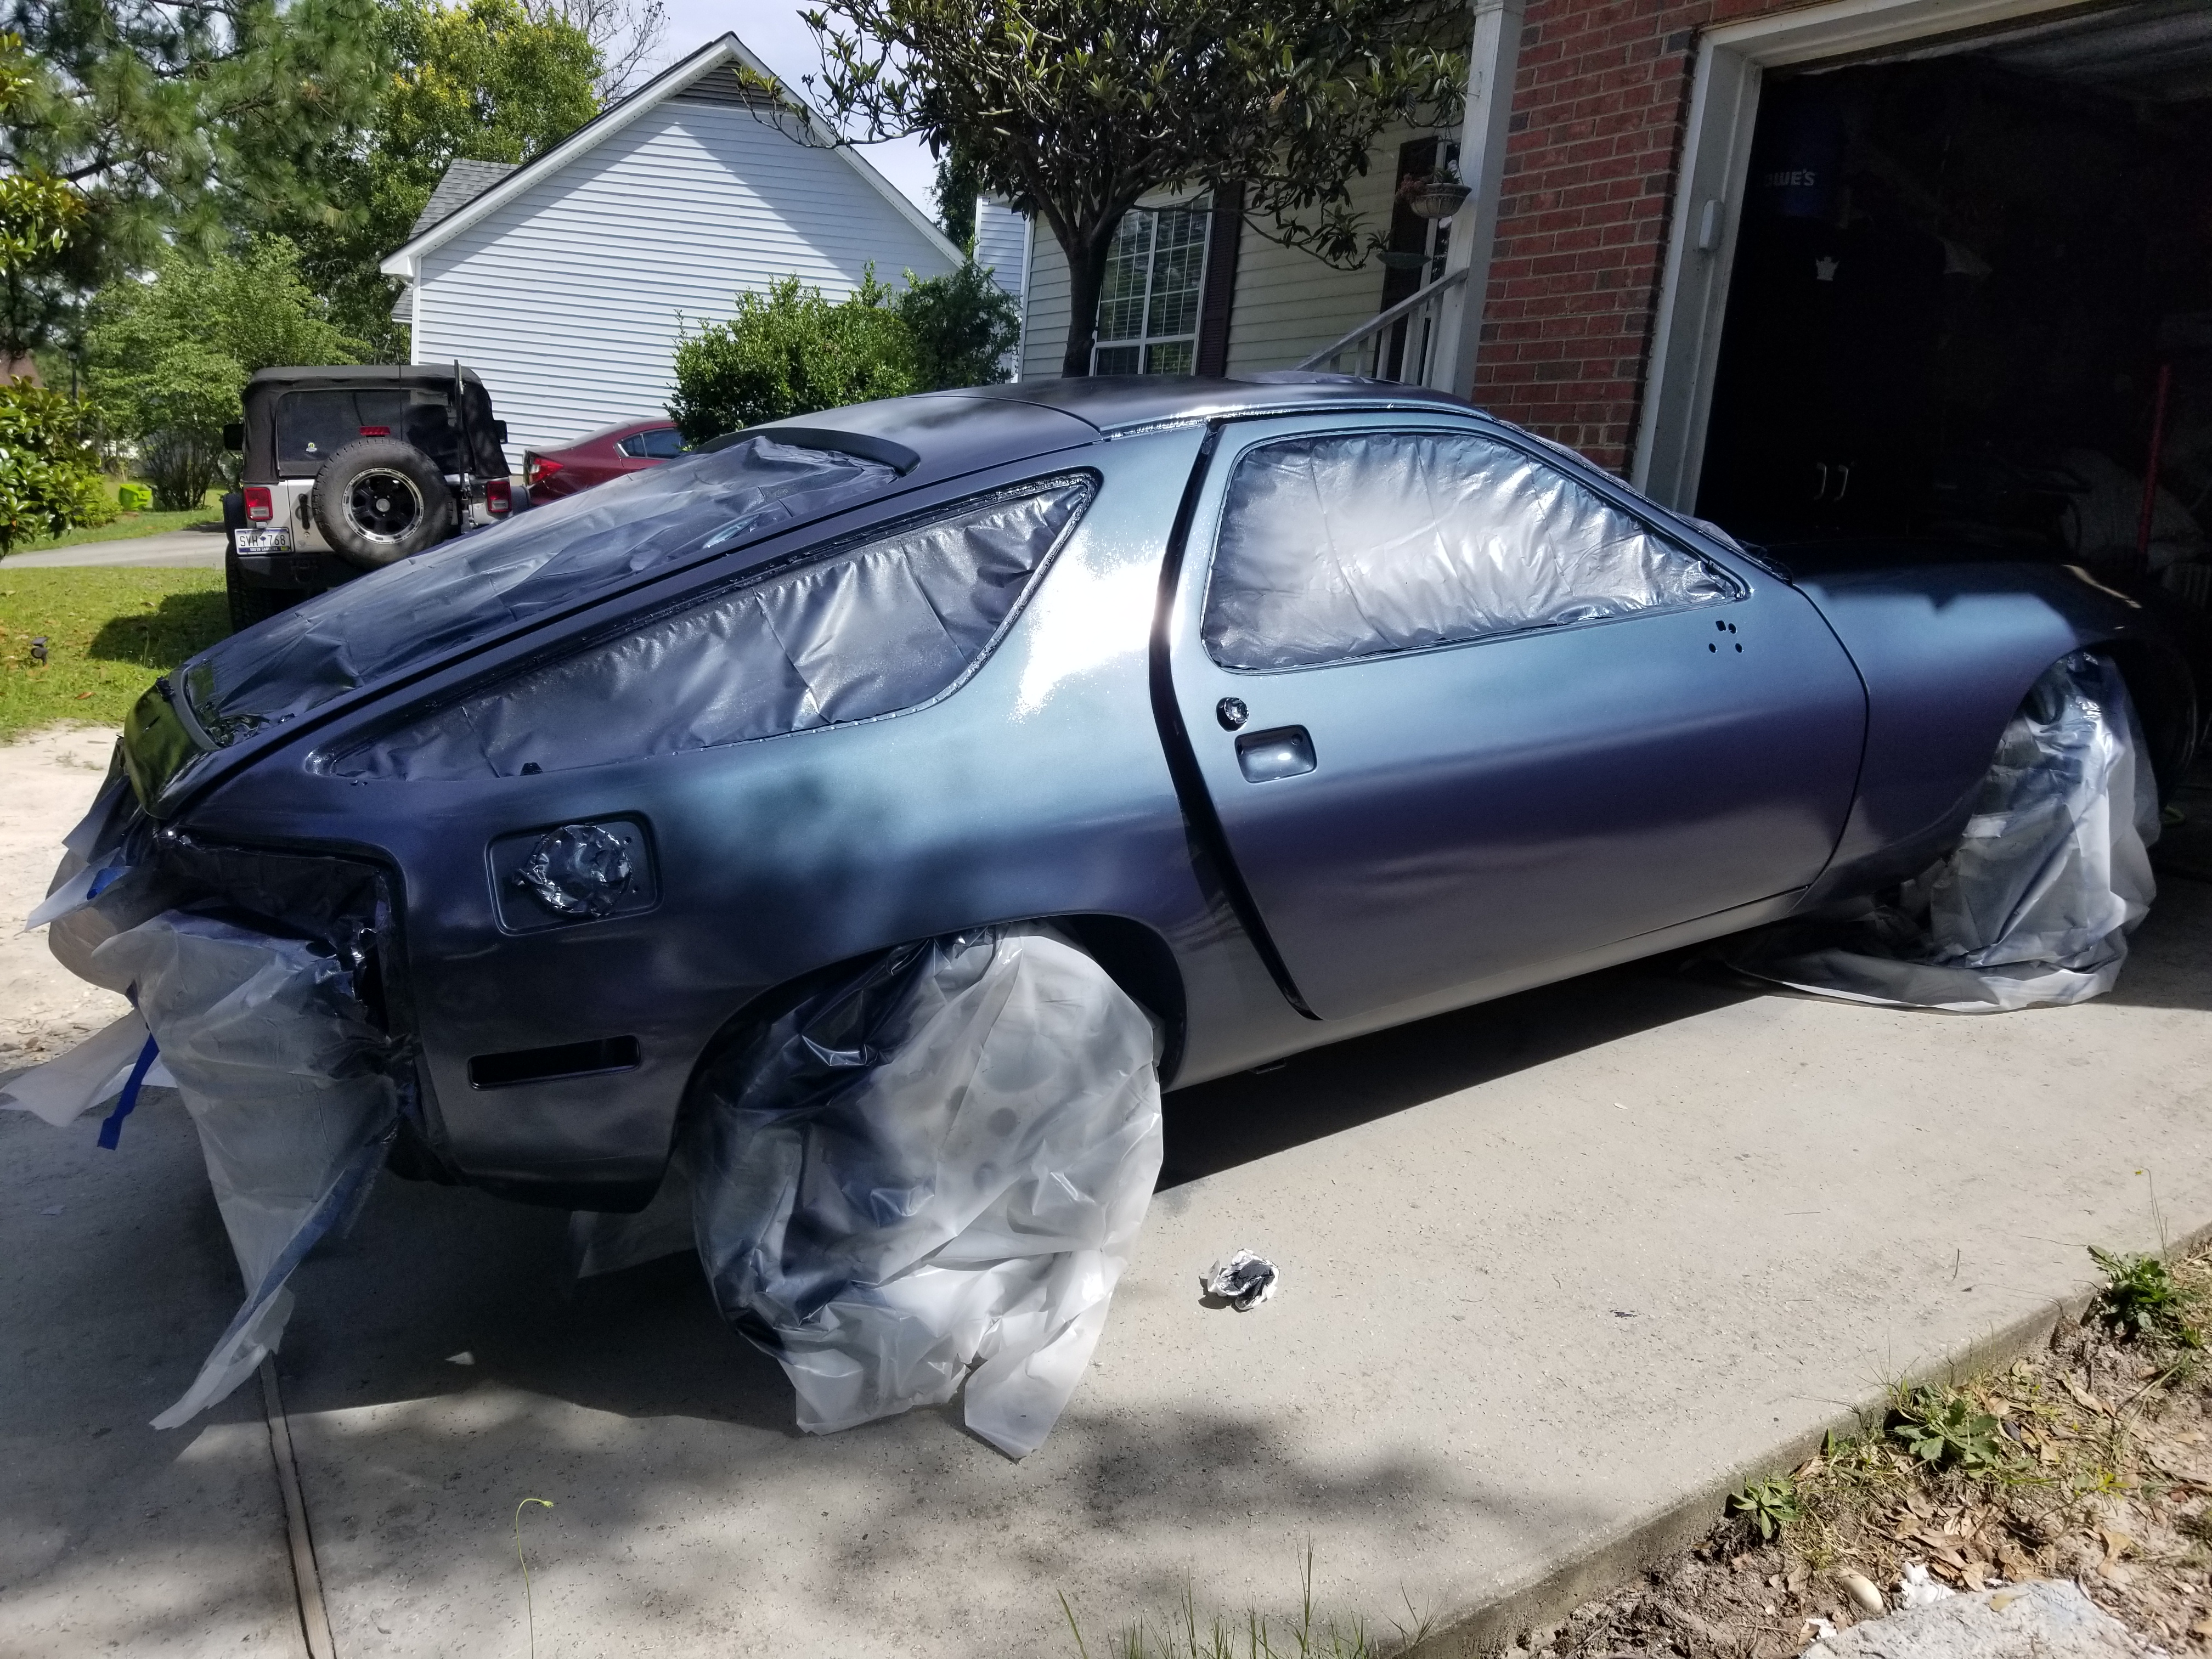
Enough of the bad news though, the car looks pretty good. There are definitely some places that got bugs, but I think it'll all sand out. The whole car will be getting wetsanded and buffed anyway. This isn't one of those fine "off the gun" paint jobs. It definitely has orange peel. Like I said though, it has 3 coats of clear, so should have plenty of room to sand out the orange peel at least.
Here's getting the chips that were down to metal (mainly on the hood and fender) on the car.
And getting it masked off.
Here's after priming.
And the separate parts. Yes they're near the tree, but also were shielded by the carport (which turned out not to be adequate for 30 mph wind gusts).
And the car back in the garage for the night.
After block sanding the primer the next day.
Didn't get a picture of just the sealer due to time, but shot it with sealer then 3 coats of color, then 3 coats of clear.
After taking an hour or so break because painting in 90 degree heat is exhausting, I went and got the separate panels blocked and sprayed them down with color.
Now is where bad stuff started happening. Right as I was spraying down the last coat of clear the wind started gusting up to 30mph+, bear in mind it was supposed to be sunny all day. I hurried up and got the freshly cleared pieces all the way under the carport (on top of the tan 86.5). Thought I was fine until it started raining, while still blowing with 30mph winds. Needless to say some water got on those pieces.
The bumpers are both going to need sanded down and most likely reshot with color and clear (ignore the couple spots where I fooled around with some sanding).
The fender didn't get it so bad. I've been working on seeing if I can save it. Maybe it'll still need a fresh couple coats of clear applied after sanding.
Enough of the bad news though, the car looks pretty good. There are definitely some places that got bugs, but I think it'll all sand out. The whole car will be getting wetsanded and buffed anyway. This isn't one of those fine "off the gun" paint jobs. It definitely has orange peel. Like I said though, it has 3 coats of clear, so should have plenty of room to sand out the orange peel at least.
The following users liked this post:
Oosty (06-30-2020)
06-30-2020, 07:03 PM
#269
Advanced

My God Man,
Is there anything that you won't try in that car port and backyard. You are an inspiration to me too not keep plodding along at my own pace but to strive to near yours. Unbelievable. Absolutely gut wrenching to be done in by the weather like that but I'm looking forward to learning from your solution.
Thanks!