When you click on links to various merchants on this site and make a purchase, this can result in this site earning a commission. Affiliate programs and affiliations include, but are not limited to, the eBay Partner Network.
I can't agree with your logic, Greg. A weak head gasket is not a safety valve that protects the engine.
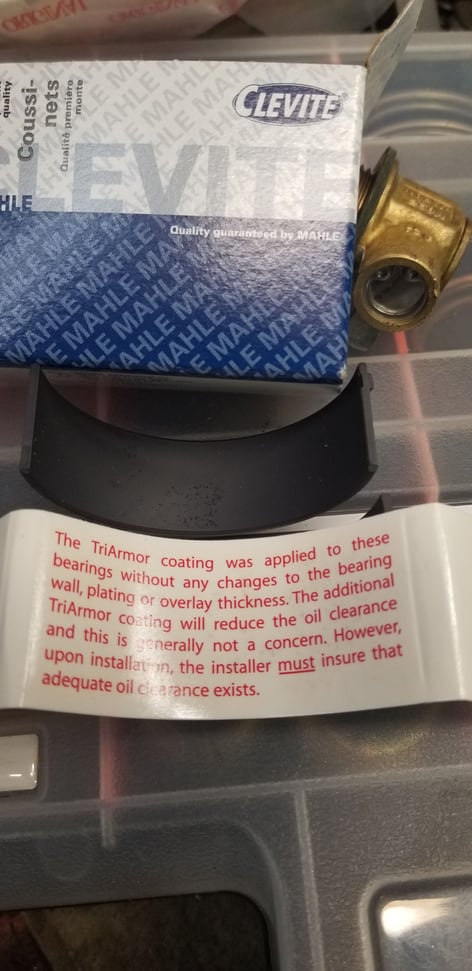
A blown head gasket puts water in the oil, damaging the bearings and possibly the crank. It can overheat the motor, warping the heads. If it is a weaper and goes undiscovered for a period of time, the coolant will erode a groove into the head along the path it always follows.
In short, a blown head gasket damages other parts, it does not save them from damage.
My reference is, quite obviously, about catastrophic, instantaneous failure on a high performance engine, not long term neglect.
Even a 50 amp fuse in a 25 amp holder can deteriorate and fail, over time.
It seems almost futile to try and get my point across, but I will repeat, once more. Of the dozens and dozens of high performane engines I've built, with 968 104mm head gaskets, I've never had any issues with any sort of head gasket failure. No seeping, no leaking, no water in oil, no water in combustion chambers.
Zero. Nada. None.
Therefore, these gaskets were my recommendation to Kevin. Yes, these gaskets require minor modifications to work...takes about an hour to modify the gaskets.
There are obvious options, one of which you use.
However, repeating again, the only "weeping" head gasket issues I have had were with Cometic gaskets. And yes, one of those engines did allow coolant to get into the oil.
Using Cometic gaskets is your recommendation, but you have a lengthy list of special "hoops" you jump through to use these gaskets. (None of which are recommended by Cometic, BTW.)
So, let's think about this for a client in Podunk, Nebraska:
A client of yours, who removes a head (for any reason) needs to first remove the engine, because it has studs.Then, they need to go against Cometic's recommendations and use a special sealant on the new gasket. Then the engine needs to be "baked", with their handy engine oven (over in the corner of their garage), three times. Then, they need to remove the valve covers and re-torque the heads. At this point, they can re-install the engine.
My client slaps a head gasket onto the block, still in the car, torques the head, and is done.
How about Kevin's engine?
To use Cometics, the way you do, he needs to buy a set of head studs, use a special sealant on the Cometic gasket (again, against every recommendation they make) and torque the heads. Then he pulls out his "handy dandy" engine oven and cooks the engine three times. Then he re-torques the heads.
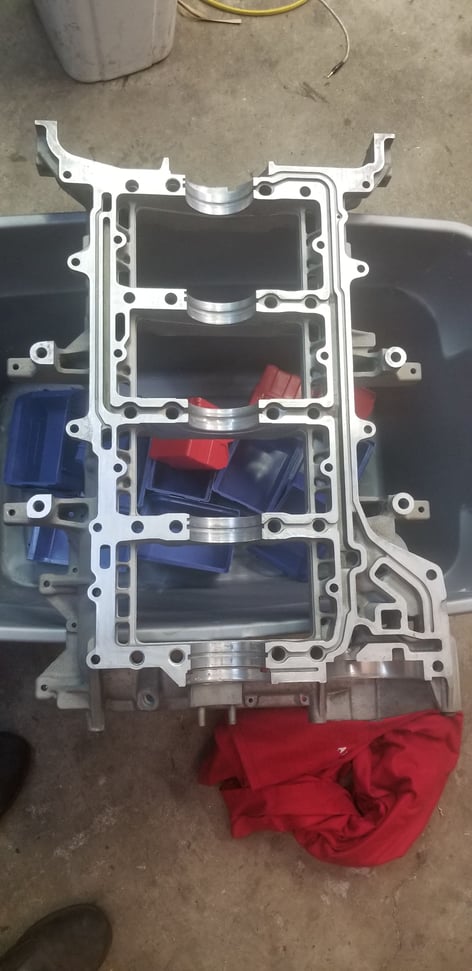
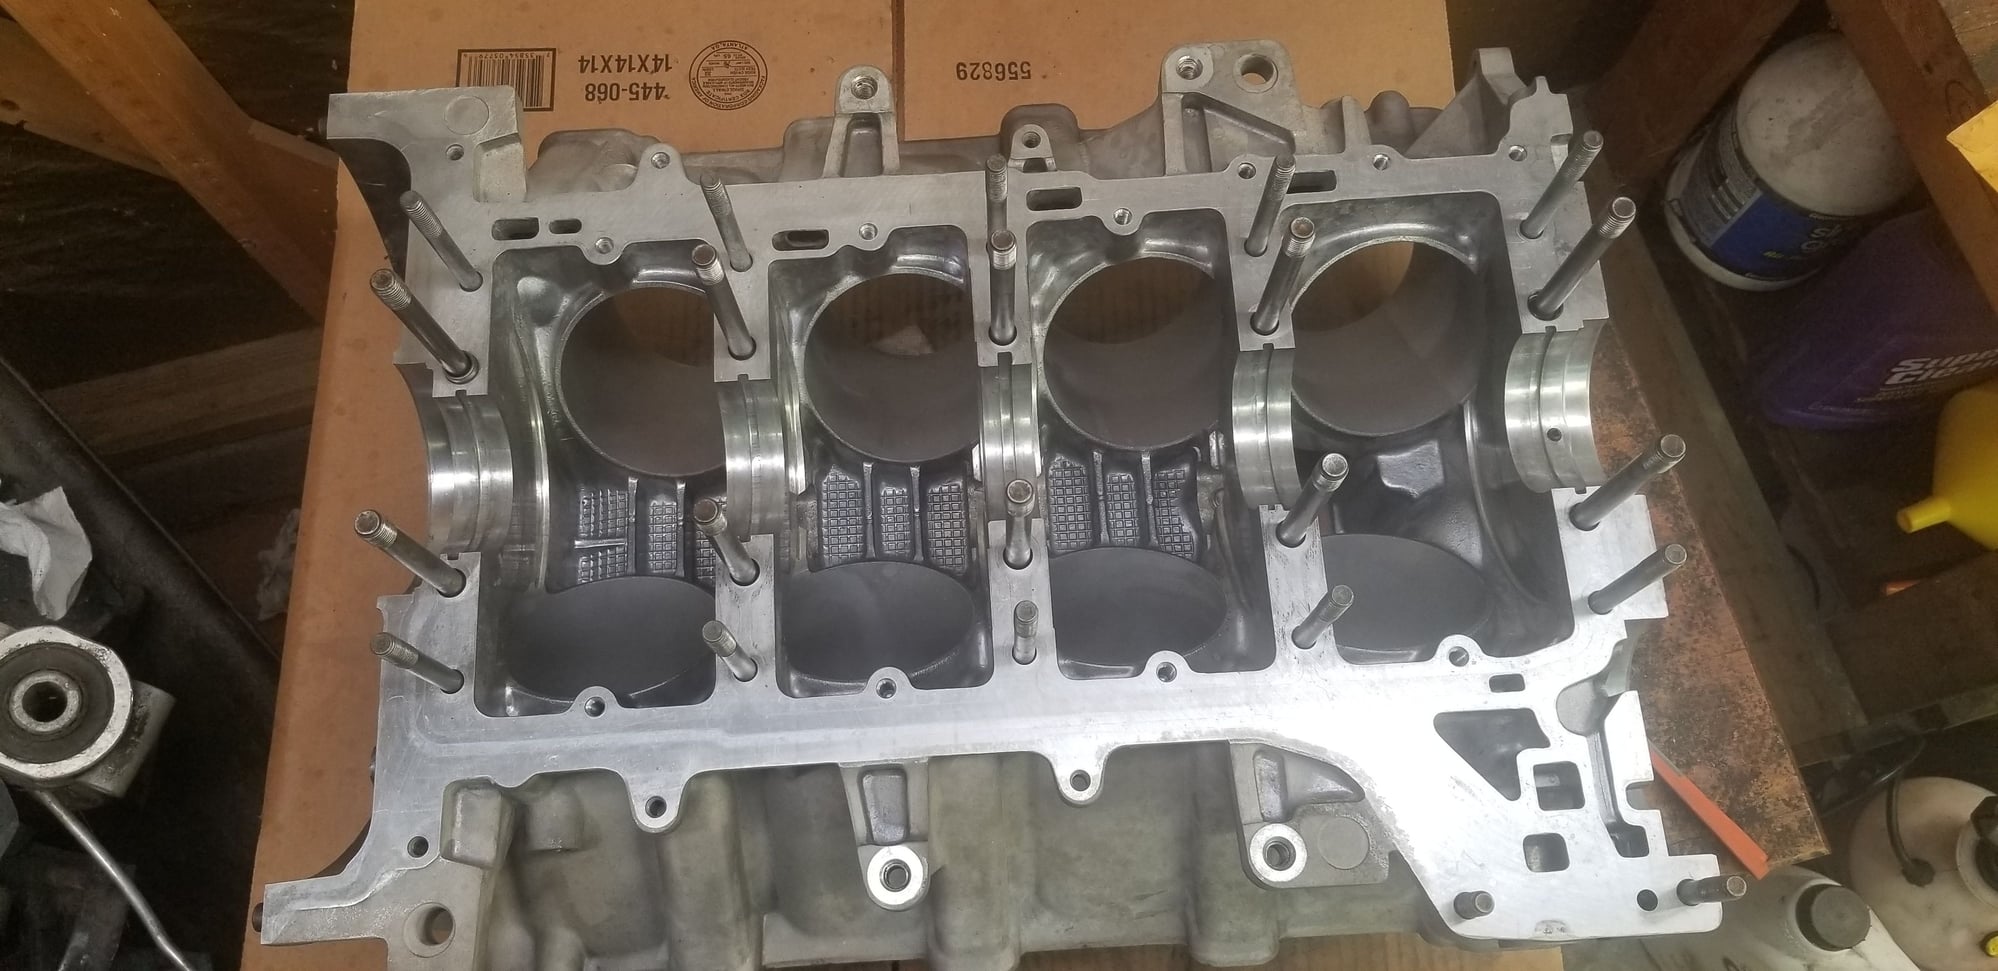
This weekend I assembled the rods and pistons(making sure the opposing piston rods narrow shoulders faced each other) - leaving one wrist pin spring clip out in case I misunderstood the narrow versus wide offset wrist pin debate. I oriented the narrow side inboard on the passenger side and outboard on the driver side. This is what Hammer did. This is better on the powerstroke and not how Porsche did it at the factory - they went for quieter.
The 2 and 6 pistons gave me a challenge. The narrow and wide offsets were not consistent side to side. It's as if the bore is off the centerline. I checked more than a few times. Narrow on one side wide on the other.
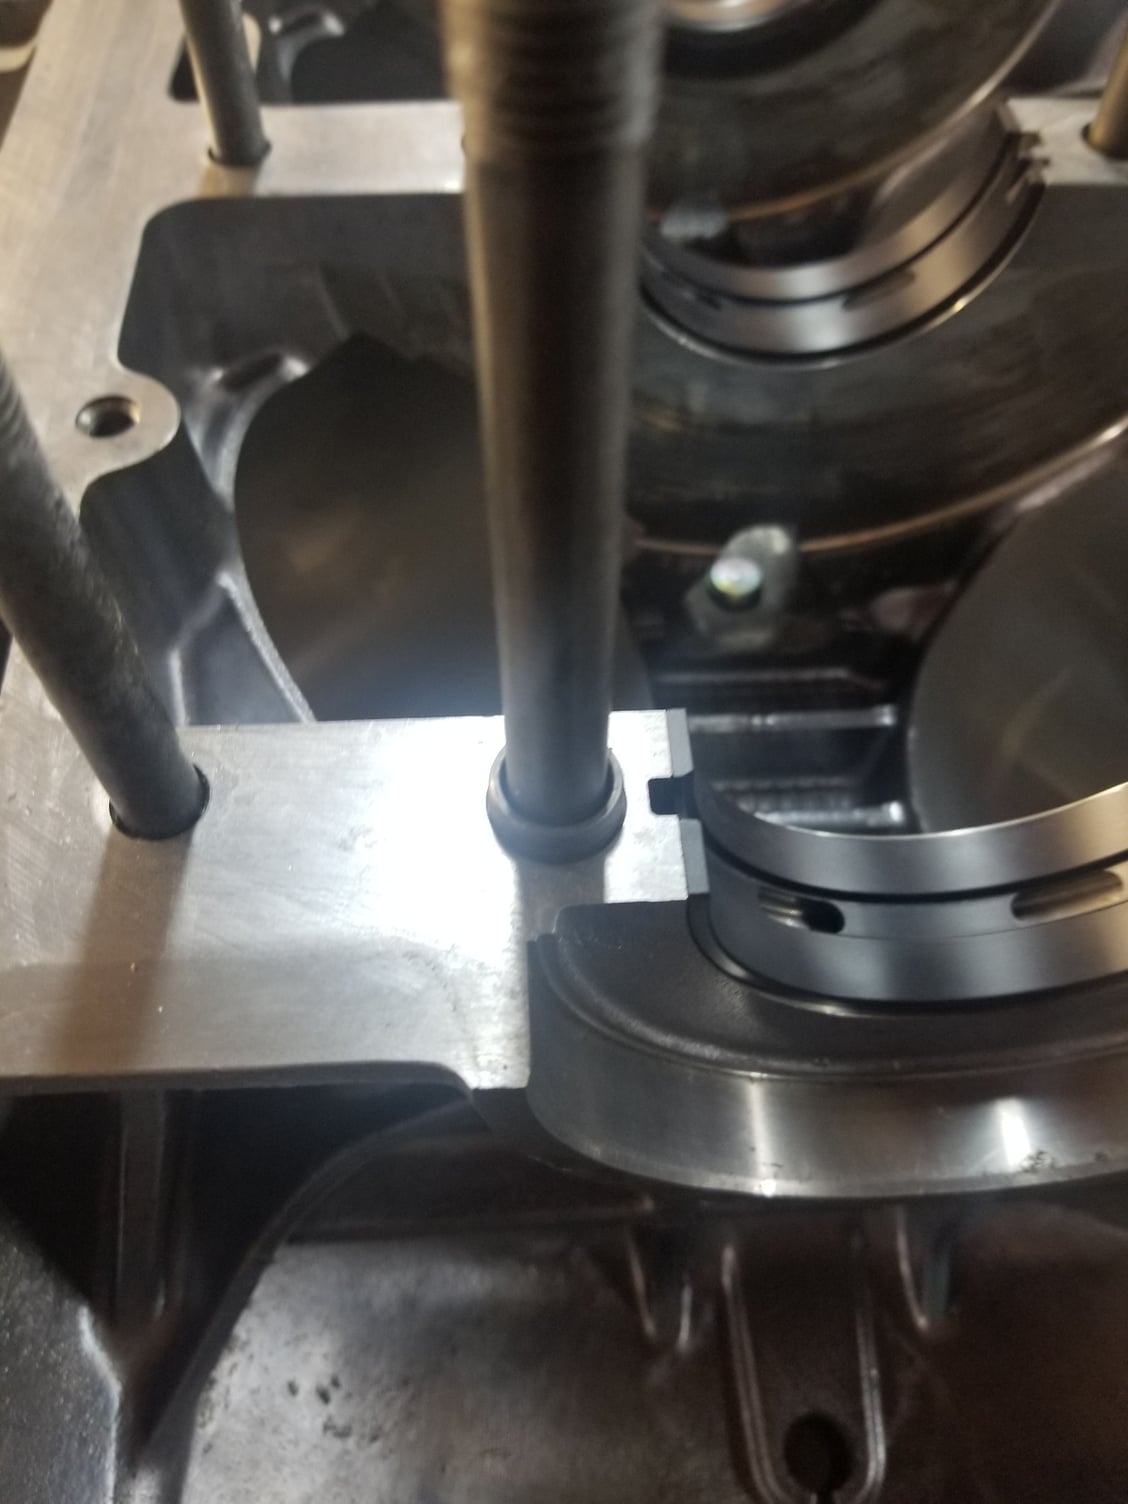
I cleaned the crankshaft dirt traps for any metal shavings left over from the newly tapped holes and screwed in the stainless steel plugs that had red loctite on their threads.
Finally, I checked the piston ring gaps. While the top rings by and large were gapped to tolerance, none of the 2nd rings were. So, I plan on buying a manual piston ring filer as well as a piston installer.
Hopefully, the 2/6 bearing will be grooved this week.
This weekend I assembled the rods and pistons(making sure the opposing piston rods narrow shoulders faced each other) - leaving one wrist pin spring clip out in case I misunderstood the narrow versus wide offset wrist pin debate. I oriented the narrow side inboard on the passenger side and outboard on the driver side. This is what Hammer did. This is better on the powerstroke and not how Porsche did it at the factory - they went for quieter.
The 2 and 6 pistons gave me a challenge. The narrow and wide offsets were not consistent side to side. It's as if the bore is off the centerline. I checked more than a few times. Narrow on one side wide on the other.
Semi-retired, as of Feb 1, 2023.
The days of free technical advice are over.
Free consultations will no longer be available.
Will still be in the shop, isolated and exclusively working on project cars, developmental work and products, engines and transmissions.
Have fun with your 928's people!
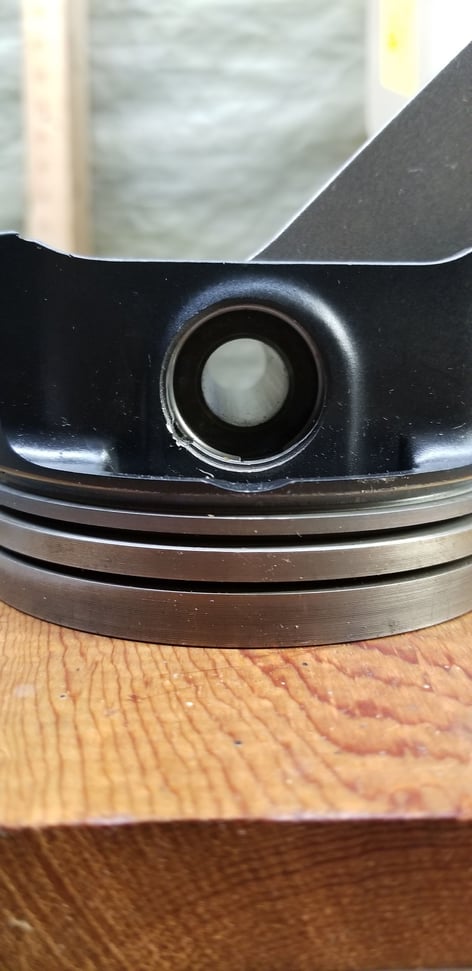
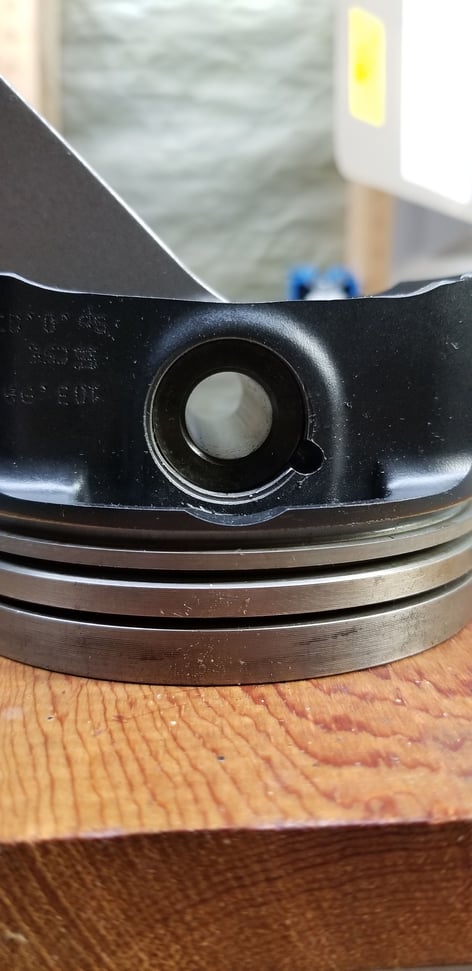
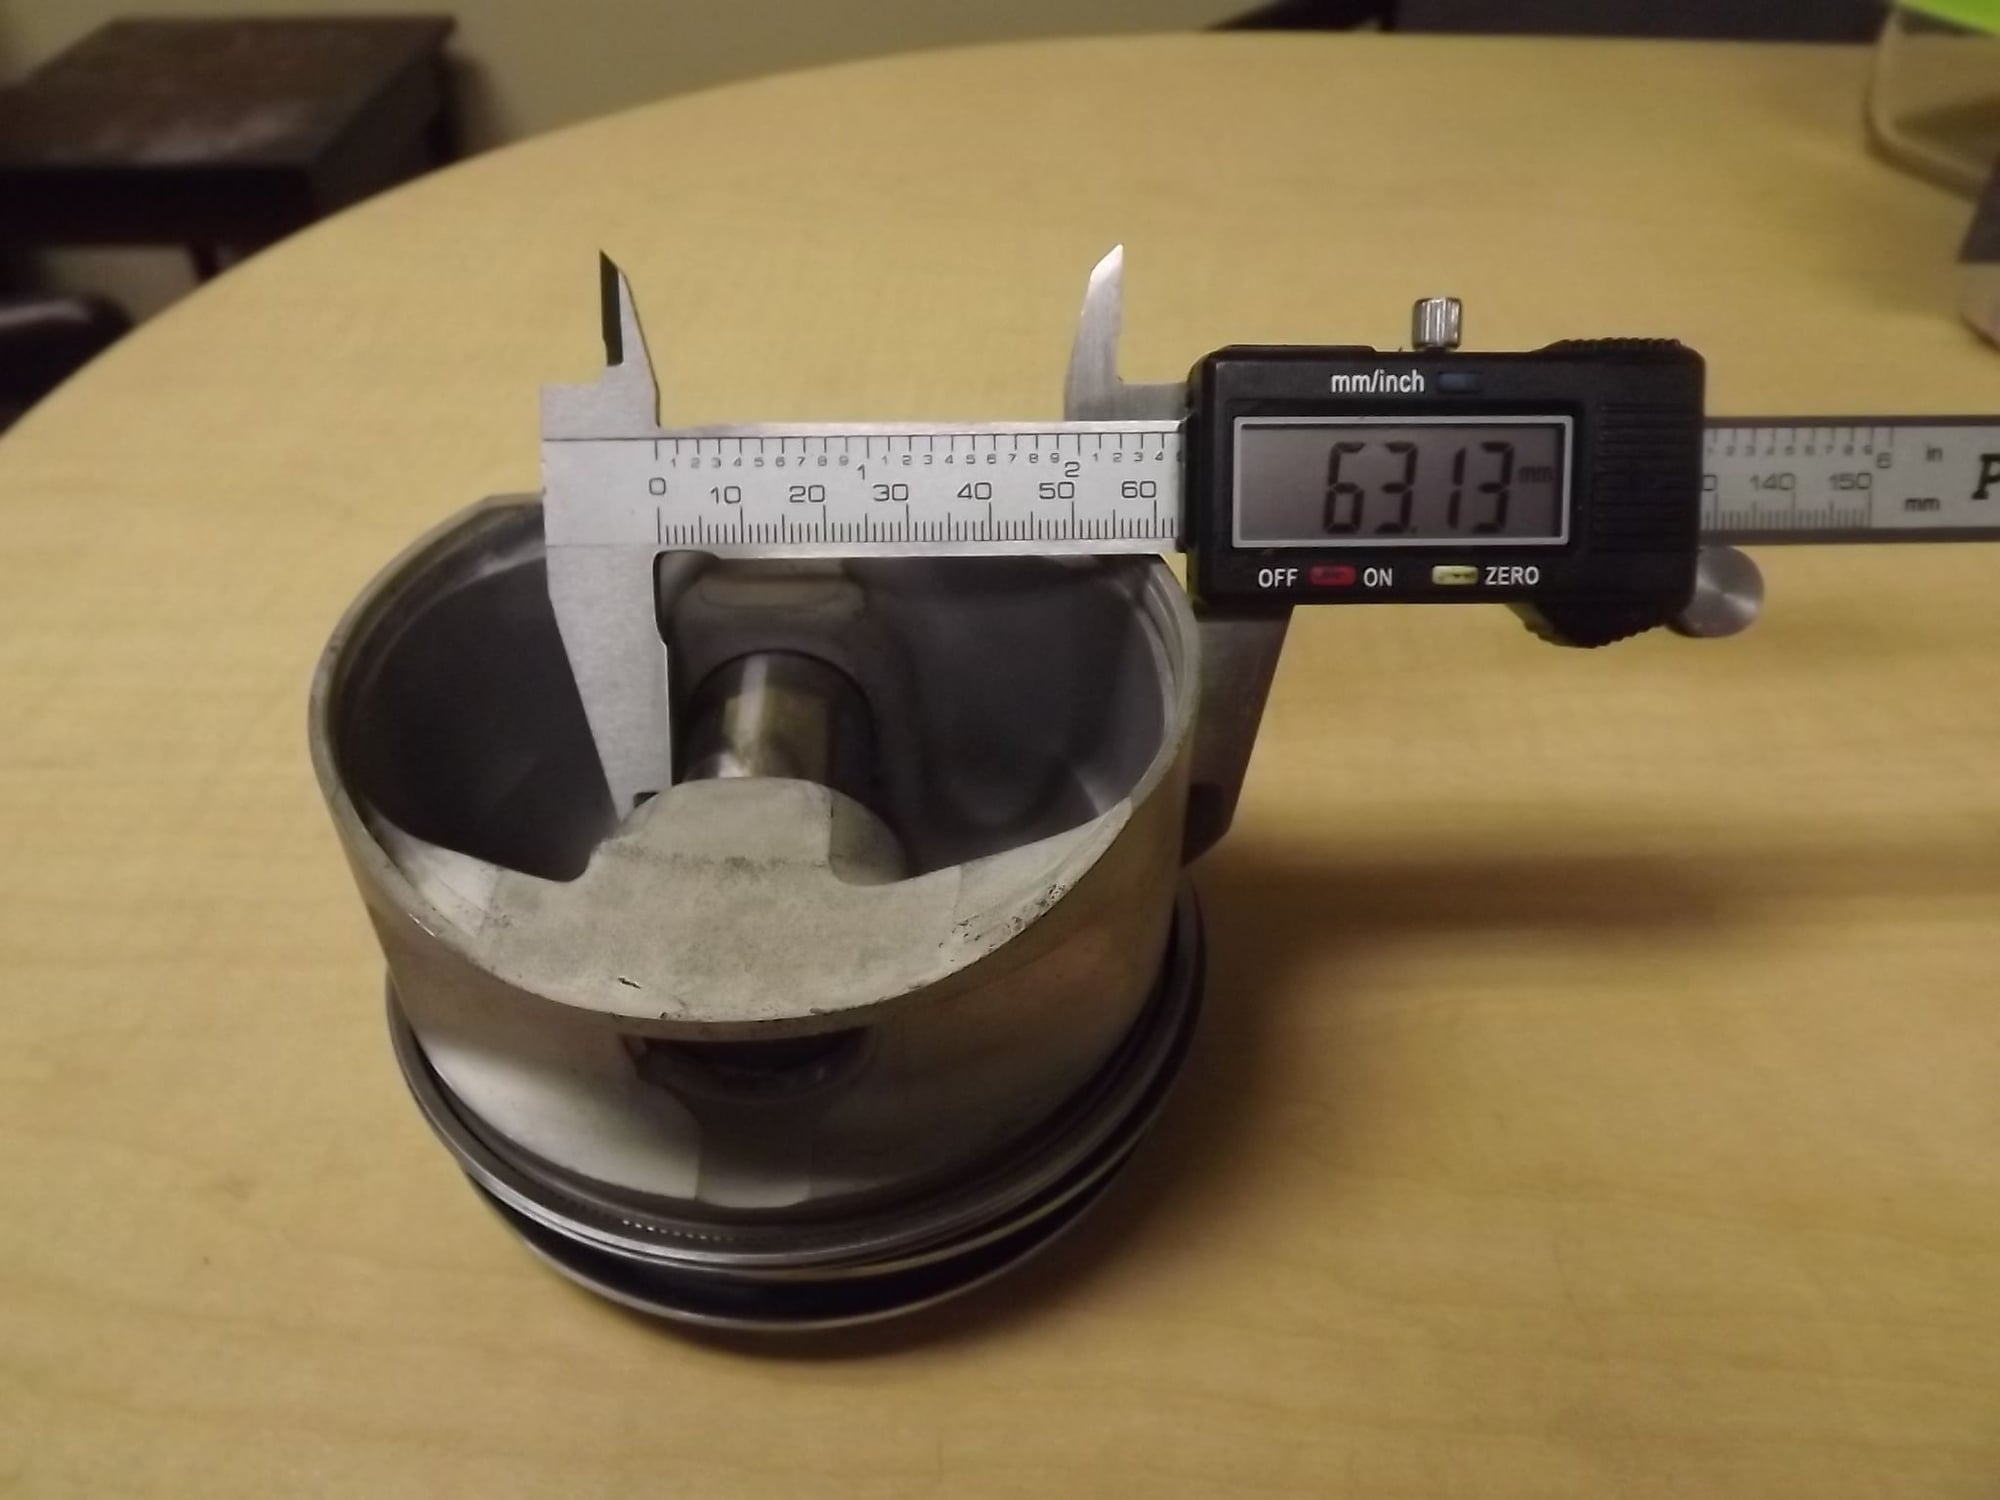
Profile 1 piston offset to the left. Profile 2 piston turned 180 degrees. offset is still to the left.
Install piston pin.
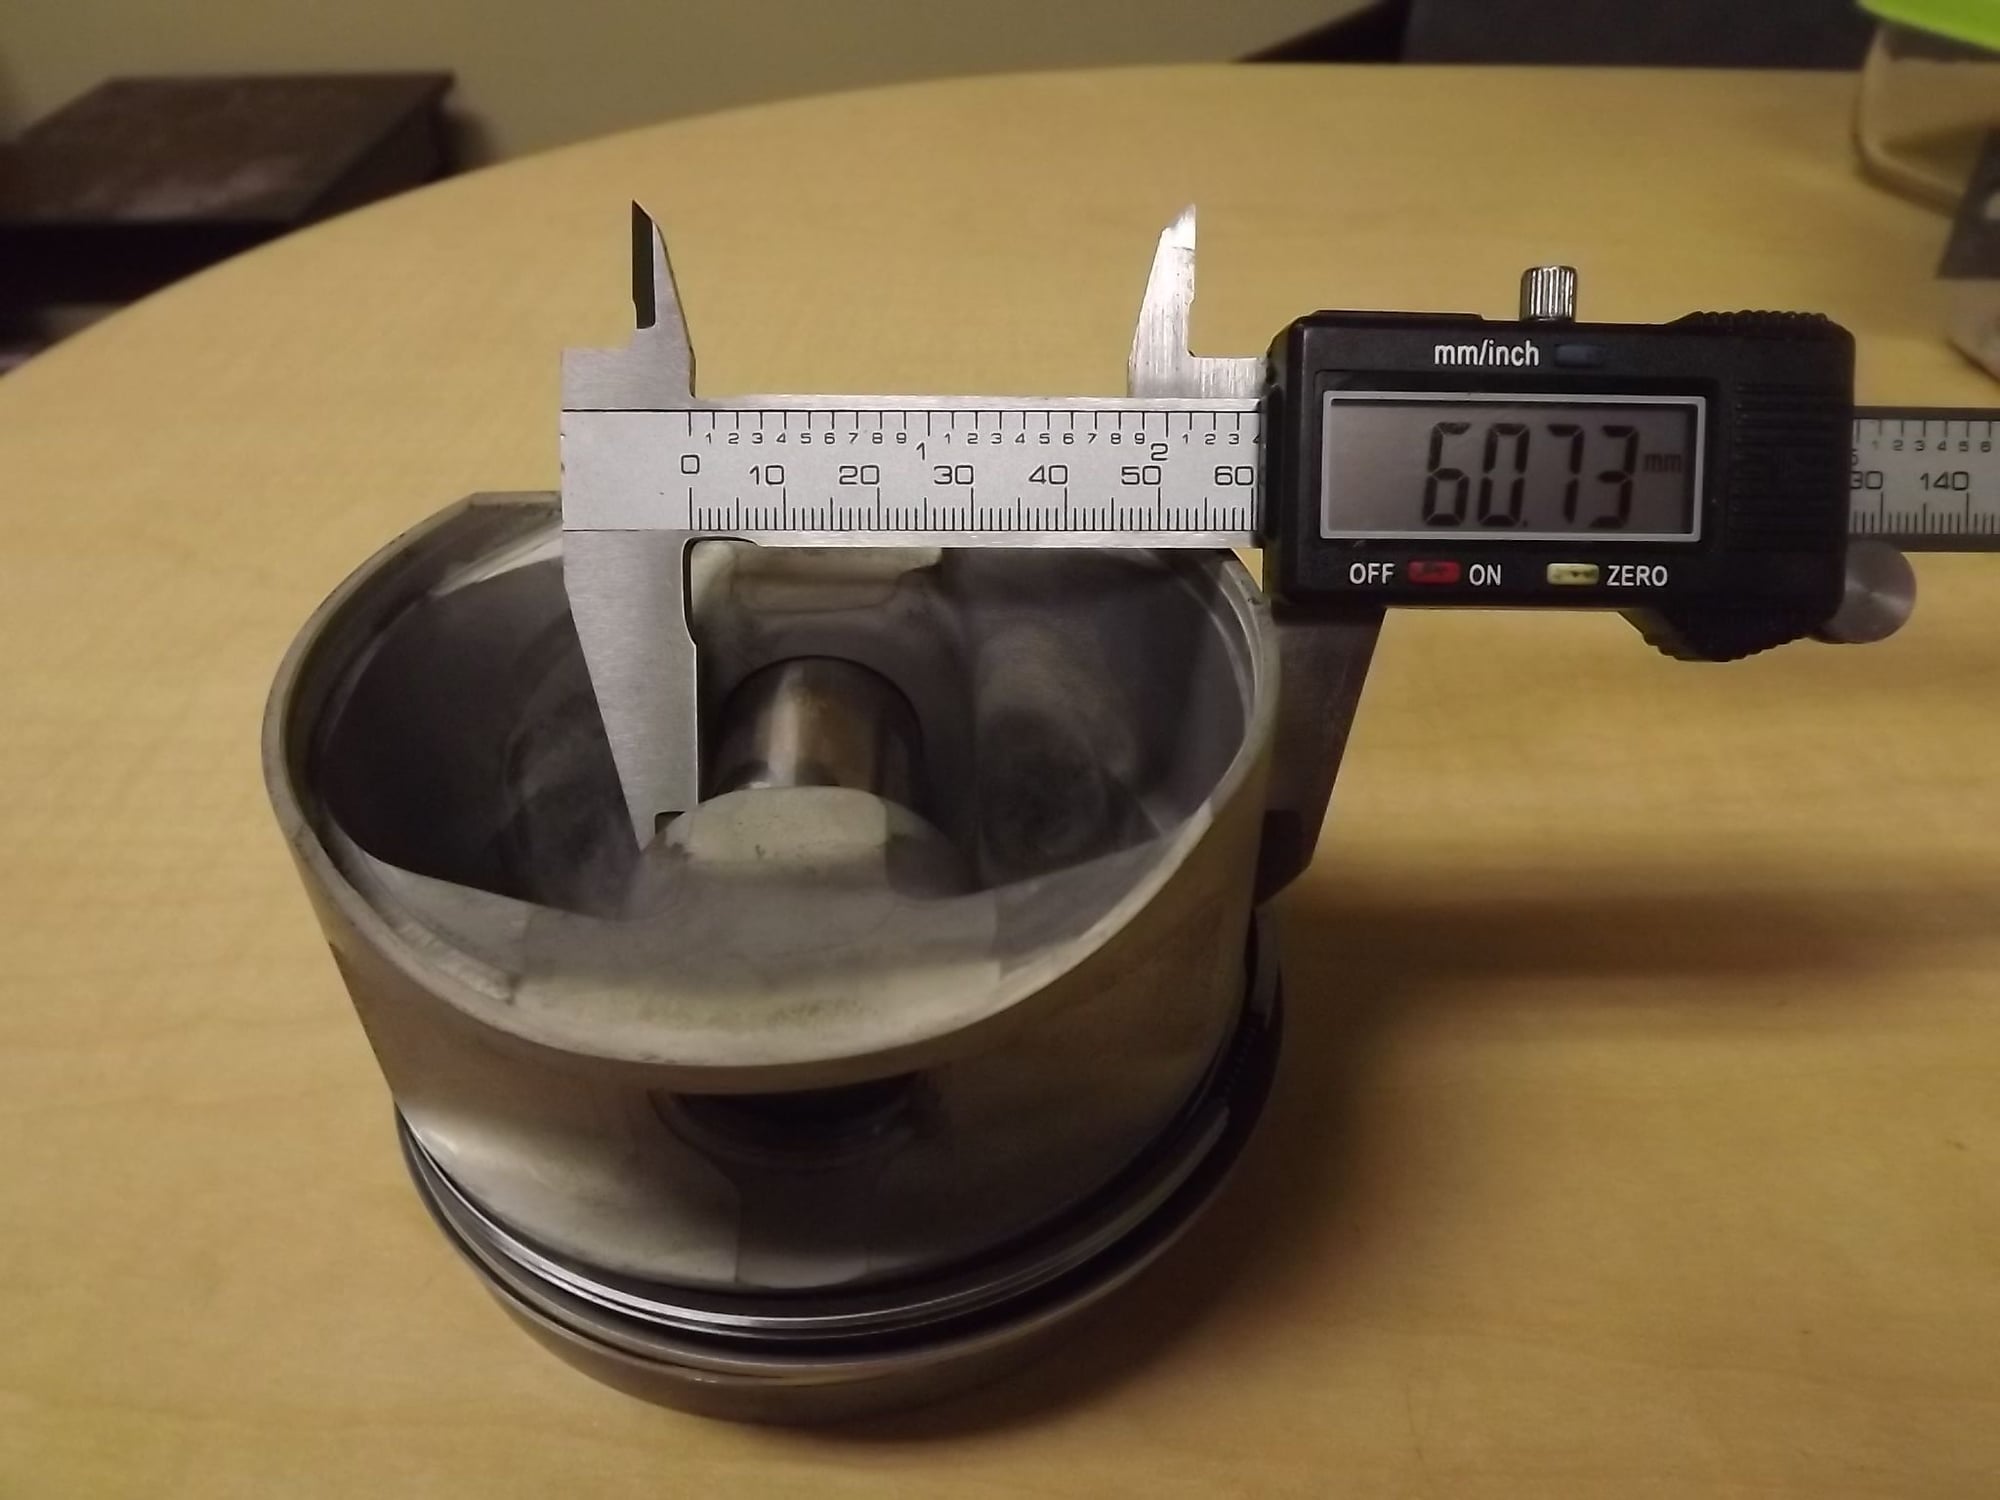
Measure from pin to outside of one skirt. Measure from pin to outside of other skirt.
Here's pictures of that, from a 100mm GTS piston:
The difference between the two is 2.4mm, which means this piston pin is offset to one side 1.2mm.
The '87 and later 928 pistons all have symmetrical valve reliefs and install on both sides of the engine with an arrow facing forward. This means that all of the pistons will have the same piston offset in relationship to the crankshaft.
Prior to 1987, Porsche made all their 928 pistons with pin offset and asymmetrical valve reliefs. This means that one side of the engine has the offset to the crankshaft one direction and the other side of the engine has the offset to the crankshaft in the other direction.
This continues, today, and is why the 997.2 pistons "loose" their Ferroprint and gall on the 4-6 side.
"For a company that "hangs their hat" on engineering, not their finest moment."
The easiest way to remember piston offset is:
If you can carry the piston over the top of the engine and install it on the other side, the offset in the piston and the rod offset to the crankshaft will be the same from one side of the engine to the next.
If you have to carry the piston around the front of the engine to install if on the other side, you'd better hope the pin is centered (zero offset)! If the pin has an offset, the two angles to the crankshaft will be different from one side of the engine to the other. Not very good engineering.
That makes perfect sense - for the life of me I could not figure out how to properly measure the wrist pin offset.
So, the block and pistons are on their way to Savannah, GA. The bores will be matched to the pistons. Hopefully, in a couple of weeks with that do the assembly can begin in earnest.

 05-03-2019, 02:20 PM