When you click on links to various merchants on this site and make a purchase, this can result in this site earning a commission. Affiliate programs and affiliations include, but are not limited to, the eBay Partner Network.
I scoured RL for every reference to using a oil pan spacer and the mini-starter. All of them involved some amount of oil pan and motor grinding. To me there was a risk of warping the pan when welding. I think you found this out yourself. I'm glad you were able to weld it in your latest attempt. So, I am taking a chance with JBWeld. I'm putting a lot of faith in my oil level sensor to let me know if oil is leaving the pan.
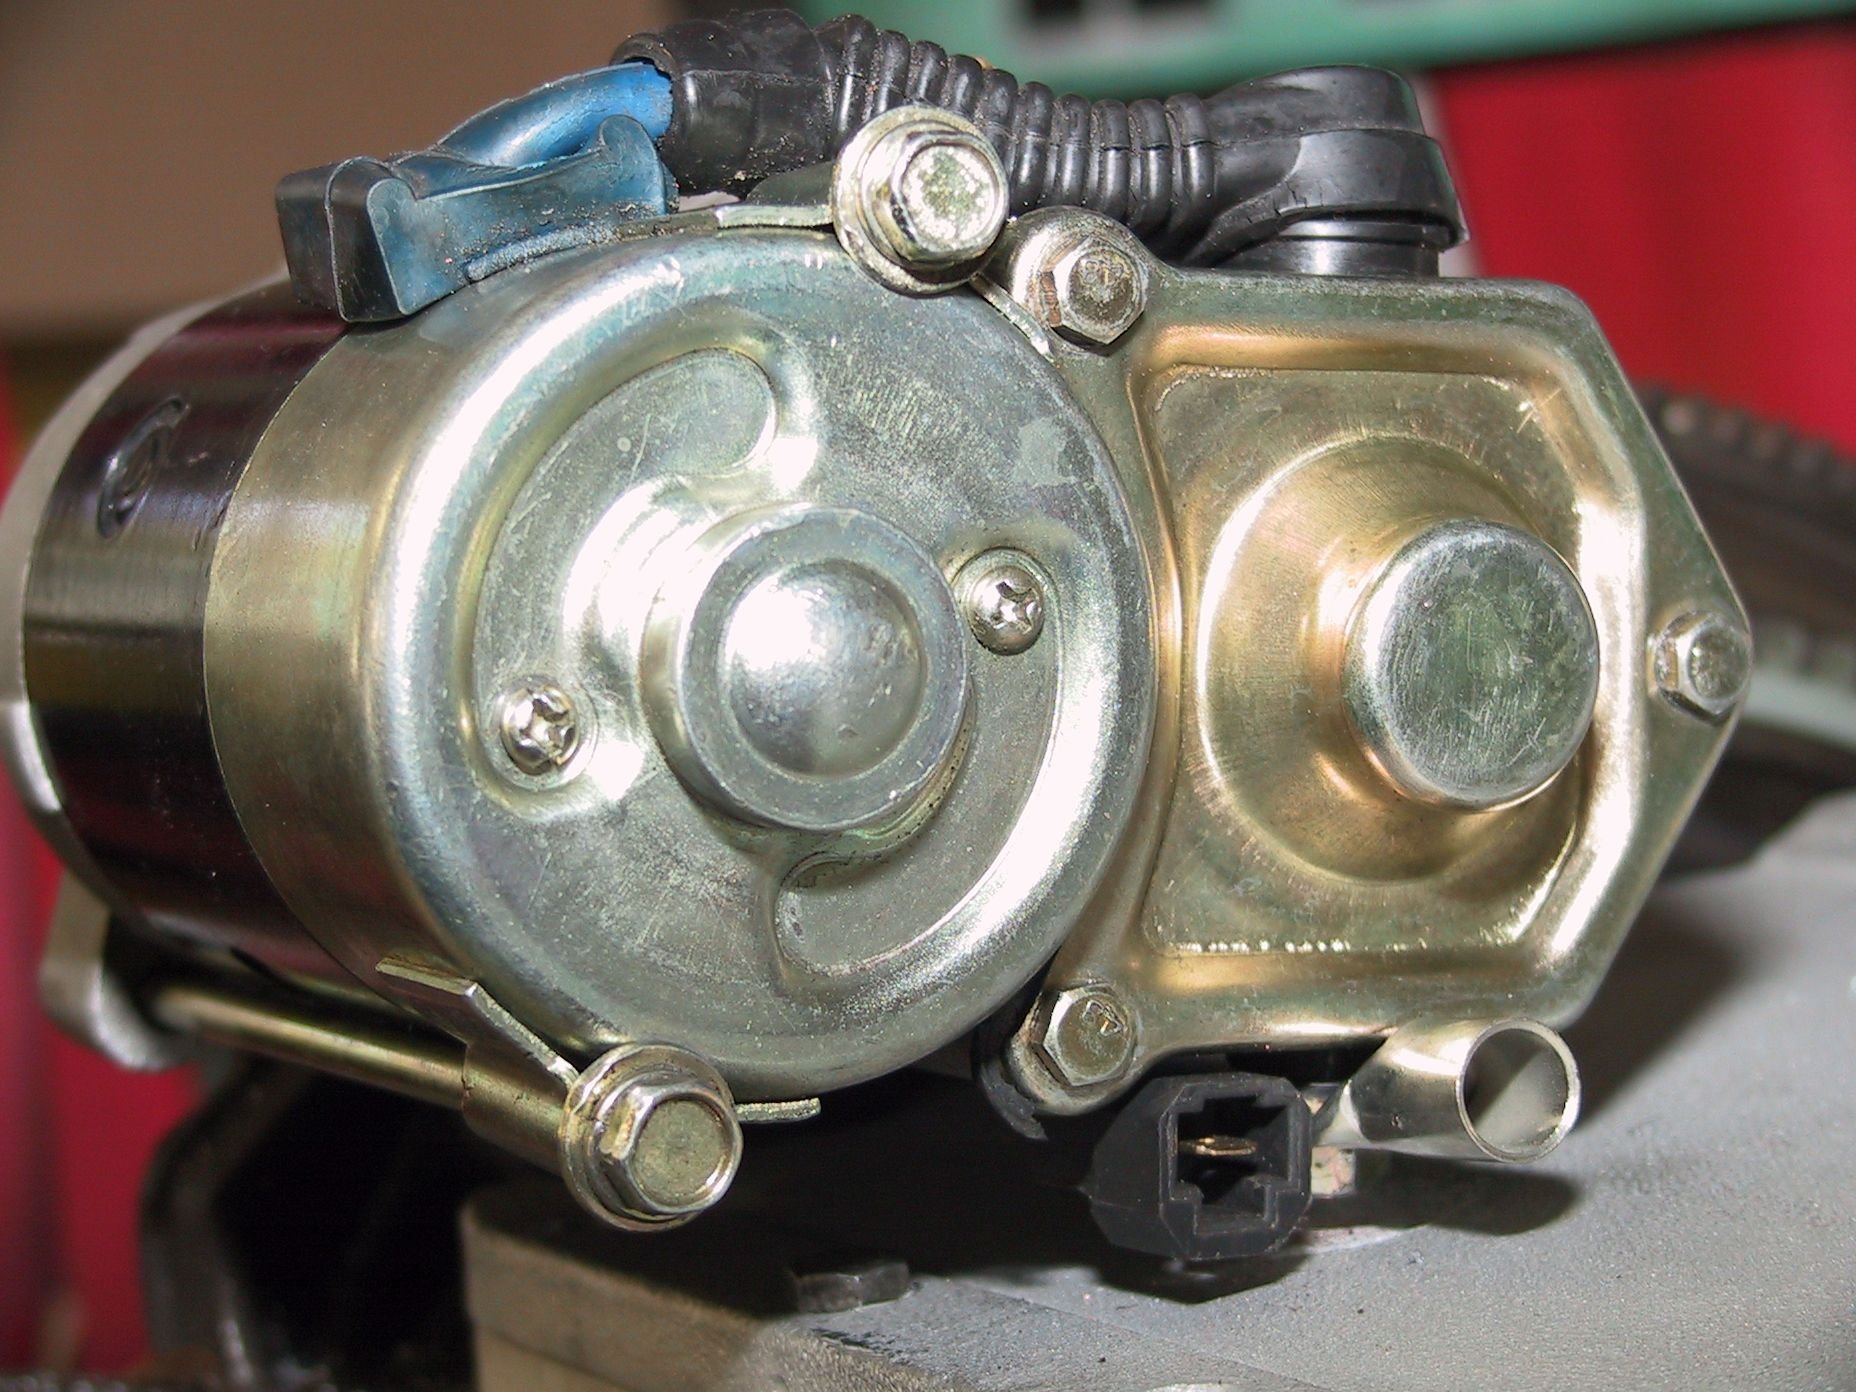
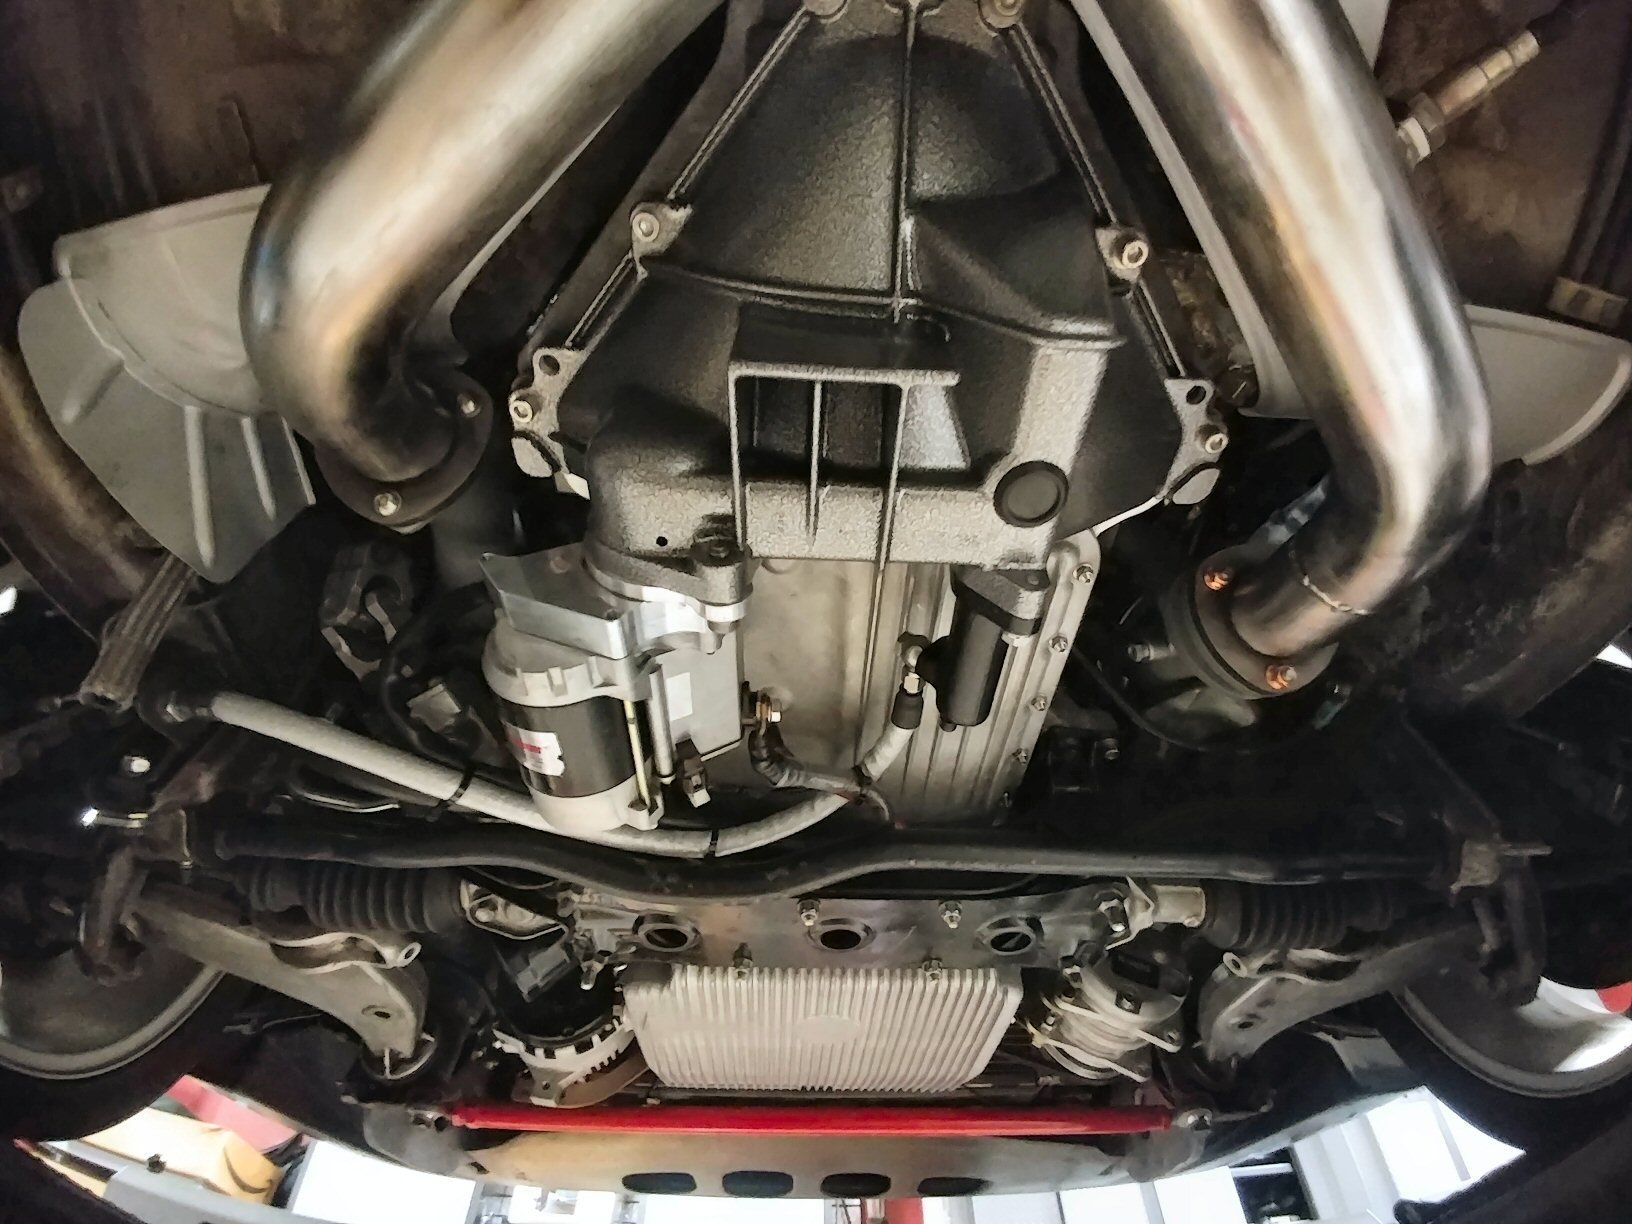
Tonight I mocked up the block with the oil pan, pan spacer, GB's OPG and early lower bell housing with the starter attached and as I expected had to start removing material from the starter as others have. I have an upper bell housing so that helped me line up exactly where the lower bell housing will be on the motor. I now have clearance between the motor and the oil pan. I need to widen the recess a bit more in the pan to eliminate any interference with the upper starter cheese head bolt.
I still plan to adhere a 2-3mm rubber buffer absorb any vibration between the starter motor and oil pan.
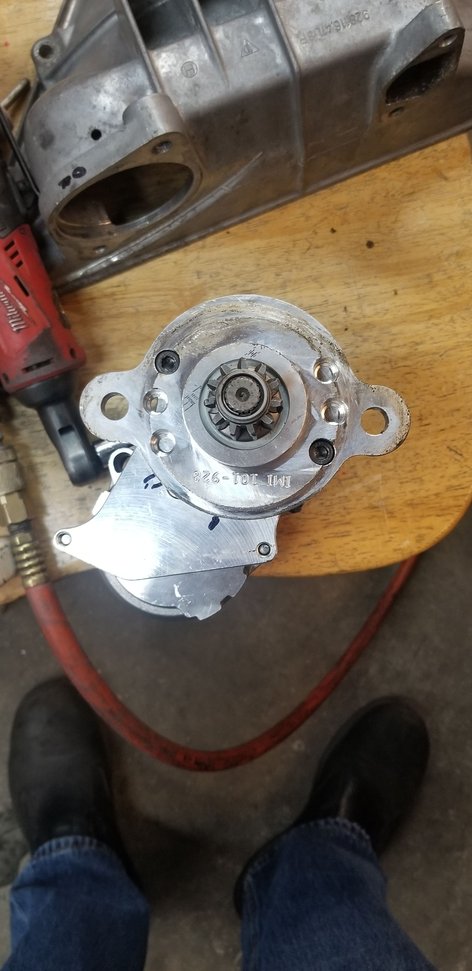
This got me worried as I already had 2 Mini Starters. So today, for a break from wiring, we tried the mini starter on my '86 block with the sump spacer.
As you can see it fits but we had to chamfer the stater flange just slightly to clear the back edge of the sump. Also had to grind a grove for the lower starter stud. It did go in but too tight.
The battery cable bolt got shortened by about 5mm but fits the cable end fine and the sump was too close @ about 1mm, so it got ground from 4.6mm thick to 3mm thick.
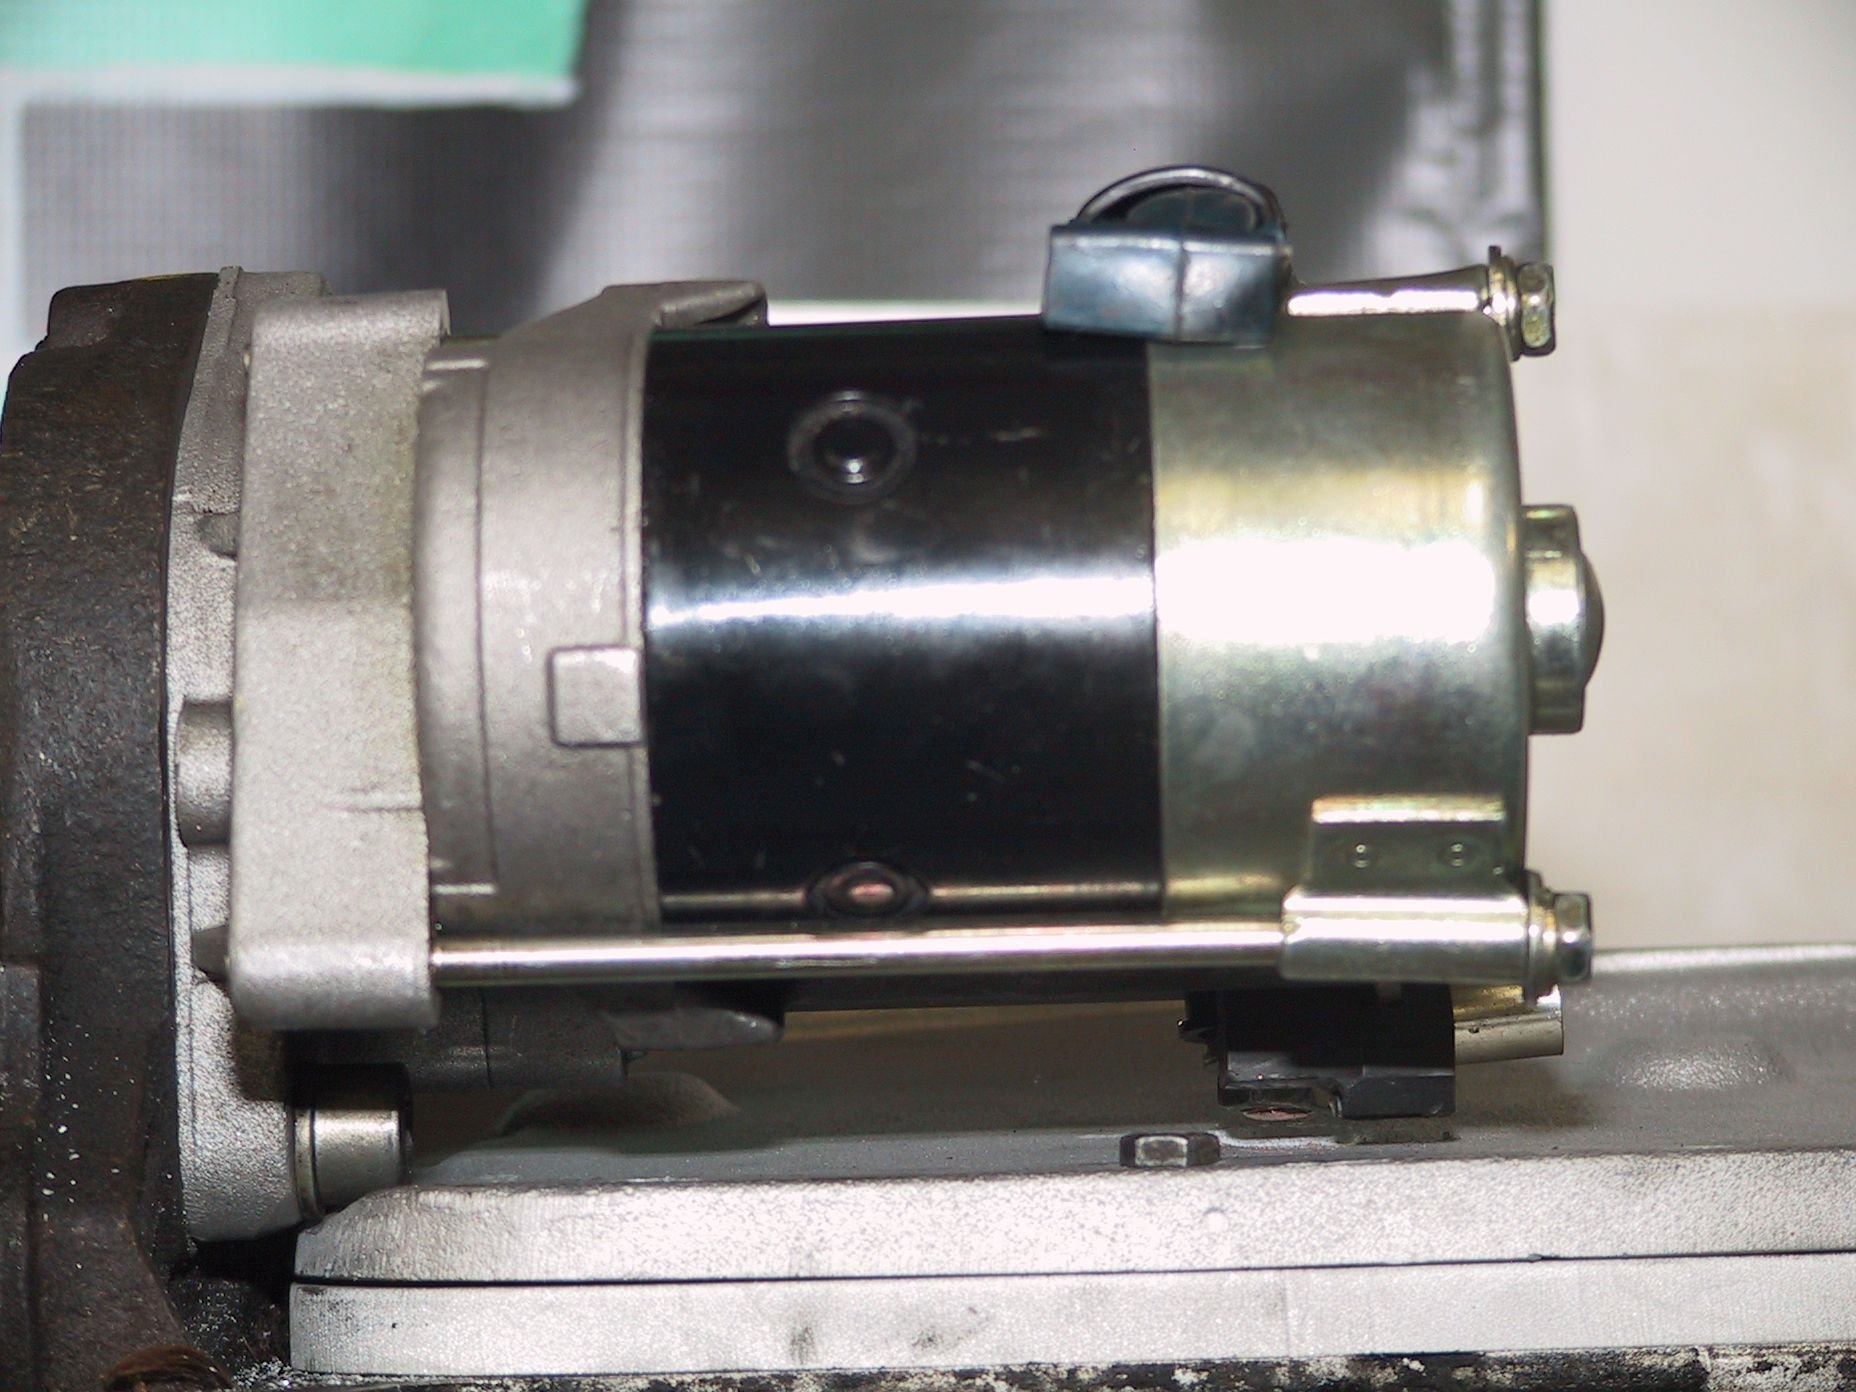
Powered it up and it spins over beautifully.
I will glue a bit of plastic as an insulator in at final build.
I scoured RL for every reference to using a oil pan spacer and the mini-starter. All of them involved some amount of oil pan and motor grinding.
There is something funny going on. I have not had to make any mods to the oil pan during an oil pan spacer install with mini starter. I have have installed many, and my own race car has this setup, too. I don't understand why your install required so much modification.
Here are two of those installs. Two different cars. Both have oil our oil pan spacers, oil pan stud kits, and mini-starter. Even headers. No conflicts, no major mods needed. On occasion, when using the early lower bell housing on a car, a small amount of material has to be removed from the inside of the lower bell housing, but that's it. No oil pan mods are needed at all.
Where did you get your starter? I wonder if you got the wrong one.
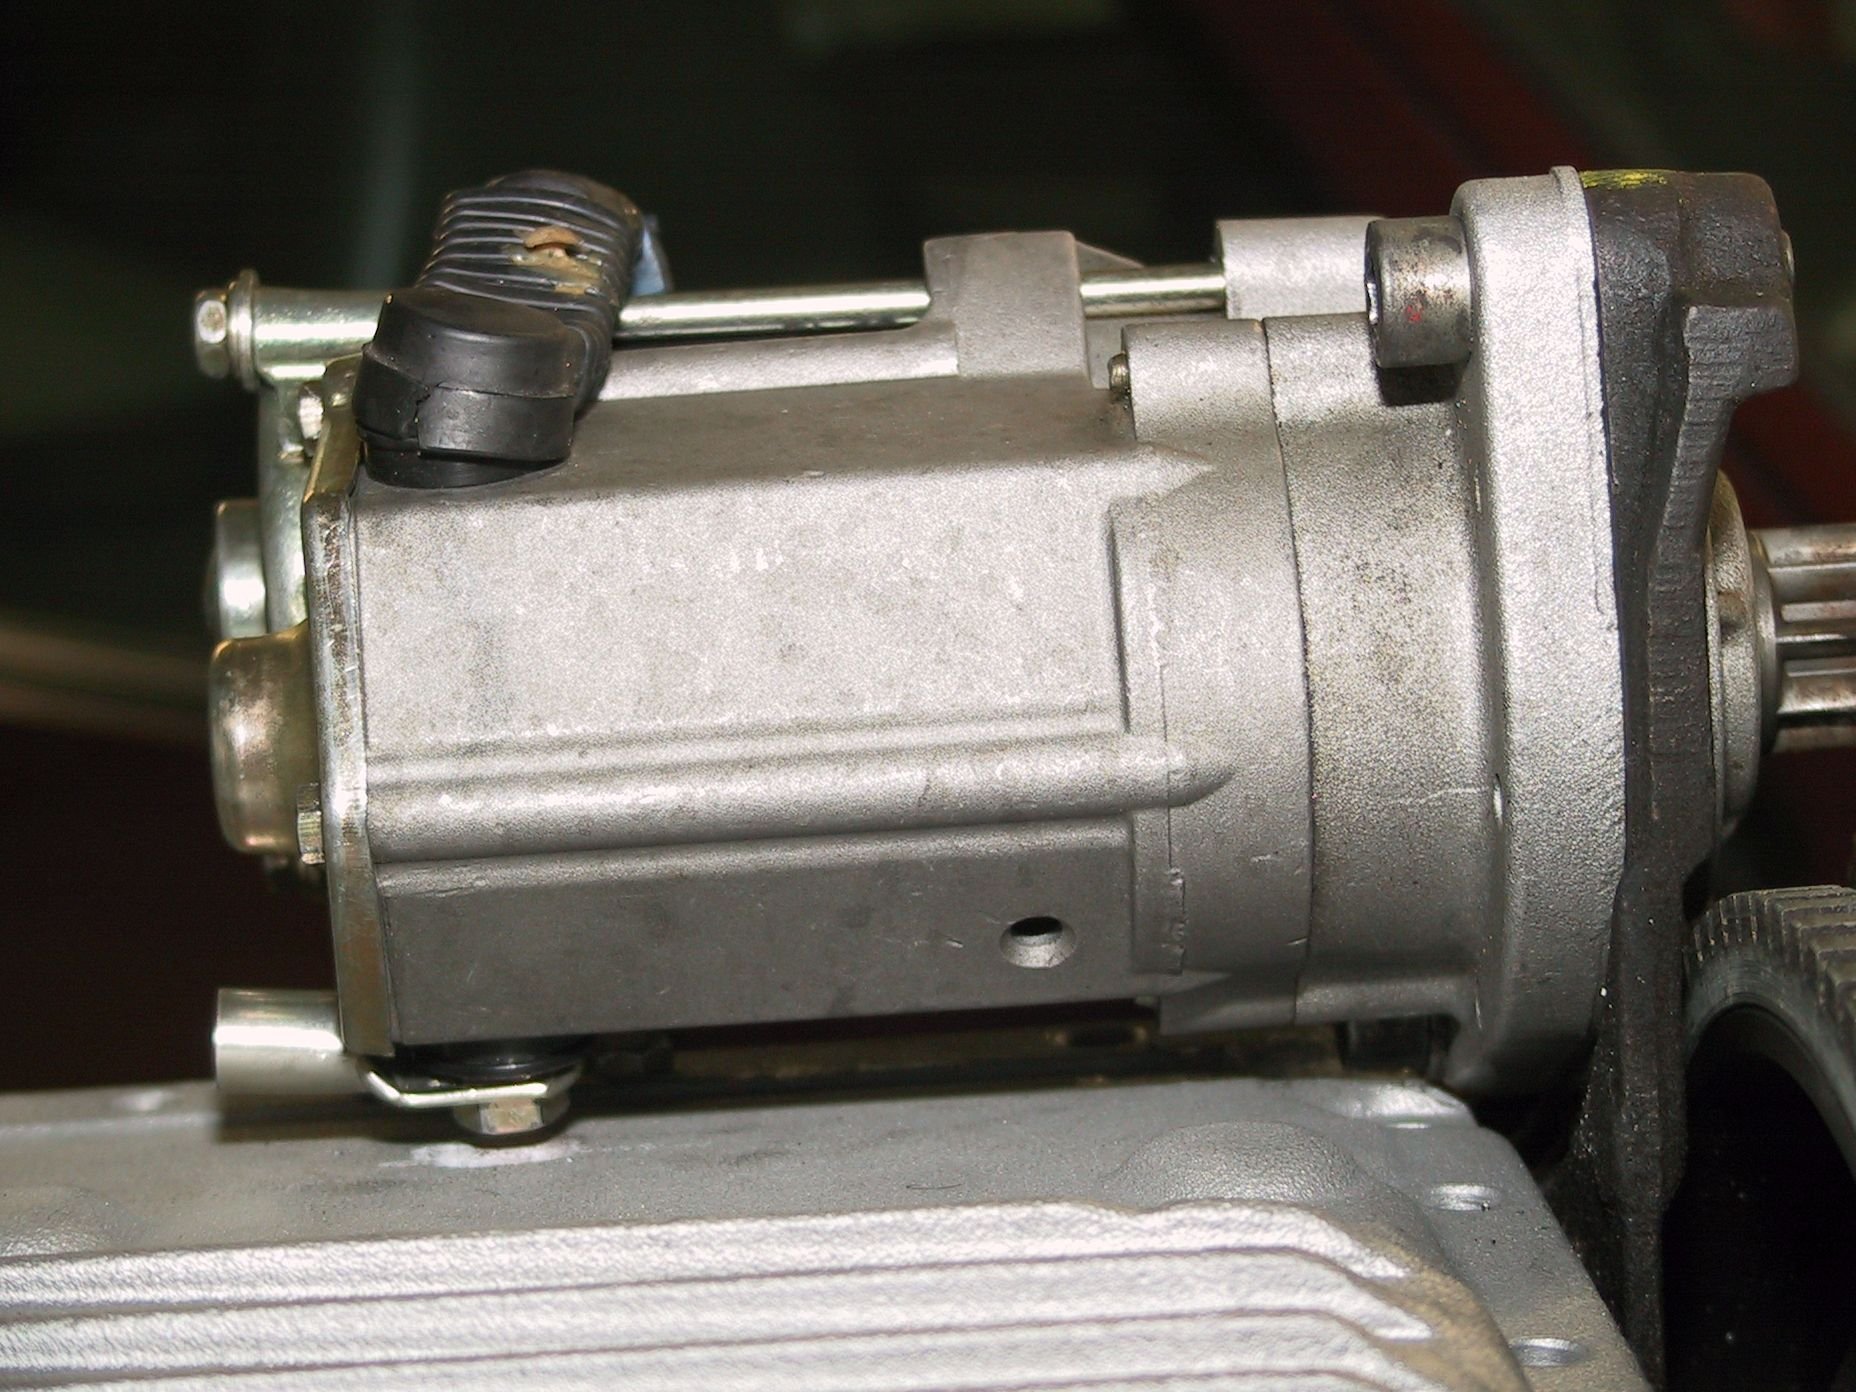
Looking at my pics, notice how the starter is not completely under the oil pan. It is clocked to be off to the side a little - making it unnecessary to grind off that oil pan nib.
There is something funny going on. I have not had to make any mods to the oil pan during an oil pan spacer install with mini starter. I have have installed many, and my own race car has this setup, too. I don't understand why your install required so much modification.
Here are two of those installs. Two different cars. Both have oil our oil pan spacers, oil pan stud kits, and mini-starter. Even headers. No conflicts, no major mods needed. On occasion, when using the early lower bell housing on a car, a small amount of material has to be removed from the inside of the lower bell housing, but that's it. No oil pan mods are needed at all.
Where did you get your starter? I wonder if you got the wrong one.
Looking at my pics, notice how the starter is not completely under the oil pan. It is clocked to be off to the side a little - making it unnecessary to grind off that oil pan nib.
Carl,
Nothing funny going on.
The installations you mention are where the starters are clocked away from the centerline and closer to the headers.
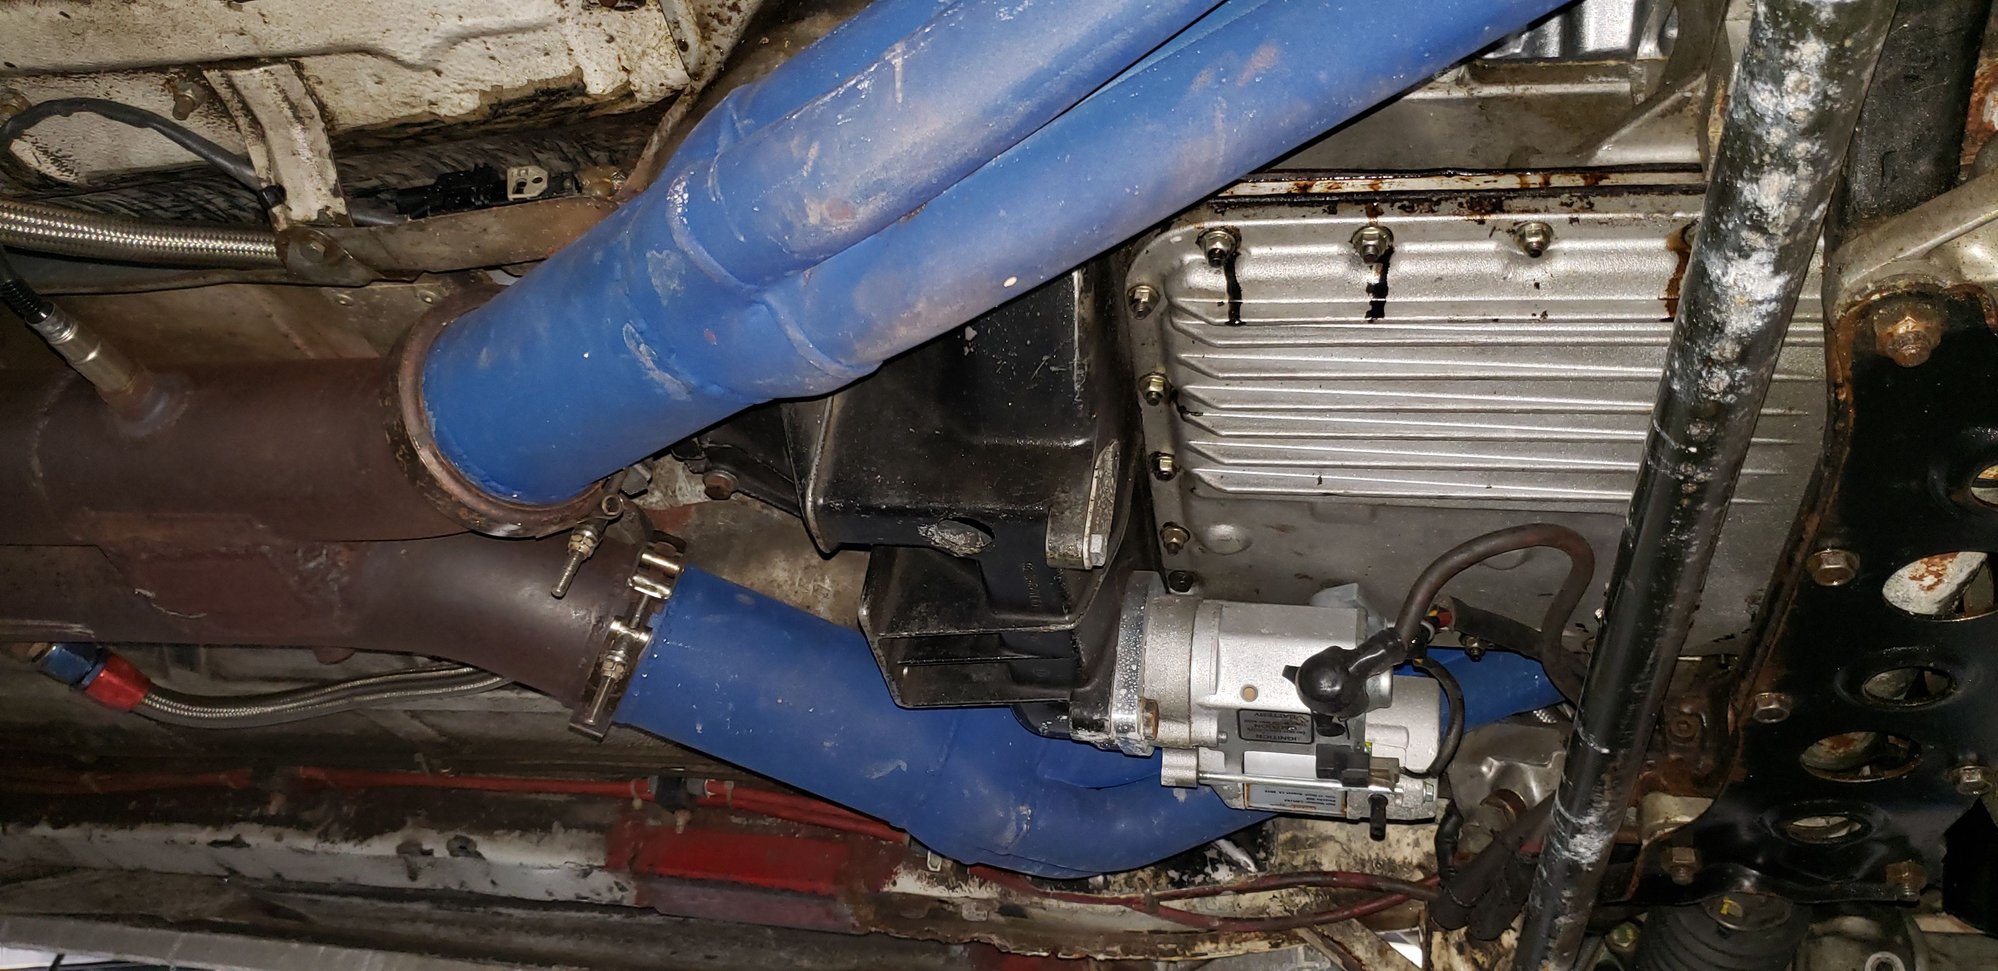
Here's mine
Last edited by Kevin in Atlanta; 12-13-2019 at 12:40 PM.
Reason: Added a picture
The installations you mention are where the starters are clocked away from the centerline and closer to the headers.
Here's mine
When using one of these starters with headers, I always clock them so that the starter is directly below the crankshaft, like Kevin is doing it. Perfect place for a starter....out of the way of everything, with the weight as low as possible and centered.
When using a pan spacer, I grind on the "nub" on the oil pan until the pan starts to get thin, and then I grind the remainder off of the starter motor. We make this modification here, before we ship the starter, when a pan spacer and starter are ordered together. I also deepen the notch in the pan, where the bolt sits, although I always supply a stainless upper bolt, with the OD cut down, when I supply the starter for use with a pan spacer.
Like almost everything, this job requires some thought, the first few times though. After you've done it 20 times...it becomes "muscle memory".
Yep, yours was one of the pan spacer modifications I followed. Not all mini-starters are the same. Yours is 13mm shorter than the one I used. It also appears to be slimmer allowing less of the oil pan to be removed. There's that.
You used the OEM bracket. I could not. My S3 block requires a matching model year starter bracket and the bracket will not accommodate the late model clutch. So. I used the early lower bell housing cover. This leads to challenges when approximating the amount of material needed to remove. In hindsight, I think I should have mounted the mini-starter on the S3 bracket while I made the oil pan and starter motor motor adjustments. Geometry should be the same. I had considered milling the starter bracket to allow the late model clutch, but since I had already had the early lower bell housing I used it.
A bit off topic, but if I were to do this again, I would start by modifying the mini-starter. The current version has 3 adjustments.
Sterling has one with 4. That version gets you were you need without grinding the oil pan. You do, however, have to remove material from the motor proper where it interferes with the lower starter mounting bolt. I would suggest rather than limiting the rotation points to 3 or 4, the manufacturer should remove the material between the 4 holes to allow you to turn the motor to the point there is no interference without having to mill the attachment bracket as Sterling did. With the motor mounted and the button heads not tightened down you can turn the motor until there is no interference, mark the motor mounting bracket and tighten everything down. This will not disturb the geometry that demands the pinion be offset to clear the the timing ring. This all assumes that the two bolts torqued down is sufficient to keeping the motor from turning once in use. :-) That could be a bad assumption.
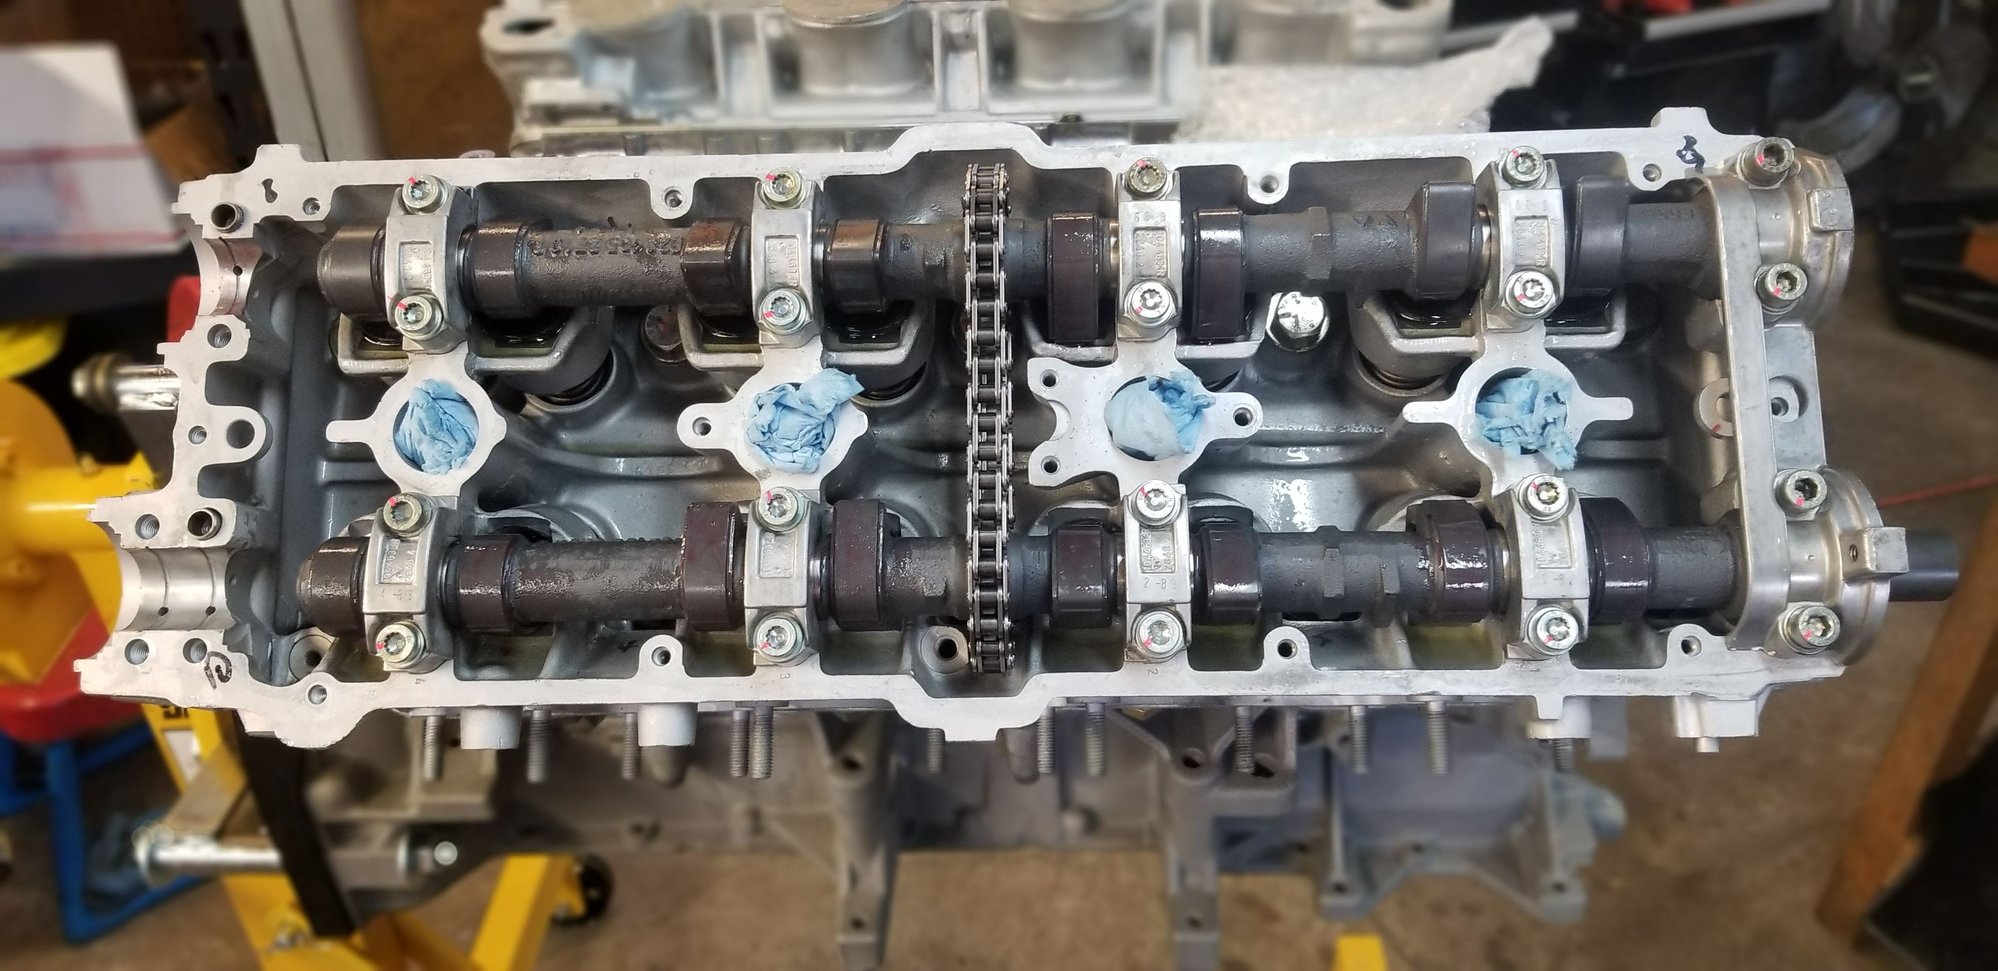
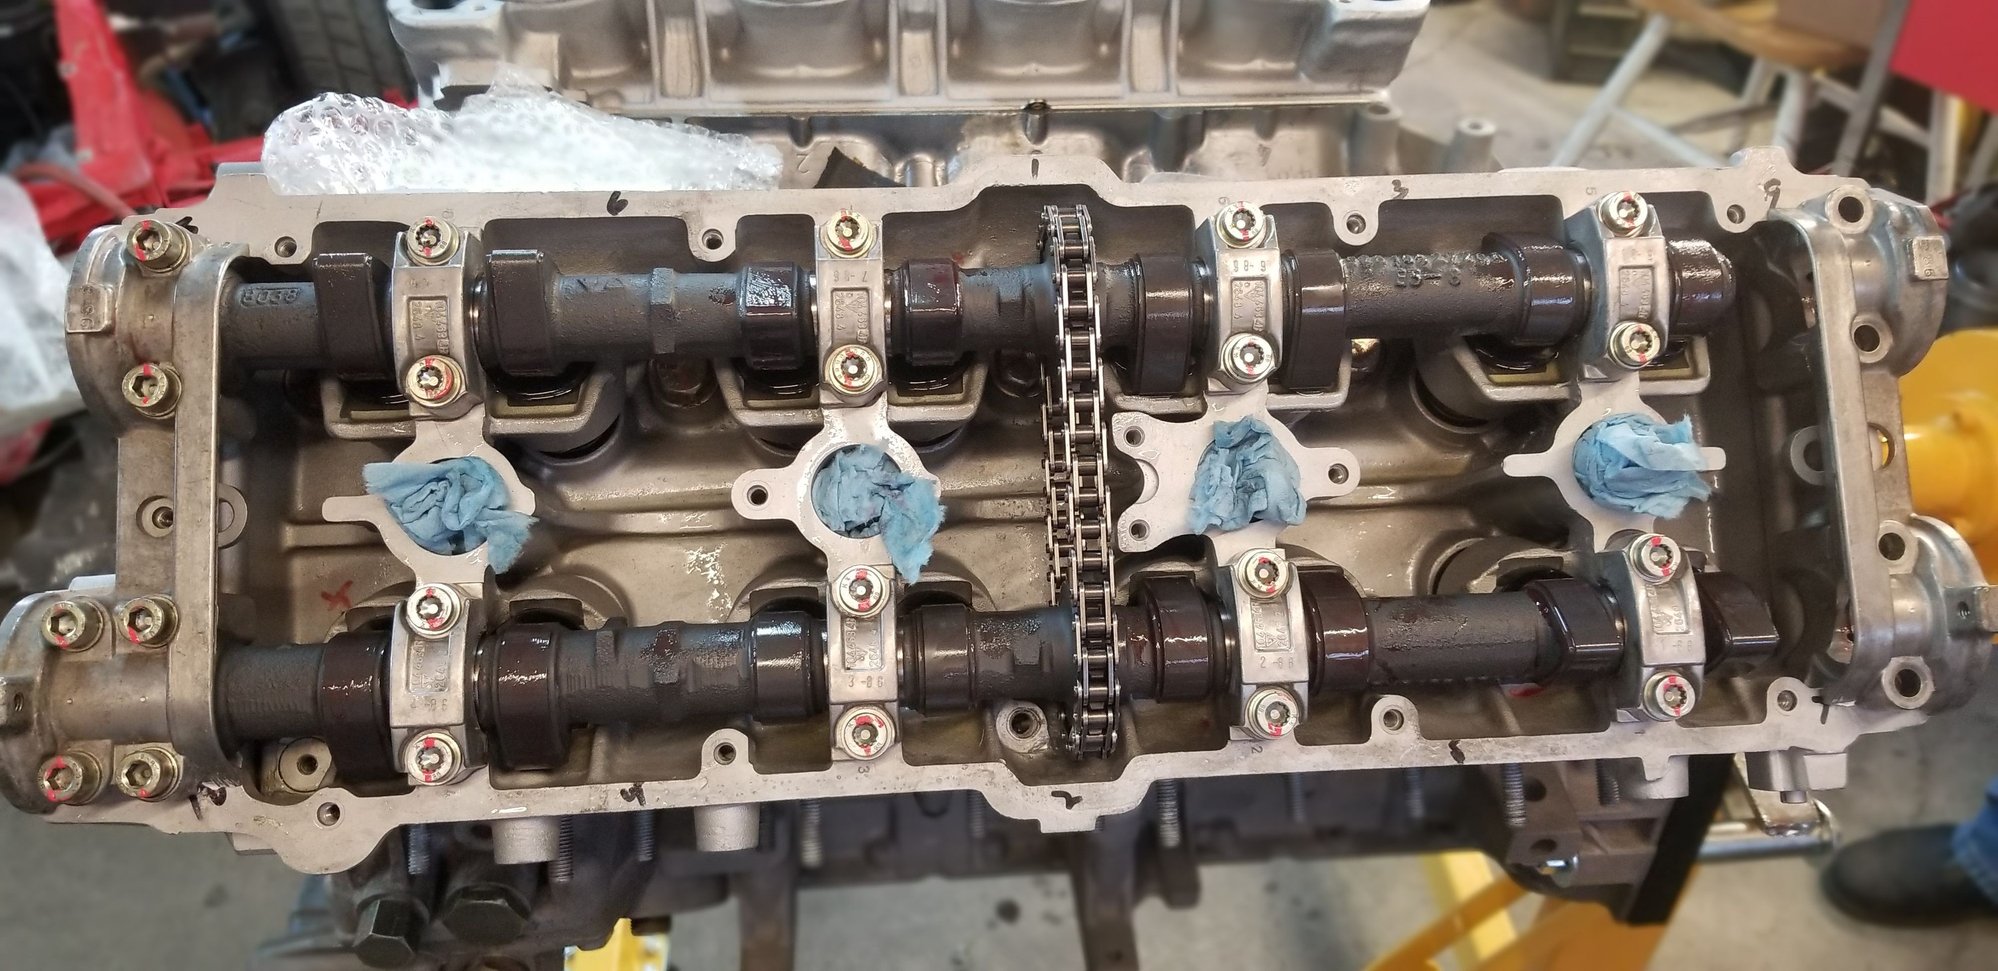
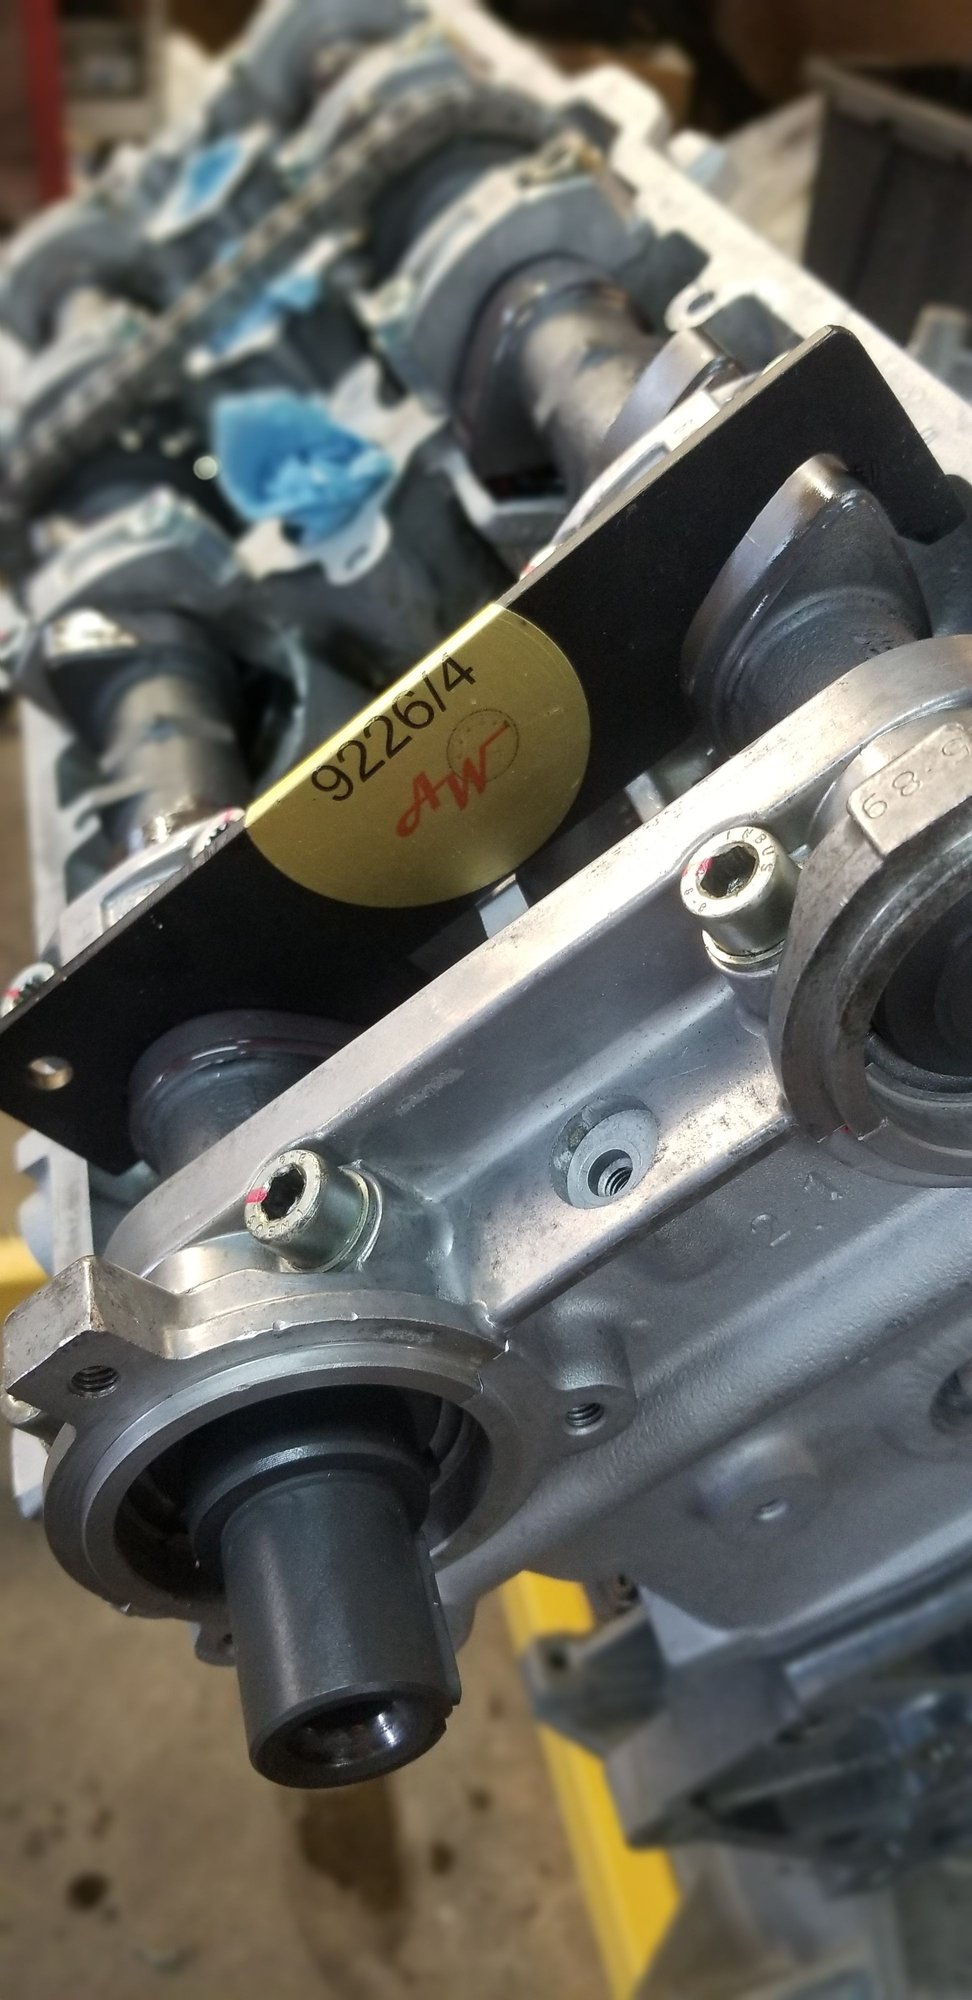
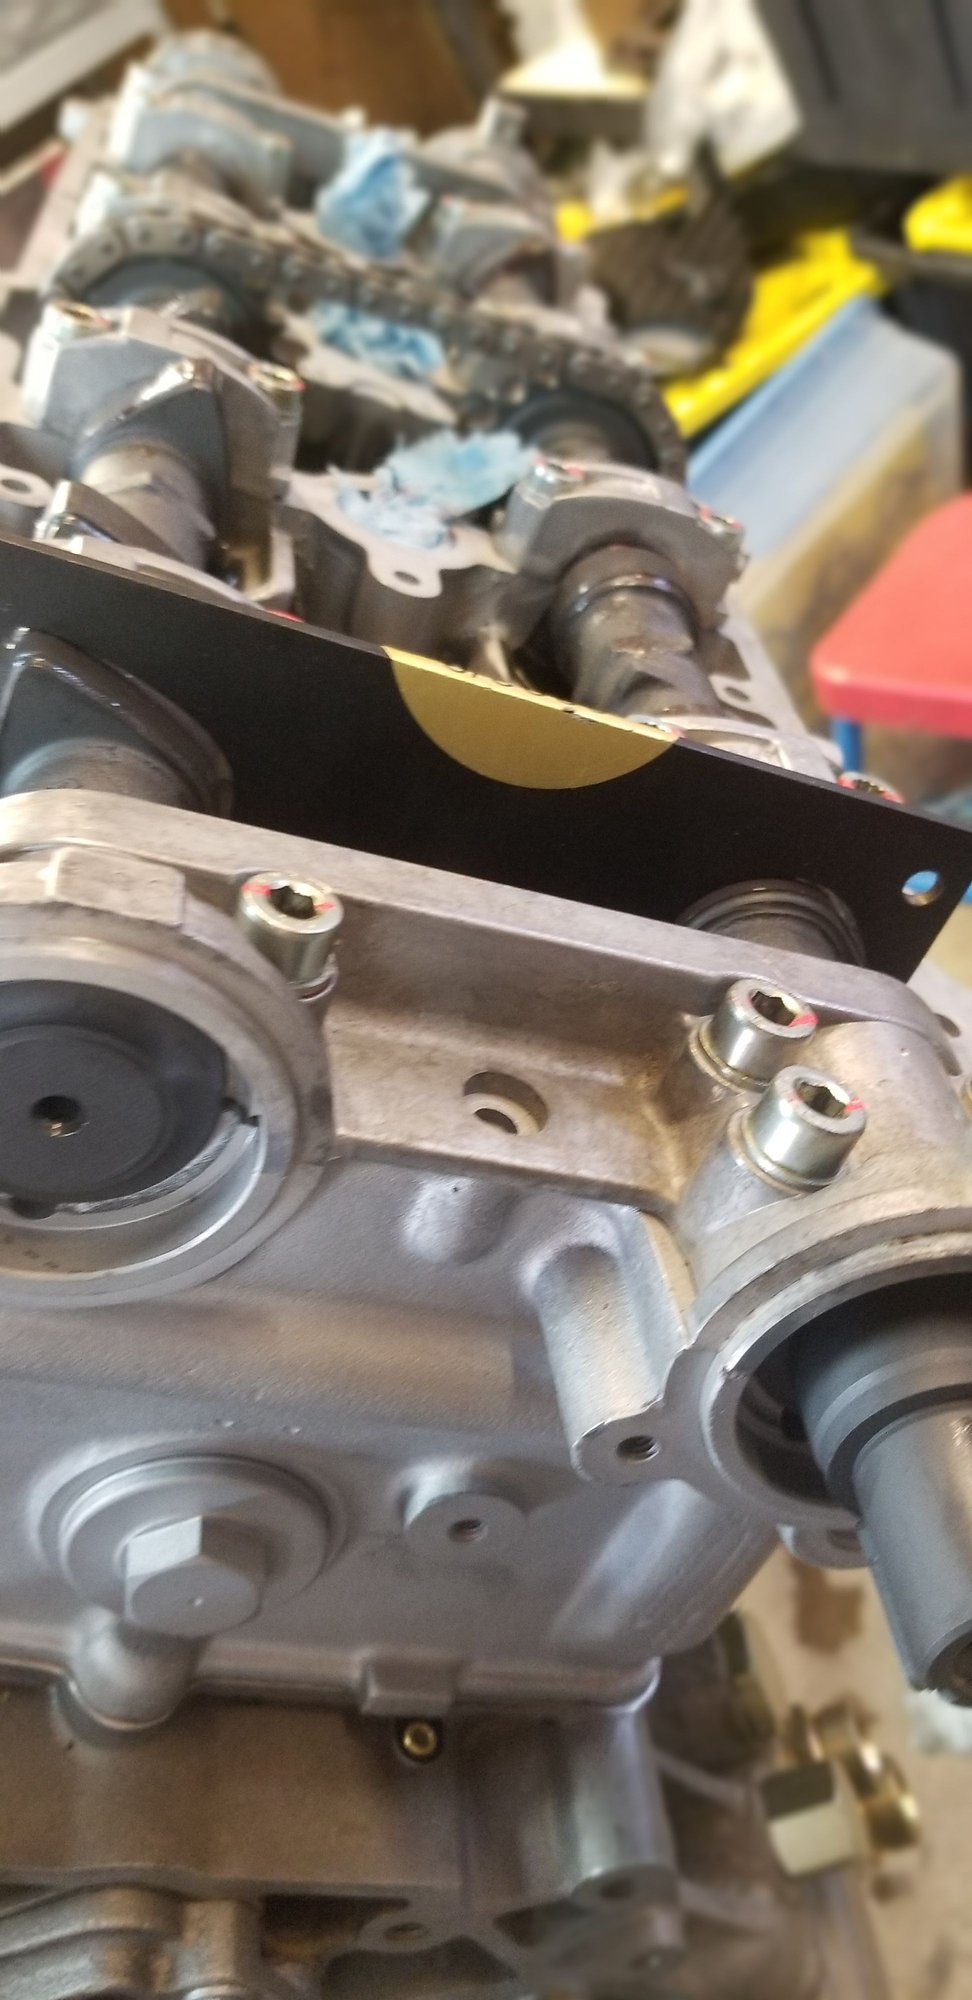
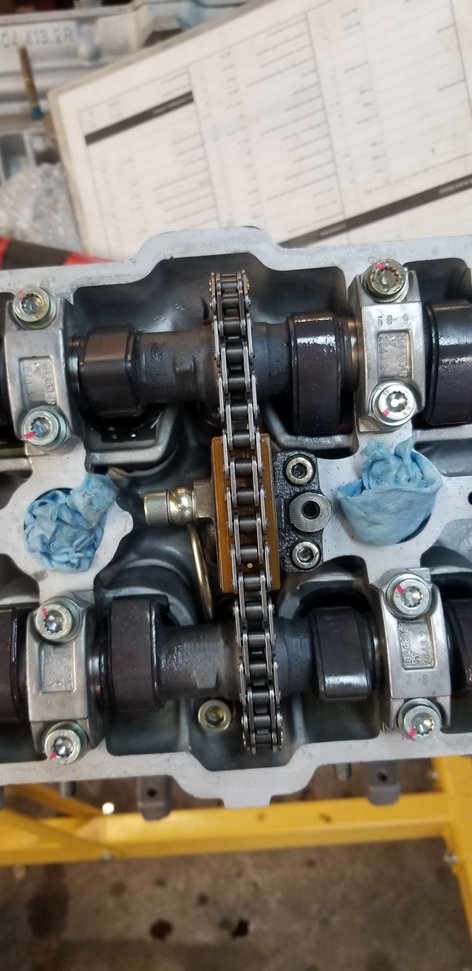
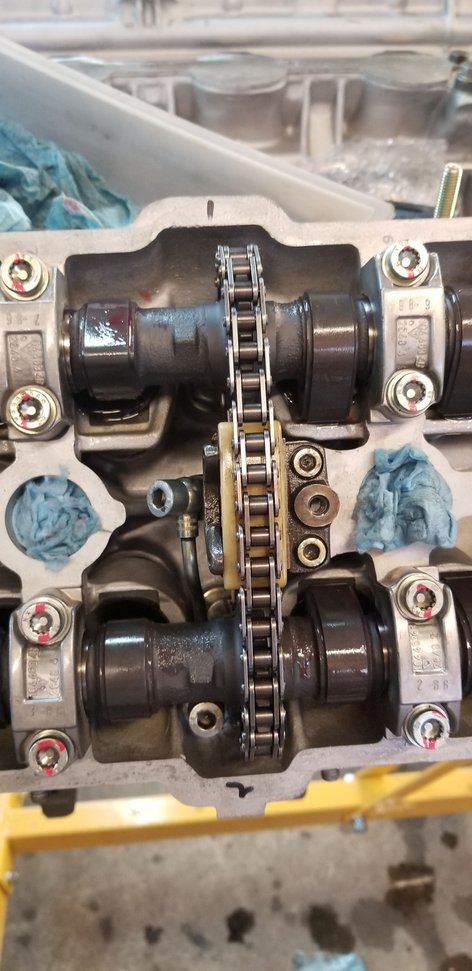
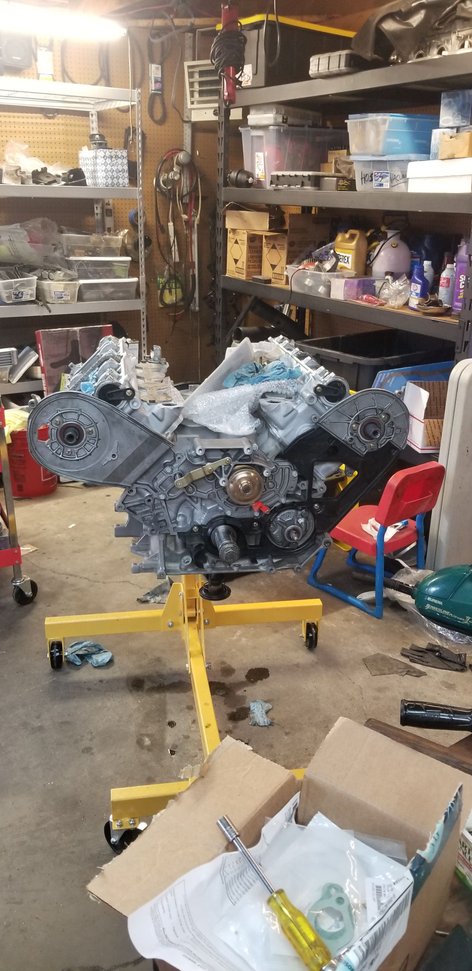
Engine is a bit more complete now. While waiting for longer bolts to install the oil pan Kevin Wilson and I pumped up the VW hydraulic lifters in a bath of non-detergent engine oil. We placed the the cams in the head with new racing chains,
This is what IWIS Germany say about their Porsche 928 racing cam chain:
This is the RacingChain for Porsche with 42 links. Designation: G68V-2 42 Links endless. Brand: Porsche 928, 944, 968. Part no.50031369. The racing version of this chain has an IC+ pin and fine blanked plates for higher resistance. All other features are the same. IC is a coating technology of the pins. Only available at IWIS.
The visual quality of the Febi/Bilstein chain isn't very good, so I have not used any of those.
My cost difference between the IWIS chain and the Racing IWIS chain is $2.36....less than $5 for two chains. Fairly insignificant in the overall price of building one of these engines.
All that being said, I've never seen or heard of a chain failure in any 928 engine, so I'm not convinced it really matters. This has probably been done purely as a "marketing" tool.
After all, if something says "racing", it must be better, right?


 12-12-2019, 10:25 PM