When you click on links to various merchants on this site and make a purchase, this can result in this site earning a commission. Affiliate programs and affiliations include, but are not limited to, the eBay Partner Network.
And, I see some gouging on the bottom surface of your cam box - take a large flat file and make sure that gasket mating surface is FLAT and SMOOTH - otherwise you'll have oil leaks.
Next time, just use a drill bit in a drill. A drill bit that's slightly larger than the shank of the bolt will remove the head, and then all those parts just slide off the shaft (and you'll be able to thread out the rest of the bolt with your fingers). And you get to reuse the distributor rotor mount!
(Oh, and a word to the wise, although you now know this, never, NEVER use an impact wrench to loosen a triple-square. Always use a beaker bar. For that bolt, I use a 32mm wrench on the hex and my triple-square on a breaker bar - I line them up so I can squeeze them together like scissors to break the torque. I was told these bolts are called "cheese-heads" because they have the strength of cream cheese...)
I forgot to mention that I tried to drill it out first. That damned bolt is so hard that a new 1/4" drill bit barely made a mark. I was also lubricating it for it not to get too hot. Then, I tried a bit that was a tad bigger than the triple square hole but that could barely enlarge the bolt's hole. So, I resorted to my cutoff tool. The compressor had a workout today.
BTW, my Vim bits are impact duty. Remember that the bolt was on so tight that even after the head was cut off, it didn't screw out easily as I was expecting. I had to use Vise-Grips and I had to lock the cam sprocket's teeth with a screwdriver so that I could turn the Vise-Grips
Originally Posted by Van
And, I see some gouging on the bottom surface of your cam box - take a large flat file and make sure that gasket mating surface is FLAT and SMOOTH - otherwise you'll have oil leaks.
Thanks. I also noticed that. Thanks for the tip. Should I use gasket maker in addition to the gasket?
My OPRV tool arrived today so I can install the oil cooler next. Can I do that now or should I wait until after I replace the rod bearings? It won't get in the way of oil pan removal, right?
Also, I forgot to mention that I pressed the middle part of the lifters and for 2 of them, I was able to compress them (not easily though) but for the other 6, they wouldn't budge. Are 2 bad or are the 6 bad?
Should I use gasket maker in addition to the gasket?
I always put the cam box gaskets on dry. Id' never want a little bit of sealant to get caught in a lifter...
Originally Posted by alpinewhite
My OPRV tool arrived today so I can install the oil cooler next. Can I do that now or should I wait until after I replace the rod bearings? It won't get in the way of oil pan removal, right?
You can do that any time.
Originally Posted by alpinewhite
Also, I forgot to mention that I pressed the middle part of the lifters and for 2 of them, I was able to compress them (not easily though) but for the other 6, they wouldn't budge. Are 2 bad or are the 6 bad?
If you can push the button in, the check valve isn't holding. That's a bad thing.
Made some progress again today. I was able to pull out the intake manifold and the head. I didn't see anything obvious with respect to leakage on the head gasket. Perhaps you guys can. Maybe I don't know what I'm looking for.
Found an o-ring just sitting on top of the upper balance shaft housing near the AOS. I wonder if this is an old piece.
Gonna take the head to the machine shop on Monday for a valve job.
Now that the AOS is in plain view, should I replace the two o-rings I see mentioned on some threads?
That little thing, which always reminded me of the Playboy logo, is a temperature vacuum valve going to the charcoal canister/emissions system. Basically, once the engine is warmed up, it allows vacuum to actuate a little valve over by the brake master cylinder.
I usually take the head off with the exhaust manifold still connected.
That head gasket suffered a failure. Good thing you removed the head. Is that water in your #2 cylinder?
Yes, that's water in cyl 2. Remember how water came out too when I took off the exhaust manifold?
Originally Posted by snb13
It won't get any easier to replace the seals on the AOS. With everything removed is the time.
Ok. I'll replace them, then. Thanks.
Originally Posted by Van
I usually take the head off with the exhaust manifold still connected.
Removing the 6 bolts from the headers to the exhaust pipe was not very easy since I don't have a lift. I put the car on ramps, though, which aided in gaining some room I needed to loosen them. I loosened them enough so that I can separate them from the head. Next time (I hope there won't be one), I will try it your way.
Originally Posted by odonnell
The head gasket is definitely blown. Get new head nuts and washers too and you'll be back on the road.
Yes, I already have the new nuts and washers. Could someone please show me the part of the head gasket that caused the failure? Arrows on the picture would help. I need to see telltale signs for my education. Is it because of all the oil visible on the head gasket for cyl 1 (right most on the pic)? I still don't see how the water got mixed with the oil.
BTW, where are the oil passages on the head? Here is the picture of the head.
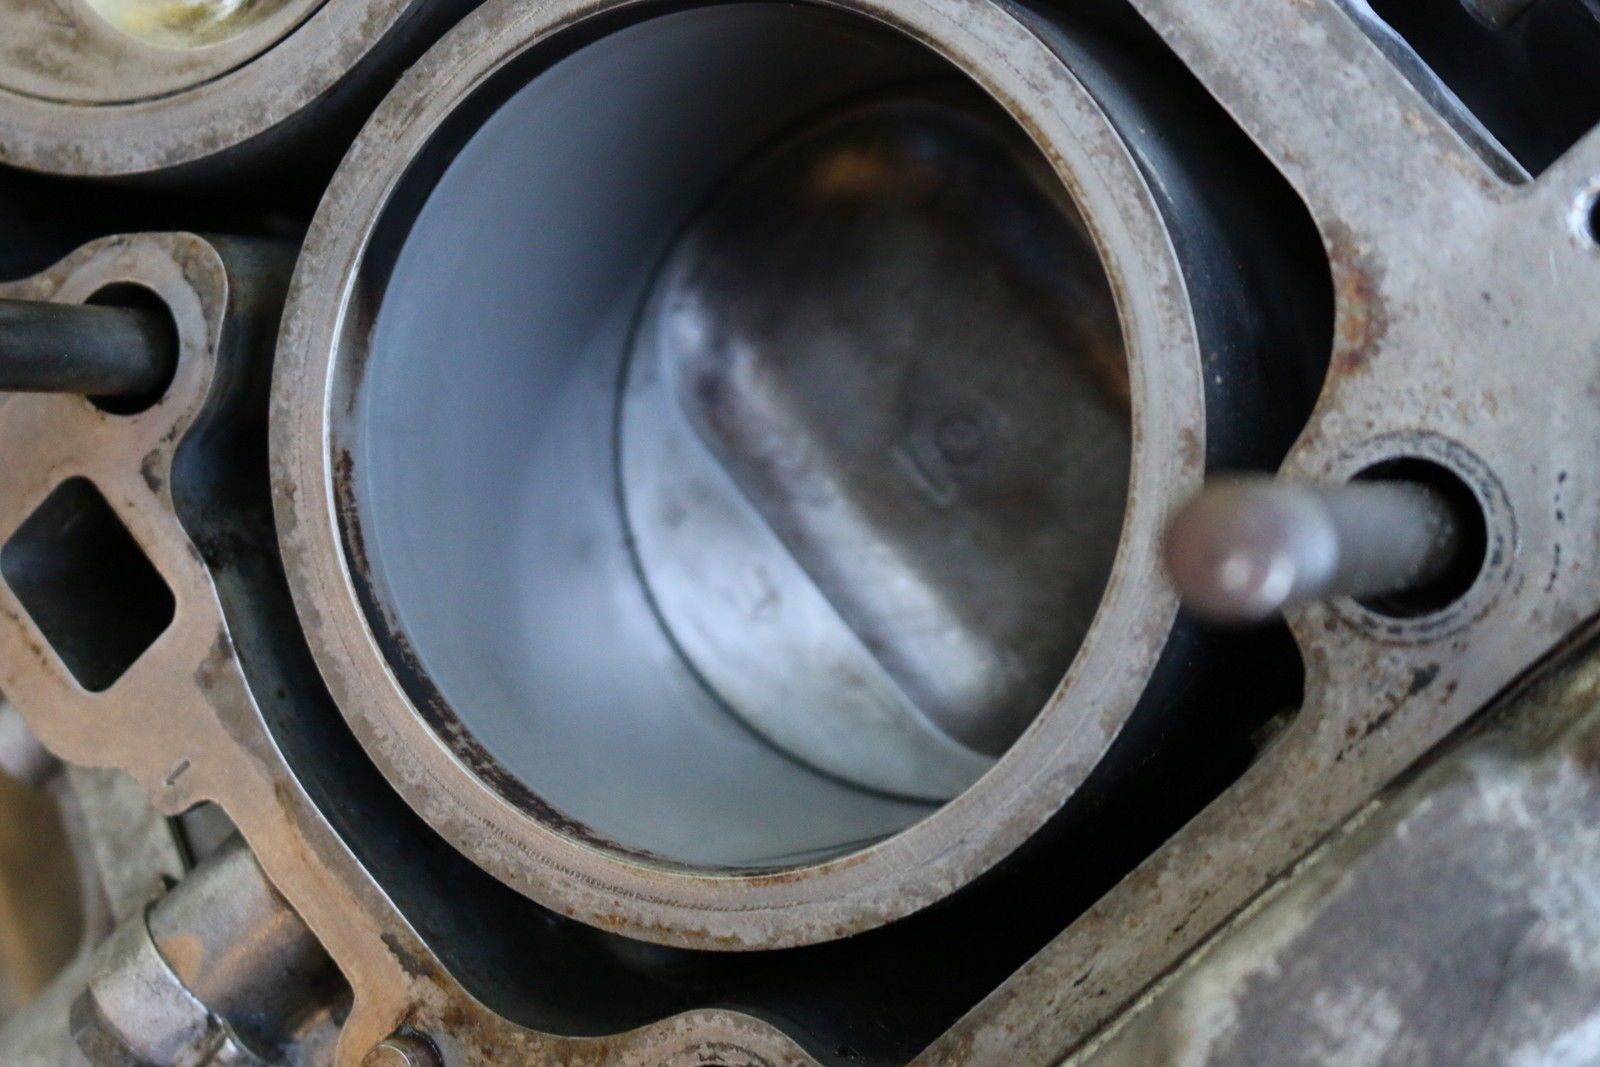
Do you guys agree that there's no cylinder wall scoring on cyls 2 and 3? I will rotate the crank next to inspect cyls 1 and 4. If you guys agree that scoring is not present, that'll save me from having to re-ring the pistons.
Last edited by alpinewhite; 10-09-2016 at 04:14 AM.
You'll need much closer, higher resolution pictures with great lighting to really see bore condition well via pictures. The camera lens needs to be damn near inside the cylinder, like this
But, from what I can see they look OK. Also I can tell you right now that head is going to need skimming. Have them take off as little as possible, maybe .007-.008".
Also just so you know, reringing is not done to correct bore damage. On Alusil blocks, if the bore is scratched, the only corrective actions are reboring or rehoning depending on the depth of the damage; or steel sleeves. In any case, you buy new oversize pistons too. Reringing a scored bore usually makes the situation worse.
But, from what I can see they look OK. Also I can tell you right now that head is going to need skimming. Have them take off as little as possible, maybe .007-.008".
How can one tell that skimming will be necessary?
How do I compensate for the smaller combustion chamber which causes compression ratio to increase?
I need to see telltale signs for my education. Is it because of all the oil visible on the head gasket for cyl 1 (right most on the pic)? I still don't see how the water got mixed with the oil.
 10-02-2016, 01:22 AM