When you click on links to various merchants on this site and make a purchase, this can result in this site earning a commission. Affiliate programs and affiliations include, but are not limited to, the eBay Partner Network.
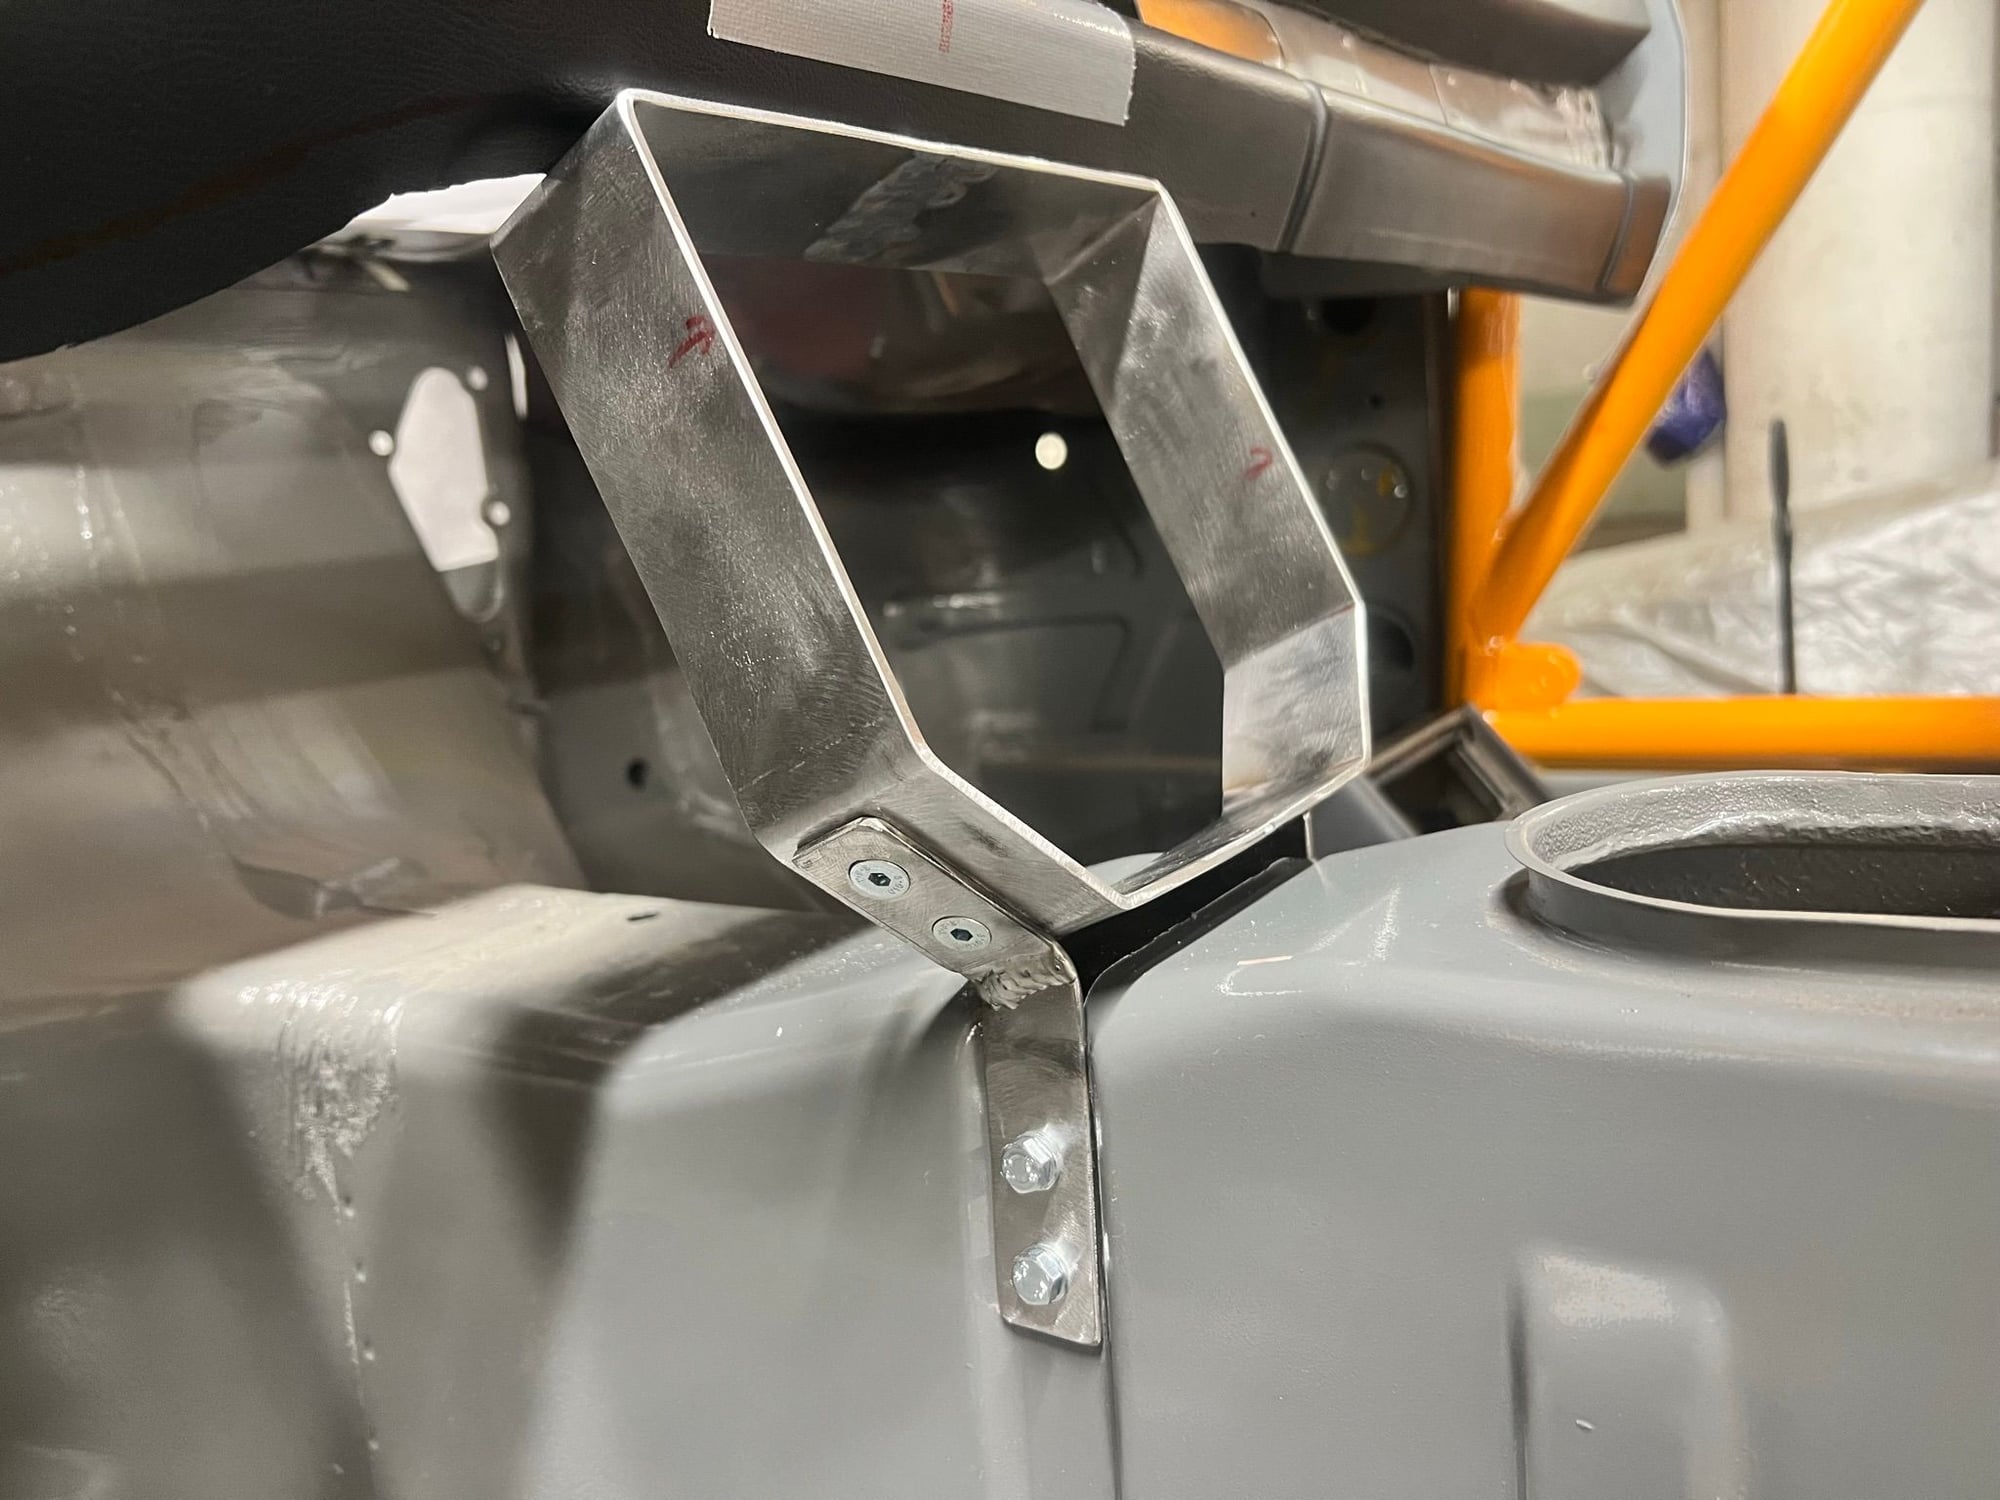
Have spent multiple sessions in the workshop, working on the dash and a centre console. Adjusted the width of the dash. Created end plates from 3mm steel. Welded on screw "bosses". Made two sets of 3 little holder brackets that was riveted to the dash. Made two brackets between the dash and the car. Used CAD (Cardboard Assisted Design) to mock up a centre console. And made the centre console frame, also using 3mm steel (and not aluminium), as I don't have a TIG welder. Veeery time consuming.
Still need to make a face plate, including holder tabs for the centre console. And a small connection betwen the dash and centre console, to provide a bit of rigidity to the lower section of the dash. Crack removal and upholstery of dash and side plates is up next.
.
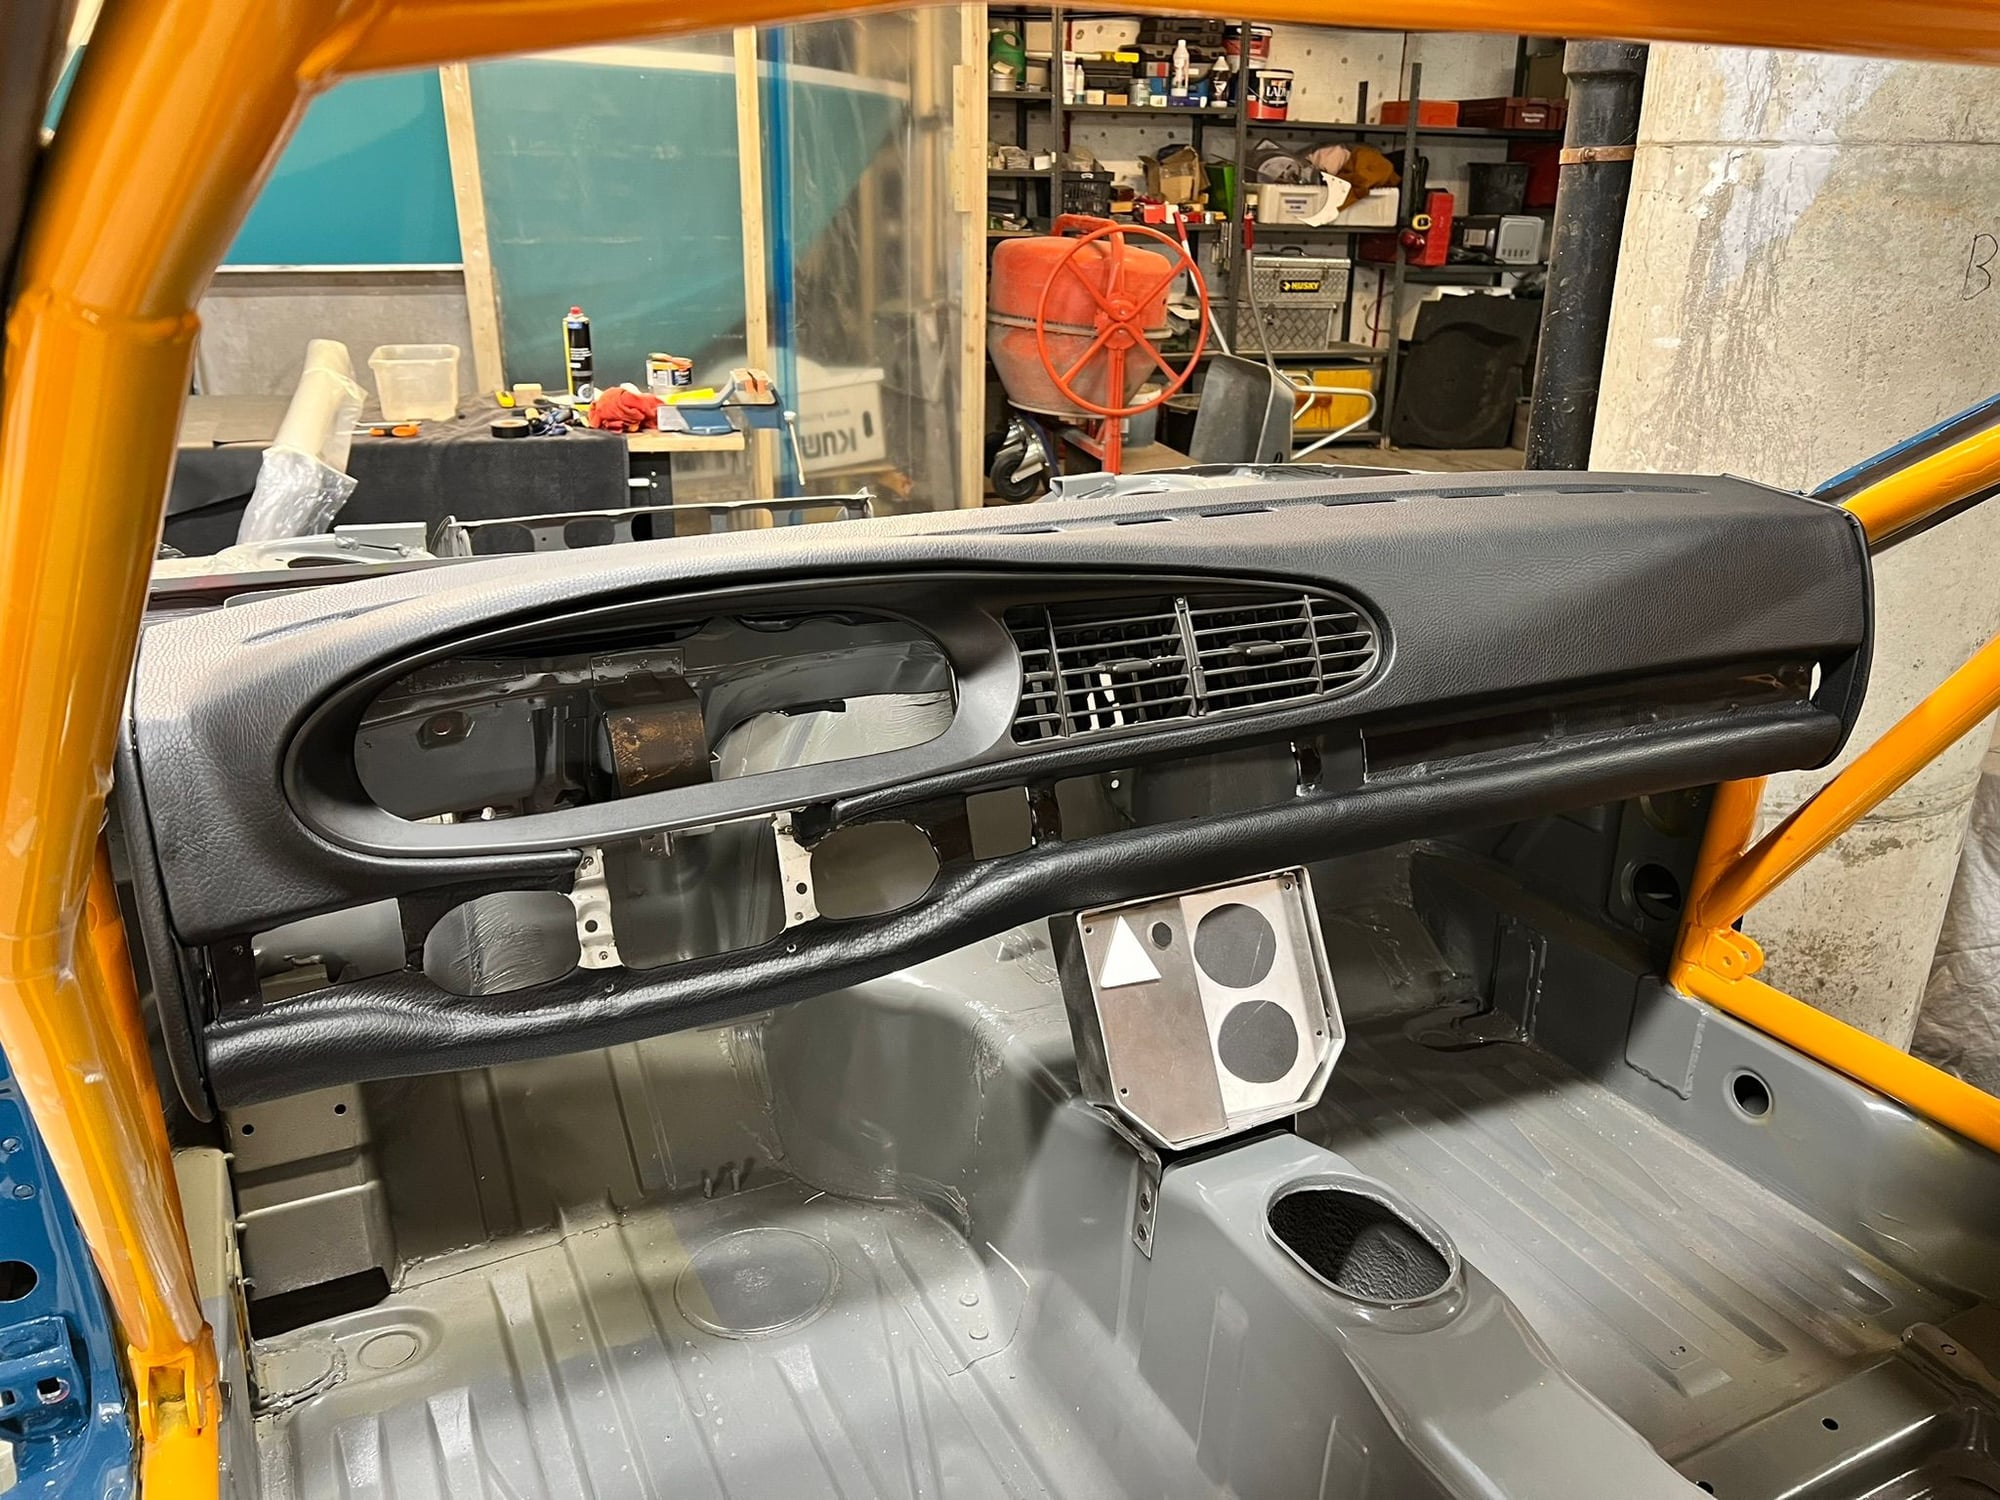
The dash is ready for final assembly. Got eager to see how good it could get, and ended up spending a lot of time on this. Cut the width to fit between the roll bars. Made bolt-on custom end-plates for the dash, so I could cover it all without sewing. Created brackets for solid mounts to the body. Filled in the holes from the side vents. Cut the bottom of the dash. And attached the (top of) the glove box lid permanently. Filled in all the cracks on the top surface. I actully ended up removing all of the original vinyl, before covering with fresh material using contact glue, heat gun and quite a bit of patience. Really happy with the result
.
The high school youth had been more than a little sloppy, when masking the engine bay and interior, before they painted the roll cage. So there was much orange stuff, where it should not be. See example picture. Due to long term sick leave at the high school, they have not been able to redo this part of the paint job prior to december. Like we planned in september...
I got impatient, and got a local paint shop do the respray of Nardo Gray. I got a date, and then I spent 5-6 long sessions in the workshop, roughing up the surface using 180/240 grit sandpaper and skotch-brite type pads. And did all the masking myself. With liberal amounts of masking tape. On the outside and most of the cage. Then it was off to the paint shop in almost 10C below freezing.
Unfortunately I had used protective film on parts of the roll cage, during my work with the dashboard. And some paint came off, together with the TPU film. Now the front section of the cage is gray.
A surprise underway in this process is that more stringent regulatory requirements was implemented during 2023. Wrt the chemical contents of automotive paints. The paint shops need special certificates and ventilation equipment to paint the singel-stage tractor/lorry type paints that was used initially on my car. Paints that don't need clear coat. So... Now the interior and engine bay is veeery nice and shiny, from the liberal amounts of clear coat
Now it is back in the garage. With a slightly thinner wallet. Ready to paint a bit of orange, and start the assembly.
.
After having removed the masking I found that not only the front of the cage needed new paint. But the whole thing... Masked up the interior, sanded down where needed, and prepared the entire cage for paint. Given my facilities and budget, this was done with a brush. Paint is 1K Monopol 604. Same type of paint that is on the bottom of the car. Nothing like doing the same job twice...
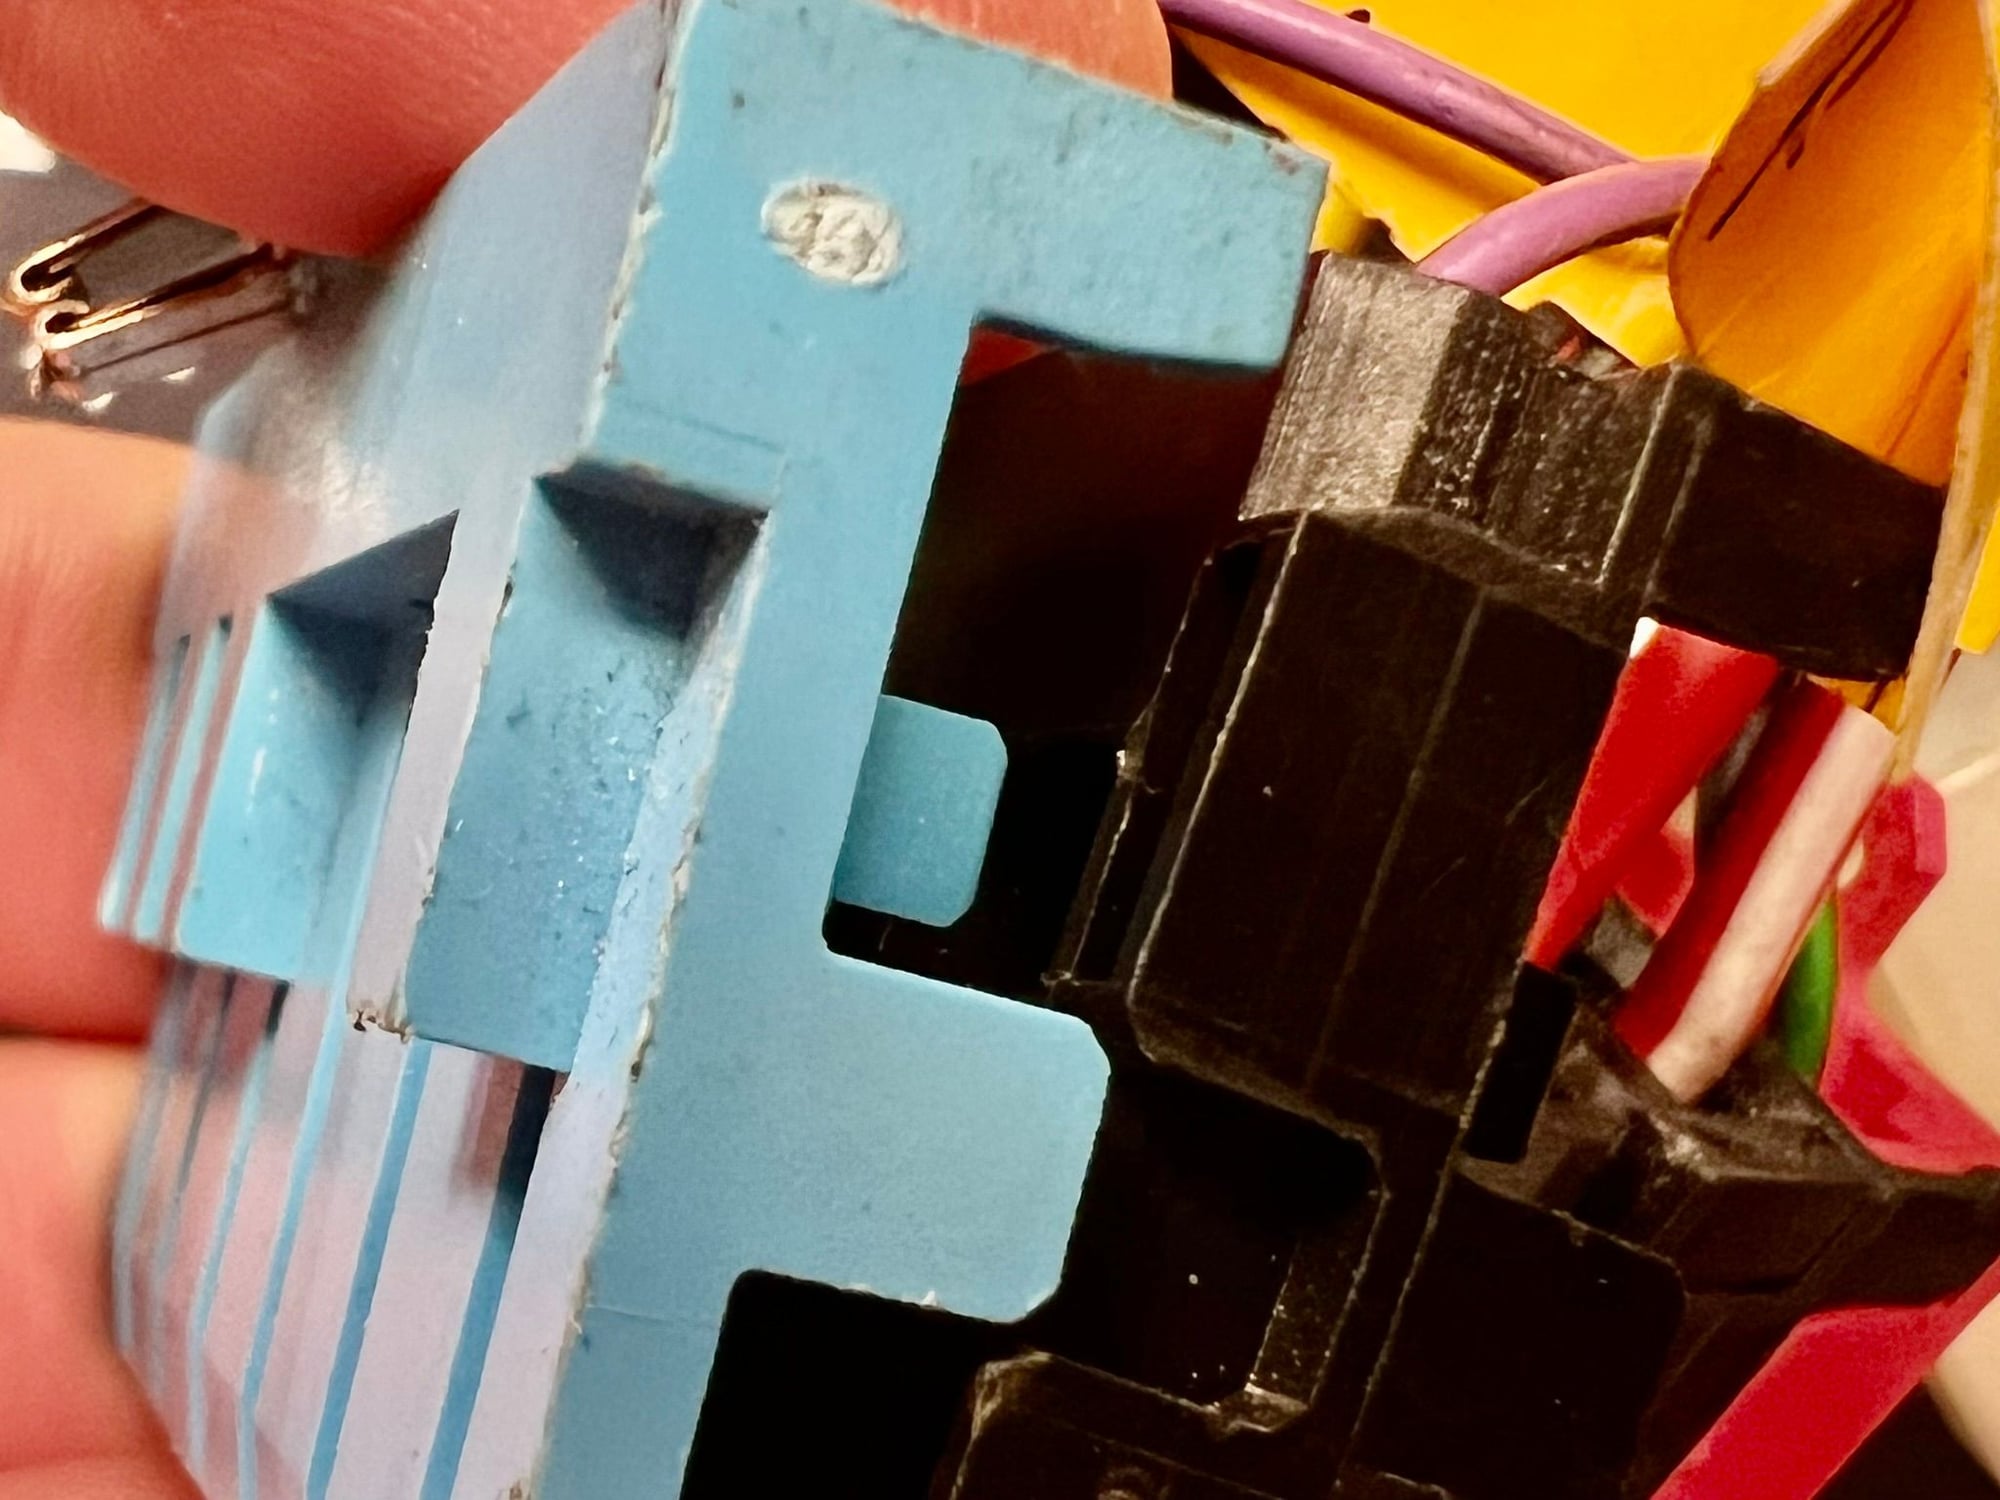
Working on the simplification of the wiring loom I planned on establishing a couple extra connections between the interior and front wiring looms. From visual inspection it looked like the contact elements in the two red four pin connectors I had cut out looked similar to the contact elements in the 10-15-20 pin module connections on the bottom of the fuse box. However, They did not want to slide in place.
But now that I have separated a couple of layers from the big module plugs I understand why. The contact elements in the big module plugs are double secured from going backwards. It is the little one-way hook, but there are also some ribs the poke through the neighbouring layer and 100% secures the connection element.
I found that the connection element (99965245123) is NLA. https://www.rosepassion.com/en/99965...g-piece-P70362 Good thing then that the connection elements from red plugs -are- identical to the ones in the big module plugs. And these I can use to establish 4 new connection between the interior and front wiring looms.
This is of course the same for 968, late 928, 964 and 993, that all uses the same type of module plugs towards the fuse box.
I'll leave a few extra images here, because it appears that not many others have written or documented this on the usual Porsche sites. I have Google'ed for hours, not finding a firm conclusion anywhere.
he interior wiring loom is ready for installation. Removed switches and wiring for most creature comforts; Rear hatch opener, rear window wiper, targa roof, alarm, stereo, electrical seats, glovebox light and cruise control. Left wiring for windows and mirrors for now. Started in the workshop, but eventually moved into the warmth of my own kitchen table.
Prepared for a seperate racing terminal & fuse block in the glovebox area, for electonic kill switch, FIA rear light, extra instruments/sensors (oil/water temp), LED racing driving lights and USB power. I rerouted and added wiring to this area. Including the establishing of connections between the front and interior wiring harnesses, through the main Central Electric fuse box. Added some extra wiring twards the back of the car in case of possible additions in that end. Permanently bypassed the alarm and the brake pad wear warning and shrinkwrapped all loose ends so I can power up without everything connected. Wrapped it all in fresh Tesa brand fleece Tape. Documented all changes with notes on the diagrams and in Excel.
It's amazing how massive the harness is...
When I stripped mine I think I weighed out 60lbs of wire removed.
No headlights, wipers, horn, P-windows, mirrors, etc.
 10-24-2023, 02:58 PM


")