When you click on links to various merchants on this site and make a purchase, this can result in this site earning a commission. Affiliate programs and affiliations include, but are not limited to, the eBay Partner Network.
I really like the concept of this car... track & road with all the necessary funtionality for both.
That is a great idea with the battery interchange concept. You get the marginal benefit on the track, but then can easily switch back to a full size unit which certainly would feel "safer" when you are heading on a long road trip!
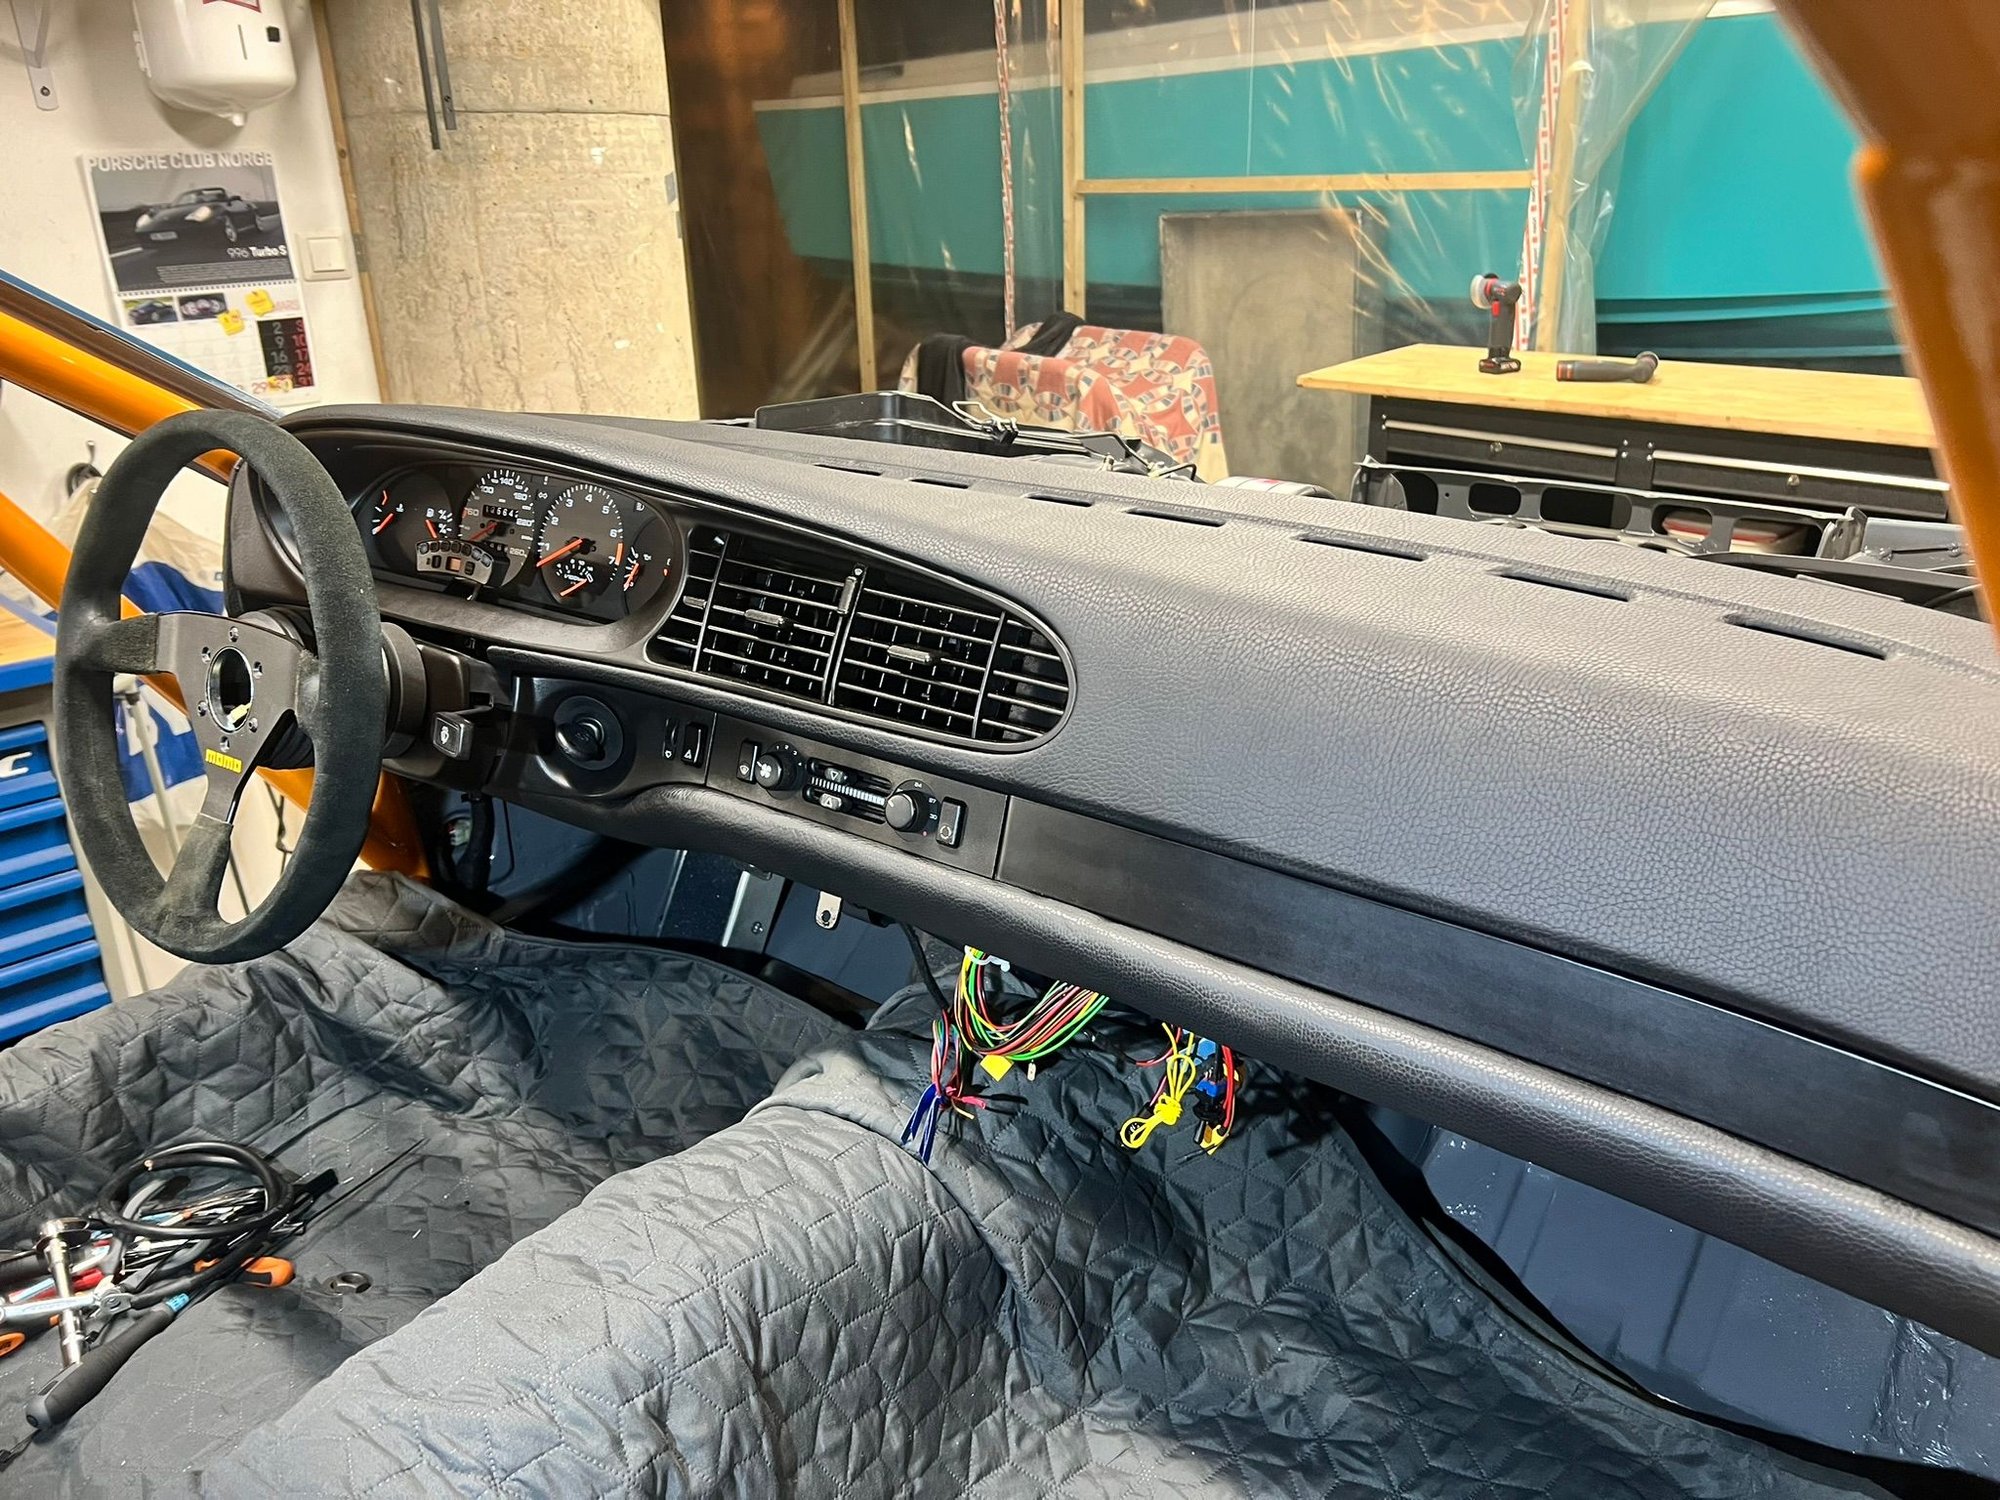
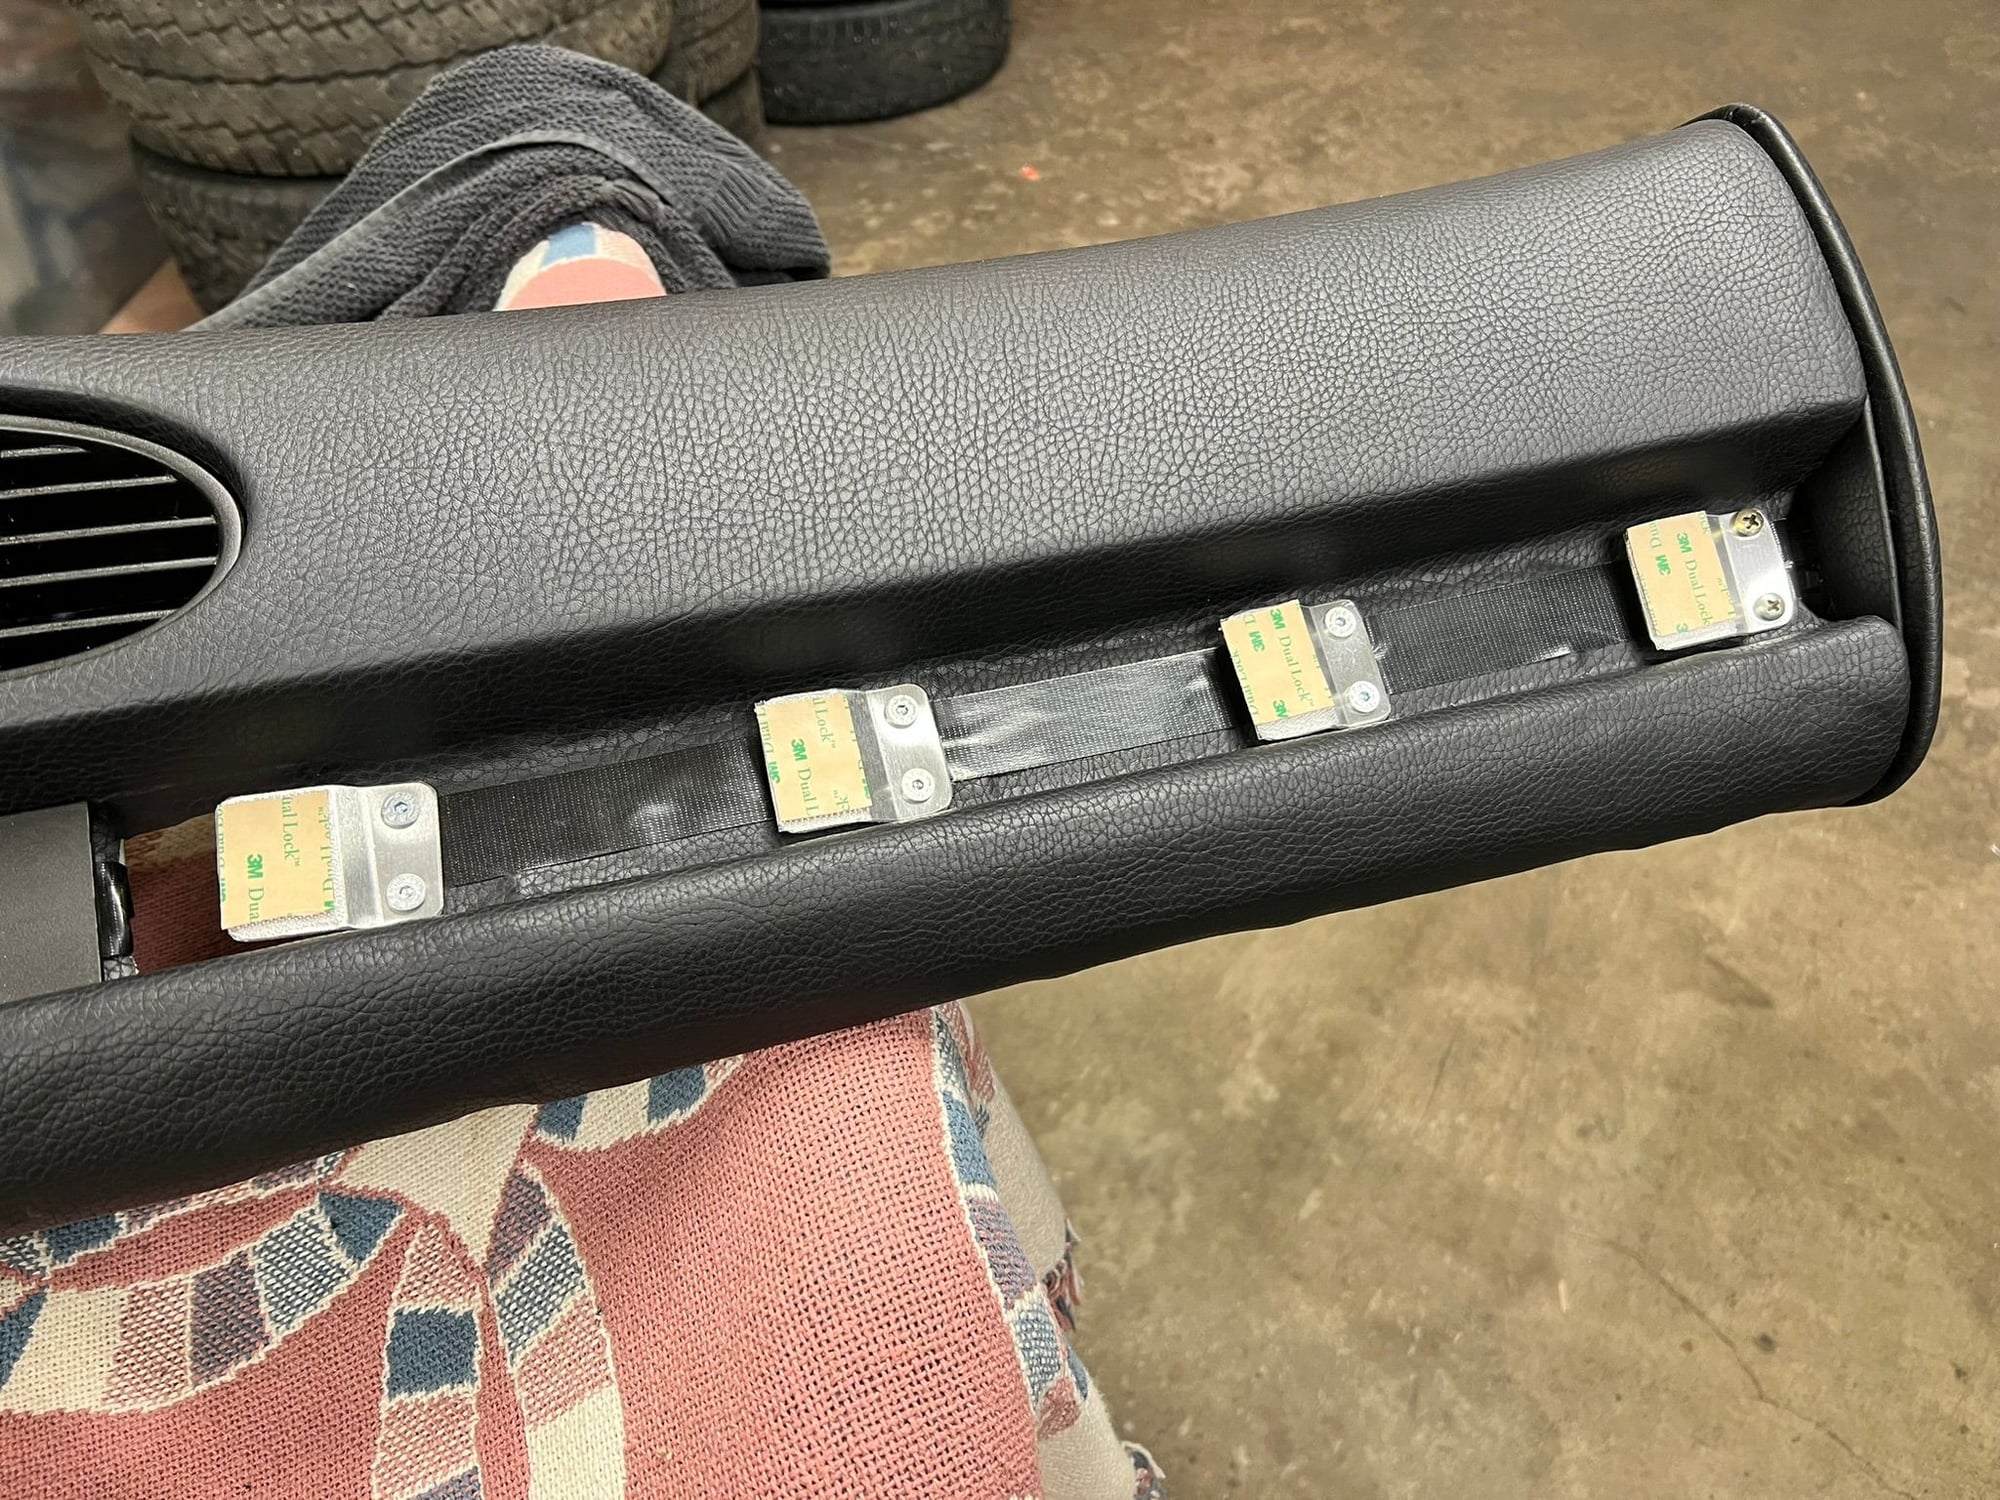
The shift light is Shift-P2 from Ecliptech. Polished the front glass and generally cleaned and refurbished the instrument cluster. Made a beauty cover to replace the right side plastic dasboard profile, that had various empty slots. Moved the hazard switch over to the left side of the HVAC controls, to where the heated rear window switch was located. Made new gaskets for the ventilation (From felt fabric), to ensure all air is directed to the windshield when needed. I am sitting very low in the car, so the steering column is lowered 10-15mm, by spacing it down on its mounts. Hence the gap between the instrument cluster and steering column cover.
I ran into an issue I have not understood 100%. I have enough wiring in the car to turn on the ignition. And the instruments, fans and some instrument lights are working. I still do not have anything in the engine bay, and the DME computer is not in place yet. But… When I turn the ignition off, the instrument cluster and the little HVAC interior fan stays on. And there is a bit of voltage at the first part of the DME relay. The voltage at the DME relay is certainly dropping, as the diagnosis LED light on my Ftech9 solid state relay is getting a bit dimmer. So something is happening to the voltage. I have isolated this to the Terminal 15 relay staying activated (closed), when I turn off the ignition. I measure 3-4V on the constant 12V at the coil, being fed by through the Terminal 15 relay. The ignition shuts fully off, both if I remove the Instrument light fuse (# 38) -or- remove the right side connector from the instrument cluster. It might be related to my hardwiring the alarm module bypass, where one of the two alarm jumper leads feed the alternator 12V field initiation, from the instrument light fuse (fuse 38). However; My hunch is that this is related to the diode between ground and 12V, on the charge light warning bulb circuit, in the instrument cluster. This circuit is hooked to the car through the right side cluster connector. But… Rather than continue the search, I have opted to push this until I have the engine, with alternator, coil and DME computer in the car.
. . . .
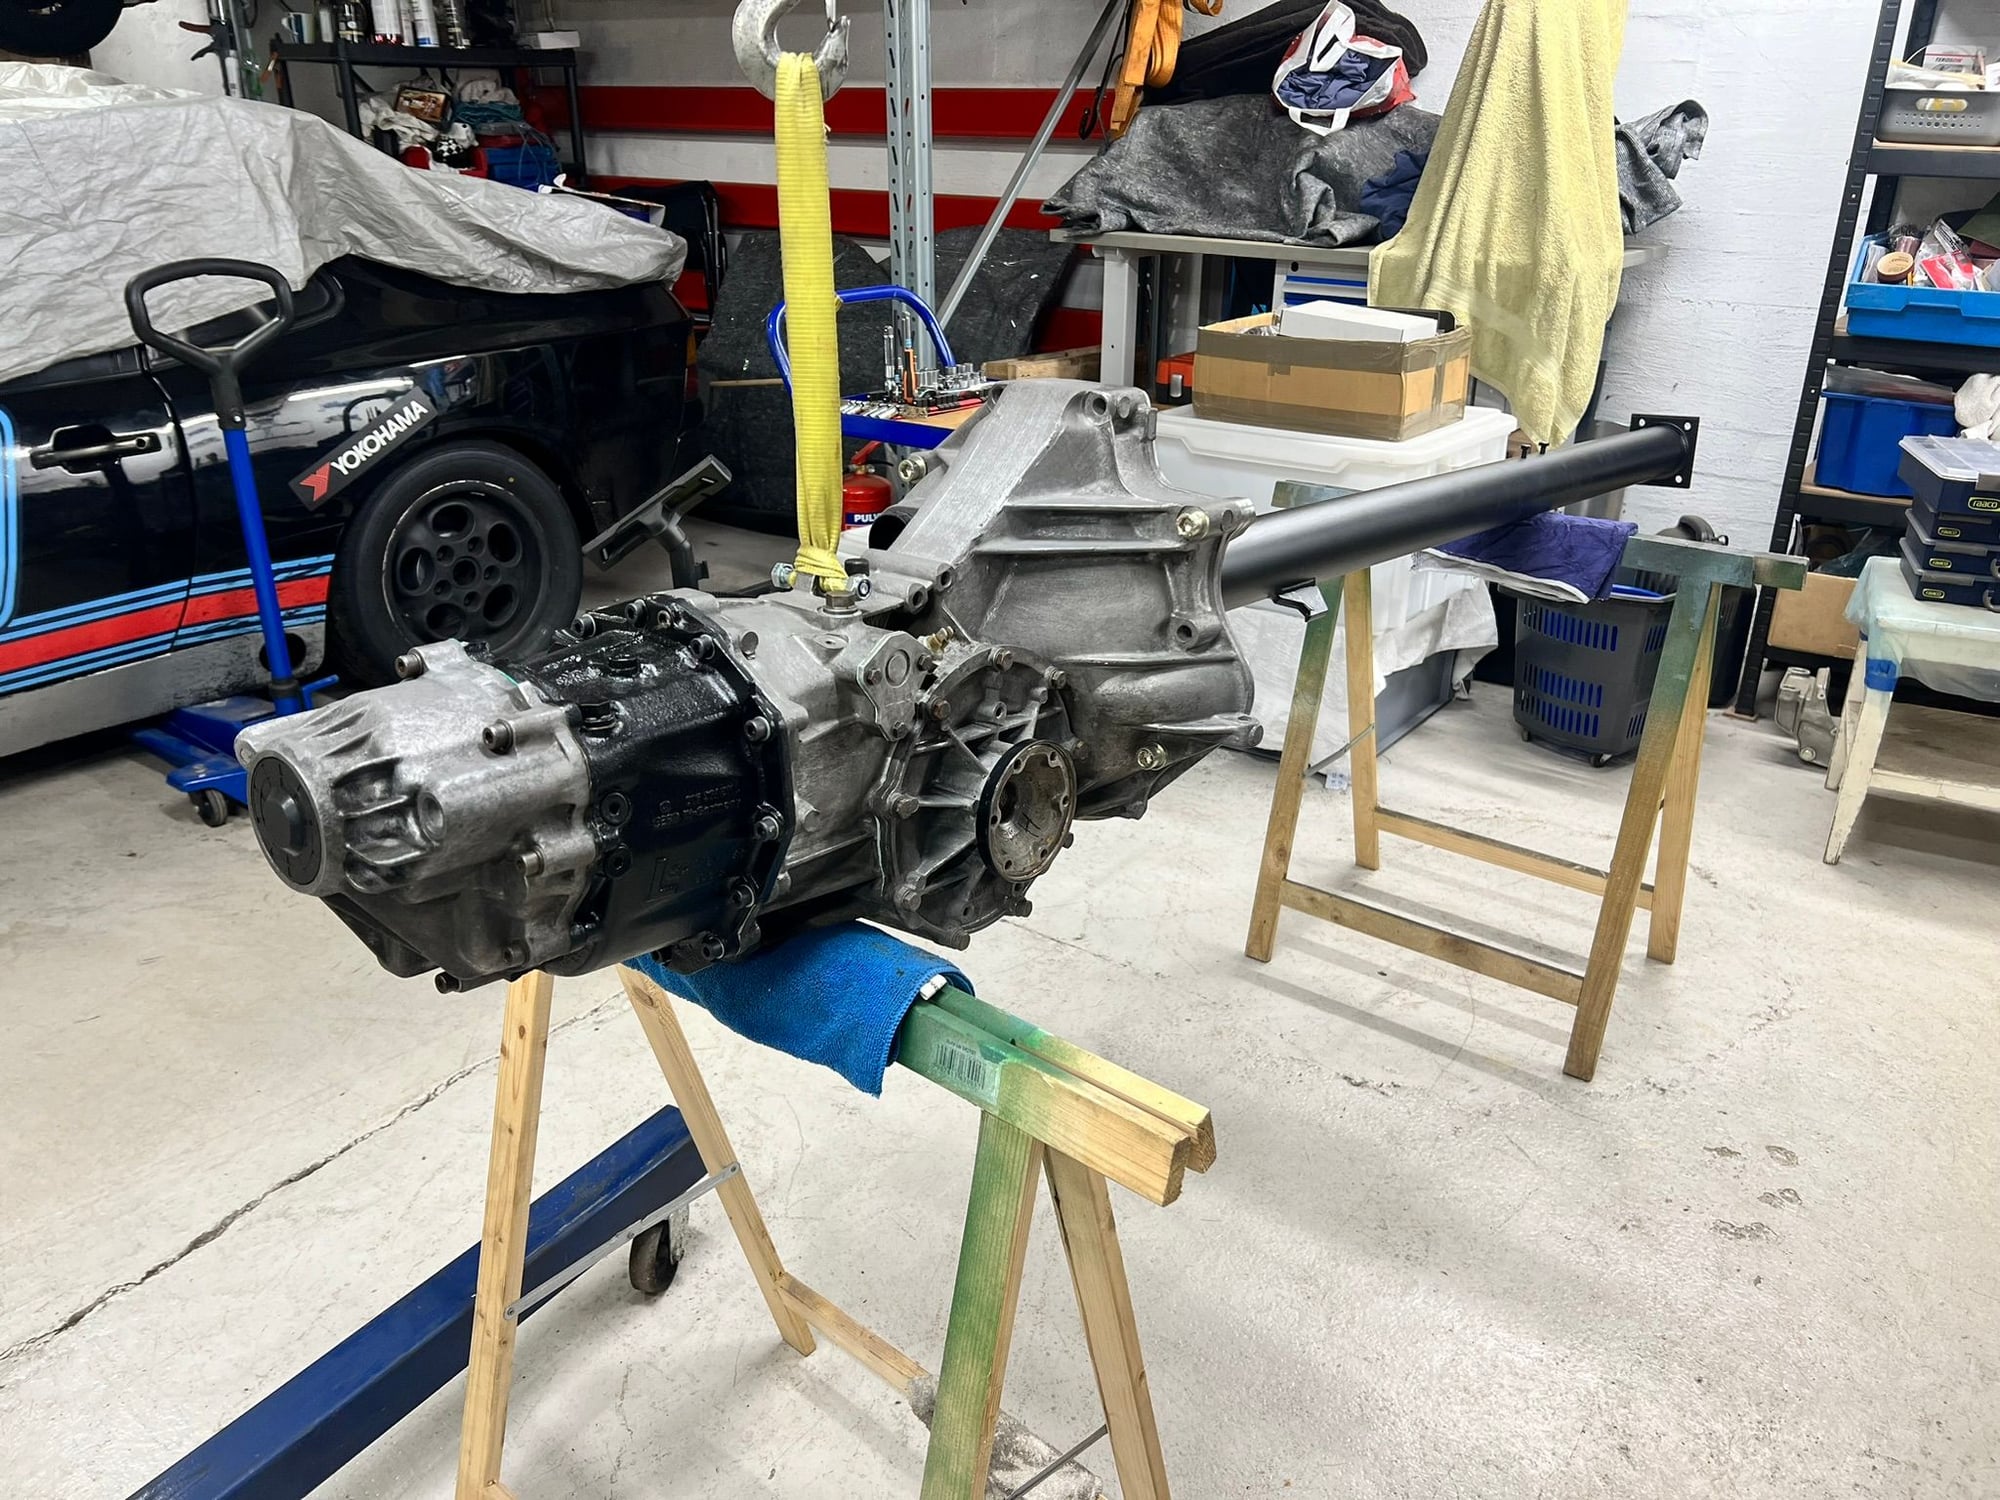
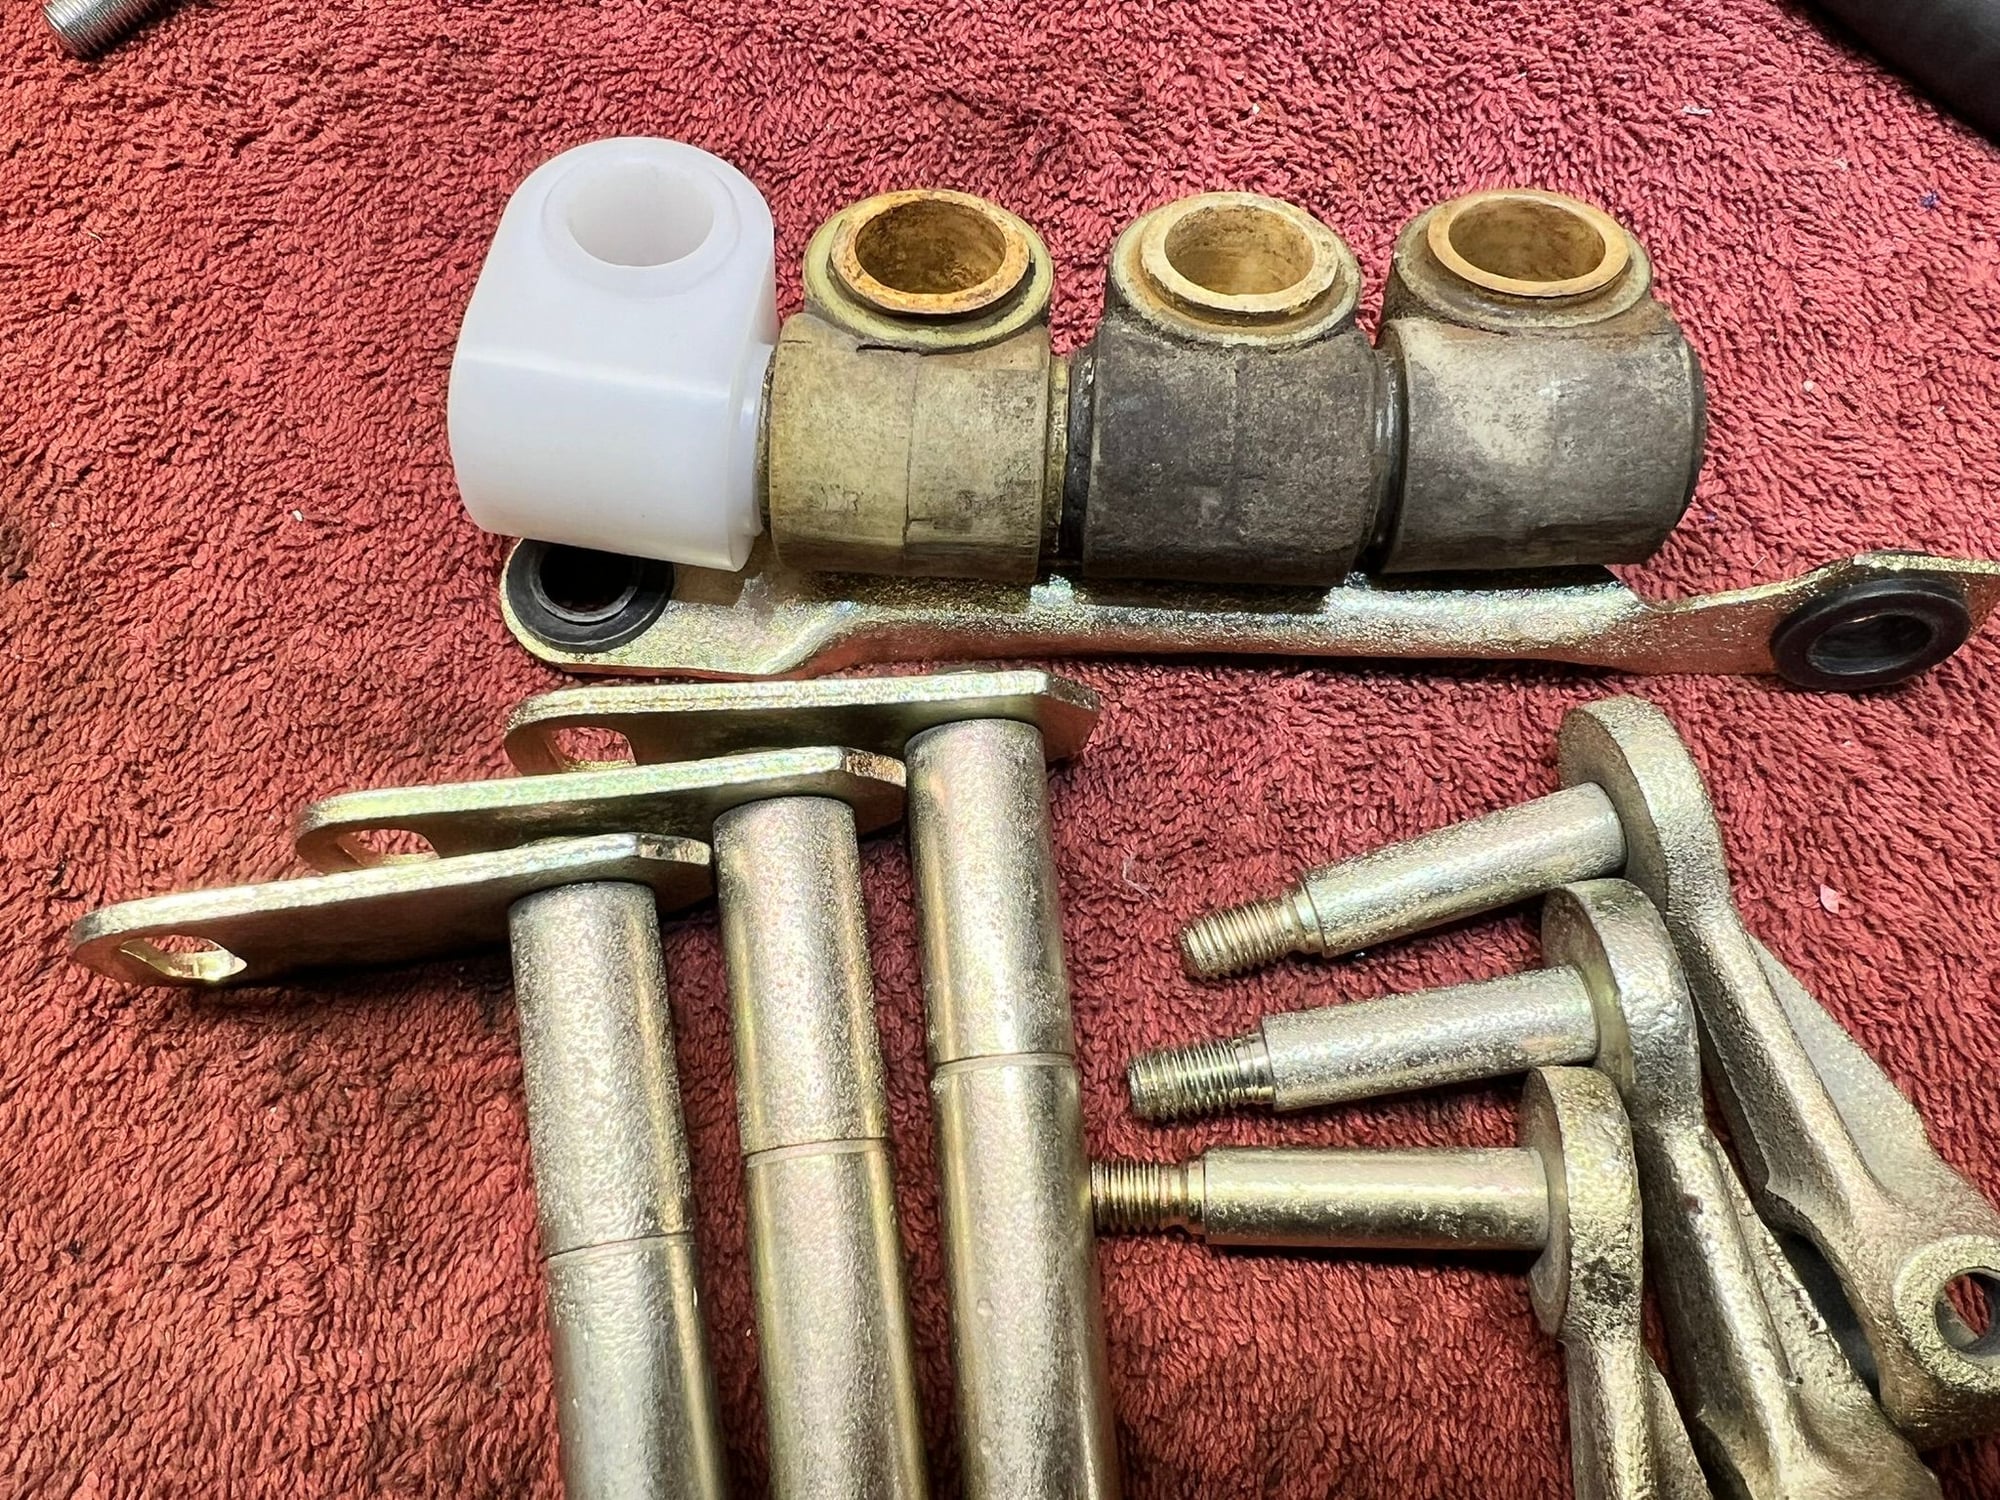
Assembly of the drivetrain and shifter linkage underway. Spent some time switching back and forth between various components, testing to identify what combination of shift linkage provides the best precision, to minimize play at the shift ****.
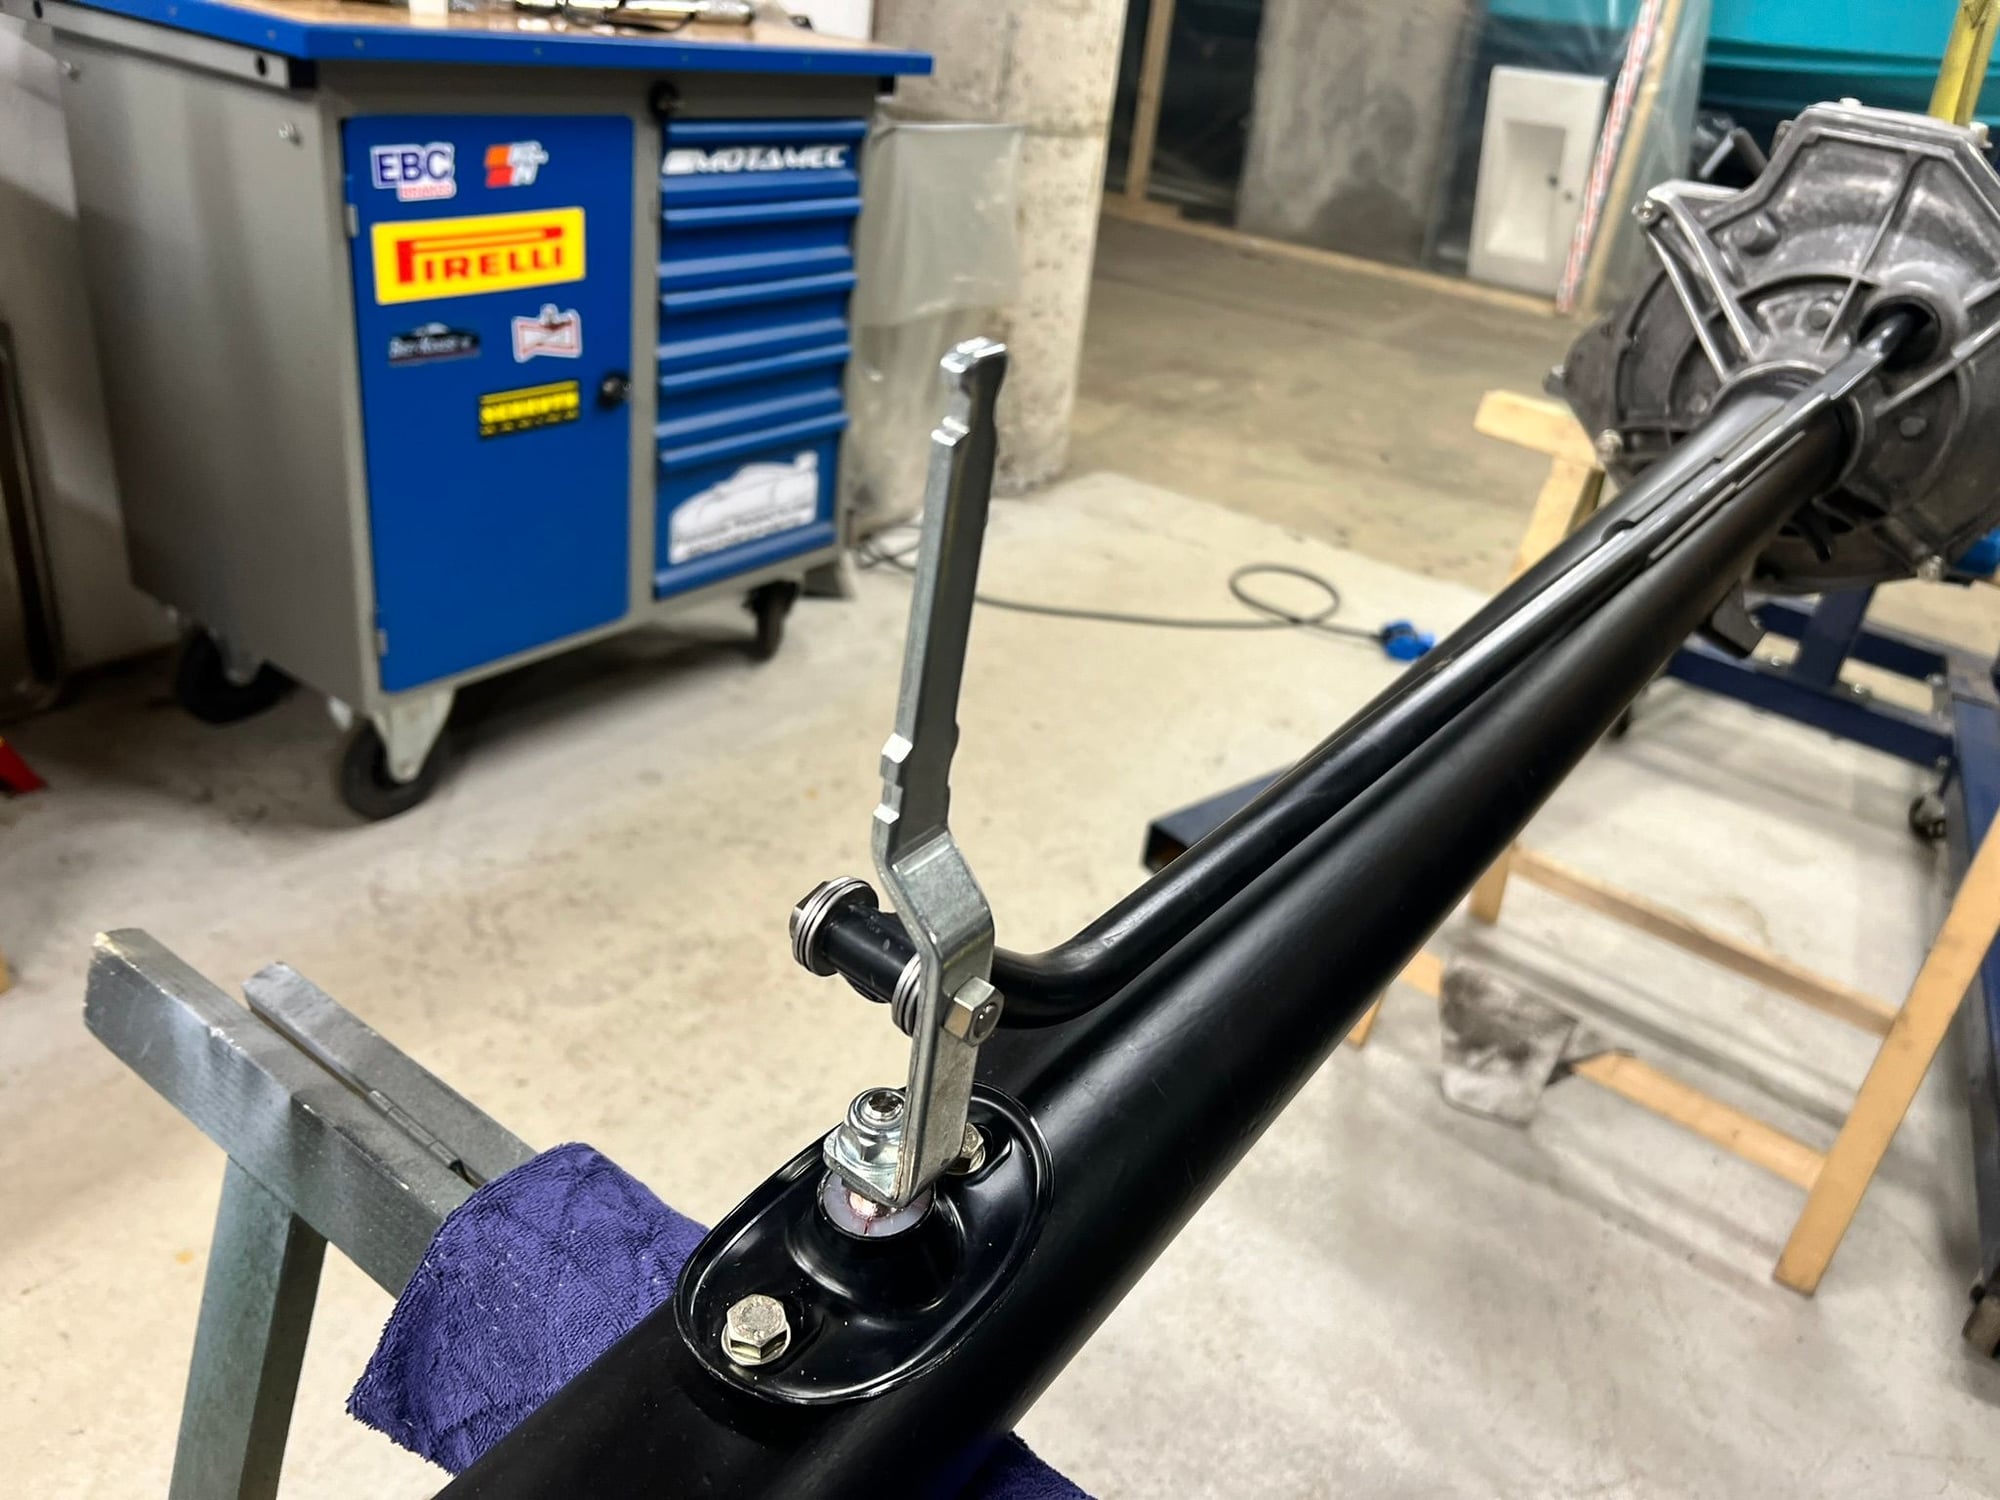
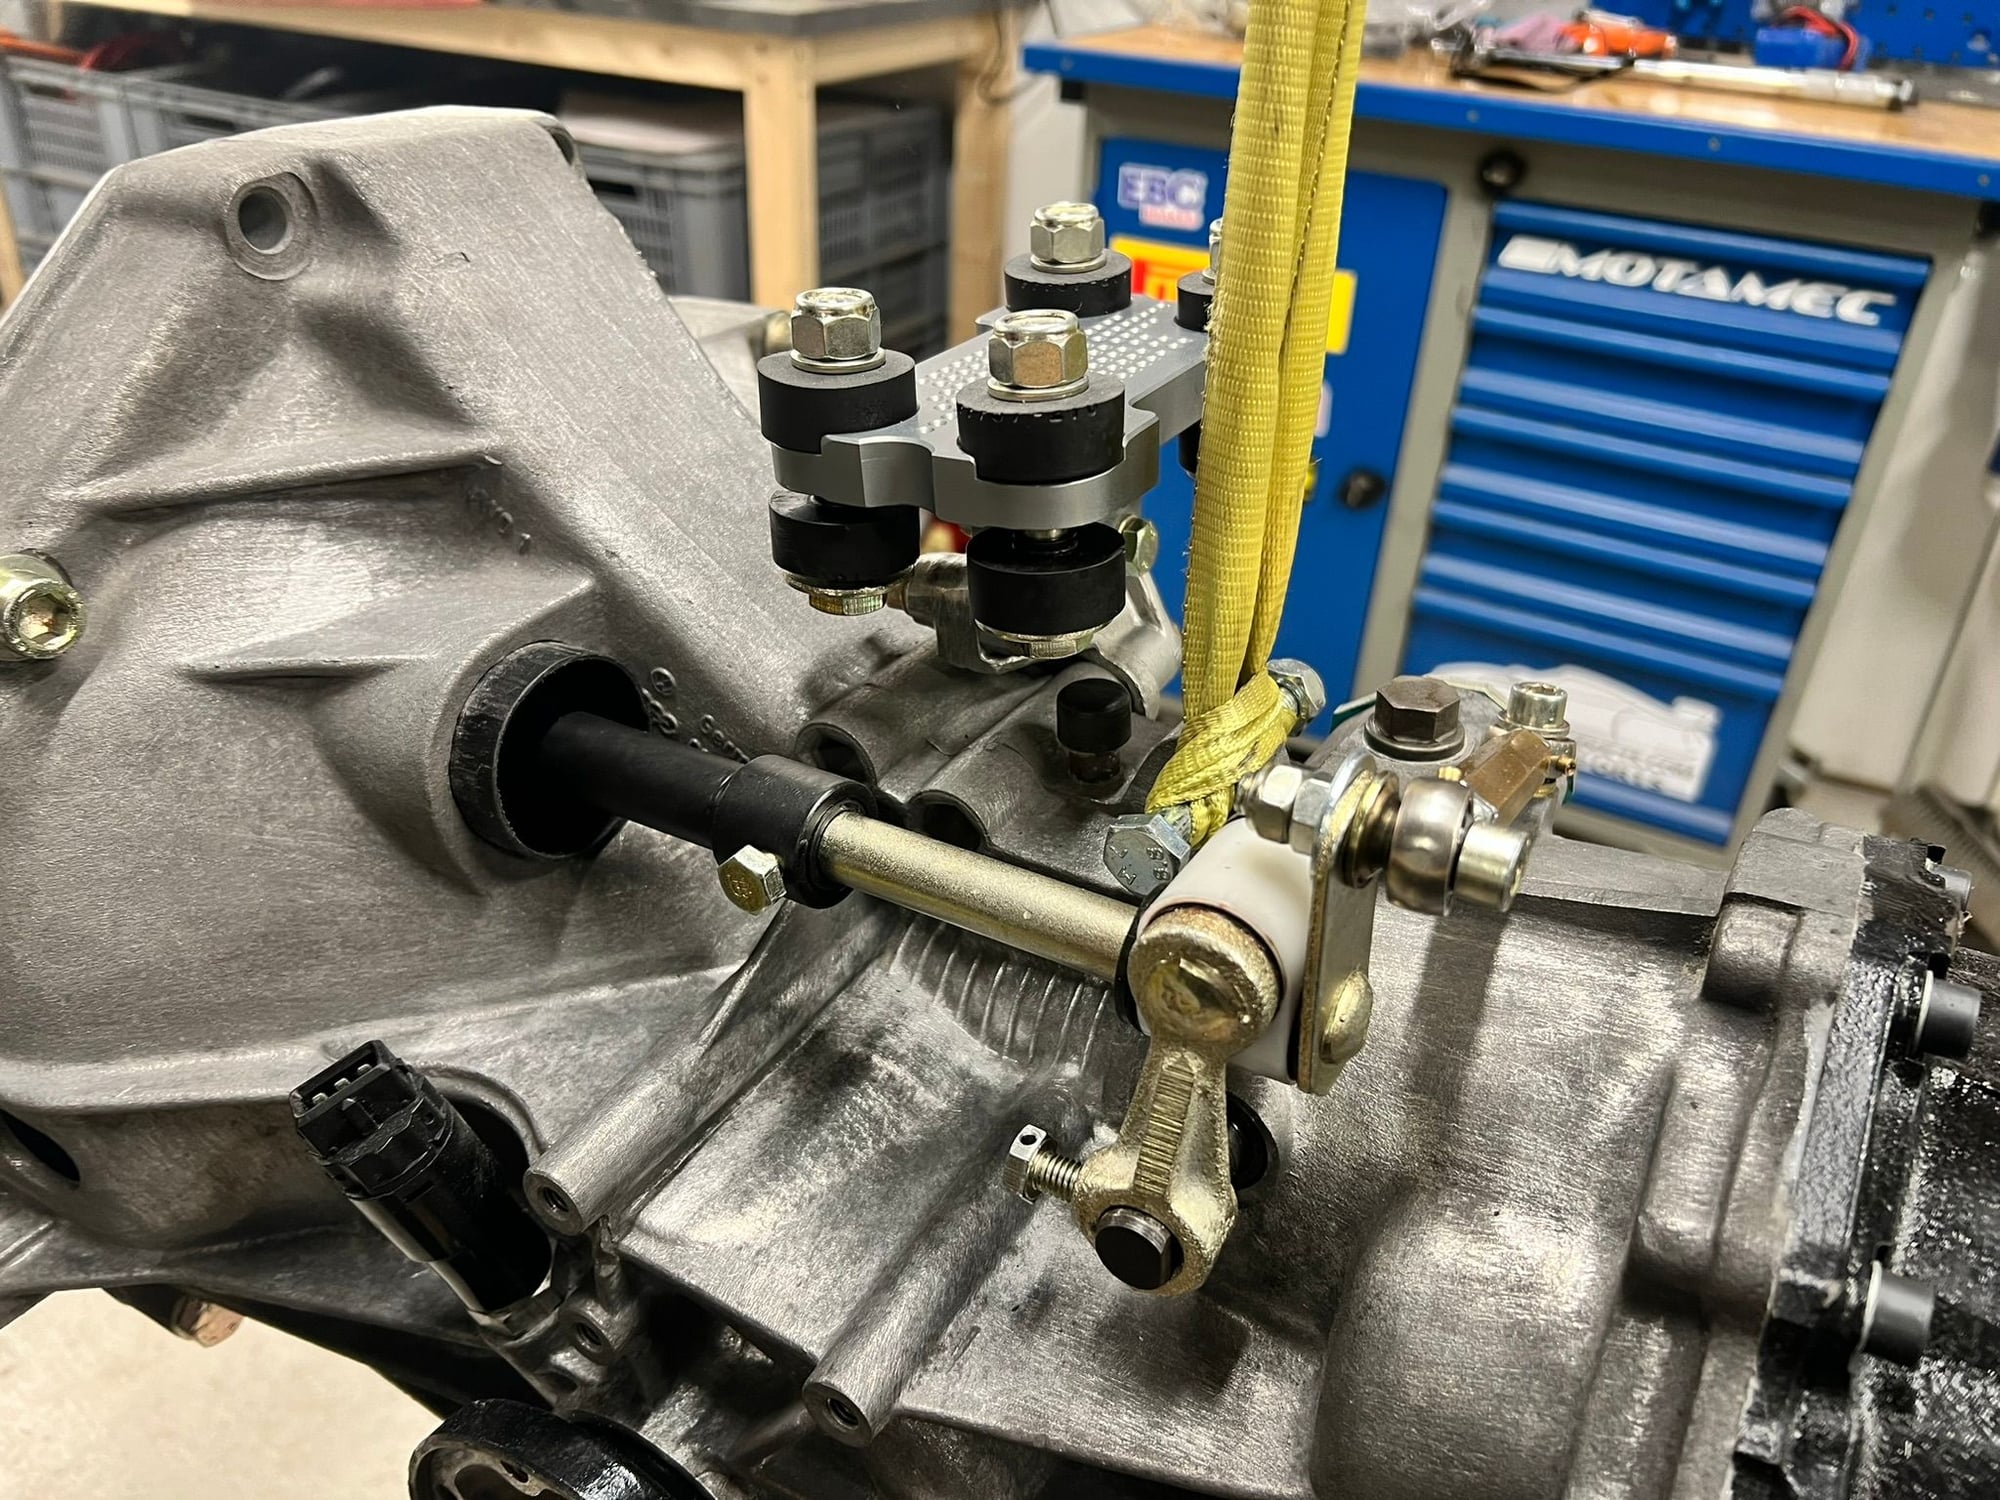
Selected the less corroded version of the parts I had available. Replaced the original plastic bushing with a repro-unit from Partworks (large white unit, with two large holes at 90 deg). The Partworks kit included shims, to balance play and stiction. Also, I have three different types of cross bar available (The link bar with two ball joints, going across the top of the transaxle). The original 39 year old unit, the model from Only 944 and unit that came with a "precision" kit, that was bought used. Of unknown origin. To top it off I have the Only 944 shift **** arm, with the needle roller thrust bearings.
What I found was that the longitudinal play at the shifter ****, as result of play in the linkage, was more or less non present. However there is longitudinal play as result of movement inside the transaxle. I assume this is inherent in gearbox design. Not something I can influence.
The needle thrust bearings of the Only 944 shifter arm minimized play at the forward end of the system. But there were significant differences between the three cross bars. I measured the following transversal play at the shift ****:
Original 39yr old link = 10-11mm
Only 944 link = 6-7mm
"Precision" link = 1-2mm
Having concluded on the shimming and cross bar, I continued to clean the threads and torquing it all down. Together with blue thread lock. I am also planning on using safety wire on the two bolts with pointy tips, attaching to the round axles. The two that are typically prone to coming loose.
.
There is still progress. Albeit a bit slower than I would like. There was a boat that needed some attention before it was put on the water for the summer. And the house is about to get a couple coats of oil based wood paint.
But the engine, torque tube and transaxle is ready for the marriage with the rest of the car. And for this occasion I have made a video. A run through of the long list of solutions and details I have chosen to include in this build. There are no spectacular parts here, just a thorough build job.
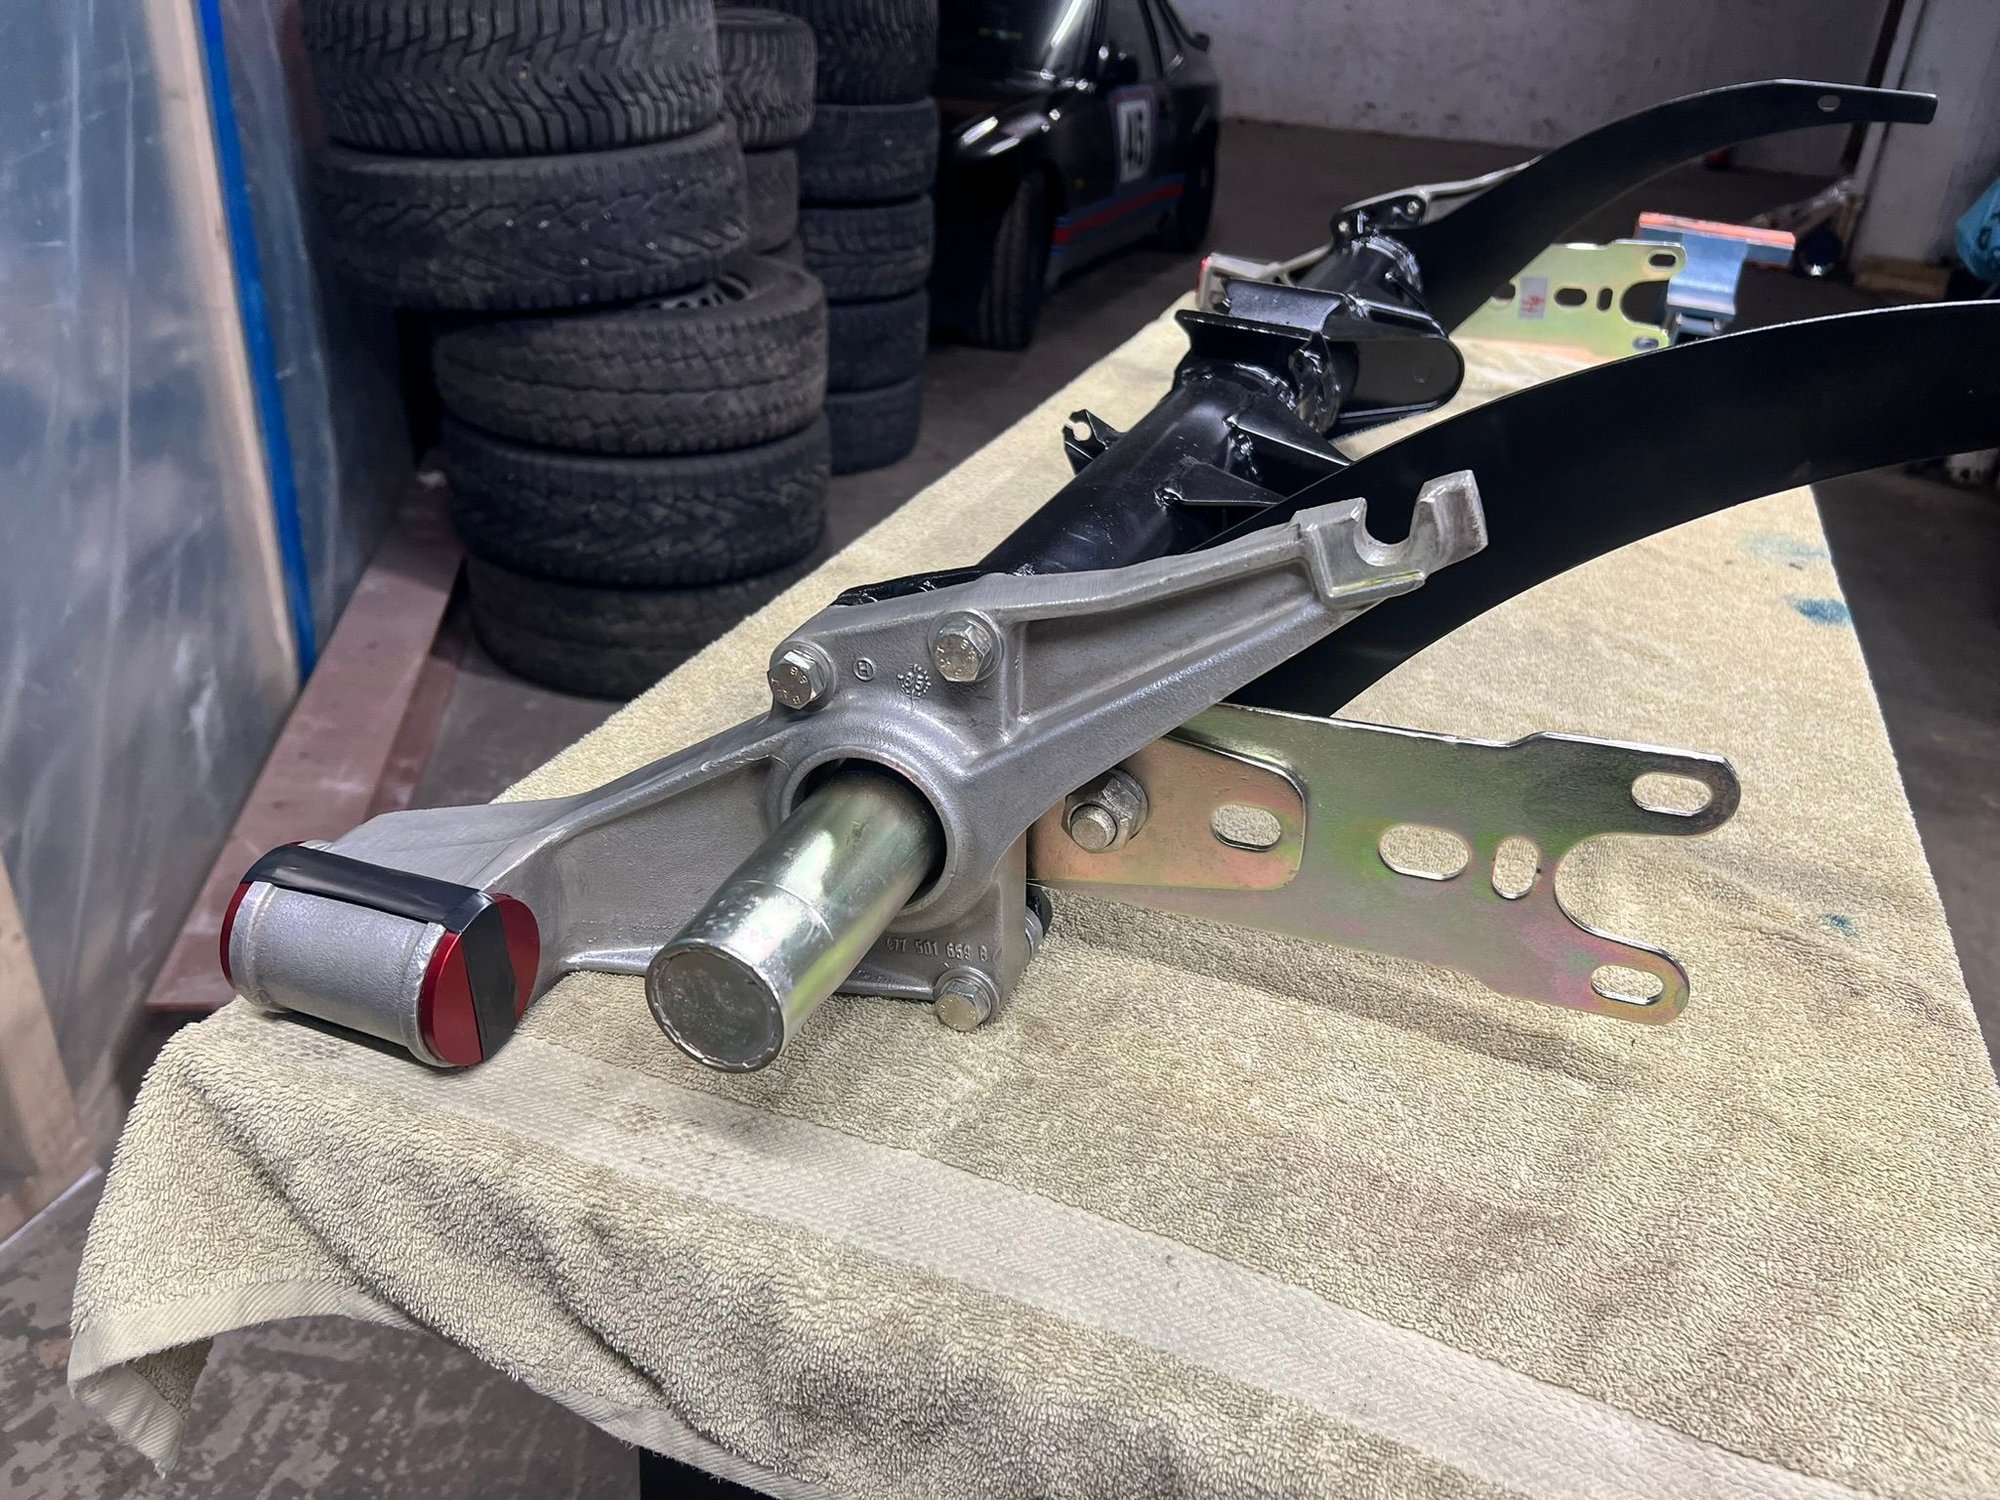
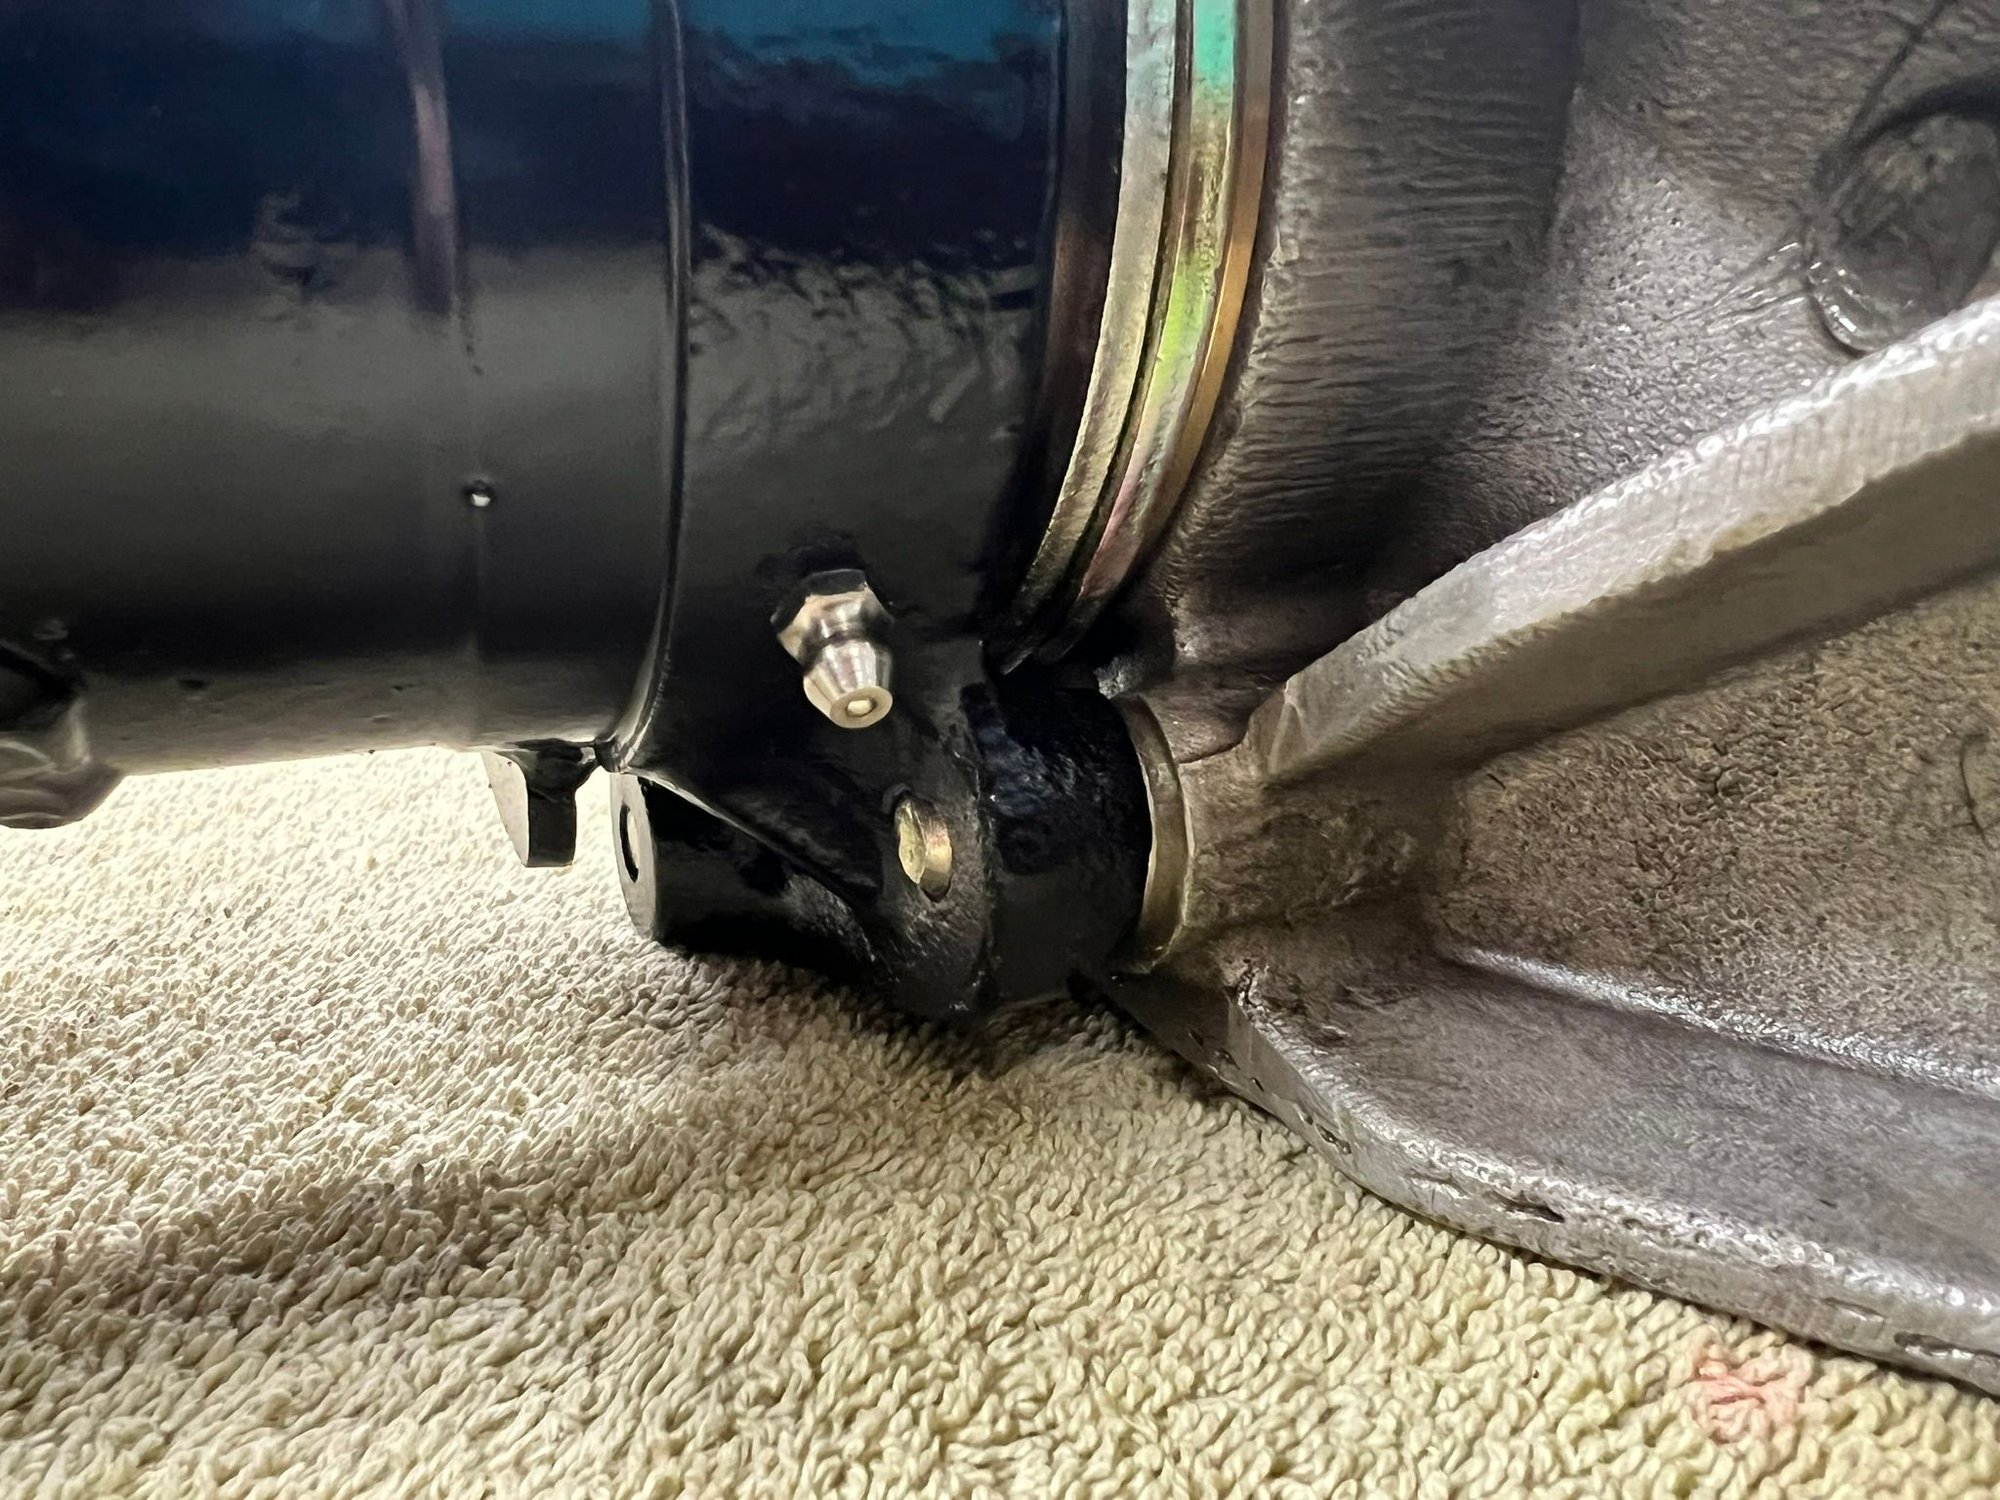
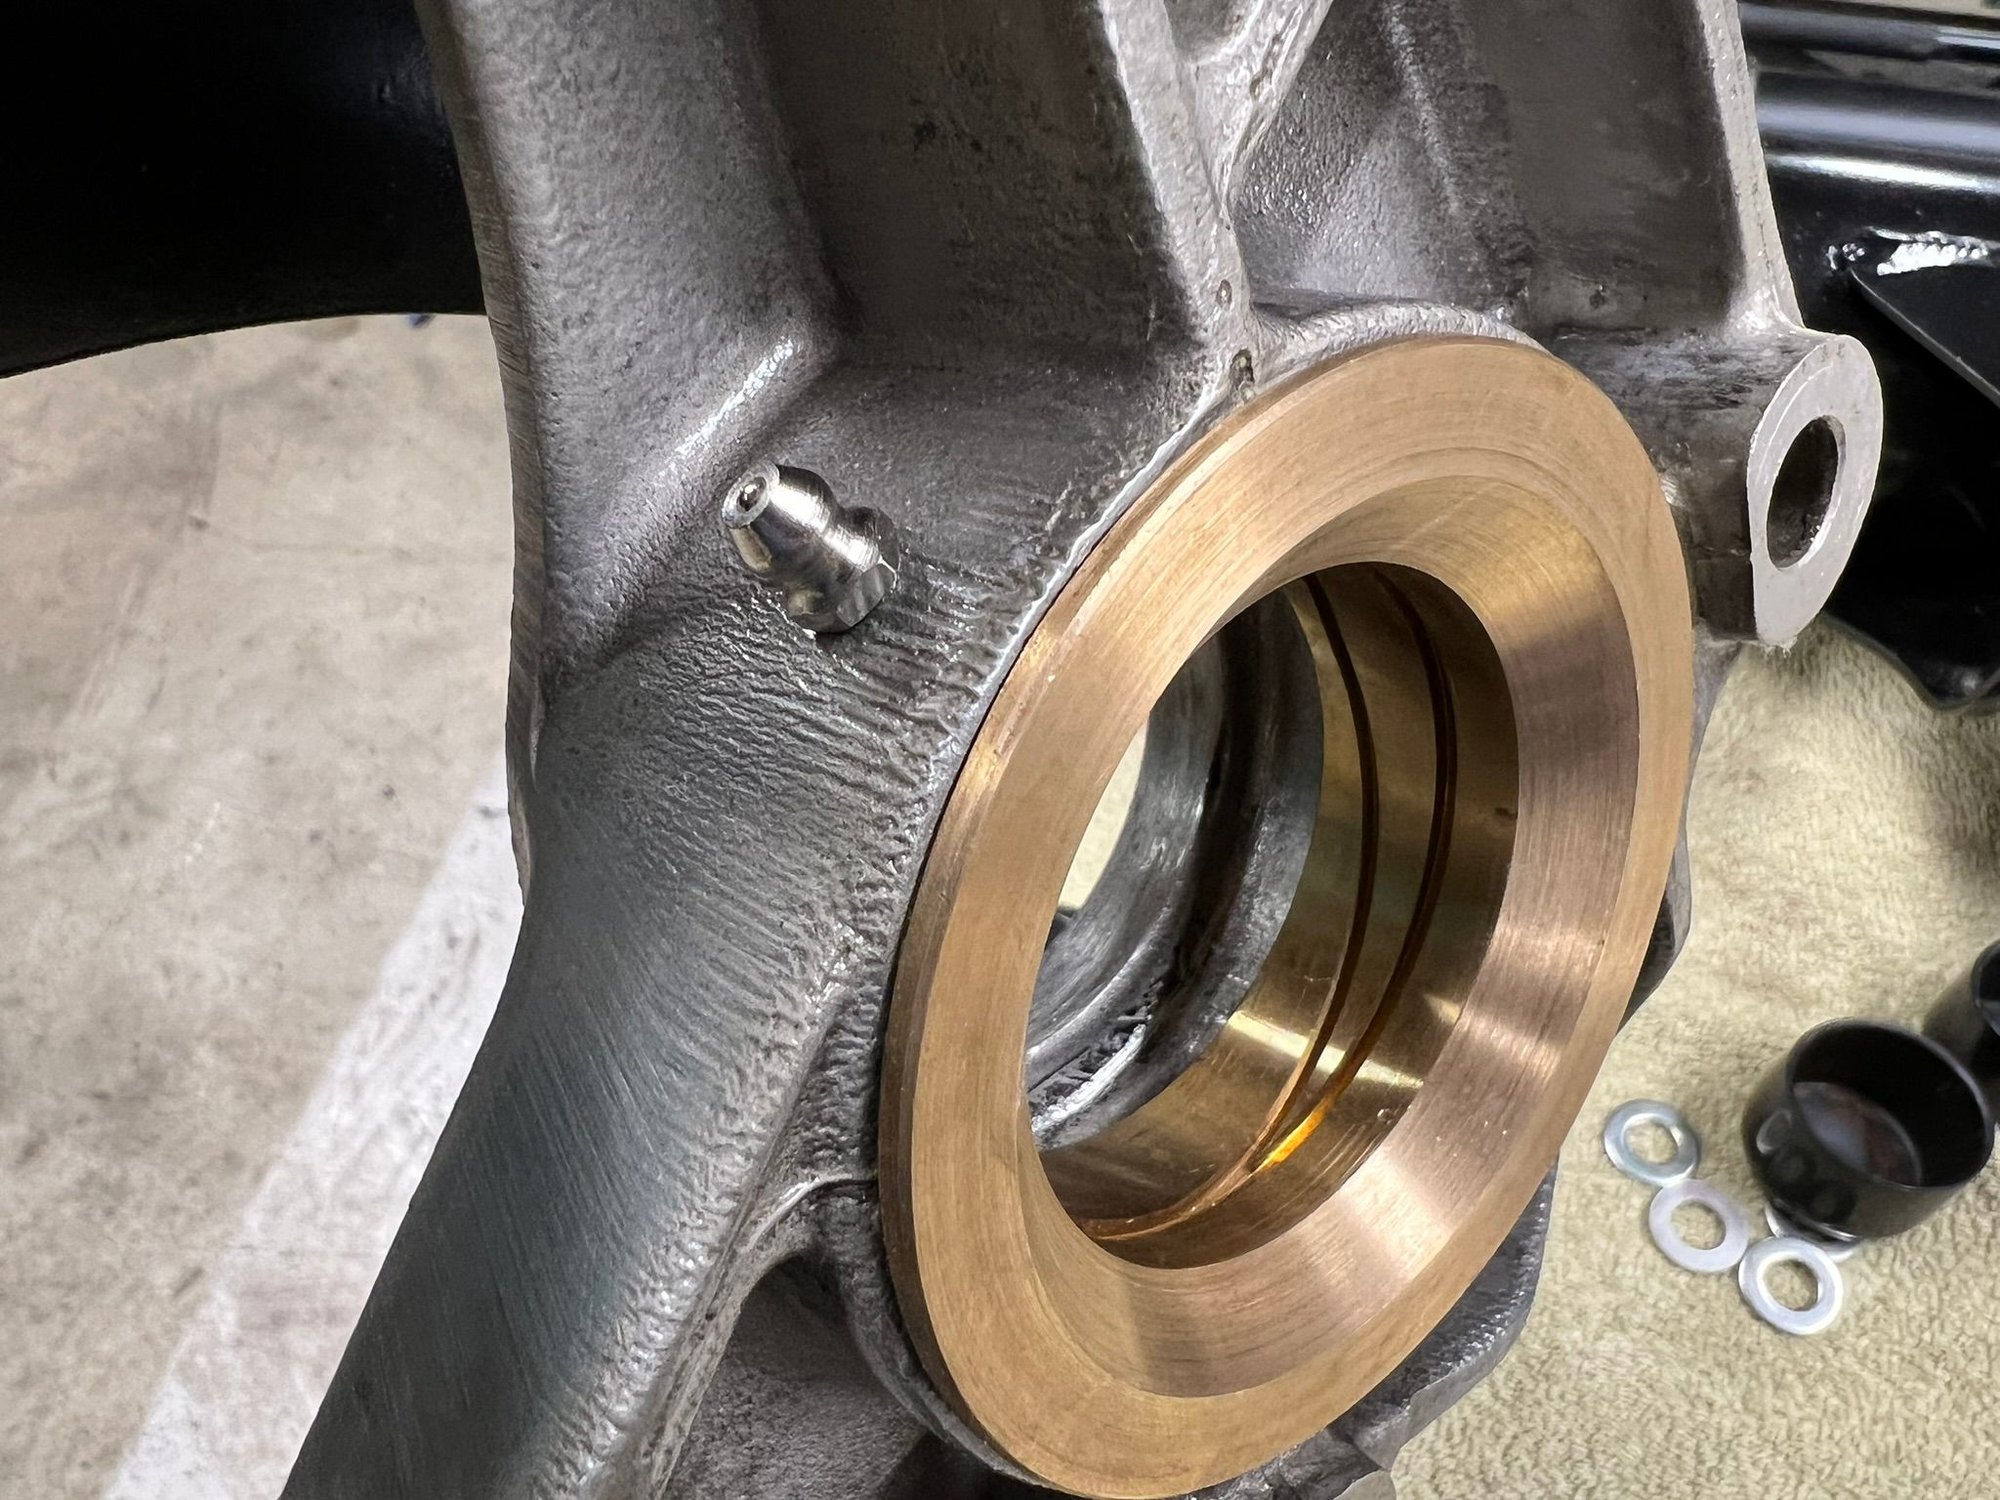
Torsion tube ready for final assembly. Elephant racing poly-bronze bushings. And 28mm sway-a-way torsion bars.
I expected the installation of the bushings to be a bit fiddly. But other than being time consuming, it wasn't difficult. The only adjustment I had to make was to grind off some casting numbers on the ends of the torsion tube itself, to ensure a properly flat mating surface for the bushing flange.
The end result was a nice fit. Very moderate friction, and no play.
This continues to be such a great build. I enjoyed that video very much. Being able to assemble the engine/torque tube/transaxle out of the car and then marry it to the body like the factory did is great. I had briefly considered this possibility but for my situation, the logistics were not manageable (I needed the car to be a roller for a house move long before the engine and transaxle rebuilds were finished).
You seem to be making all the best choices in your project, great work!
 04-09-2024, 03:17 PM