When you click on links to various merchants on this site and make a purchase, this can result in this site earning a commission. Affiliate programs and affiliations include, but are not limited to, the eBay Partner Network.
I wish to share my next chapter in the 944 experience.
Is it an early car? Yes!
Is it red? Well, yes (pinkish-red, for now).
So why another one? Well, truth be told, a good friend of mine reached out me me a few weeks ago and offered his car for sale. I accepted and a deal was made within moments. Some of you may have seen the YouTube Channel "SpencerDog944"; a series of videos published over the past 6-7 years that profiled various in-depth repair tutorials pertaining to our beloved early models. David and I met online (by chance) years ago as we were both restoring our respective steel fuel tanks and have become good friends thanks to the 944 Community. I've actually had the opportunity to drive his 84 while down in Florida a couple years ago.
David has performed many repairs during his ownership and I feel honored to have him pass the baton to me as caretaker. Many people in our community perhaps don't share the same enthusiasm as I do when it comes to the early cars, but I've really come to appreciate the thoughtful engineering Porsche poured into them. While not fast or powerful, they are simple in design (compared to later cars with ABS/air bags, etc.) and most anyone with some mechanical ability can maintain these cars to a respectable standard. I will admit that I enjoy working on them as much (maybe a bit more) than being behind the wheel.
As with my last build thread "Ok, This is a Disease", highlighting a safari build & restoration, I would to take you all along for another ride into the wonderful world of 944 restoration. The intent of this exercise will be to simply bring the car to a point of mechanical reliability, such that anyone could drive her across the country without (too much) concern. The format will most-likely remain the same, in that I will attempt to photo-document each step will providing descriptive captions. I think this method keeps the reader engaged, without too much droning on (I hope I haven't started yet). My intended goal will be to have her ready for the 944 Helen, GA Meet in June. It's a 2,600 mile journey that I taken the past two years and hope to continue to participate in the future.
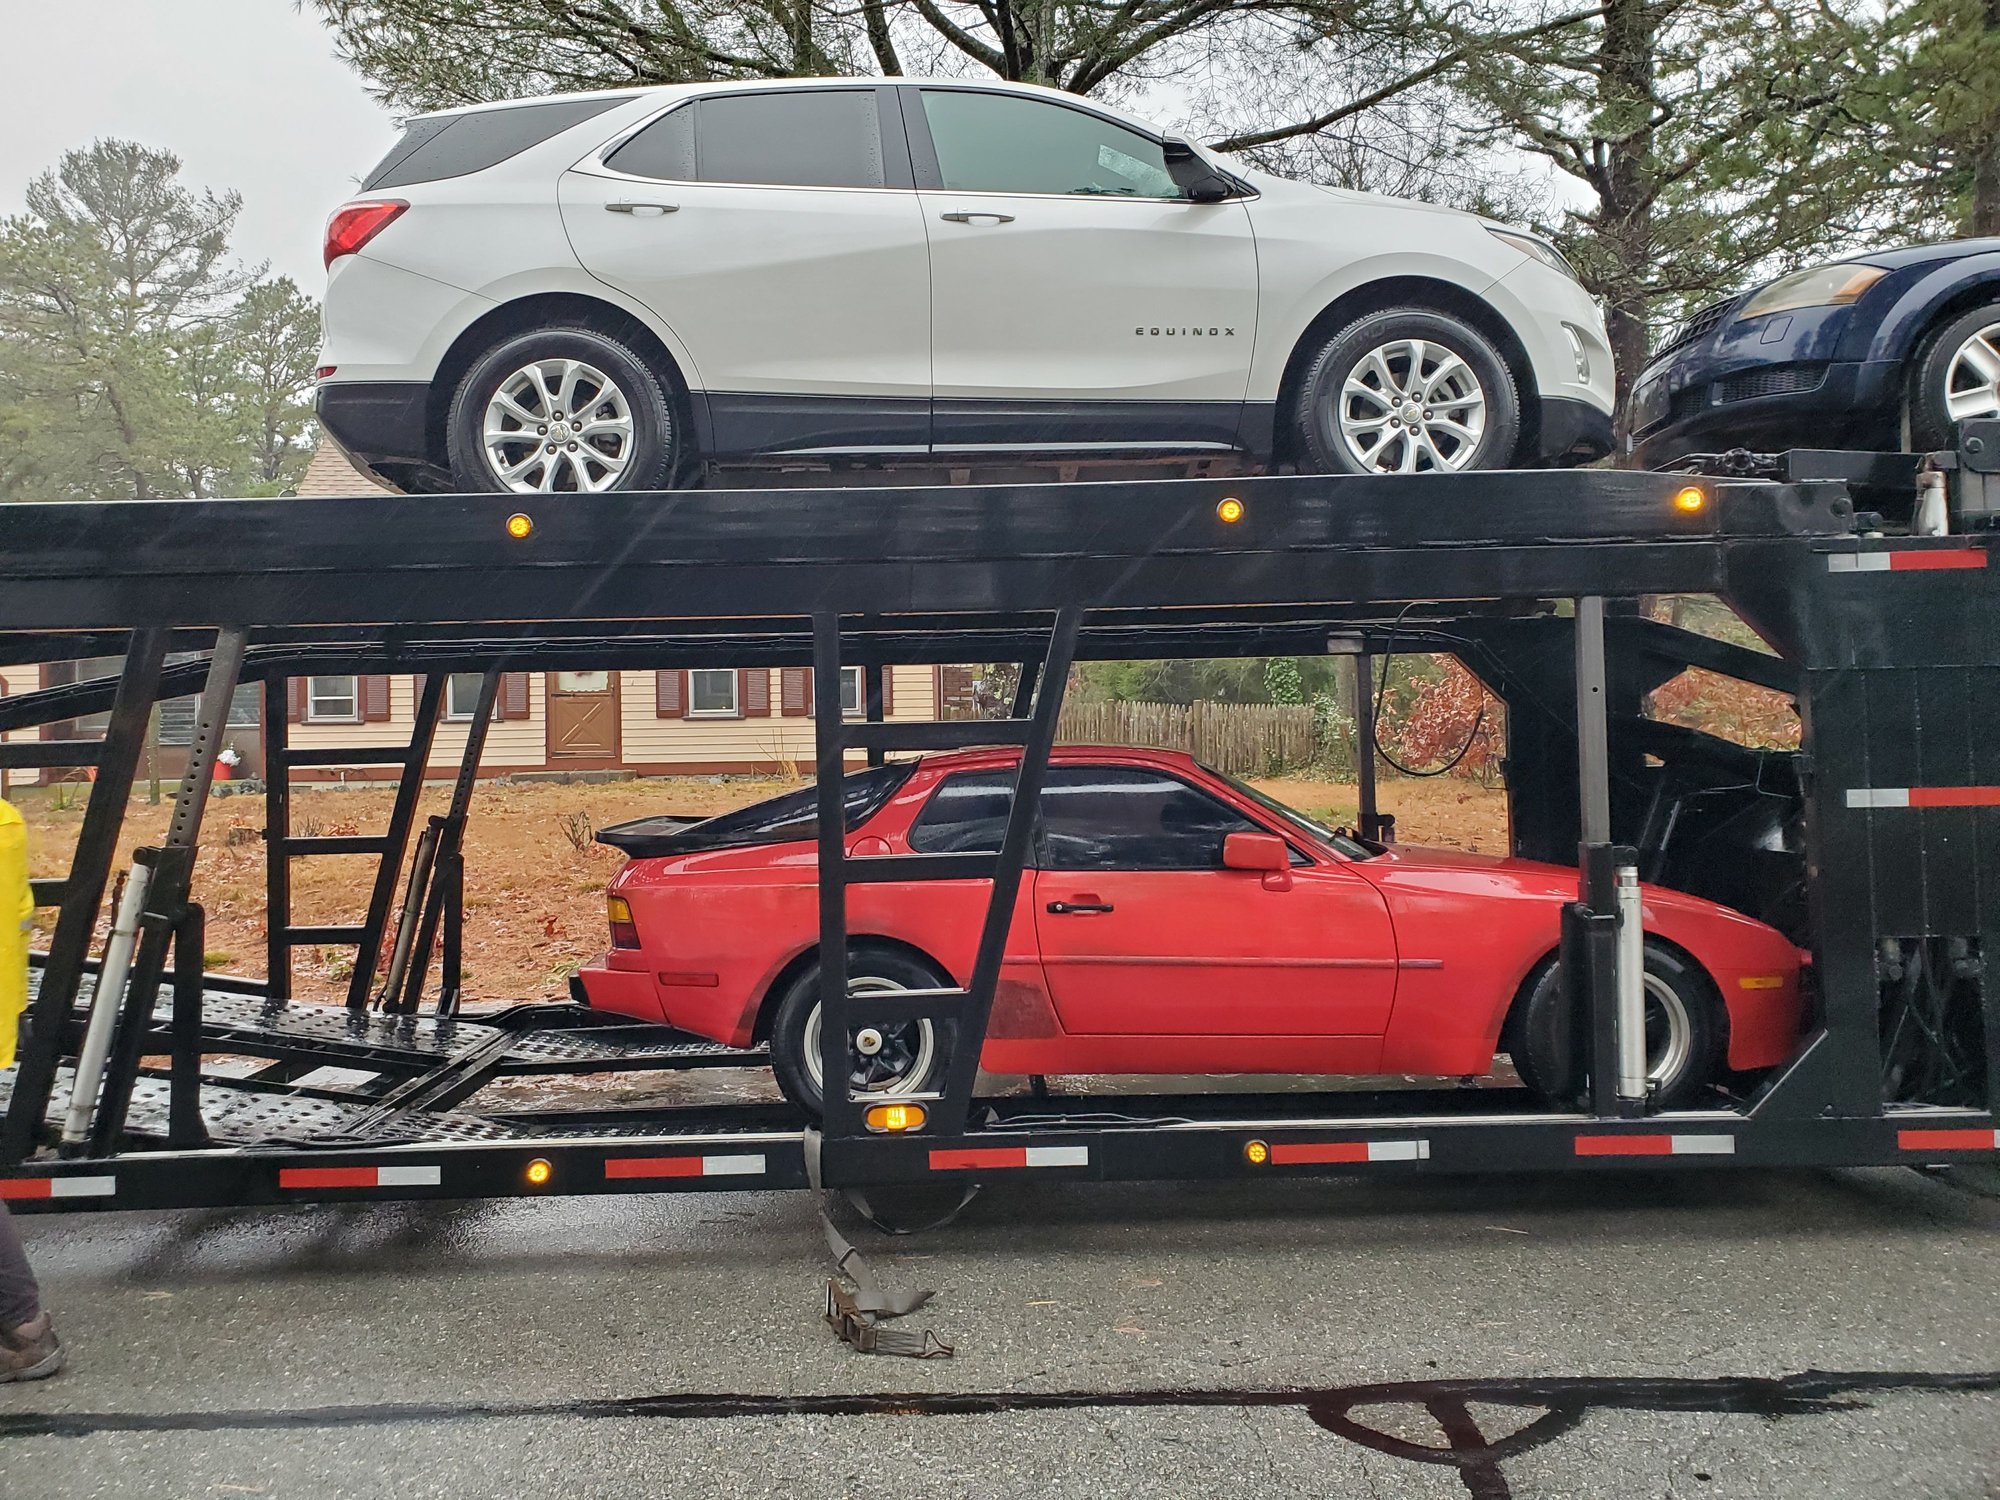
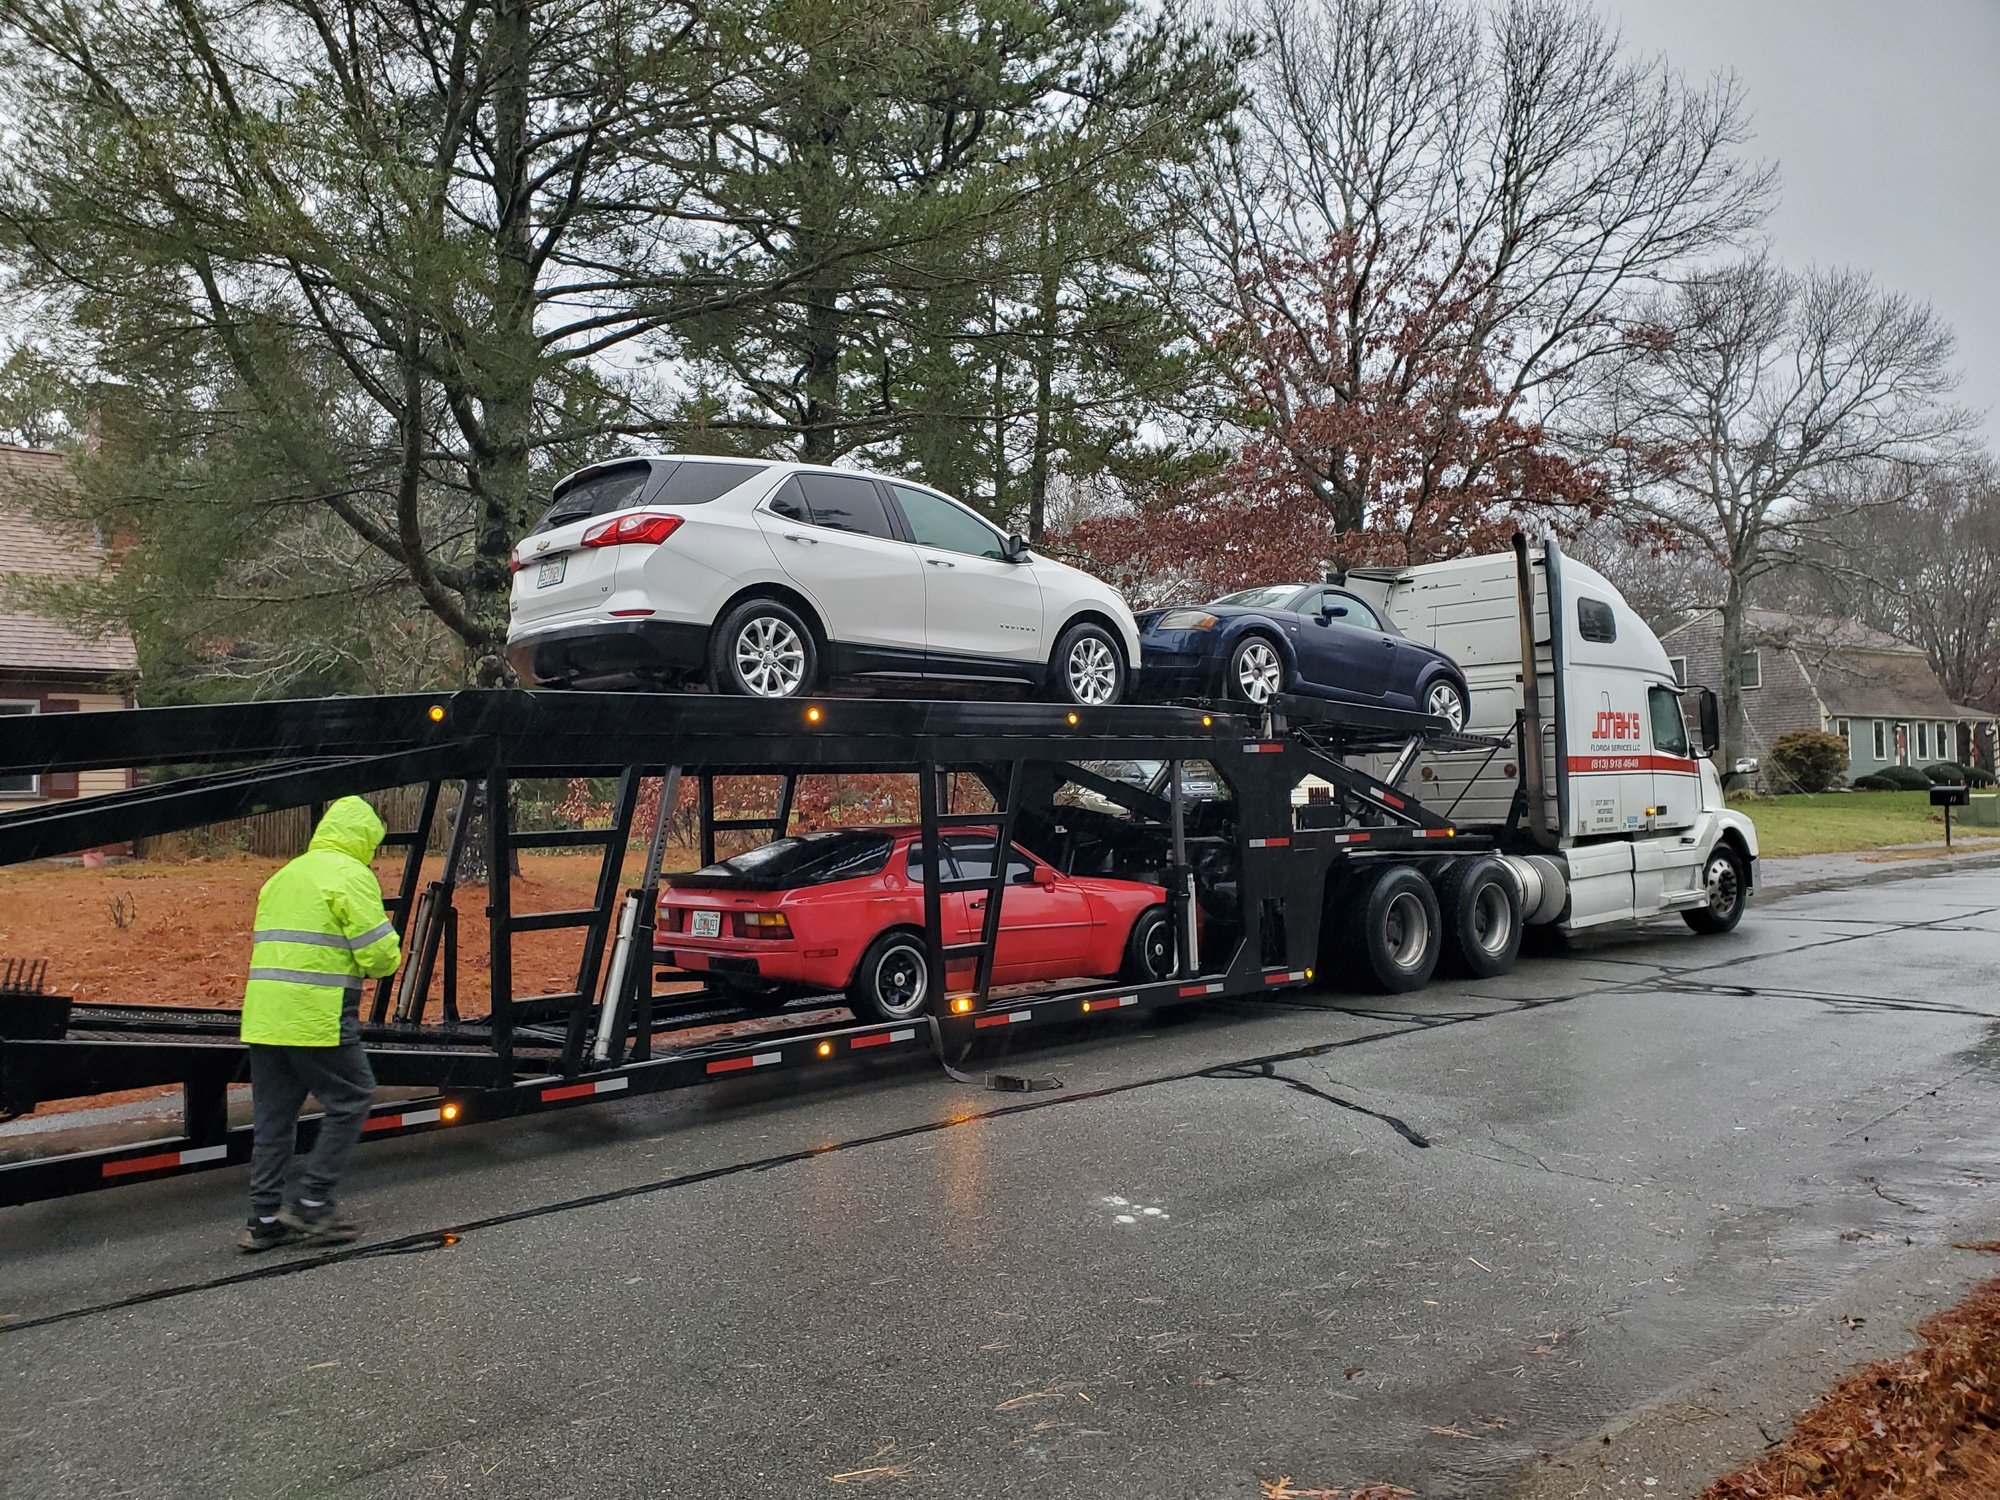
Anyway, here she is arriving by truck to my home this afternoon:
The weather didn't cooperate at all - we had gale weather conditions all day so I only had a small window to take these two pictures. Many more to come...
Unfortunately, something happened to the starter motor so we had to push her off the truck and up my driveway. There's my 1st unexpected project already!
Thanks, I'm looking forward to begin the project. It's funny that the car is sitting about 8 feet from my lift and I'll have to crawl on the ground to replace the starter.
BTW: It appears that starter motors are on backorder everywhere but I managed to find a good used unit from Elliott. Hope to replace it before next weekend.
You are correct Dan. Since this is my hobby and I generally have a blast working on them, I don't let the costs get to me (too much). This will be a nice winter project, then who knows what comes next.
While waiting for a starter, I decided to get my hands a little dirty with some easy and simple projects.
1. I replaced the ignition switch, since these are regular wear items and, well, I had a new one "in stock."
2. Replaced that small lamp in the headlight switch while I had the steering wheel and turn signal lever assembly off the column.
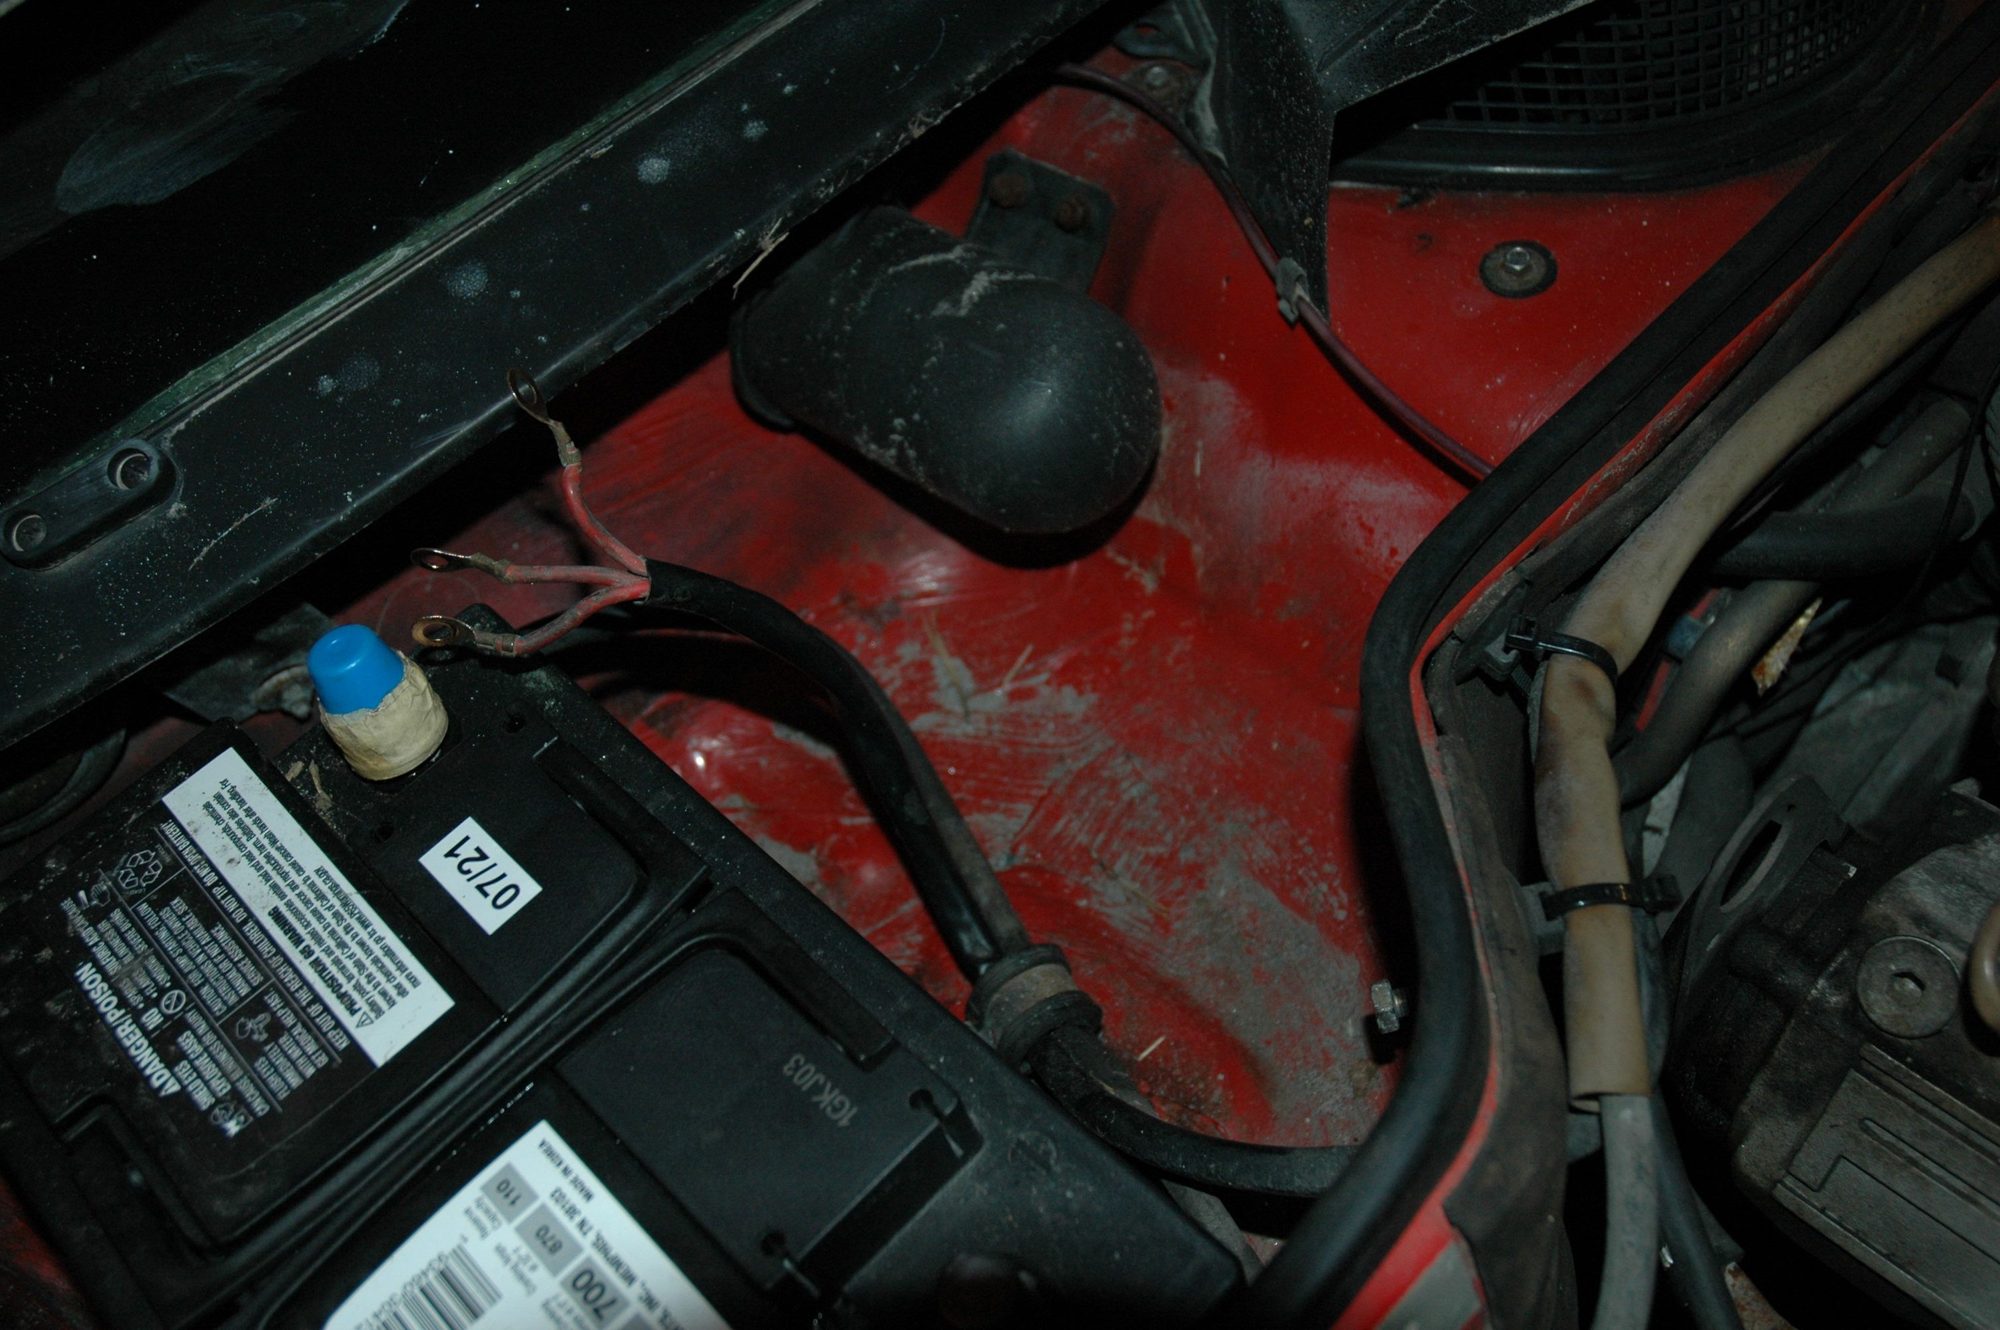
3. Conducted a battery box inspection. It was a bit dirty (actually a fair amount of sand) but NO RUST!!!!!!!!!!!!!!!!!!!!!!!!!! I noticed that the vacuum canister was full of water so after shaking as much as I could, I'll figured I'll leave it disconnected for a while. Not sure how water got in as there doesn't seem to be any cracks/holes - something to keep an eye on...
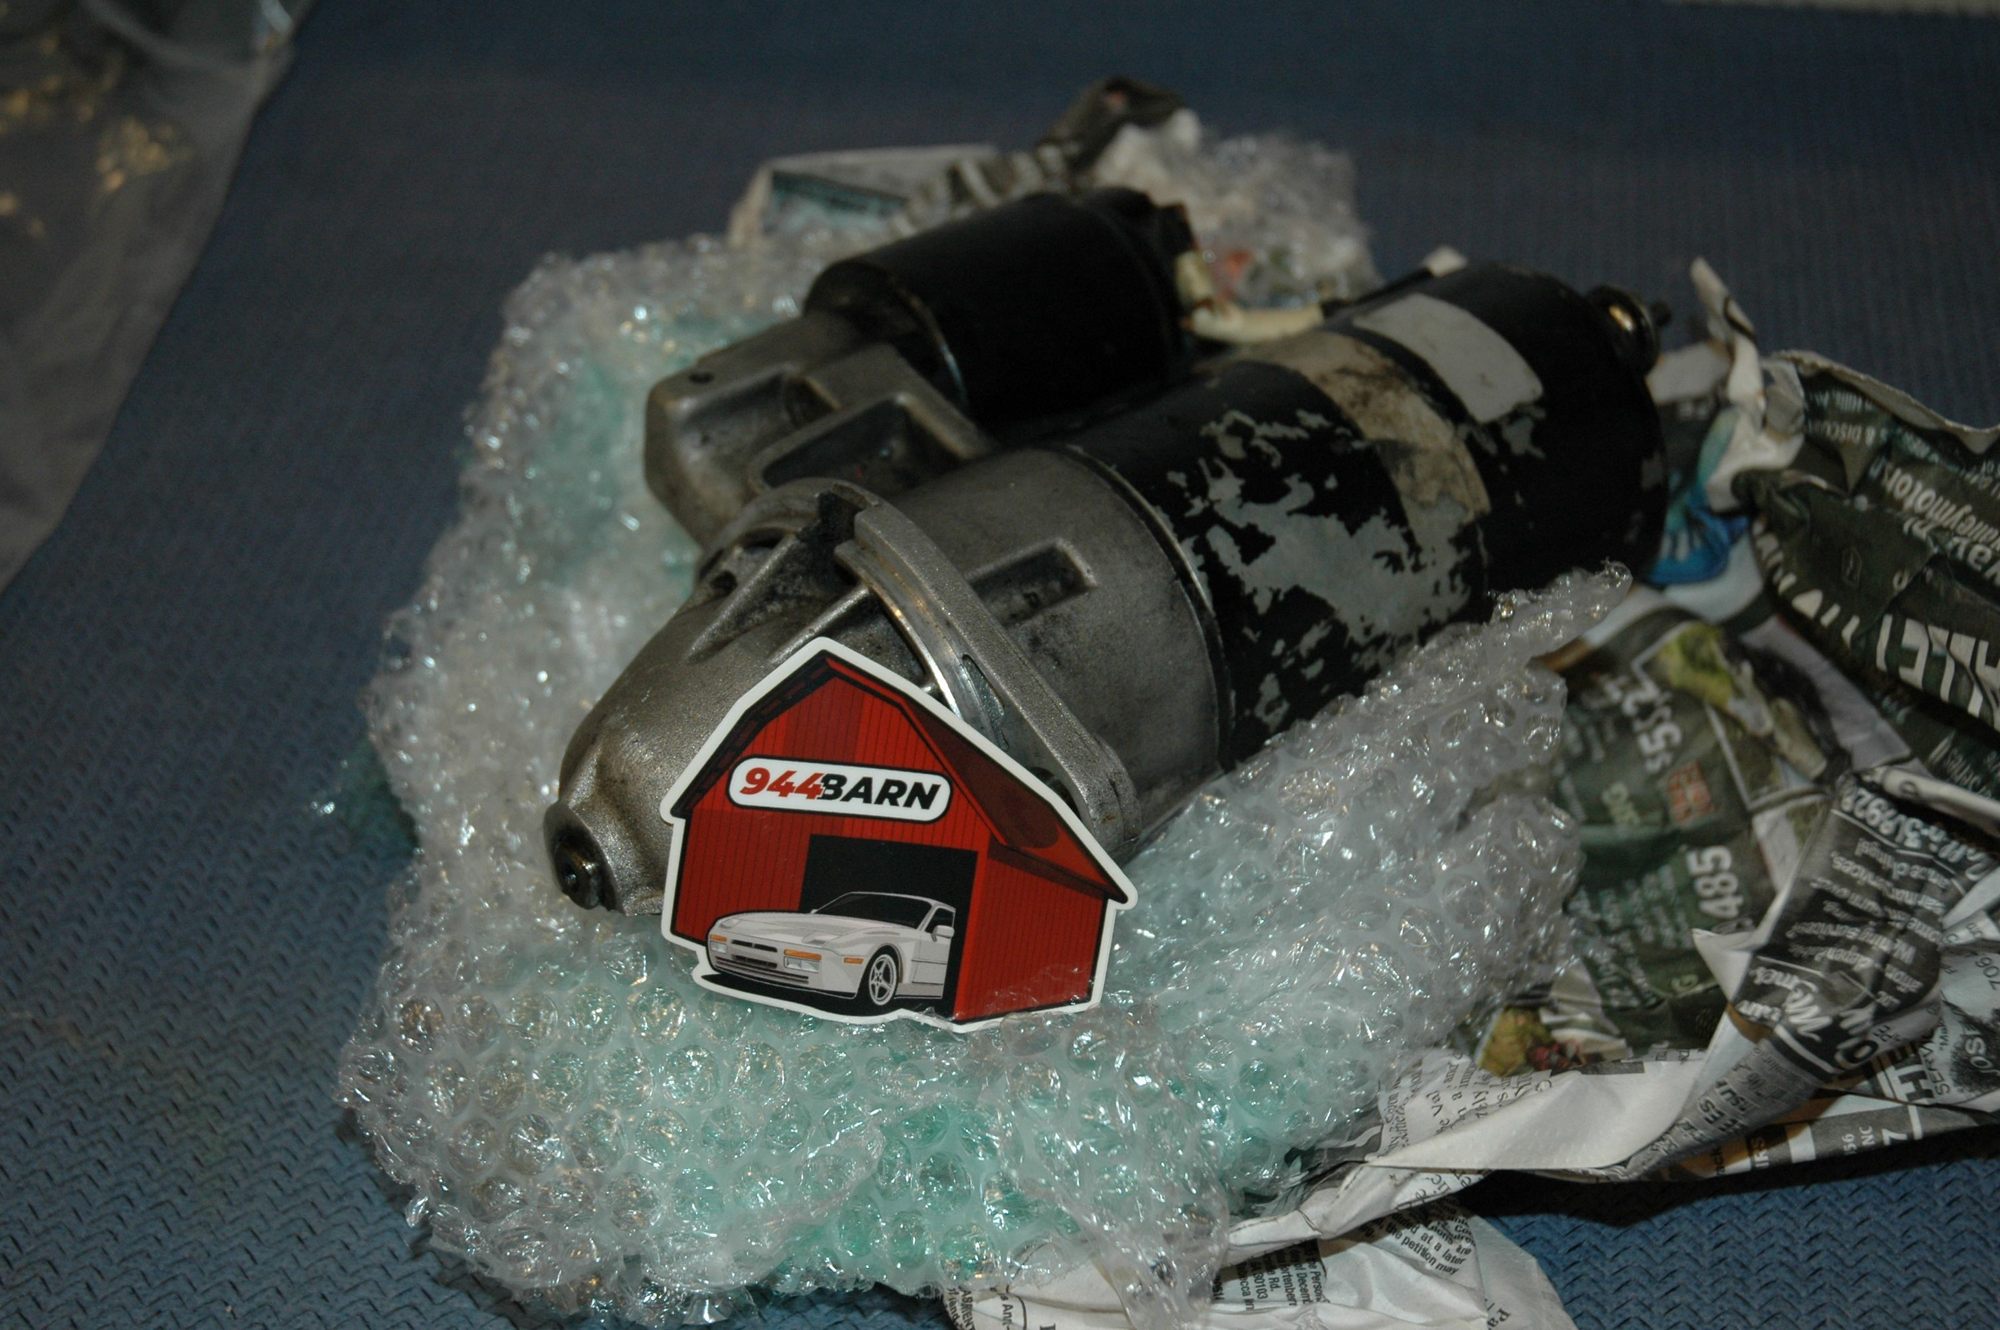
The starter motor showed up in today's mail; a huge thanks to Elliott Grafton at 944Barn!!!
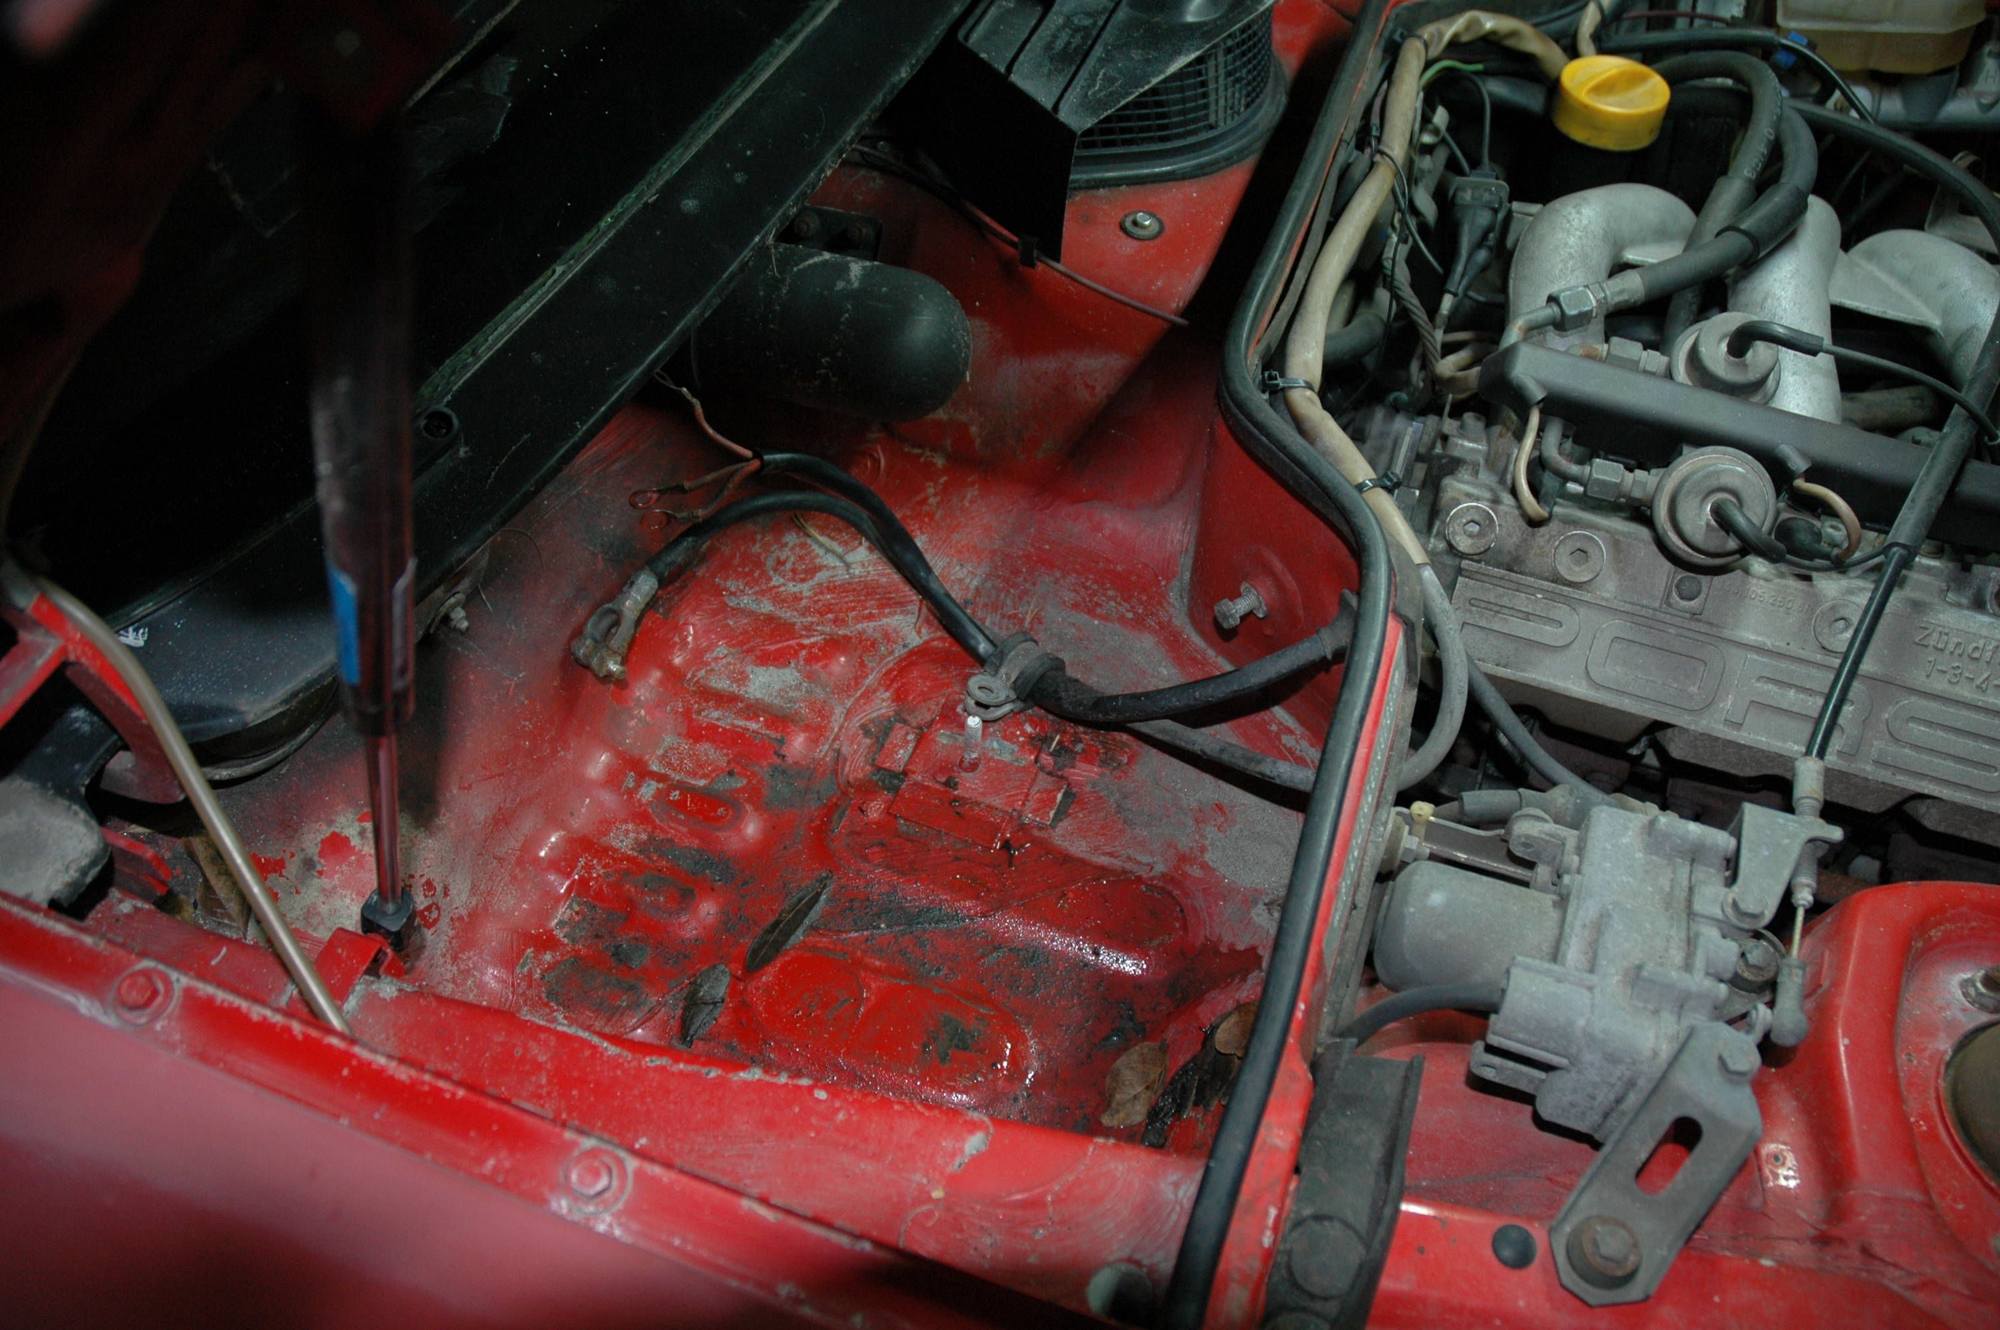
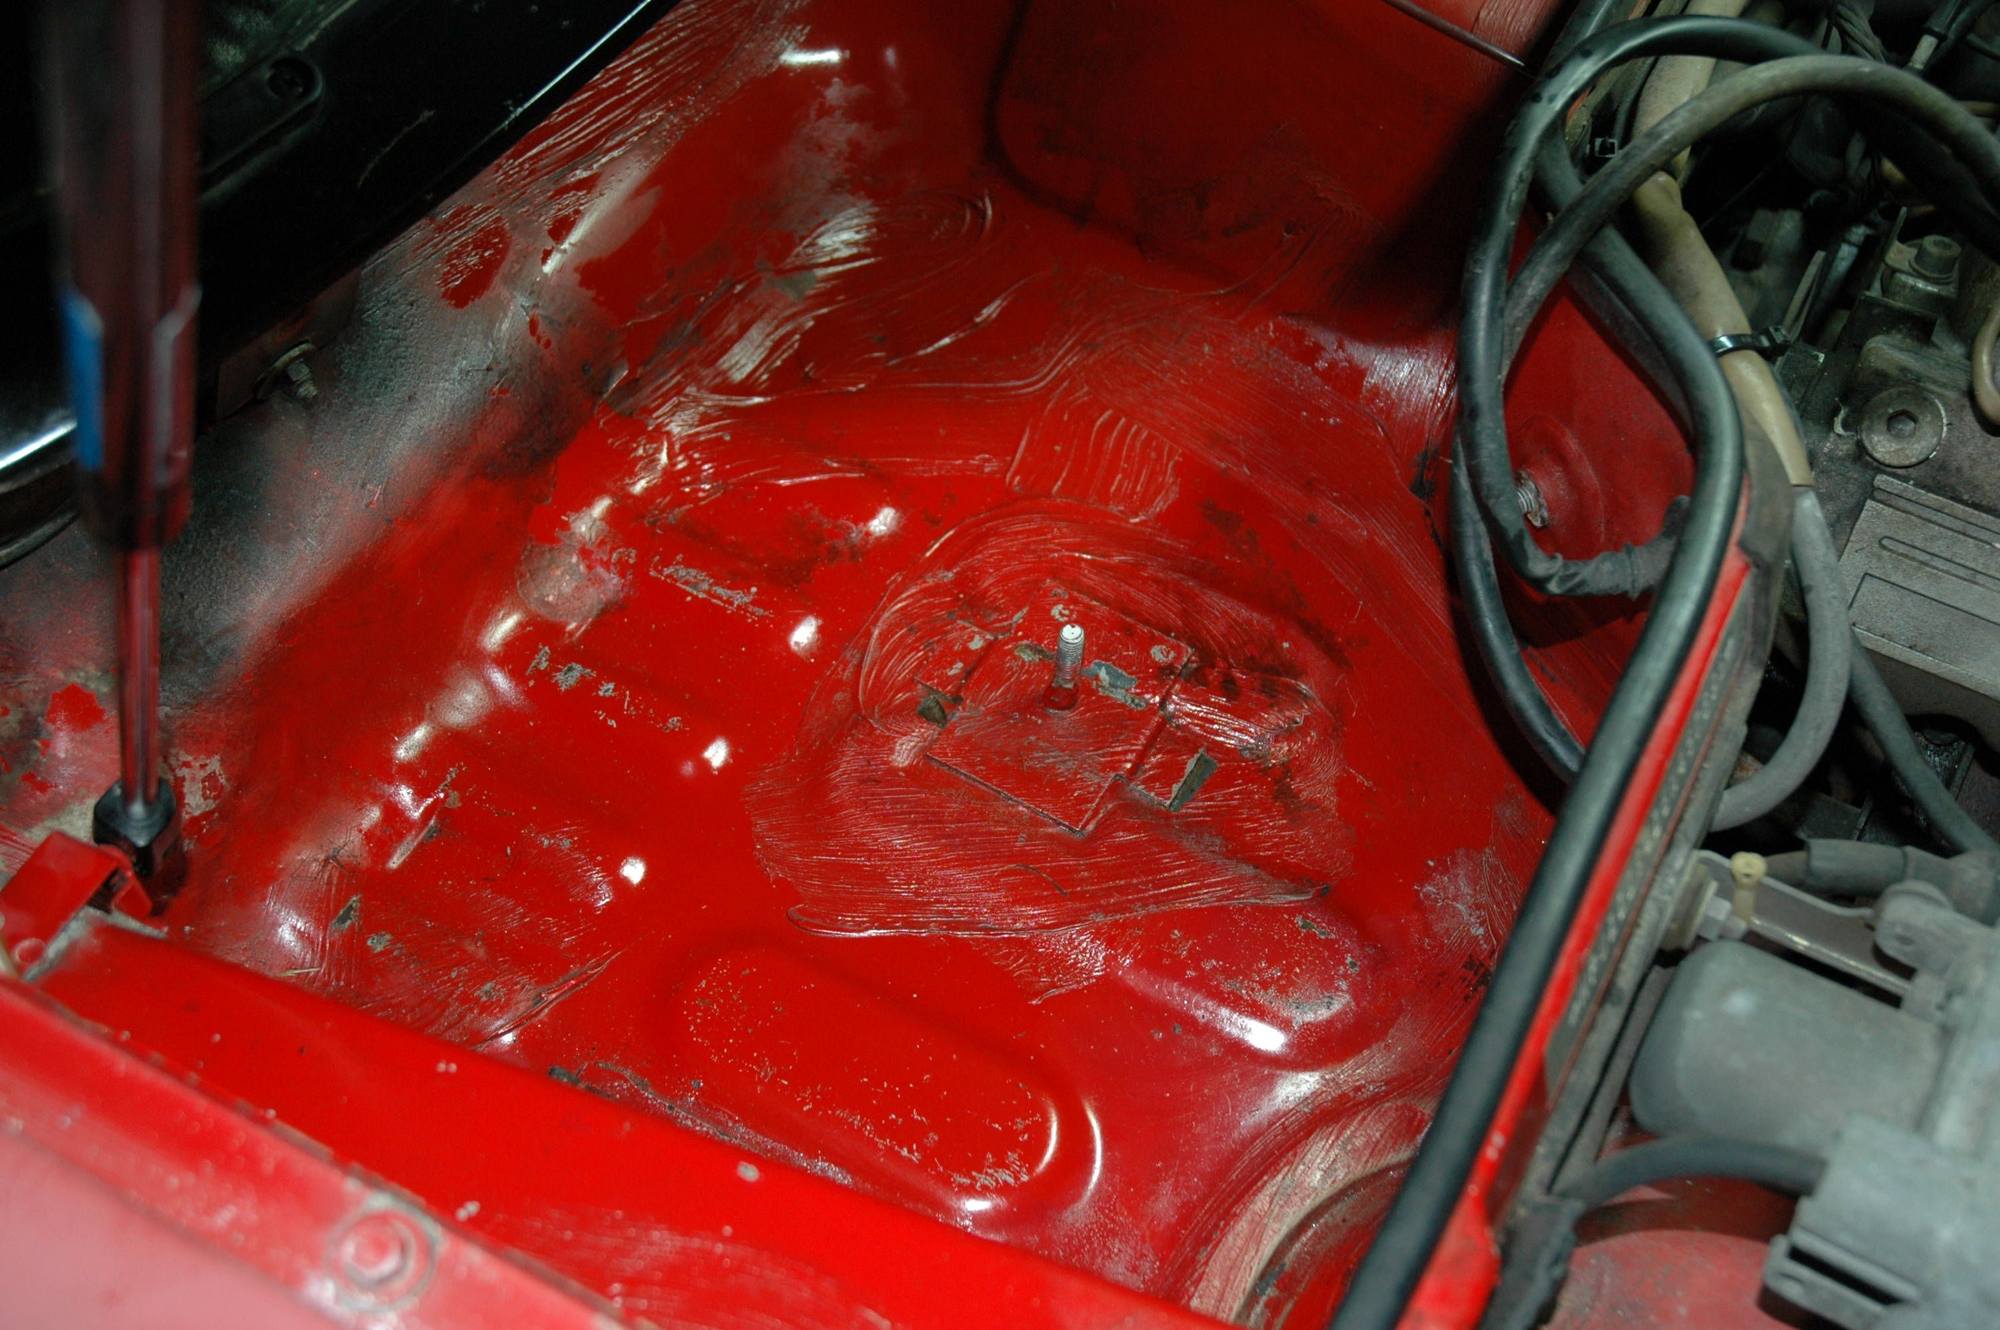
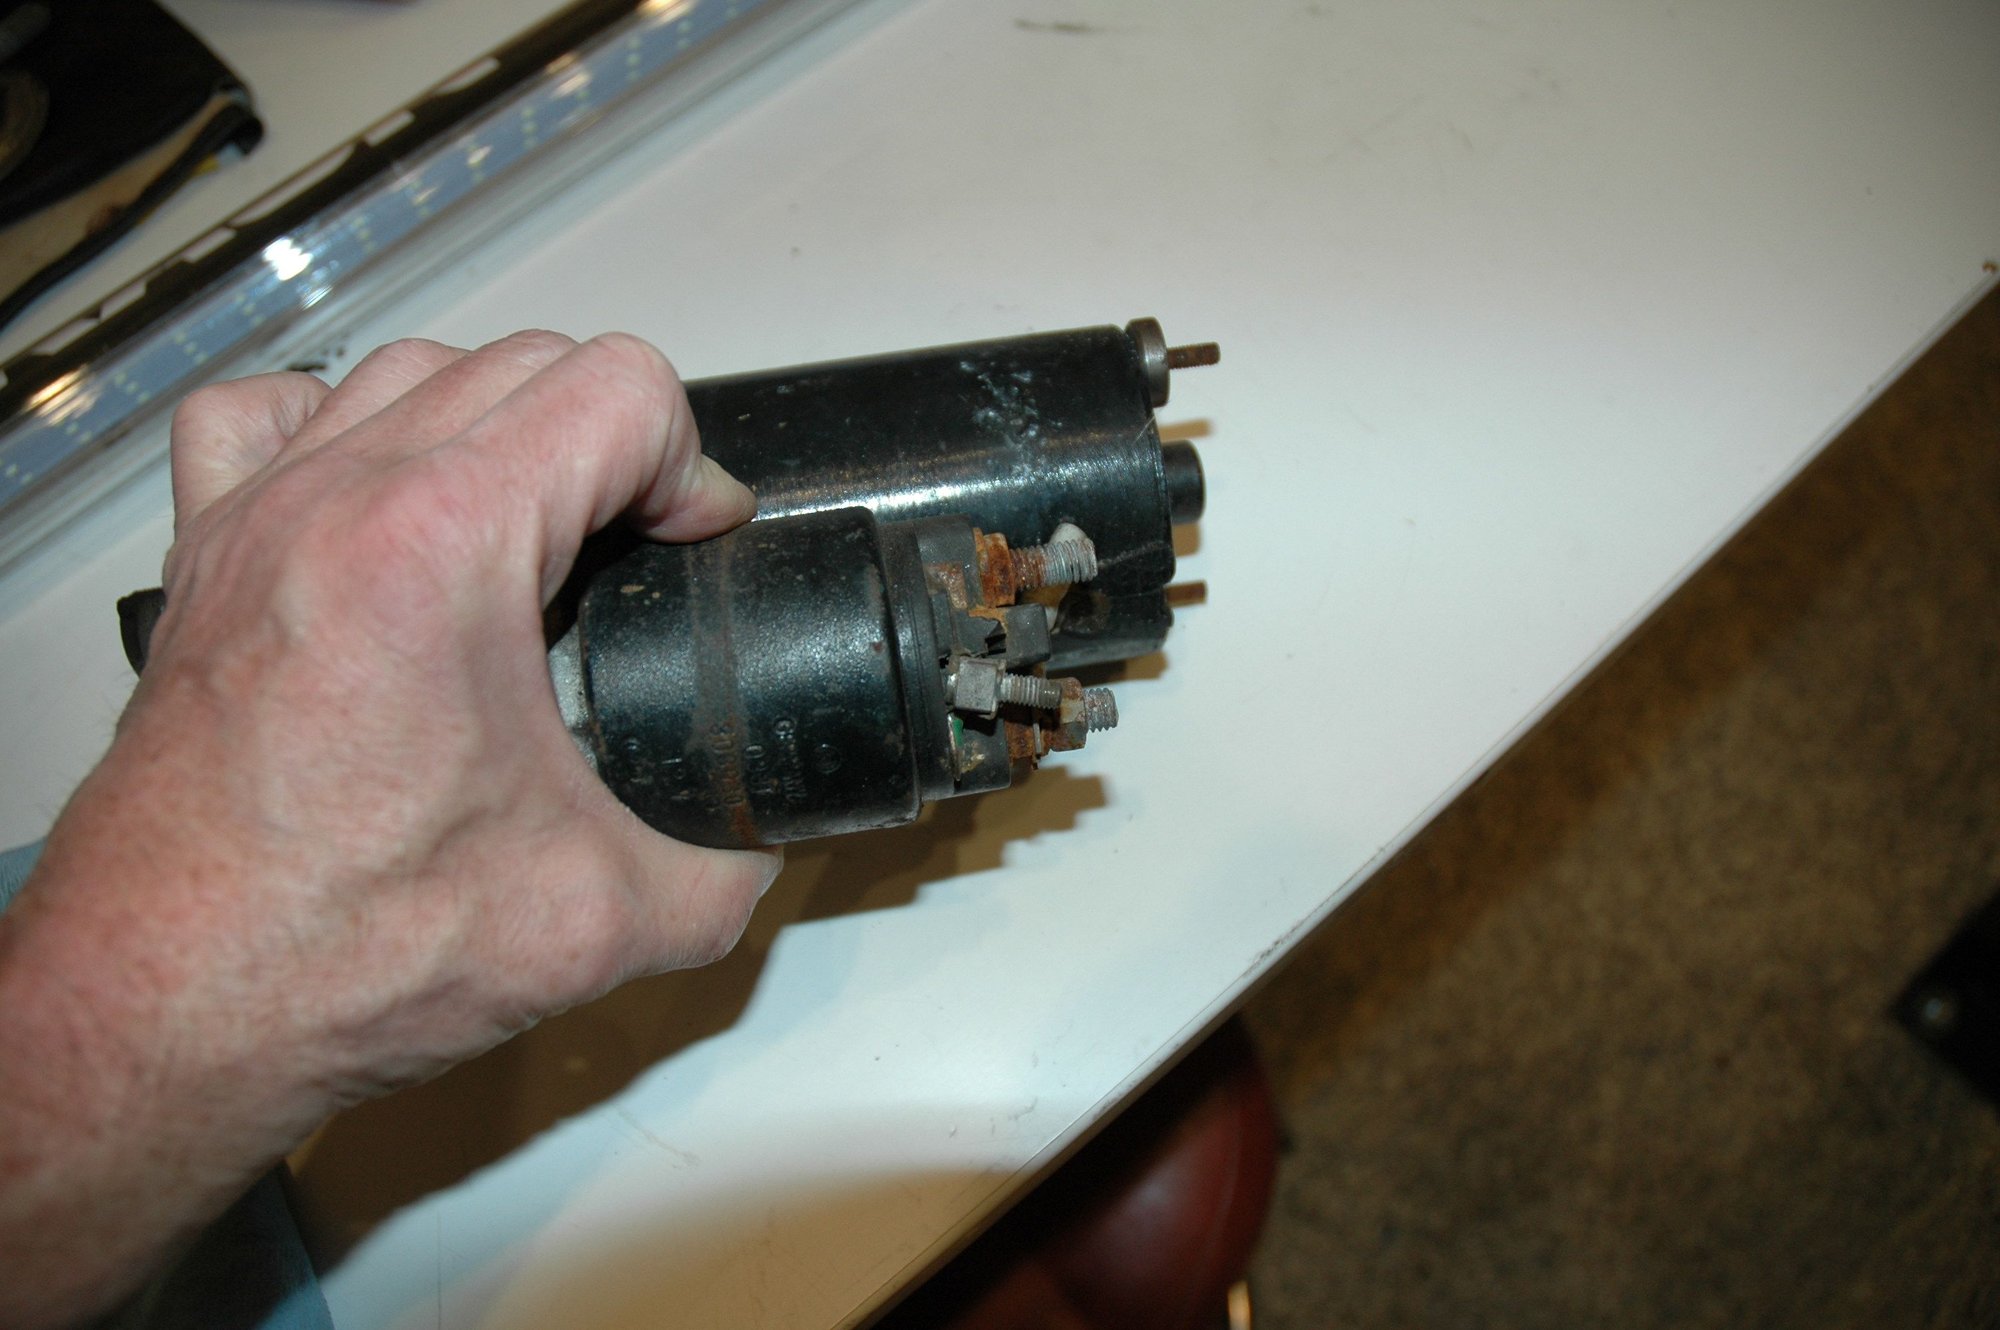
Removing the old starter revealed the non-start culprit; it appeared that the transport guys must have driven the car over something at some point. The solenoid power stand-off was broken as shown:
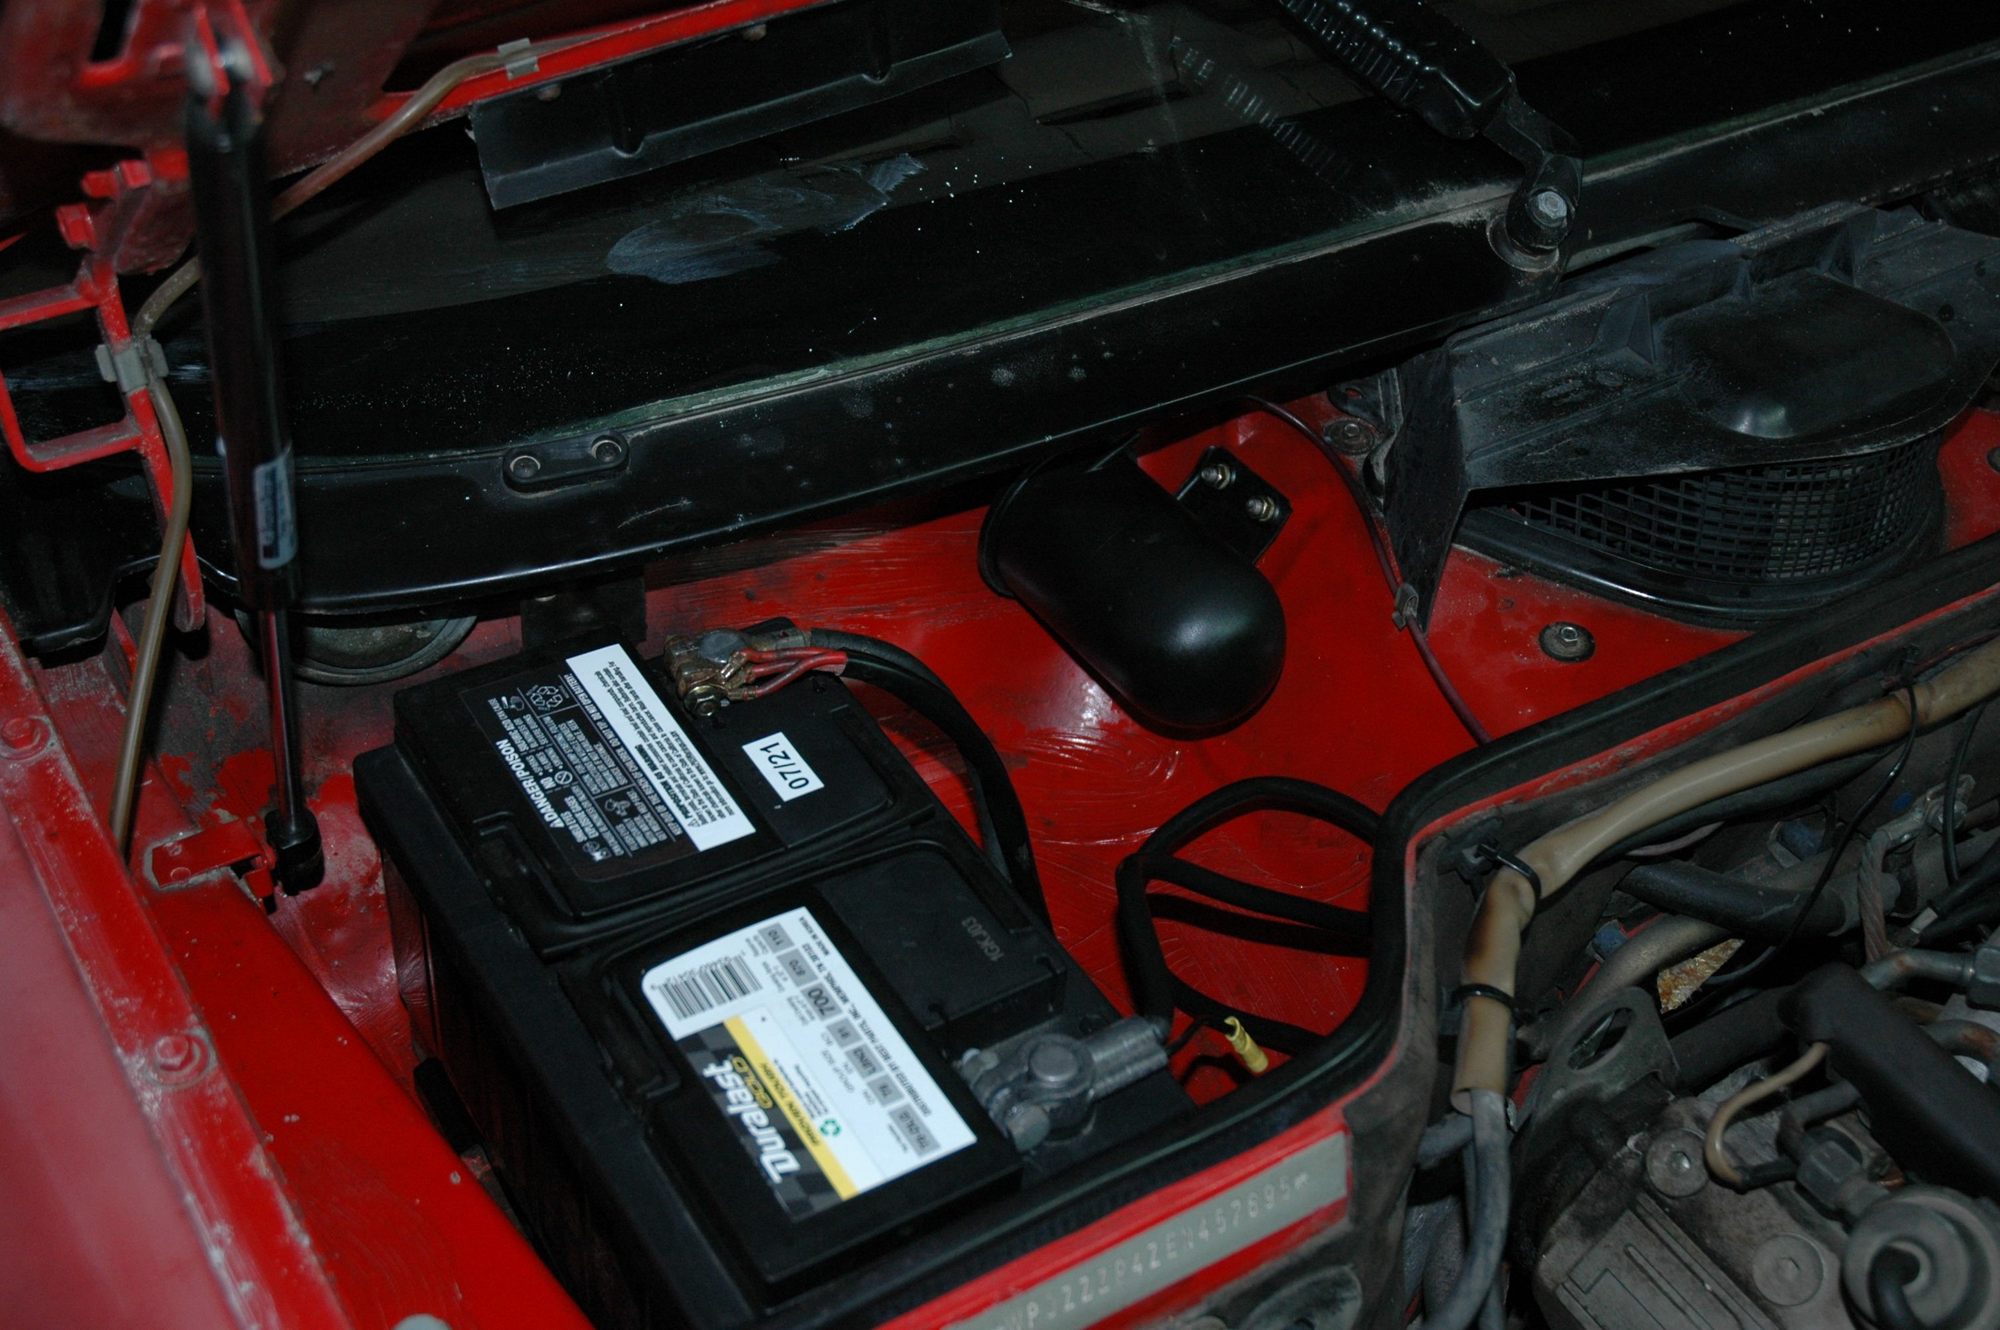
Anyway, I spent a few minutes cleaning all connections and installed new hardware and she purred right to life!
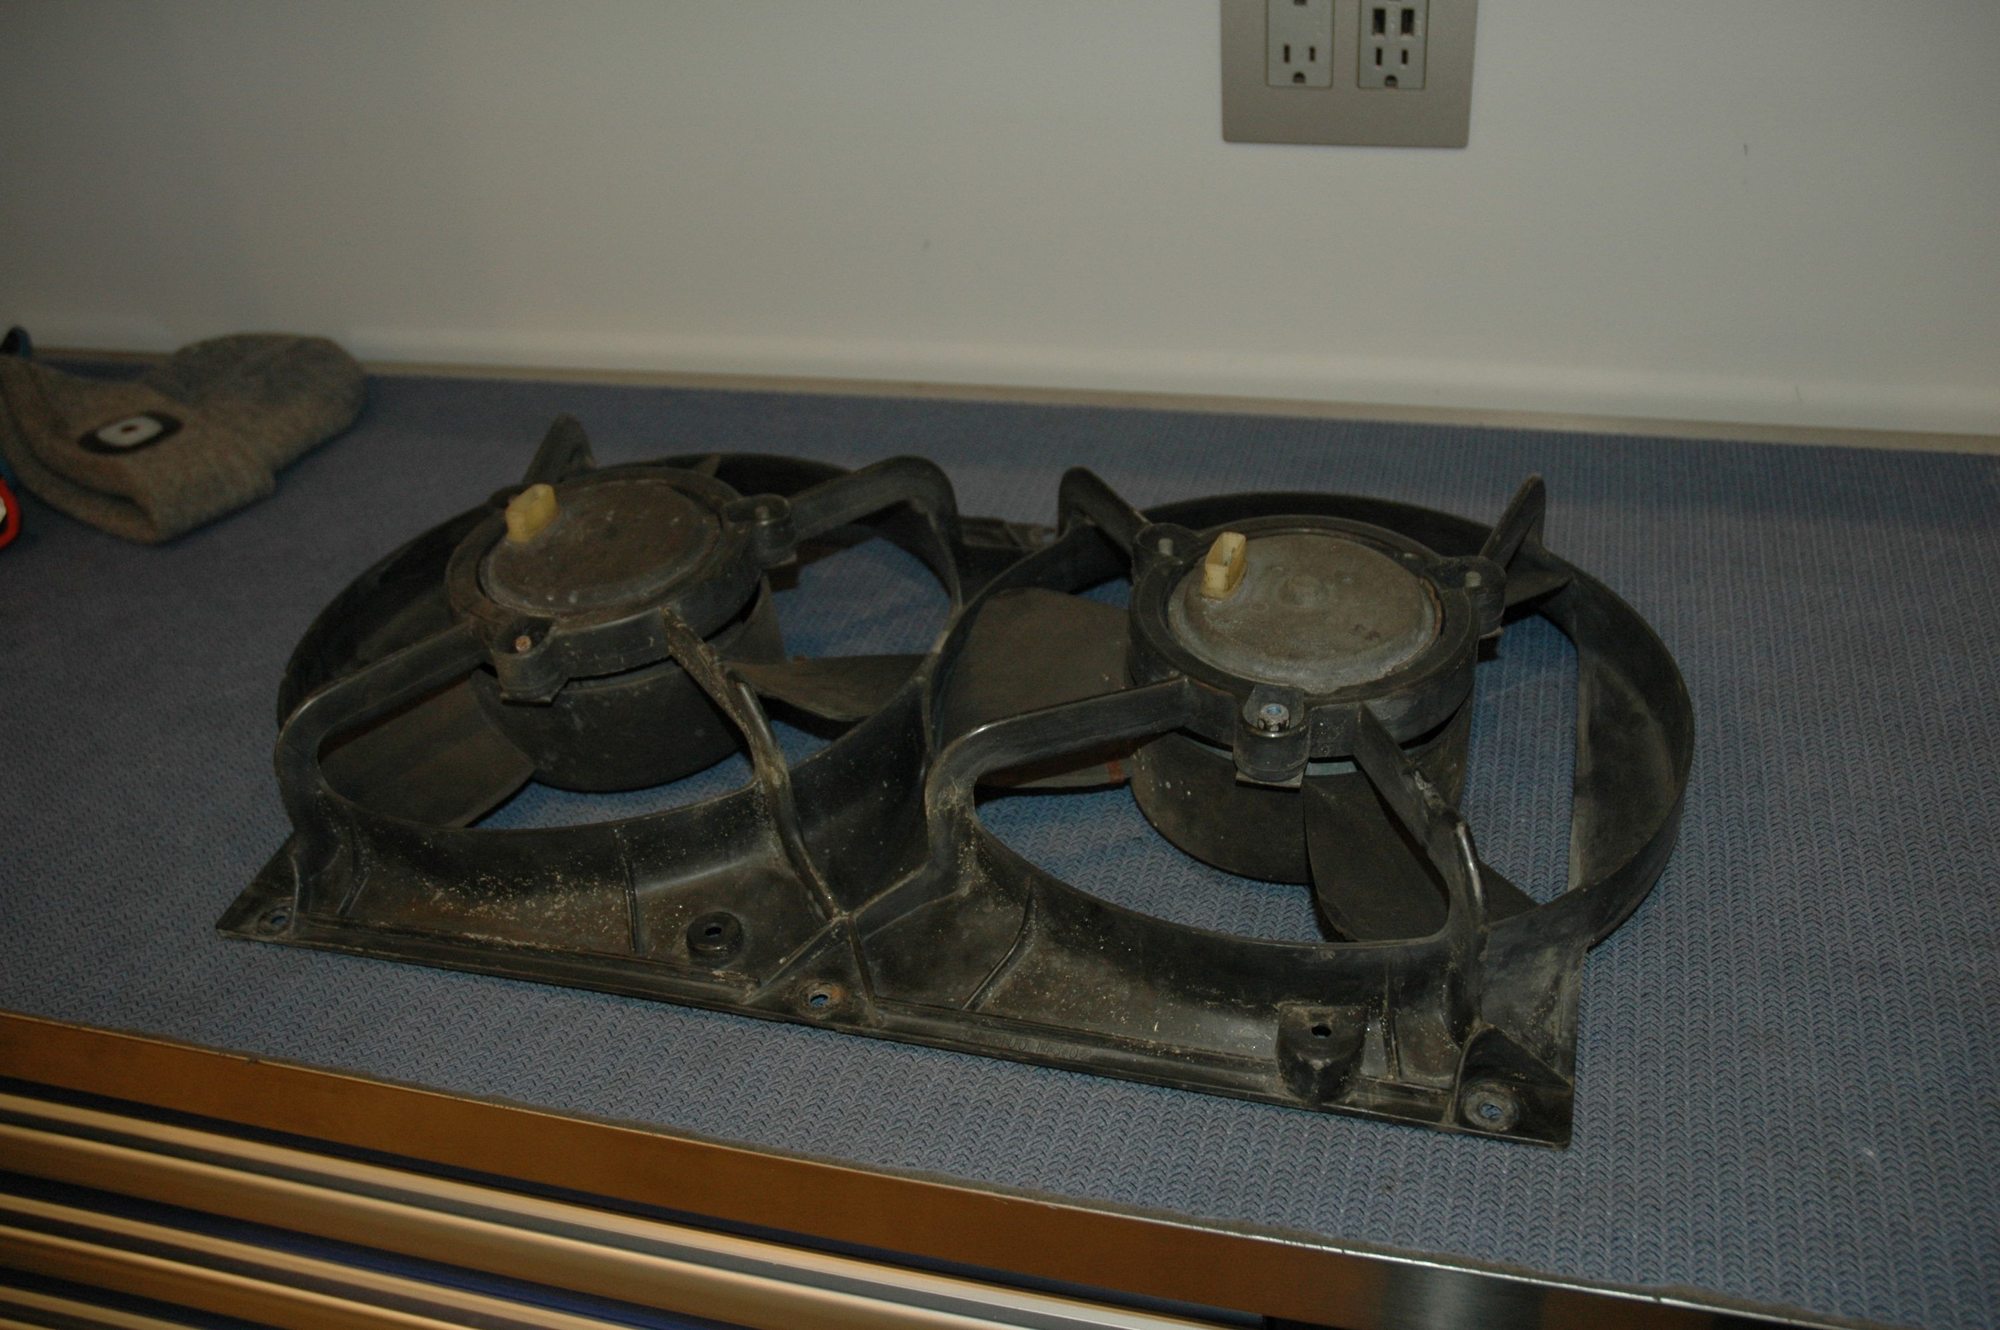
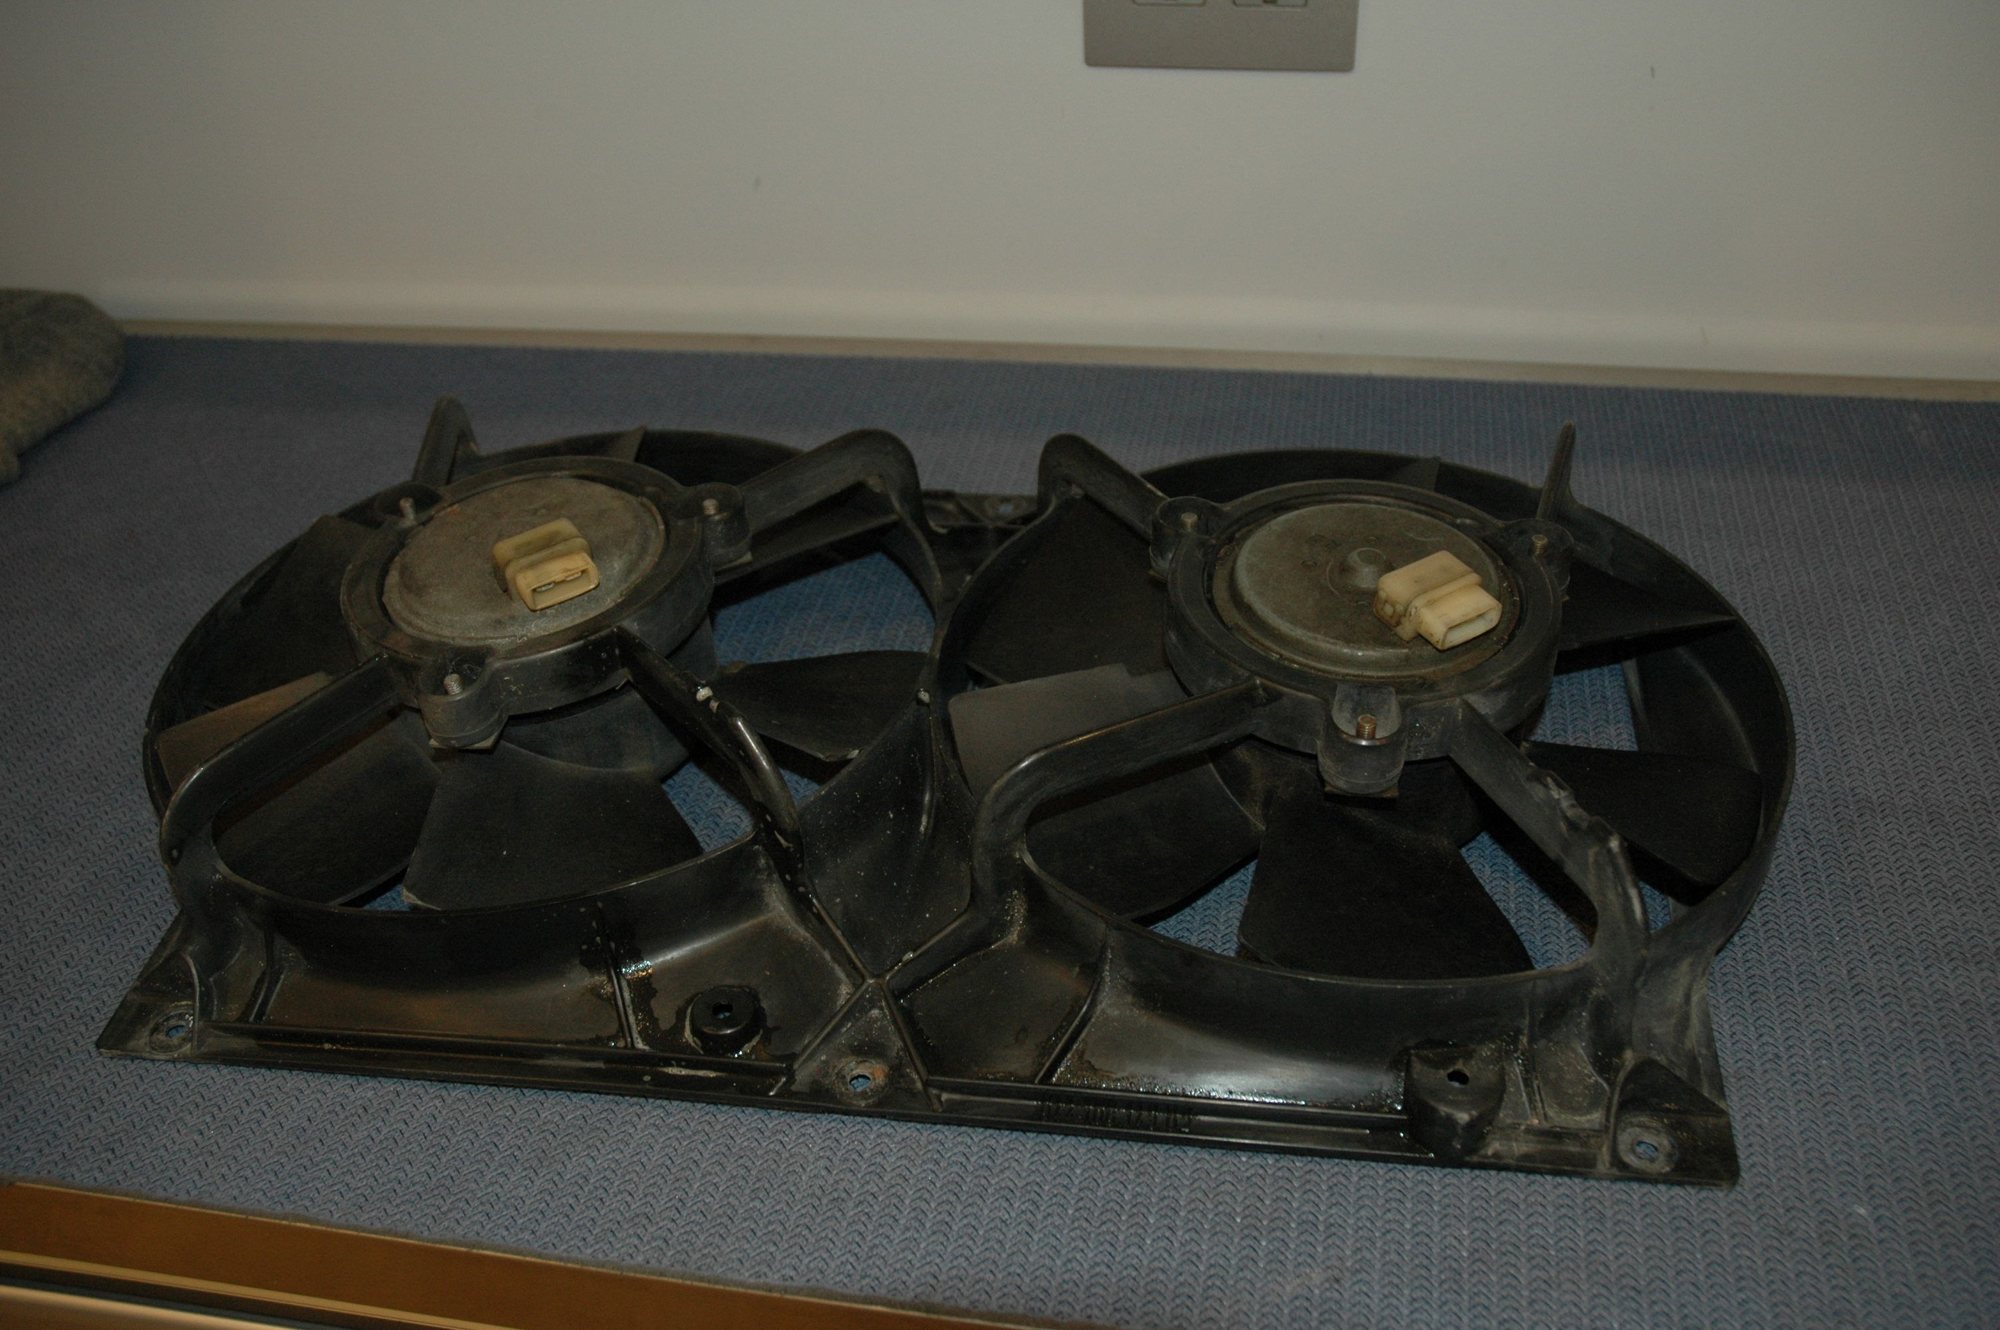
After letting her get to operating temp, I noticed that only one cooling fan turned on so, of course, it was an appropriate time to install 6-blade fans. I found upon removal that the driver's side fan motor was completely locked up.
You are correct Dan. Since this is my hobby and I generally have a blast working on them, I don't let the costs get to me (too much). This will be a nice winter project, then who knows what comes next.
Hi Patrick, I think you have the perfect approach to spending money on the 944 hobby. It's healthy to spend a reasonable and responsible amount of money on things that make you happy. This is supposed to be fun, right?
Chris - You are absolutely correct. I know full well that these cars are not investment grade, however; they do bring me joy while being under the hood as well as behind the wheel.
Happy Holidays my friend!
Patrick
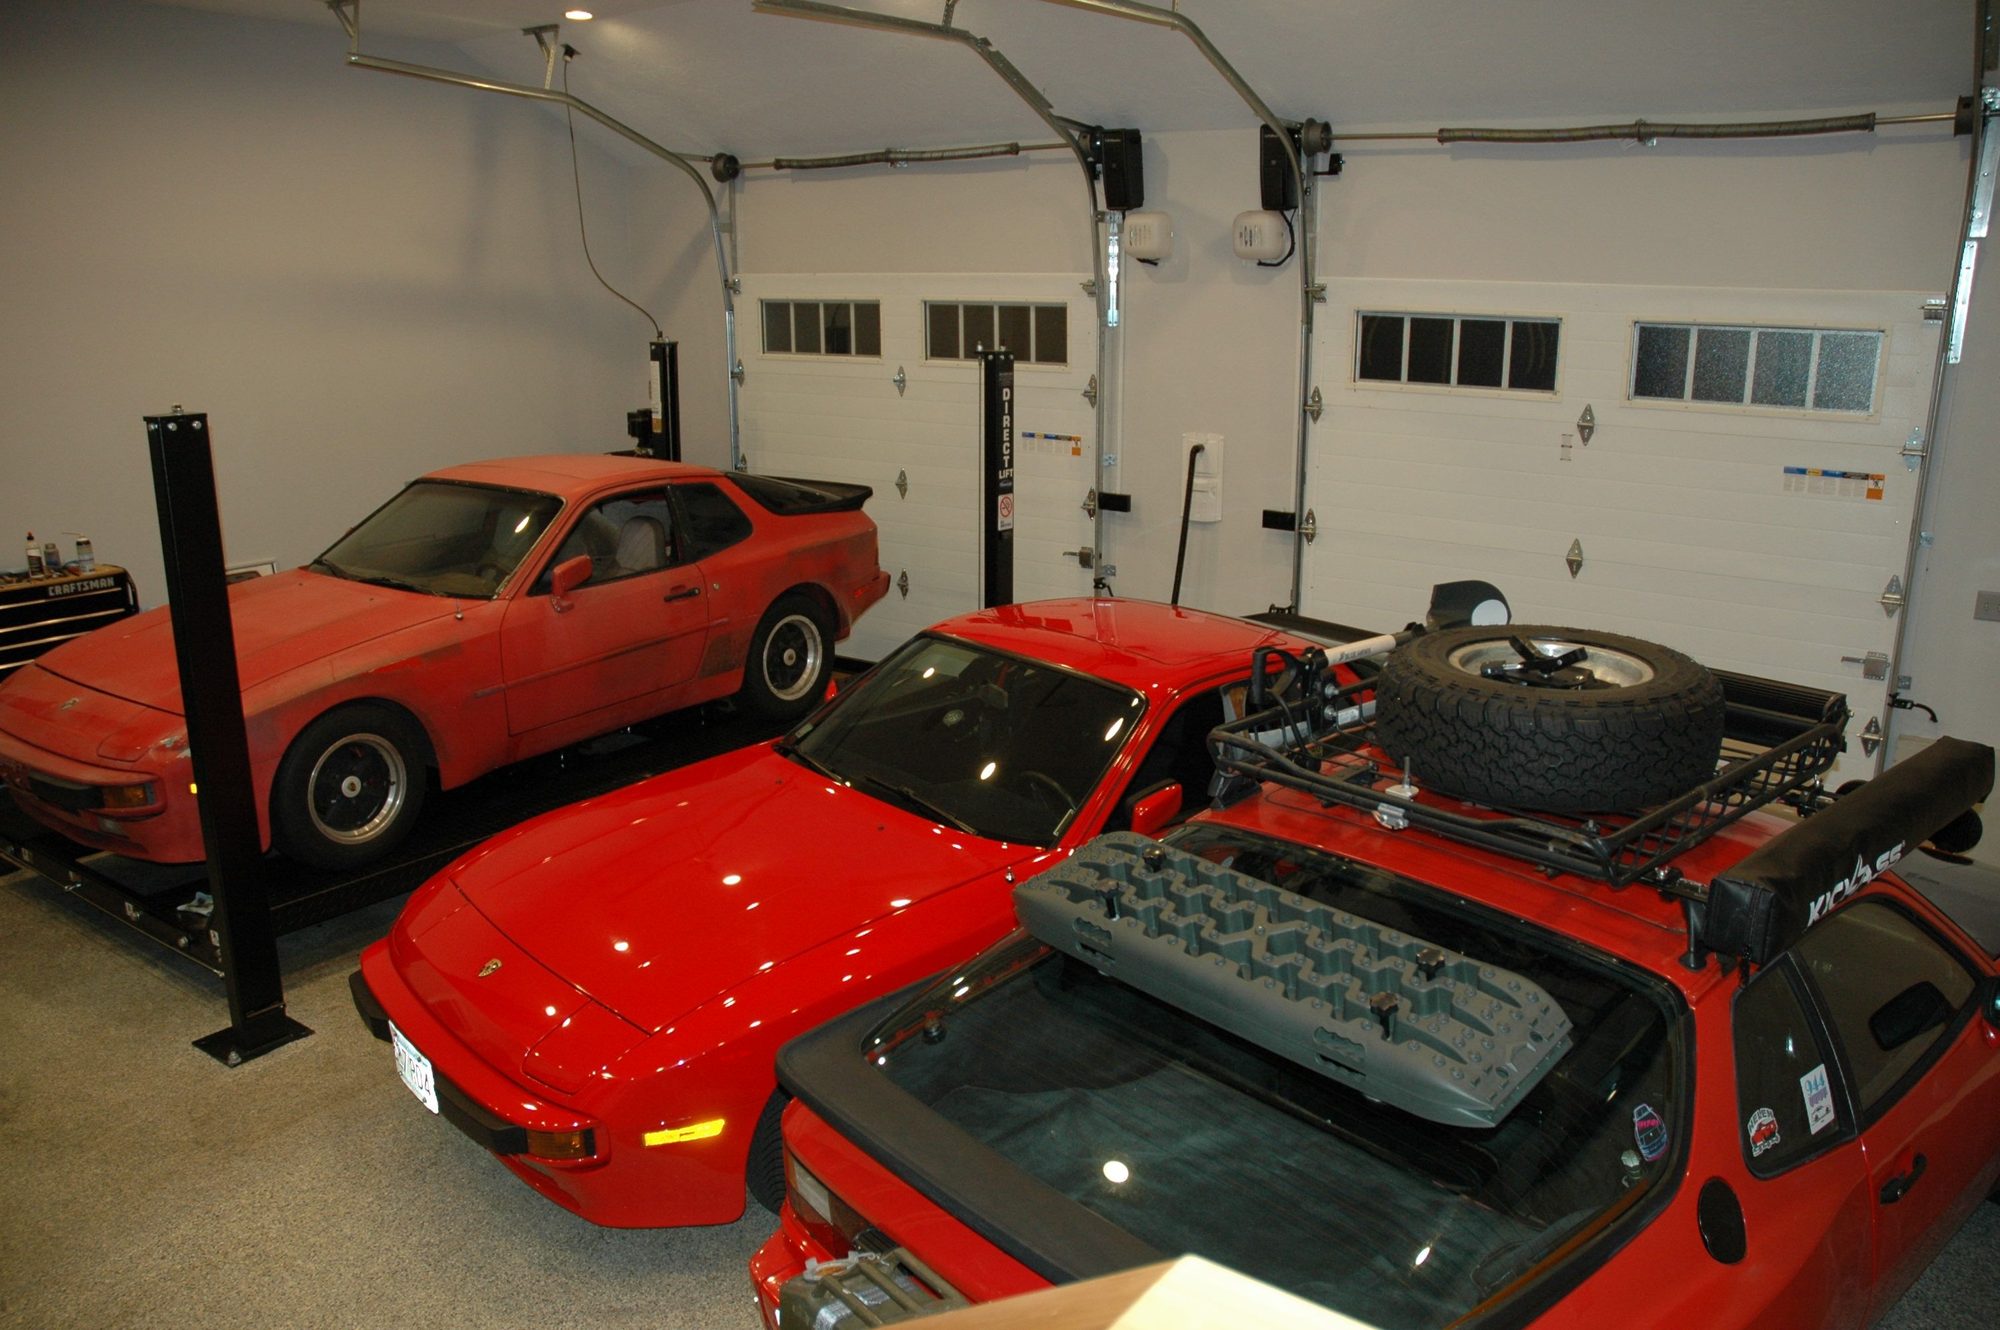
Didn't accomplish much today, with the exception that parts continue to trickle in... I also arranged the girls into the garage so that they'll weather the coming storm safe and sound. The space under the lift is allocated for the princess (a.k.a. my wife's Macan).
The "Beastie" has been listed for sale for a while now but no real offers... I really thought she'd be gone.
Started to work on a few projects yesterday:
1. Installed the typically missing rear hatch lock grommet.
2. Installed a rear wiper delete plug (the entire mechanism was long gone) - also removed the circuit wiring from inside the cabin.
3. Cleaned up passenger side power window switch contacts.
4. Had to remove the passenger side door card in order to replace a broken door handle. It was a great time to replace the outside door latch gaskets and lubricate the entire assembly. Of course, several of the door card snap clips tore off the cardboard so I spent some time repairing/re-installing them - waiting on the trim adhesive to cure before re-installing the card.
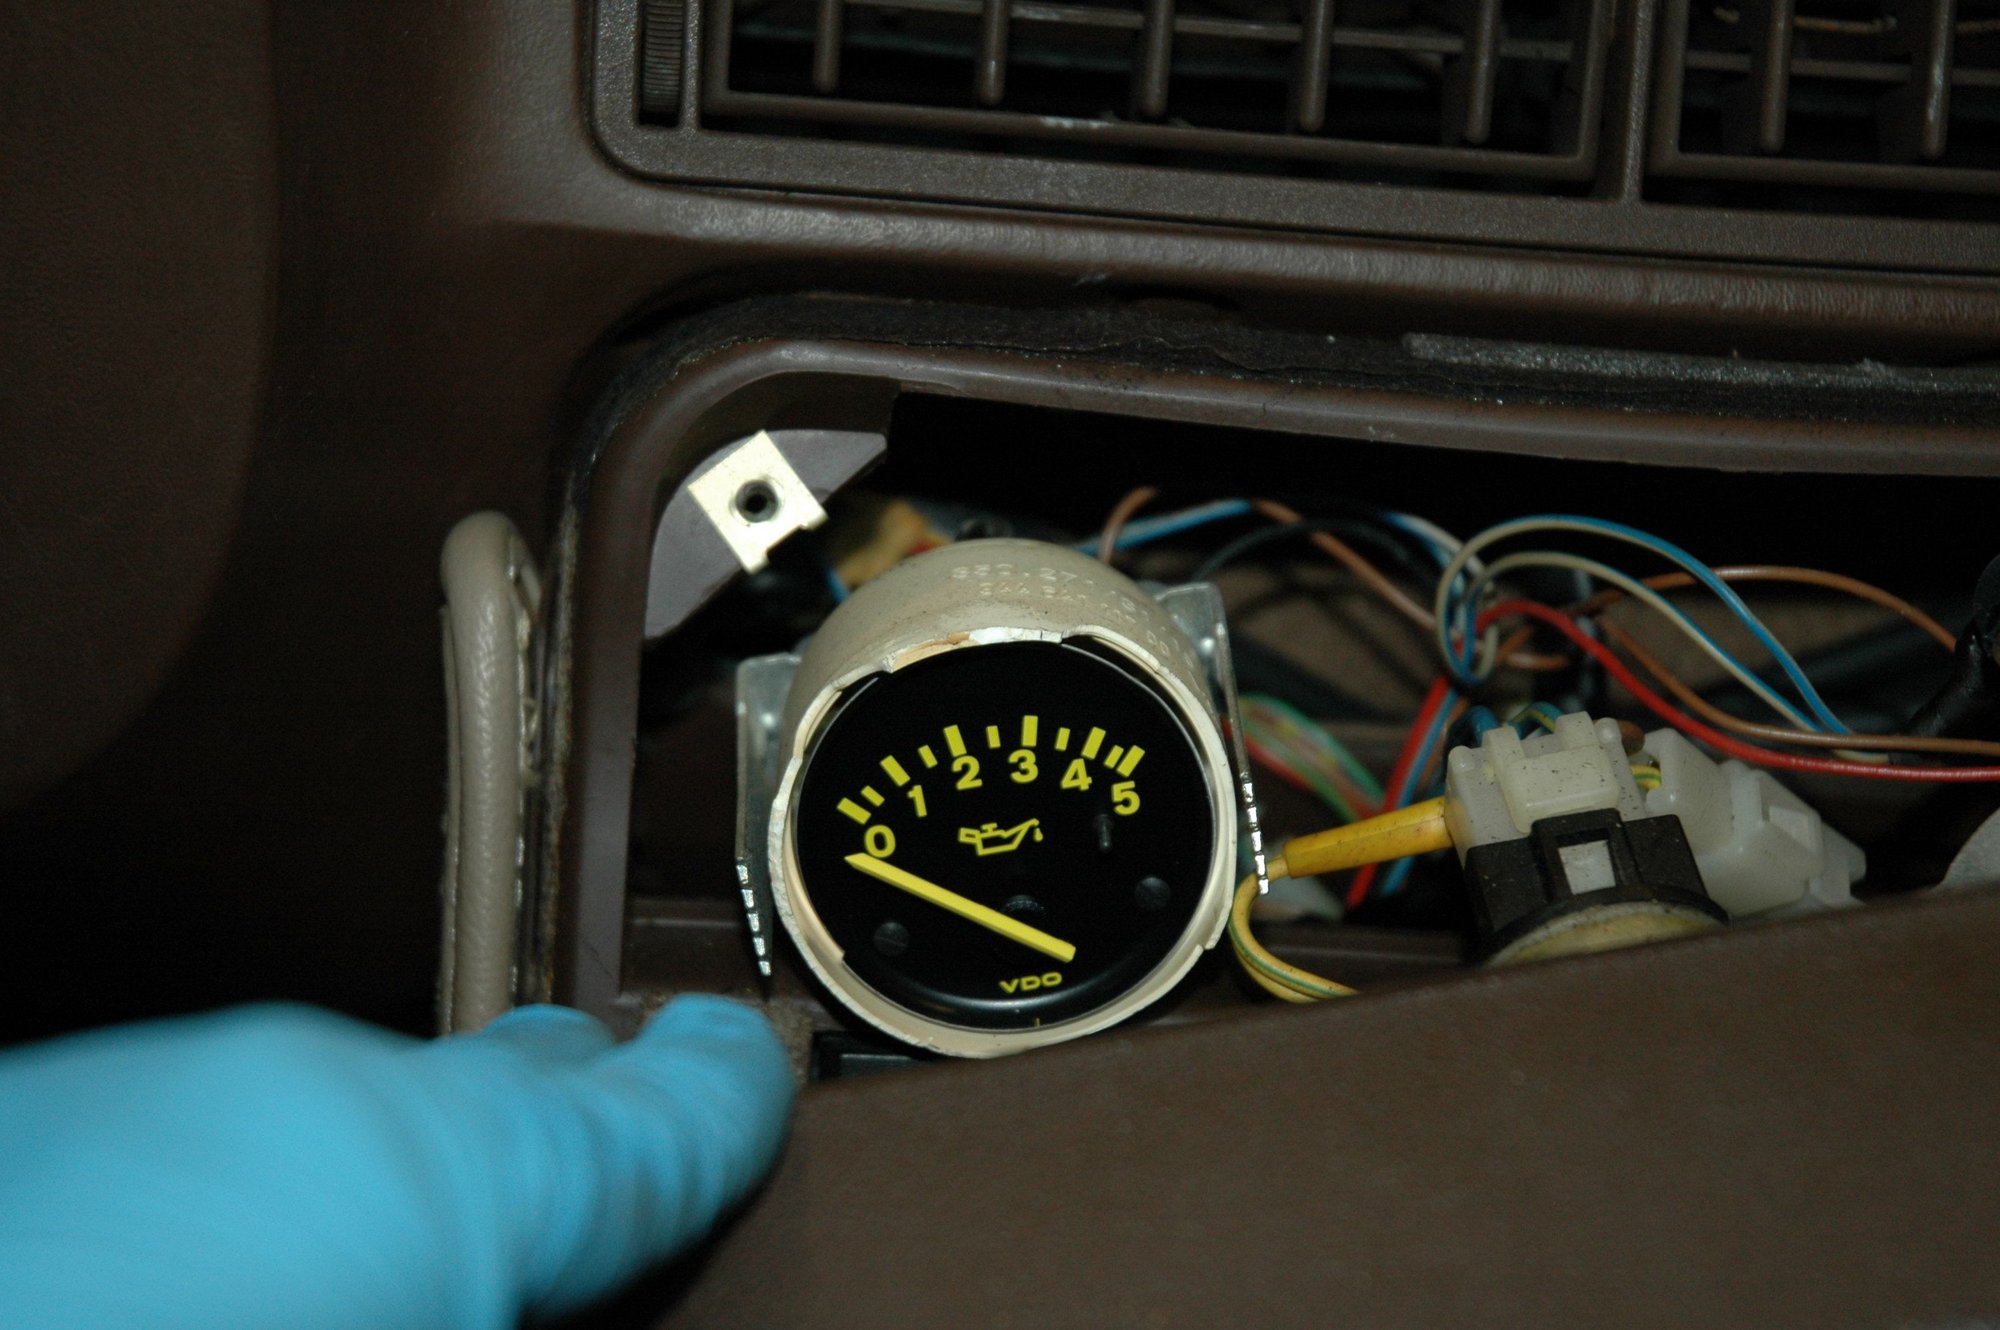
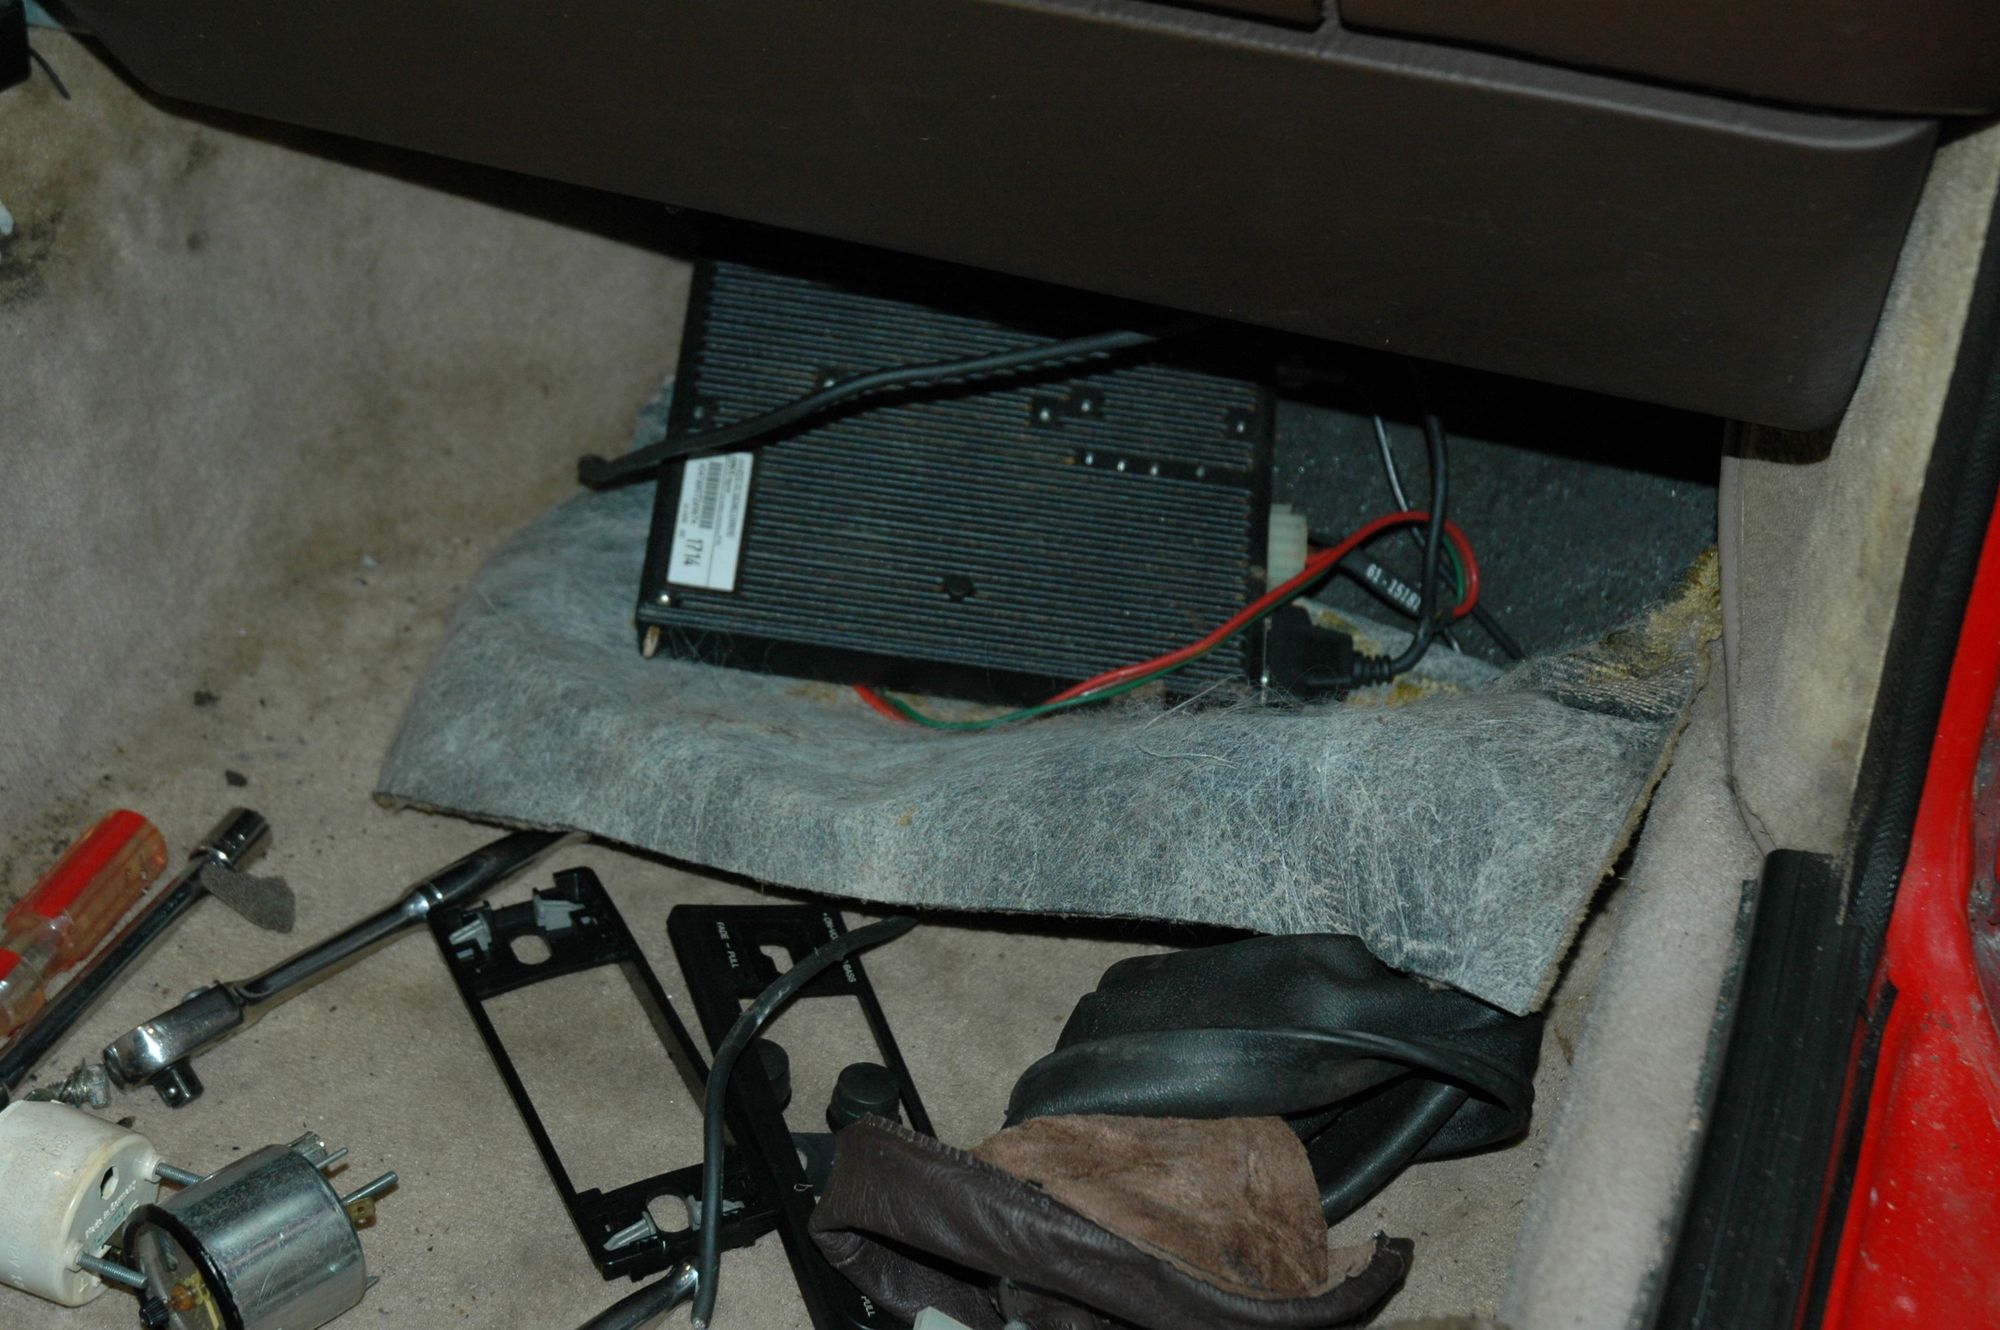
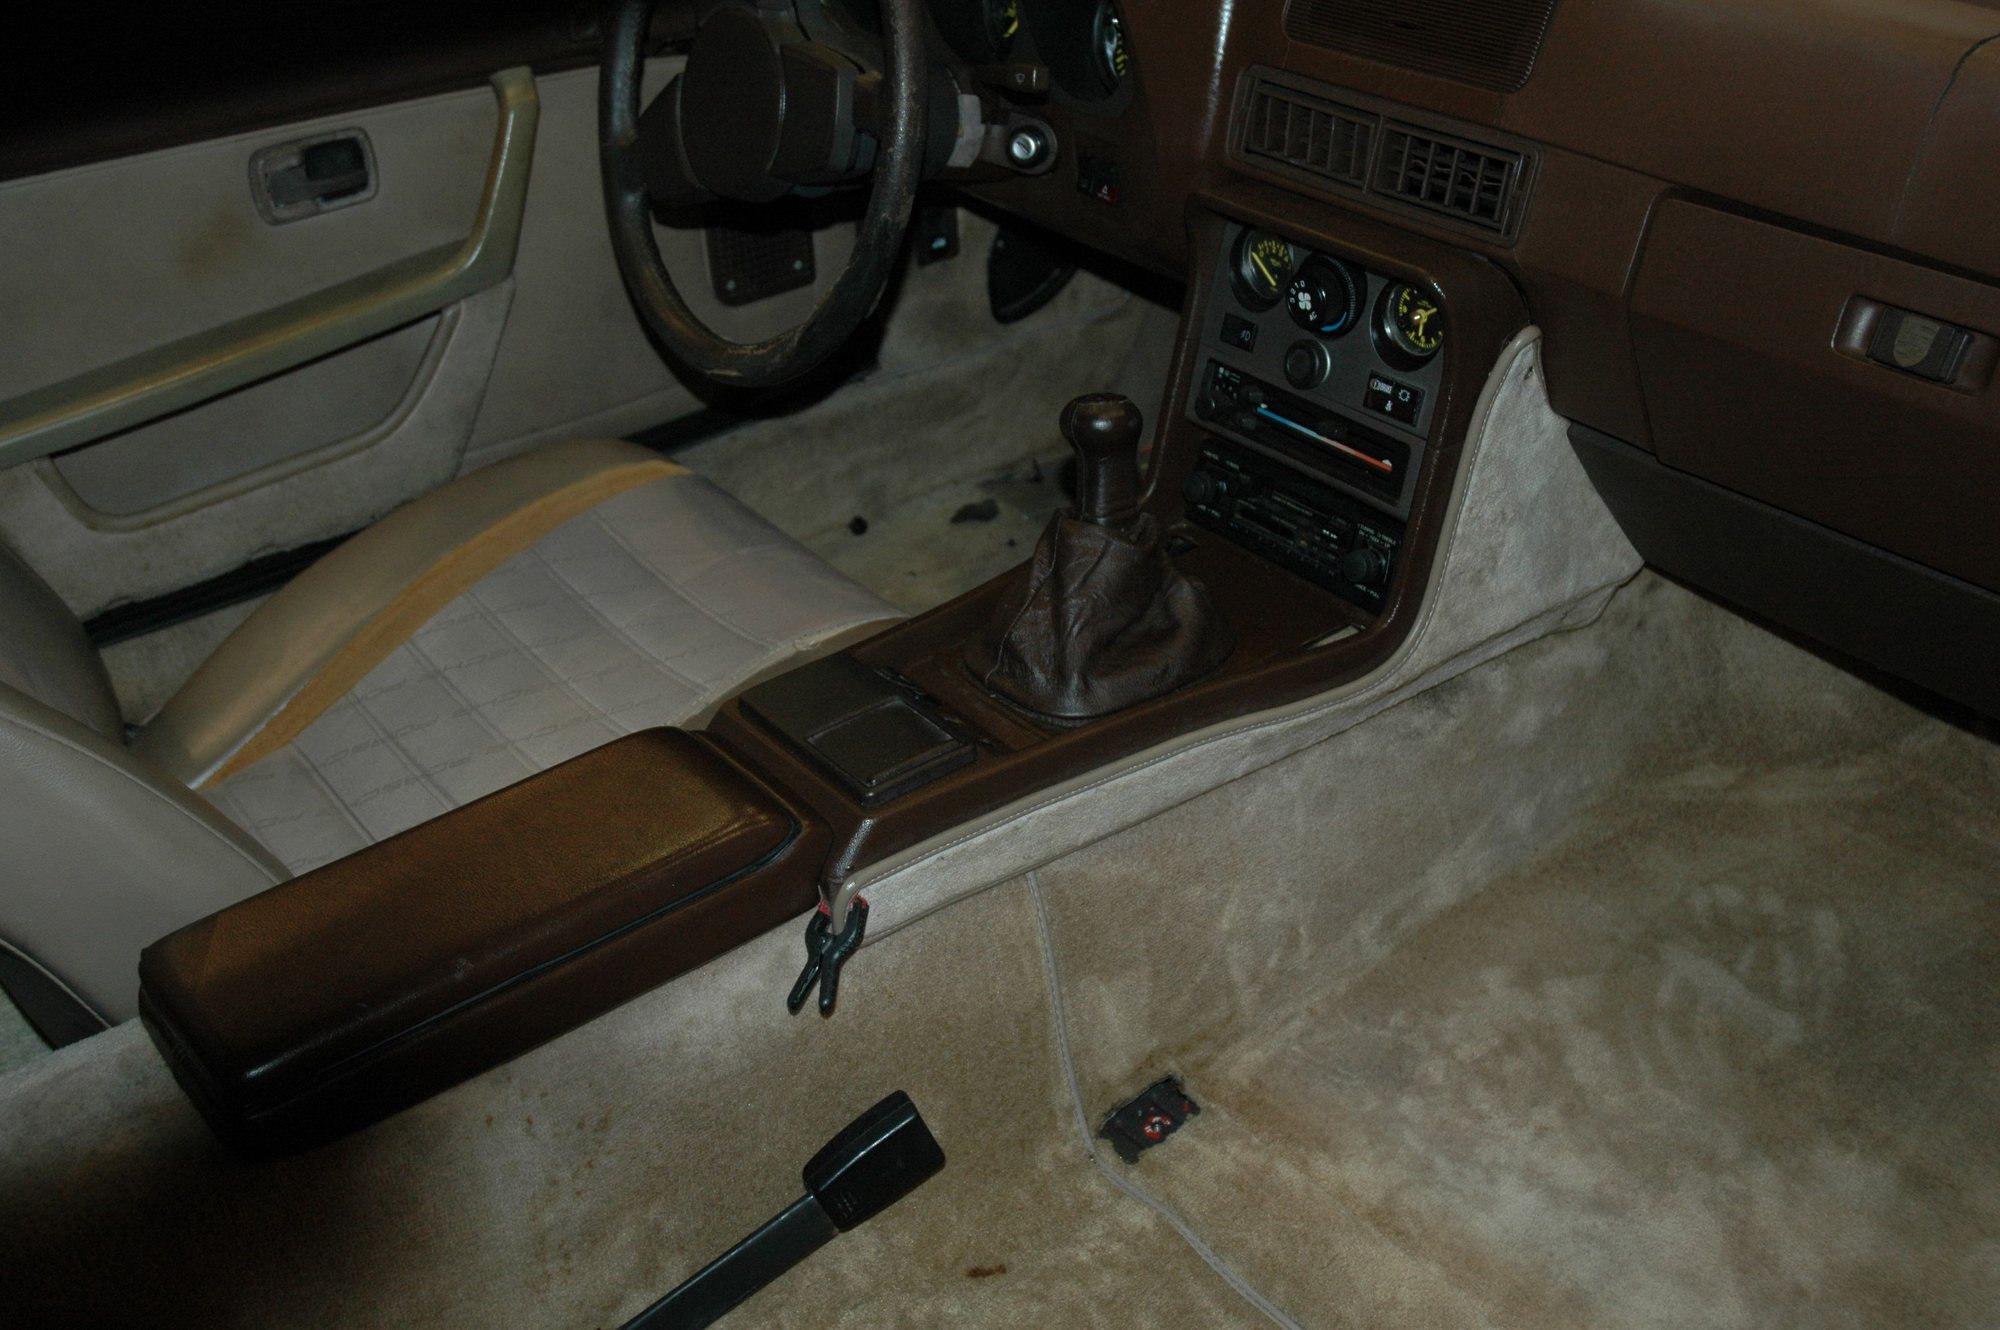
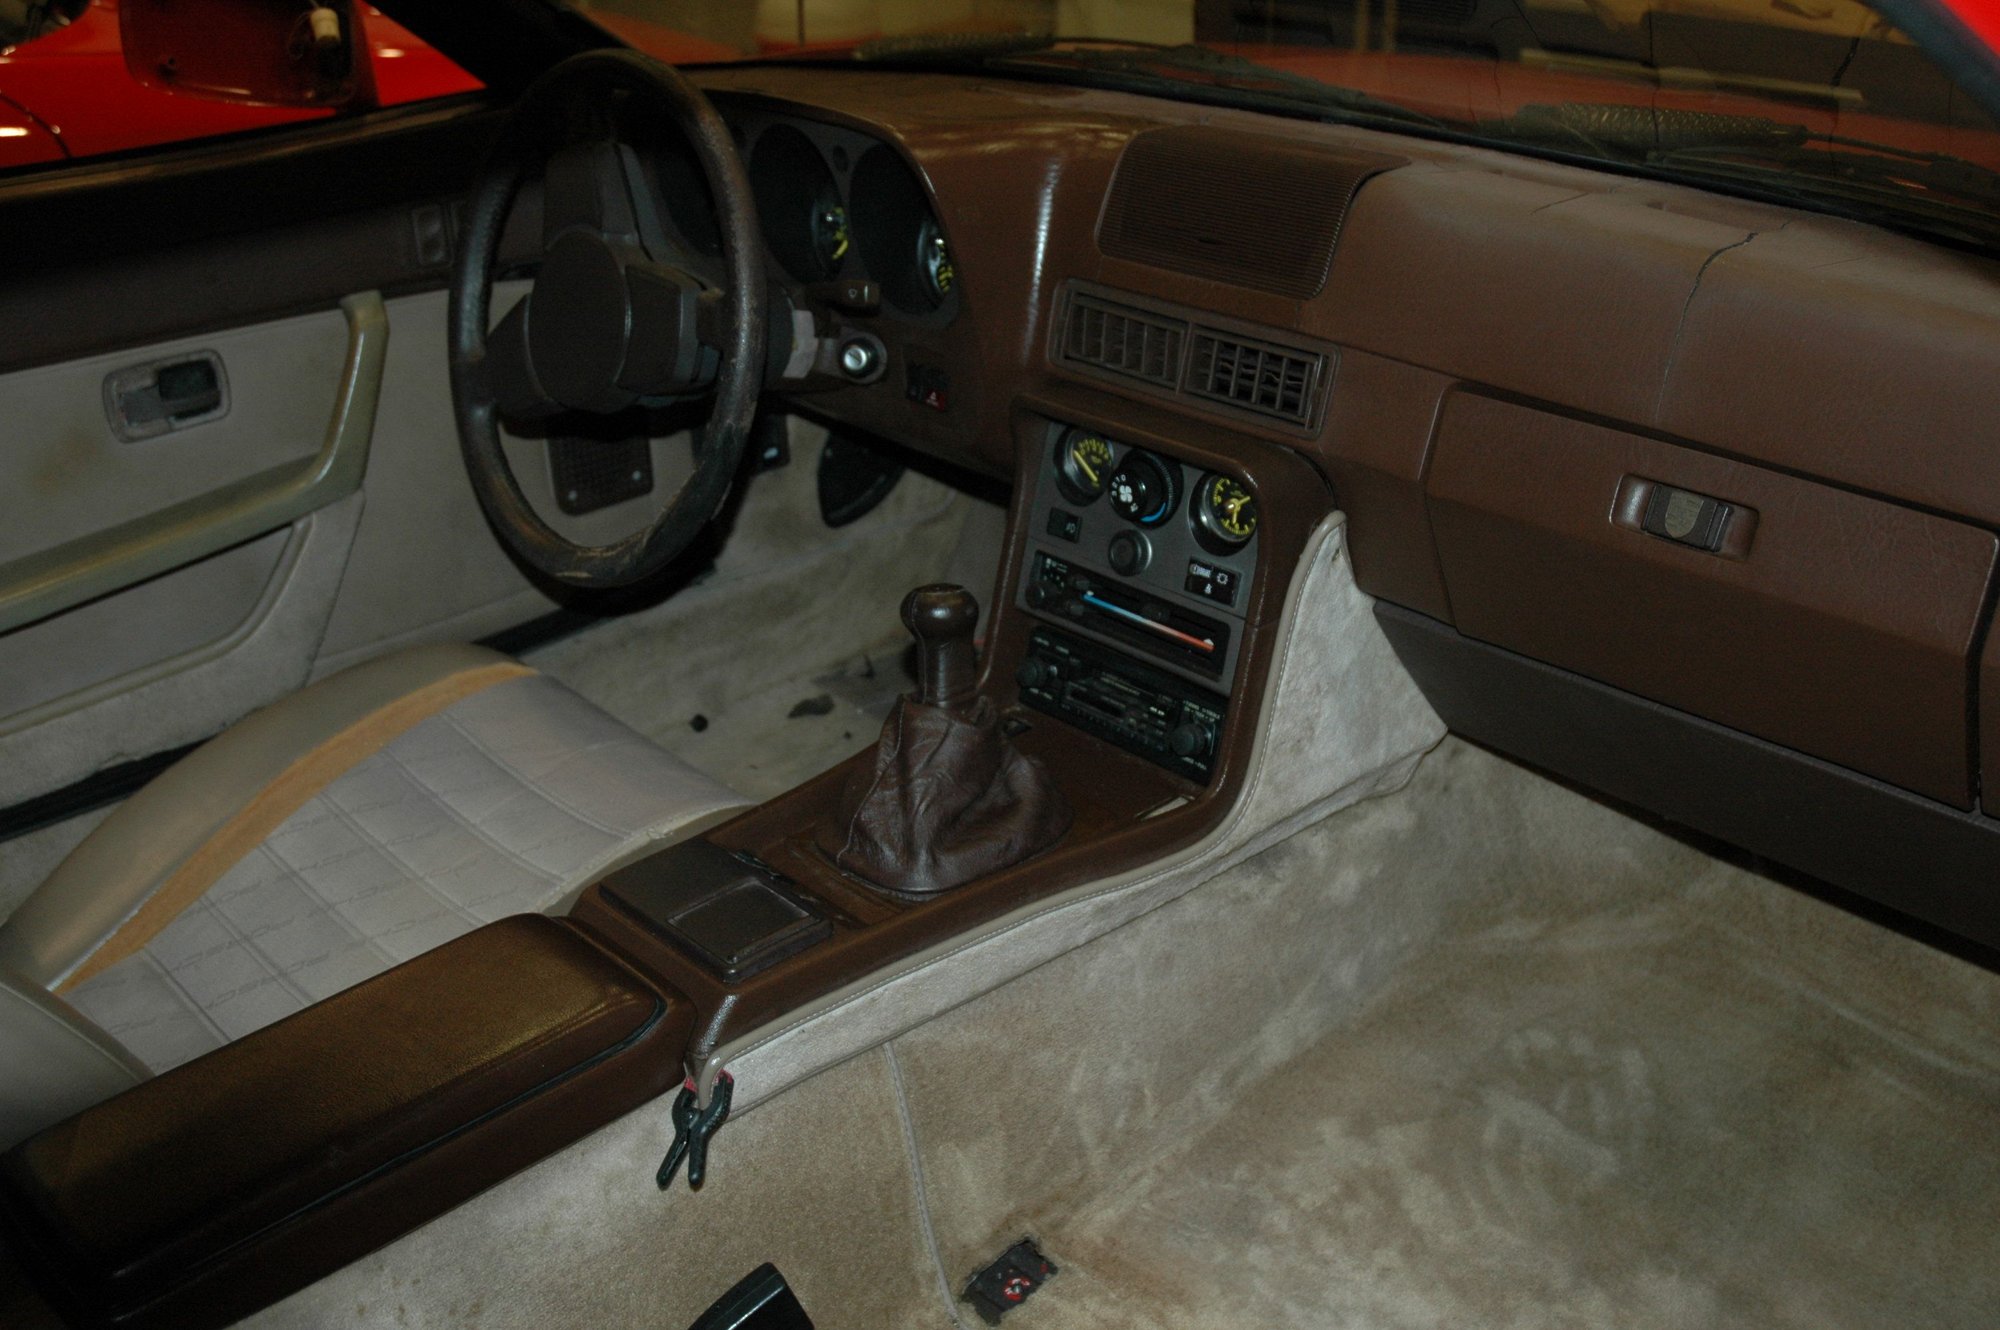
5. Had to remove the center console in order to replace a broken oil pressure gauge, defunct clock, and to remove an old (OKI) cellular phone system.
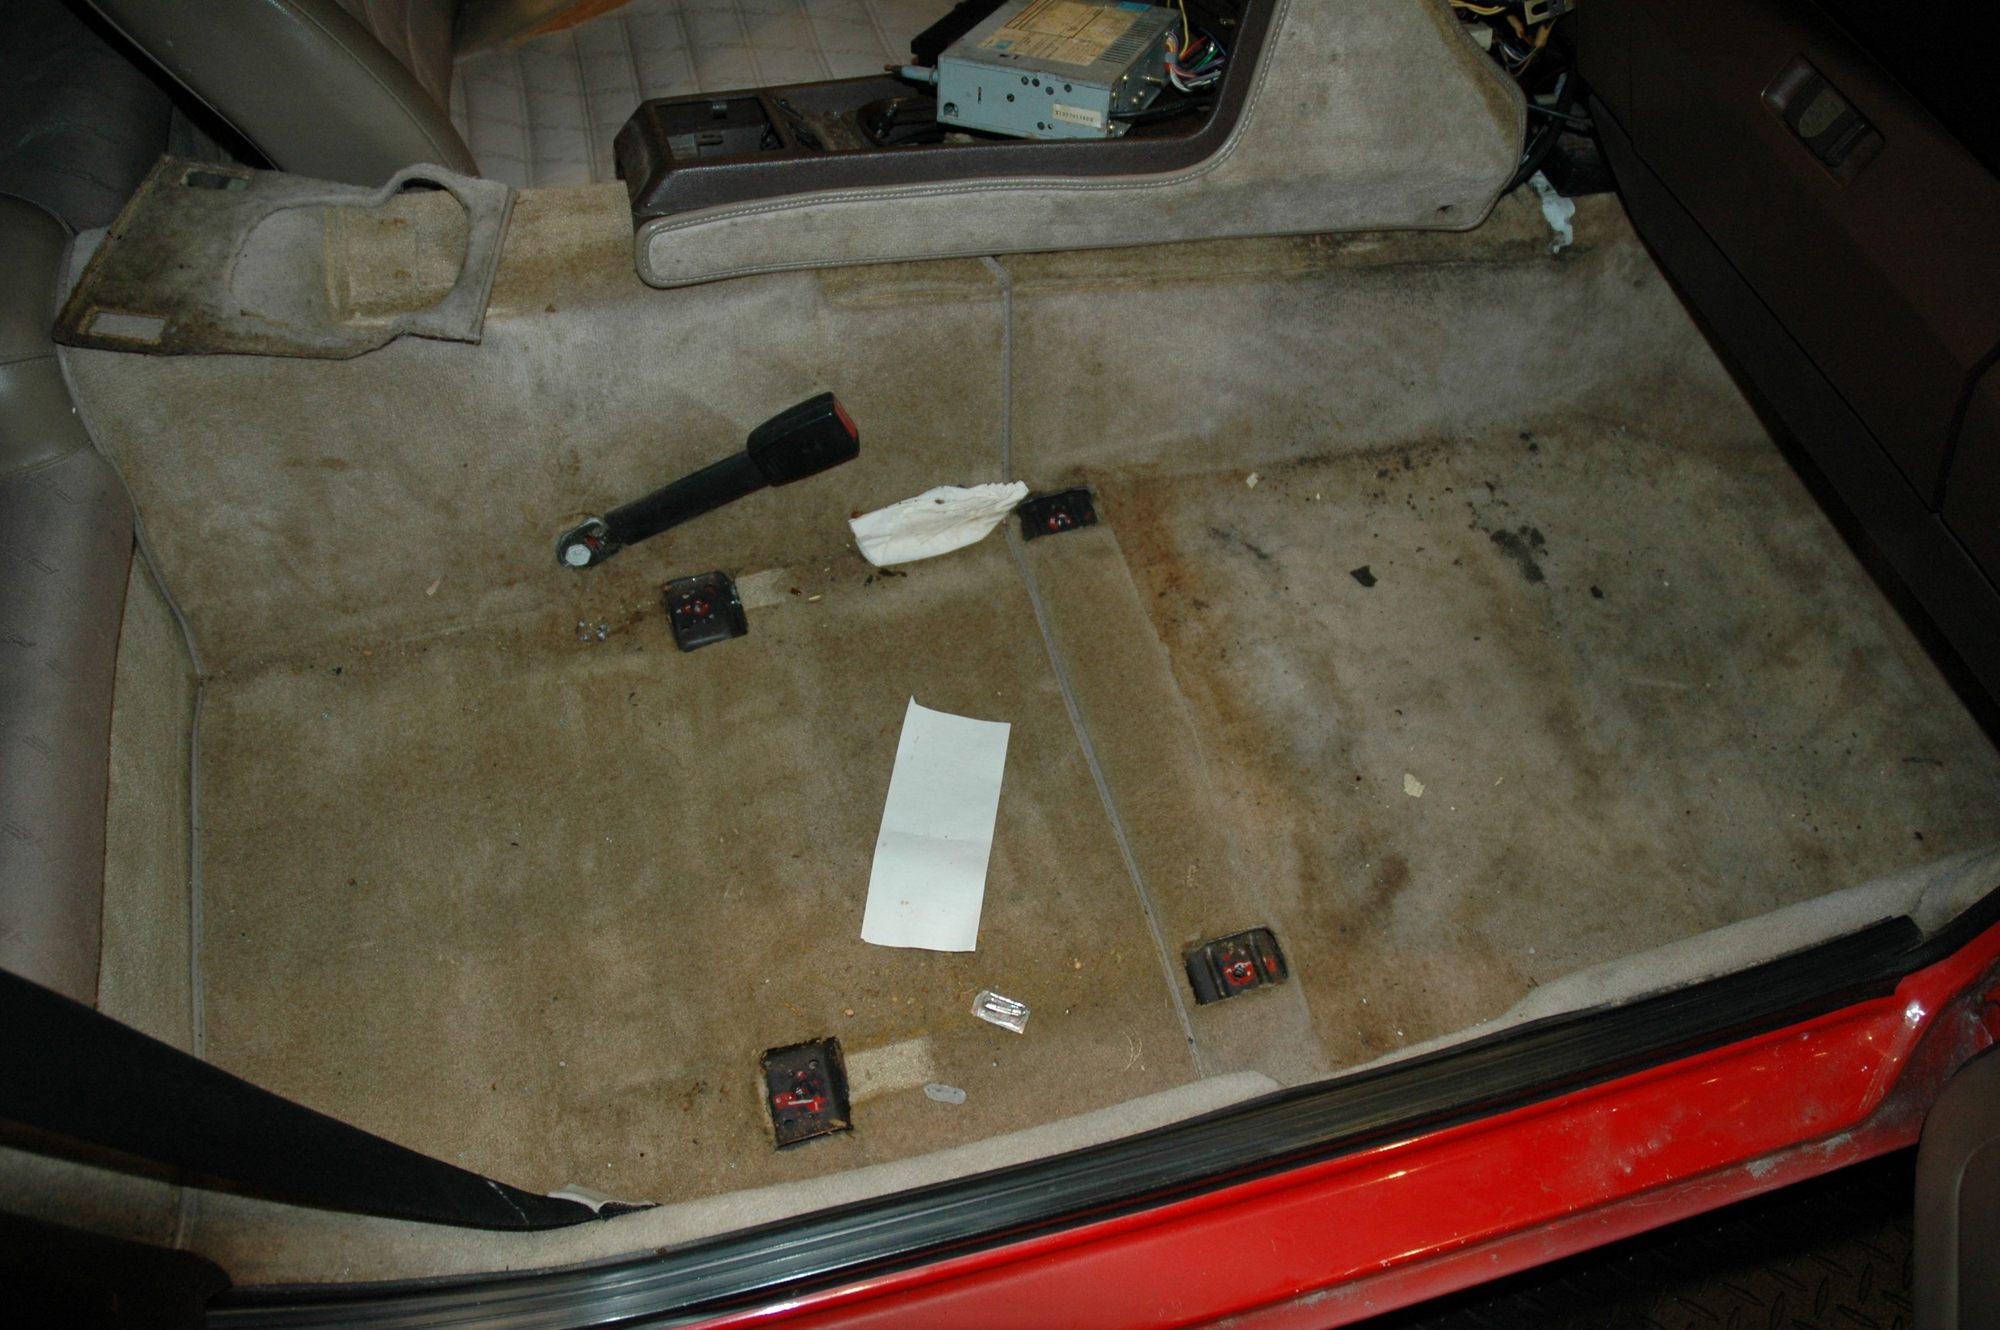
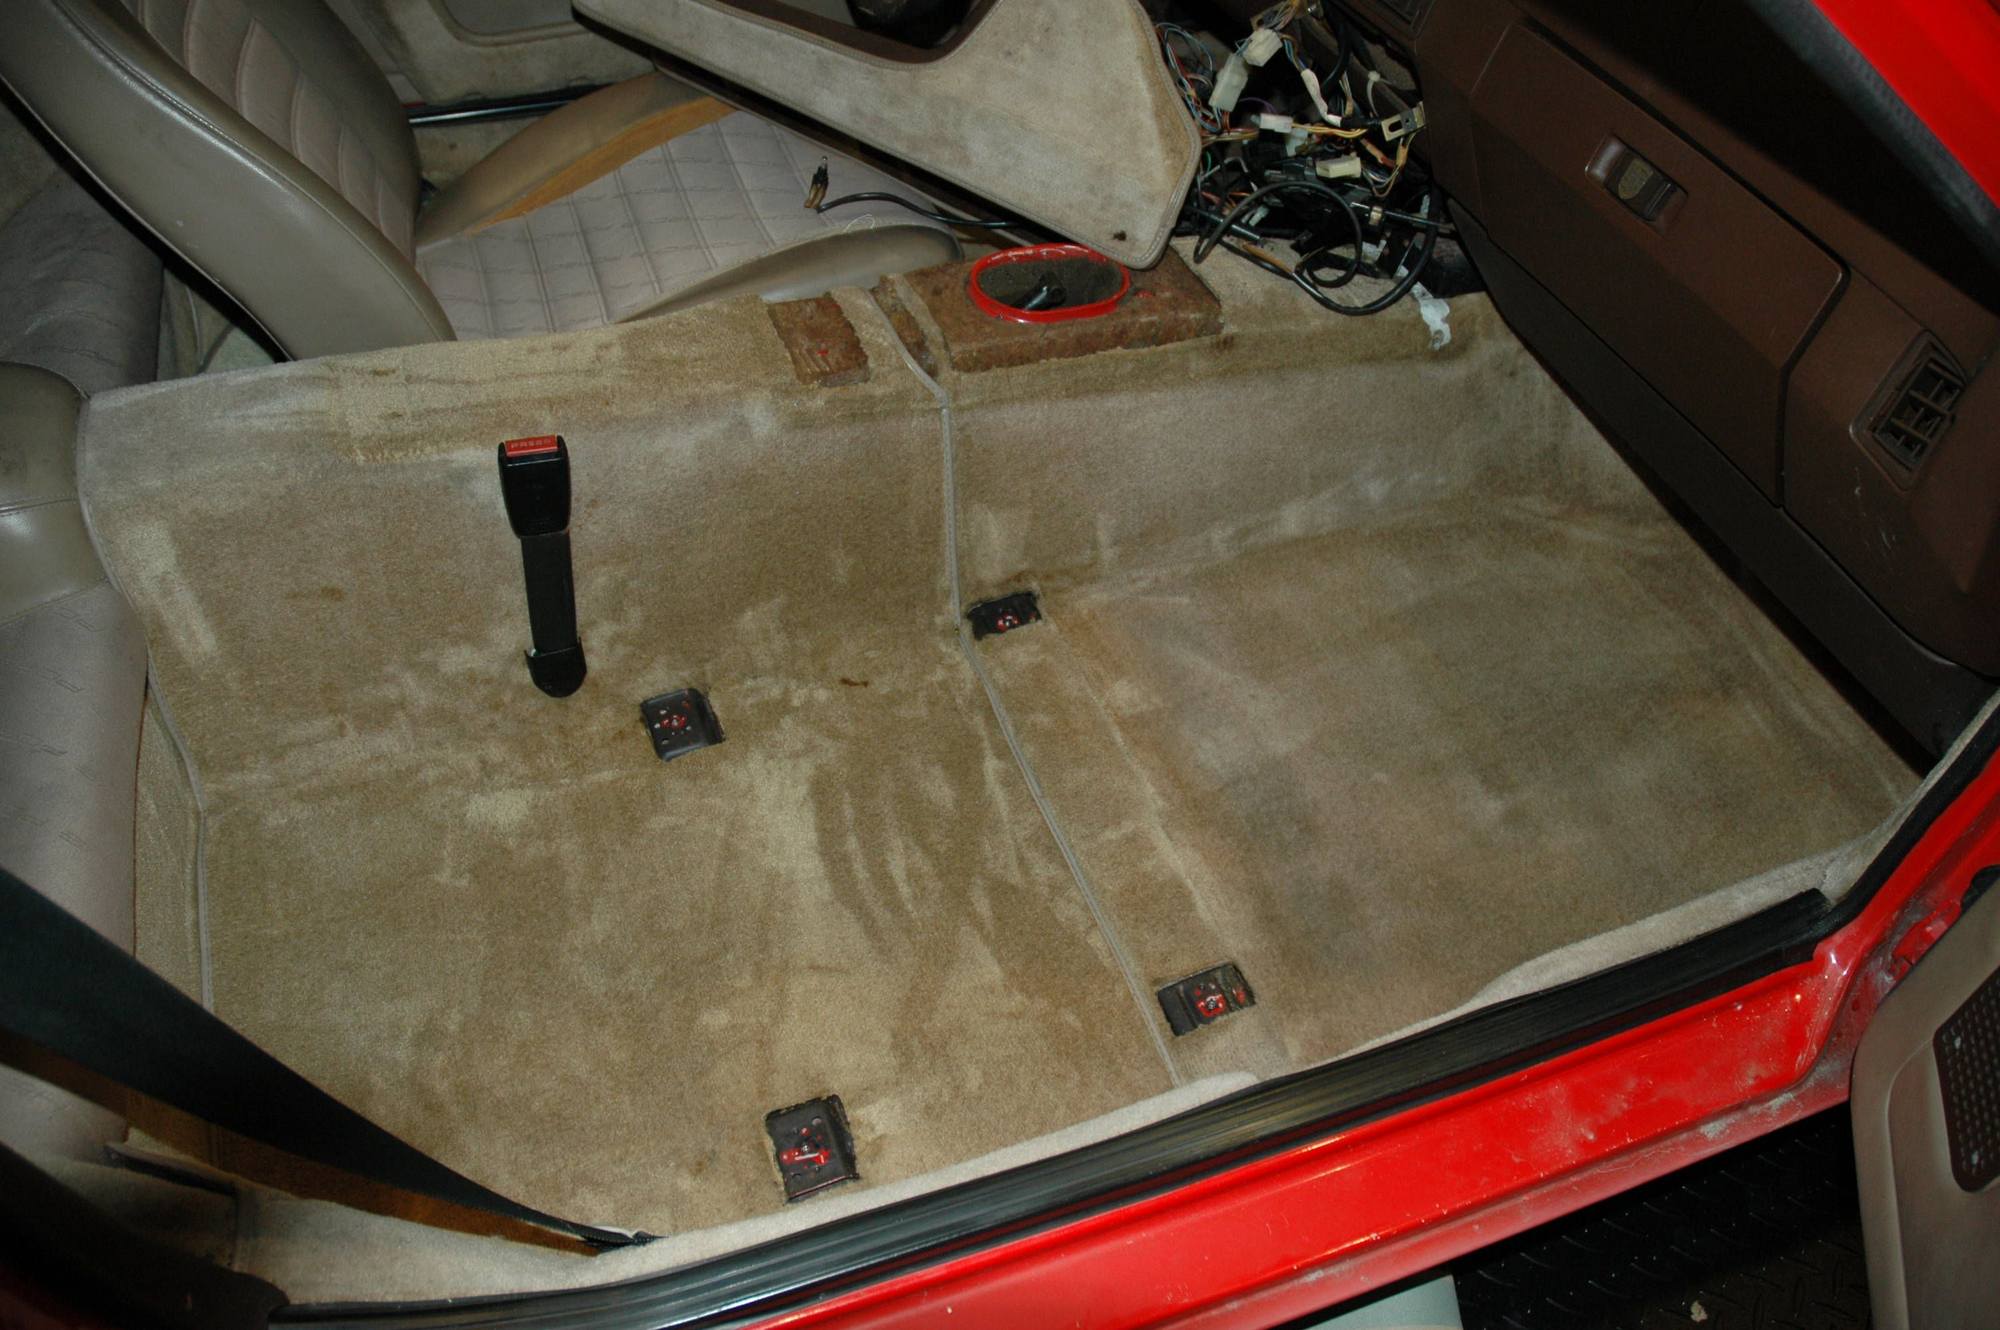
6. Removed the passenger side seat and shampooed/vacuumed that side. Also, I began cleaning the interior cabin of many years of built-up dirt/grime so I'm sure there'll be several passes over the coming weeks. Besides the cracked dashboard, most of the interior trim is at least in good to better shape! Notice the clip allowing for some trim adhesive to cure...
Thanks! I used up almost a full can of shampoo on the passenger side. Driver's side may get tackled this coming weekend.
My plan is to find someone that can install a backing strip so I can have the bolster seams sewn back together; the script fabric is actually in very nice shape, with the exception of those tears.
Dec 27-28 Update:
- Pointed the vacuum and shampoo toward the rear passenger side.
- Checked and retensioned the timing and balance shaft belts (the TB was a little tight and the BSB was a bit too loose, but otherwise still in great shape) My friend (Previous Owner) performed a front engine service back in 2019 and only put @800 miles on her since...
- Replaced windshield washer hoses.
-Cleaned that infamous blue exciter wire connection point on the alternator.
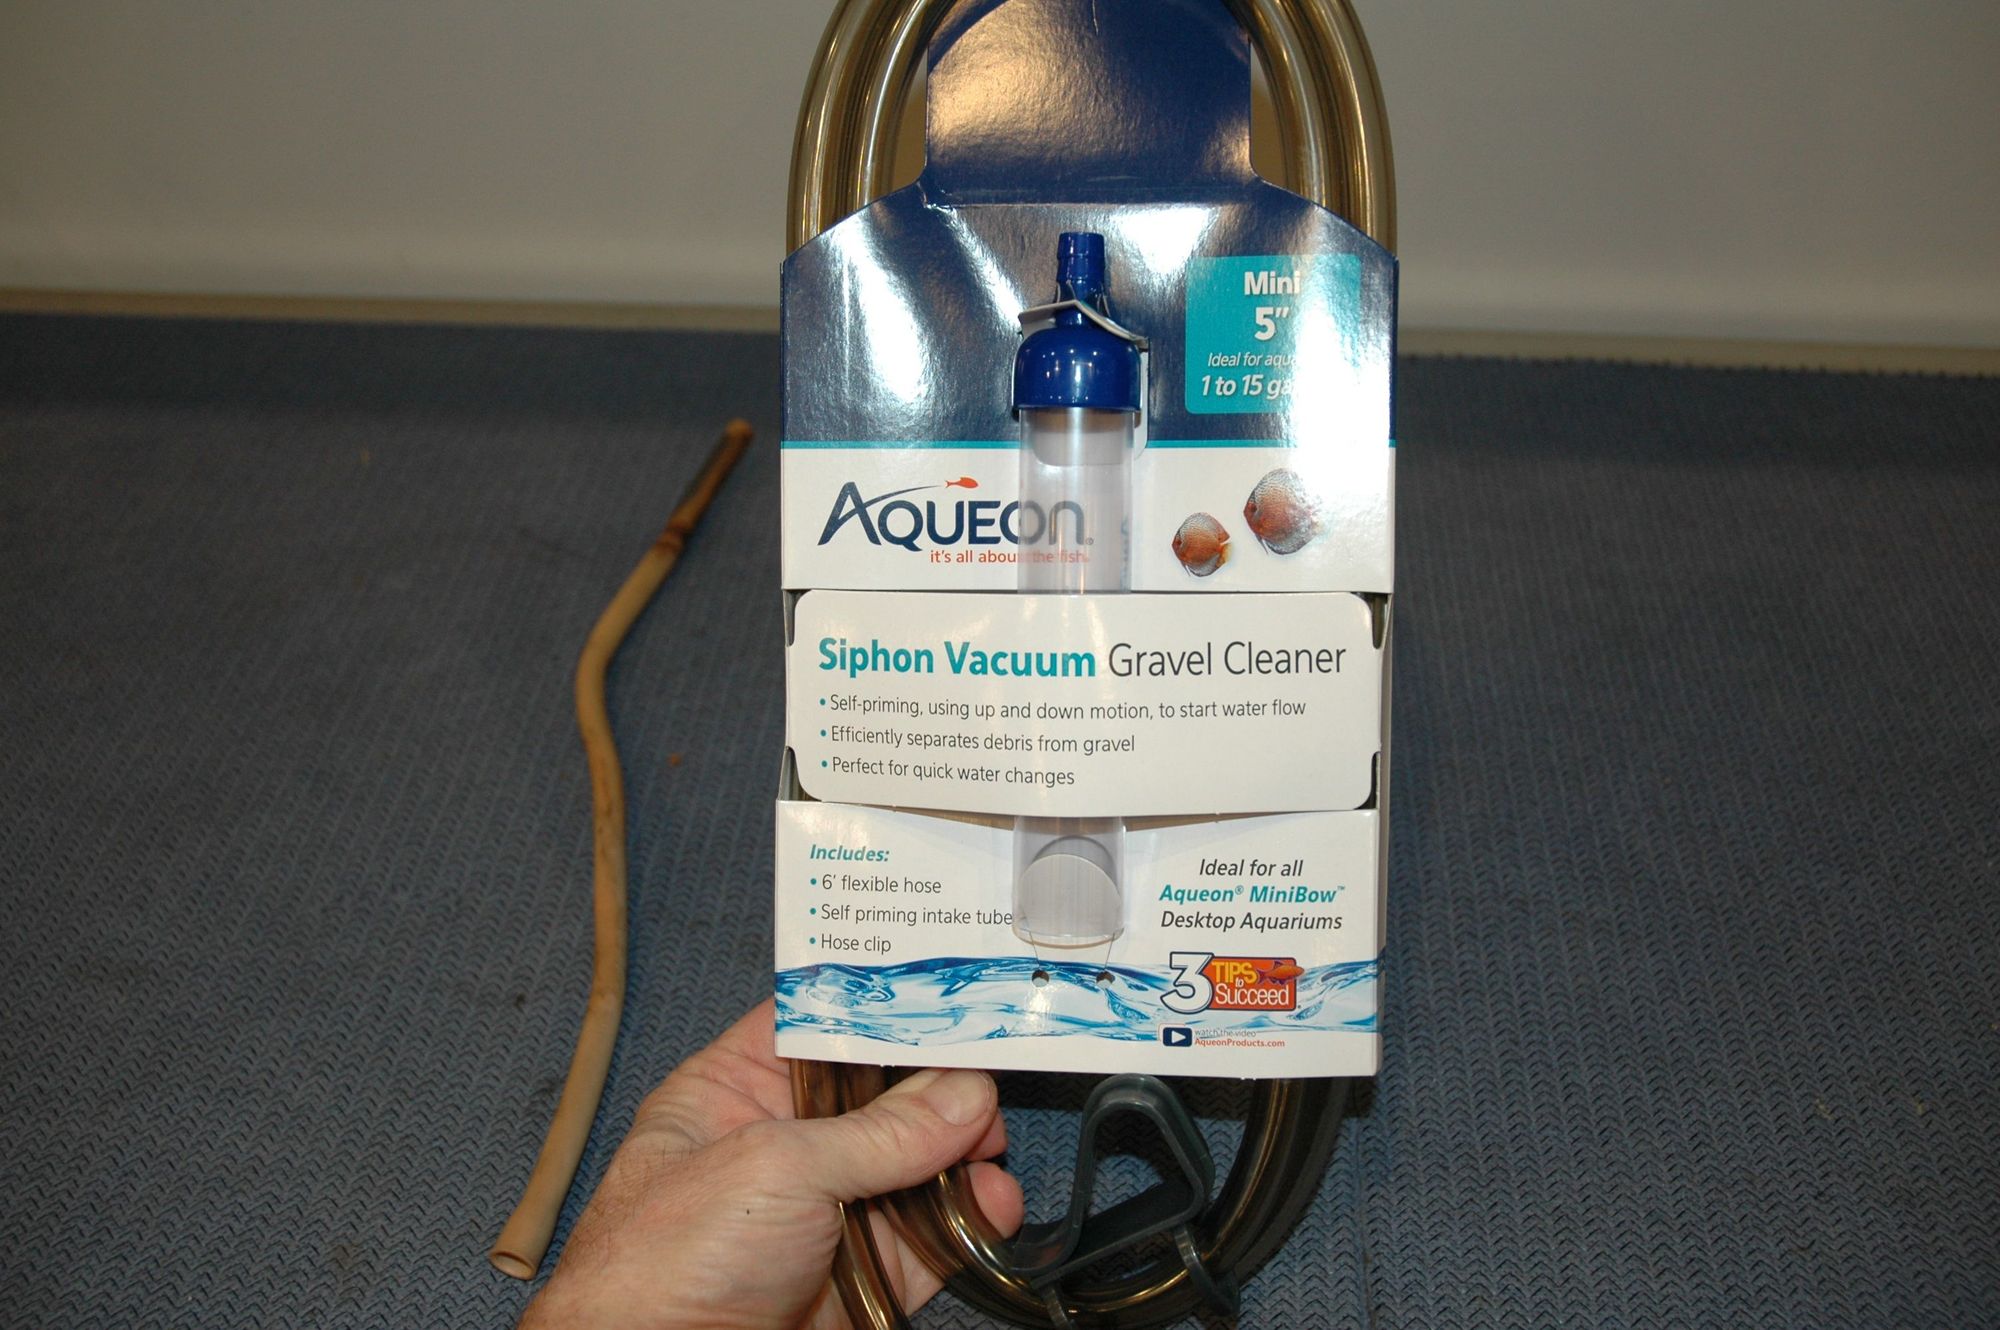
-Replaced rear hatch receiver drain lines. Unfortunately, these hoses seem to be NLA so I found this at the local pet store, which was a perfect fit!
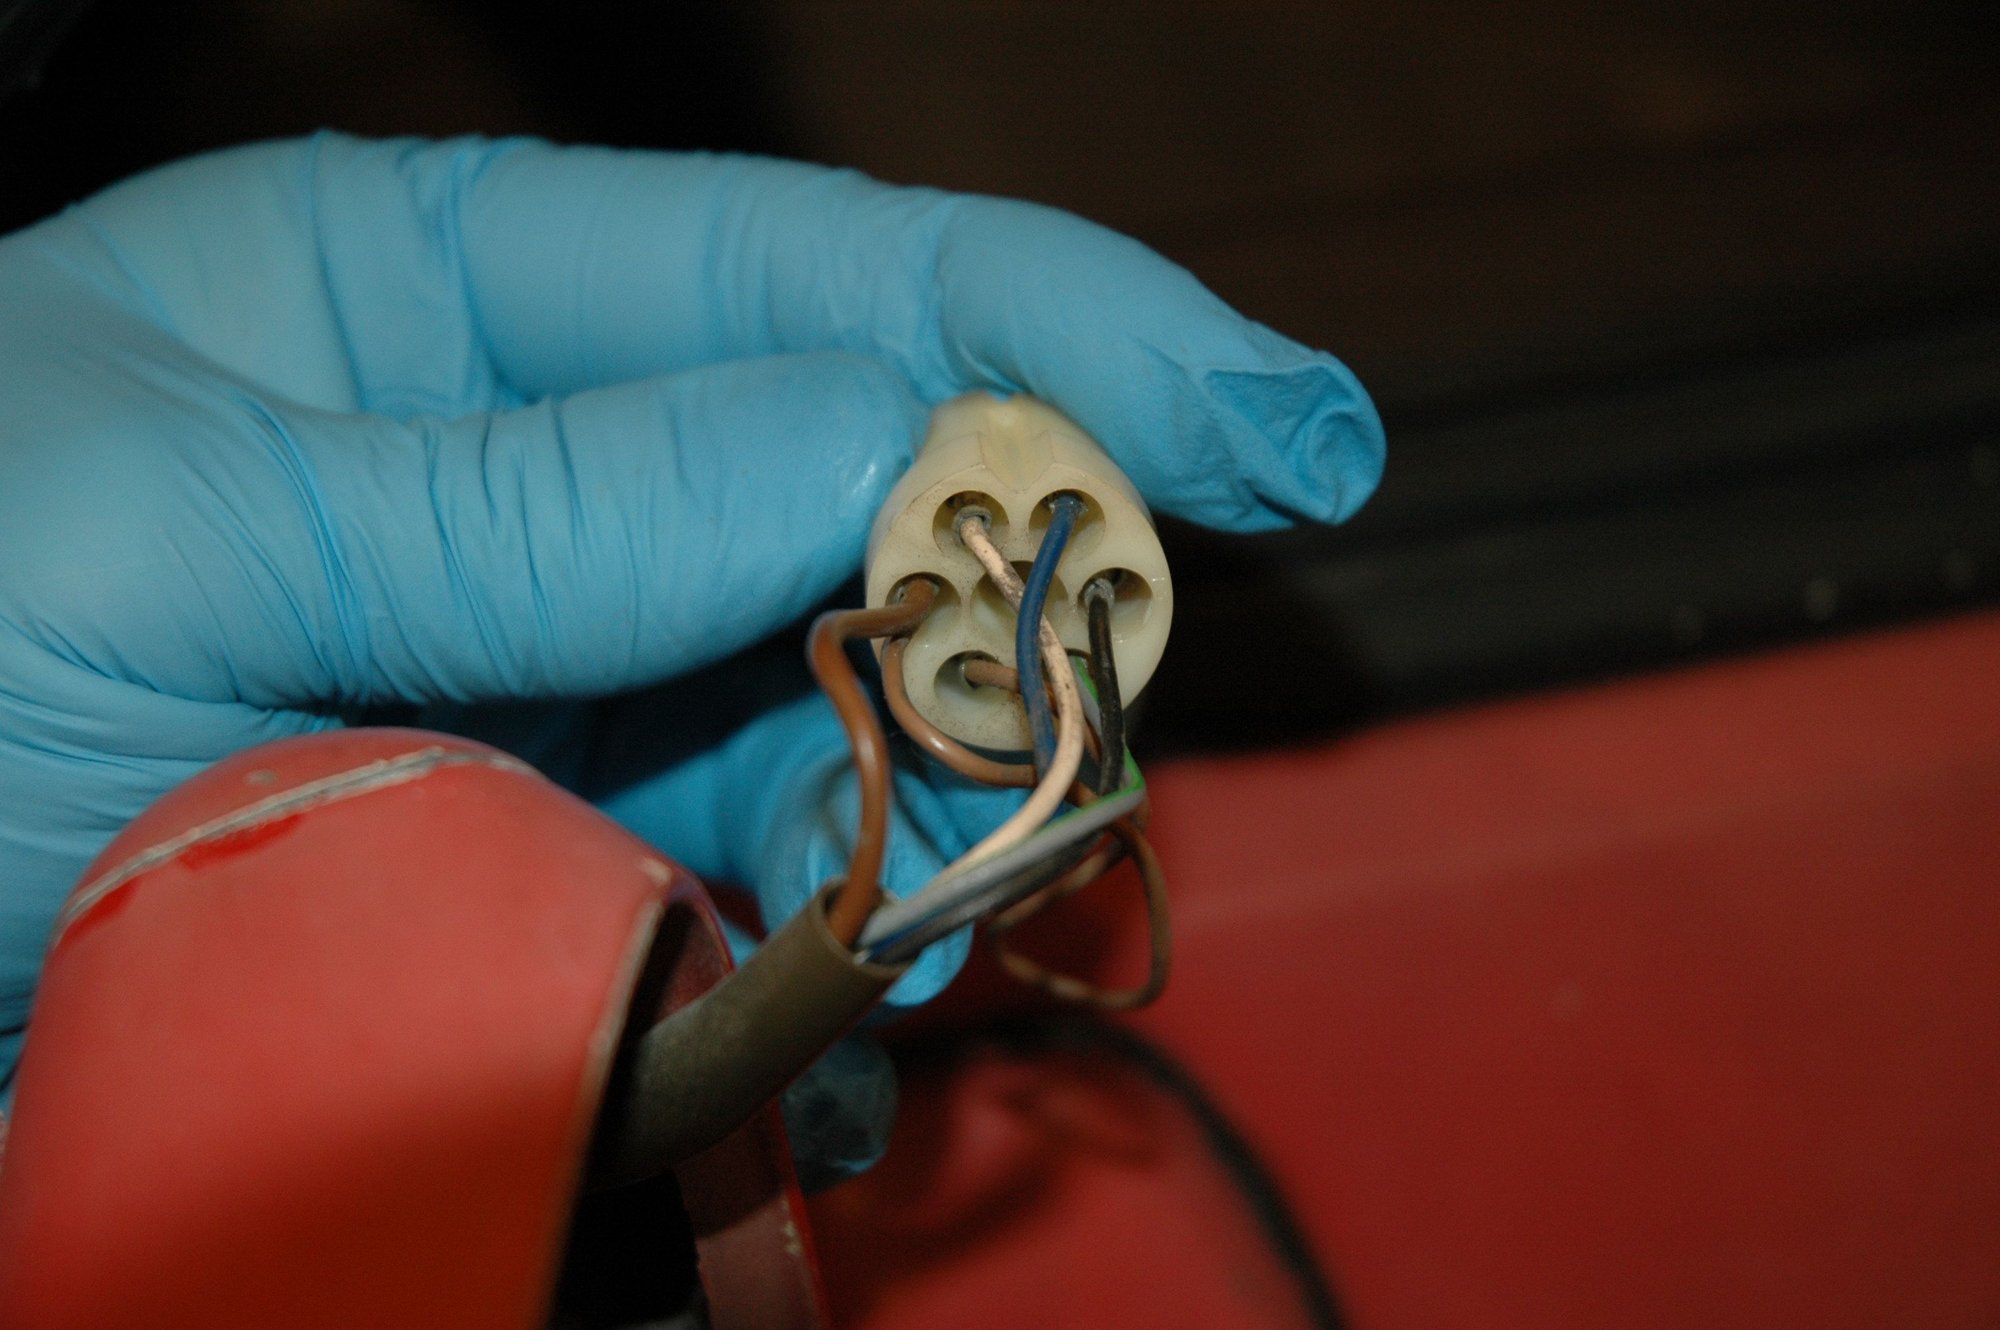
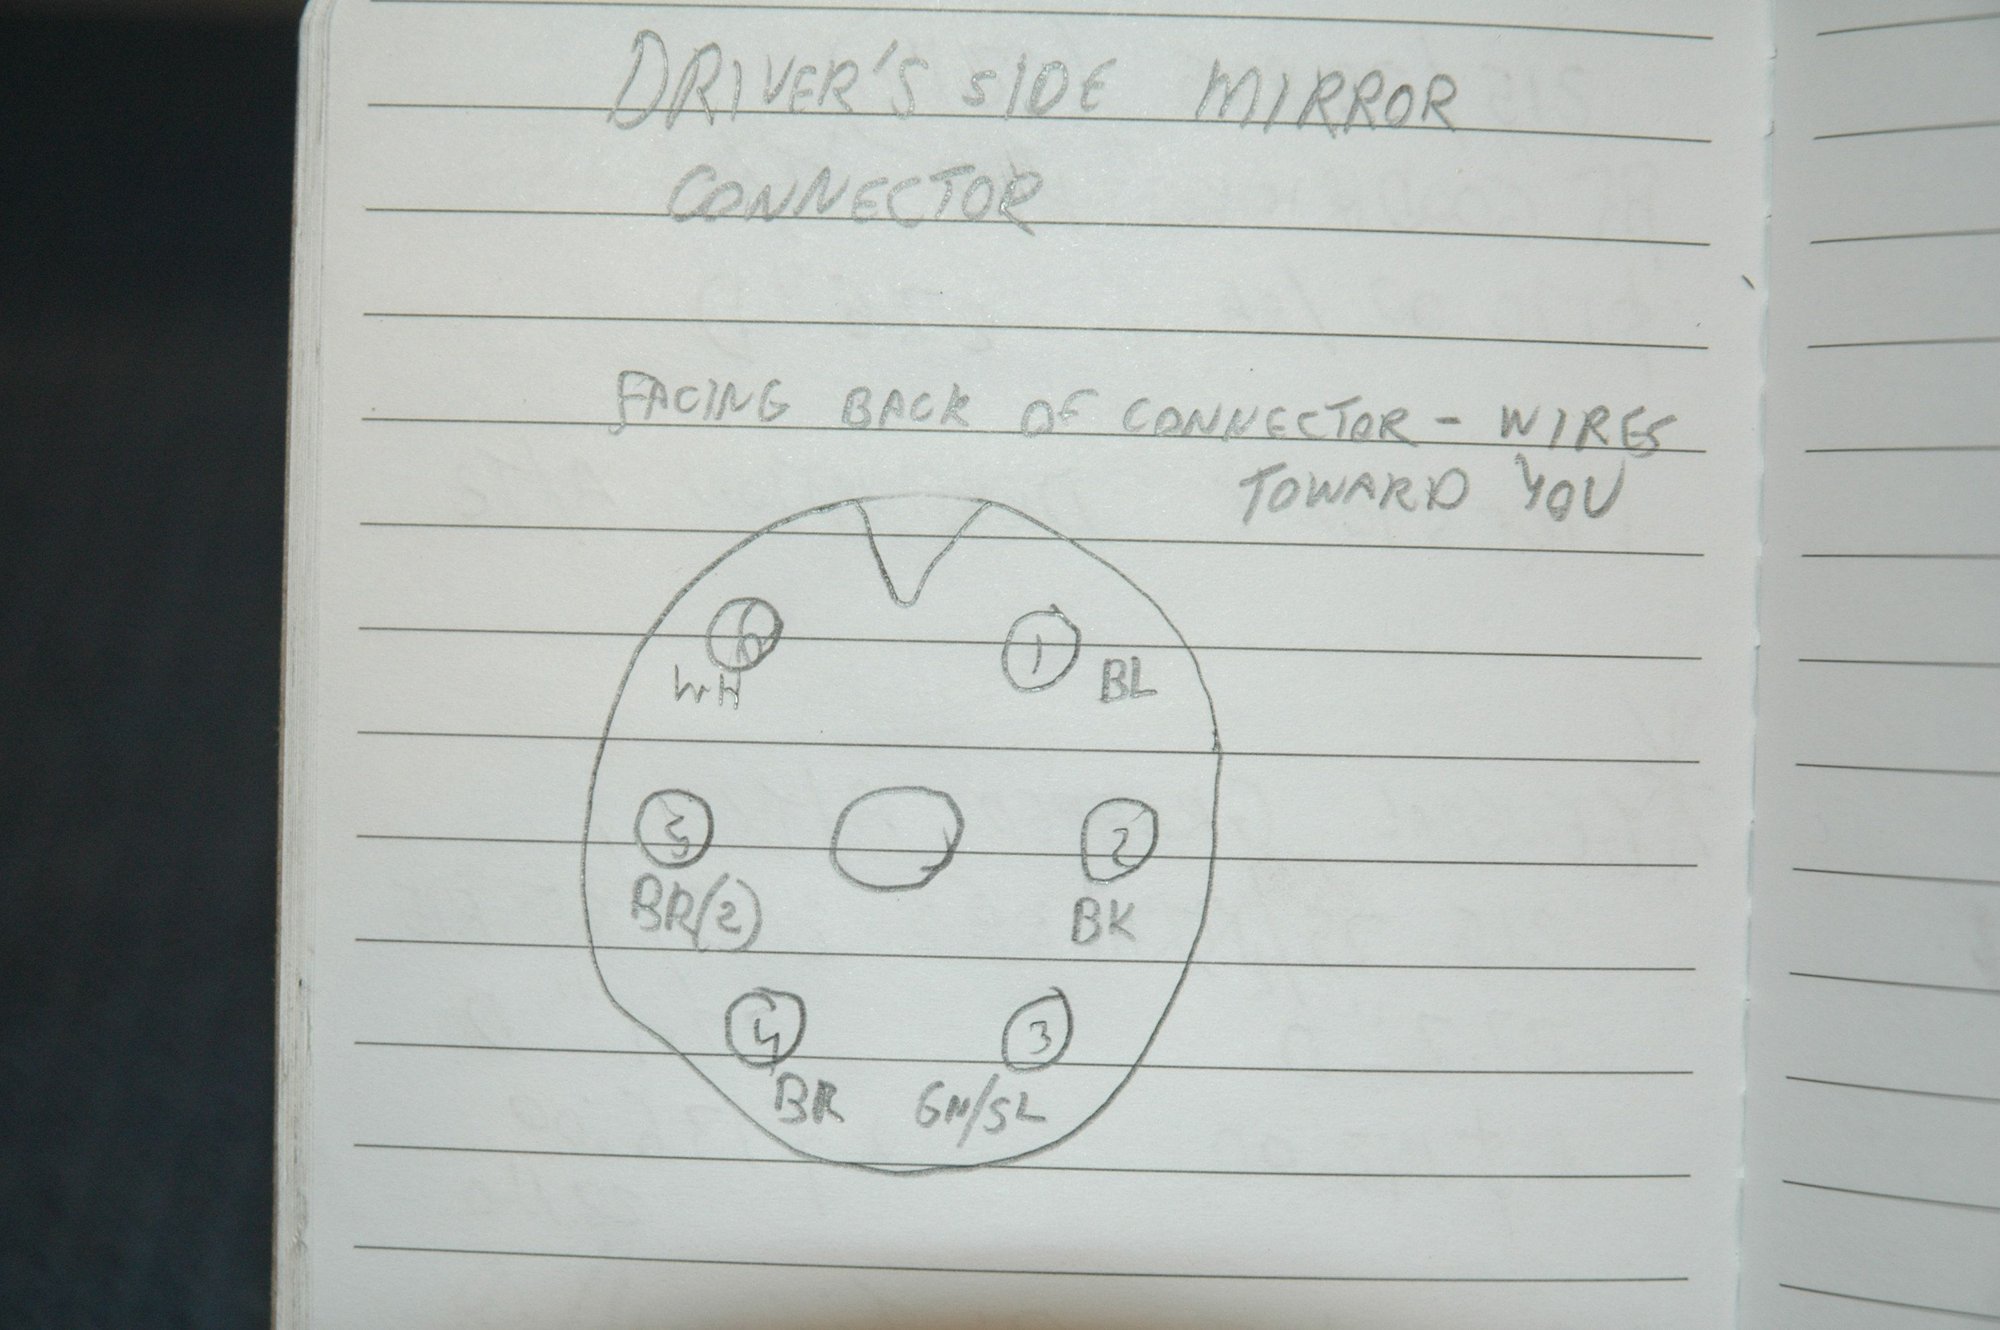
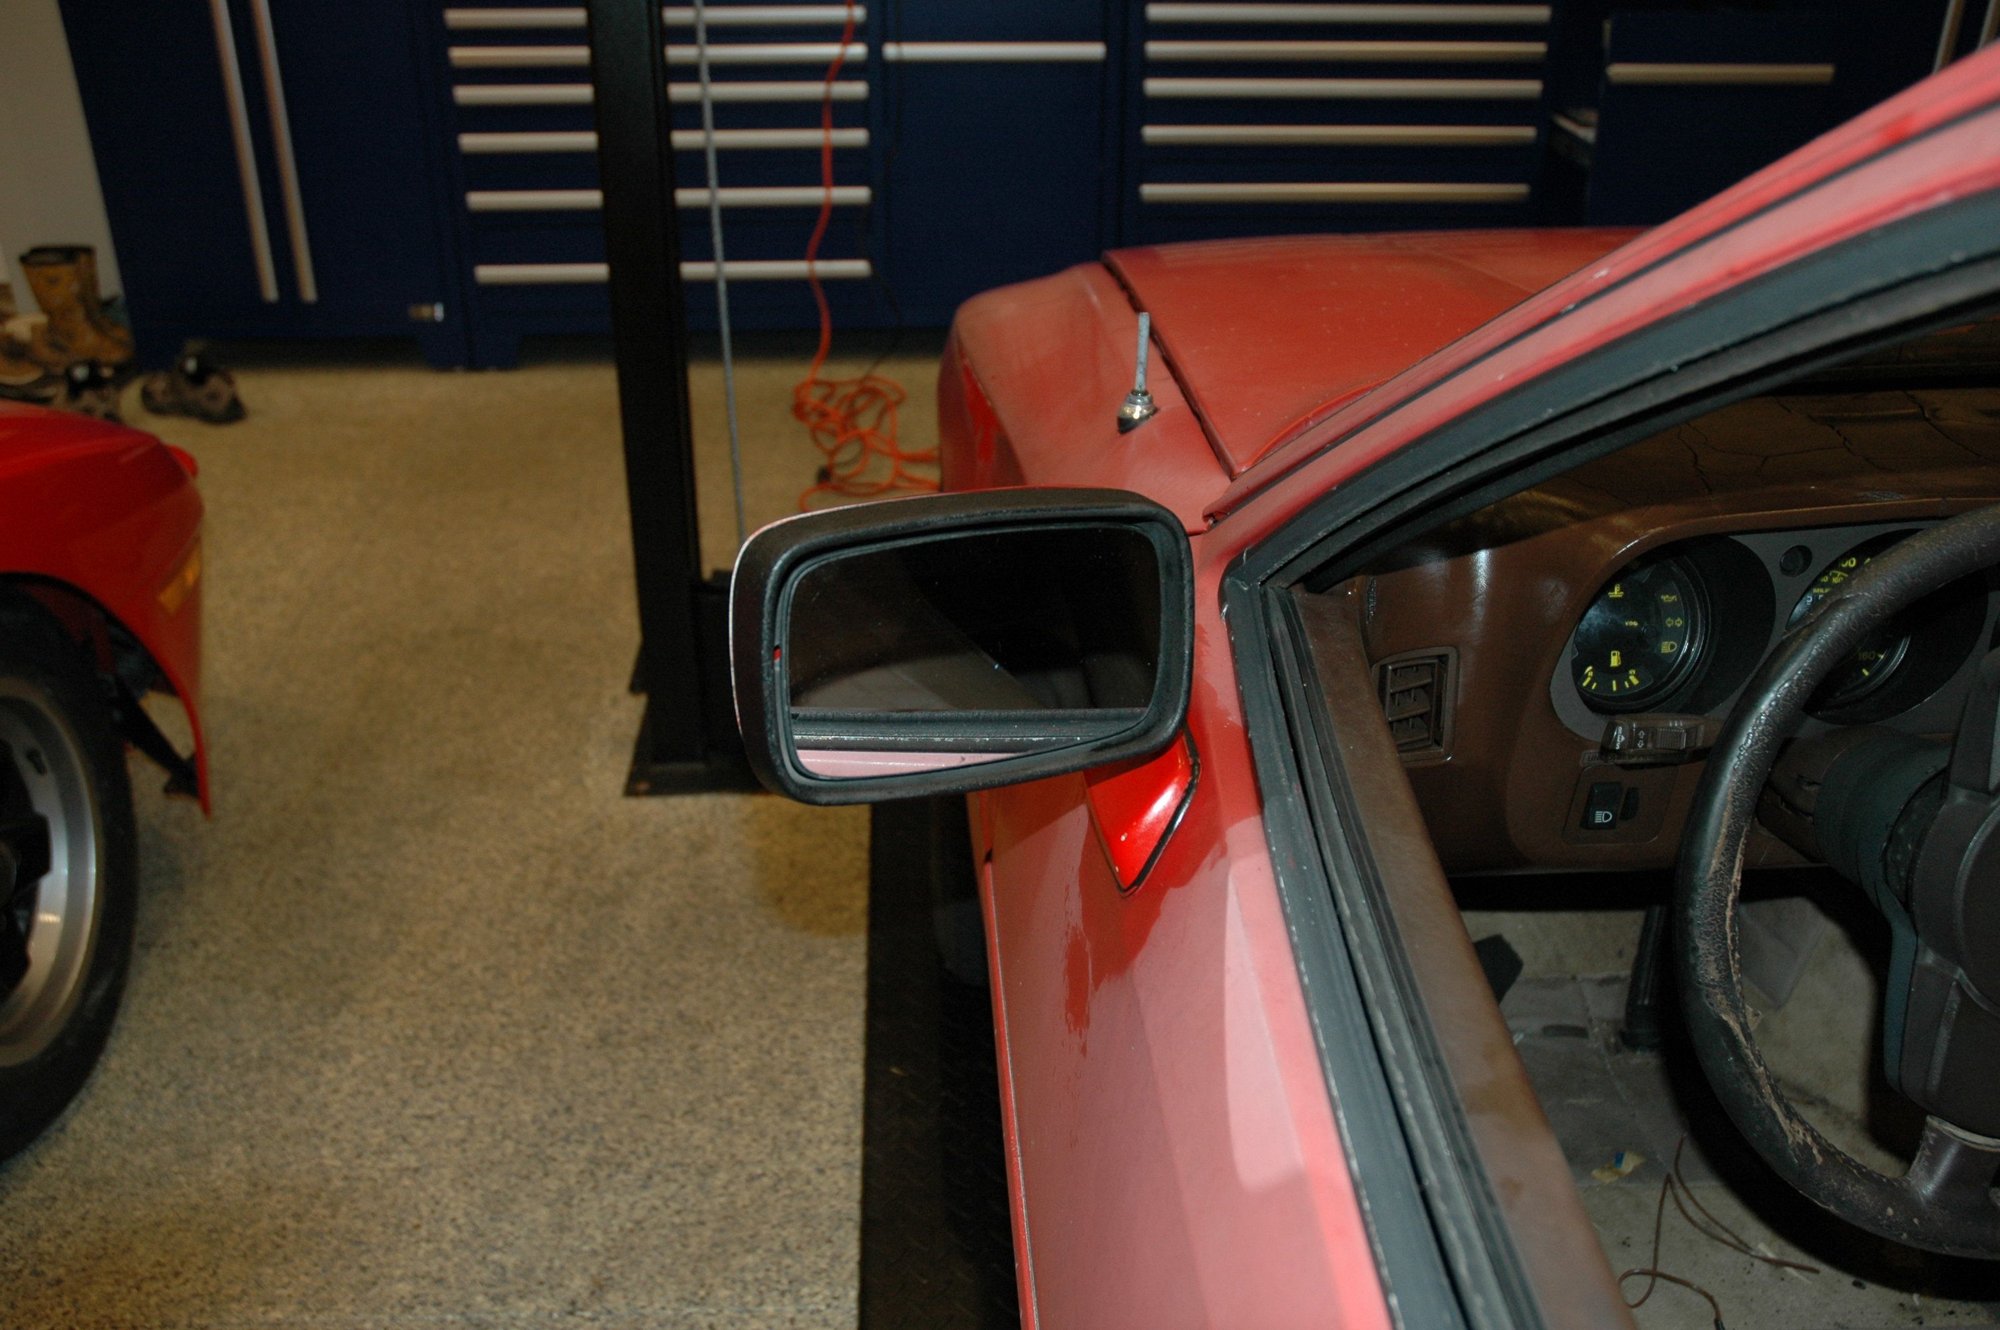
-Repaired/replaced the driver's side view mirror., which required removing the connector.
Drew up the pinouts:
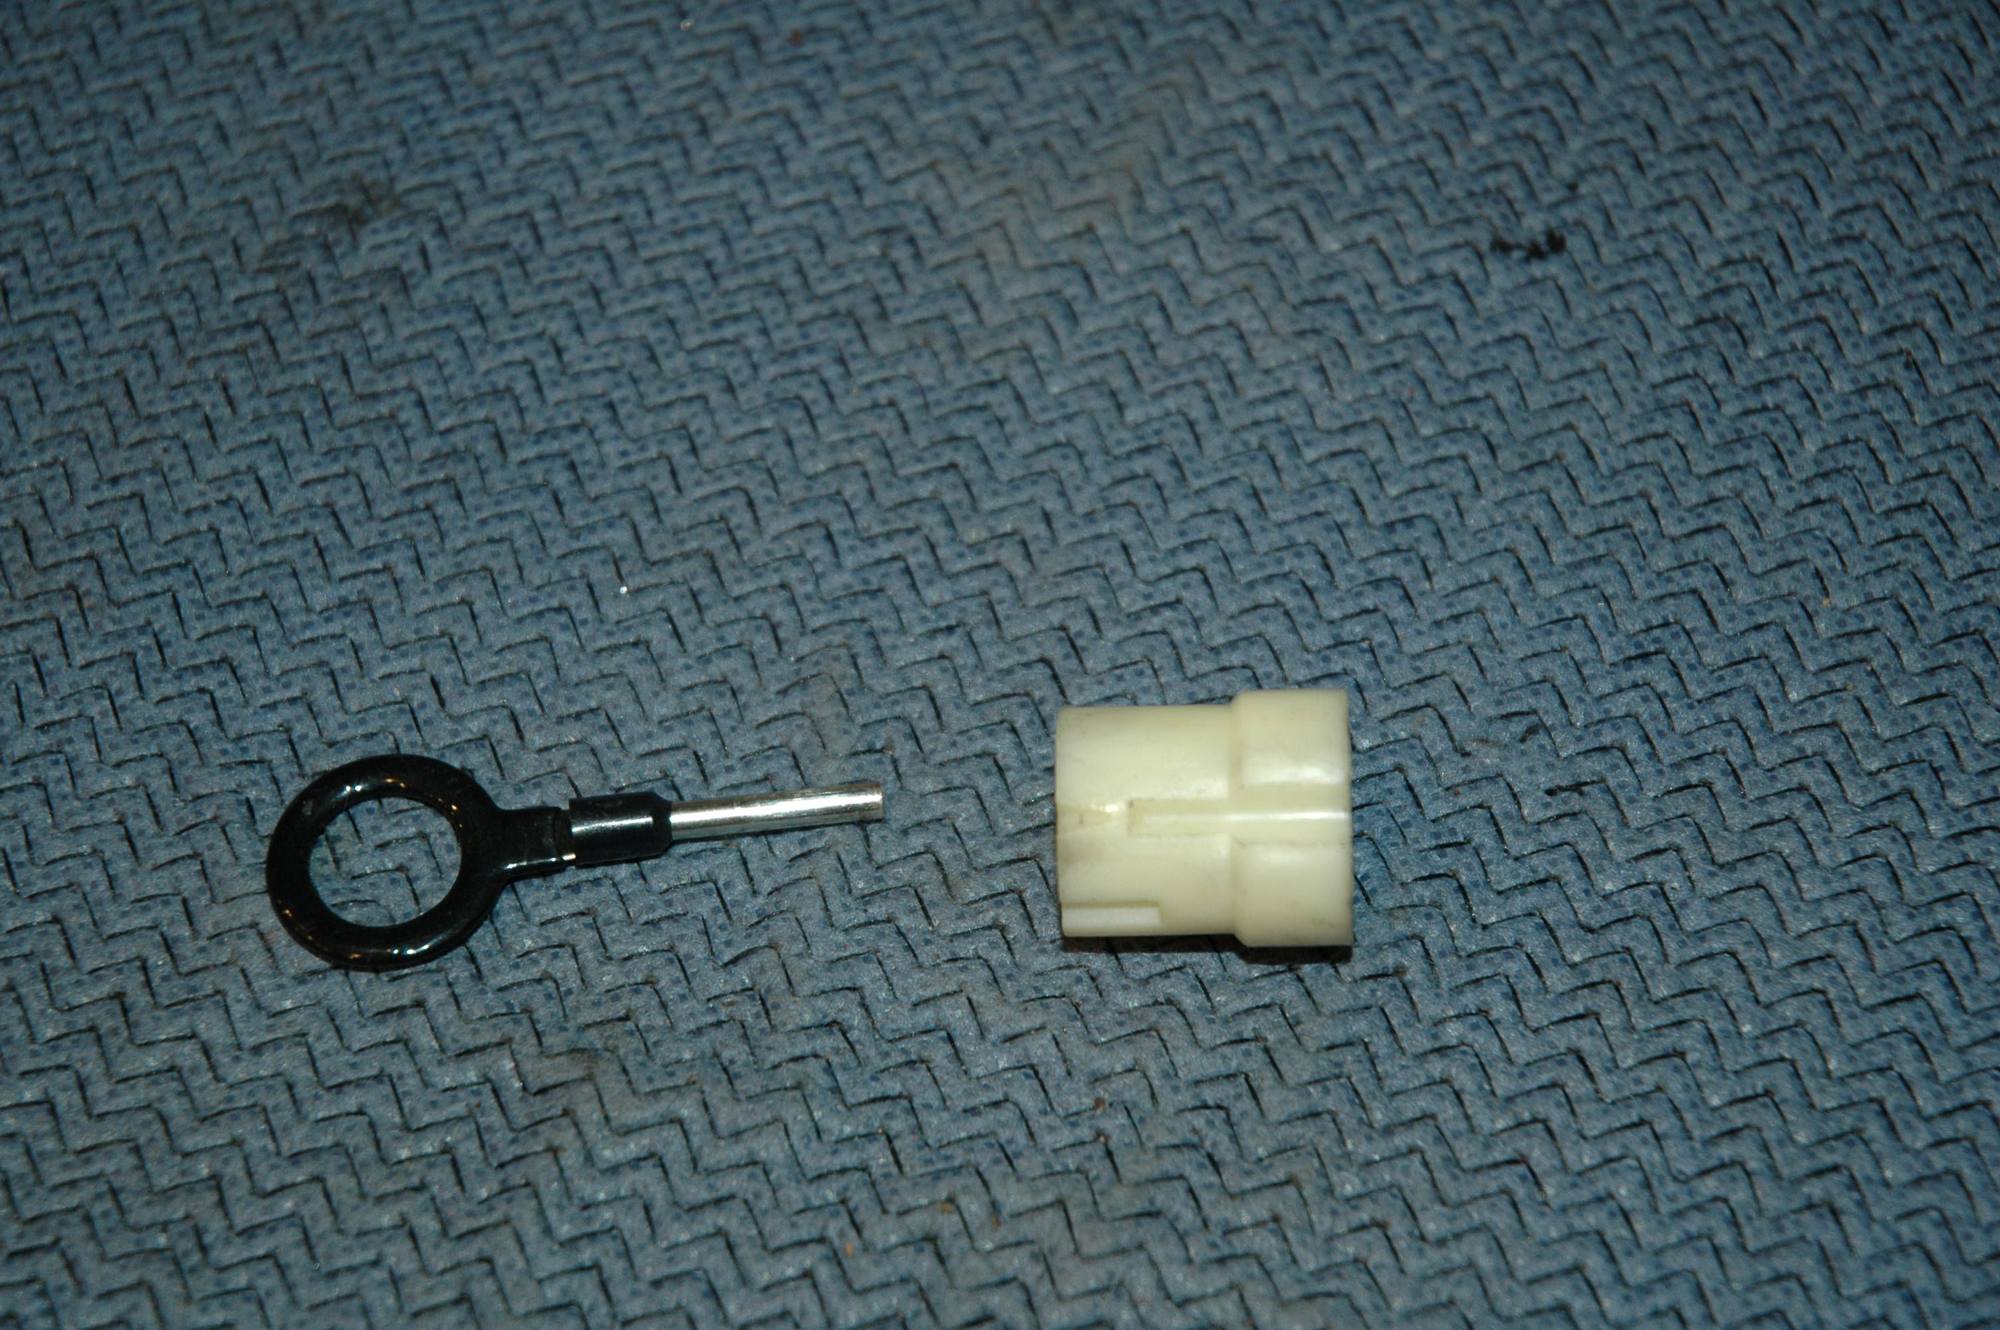
This is where the right tool makes de-pinning easy:
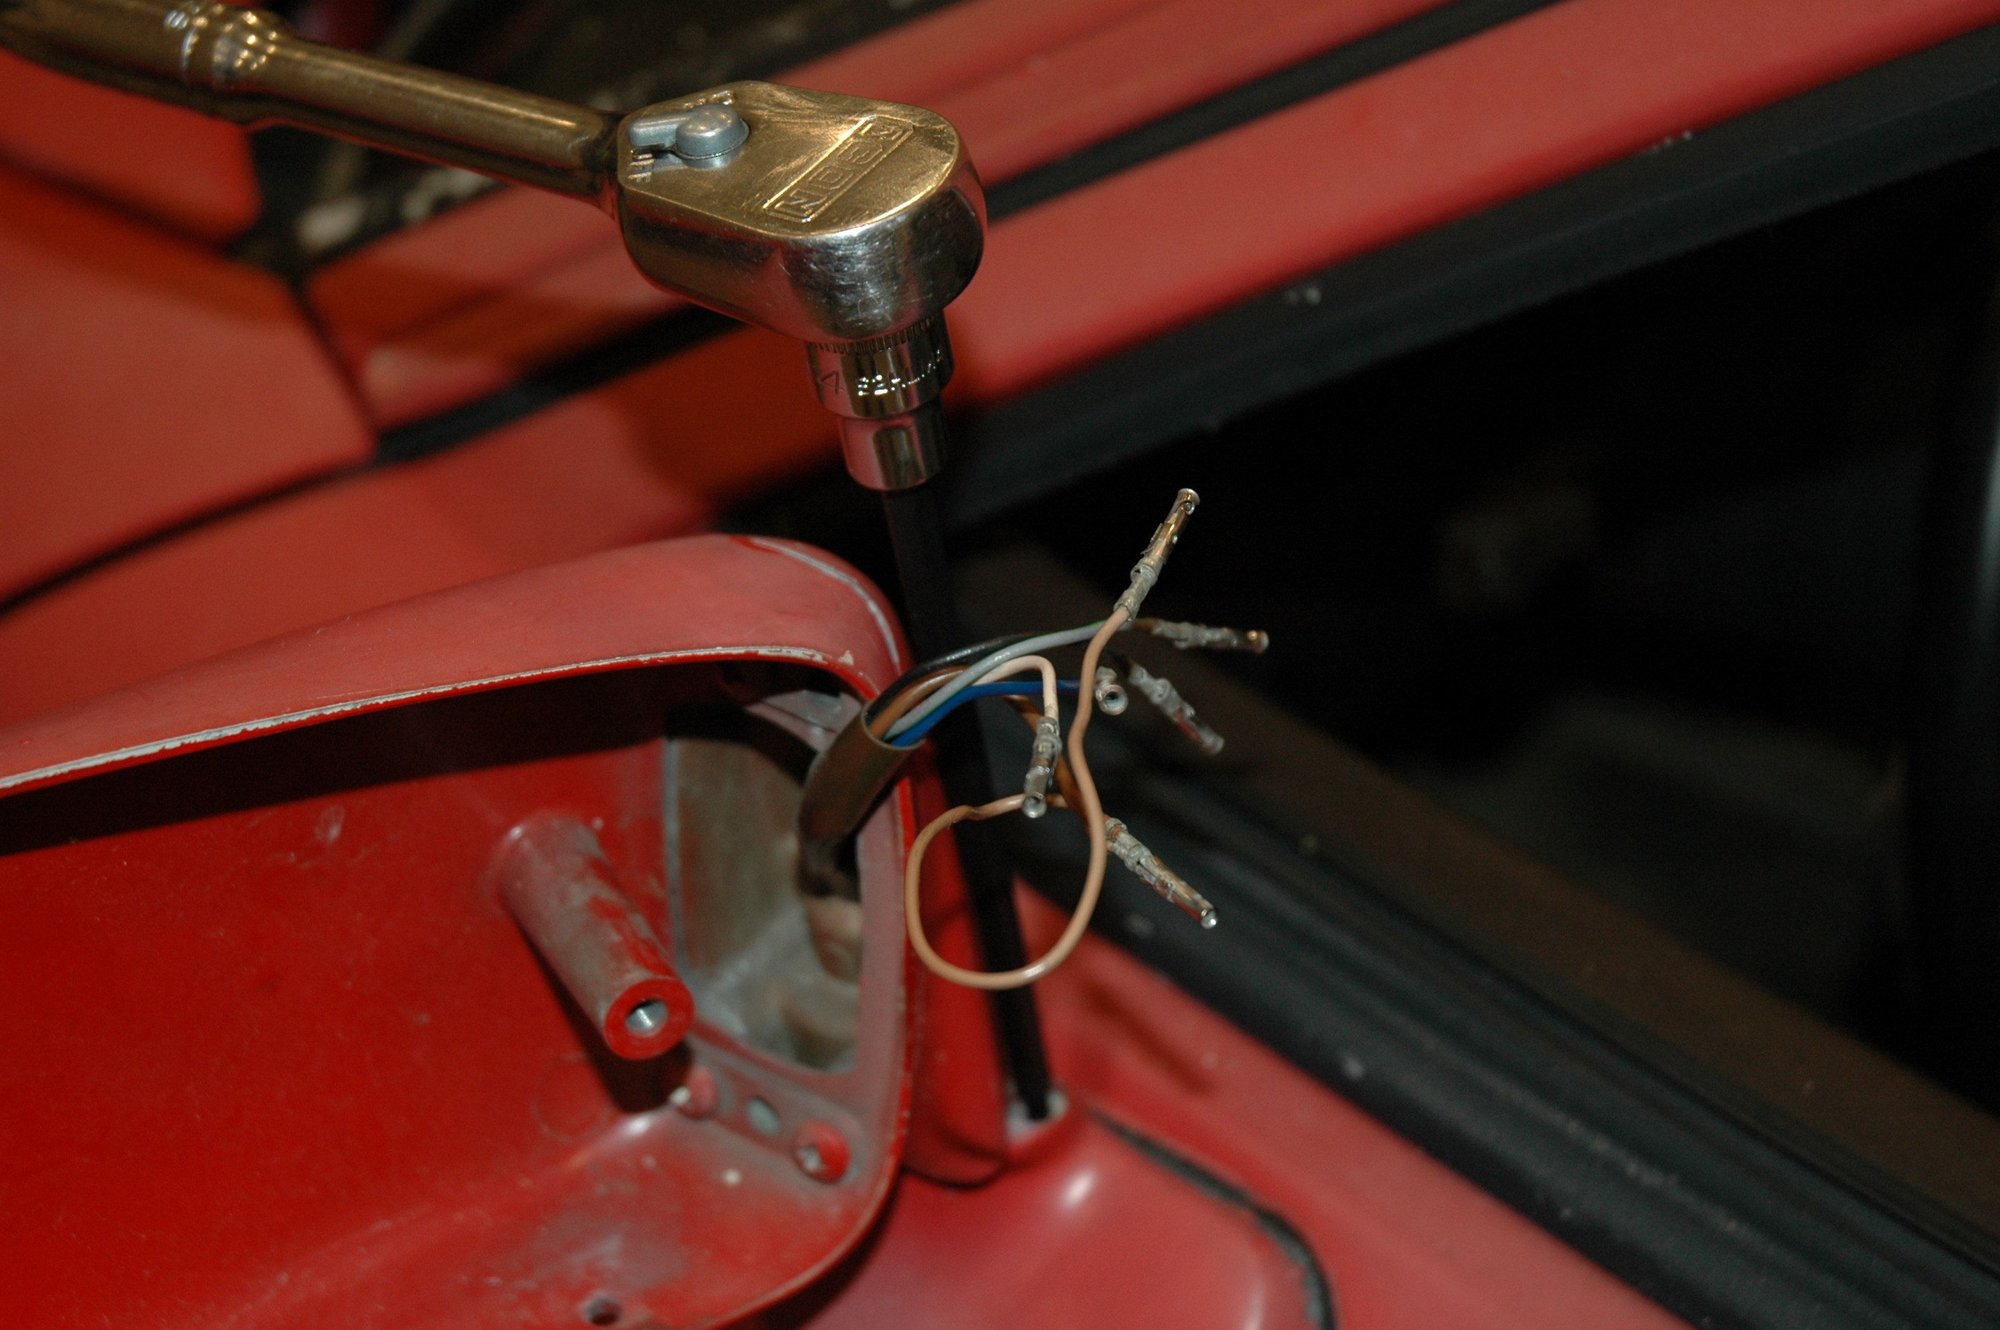
Removing the 4mm Allen bolt will allow for the mirror to be lifted off the door, just be careful pushing the connector sockets through the the housing.
All back together and it actually works (as well as the heater circuit)!
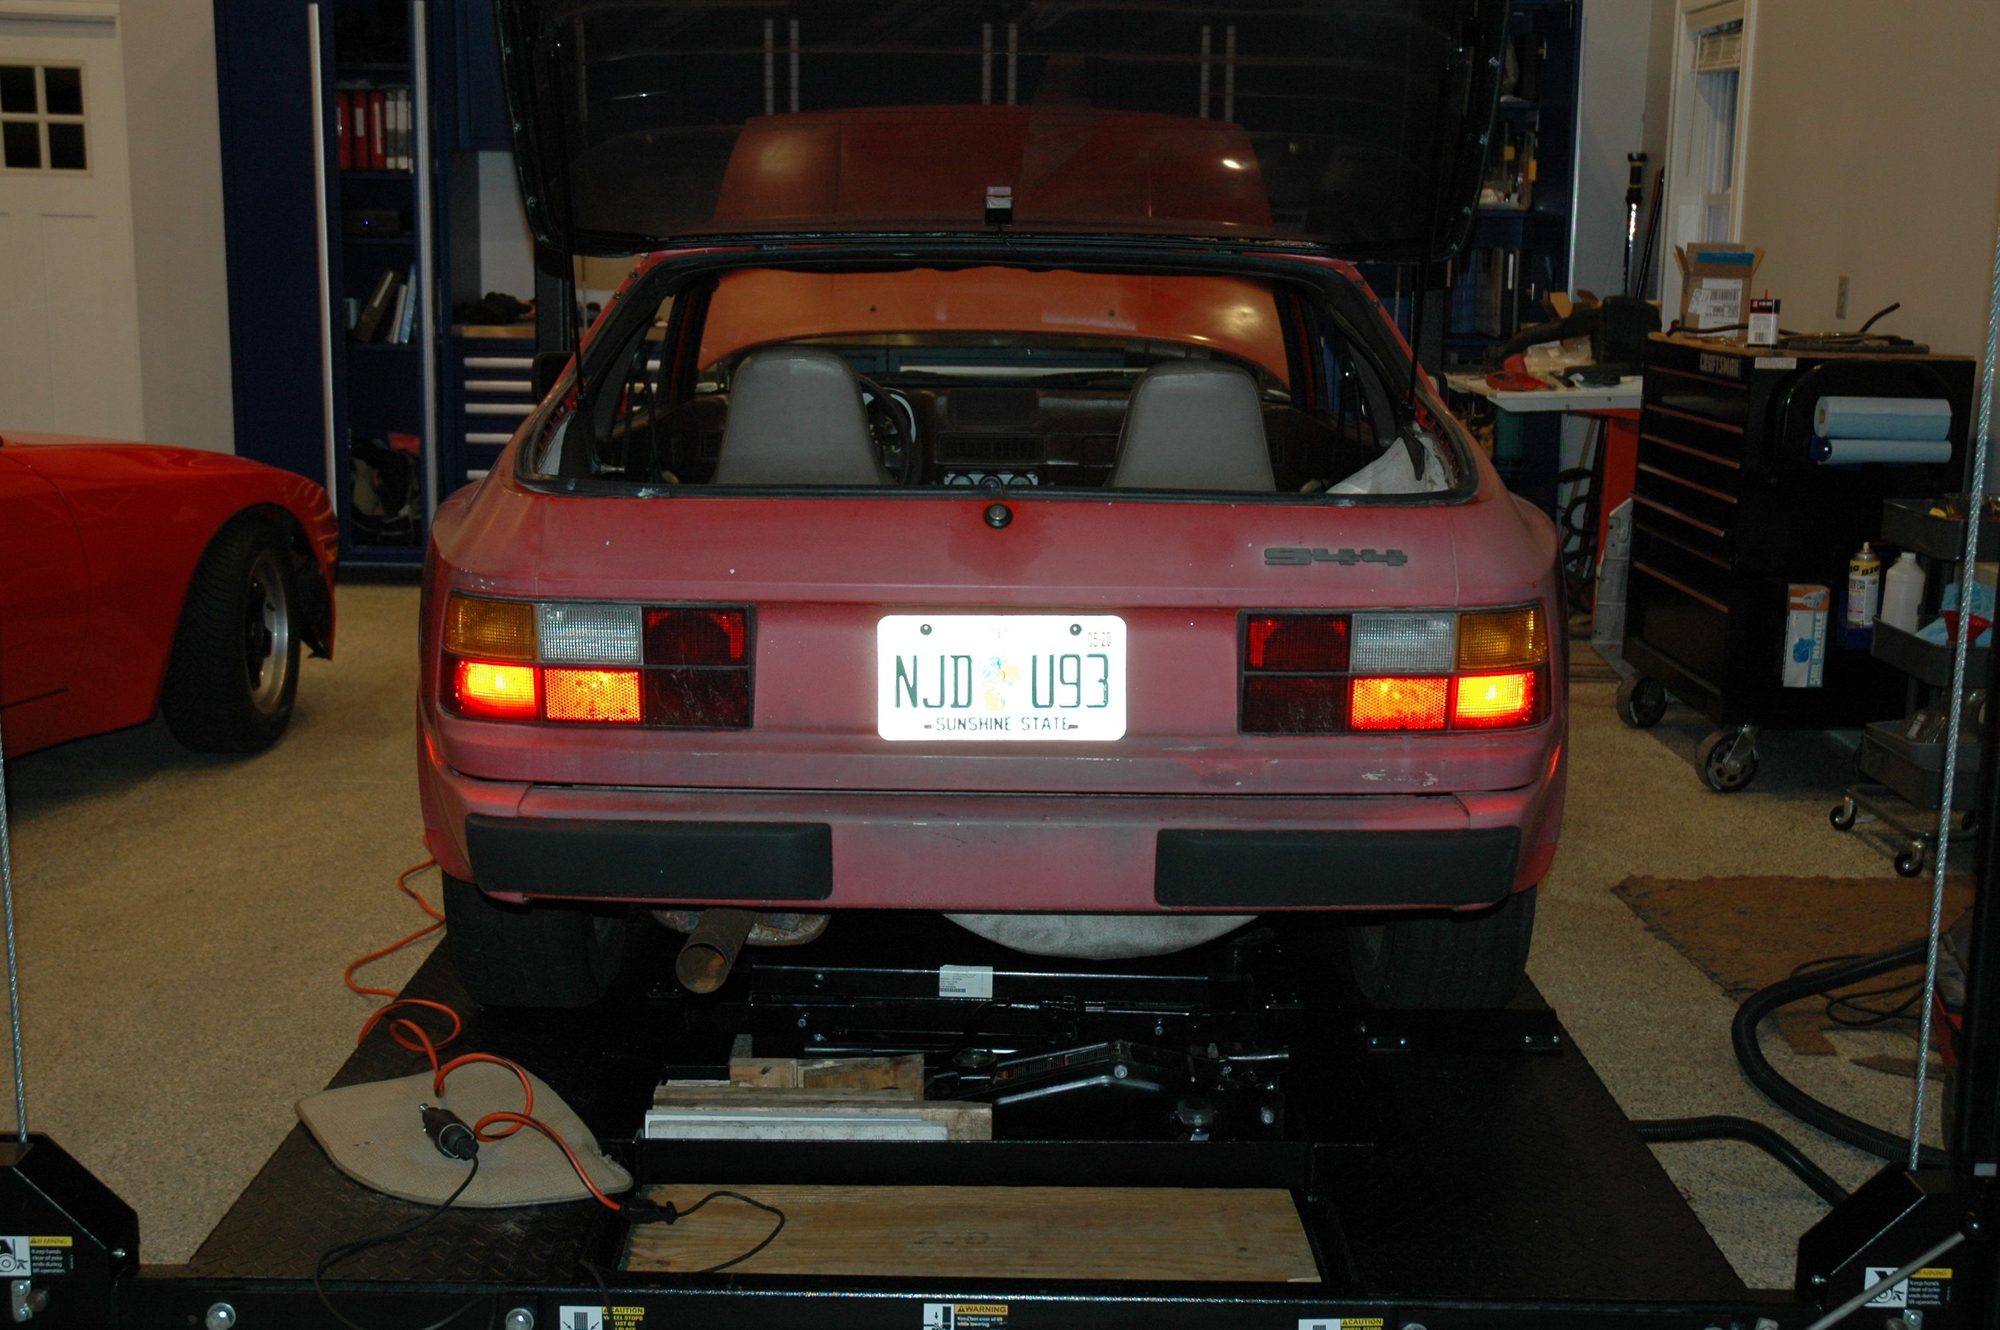
- Cleaned up that rear ground, all the taillight connectors, and installed all new fresh bulbs. I also installed Only944's taillight modification - highly recommended!!
 12-16-2022, 11:59 PM