When you click on links to various merchants on this site and make a purchase, this can result in this site earning a commission. Affiliate programs and affiliations include, but are not limited to, the eBay Partner Network.
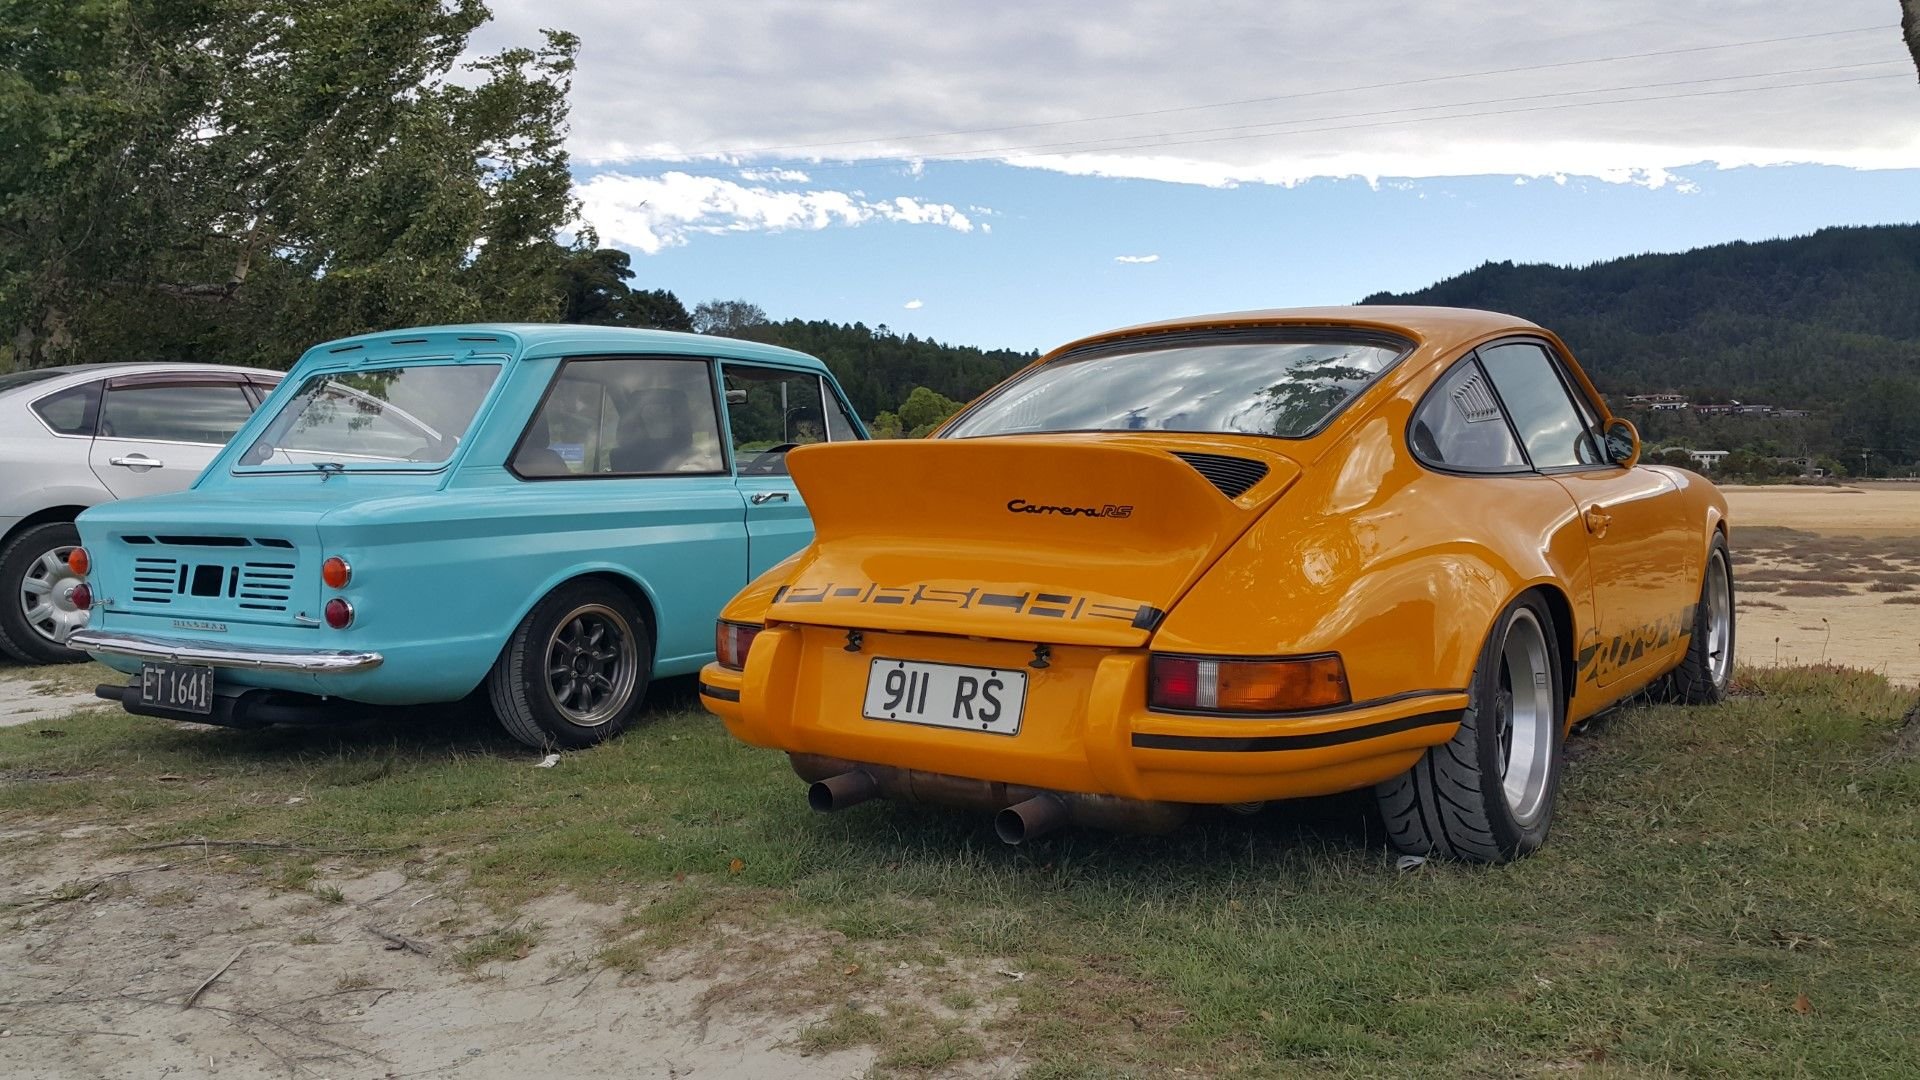
Hey folks. I had found this forum when I was looking for information on exhaust design to suit flat six engines and I thought my project will be of interest to many on here. I'm hoping this is the right place to put this because the end result I am aiming for will be very much like a baby classic 911 :-) If there is a better place for this thread then moderators please do move it so.
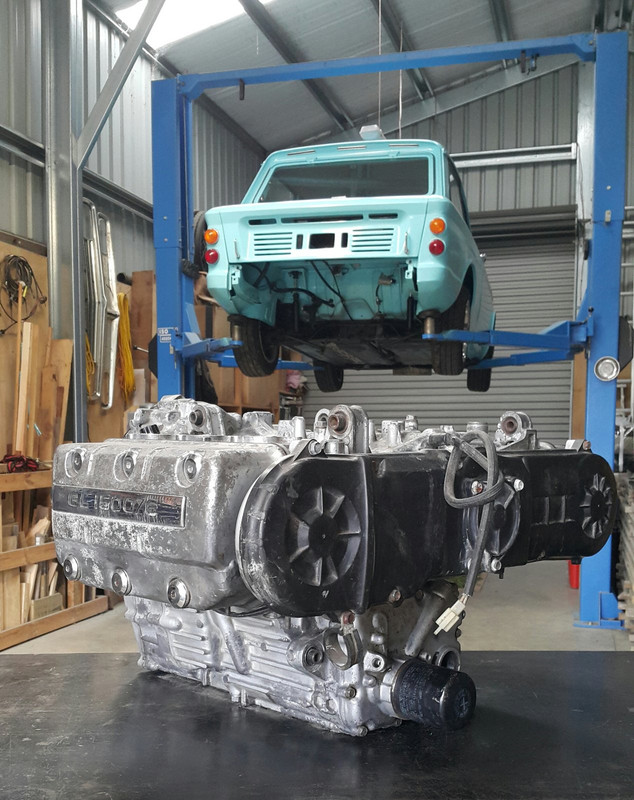
Here's a pic worth a thousand words to what my project consists of...
The car is a 1965 Hillman Imp that I rescued from a field where it was sitting, rusting away. After restoring it back onto the road and along the way fitting a datsun 1200 engine out back I found myself yearning to make something more of it. Early on in the restoration I had been having thoughts about the beautiful little 1500 cc flat six found in the Honda Goldwing bikes. This idea never left me and after after a mate had suggested a way around the main stumbling block, which was the fact the Honda engine has backwards rotation, I ended up buying a Goldwing engine and a Subaru Leone gearbox to adapt it to.
The engine arrived on a pallet early last year, 1 day before New Zealand went into full lockdown. A perfect way to spend enforced workshop stay at home :-)
I have written a full blog/thread on the car restoration from the very beginning until it was on the road and I have continued that thread as the Goldwing engine project took over. Fr those of you interested you can read that thread on the main forum I frequent, oldschool.co.nz. Here's a link to the very beginning ....
I have had 8 months off the project due to other projects having to be finished, including the main one where my Wife Hannah and I had to prepare our housetruck for sale, move it on to its new home and then build a new house to live in above our workshop. We run a engineering workshop from home, serving the local area we live in here in the sunny top of the south Island, New Zealand. Its been a dream to have a mezzanine house above the workshop so that had kept us very busy for the last 6 months.
Back into the Baby 911 build now so if its of interest here I'll post up my updates as I go. I'm super excited about this build. The little Imp is already so fun to drive, even just with its little 60bhp Datsun engine. I can't wait till I have a sonorous, torquey, smooth and free revving flat six out back. There is no way I can afford a real 911 but I can build stuff so I'll do my best to make my own take on a classic 911 :-)
I do hope you will find some enjoyment from this build.
Alex
Latest update ....
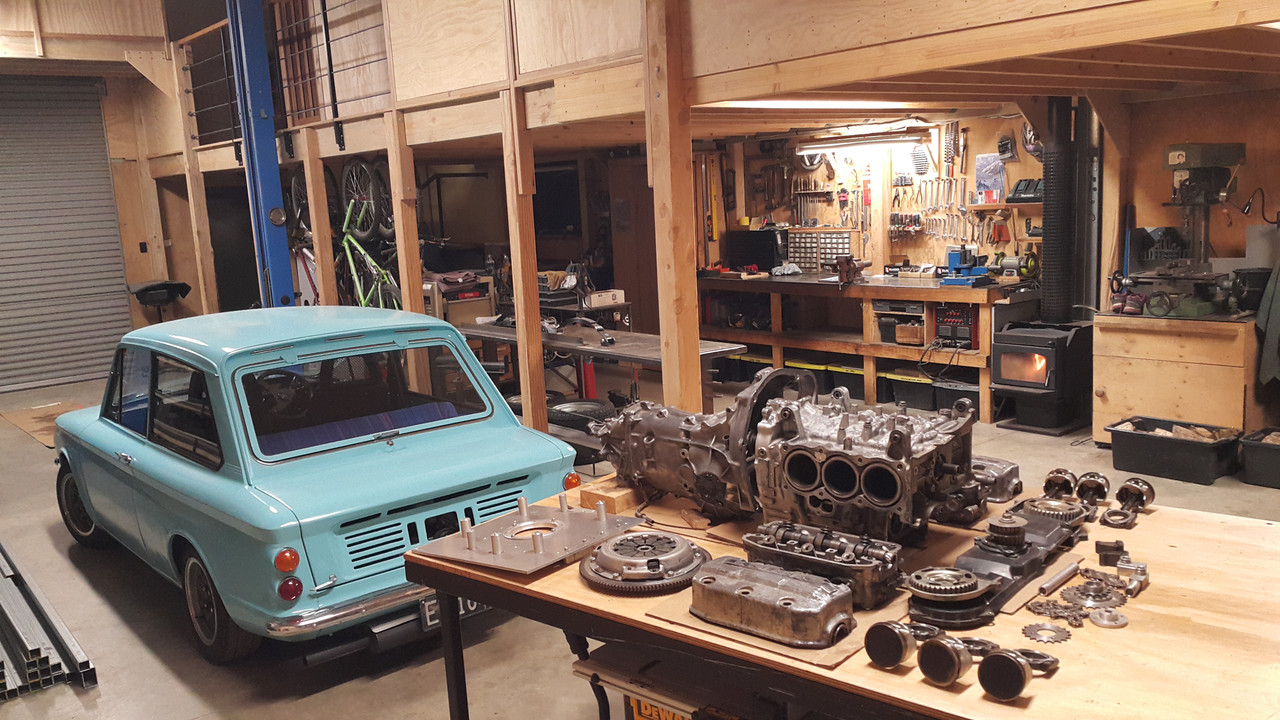
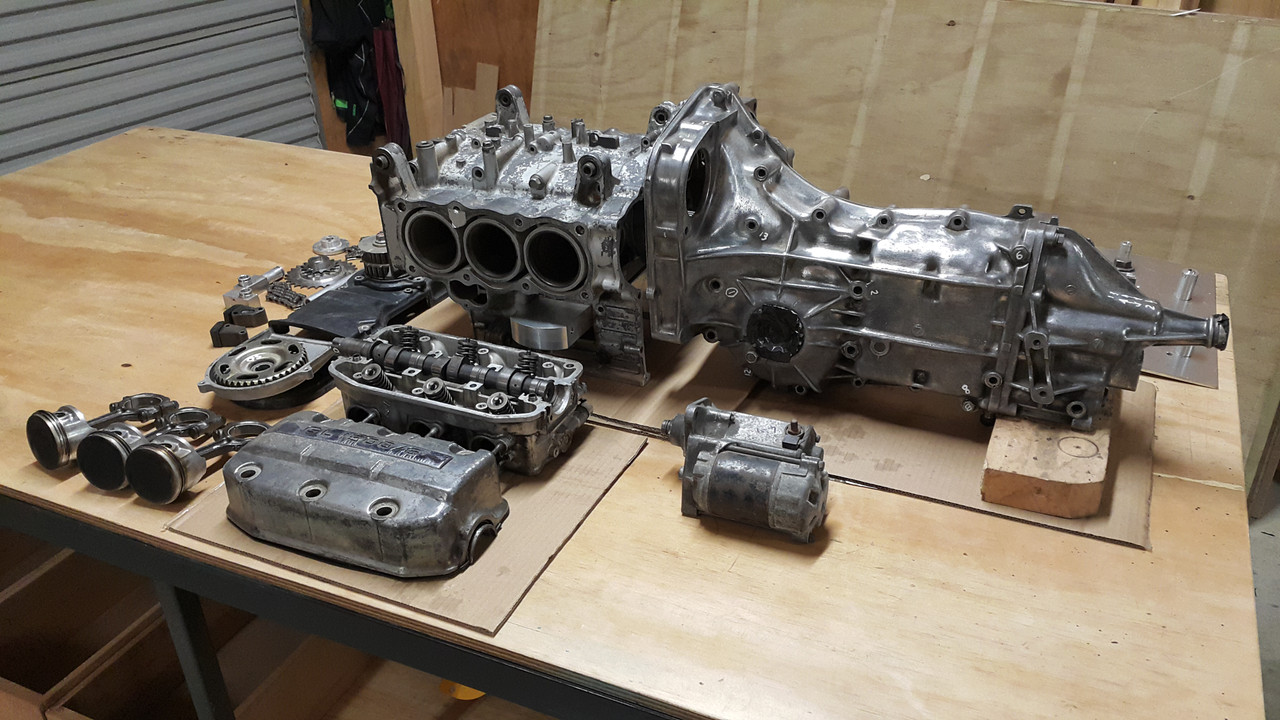
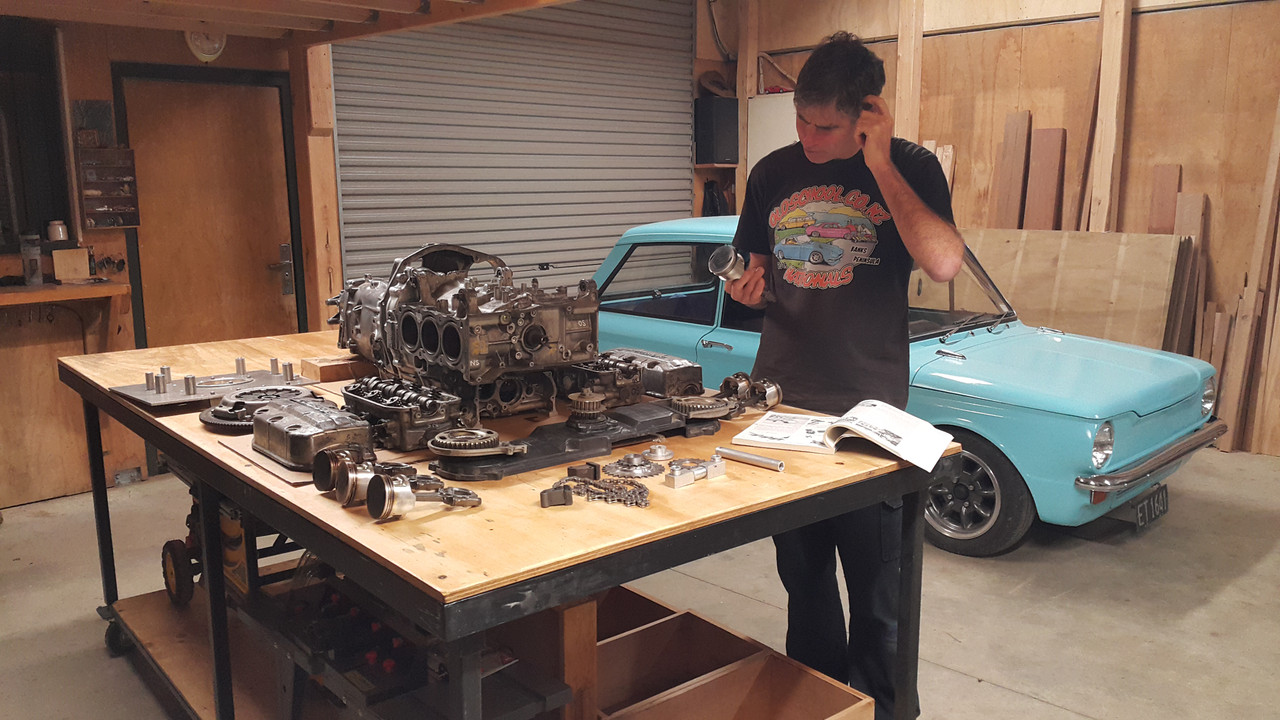
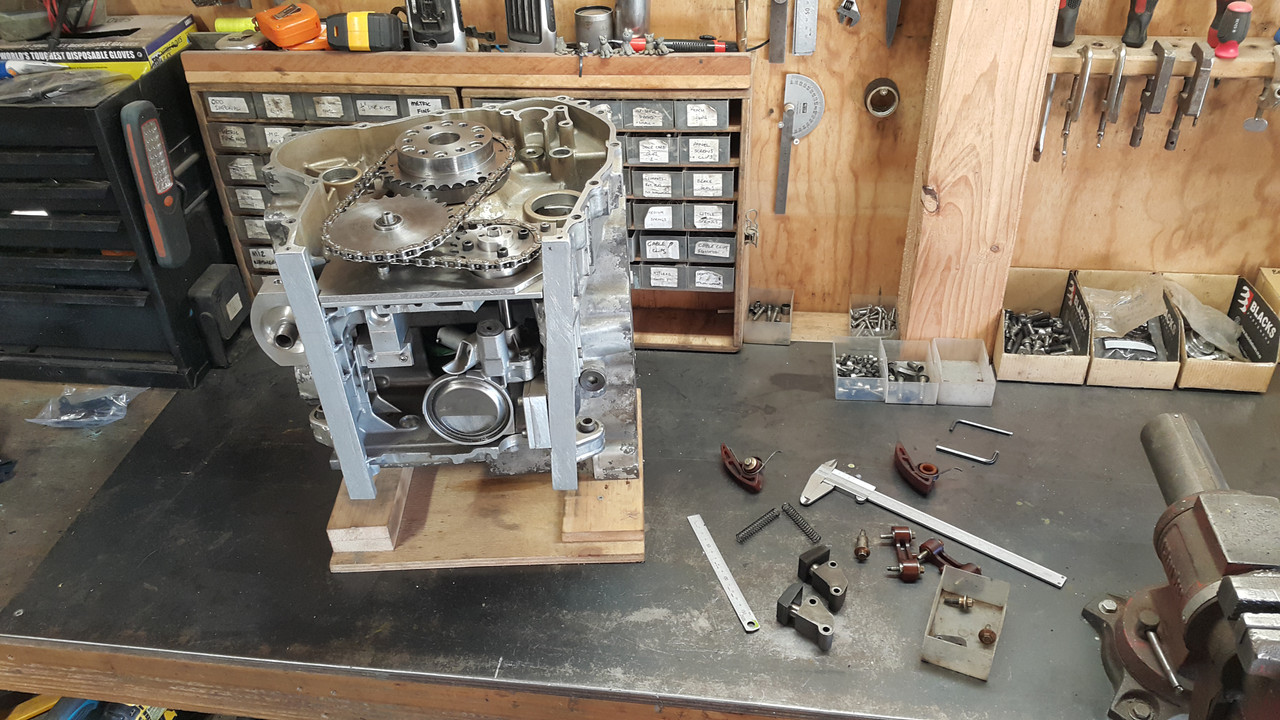
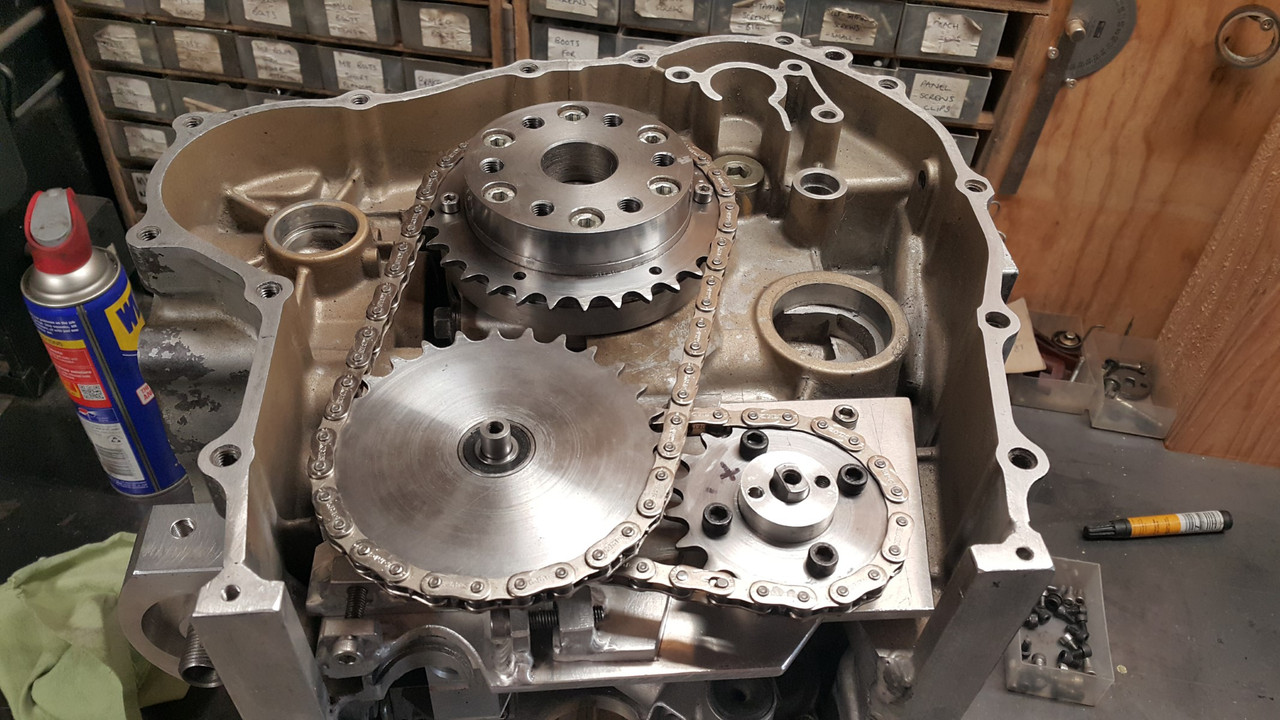
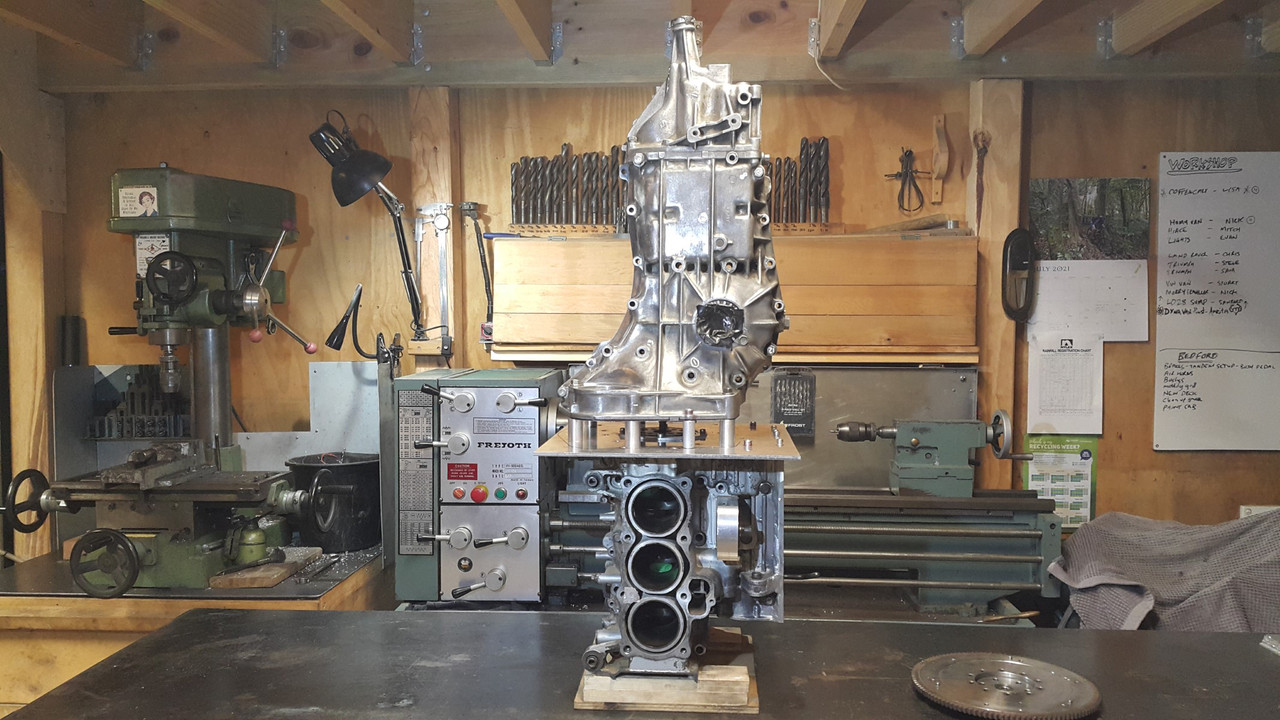
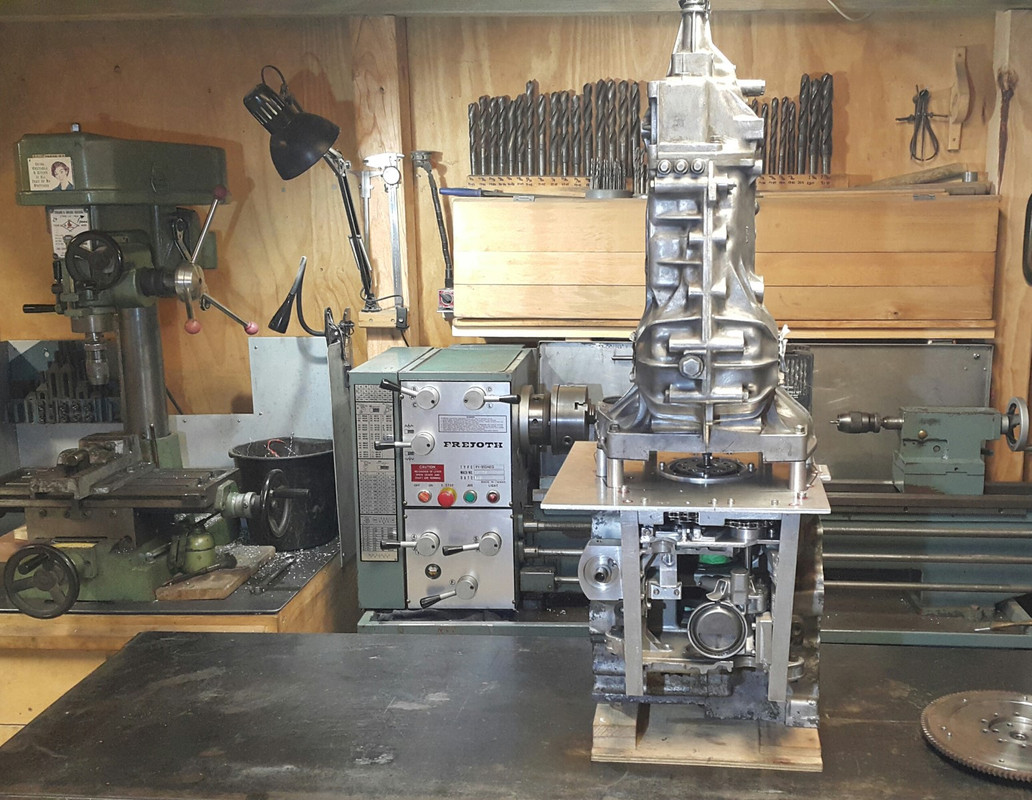
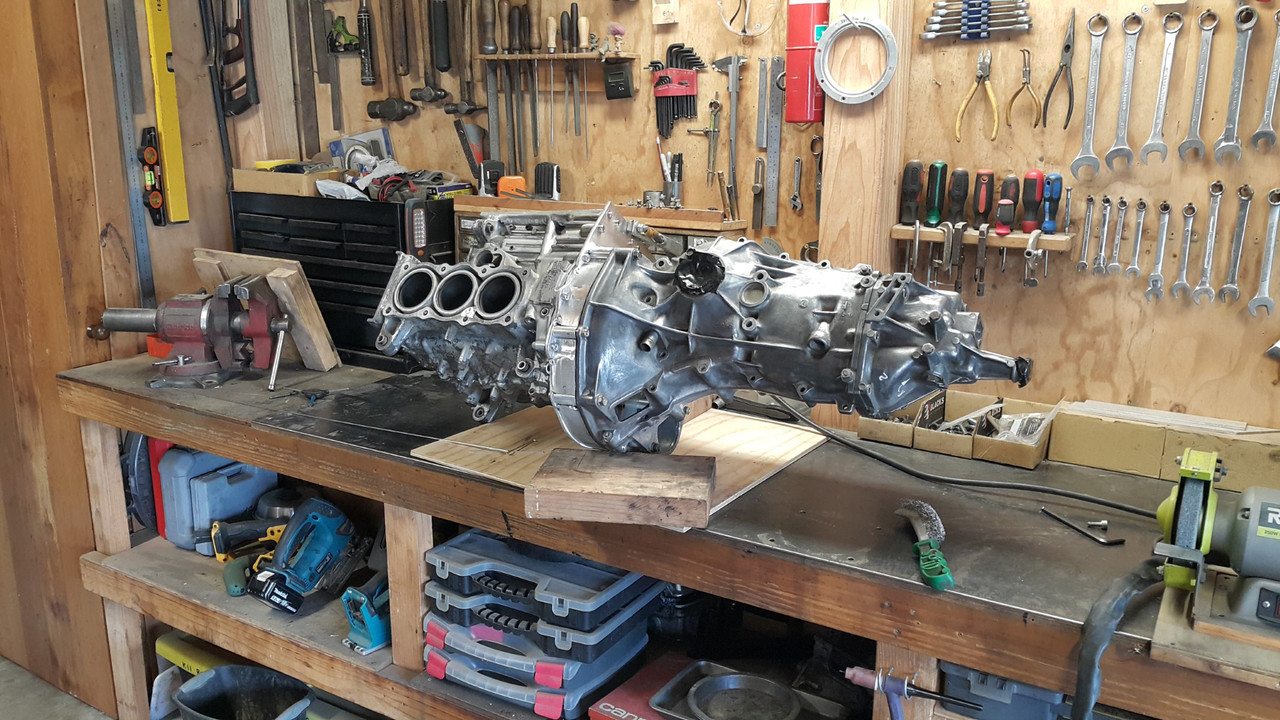
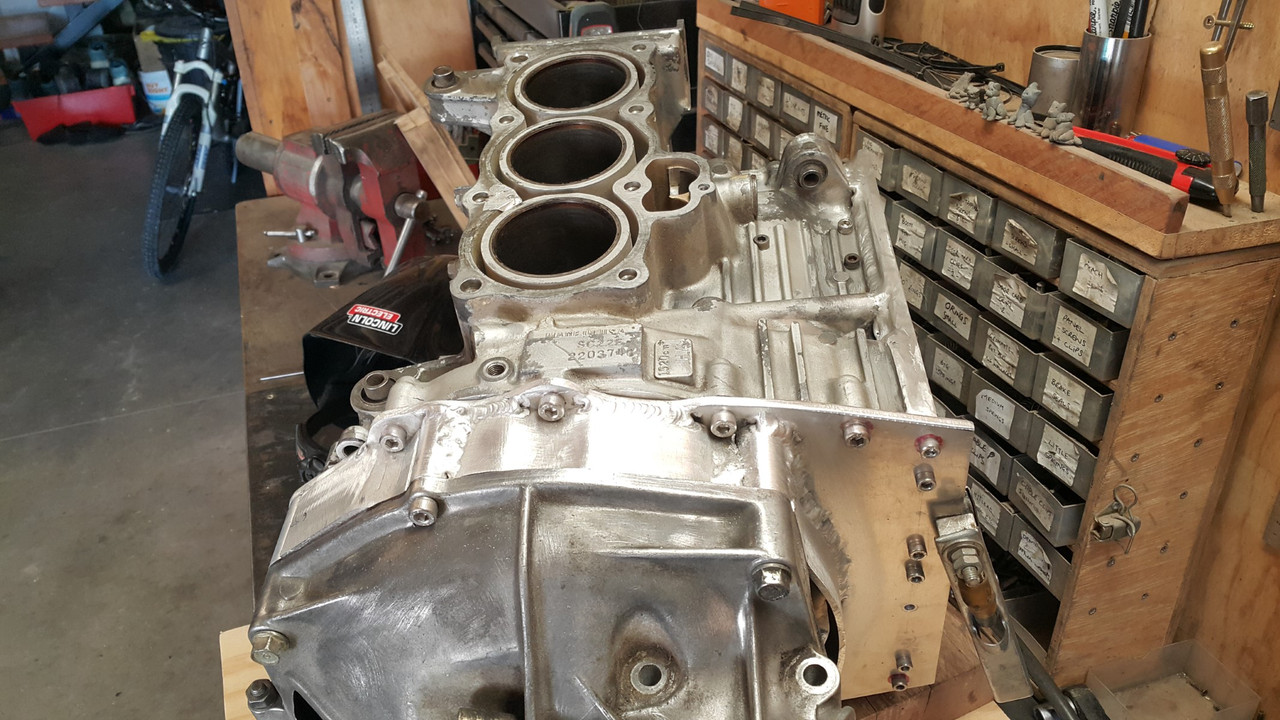
I just needed to get my 'flat six fix' so I dug out all the bits that had been hibernating under the bench and had some fun piecing them together in a sort of organised fashion on the table...
Now where does this bit go?....
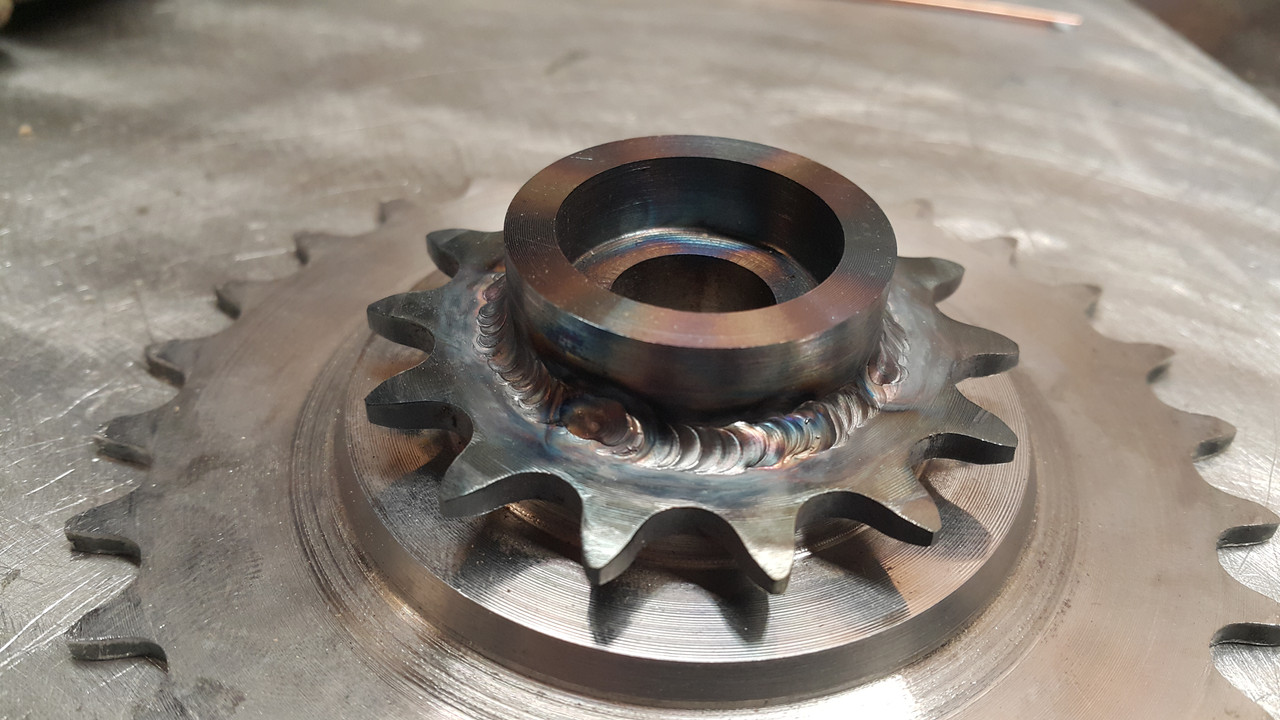
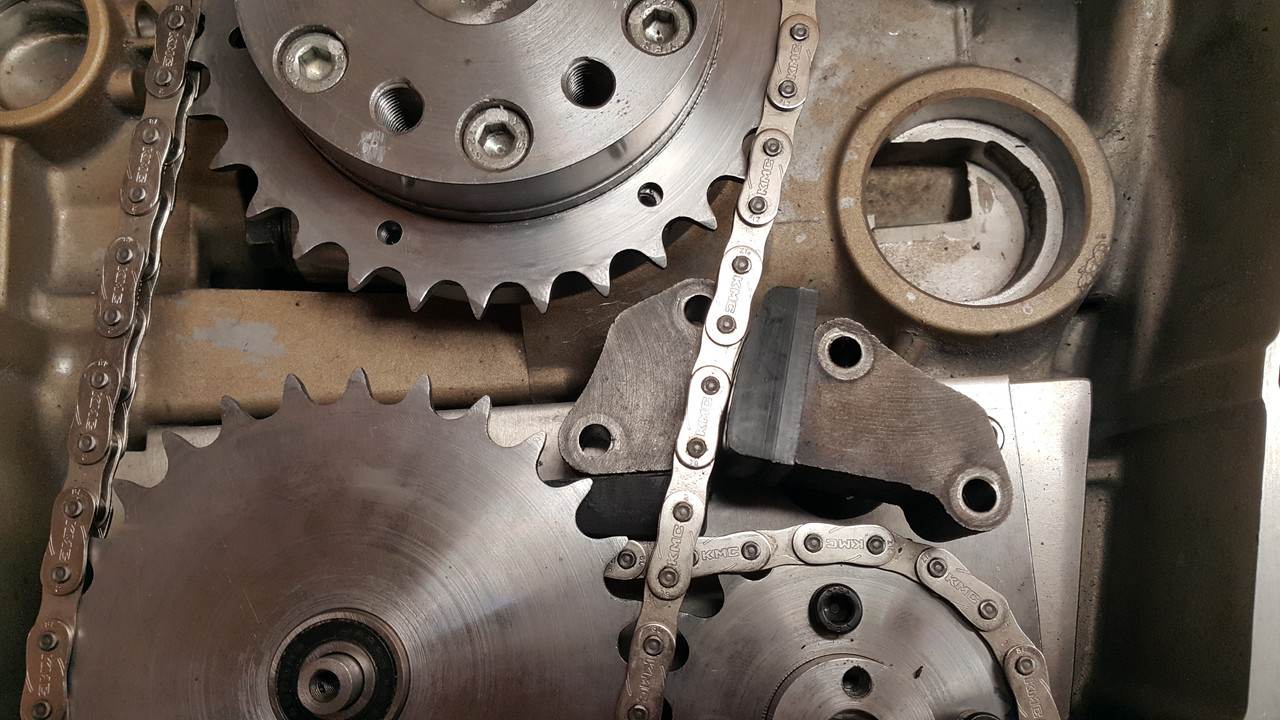
After having some fun taking photos I stashed some of the parts like the heads, cam gear, pistons etc that I wont need for a while back under the bench until needed. I had to confront a mini stumbling block I had with the oil pump drive sprockets. There is one small sprocket that slides onto the hub of a larger one and needed to be fixed in place. My initial thoughts were to weld it but I was worried that it would warp and cup. I sized it up for possibly bolting it in place using small cap screws but there just wasn't enough room between the chain and the hub, even for small 4mm screws. Welding it was going to have to be. I would get some advice though beforehand.
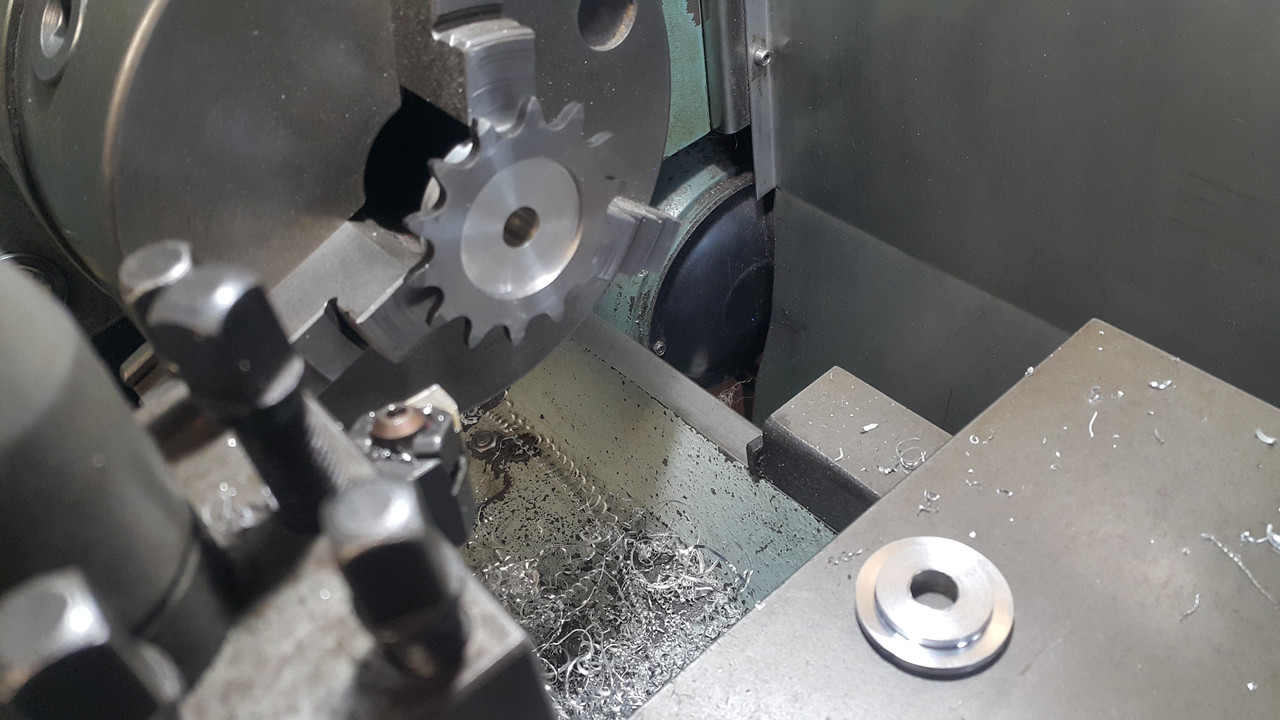
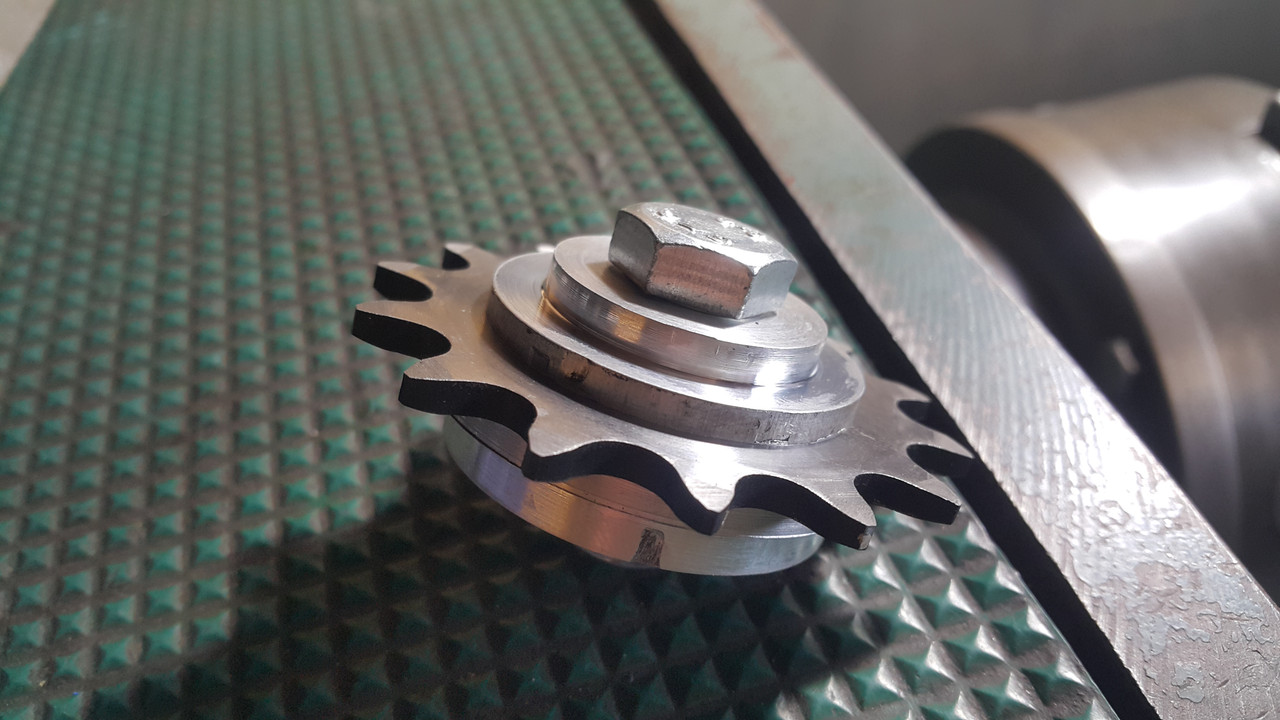
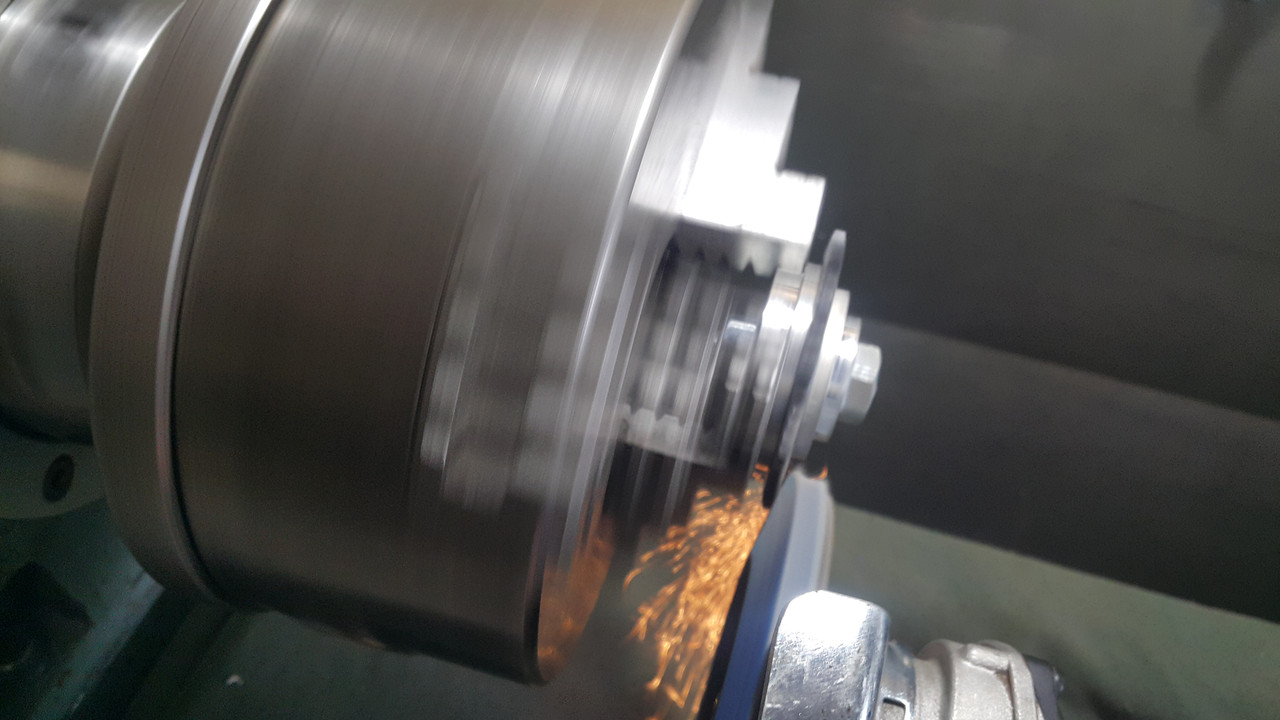
But first I wanted to add a very slight taper to the teeth so there would be no sharp square edges that could potentially catch and rub against the inside of the chain plates. 3 of the sprockets were easy enough to pop in the lathe and give them a tickle with a flap disc. But the smallest I had to whip up a little hub to clamp it on...
Trying to take a photo with one hand while holding an angle grinder in the other...
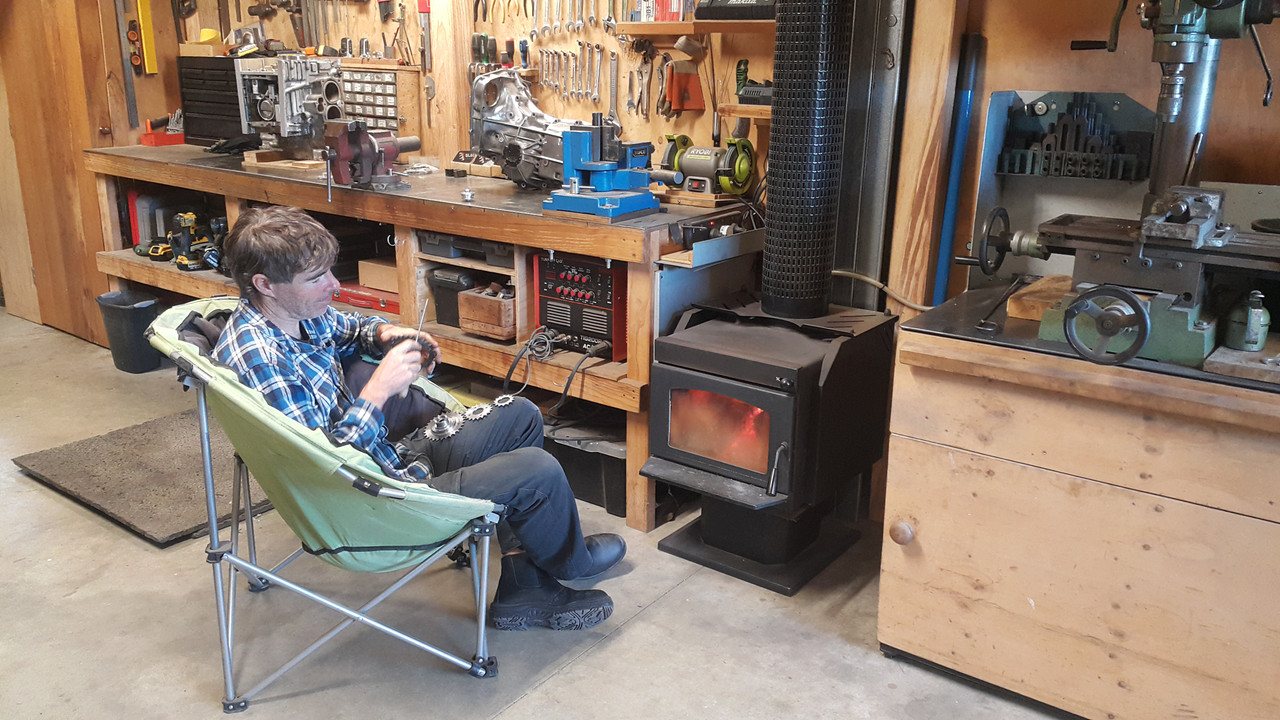
Then sitting in front of the fire and cleaning off any sharp edges...
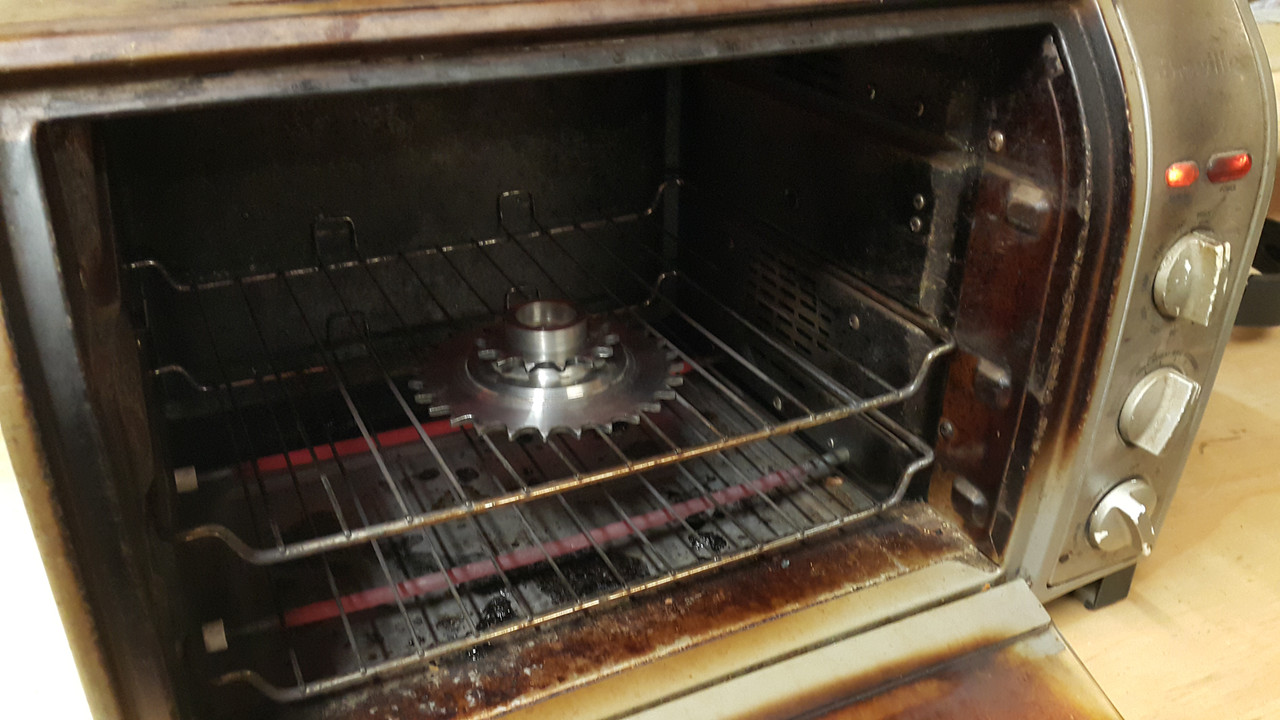
Now I had sprockets I was happy with I had to confront my welding issue. I popped over the hill and chatted to another engineer I know who has a lot more experience with welding of such things than me. He pretty much told me what I had already guessed and I decided to just go for it. But just to be sure I thought it prudent to machine up a fake sprocket and hub to see how they faired when welded. There was no cupping evident so I went ahead with the sprocket. First thing though was to heat both parts up gently. Not too hot. Just hot enough that I could touch them but not get burnt...
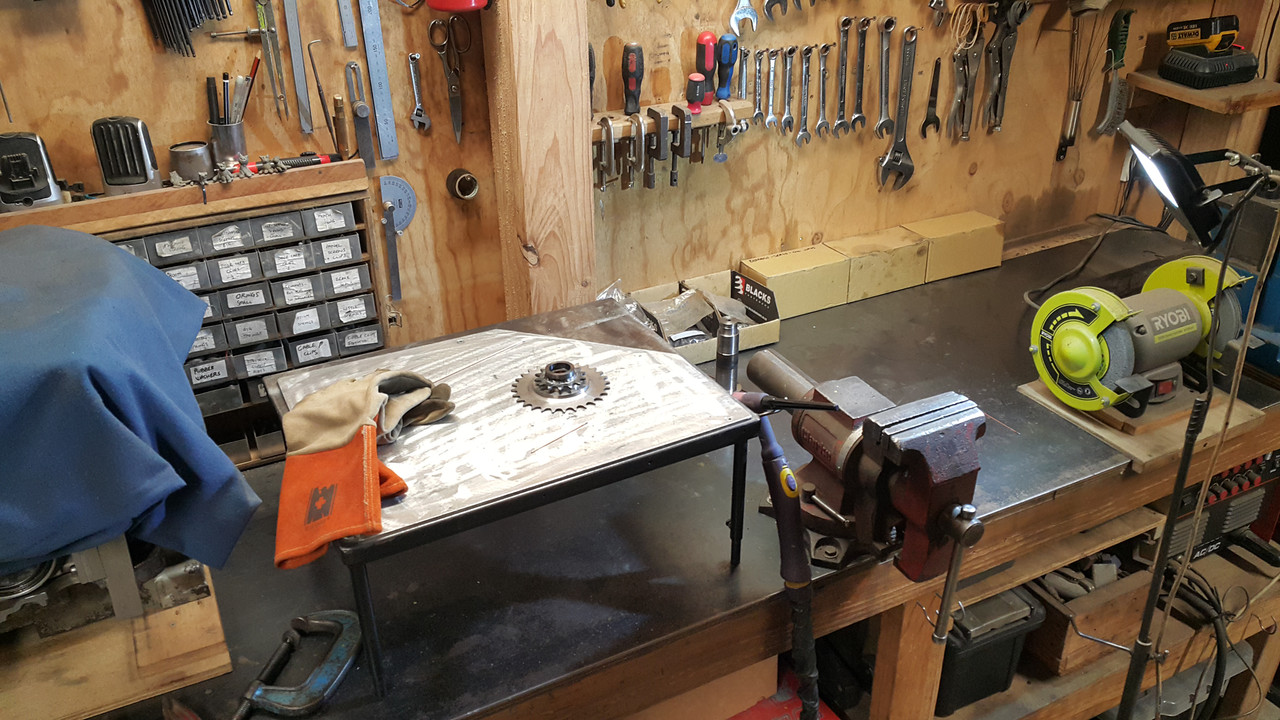
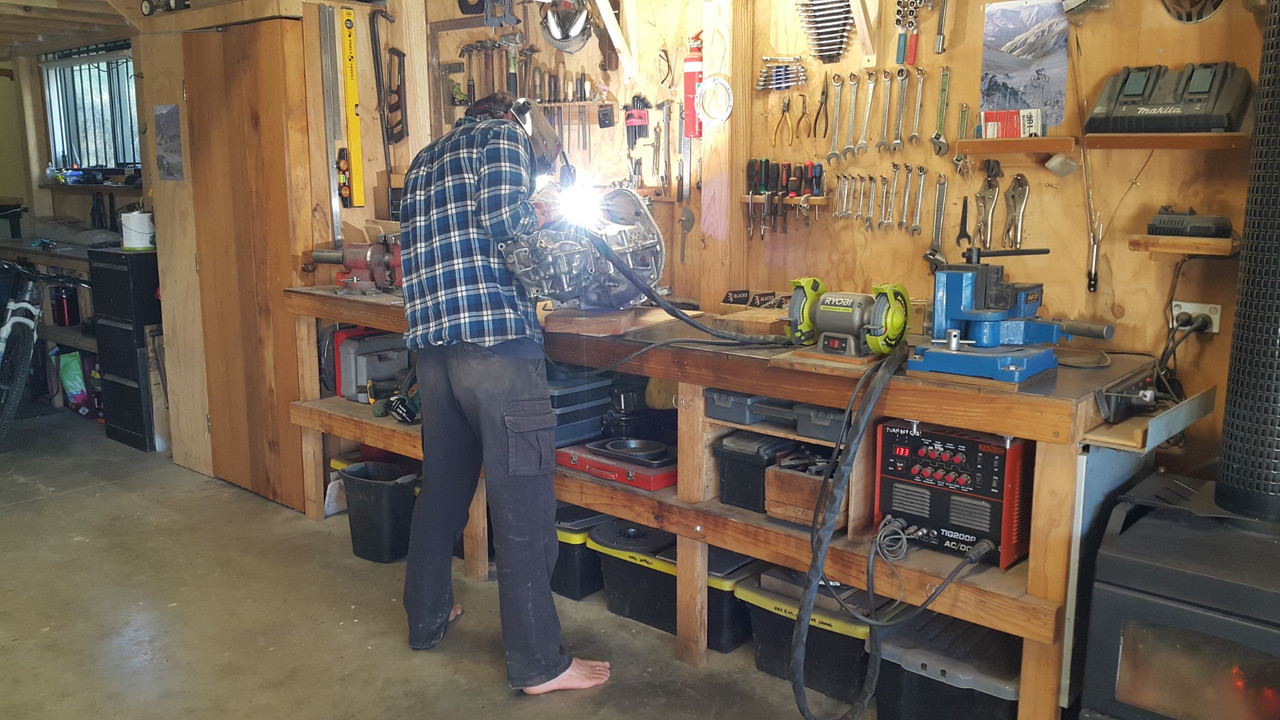
This way the welding could be quick and light without a mass of steel sucking the heat. But not so hot that shrinkage could be an issue either. I used the little tig welding table I had built ages ago for more comfort when doing such jobs...
I'm certainly not a super neat tig welder like some artists out there (and never will be with only having decent sight out of one eye so judging the distance can be an issue) so I was very happy with the result and super happy that nothing pulled..
With this part finished I could concentrate on the chain tensioner design. I had a few ideas and had amassed a few bits to tinker with....
Being that the chains are under constant load and only turning a pump the tensioners are really only needed to stop excessive slap. Nothing to do with timing changes like a cam chain.
I had two Datsun A12 tensioners to try out but no matter how I arranged them they conflicted with each other and there was no room for mounting bolts where I needed them..
So I tried out some Mazda/ford 2.0 duratec tensioners and they show great promise...
I will make mounting blocks to suit and knock this part of the build on the head! Then onto finishing the bellhousing.
Hopefully some more updates soon although we have also started pulling one of the Micras down for the big swapsie game but that is mainly Hannah's project so I can keep working on this as I can.
Cheers. Yeah some fantastic roads about here. Although sadly some of the best hillclimbs roads locally to me have had the speed limits reduced recently to quite boring levels and really ruined the fun :-(
I'll just be really happy to have this car on the road with the lovely flat six warble out back. I have only recently had my first drive of a friends 911 and it was huge fun! I want that sound!!!
here is an update! But to save my sanity I might do it in two lots.
So a fella on the oldschool car forum here in NZ pointed out that many bikes don't run tensioners. So I looked into motorbike oil pump chains and yeah- bugger all have tensioners and they actually run quite loose. I then decided to scrap the idea of spring loaded tensioners because even with the ones I had they were still a bit awkward to fit and didn't quite work in the angle I would have wanted.
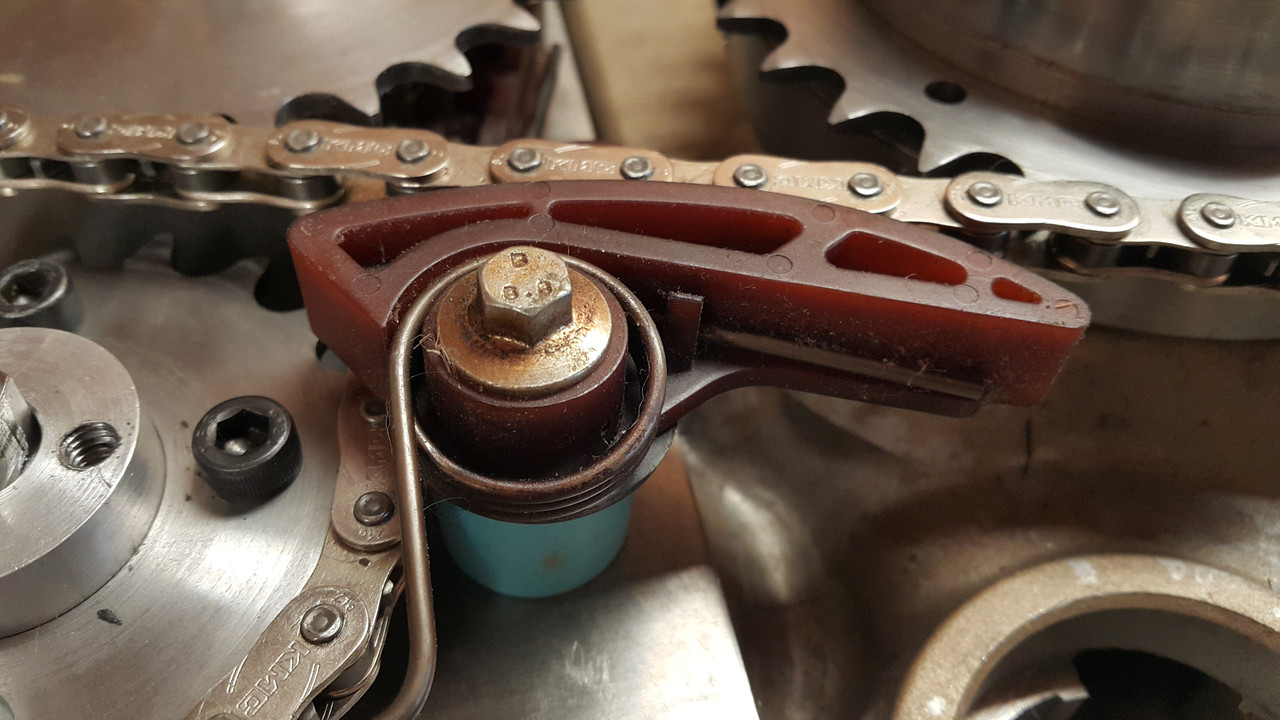
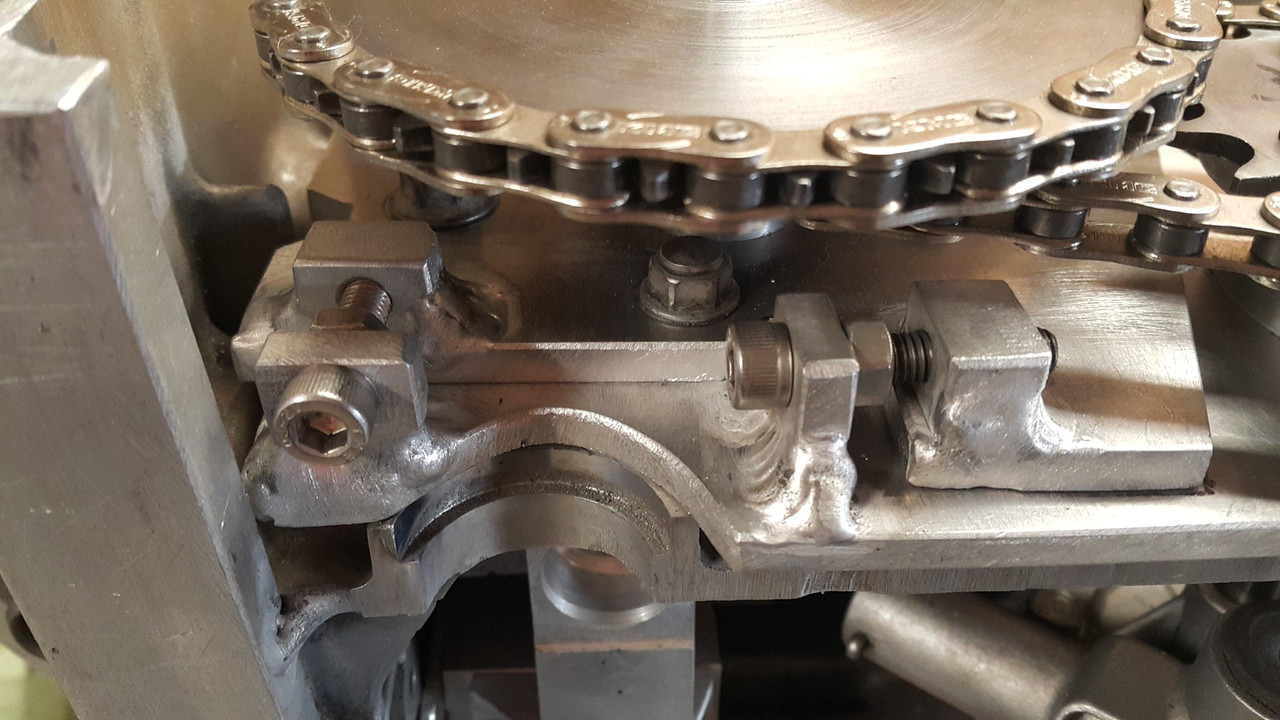
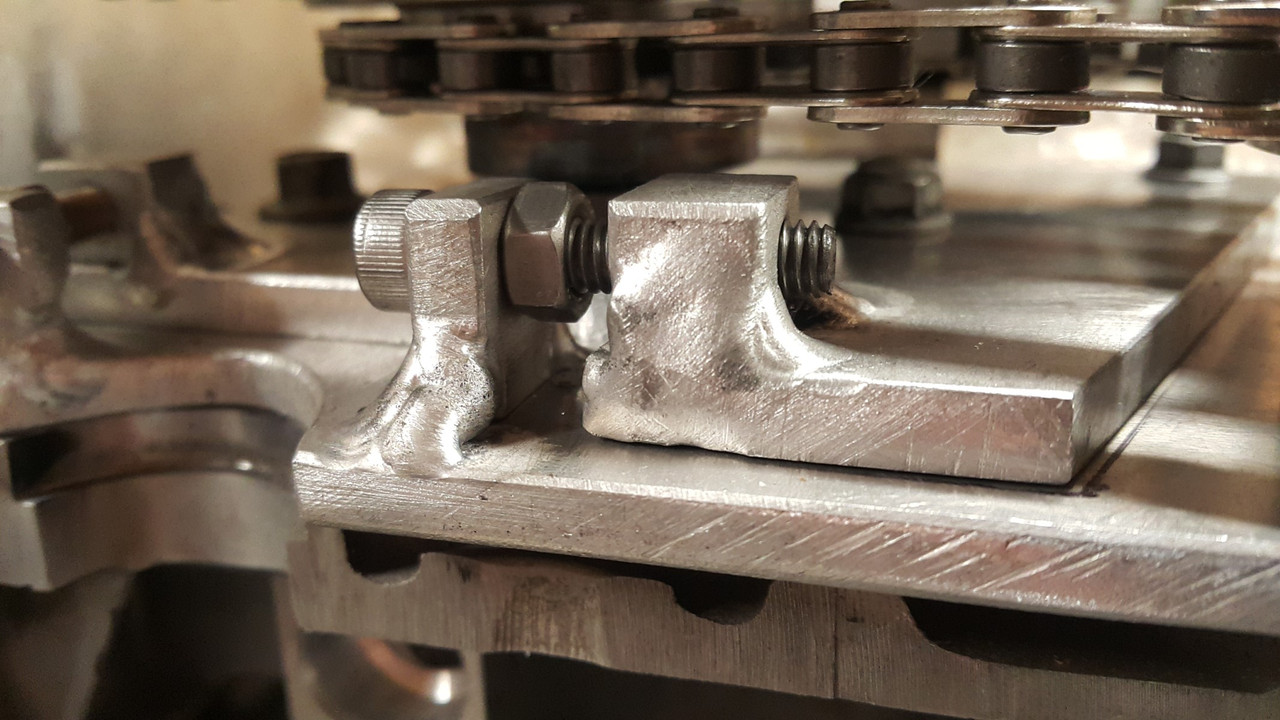
So enter stage left my new adjustable tensioner device...
which fits like this...
The bolts that clamp it down are actually accessible from below with the sump plate removed so once the chains wear to a point that I'm not happy with I can tension them independently. The will be nyloc nuts replacing those normal nuts on the tensioner bolts when the final assembly takes place.
So with that finally finished I moved on down. The sump cover. It has to be fairly beefy because it could see some hits plus the engine will rest on it when on the bench. It has to be alloy so It can be used as a useful heat sink to pull heat from the oil. It has to look cool for when the Barries look under the car. So some fins were in order.
I bought a big lump of alloy from Ulrich aluminium.
That hurt.
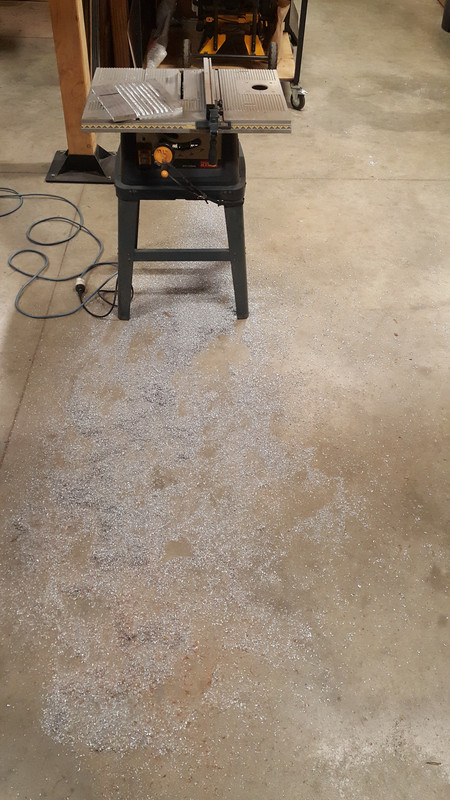
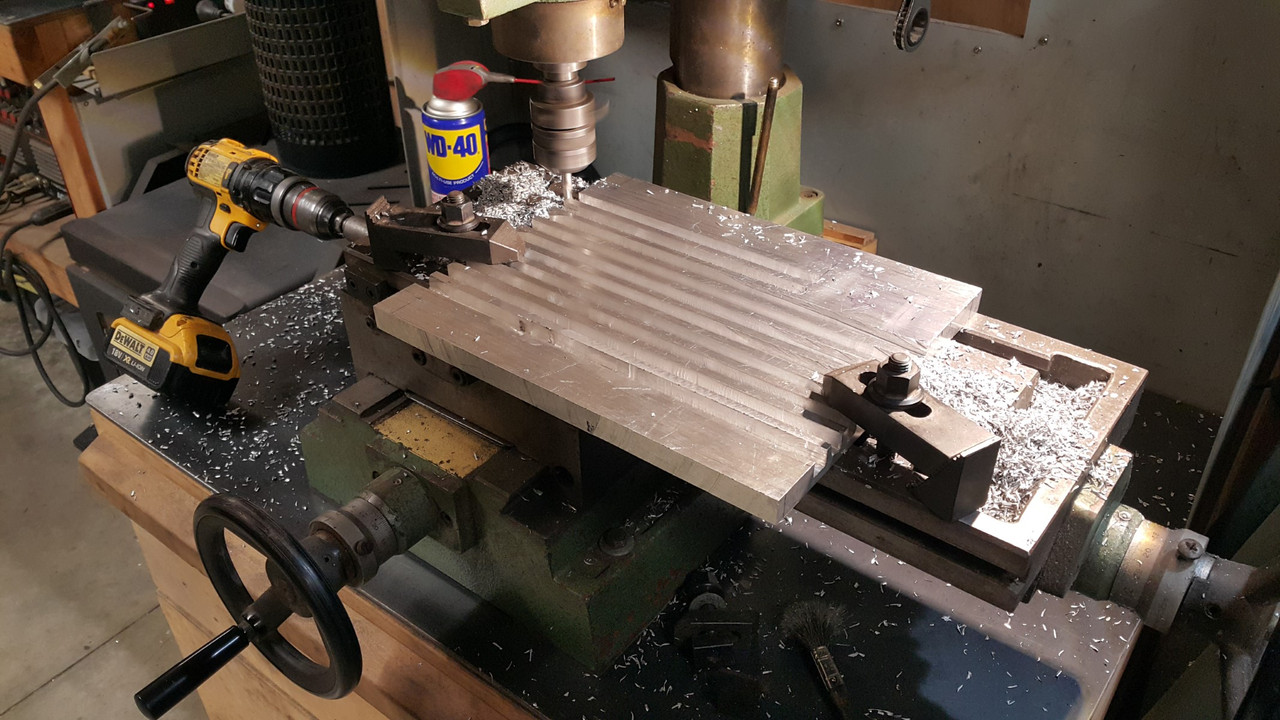
I put it through the old table saw and did some rough cuts just to save on time milling...
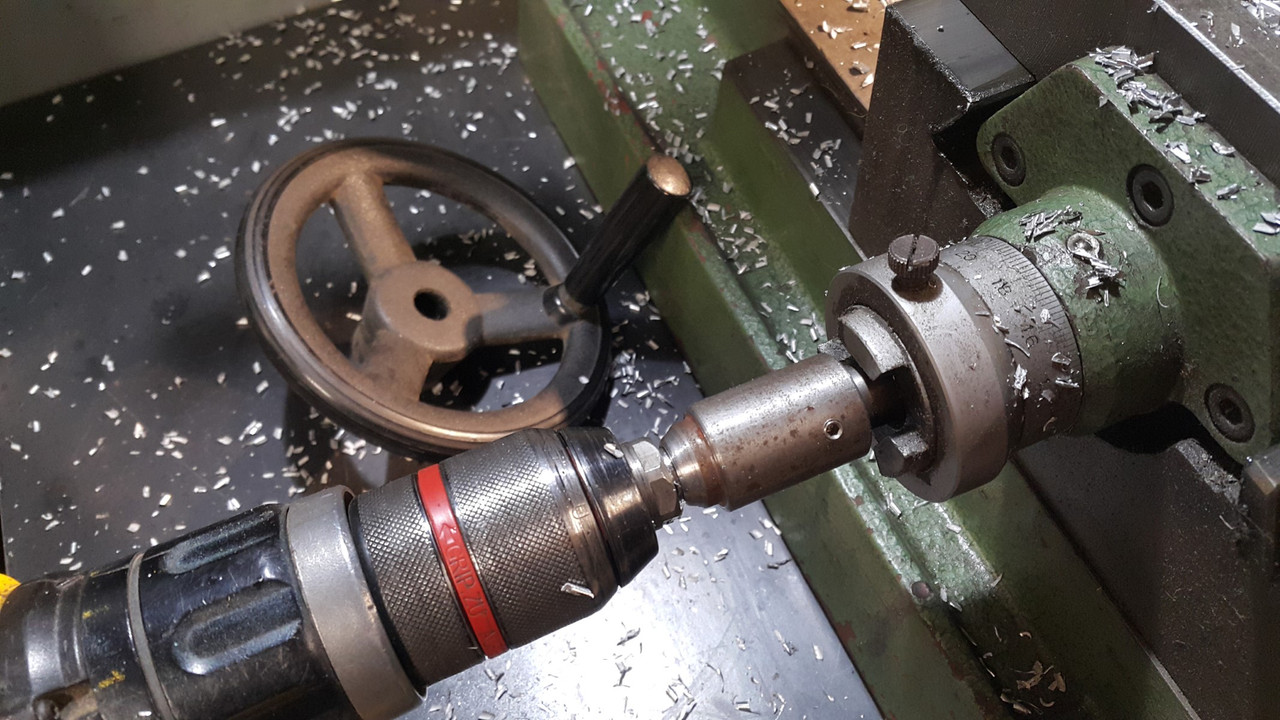
Into the mill and did milly things. It was going to take bloody ages thought so I made a new tool which I shall call the DDC.
'Dewalt drill control' ...
It could always be an MDC. Makita drill control. My cunning design is adaptable.
In action...
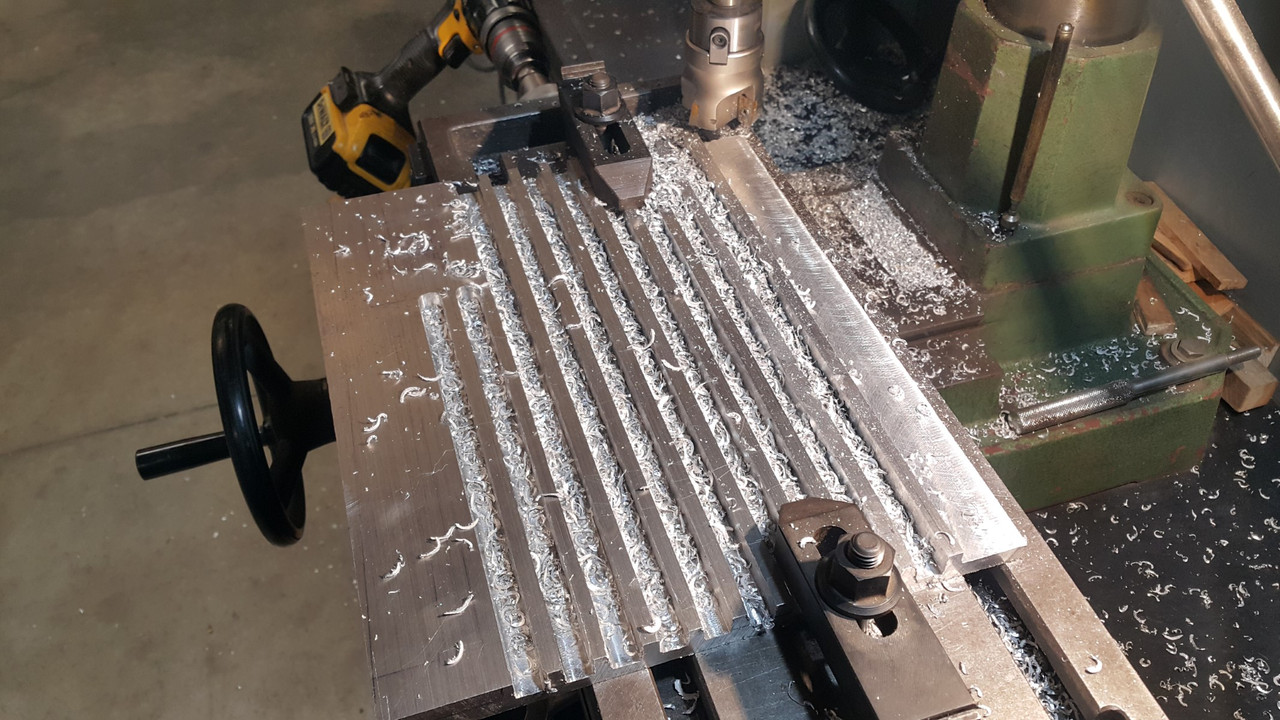
Groovy man...
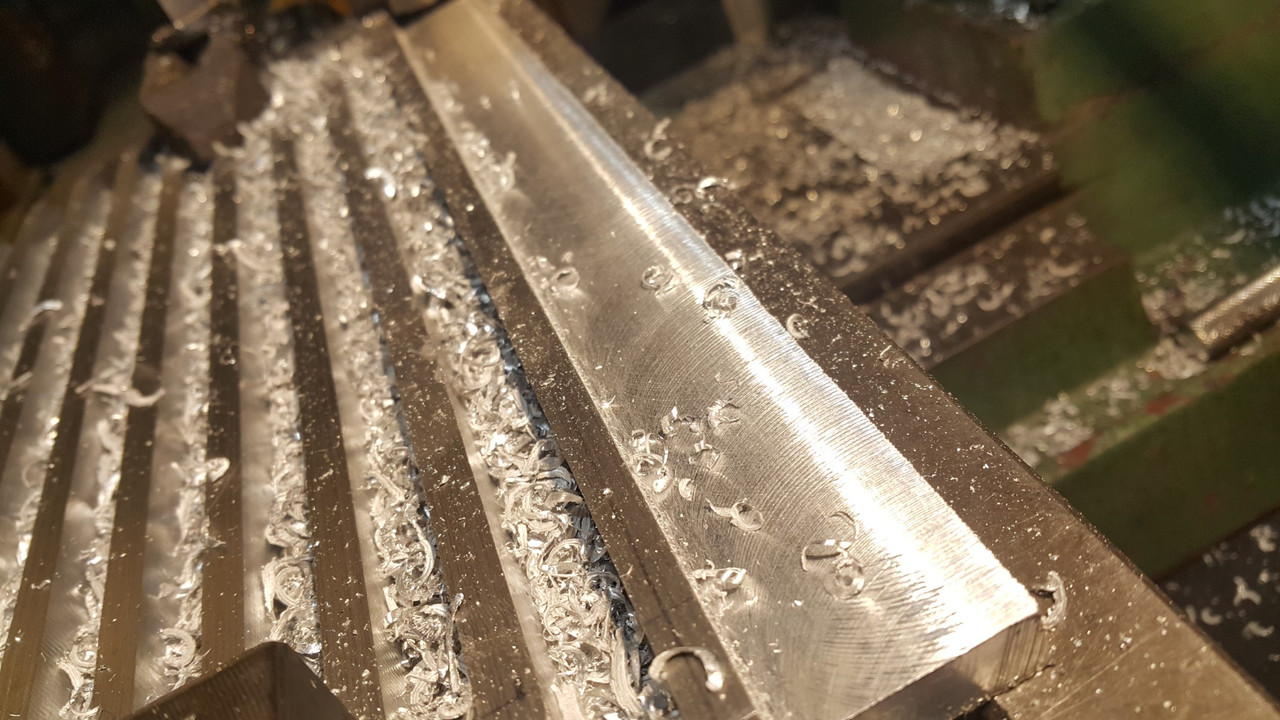
Then the sides taken down...
I stopped there. The bit that is left unslotted will be machined to suit a recessed sump plug. I wont do any more until I finish the front cover below the cambelts where I'll also be adding some engine mount points.
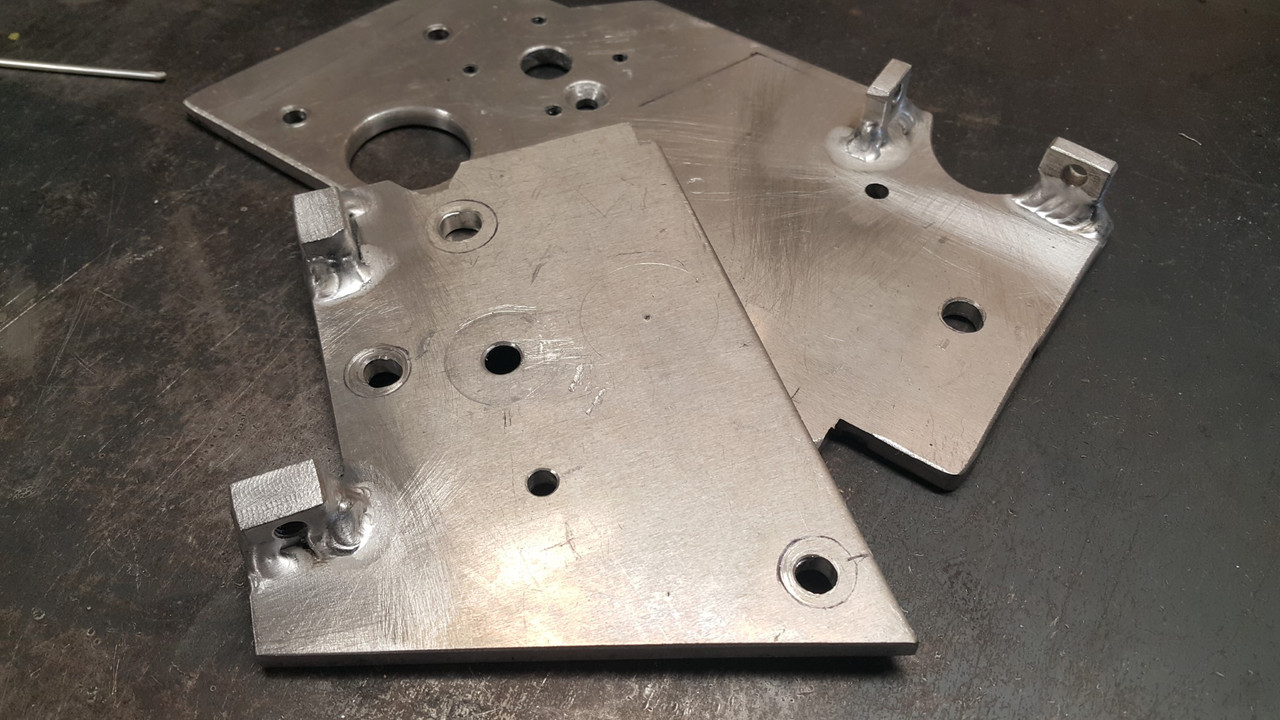
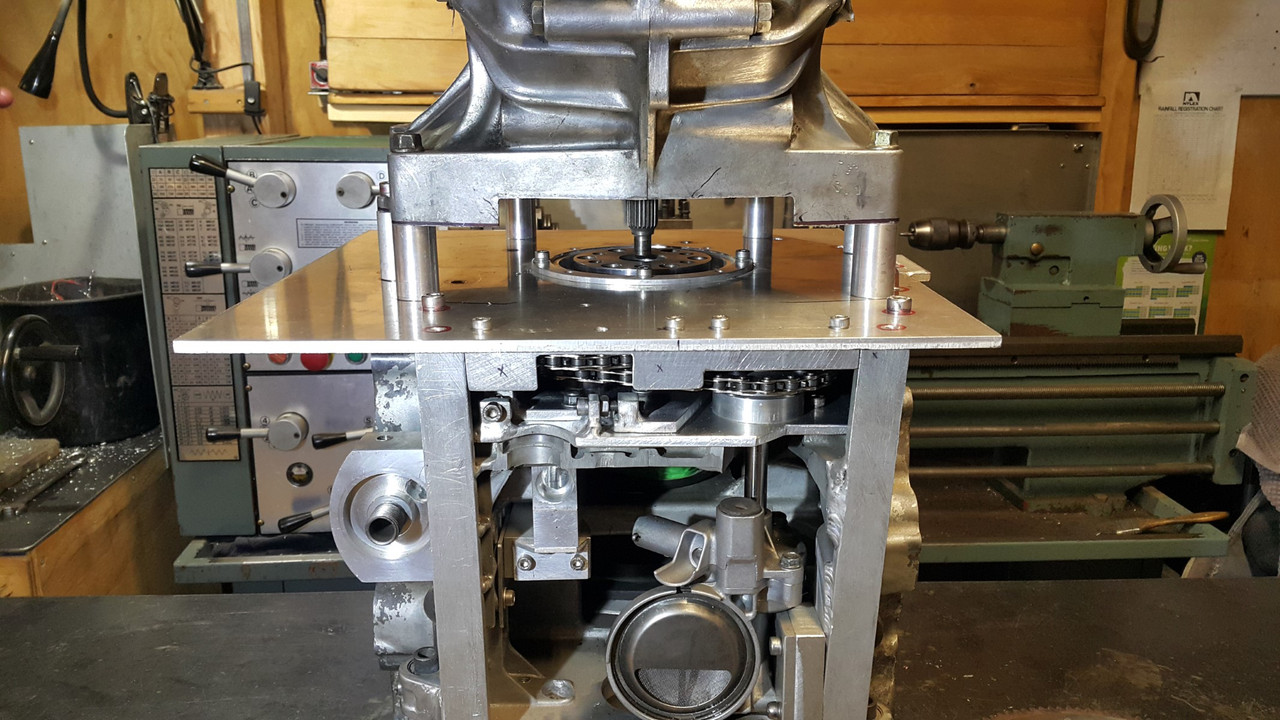
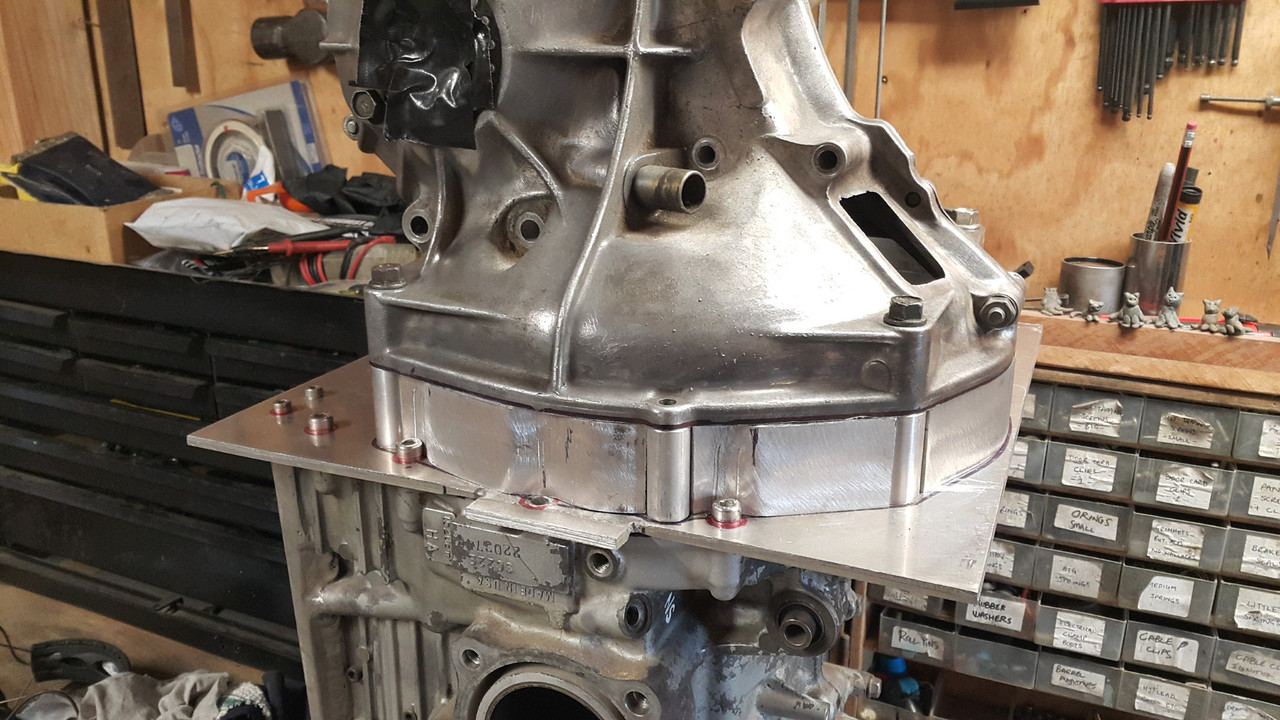
Next up was to finish the adaptor plate that connects the engine to the gearbox bellhousing.
I had machined a bunch of pedestals to an exact length I had worked out to suit the positioning of the spigot shaft on the end of the first motion shaft into the spigot bearing. These pedestals have been machined on the gearbox end to locate within the dowel like spot faced bolt holes on the bellhousing. This way there was no chance of any float in any direction - the box would always be perfectly concentric to the engines crank and the bolts are really just clamping it.
I bolted it all up together...
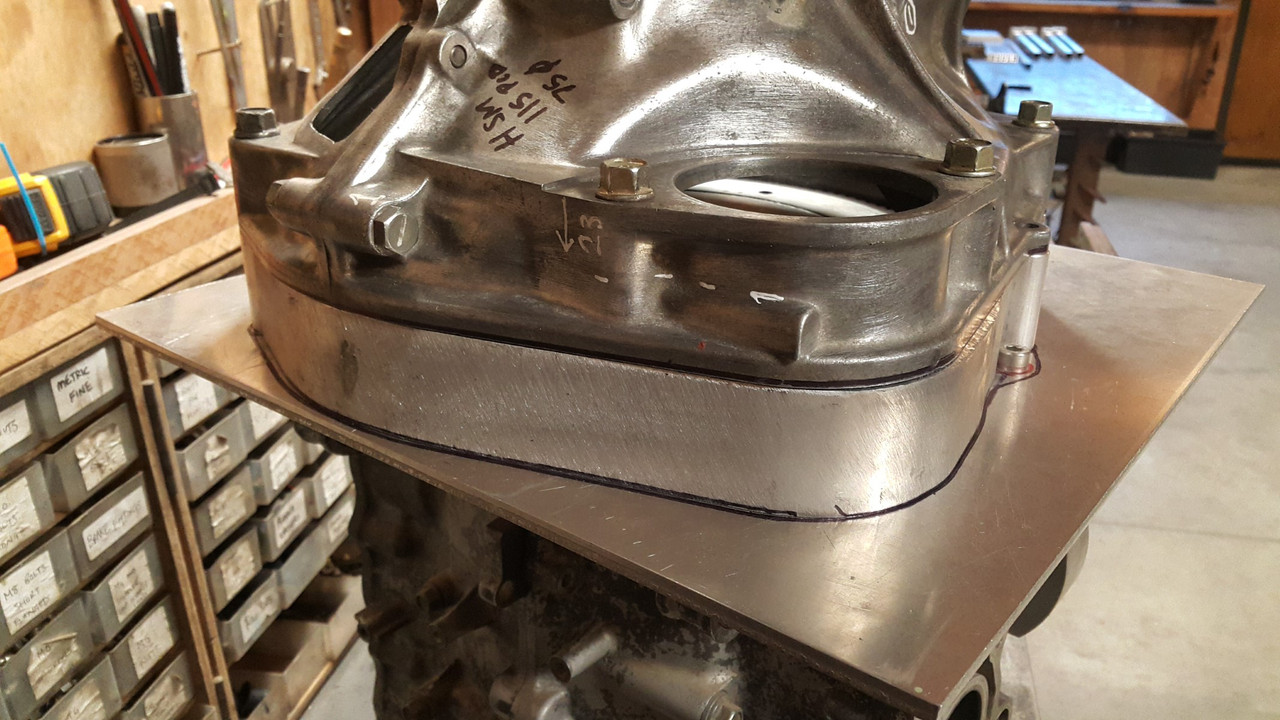
Then cut some strips of 4mm alloy plate and started bending them to suit. Connecting the pedestals...
Once I was happy with the fit up of those filler strips I ran a marker pen around them and took it all apart. Then cut the plate back to the lines in the bandsaw.
Well I did so for a while but due to several things including the bandsaw having a totally rooted bearing collapse in the saws gearbox so making blade run off the driving wheel. plus the only course pitch blade having some missing teeth I ended up using the jigsaw.
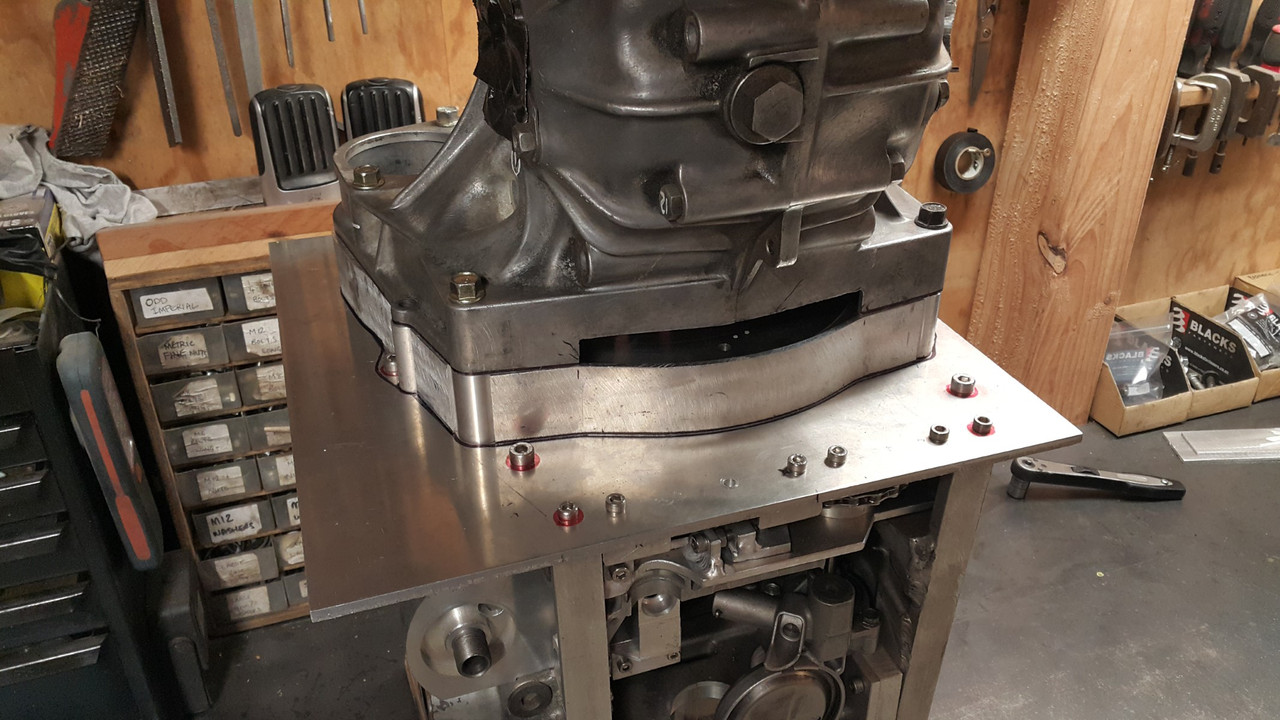
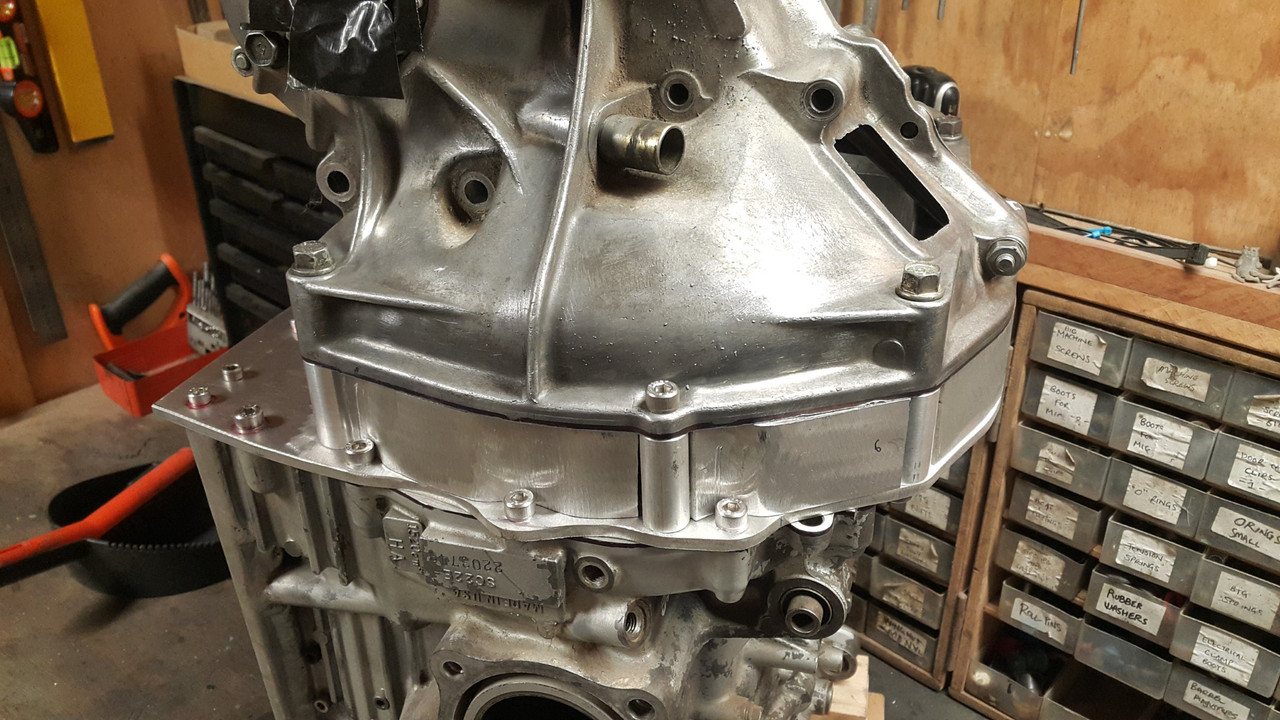
Anyway- got there in the end. Pieced it back together and it looked like this...
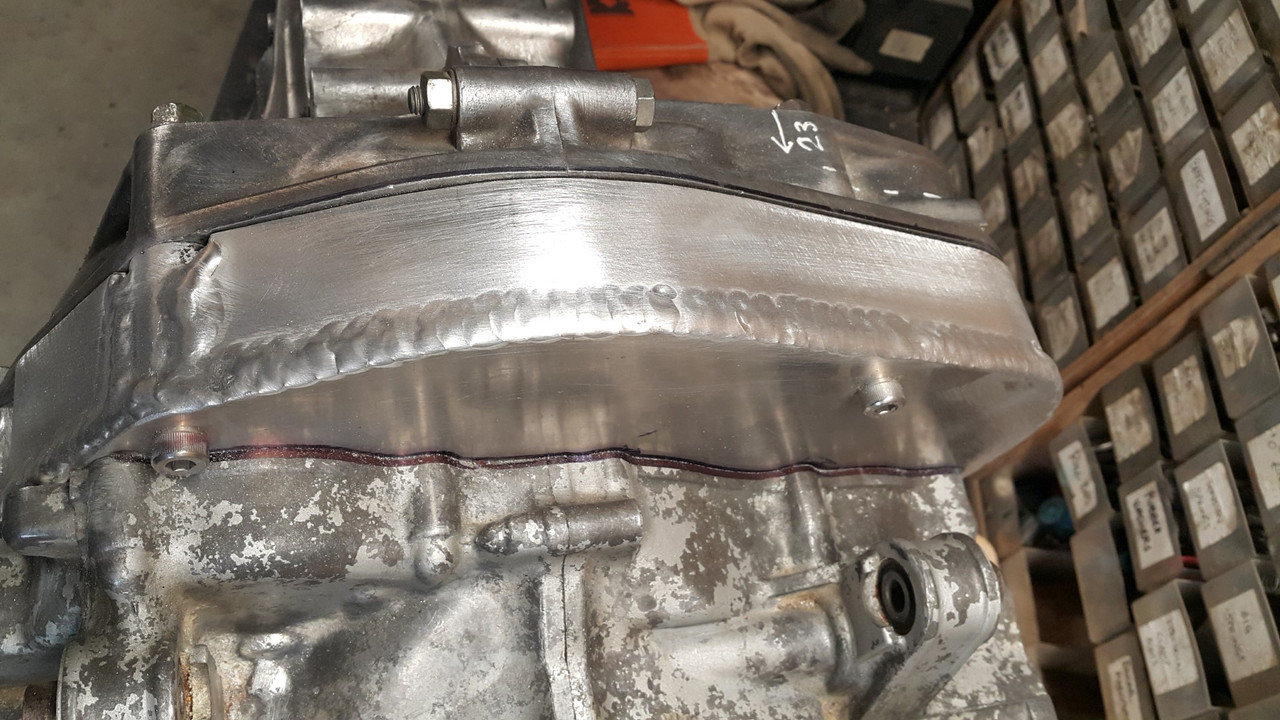
Now time to weld it all together. I knew this was going to be tricky because the whole lot is like one huge heatsink and our current power cable to the workshop and the subsequent circuit breakers I have installed as a safety net wont allow me to run the welder at enough amps for such a mass of alloy - sit on 150 amps for any longer then 20 secs and it would trip. If I had a big enough oven I'd heat the whole lot up together nice and slowly. But I don't. So I just had to be strategic about it and work fast because once I stopped welding the heat soon dispersed. Luckily the welds just have to be strong and functional because it would all be smoothed down with a flap disc for a more factory casting look I wanted.
It turned out good and best of all it hadn't warped so the box still fitted correctly and neatly. I was happy with that and it was now time to move on to the next stage which was the starter motor fitment. That will be in the next exciting instalment :-)
Thanks! I'm hoping the readers of this forum will enjoy my ramblings and photos. Its been pretty quiet in terms of responses so I was starting to think maybe its not the sort of stuff folk around here find interesting But I'll keep posting updates until told to shut up I'll have plenty of questions to ask soon when I start looking to design my exhaust system because the flat six layout is completely new to me!
Sadly I've not got the room for that.
I need to find more info on how most 911 exhaust silencers/mufflers look on the inside. How the pipes and baffles are arranged for maximum flow/sound suppression and packaging to suit a rear mounted unit across the car.
The style id like to have will have the twin centre tail pipes.
> With this part finished I could concentrate on the chain tensioner design
Air-cooled 911 have hydraulic chain tensioners. Check them out, as they may suit, as not sure static tension on cam chains is the best way to go?
Further, check out the Honda S800 configuration, including cam chain and starter motor configuration as there's some relationship there with the Gold Wing too.
Also, check out a friend's Carol, which is under-going a similar transformation, and is also a similar color.
A friend used to drive a Stiletto, so I look forward to seeing more...
> With this part finished I could concentrate on the chain tensioner design
Air-cooled 911 have hydraulic chain tensioners...
A friend used to drive a Stiletto, so I look forward to seeing more...
Hey thanks for the heads up. However the chain involved here is just there to spin the oil pump so there's no timing issues due to slack chains to worry about :-)
Stilettos are neat. The little coupe shape yeah?
I'll certainly keep posting the updates here for ya.


 07-10-2021, 09:16 PM


 But I'll keep posting updates until told to shut up
  I'll have plenty of questions to ask soon when I start looking to design my exhaust system because the flat six layout is completely new to me!
