When you click on links to various merchants on this site and make a purchase, this can result in this site earning a commission. Affiliate programs and affiliations include, but are not limited to, the eBay Partner Network.
I didn't see anywhere,, did you baffle the pan? . Maybe a set of Valkerie cams in there is you really want it to howl..
I will be doing some added baffles but due to the castings left over after I had chopped down the transmission casing there's still some walls retained - so it has already got some baffling.
As for the cams - I have had a look into this and from what I have found online there is not actually much difference/ if any at all, between the cams on the 1500cc bikes. But certainly something to look at in the future. If the conversion works out ok and the subaru transmission survives etc then I wouldn't mind sourcing a spare set of heads to play with.
Hiya - yeah all is good. I have been chipping away on it since my last update but not as much as usual. I've been enjoying a good summer, lots of cycling and swimming, hiking and general summery things plus weve had Hannah's mum come to stay a while, then her brother so family entertainment stuff.
Update soon and now that its a bit shorter in the days and getting a bit chilly I'll hopefully spend more time indoors working on this.
I've been too busy doing the summer things, entertaining guests, lots of cycling, loads of swimming and some hiking.
But I have still been whittling away on this engine. I'd love to have done more but like I think I said in a previous post - I only really want to do it when I can properly relax and enjoy the process. Plus summer has continued on quite nicely here - it's really only just become late summer However there has been a few chilly evenings and some decent rain had recently which makes for perfect tinkering time.
So where I left off was some water pipe work. I needed to build some pipes to get the cold water into the heads. The original goldwing water pump used to reside about the middle of the engine at the front (now the back..) and feed straight out into a rubber hose that split the flow equally up into the heads. But I'm now bringing the water from the front mounted radiator, via the electric pump, along the side of the engine and up into the heads. I'm going to use the original steel pipes that go into the heads.
I chopped the bends off the ends of the old hose, fitted them onto some stainless tube like this..
Now I needed to feed that pipe evenly. I cut a hole in it and squeezed the end of a stainless elbow to suit..
Mitred the end to suit..
Welded it in place..
Then continued the pipe work so it made its way around the block. I've kept it tucked away so its not out on view too much when looking into the engine bay- for a cleaner look. I'll continue the rest of the pipework later on and brace it off a mount further back. Possibly add a little heat shield where it runs close to the exhaust headers although I don't really think the water will absorb up much heat from them. But just in case..
While I was doing the summer things I had some bits turn up from China. Some nice connectors for the engine loom. My hope is to have a setup that really easily connects with just a couple of main plugs. Time will tell on that but these will certainly help.
Another parcel - more goodies..
Yay. I can continue on with the exhaust work. I need to form some 3 into 1 collectors to suit. But I need a press.
Then a customers job that was in also needed a press. A Hiace van in which I was rebuilding the front suspension and new bushes had to be pressed into place. So I built a press. We had plenty of steel in the rack left over from customers jobs and an old 12 ton bottle jack so the only thing I had to buy was a pair of springs. I made the press nice and tall to suit my height and allow for long jobs in the future.
Press in action on hiace arms..
I painted it a nice grey.
I machined up a stub and a couple of different ends to suit. Over time I'll be sure to accumulate many different bits to use.
Now I've been using it I wish I'd built one ages ago!!!
So back to the exhaust. I made a form with some pipe offcuts. 3 into 1.
It worked but I just felt the angle was to sharp a transition.
Version two, on the right, next to version one...
Worked well but getting near the end of the forming it started to collapse...
This surprised me. I was expecting the stainless tube to split. The form deformed so much that I couldn't get the last bit of flare I needed.
Roll on version three...
This one I reinforced..
It worked a treat. Much better..
Back into the press and I applied some heat and hit it with a hammer...
Which created this...
Now to fuse these collectors onto the headers. I filled in the middle hole between the tubes with a teeny little triangle of stainless. Then with more little triangles I filled up the gaps where I couldnt get the collectors formed close enough.
That's where I'm at now. I added the filling triangles to both headers and will carefully flap disc them neatly so they match the collectors as well as I can so making for an easier time welding. I know the welding wont be flash. Functional - not artisan.. but I'll just be happy to get to that point because its like a big part of the build to check off.
I promise I shall do my best to get more time in on this build from now on.
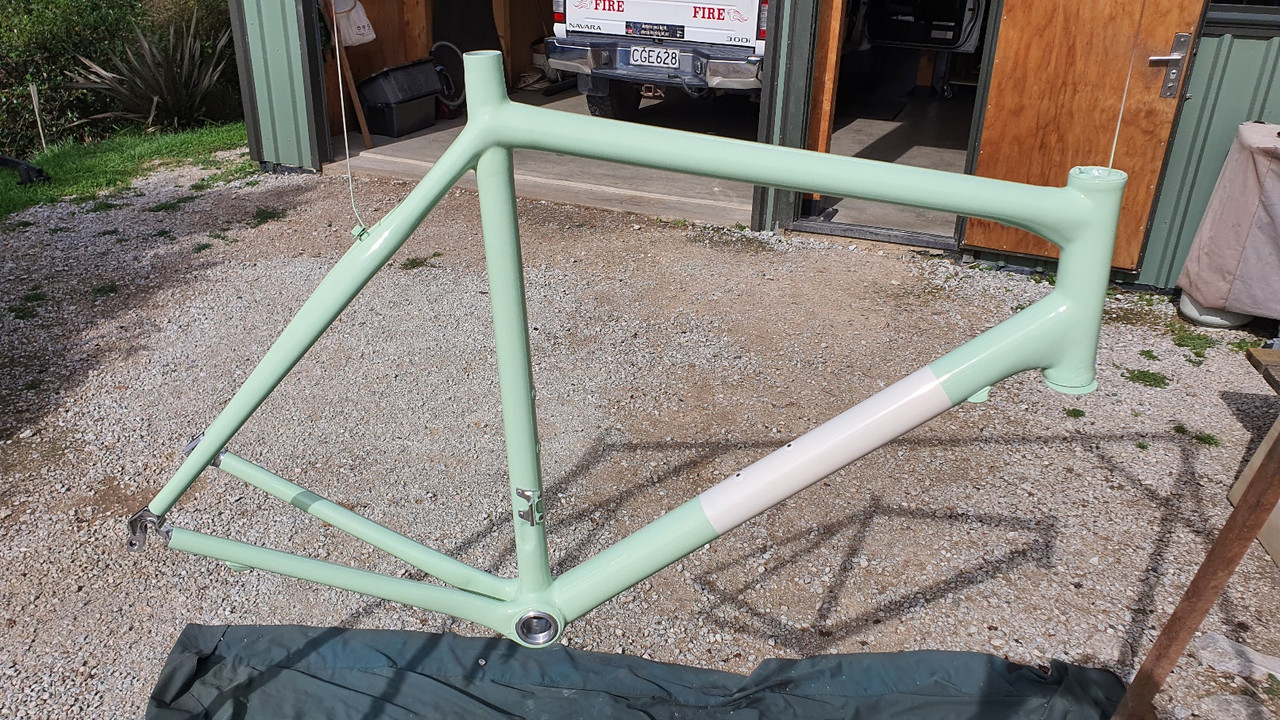
however - I do have this shiny Scott CR1 road frame that I've just painted to build up and ride before winter turns up...
You come up with very practical and insightful approaches to solving the various challenges. It is really educational. I feel like I learn something every time I look at this thread...
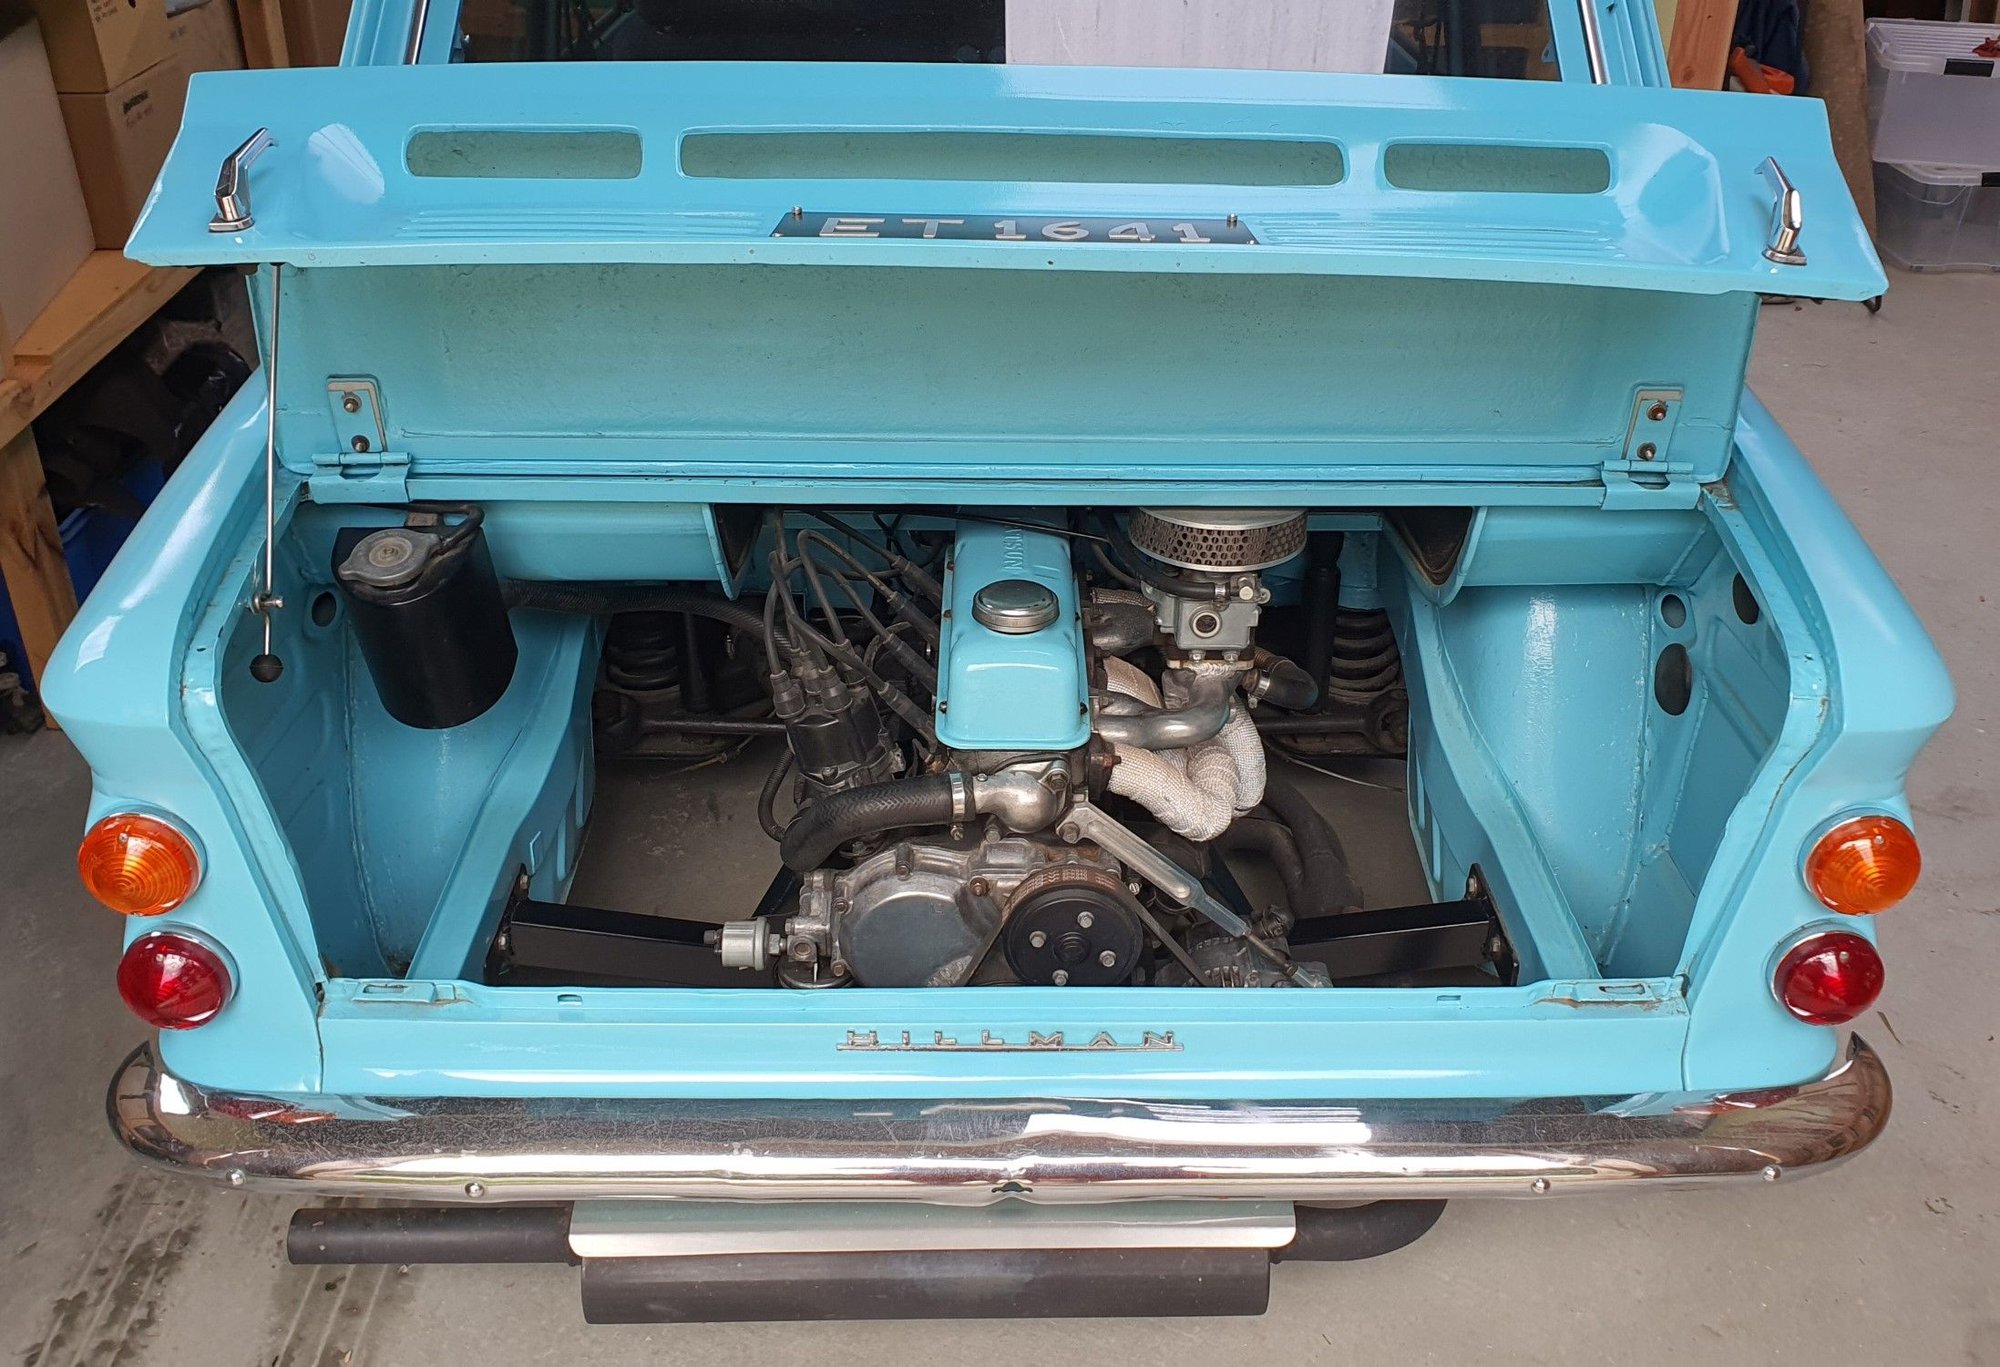
I thought I'd better add some general 'classic car actually getting used' photos because it does actually get hooned about quite a lot.
For example - I hooned all the way to the oldschool '23 Nats. A huge distance for this little car @ around 5km this year Quite handy having the Nats on our doorstep this year. A great weekend of catching up with loads of good mates and checking out some cool cars/eating food/fine ales etc. I didn't actually take many pics of the event full stop let alone the Imp so here's a smattering..
A sports car and a Jag...
Had a good time racing over the Takaka hill on the way back from the Saturdays cruise to Golden bay with that Jag. I don't think the Jag Six was needing to put in as much effort as my little Datsun 1200 was up the hill Good solid fun trashing little engines.
Other O.S cars at the lunchtime stop in the bay...
On the way back, stopping for the most unlikely car to breakdown, a Corolla - did just that again...
As well as going to Nats this summer has seen the Imp doing many trips to various beaches in our bay. It makes for a pretty fun and cheap way to get around all the little roads here.
general lurking...
Spotted the Bedford CF I played a major part in building a few years ago - the van sits atop a full Falcon running gear and suspension. I never realised quite how similar the paint colour is to my Imp...
A big change this past year that's been just so good for the car is it having its own garage to reside in. Throughout the hottest days this summer its been out of the sun and kept clean - free of the usual pine pollen we get, then the dust from the yard. Its super dry in there and makes it more of an event to 'take the Imp'.
Plus it just looks so perfect in there ....
The bikes are safe and dry too. Wonderful not having all of that car, bikes and other stuff in the main engineering workshop!
Oh also this summer I spotted the perfect picnic set for the Imp (although possibly a tad too heavy/bulky..)
So yeah - the car has been used plenty over the summer even though I've not done so much on the flat six and I think this helps me keep enthused about the Imp in general. Its well worthy of a better heart.
So back to that heart. Continuing on from the last post I had the collectors in the shape I wanted and after a bit of careful trimming with the flapdisc I had them fitting close enough that I wasn't going to have to fill any large gaps with filler rod. I took my time welding them, trying to not blow through and they turned out fine...
With those in place I was able to weld the engine side of V clamps in place. I double checked the clearances with the cross member in place and it was still lining up good so on they went. Very carefully too, with lots of tacks first because I had read that V clamps can easily warp if the welding is too hot, slow, uneven etc. Luckily I must have been careful enough because they stayed flat and true
Next up is the oil filler placement. I really want to get this in the right spot, not just for the function but the looks. It'll be right there on display, doing its best to upset the symmetry of the horizontally opposed engine. I decided I needed to get another idea of what's on display when the lower half of the engine is 'hidden' behind the rear valance. The top bit of this alloy box section is pretty much where the top of the valance will be (slam panel?)
The filler will have to come up to the left at a slight angle because there's no way its going to sit in front of the main pulley. I'm not yet set on the height of the filler cap but for now that can wait. There will be plenty of room in that area. I'm still going to use the extra pair of flanges I machined up when I made the filler plug. These will allow me to unbolt the vertical part of the filler tube so I can easily remove the cam belt cover. I also don't really want the tube poking up in the way, waiting to get knocked while I move the engine about the workshop or while fitting it etc
So yeah- I think I'll machine the front plate to suit the base flange, mount that, weld the lower bits of tube to suit and leave deciding the final height of the top half of the filler tube till later on when the engine is in place
Since the last update there has been some progress. Its good when I get stuck in on a particular part but often I end up doing a little bit here on one thing and then a bit on something else and find I often finish up without feeling like there's been any real progress. But I think this is just the nature of this sort of build. The hardest parts are done and while I feel like I'm nearing the end of the 'project tunnel' there is still a load of small bits to do.
I think I'll do the white board thing. Write down all the jobs remaining and start sussing out a plan of attack.
Or put the kettle on and watch cat videos on instagram instead.
But hey- progress is progress no matter how small. Plus Hannah is going to leave me alone for 3 weeks while she takes off to the UK to see her family. So apart from having to feed our cat child I'll pretty much be a free man and can spend as much time as I want working on the engine.
Or watching more cat vids and riding my bikes.
Anyway. Oil filler. I drilled holes, tapped holes and mounted the base part in place..
I cut a 45 degree angle on two bits of tube, welded them and created the horizontal part..
Then drilled and tapped the flanges for the upright. I have left the final height decision for now. It'll be better to decide on that when the engine is sitting in place. My gut feeling is that I'll have the cap set a lot lower because there's plenty of room to get a oil bottle/funnel in there for filling. I have marked a line on the upright so you can get an idea of where the oil height sits...
I have a couple of nifty/silly ideas for the filler tube upright and checking the oil level. I'll play around with those ideas later on when the engine is in place and I've completed more of the harder jobs - like driveshafts and gear shift rod etc. It'll be a treat.
Next thing is to finish the top two water pipes that leave the heads. I had already made the front one some time ago and was about to start the rear one yesterday when I spotted an error I had made. The front pipe I had cobbled together and bolted in place..
Which pushes into the head as such...
But I discovered when I looked into the hole that the land within the bore only goes in 10mm before it opens right out. I thought it was a longer land and as it is now the position of my pipe sits when bolted in place has the O-ring sitting right on the very edge - not in the middle. You can see where the factory pipes placed the O-ring in the middle with a visible mark evident here...
I could easily move the bracket or weld up and re-drill the hole. Its only out by 3mm. But I'm not very happy with the look of the pipe - which I had made up out of bits of the thin old steel pipes. It's quite visible right there on display on the top of the engine even when the inlet and alternator are plonked in place..
Potential corrosion points too. I was going to paint them black but I think I'll make new stainless ones - easy now I have some proper stainless bends.
Another thing I had done to the engine a while back was to cut a load of the castings down, including removal of most the original engine mounts. It really cleaned the look of the engine up. Last night I realised I could removed some more ugly. The little tube fittings left over from the exhaust air injection emissions system. You can see them here next to the inlet ports..
They pull out, sealed by o-rings.
The holes left go down through the end of the heads and feed into passage ways that feed into the exhaust ports. None of this system is needed and its just extra mess.
I have a couple of ideas on how I could seal up the holes neatly. One idea involves tapping out the holes with a suitable tap and screwing in some bungs and this meant opening up the magical workshop portal...
into the world of stuff that I really don't like to have out cluttering up the workshop..
I have this old barry spec set of little drawers that my uncle gave me filled with all sorts of specialist taps...
This one, a BSB (British standard brass) looks ideal.
But before I start making more mess with taps and machining up plugs I another idea that will probably turn out neater.
Speaking of trying to make things neater. The original paint on the engine is pretty shot. I was thinking of getting it vapour blasted but I reckon the bare alloy finish left will just end up flashing off with corrosion in time - especially in the Imp where the low pressure zone tends to pull dust and moisture in over the rear mounted engine.
Plus I'm weary about anyone going near the engine with blasting equipment, leaving sand everywhere.
I think painting the block might be a better idea. A light grey similar to the original colour.
Speaking of trying to make things neater. The original paint on the engine is pretty shot. I was thinking of getting it vapour blasted but I reckon the bare alloy finish left will just end up flashing off with corrosion in time - especially in the Imp where the low pressure zone tends to pull dust and moisture in over the rear mounted engine.
Compound machine polished aluminum can be finished to resist corrosion and dulling?
I forget the name of the compound, but done correctly it can appear near-chrome or stainless like, and resist not much more than slight dulling over time.
The side and bumper rub strips on my 356 were polished this way, and remained so for years... but, not engine compartment I suppose?
911 fans though might be different...
Yeah I think a really high polish can last quite well and I'll attempt this on the cam covers. But polishing the complex shape of the cast engine block, with all its nooks and crannys, would be hard work indeed and then even trickier to keep it looking good once all the parts are bolted on.
Even the alternator and its bracket on the existing Datsun A12 engine setup I have out back is hard enough to keep clean and corrosion free...


 12-25-2022 | 04:34 PM

 However there has been a few chilly evenings and some decent rain had recently which makes for perfect tinkering time.
.jpg)
.jpg)
.jpg)
.jpg)
.jpg)
.jpg)

.jpg)
.jpg)
.jpg)
.jpg)
.jpg)
.jpg)
.jpg)
.jpg)
.jpg)
.jpg)
.jpg)
.jpg)
.jpg)
.jpg)

 Quite handy having the Nats on our doorstep this year. A great weekend of catching up with loads of good mates and checking out some cool cars/eating food/fine ales etc. I didn't actually take many pics of the event full stop let alone the Imp so here's a smattering..
.jpg)
.jpg)
.jpg)
.jpg)
.jpg)
.jpg)
.jpg)
.jpg)
.jpg)
.jpg)
.jpg)
.jpg)
.jpg)
.jpg)
.jpg)
.jpg)
.jpg)
.jpg)
.jpg)
.jpg)
.jpg)
.jpg)
.jpg)
.jpg)
.jpg)
.jpg)
.jpg)