When you click on links to various merchants on this site and make a purchase, this can result in this site earning a commission. Affiliate programs and affiliations include, but are not limited to, the eBay Partner Network.
....Also, I wonder if it is easier to remove front or the back bumper to check? At least with the back bumper, you wouldn't have to contend with the PITA washer hose connection. 😬
Originally Posted by mc3456
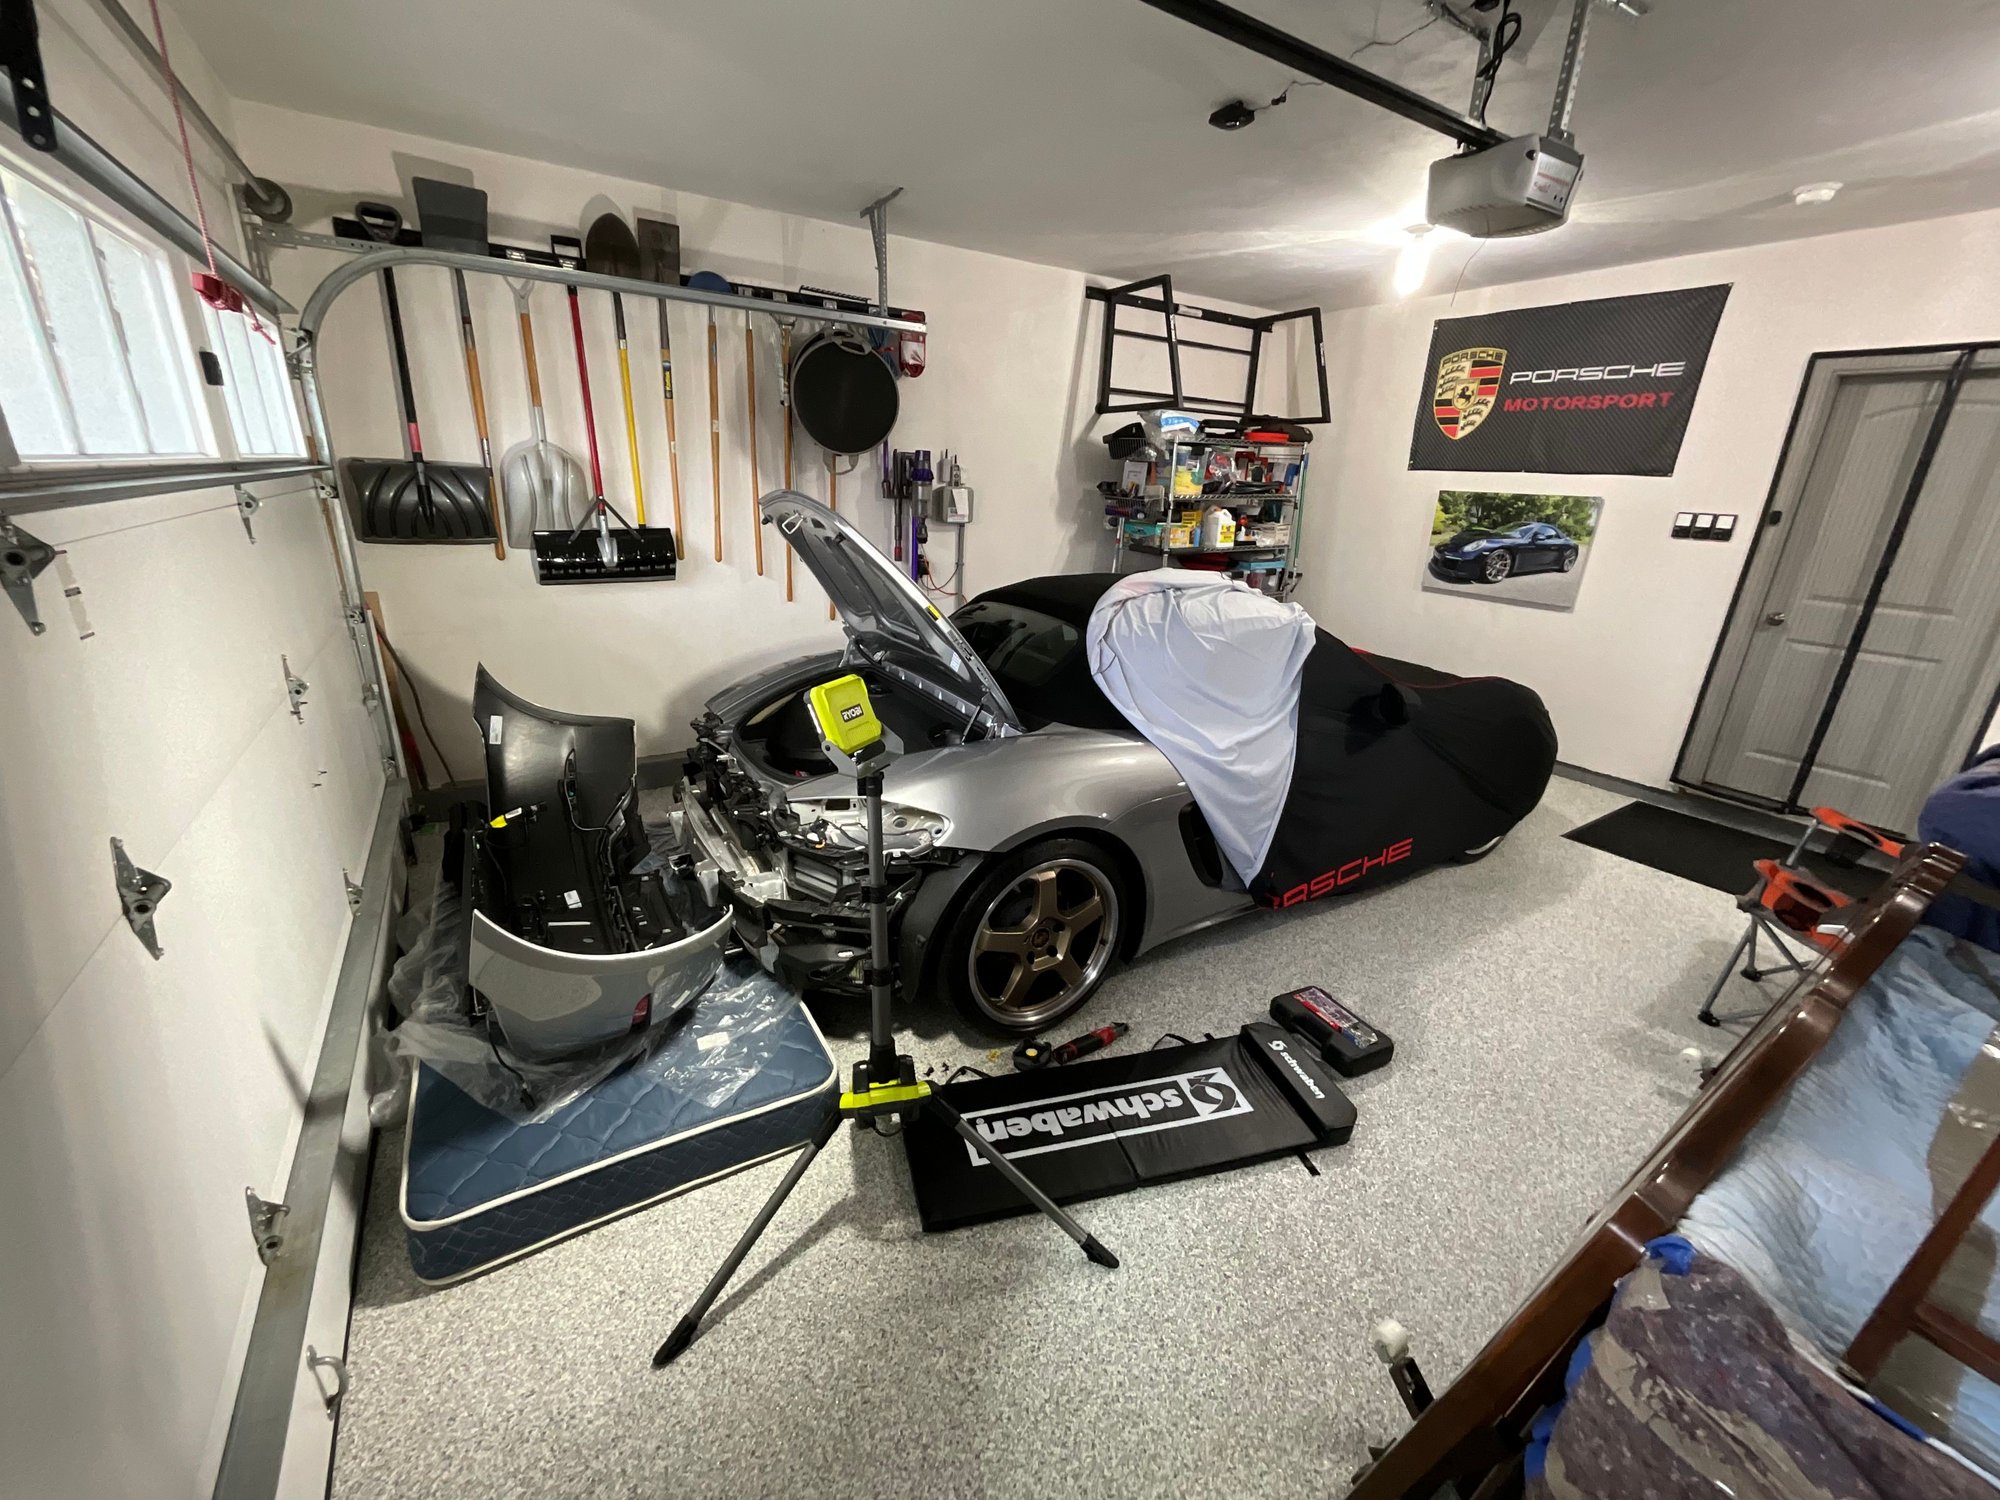
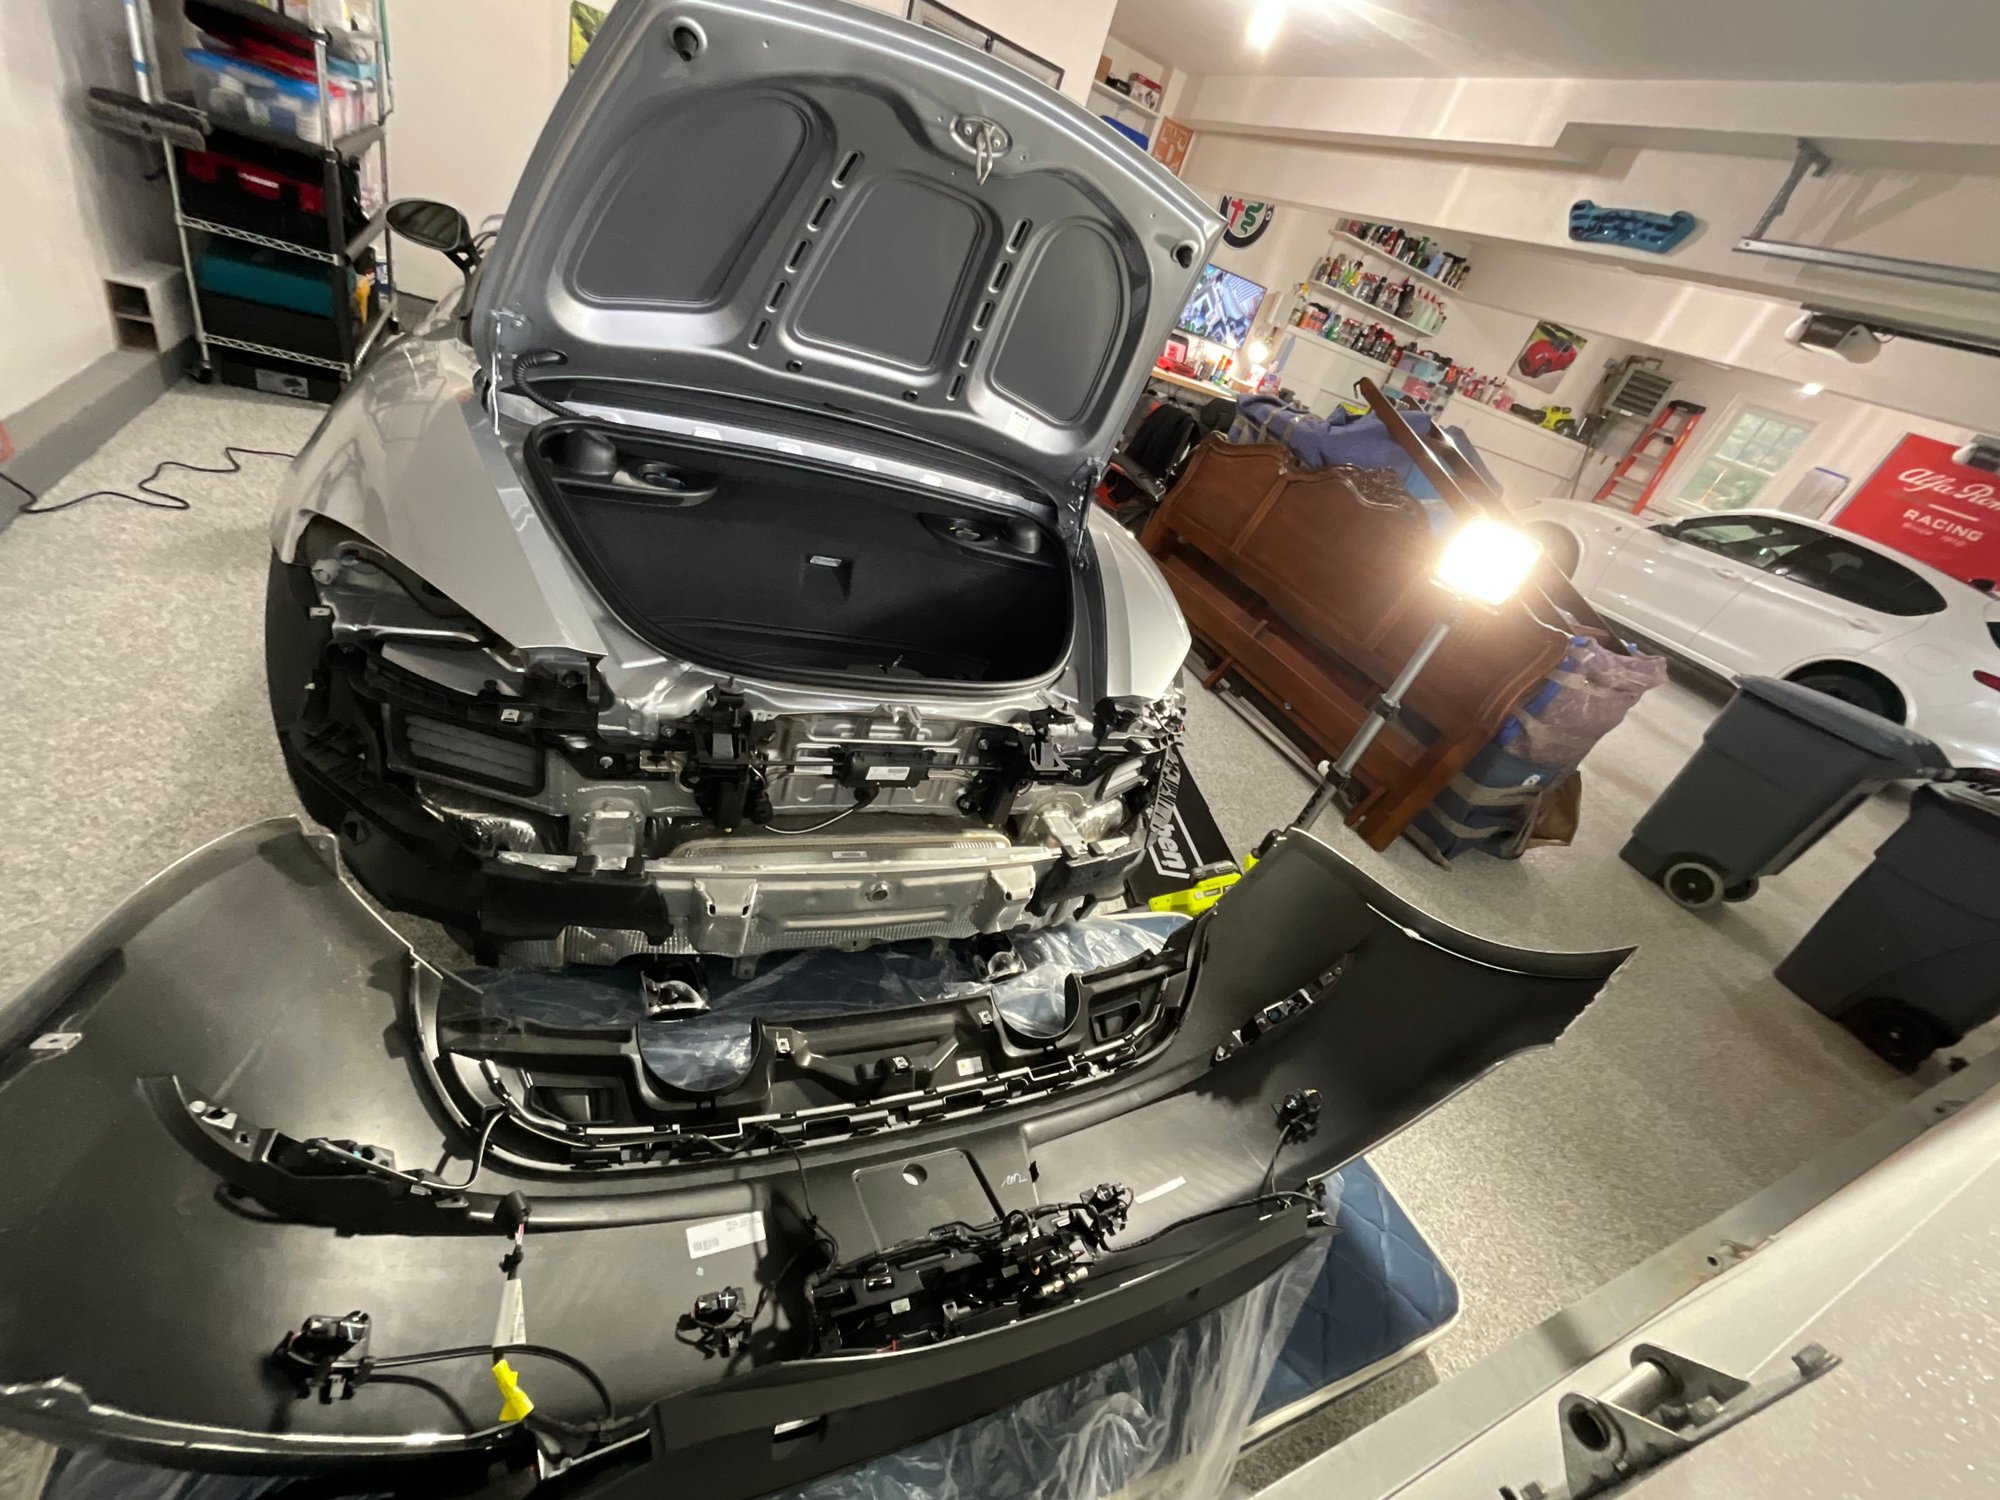
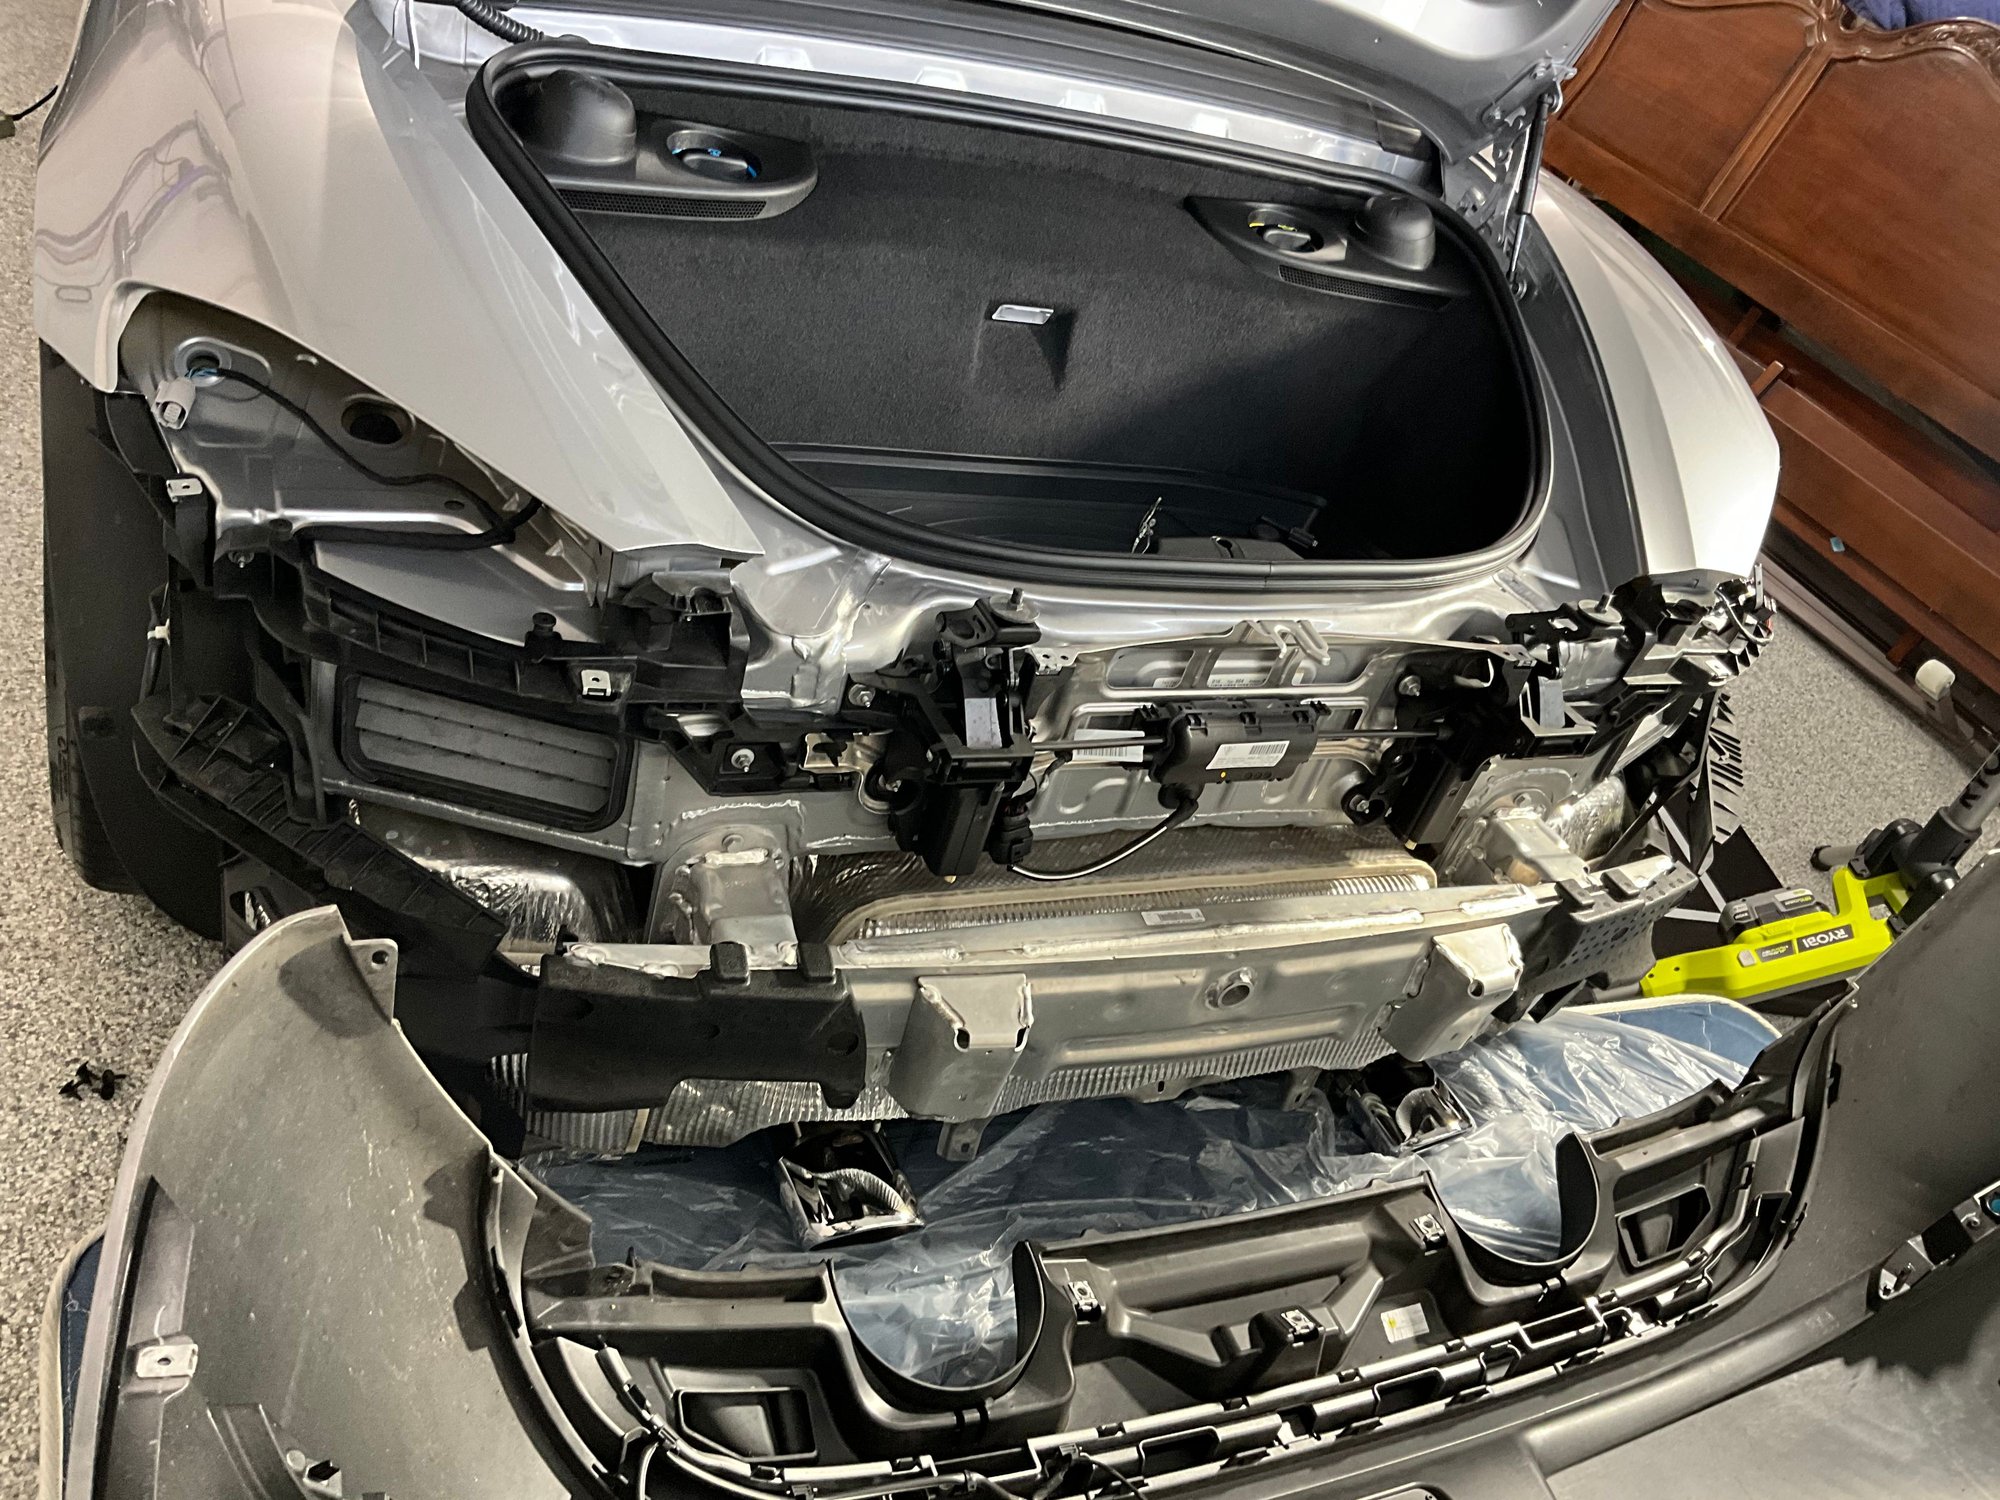
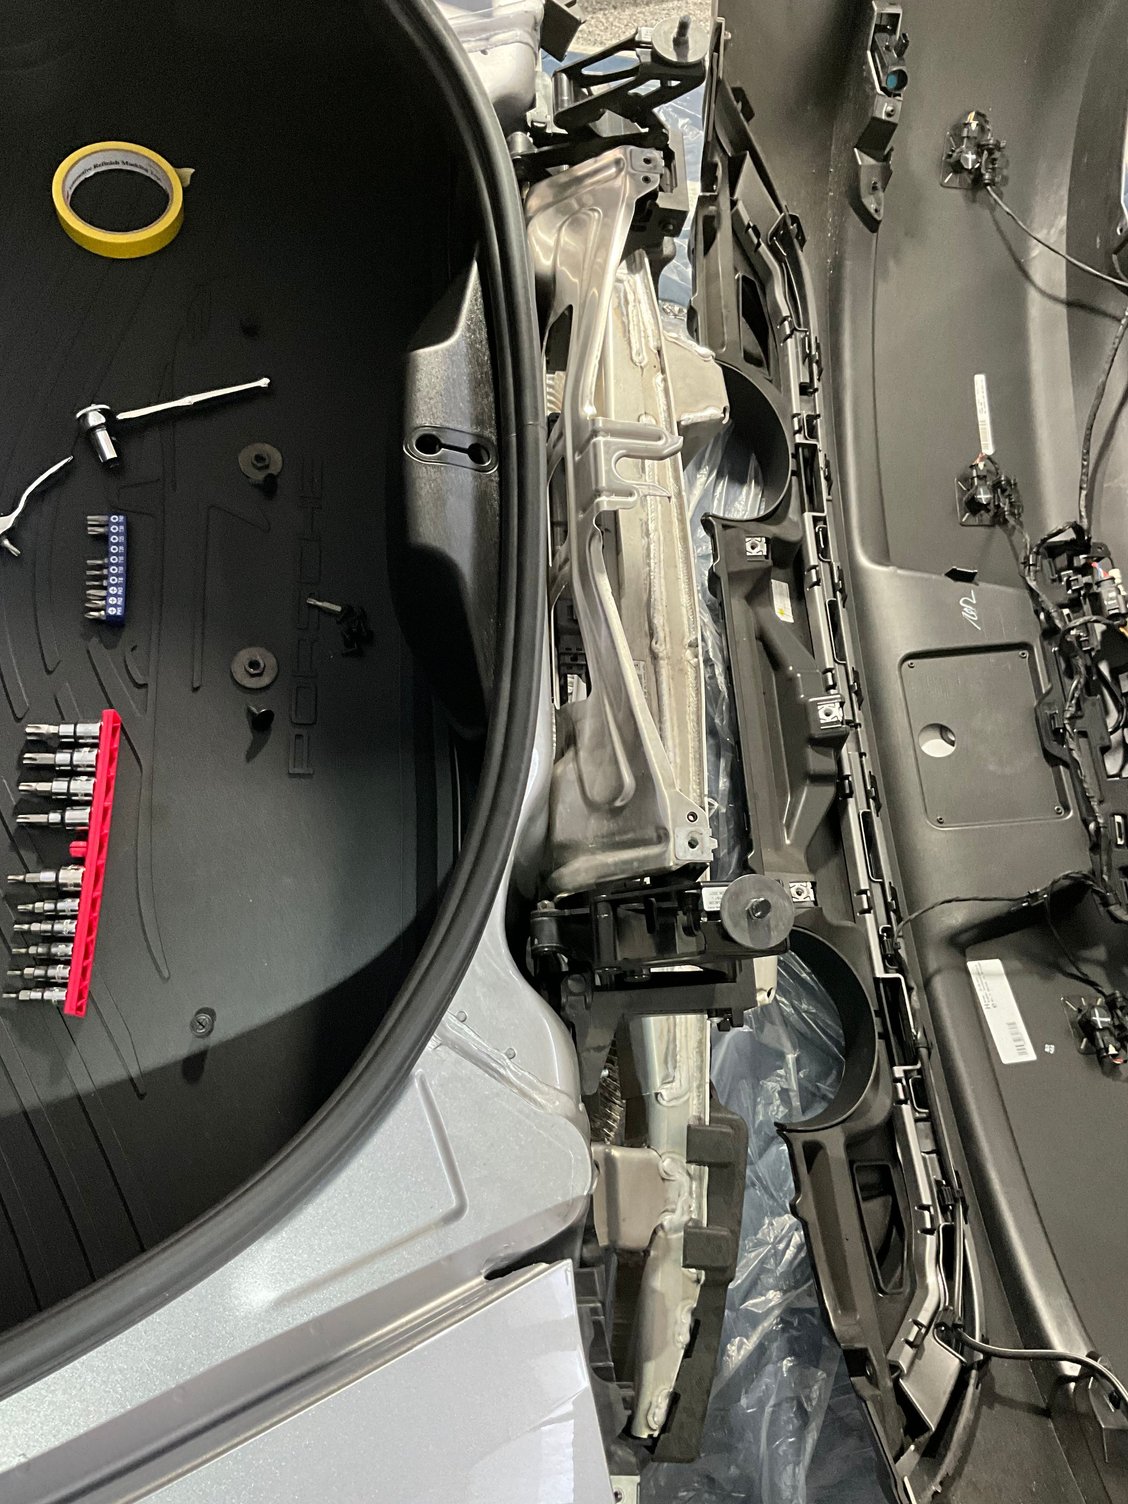
Eagerly awaiting your results. Document with plenty of pics. Thanks SO much for your assistance. Removing the front bumper wasn�t crazy hard, but not as easy as it could have been had I owned a floor jack and jack stands. However, slow and steady works fine.
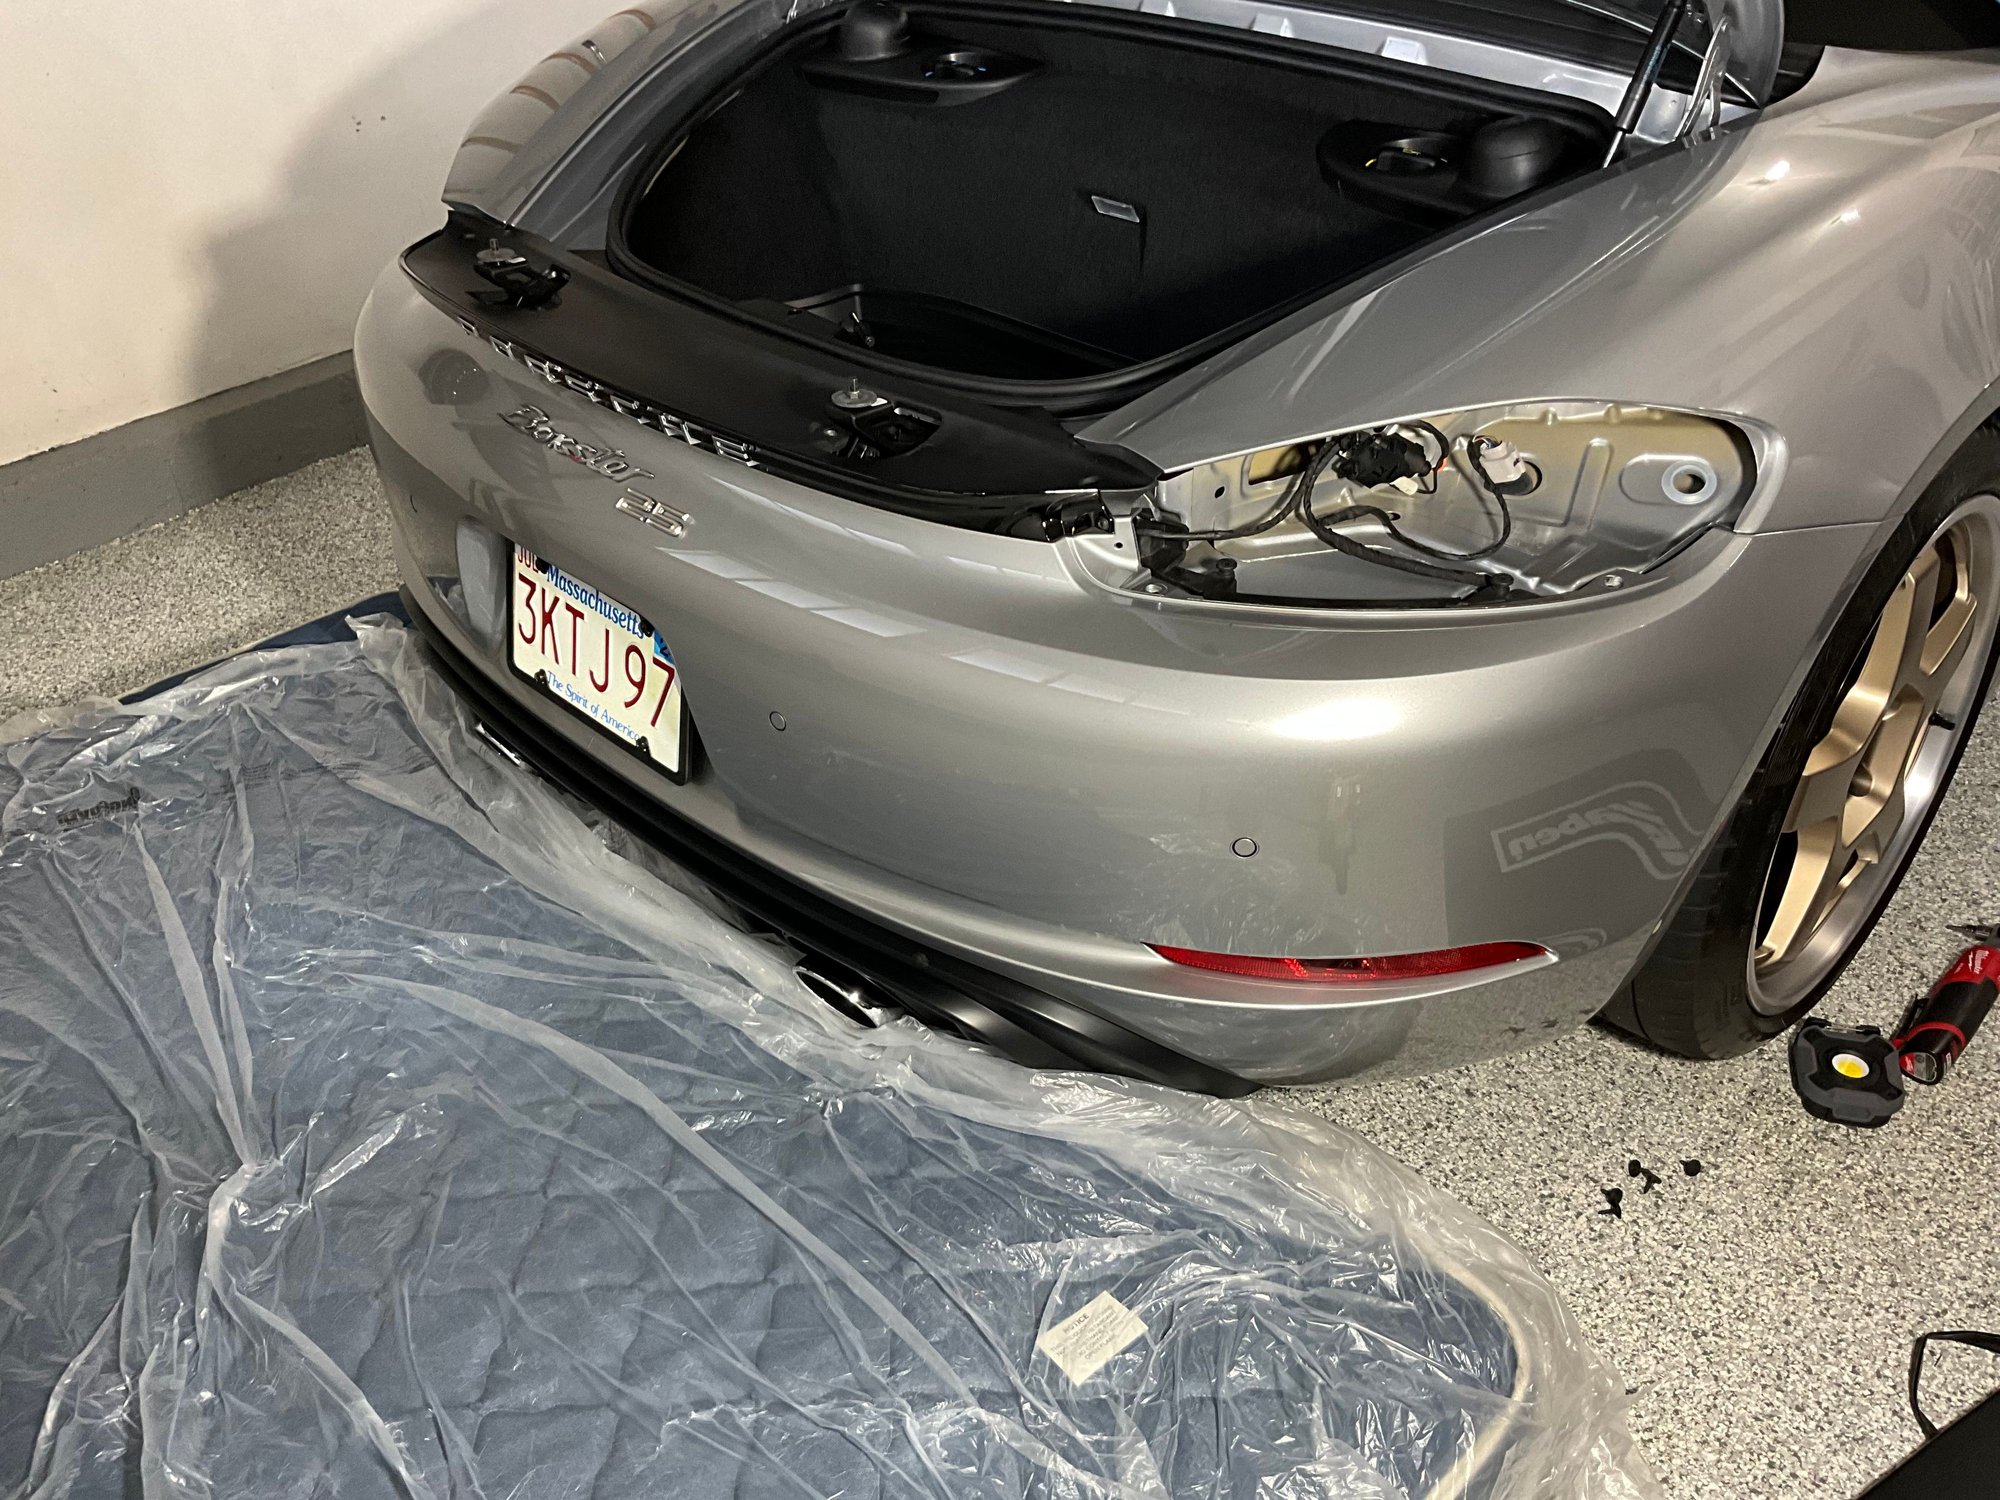
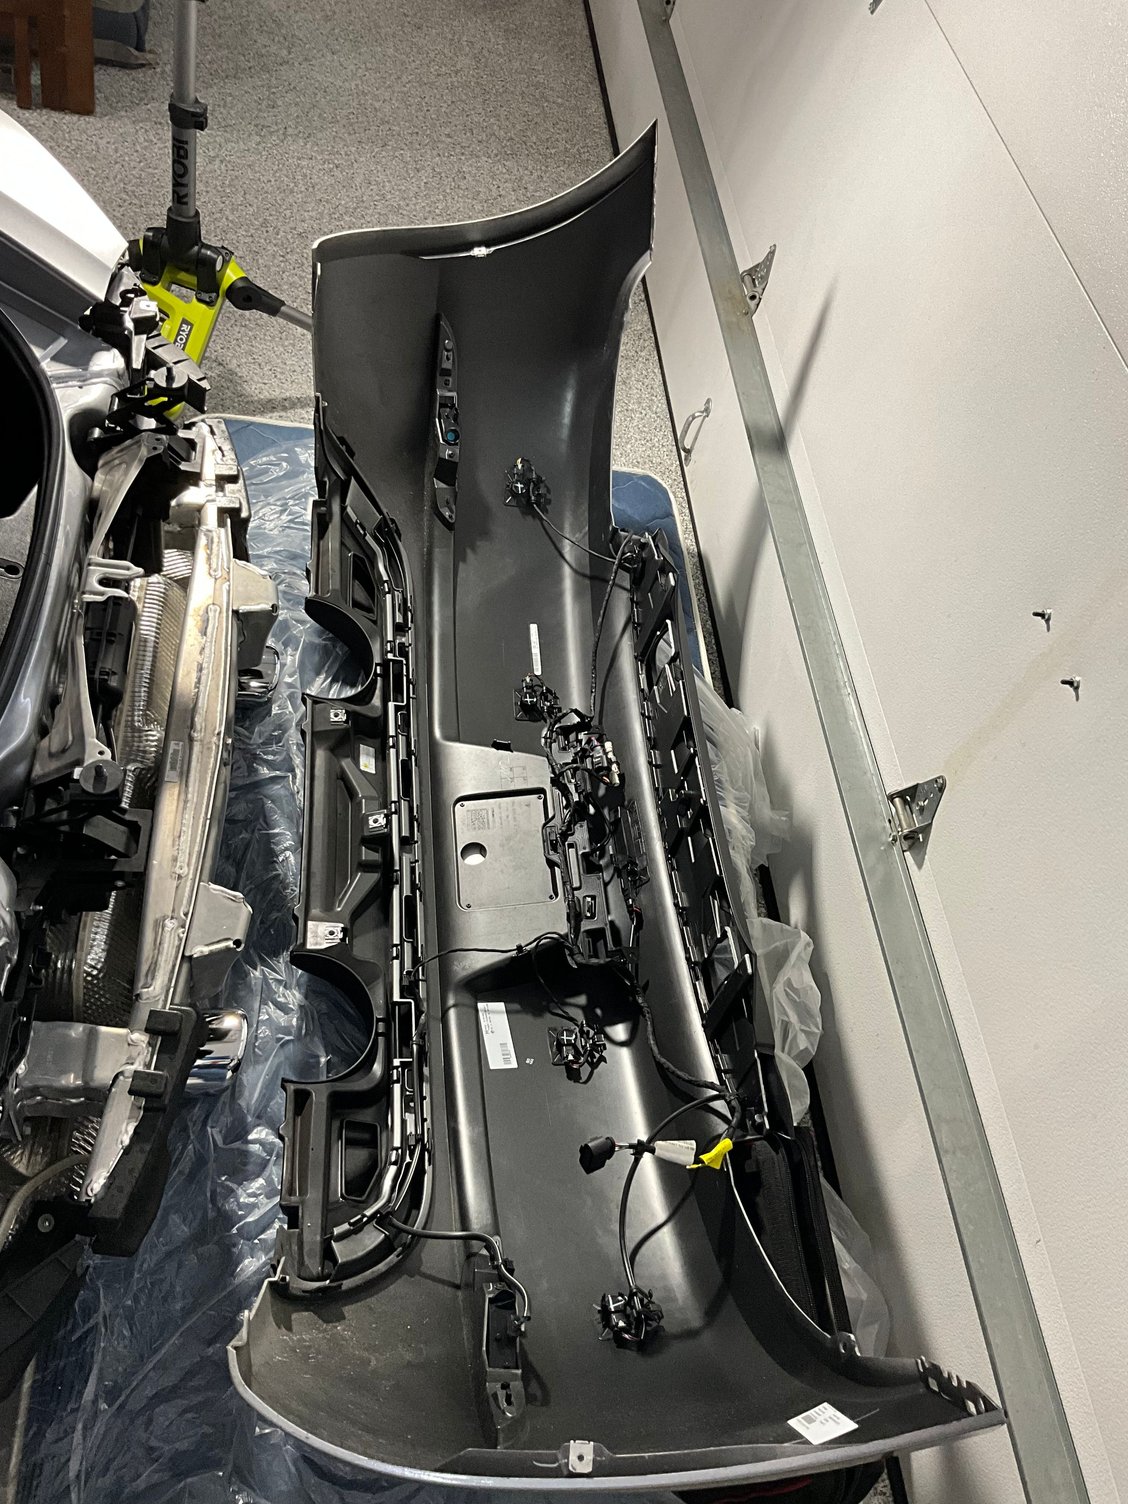
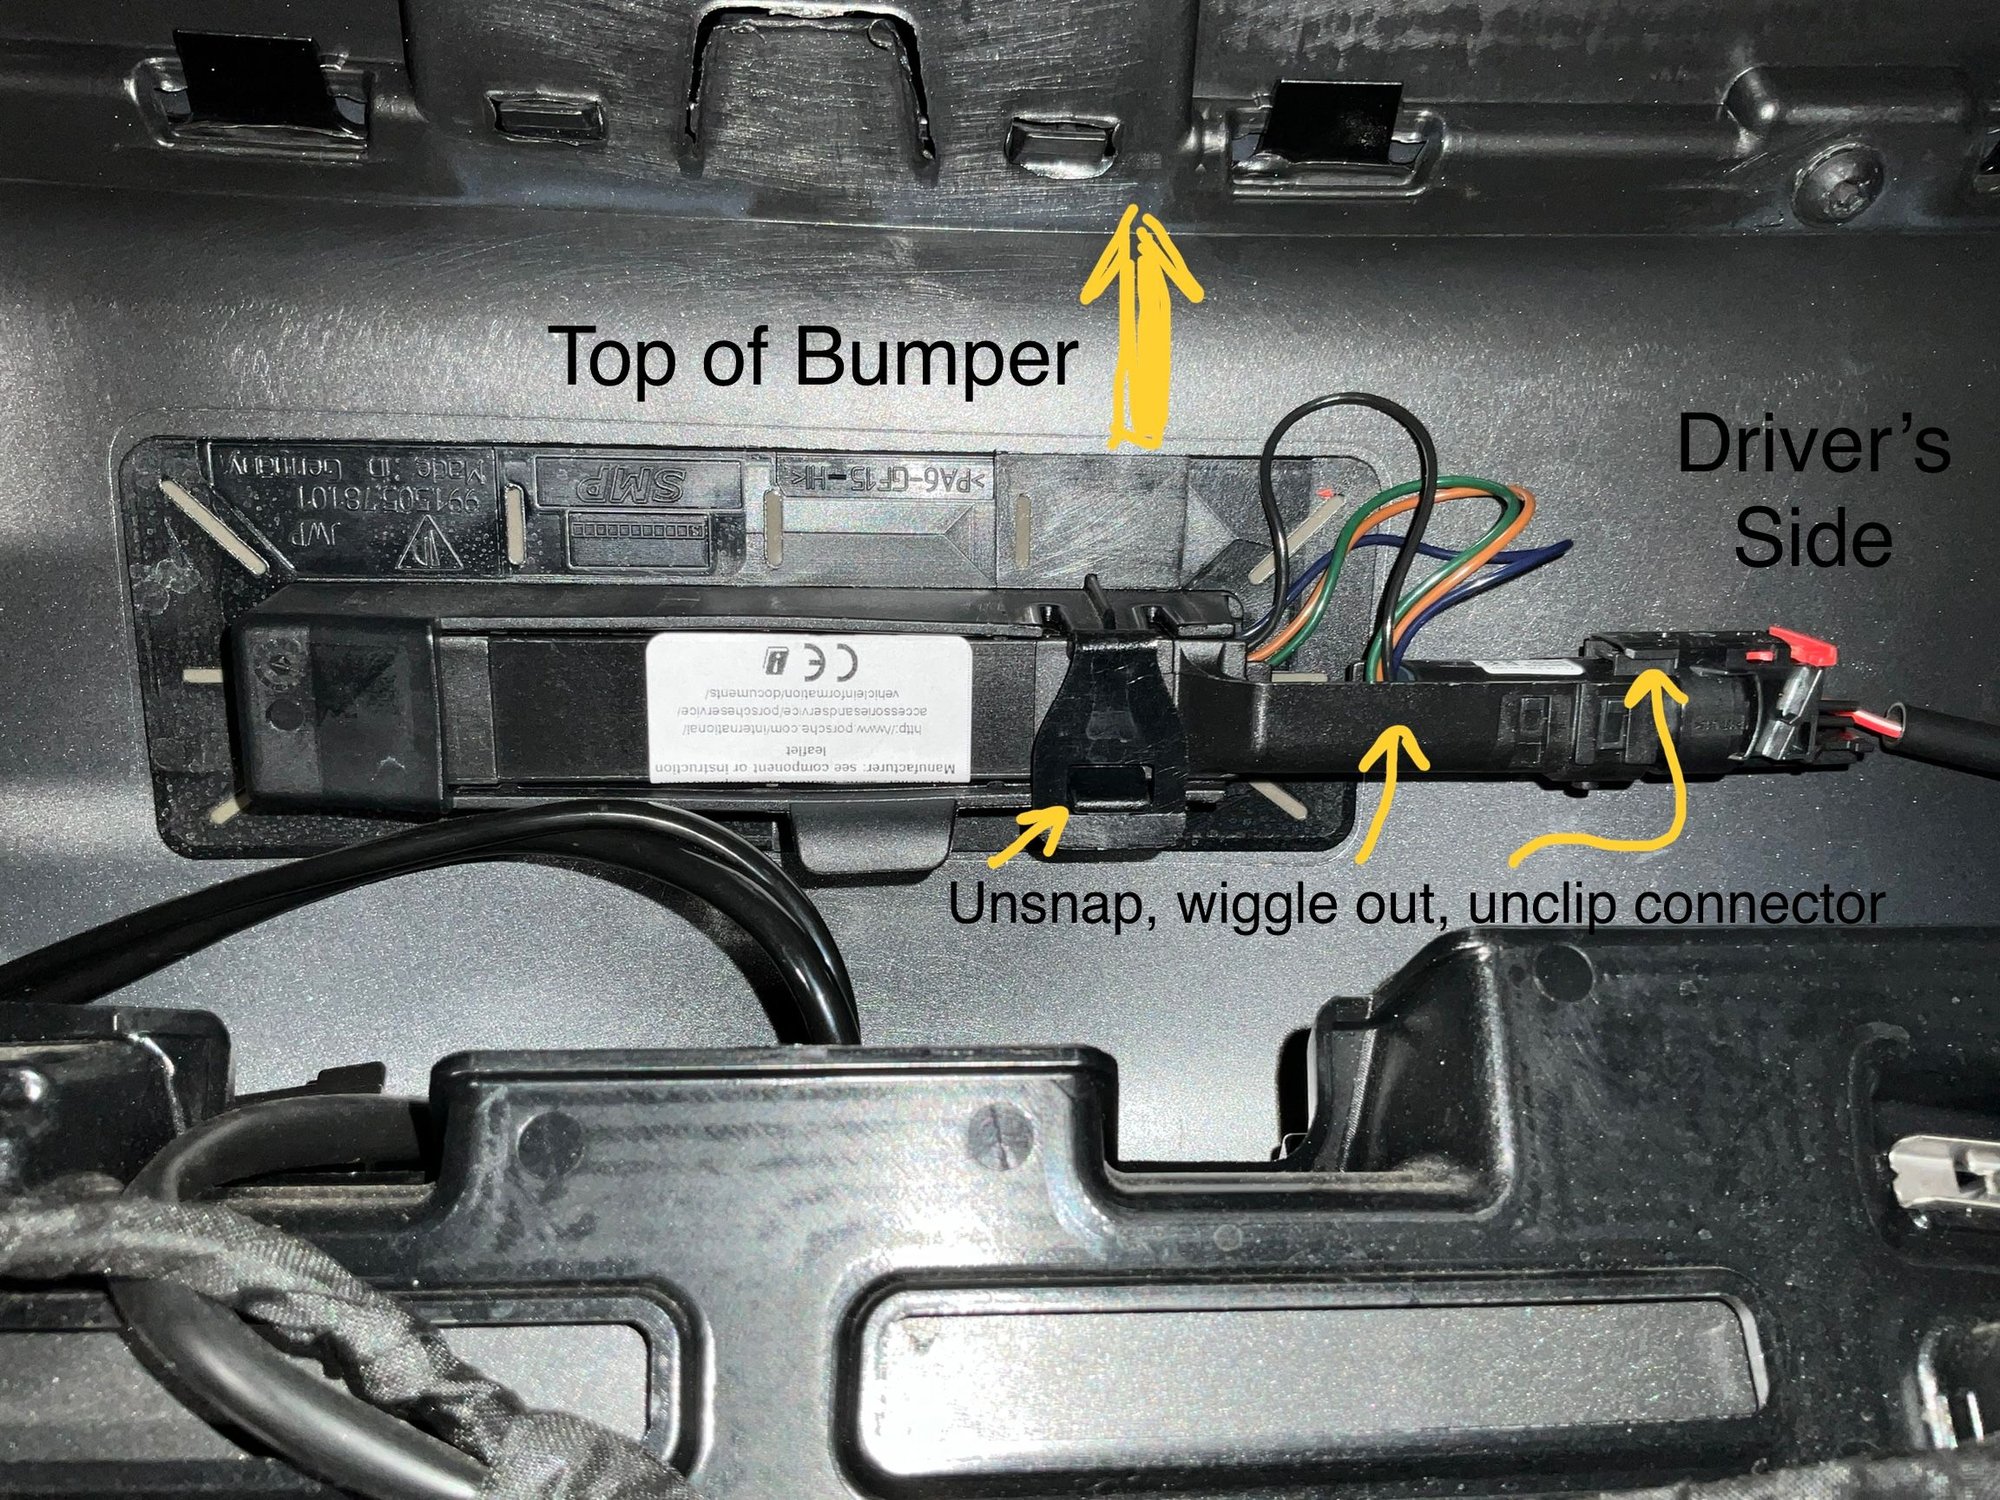
Finally installed the rear sensor yesterday. As with the front, it was just a matter of replacing the dummy sensor with a real one plus PIWIS coding described earlier in this thread that @718socal helped me with. I only disconnected the harness on the drivers side which allowed the bumper to be pulled away enough to reach in. The passenger side is a weird connector that I didn't want to disconnect, so no good pictures of the back side of the bumper but its basically the same as the front. I used these YouTube youtube video for reference...
Same - I'm also very interested in doing this. Can't believe Porsche isn't going to retrofit the '22 models with these!
Originally Posted by mc3456
I thought the rear bumper might be easier to remove than the front, but I think it might be a bit more time-consuming due to the rear spoiler and taillights needing to come off. The front bumper is pretty straightforward, but it took my about 5x longer than necessary because I don't have jack/jack stands and did not remove the wheels nor fender liners completely. If you do all the things I didn't, the front is a piece of cake. The rear bumper = TBD.
The rear bumper is not that difficult to remove, the trickiest part is removing the outer 2 of 6 torx screws on the leading edge of the spoiler. I needed to use my stubby torx bit and ask my wife's (smaller fingers) assistance to get at them. I would recommend removing these first before taking any thing else apart. Tail lights are easy (see vid). There are 3 torx screws tucked up from below that attach the rear apron that will require the car to be raised for easy access.
FWIW, I was able to buy 2 used sensors on eBay for about $100 US plus shipping. Part # 99163713301
stubby torx bits
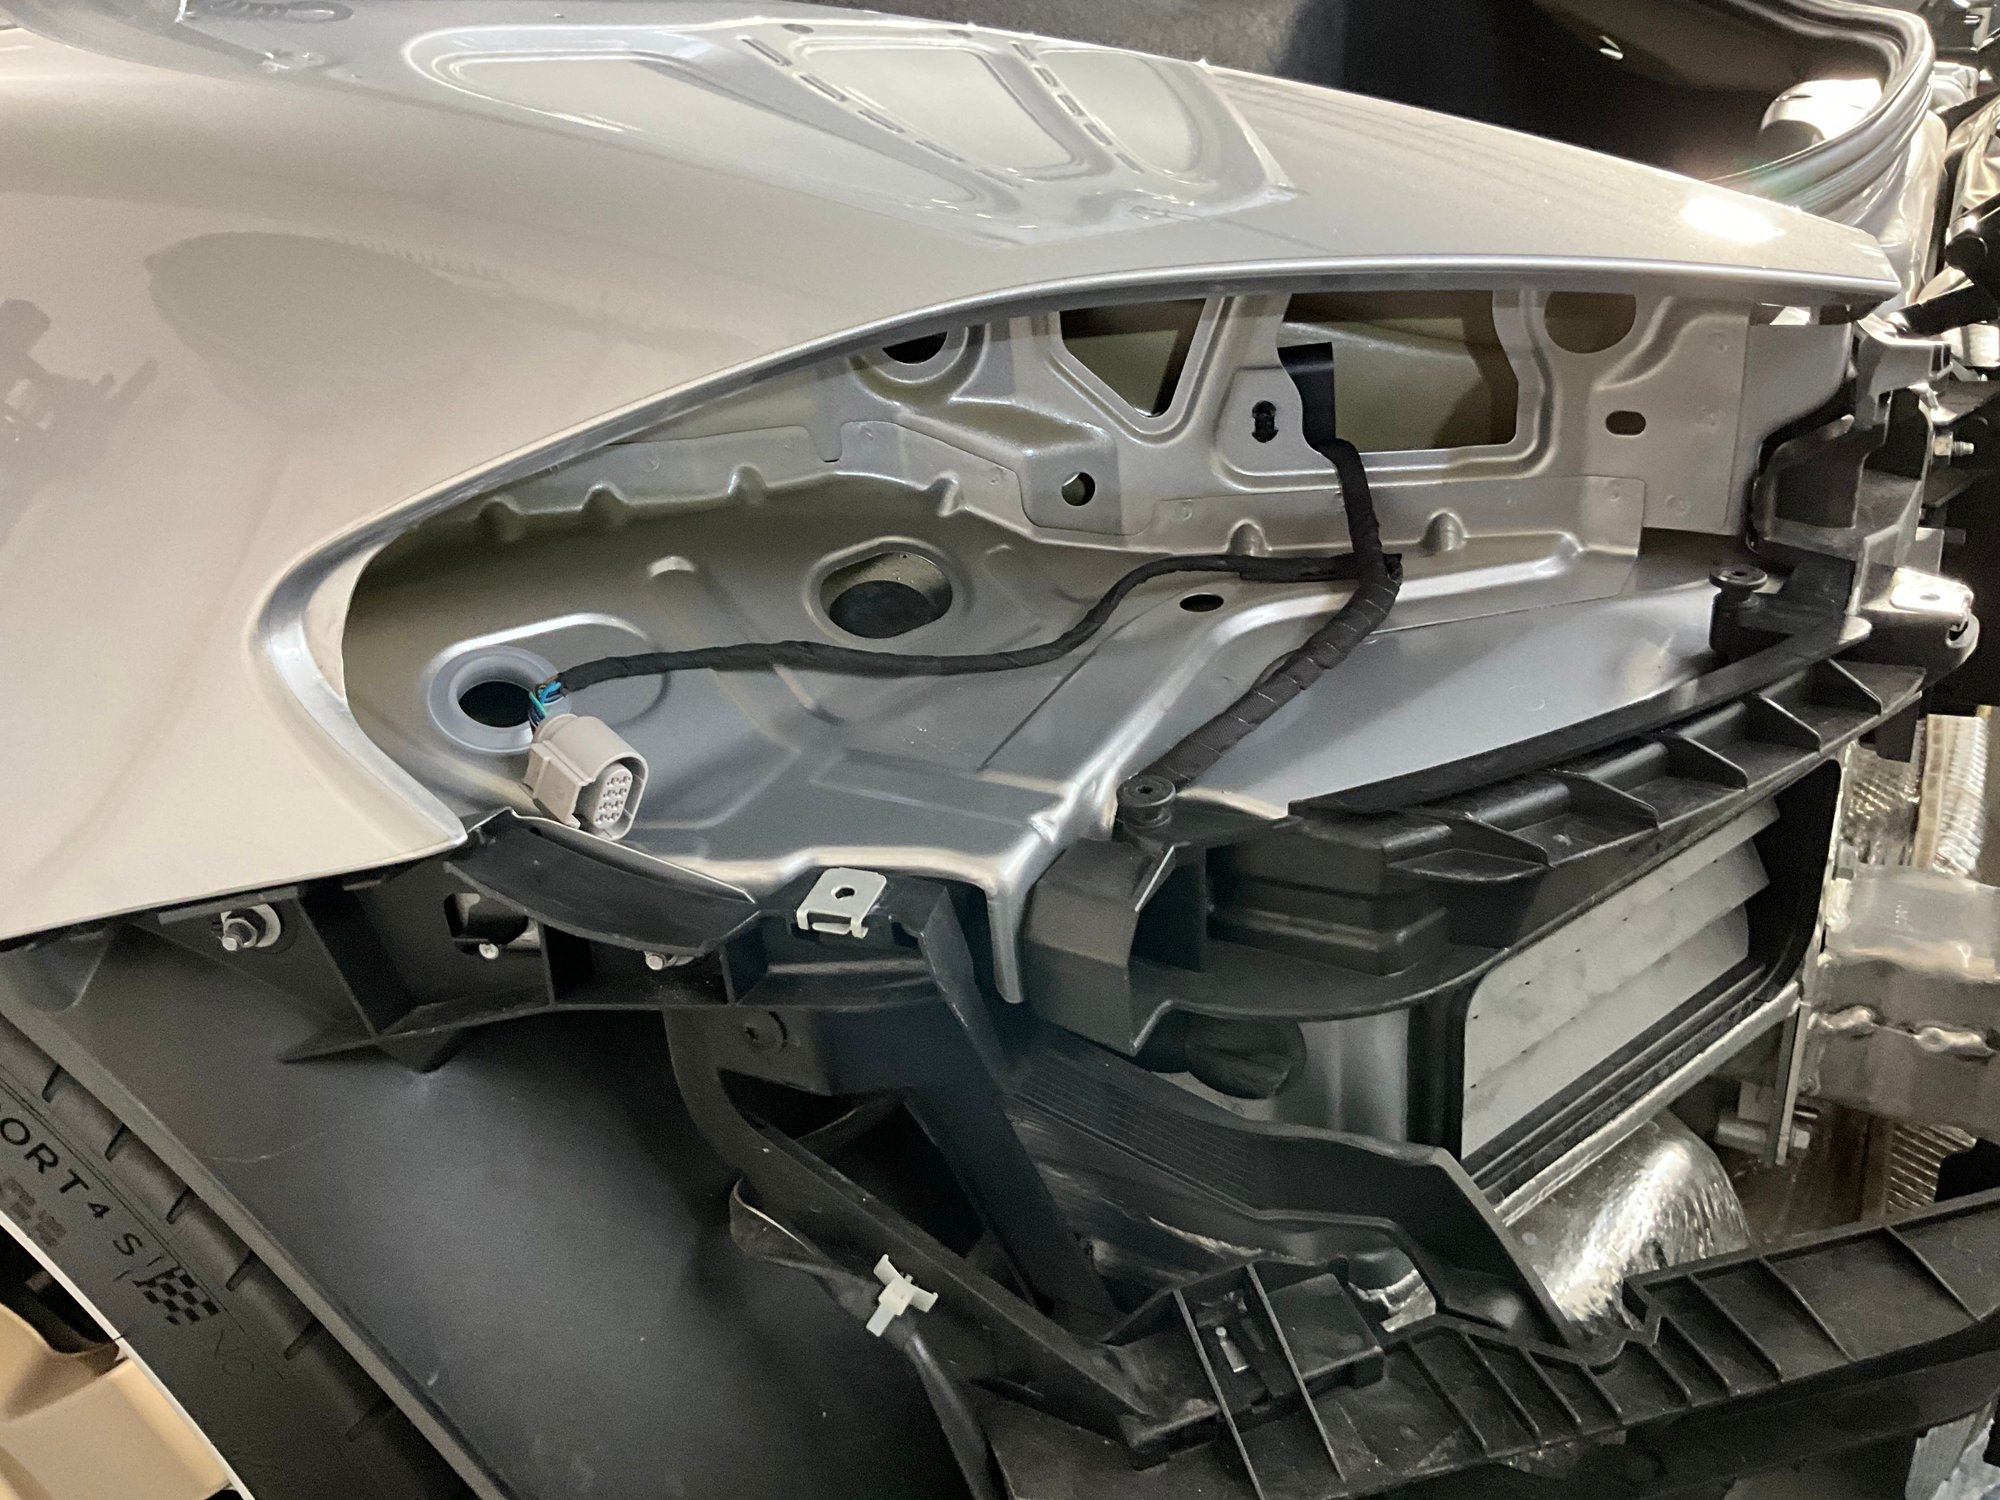
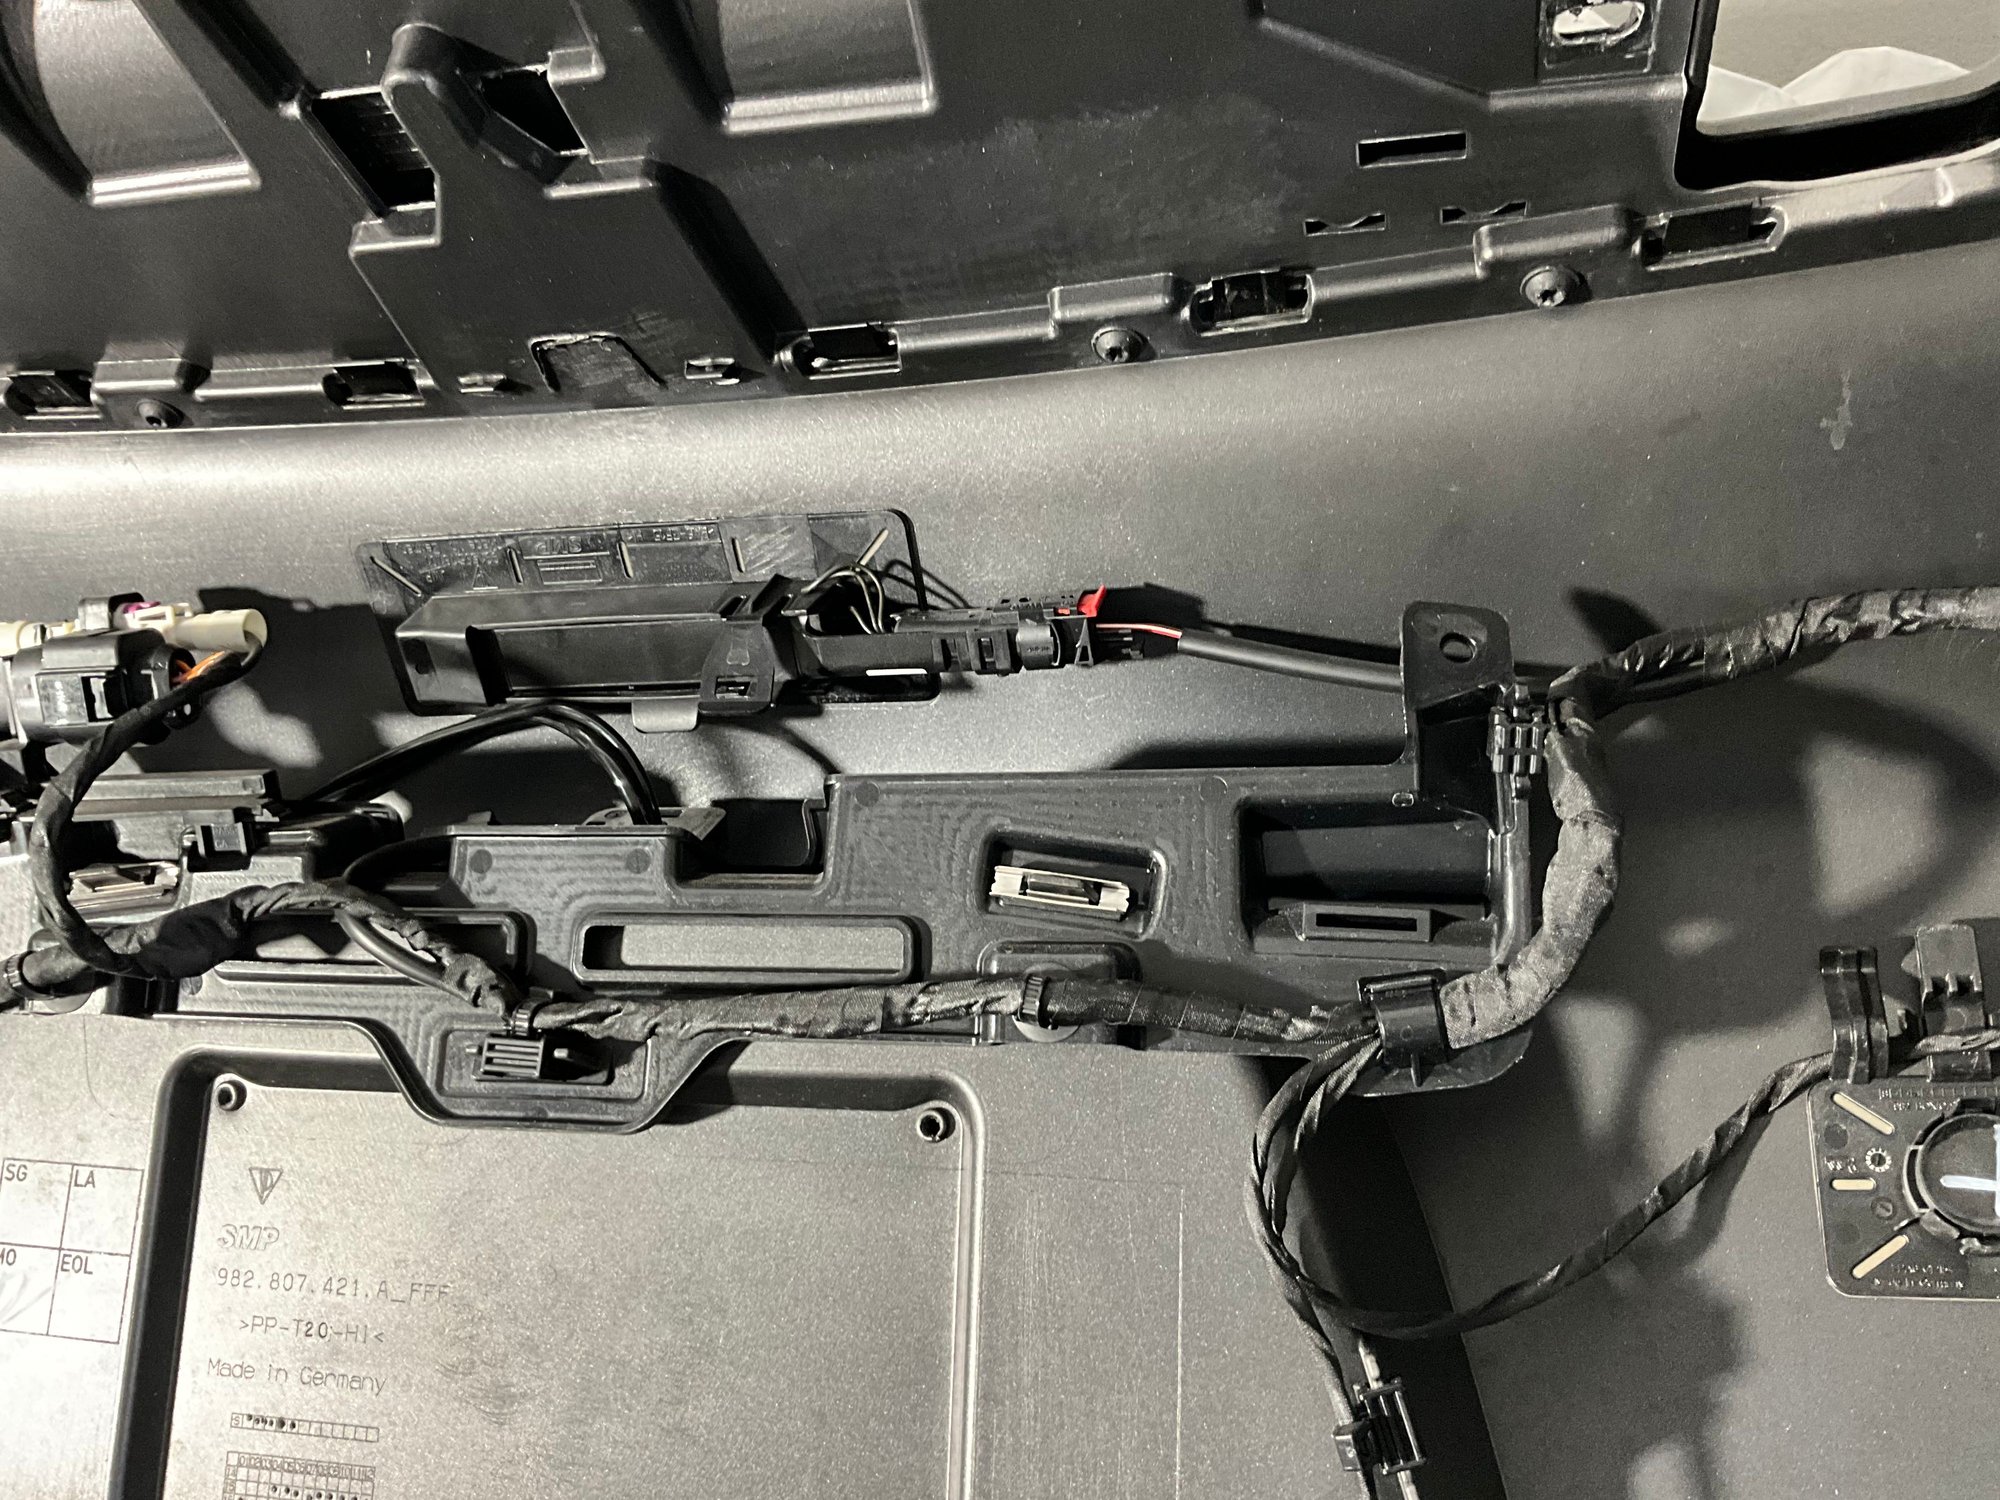
Driver's side harness unclipped from body
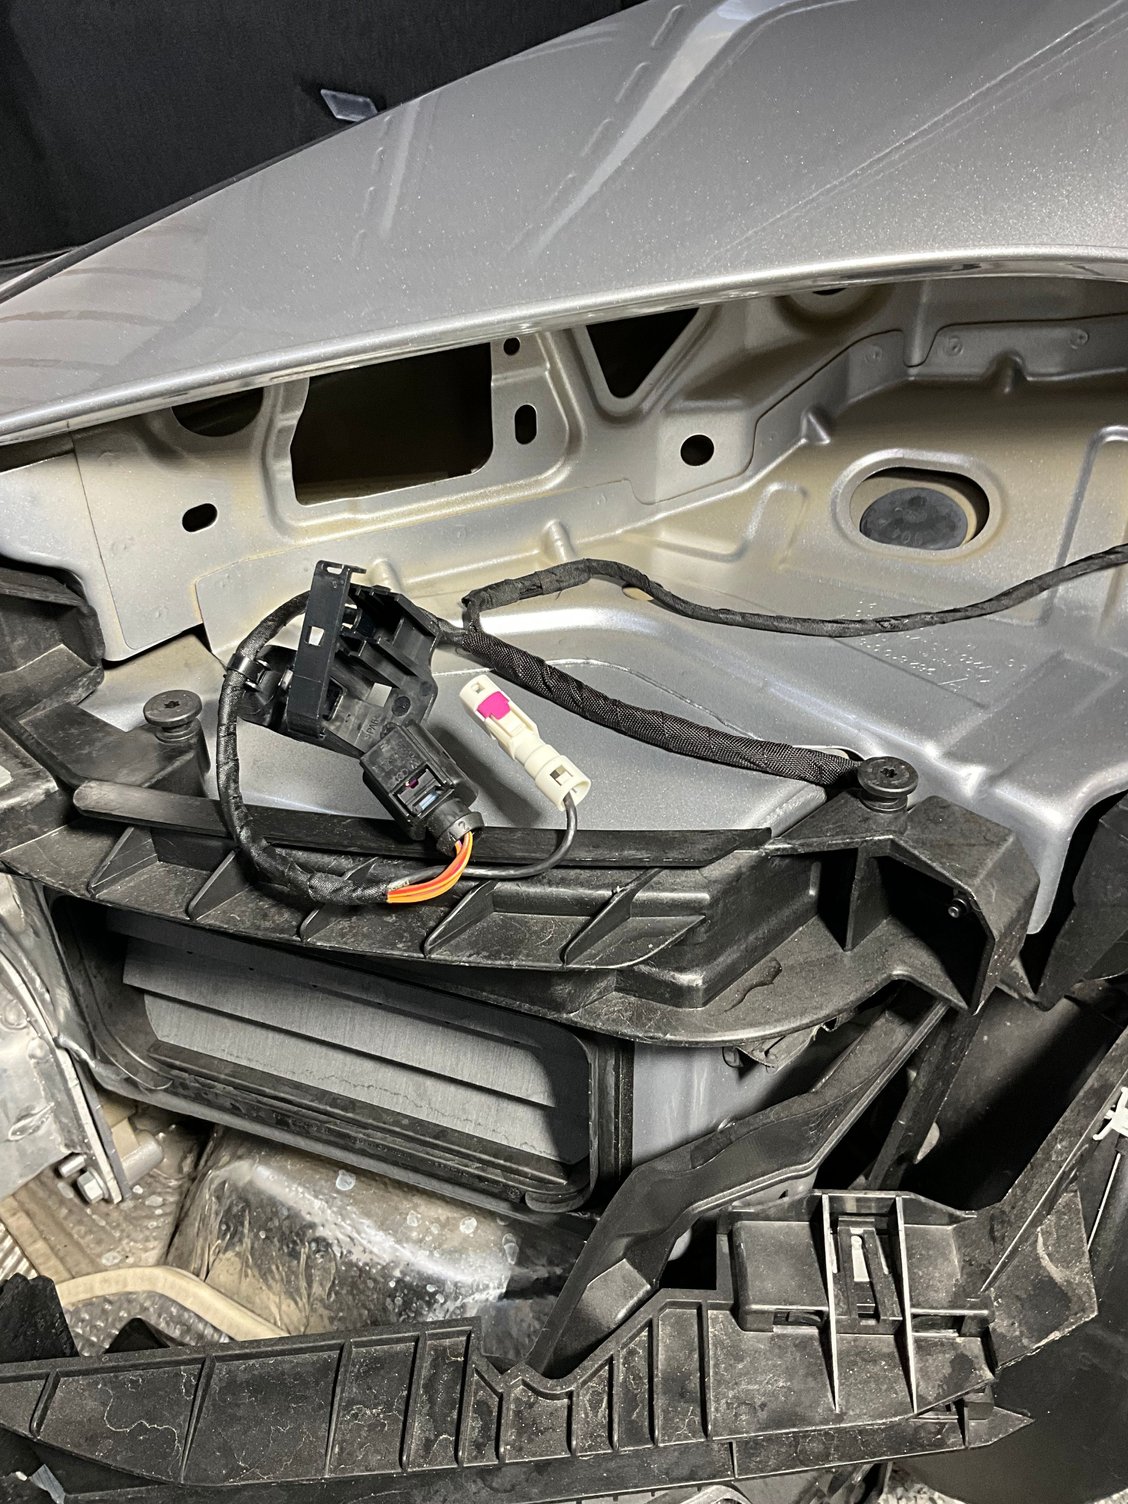
Passenger side harness unclipped from body. The extra wires that I didn't disconnect are for the rear camera. Gets dusty back here!
Sensor is located directly above backup camera, with clip unlatched it just wiggles out of the bracket.
Until I get to take off my bumper, do you recall if the rear camera can be tightened up from behind (screw/bolt or something)? Mine seems to wiggle a bit and have wanted to tighten it up somehow. The dealership said that was “normal”…but then, they also said there was no way to retrofit the sensors on my 2022 car either. 🙄
Until I get to take off my bumper, do you recall if the rear camera can be tightened up from behind (screw/bolt or something)? Mine seems to wiggle a bit and have wanted to tighten it up somehow. The dealership said that was �normal��but then, they also said there was no way to retrofit the sensors on my 2022 car either. 🙄
@mc3456 looking closely at the back of the B/U camera in my picture it appears that it's simply pushed into the hole and secured by spring tabs. If so you can probably shim it or bend out the tabs. - Jerry
Same - I'm also very interested in doing this. Can't believe Porsche isn't going to retrofit the '22 models with these!
I'm in the same boat. I thought I was getting this feature. Unfortunately, I don't have a screenshot of the appropriate porsche build info page where keyless entry is described. They'd probably use the "specifications subject to change without notice" excuse anyway.
I'm in the same boat. I thought I was getting this feature. Unfortunately, I don't have a screenshot of the appropriate porsche build info page where keyless entry is described. They'd probably use the "specifications subject to change without notice" excuse anyway.
I have it, mostly useless. Slow and much easier to just press the buttons on the remote!
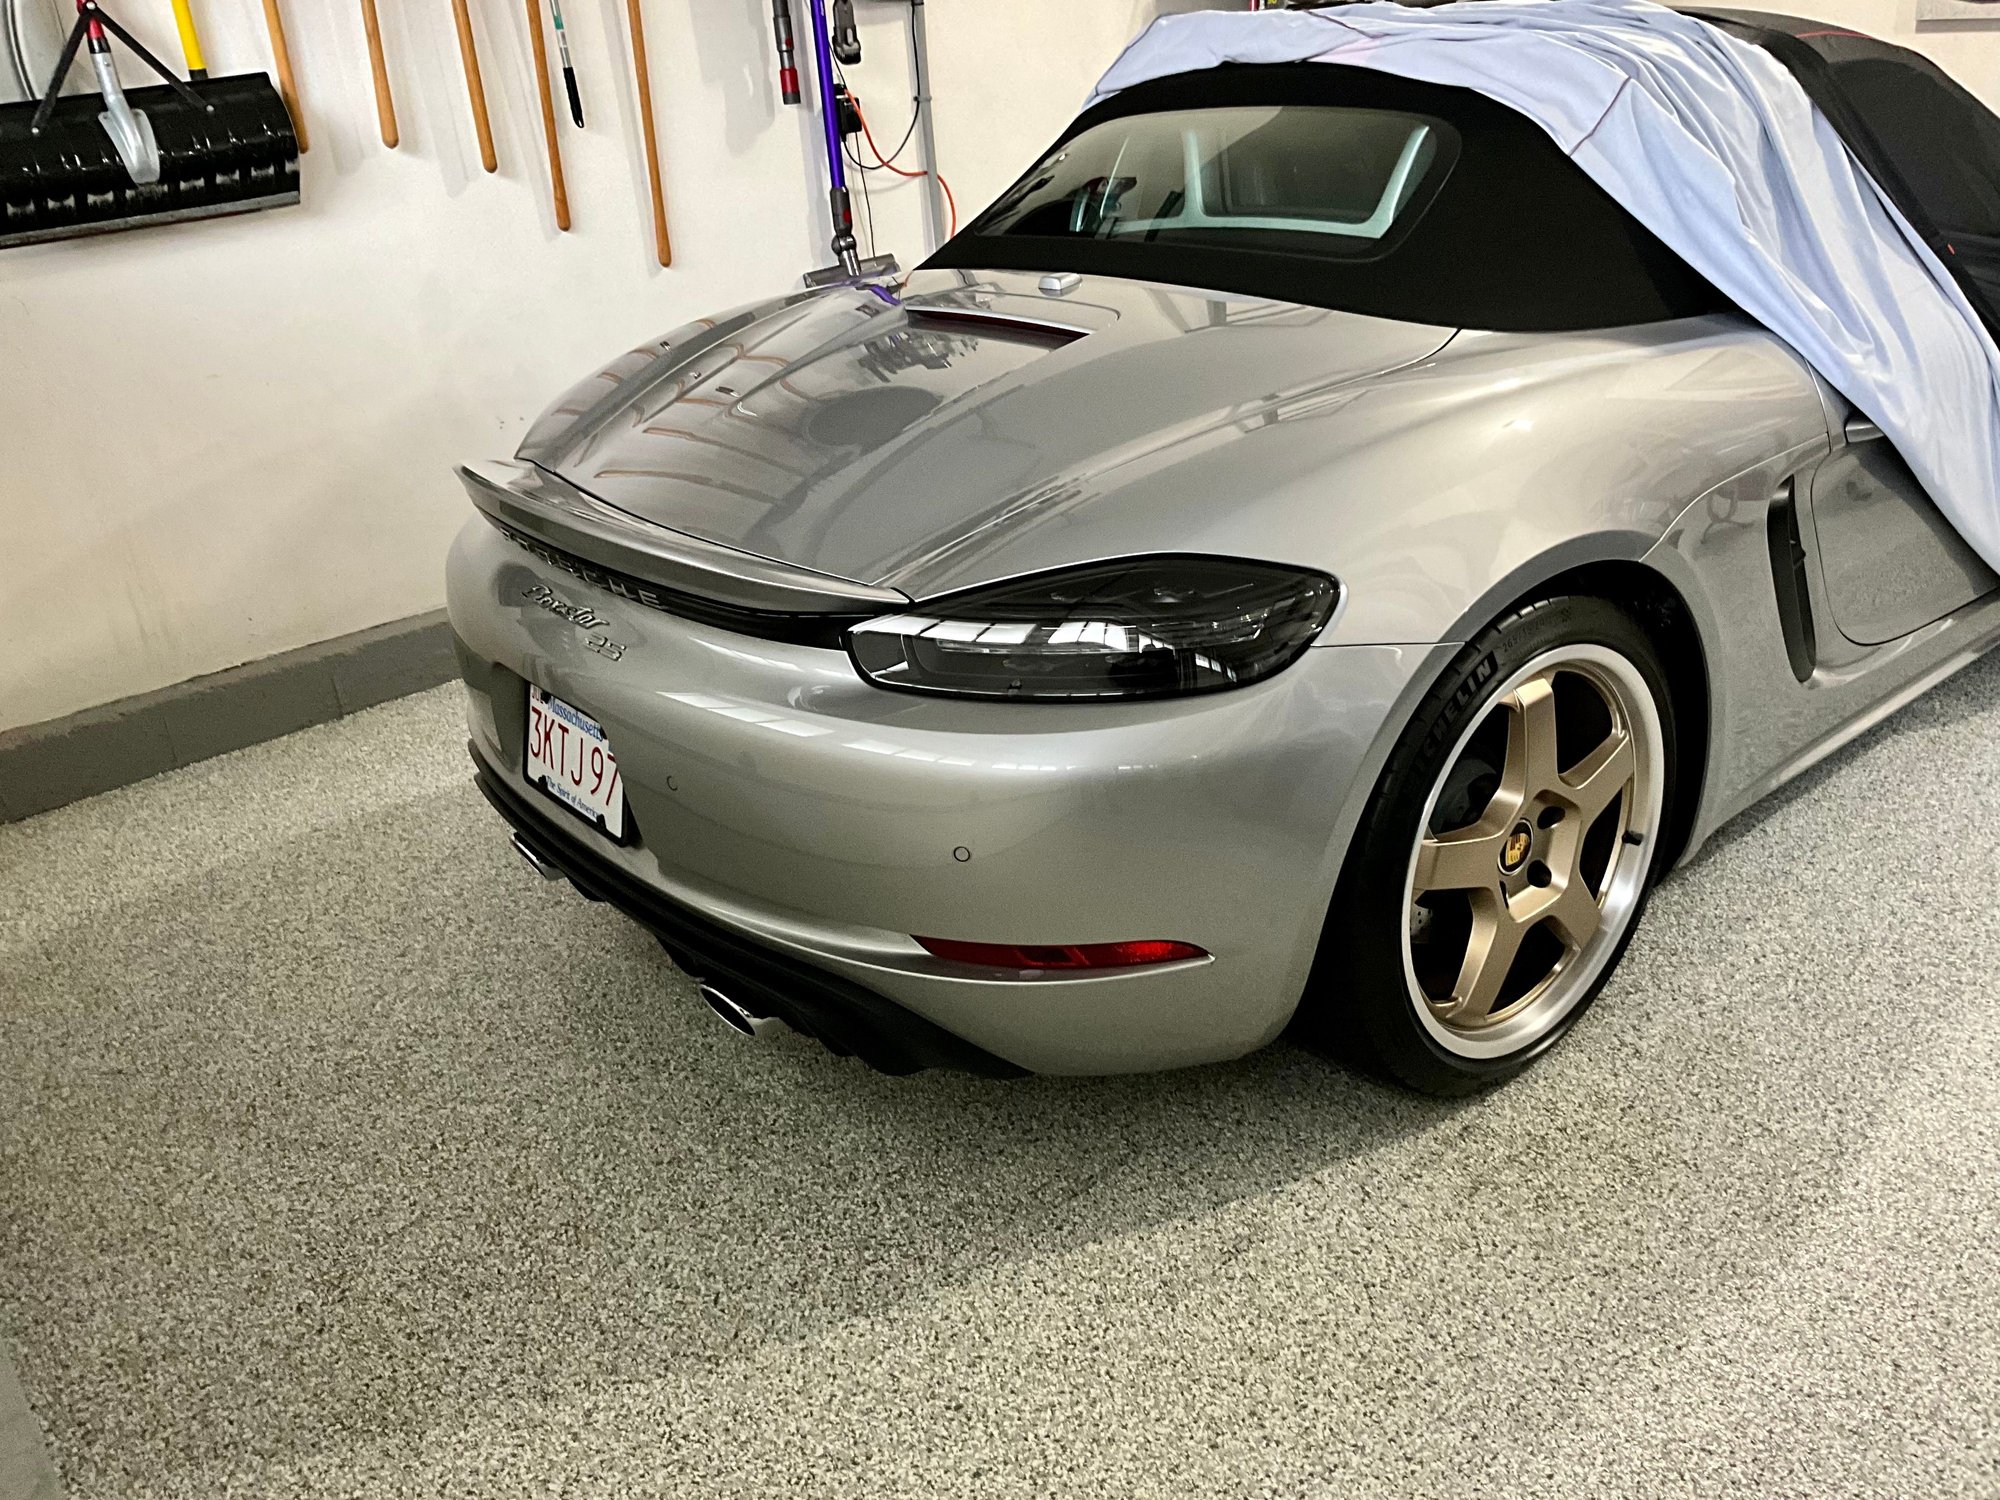
Just finished removing the rear bumper to replace the dummy sensor and install the working one. Overall not too bad, but getting the driver’s side tail light to release was the hardest part for me. It just didn't want to release from the ball socket, then came shooting out with more force on the trim tool. Definitely take your time on removing the lights. For reference, my passenger's side light came out easily. I didn’t document every step, but here are few more pics for reference.
Not looking forward to removing the front bumper again though after having just done it about 3 weeks ago to perform a "Neodyme delete" procedure. The front is a lot trickier if you don't have a lift/jack/jack stands, but still possible if you take your time.
Pro tip: Don’t forget to drain your washer reservoir prior to disconnecting the washer hose.
Just finished removing the rear bumper to replace the dummy sensor and install the working one. Overall not too bad, but getting the driver�s side tail light to release was the hardest part for me. It just didn't want to release from the ball socket, then came shooting out with more force on the trim tool. Definitely take your time on removing the lights. For reference, my passenger's side light came out easily. I didn�t document every step, but here are few more pics for reference. Not looking forward to removing the front bumper again though after having just done it about 3 weeks ago to perform a "Neodyme delete" procedure. The front is a lot trickier if you don't have a lift/jack/jack stands, but still possible if you take your time.
Pro tip: Don�t forget to drain your washer reservoir prior to disconnecting the washer hose.
Bravo. I would never be able to do that. You just need coding now
Just finished removing the rear bumper to replace the dummy sensor and install the working one. Overall not too bad, but getting the driver�s side tail light to release was the hardest part for me. It just didn't want to release from the ball socket, then came shooting out with more force on the trim tool. Definitely take your time on removing the lights. For reference, my passenger's side light came out easily. I didn�t document every step, but here are few more pics for reference. Not looking forward to removing the front bumper again though after having just done it about 3 weeks ago to perform a "Neodyme delete" procedure. The front is a lot trickier if you don't have a lift/jack/jack stands, but still possible if you take your time.
Pro tip: Don�t forget to drain your washer reservoir prior to disconnecting the washer hose
@mc3456 Great job especially the pictures Can you identify these 2 screws that I seem to have left over? ...do you know where they're supposed to go? The large thread pitch leads me to believe they connect to plastic parts together, but I can't seem to find their location. BTW what is "Neodyme delete"?
@mc3456 Great job especially the pictures Can you identify these 2 screws that I seem to have left over? ...do you know where they're supposed to go? The large thread pitch leads me to believe they connect to plastic parts together, but I can't seem to find their location. BTW what is "Neodyme delete"?
Yes, they are the screws on the inside corners of each tail light that you don't need to remove. I took one out and realized it only holds the black plastic trim with the PORSCHE logo on it to bumper itself. You have to pop out the tail lights to get access to it. See pix for reference of location.
Yes, they are the screws on the inside corners of each tail light that you don't need to remove. I took one out and realized it only holds the black plastic trim with the PORSCHE logo on it to bumper itself. You have to pop out the tail lights to get access to it. See pix for reference of location.
@mc3456 Thank you! Guess I'll be removing my taillights again! thankfully is quite easy. BTW, were you able to tighten up your B/U camera?
Bravo. I would never be able to do that. You just need coding now
If you can figure out the coding, then you can definitely do this job. It is just unscrewing a few bolts and a lot of Torx screws. Just take your time, have the right tools, document what goes where, and have plenty of working light. I had actually picked up a Milwaukee Cordless Speed Ratchet a few days ago and that made all the difference.
If you can figure out the coding, then you can definitely do this job. It is just unscrewing a few bolts and a lot of Torx screws. Just take your time, have the right tools, document what goes where, and have plenty of working light. I had actually picked up a Milwaukee Cordless Ratchet a few days early and that made all the difference. I also just happen to have a tiny 4" hex ratchet that I could load my Torx bits into for the tight spots like removing the 6 Torx screws on the rear spoiler. Bought it a few years ago on a whim and has paid for itself 100x over. Good complement to a ratcheting Torx driver.
Now I just need to take off the front bumper again for the front sensor, and then figure out the coding situation. To your earlier point, I will outsource the coding this go around. I really only want to activate these sensors and add the ability to open/close the roof/window with my key. I had a Smart Top on my 991.2 C4S which is plug N play, but on the 718 Boxster, you need to remove the driver's seat, cut the carpet, and then crimp a wire-tap for power. Having done that before on a different car, I will happily forego that method.
x2 on the light, I recently bought a couple of LED flashlights on Amazon which were very helpful to have for this task. Remote top operation is also nice to have. Had it standard on my previous BMW Z4 so I was very happy to get that working thanks to the help of @718socal .
Sheesh ... I thought I was bad for forgetting the location 2 screws that didnt need to be removed (which are now re-installed, thanks for showing me where, lol).. You never answered my question about what is "Neodym Delete"?

 01-01-2023, 07:56 AM
 I only disconnected the harness on the drivers side which allowed the bumper to be pulled away enough to reach in. The passenger side is a weird connector that I didn't want to disconnect, so no good pictures of the back side of the bumper but its basically the same as the front. I used these YouTube youtube video for reference...


 especially the pictures
  BTW what is "Neodyme delete"?


 thankfully is quite easy. BTW, were you able to tighten up your B/U camera?