When you click on links to various merchants on this site and make a purchase, this can result in this site earning a commission. Affiliate programs and affiliations include, but are not limited to, the eBay Partner Network.
Hey it WAS a success, it got me a great deal and save me a lot of Canadian Peso's in the process, and for that I thank you!
The T-Design module looks like it does the job, just a bit annoying that we even have to do this, the button should just stay where they were set last.
Hey it WAS a success, it got me a great deal and save me a lot of Canadian Peso's in the process, and for that I thank you!
The T-Design module looks like it does the job, just a bit annoying that we even have to do this, the button should just stay where they were set last.
For those of you awaiting delivery of your cars, I believe that the car arrives at the selling dealer with the two center console side panels not in place. I am hoping that I can have them install the TDesign module, along with a Rennline magnetic phone mount, before they install those two side panels during their final PDI.
For those of you awaiting delivery of your cars, I believe that the car arrives at the selling dealer with the two center console side panels not in place. I am hoping that I can have them install the TDesign module, along with a Rennline magnetic phone mount, before they install those two side panels during their final PDI.
Interesting! I was going to say or better yet have them leave them off so you can see first hand how they mount so you will know for the future...
Rec'd my T-module last week...can someone post a photo of this "pssgr side metal piece" please. The spot to stick it...I would also like to verify the orientation of the module itself (i.e. wires toward front of car, toward rear of car, etc.).
Interesting! I was going to say or better yet have them leave them off so you can see first hand how they mount so you will know for the future...
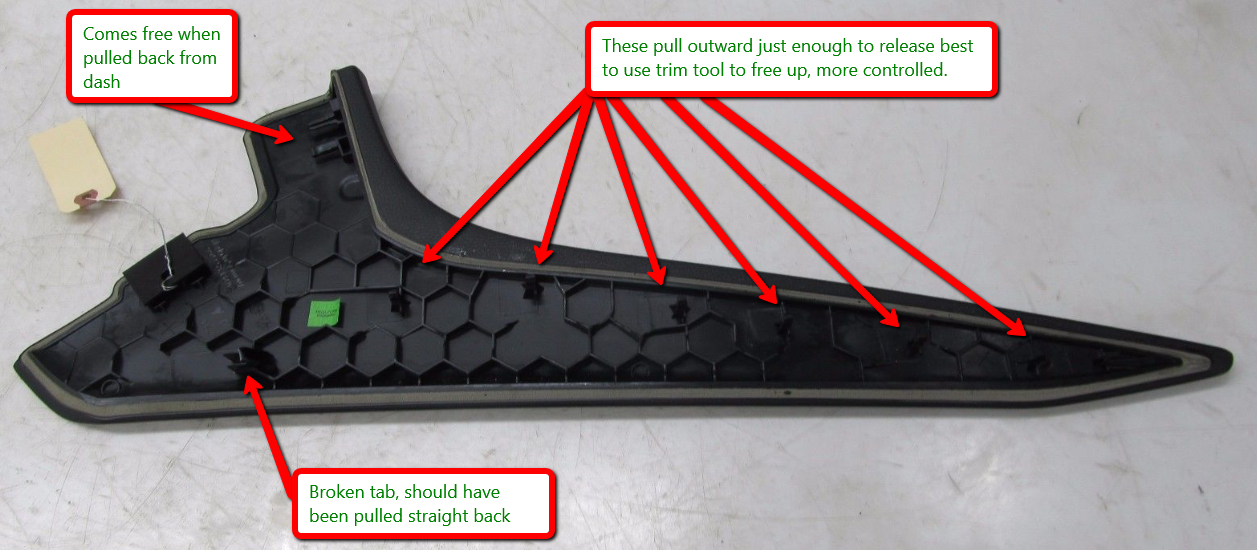
I've seen several videos of the side panels install - simply place the forward piece of the panel into the slot, rotate down a few degrees and snap the panel into place. Seems to be very straightforward.
I've seen several videos of the side panels install - simply place the forward piece of the panel into the slot, rotate down a few degrees and snap the panel into place. Seems to be very straightforward.
It is... until you break the front clip that needs to come out just a bit further to clear! These panels are about $800/ea in leather, I try to refrain from repeated removals because the plastic is easy to break, IMHO watching a video is not the same as doing this yourself.
My suggestion was just to give someone that is a DIYer the opportunity to complete their own install of the module before putting the console back together.
Rec'd my T-module last week...can someone post a photo of this "pssgr side metal piece" please. The spot to stick it...I would also like to verify the orientation of the module itself (i.e. wires toward front of car, toward rear of car, etc.).

 01-11-2021, 01:08 PM