When you click on links to various merchants on this site and make a purchase, this can result in this site earning a commission. Affiliate programs and affiliations include, but are not limited to, the eBay Partner Network.
the neat thing after the rubber degrades is that you only have to change that part and not the whole mount which will normally be done every 10-15 years or so if they last that long. much cheaper in the long run if you can source the rubber.
I have a set of Volvo mounts sitting in a box that need to go on my car, so it might take some convincing for to go this way on the motor mounts...however the tranny mounts are intriguing. I don't think there is a cheap/effective alternative for those, like there is for motor mounts...
I found a new machining source who can make the cases at a reasonable price for these. I need to get the hardware and the isloators re-quoted (I don't have time to cast them myself any more).
Anyone still interested in these mounts? I would need to run a batch of 10 sets. Depending on the price of the isolators, I would anticipate that the price would be around $400/pair.
Hans, are these for the motor mounts or trans mount? I'm very interested in the motor mounts and were hoping you would do a run at some point. Do you have anymore feedback from your beta tester? It has now been a few years and curious how they have been holding up.
I will preface this update to say I am working with one of our sponsoring vendors to get these mounts out to the public. Pricing/availability is yet to be determined, but hope to have that information soon with the official product release. This is a development thread so everyone can see the process, or find inspiration in the design to make something on their own.
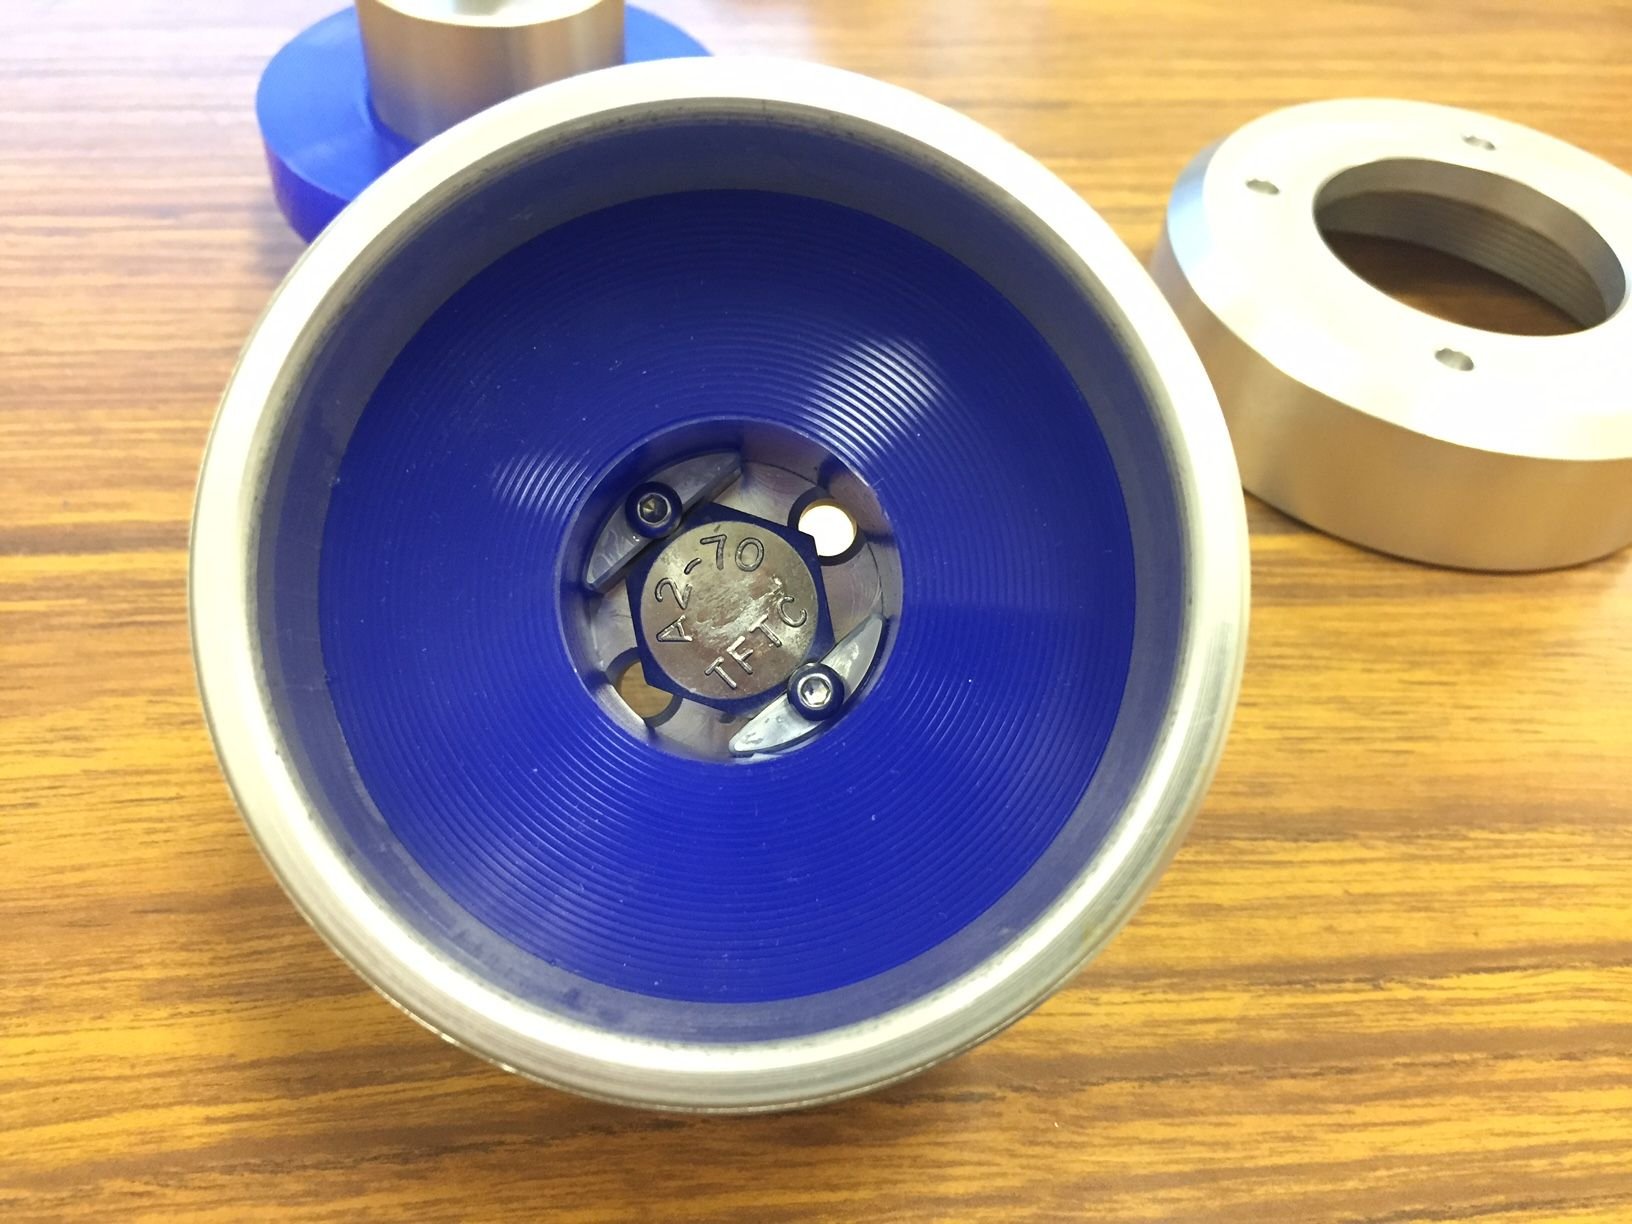
I have the first batch of hard components back from the anodizer, and the set of test urethane inserts from the prototype mold. There was a bit of swelling in the urethane inserts, so I am having the multi-cavity tool specced a tad undersize to ease in servicing the mounts. I am also going to run a much lower durometer rubber than the current prototype parts. I am working with the urethane shop to get these components completed now.
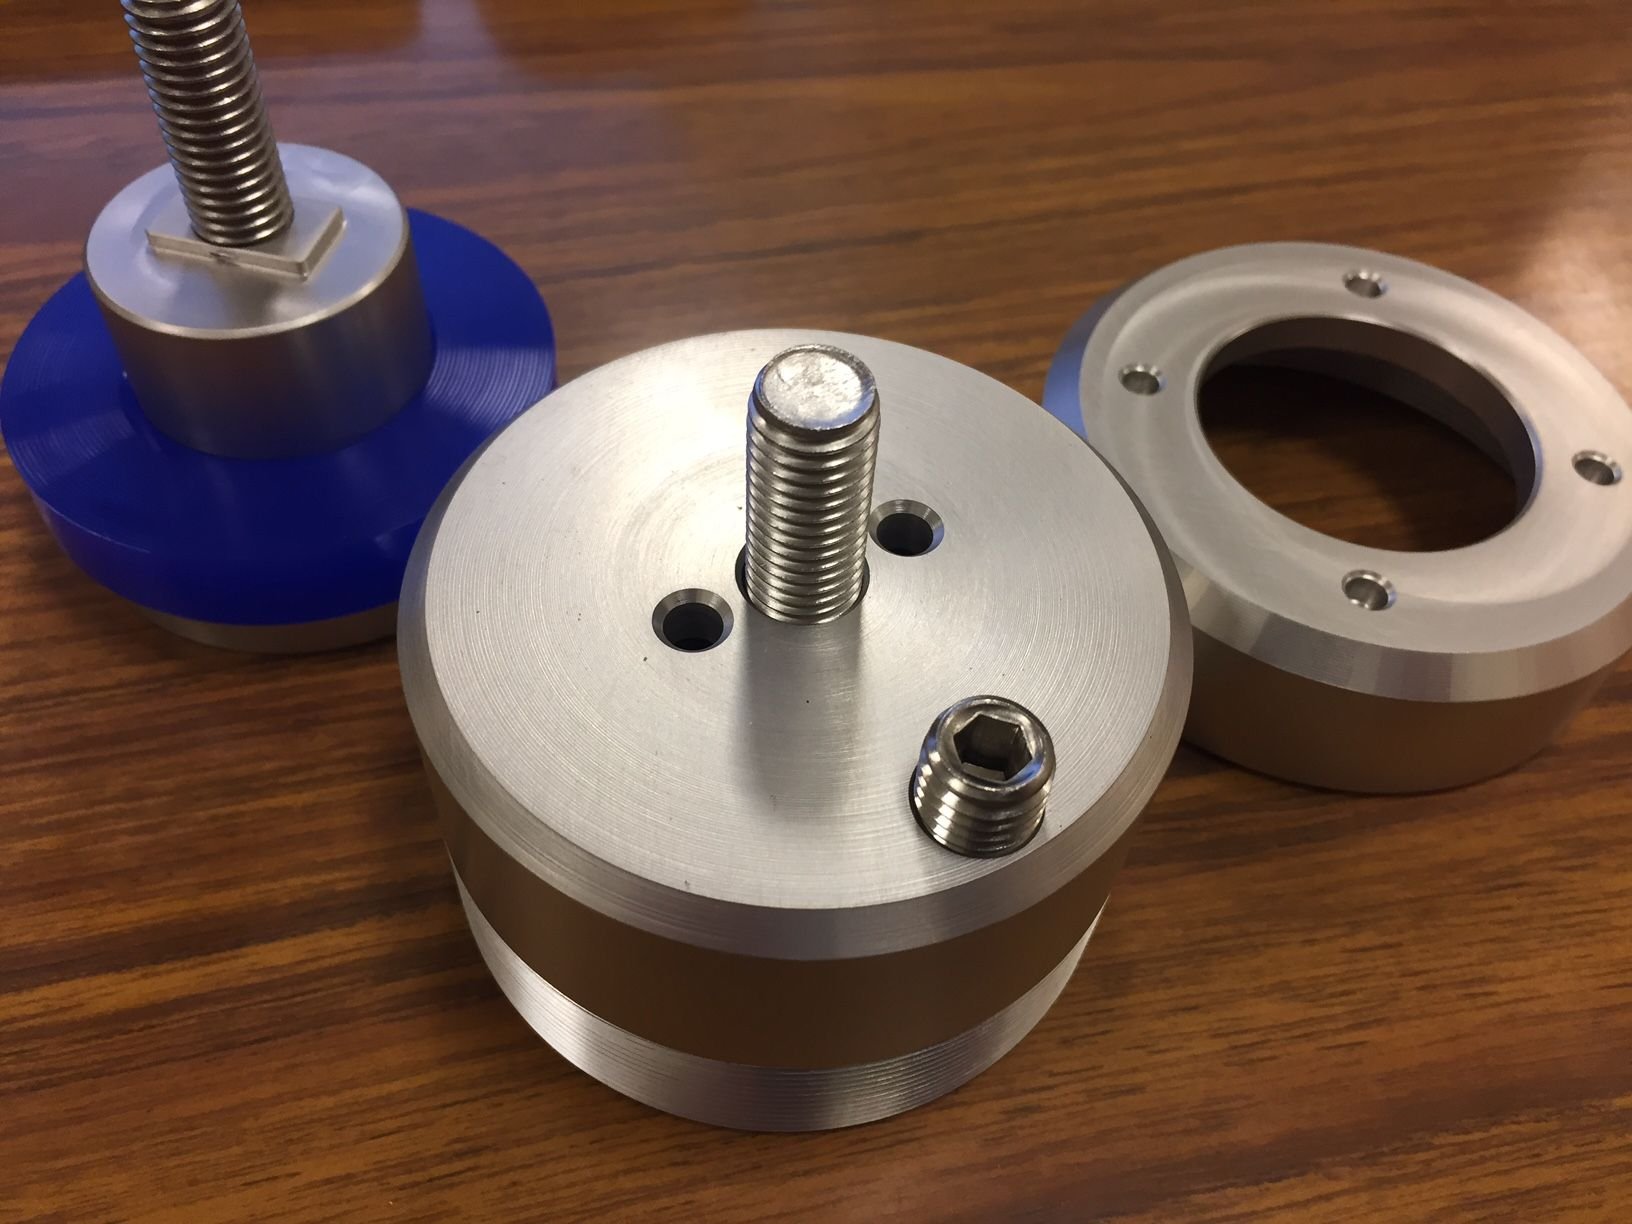
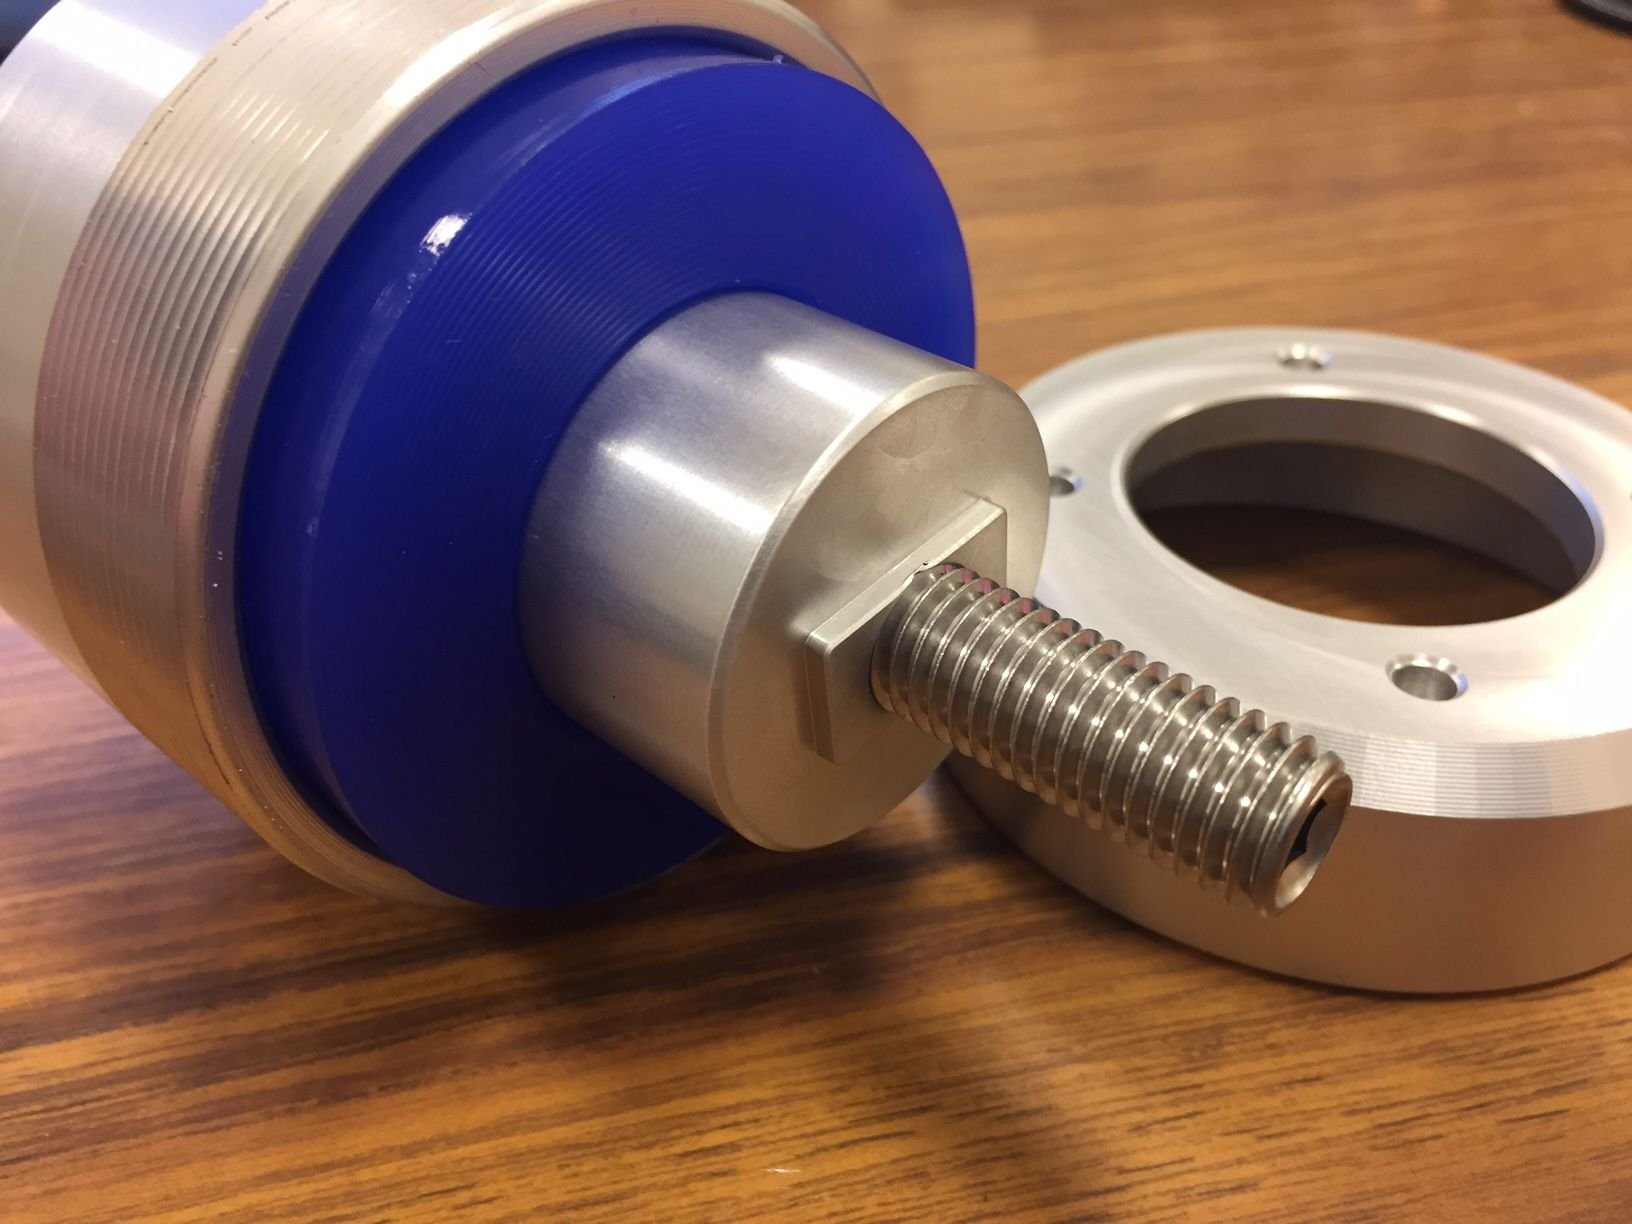
A couple of more recent design changes, the lower fastener is now held captive by two large bosses and two optional screws. The screws allow the lower bolt to float a little bit in all directions, which will hopefully help with installing in the lower crossmember. The screws can be completely removed if there are clearance issues, allowing the bolt to be pressed up inside the bod. The provided stainless hardware is slightly magnetic, so if the retention screws are omitted, the bolt can be pulled back down and rotated with a standard pickup magnet once over the crossmember. The bolt can also be replaced by any standard M12 bolt if a different length or material is required.
The upper stud is also now a setscrew. This allows installation of various length fasteners, or even switching from a stud-style to a bolt-style fastener for low clearance applications.
As can be seen, the lower locating pin is removable and optional.
The threaded body will allow for customization of the inserts or installation of shims. A nylon-tip setscrew is provided to keep the lid tensioned and preload set at the desired amount.
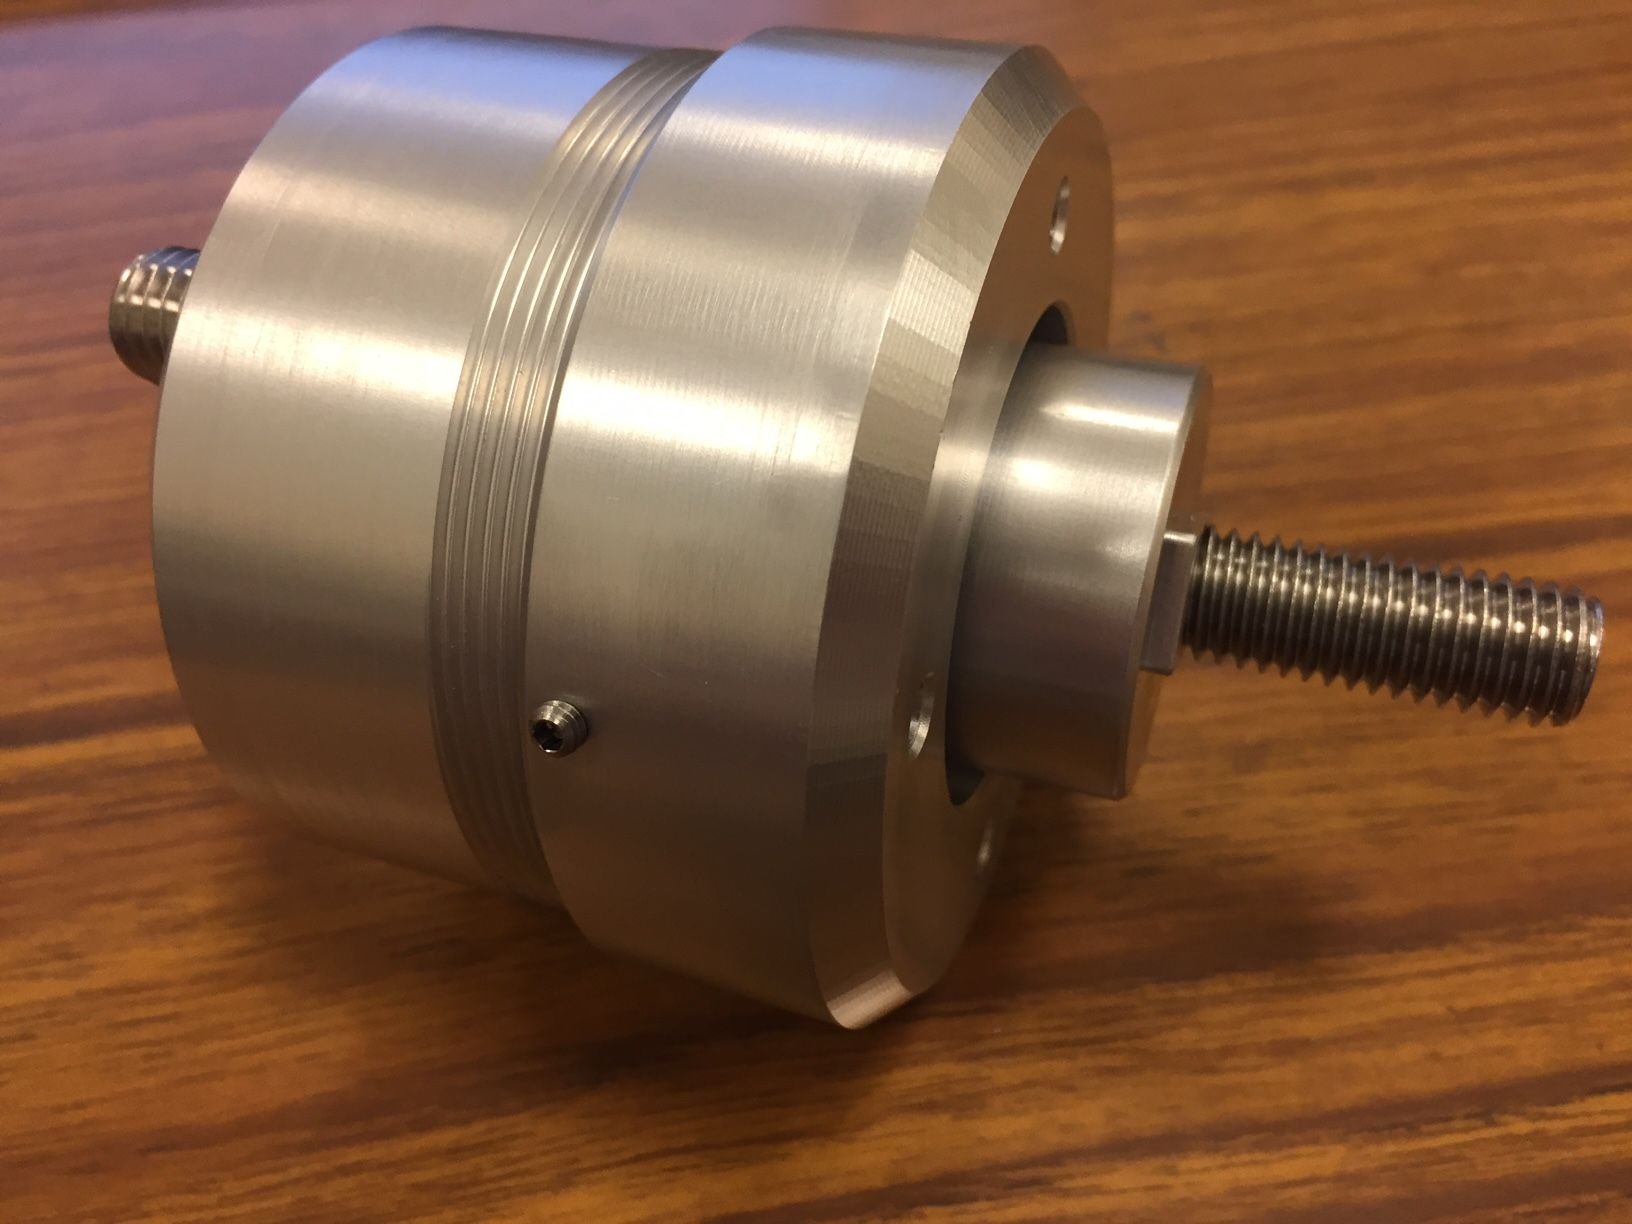
The body of the mount has been clear anodized to keep the mounts looking good and threads clean for many years of service.
I will preface this update to say I am working with one of our sponsoring vendors to get these mounts out to the public. Pricing/availability is yet to be determined, but hope to have that information soon with the official product release. This is a development thread so everyone can see the process, or find inspiration in the design to make something on their own.
I have the first batch of hard components back from the anodizer, and the set of test urethane inserts from the prototype mold. There was a bit of swelling in the urethane inserts, so I am having the multi-cavity tool specced a tad undersize to ease in servicing the mounts. I am also going to run a much lower durometer rubber than the current prototype parts. I am working with the urethane shop to get these components completed now.
A couple of more recent design changes, the lower fastener is now held captive by two large bosses and two optional screws. The screws allow the lower bolt to float a little bit in all directions, which will hopefully help with installing in the lower crossmember. The screws can be completely removed if there are clearance issues, allowing the bolt to be pressed up inside the bod. The provided stainless hardware is slightly magnetic, so if the retention screws are omitted, the bolt can be pulled back down and rotated with a standard pickup magnet once over the crossmember. The bolt can also be replaced by any standard M12 bolt if a different length or material is required.
The upper stud is also now a setscrew. This allows installation of various length fasteners, or even switching from a stud-style to a bolt-style fastener for low clearance applications.
As can be seen, the lower locating pin is removable and optional.
The threaded body will allow for customization of the inserts or installation of shims. A nylon-tip setscrew is provided to keep the lid tensioned and preload set at the desired amount.
The body of the mount has been clear anodized to keep the mounts looking good and threads clean for many years of service.
I hope you enjoy.
Wow! They look great! Can't wait until I can get my hand on a set. These will compliment my newly rebuilt engine perfectly once its done.
The Volvo mounts I have in a box waiting for me to get brave enough to start that job seem inadequate now. Everything Hans makes is beautiful, and completely hidden away. Maybe he should make some more visible things


 10-02-2015, 02:47 PM