3D Printing 924 & 944 Parts - Development and Discussion
#181
Went to pull the sunroof completely out and had a failure, presumably due to an improperly adjusted limit switch. Works fine in tilt, but when trying to retract the arms for roof removal it eats them.
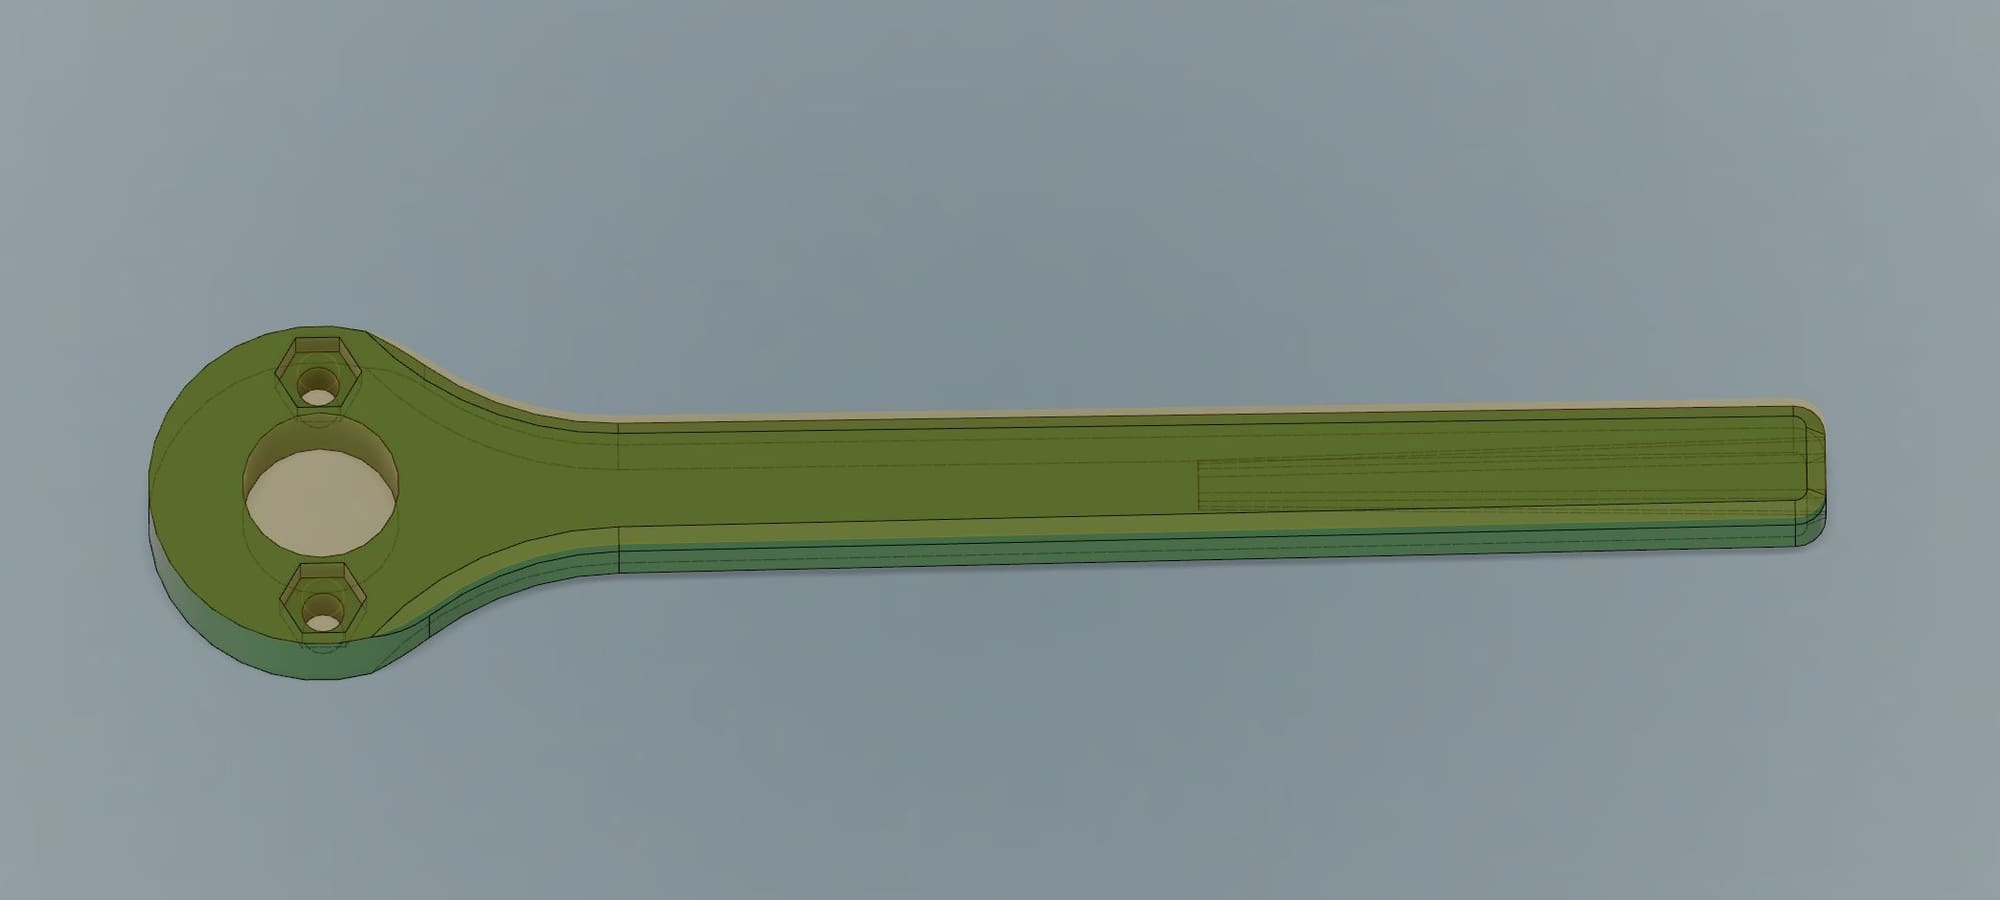
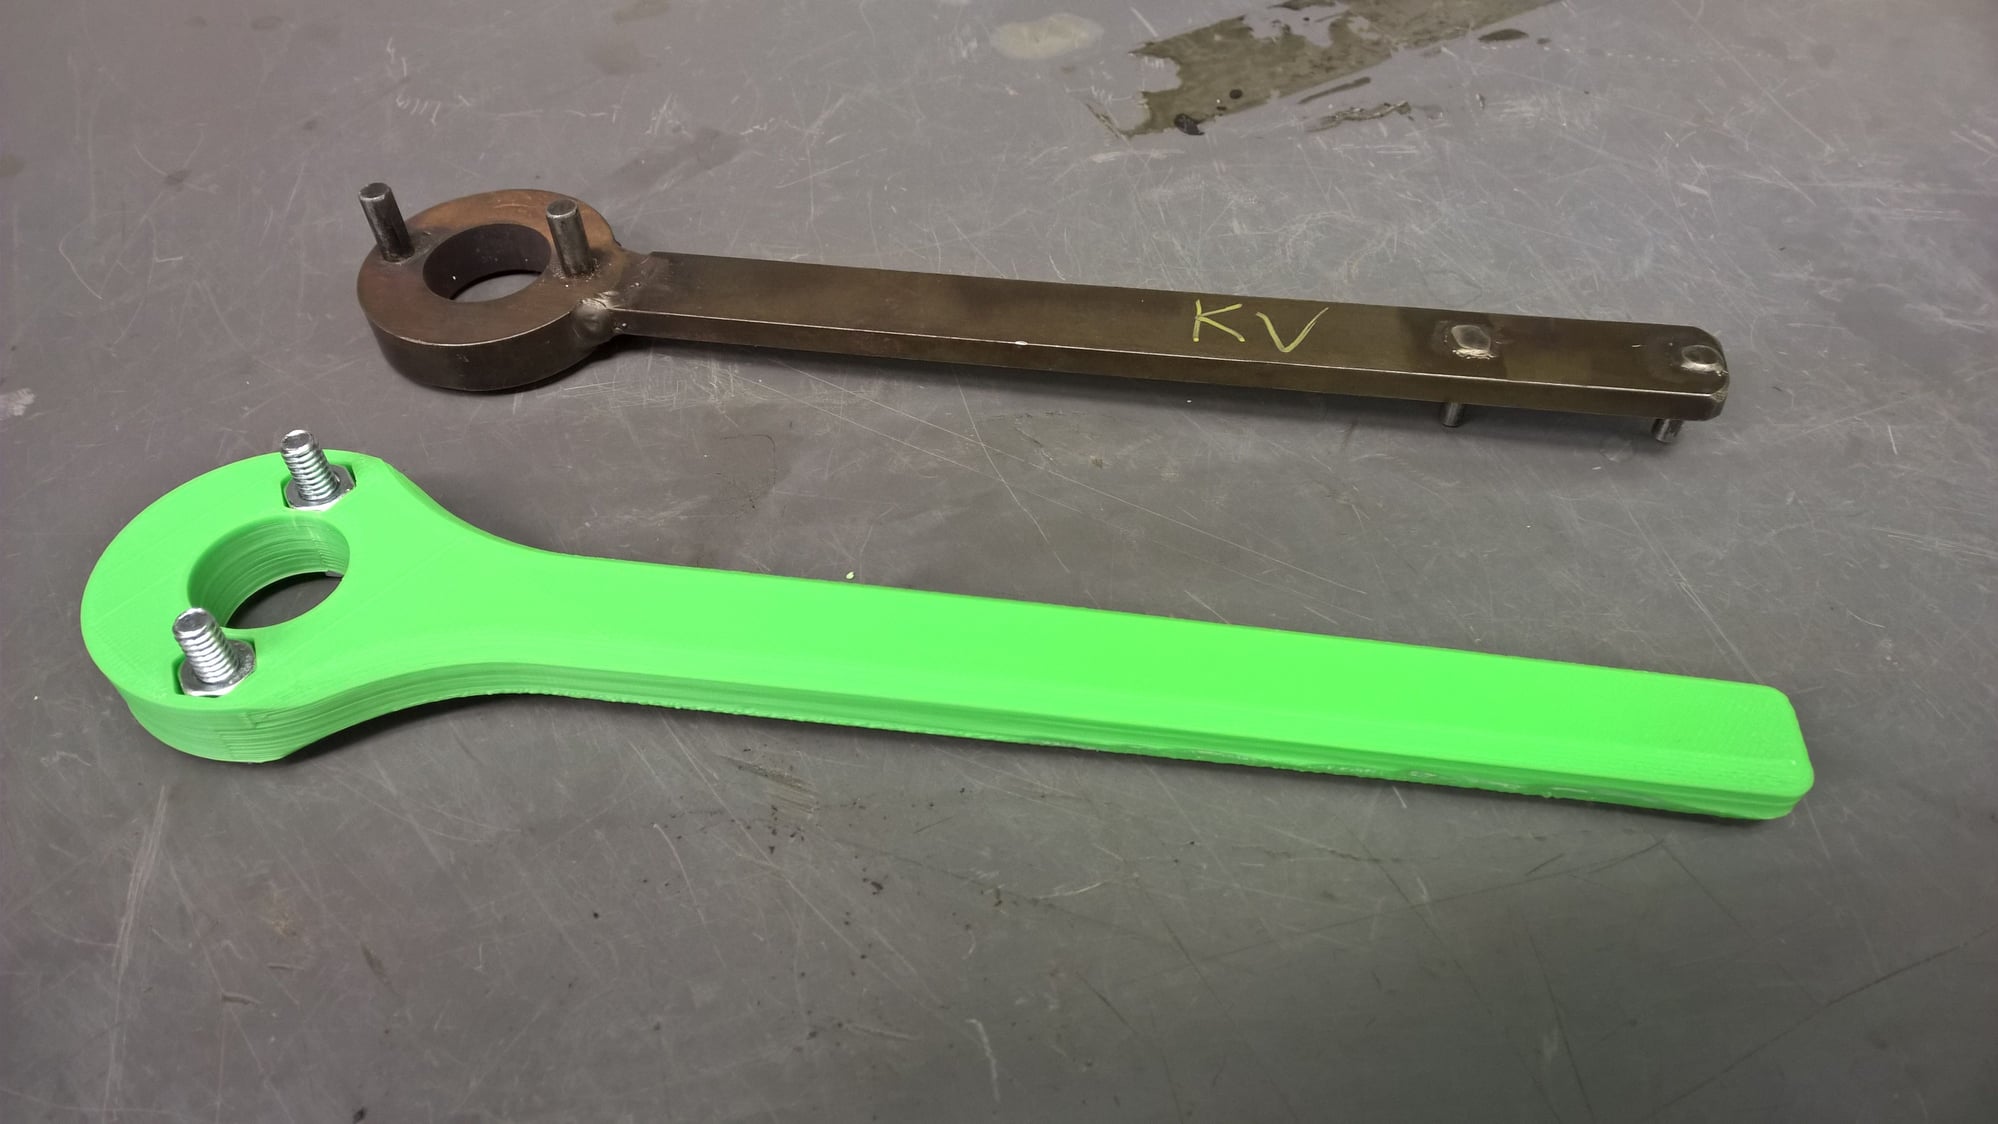
Printing a new redesigned set now, with twice the wall/skin thickness and higher infill density. Heading out to adjust the limit switches while that runs.
#182
Freedom Enthusiast
Rennlist Member
Rennlist Member
#183
Meme-dog above was done with an SLS (laser sintering of a powder medium) process, where most of us tend to run FDM (melted filament style) machines. There is a huge difference in price that reflects the huge difference in quality and resolution.
Finished installing the new hotend and did some basic calibration earlier, decided to knock out a set of the newer revision gears as a test print:
They feel a lot stronger than the first revision, and look a lot better too.
Finished installing the new hotend and did some basic calibration earlier, decided to knock out a set of the newer revision gears as a test print:
They feel a lot stronger than the first revision, and look a lot better too.
#184
These rear hatch lock seals are very expensive now ($80 per side) and mine need replacing. If they can't be 3D printed, maybe a mold can be.
Similar to this:
924S:
944 512 365 01 - Left
944 512 366 01 - Right
944S2:
477 827 365D - Left
477 827 366D - Right
For chassis up to 94FN4 00259 then same as 924S
968:
944 512 365 02 - Left
944 512 366 02 - Right
I don't know how different each seal is from the other.
PM me if you're interested, I might be able to supply new 924S seals for development purposes.
#186
Pro
Thread Starter
These rear hatch lock seals are very expensive now ($80 per side) and mine need replacing. If they can't be 3D printed, maybe a mold can be.
Similar to this:
924S:
944 512 365 01 - Left
944 512 366 01 - Right
944S2:
477 827 365D - Left
477 827 366D - Right
For chassis up to 94FN4 00259 then same as 924S
968:
944 512 365 02 - Left
944 512 366 02 - Right
I don't know how different each seal is from the other.
PM me if you're interested, I might be able to supply new 924S seals for development purposes.
Similar to this:
924S:
944 512 365 01 - Left
944 512 366 01 - Right
944S2:
477 827 365D - Left
477 827 366D - Right
For chassis up to 94FN4 00259 then same as 924S
968:
944 512 365 02 - Left
944 512 366 02 - Right
I don't know how different each seal is from the other.
PM me if you're interested, I might be able to supply new 924S seals for development purposes.
http://www.sunsetporscheparts.com/oe...he/94451236502
@Ish_944 - Why did the new ones fail so quick?
How do the new ones feel? Mine seem okay - they feel more like rubbery-foam than rubber. Low density.
I thought about trying to print these with the Ninjaflex (polyurethane). Even with a low infill density they would still be stiffer than the OE parts, so they might be more difficult to fit into place.
#187
Three Wheelin'
Yes, a foam rubber. Kyle from Only944 may look at these in the near future.
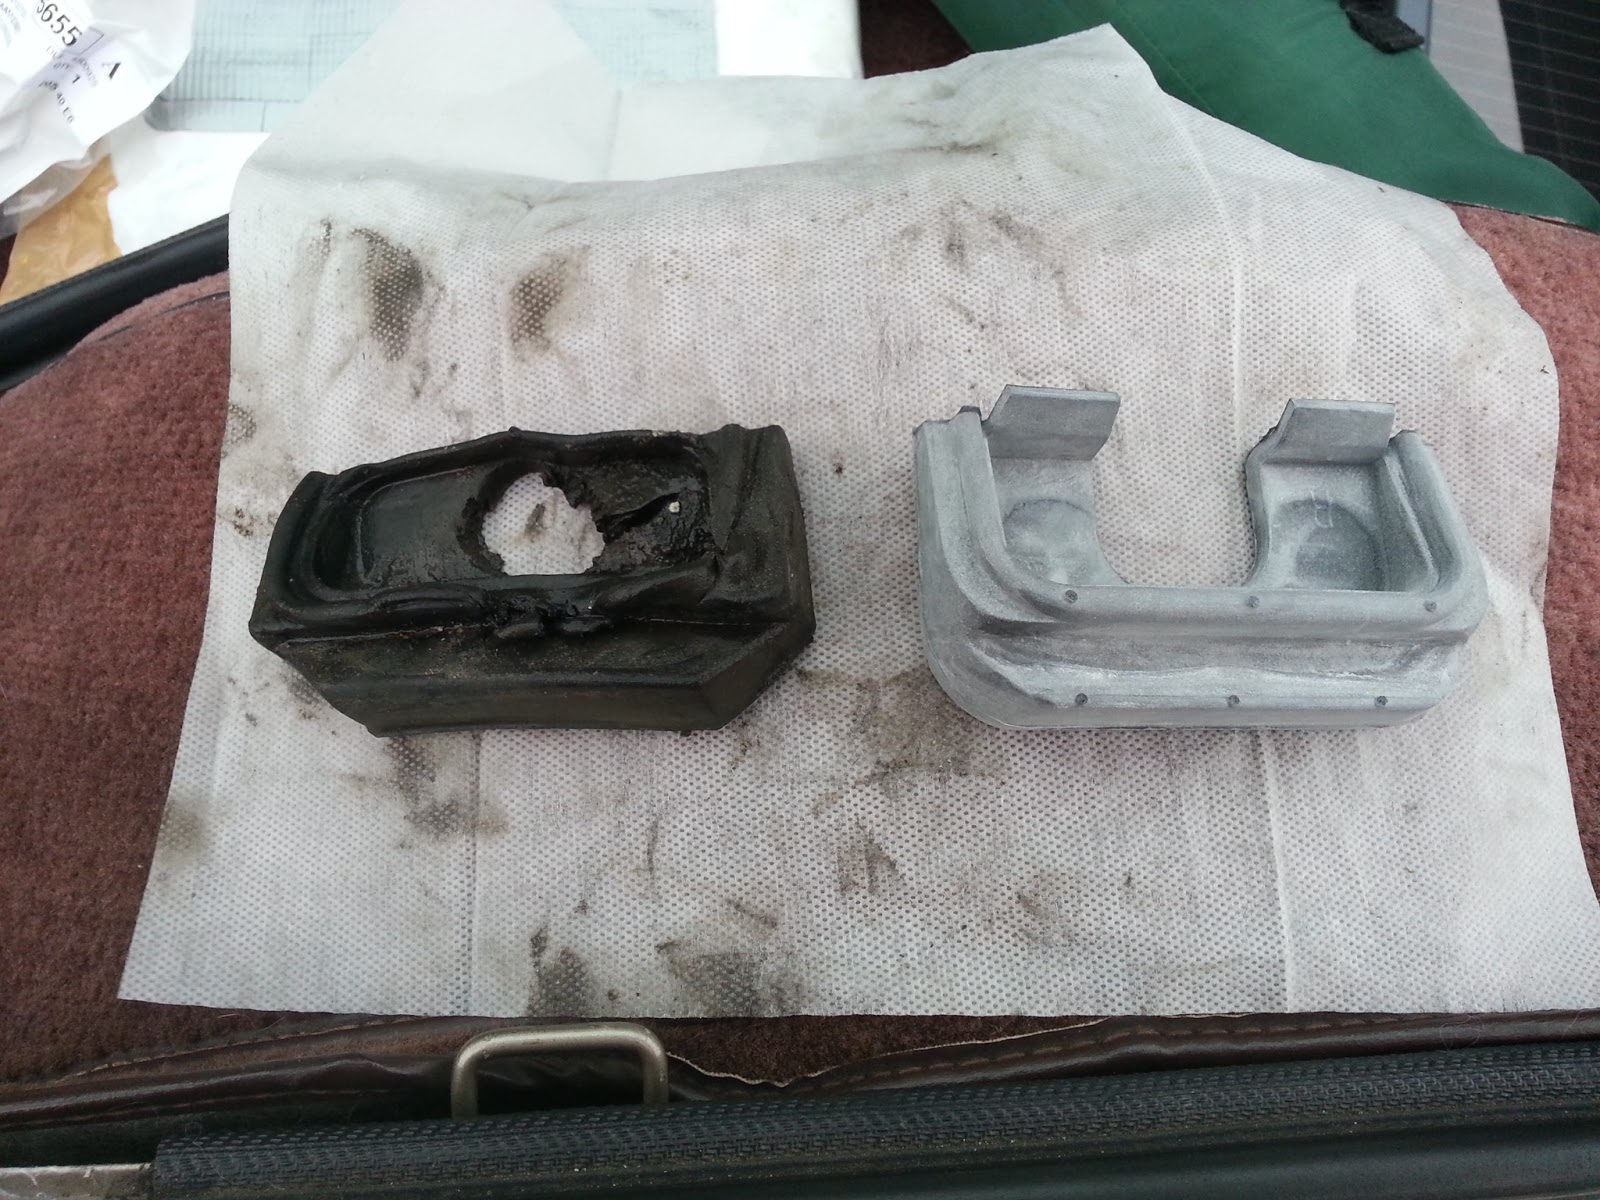
I bought new ones from 944online early last year. They are a PITA to fit and even with using dishwashing liquid to help work them into position both of mine tore and they are ill-fitting. These are an important seal, like the hatch pin seats, good hatch seals and correctly adjusted hatch pins. They all work together for a tight fitting hatch to prevent exhaust gases coming into the cabin, and bad ones contribute to hatch rattle and hatch glass separation.
#188
Climate controll
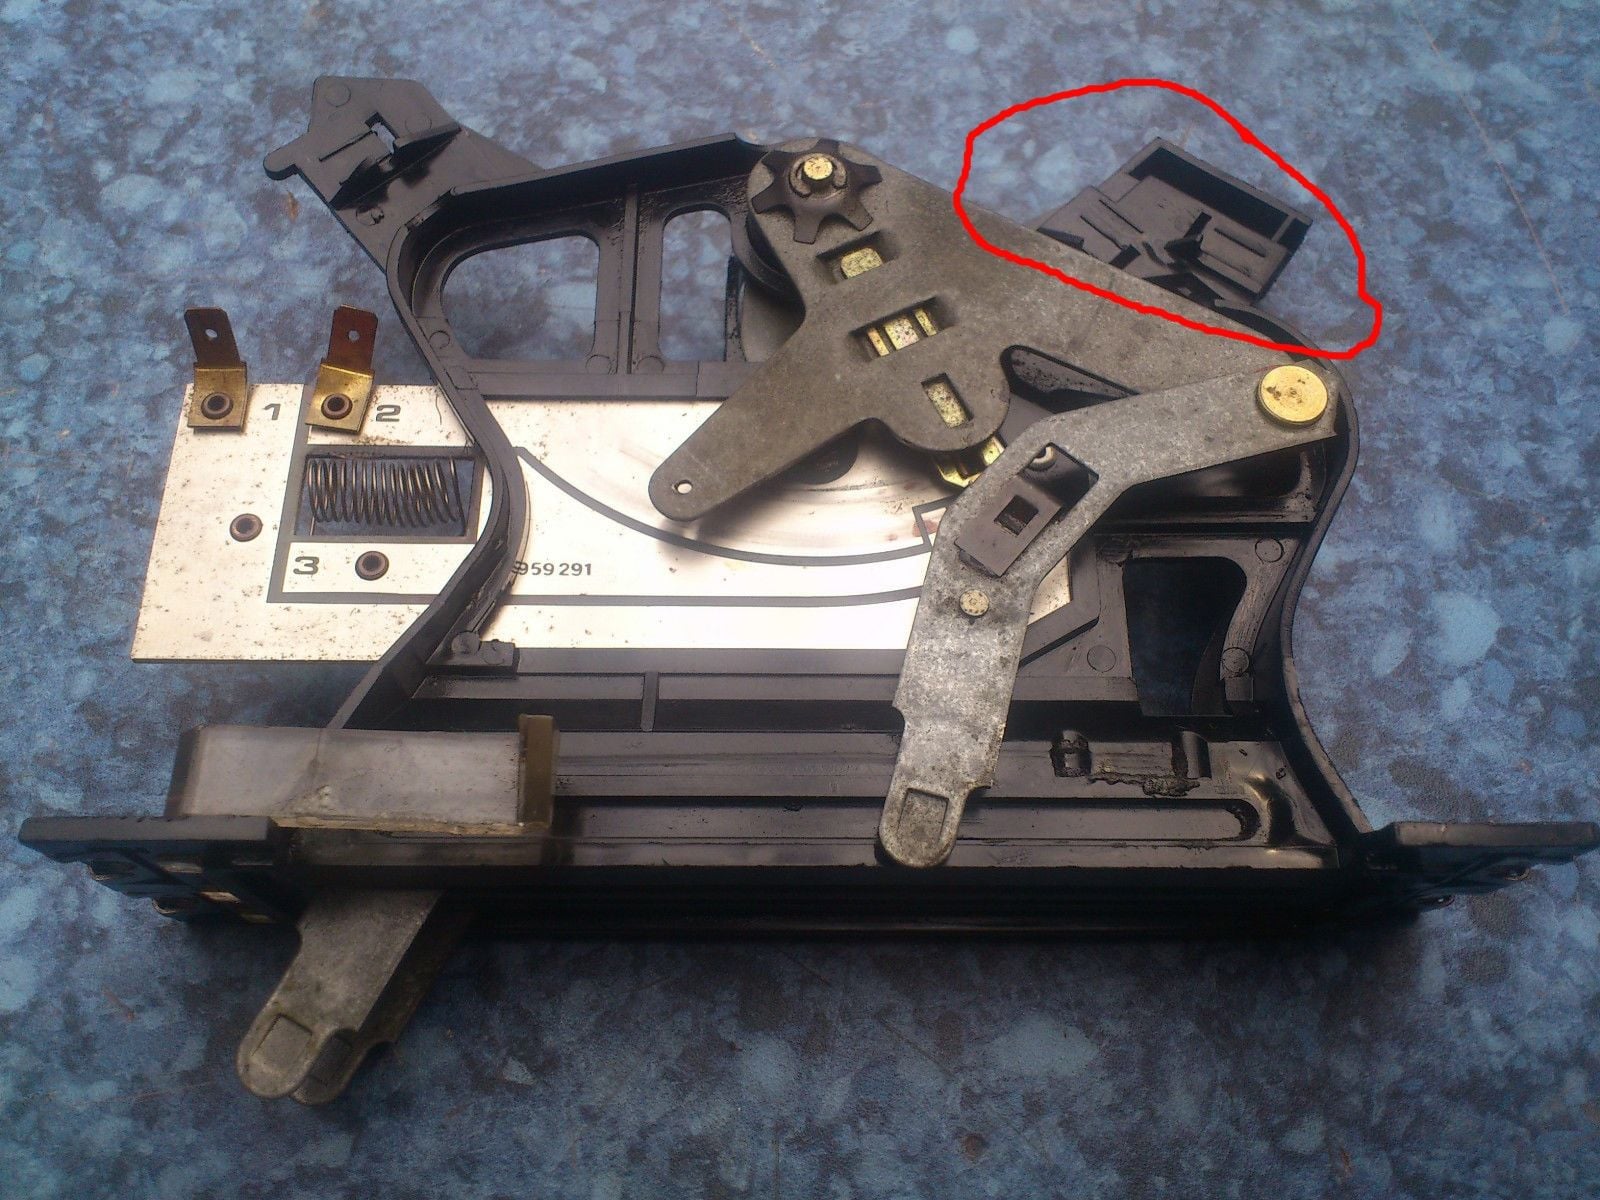
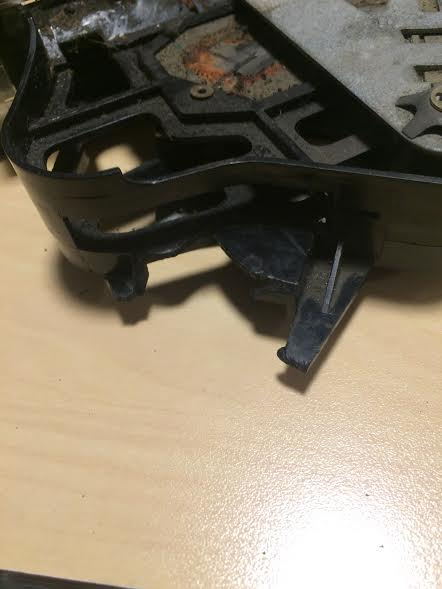
I have broken the wire connector on the climate control (the one controlling temperature and window/floor airflow)
I'm not able to make a good model as i only have pictures to go off.
What its supposed to look like:
Mine:
Part number: 477819045
Can someone help me?
I'm not able to make a good model as i only have pictures to go off.
What its supposed to look like:
Mine:
Part number: 477819045
Can someone help me?
#191
Pro
Thread Starter
Jay - I'll check that out next time I'm under the car.
~~~~~~~~~~~~~~~~~
I was inspired by the MacGyver thread to model and print a balance shaft tool.
Download and modify the CAD file at will:
http://a360.co/2erZeeg
Download the STL directly:
http://kveder.net/944-bs-tool-v3.stl
I printed using HIPS at 80%, but ABS is probably better. Print is a bit ugly on the handle because it lifted off the bed early on.
Hasn't been tested yet!
Uses 1/4" nuts and bolts, ~ 1-1/2" long.
#193
Three Wheelin'
3d print some Porsche wheel beer coasters?
The following users liked this post:
riviera 93 (04-11-2020)