

Past the stage of no return

 01-03-2009 | 11:20 PM
#3
Instructor
Joined: Feb 2006
Posts: 149
Likes: 0
From: Little Rock, Arkansas
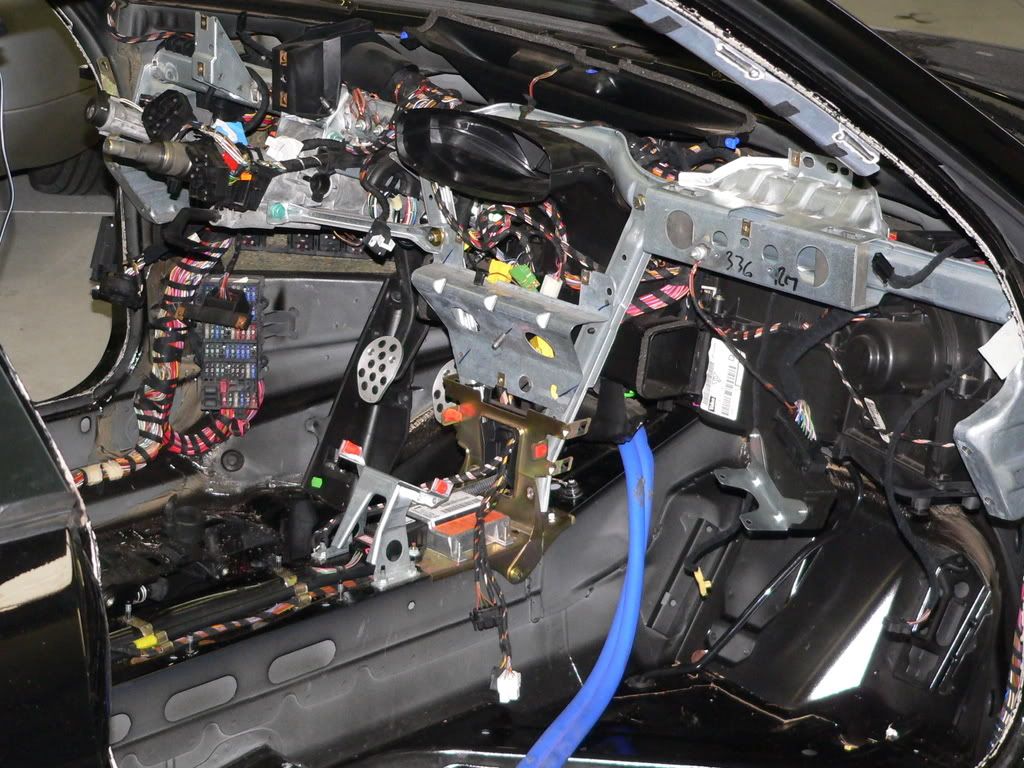
True enough, you're just getting started. Enjoy. Mine looked like that at first too. Next, all those pesky factory wiring harnesses have to leave immediately. Can we have pics of the engine bay and exterior. With those we can tell you that the HVAC components must leave and the engine bay fan and some other unnecessary things. Then we'll be suggesting the removal of those crazy heavy bumper covers (front and rear), front impact bar (some choose to leave the rear in case someone decides they can't stop as fast as you can so they give you a little love tap from behind -- don't want any nasty engine bay damage from such friendly nudging you see?), fenders, hood, doors, roof and rear deck lid and replacement with proper carbon parts.
Nice. Keep the pics coming, we enjoy seeing our babies stripped down and redressed in proper clothing.
Nice. Keep the pics coming, we enjoy seeing our babies stripped down and redressed in proper clothing.
01-11-2009 | 07:42 PM
#4

Thread Starter
Advanced
Joined: Aug 2005
Posts: 95
Likes: 0
True enough, you're just getting started. Enjoy. Mine looked like that at first too. Next, all those pesky factory wiring harnesses have to leave immediately. Can we have pics of the engine bay and exterior. With those we can tell you that the HVAC components must leave and the engine bay fan and some other unnecessary things. Then we'll be suggesting the removal of those crazy heavy bumper covers (front and rear), front impact bar (some choose to leave the rear in case someone decides they can't stop as fast as you can so they give you a little love tap from behind -- don't want any nasty engine bay damage from such friendly nudging you see?), fenders, hood, doors, roof and rear deck lid and replacement with proper carbon parts.
Nice. Keep the pics coming, we enjoy seeing our babies stripped down and redressed in proper clothing.
Nice. Keep the pics coming, we enjoy seeing our babies stripped down and redressed in proper clothing.

 01-11-2009 | 08:45 PM
#6
Thread Starter
Advanced
Joined: Aug 2005
Posts: 95
Likes: 0
True enough, you're just getting started. Enjoy. Mine looked like that at first too. Next, all those pesky factory wiring harnesses have to leave immediately. Can we have pics of the engine bay and exterior. With those we can tell you that the HVAC components must leave and the engine bay fan and some other unnecessary things. Then we'll be suggesting the removal of those crazy heavy bumper covers (front and rear), front impact bar (some choose to leave the rear in case someone decides they can't stop as fast as you can so they give you a little love tap from behind -- don't want any nasty engine bay damage from such friendly nudging you see?), fenders, hood, doors, roof and rear deck lid and replacement with proper carbon parts.
Nice. Keep the pics coming, we enjoy seeing our babies stripped down and redressed in proper clothing.
Nice. Keep the pics coming, we enjoy seeing our babies stripped down and redressed in proper clothing.
The vid is from RTL in oct before the latest mods
http://www.youtube.com/watch?v=tnVlq72KKWo
01-11-2009 | 11:43 PM
#7
Rennlist Member
Joined: Aug 2004
Posts: 1,445
Likes: 1
From: The right side of Leftville
So this was a 2001 that went from a 3.4 to a 3.6? I'd love to hear about the conversion to the 3.6l. Do you think it was better to go that route vs selling the 2001 and buying a 2002+ with a 3.6?
I'm assuming that you are going GTS3 and GTB for PCA. What wiring did you dump? Where did you move the fuse panel that was in the drivers side footwell to?
I'm assuming that you are going GTS3 and GTB for PCA. What wiring did you dump? Where did you move the fuse panel that was in the drivers side footwell to?
Trending Topics
01-12-2009 | 12:54 AM
#8
Race Car
Joined: Apr 2008
Posts: 3,549
Likes: 2
From: Texas
 01-12-2009 | 01:45 PM
#9
Pro
Joined: Dec 2003
Posts: 561
Likes: 0
From: Baltimore Md.
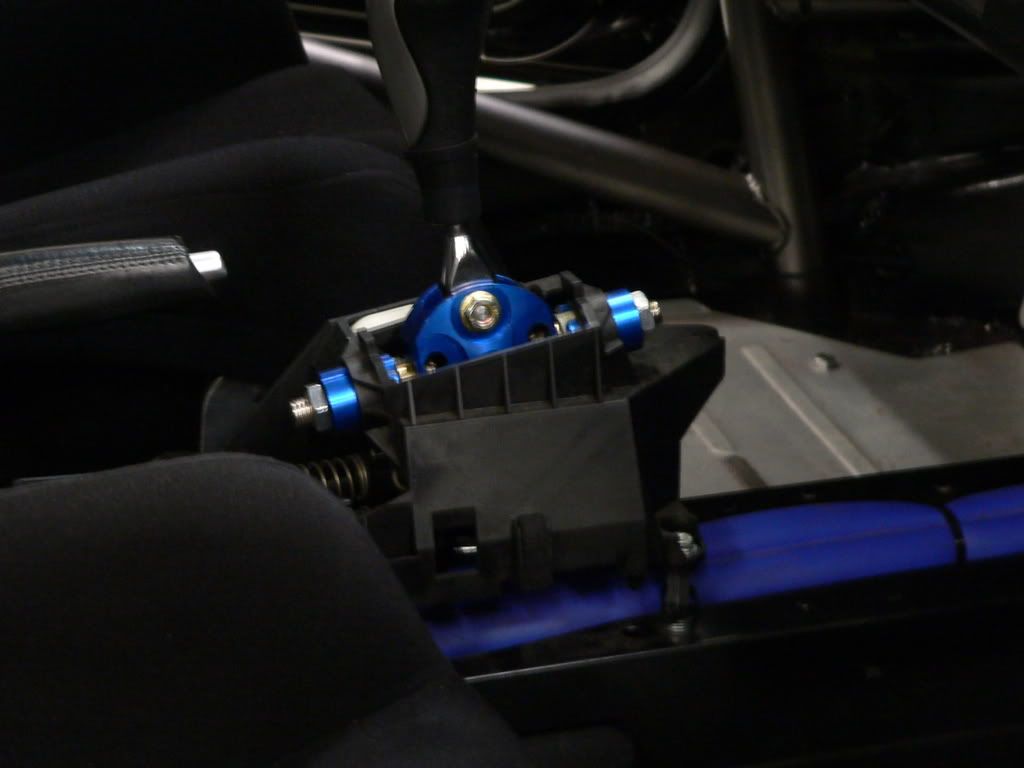
Whos shifter is that and why the right side net with the halo seat?? Looks great, would love to see some exterior shots. When do you think you'll have it ready? Sebring is only 3 1/2 weeks away and we sure could use somemore folks in GTB!!!
01-12-2009 | 02:00 PM
#10
Addict
Rennlist Member
Rennlist Small
Business Sponsor
Rennlist Member
Rennlist Small
Business Sponsor
Joined: Oct 2007
Posts: 3,183
Likes: 10
From: Durham, NC
I think John (RedlineMan) has the basic number floating aroudn in a few of his posts. Double digit inches are what I am remembering.
And many orgnizations are now requiring it.
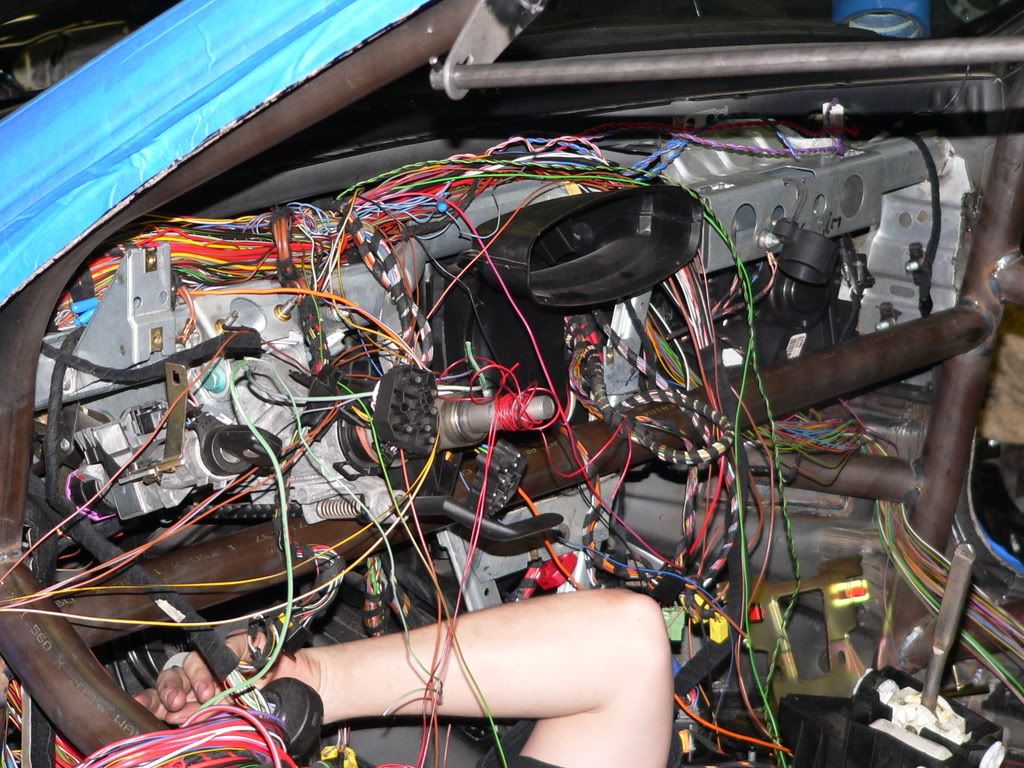
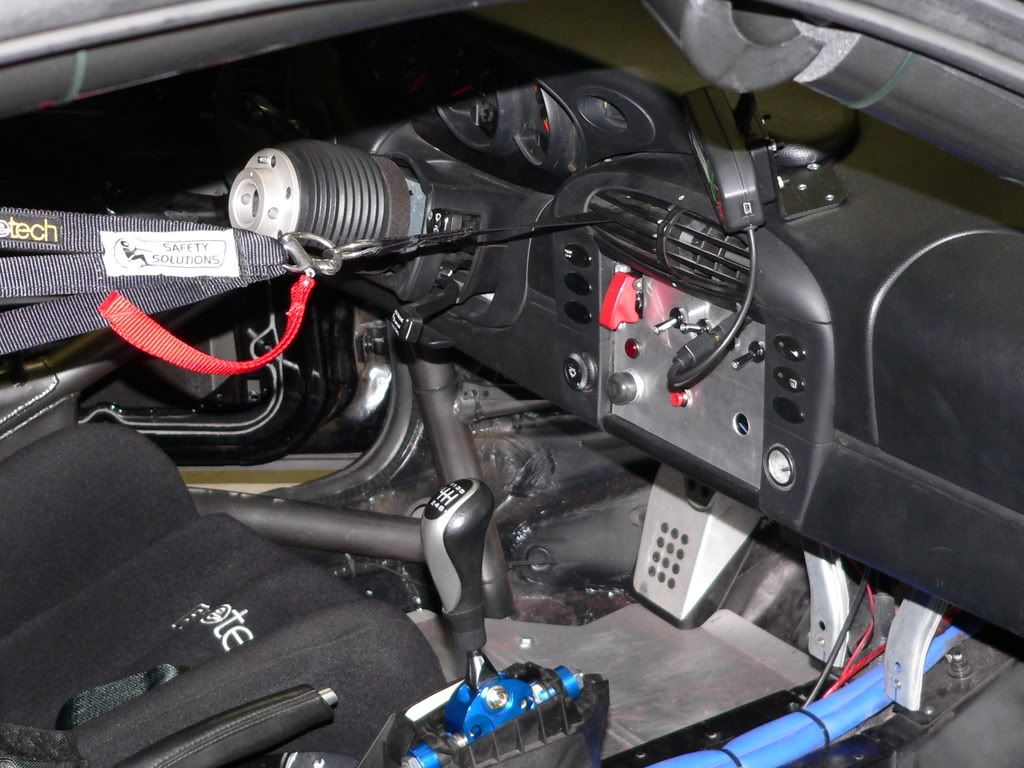
Why route the dashbar under the steering column? Was it a space issue above the column?
01-12-2009 | 05:39 PM
#11
Advanced
Joined: Nov 2006
Posts: 65
Likes: 0
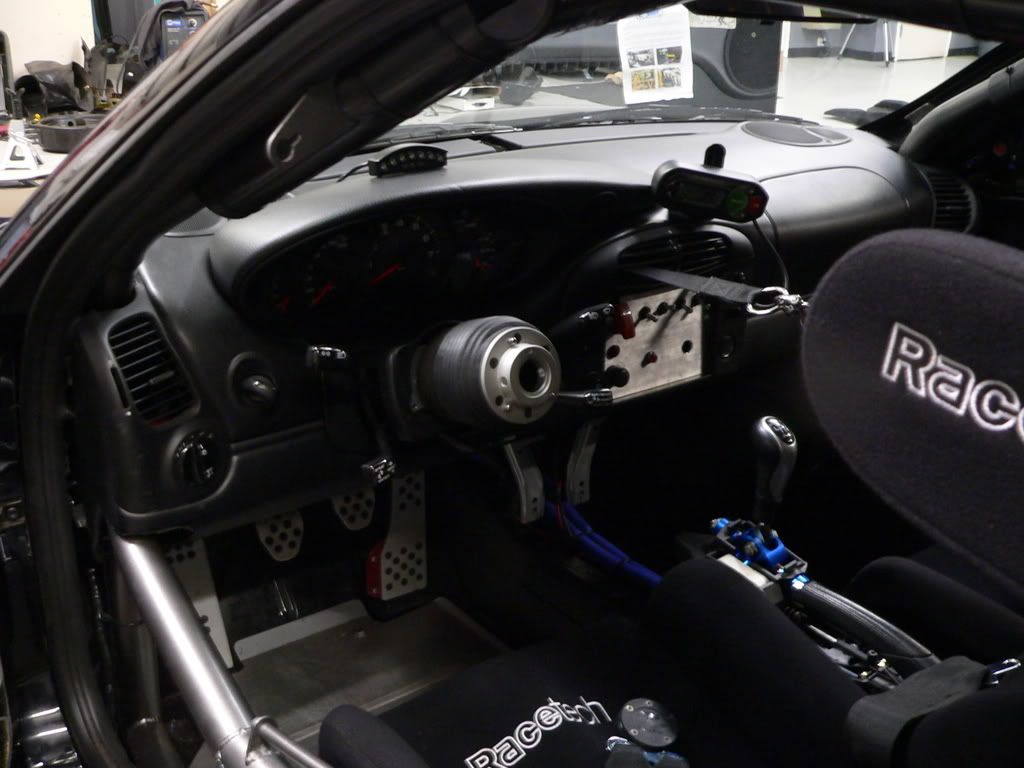
The pictured car is mine. It’s a 2001 996 that I’ve been doing NASA TT’s with for the past two years. I know and enjoy the car, so I decided to convert it into a wheel-to-wheel car. The weight/WHP should place it competitively in NASA GTS4. In addition, it should qualify for PCA GTB, although I’m not sure how competitive it will be with the current rules.
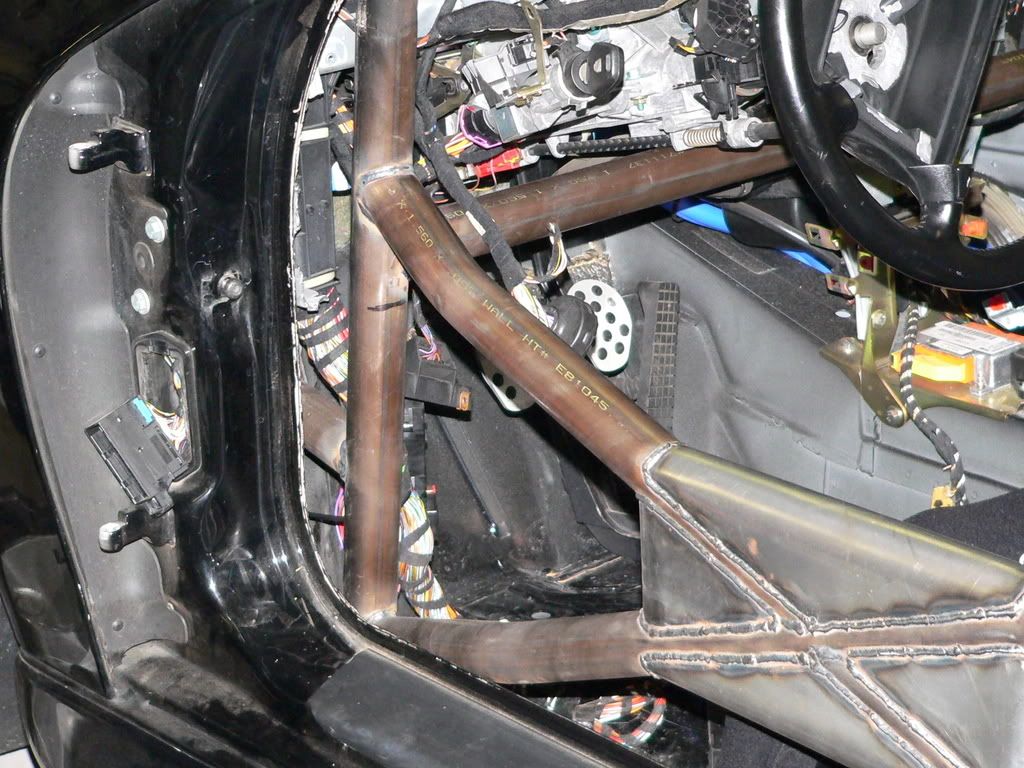
Genesis One automotive in Cumming, GA installed the cage. To the best of my knowledge, the location of the dashbar was dictated by the dash reinstall and the fact that it stiffens the bottom end.
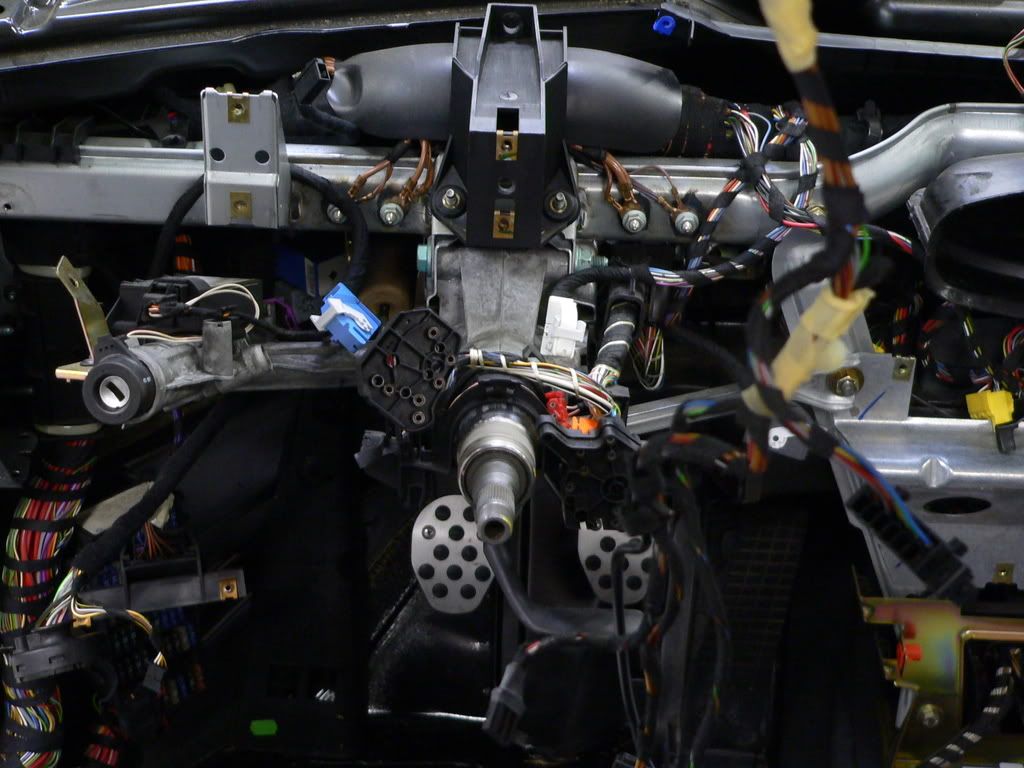
What remained of the fuse box was tucked up under the dash above the driver’s foot well.
I’m not a mechanic, but I believe the 3.4l to 3.6l conversion was done utilizing the original wiring harness and ECU. Modifications were made to the cam sensors to resemble those on the 3.4l. The idle is a little rough, but it’s a dedicated track car (obviously) so it’s not a concern.
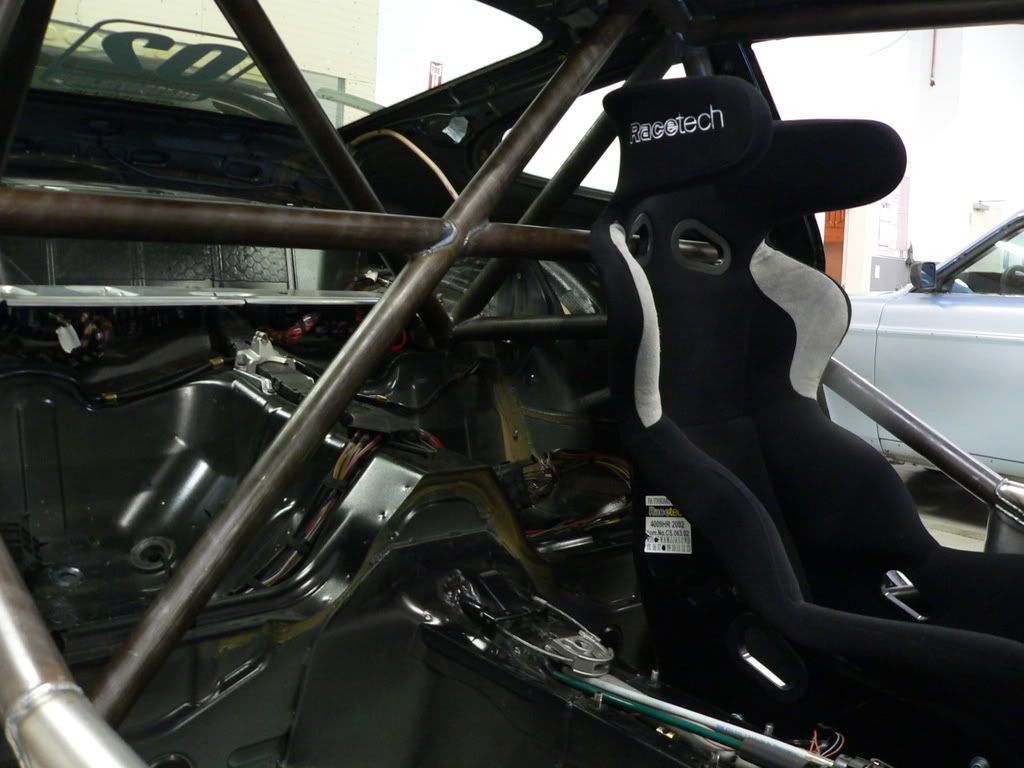
We got the car back from the cage fabricator last Monday and I was turning laps at Roebling Road five days later – Quite a feat by Orton.
I can’t wait until the first NASA event at CMP next month.
I’ll post more pictures when the car is closer to completion.
I’m still looking for a few parts, so I guess I’ll put some feelers out:
Thanks ,
Patrick
Genesis One automotive in Cumming, GA installed the cage. To the best of my knowledge, the location of the dashbar was dictated by the dash reinstall and the fact that it stiffens the bottom end.
What remained of the fuse box was tucked up under the dash above the driver’s foot well.
I’m not a mechanic, but I believe the 3.4l to 3.6l conversion was done utilizing the original wiring harness and ECU. Modifications were made to the cam sensors to resemble those on the 3.4l. The idle is a little rough, but it’s a dedicated track car (obviously) so it’s not a concern.
We got the car back from the cage fabricator last Monday and I was turning laps at Roebling Road five days later – Quite a feat by Orton.
I can’t wait until the first NASA event at CMP next month.
I’ll post more pictures when the car is closer to completion.
I’m still looking for a few parts, so I guess I’ll put some feelers out:
Thanks ,
Patrick
