When you click on links to various merchants on this site and make a purchase, this can result in this site earning a commission. Affiliate programs and affiliations include, but are not limited to, the eBay Partner Network.
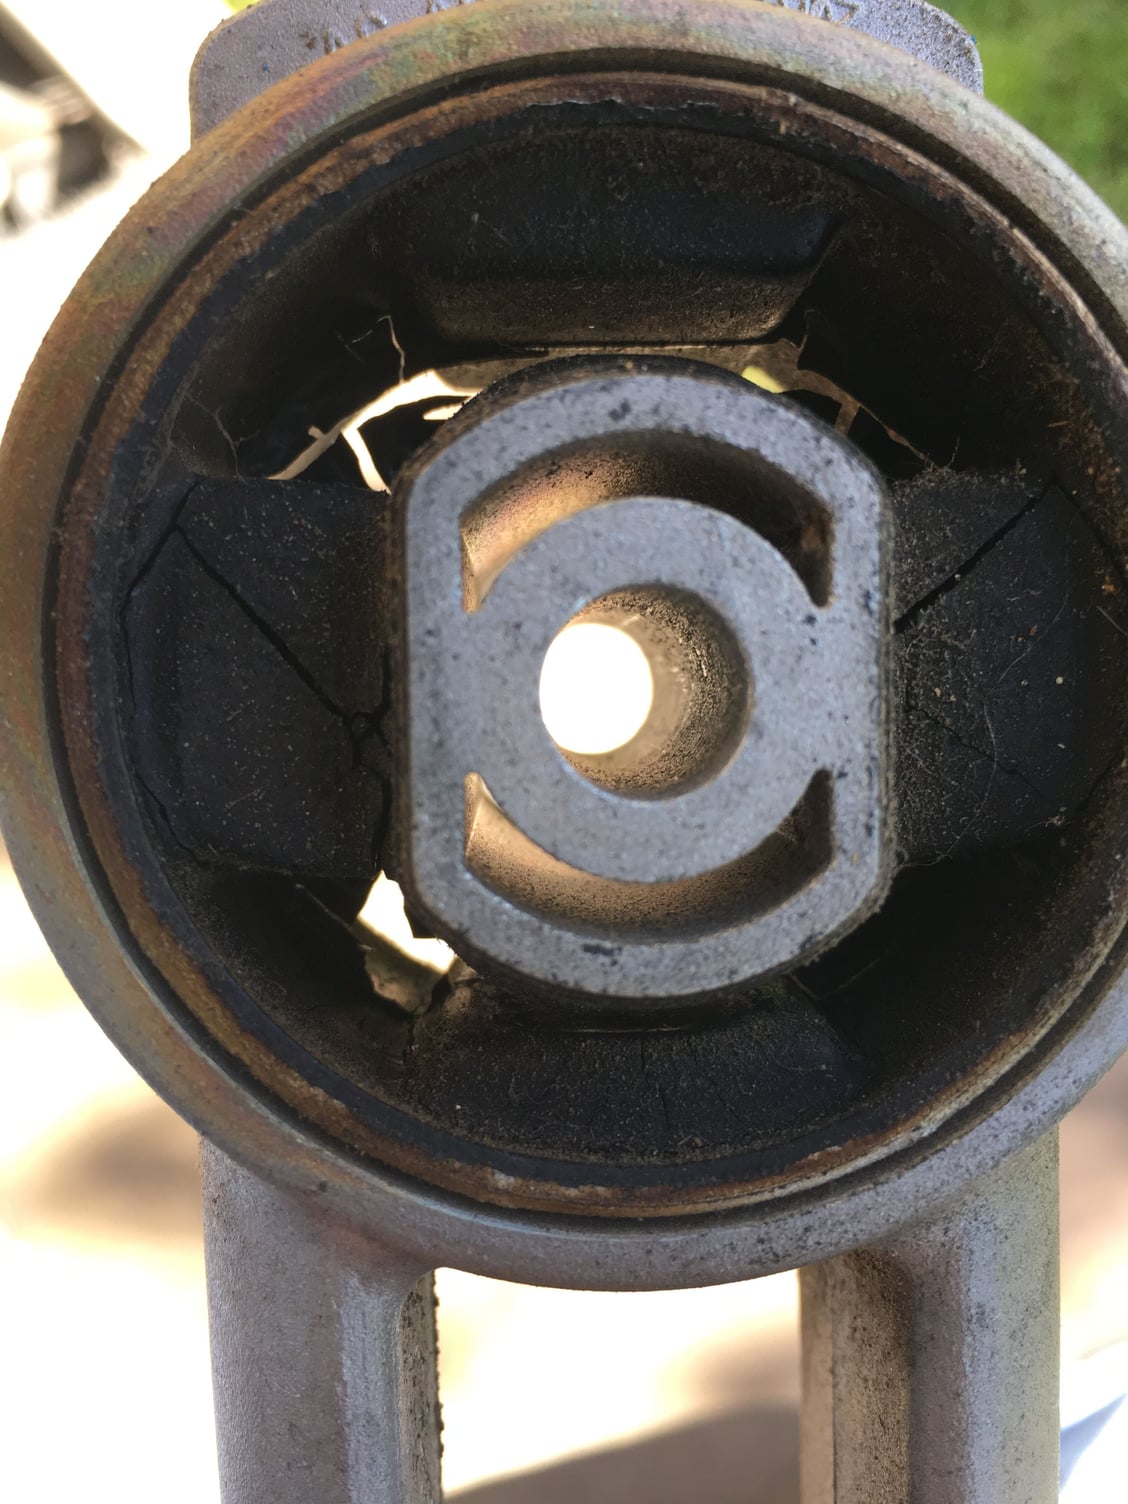
I replaced engine torque strut. No extra work to do it while replacing the spark plugs and coils.
The body side bushing was shot.
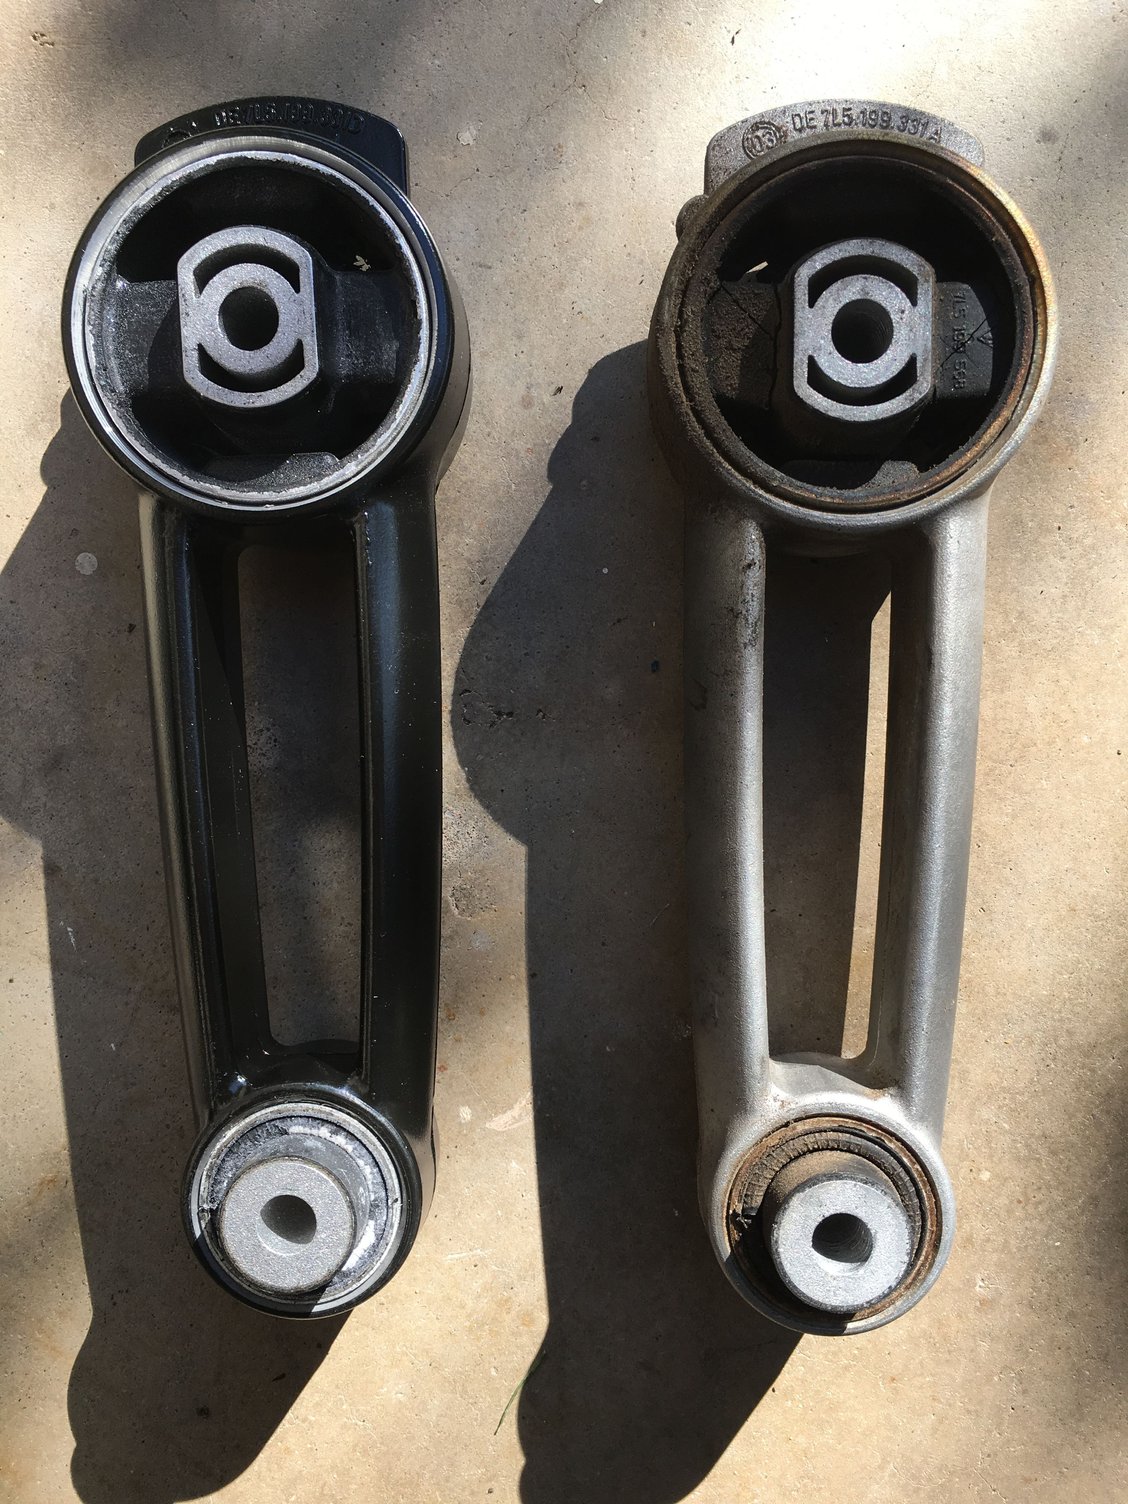
Looks like Porsche changed the strut to black (I got mine from Sonnen). I don't know when they made the change but if your looking at Cayenne's and see a black strut it probably indicates the strut is not original.
Thank you for posting. I replaced the plugs, coils, and torque arm recently on my 06 CTTS at 81K. My torque arm looked just as worn as the old torque arm in your pics at only 81K. My engine is now noticeably smoother than before. I'm hoping the new torque arm will prolong the life of my lower engine mounts.
After re-installing my right headlight after re-placing the coolant expansion tank I was getting all sorts of headlight errors (dipped beam, headlight adjustment, directional signal, side light). I had previously modified the harness so it didn't mount into the headlight bracket to fix the directional signal error.
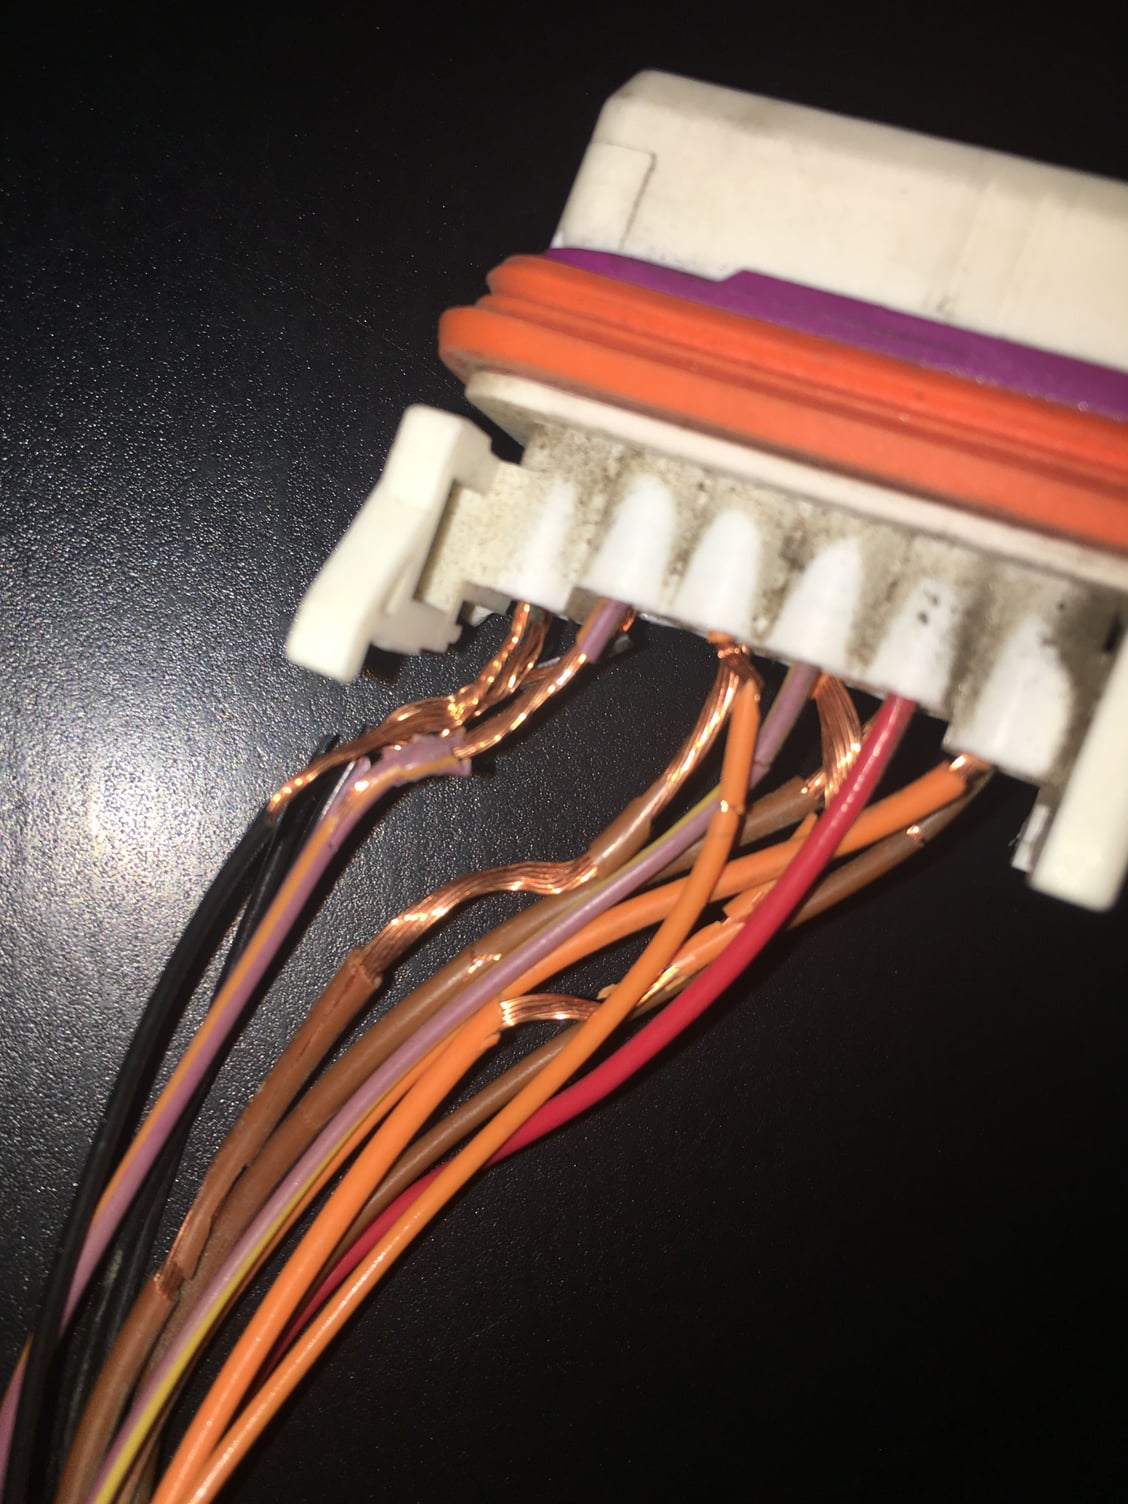
When I pulled the headlight out my harness looked like this.
I electrical taped the wires but still had directional signal and sidelight errors. I installed a new wiring harness but still had errors. A new fuse (10amp in location #5 on the right side dash) fixed everything.
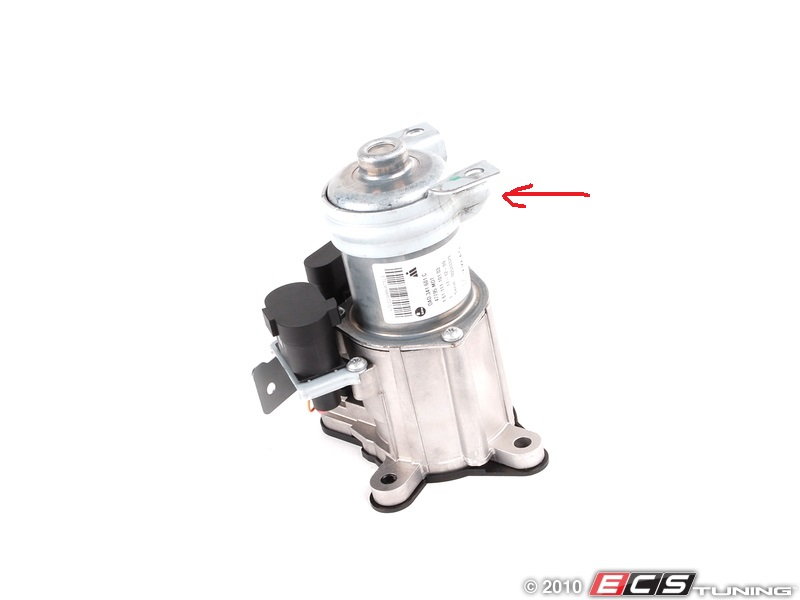
I had the old version stepper motor (0AD341601A) and although I didn't have any error codes or obnoxious sounds others report I did have some balkyness at low speeds, especially when turning sharply, and you could almost feel it "step".
I found an updated stepper motor (0AD341601C) at a local yard for $145 with a 4 month/4K mile warranty and figured I had nothing to loose. Donor vehicle was a 2005 with 120K miles so very close to my rig.
Very easy install and well worth it. The balkyness is significantly reduced and a very fortunate added bonus, the engine mount vibration when coming to a stop has been dramatically reduced.
One note. If you go the used route make sure to get the mounting bracket (red arrow in second photo). As shown below, the updated version (on the right in the photo below) is shorter and thicker so the old bracket would require manipulation to work.
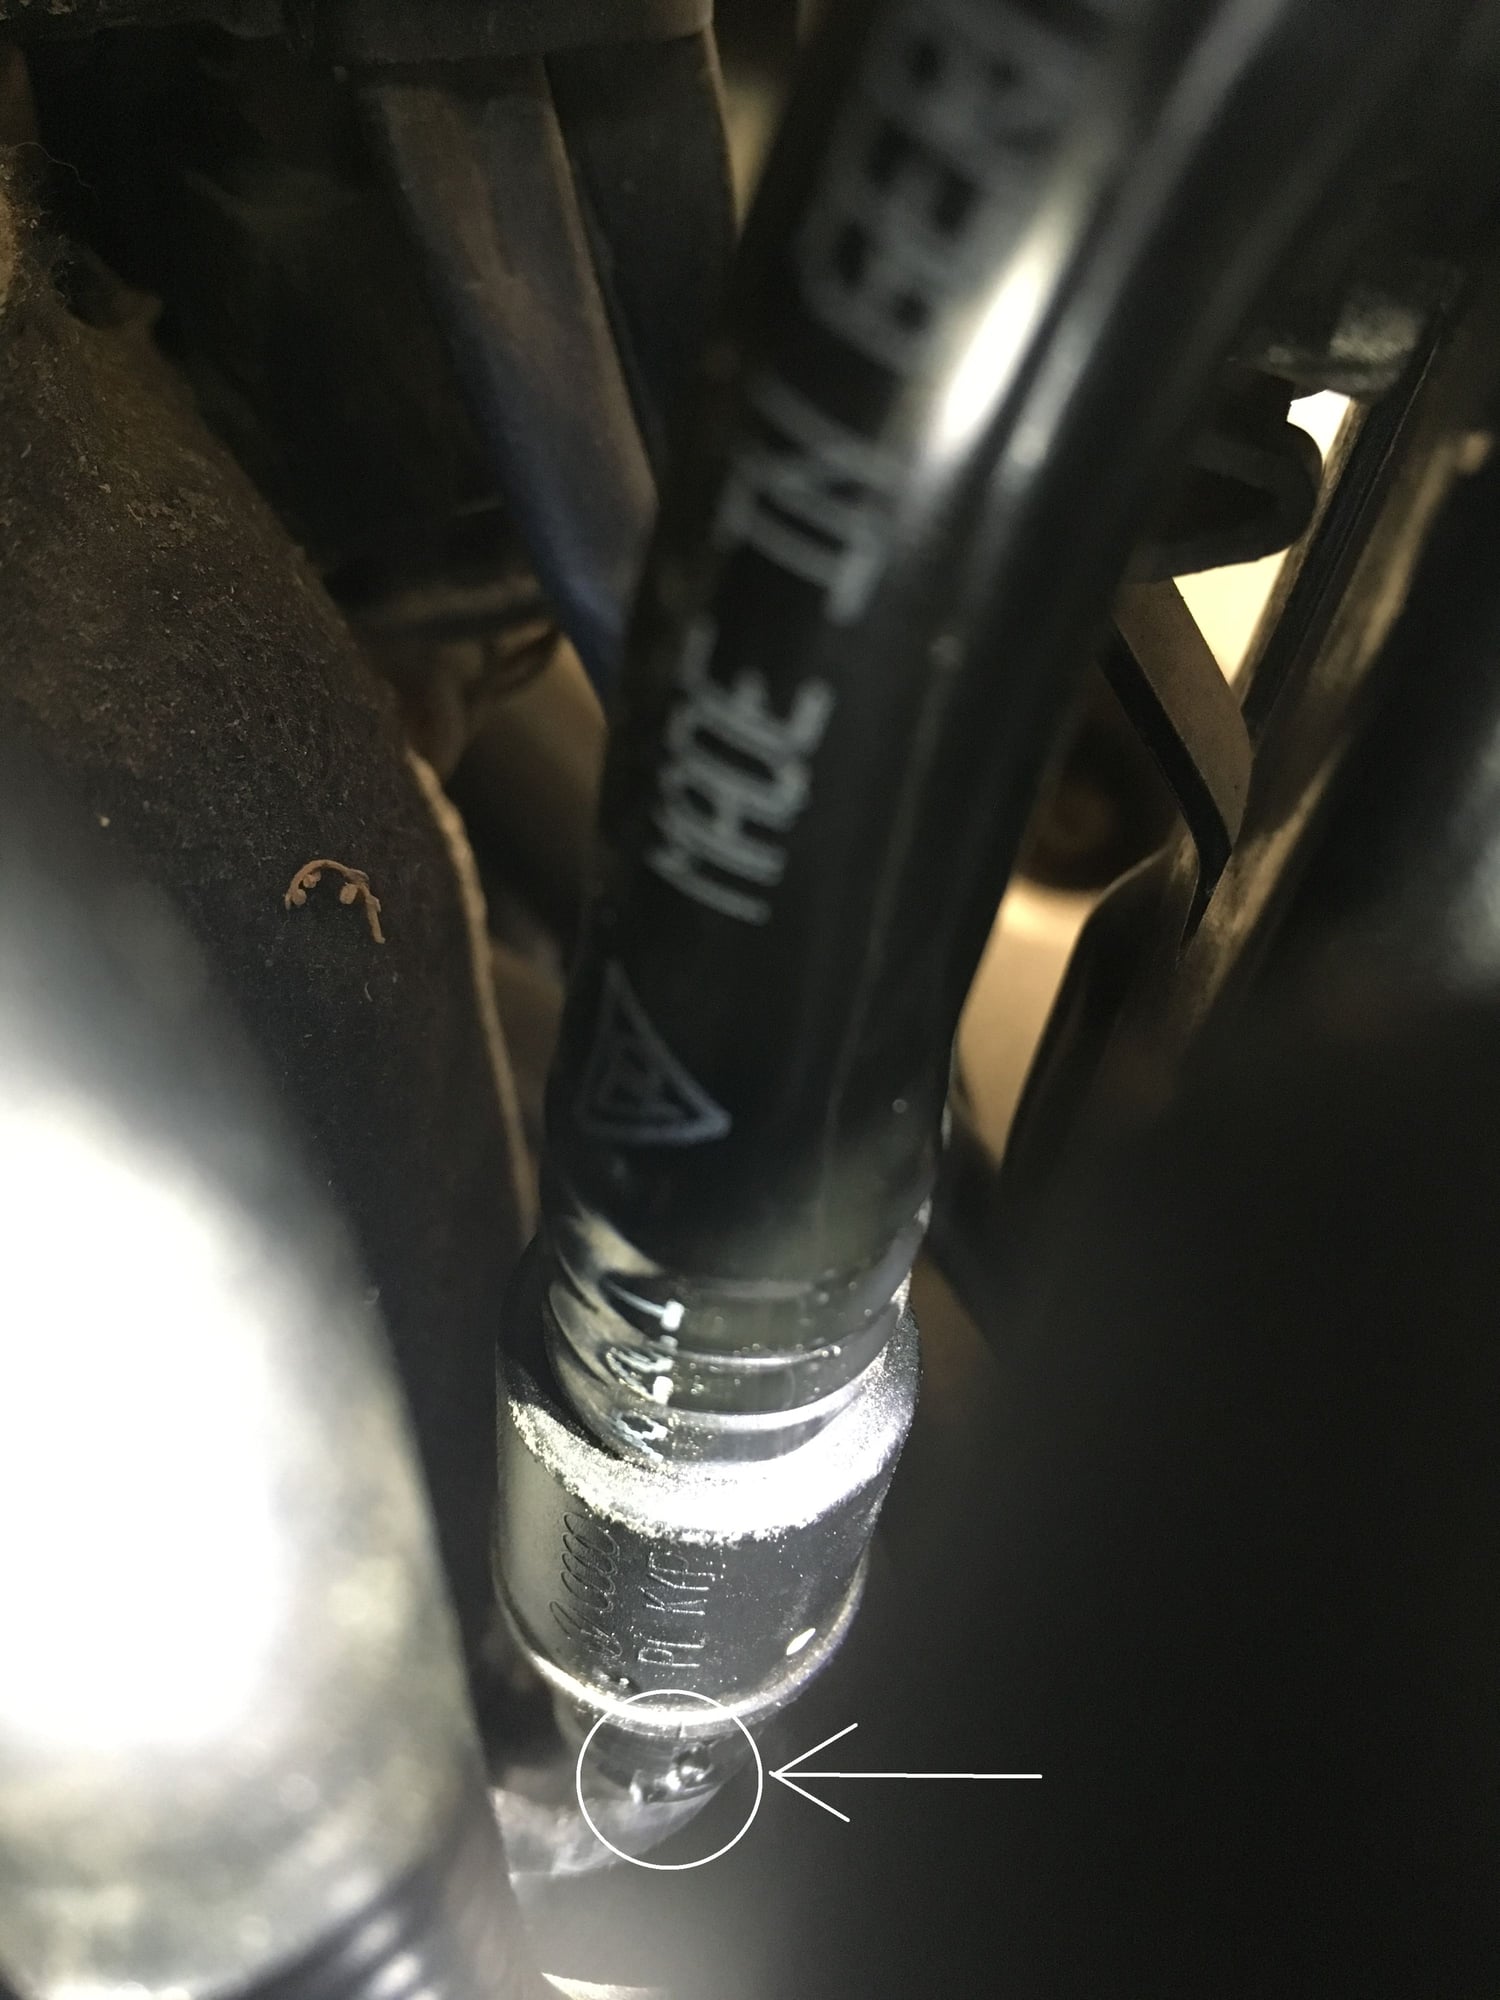
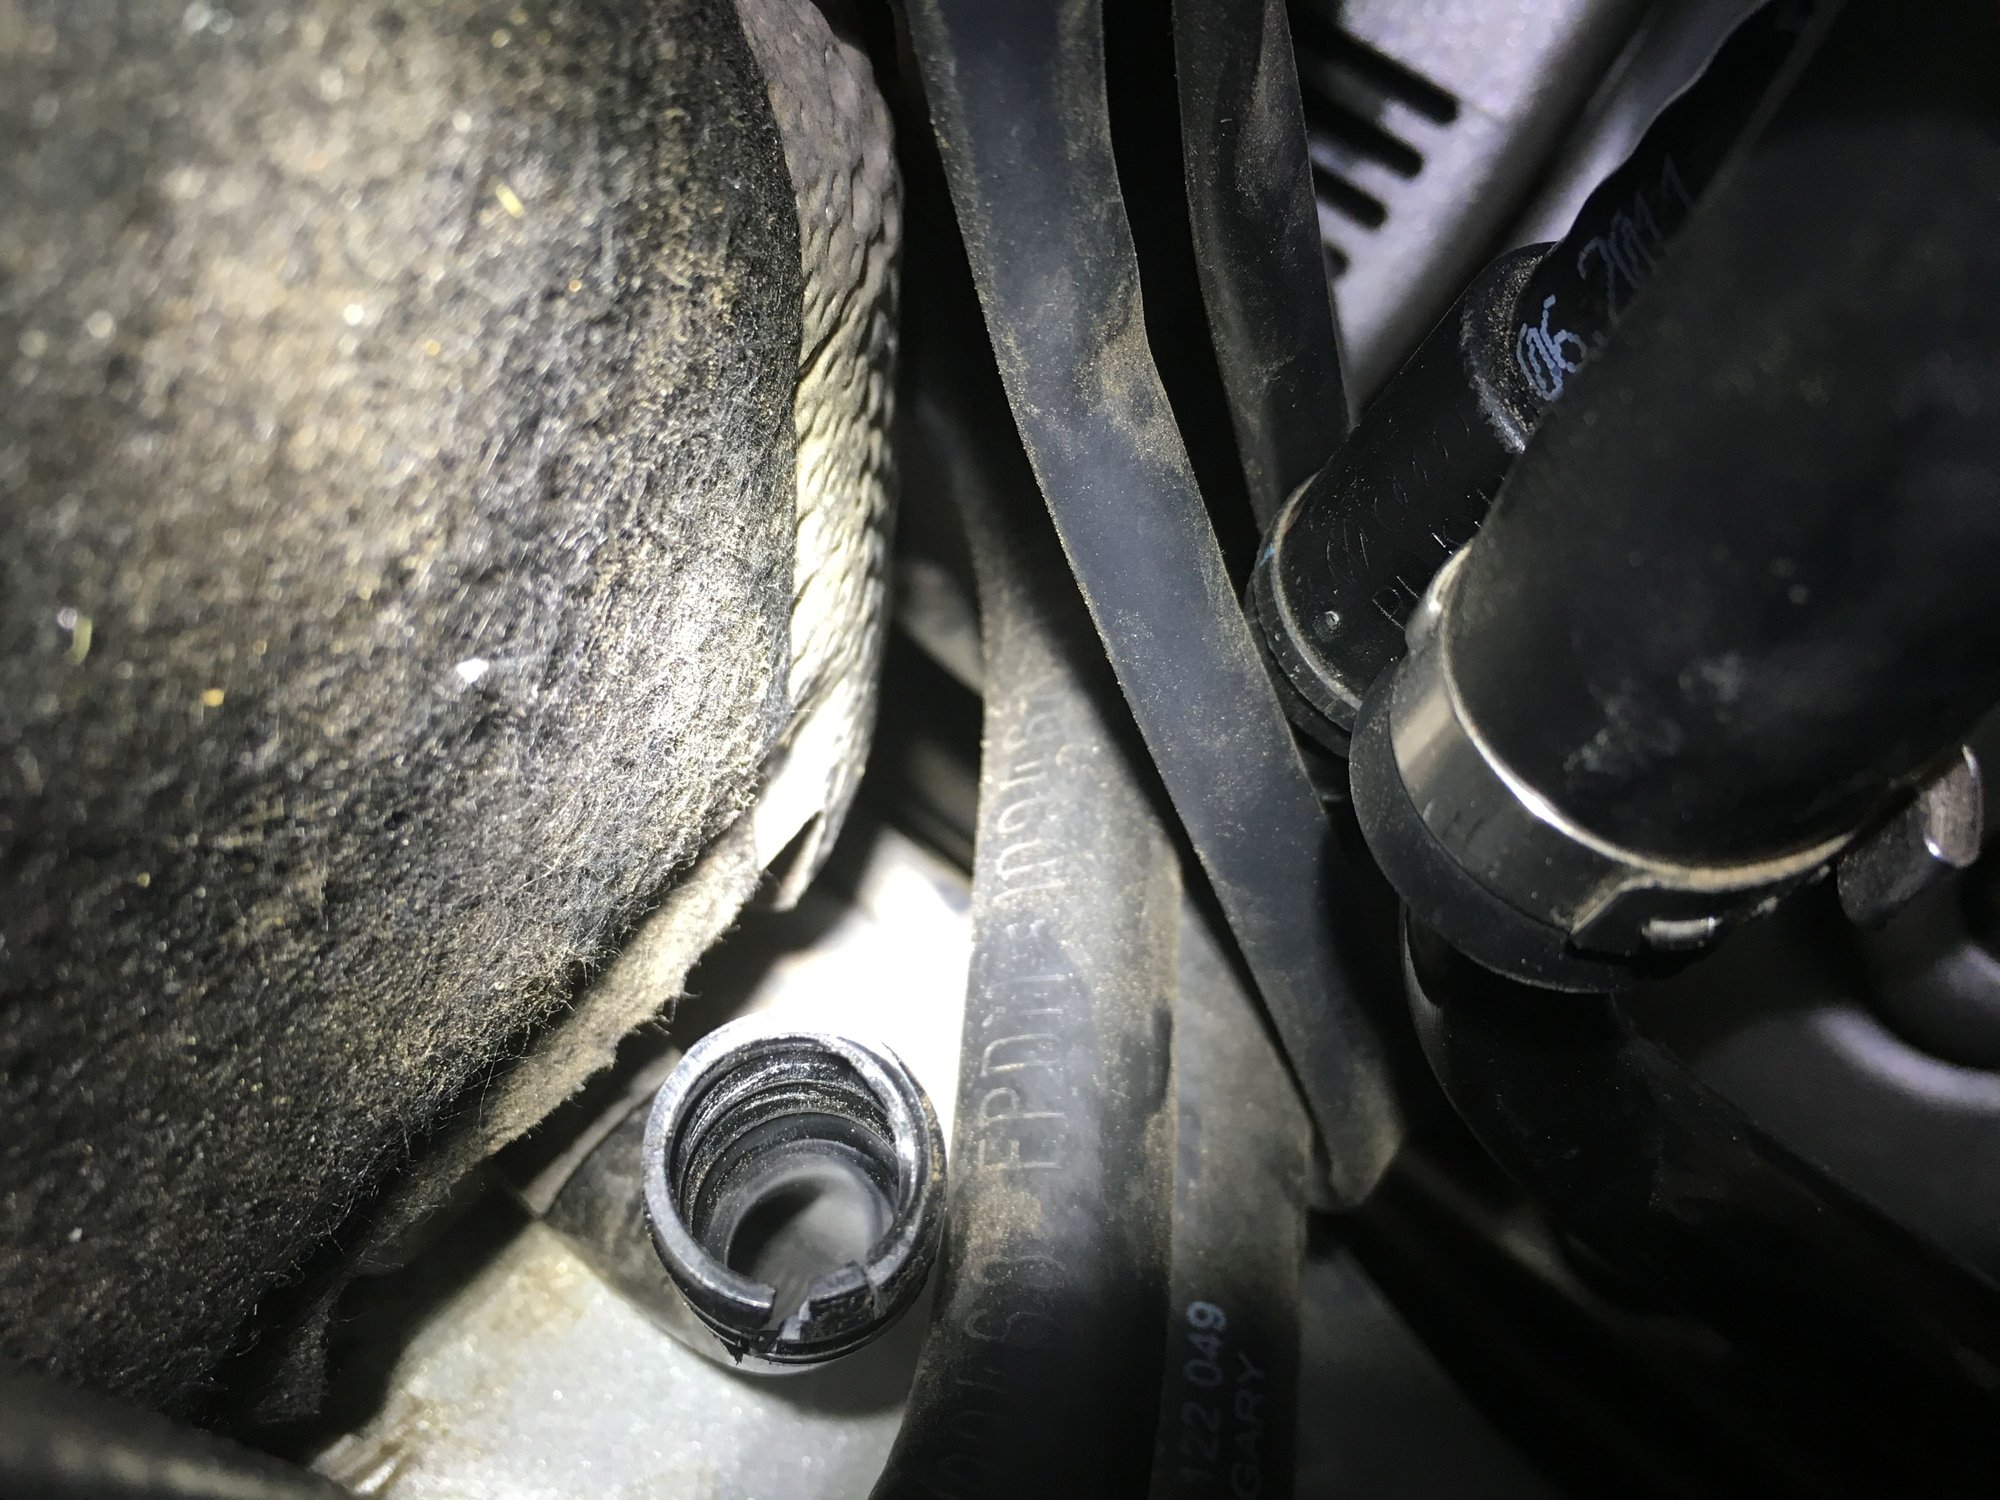
The brake booster light came on and I found a crack in the "lower" brake booster hose that runs between the two firewalls connecting the pump and booster (pn 955 355 57 51).
The hose was cracked where it attaches to the "upper" hose just outside the front firewall. See photos below.
The repair is not too bad but you have to remove the booster pump, cowl and wiper motor. The worst part is the grommet in the front firewall. The hose came with a new one that proved too hard to re-install completely (I got part of it in and gave up). I also replace the grommet where the hose attaches to the brake booster (pn 955 355 921 00). It was only $2 and easy to replace but the existing one looked fine.
I can no longer edit the 2nd post with the running tally of costs so I will update in each post.
Failed part
123,000 mi (09/2016) - lower brake booster hose (DIY) - $100
Running totals
$10,500 - includes $3,500 reduction for deferred maintenance items
$1,715 - failed parts
$1,302 - wear and tear items
$1,249 - routine maintenance
Just picked up a 2005 Turbo and have been playing catchup on the maint items like you have the last 2 weeks.
Someone had replaced all the exterior bulbs with cheap LED, no resistor bulbs. Lights were intermittent and getting replace bulb errors. Was happy that all I had to do was put in new "regular" bulbs. Had to replace the cornering light bulbs and fuse. One headlight bulb was black so replaced it too. Also got a new headlight harness for the driver side, it was bare in places like yours and wiring looked pretty brittle.
Need to do the same with the interior bulbs too.
Also had to do the booster line. After replacing the brakes were still a little spongy. Was just going to flush and make sure all the air was out but found the front brake disc was the 6 cylinder 320mm instead of the S and Turbo 350mm. Yikes! Only about half the front pads were even touching the disc.
Found a couple of small oil leaks, pan gasket and one of the turbo lines.
And both the rear hatch and window shocks were gone.
With same miles and deferred maint issues got mine for the same you did.
After one year of daily driving the 2005 CTT here is a summary:
9,000 miles
Zero check engine lights
$240 in unexpected repairs
Endless smiles when I get to use my right foot
The truck now has 125,000 miles on it and seems to drive better every day.
After the initial sorting out and maintenance catch-up the only issues have been very common items on these vehicles (coolant expansion tank, headlight wire harness, blower motor, brake booster hose).
I see no reason this truck can�t go another 100,000 miles so I have no qualms doing the scheduled and preventative maintenance and fixing things as they come up to keep her running like new.
Next up are valve cover gaskets and probably some new breather hoses (there is a hiss near the air-oil separator but that isn�t the issue so I will be investigating that soon). I am debating doing the water pump and pulleys. They don�t seem to be making any noise so I think I will wait.
My valve covers where seeping oil - it wasn't bad yet (no smoke or smell from dripping on exhaust) but figured I would tackle it before it got messier.
I was fully prepared for the tough to access back bolts on the right side but feared stripping the 2nd to back bolt and decided I better stop before I do real damage. I think my concern was using a T-30 driver as instructed in the Pelican Parts write-up. I think the proper driver is T-40 (seems Porsche agrees in the attached repair manual).
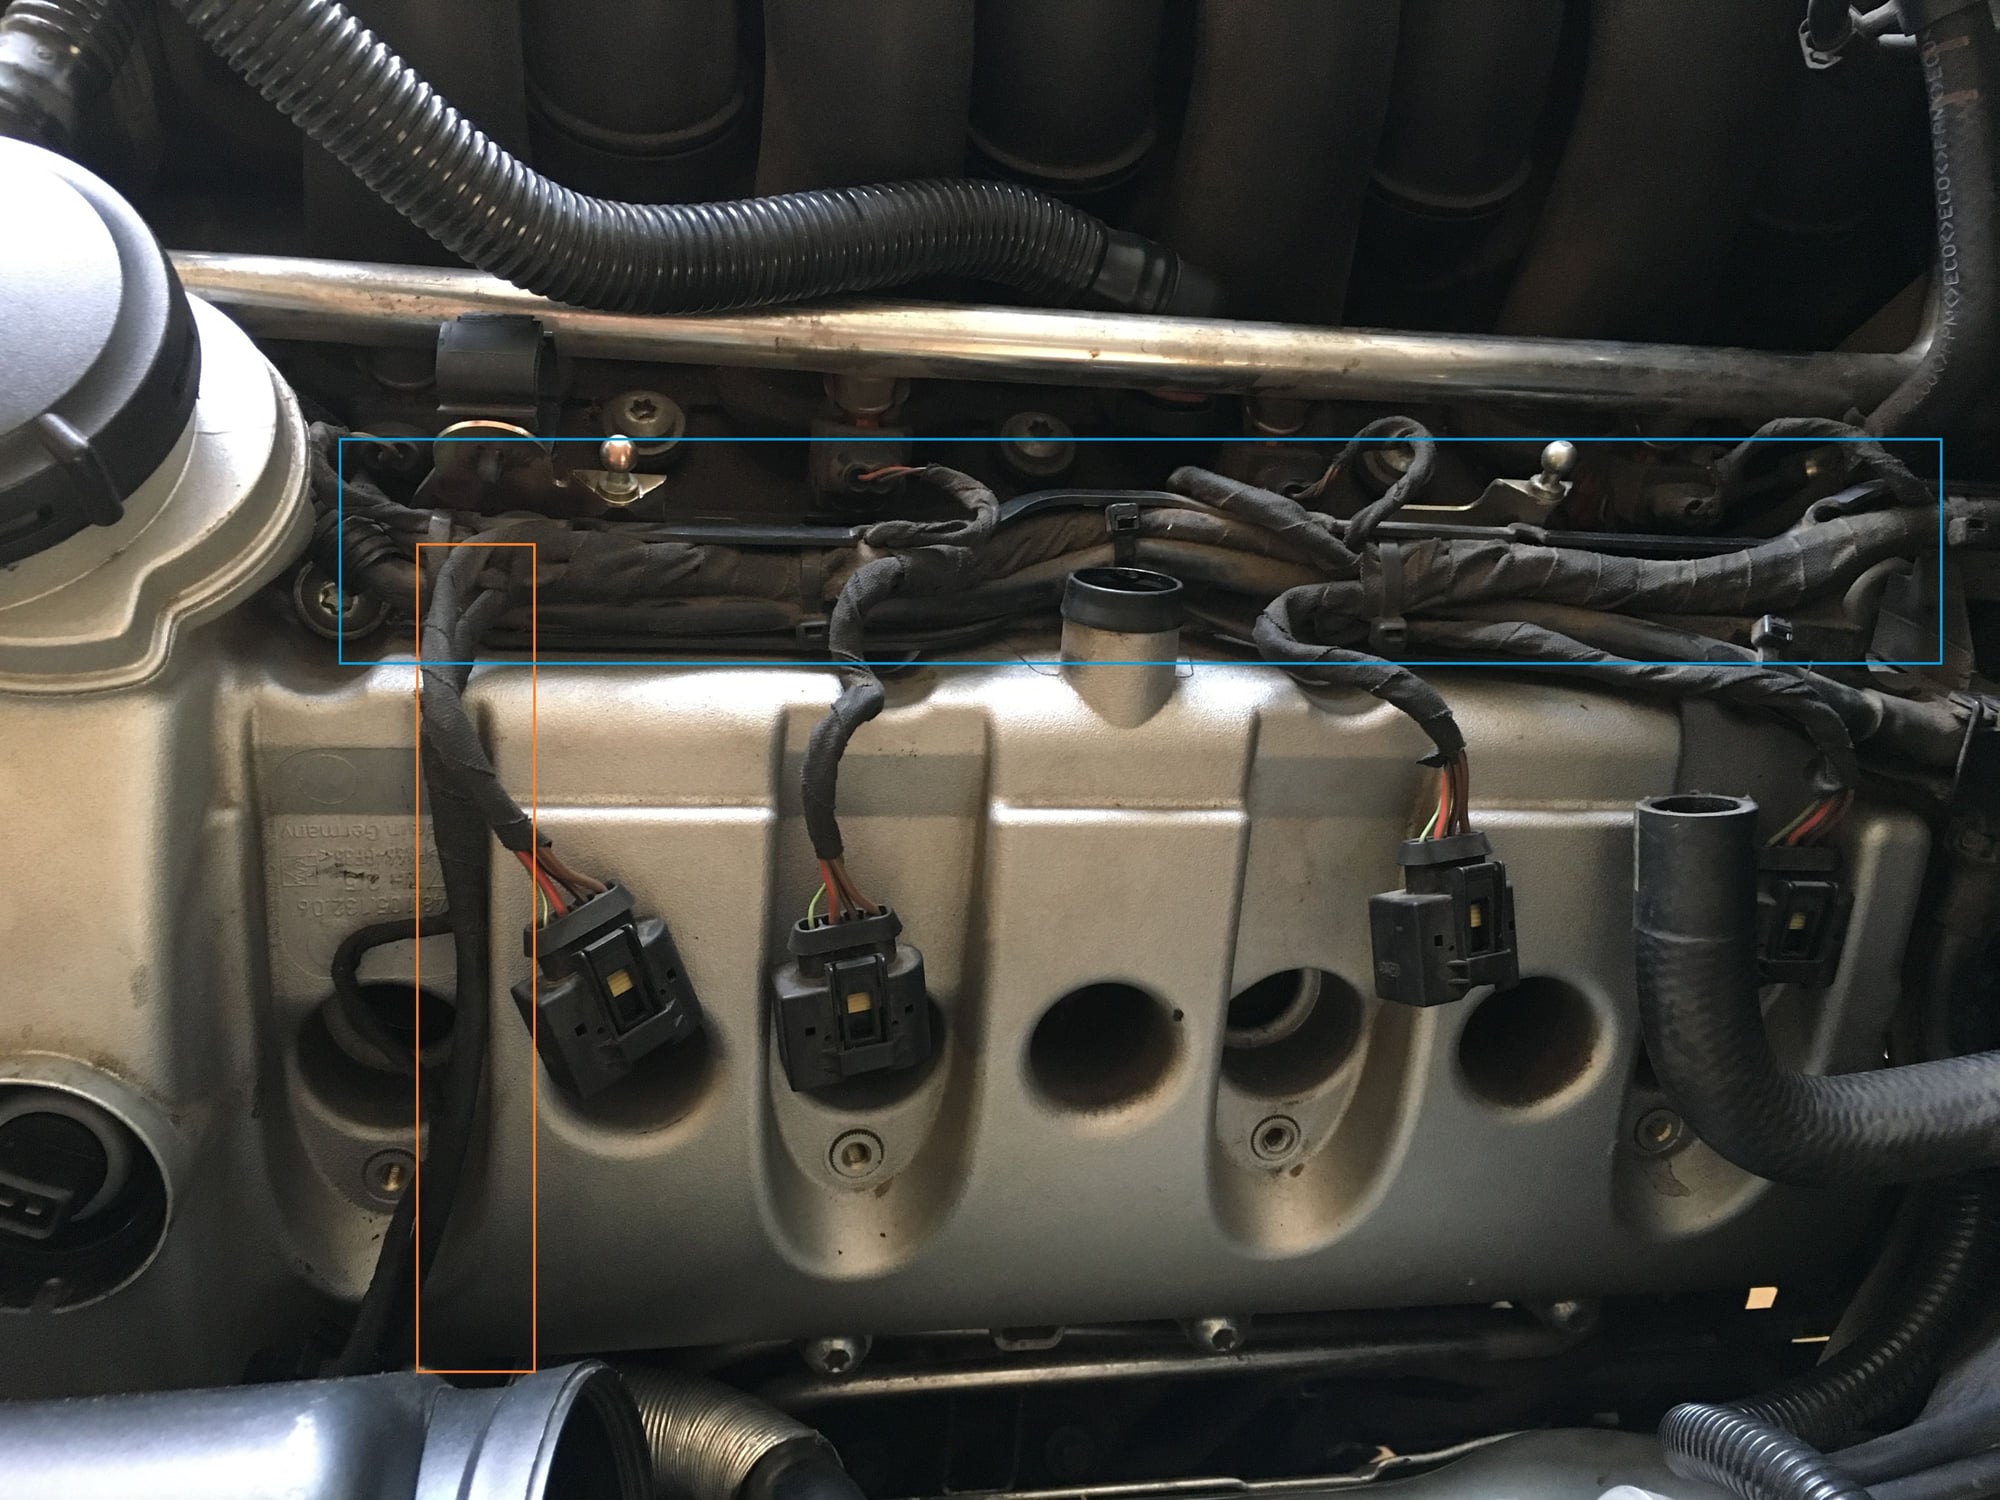
Not ready to admit complete defeat I figured I would do the left (driver) side. However, when the wire running over the valve cover (outlined in orange) and the wire harness at the top of the valve cover (outlined in blue) became problematic I figured I would have an Indy do both sides.
I couldn't find any info on dealing with the wire and wire harness (see below) so if anyone has some tips it would definitely help others.
I provided the parts ($115 from Sonnen) and delivered it to an Indy who charged $477 in labor. I had it completely taken apart so the labor should be a little lower than if they did the whole job.
Parts list
948-105-931-03 valve cover gasket (bank one - right side)
948-105-932-05 valve cover gasket (bank two - left side)
948-105-933-00 (2) spark plug gaskets
948-105-934-00 (2) cam adjuster seals
000-043-204-35 Porsche sealant (Loctite SI 5900 Flange Sealant)
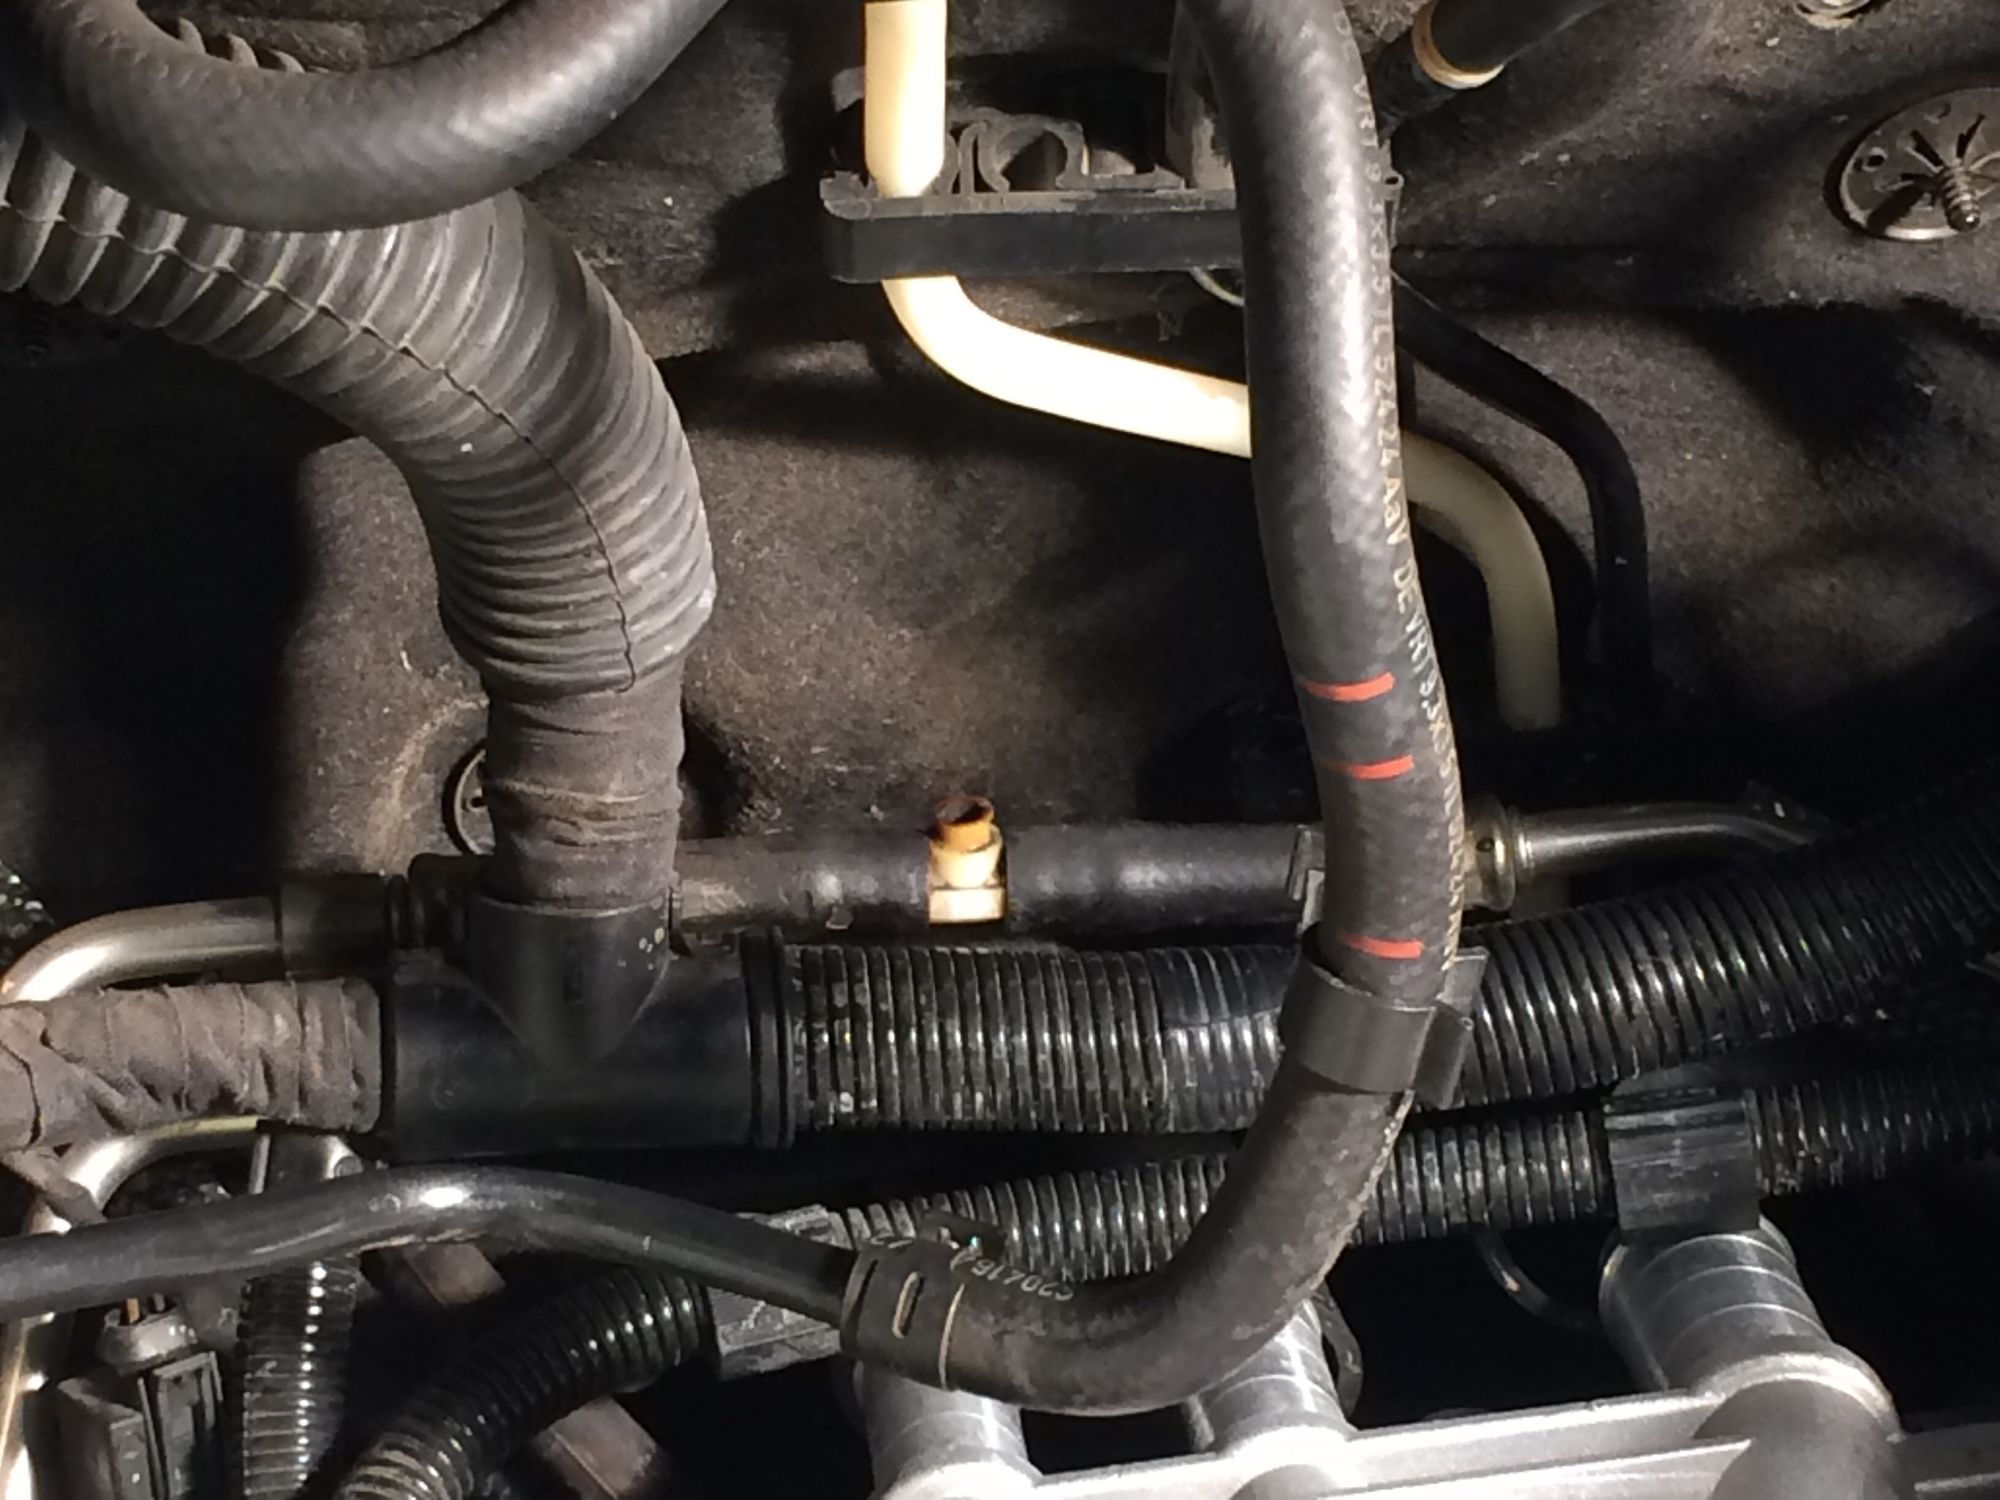
When I took the valve covers off I noticed the plastic T in the vacuum line behind the intake manifold was broken. I know this is a common failure and figured I would replace it the next time I had to take the intake manifold off. Below is a picture of the T (not from my vehicle).
While the vehicle was at the Indy getting the valve covers done he asked if I wanted him to replace the entire vacuum line (948-107-215-52 ~ $150). When he said he didn't have to take the intake off and he was willing to do my recommendation of replacing it with a brass T and high pressure hose I had him do it.
Cost
Brass T - $7
High pressure hose (9.5mm) - $7
Clamps - $15
Labor - $130
My Indy said this vacuum line feed scavenged crankcase fumes to the turbos. I can't say I notice a difference in performance but the pig is running great.
She's still running great at 138,000 miles and I see no issue with it going over 200K so I invested some time into spring maintenance. Unless stated, all items below were DIY:
Water pump
Water pump (Laso) (94810601104) - $113
Water pump gasket (Porsche) (94810611503) - $4
Water pump pulley (Porsche) (94810609001) - $40
Water pump pulley bolt (Porsche) (99907310401) - $2
The water pump was original and this was replaced preventative maintenance. It wasn't leaking and upon removal seemed to be in pretty good condition. pretty easy job with the intake and throttle body off.
to work - the clamp end was too large and stiff to get into the tight spots. But http://www.sears.com/craftsman-cable-operated-hose-clamp-pliers/p-00949803000P?sid=IDx01192011x202447059&gclid=CjwKCAjw8r_XBRBkEiwAjWGLlC7P8T1b0M8ABTKD4pjnTLznDbVajTcONtOVoIRlHU878ursvXF7yRoCqPMQAvD_BwE&gclsrc=aw.ds&dclid=CKWYwsrV9NoCFcV-YgodOCIOdA worked.
Coolant hoses and metal T's
Inlet hose (Porsche) (95510632350) - $23
Water hose assembly (Porsche) (94810603551) - $30
Metal coolant T's (jagsthatrun.com) (1"x5/8"x1" and 3/4"x3/4"x3/4") - $50
The larger coolant T hose (95510632350) was replaced at 80,000 miles but the other hose was original so this was preventative maintenance. The large T had a little coolant seepage. This job is as bad as the rumors. Can't imagine doing it without removing the manifold.
Starter
This was a WYAIT item. I don't know if my coolant pipes were done preventatively or if the starter may have been comprimised by coolant. The starter was a little slow and occassionally I would turn the key and get nothing. I was able to replace the starter with the coolant pipes in place but had to remove the plastic bridge at the back to get an extra 1/4".
Starter (Bosche re-built) (94860410600) - $238
It definitely starts faster and its fun to start it up and get a quick bark. Worth the time and $.
WYAIT and related items
Vent tube (Porsche) (94810601603) - $44
Coolant temp sensor (Porsche) (99660641000) - $25
Manifold gasket x2 (Porsche) (94811014501) - $46
Throttle body gasket (Porsche) (948 110 143 01) - $13
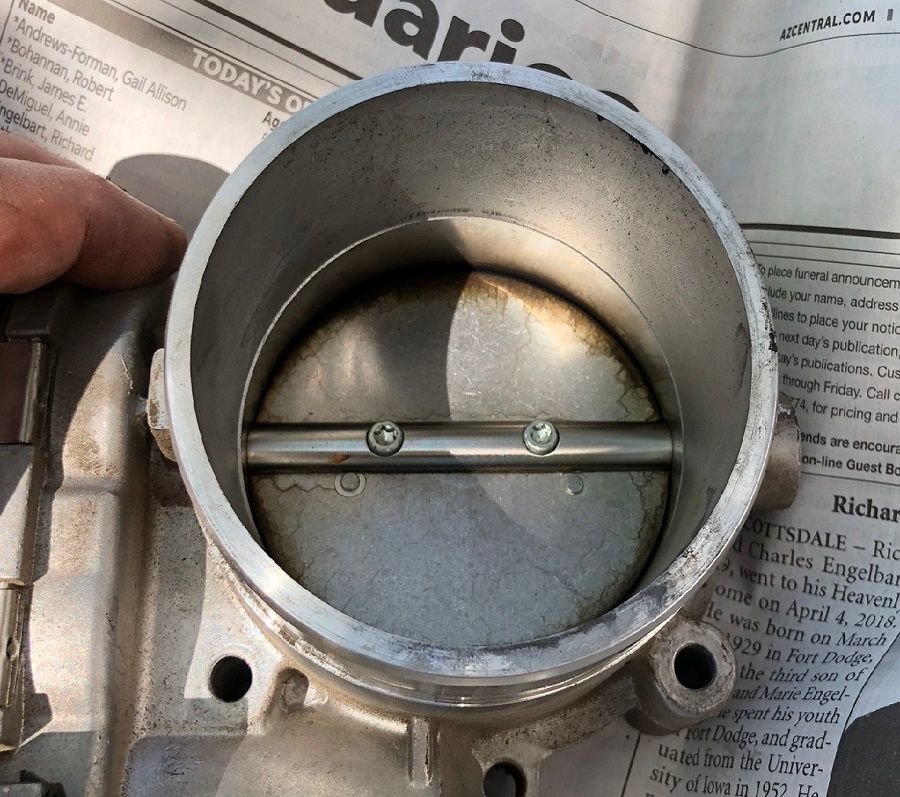
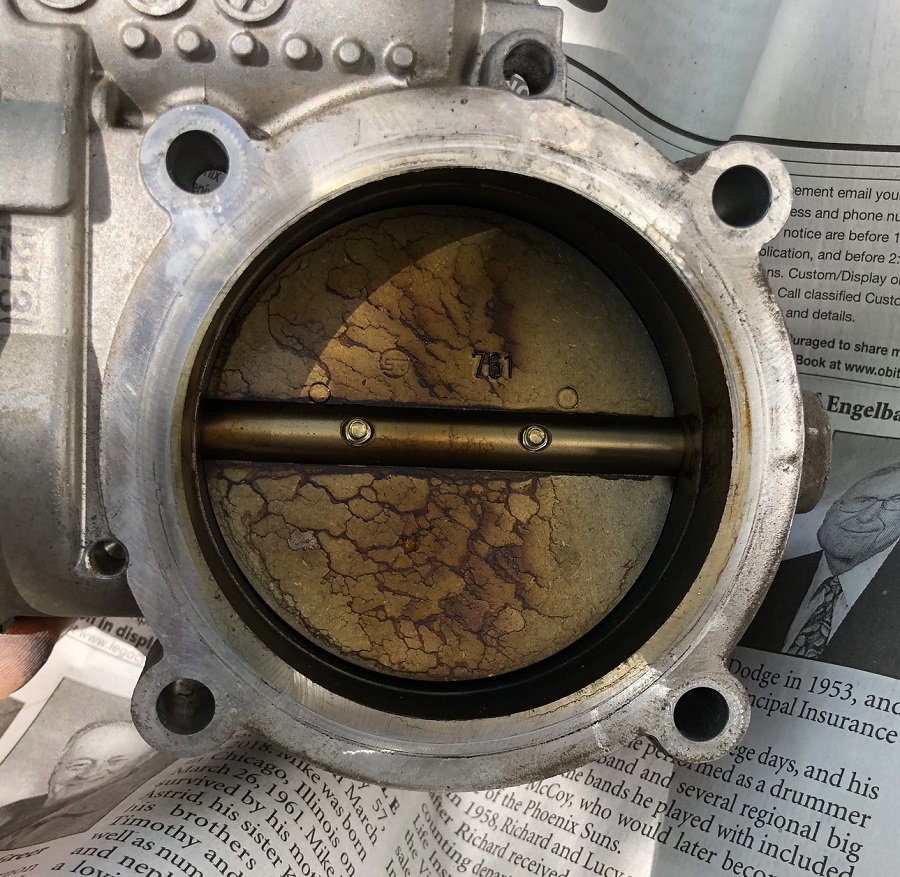
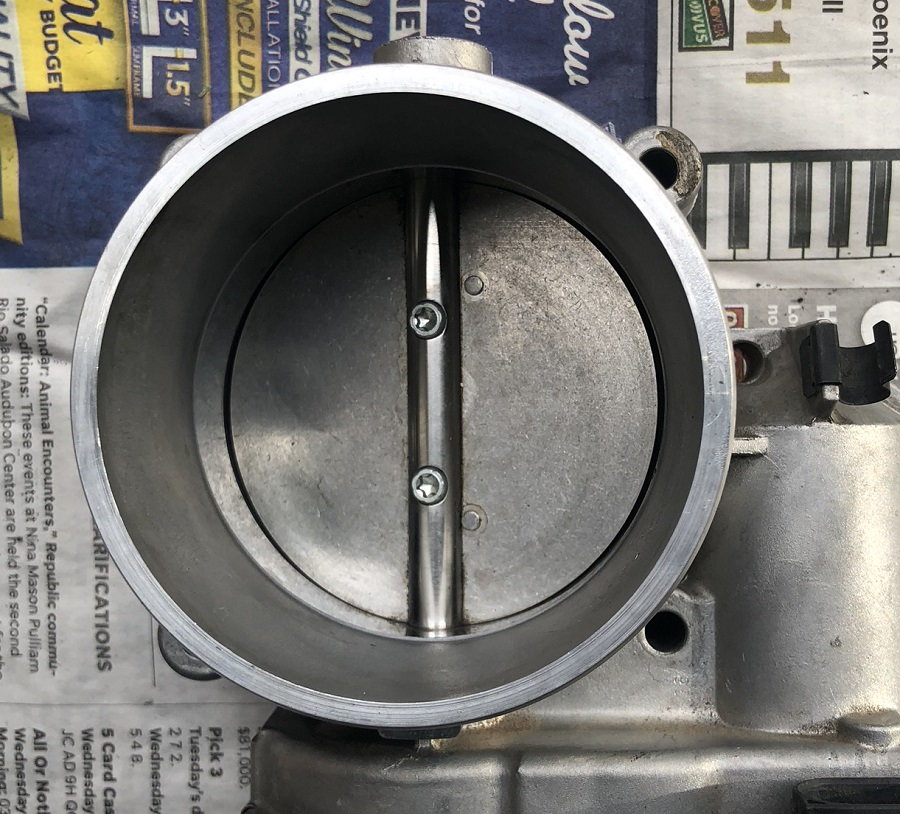
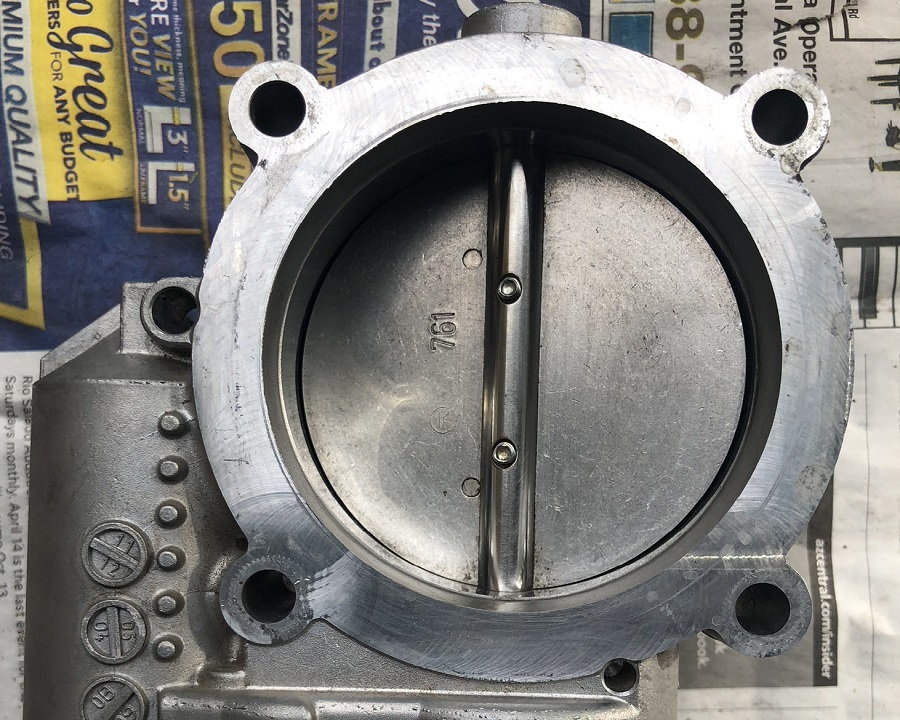
Clean throttle body - $0
Coolant (Porsche) (1 gallon) - $43
Bleed coolant system (done by Indy) - $120
Other
The serpentine belt was replaced at 80,000 so I didn't replace it. I gambled and assumed the thermostat was replaced when the coolant pipes were done so I didn't replace it.
This was a time consuming and frustrating (coolant T's) couple days work but amazingly I managed to get everything apart and back together without breaking any plastic parts.
Bonus
After the repairs the shifting is much smoother at low speeds (under 25mph) and the engine mount related vibration (accompanied by an RPM dip) when coming to a stop is 75% improved. Only thing I can figure is cleaning the throttle body and the upper engine mount may not have been properly tightened by the Indy that did the valve cover gaskets a year ago. The throttle body didn't seem too bad (see below) and the engine mount wasn't overly loose. Regardless, I love the result.
Such a helpful thread, @GrandeOak . I'm practically on the eve of getting my first 955 (CTT or CTTS) and this is a great rundown of maintenance items. First candidate is undergoing PPI now. Three other candidates in the running. Seems like when they're properly maintained, 955s are a relative bargain if you go in eyes wide open and are handy with a wrench and have the funds to keep them going. (Much like my beloved 986.

 03-21-2016, 11:29 AM