When you click on links to various merchants on this site and make a purchase, this can result in this site earning a commission. Affiliate programs and affiliations include, but are not limited to, the eBay Partner Network.
You can wait and see or you can trust what the data and we are saying. The car with dunlops can brake way later than the cars with the cup2. To the point that if you brake with then cup2 at the same point as the dunlops you would end up in the gravel trap. Also mid corner speed is faster on the dunlops. We have also found the optimal tire pressures for both types of tires.
Care to share tire pressures for both? Very little info for Dunlops on this forum.
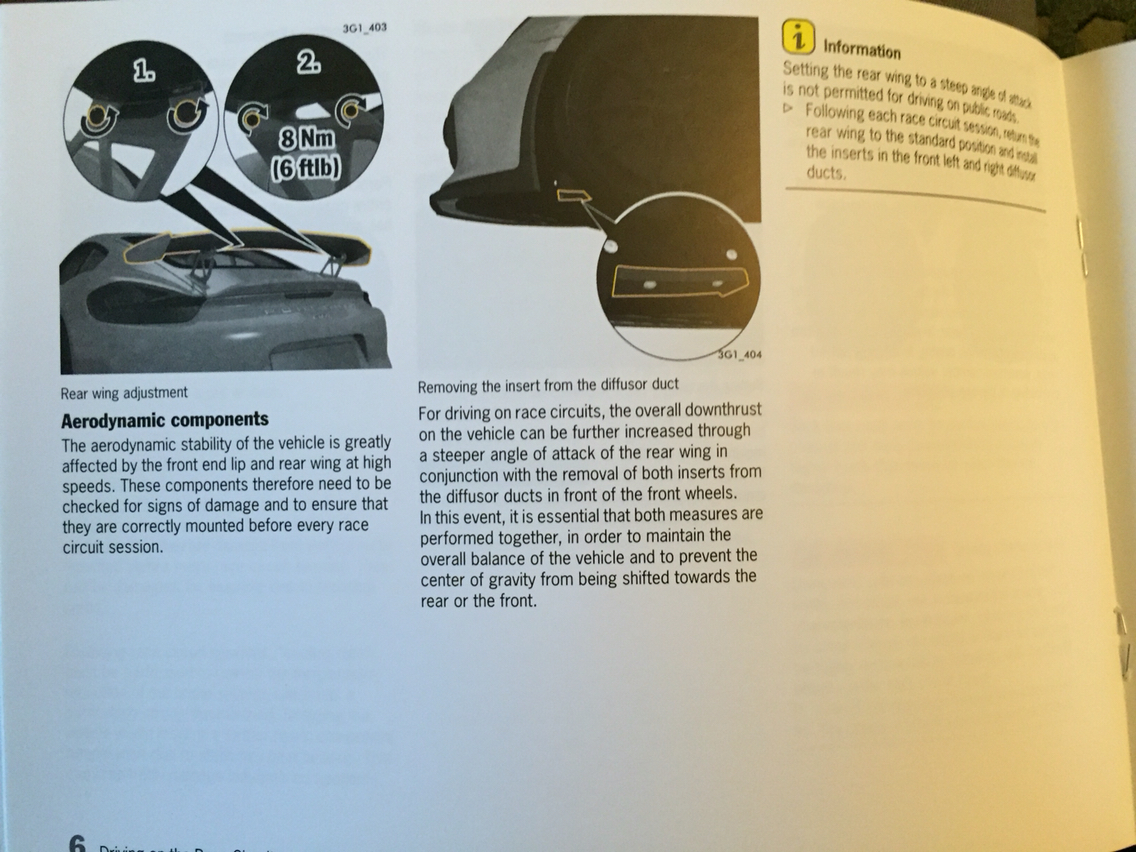
So, I re-fitted one of my aero pieces for the purposes of photographing the removal to try to give everyone a visual. I created a GIF of the process.
T25 Torx. The first time you try to loosen the screws there may be a 'slipping' feeling as if the Torx bit is too small, but it's actually caused by little gripping ridges on the back of the screws rubbing against the plastic as you loosen them.
Hopefully this helps. I can post the individual photos if needed.
Thanks Gifman. Another tip for everyone: Put the Torx screws back in afterwards. Sure, it's a gram or two added to your curb weight, but at least you'll know where they are if you ever want to reinstall the aero blockers.
Thanks Gifman. Another tip for everyone: Put the Torx screws back in afterwards. Sure, it's a gram or two added to your curb weight, but at least you'll know where they are if you ever want to reinstall the aero blockers.
Plus it will keep the teeth clean if you ever wanna put them back
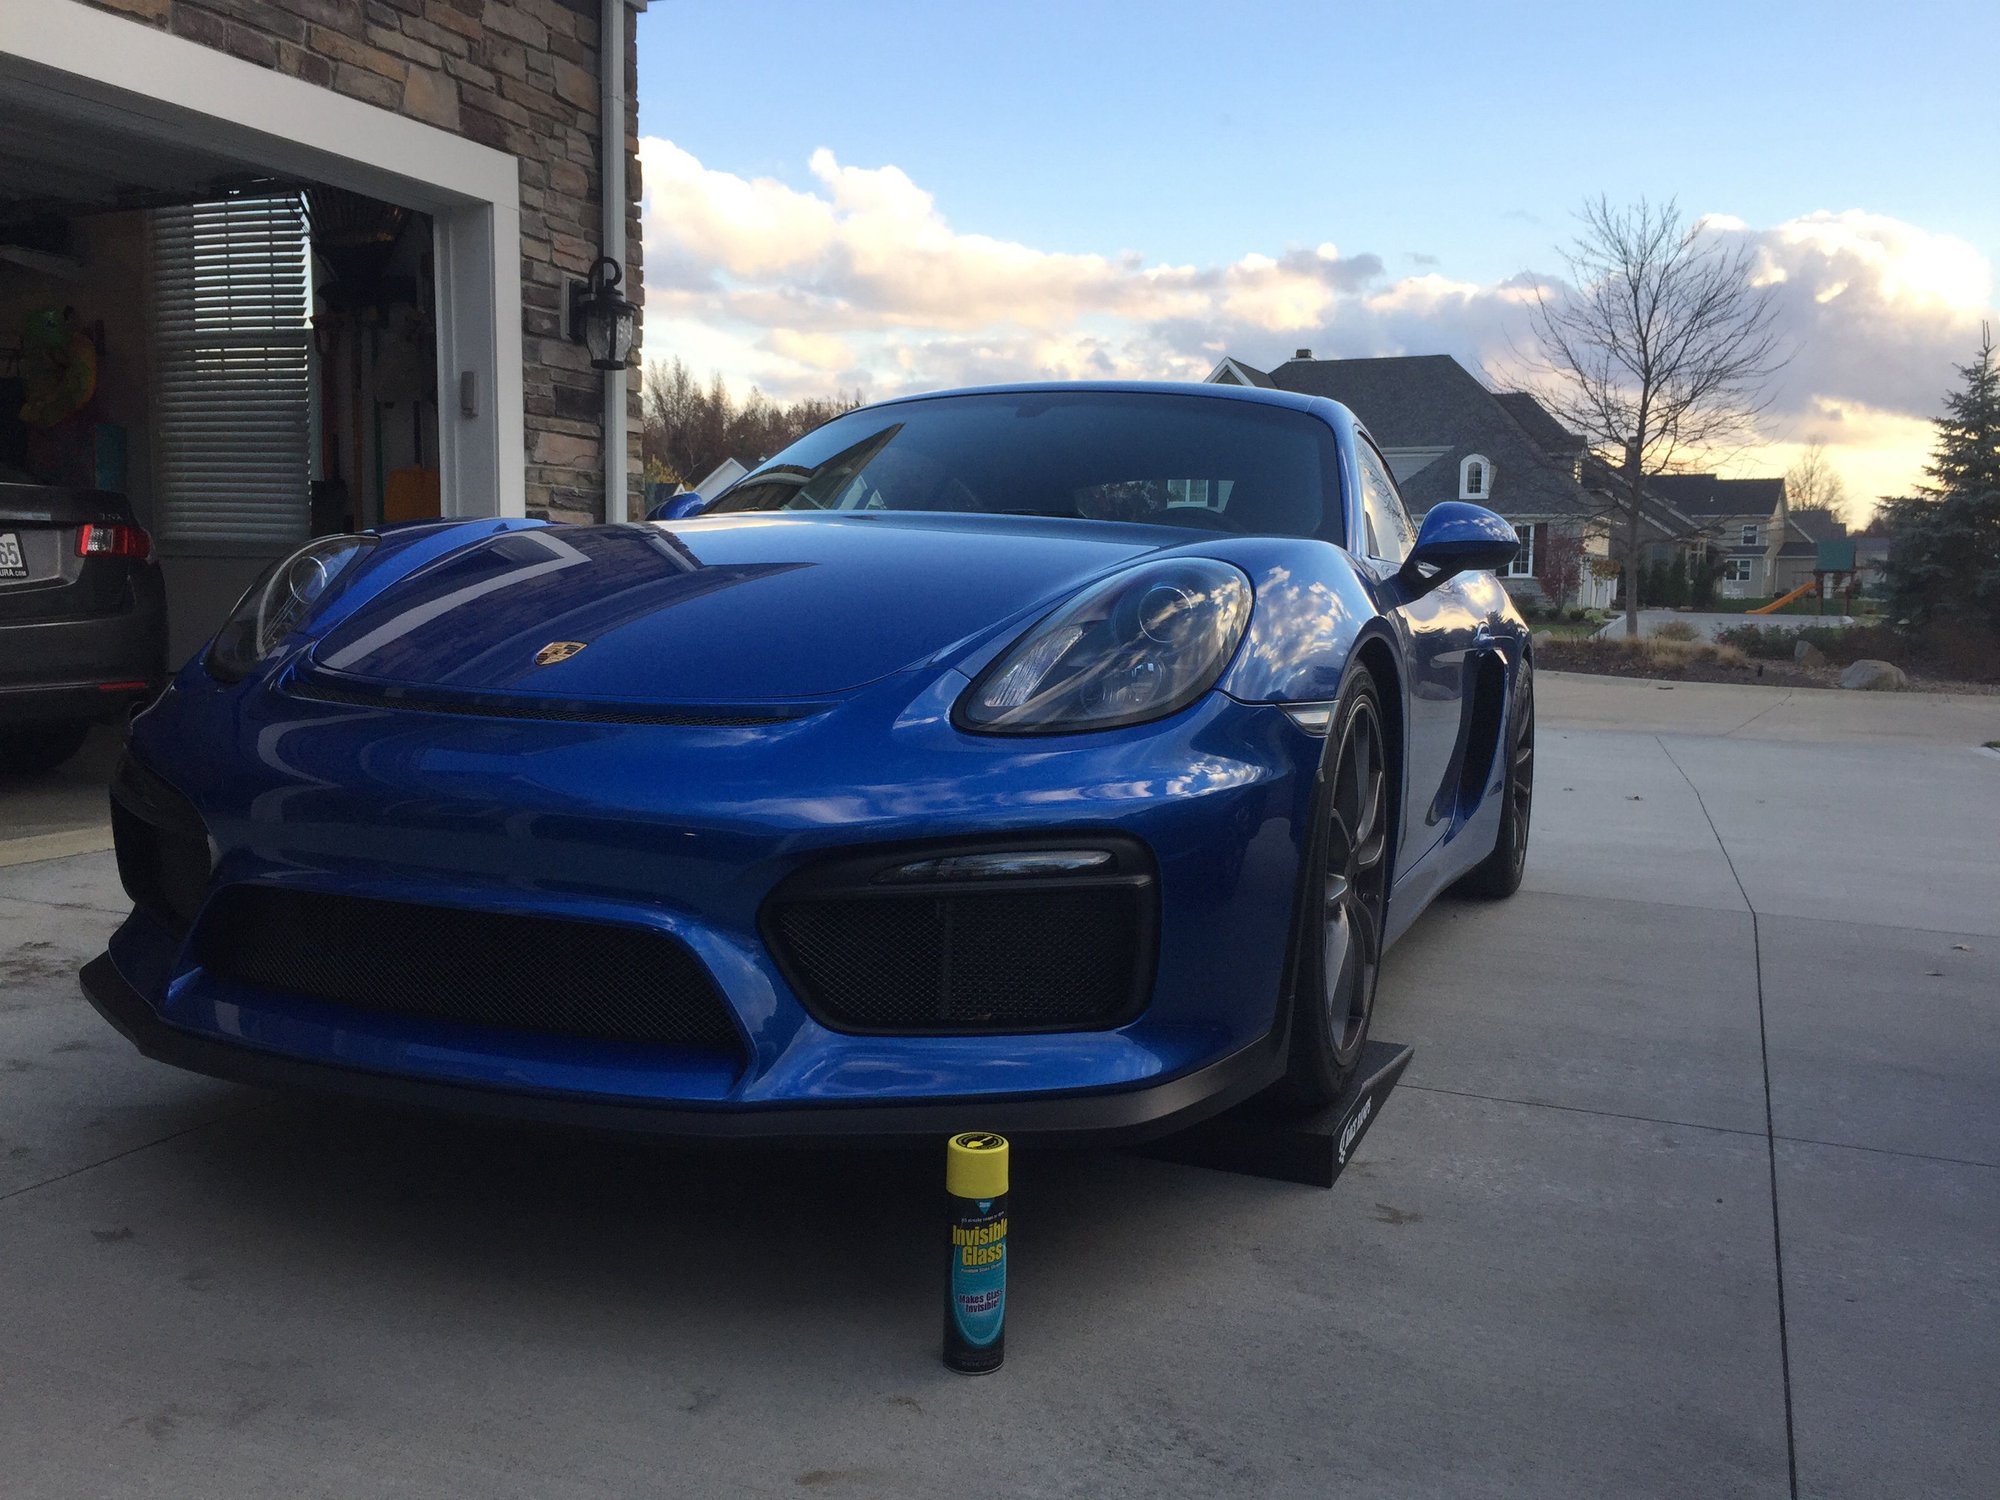
Oh, I can't remember who asked but this is the height that the Race Ramp Trak Jax raises the front of the car by. I put a standard size aerosol in front of the lip to try to give a familiar visual reference.
Not necessary for removing the aero pieces but it sure makes photographing it easier
That's interesting because I do not like a 4psi spread between front and rear HOT (subjectively). Perhaps this is "fastest" on a smooth track like Bahrain or perhaps such a spread worked well for you to get some more grip out of the fronts.
Thanks Gifman. Another tip for everyone: Put the Torx screws back in afterwards. Sure, it's a gram or two added to your curb weight, but at least you'll know where they are if you ever want to reinstall the aero blockers.
I put the Torx screws in a zip-loc baggie with the aero blockers, so all the parts are together and I won't have to worry about the extra 2 grams of weight.
That's interesting because I do not like a 4psi spread between front and rear HOT (subjectively). Perhaps this is "fastest" on a smooth track like Bahrain or perhaps such a spread worked well for you to get some more grip out of the fronts.
Agreed. That kind of difference implies all kind of induced understeer.
Oh, I can't remember who asked but this is the height that the Race Ramp Trak Jax raises the front of the car by. I put a standard size aerosol in front of the lip to try to give a familiar visual reference.
Not necessary for removing the aero pieces but it sure makes photographing it easier
One thing i did notice. Your front tires look way too fresh. Get out and track the car or at least work it! Made me feel bad chewing mine up. carl
One thing i did notice. Your front tires look way too fresh. Get out and track the car or at least work it! Made me feel bad chewing mine up. carl
They are way too fresh, Carl! I do need to get out to the track when spring hits.
Full disclosure: I almost destroyed my rocker panel after taking this shot.
I had a large rubber wheel chock lying around (idiot) and I swung the car around in reverse and heard a bang and felt resistance. There was the chock wedged under the rocker panel with the rocker panel bulging out. I almost threw up. I thought I had destroyed the panel. I couldn't even pull the chock out. Had to drive the car forward. Luckily after freeing the chock everything went back to normal and there isn't even a scratch. Thank goodness for plastic panels. Way too close for comfort!
After seeing the magic gif, it took me all of 5 minutes to remove the front pieces and adjust the wing. I was surprised at how little the wing shifts up. Put screws and plastic pieces in a ziplock and put them in the storage compartment behind my seat for safe keeping. I used the angle of my driveway into my garage to tilt the nose up. Gave me plenty of space to access the nose pieces.
I can't wait now to remove the 5 lug wheels with an electric impact gun and adjust the sway bars. I've been scarred by center locks.
 11-07-2015, 07:47 PM