When you click on links to various merchants on this site and make a purchase, this can result in this site earning a commission. Affiliate programs and affiliations include, but are not limited to, the eBay Partner Network.
Good afternoon all, wanted to do a little writeup on this as I have seen guides for the 991.1 but not for the 991.2 and the setups are quite a bit different. I am in process of doing this, so it may take a couple days to complete. To be clear, I was not sure if the 991.2 had a 3 year/40k service interval, or a 4 year/40k service interval. I did the earlier one to be safe but my car has 15k miles on it and was built in March of 2018 (2018 Carerra T). As of writing this, I have completed the drivers side (3 plugs) with no issues. I purchased the plugs from FCP Euro along with a few other items (Mahle Oil filter, Hengst cabin filters, etc).
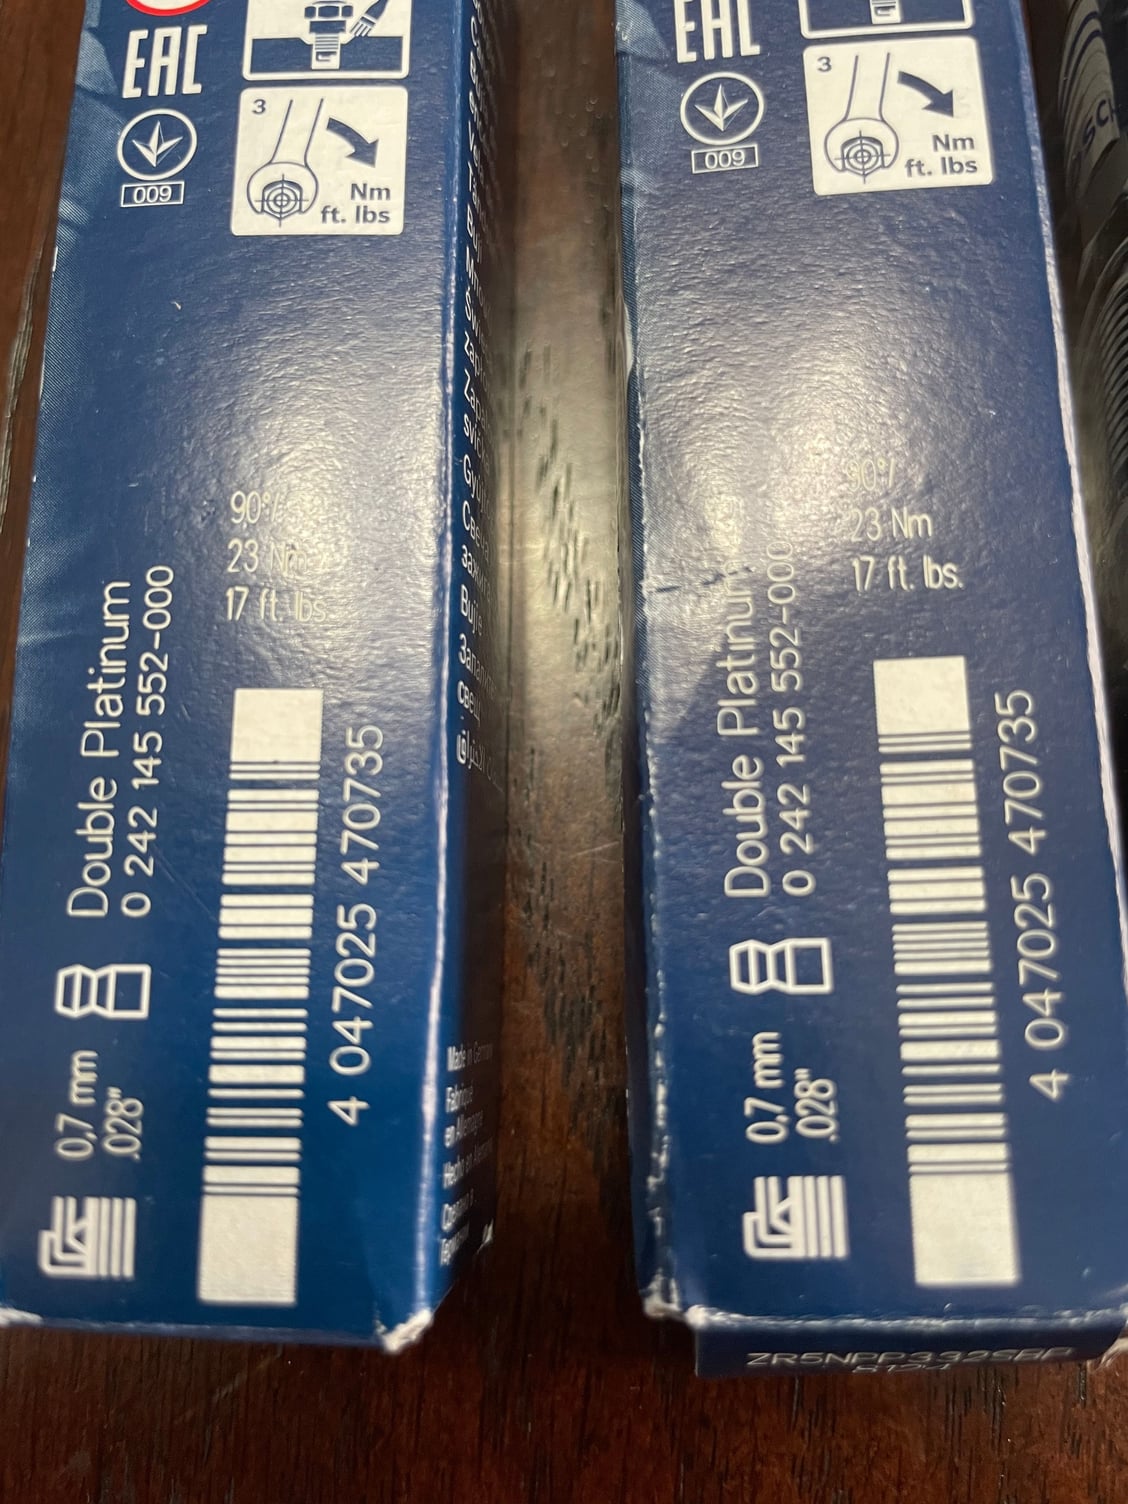
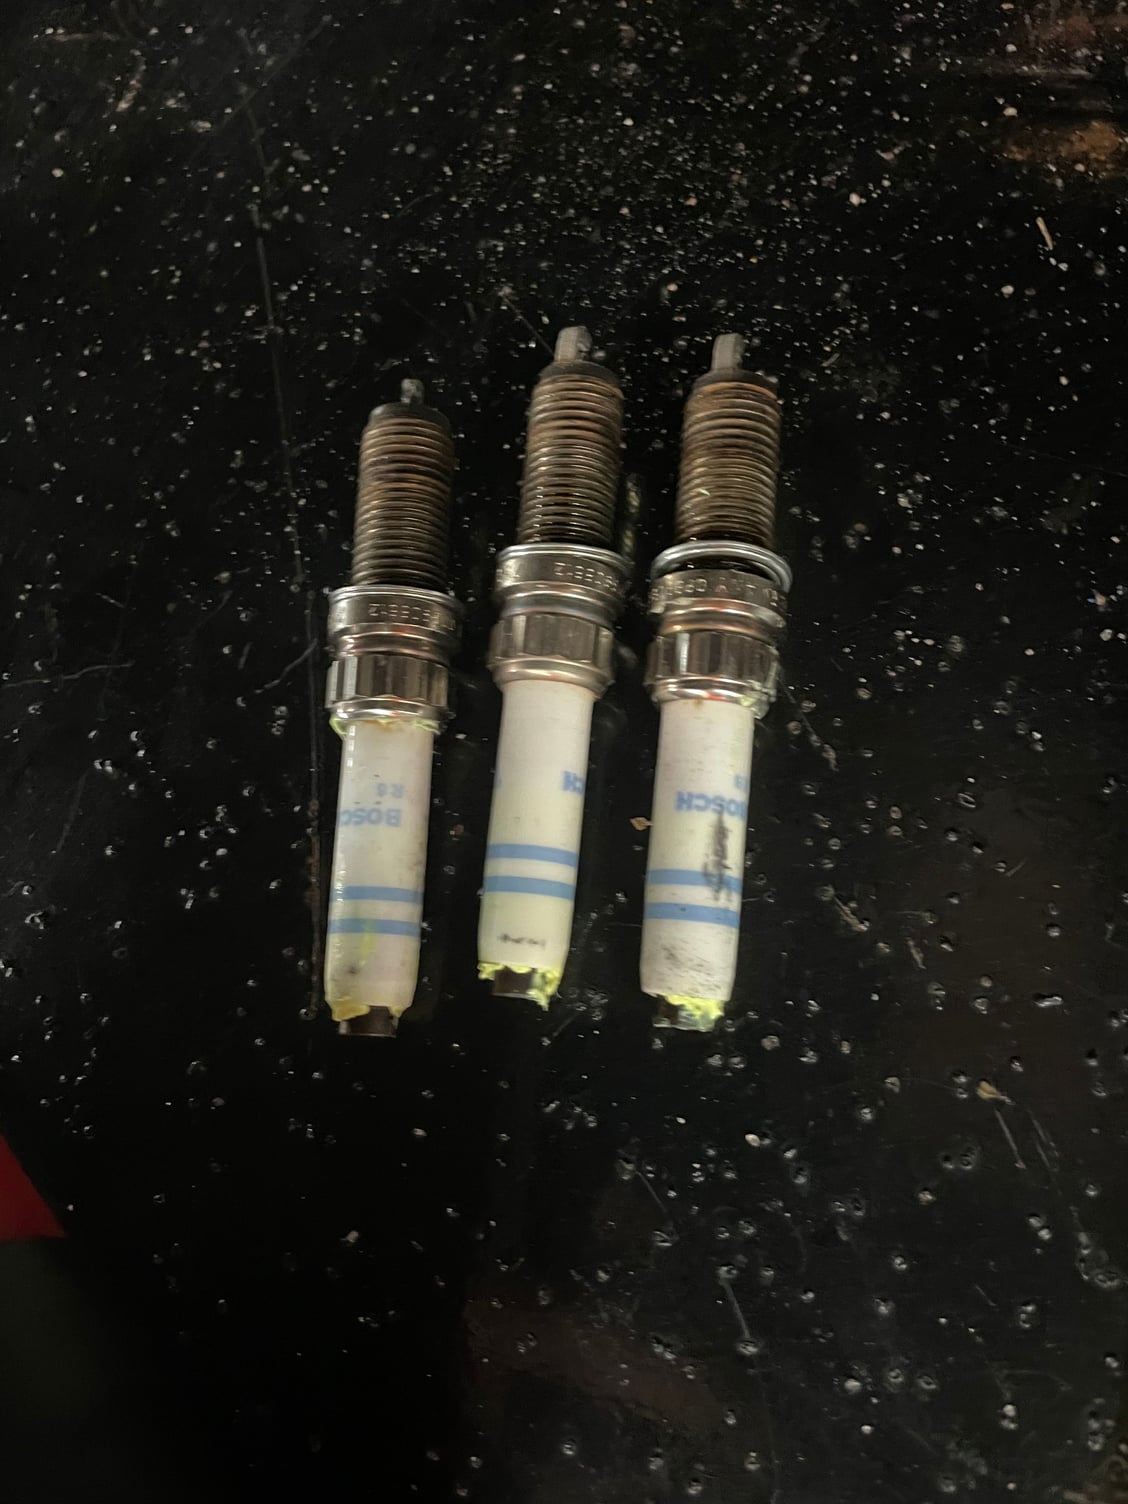
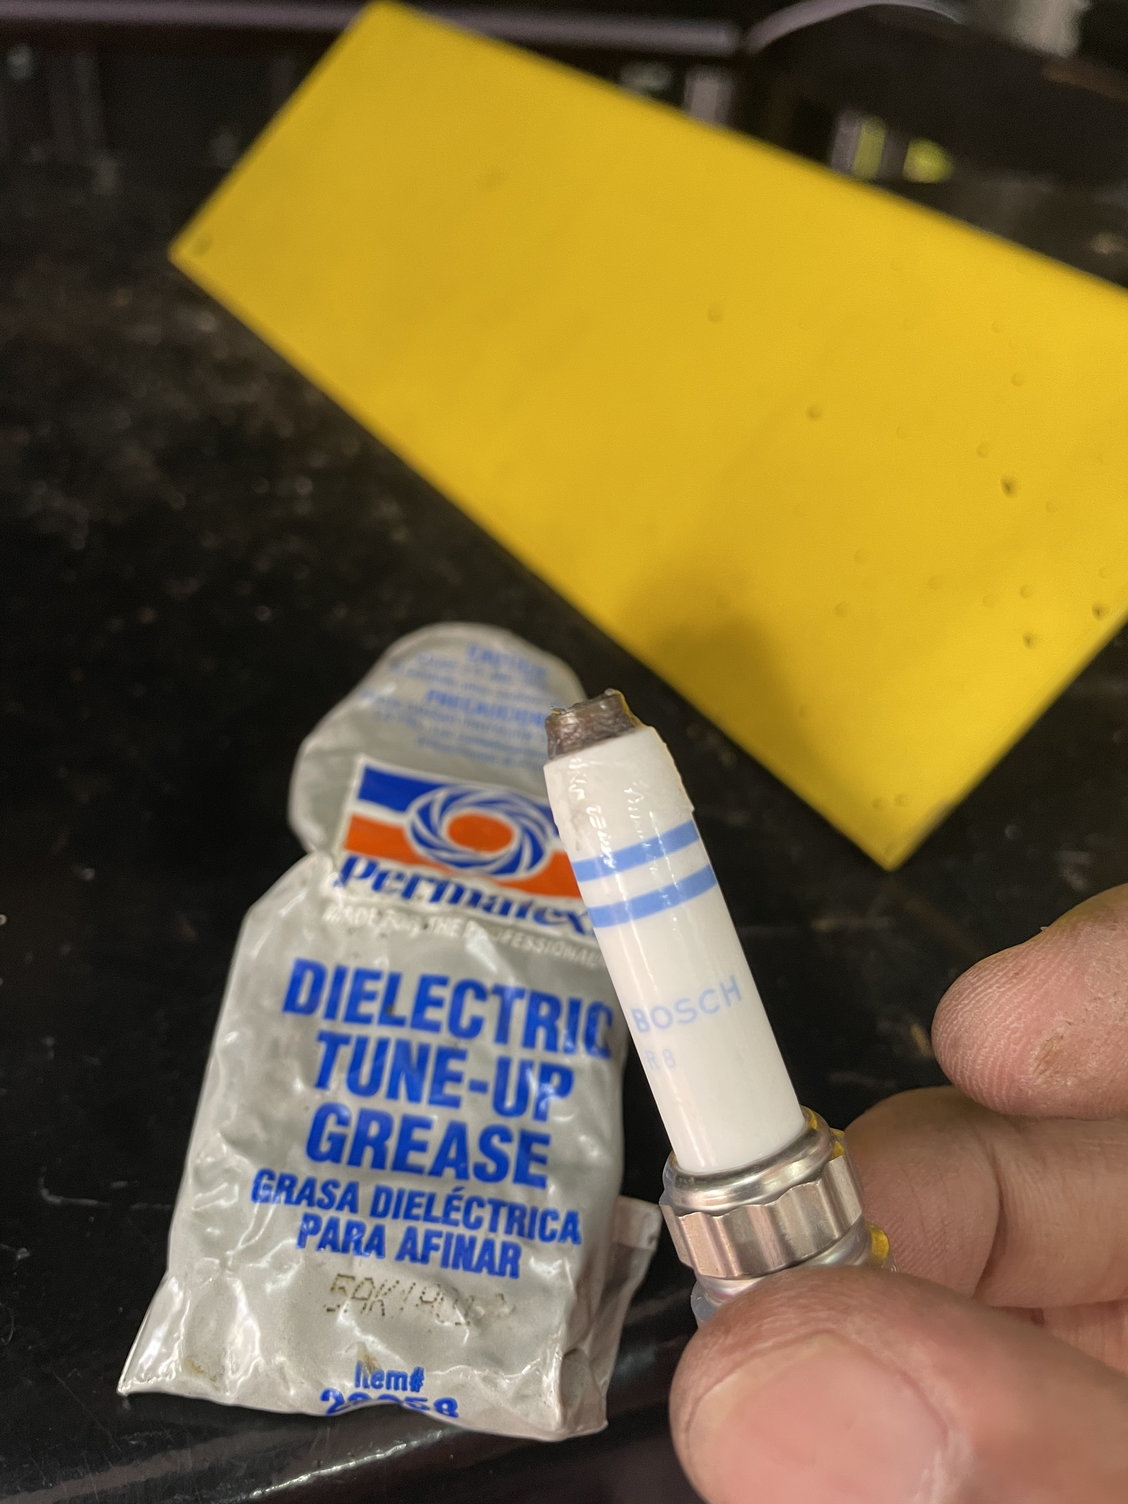
Bosche Oe plugs part number 8124 Part numbers and info
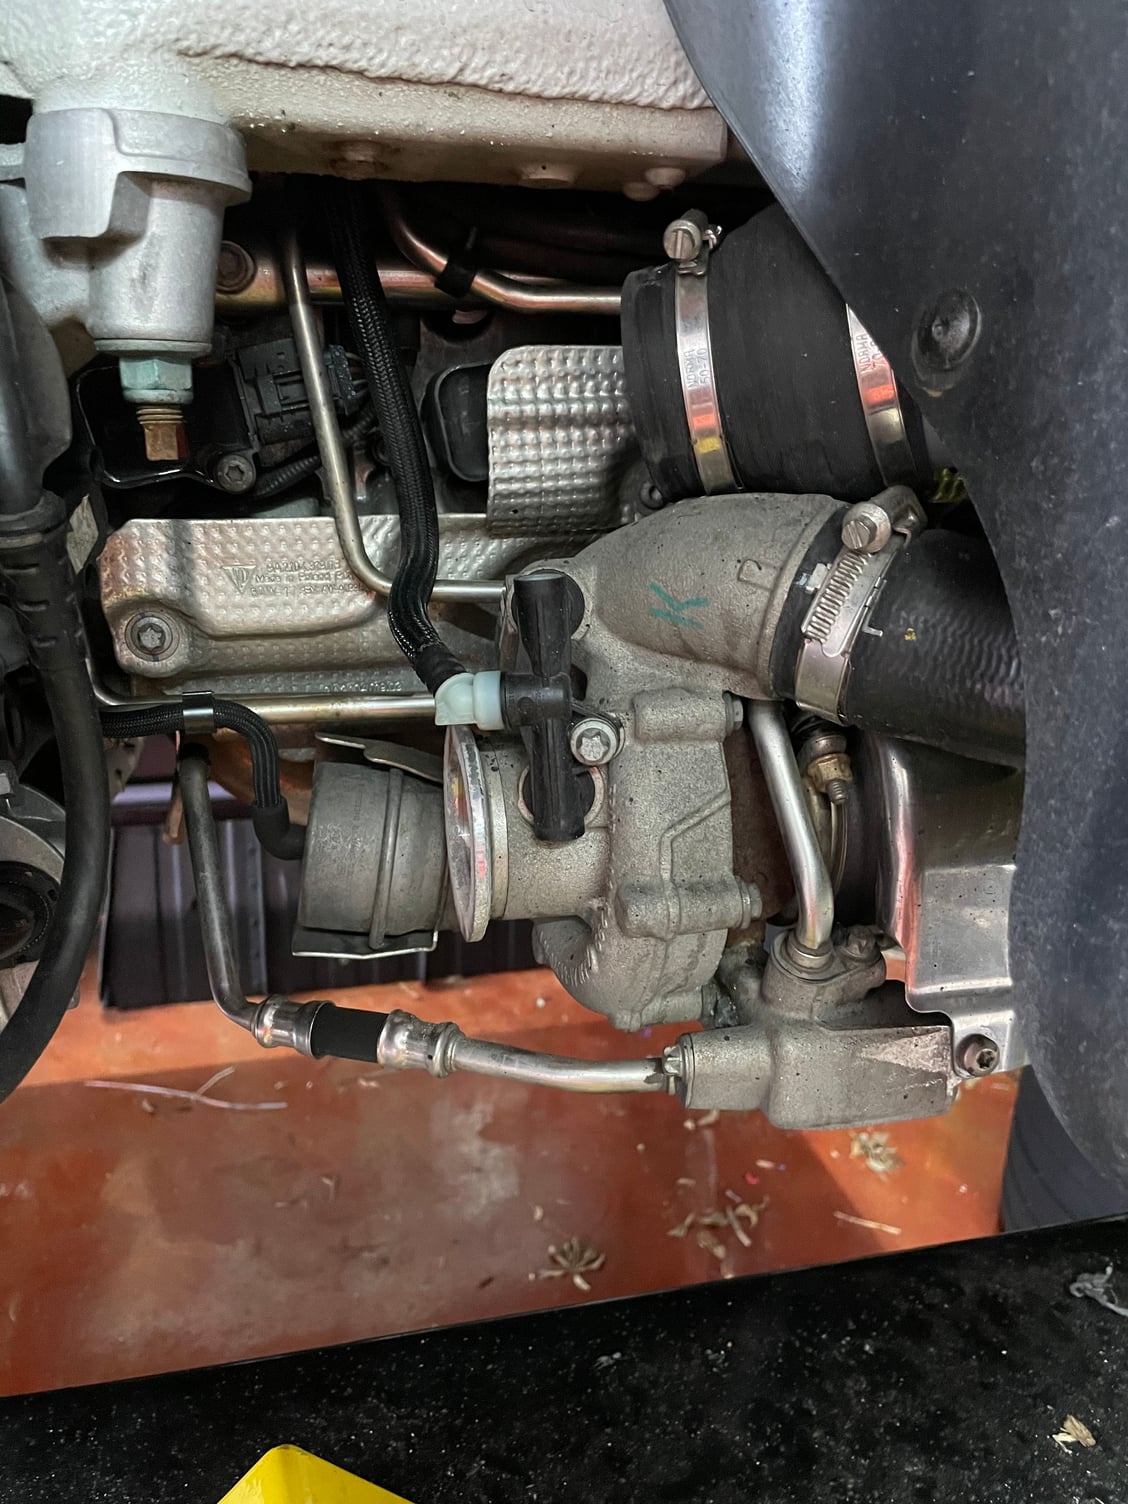
First up, is to remove the rear wheels and the turbo inlet tube. I can say to change the plugs it would be the easiest to do while the rear bumper and intercooler cage assembly is off the car but it�s not necessary. Just makes getting to things harder and you need a good assortment of extensions, wobbles, etc.
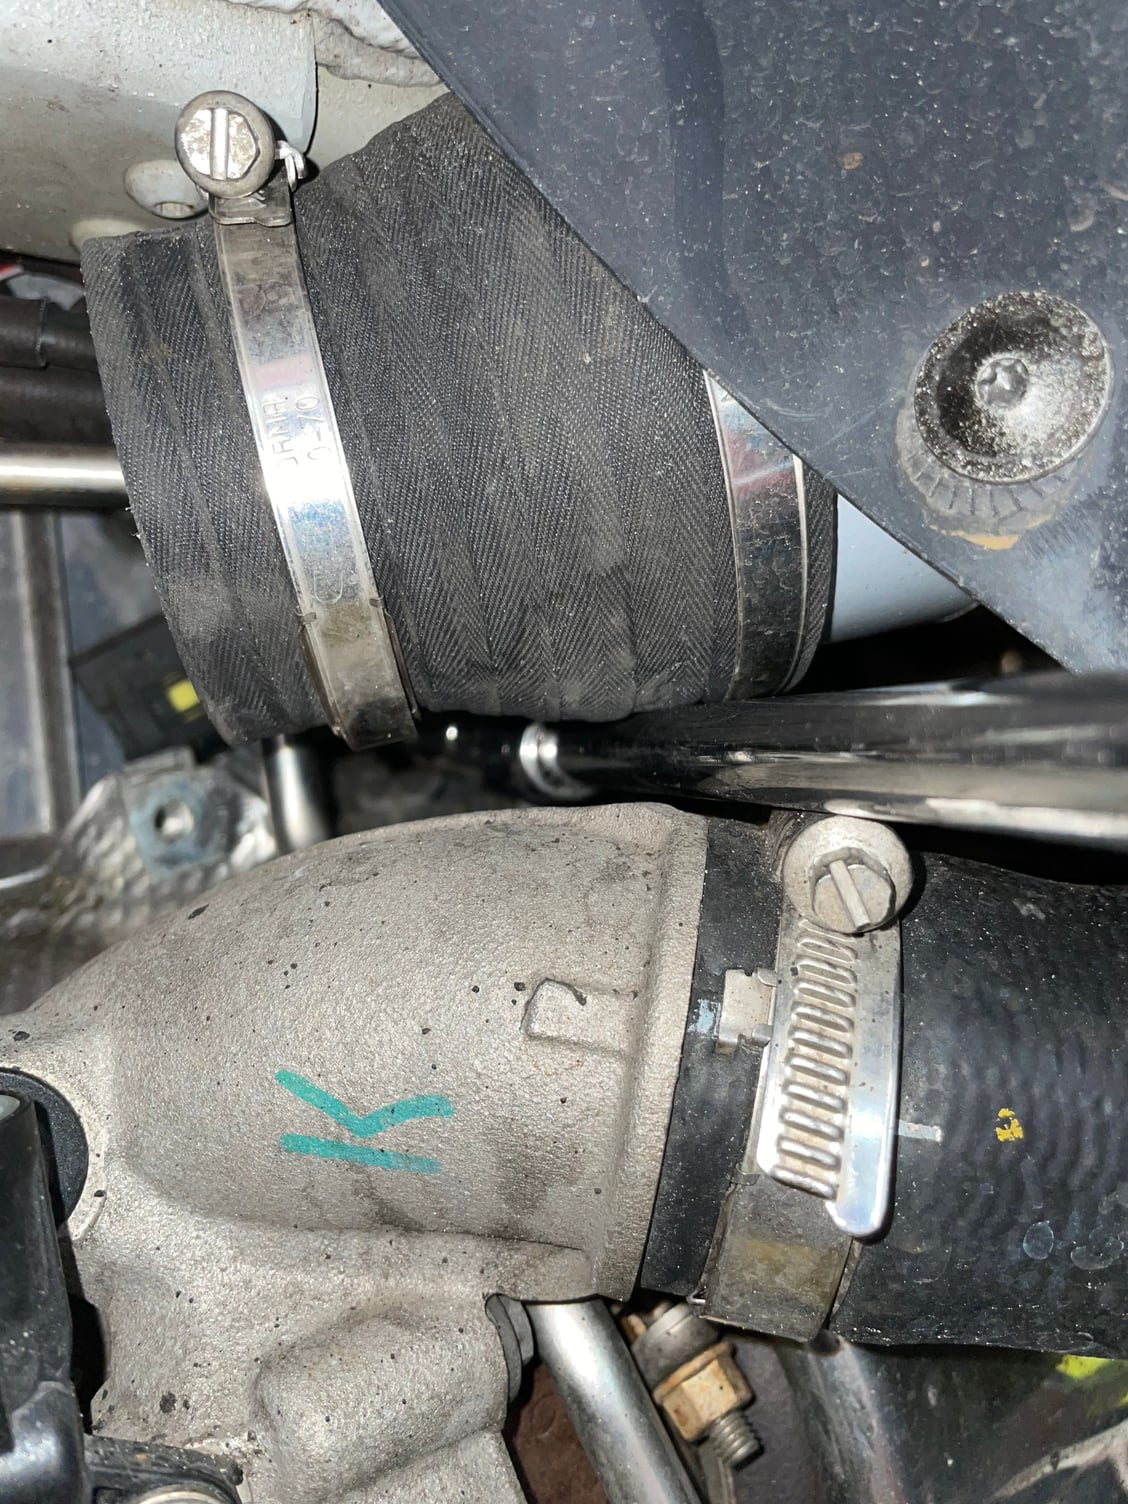
Loosen the clamp that attaches to the inlet and the worm clamp up top that connects to the air intake Removed by pulling from the inlet end first gently.
Next up is to remove the heat shield covering the coils. There are two torx bolts here and there is also a wire clipped to it that you will need to pull off.
First bolt is easy Second...not so much. Needed a couple wabble extensions on a 1/4 socket set Here is what I used. Here is where you have to pry off the clip holing on the wire to remove the shield.
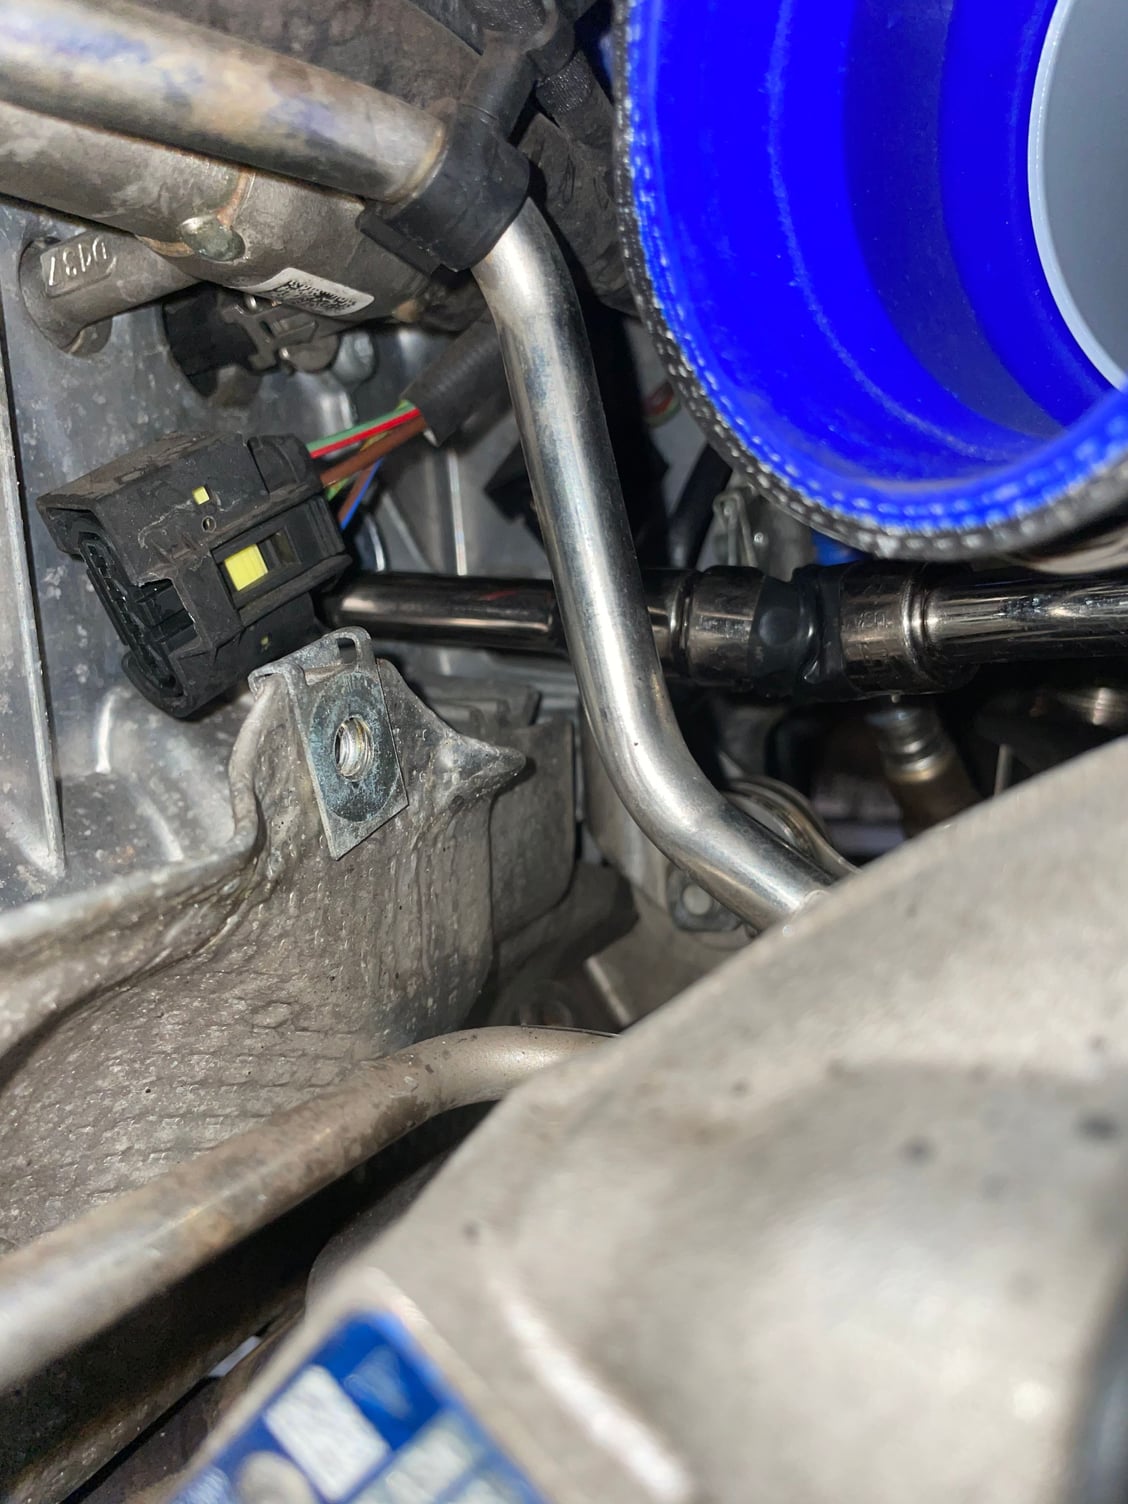
Once the heat shield is off, you have access to the first two coils (this is on the drivers side). Loosen the torx bolt holding the coil in (does not come out completely), disconnect the connector and pull the coil by gently turning and pulling. Should pop out with just a bit of force.
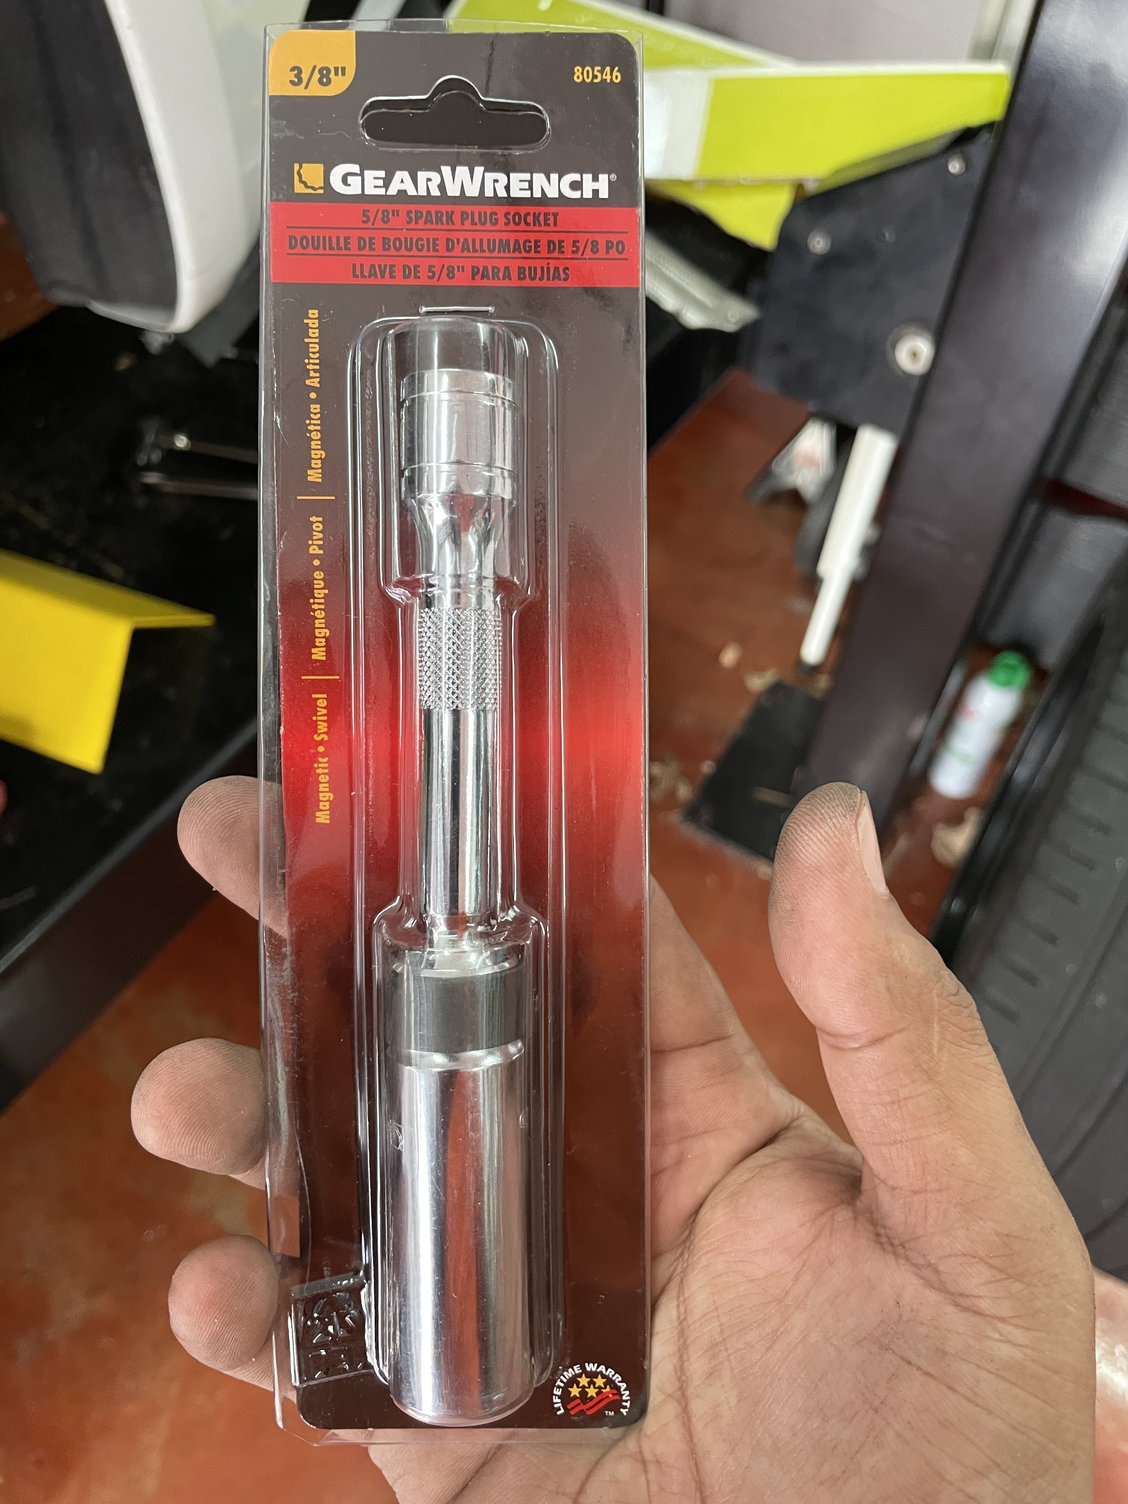
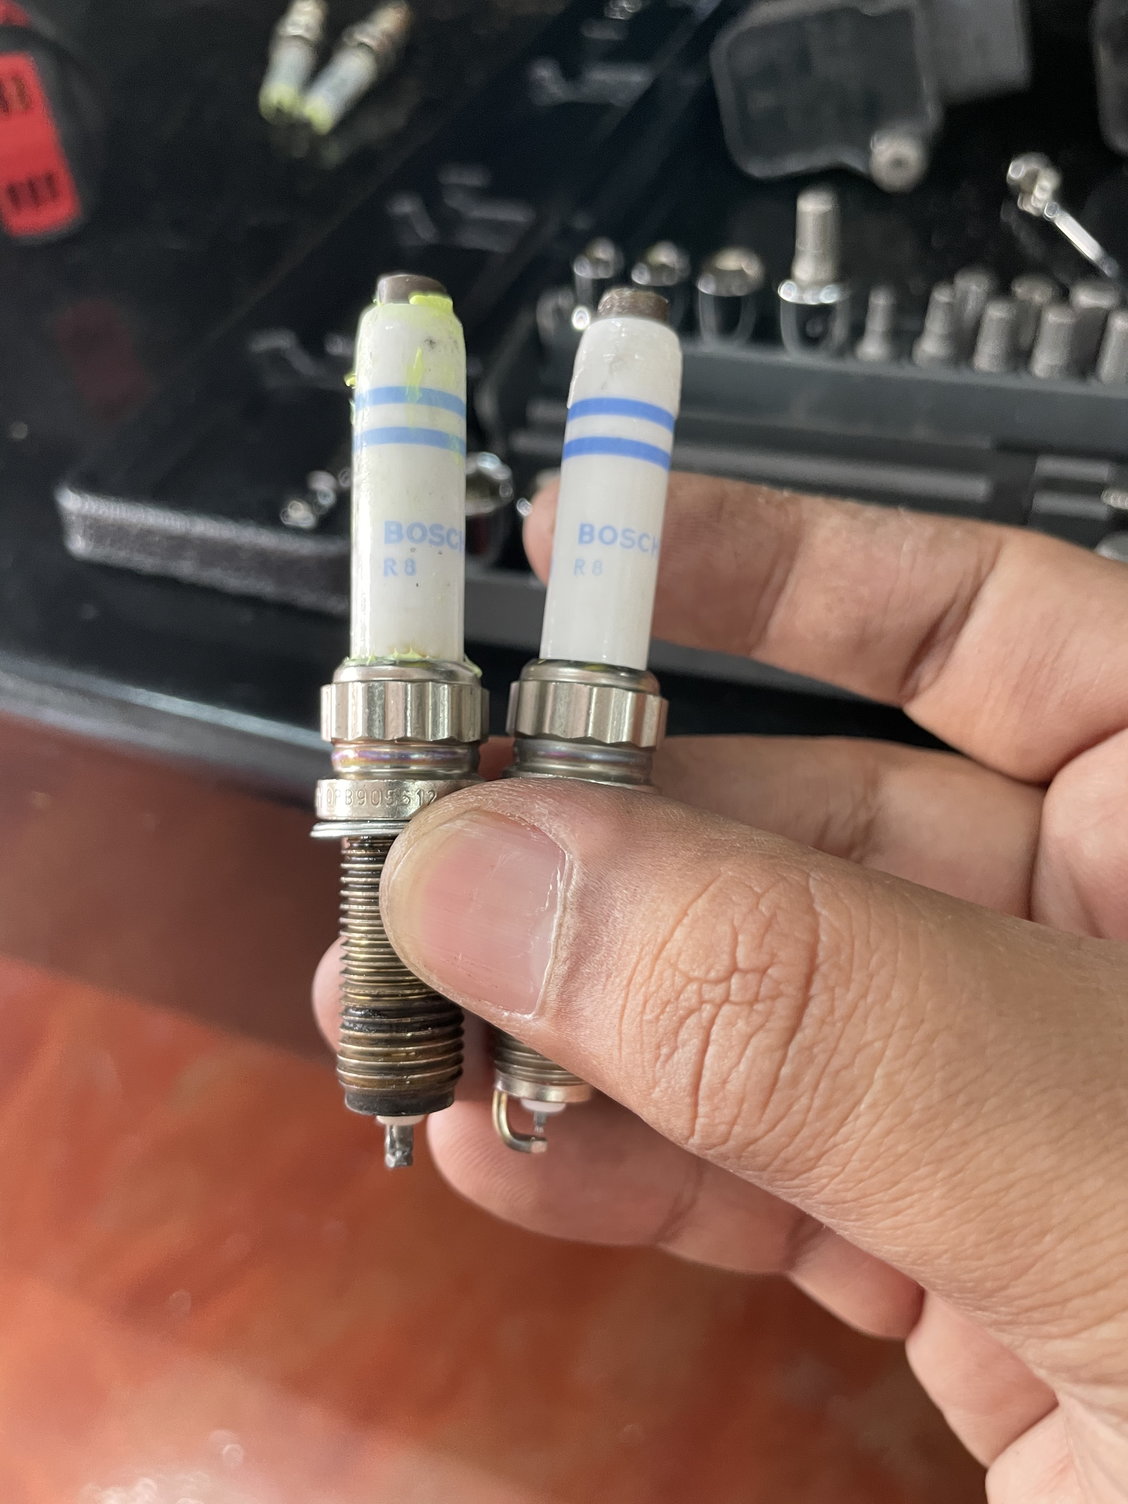
In one of the other threads, it was recommended to get the tool below to remove the spark plugs on the 991.1. I can confirm that this tool DOES NOT work on the 991.2 as the 991.2 uses a 14mm 12 point socket. Thankfully I had one around from my days of installing head studs on Supra motors. I used this socket in addition to a magnet to pull out the plugs.
Don�t buy this for you 991.2 The angle that the plugs come out at.
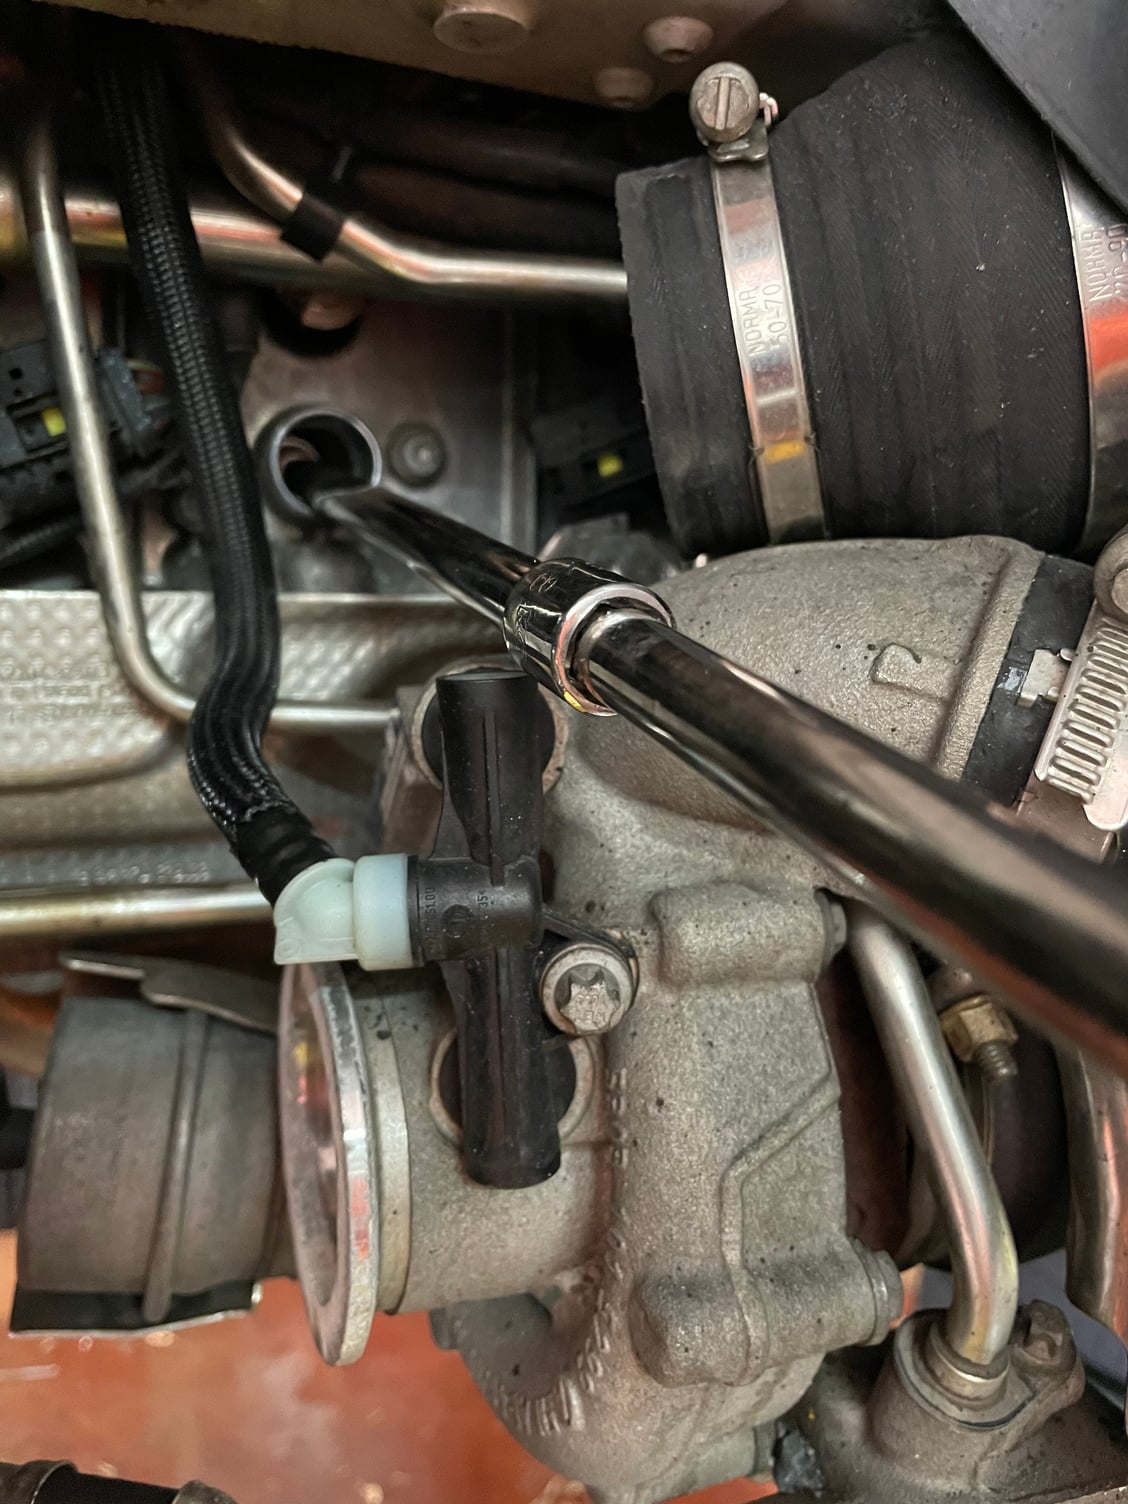
The forward two plugs are easy to get to-the back you can�t even see. Here is where you have to use some ingenuity, wobbles and extensions to access the last plug.
How it looks What it looks like from behind the turbo
Install is the reverse of removal-be mindful of the angle the plugs go in as it�s not centered in the hole. I suggest starting by hand on an extension and then tightening with the ratchet. I tightened 1/2 a turn past where it seated on the ratchet. I also added some di-electric grease to aid in future removal. The oem plugs had something similar and the oem manual calls for talcum powder which I didn�t have and they didn�t seem To use from factory.
Di-electric grease applied to the top of the insulator.
 01-25-2021, 02:42 PM