When you click on links to various merchants on this site and make a purchase, this can result in this site earning a commission. Affiliate programs and affiliations include, but are not limited to, the eBay Partner Network.
To update, and this may help others experiencing the same issues, I found the Bose amplifier online. Worst case if I can't have it repaired, here for $785... ouch. Remanufactured PCM unit, $1516... quite ouch. $300 core charge, no mention of reprogramming. (The PCM unit linked is for my options, yours may vary)
From what I'm seeing I'm pretty confident it's the amp. I'll still be checking for moisture under the carpet to be safe. Now just to hope that the local shop that used to repair the radios in our old Lincolns can help with this if I'm not able to figure it out.
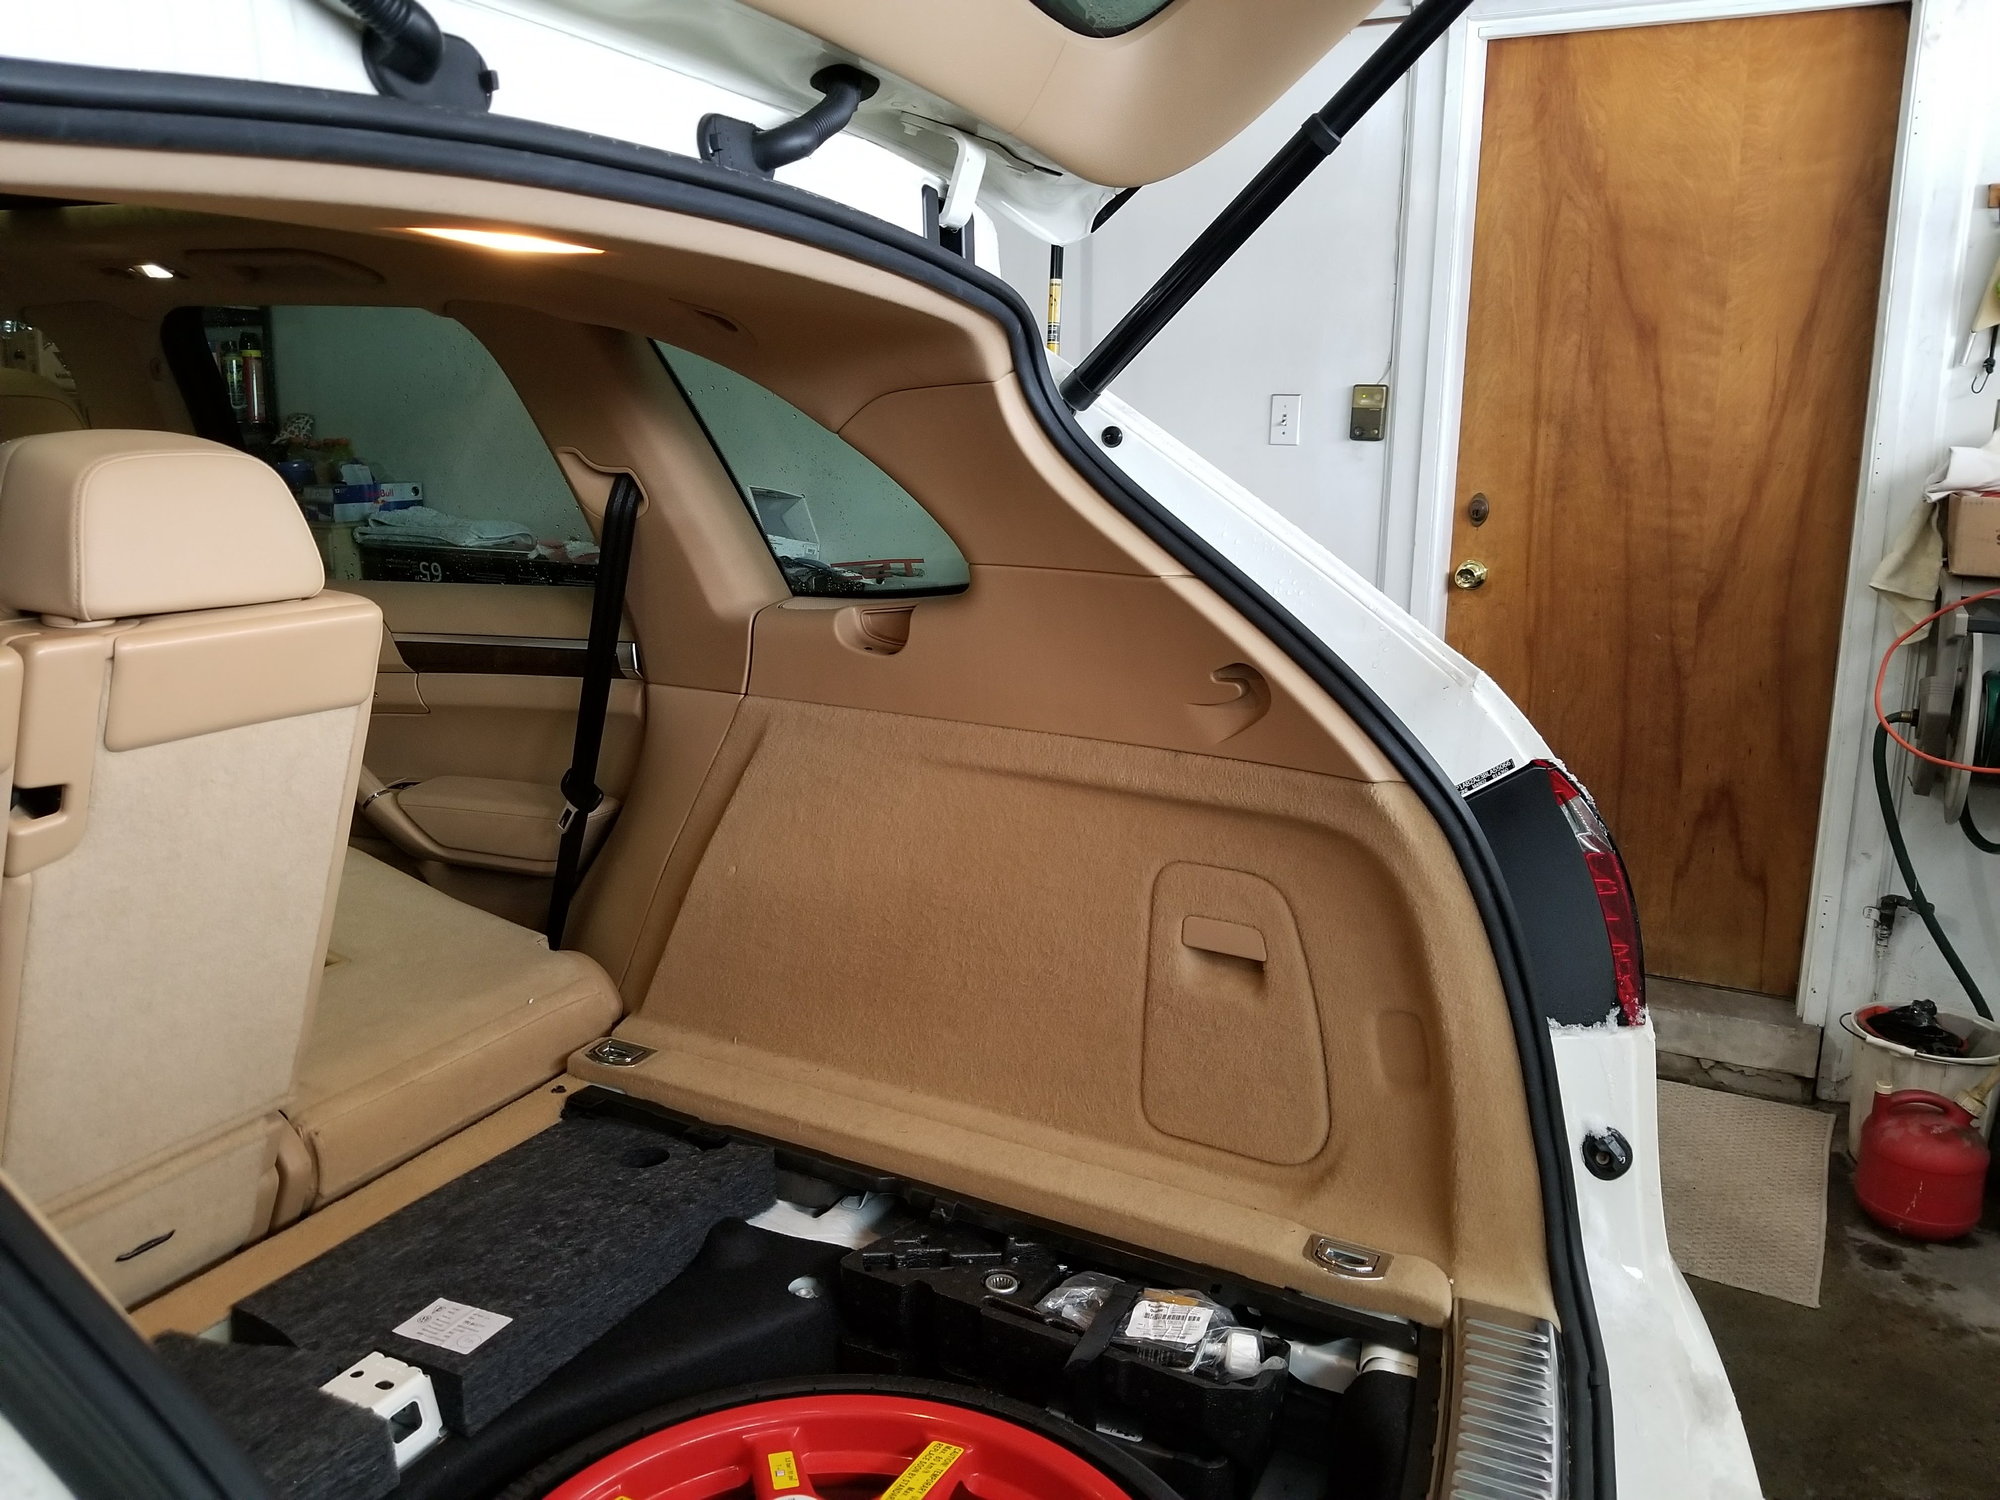
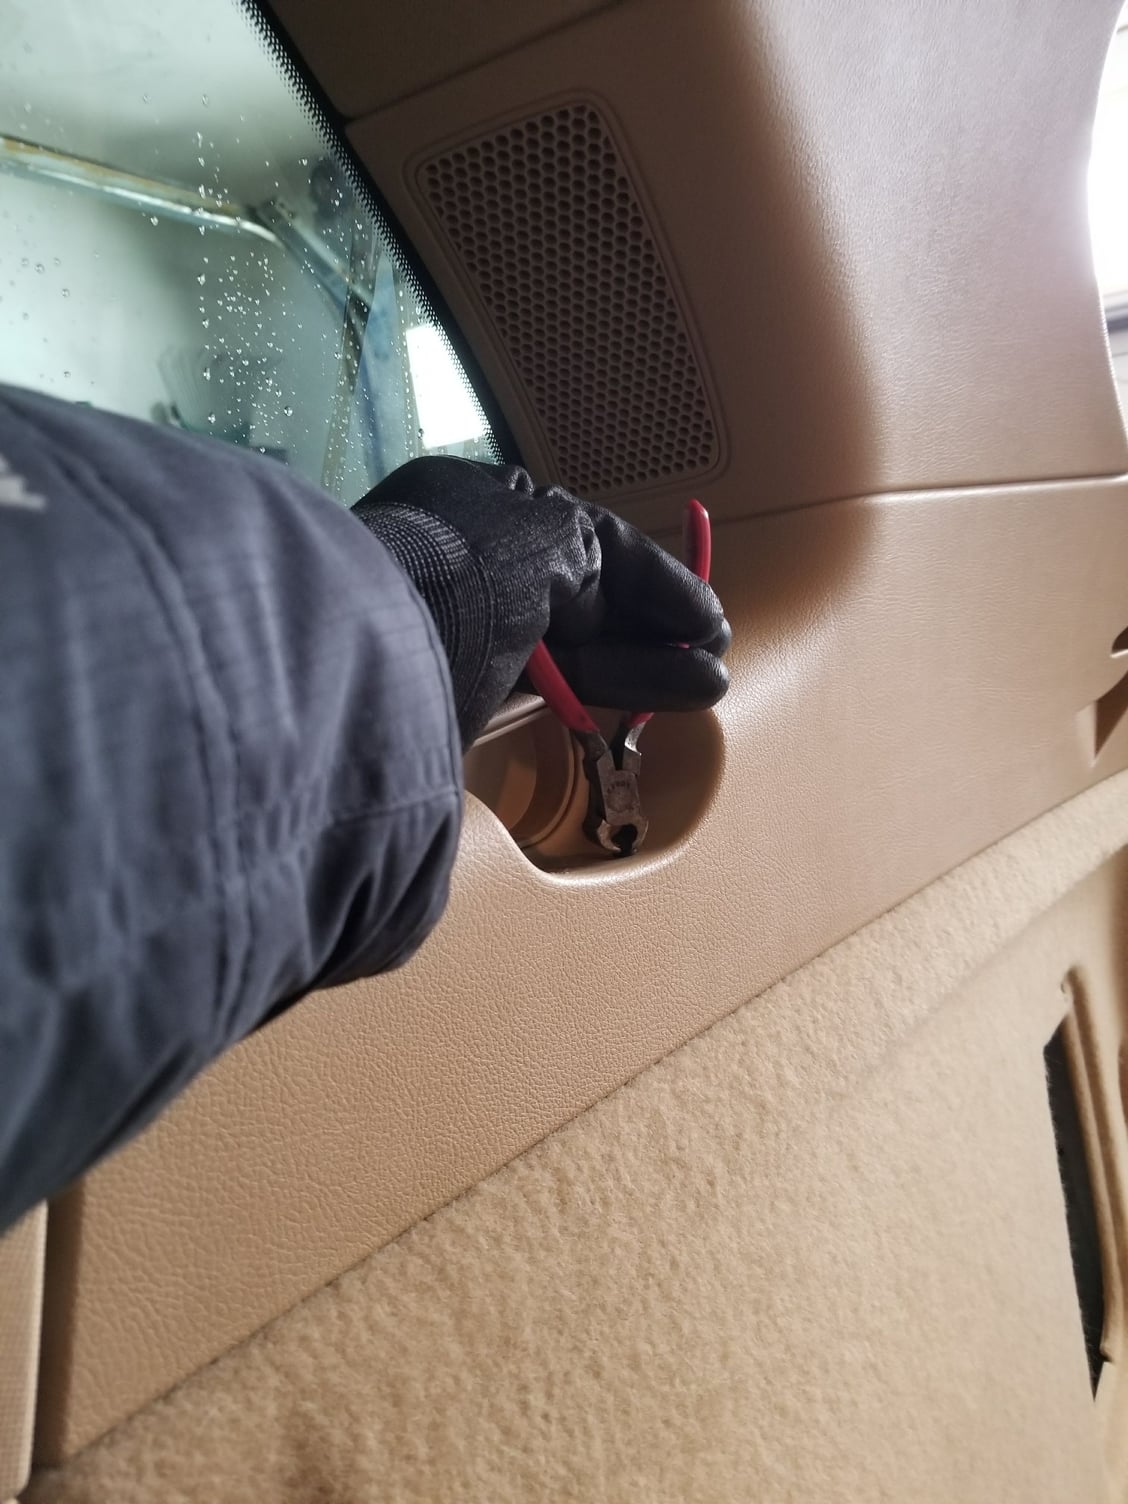
Access to and removal of radio amplifier: So far as I can tell, all audio configurations are located in the same spot, so this should apply to all 958 Cayennes. Remove luggage tie-down trim piece - four torx bolts in the tie-down points and pops up and out. Pull back your trunk seal and pop the upper D-pillar trim off (comes right off, has a nylon retaining strap), pop the lower polished trim piece off. There's two small push-pins in the recess for the luggage cover, best way I figured to pull those was carefully with some wire cutters - shown below. Upper C-pillar trim pops right off. Lower C-pillar trim is a PITA, but can be removed with the seat slid forward. Lower D-pillar trim has two plastic threaded push-pin fasteners. Use a hex-head until it strips, then lightly "hammer" a small torx bit in when it strips out. Wheel well cover will come right out after that, depending on options a speaker connector may require removal to gain full access. 3 torx bolts hold the amplifier in place, and two connectors going to it (at least for Bose)
In my particular case:
GOOD NEWS: Bone dry under the front carpets. Got the amplifier out and think I know what's happened here, which brings us to the....
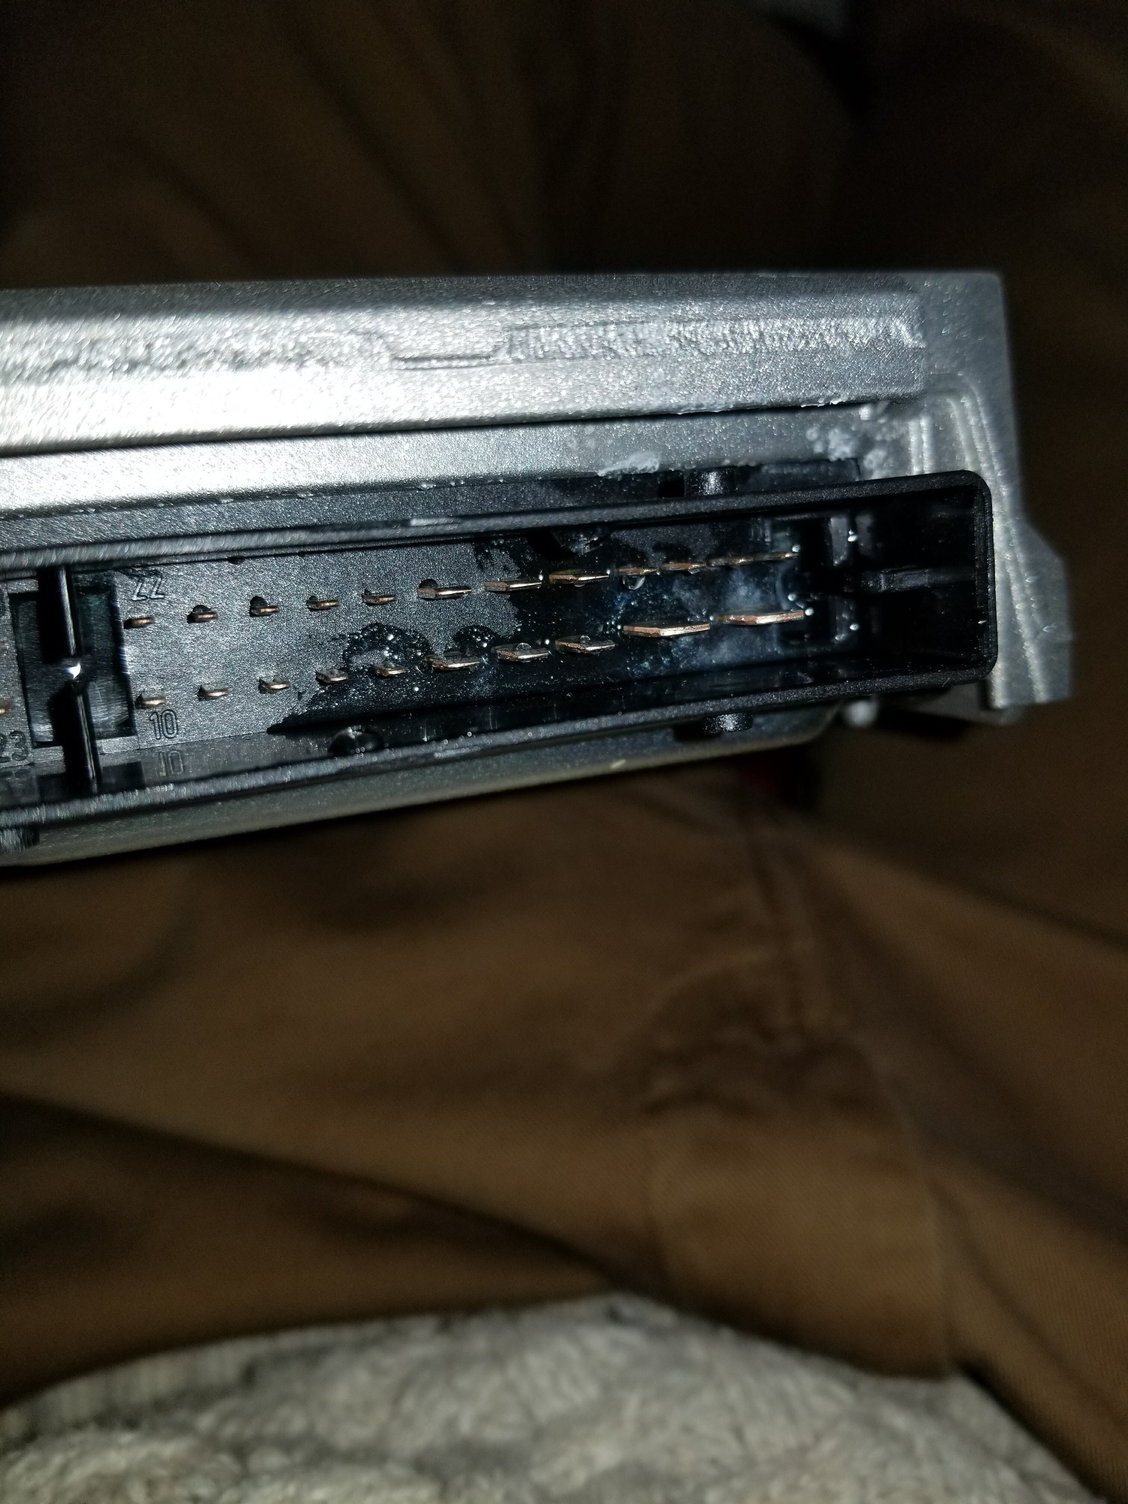
BAD NEWS: Moisture in the connection! Grrrreeeaaaat.
While that's thawing out so I can crack it open and see what's shorting internally, I'll be hunting down where it's coming from.
The white-ish look to that almost looks like dielectric grease.. have you tried a Q-tip? It may just be the result of electrolysis (water/electricity/dissimilar-metals) - or ?
The white-ish look to that almost looks like dielectric grease.. have you tried a Q-tip? It may just be the result of electrolysis (water/electricity/dissimilar-metals) - or ?
I poked at it a bit, it was ice. It's already almost dried up completely. There was also moisture marks on the foam panel that stays on the internal body structure, and ice on the bottom. Microfiber rag, spare pair of socks and bike tire tube I kept in the RH storage cubby were also wet & frozen
Checked the top side of the headliner and backside of the wheel well cover panel, which showed no signs of moisture. Sunroof drain tube was fully covered in dust with no drippy-drippy lines, so that seemed to have ruled out that possibility. My flashlight happened to hit my dirty rear quarter window just right, showing some drip lines that seemed to have clean the interior dirty filminess. Gave it a wipe across and that confirmed these drip lines were on the inside:
There was also moisture accumulation on the structure / "sill" under the window, pretty much directly above where the amplifier sits.
Checked all the other connections and control boxes back there, and no signs of moisture were present. Fortunately it's cold enough that if there were, the rest of it would be ice as well. Also conveniently the stereo was working today for a short bit (after not working at all since Thursday evening) when I had to run and get heater fuel, I cycled through different sources on the PCM and everything seems to be working fine. Hooked up the Porsche scanner I got from Amazon and ran the diagnostics for PCM and amplifier, gave me a fault code for the amplifier (8E02, Amplifier, Malfunction) ruling out a PCM malfunction for me at this time.
As of right now, it looks like the rear quarter-window seal accumulated some moisture and froze up, possibly splitting. I'll be taking some sealant and giving a light bead to the inside as well as trying to pull the exterior trim off and sealing the outside and drying up anything else inside. Once the amp seems to dry/thaw a bit more I'll try to pop it apart and see what all (if anything) may be affected internally.
Is the quarter panel glass glued in? From the inside? That's what the photo makes it look like. Don't see any channel rubber there. Or it could be from the outside. If so - a window glass guy might be your best bet - have him take it out (they use a thin wire they poke through the sealant so the ends are inside and outside - then they work it around the glass to cut the sealant) and reinstall it.
From what I can tell, there's an adhesive/sealant, with a rubber seal over that, then the exterior trim clips into that, and from what I'm also seeing from that, it's absolute hell to get the exterior trim piece back on - assuming it doesn't get bent on removal.
From what I can tell, there's an adhesive/sealant, with a rubber seal over that, then the exterior trim clips into that, and from what I'm also seeing from that, it's absolute hell to get the exterior trim piece back on - assuming it doesn't get bent on removal.
Sounds like I'm in for a bad time.
Just looked it up - and yes - hell. It's glued in from the outside. Needs a special cutter-knife with pullies that fasten to the glass to guide it around the edge of the glass, and of course special tools to install it. There appear to be 3 clips for the trim that are installed (after being bought) while gluing the window back in - they're installed at the same time as the glass.
Sort of why I suggested ask a window guy. They do this stuff day in/day out - and experience counts for a lot in this sort of job. Plus having the right tools and materials (the bonding adhesive is a 2 part that gets mixed in a glue-gun right before application.. that kinda thing.) If you can get the exterior trim off - you might be able to add a bead of sealant around the edge of the glass on the outside.
Interesting - from the manual: "The new side window is supplied complete with trim frame and trim." = that rather implies the trim may be one time use.
Yeah, I tried to pop the trim and it wasn't budging, and now has a slight wiggle to it. ugh.
I used a flowable window sealant around the inside, went to a wider area that where the dripping seemed to be coming from and letting that cure until tomorrow. Cracked the amp open and saw nothing corroded or fried, so I'm almost hopeful it may have just been moisture on that main connection causing this, I'll know tomorrow when I plug it in and play it for a while to see if it acts up before I put everything back together.
Do any of you guys having these problems have a newer iPhone plugged in or connected to the system? There are some guys on the 997 forum having weird PCM issues with it rebooting to the splash screen, cutting out, etc and the problems don't repeat if their newer iPhone aren't connected to the PCM via either Bluetooth or to the multi plug. Just thought I'd mention it.
Re-installed the amp, plugged it in and no sound came out. PCM refused to switch sources from FM again. Figured maybe not having the speaker in the lower C-trim hooked up may have been causing it an issue. Hooked that up and everything started working! Great! NOT. Cut out again after just a minute or so.
There's a tiny relay on the board inside some of these amps that just dies.
I'm also going to double-check my ground connection and fuses. If that yields no results I'll be calling my local electronics shop to see if they can look at it, and possibly fix it this week. If not I could either gamble on a second-hand amp or bite the bullet and buy a new one.
Is it fully dried out inside? If you have it out - open it up and put an old fashioned 40W-60W incandescent bulb in a fixture you can get near to it (a pivoting desk lamp works well) - and heat up the insides for a few hours. It's possible there is still moisture inside causing problems.
Pulled it back out, have the heater/dryer back inside the hatch and the board is out of the housing in front of a heat vent with a towel over the back/top of it. After a little bit there I'll give it a light going over with the heat gun to really make sure and throw it back in to test again.


 02-10-2018, 03:46 AM