When you click on links to various merchants on this site and make a purchase, this can result in this site earning a commission. Affiliate programs and affiliations include, but are not limited to, the eBay Partner Network.
Success! Had my buddy help me change out the tubing. Went back to Napa and got some heater hose. I made sure it had the same part number as the one that Dilberto posted in the pic. The heater hose is much softer than the fuel line I had.
When we took off the fuel line hose off the bearing, it was warm from the exhaust and from driving. It was as soft as the cold heater hose.
Installed the new hoses in the bearing support and took it out to for a drive. NO MORE VIBRATIONS. Drove it home and it was smooth. I will drive it for a few more days and check the zip ties.
After lurking for quite some time I wanted to become a member and share my experience. This jimmy rig saved me tons of money and time and performed it in under an hr. Thank you all for your endless amounts of knowledge. I pieced together a couple of videos for those that feel this may be an overwhelming task... To those, I assure you it is NOT.
Check out the videos if you have a couple minutes to spare and see for yourself how easy of a fix it really is. It's not edited so excuse the different videos but you get the point!
2010 base. 94k miles. First felt the midget with a hammer a few weeks ago during a 3/4 throttle acceleration on an on ramp. Realized immediately (thanks to this forum) what it probably was and spent the next few weeks driving like the throttle had an egg under it while I debated on how I wanted to fix it.
I really wanted to do the EPS fix, but honestly didn't like the way the silicon points were to hold the bearing in place. It just didn't seem right. I also read every review of it on Amazon and noticed a number of them complaining about vibration and then receiving a replacement unit.
So I decided on the "Jimi fix".
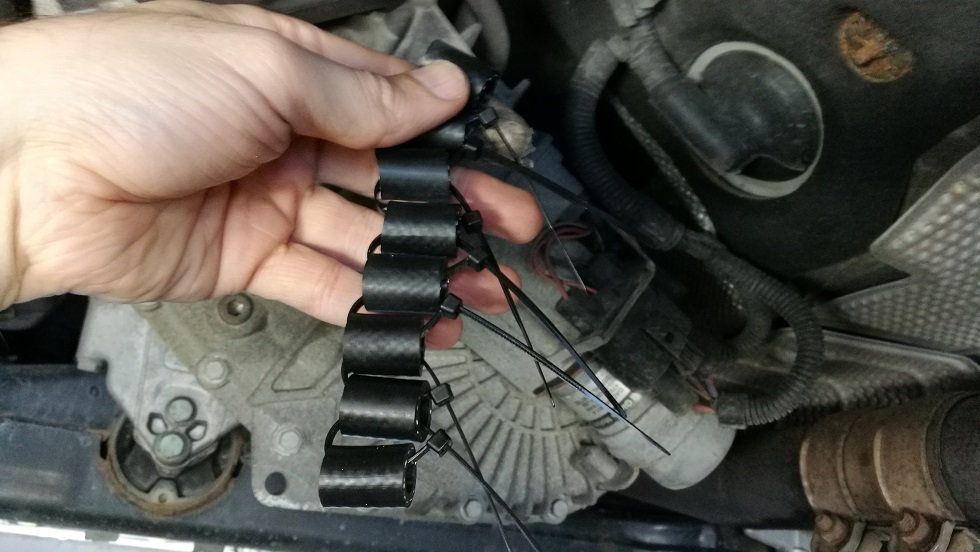
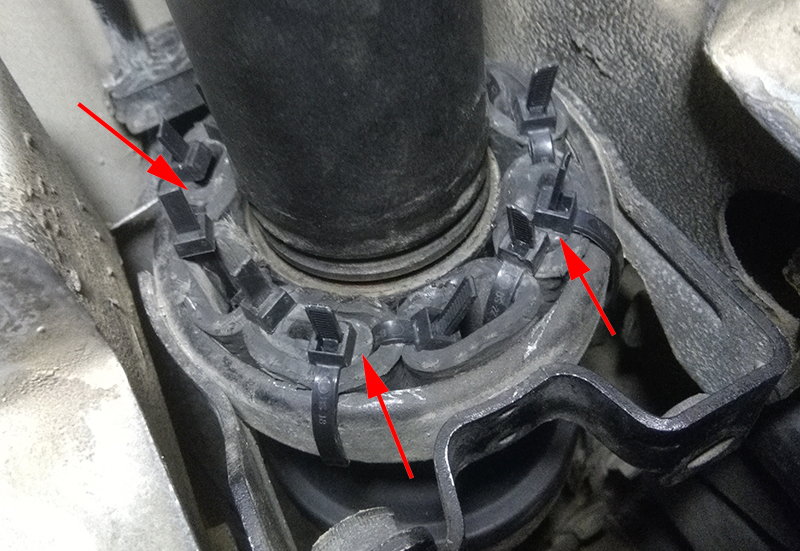
I pre-made mine using 8 pieces of 1 1/4 inch long, 5/8 inch OD heater hose (Gates brand) and loosely zip tied them with medium duty black, UV resistant ties.
Jacked up the driver's side about 6 inches and used jack stands. Unbolted the bracket and was able to grab the support and by twisting it, rip it apart. Used razor blades to cut away the leftover rubber and then wrapped the new assembly around the carrier and zip tied it. This let me easily put the 4 ties, spaced every other piece of hose, onto the carrier. I then tried to slide it over the bearing.
This was not easy. I spent a good 45 minutes pushing, prying, swearing. I finally decided to use a lubricant on the hose pieces and try to mount the carrier loosely in place so with the intention of doing a slow drive around the block in hopes it would force it to slide into place.
It didn't. However, it did warm up the hose enough to make it more pliant and that after another 30 minutes I finally had success. It lined up. I then added a couple more zip ties just to make sure it wouldn't move around and bolted the bracket back up. Took it for a drive and after a few minutes, gradually worked up the acceleration to do several full throttle tries, all while keeping my right arm resting on the console.
I am going to pre make another set and keep it inside the pig, just in case it is ever needed.
A giant thank you to everyone for their write-ups, pictures and videos!
Last edited by Mark7000; 07-15-2017 at 09:22 PM.
Reason: added mileage
Tools needed:
16mm and 13mm socket, wrench and an extension helps.
Several razor blades. – I went through 3
About 1’ of 5/8” coolant hose, cut into eight 1”-1.5” pieces. (I obtained mine from NAPA, nothing special)
12 zip ties – I used 12” medium duty black ties, but cut off quite a bit.
Is it 5/8” inner diameter or 5/8" outer diameter of coolant hose?
1200 kilometers with caravan and Jimi-fix working perfect
I did not remove rubber around bearing, making the fix even easier.
For those living in Scandinavia, the rubber hose are from Biltema :
Fuel hose 17mm, partnumber 52467
Last edited by kjbu; 08-04-2017 at 02:56 PM.
Reason: wrong picture
In less than 3 weeks, I have put 2800 miles on my "Jimi Fix". Over 2300 of those miles were put on in a 6 day trip, with speeds as high as 95mph. I checked it tonight and there is zero wear or anything out of the ordinary to be concerned about.
Thought I’d add a long term report and mod for the fix. I ran the standard fix for about 10,000 kms, when I started to get a slight vibration between 80-90 kph. Taking the fix apart I found the hose was a lot softer than when it started (no surprise). Rather than making a new ring, I added smaller tubing inside 4 out of the 8 hose sections. It was still flexible enough to get in there, but by having 4 points less compressible, the shaft is held more firmly. Vibrations disappeared and all is good again.
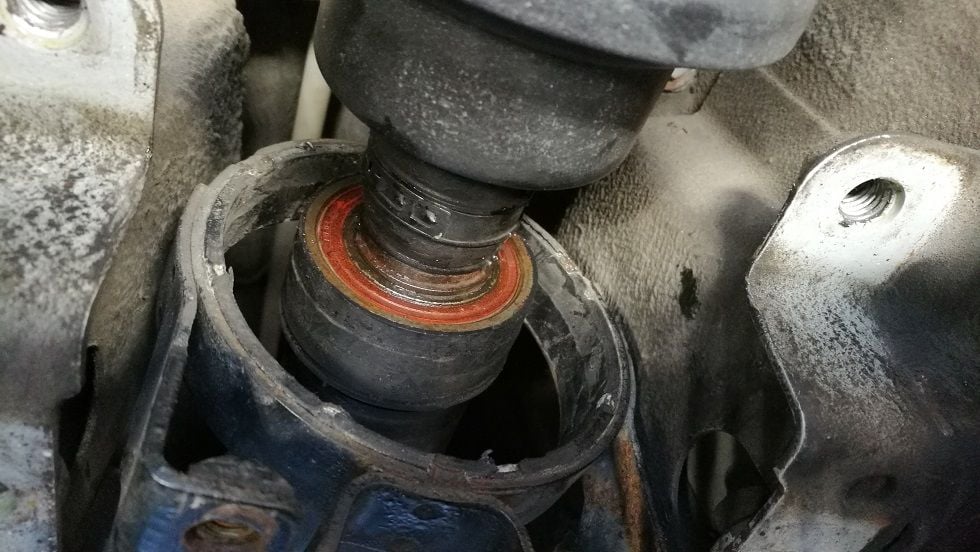
I shaved down all the existing rubber on both the bearing and the housing.
I wasn't able to get the assembly (hoses secured to housing) over the bearing.
I smothered both the shaft and bearing in dilectric grease, still ... no chance.
I removed one of the 1.5" pieces, still no chance.
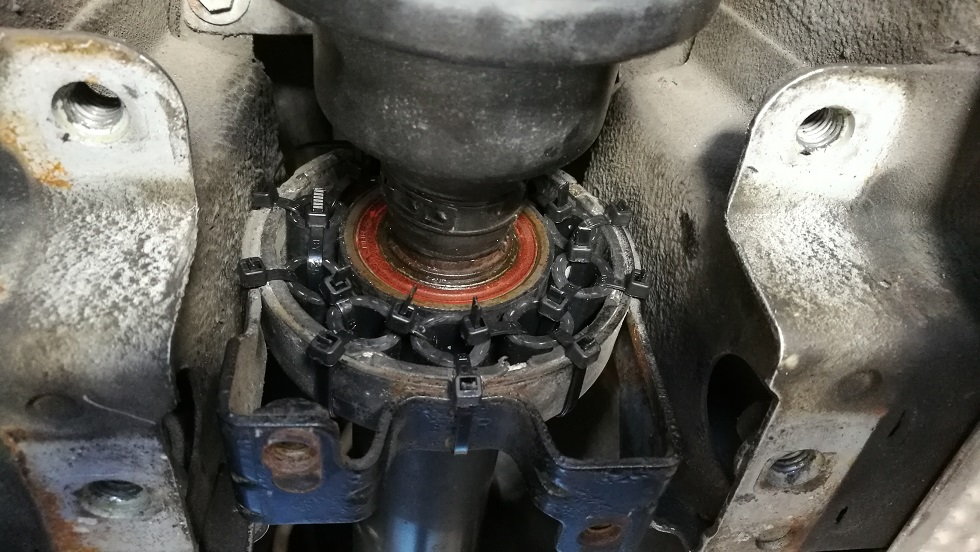
Eventually I had to remove 3 of the 1.5" pieces, was able to get the housing with the 5 pieces over the bearing.
Then one by one I was able to force the remaining three 1.5" pieces into the housing over the bearing and secured the pieces to each other and onto the housing.
Test drove it and it works but I think the 5-then-3 method of putting the 1.5" pieces into the housing once it's over the bearing is going to be way faster than trying to force all 8 1.5" pieces over the bearing al at once.


 06-20-2017, 11:06 PM