When you click on links to various merchants on this site and make a purchase, this can result in this site earning a commission. Affiliate programs and affiliations include, but are not limited to, the eBay Partner Network.
Replaced PCM 2.1 with Sony radio plus ashtray replacement
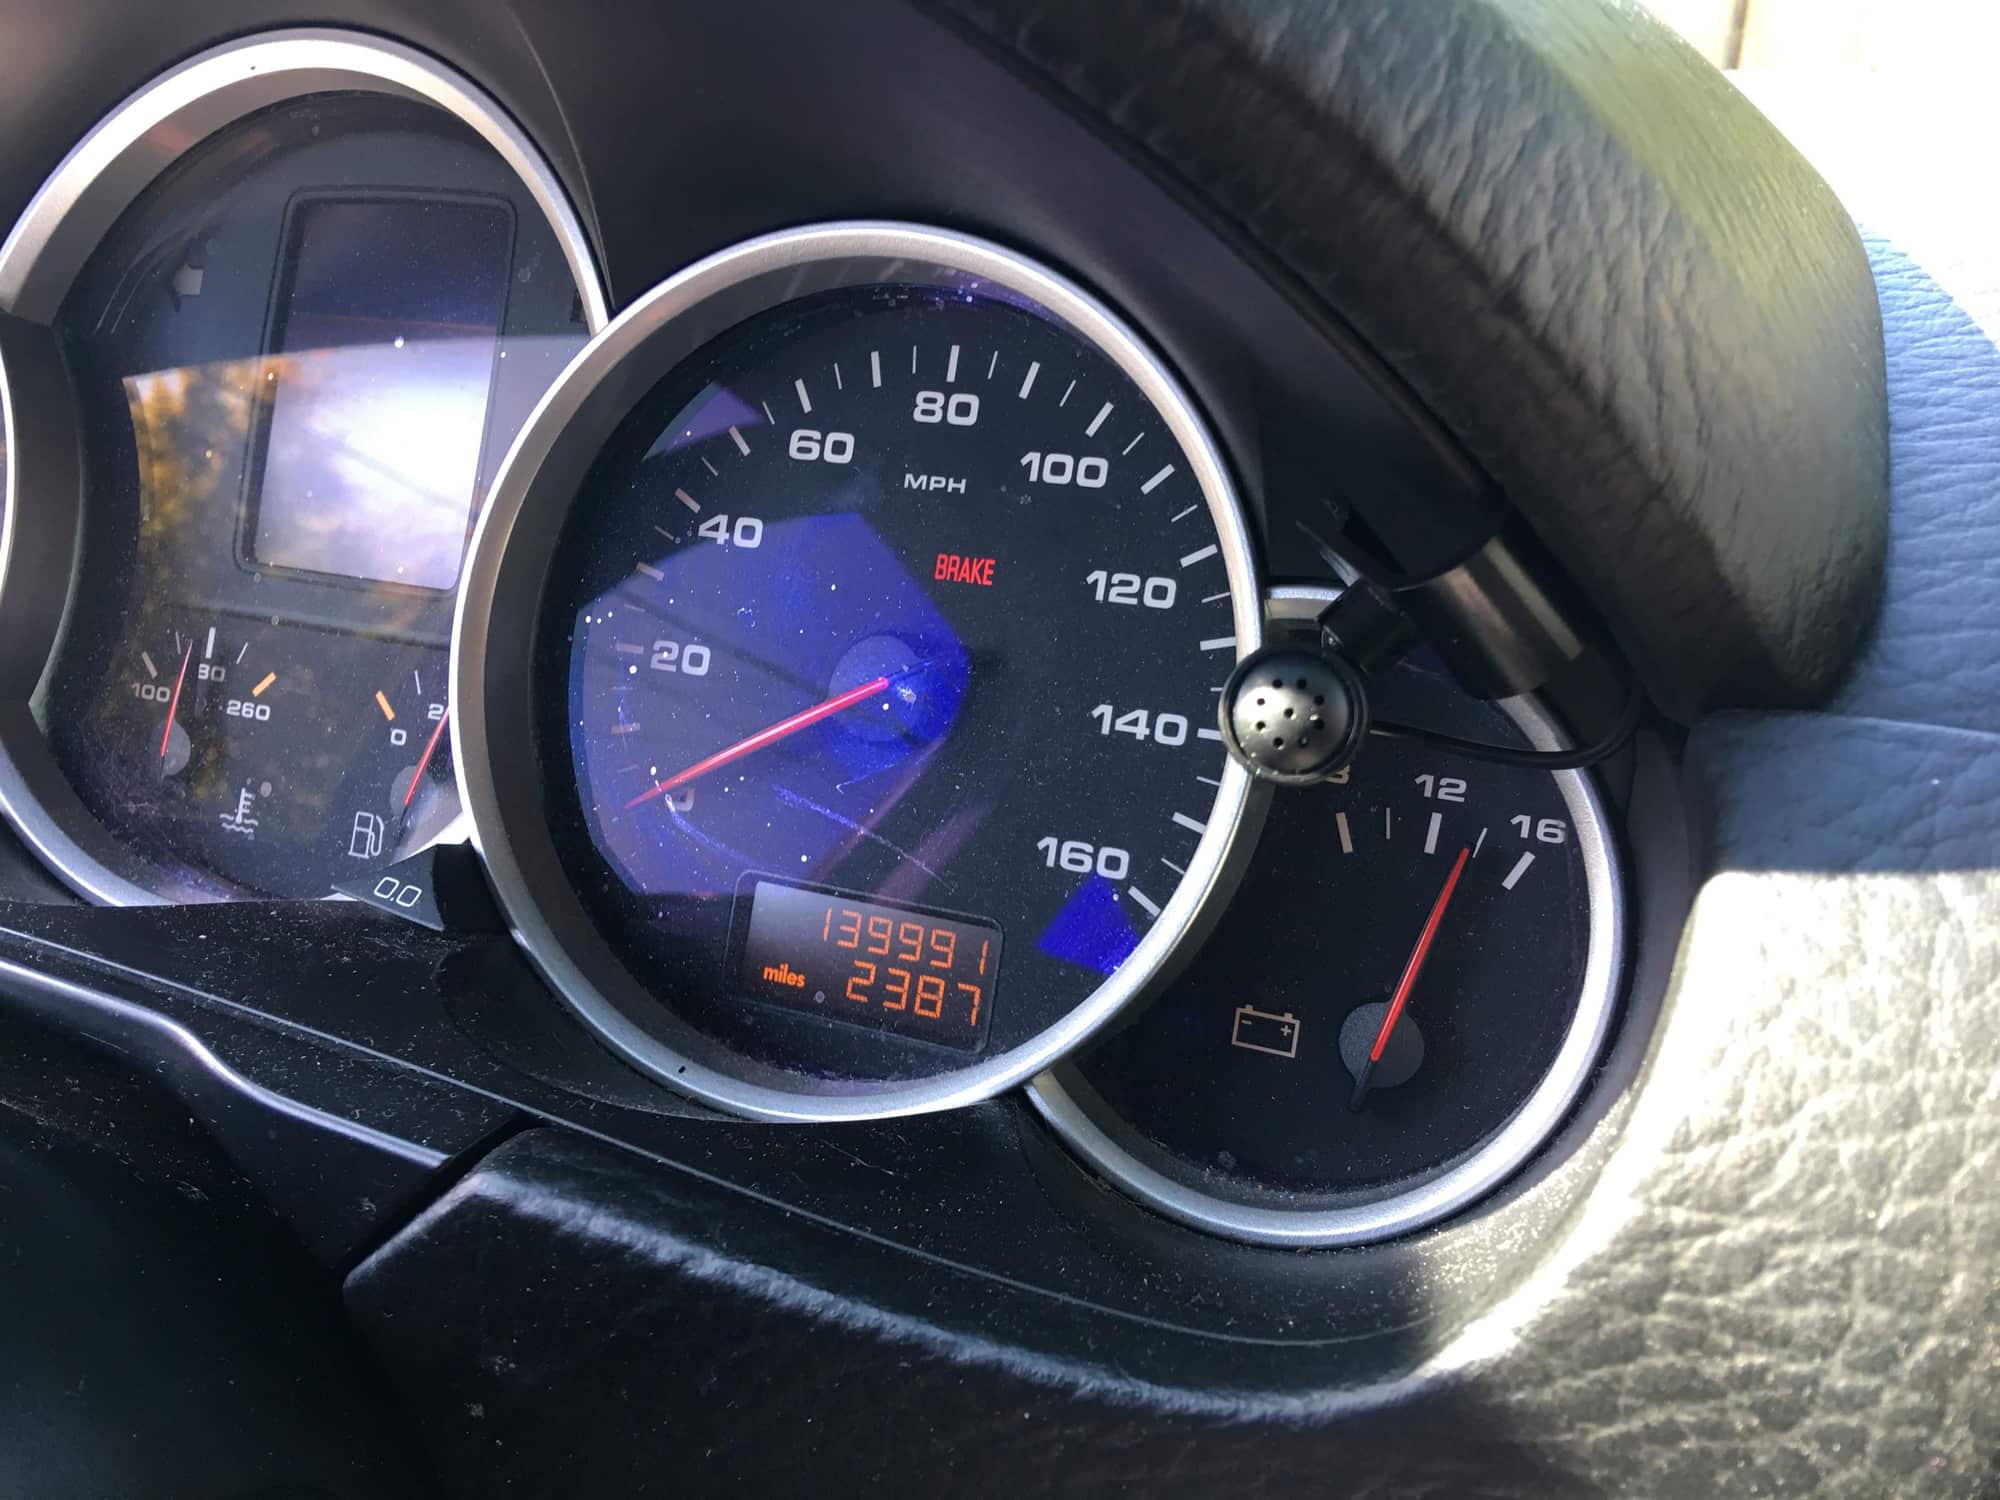
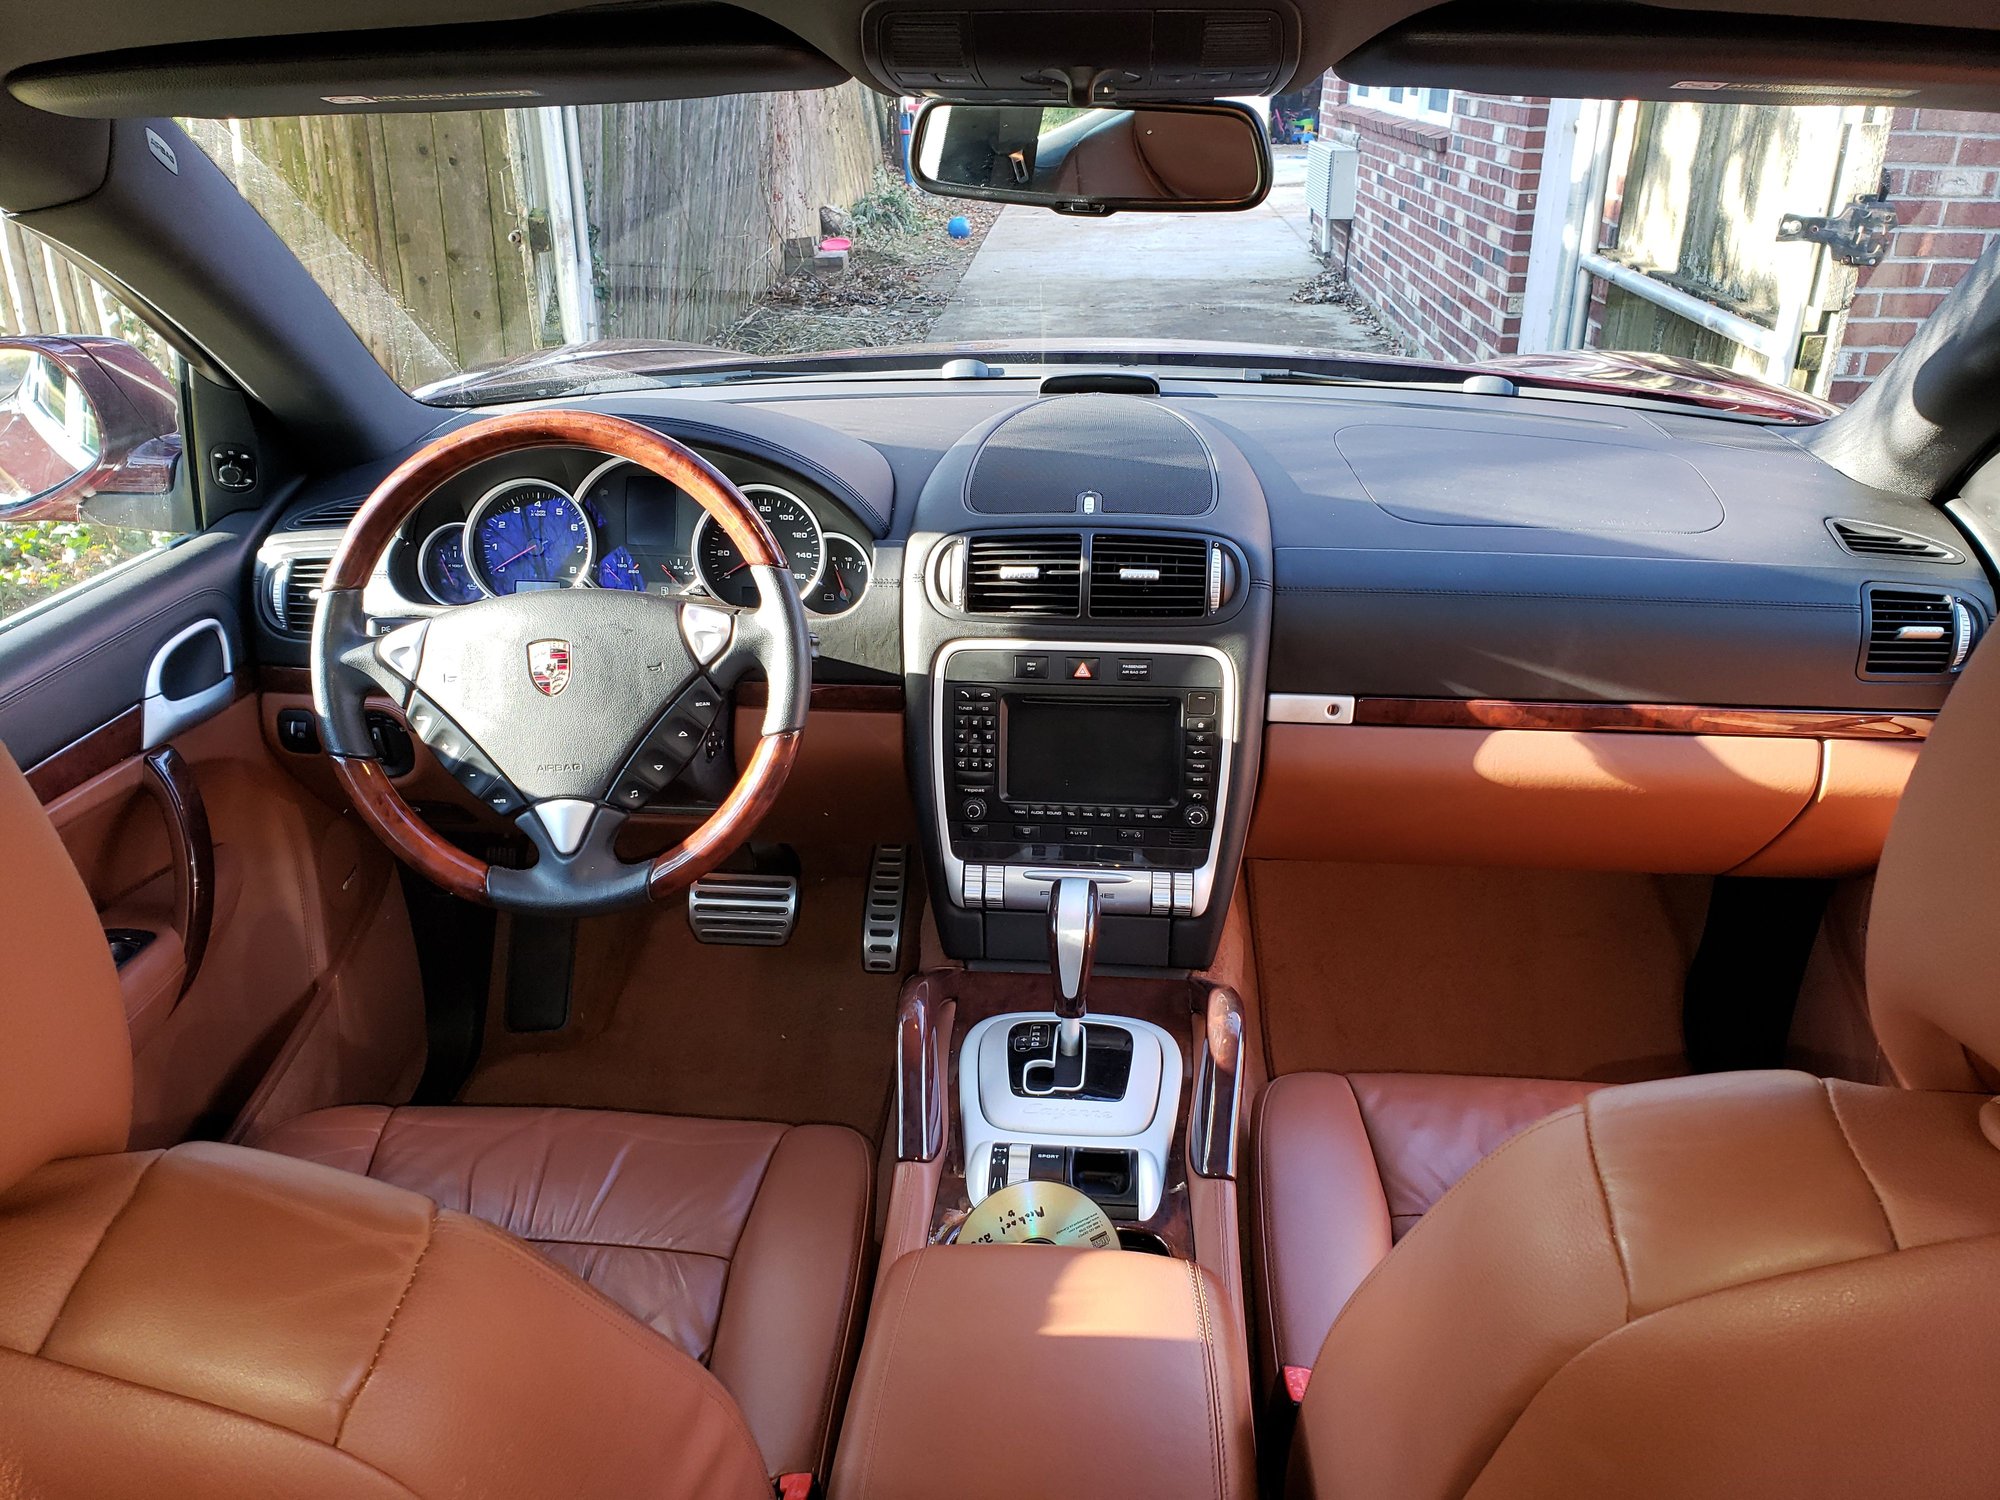
Posting my audio upgrade project for my 2006 Cayenne S in hopes of inspiring others and others' comments. My PCM 2.1 was on its last legs after 140K miles...no navigation and no volume control on the radio itself (steering wheel controls worked still). I believe the navigation DVD player under the passenger seat was a victim of water intrusion that I had to overcome a couple years ago. The PCM head-unit was getting tired and outdated...no Bluetooth, no place to plug in phones and so on. And the 6 disc changer in the back of the car, although it worked and I liked to fill it for road trips, my kids say it's old technology and they want to plug in their phones for music. Something about Spotify and Pandora, etc... The Bose factory sound system still sounded great and I wanted to keep using as much of that system as possible.
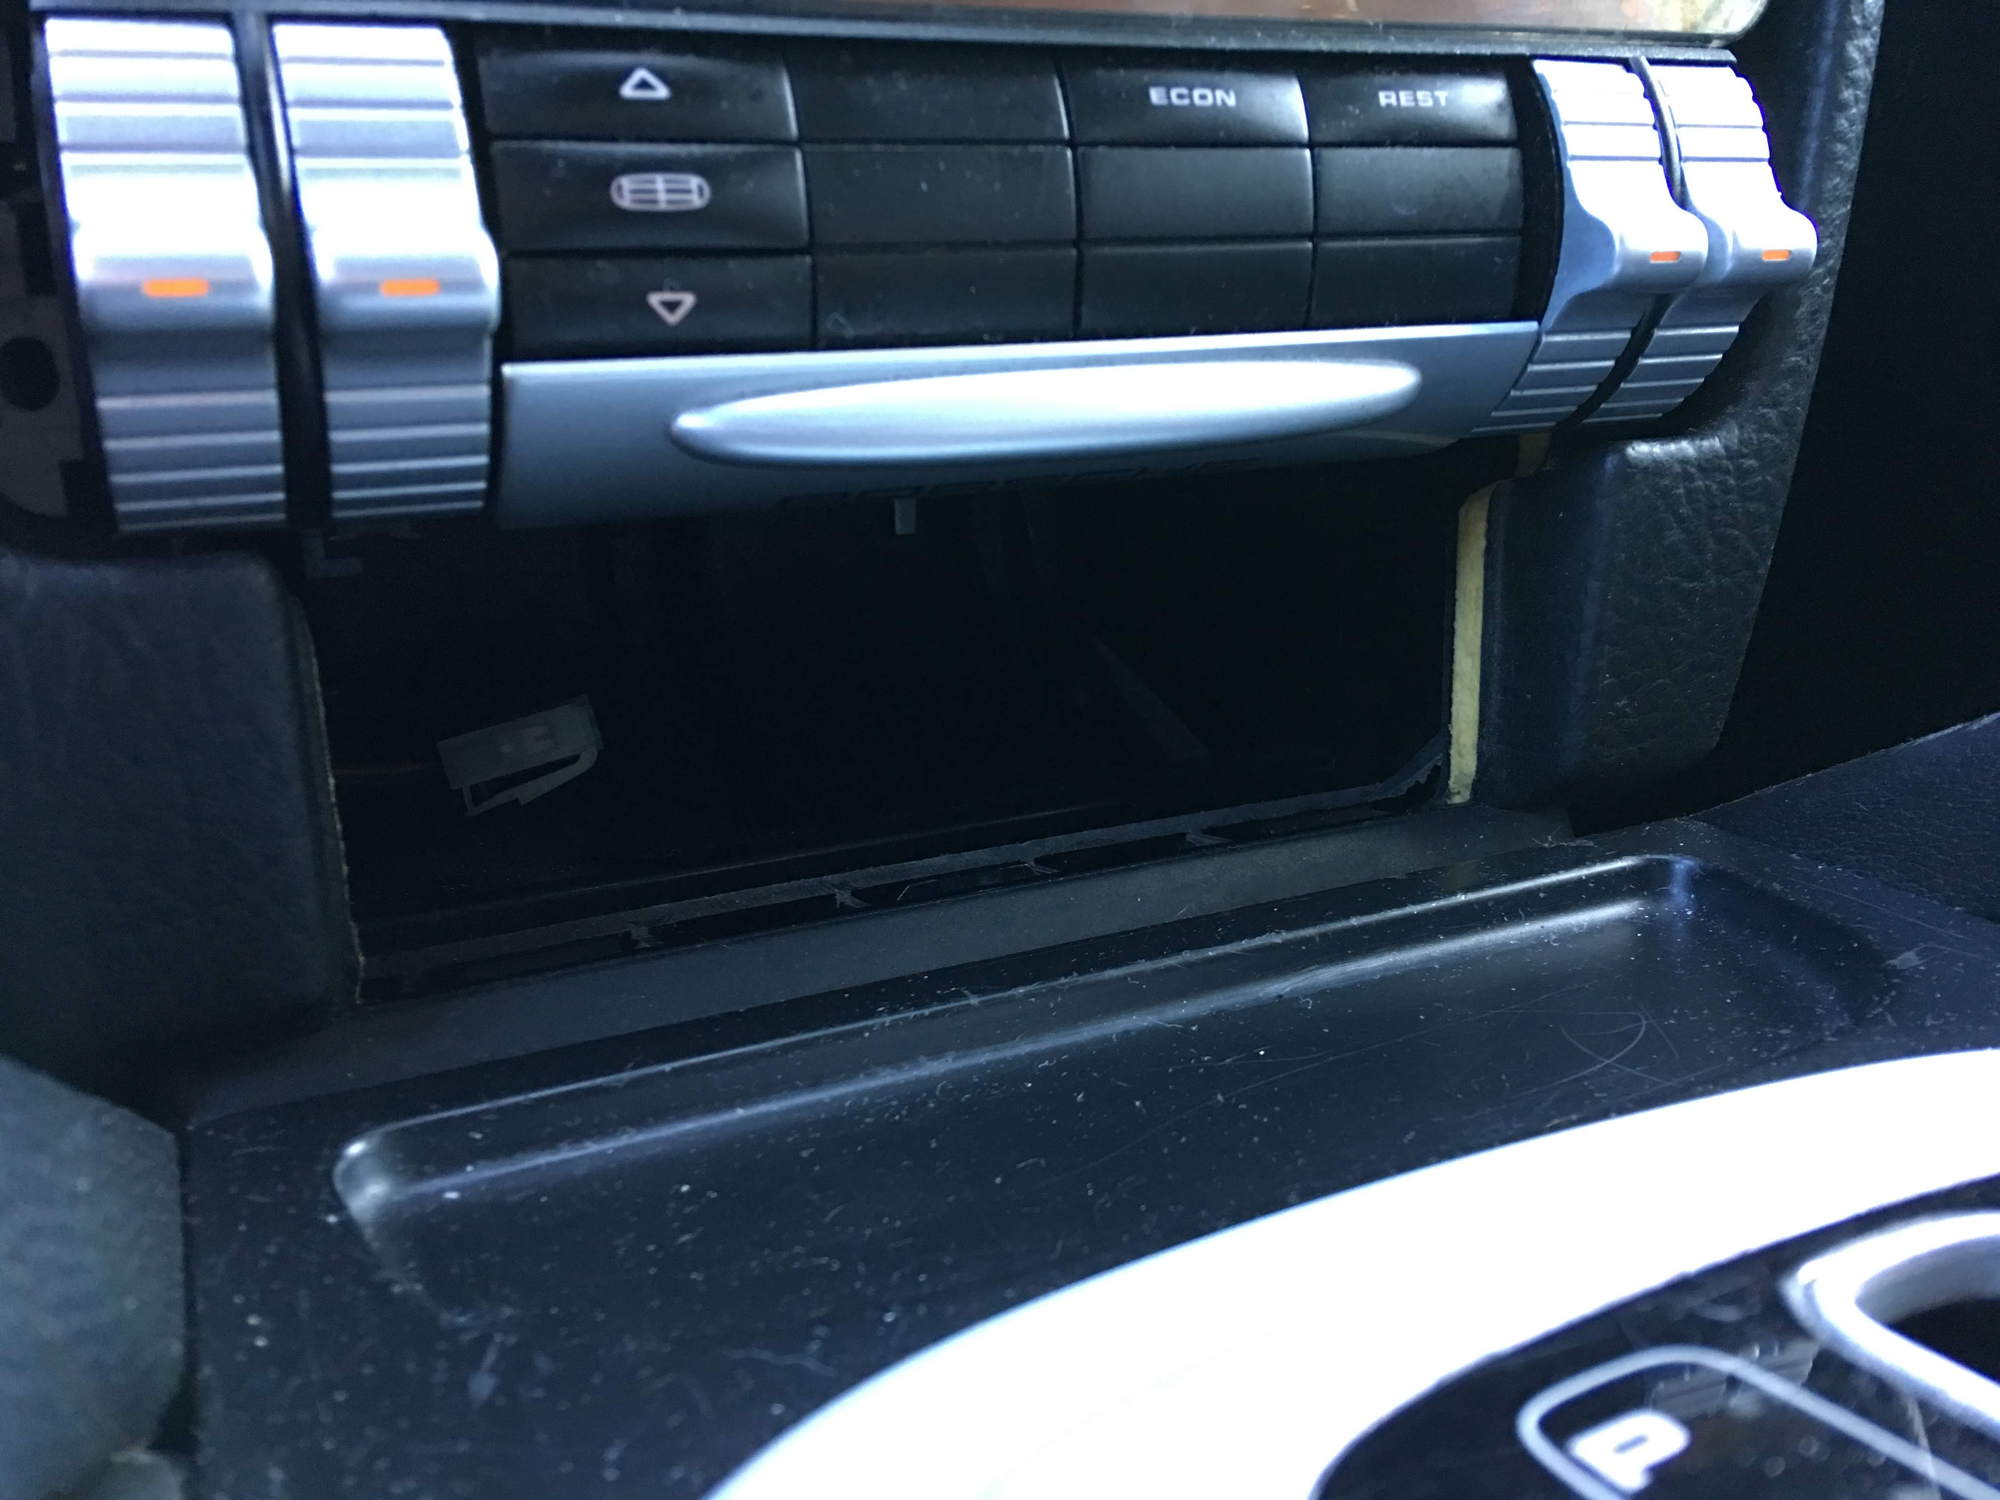
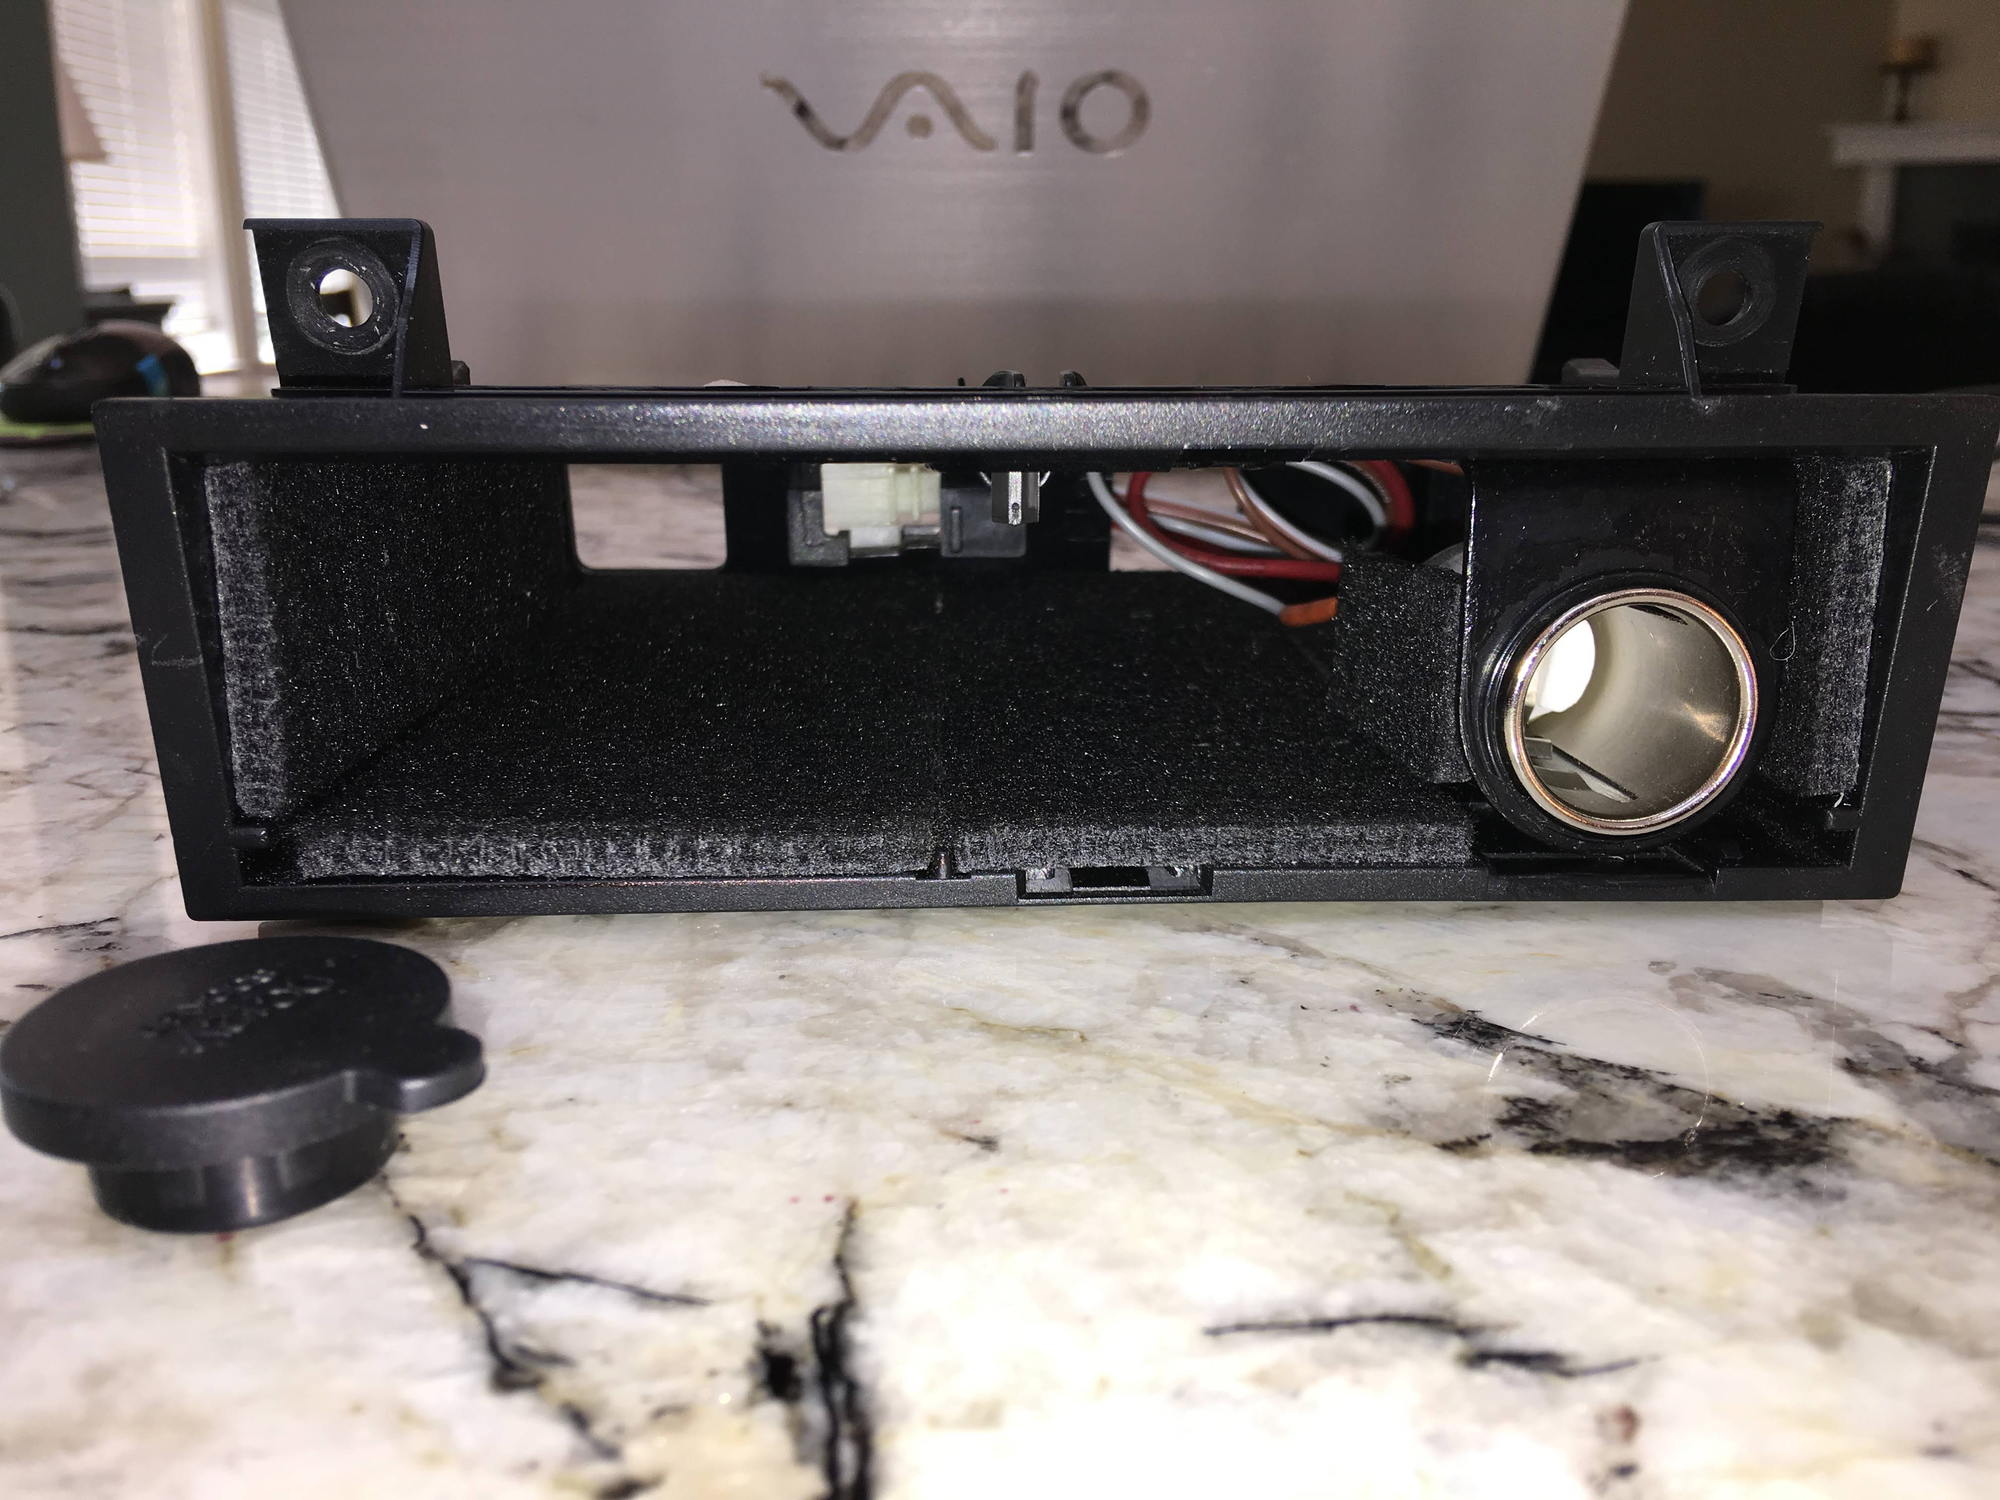
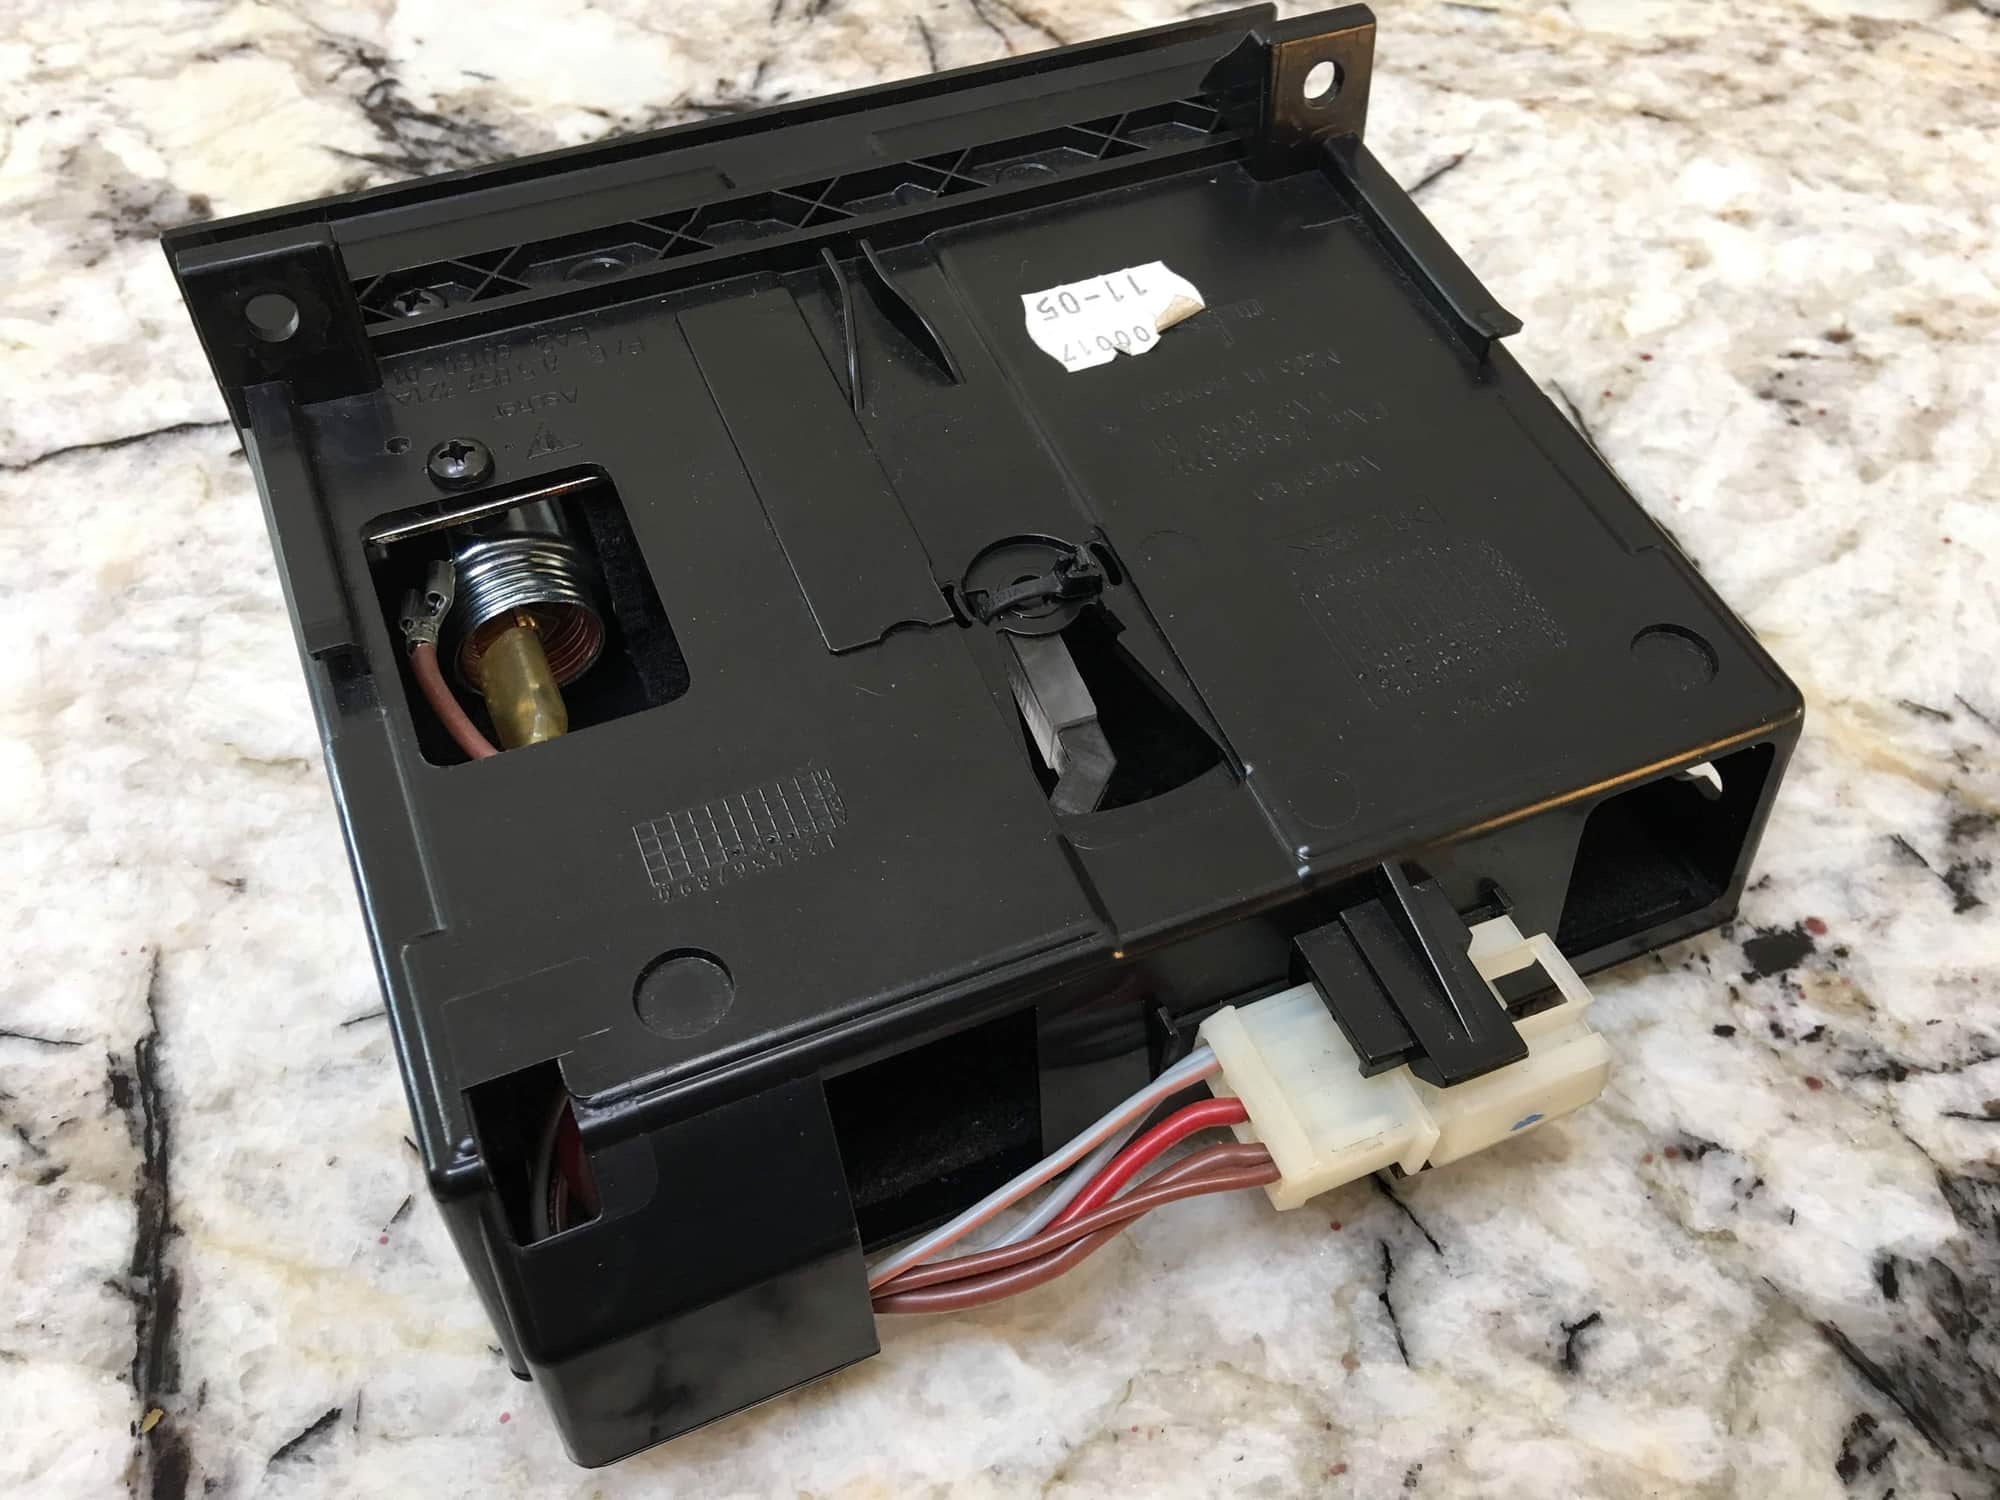
Step 1. First was to remove the original Becker PCM head unit and then remove the ashtray. I converted the ashtray into a storage cubby while retaining the 12V socket. (See photos.) I worked on this while waiting for the Sony stereo (XAV-AX5000) to ship out from Crutchfield. There are plenty of threads on the Rennlist forum about removing the radio unit and ashtray, for which I owe a debt of gratitude. At first, I considered buying the Non-smokers accessory ashtray replacement from one of the Porsche online outlets but thought $195 a bit steep! Plus you lose the 12V outlet. So I gutted the factory ashtray and modified the housing into a modest little cubby, including a new socket from the local autoparts store. The old socket was a little corroded so I ditched it in favor of a new one. I was able to retain the illumination inside as well from the original wiring harness.
Side note on removing the factory radio. Before removing the original factory radio I made sure to orient the fader and balance both at dead center. Next I turned up the volume to slightly higher than normal listening volume, but made sure not to get close to clipping level. I turned off all the fancy sound processing (surround, Audiopilot, etc.) in various settings and then powered it off. Finally, I removed the 4 torx screws and out she came. The navigation DVD player and the 6 disc changer remain in place as a reminder of a bygone era.
Ashtray removed.
New storage cubby made from old ashtray housing.
Step 2. After the new cubby was screwed back in place in the ashtray opening, I started the Sony stereo install. There are numerous threads and videos on that topic so I will skip most of it. Here are the 1-offs for this project.
I fed the phone USB connection cables from the radio down behind the climate controls to the new cubby and through the holes in the back of it. The cables come out the front or gather up nicely in the new space leaving the shifter area uncluttered.
Cubby installed.
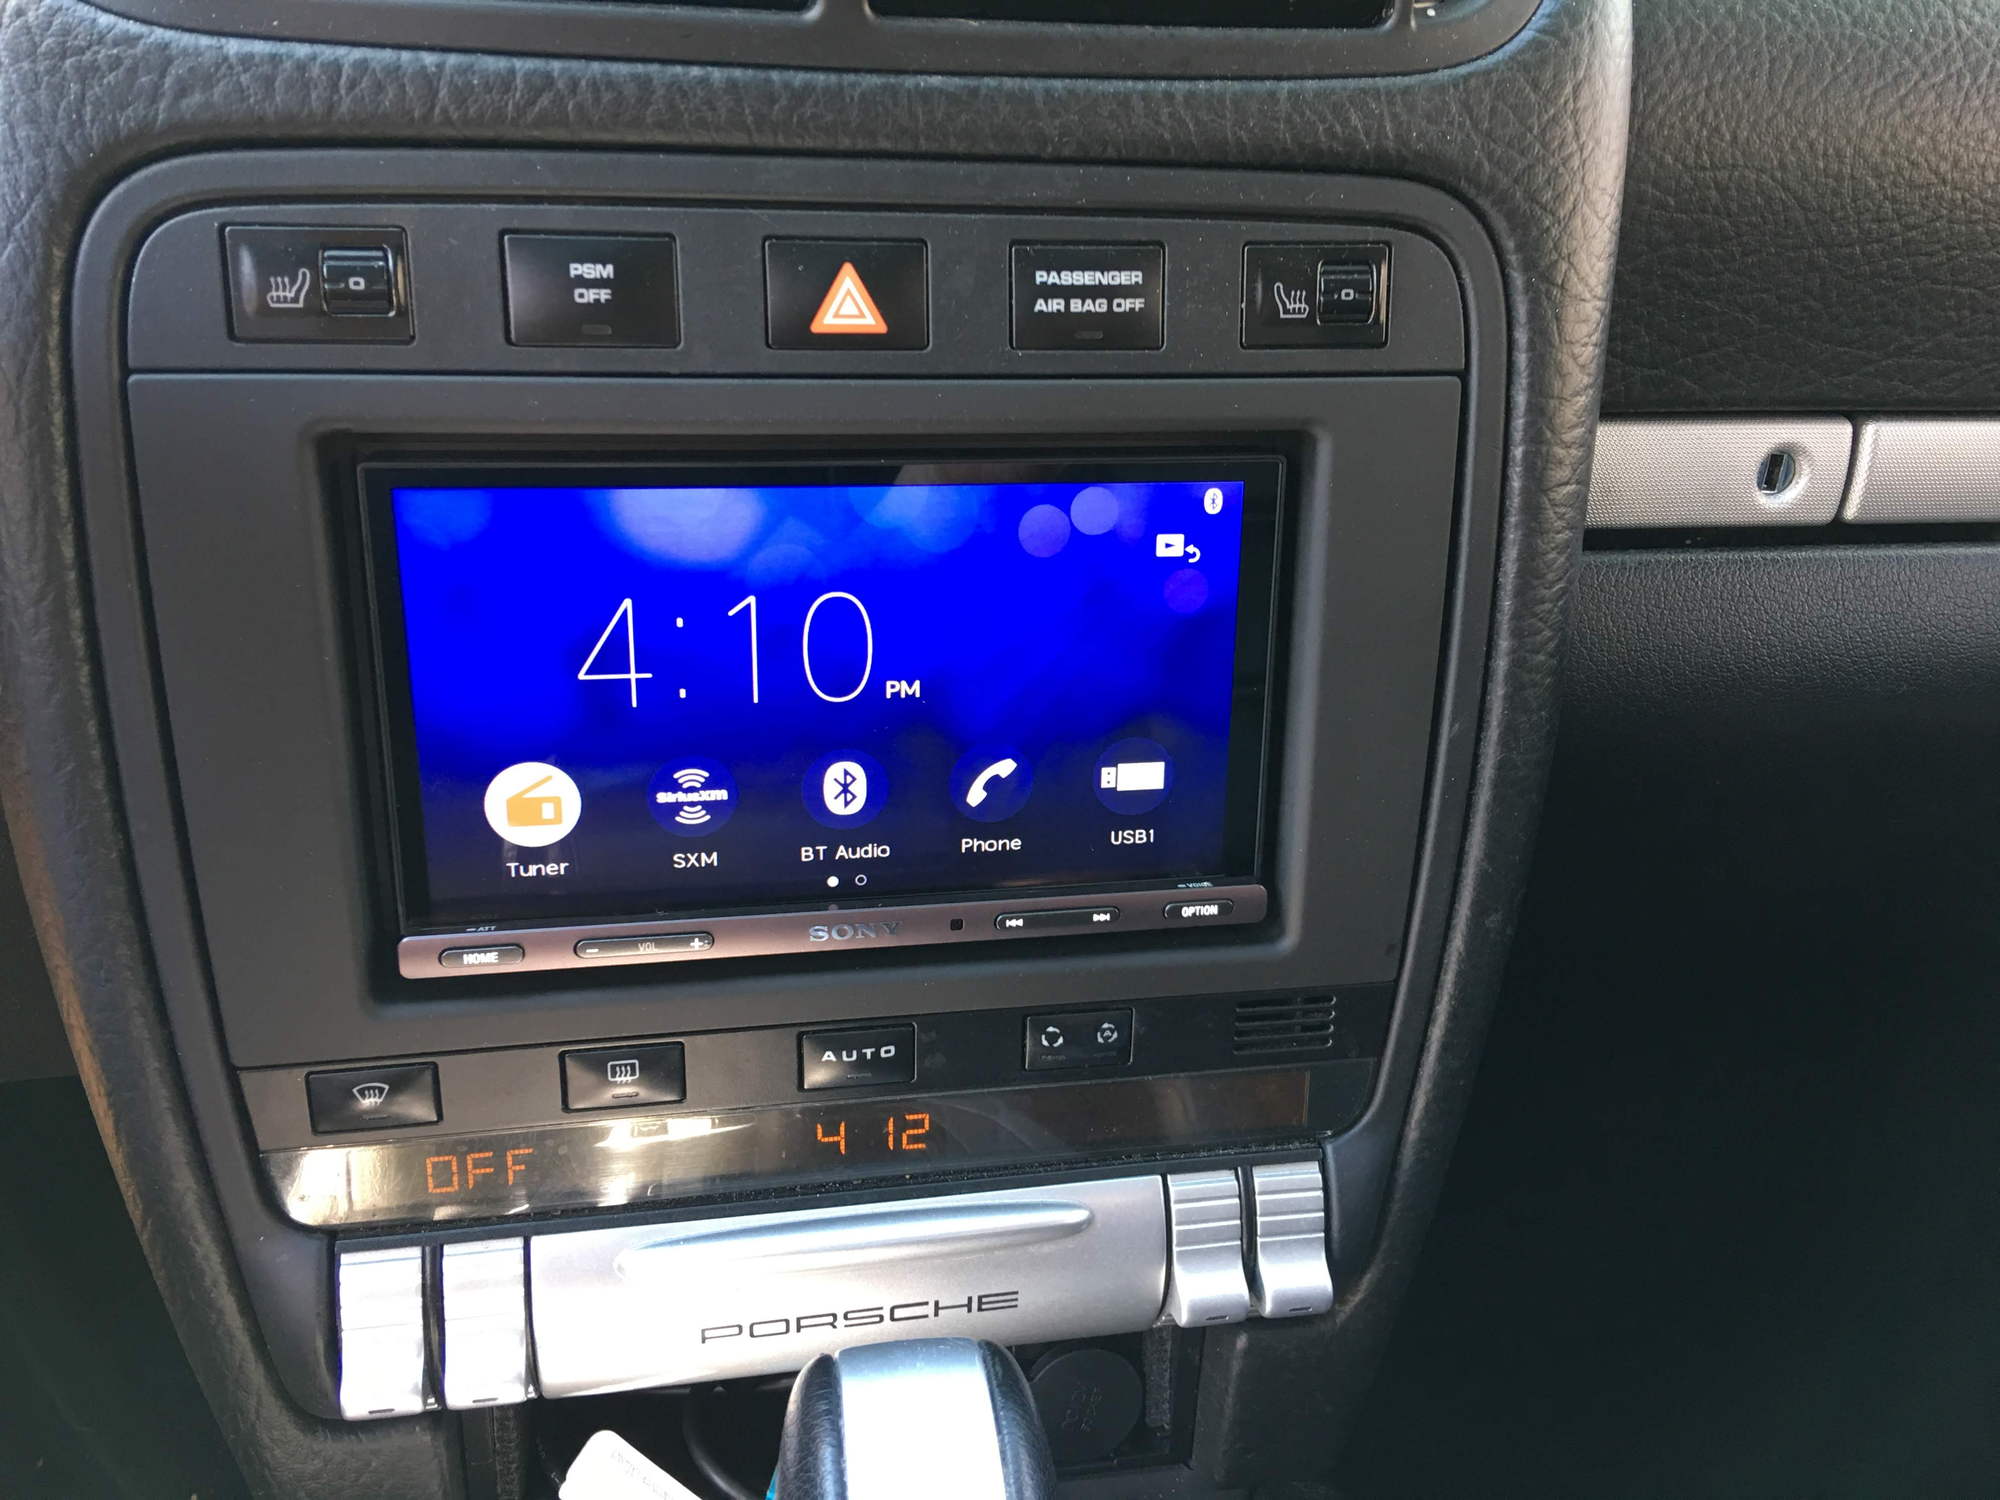
Step 3. The Sony gets hooked up with all the provided harnesses and adapters. The antenna adapter I purchased connects to the black main antenna connection, which I found works great for reception on its own. I experimented using the diversity antenna connection (yellow connector) but that offered no reception. The radio pre-amp output is only connected for the front channels. Rear pre-amp output is not used because the Scosche adapter kit has just one analog pre-amp input for the optical digital audio connector. Mounted the new radio in the Metra dash kit which, by the way, matches the factory dashboard really well. At this point to make it all fit nice and clean, I had to consolidate all the wiring and adapters into a area under the new Sony radio unit, within the Metra dash kit footprint. It took a little trial and error but eventually worked out fine.
Sony XAV-AX5000
Step 4. I ran the wiring for Sony's included Bluetooth microphone up through the dash and mounted it on the right side front of the instrument cluster near the voltage gauge. That was not as hard as it may sound, but you have to take your time and be careful not to break the plastic parts during disassembly. The top dash cover of the instrument cluster comes apart fairly easily and the instructions can be found at https://cai-store.com/pages/installa...cle-generation in the Cayenne 955 section. Don't rush and follow the instructions. This is a great online retailer to do comparison shopping for car radios and install gear. They have good stuff too.
The backup camera is next weekend's project along with the install of some replacement tailgate strut dampers. That issue of the tailgate falling on your head after a few years is well documented. But I did connect the necessary cable to the back of the Sony radio before tucking the radio into its cavity in the dash. The camera cable is waiting for me in a bundle under the glovebox cover under he dash presently.
Microphone mounting.
The parts list was as follows:
Sony XAV-AX5000 Metra 40-EU10 Antenna Adapter Metra 99-9604B Dash Kit Metra ISOPK Screw Pack Scosche LPPE15 Wiring Interface Crutchfield ReadyHarness�
Navinio car Backup Camera (from Amazon)
When you order at this at Crutchfield they do a good job of offering all the accessories you need to get it done, https://www.crutchfield.com/. I decided to get the backup camera from Amazon after reading the reviews and forums.
Step 5. Before buttoning up the dash for good with the Metra faceplate, I configured the steering wheel controls. The kit from Crutchfield somehow had that ready to go with the default connection as part of the ReadyHarness, so there was really not much to do there. I did have call tech support because the instructions on steering wheel controls were not crystal clear to say the least. Now I have volume controls and stations up/down on the steering wheel, but may experiment with the Sony custom steering wheel mapping feature to see if I can get the rest like Source and Muting.
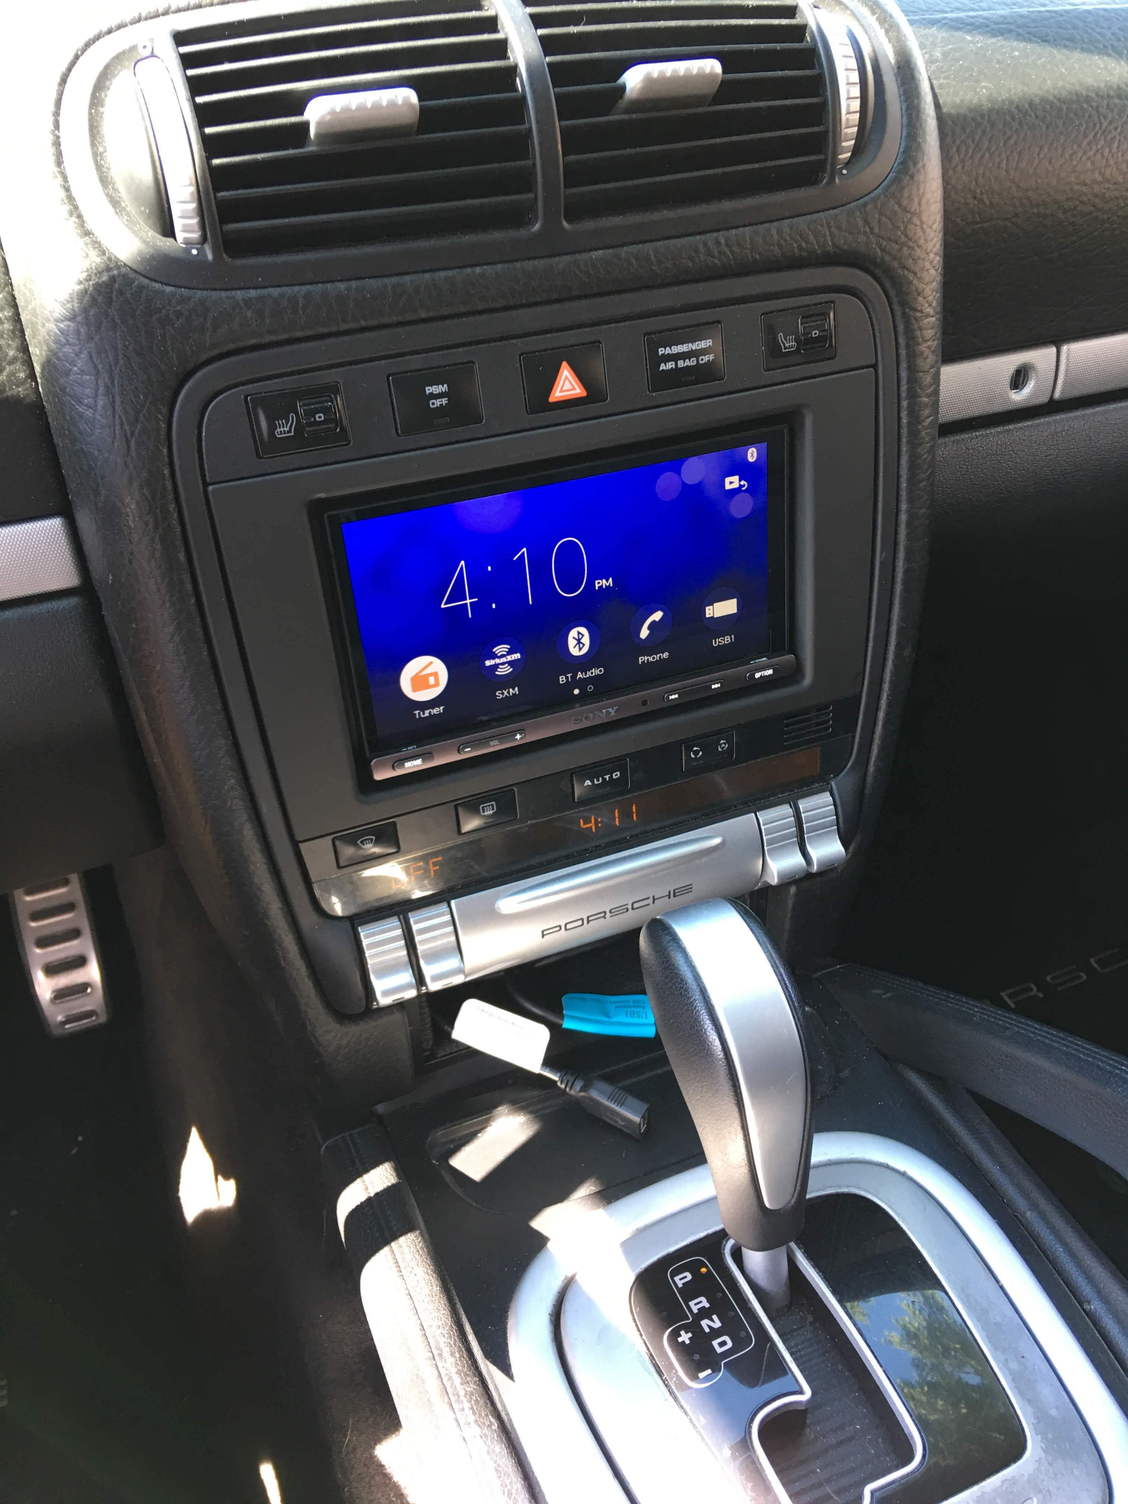
Step 6. I continued with the initial set up of the radio and fully tested all the functions and connections before mounting the Metra faceplate. It attaches with the 4 factory Torx scews and finally replaced the dash trim plate that snaps off / snaps on. Again, you can search the forum for several articles on radio removal and the trim piece. Take it slow and don't break it.
Install completed.
Finally, the results. Enjoying the hell out of this new system so far! The sound quality is VERY good even though there is no front / back fader controls. FM Stereo reception is better than the old PCM 2.1 and sounds good. I have loaded up an old USB memory stick with a few albums from my CD collection and plug it in one of the USB connection cables...sounds beautiful. The Bose system continues to use all speakers including the center channel in the dash and hopefully later on it will utilize the subwoofer. I say "hopefully" because remember that water intrusion problem I mentioned earlier? Yep...I need to replace the subwoofer amp and speaker in the rear spare wheel well. I found some used ones on eBay. Even without the sub running there is plenty of solid bass, and quite enjoyable sound. Handsfree talking through Bluetooth is what promtped me to start this quest, and I love having it now. Cant wait to try out the backup reverse camera when I am finished with that.
Lastly, my kids are teaching me how to use Apple Car Play and Android Auto which they use and appears to work quite well on the Sony.
If anyone is interested in more details on the ashtray conversion or the install, I do not claim to be an expert. But I will share what I know.
Great writeup man. I am in the midst of diagnosing my PCM issues and if all else fails, I will probably go with what you did here. Nice job posting the parts list as well, big help.
Posting my audio upgrade project for my 2006 Cayenne S in hopes of inspiring others and others' comments. My PCM 2.1 was on its last legs after 140K miles...no navigation and no volume control on the radio itself (steering wheel controls worked still). I believe the navigation DVD player under the passenger seat was a victim of water intrusion that I had to overcome a couple years ago. The PCM head-unit was getting tired and outdated...no Bluetooth, no place to plug in phones and so on. And the 6 disc changer in the back of the car, although it worked and I liked to fill it for road trips, my kids say it's old technology and they want to plug in their phones for music. Something about Spotify and Pandora, etc... The Bose factory sound system still sounded great and I wanted to keep using as much of that system as possible.
Step 1. First was to remove the original Becker PCM head unit and then remove the ashtray. I converted the ashtray into a storage cubby while retaining the 12V socket. (See photos.) I worked on this while waiting for the Sony stereo (XAV-AX5000) to ship out from Crutchfield. There are plenty of threads on the Rennlist forum about removing the radio unit and ashtray, for which I owe a debt of gratitude. At first, I considered buying the Non-smokers accessory ashtray replacement from one of the Porsche online outlets but thought $195 a bit steep! Plus you lose the 12V outlet. So I gutted the factory ashtray and modified the housing into a modest little cubby, including a new socket from the local autoparts store. The old socket was a little corroded so I ditched it in favor of a new one. I was able to retain the illumination inside as well from the original wiring harness.
Side note on removing the factory radio. Before removing the original factory radio I made sure to orient the fader and balance both at dead center. Next I turned up the volume to slightly higher than normal listening volume, but made sure not to get close to clipping level. I turned off all the fancy sound processing (surround, Audiopilot, etc.) in various settings and then powered it off. Finally, I removed the 4 torx screws and out she came. The navigation DVD player and the 6 disc changer remain in place as a reminder of a bygone era.
Ashtray removed.
New storage cubby made from old ashtray housing.
Step 2. After the new cubby was screwed back in place in the ashtray opening, I started the Sony stereo install. There are numerous threads and videos on that topic so I will skip most of it. Here are the 1-offs for this project.
I fed the phone USB connection cables from the radio down behind the climate controls to the new cubby and through the holes in the back of it. The cables come out the front or gather up nicely in the new space leaving the shifter area uncluttered.
Cubby installed.
Step 3. The Sony gets hooked up with all the provided harnesses and adapters. The antenna adapter I purchased connects to the black main antenna connection, which I found works great for reception on its own. I experimented using the diversity antenna connection (yellow connector) but that offered no reception. The radio pre-amp output is only connected for the front channels. Rear pre-amp output is not used because the Scosche adapter kit has just one analog pre-amp input for the optical digital audio connector. Mounted the new radio in the Metra dash kit which, by the way, matches the factory dashboard really well. At this point to make it all fit nice and clean, I had to consolidate all the wiring and adapters into a area under the new Sony radio unit, within the Metra dash kit footprint. It took a little trial and error but eventually worked out fine.
Sony XAV-AX5000
Step 4. I ran the wiring for Sony's included Bluetooth microphone up through the dash and mounted it on the right side front of the instrument cluster near the voltage gauge. That was not as hard as it may sound, but you have to take your time and be careful not to break the plastic parts during disassembly. The top dash cover of the instrument cluster comes apart fairly easily and the instructions can be found at https://cai-store.com/pages/installa...cle-generation in the Cayenne 955 section. Don't rush and follow the instructions. This is a great online retailer to do comparison shopping for car radios and install gear. They have good stuff too.
The backup camera is next weekend's project along with the install of some replacement tailgate strut dampers. That issue of the tailgate falling on your head after a few years is well documented. But I did connect the necessary cable to the back of the Sony radio before tucking the radio into its cavity in the dash. The camera cable is waiting for me in a bundle under the glovebox cover under he dash presently.
Microphone mounting.
The parts list was as follows:
Sony XAV-AX5000 Metra 40-EU10 Antenna Adapter Metra 99-9604B Dash Kit Metra ISOPK Screw Pack Scosche LPPE15 Wiring Interface Crutchfield ReadyHarness�
Navinio car Backup Camera (from Amazon)
When you order at this at Crutchfield they do a good job of offering all the accessories you need to get it done, https://www.crutchfield.com/. I decided to get the backup camera from Amazon after reading the reviews and forums.
Step 5. Before buttoning up the dash for good with the Metra faceplate, I configured the steering wheel controls. The kit from Crutchfield somehow had that ready to go with the default connection as part of the ReadyHarness, so there was really not much to do there. I did have call tech support because the instructions on steering wheel controls were not crystal clear to say the least. Now I have volume controls and stations up/down on the steering wheel, but may experiment with the Sony custom steering wheel mapping feature to see if I can get the rest like Source and Muting.
Step 6. I continued with the initial set up of the radio and fully tested all the functions and connections before mounting the Metra faceplate. It attaches with the 4 factory Torx scews and finally replaced the dash trim plate that snaps off / snaps on. Again, you can search the forum for several articles on radio removal and the trim piece. Take it slow and don't break it.
Install completed.
Finally, the results. Enjoying the hell out of this new system so far! The sound quality is VERY good even though there is no front / back fader controls. FM Stereo reception is better than the old PCM 2.1 and sounds good. I have loaded up an old USB memory stick with a few albums from my CD collection and plug it in one of the USB connection cables...sounds beautiful. The Bose system continues to use all speakers including the center channel in the dash and hopefully later on it will utilize the subwoofer. I say "hopefully" because remember that water intrusion problem I mentioned earlier? Yep...I need to replace the subwoofer amp and speaker in the rear spare wheel well. I found some used ones on eBay. Even without the sub running there is plenty of solid bass, and quite enjoyable sound. Handsfree talking through Bluetooth is what promtped me to start this quest, and I love having it now. Cant wait to try out the backup reverse camera when I am finished with that.
Lastly, my kids are teaching me how to use Apple Car Play and Android Auto which they use and appears to work quite well on the Sony.
If anyone is interested in more details on the ashtray conversion or the install, I do not claim to be an expert. But I will share what I know.
The RCA cables from the Scosche LPPE15 are labeled rear L and R. That's where I plugged them in on the Sony, but now I have no sound from the phone because it only uses the front speakers, apparently. I guess I should switch the RCA's to the front?
This was an inspirational write up. I just bought a 2008 CS with only 26k orig mi on its clock w/ Bose. Merry Christmas to me from me. One of the reasons I pulled the trigger was because of how cool the members of this site are.
One of my first projects is to upgrade the PCM. Most of the other excellent write ups on this project are 2-3 years old, so when I saw your equip list, it seemed more relevant.
One of my biggest fears with any aftermarket install is electrical gremlins that can occur when you start messing with stock. Have you had any issues since the install?
I bought my package with the Sony head and recommended accessories from Crutchfield and it showed up today. It is going to be a couple weeks before I start messing around. Before I start peeling back trim, I would love any update you otmr anyone else can provide.
Congrats on the "new" 2008, which looks great by the way. When working on the radio I urge you to cover up the center wood grab-handles and shifter area with a big towel. As I was working, I rested the radio unit on those a few times and yours look way too nice to get scratched up.
On your questions about gremlins, so far after 4k miles since installation, I have no serious gremlins. I can still set the clock through the interface for the gauges, and the message center seems to work just as before. There is some quirkiness on the Sony when the ignition is off. It still has the ability to power up for just a few minutes but then powers off. But I believe the factory radio did that also, so I think there is some voltage sensing going on there. Lastly, when a service shop hooked up a scan tool to the car I believe there was a fault code that basically reports the PCM system as missing or having a problem, which is not really going to bother anyone.
I highly recommend that you consider the ashtray cubby hack that I mentioned above. Takes about an hour of workbench time plus the time going to the store for the materials. It is really, really handy to have the lighter socket there and to be able to tuck all the USB cables away in it. There are many times when I have had my iPhone hooked up to the USB cable and someone else used the lighter socket right next to it so having both options right there is great. NOTE, it is a little tricky removing the climate controls module to, in turn expose the screws and remove the ashtray. There are several articles on Rennlist that cover that climate control module removal. (I am not an expert on any of this just a DIY'er that tries to save a few bucks.)
Correct on using the front RCA outputs. As noted in step 3, "The radio pre-amp output is only connected for the front channels. Rear pre-amp output is not used because the Scosche adapter kit has just one analog pre-amp input for the optical digital audio connector." Also, see step 1 and how I oriented the factory PCM unit's controls before removing it. Thanks.
nice new car! Congrats on finding such a low mileage one! I just did the install yesterday on my '05 CTT with all the suggested parts, including the Sony head unit and LPPE15 from Schosche (that was the most expensive part!). I attached the wire for the backup camera which I will run through to the tailgate at another time. Everything worked fine, except that the phone has no sound, apparently because the schosche RCAs are labelled to connect to the rear inputs on the head unit and that's what I did. The Sony uses only the front speakers for the phone, so I guess it doesn't detect the rear inputs and you get silence. I will try switching over the RCAs to the front inputs on the Sony today. Hopefully, that works. It's too bad that nobody has posted a video or photos of the wiring itself from the Schoshe to the head unit, because that is the trickiest and most difficult part, especially soldering 14 connections, if you are not familiar with that process. I had to call Schoshe with a question - why are there 2 red, 2 black and 2 yellow wires on the harness when the diagram only shows one of each? A human answered the phone and told me to connect them all together, which seems to be working. I'm not looking forward to pulling out the head unit again as it was tricky getting it back in with all the extra wires and adapters taking up the limited space.
Nice setup and install!
I used the exact same kit when I installed my Alpine Halo9 head unit about 2 weeks ago, and from the LPPE15 wiring harness I had to only use the black/yellow/red/blue wires. There were about 15 additional wires that I simply capped off because my speaker audio ran from the Bose fiber optic cables into the LPPE15 fiber optic box and into the front RCA inputs on the back of the head unit.
Off the top of my head I believe the second set of red/blue wires were for park and reverse. Unfortunately Alpine requires that you purchase an additional $15 box (MicroBypass Parking Brake Override Module) in order for you to have access to certain functions while driving(safety feature). If I want to merely adjust the fader or balance settings, the vehicle MUST be in Park and the emergency brakes fully engaged. My research yielded that this is a "special safety feature" specific to Alpine and Kenwood or Pioneer. With other manufacturers the user can simply bypass this feature by grounding out a existing wire or some similar technique to accomplish this free of charge.

 07-24-2019, 01:56 AM


 specific to Alpine and Kenwood or Pioneer. With other manufacturers the user can simply bypass this feature by grounding out a existing wire or some similar technique to accomplish this free of charge.