When you click on links to various merchants on this site and make a purchase, this can result in this site earning a commission. Affiliate programs and affiliations include, but are not limited to, the eBay Partner Network.
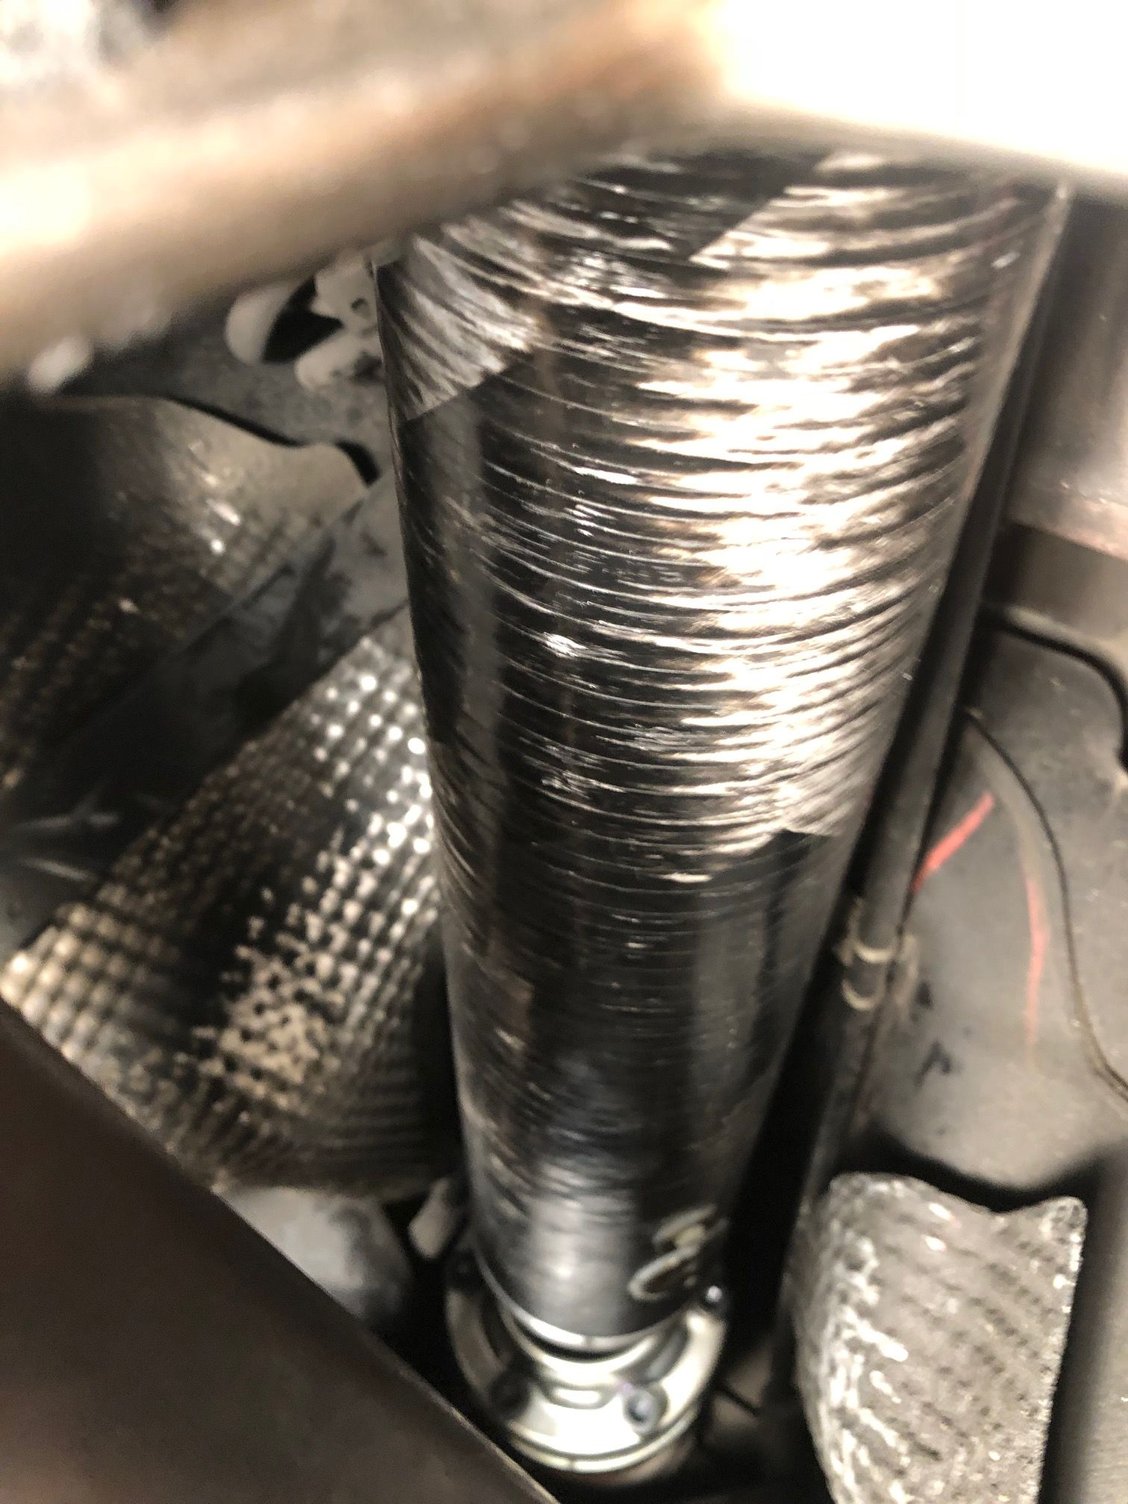
DSS Carbon 1-piece drive shaft installed on 957 GTS
After 6 weeks of wait, my 1-piece carbon fiber drive shaft arrived from Drive Shaft Shop. It was a custom order, therefore there is a 4-8 weeks wait, as they seem not to keep these in stock.
I got it for MSRP plus shipping via eBay vendor, I was able to score 0% APR PayPal financing for 24 months, so for about $60 a month, happy to get one.
I was able to tackle this just by raising the car to the highest level thanks to the air suspension my car is equipped with. Hand brake on, car in neutral. Honestly, NOT the most fun project, the access is tight, colorful language might be on display :-)))
OEM DRIVESHAFT REMOVAL POINTERS: Sooner you lower the exhaust, faster you will progress, You should start with that.
- I find it easier to unbolt the drive shaft at the front first (by the transfer case) then unbolt the support plate in the middle, then move to the rear diff. The diff will be your top enemy in this project. The access to the top bolts is limited, but by removing the front of the shaft first and having most of the exhaust tubing out of the way, it becomes easier to move the shaft around to access the bolts. Good set of tools is a major plus, like long extensions and different size ratchets, my shortened allen wrench I used to drain transfer case oil in the past a was a perfect tool.
- When you finally remove all 6 bolts from the diff, you will discover the shaft is seized to the diff and does't want to separate. Don't waist your time banging on it or trying to pry it off, of course give it a try, but unless it separates right away, move on. I used a slim jack to put pressure on the driveshaft coupling and it came right off. I would have saved a lot of time doing that right away
1-Piece drive shaft INSTALL: I have no doubt, it is way easier then re-installing 2-piece unit.
- you install supplied mounting brackets to both diff and transfer case.
- now the HIGHLIGHT of the project, you easily slide the one piece unit into the brackets, it fits like a glove. The driveshaft just sits in the brackets waiting to be bolted in, no extra hand needed. Excellent fitment. It is recommended to use "thread-locker" fluid for the bolts. I used the blue one from Loctide. You bolt up the rear (diff side) first, then move on to the front. With car being in neutral, the transfer case is lose, so you can turn the mounting plate to line-up with the bolts of the driveshaft easily, just make sure that your markings on the driveshaft and the bracket line up to prevent any potential vibration.
FEEDBACK: I just took the car for the short 5 mile spin after finished. Too early to provide full feedback. First impression is excellent, zero vibration, very quite ride.
- I did the jimmy-fix, put 25K miles on it, great option and it saved me. Happy to learn about that on this great forum. However, the car was never as good as before the support failed. I tried few different hoses, but always felt slight vibration at 50mph, which created slight droning-like sound through the cabin, all of that is now completely gone.
I would like to thank Petza914 for all the input. First time I heard of the 1-piece option was on your build-thread, when I saw it, I knew I wanted to get one. Hopefully all set for good.
Congratulations on the beautiful upgrade Rossi. Would you say the shifts feel more harsh after the one-piece driveshaft was installed? That is my only reservation about doing this upgrade. Thanks!
I reached out to every seller on eBay who sells DDS driveshafts, those guys (doneritemotorsports) were the only ones willing to get me one through eBay, which was my ultimate choice, as I wanted to get the awesome 0% interest financing for 24 months.
Originally Posted by Petza914
Rossi, looks great and glad you're pleased with the outcome as I have been with my aluminum one. Yours is prettier
Thank you so much. Just so awesome to upgrade as it is SO SMOOTH and finally so pleased that got rid of all the vibration issues from my "jimmy-fixed" OEM one. Thank you for the guidance.
Originally Posted by Joel928s4
Congratulations on the beautiful upgrade Rossi. Would you say the shifts feel more harsh after the one-piece driveshaft was installed? That is my only reservation about doing this upgrade. Thanks!
I have 6-speed manual. Shifts are the same as before, absolutely zero difference, except on the first day, I actually thought that the clutch resistance was little bit lighter, I am sure that was just me, feeling stronger after a day of wrestling the OEM driveshaft from the day before, but it made me wonder. Couple days later, car just feels great.
You always hear and read about when upgrading to 1-piece unit about "more direct feel". I was somewhat sceptical at first, but after 250 miles, the car does feel noticeably more nimble,is it night and day? No, but noticeable. My wife approves this upgrade, as she noticed and likes the ride quality improvement from the passanger point of view.
Originally Posted by blah1
I�m curious as well about the shifting. Also, if the CF shaft if worth the extra $ compared to the aluminum?
I went with the CF unit for piece of mind, as it is the closest to OEM based on the manufacturer.
As far as aluminum goes, it is shaft by shaft scenario, there is a higher chance that you could end up with a noisy aluminum one. Just google around little bit.
I did lots of homework, reading up about theses one-piece CF and ALU shafts from DSS on other platforms as there is really not that much Cayenne data.
With the slimmer design, the CF is potentially better fitment and easier instal. Just me, but I learned to get what my heart is set on, or I will be regreding and getting it later blowing the money twice. LOL
Thanks for answering my question Rossi, I didn't notice that your Cayenne was a manual. Congratulations on the upgrade and on owning a manual Cayenne, very cool!
Can anyone tell me why they are not on the forum as a sponsoring vendor? There should be a group buy set up for that driveshaft, since we are all going to need one of those sooner or later.
Can anyone tell me why they are not on the forum as a sponsoring vendor? There should be a group buy set up for that driveshaft, since we are all going to need one of those sooner or later.
There is one, Lindsay racing sells DSS shafts here (or used to)


 11-20-2018, 01:09 PM