When you click on links to various merchants on this site and make a purchase, this can result in this site earning a commission. Affiliate programs and affiliations include, but are not limited to, the eBay Partner Network.
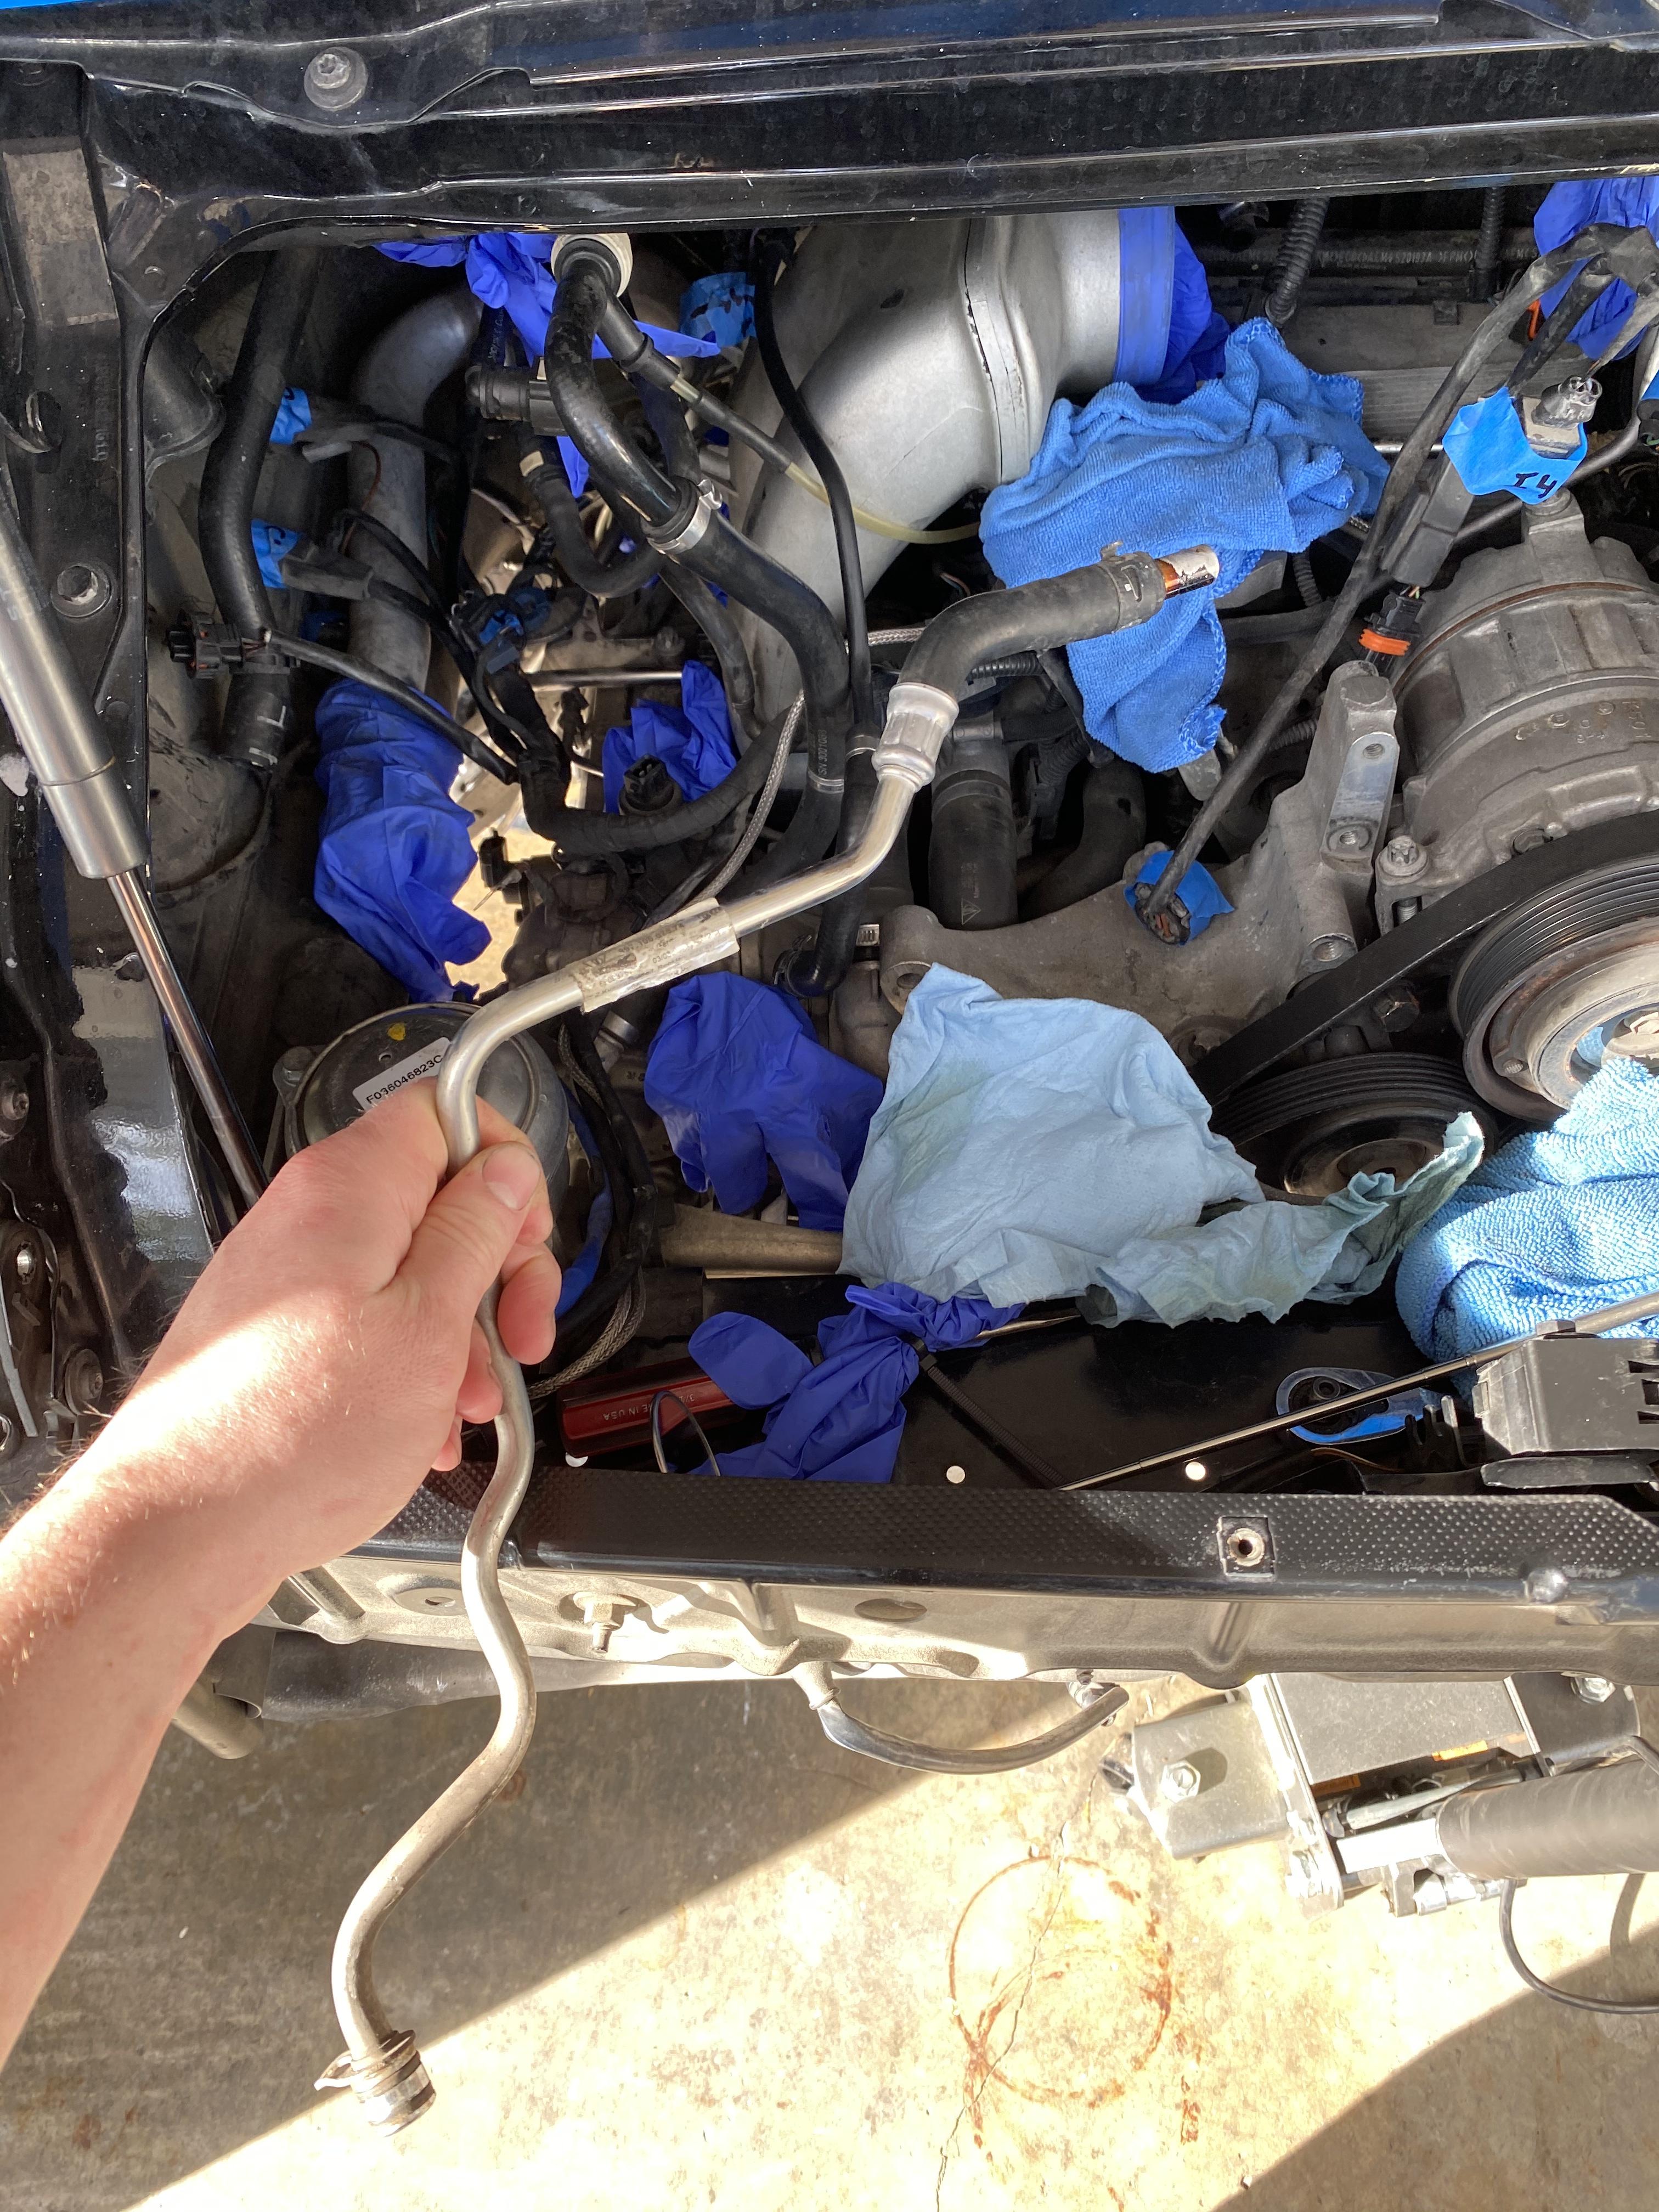
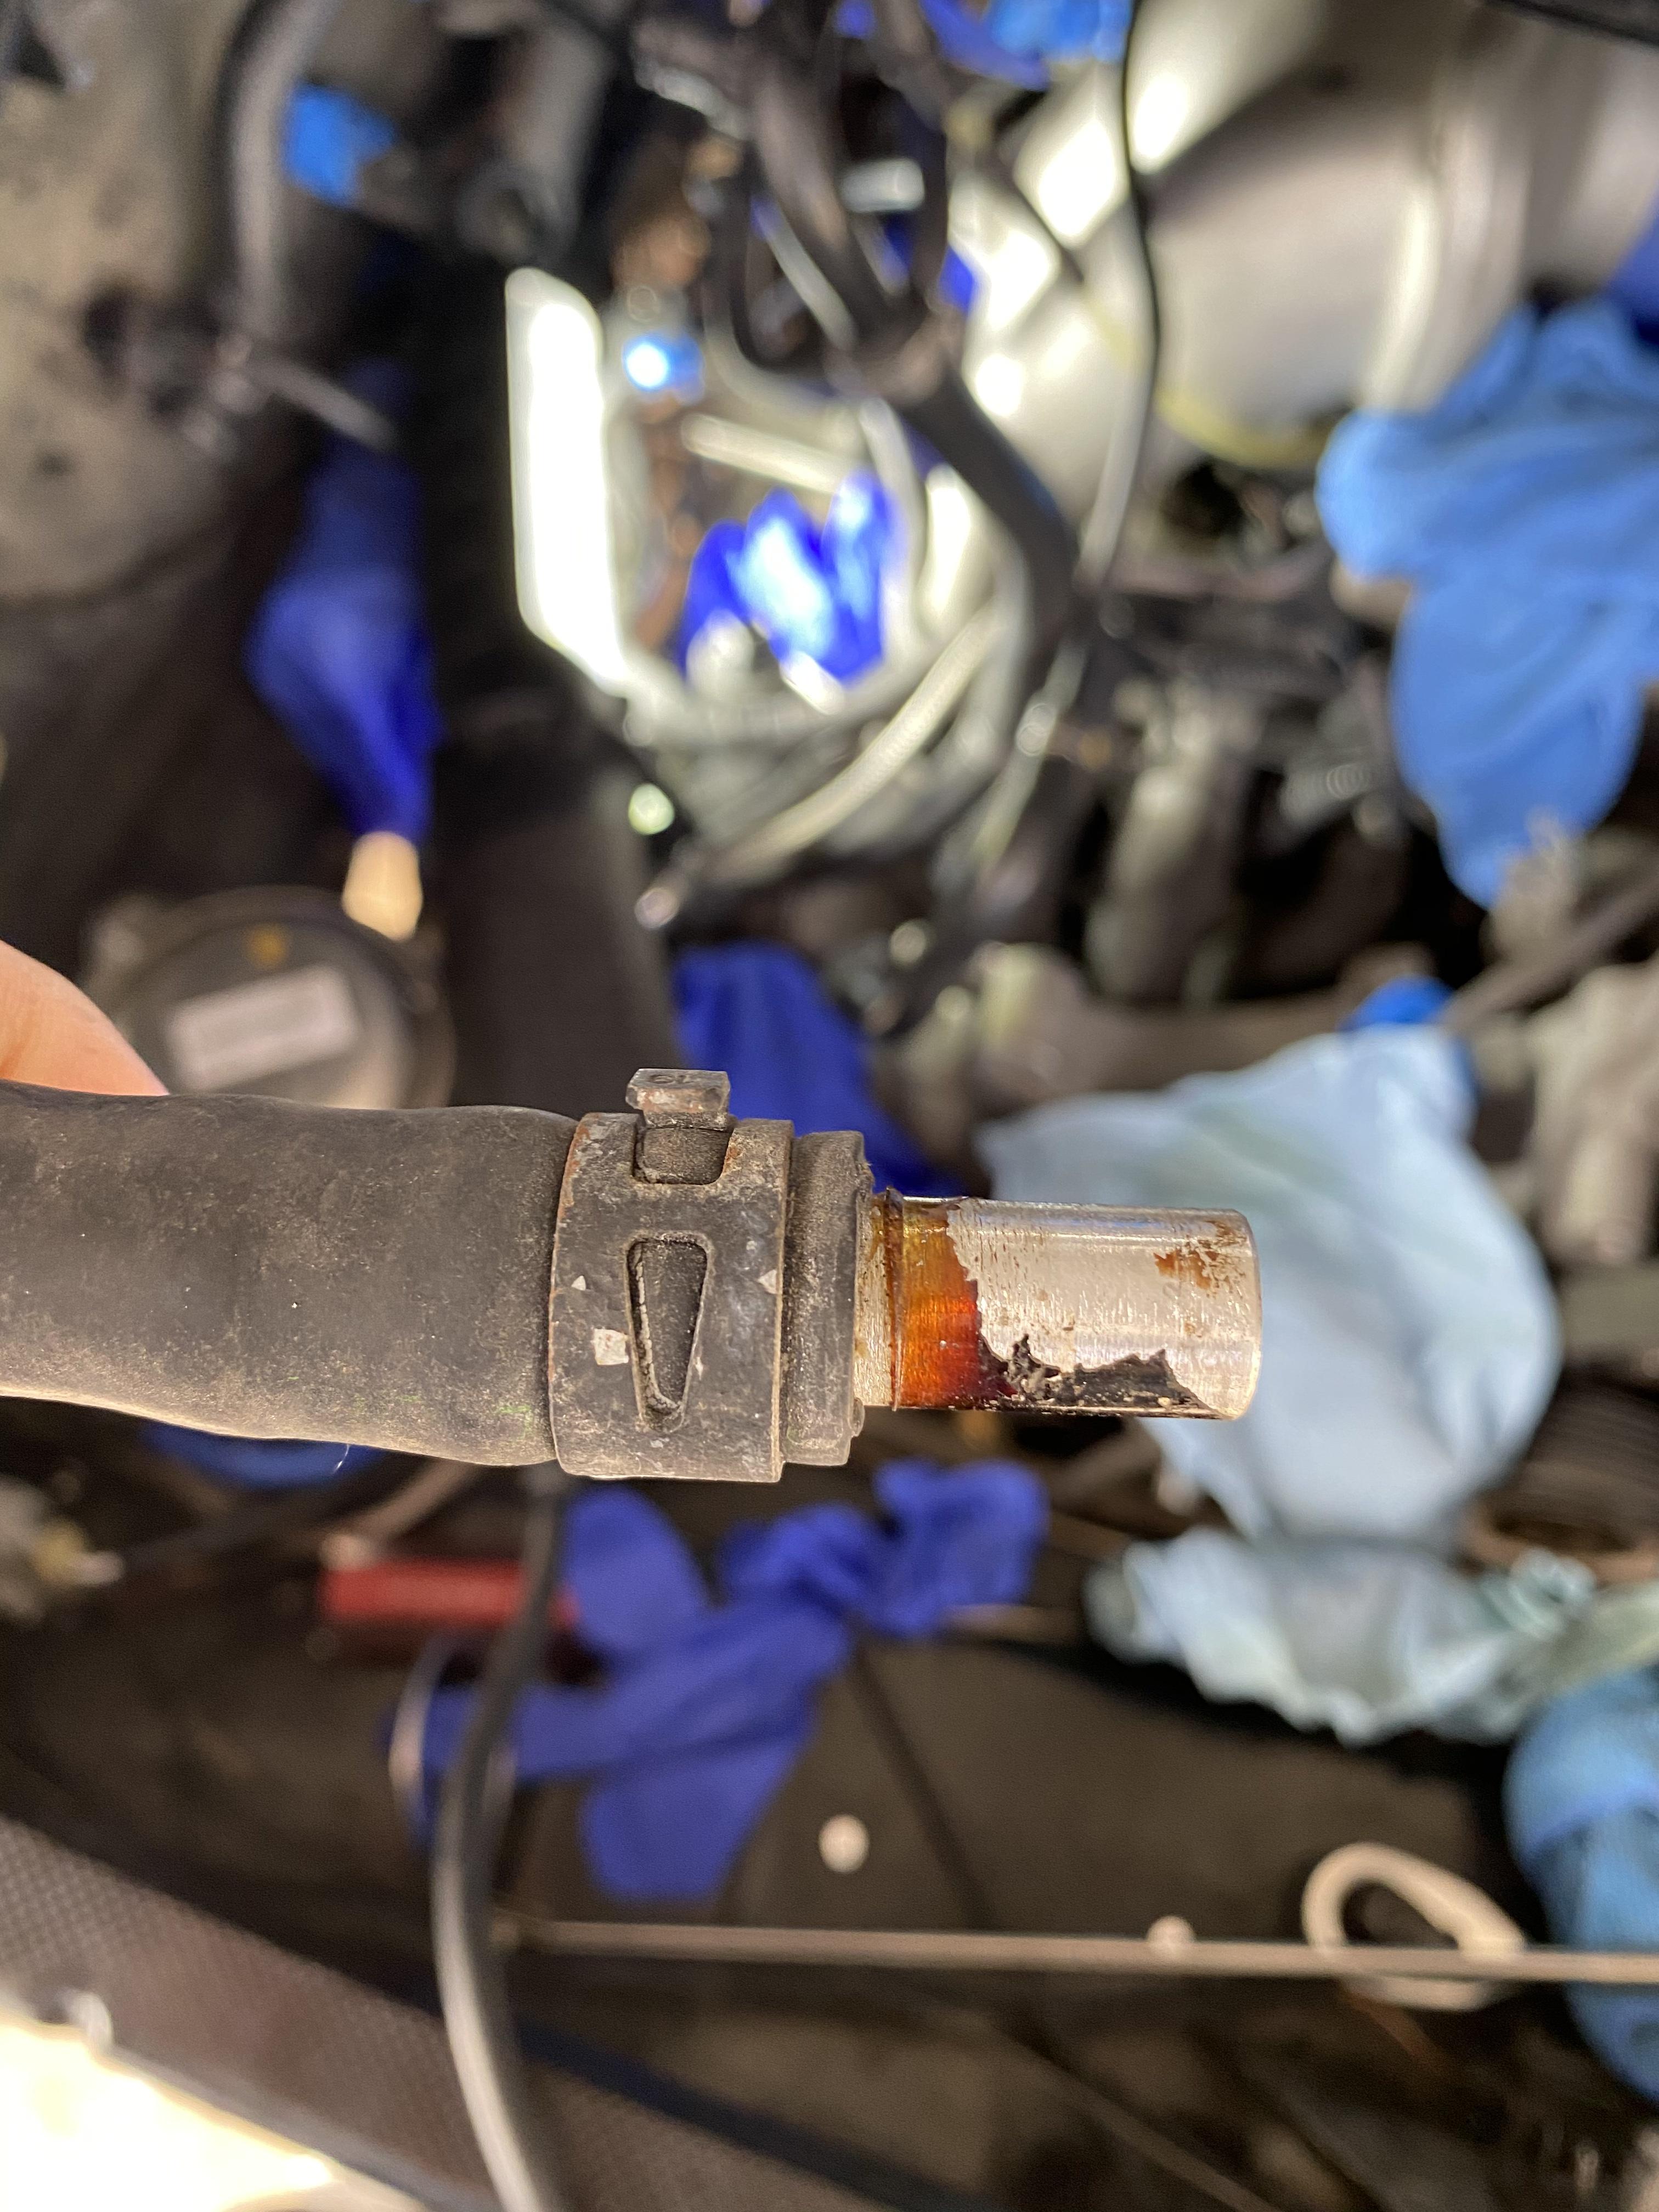
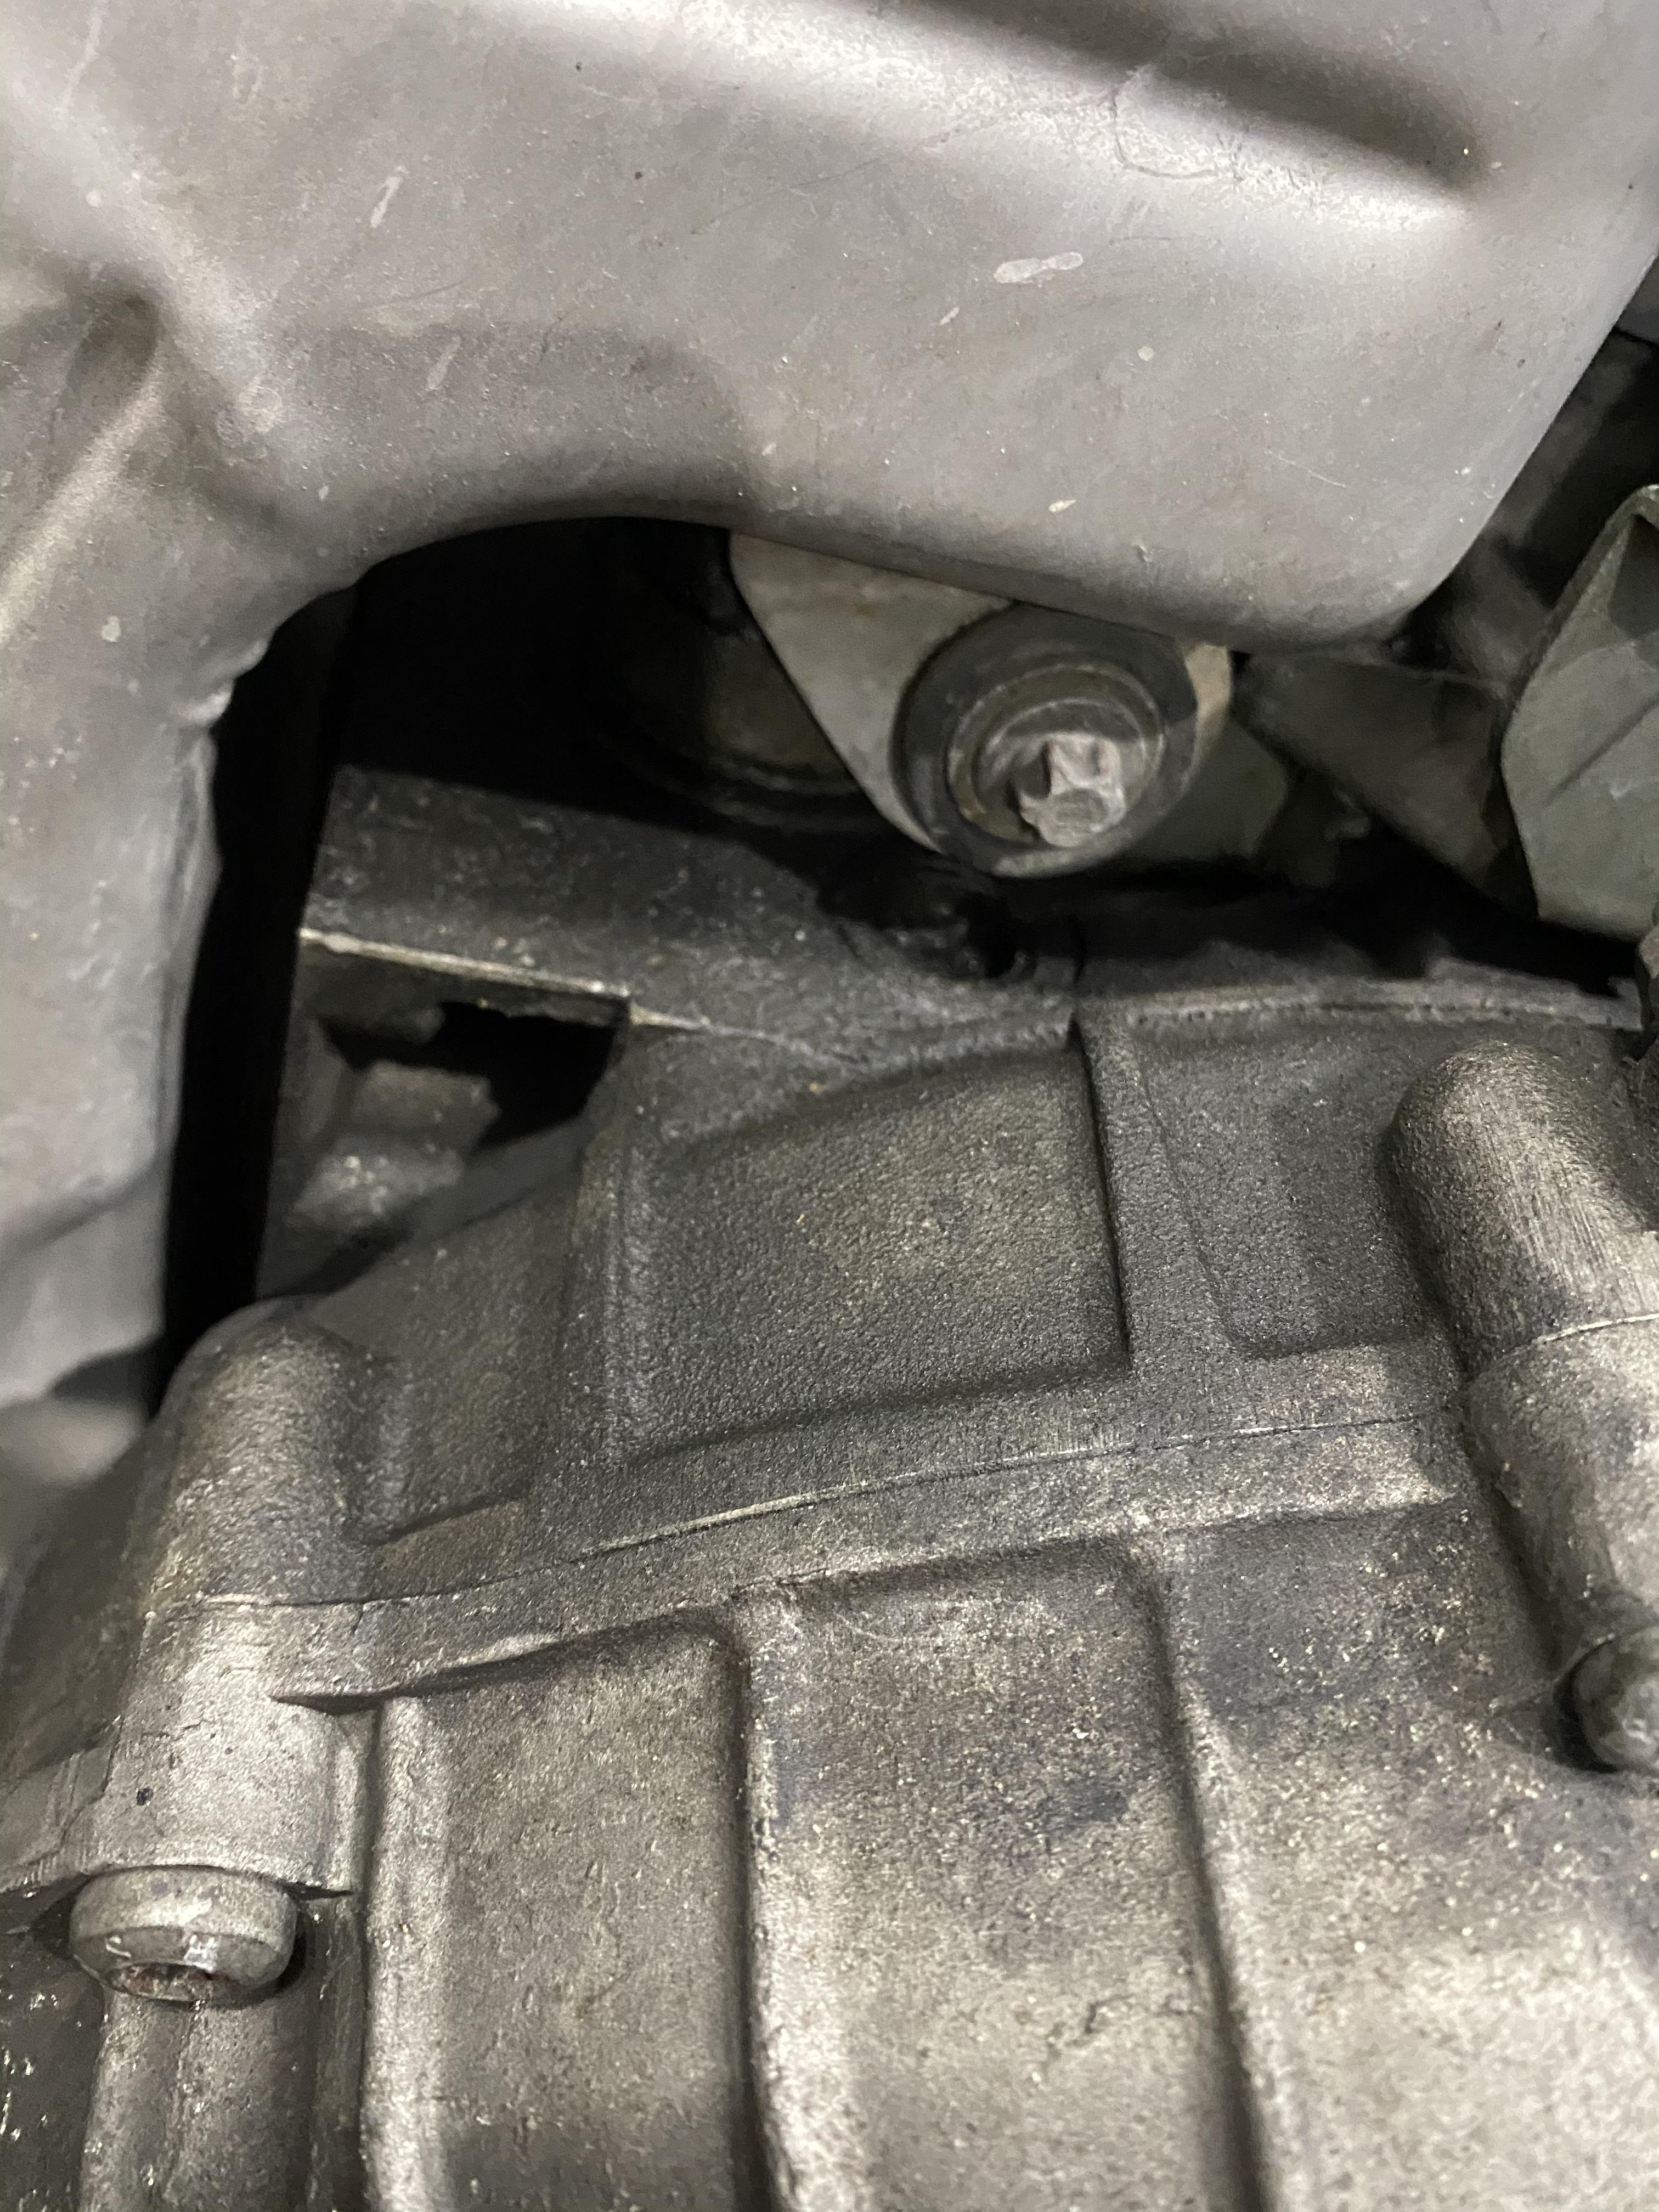
Howdy. My TT recently crossed over 120k and I decided to celebrate by doing a tune up. Plugs/coils, etc, since I was chasing some erratic fuel trim issues that improved after installing new MAFs but didn't yet fully normalize. I did the coils/plugs with the engine in following TheRocks fantastic DIY. The plugs were definitely due for a swap (last done 5-6 years ago per the PO, ~20k miles) and all 6 coil packs were cracked, I suspect they were the originals. The exhaust is aftermarket FVD and I thought maybe the cats were bad, but the 200 cel units looked great when I removed the exhaust. I also did a boost leak test and heard a *tiny* hiss behind the plenum. So I kept digging and disassembling, removed the turbos since I planned a rebuild, and swapped out the WP and t-stat while I was "in there," and eventually found myself holding a coolant pipe that separated itself from the block. Great. I knew this meant the engine had to come out, which was only *slightly* annoying considering all the work I did with the engine in.
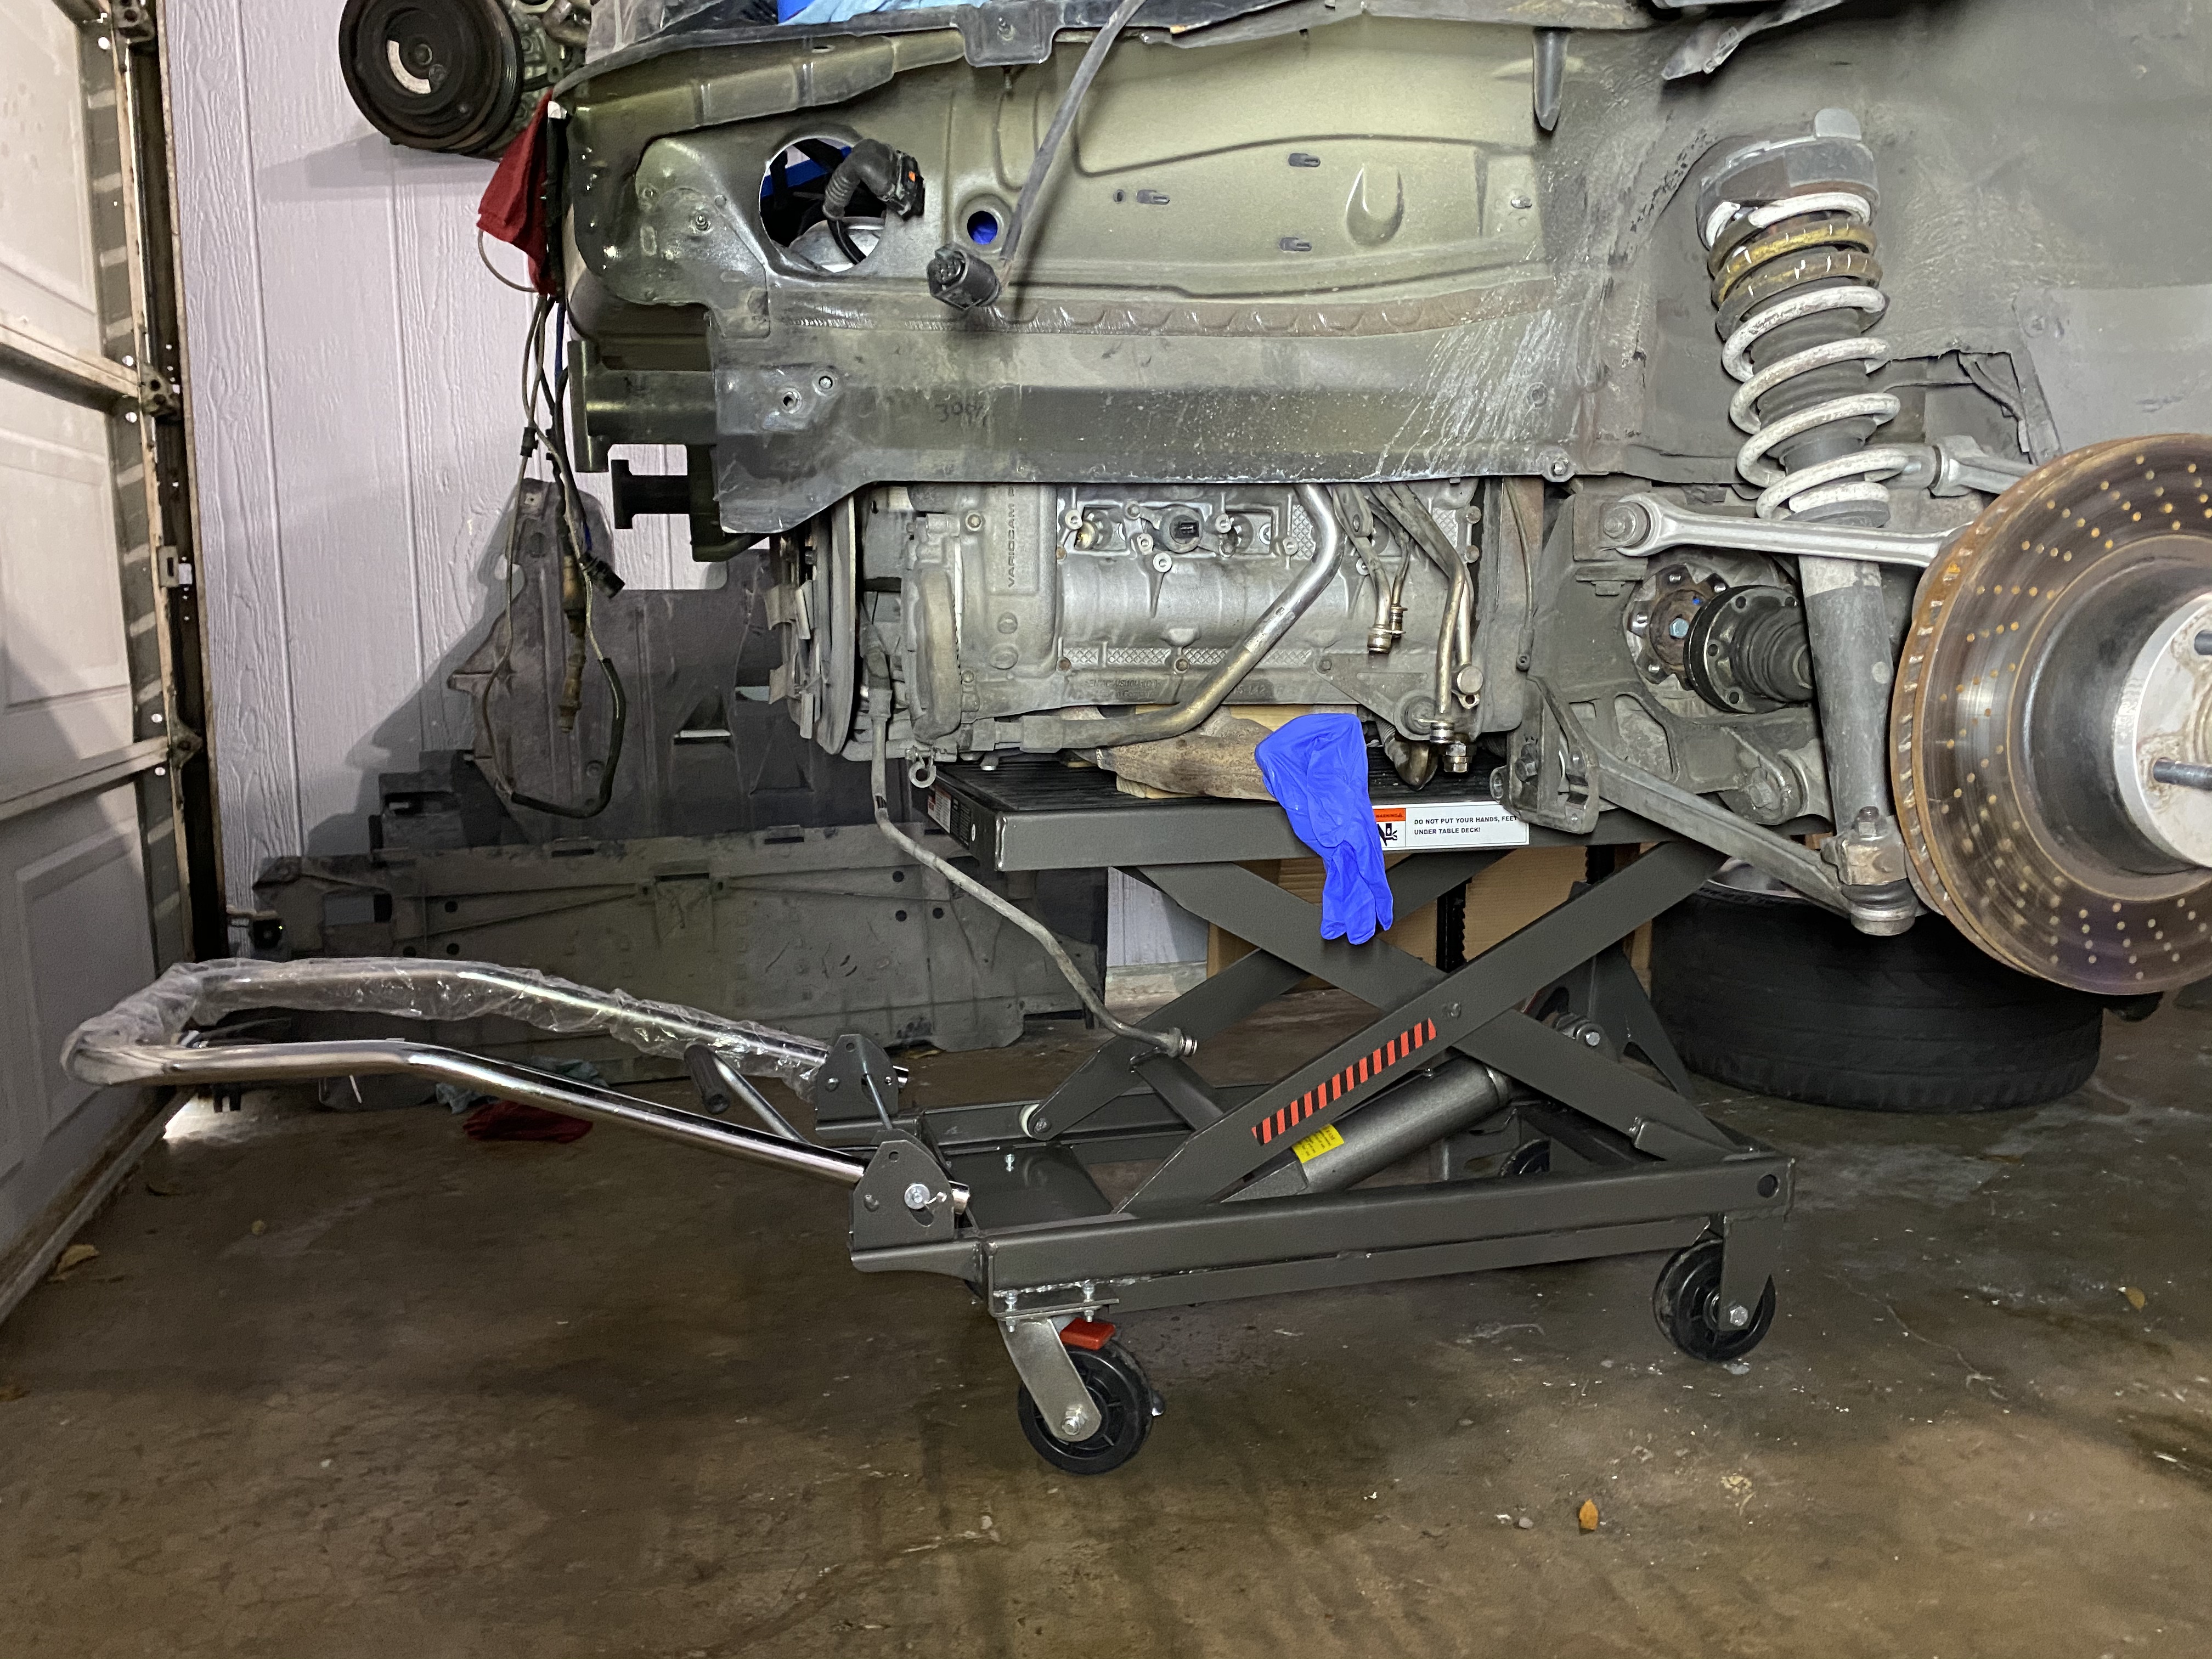
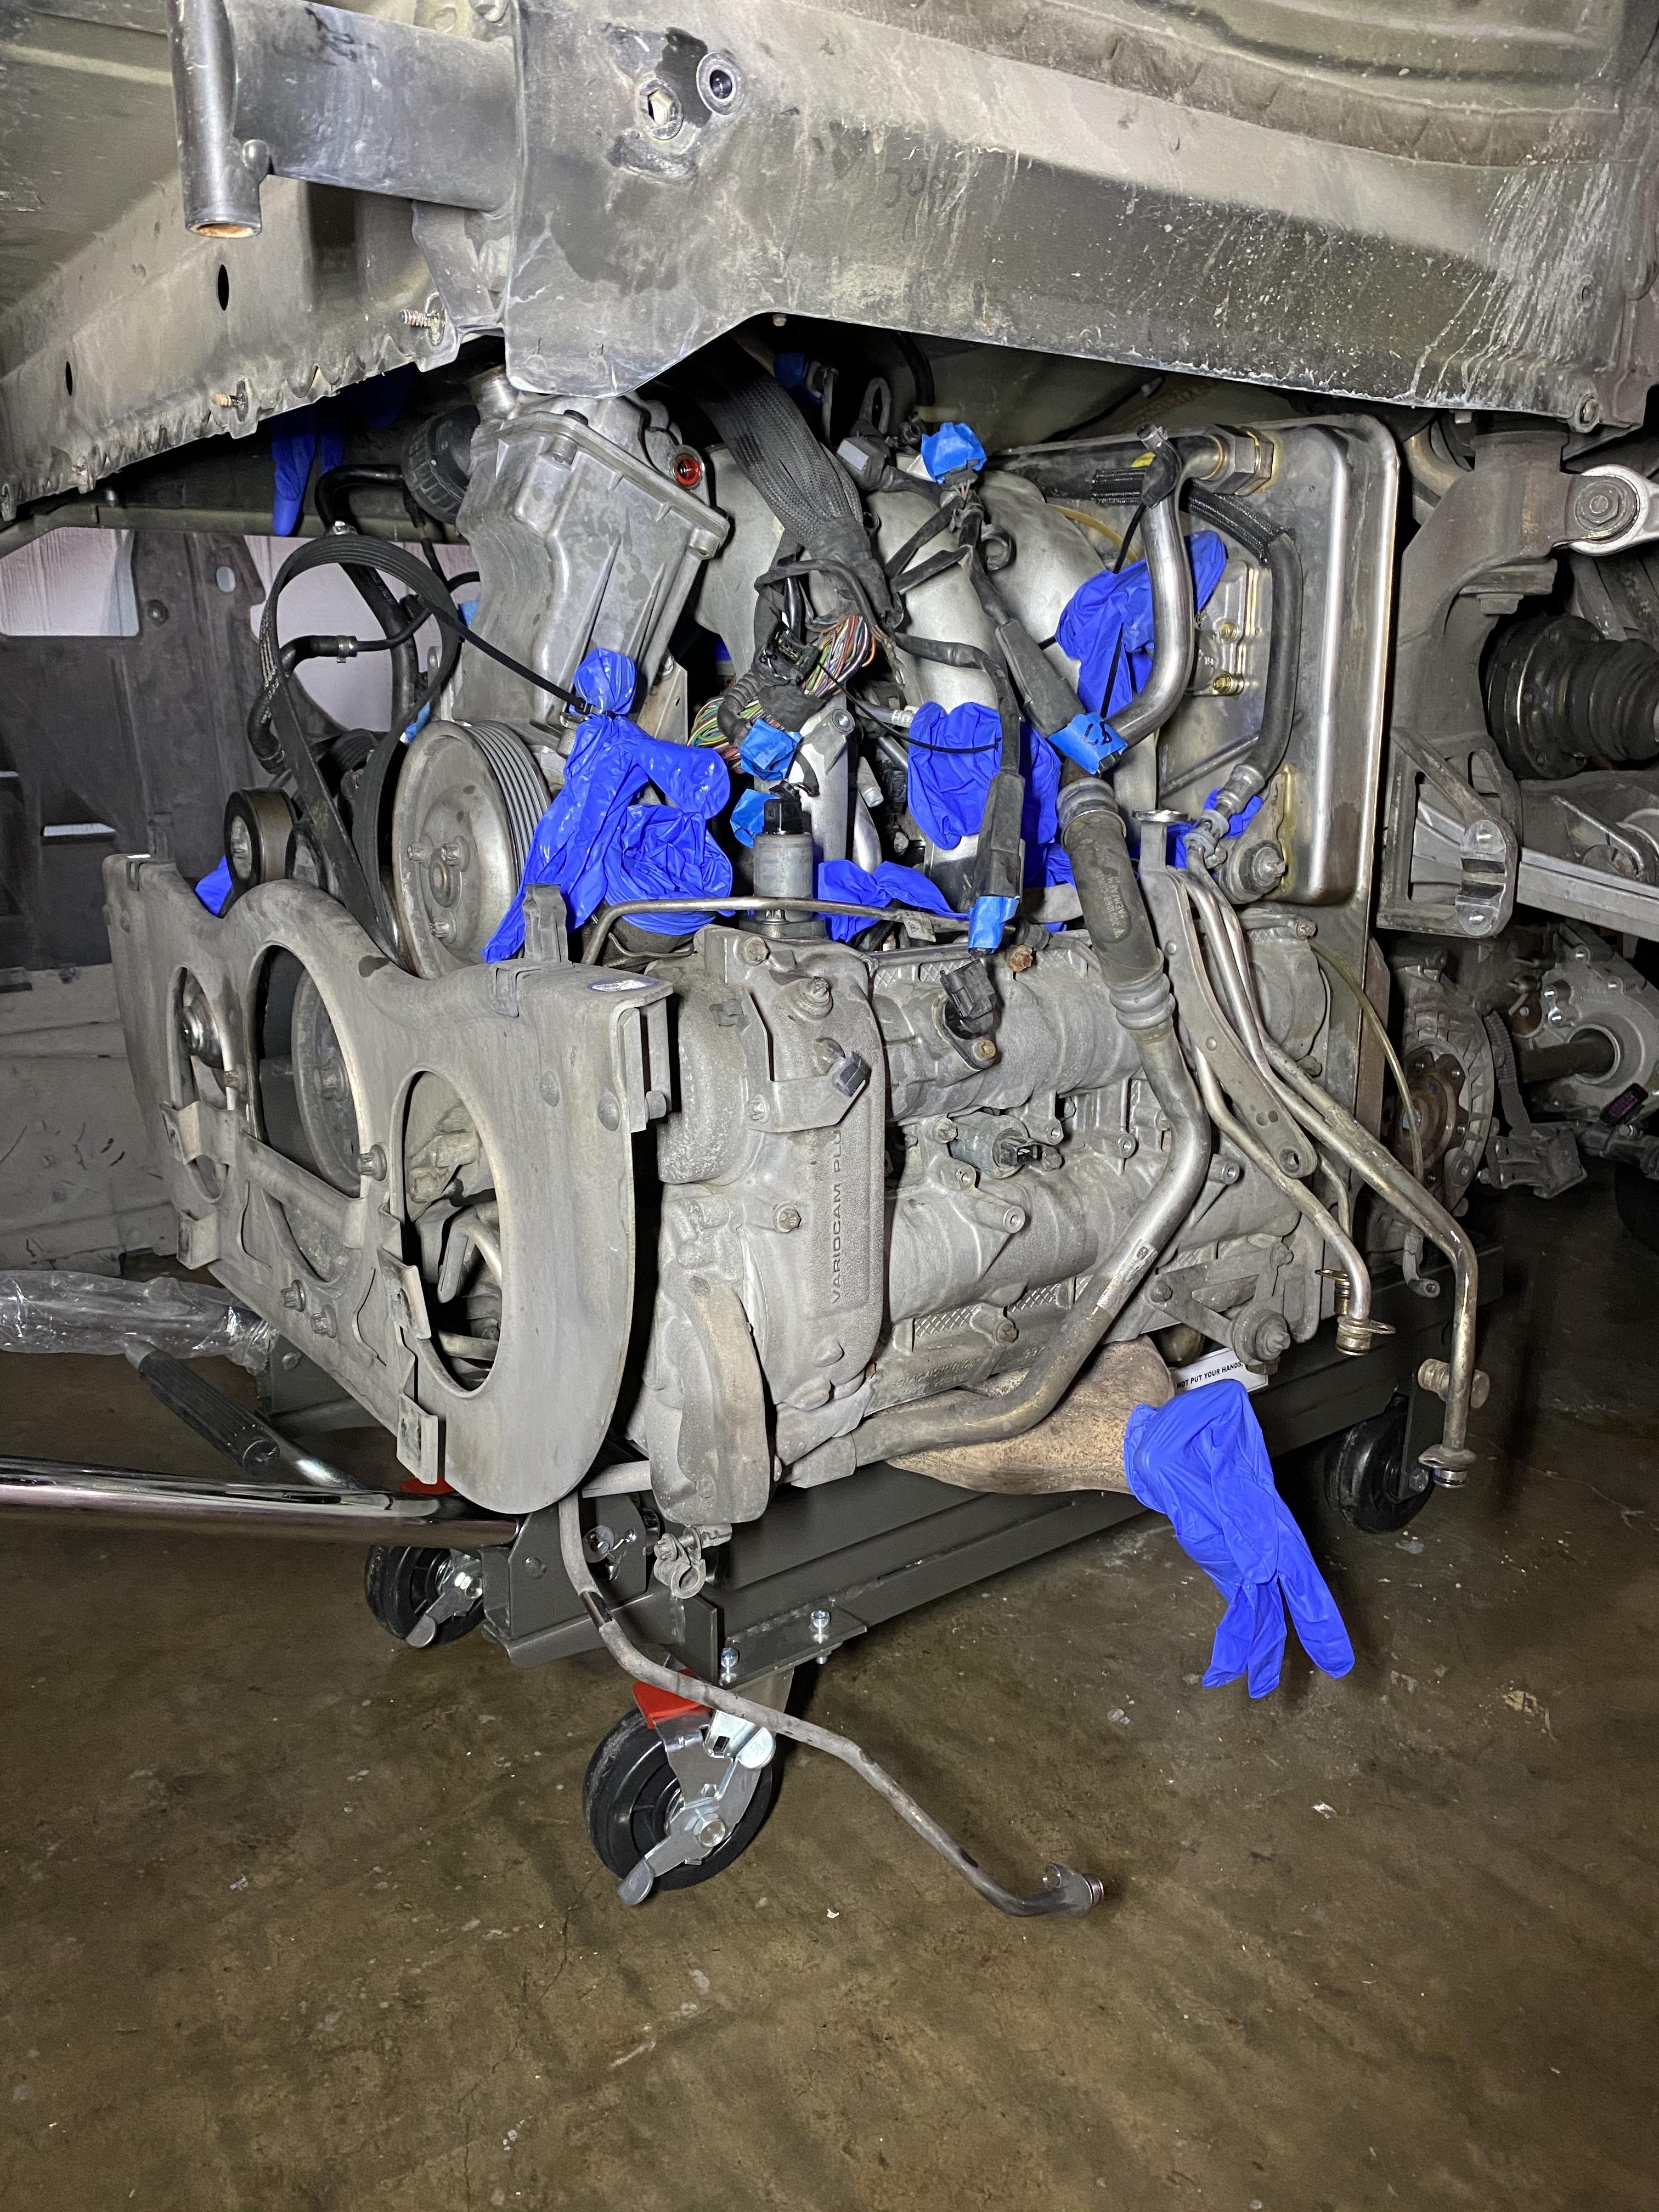
I picked up a few tools from HF and some tall jack stands and got to work. Yep, I dropped it on jack stands. It actually wasn't that bad of a removal and if anyone has questions or needs details, I will be happy to help. 24 inches from the floor to the lowest portion of the suspension is the minimum needed to pull this out on the 1000lb hydraulic cart from HF. I set my stands at 23" because I did not want to extend the jacks to full height, and then gently raised the frame with my jack to get the last bit of heigh needed to slip the drivetrain out. It was actually pretty drama free - important points are to make sure the O2 and EGT sensors are safely tucked away, that the engine ground on the DS is unhooked, and the starter cable and shift links are disconnected (this is a tip). I left the AC with the frame, and took the PS pump and reservoir with the engine.
Carefully lowering the table while checking clearances:
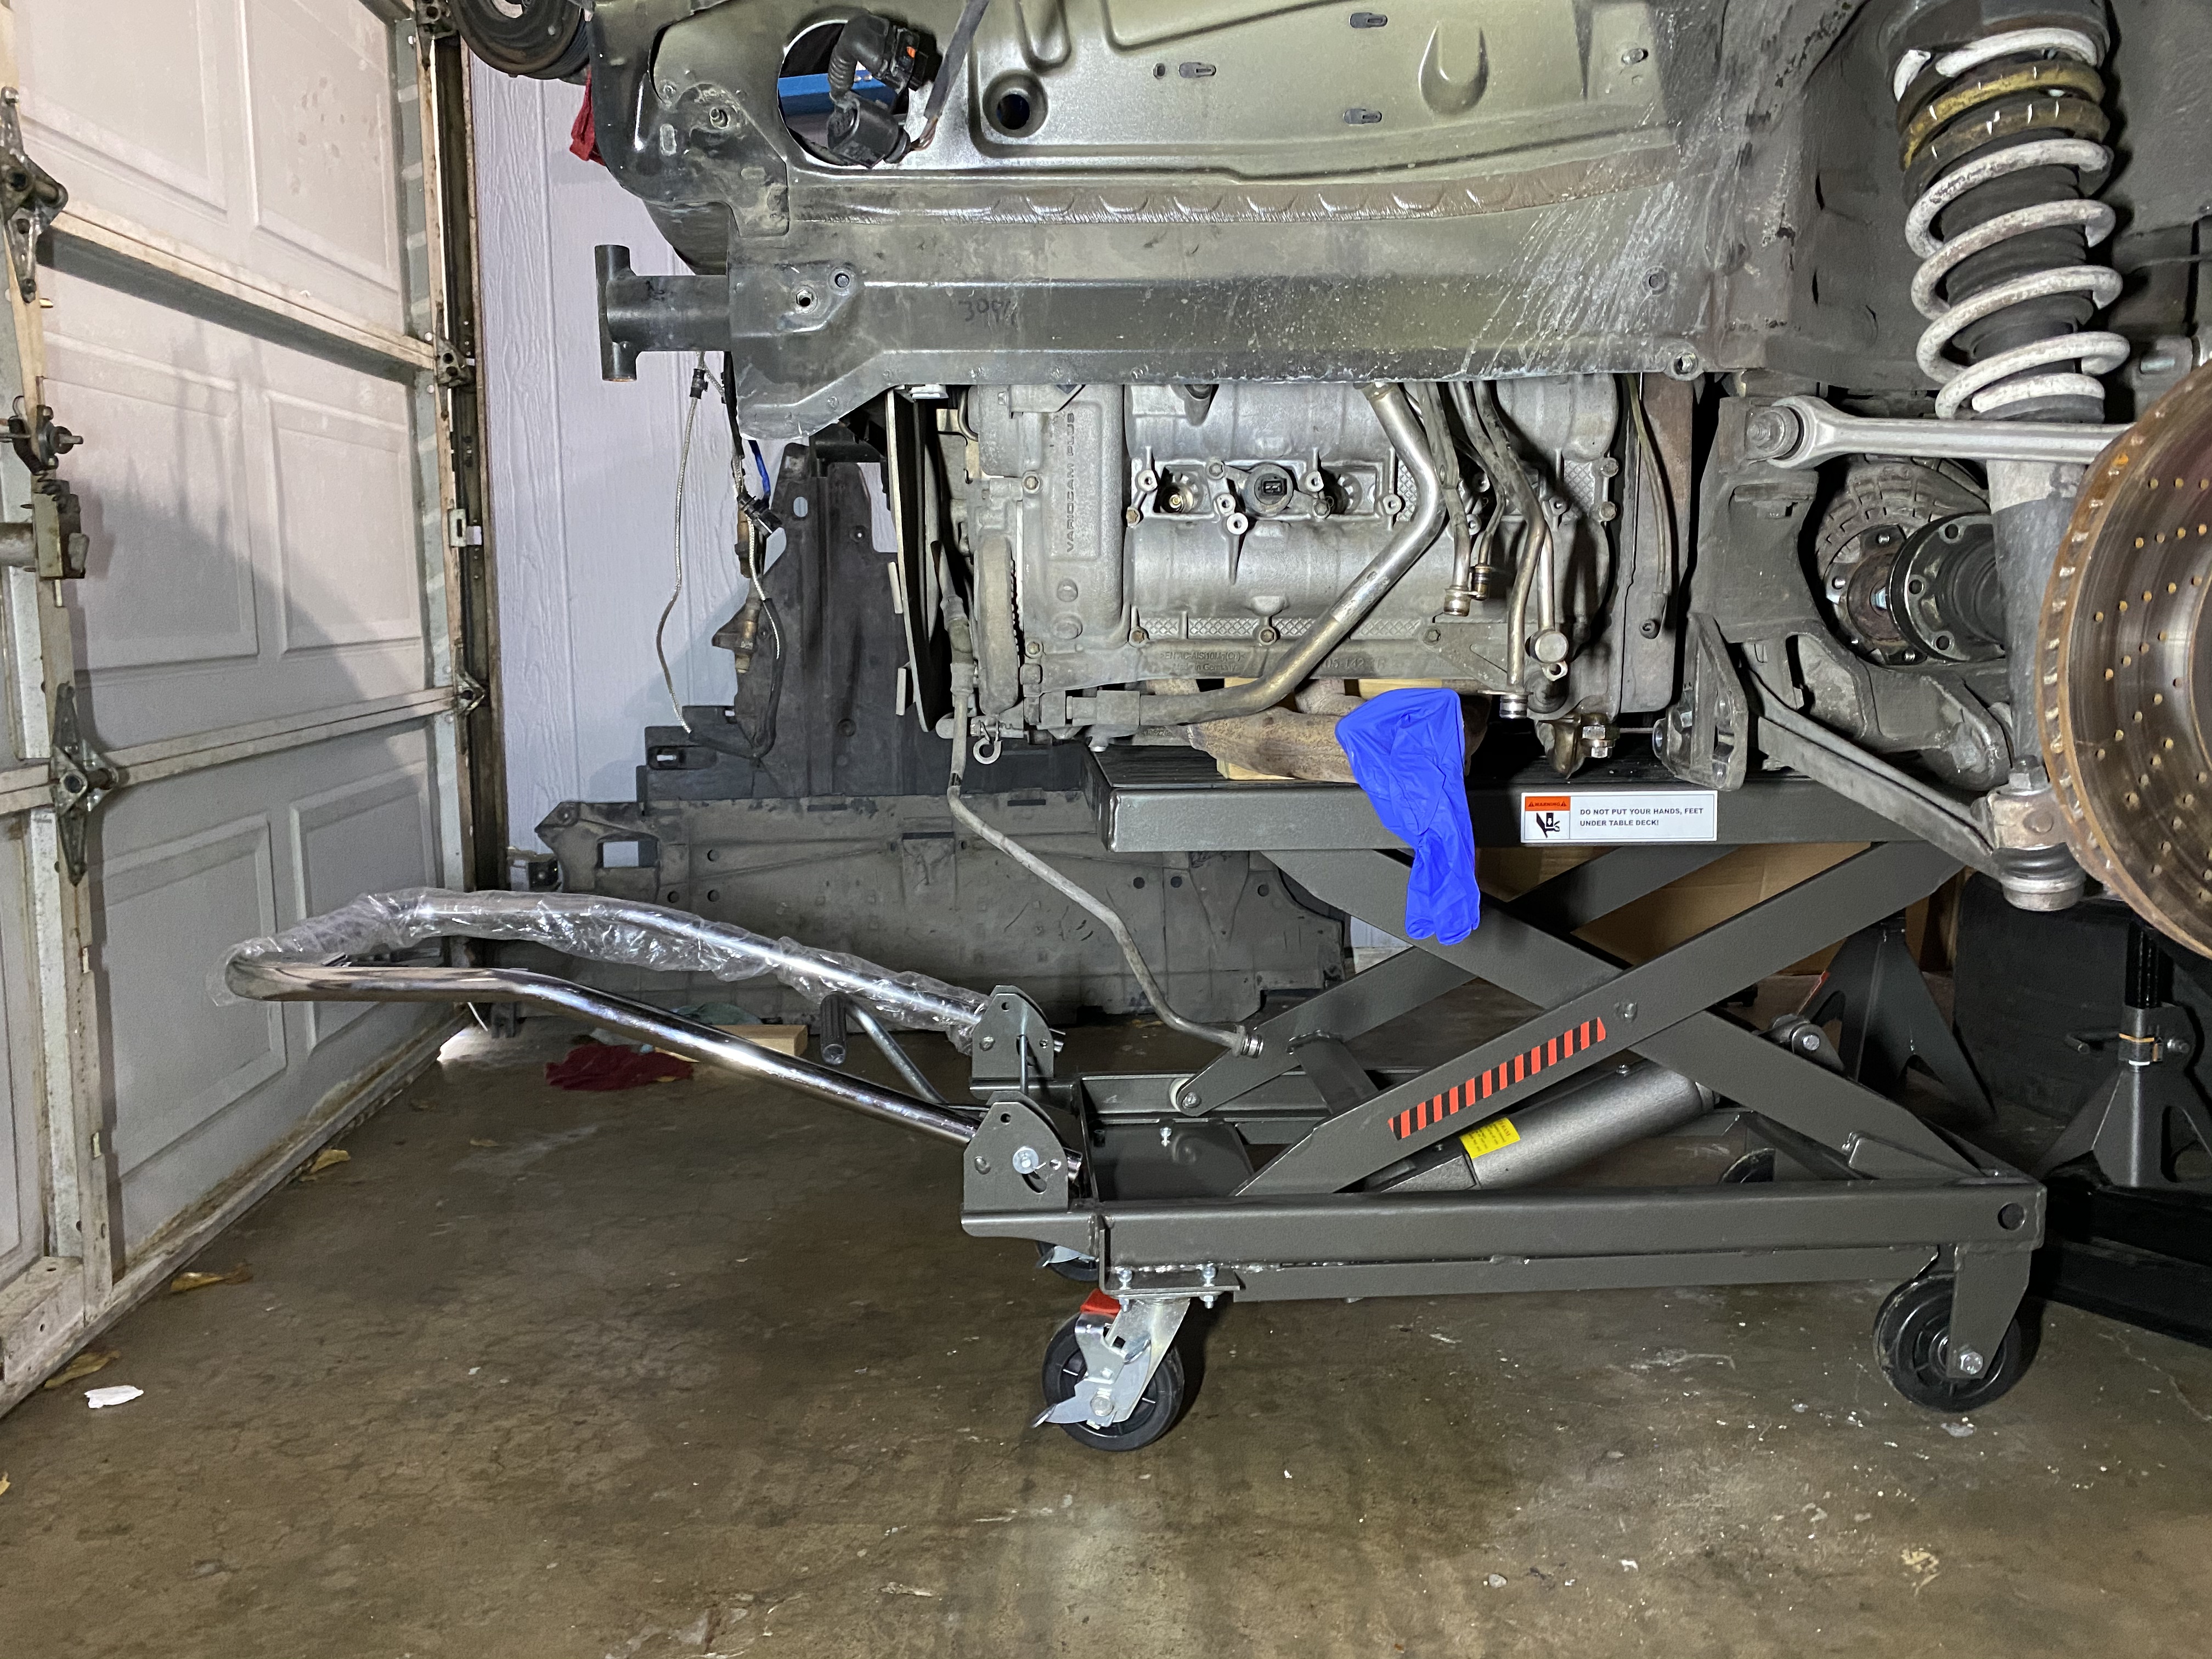
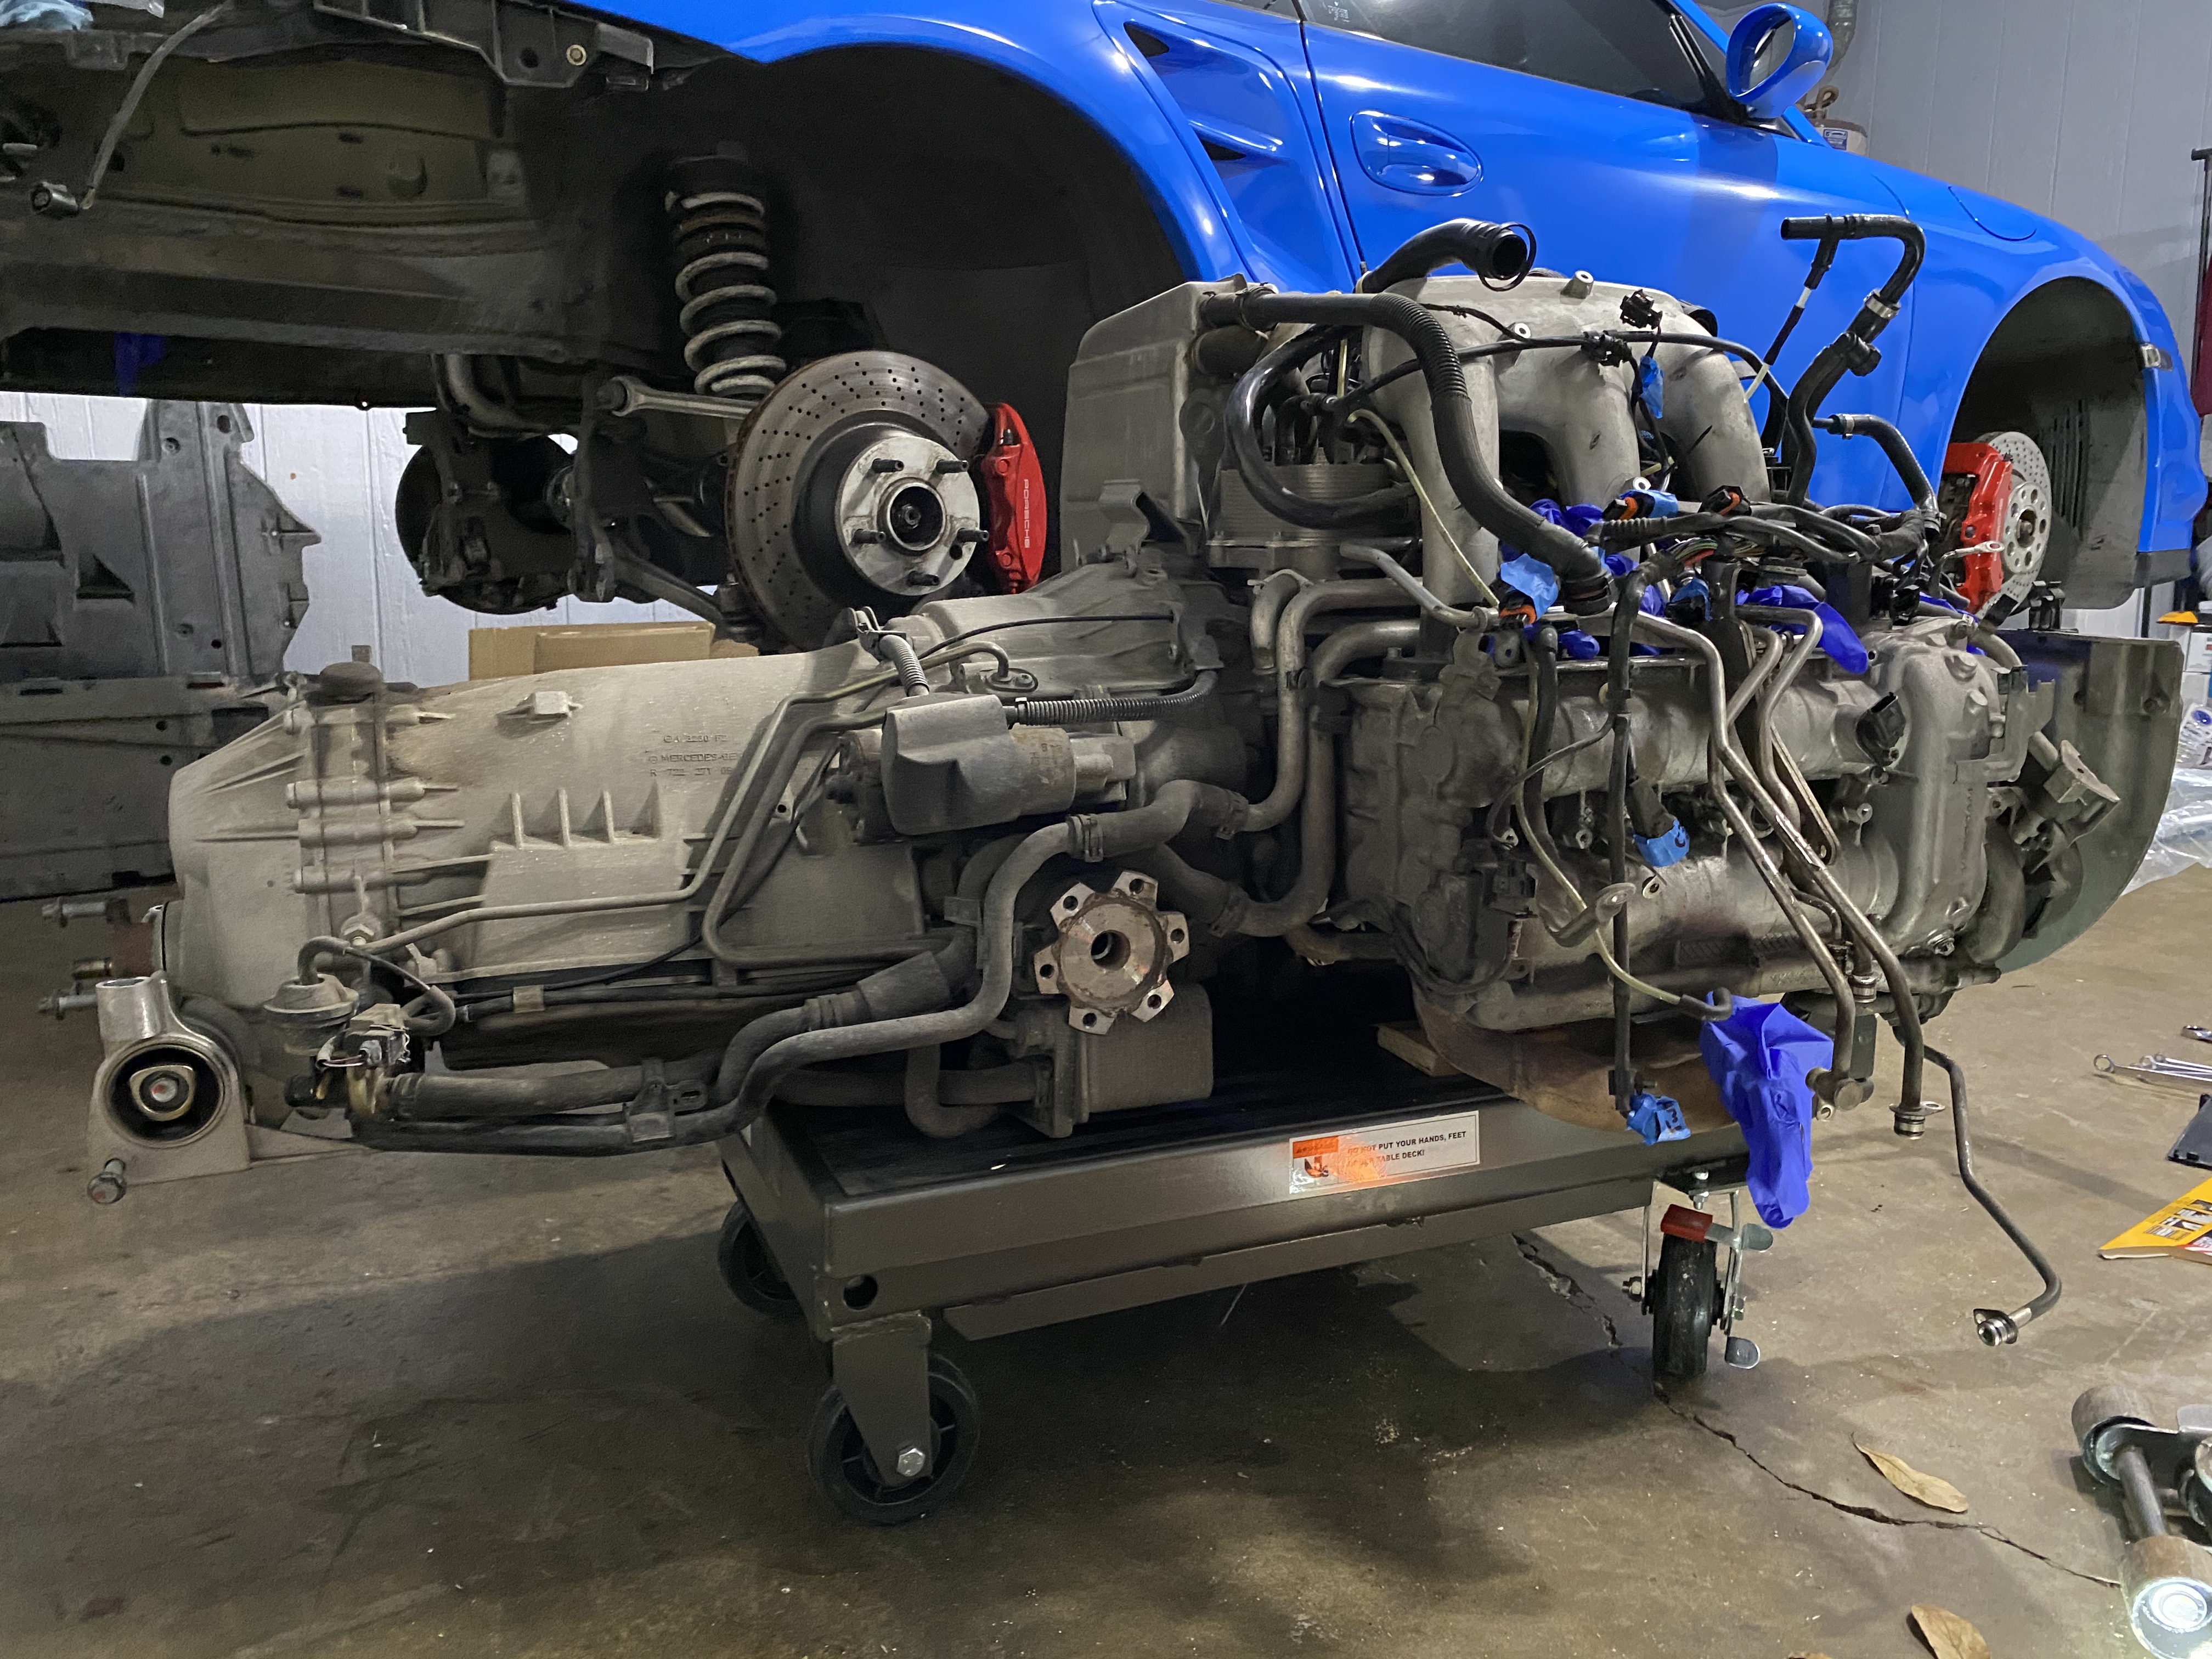
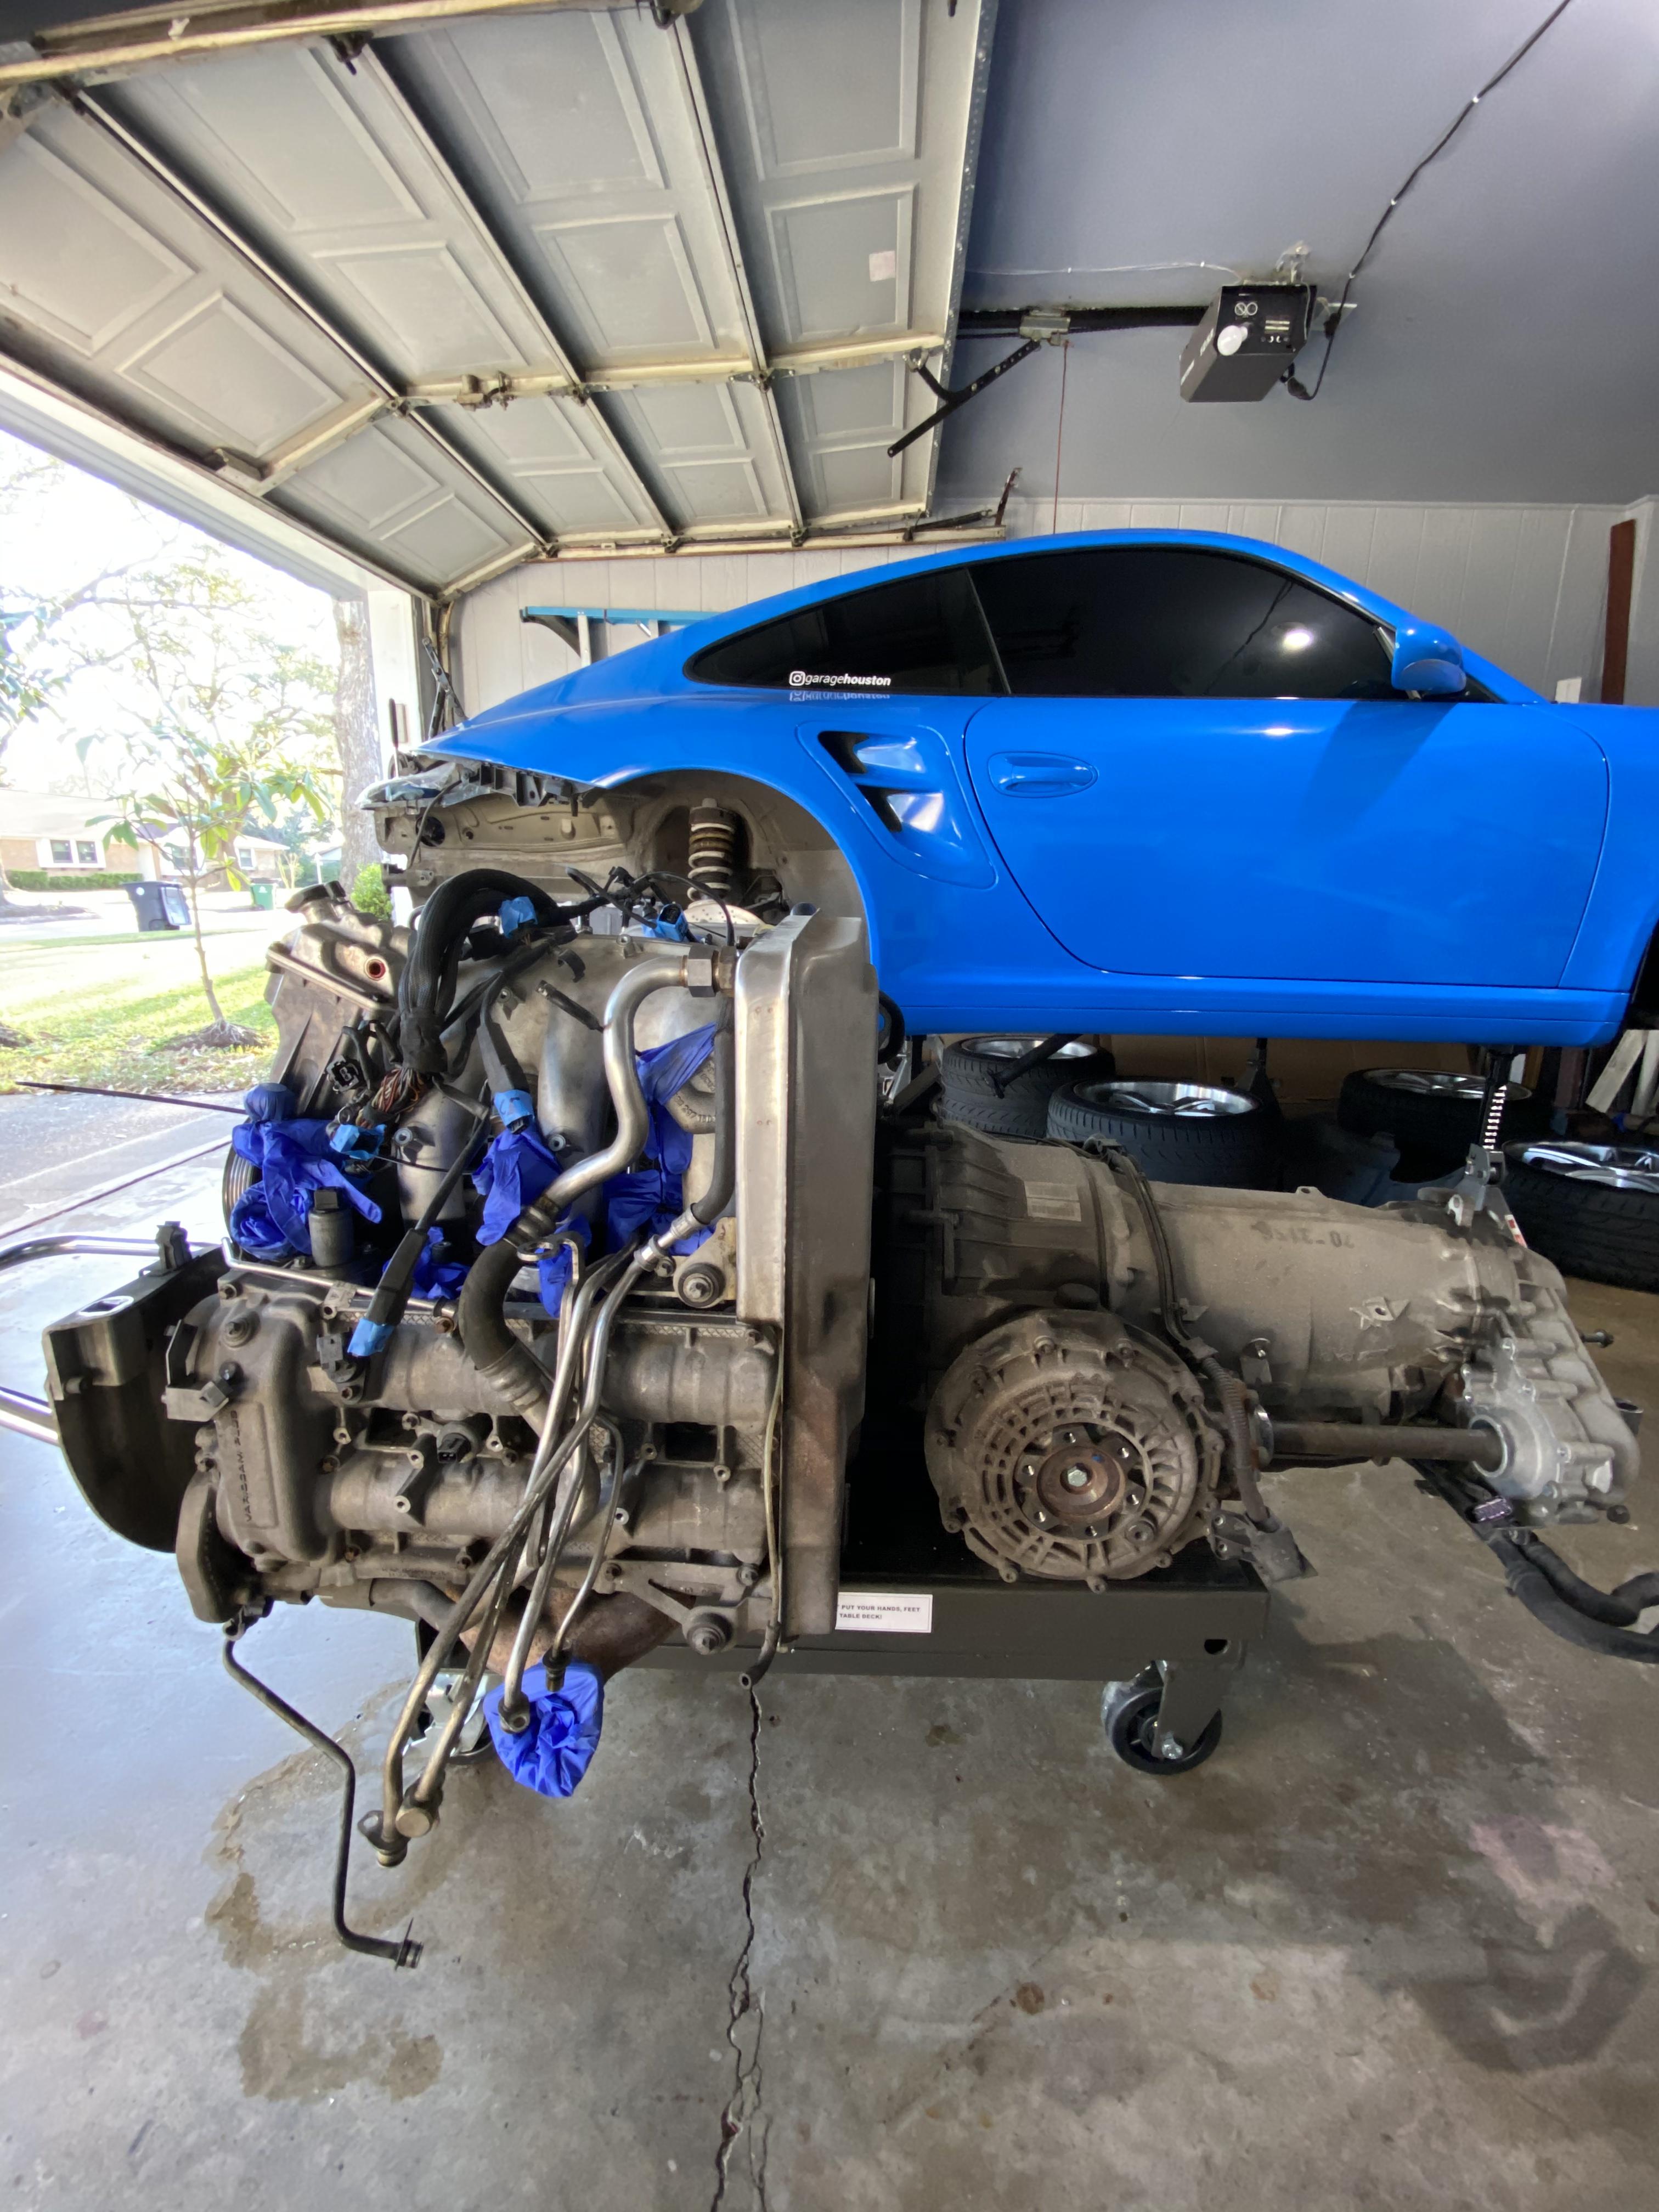
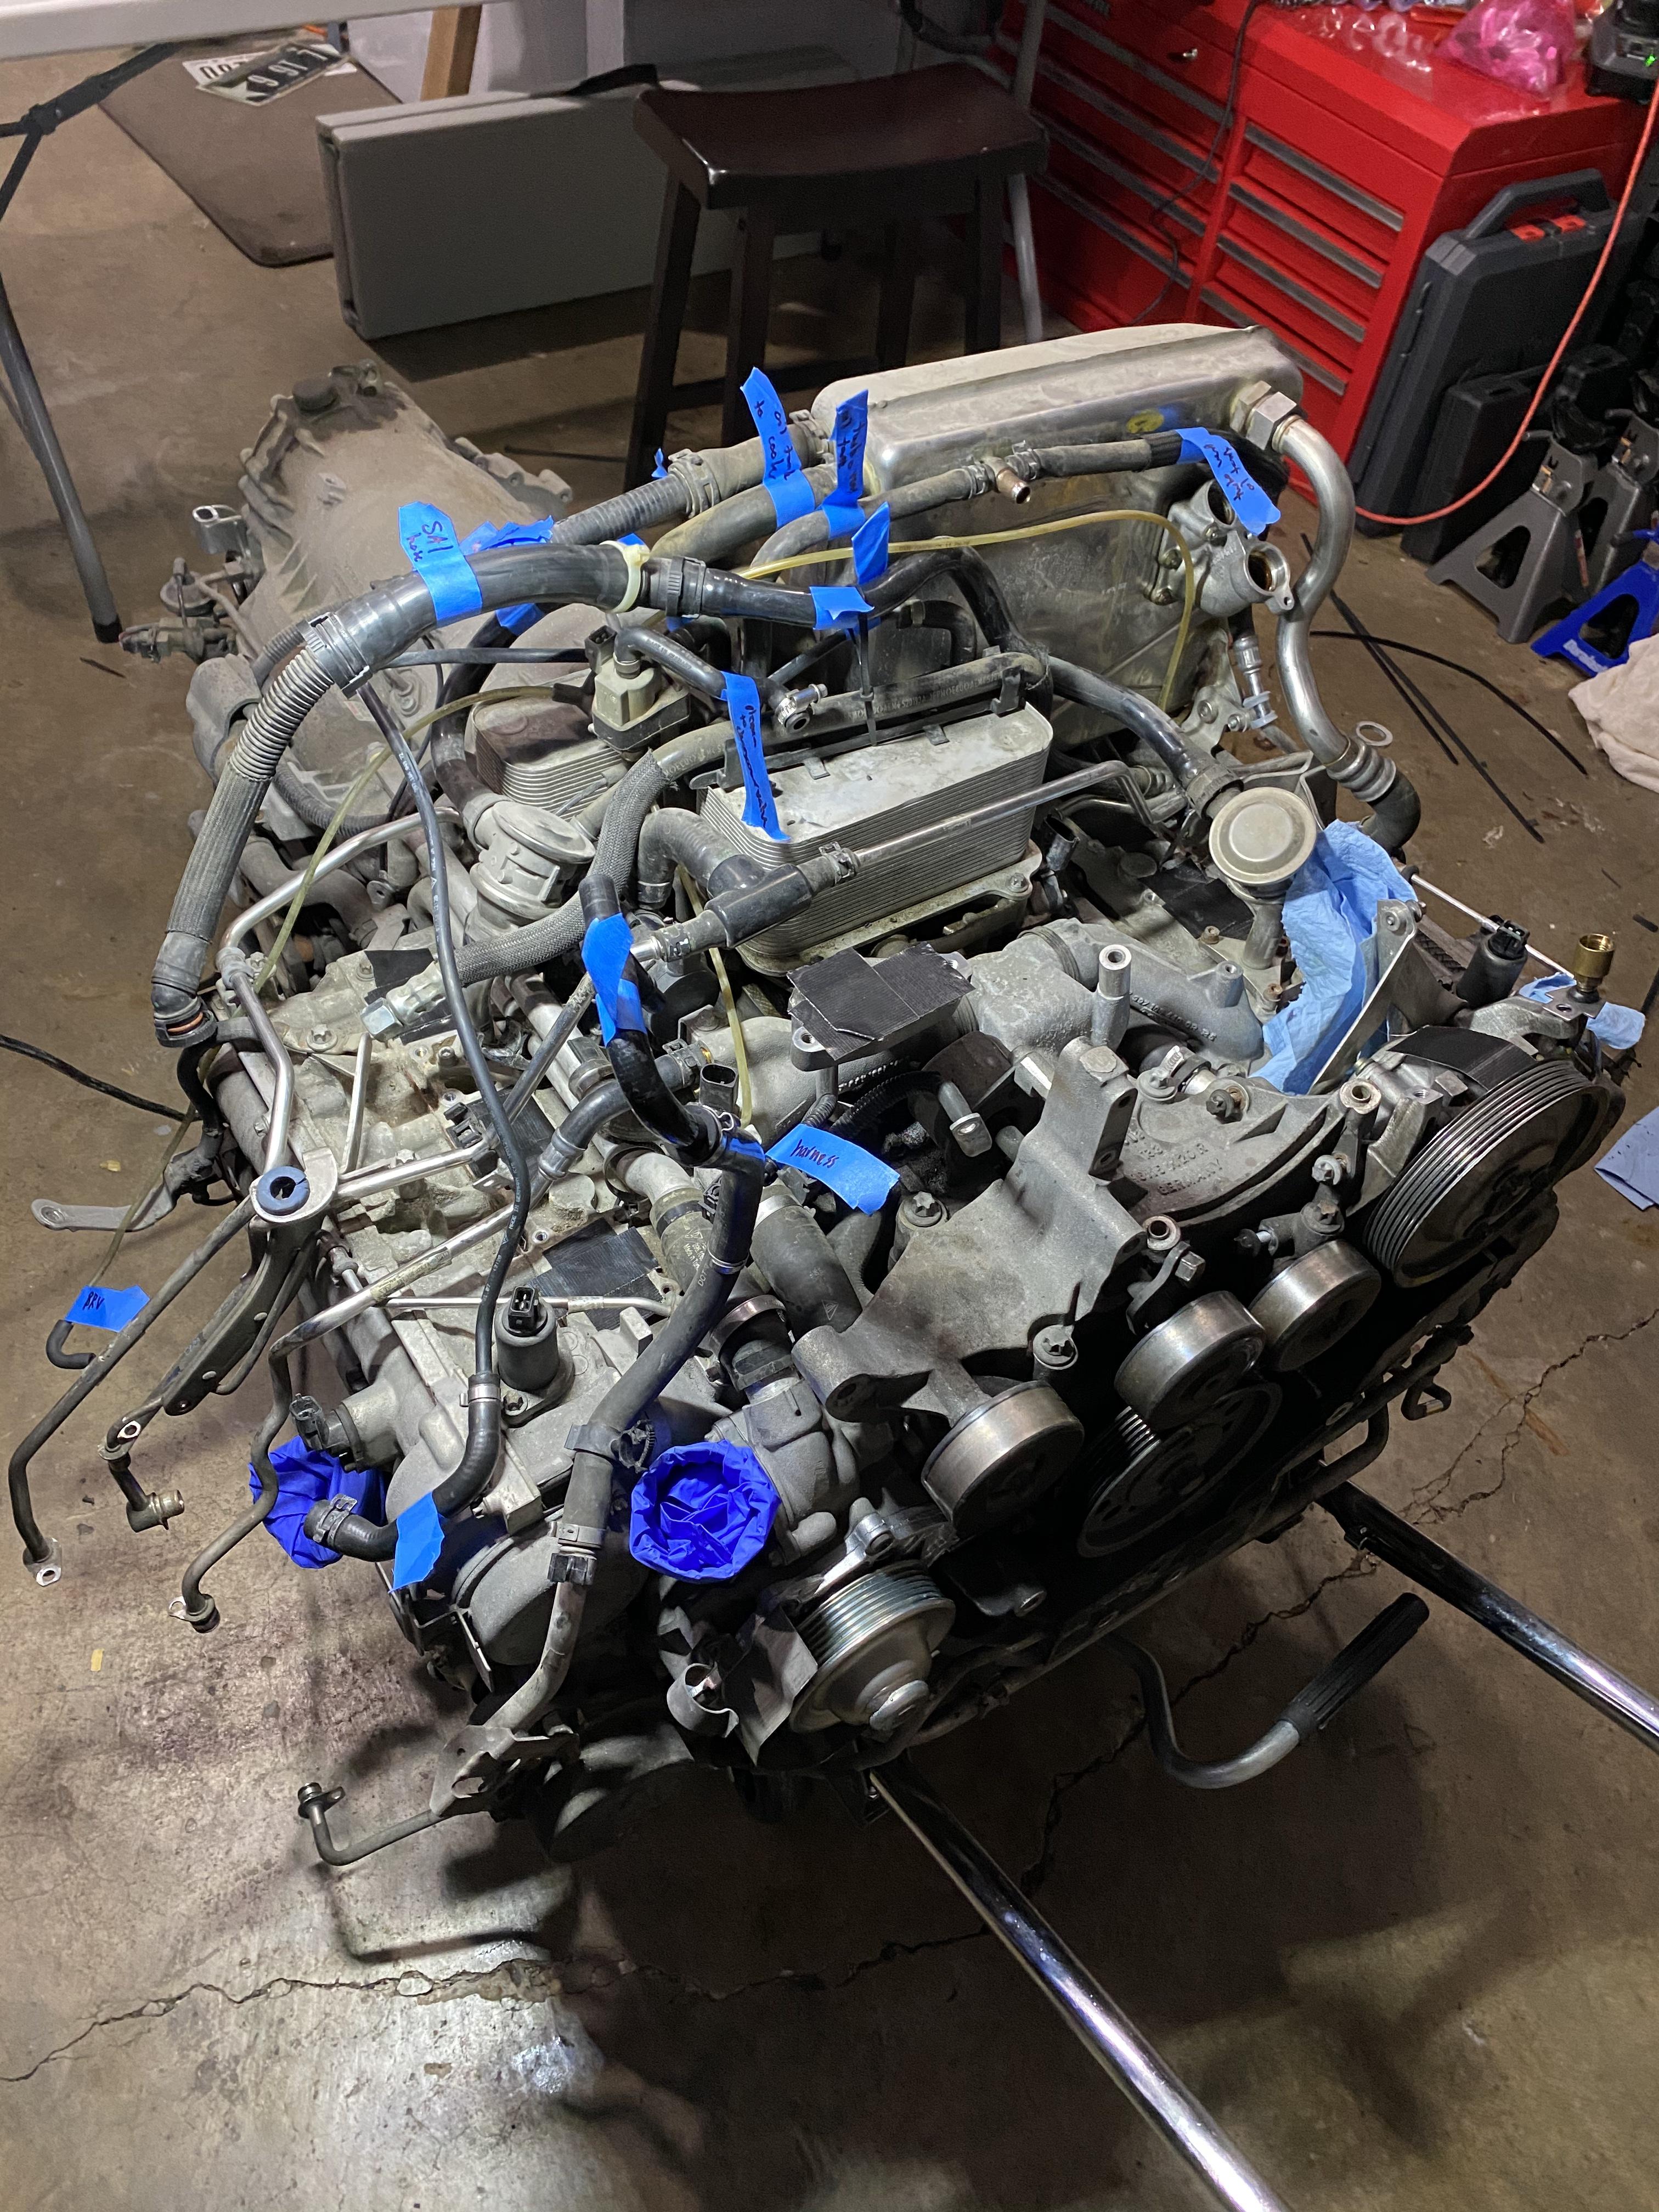
Eagle has landed:
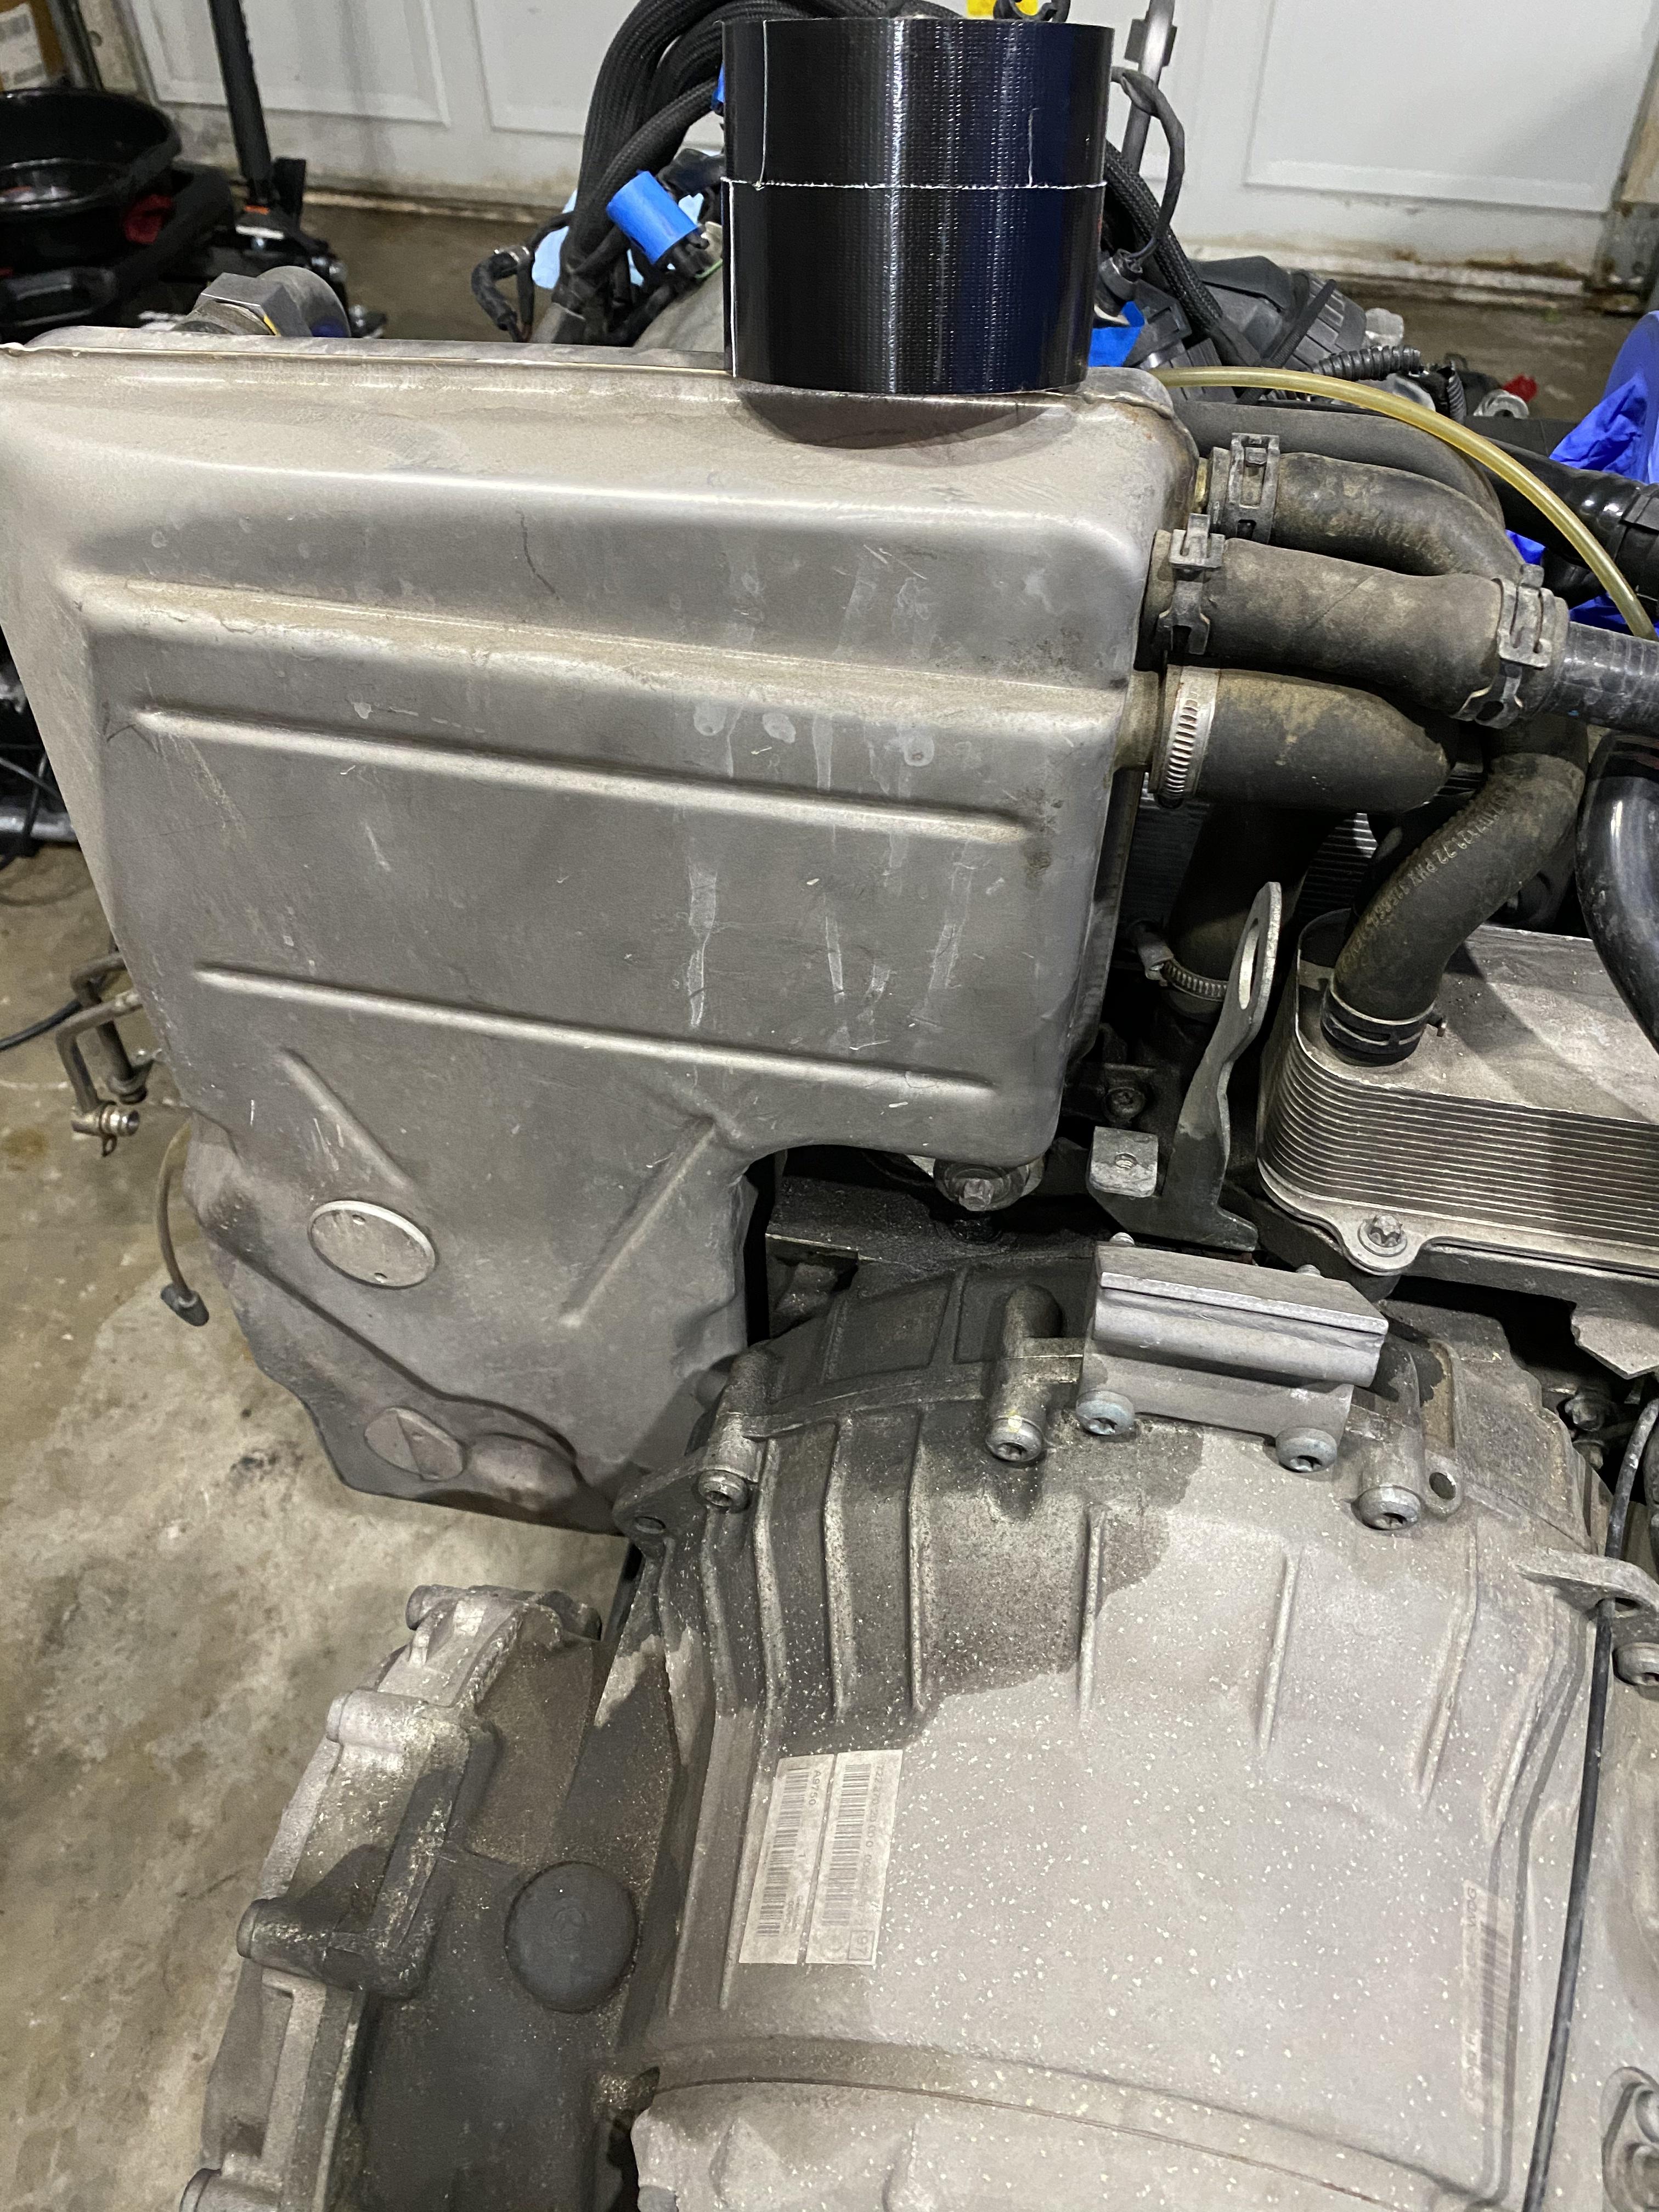
Highest part of the engine for me (along with the PS reservoir) - I had taken off the oil filter housing earlier when I was trying to get better access to the intake plenum:
Who needs a lift? (I do, desperately, but you gotta roll with what you have)
The engine has an oil leak at the top that will be taken care of:
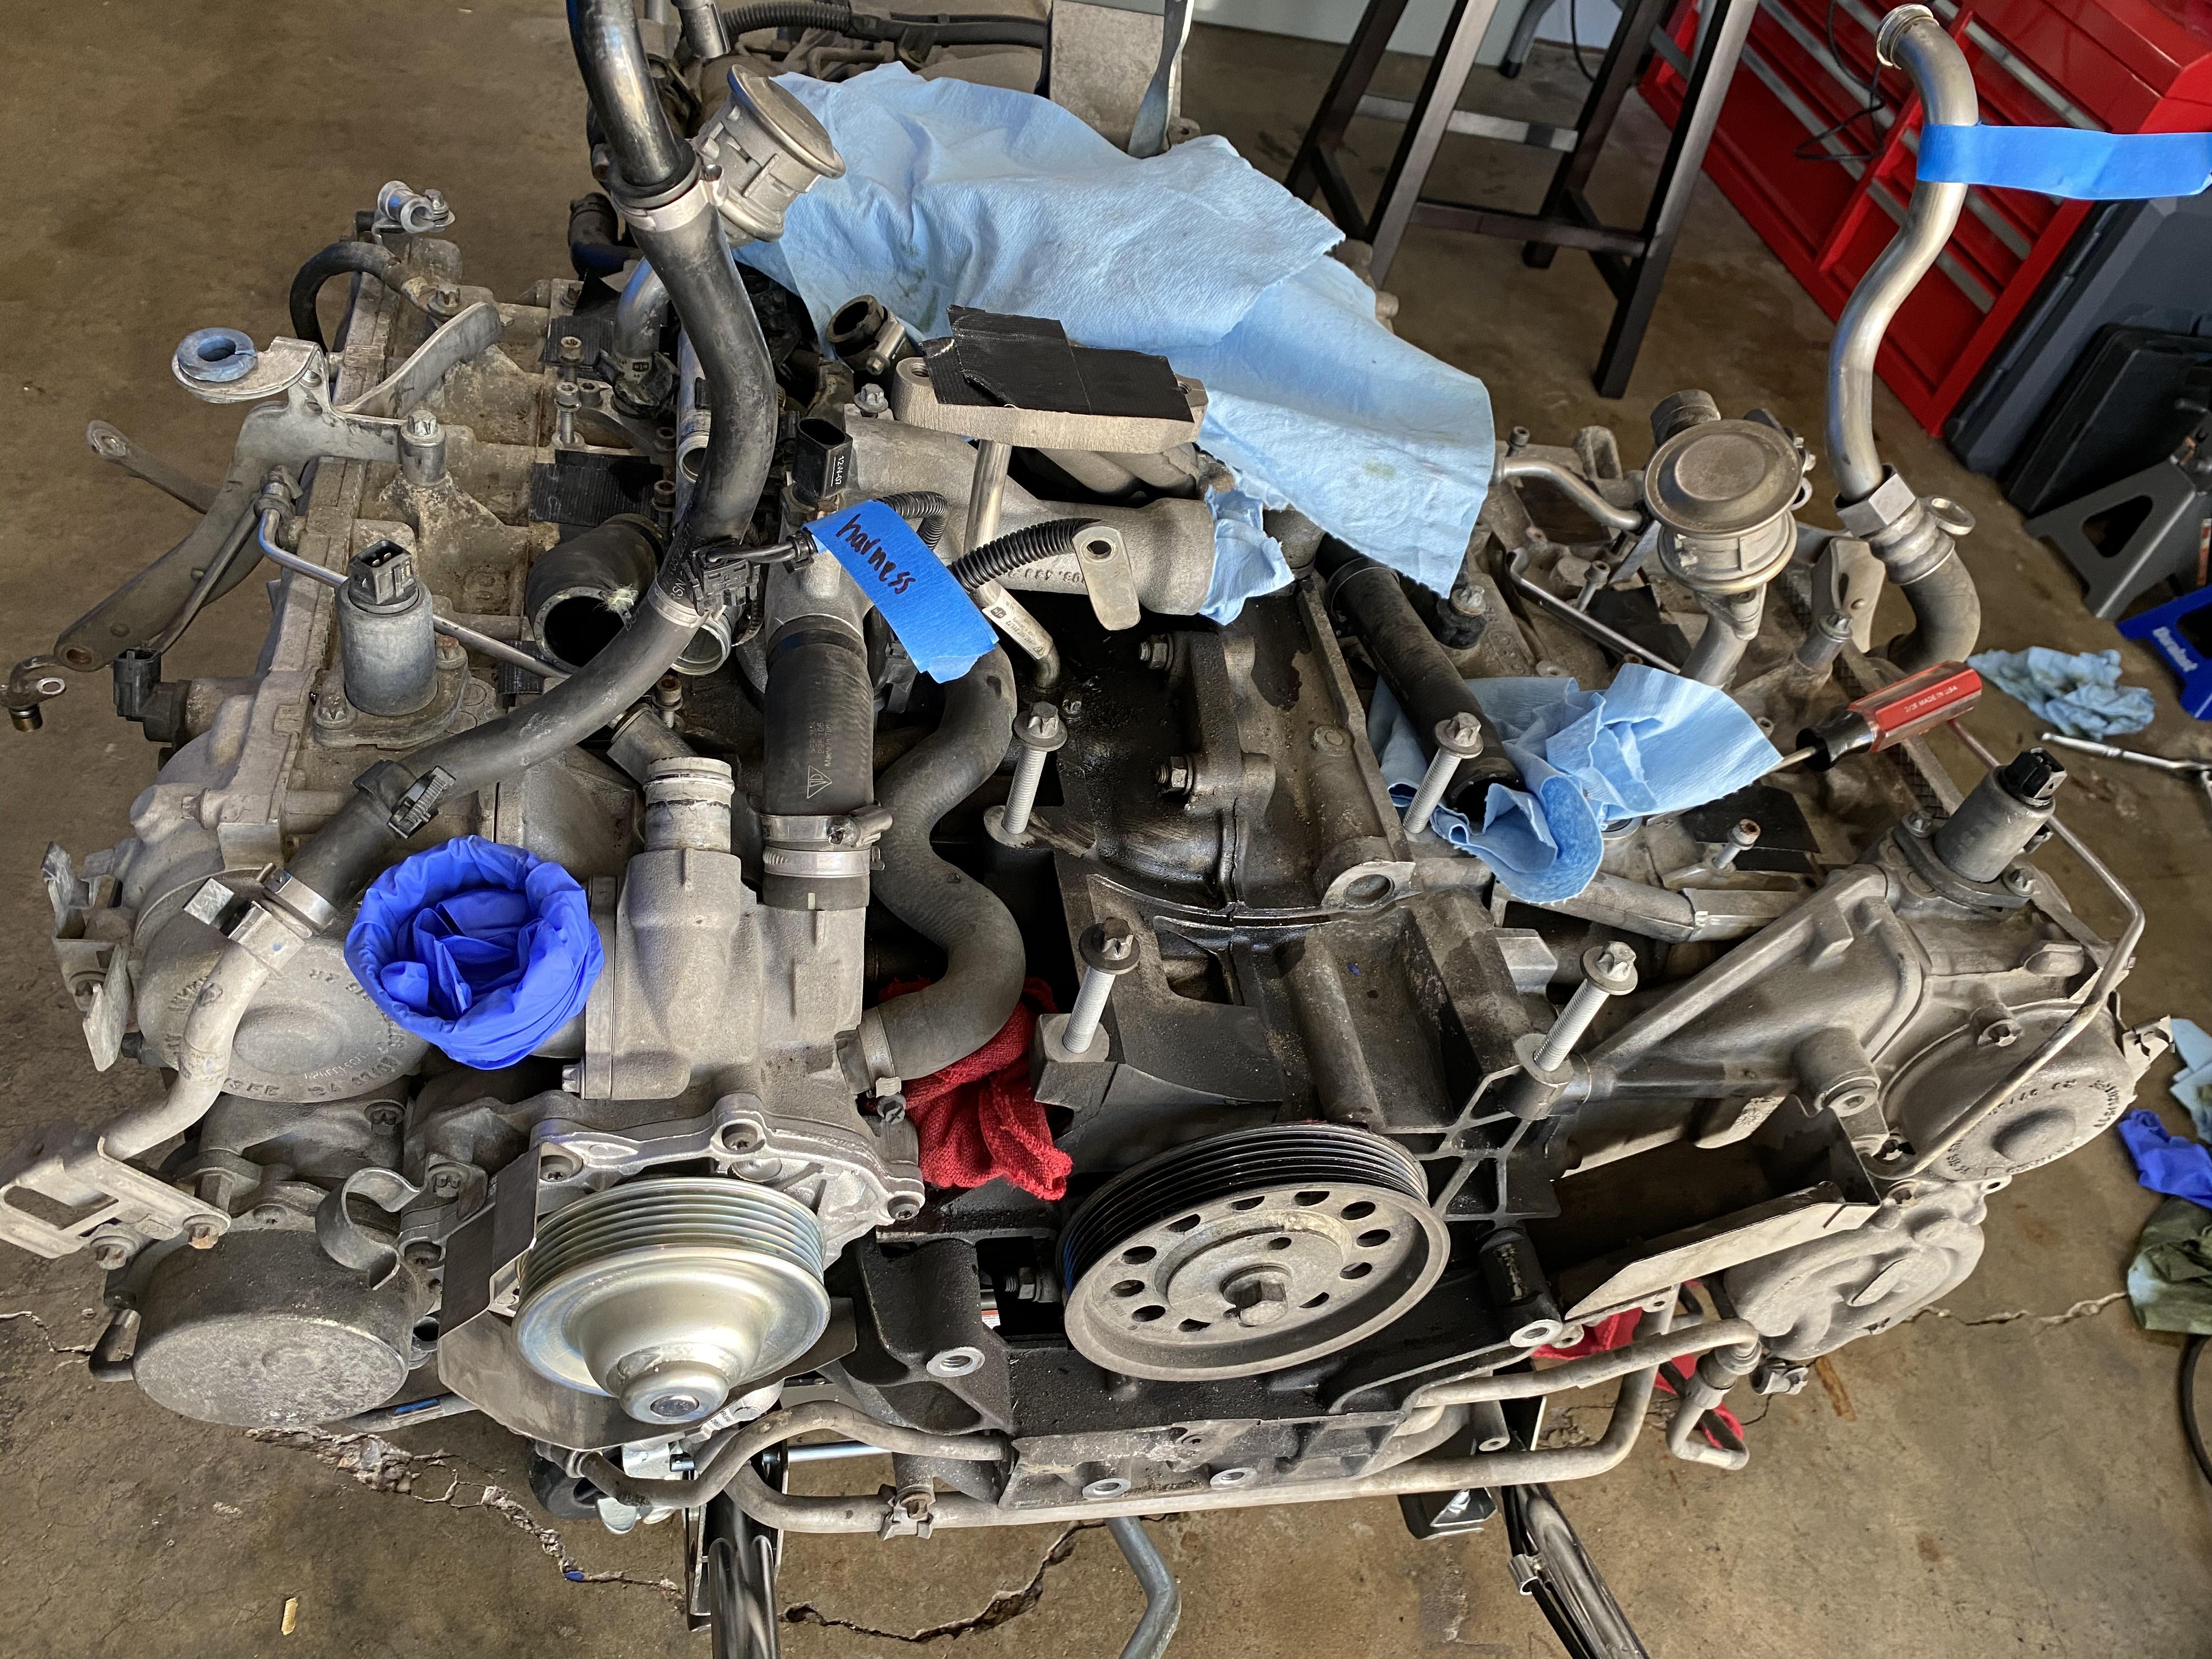
I tagged just about everything and took LOTS of photos to help with reassembly:
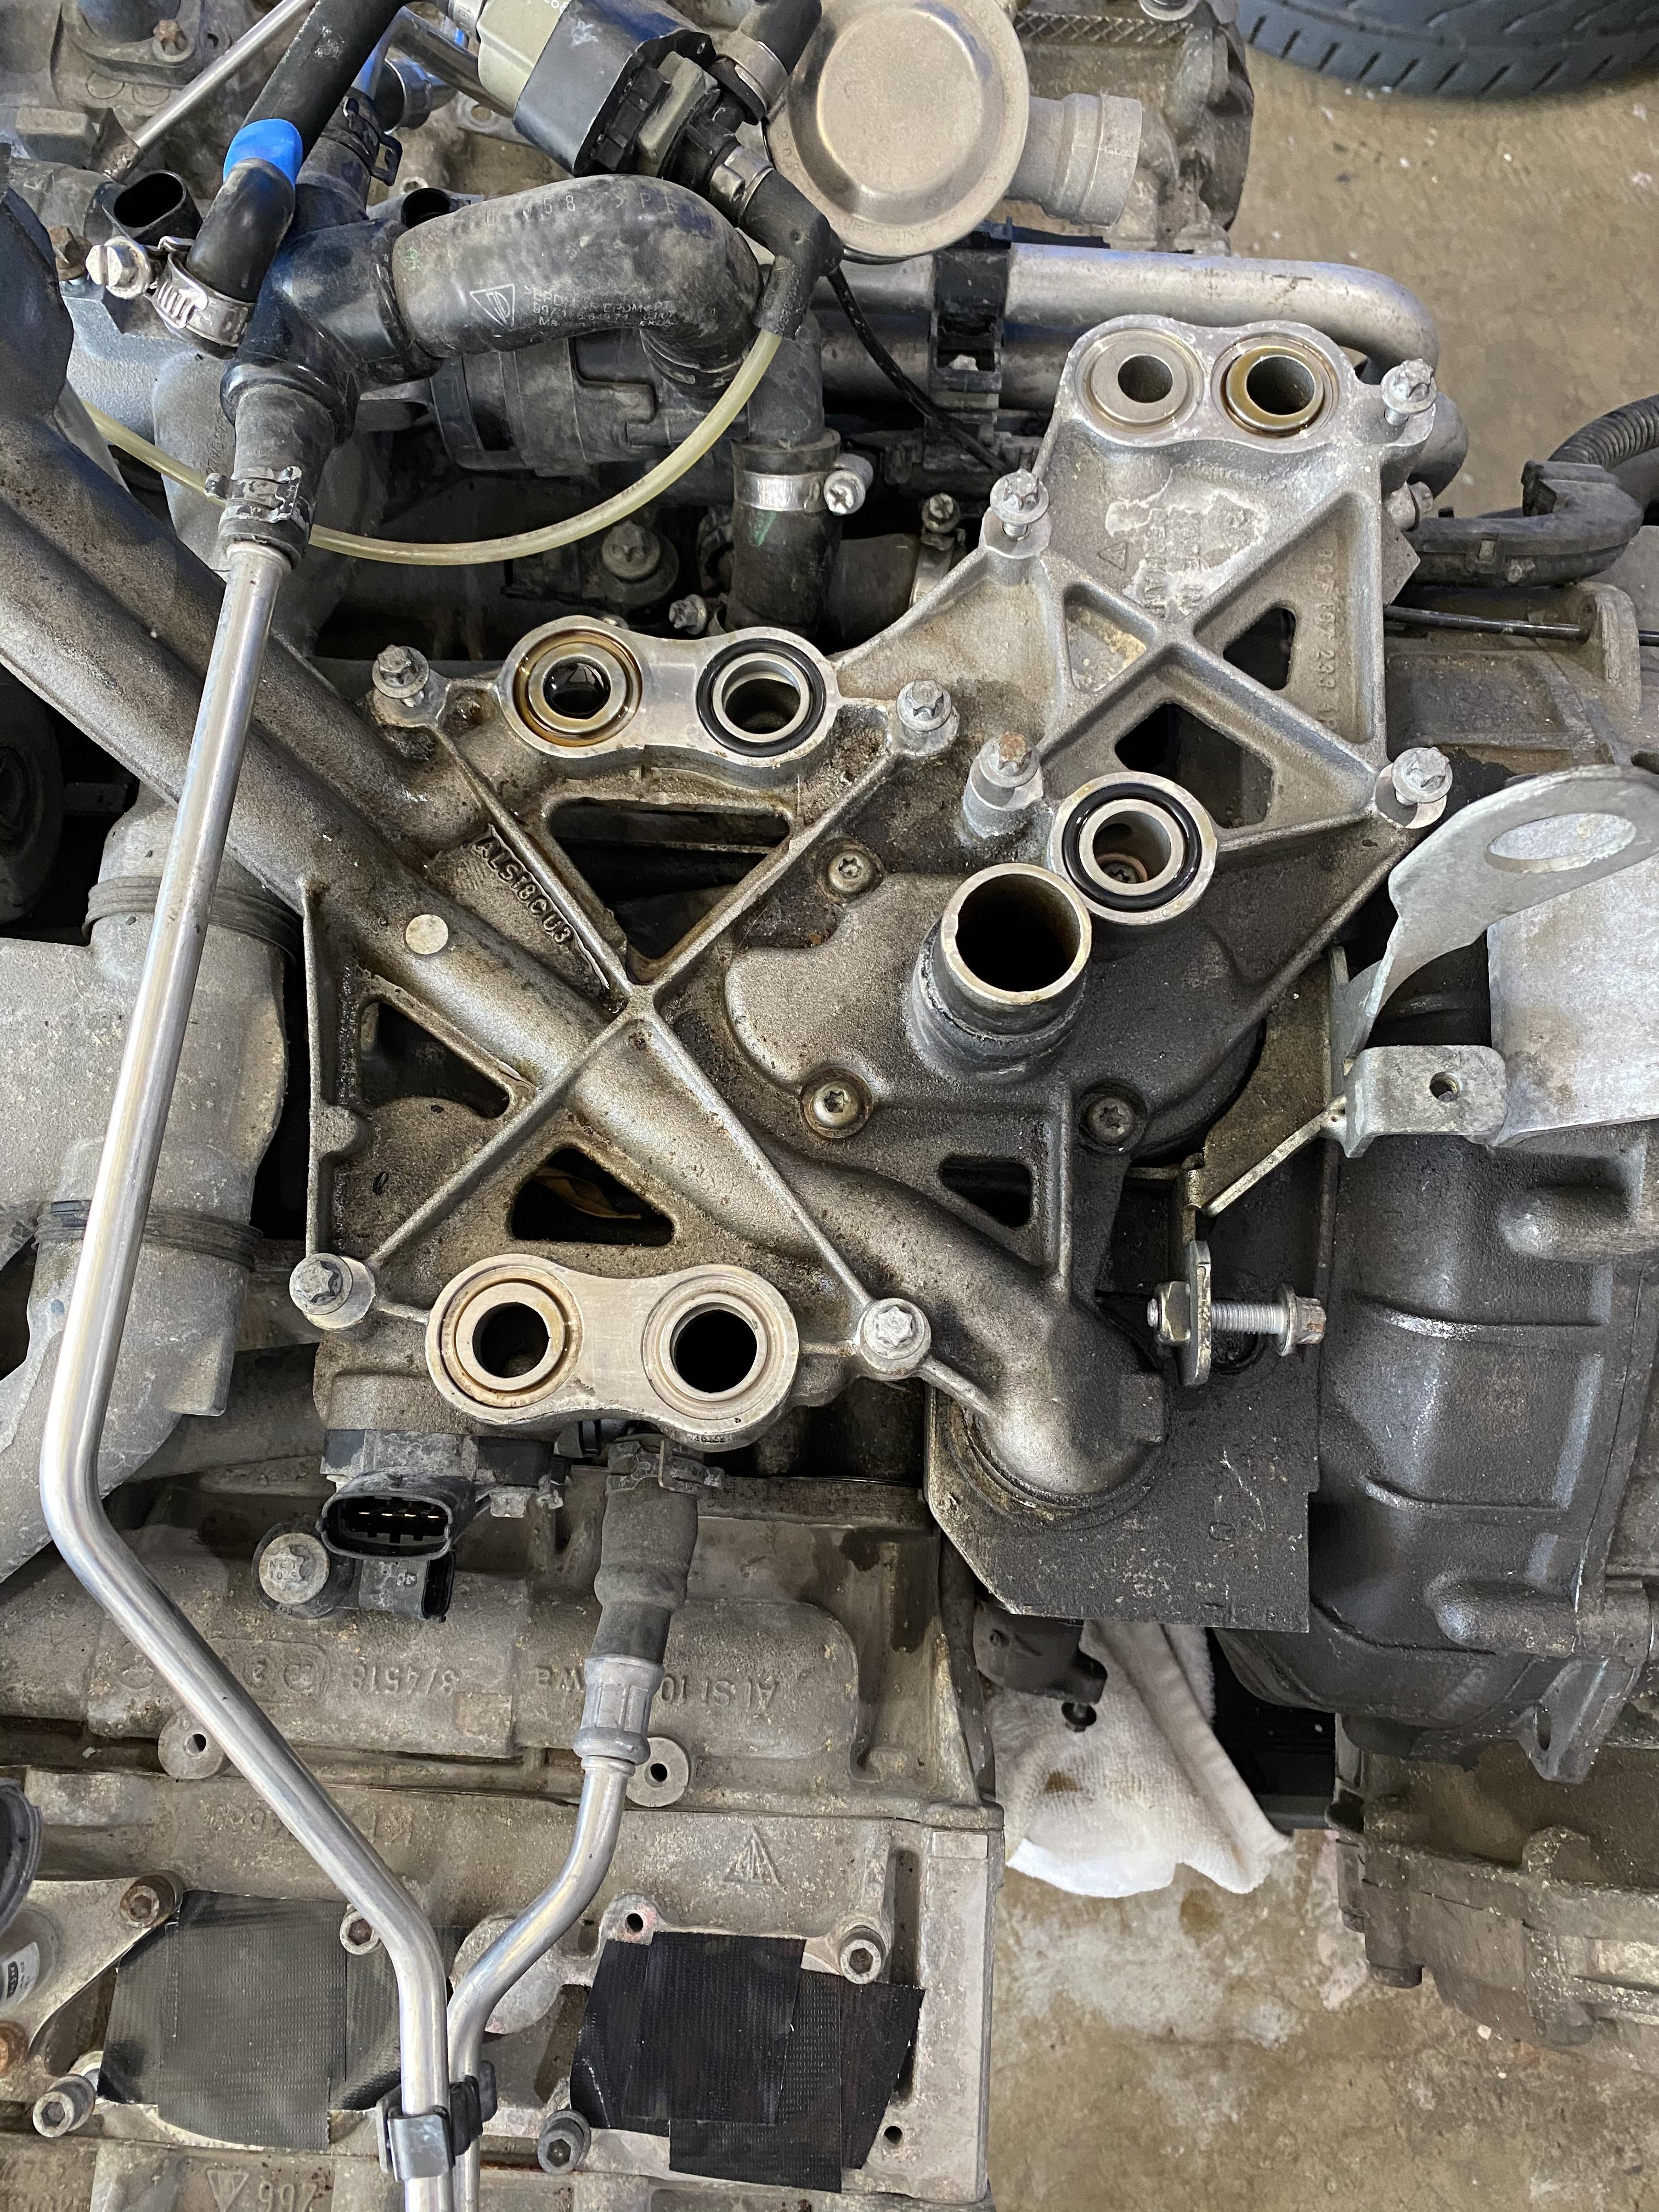
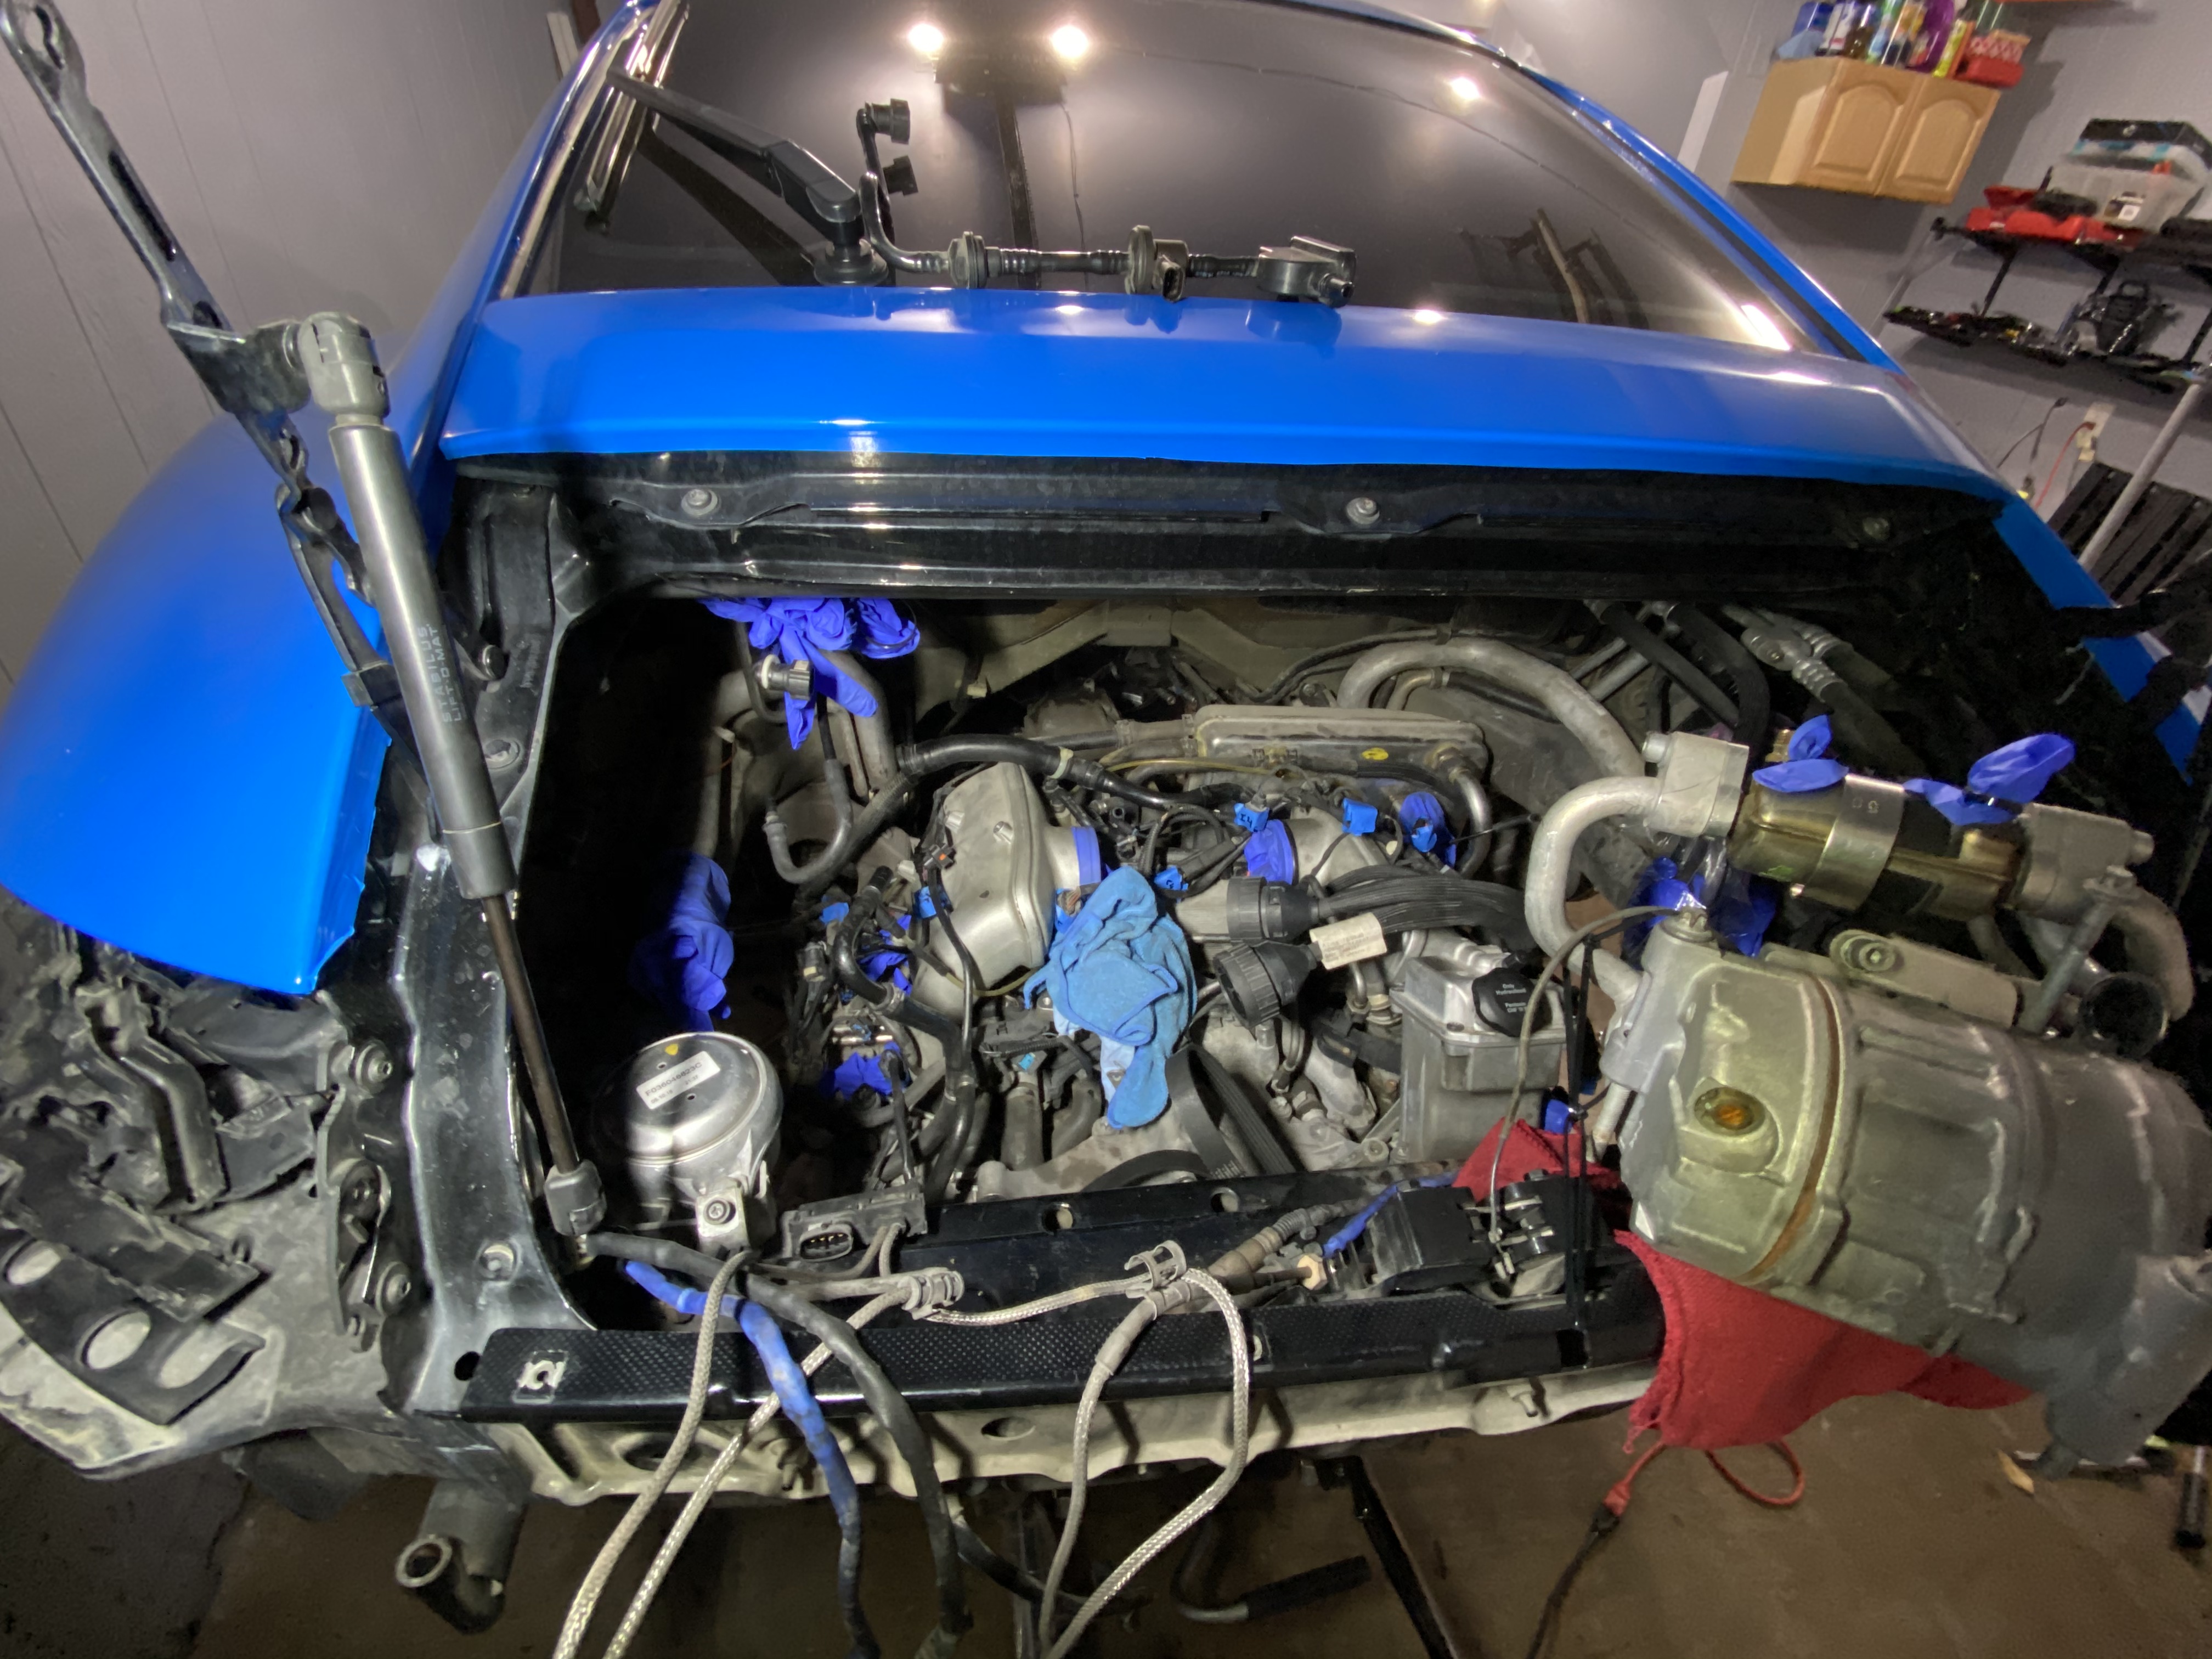
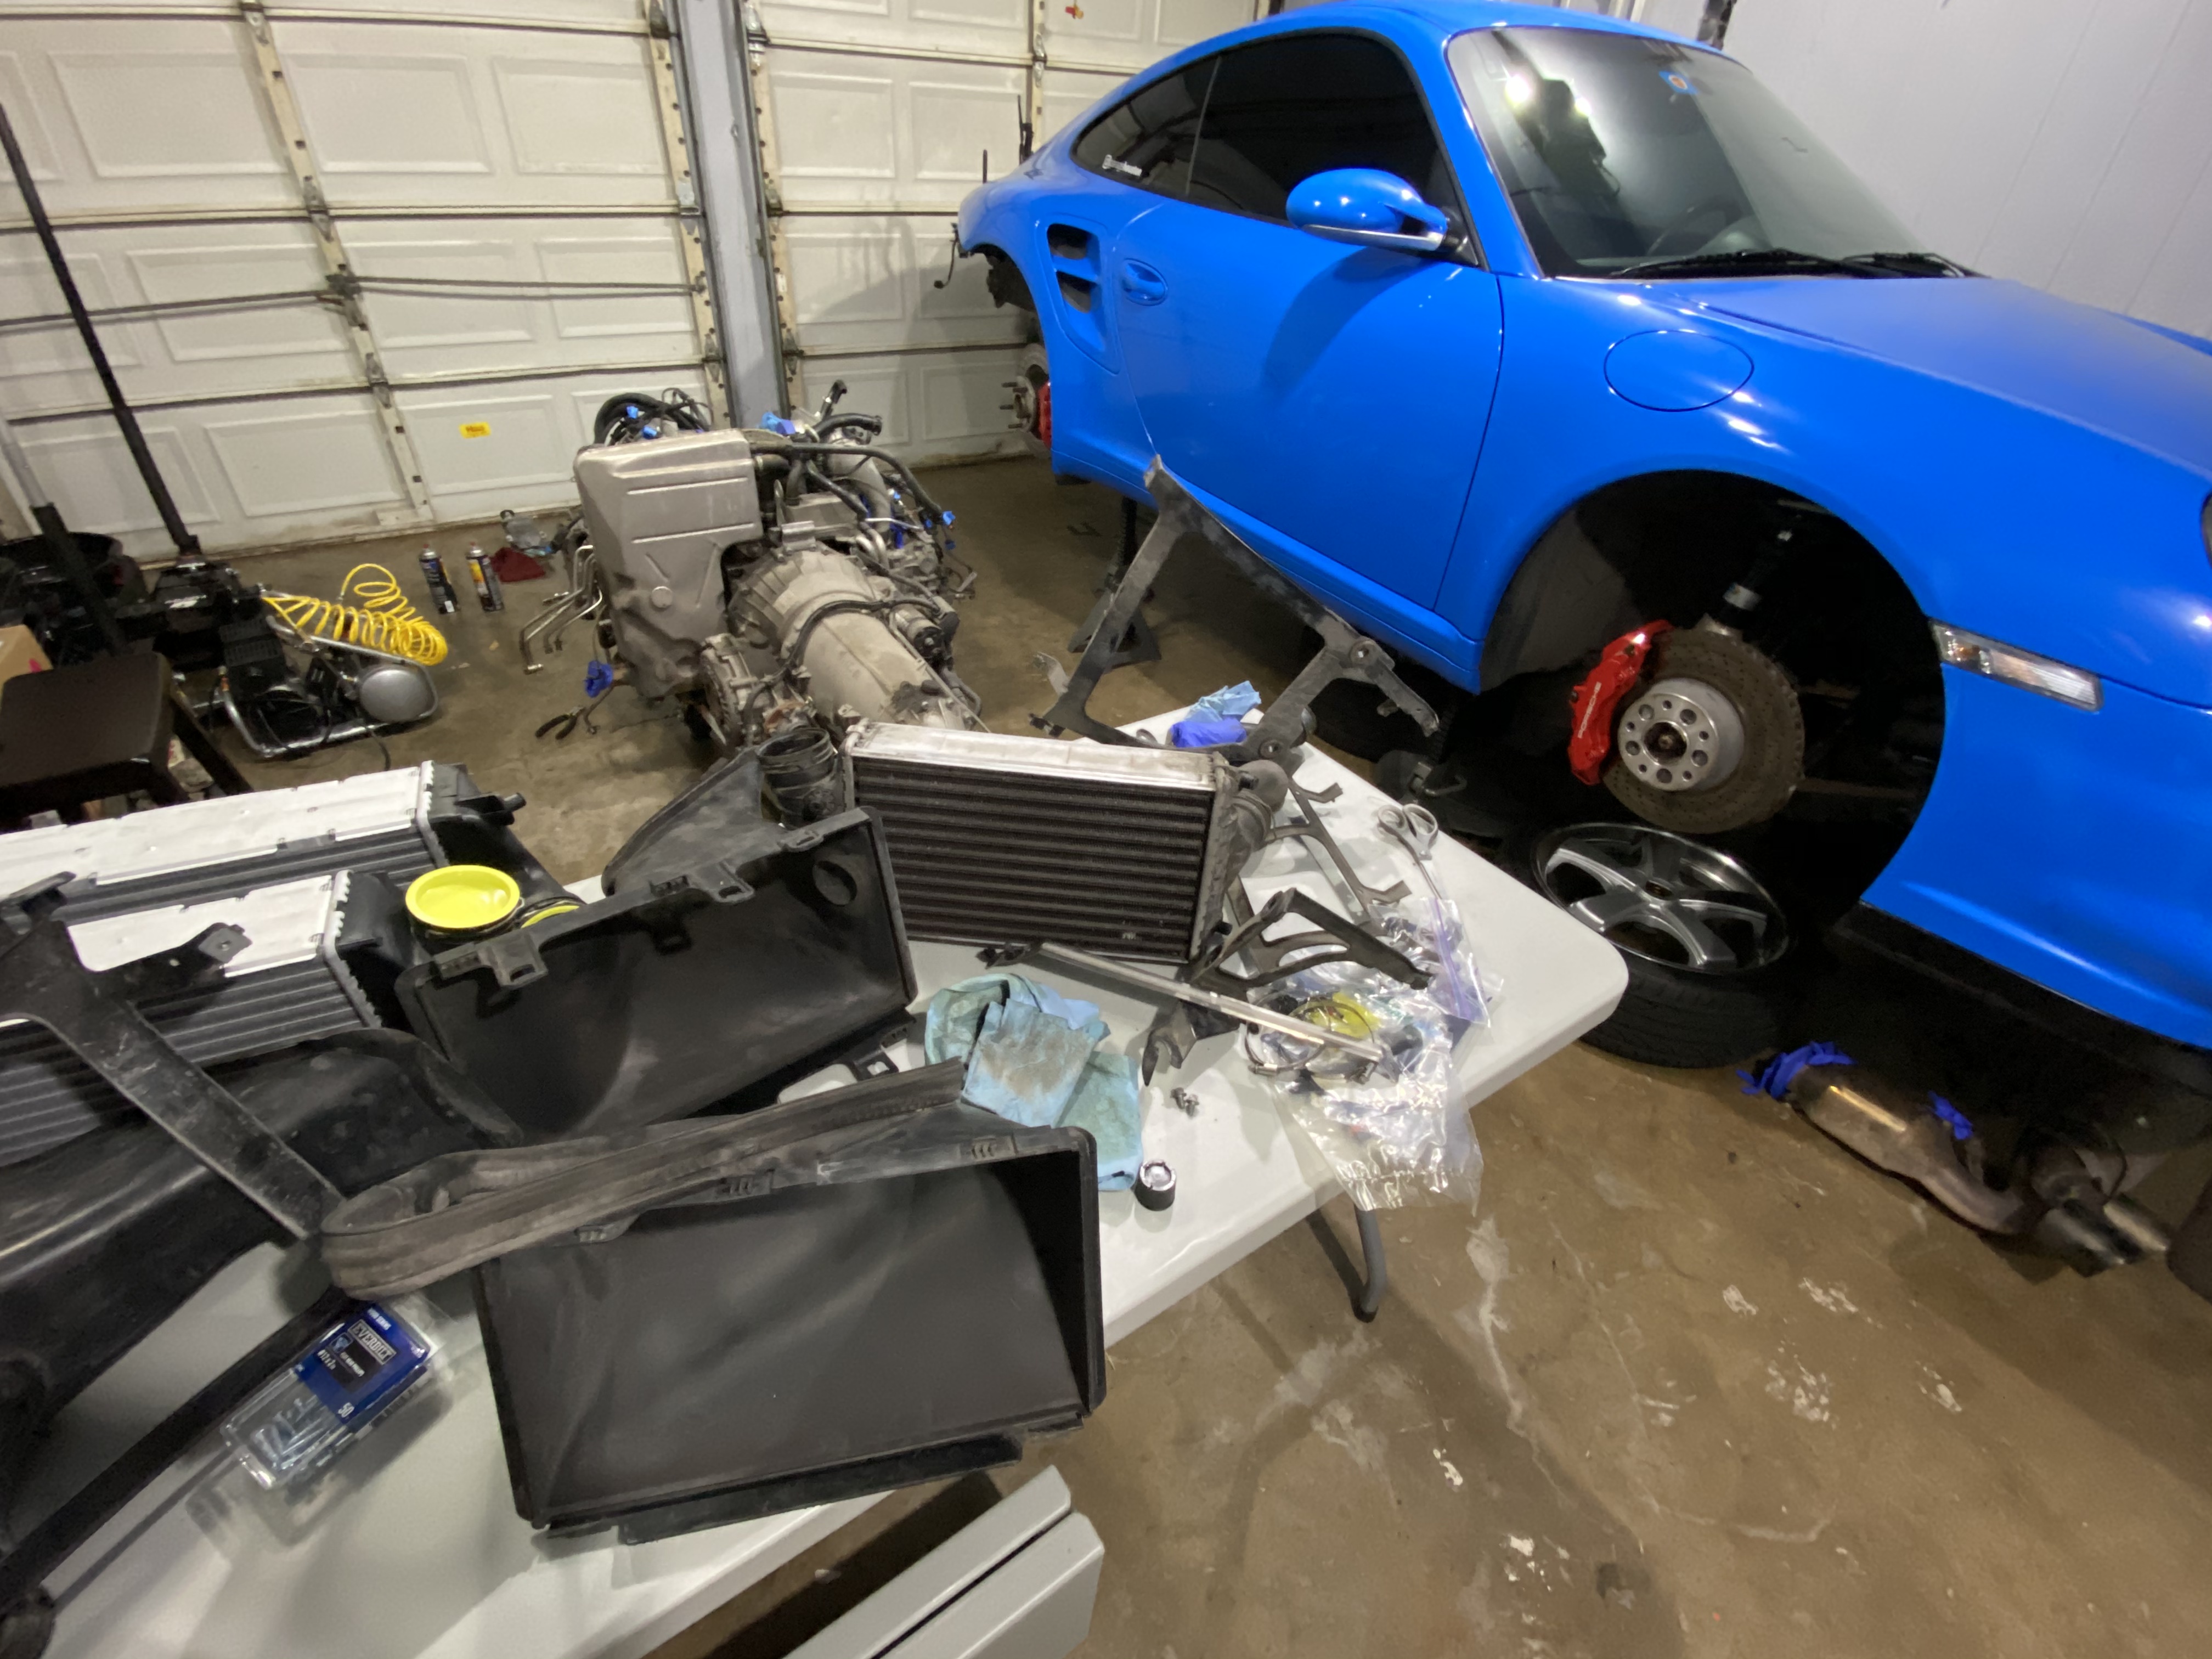
And this is how she sits today - intake runners and engine harness removed:
Since the engine is out for the coolant lines, I decided to also do a few upgrades. I ordered 63.5 mm VTG turbos, ID1050x injectors, DO88 intake pipes, and 997 GT2RS intercoolers. If I'm gonna go through this much trouble, I figure I might as well "send it."
My office for the next little while:
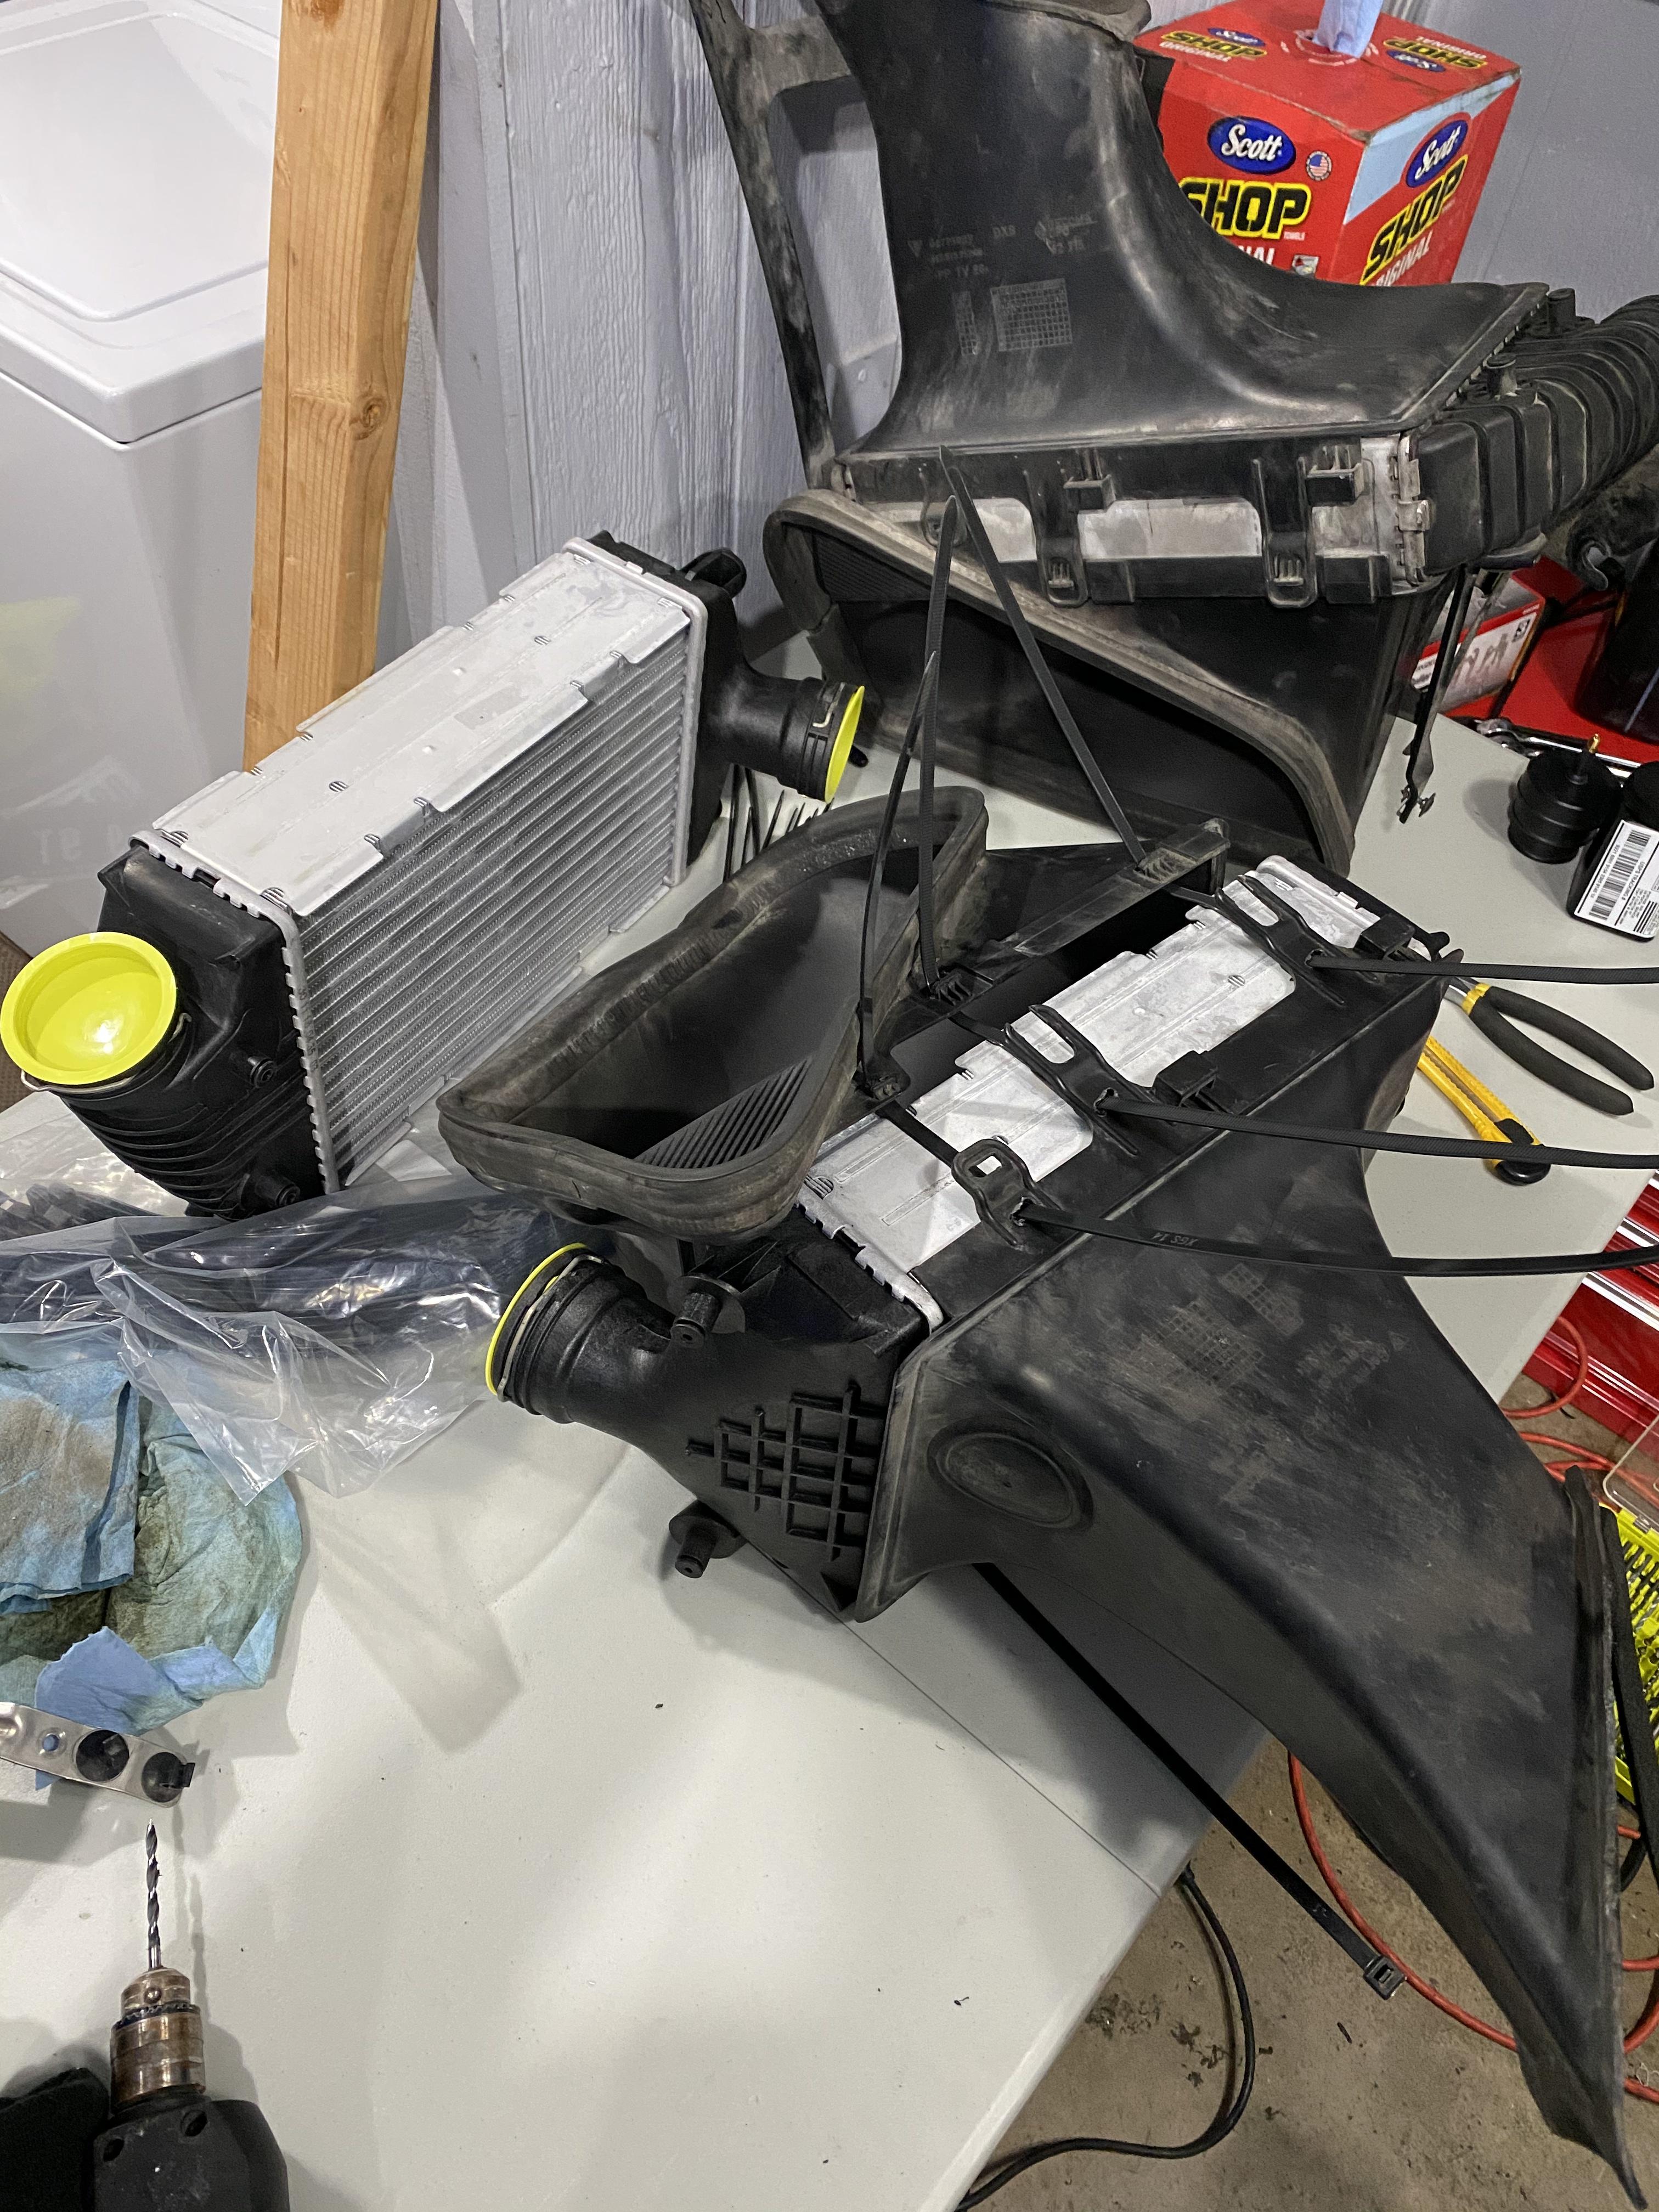
Got the GT2RS OEM ICs from Autodoc uk for about 750 bucks.
And then used TheRock's DIY guide to fit them into the standard IC housing
So now that the engine is out and I will be doing the coolant lines (SW elbows) with re-glue and pins... my question to the Mezger geniuses is what else should be done while the engine is out? I plan to replace the hoses and gaskets, but I think the turbo and oil lines look fine. No corrosion and they came off of the turbos pretty easily. I welcome any and all suggestions!
Sharkwerks metal coolant pipes should also be done. They are a bit of a PITA, have to pull the intake mani and dig down in there...but the factory ones are plastic and can crack. Engine out to fix if it happens. Perfect time to do turbo inlet pipes. They are inexpensive and make an improvement in flow to the turbos. I see your upgraded ICs....those are a huge improvement over the factory units. I assume you have replaced your fuel filter too?
The only other thing on my list was pinning the cams. But that requires a bit more work and access to a special tool.
In in general as far as actuators and sensors I take aid it ain�t broke don�t fix it deal but I did replace the aux coolant pump along with every other price of rubber I could find.
I made my my own rubber end for the piece your holding in your hand since they were nit currently available on planet Earth.
I did almost all the o rings. I left the oil/coolant manifold on the engine so I did not do those as they were dry.
I even did the big o rings on the big coolant pipes front and rear on the car as well as those little fittings on the top of the L & R rads.
There were some metro seals on the lower coolant lines and the oil tank that were replaced.
Feels awesome right? I felt great when I removed my engine. Ok check the distance between the pulse sensor and flywheel. This is the adjustment that needs to be done to prevent the 4K overshoots at start up. Replace both coolant lines that go from the elbows you are replacing to the turbos. Two of them. Will you be changing the clutch, PP and flywheel? Get Kevin�s stuff. Clean the engine. Check the slave and accumulator. Both water pumps lime Ed recommended.
Thanks for the input, fellas. It's a tiptronic... at least there's less work involved Same 722.6 as in my W210 E55.
I already have the SW elbows on order. Should be coming in soon. Does anyone know how the oil cooler manifold comes off from the block? Pretty sure this is where my leak is coming from... maybe this is ultimately what was contributing to my CELs.
EDIT: It's just 4 T30 torx, the return oil line (2x E10) and 1x E10 for the oil fill pipe.
I am thinking about pinning the cams - in fact, I would love it, but I would need access to the timing tool. Anyone renting one out by any chance? I checked my camshaft deviations with a durametric about a month ago:
Bank 1: -4.34
Bank 2: -2.39
Here's how we're sitting now:
New turbos on their way!
And bonus pic of the #92 RSR at COTA from last weekend (Shot with a Sony mirrorless and 85 mm lens, photo courtesy of my buddy). It was my first time at a LeMans race and I had a blast.
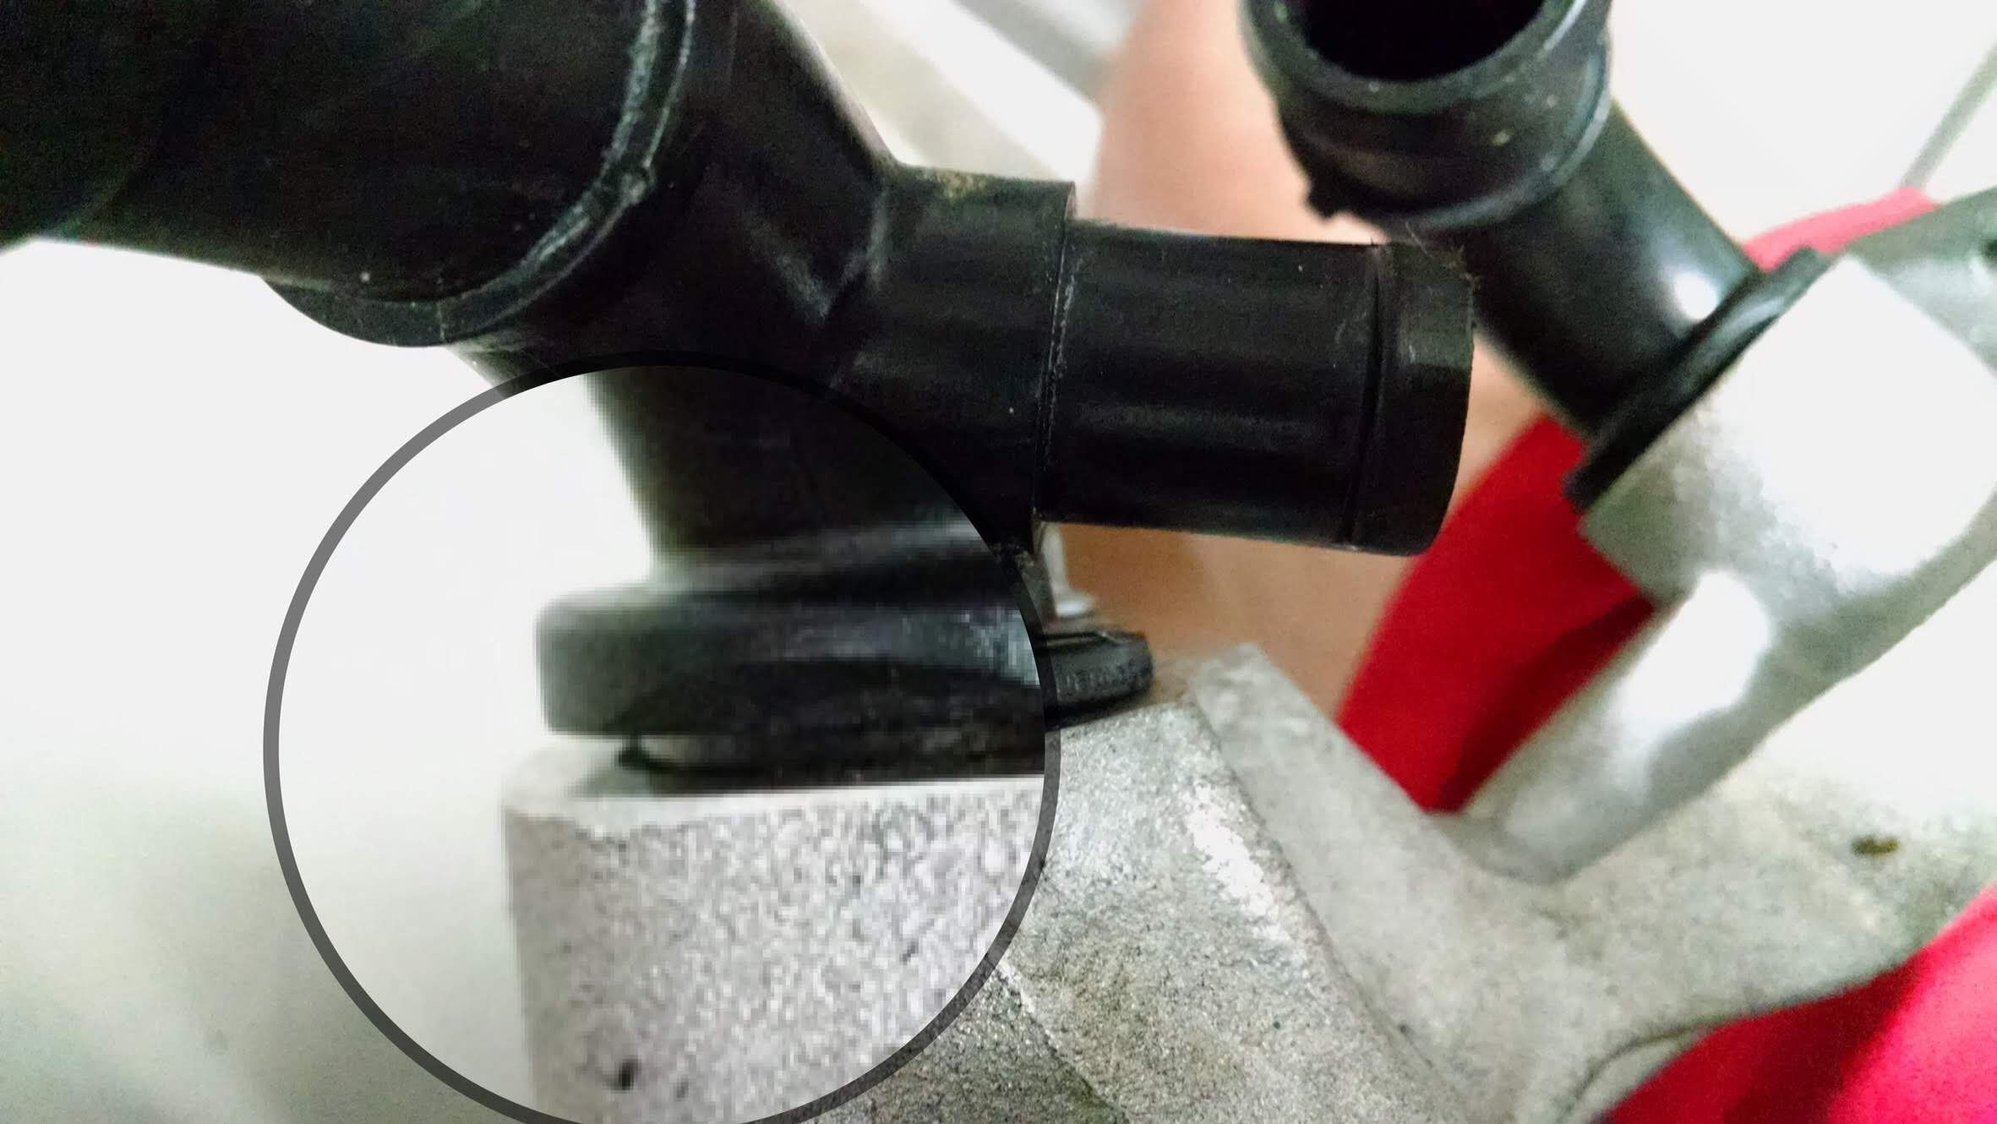
Use the adhesive shown to mate your housing to the block. Zoom in and get the part. Also, replace all the O rings and dress with the Porsche or equivalent dressing.
My housing as found was misting slightly leaking from the plastic elbow you see. When I took it off, it was slightly broken. See picture. Cheap part by Porsche that�s $30 but to the unlucky it�s a 4-7k job!
Use the adhesive shown to mate your housing to the block. Zoom in and get the part. Also, replace all the O rings and dress with the Porsche or equivalent dressing.
thanks!! Do you have the part number for the sealant? I zoomed in and don�t see a part #

 02-28-2020, 11:37 AM


 Same 722.6 as in my W210 E55.