
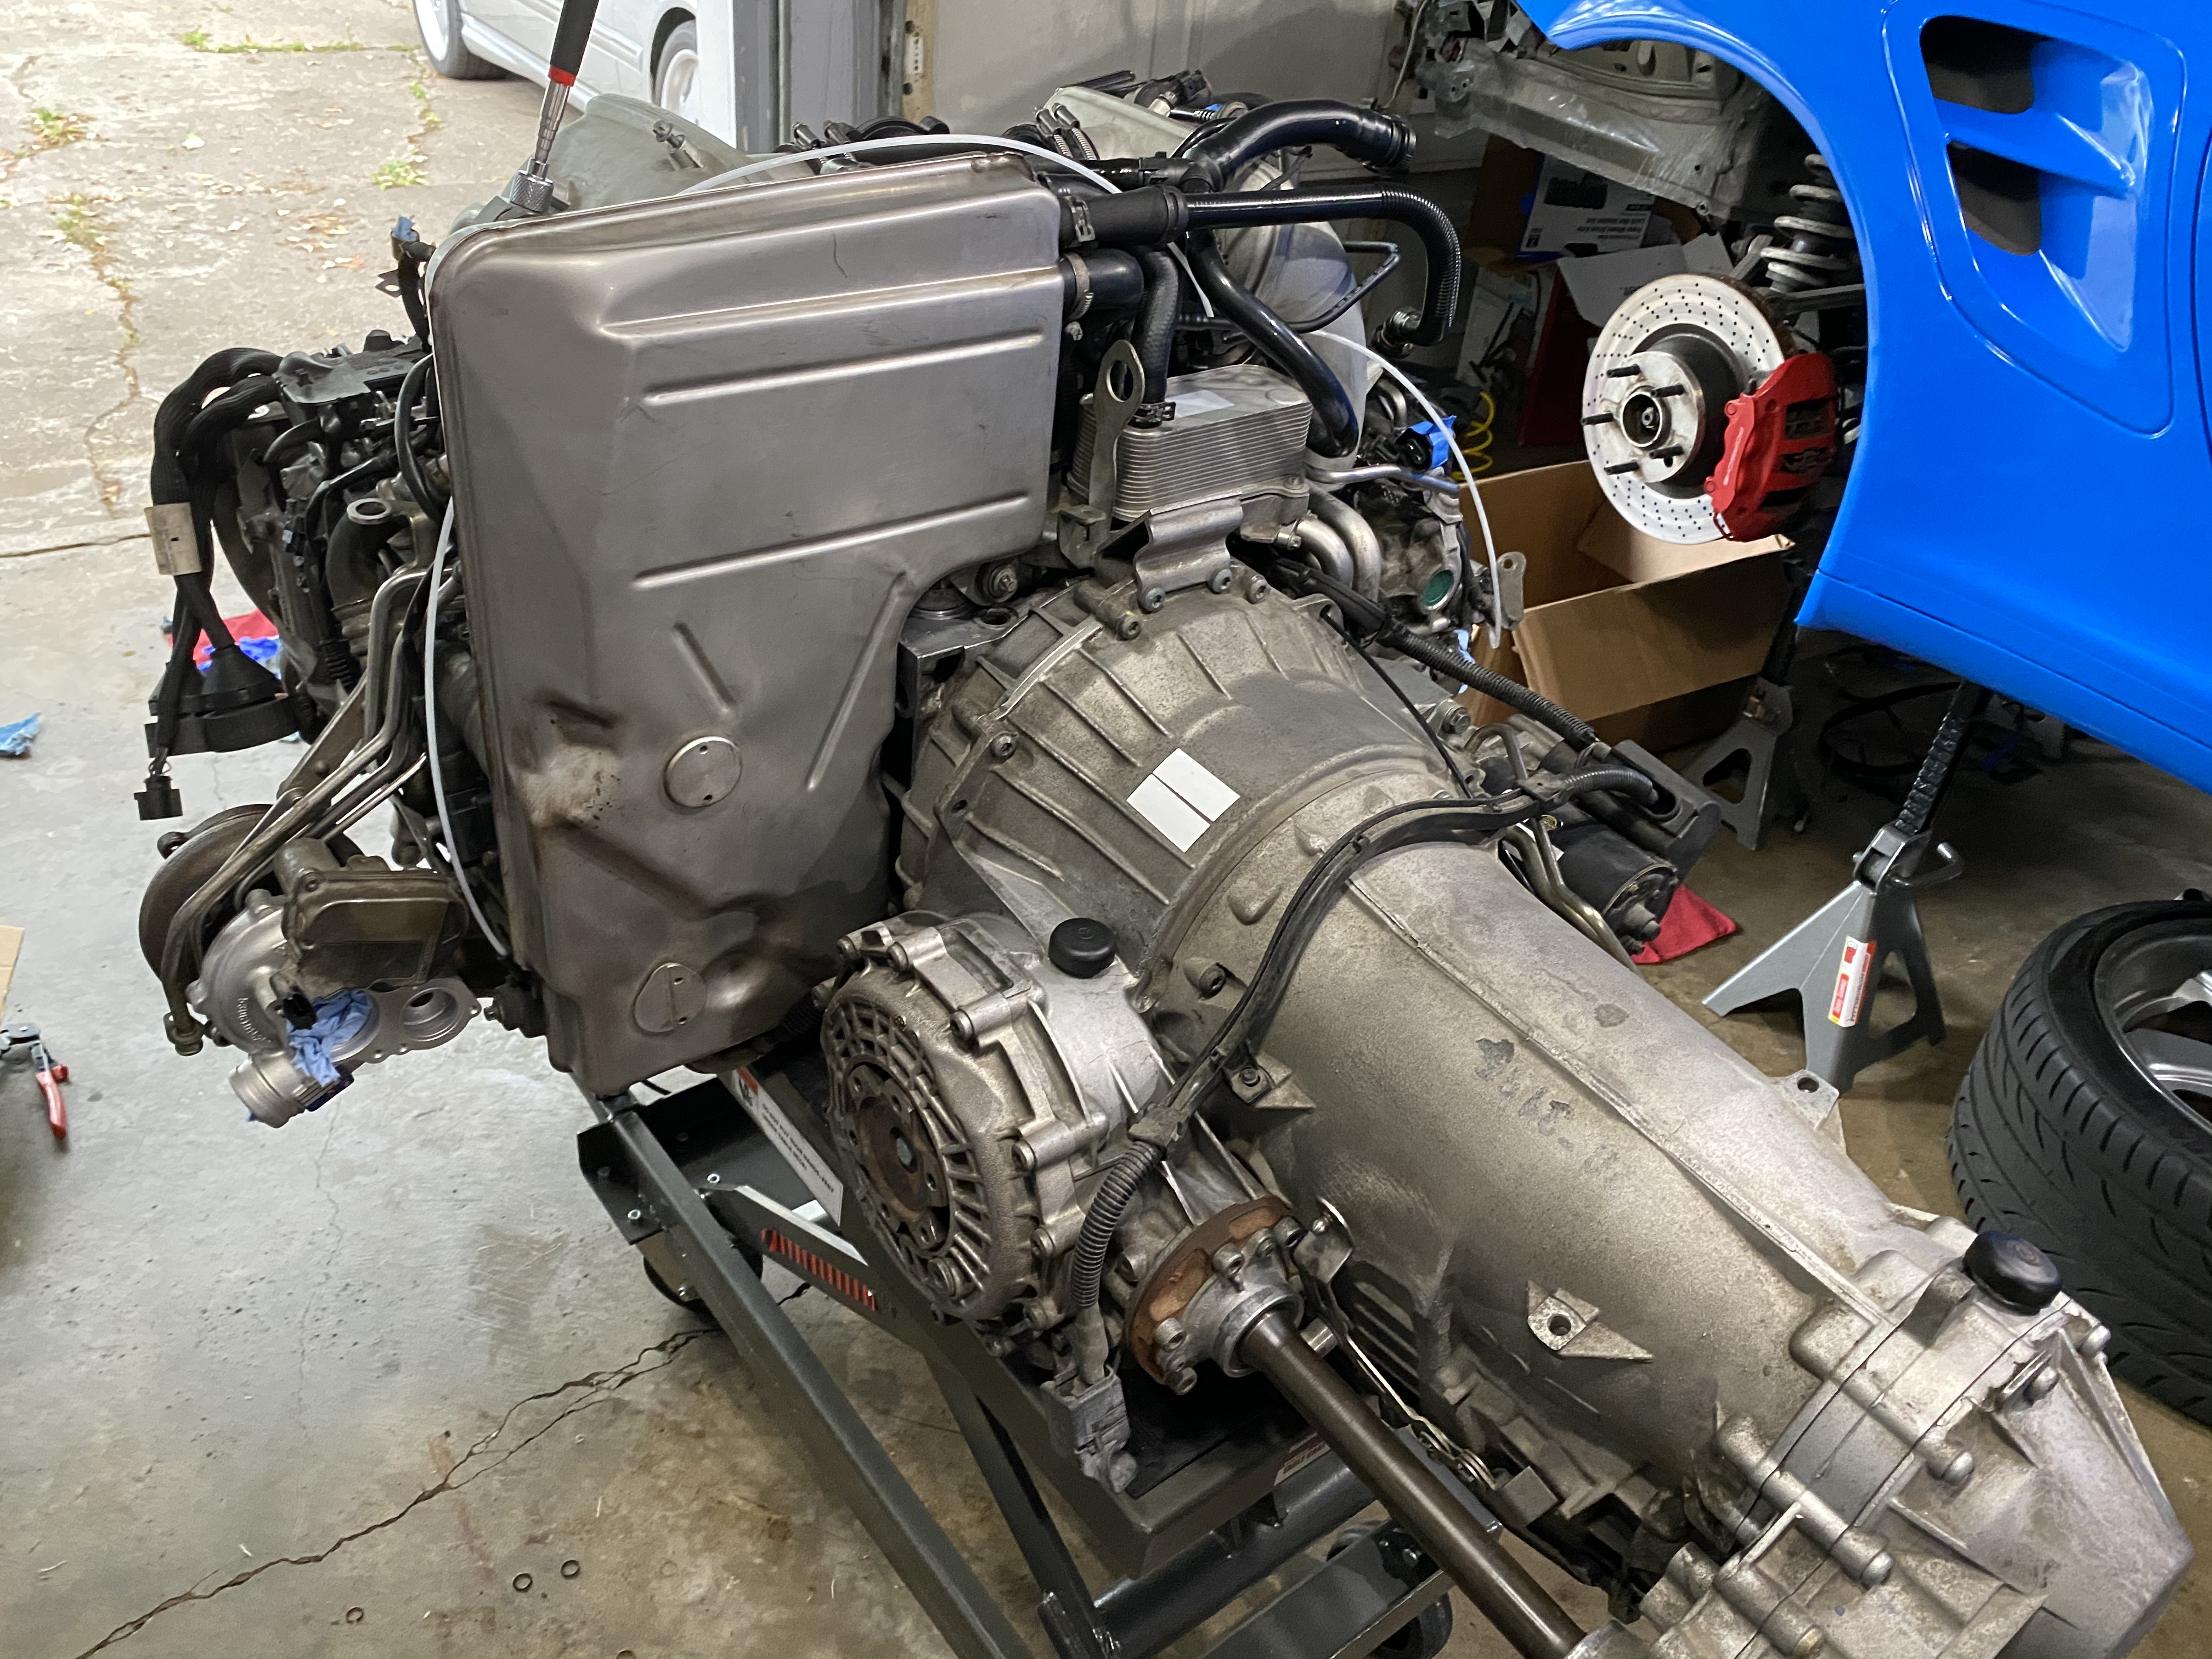
The engine is out - now what?
 03-20-2020 | 12:31 AM
#61
Thread Starter
Three Wheelin'
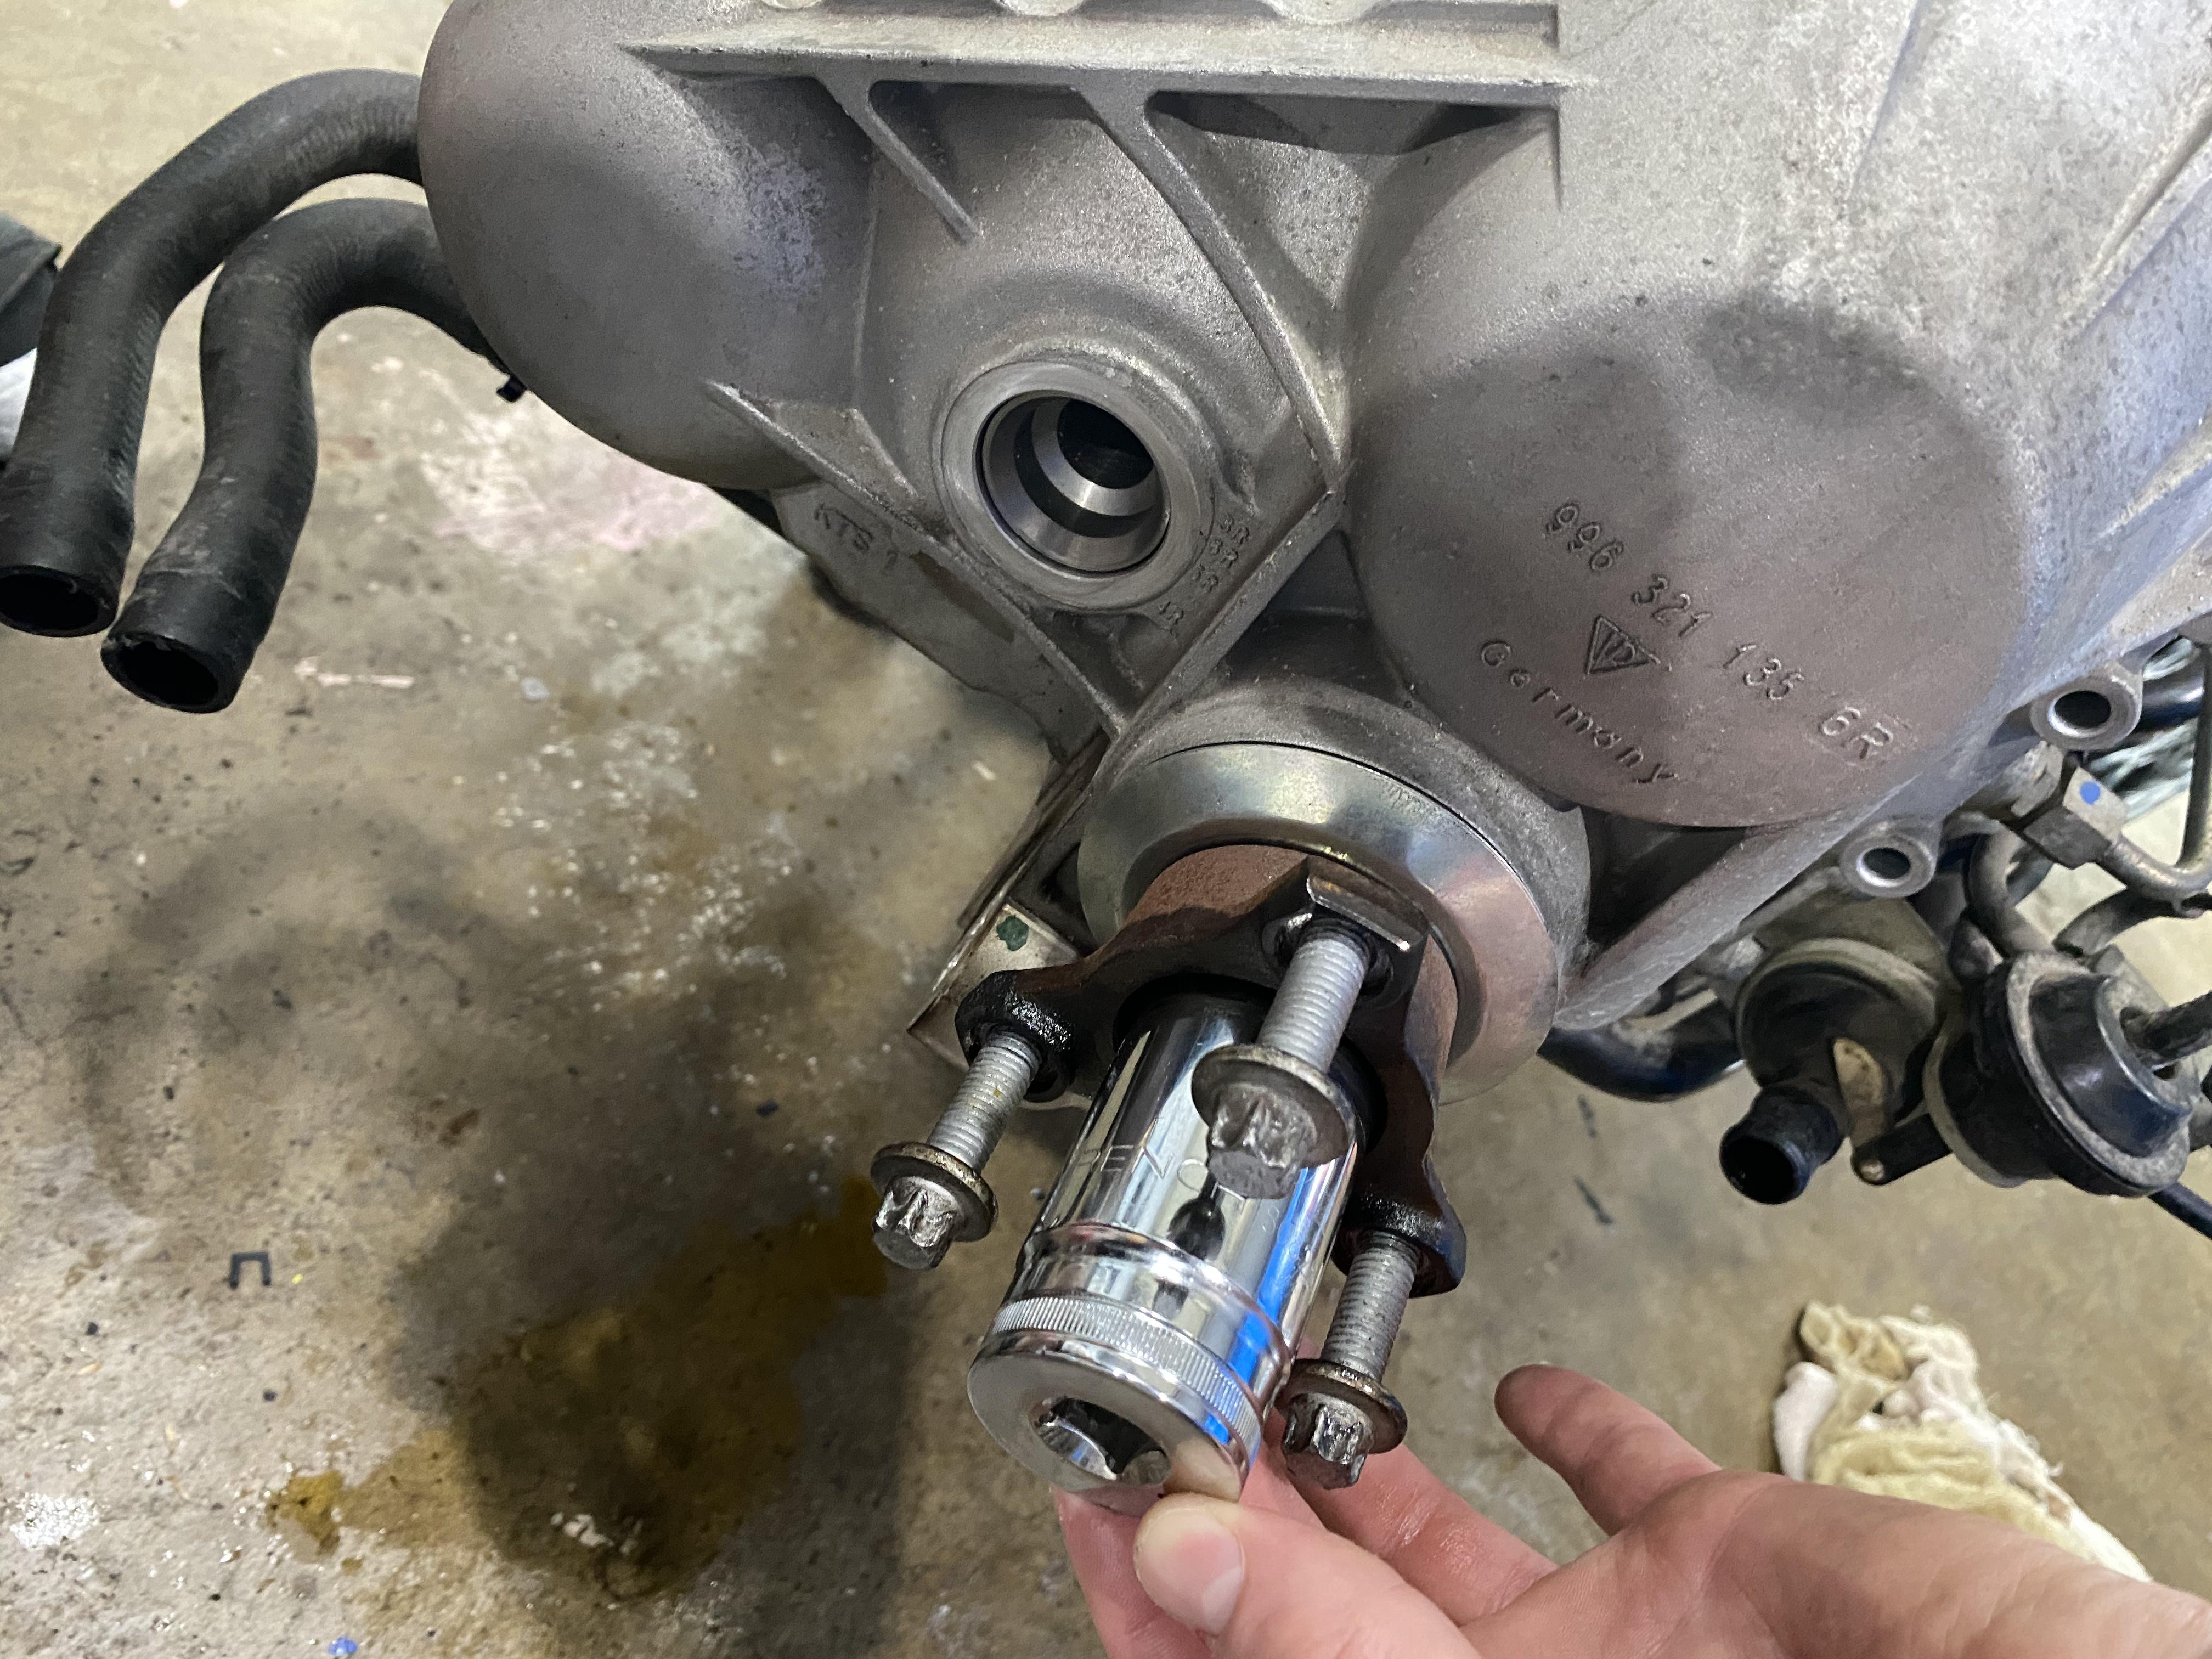
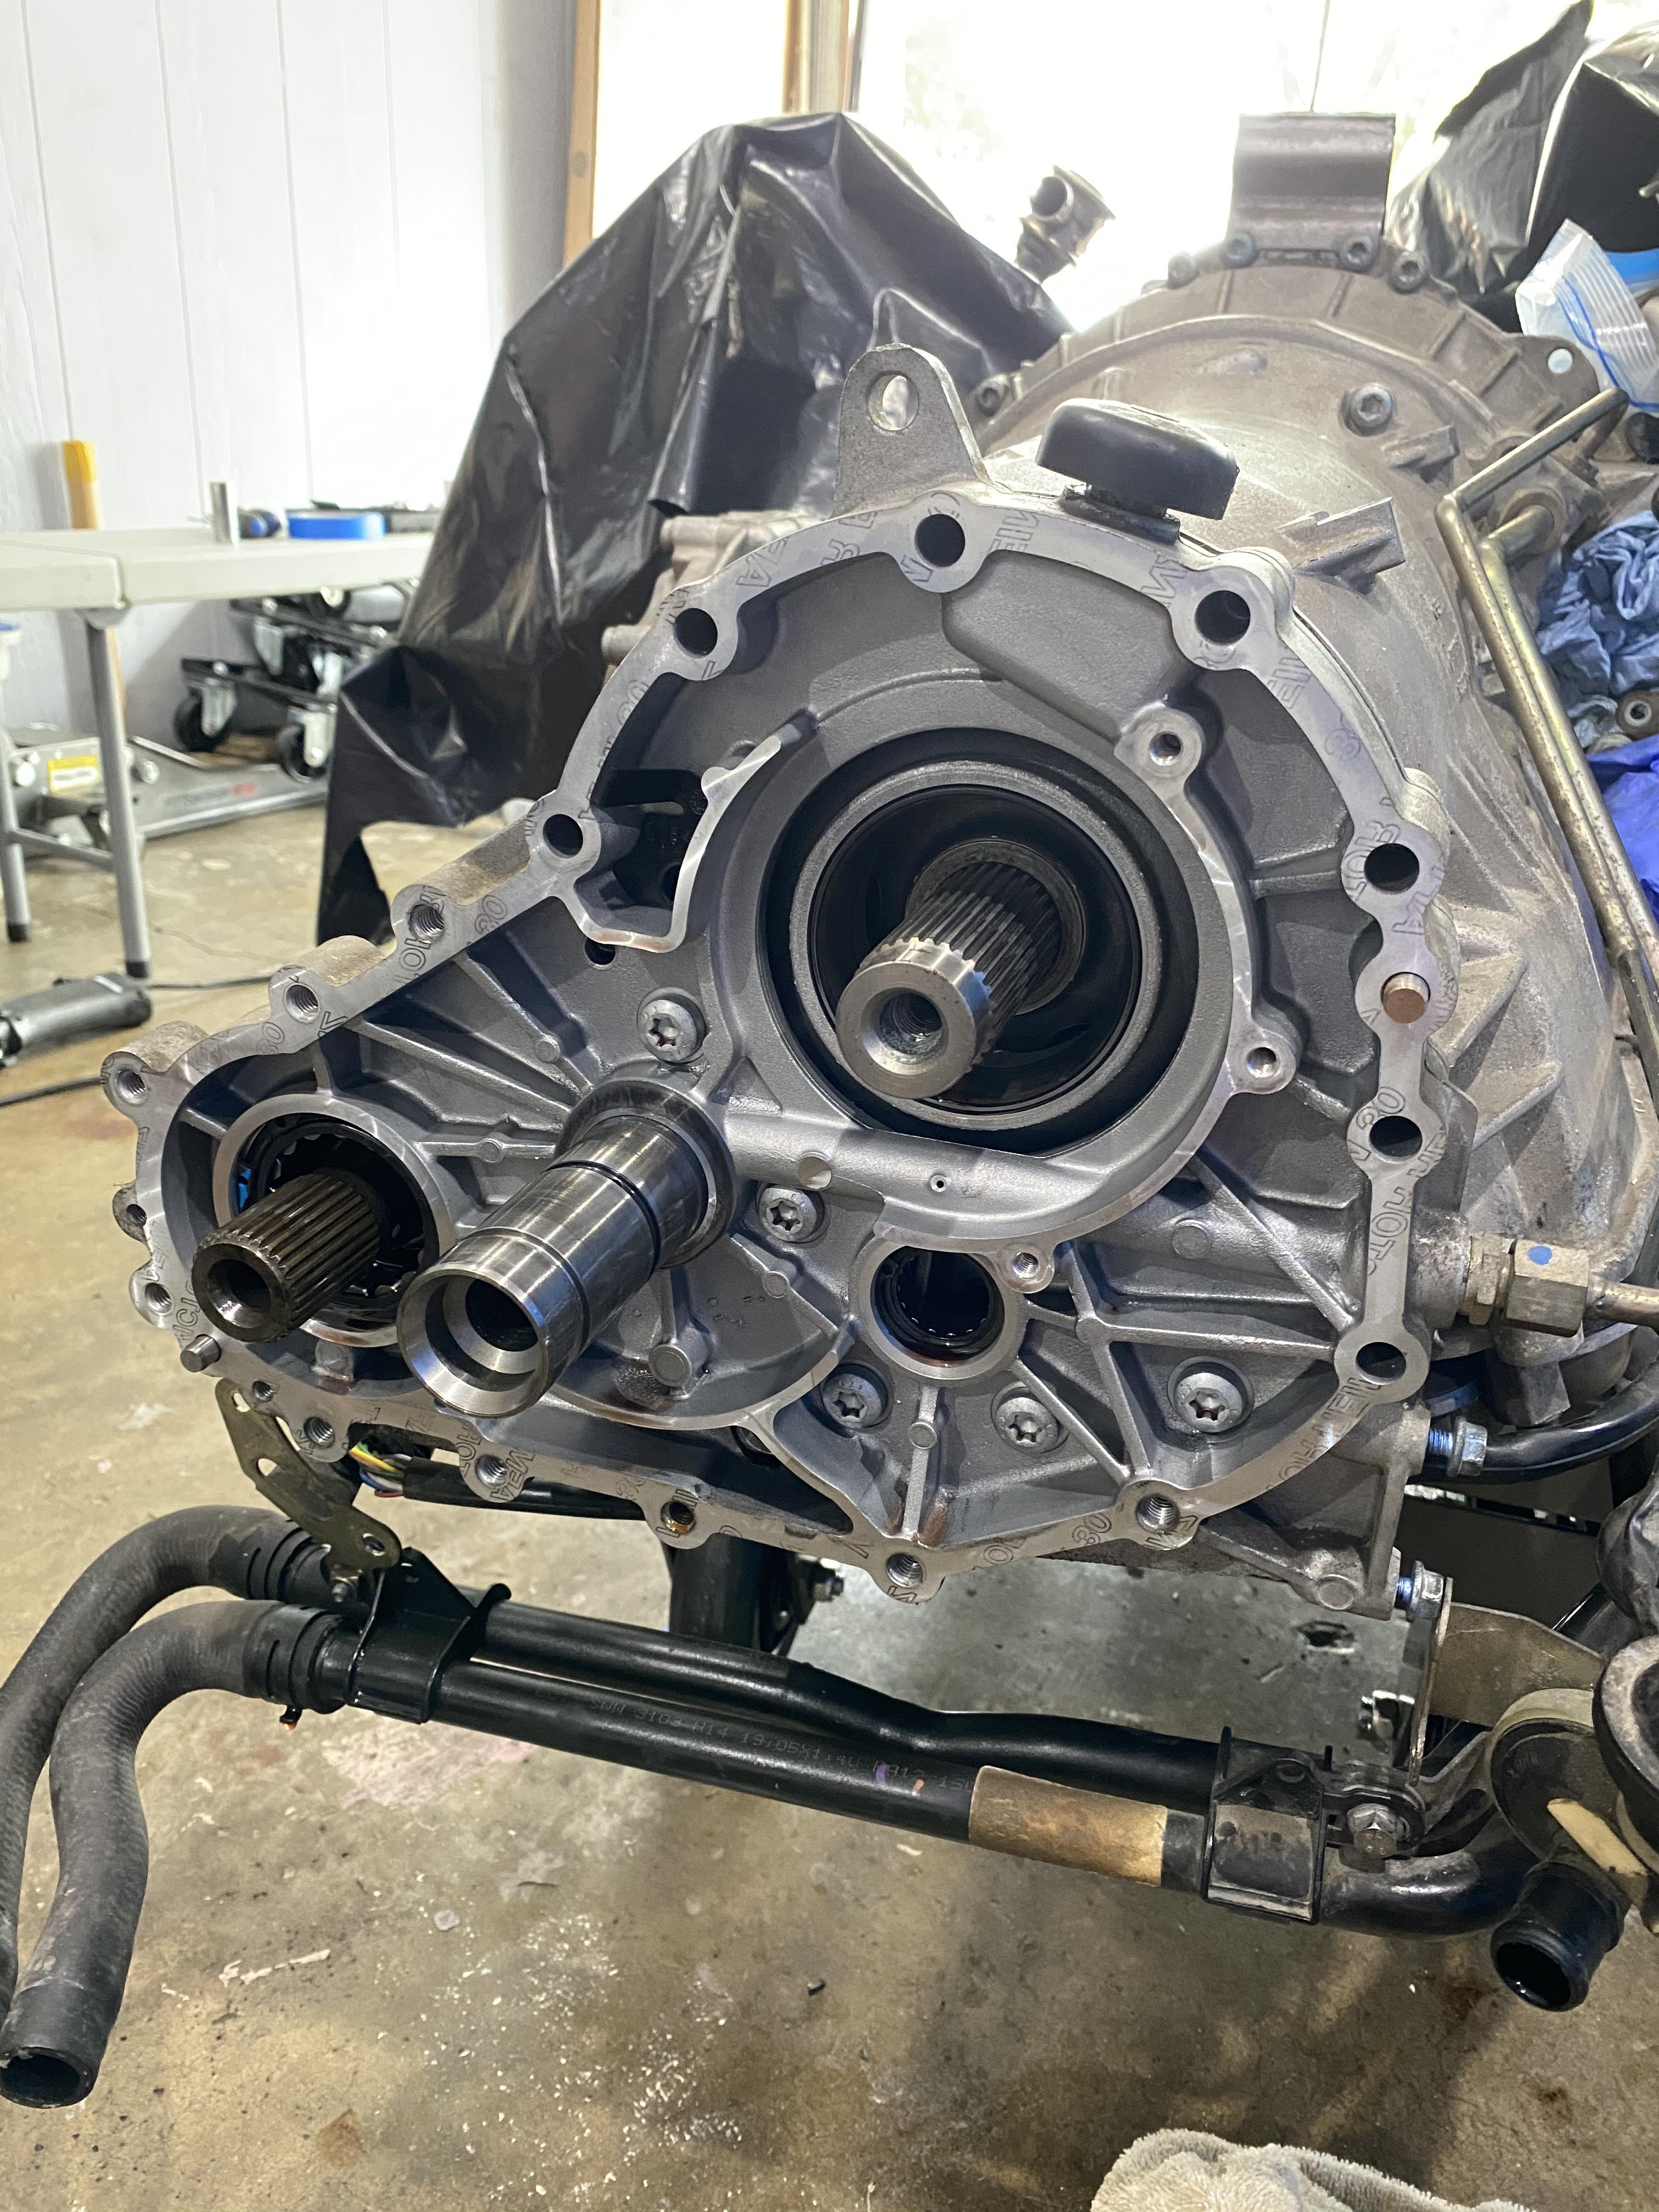
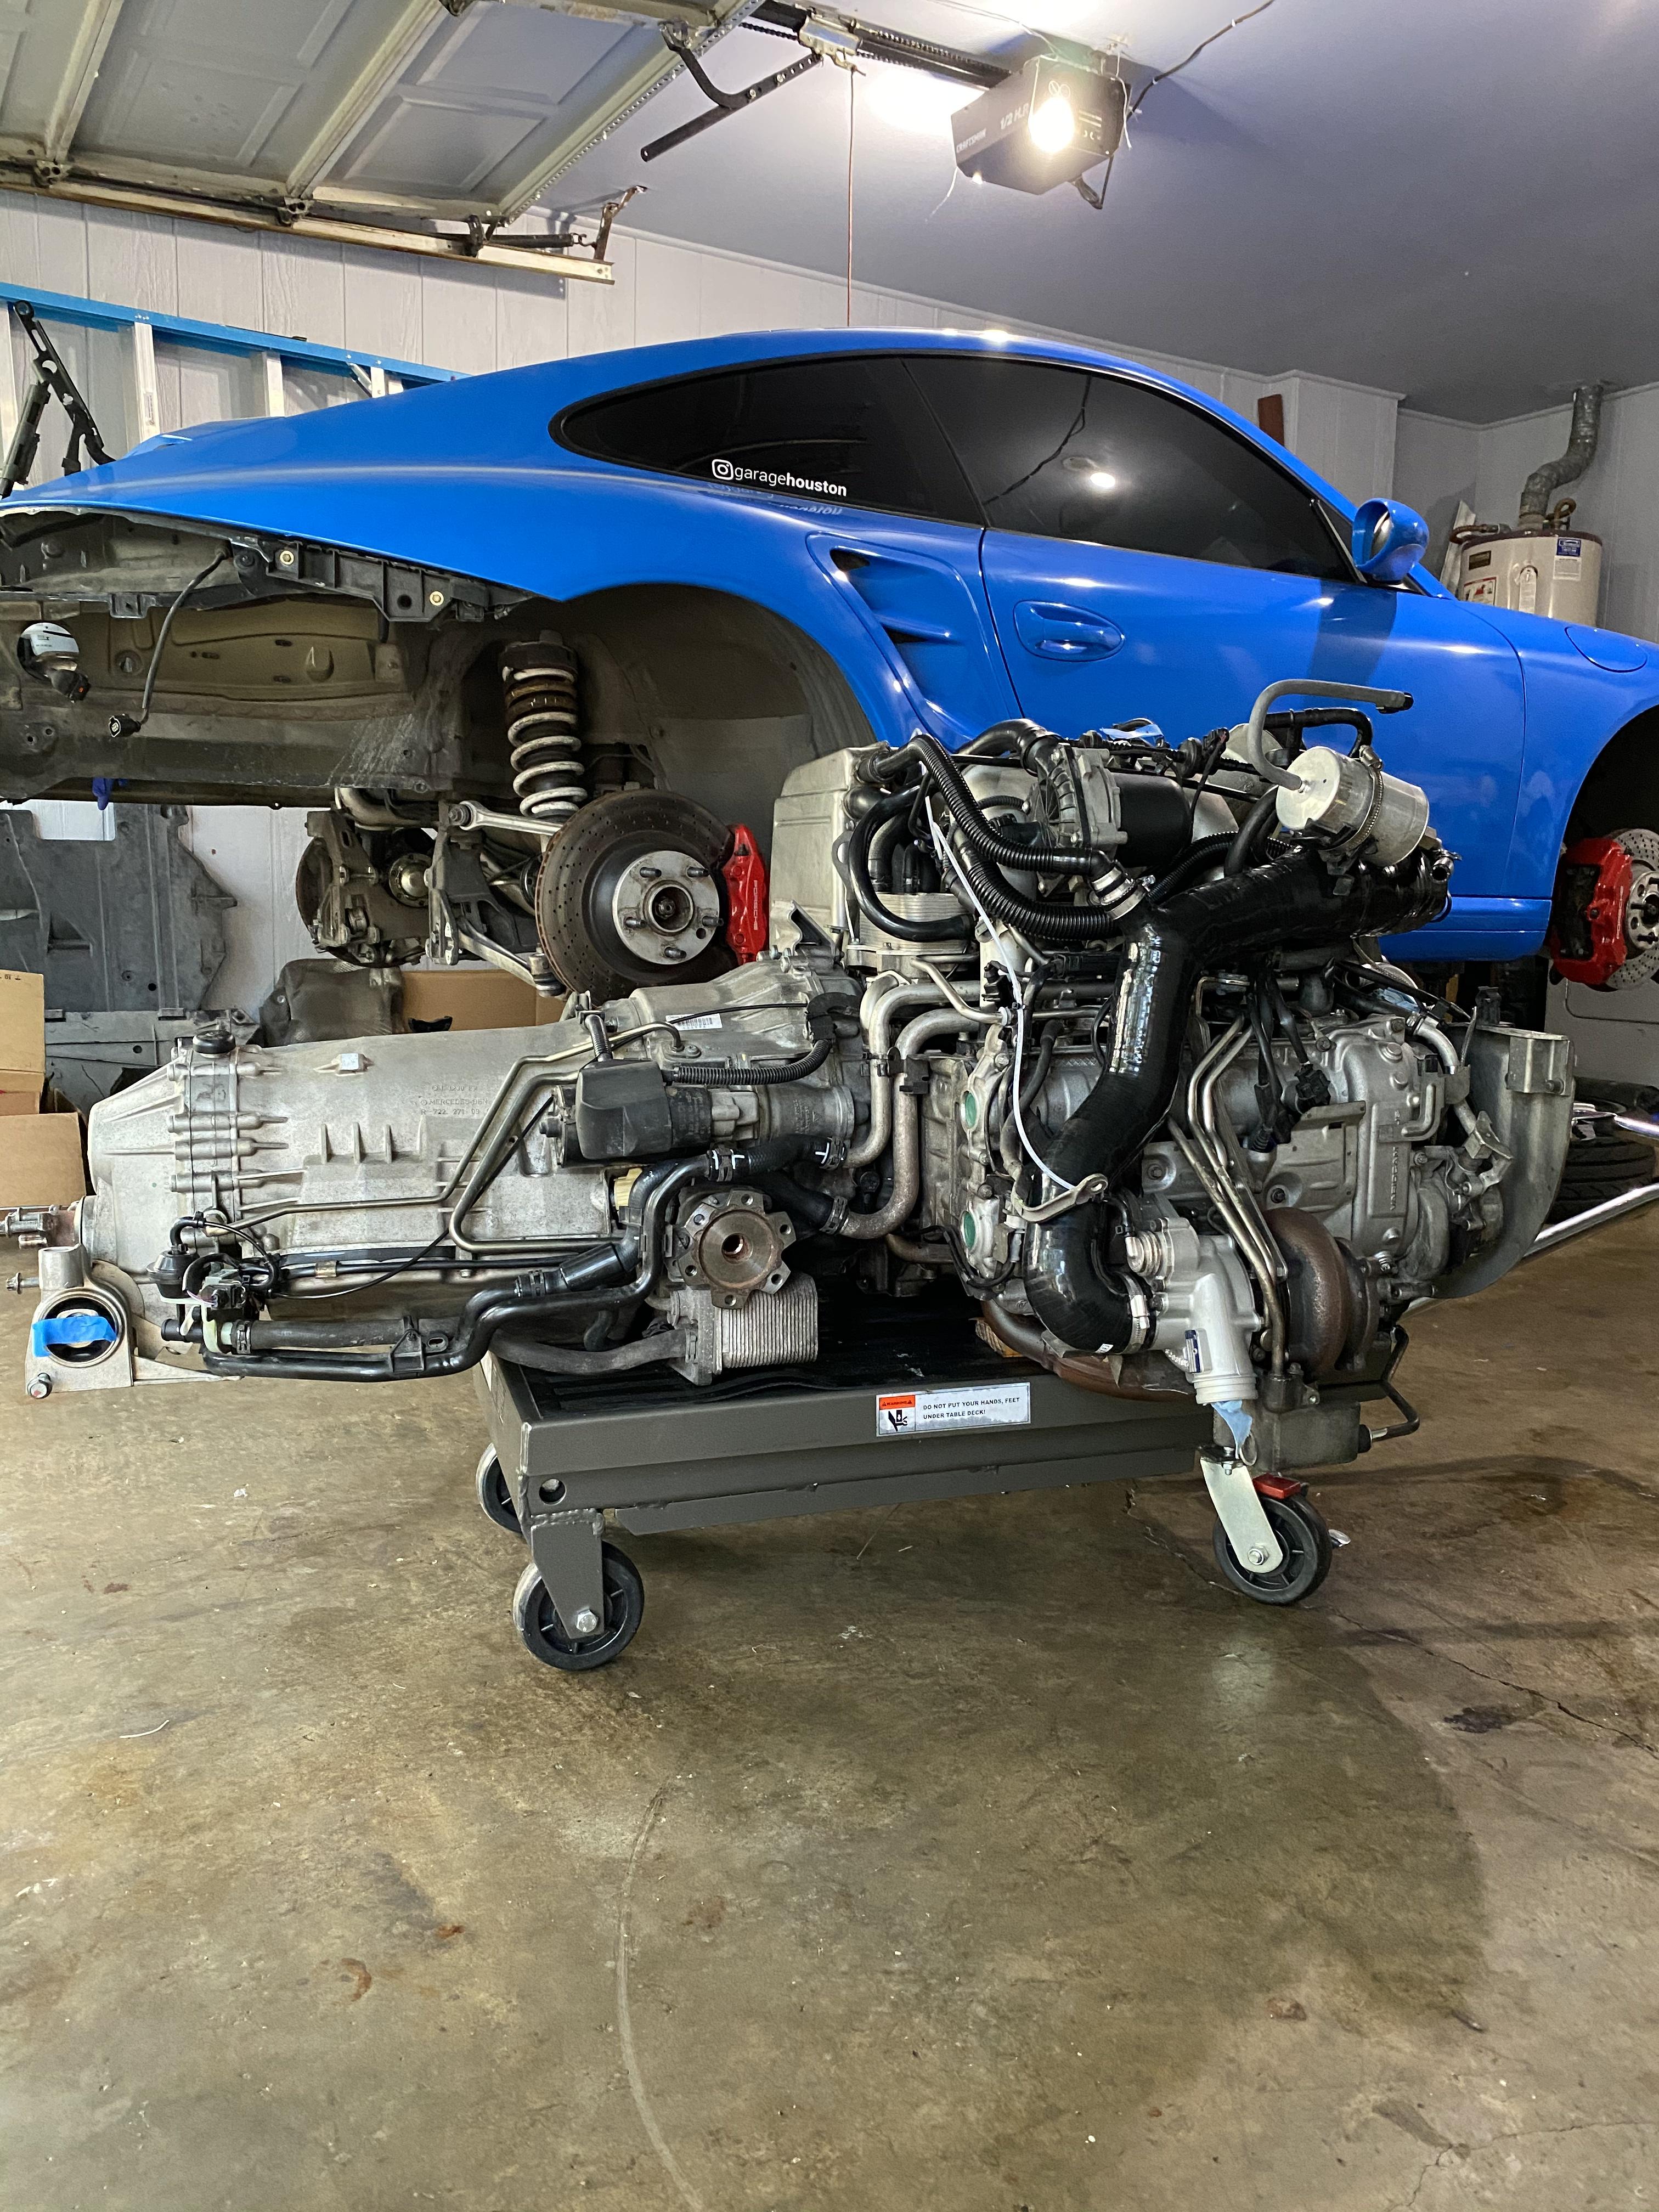
Here's the DIY for replacing the paper gaskets on the tiptronic transfer case. The paper gaskets can leak, and it seems the second one (closest to the engine) is the main culprit. Unfortunately there is no part number for this in the Porsche Katalog, and the only supplier seems to be IPT for $100 (which is insane, but... ) https://www.importperformancetrans.c..._detail&p=5433
You actually do NOT have to remove the yolk but I didn't realize this until after I pulled it off with a 30 mm 12 point socket, and then I realized there was a hidden bolt beneath the trans mount bracket. Whoops.
12 point socket on. It needed a 2 foot breaker bar and some muscle. I already removed the 8 mm allen bolt screw holding in the intermediate bearing.
There are 16 bolts to remove. They are torqued to 22 ft lbs so they come off easy.
Hidden bolt under the trans mount housing.
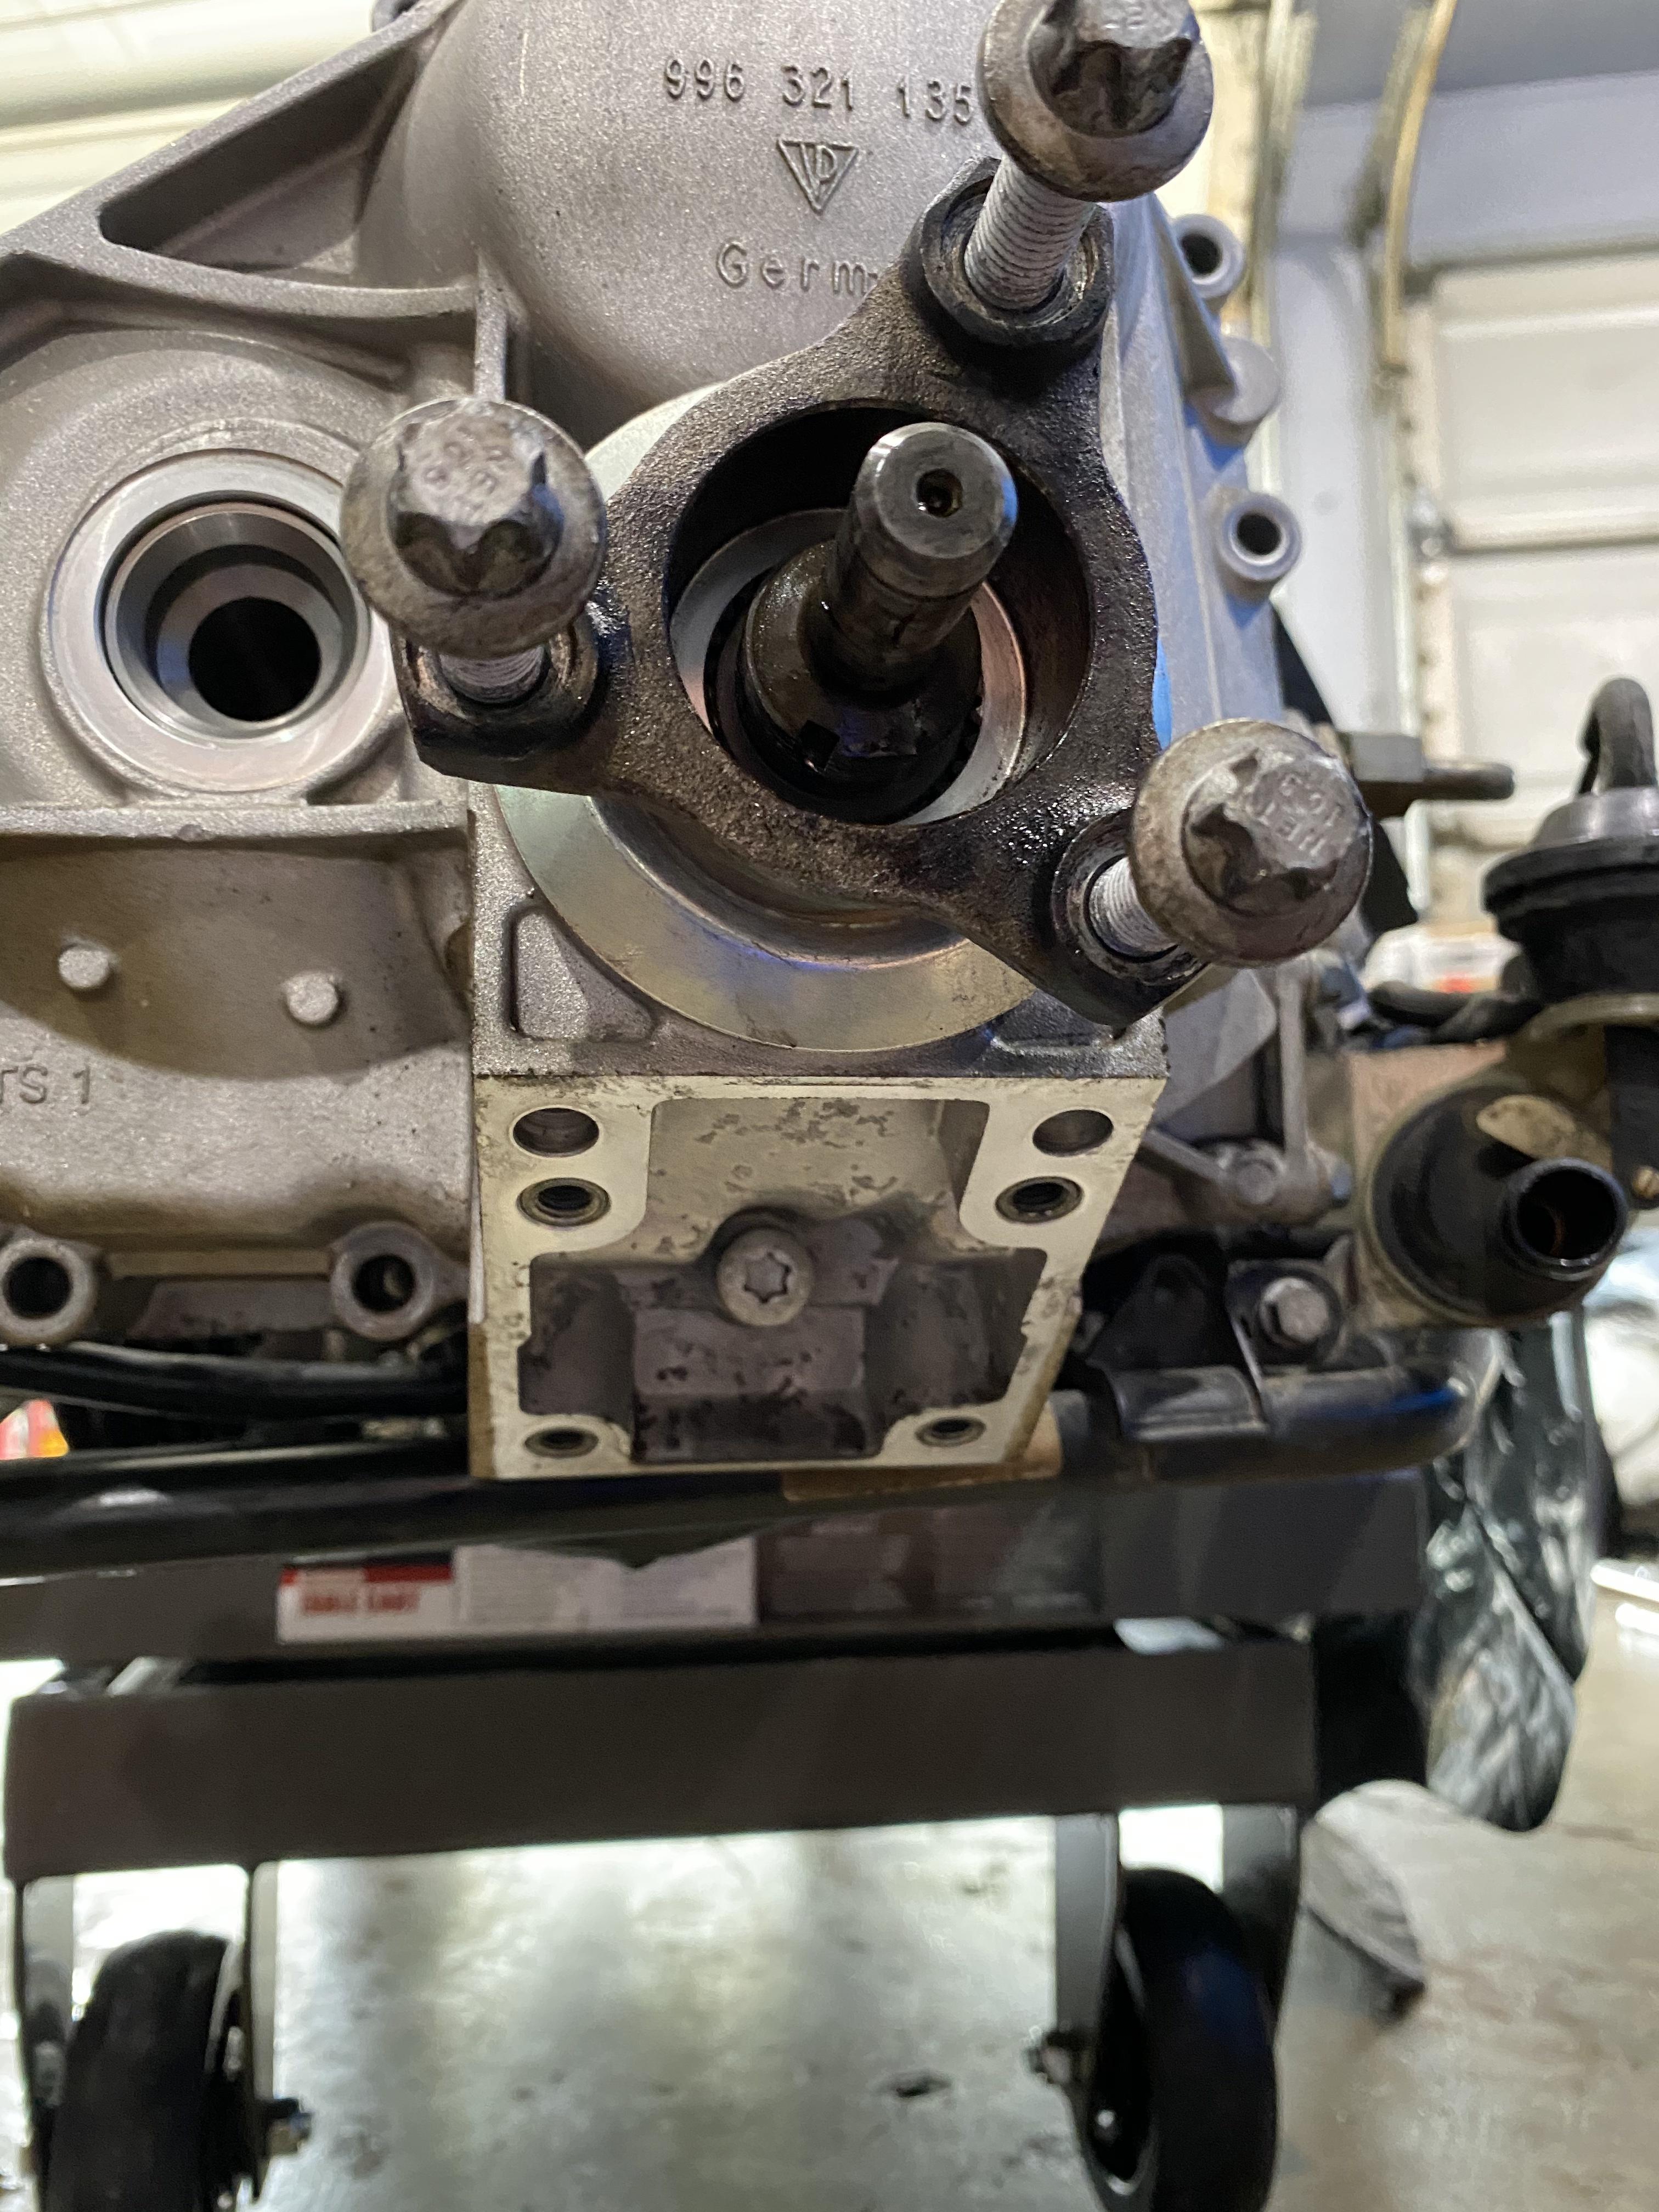
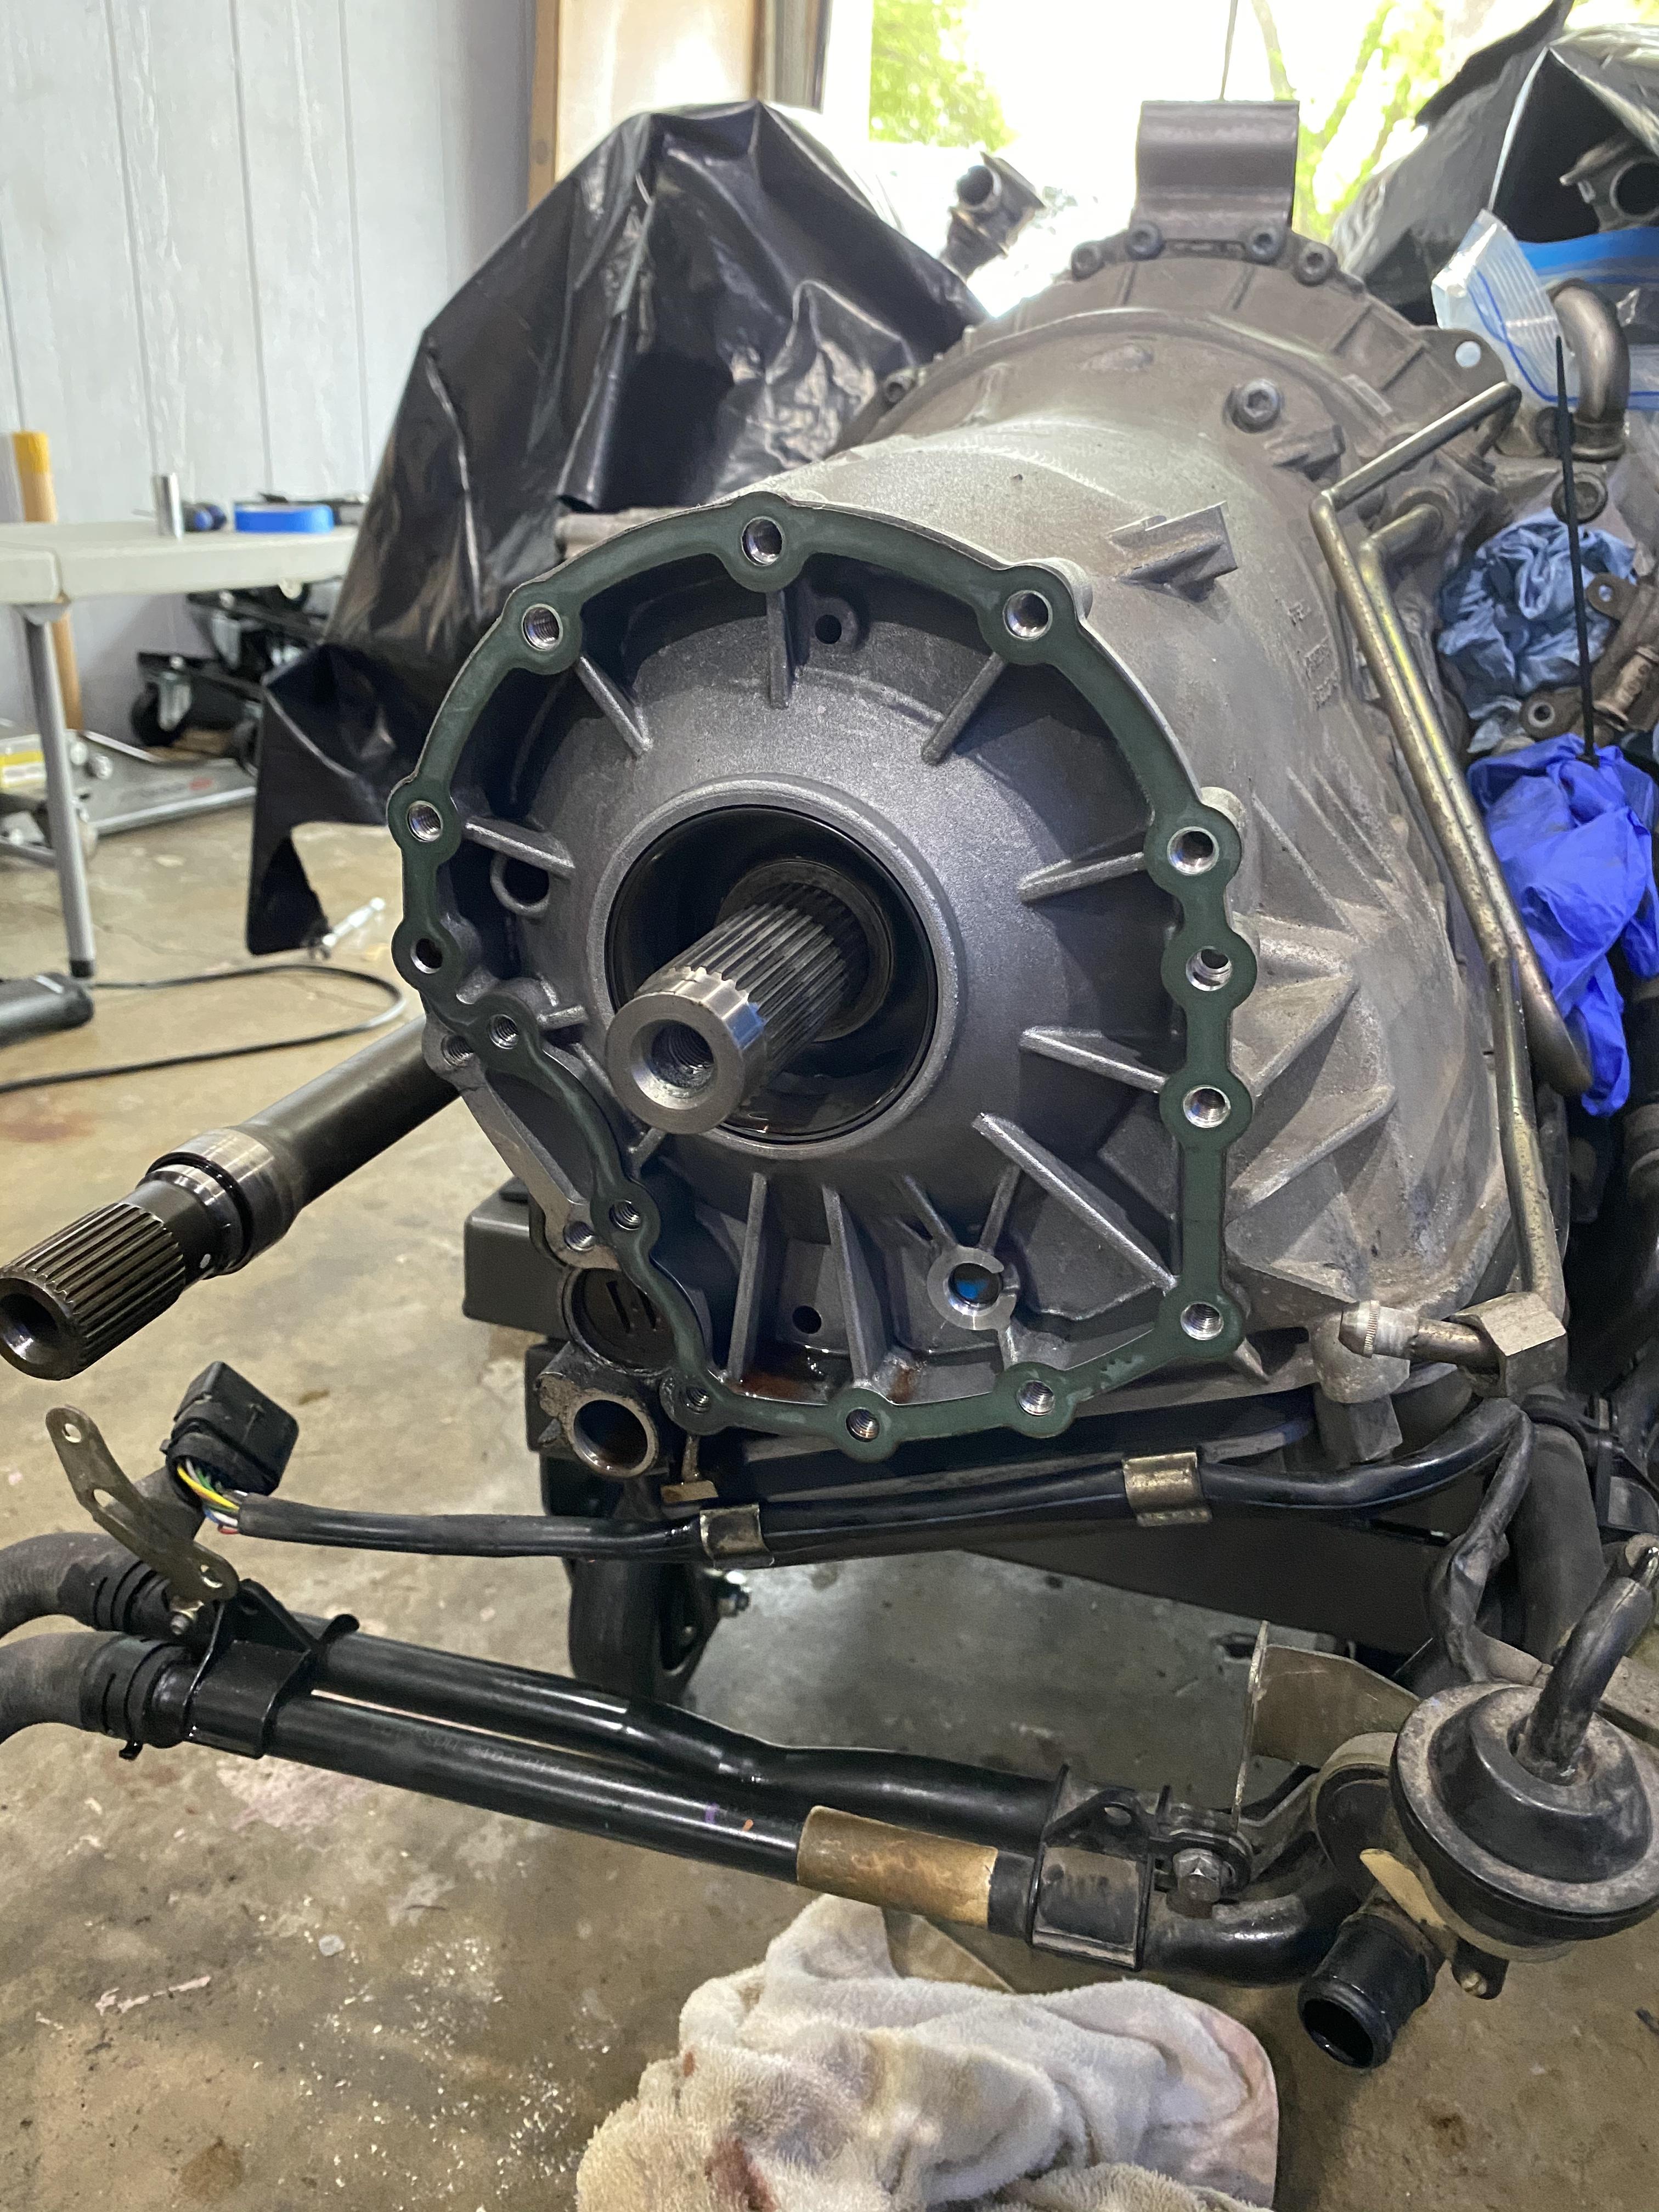
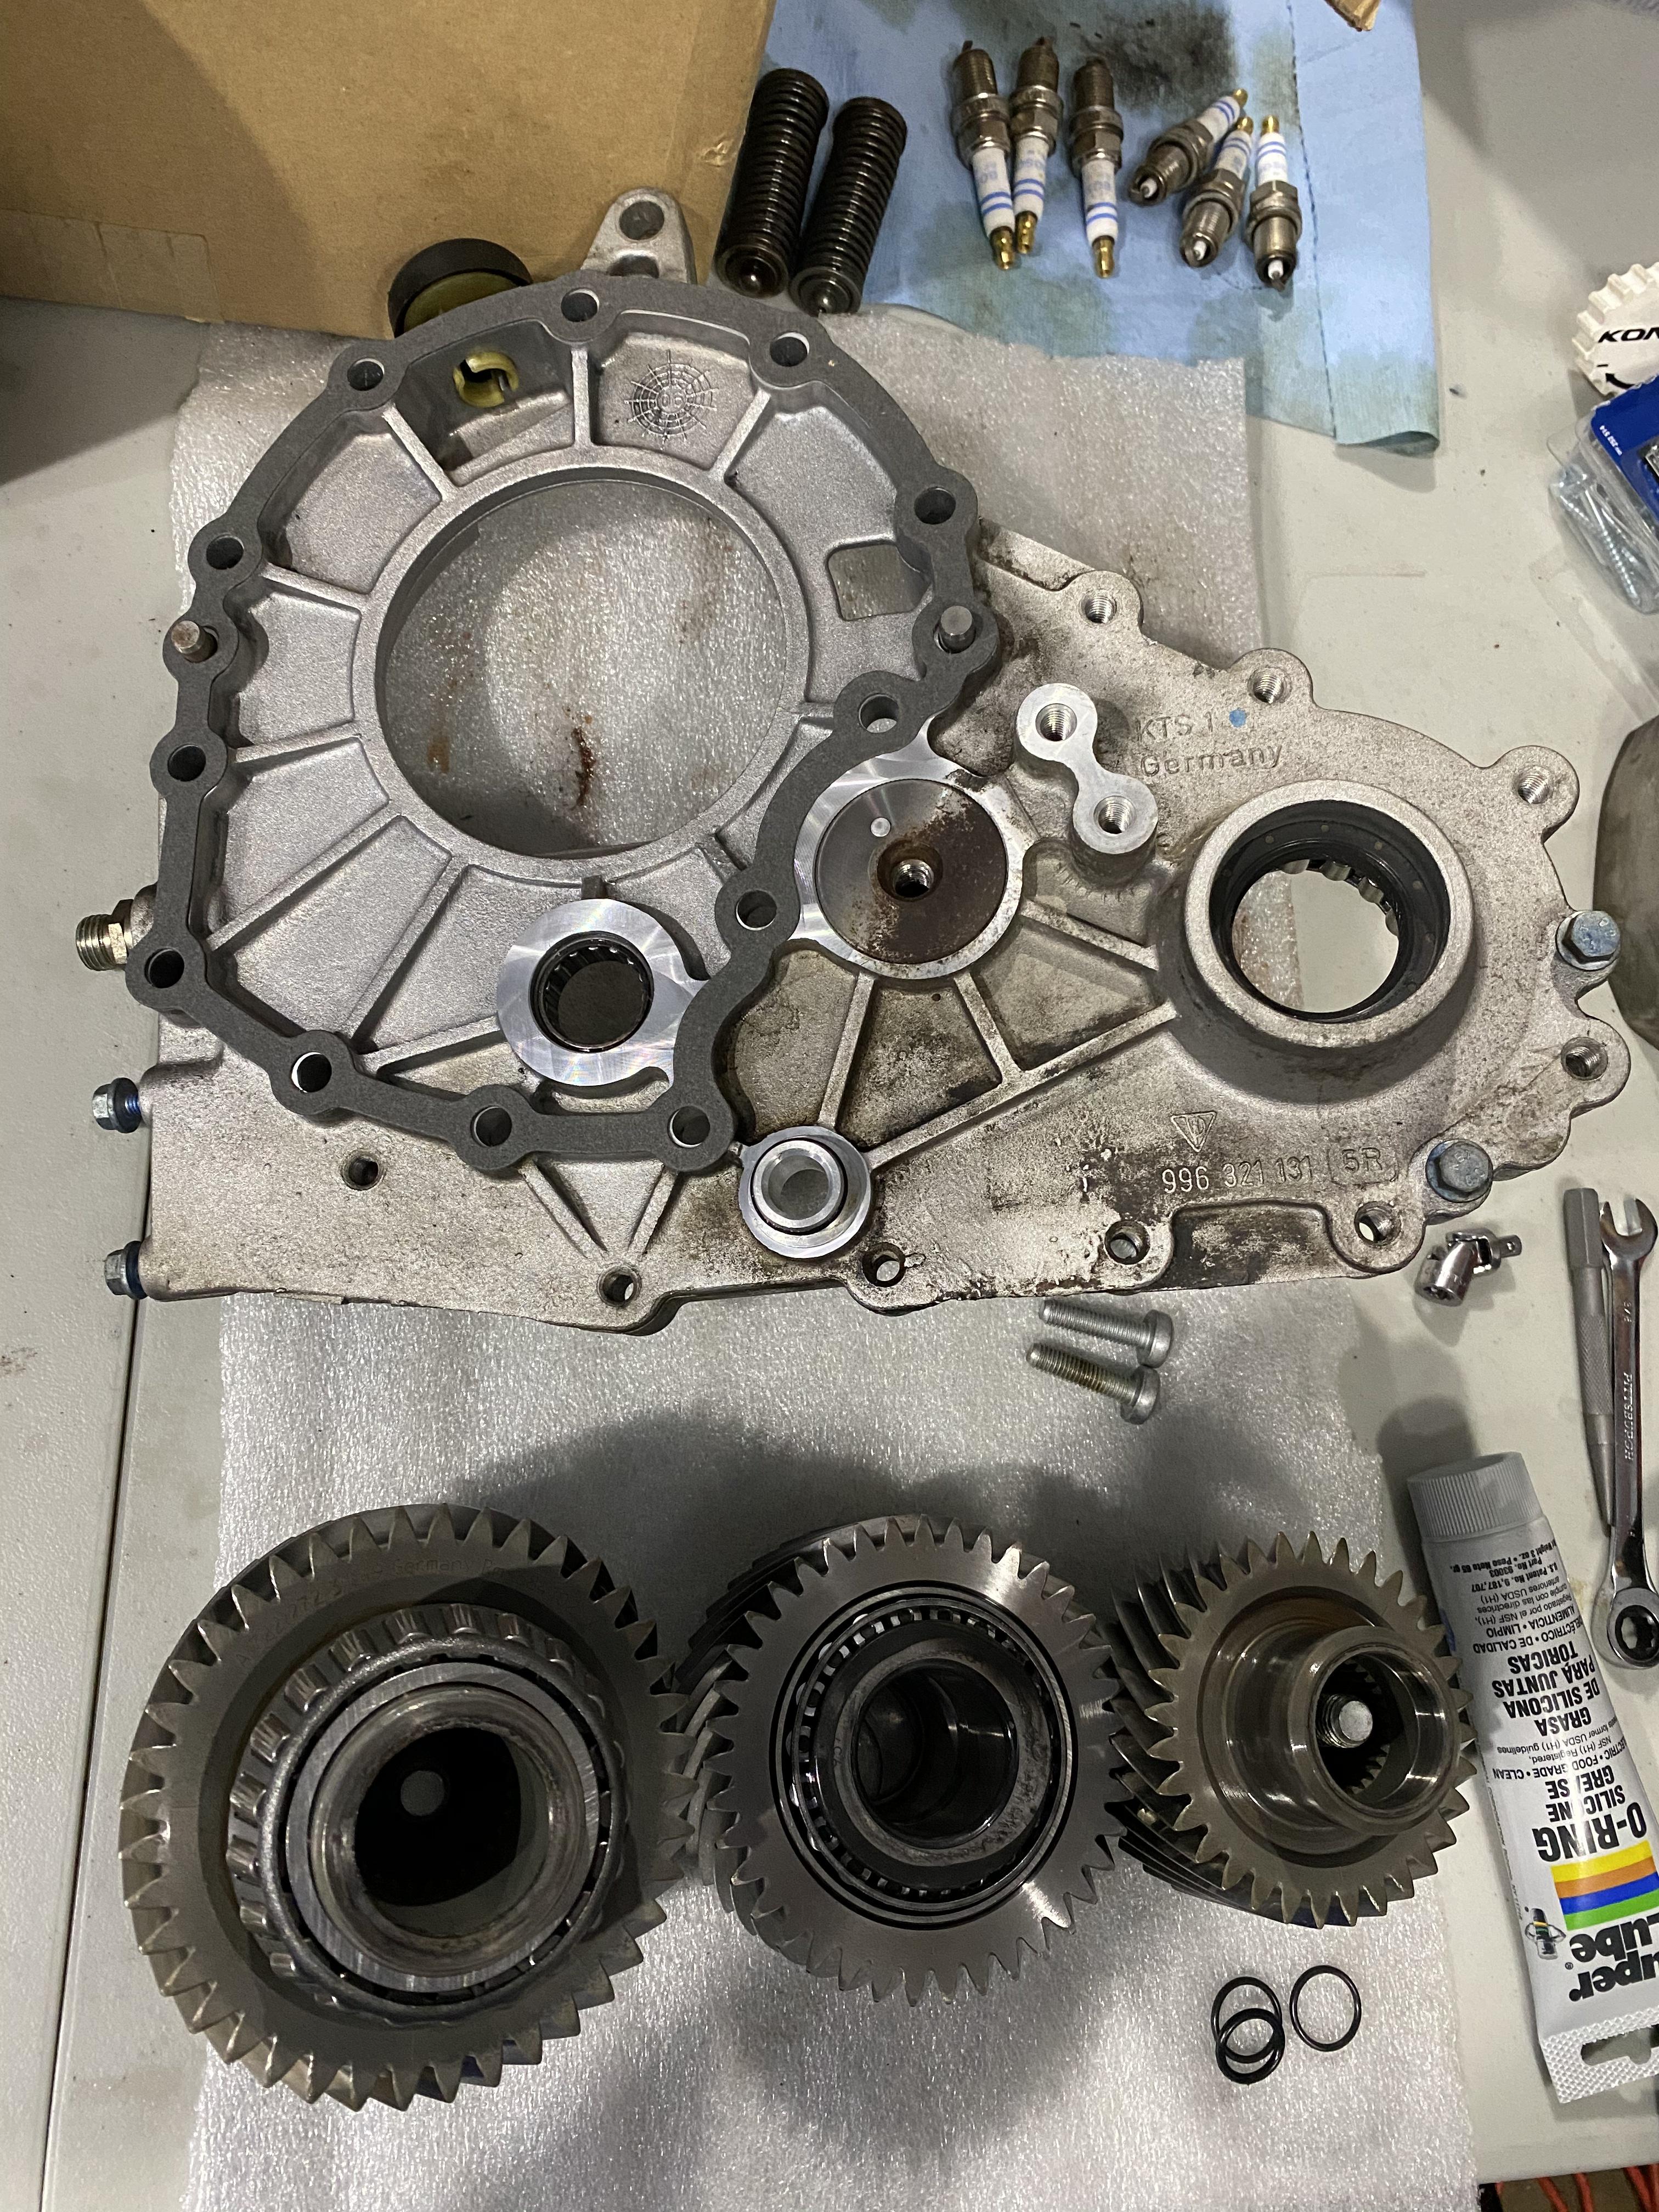
First cover off showing the larger paper gasket. Important to note - you will need to shift into neutral to allow some play in the bearings to remove them.
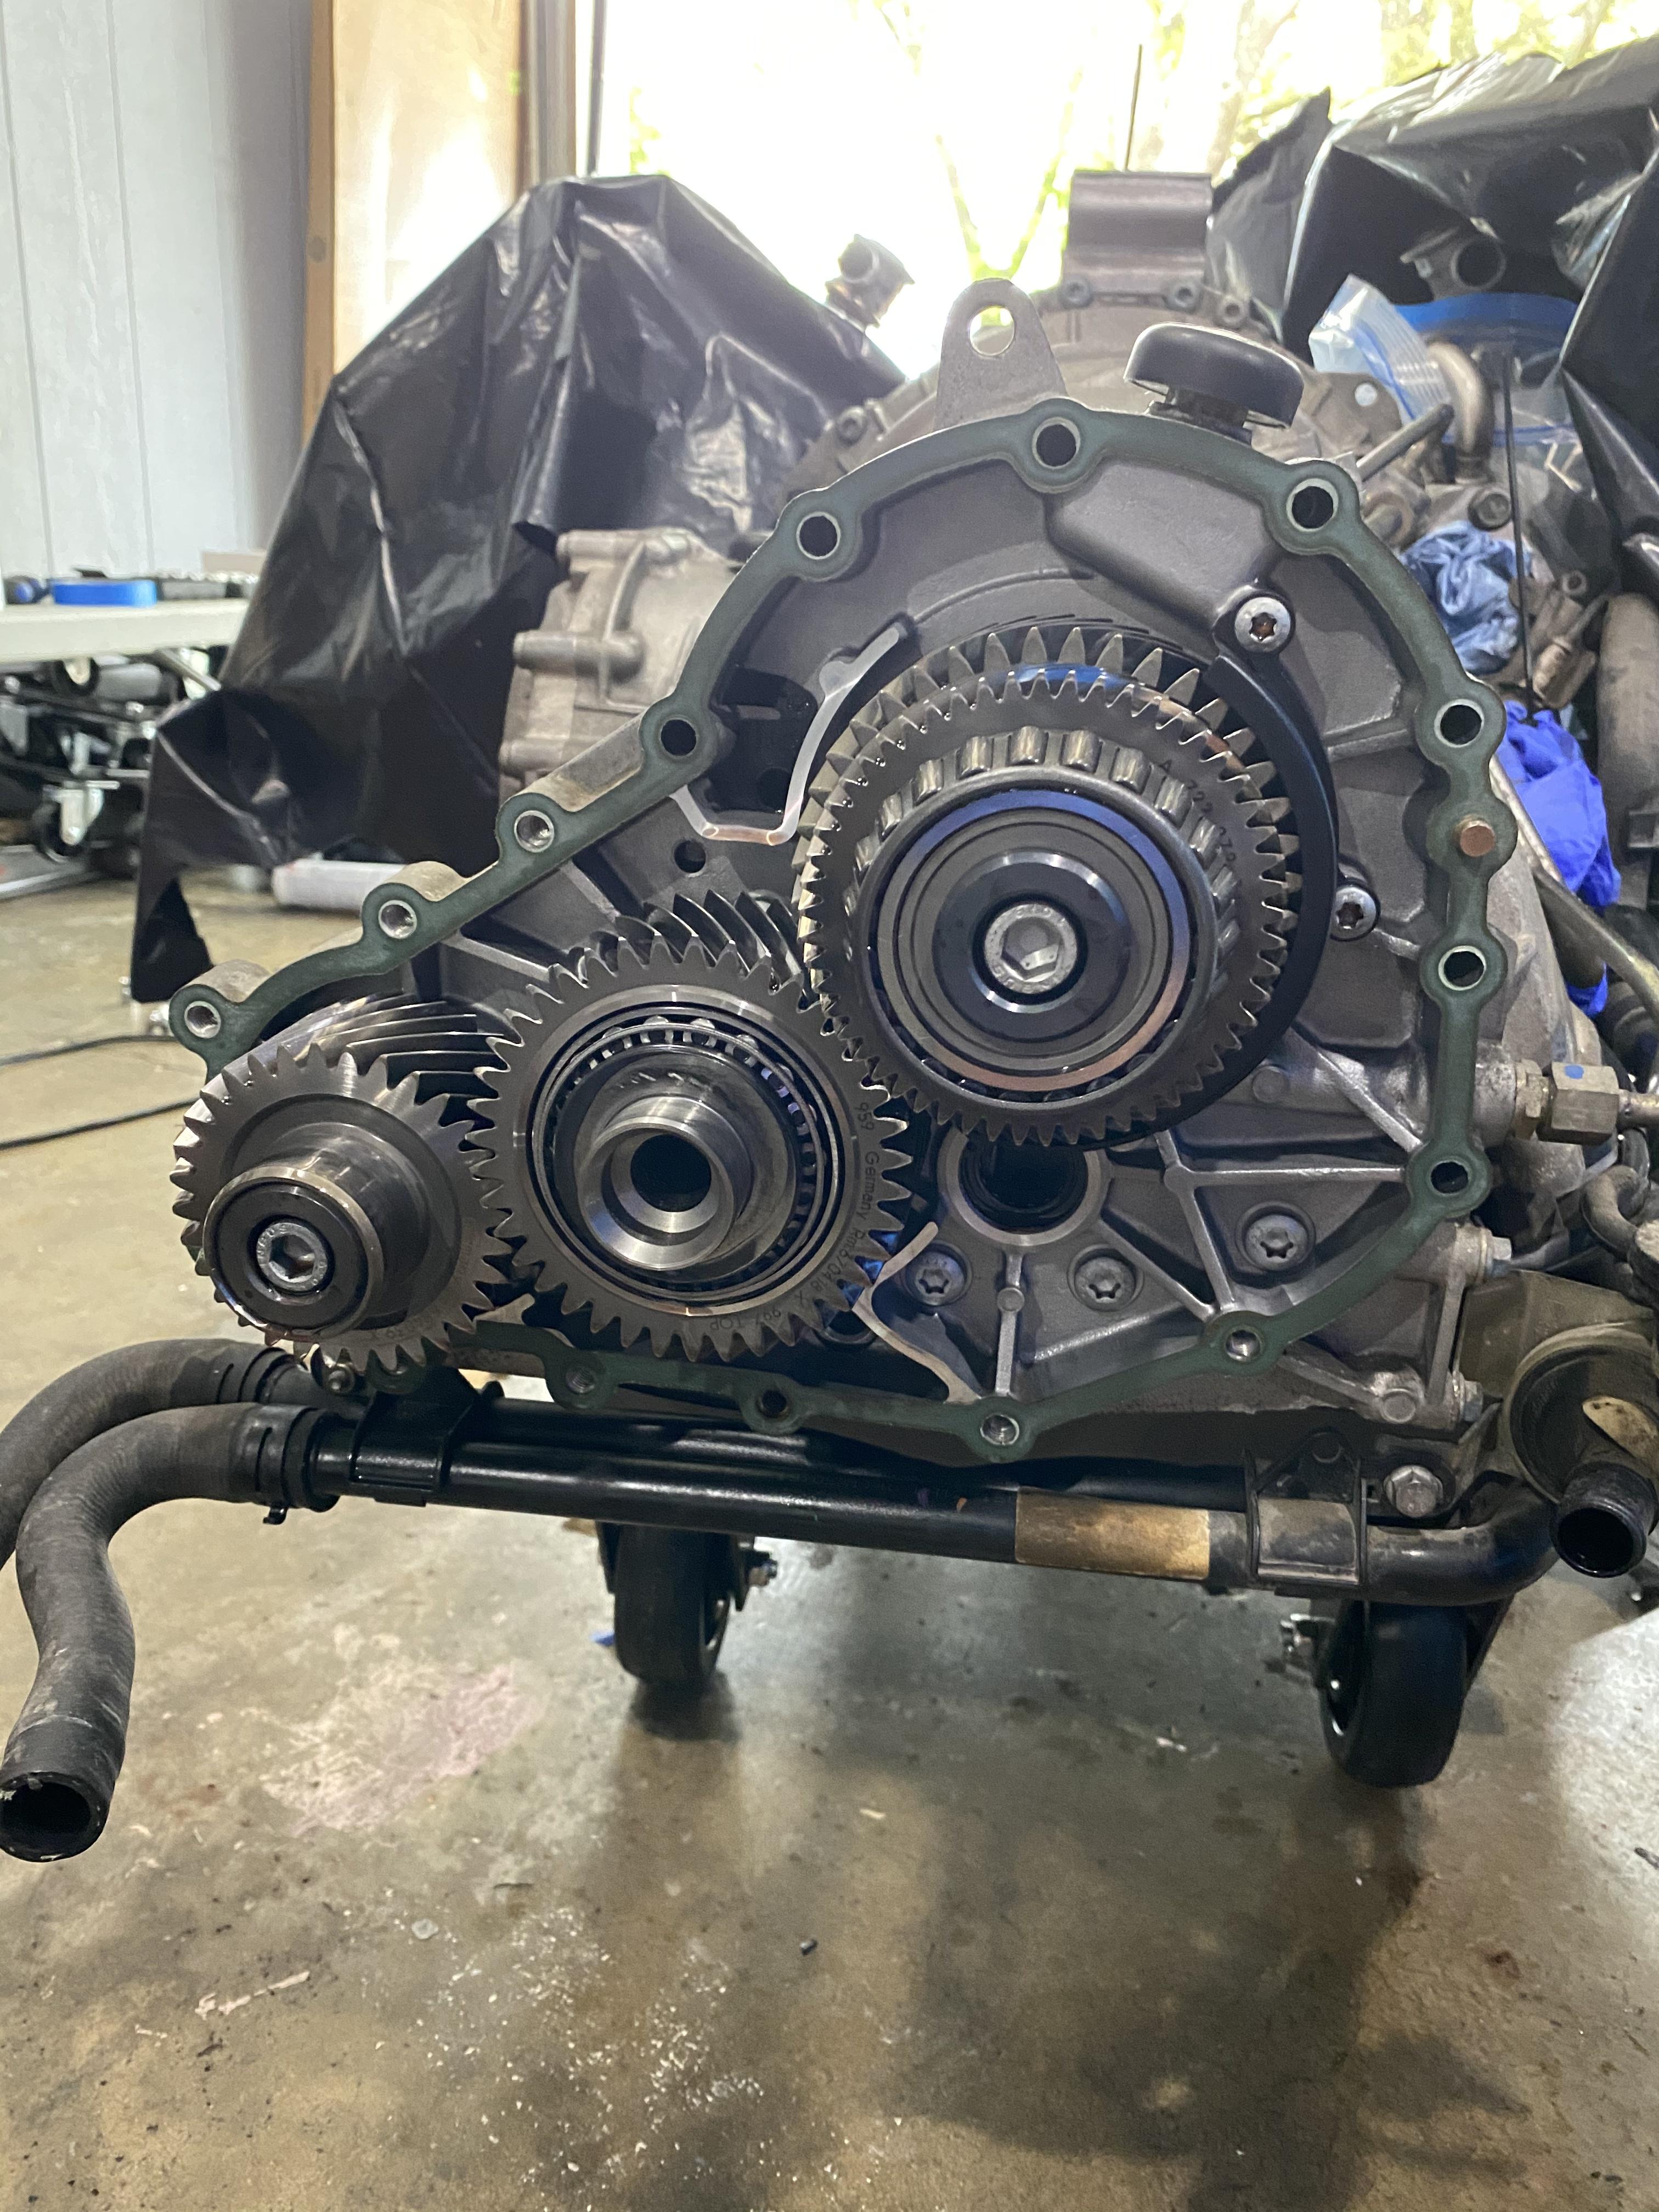
10 mm allen socket to remove the remaining 2 bearing screws. Trans in park to break them loose. They are on there pretty good. Then shift into neutral to remove the bearings.
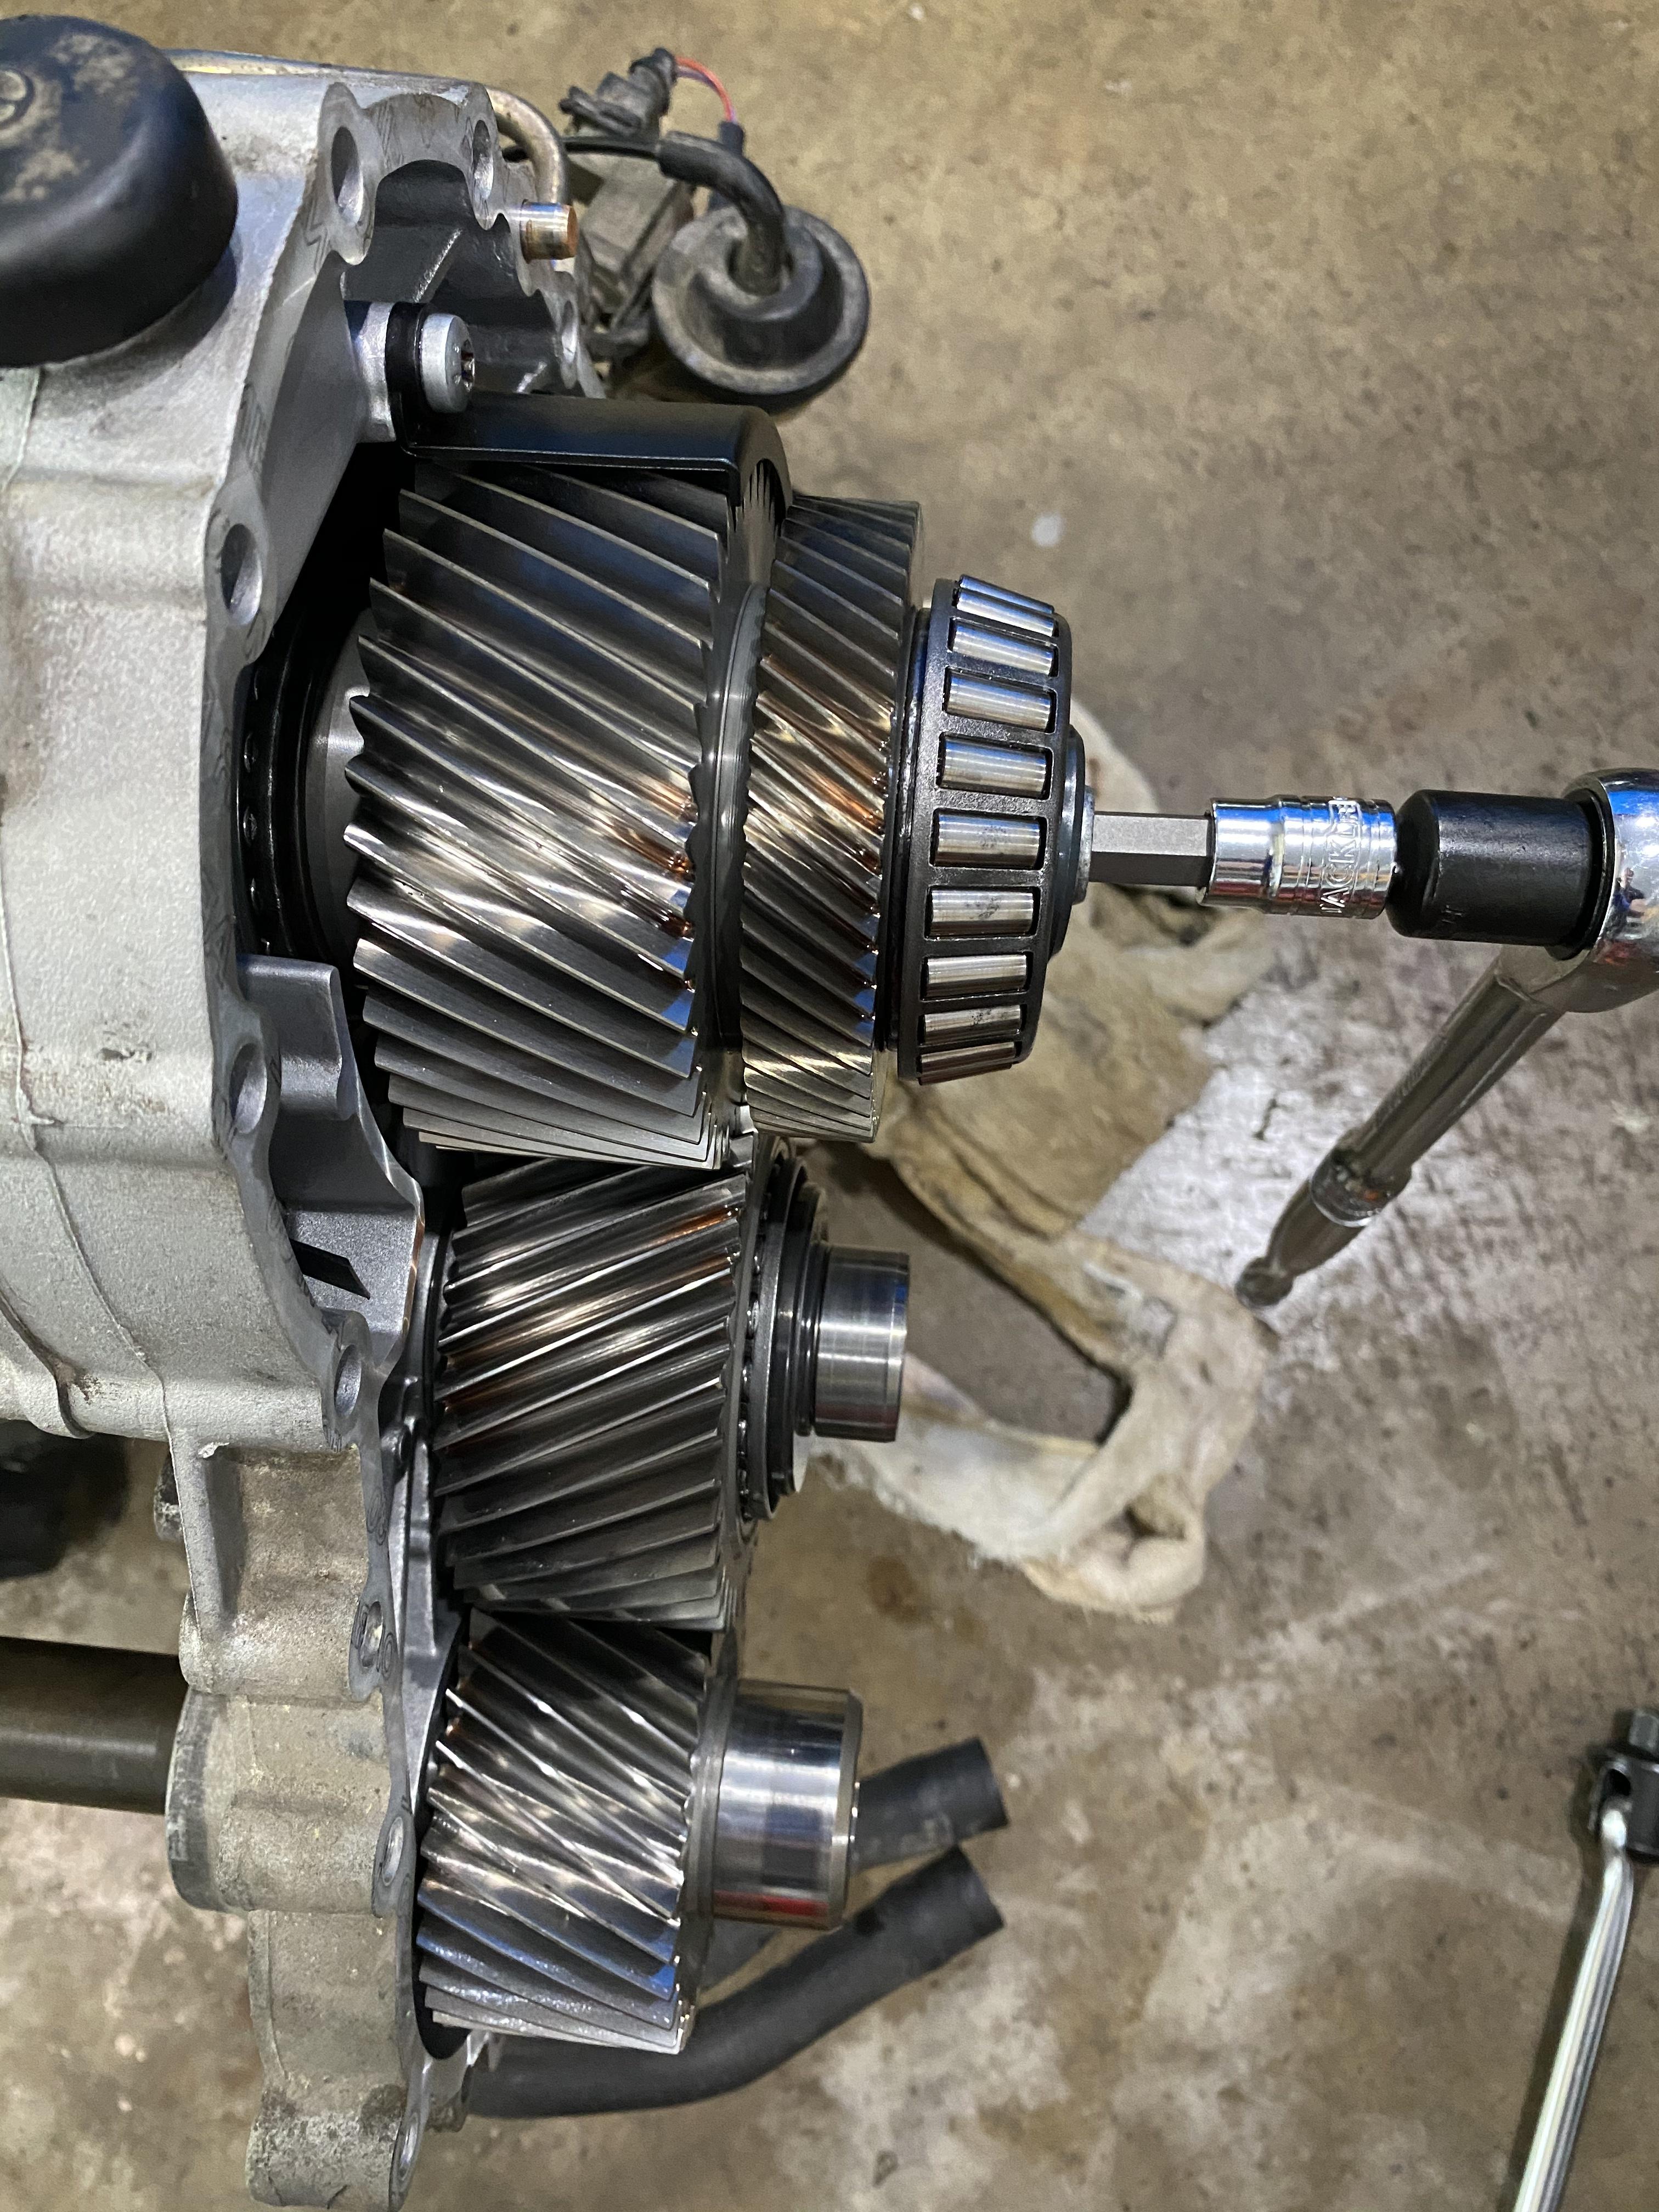
Bearings removed. Note that it is critical to keep all bearing parts in the exact same orientation to aid with reinstallation. There is also an o-ring on the intermediate transfer case bearing shaft. It goes on the groove closest to you in this photo (already removed at this point). You can see the o-ring on the previous photo. You will also need to remove the bracket holding in the primary output shaft bearing.
Two 17 mm open end wrenches to unscrew the trans oil line to the second housing.
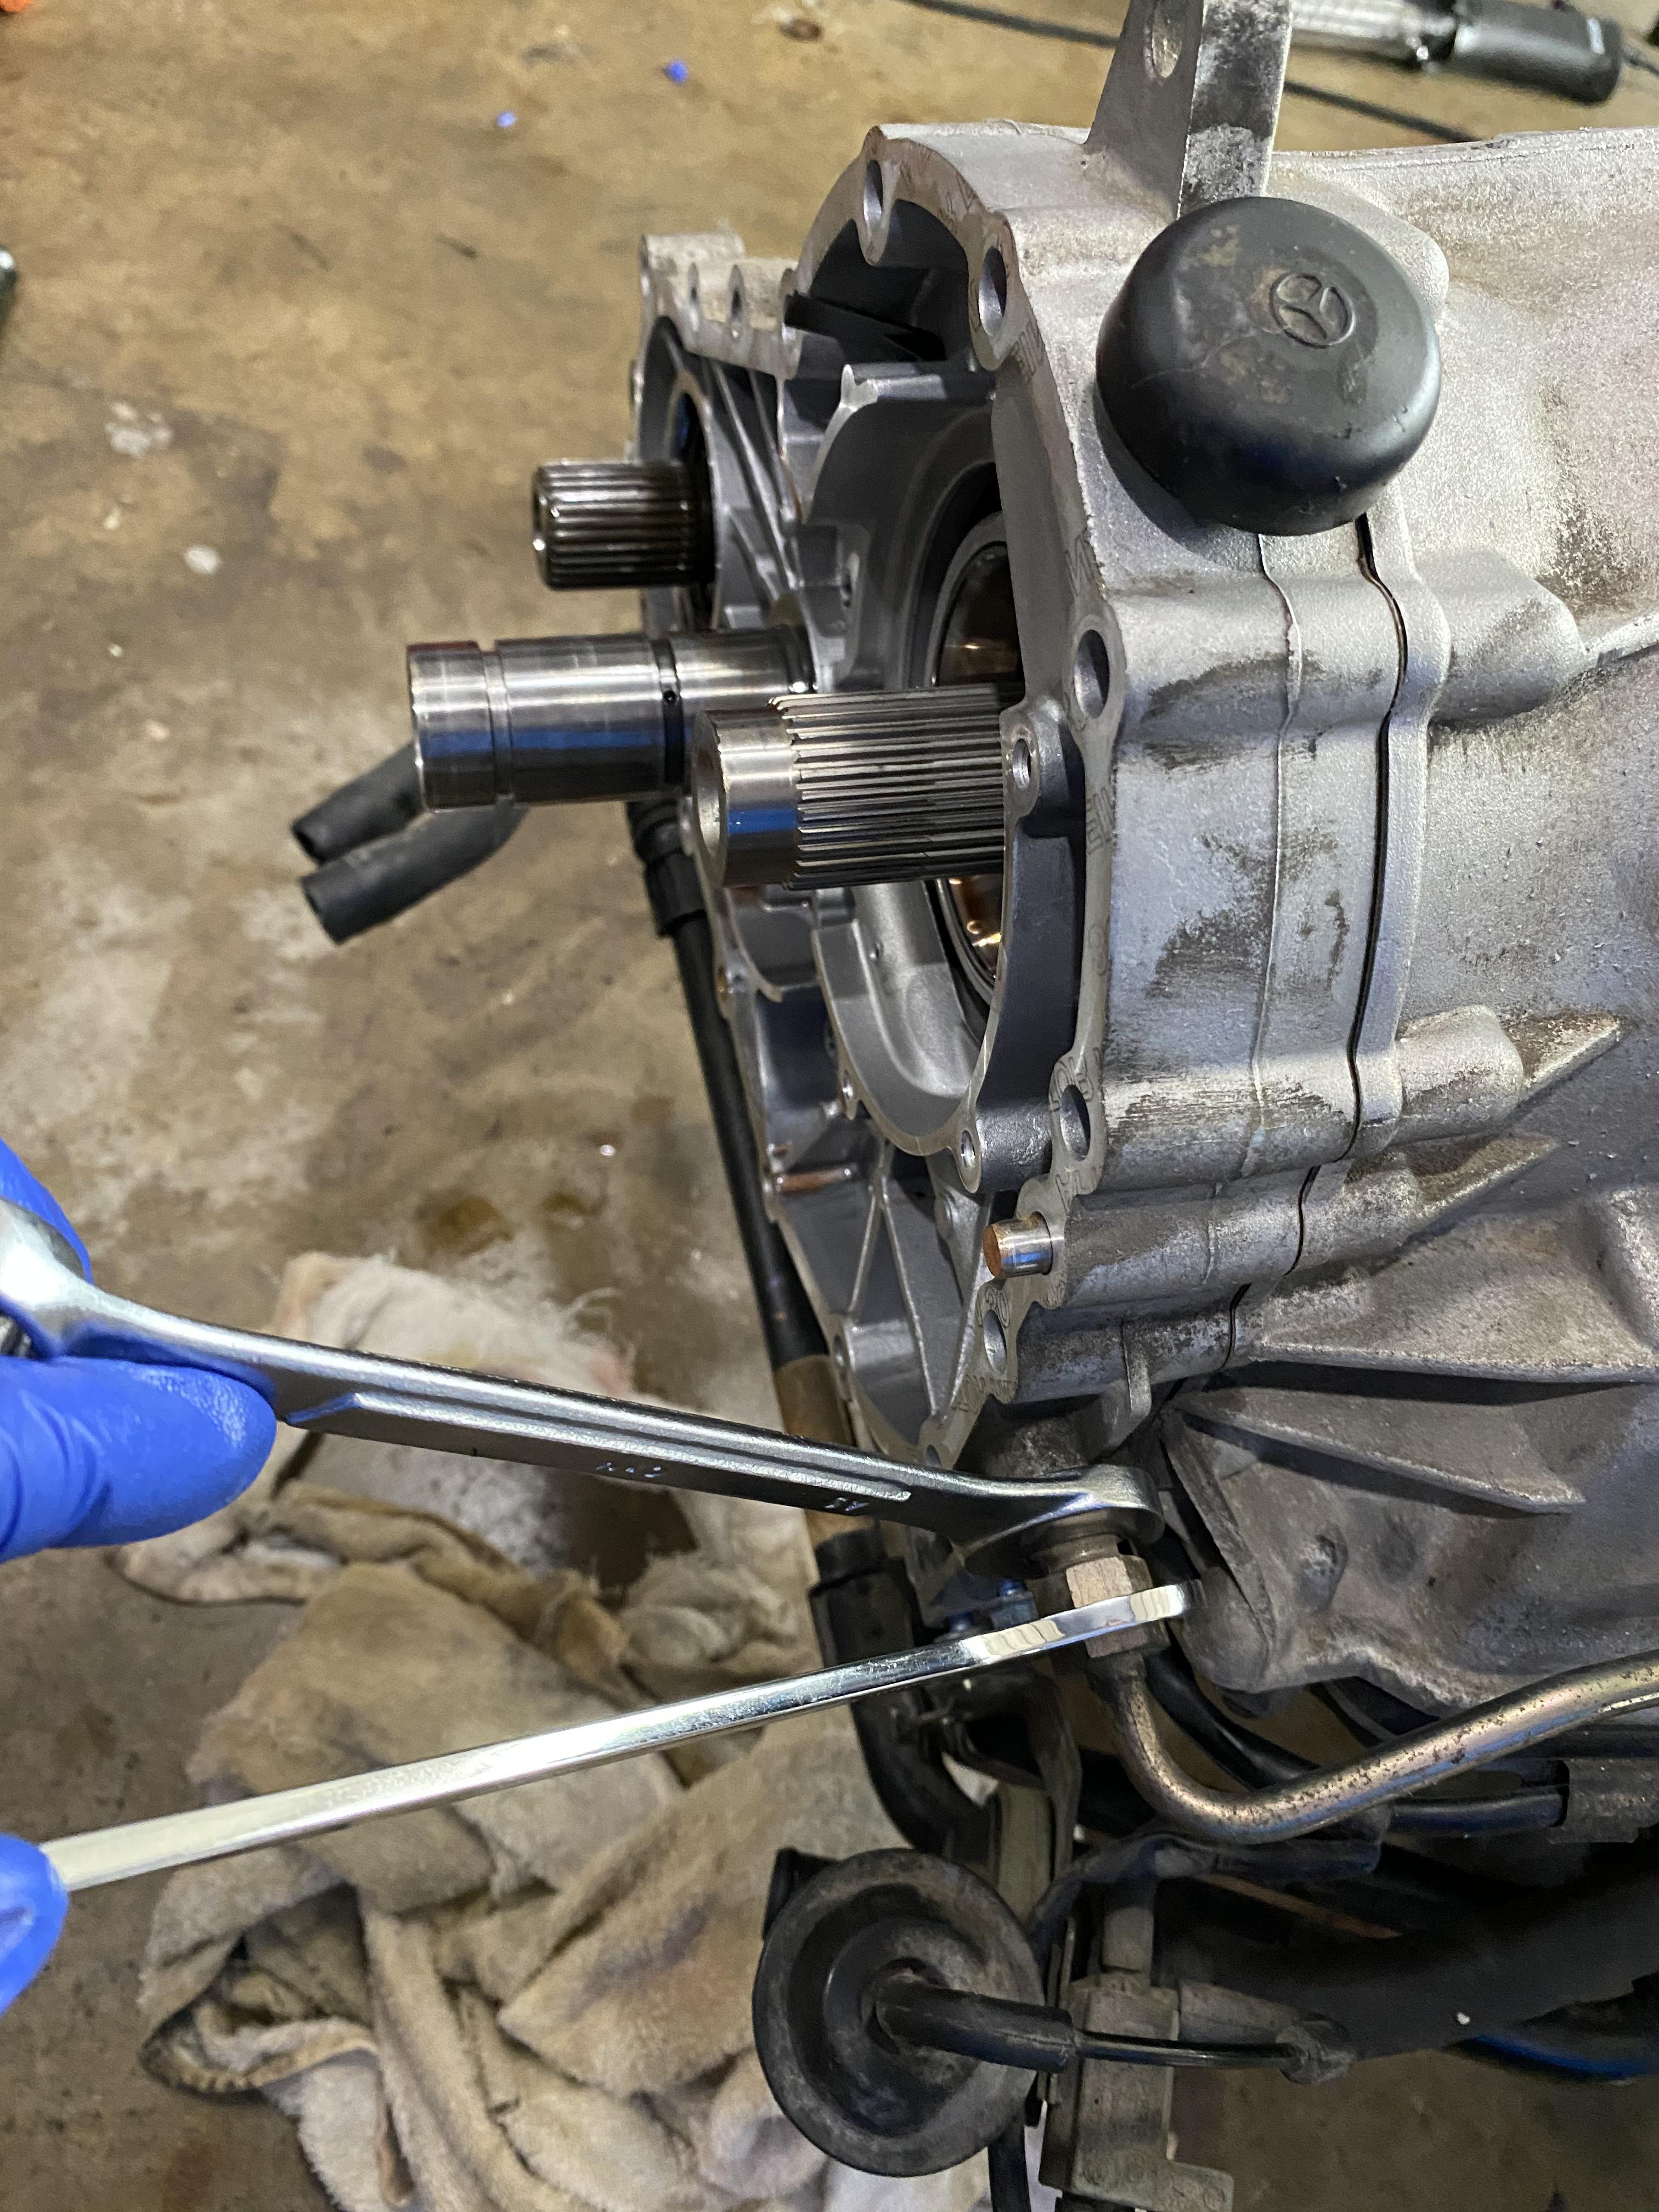
5 more bolts to remove the secondary housing
The paper gaskets on my 997TT were fine. It turned out the leak was coming from o-rings on the aluminum connecter between the main trans housing and the transfer case. Lower left in this photo.
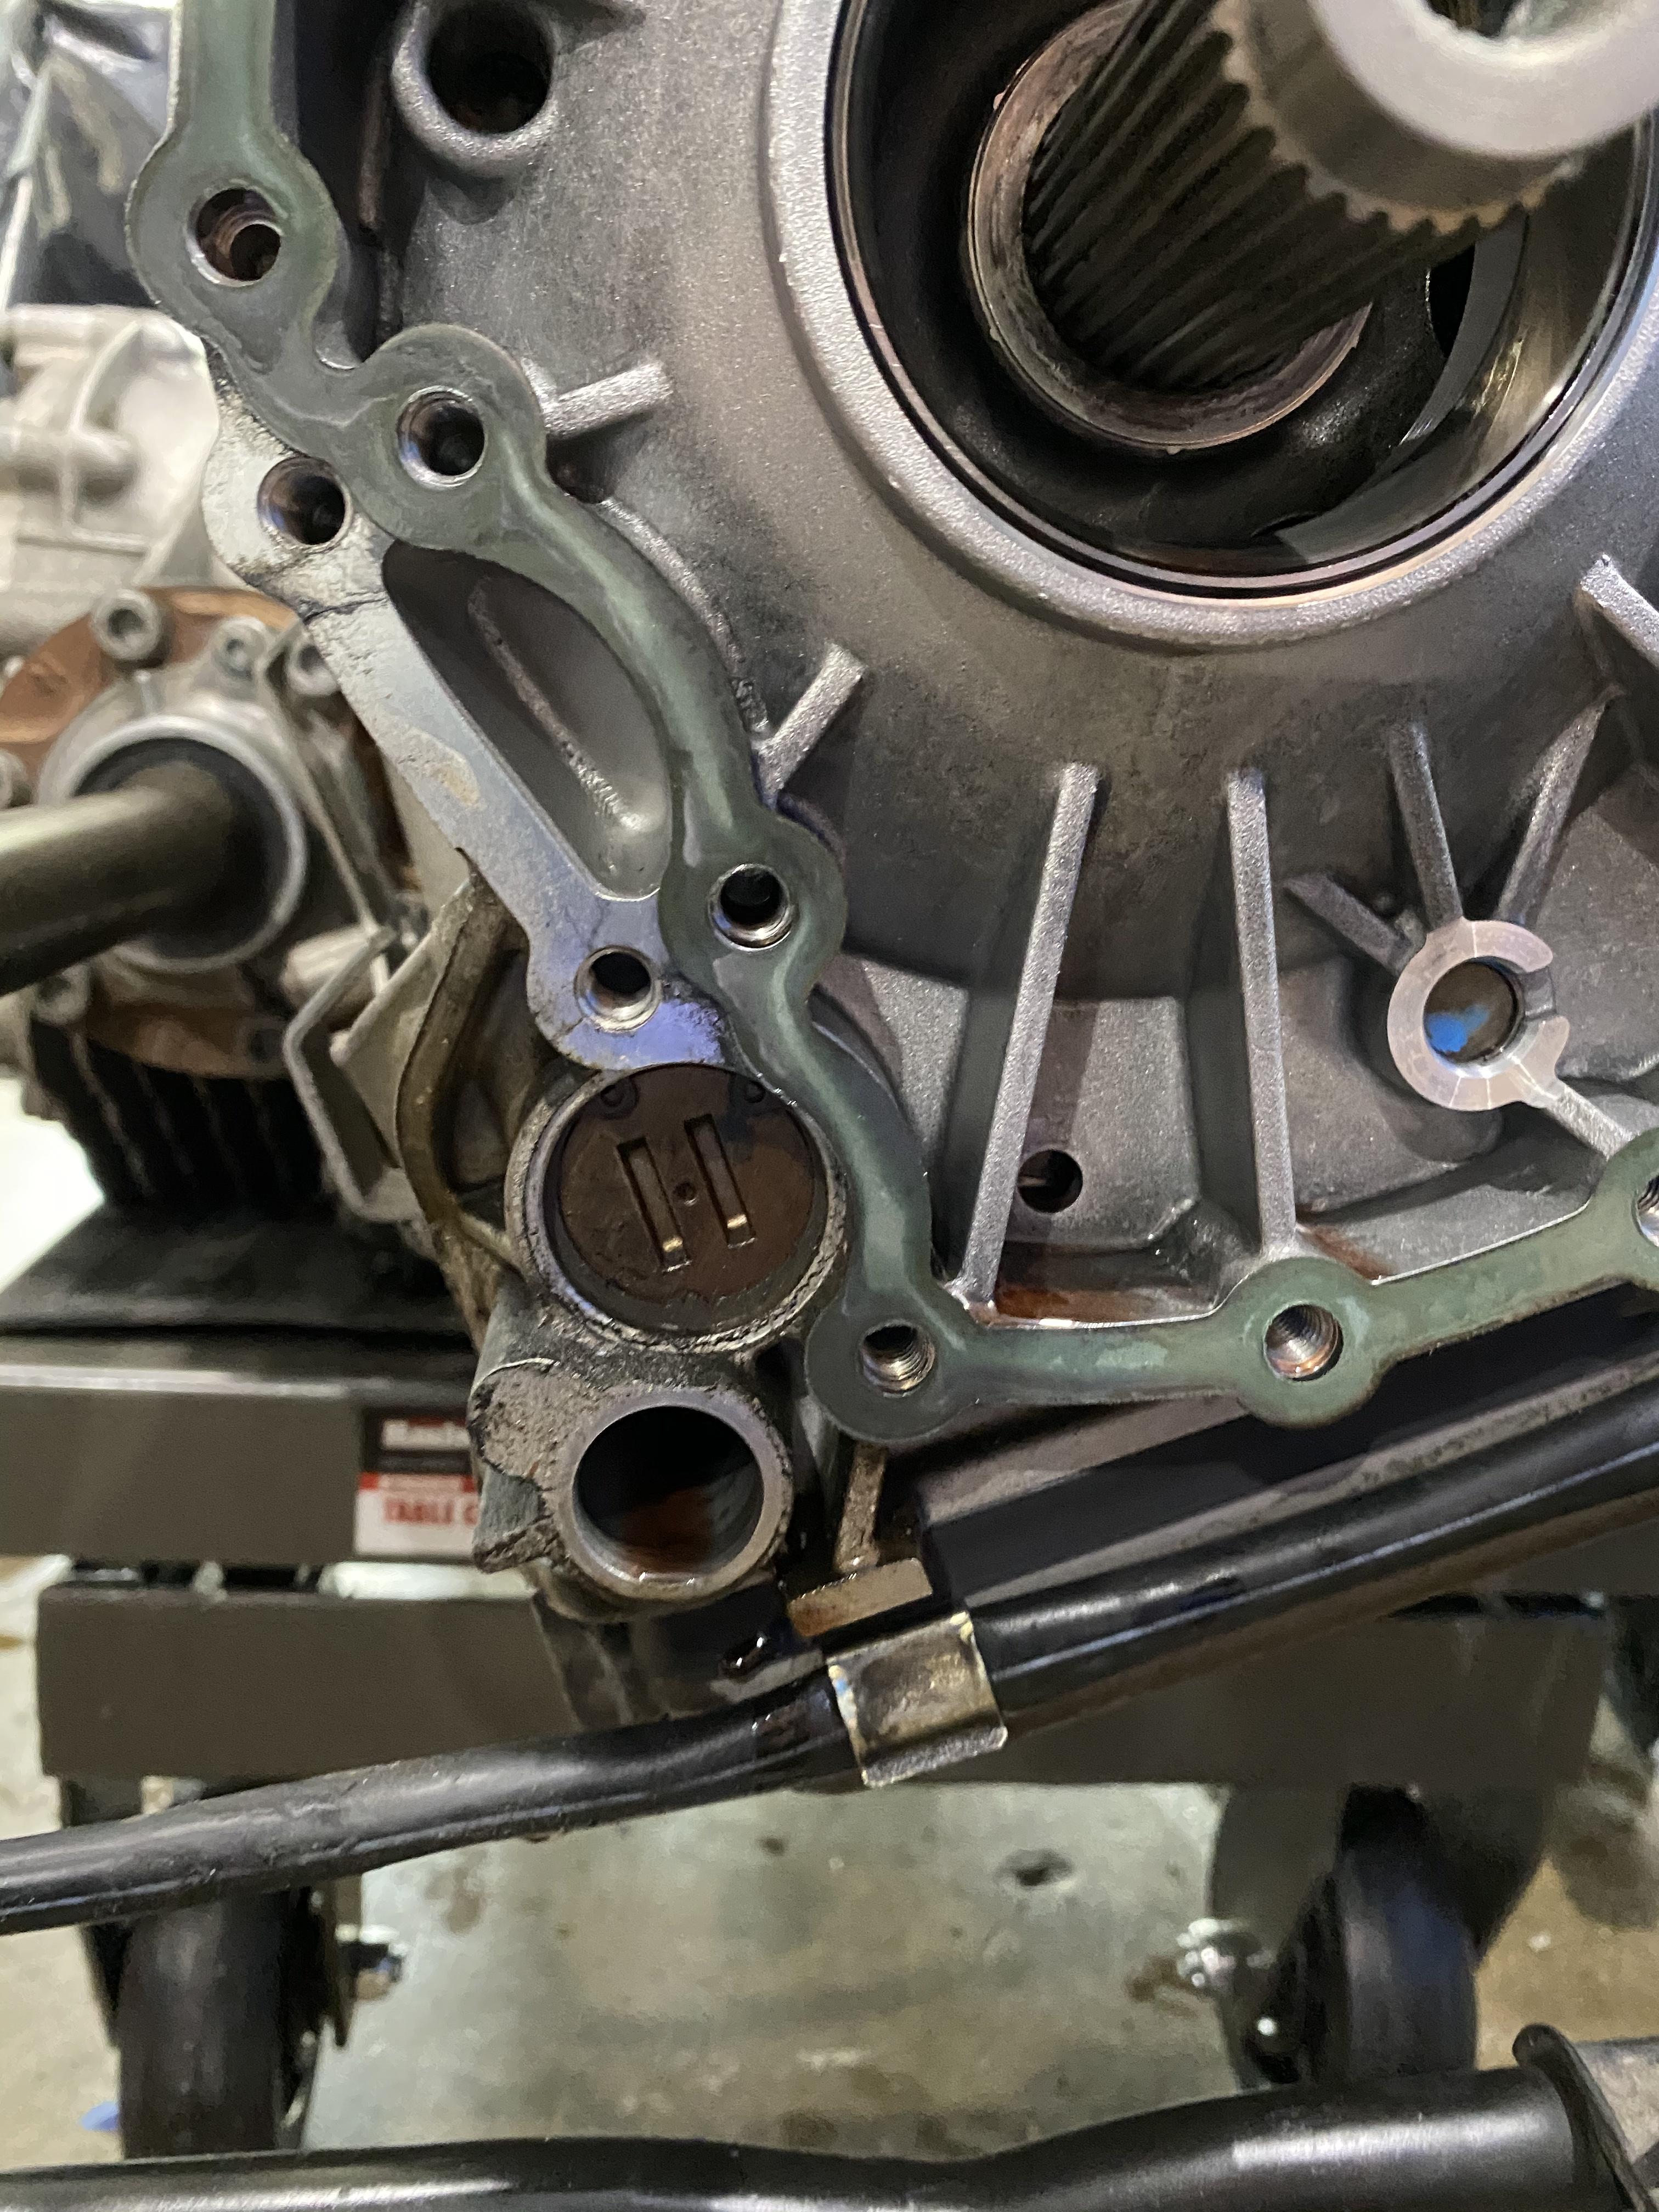
Casing removed showing the area of the leak.

Cleaned up, and new paper gasket in place. New o-rings on the aluminum connector as well, and pushed into place in the housing
Put on a new paper gasket on the second housing, reinstall the main bearing bracket, and then reinstall the bearings in the reverse order. Don't forget to put on a new o-ring on the intermediate bearing shaft. Since there is no info on the tip transfer case in the WM, these are the torque values I used:
T45 case bolts to 22 ft lbs
10 mm hex bearing bolts to 68 ft lbs
8 mm hex intermediated bearing bolt to 37 ft lbs
30 mm 12 pt output shaft nut to 120 ft lbs
You actually do NOT have to remove the yolk but I didn't realize this until after I pulled it off with a 30 mm 12 point socket, and then I realized there was a hidden bolt beneath the trans mount bracket. Whoops.
12 point socket on. It needed a 2 foot breaker bar and some muscle. I already removed the 8 mm allen bolt screw holding in the intermediate bearing.
There are 16 bolts to remove. They are torqued to 22 ft lbs so they come off easy.
Hidden bolt under the trans mount housing.
First cover off showing the larger paper gasket. Important to note - you will need to shift into neutral to allow some play in the bearings to remove them.
10 mm allen socket to remove the remaining 2 bearing screws. Trans in park to break them loose. They are on there pretty good. Then shift into neutral to remove the bearings.
Bearings removed. Note that it is critical to keep all bearing parts in the exact same orientation to aid with reinstallation. There is also an o-ring on the intermediate transfer case bearing shaft. It goes on the groove closest to you in this photo (already removed at this point). You can see the o-ring on the previous photo. You will also need to remove the bracket holding in the primary output shaft bearing.
Two 17 mm open end wrenches to unscrew the trans oil line to the second housing.
5 more bolts to remove the secondary housing
The paper gaskets on my 997TT were fine. It turned out the leak was coming from o-rings on the aluminum connecter between the main trans housing and the transfer case. Lower left in this photo.
Casing removed showing the area of the leak.
Cleaned up, and new paper gasket in place. New o-rings on the aluminum connector as well, and pushed into place in the housing
Put on a new paper gasket on the second housing, reinstall the main bearing bracket, and then reinstall the bearings in the reverse order. Don't forget to put on a new o-ring on the intermediate bearing shaft. Since there is no info on the tip transfer case in the WM, these are the torque values I used:
T45 case bolts to 22 ft lbs
10 mm hex bearing bolts to 68 ft lbs
8 mm hex intermediated bearing bolt to 37 ft lbs
30 mm 12 pt output shaft nut to 120 ft lbs
Last edited by jeebus31; 03-20-2020 at 07:51 AM.
03-20-2020 | 01:06 AM
#62
Rennlist Member
Nice work.
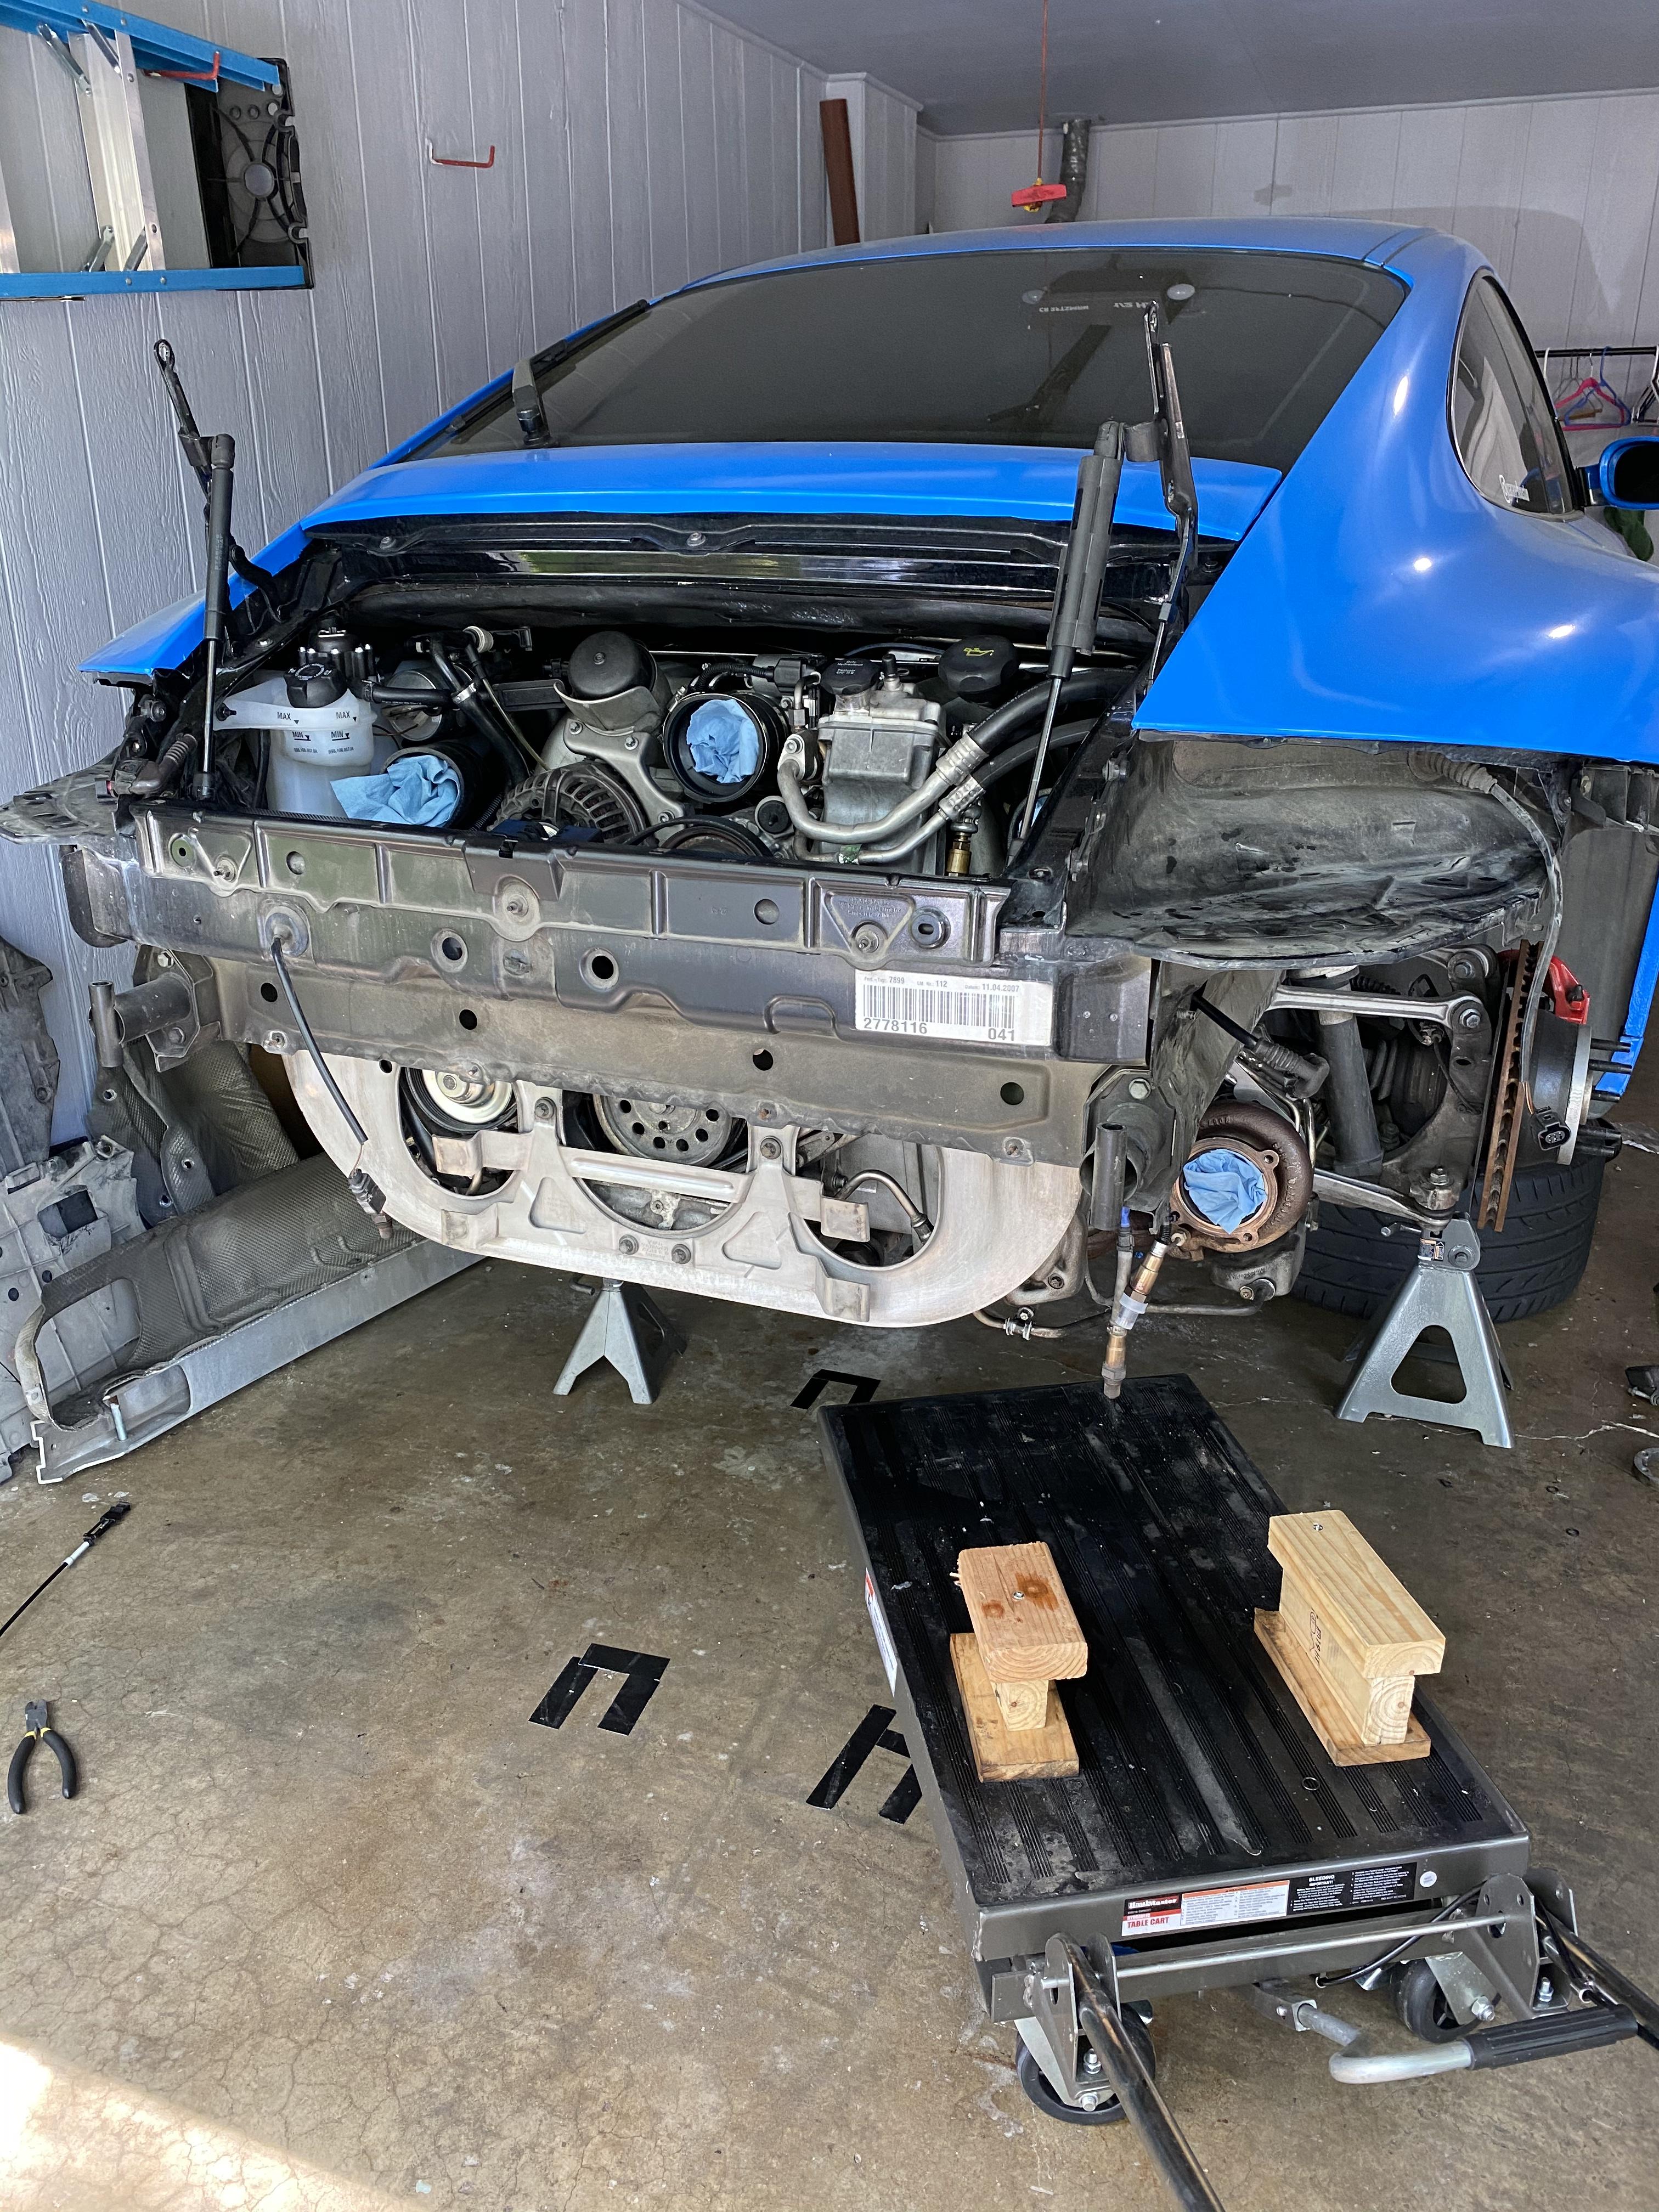
With all this "home-time" lately makes me which I had a proper 2-post lift so I could drop the motor.. Alas, I only have a scissor lift, so no dice..
Keep the pics coming!
With all this "home-time" lately makes me which I had a proper 2-post lift so I could drop the motor.. Alas, I only have a scissor lift, so no dice..
Keep the pics coming!
The following users liked this post:
jeebus31 (03-20-2020)
03-20-2020 | 10:08 AM
#63
Basic Sponsor
Rennlist
Site Sponsor
Rennlist
Site Sponsor
This thread is amazing, major kudos to you Jeebus! Keep up the awesome work 
Regards,
John Gaydos
Regards,
John Gaydos
__________________
SOUL PERFORMANCE PRODUCTS
Quality Exhaust Solutions, Fair Pricing, and Outstanding Service
John Gaydos- Owner, Performance Specialist
Cell - (484) 883-6197
johng@soulpp.com
Jon Wheel - Marketing Manager
jwheel@soulpp.com

SOUL PERFORMANCE PRODUCTS
Quality Exhaust Solutions, Fair Pricing, and Outstanding Service
John Gaydos- Owner, Performance Specialist
Cell - (484) 883-6197
johng@soulpp.com
Jon Wheel - Marketing Manager
jwheel@soulpp.com
The following users liked this post:
jeebus31 (03-20-2020)
03-20-2020 | 01:37 PM
#64
Three Wheelin'
Hmmm, I went to edit my post to remove what was I was juts informed as copyright protected information, but the post is gone.
If anyone is interested the name of the book title is listed below and I believe I purchased it (hopefully legally) from eBay:
FASTENING SPECIFICATIONS
Fastener size, grade, assemble position and tightening torque
PORSCHE 911
AUTOMOBILE
Type 997 - 2005 through 2012
THE KNOWLEDGE GRUPPE
I apologize for the post, my intention was only to help, not to do anything illegal. If I had been given the chance I would have edited the post and removed the photos.
Ed
The following users liked this post:
jayi836 (04-01-2020)
03-20-2020 | 01:50 PM
#65
Thread Starter
Three Wheelin'
Hmmm, I went to edit my post to remove what was I was juts informed as copyright protected information, but the post is gone.
If anyone is interested the name of the book title is listed below and I believe I purchased it (hopefully legally) from eBay:
FASTENING SPECIFICATIONS
Fastener size, grade, assemble position and tightening torque
PORSCHE 911
AUTOMOBILE
Type 997 - 2005 through 2012
THE KNOWLEDGE GRUPPE
I apologize for the post, my intention was only to help, not to do anything illegal. If I had been given the chance I would have edited the post and removed the photos.
Ed
If anyone is interested the name of the book title is listed below and I believe I purchased it (hopefully legally) from eBay:
FASTENING SPECIFICATIONS
Fastener size, grade, assemble position and tightening torque
PORSCHE 911
AUTOMOBILE
Type 997 - 2005 through 2012
THE KNOWLEDGE GRUPPE
I apologize for the post, my intention was only to help, not to do anything illegal. If I had been given the chance I would have edited the post and removed the photos.
Ed
I picked up my copy from RM european for about 60 bucks.
03-20-2020 | 03:48 PM
#66

Former Vendor
Hmmm, I went to edit my post to remove what was I was juts informed as copyright protected information, but the post is gone.
If anyone is interested the name of the book title is listed below and I believe I purchased it (hopefully legally) from eBay:
FASTENING SPECIFICATIONS
Fastener size, grade, assemble position and tightening torque
PORSCHE 911
AUTOMOBILE
Type 997 - 2005 through 2012
THE KNOWLEDGE GRUPPE
I apologize for the post, my intention was only to help, not to do anything illegal. If I had been given the chance I would have edited the post and removed the photos.
Ed
If anyone is interested the name of the book title is listed below and I believe I purchased it (hopefully legally) from eBay:
FASTENING SPECIFICATIONS
Fastener size, grade, assemble position and tightening torque
PORSCHE 911
AUTOMOBILE
Type 997 - 2005 through 2012
THE KNOWLEDGE GRUPPE
I apologize for the post, my intention was only to help, not to do anything illegal. If I had been given the chance I would have edited the post and removed the photos.
Ed
I did not have the post removed, but I am glad that you understand, and appreciate the protection that we must maintain for these publications. I've been fighting piracy, so I am a little more sensitive than normal about this.
The following users liked this post:
jeebus31 (03-20-2020)
03-20-2020 | 04:38 PM
#67
Three Wheelin'
Like Alex said, the book has been spot on and really a savior for filling in the gaps. If any of you work on your vehicles at all, I highly recommend this reference tool. It was about $60 and I found mine on eBay a few years ago.
It was invaluable for my project and a worthwhile purchase. I appreciate the time and effort that Jake put into it. Thanks sir and again, my apologies, it won't happen again!
Ed
It was invaluable for my project and a worthwhile purchase. I appreciate the time and effort that Jake put into it. Thanks sir and again, my apologies, it won't happen again!
Ed
03-20-2020 | 04:42 PM
#68
Former Vendor
Like Alex said, the book has been spot on and really a savior for filling in the gaps. If any of you work on your vehicles at all, I highly recommend this reference tool. It was about $60 and I found mine on eBay a few years ago.
It was invaluable for my project and a worthwhile purchase. I appreciate the time and effort that Jake put into it. Thanks sir and again, my apologies, it won't happen again!
Ed
It was invaluable for my project and a worthwhile purchase. I appreciate the time and effort that Jake put into it. Thanks sir and again, my apologies, it won't happen again!
Ed
03-23-2020 | 07:31 PM
#69
Thread Starter
Three Wheelin'
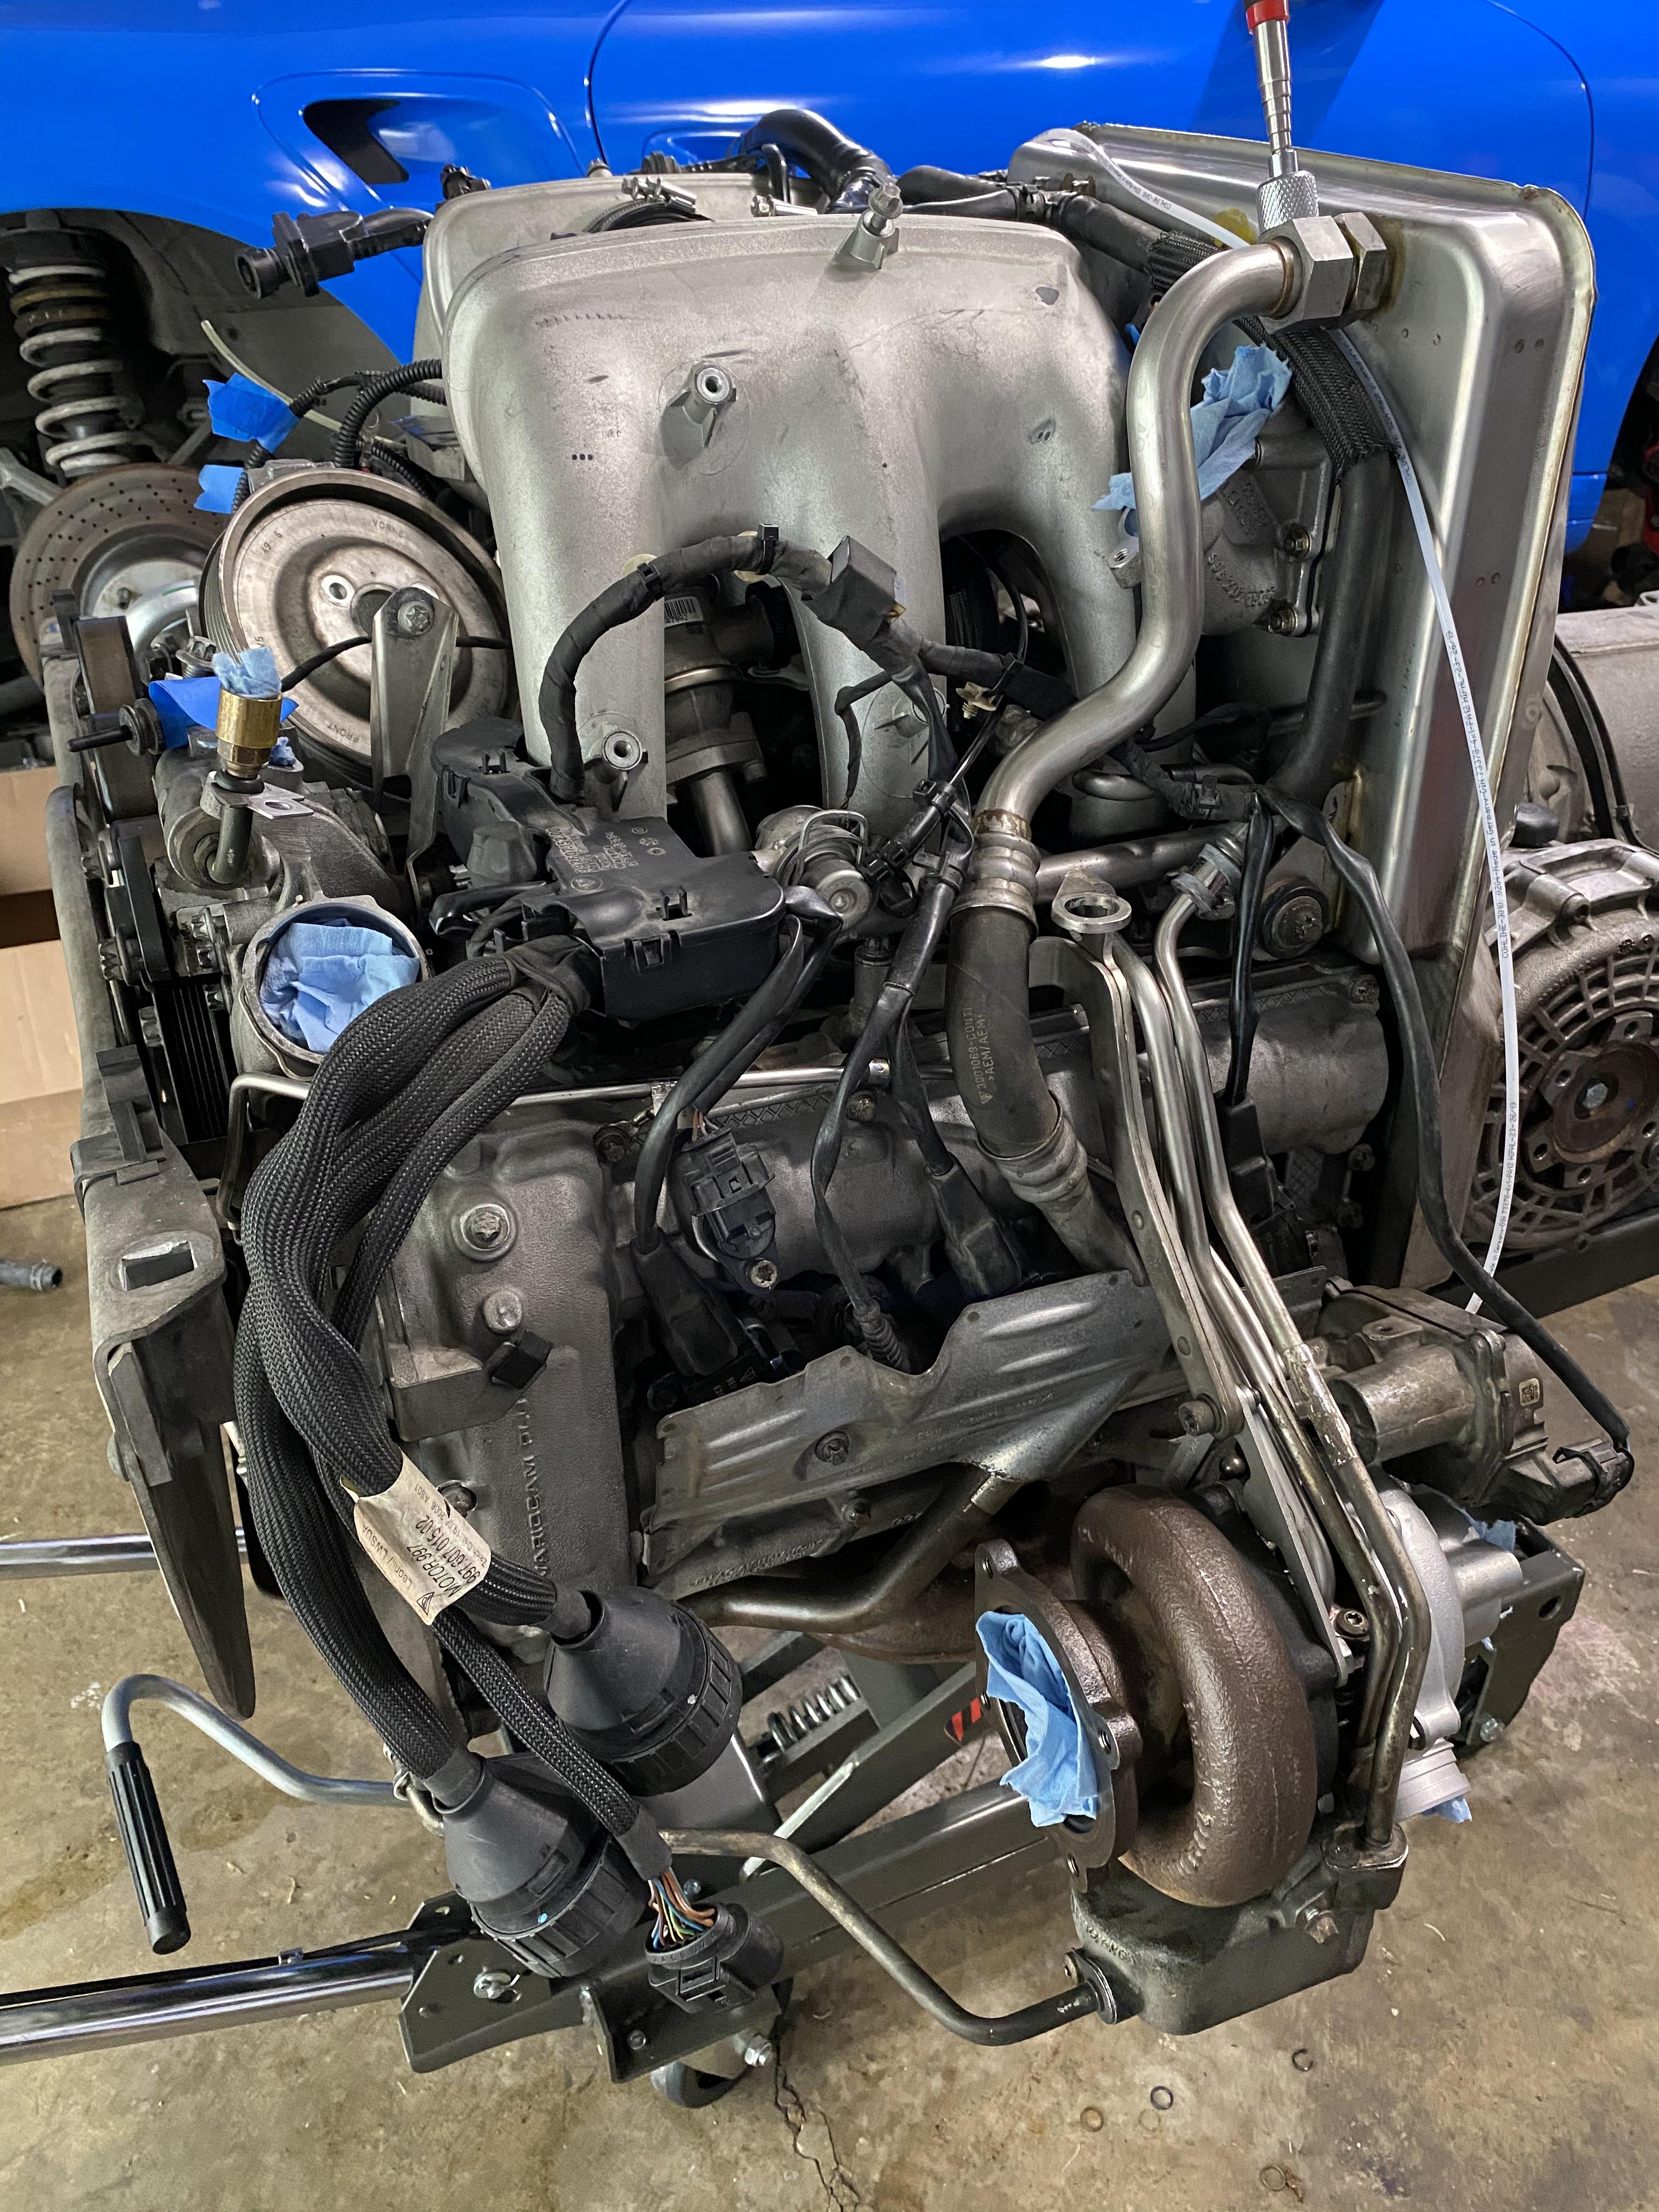
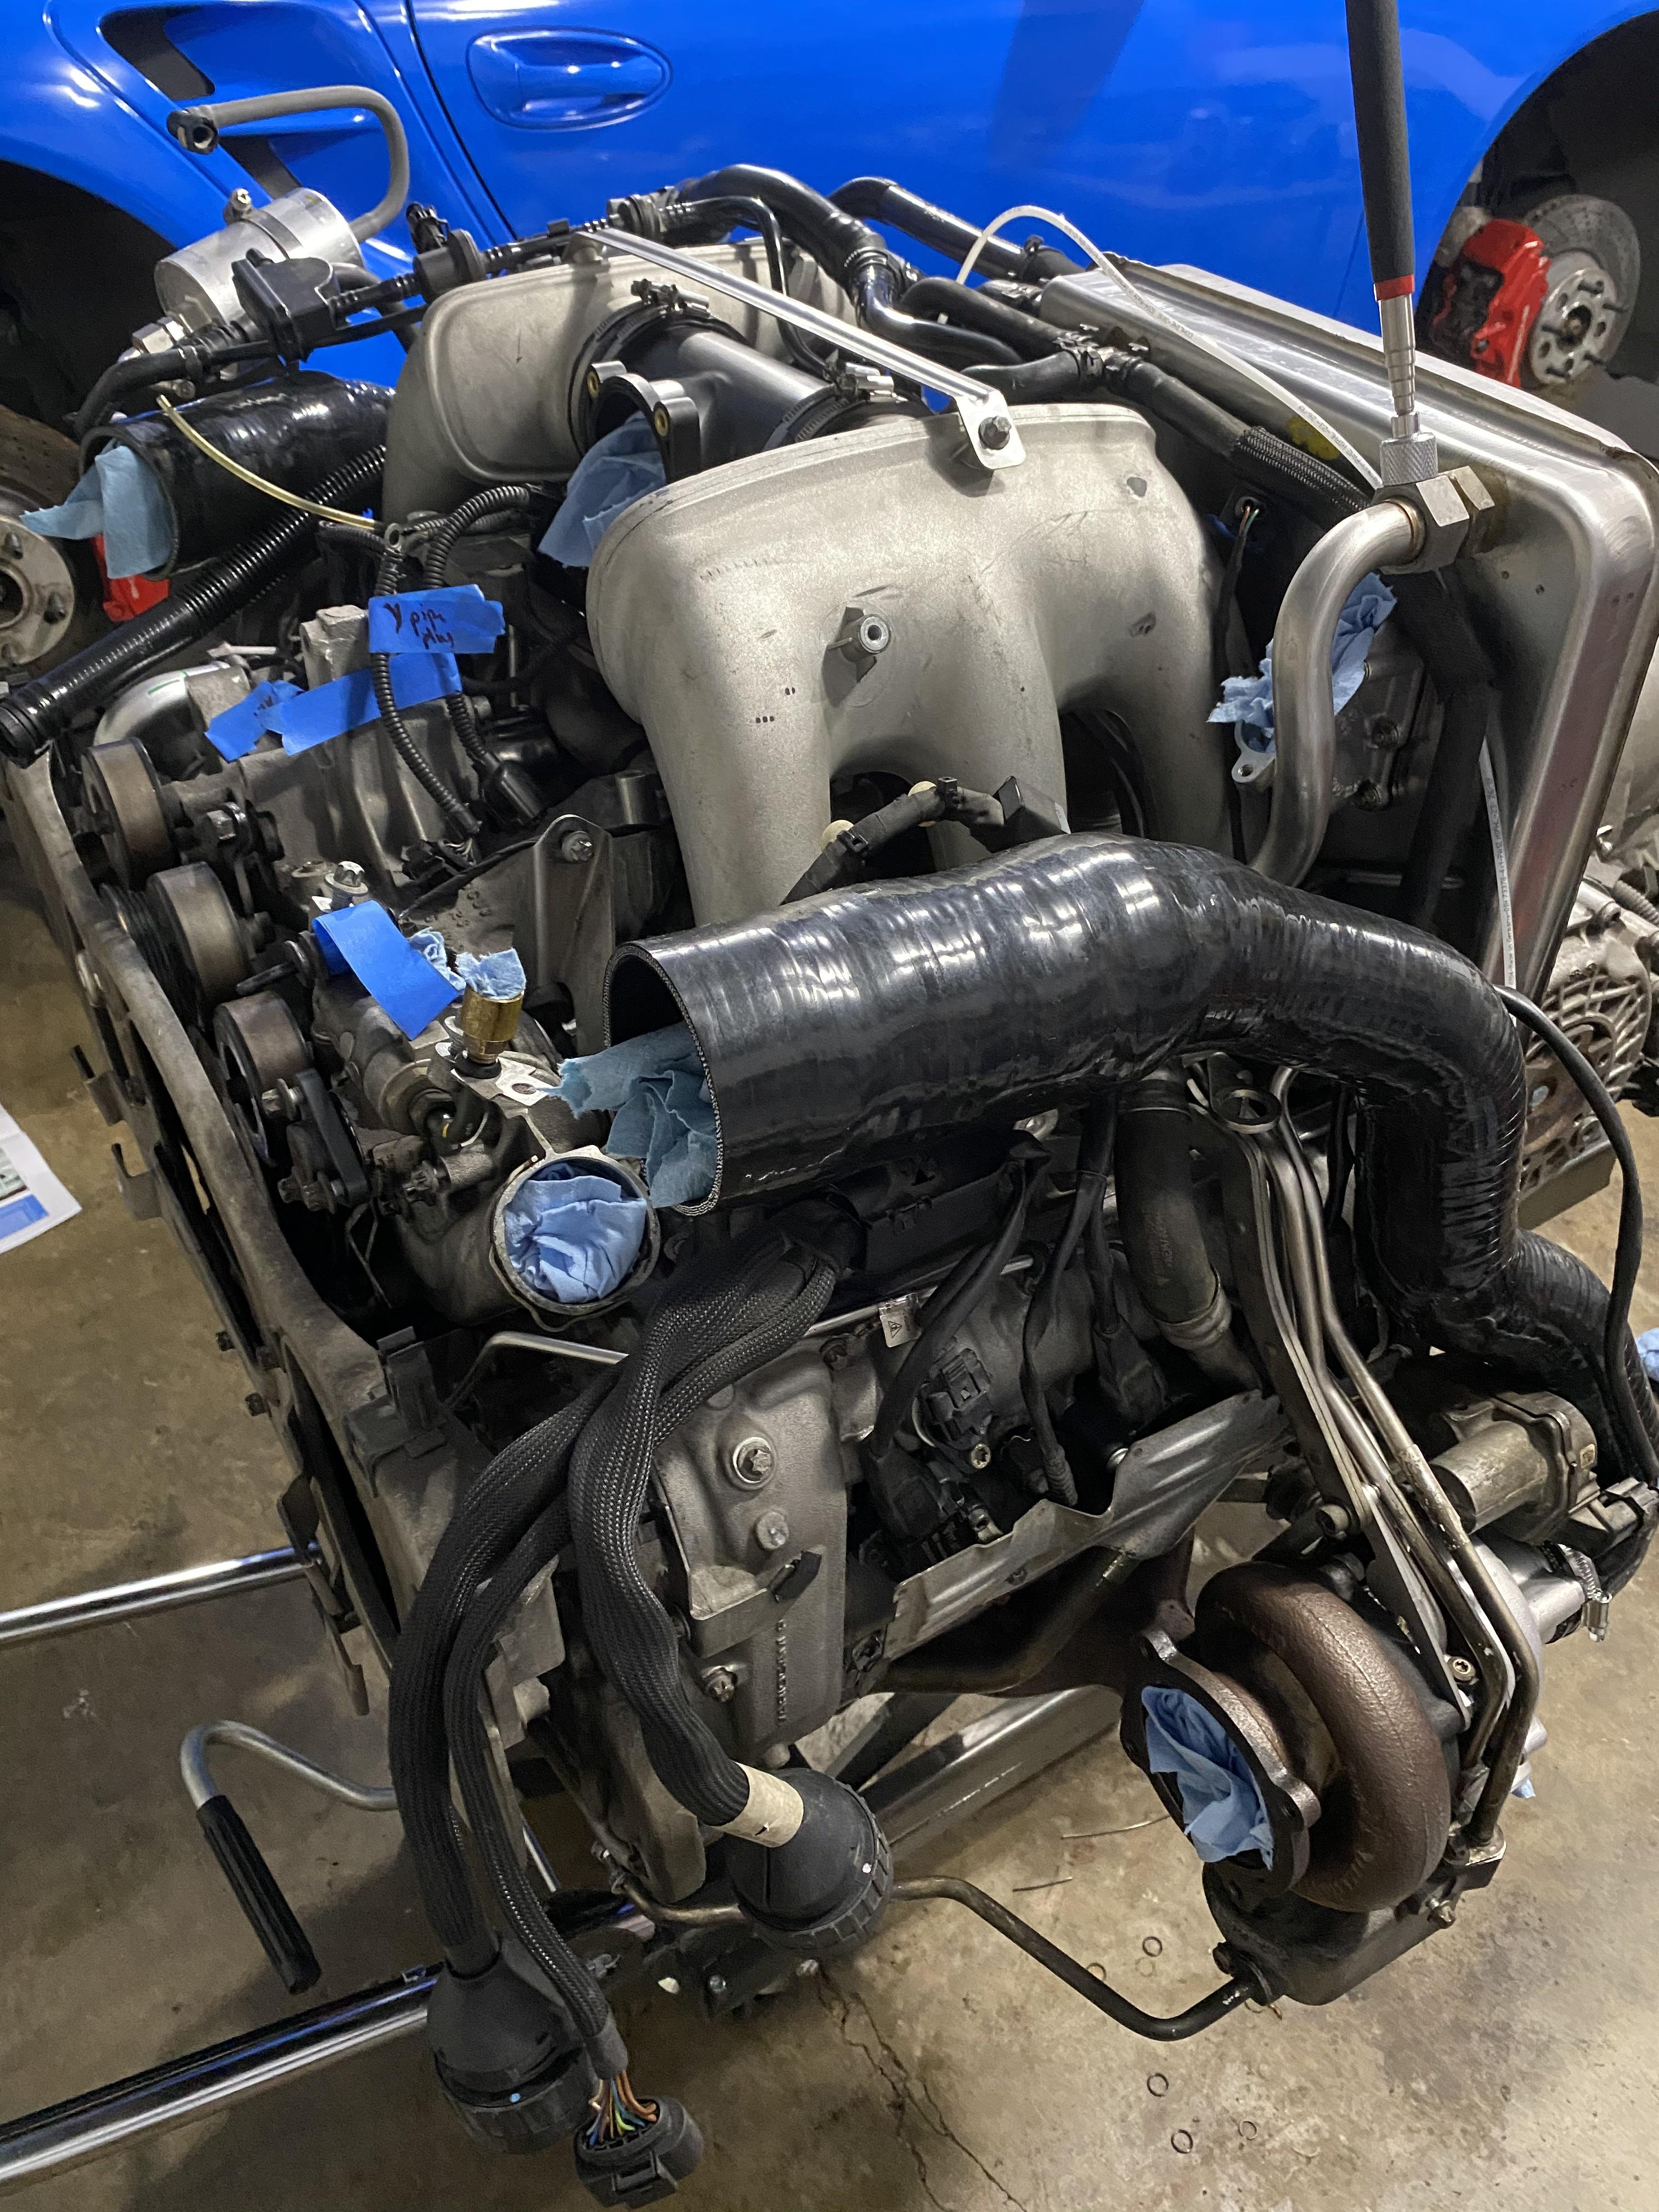
Getting close now. I picked up the turbo from the machine shop today - they were able to get the stud out while preserving the threads. Hooray. $155 mistake... but I got it done before the lockdown which I am sure is coming to us soon.
ID1050x injectors because why not
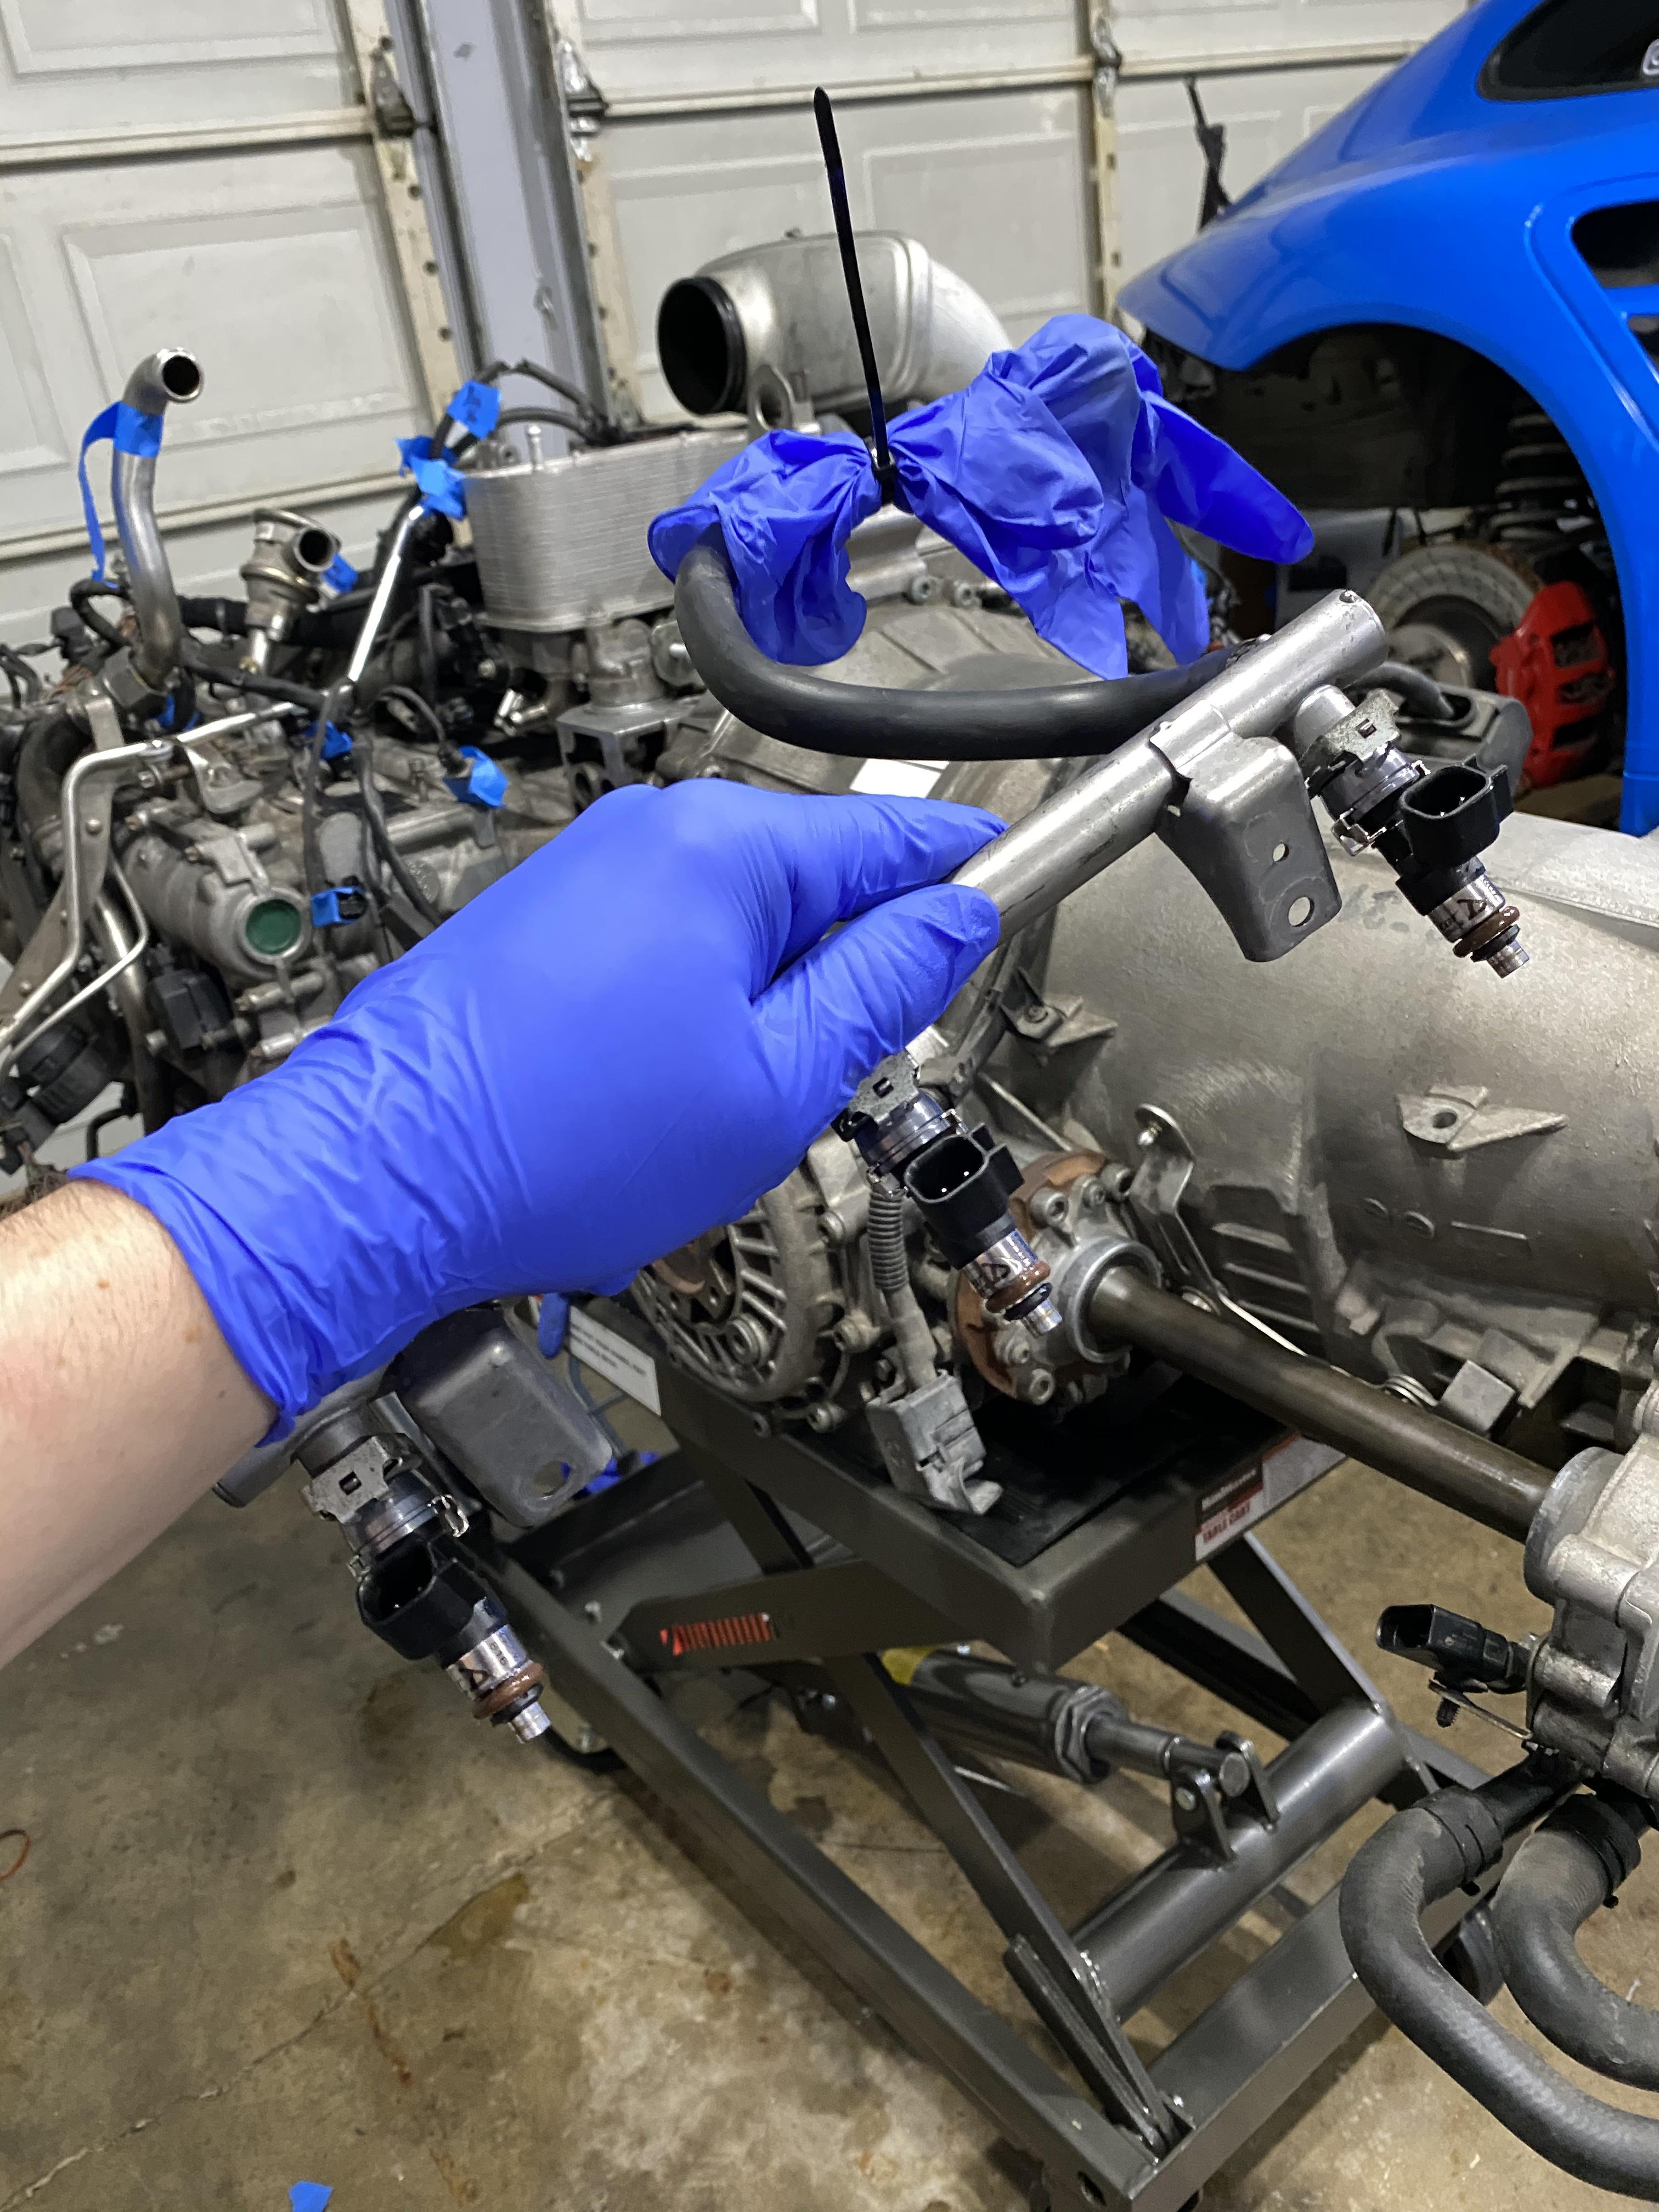
I used PnP adapters which mean they need to be angled in order to clear the intake manifold
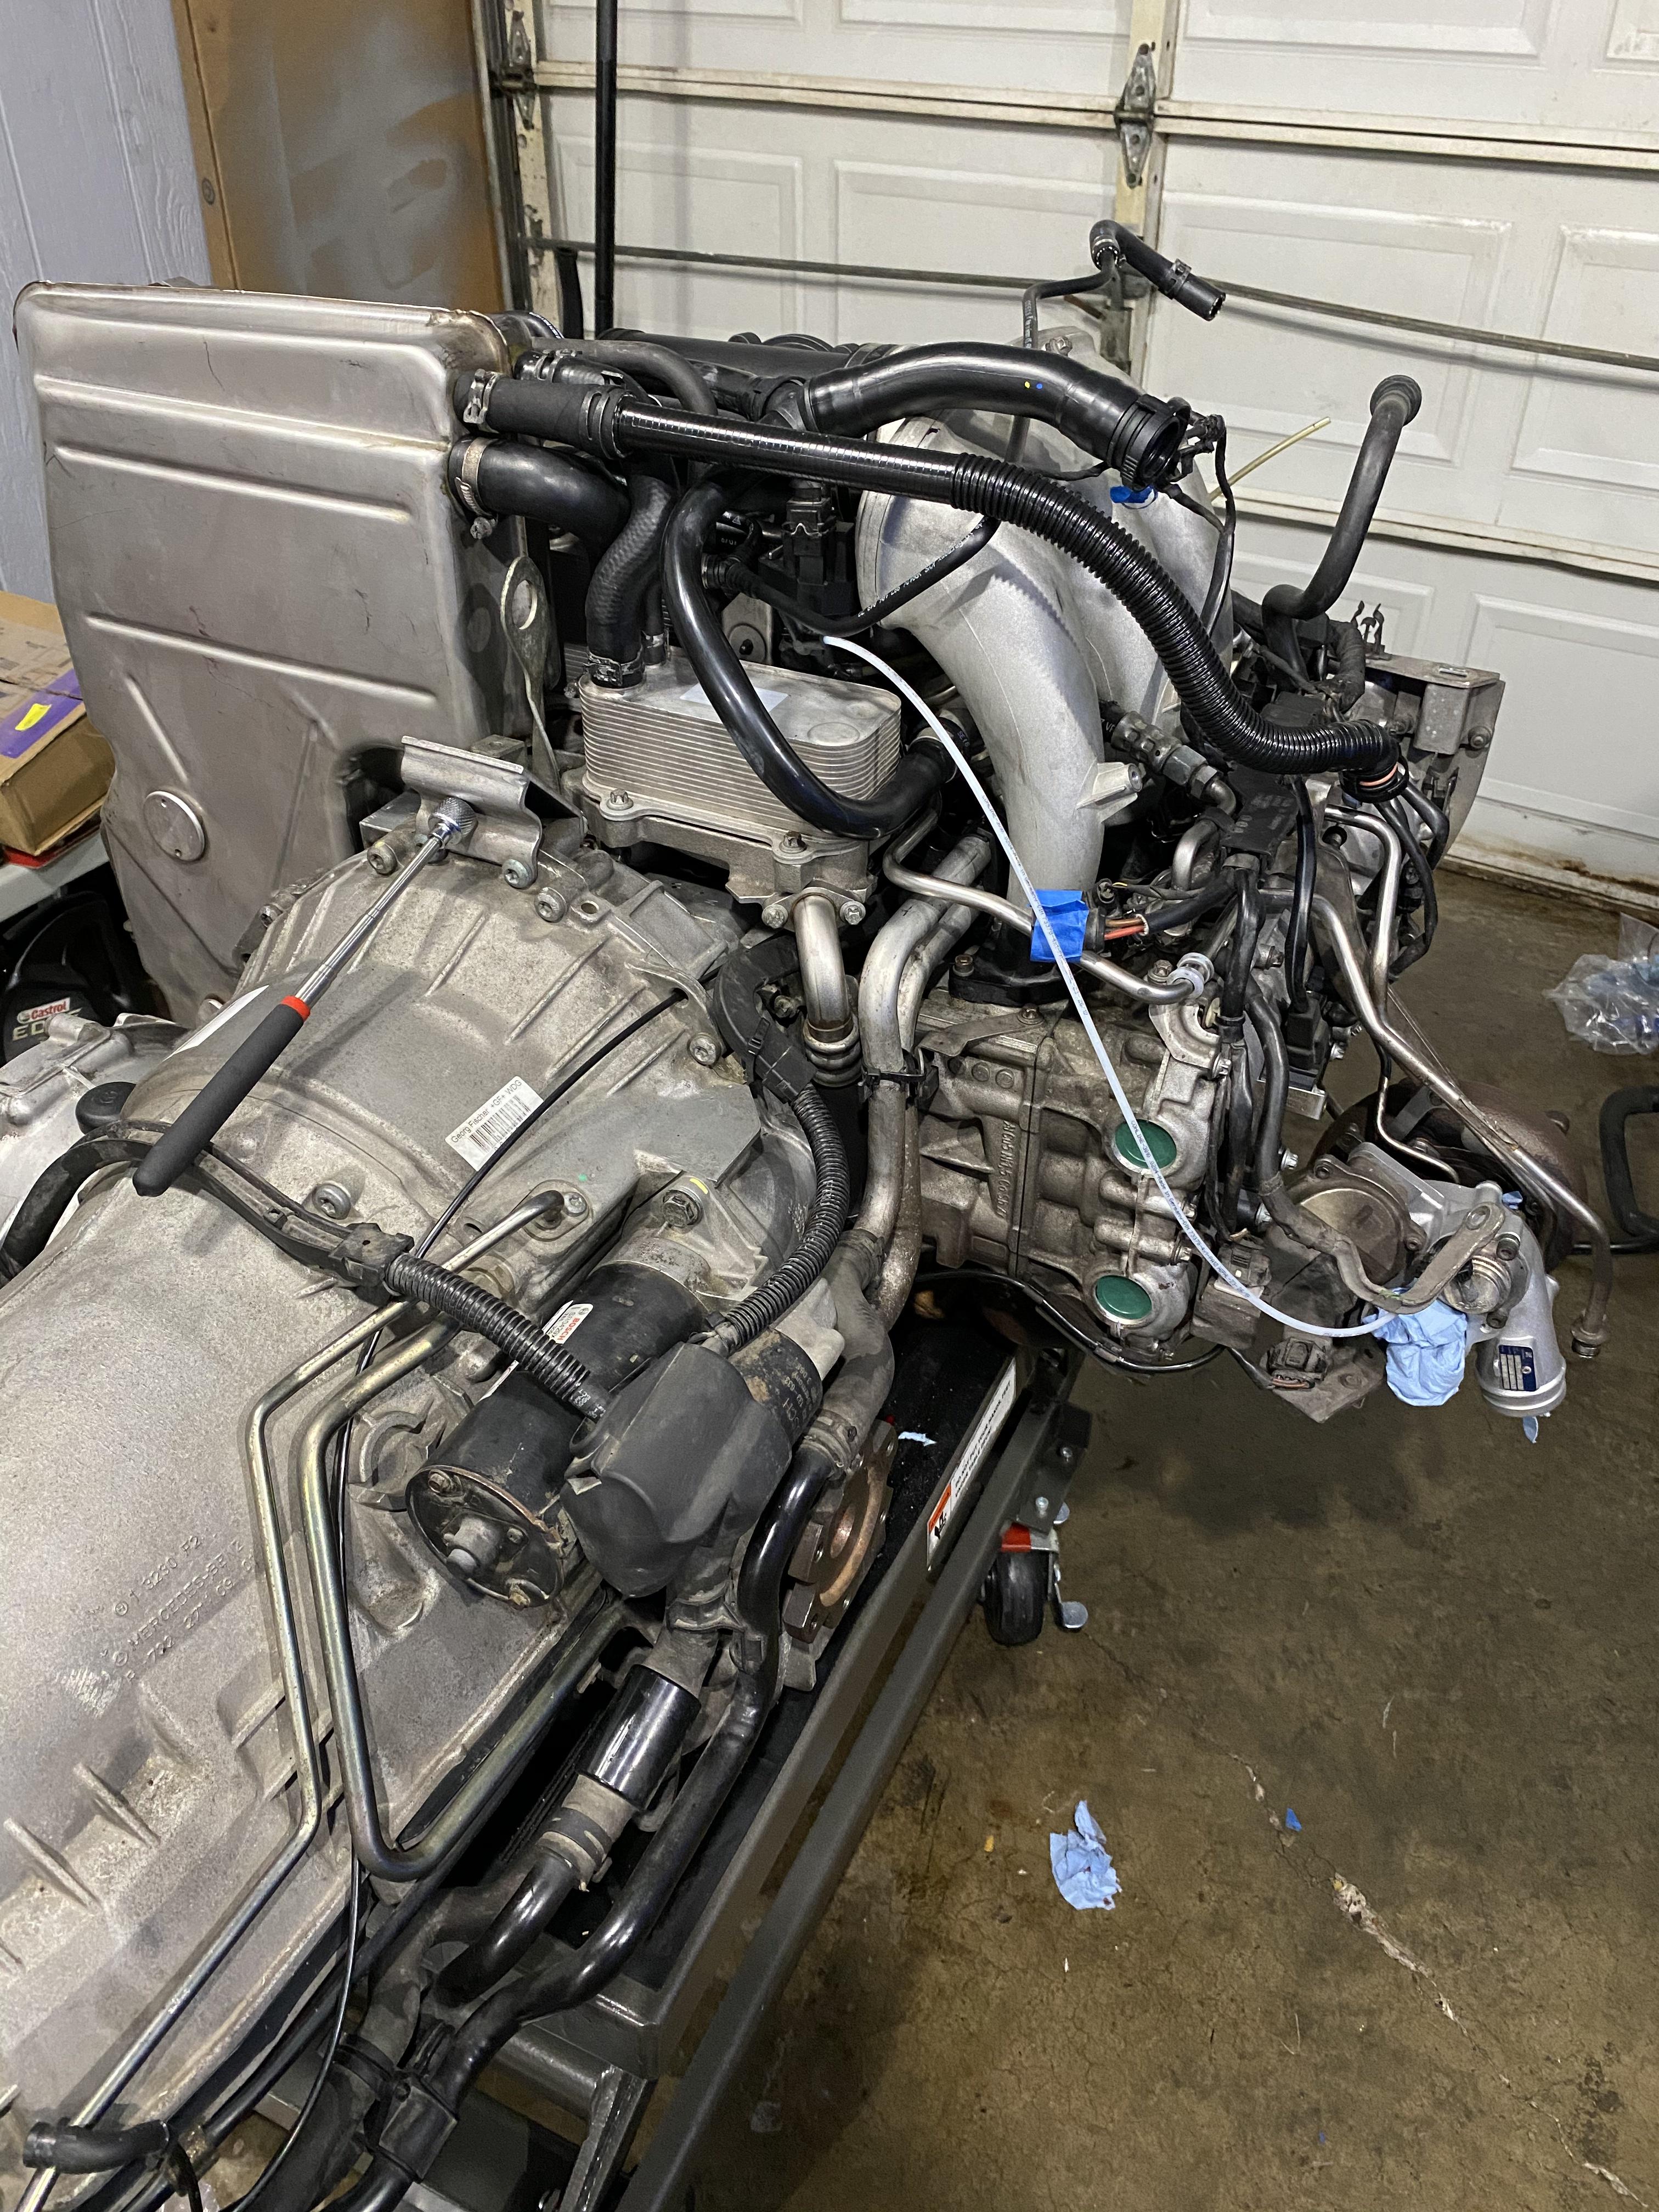
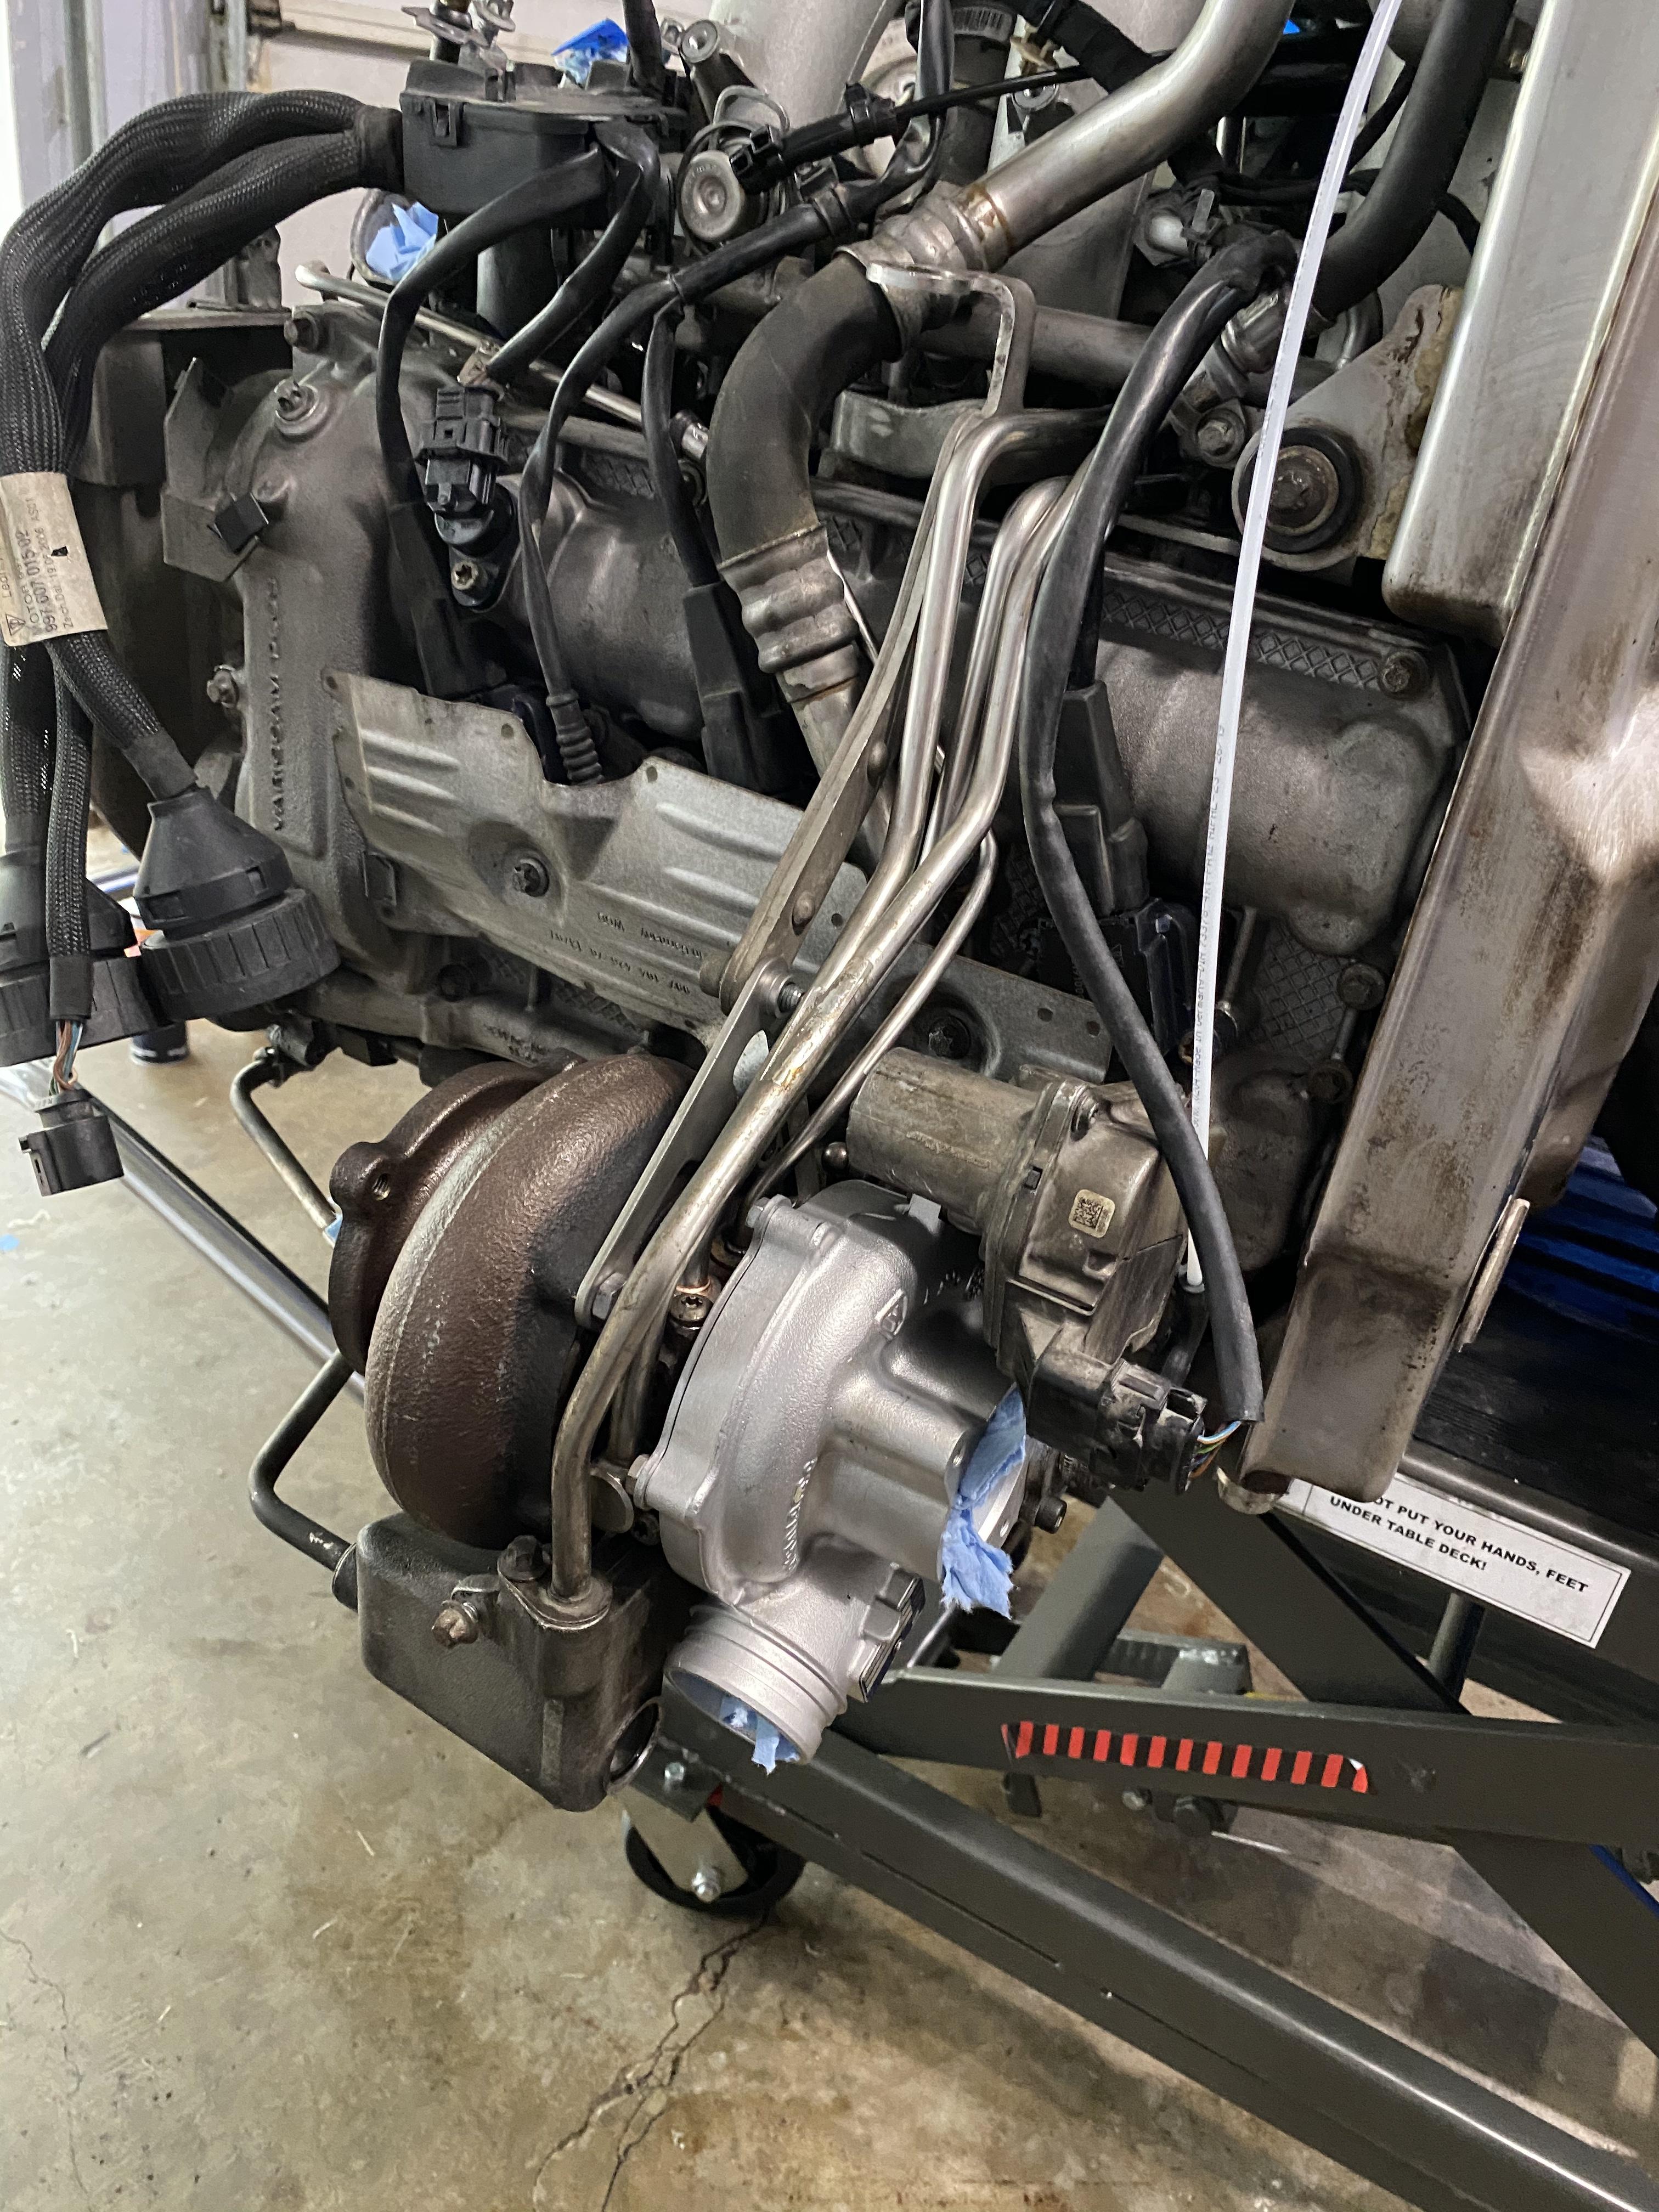
Oil tank and oil coolers cleaned up nicely with some degreaser. DS turbo and engine electrical harness in place. All new vacuum and rubber hoses. Zip tying everything religiously.
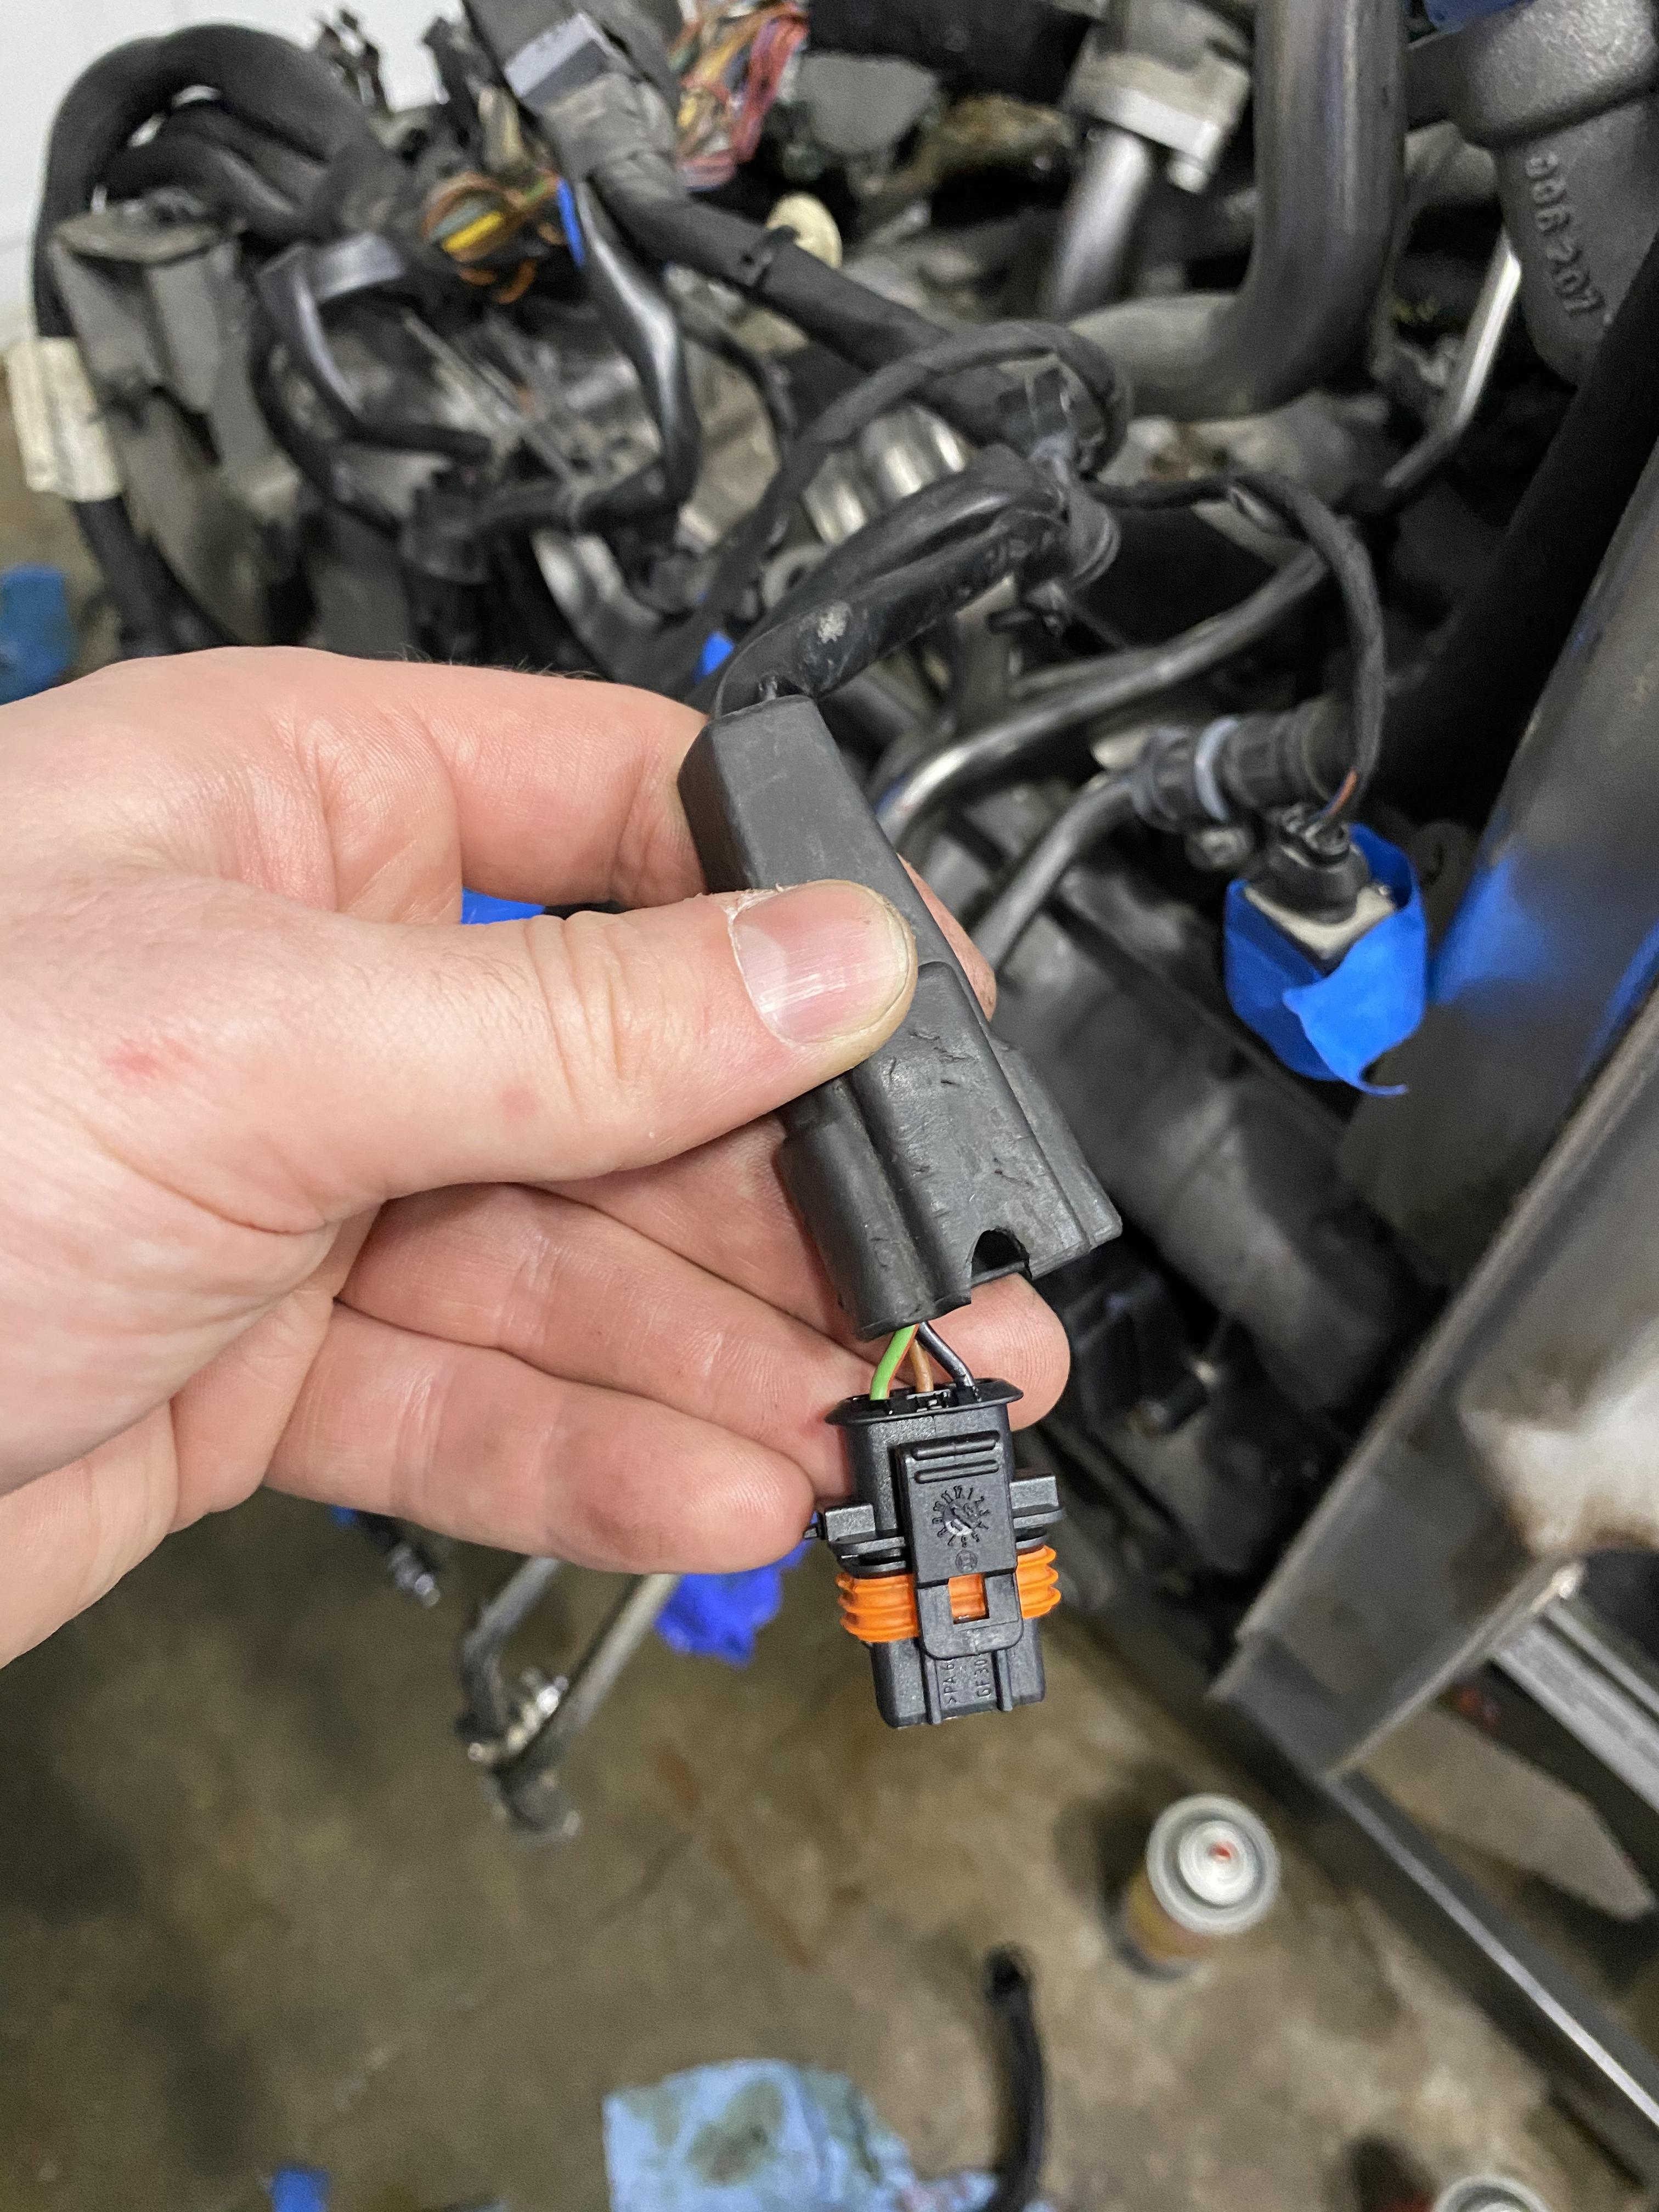
Finally got around to repairing the #6 cyl coil pack connector, which I snapped about 6 weeks ago doing the plugs/coils with the engine still in the car.
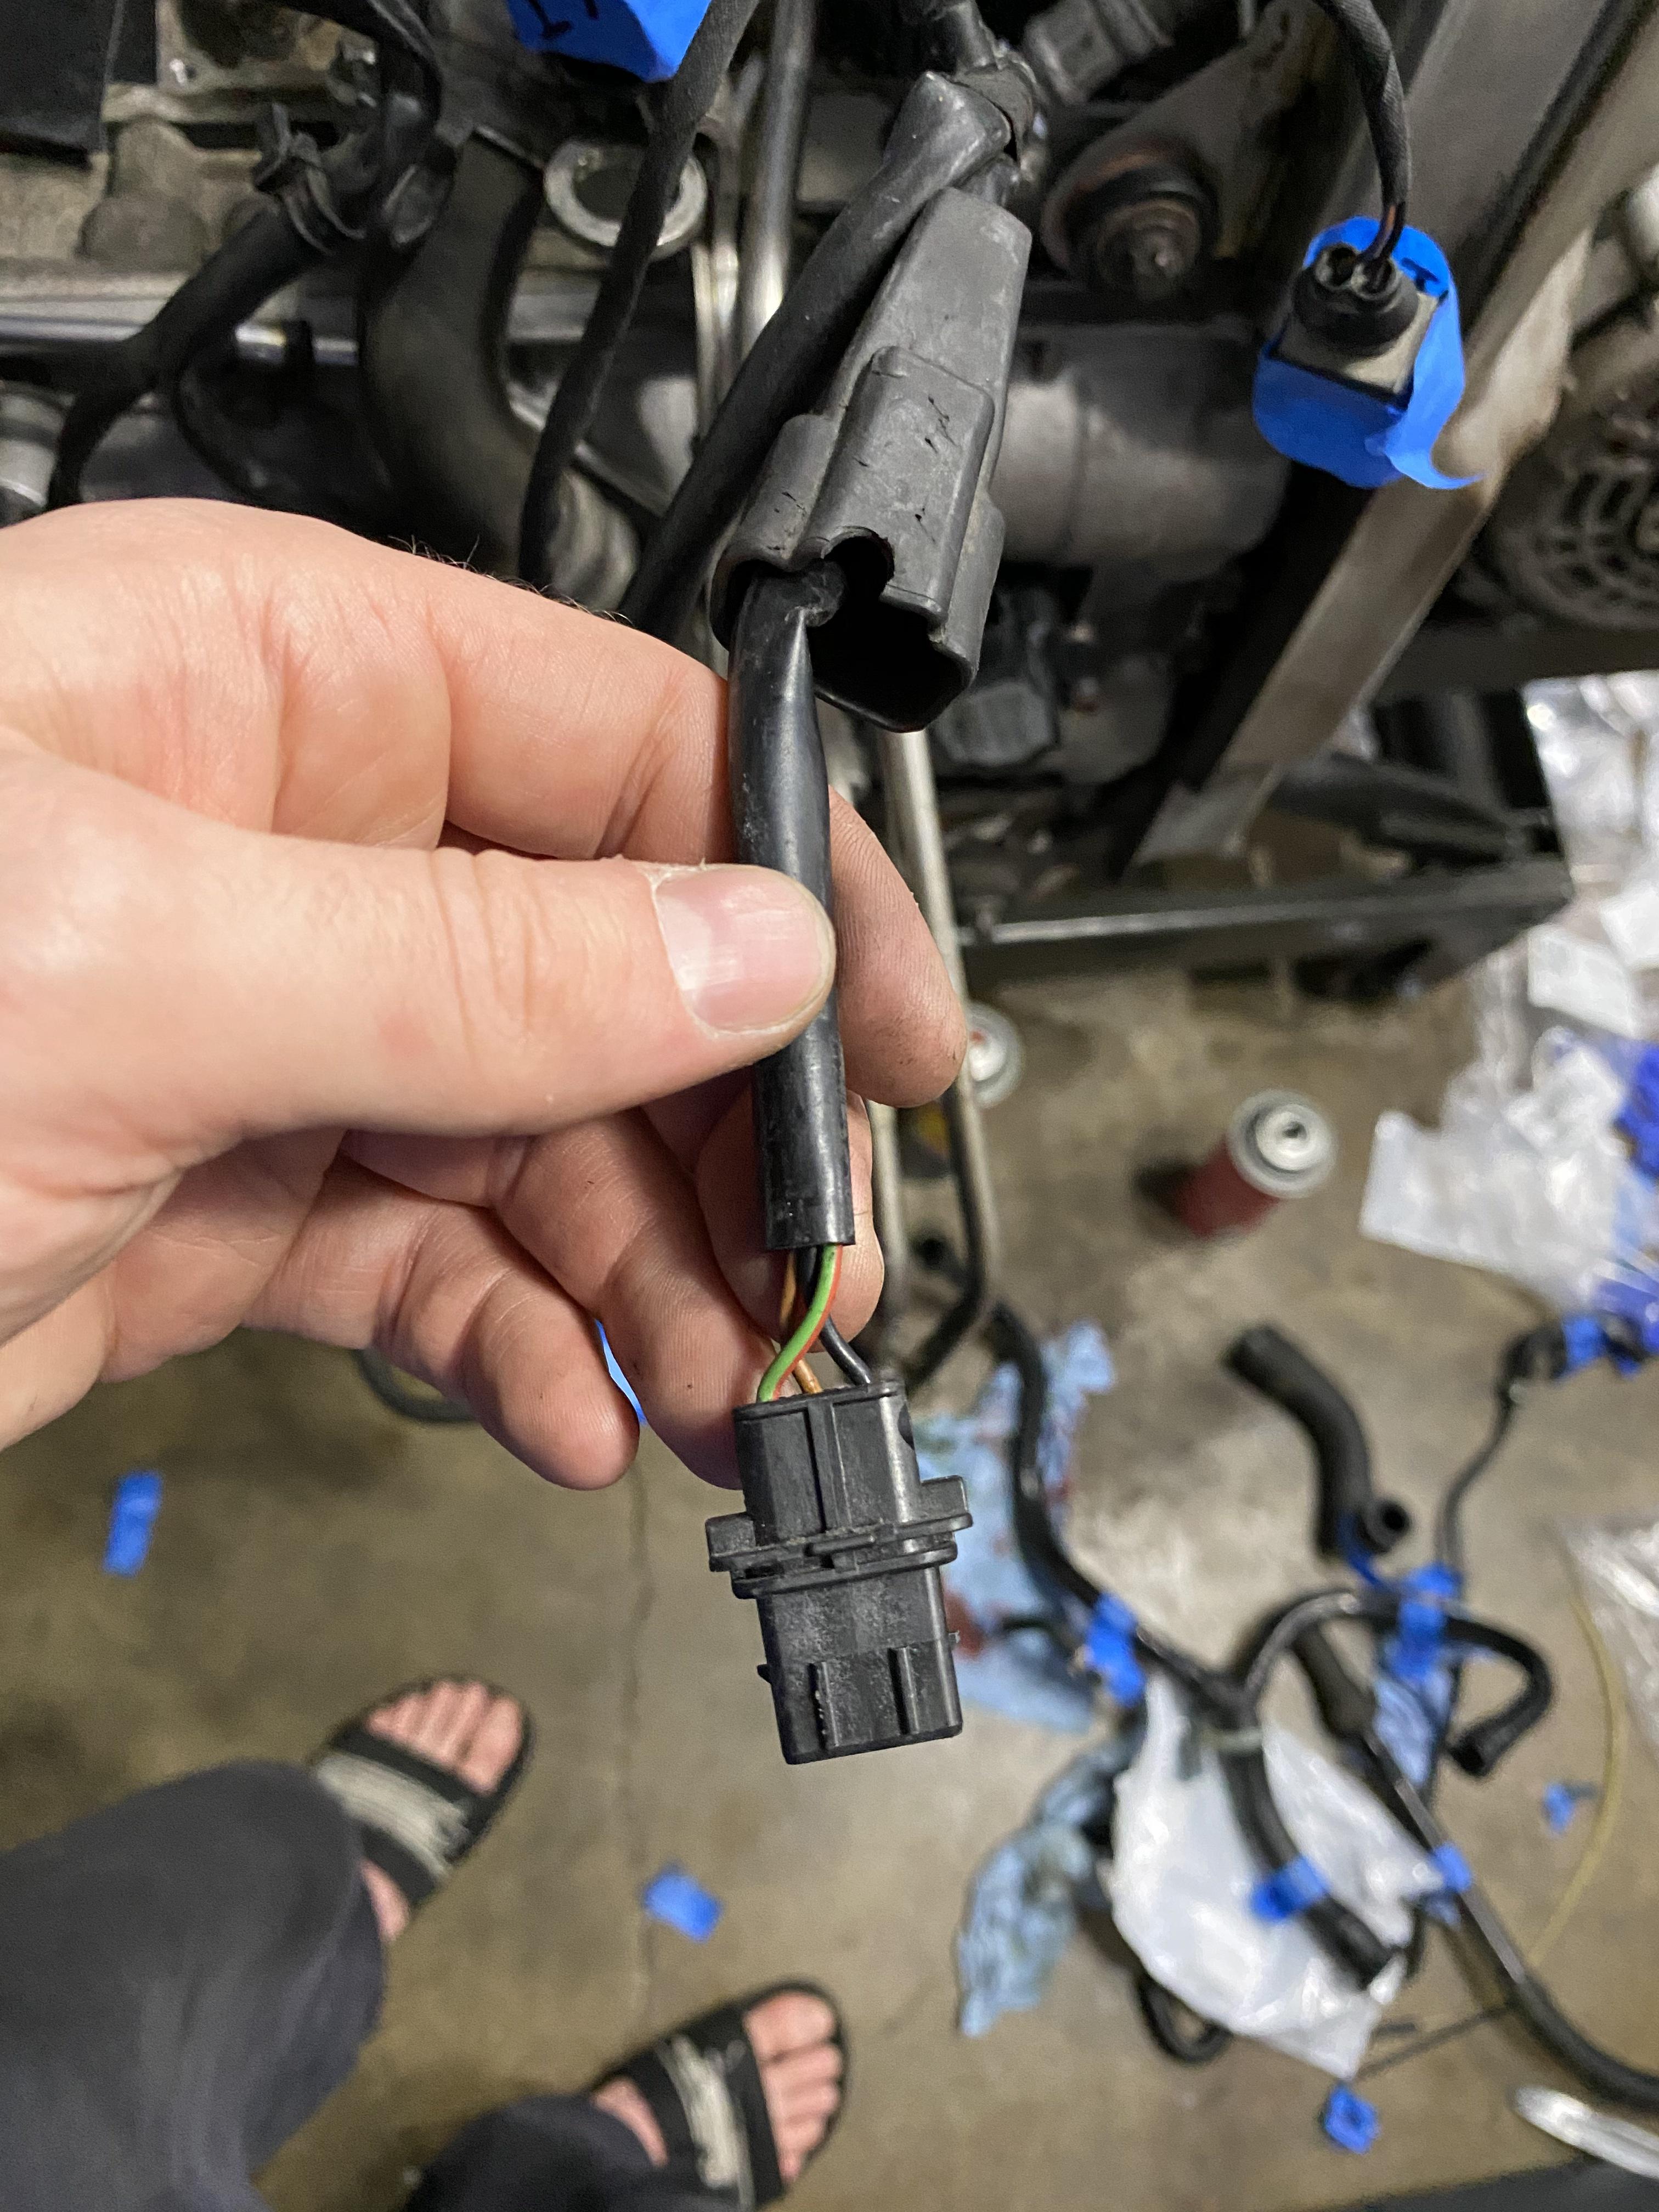
Push out the leads with a terminal wire tool. Need a key that's 5mm wide with 2mm prongs.
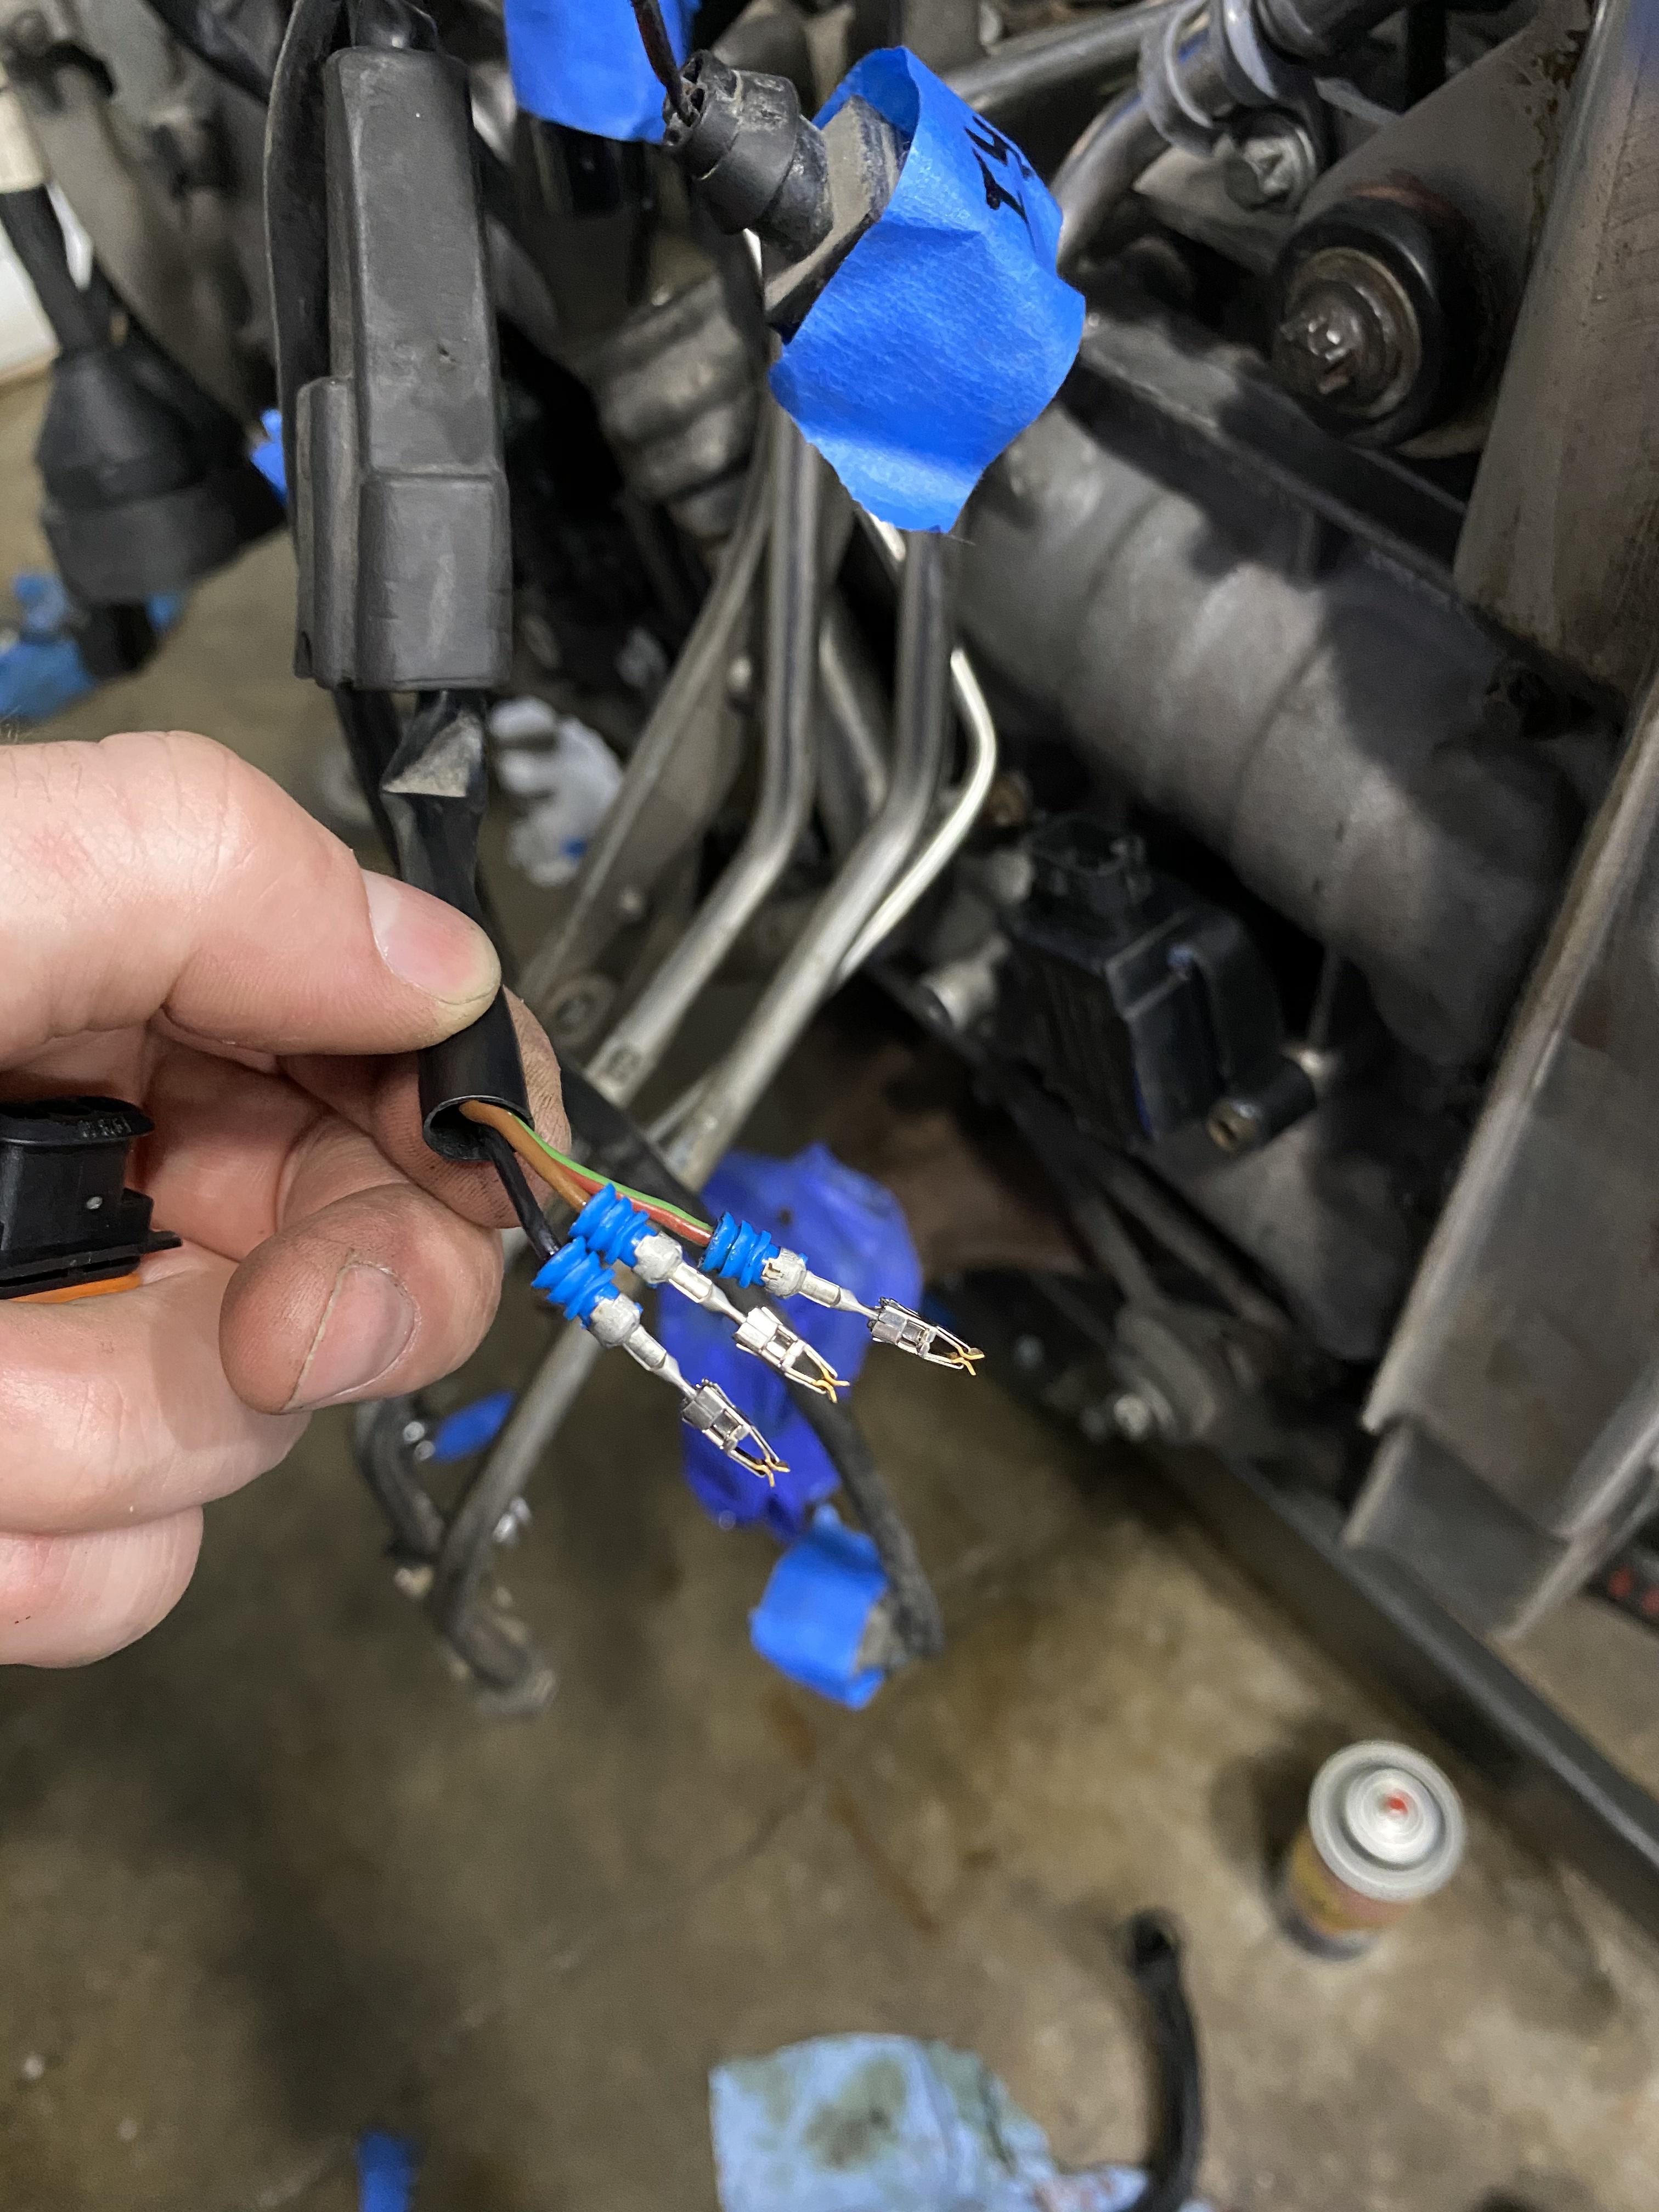
And plug them in in the same order into the new connector. Got this one from Jayi836, they are available from Latvia via Ebay.

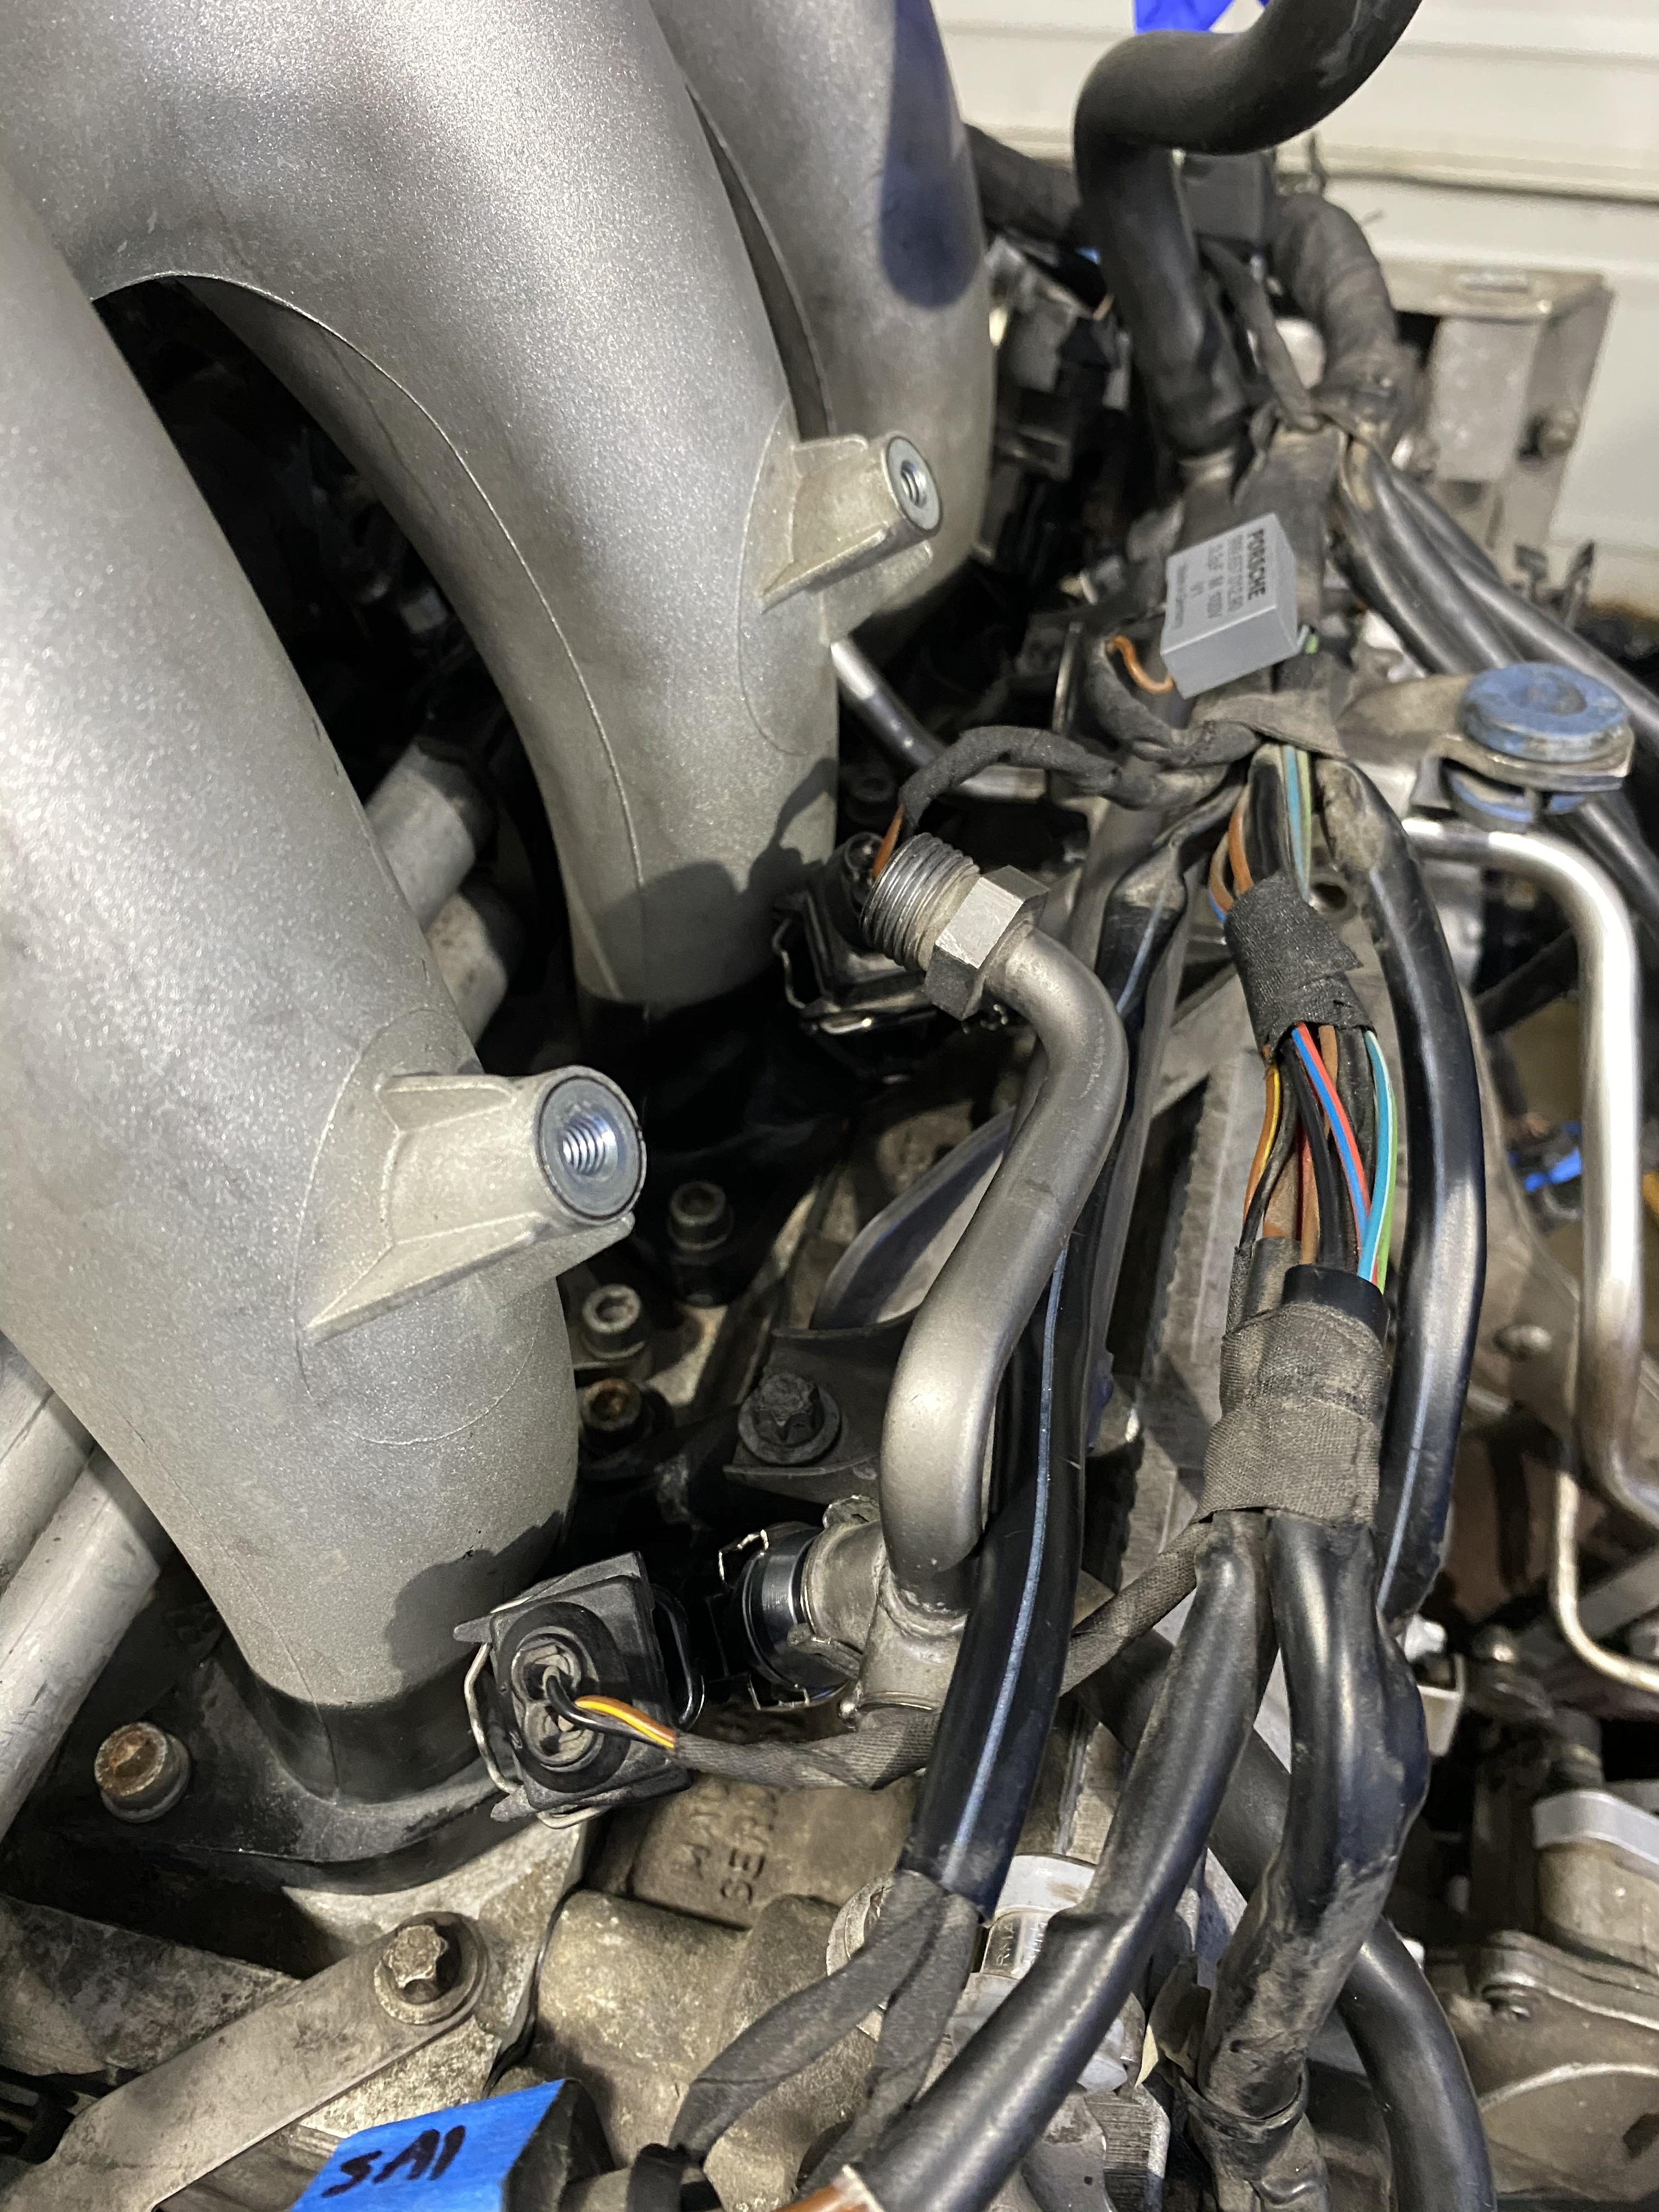
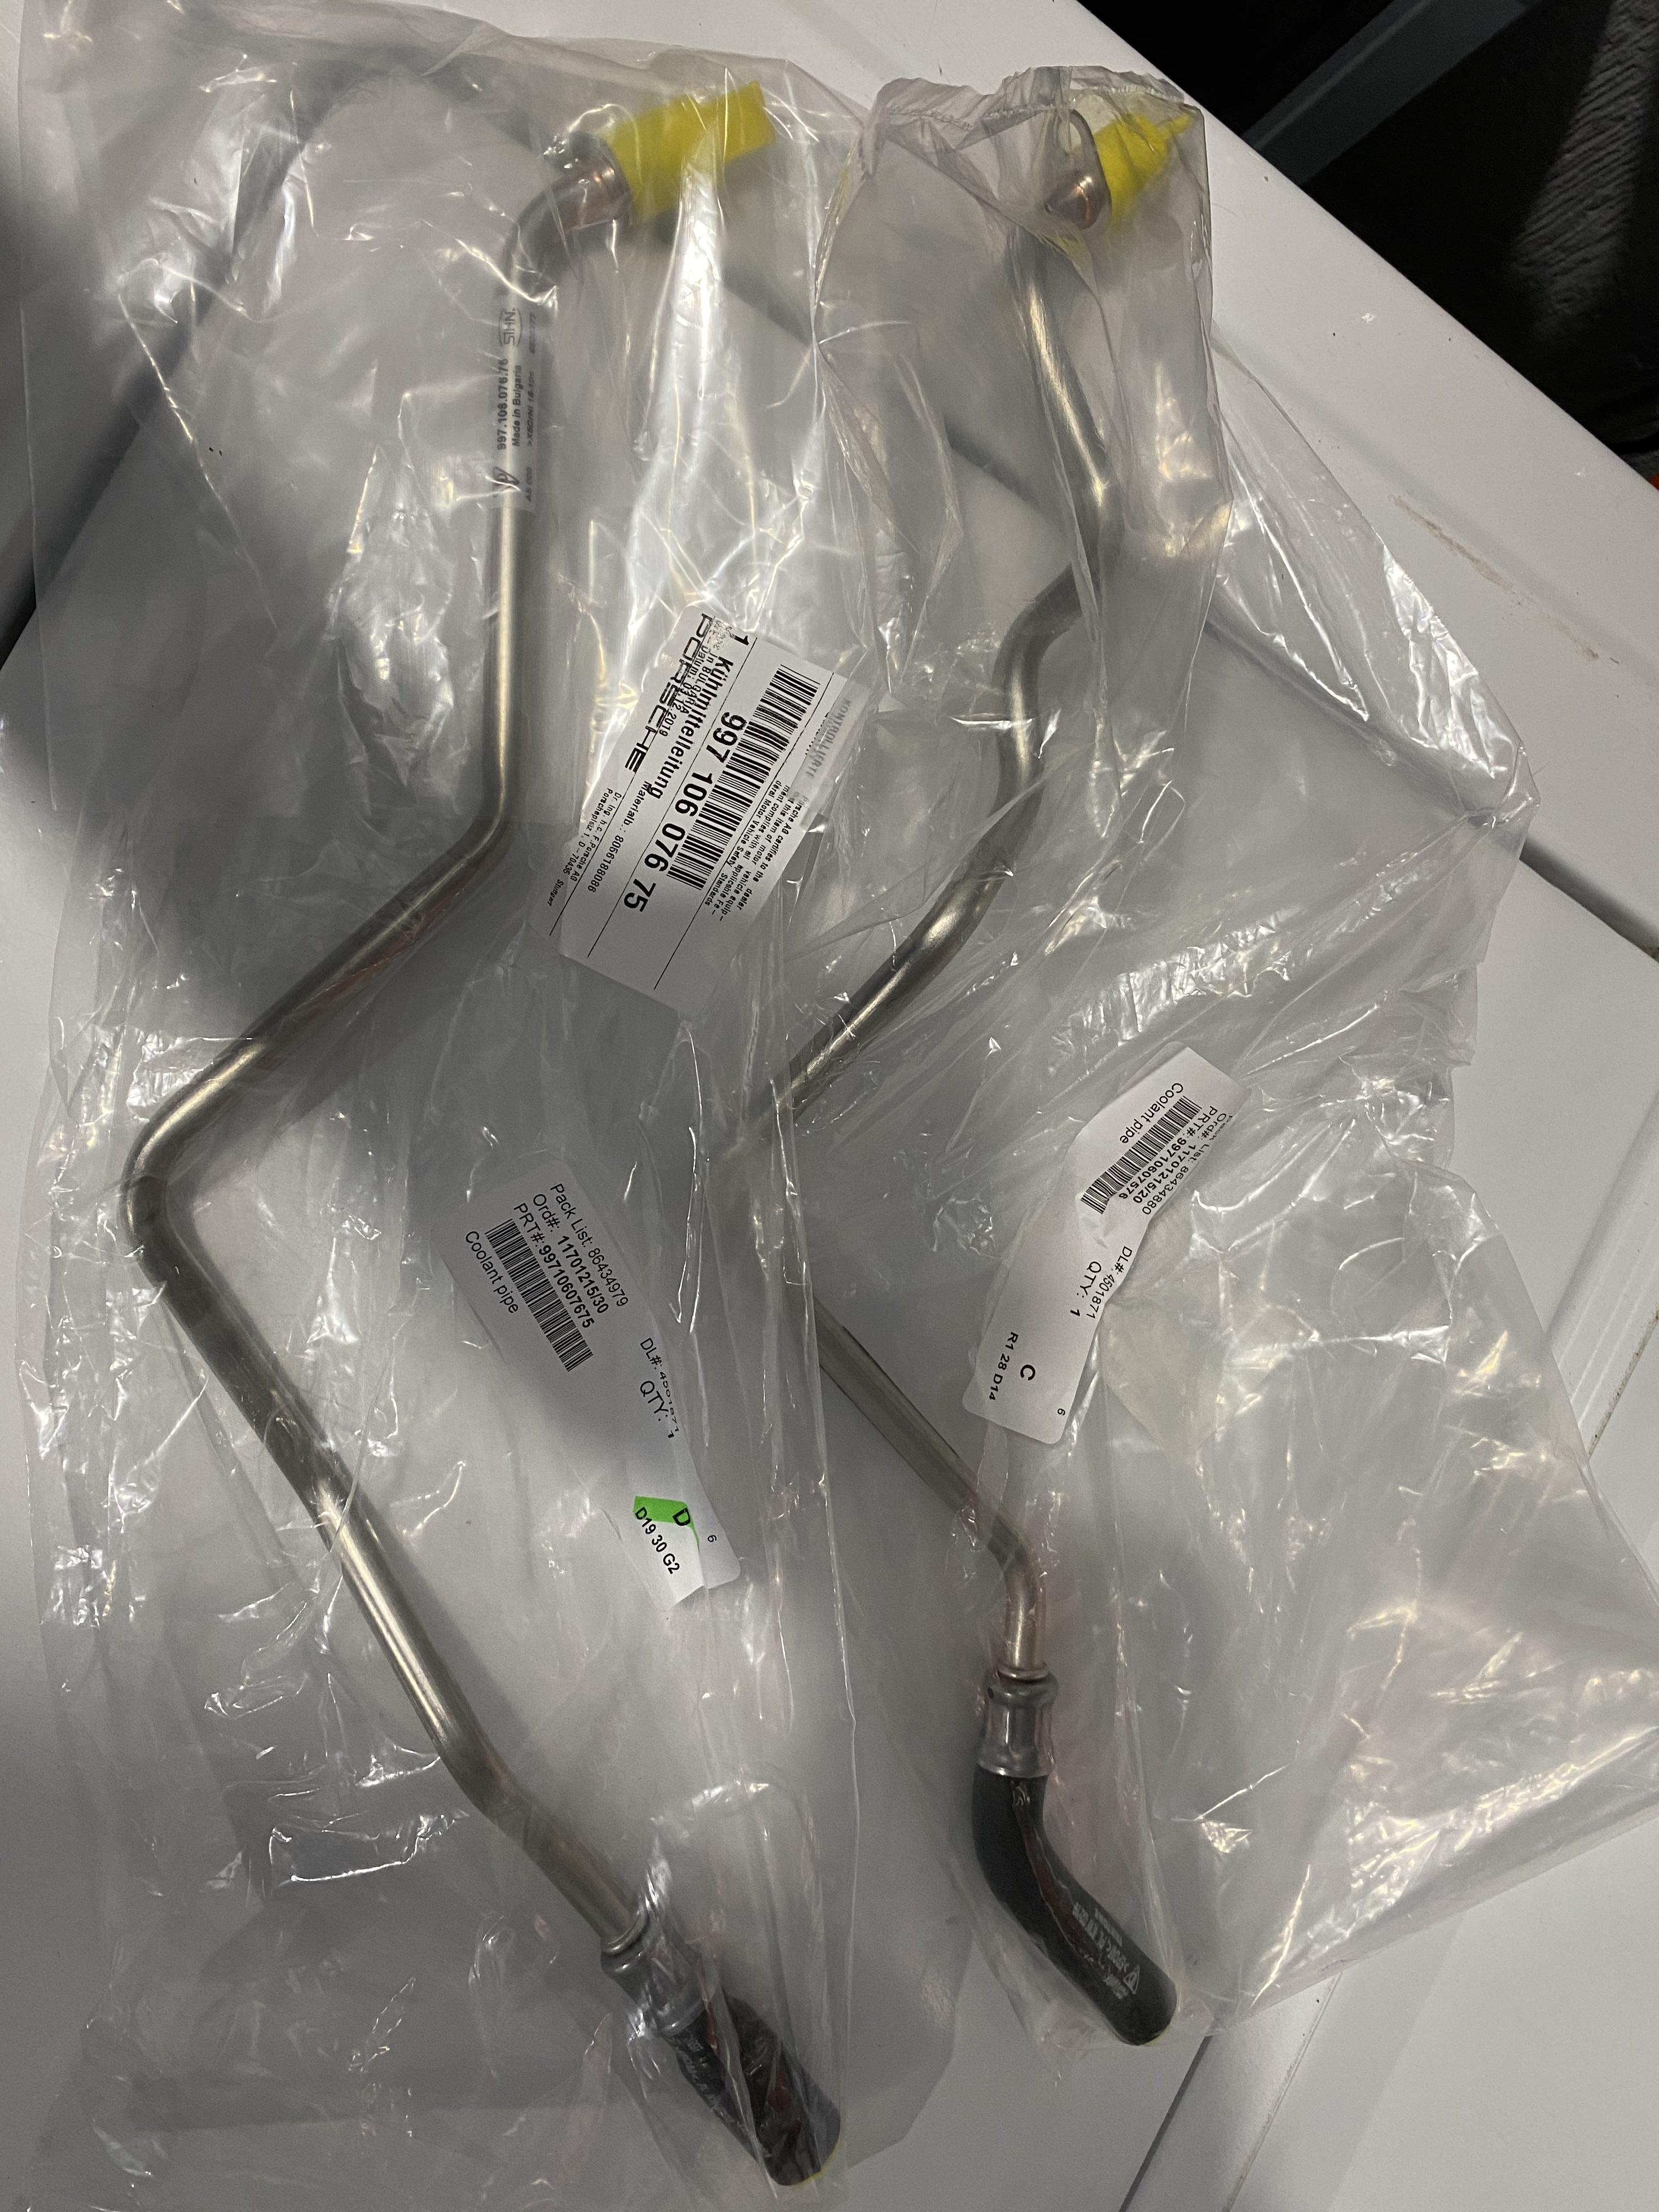
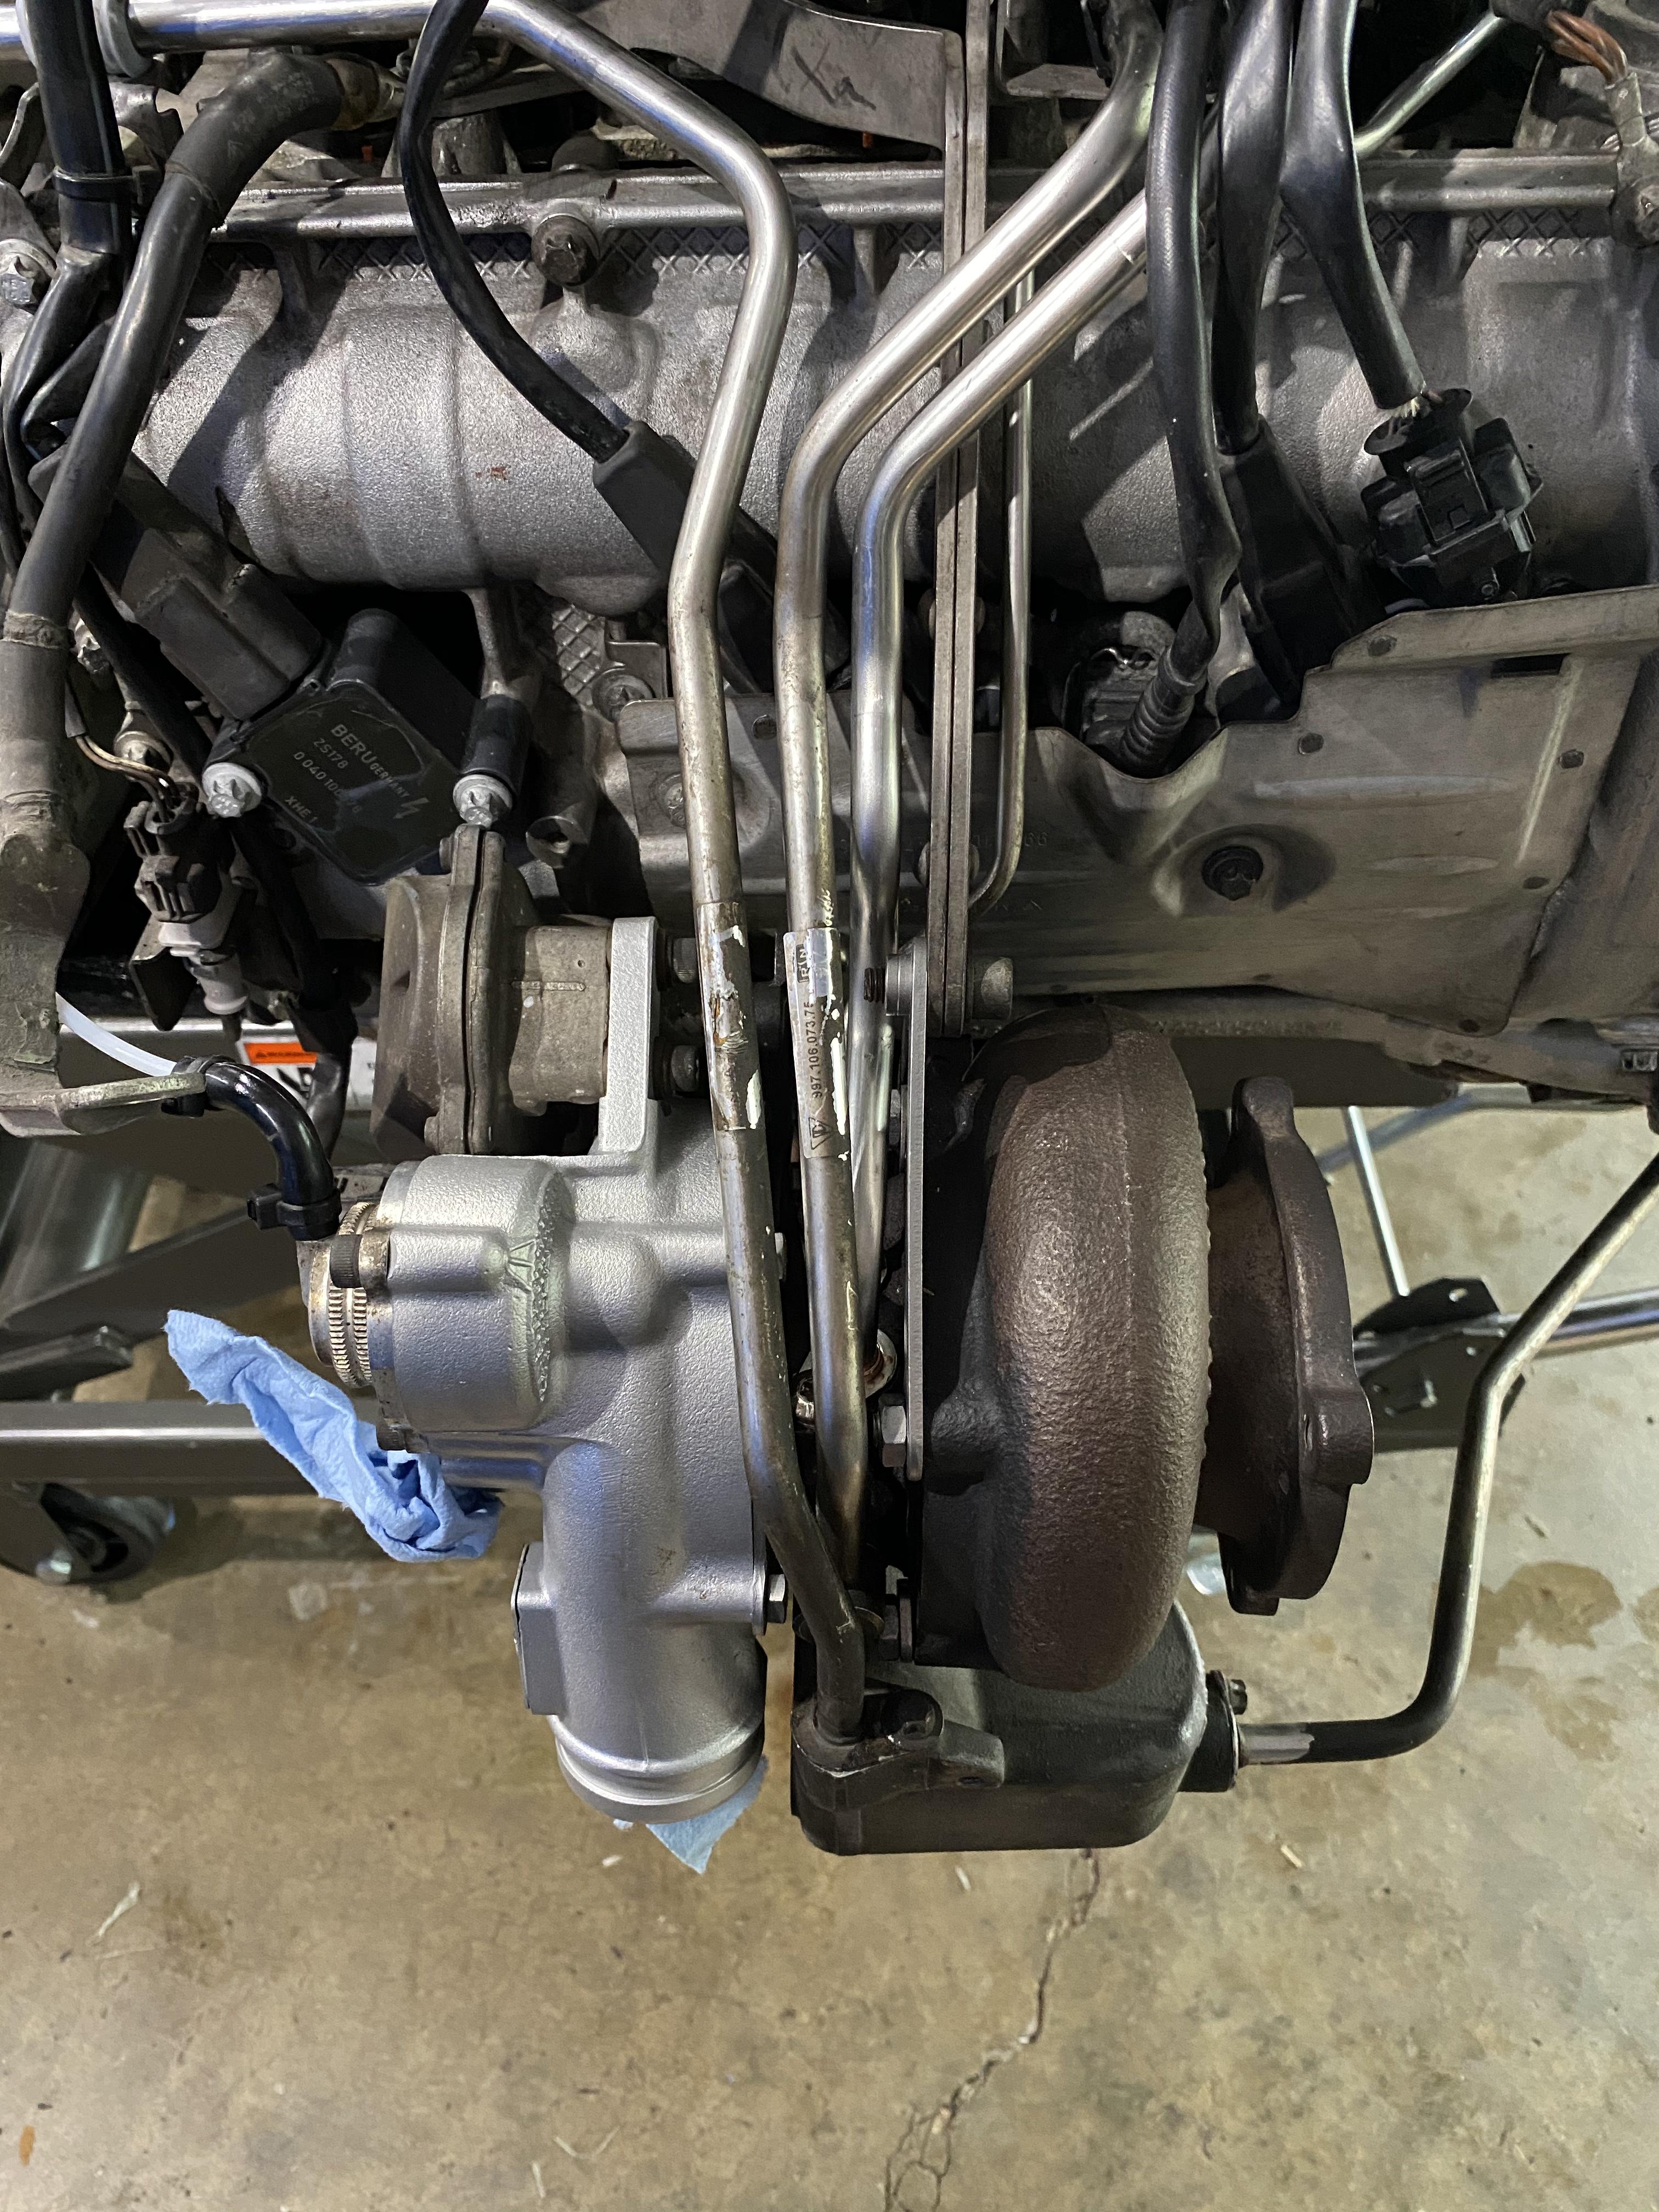
Last few parts - wanted to highlight the turbo coolant lines. I believe they went through a recent part number revision as Ed had trouble locating them. I ordered these from Porsche of Larchmont one week ago and they delivered today. Numbers for the two sides:
997-106-075-76
997-106-076-75
I did a blackstone analysis and it showed some wear metals unfortunately, this is the second one that I've done and while there was improvement with better oil, I do think I'm destined for a rebuild in the future. Hoping I can survive a year or two with the current block. The machine shop I made contact with thanks to you guys advising me to get the cams polished was a great find. They have been rebuilding Porsche motors for 20+ years and are totally supportive of my DIY approach, so I'll definitely be in touch with them once it's time to dive even deeper.
ID1050x injectors because why not
I used PnP adapters which mean they need to be angled in order to clear the intake manifold
Oil tank and oil coolers cleaned up nicely with some degreaser. DS turbo and engine electrical harness in place. All new vacuum and rubber hoses. Zip tying everything religiously.
Finally got around to repairing the #6 cyl coil pack connector, which I snapped about 6 weeks ago doing the plugs/coils with the engine still in the car.
Push out the leads with a terminal wire tool. Need a key that's 5mm wide with 2mm prongs.
And plug them in in the same order into the new connector. Got this one from Jayi836, they are available from Latvia via Ebay.
Last few parts - wanted to highlight the turbo coolant lines. I believe they went through a recent part number revision as Ed had trouble locating them. I ordered these from Porsche of Larchmont one week ago and they delivered today. Numbers for the two sides:
997-106-075-76
997-106-076-75
I did a blackstone analysis and it showed some wear metals unfortunately, this is the second one that I've done and while there was improvement with better oil, I do think I'm destined for a rebuild in the future. Hoping I can survive a year or two with the current block. The machine shop I made contact with thanks to you guys advising me to get the cams polished was a great find. They have been rebuilding Porsche motors for 20+ years and are totally supportive of my DIY approach, so I'll definitely be in touch with them once it's time to dive even deeper.
03-24-2020 | 11:31 AM
#70
Burning Brakes
She's coming back together nicely, well done.
Those connectors beak just by looking at them.
Bigger turbos and injectors too... so jealous.
Those connectors beak just by looking at them.
Bigger turbos and injectors too... so jealous.
The following users liked this post:
jeebus31 (03-25-2020)
03-25-2020 | 12:44 AM
#71
Thread Starter
Three Wheelin'
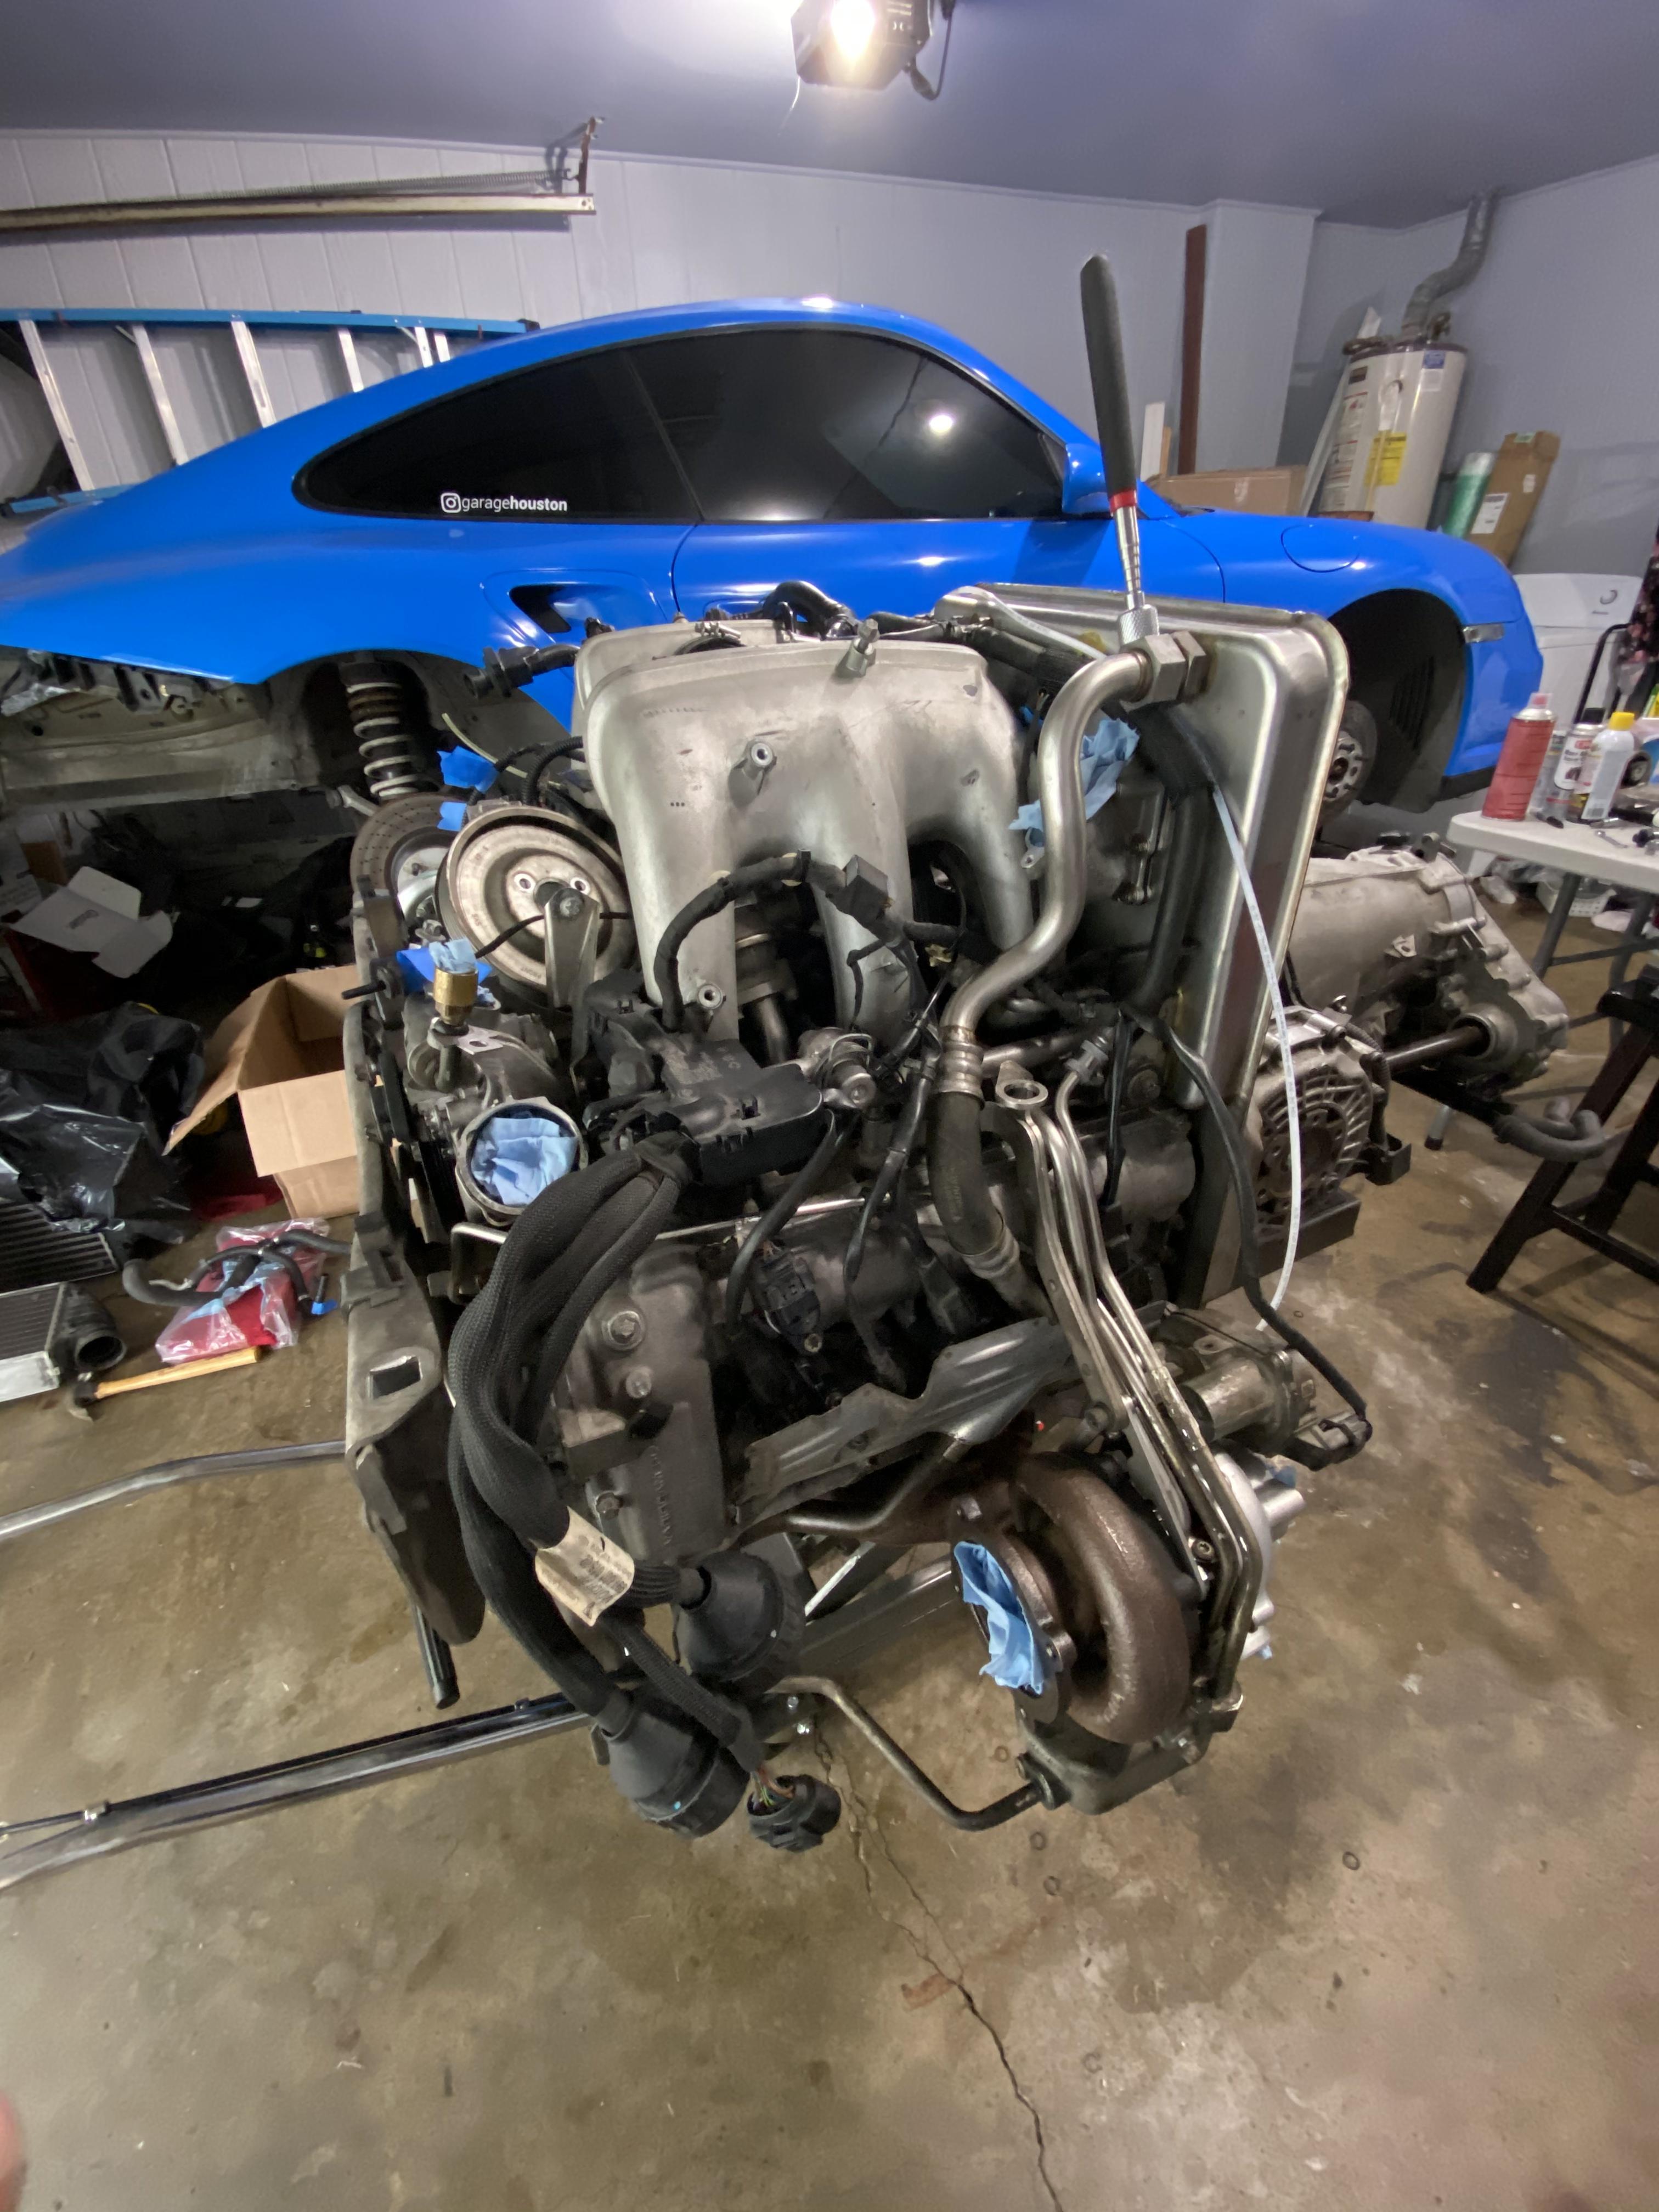
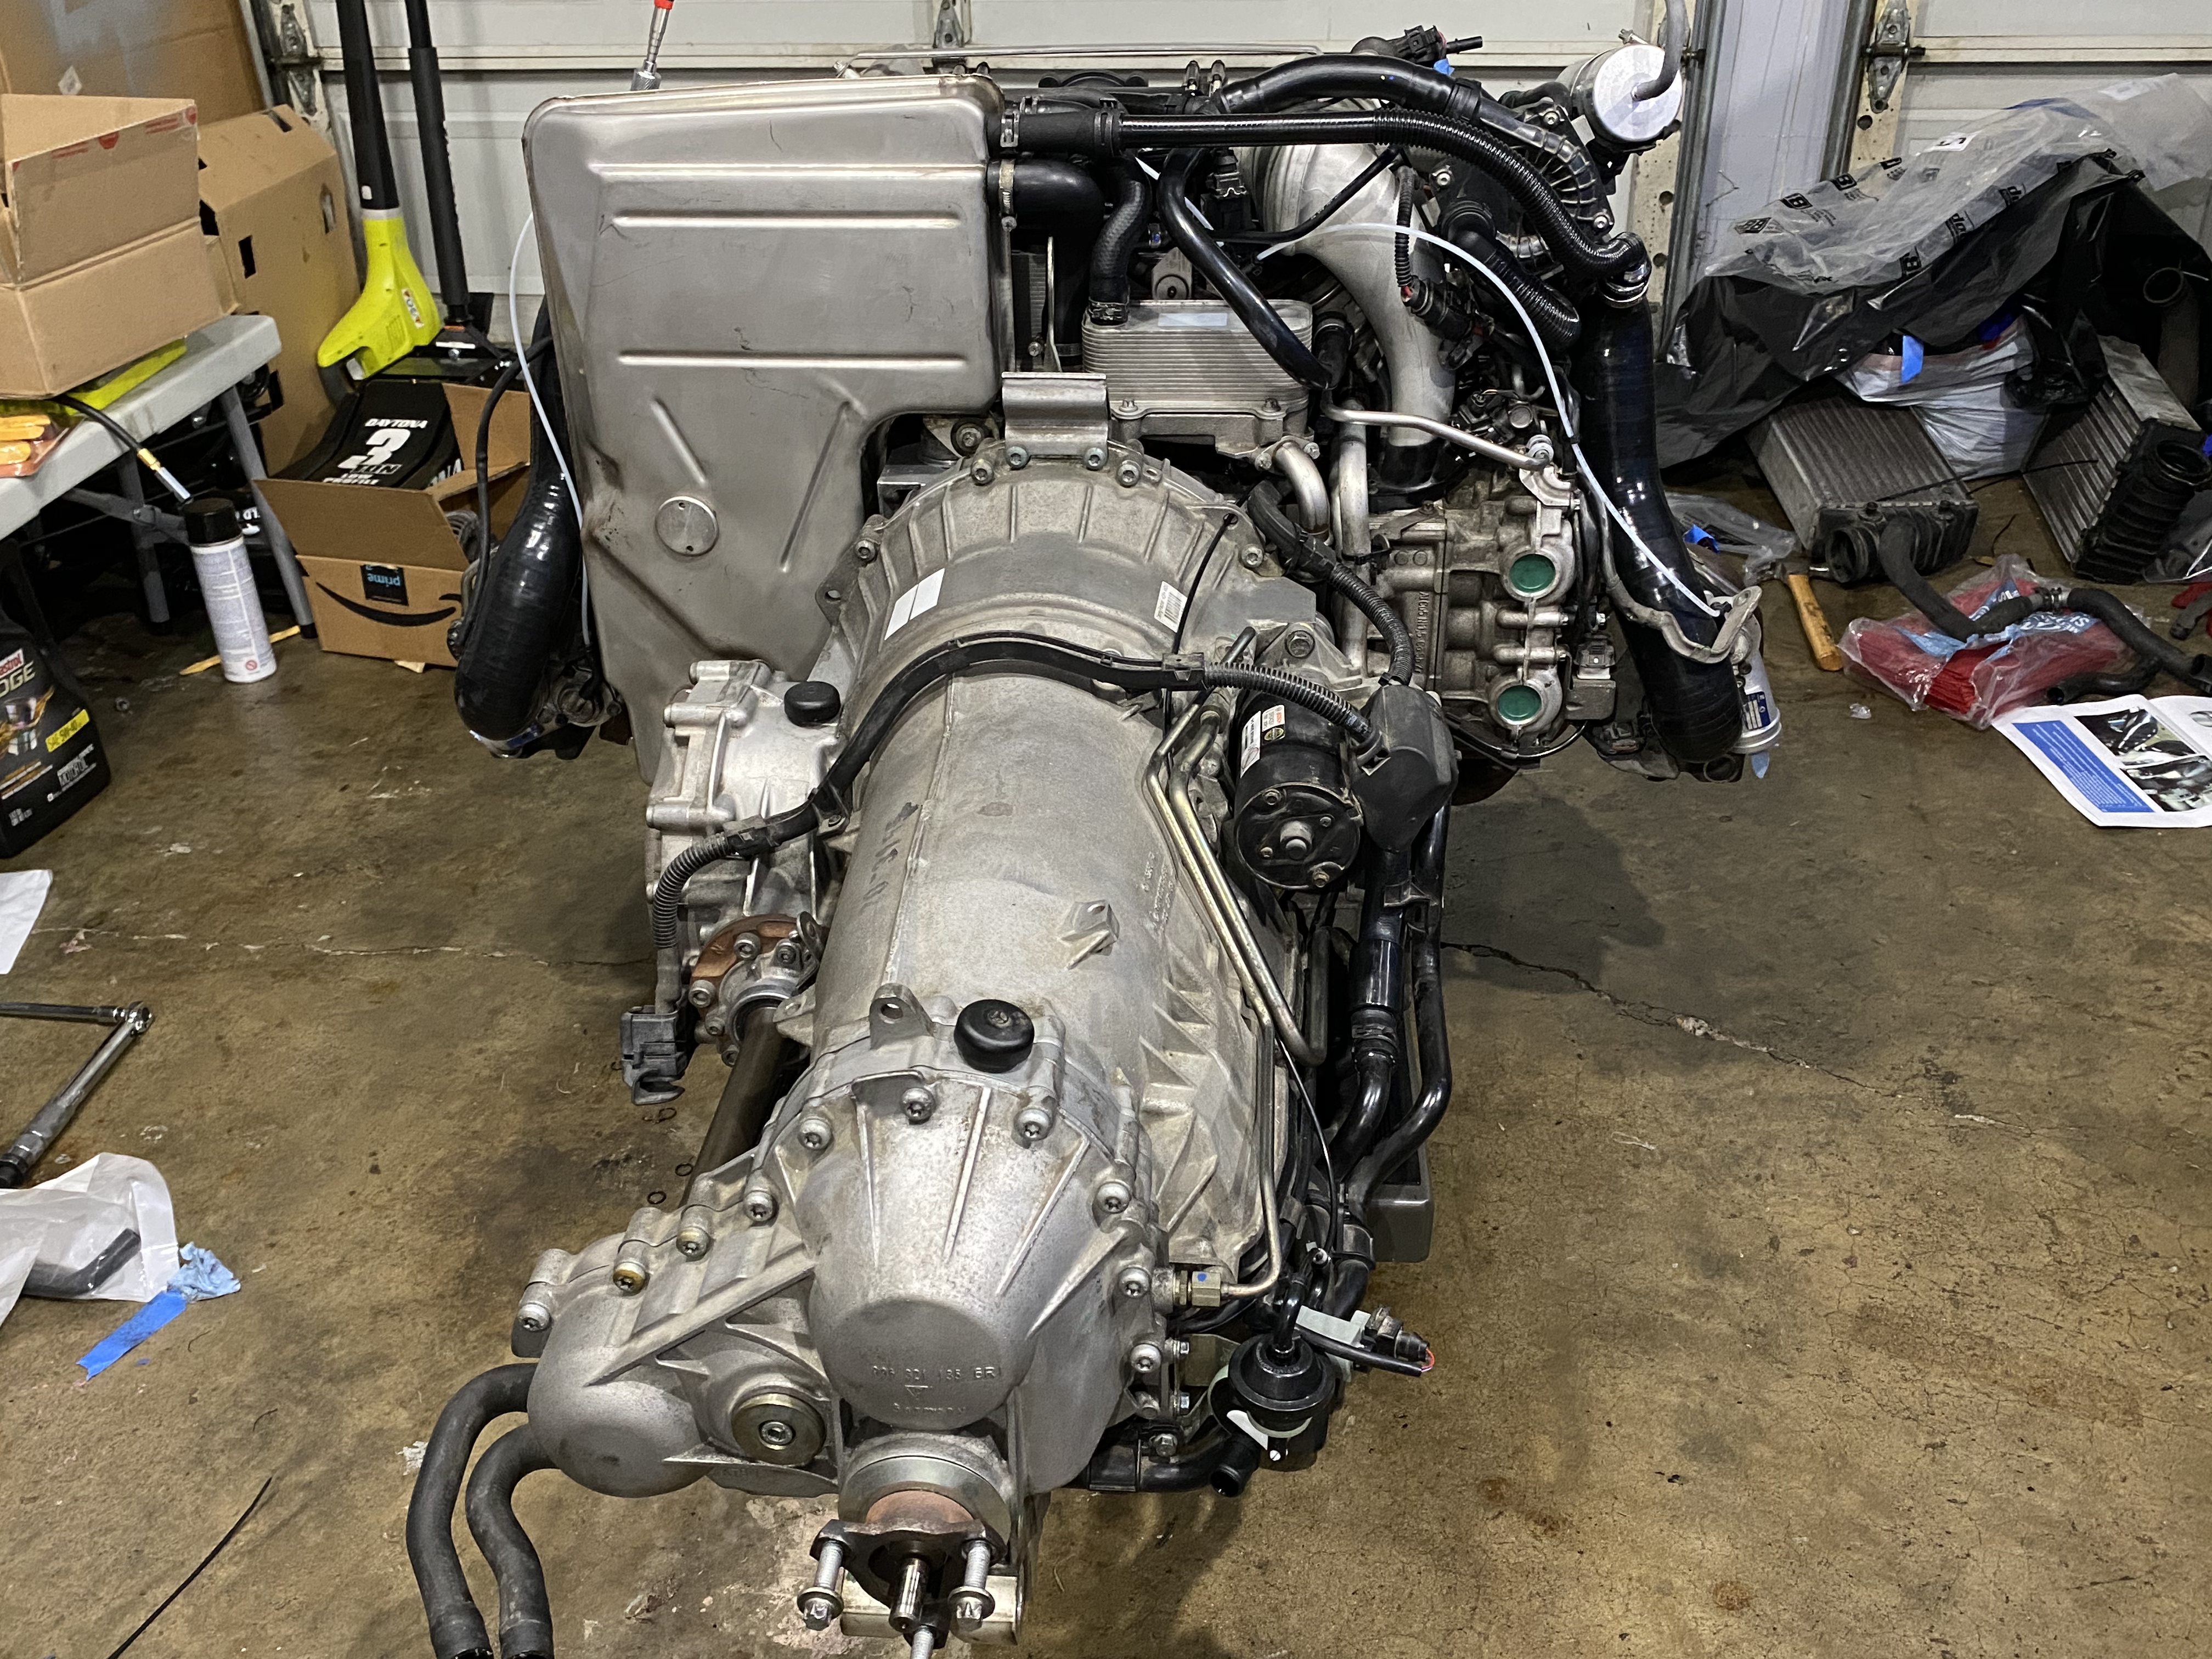
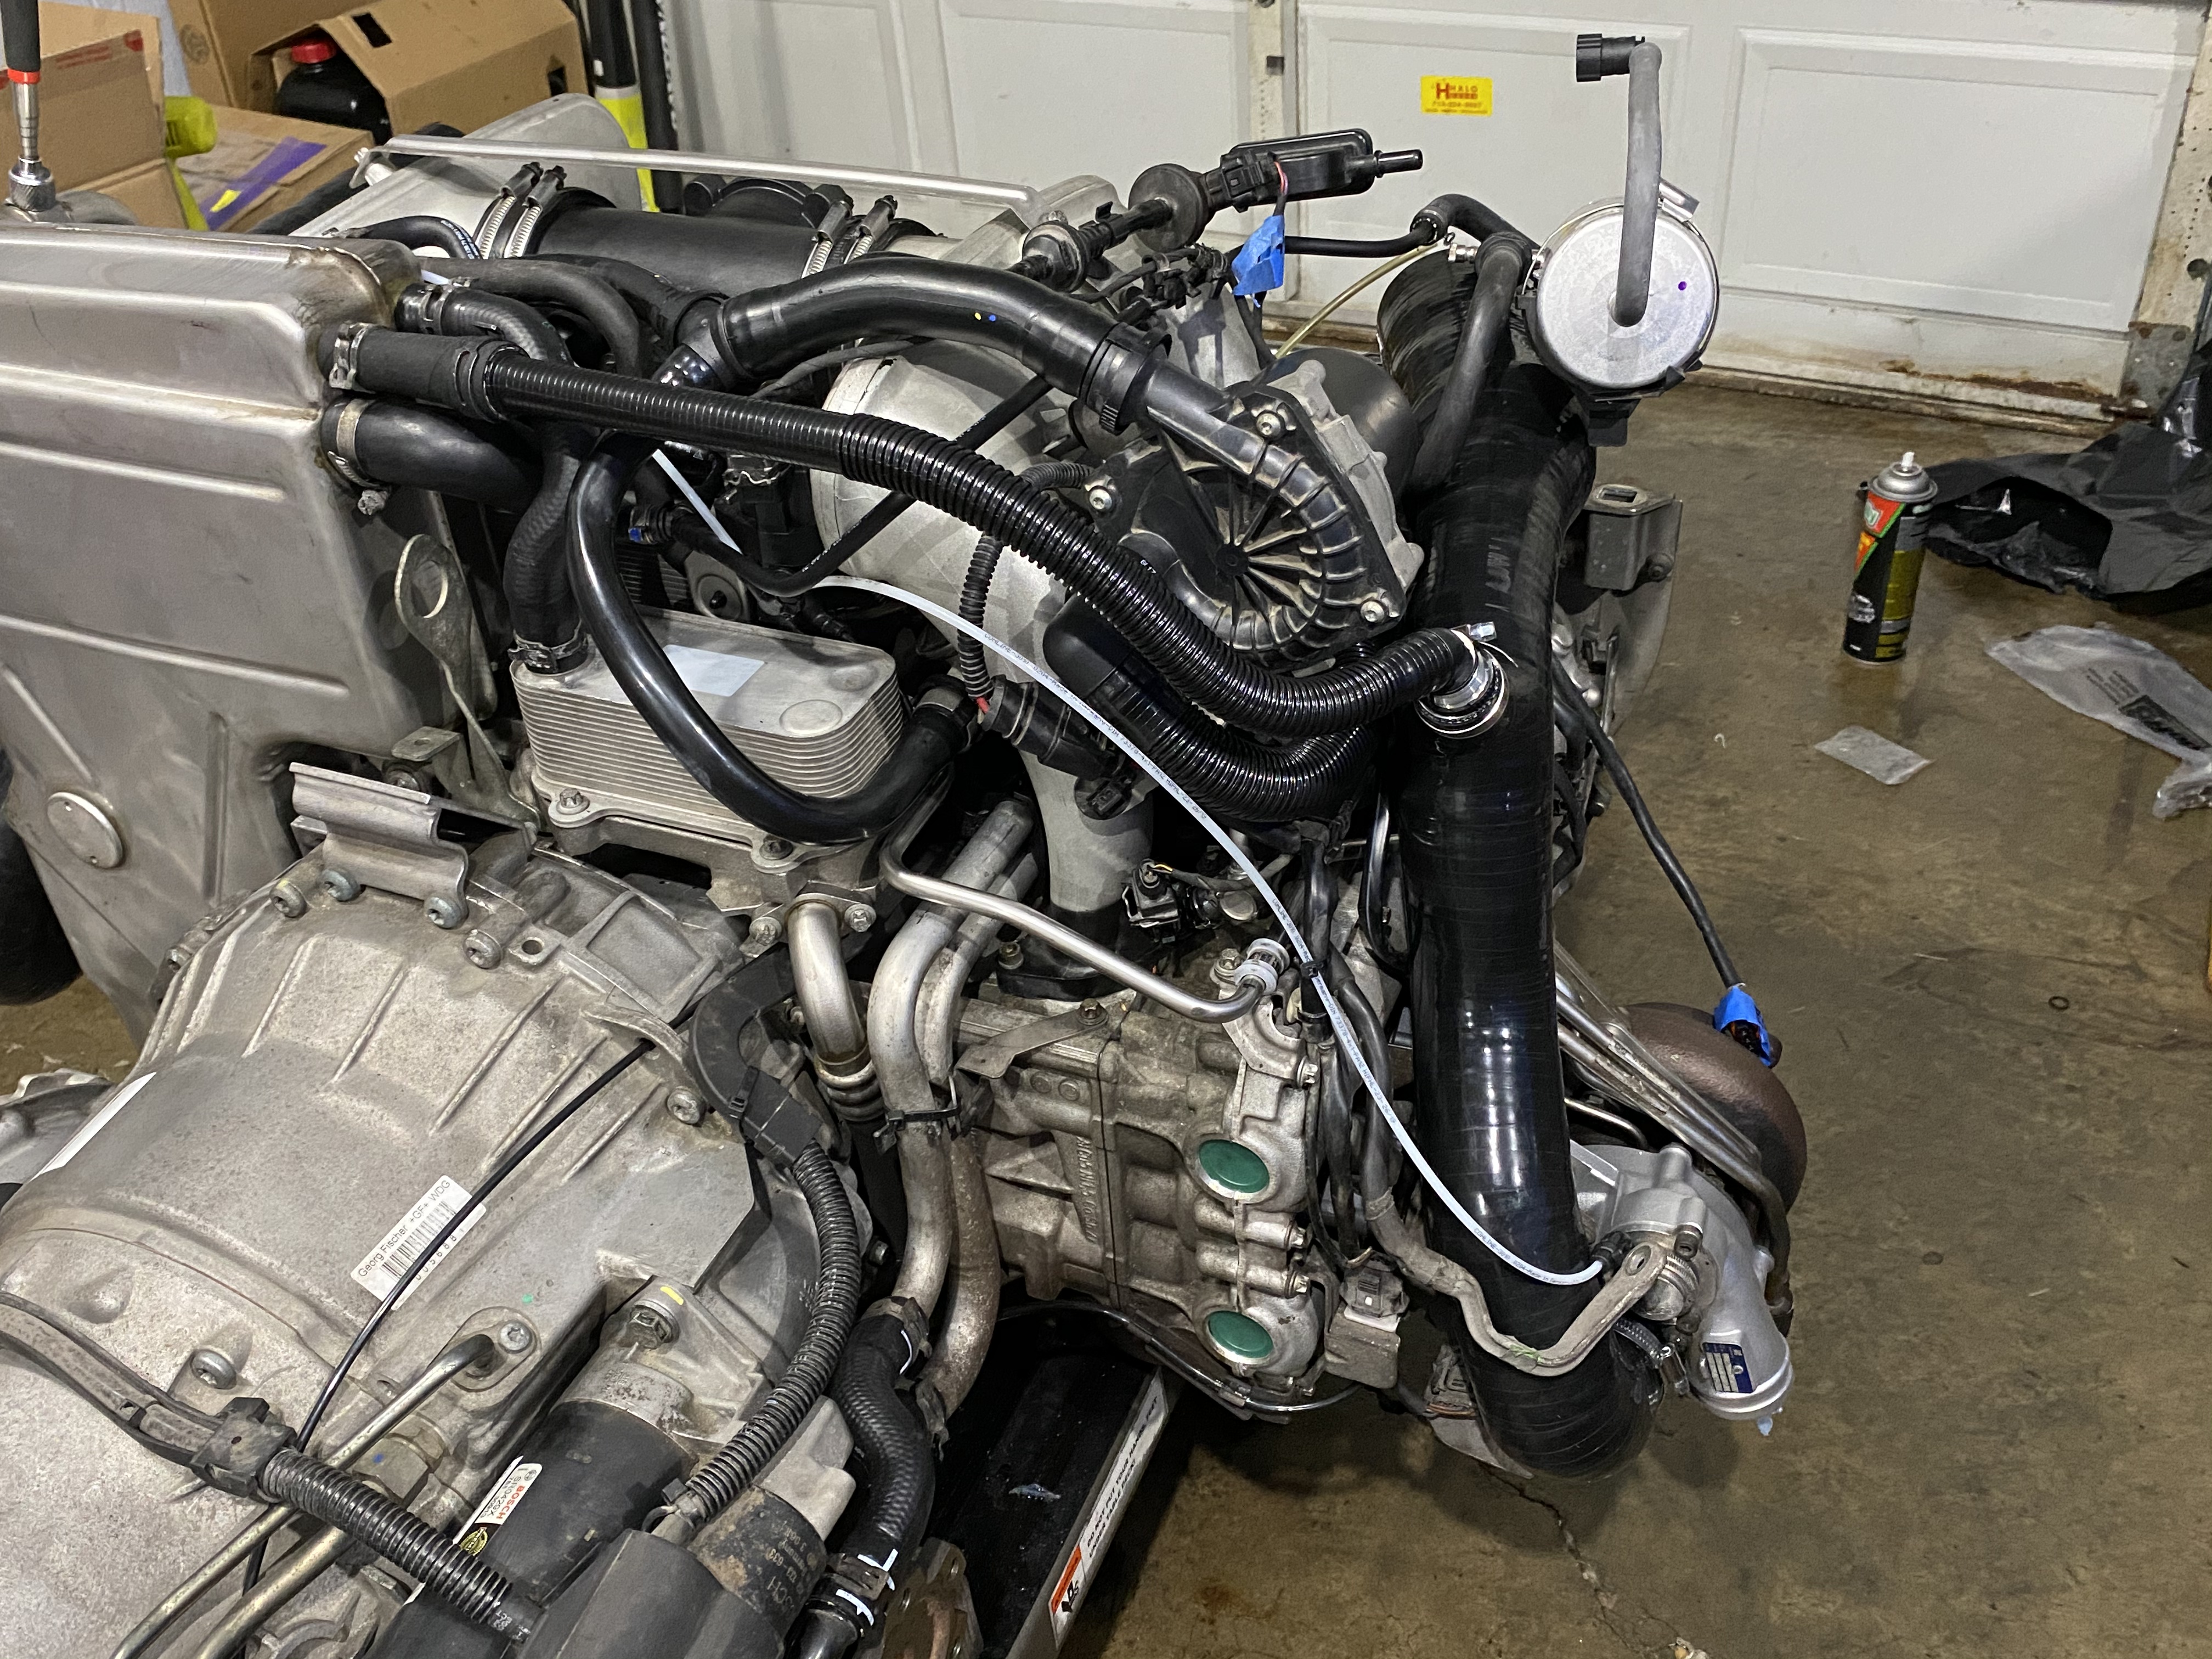
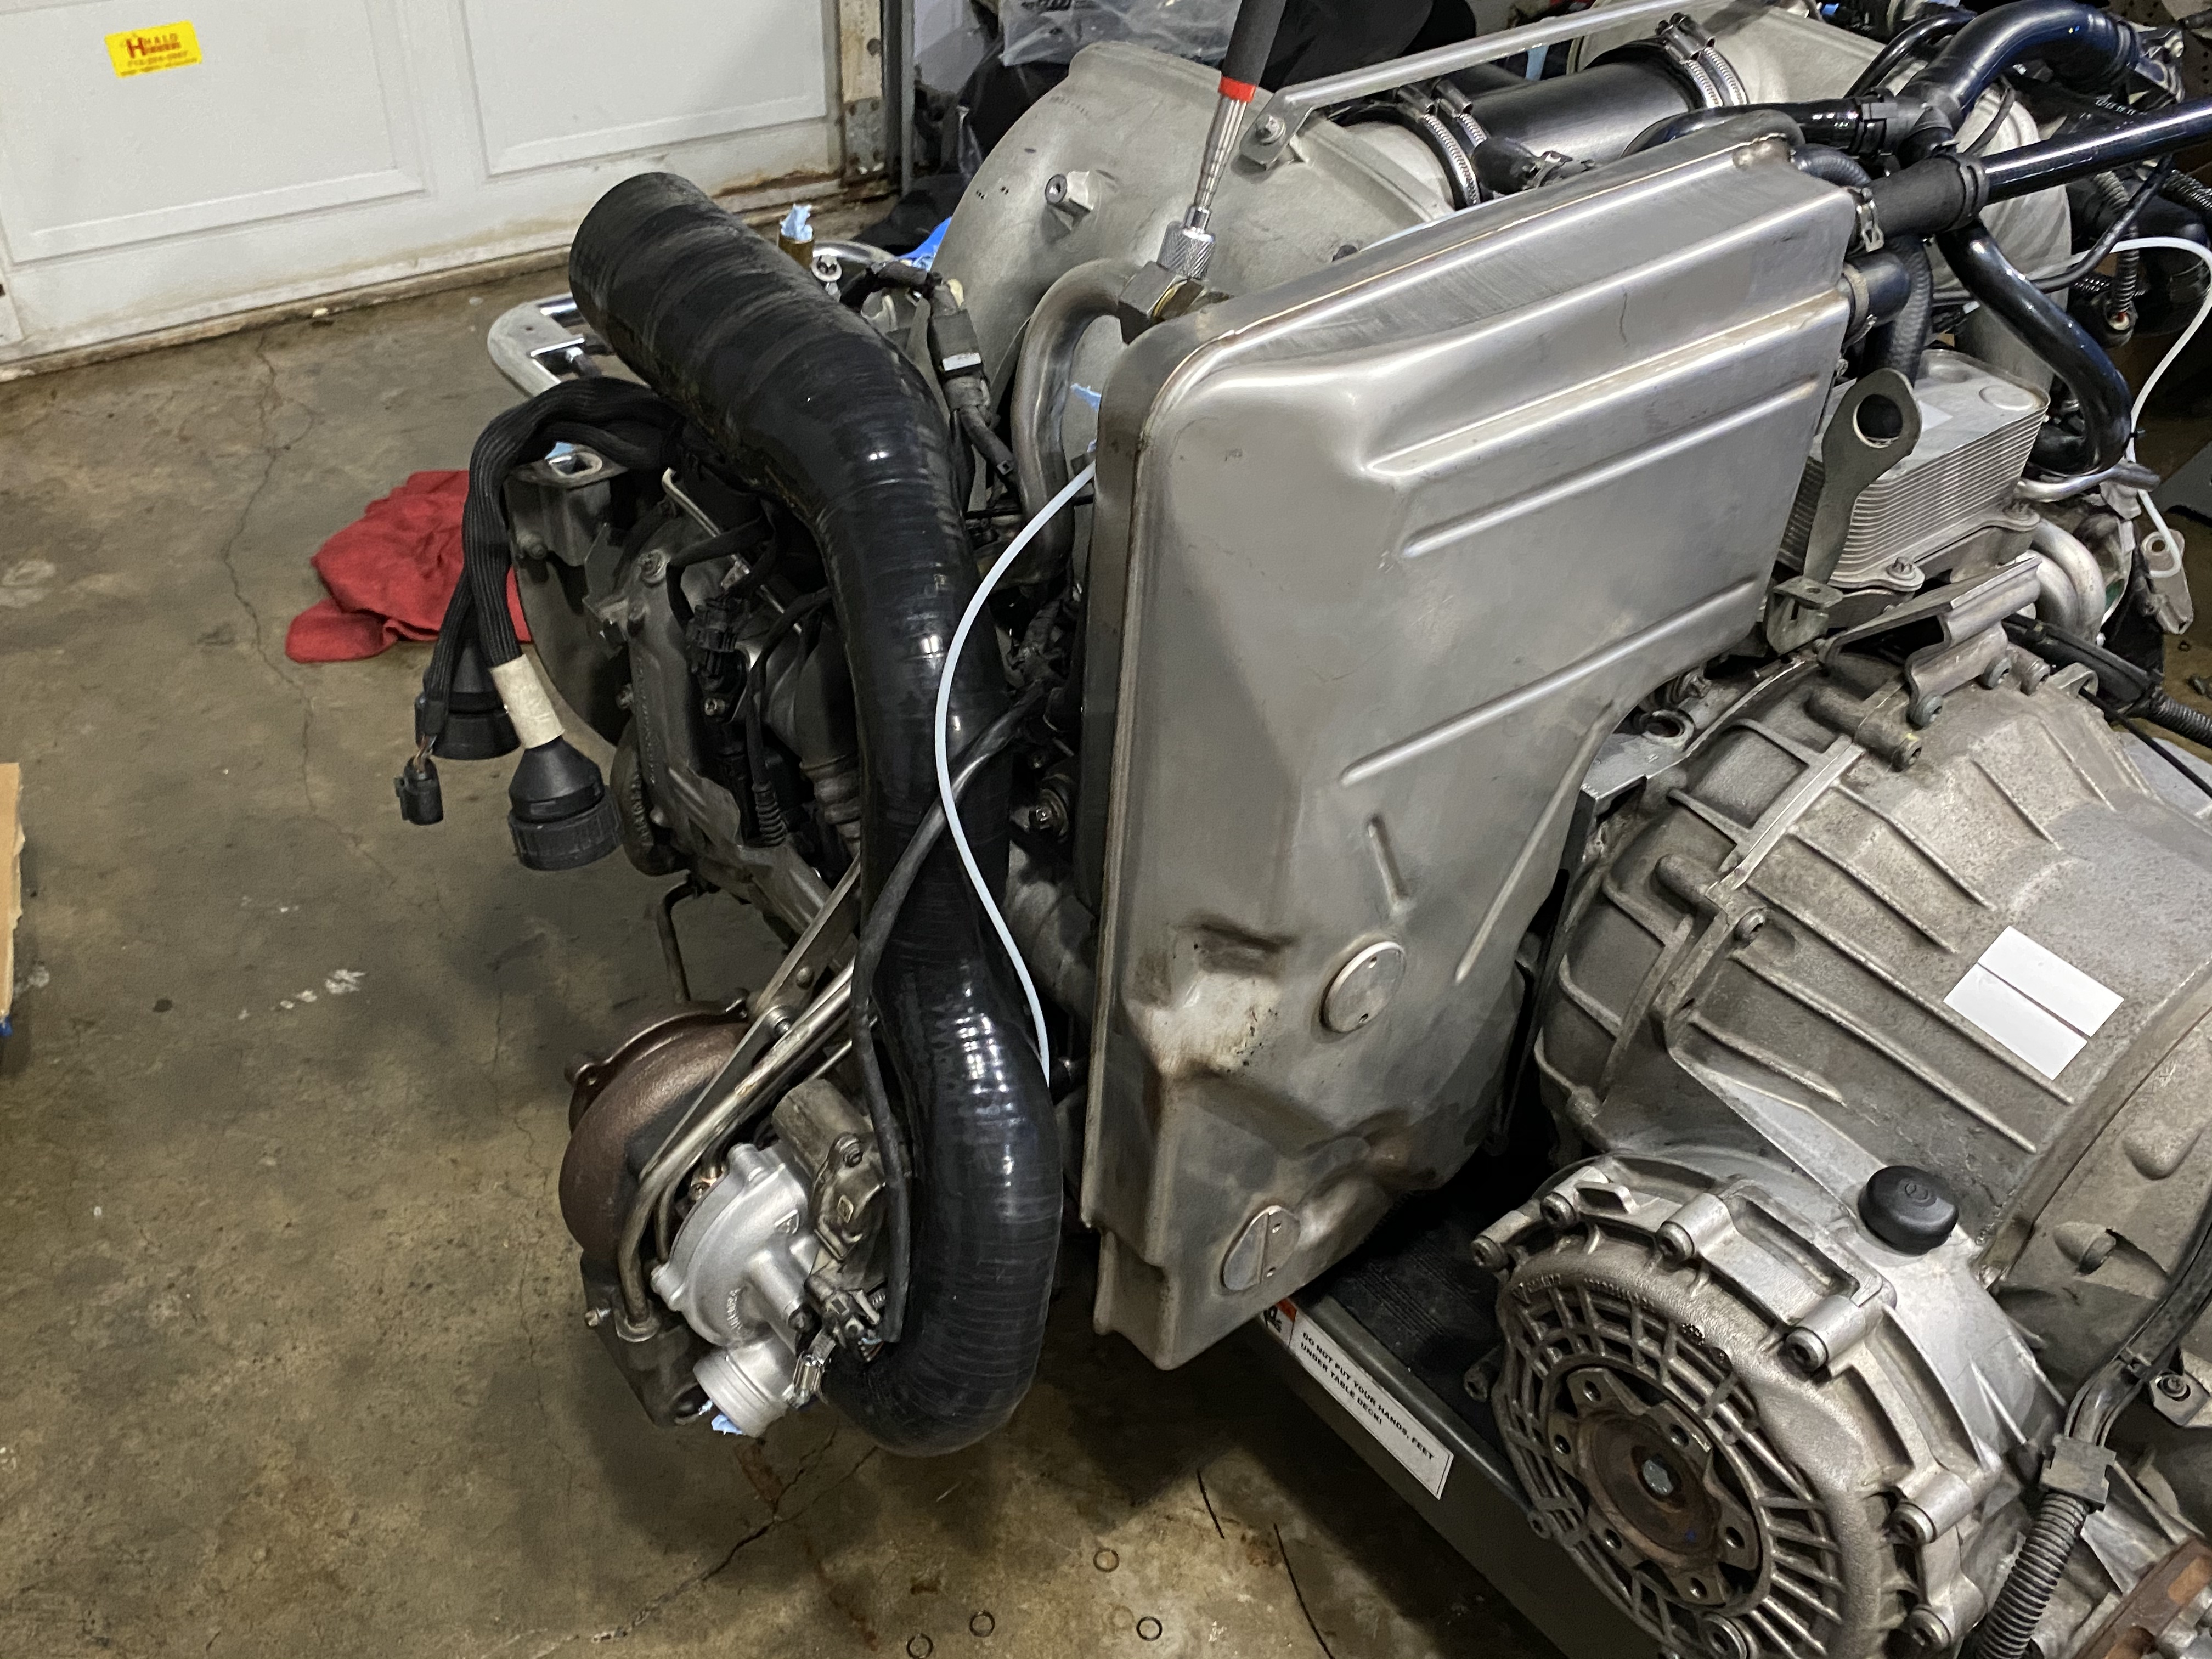
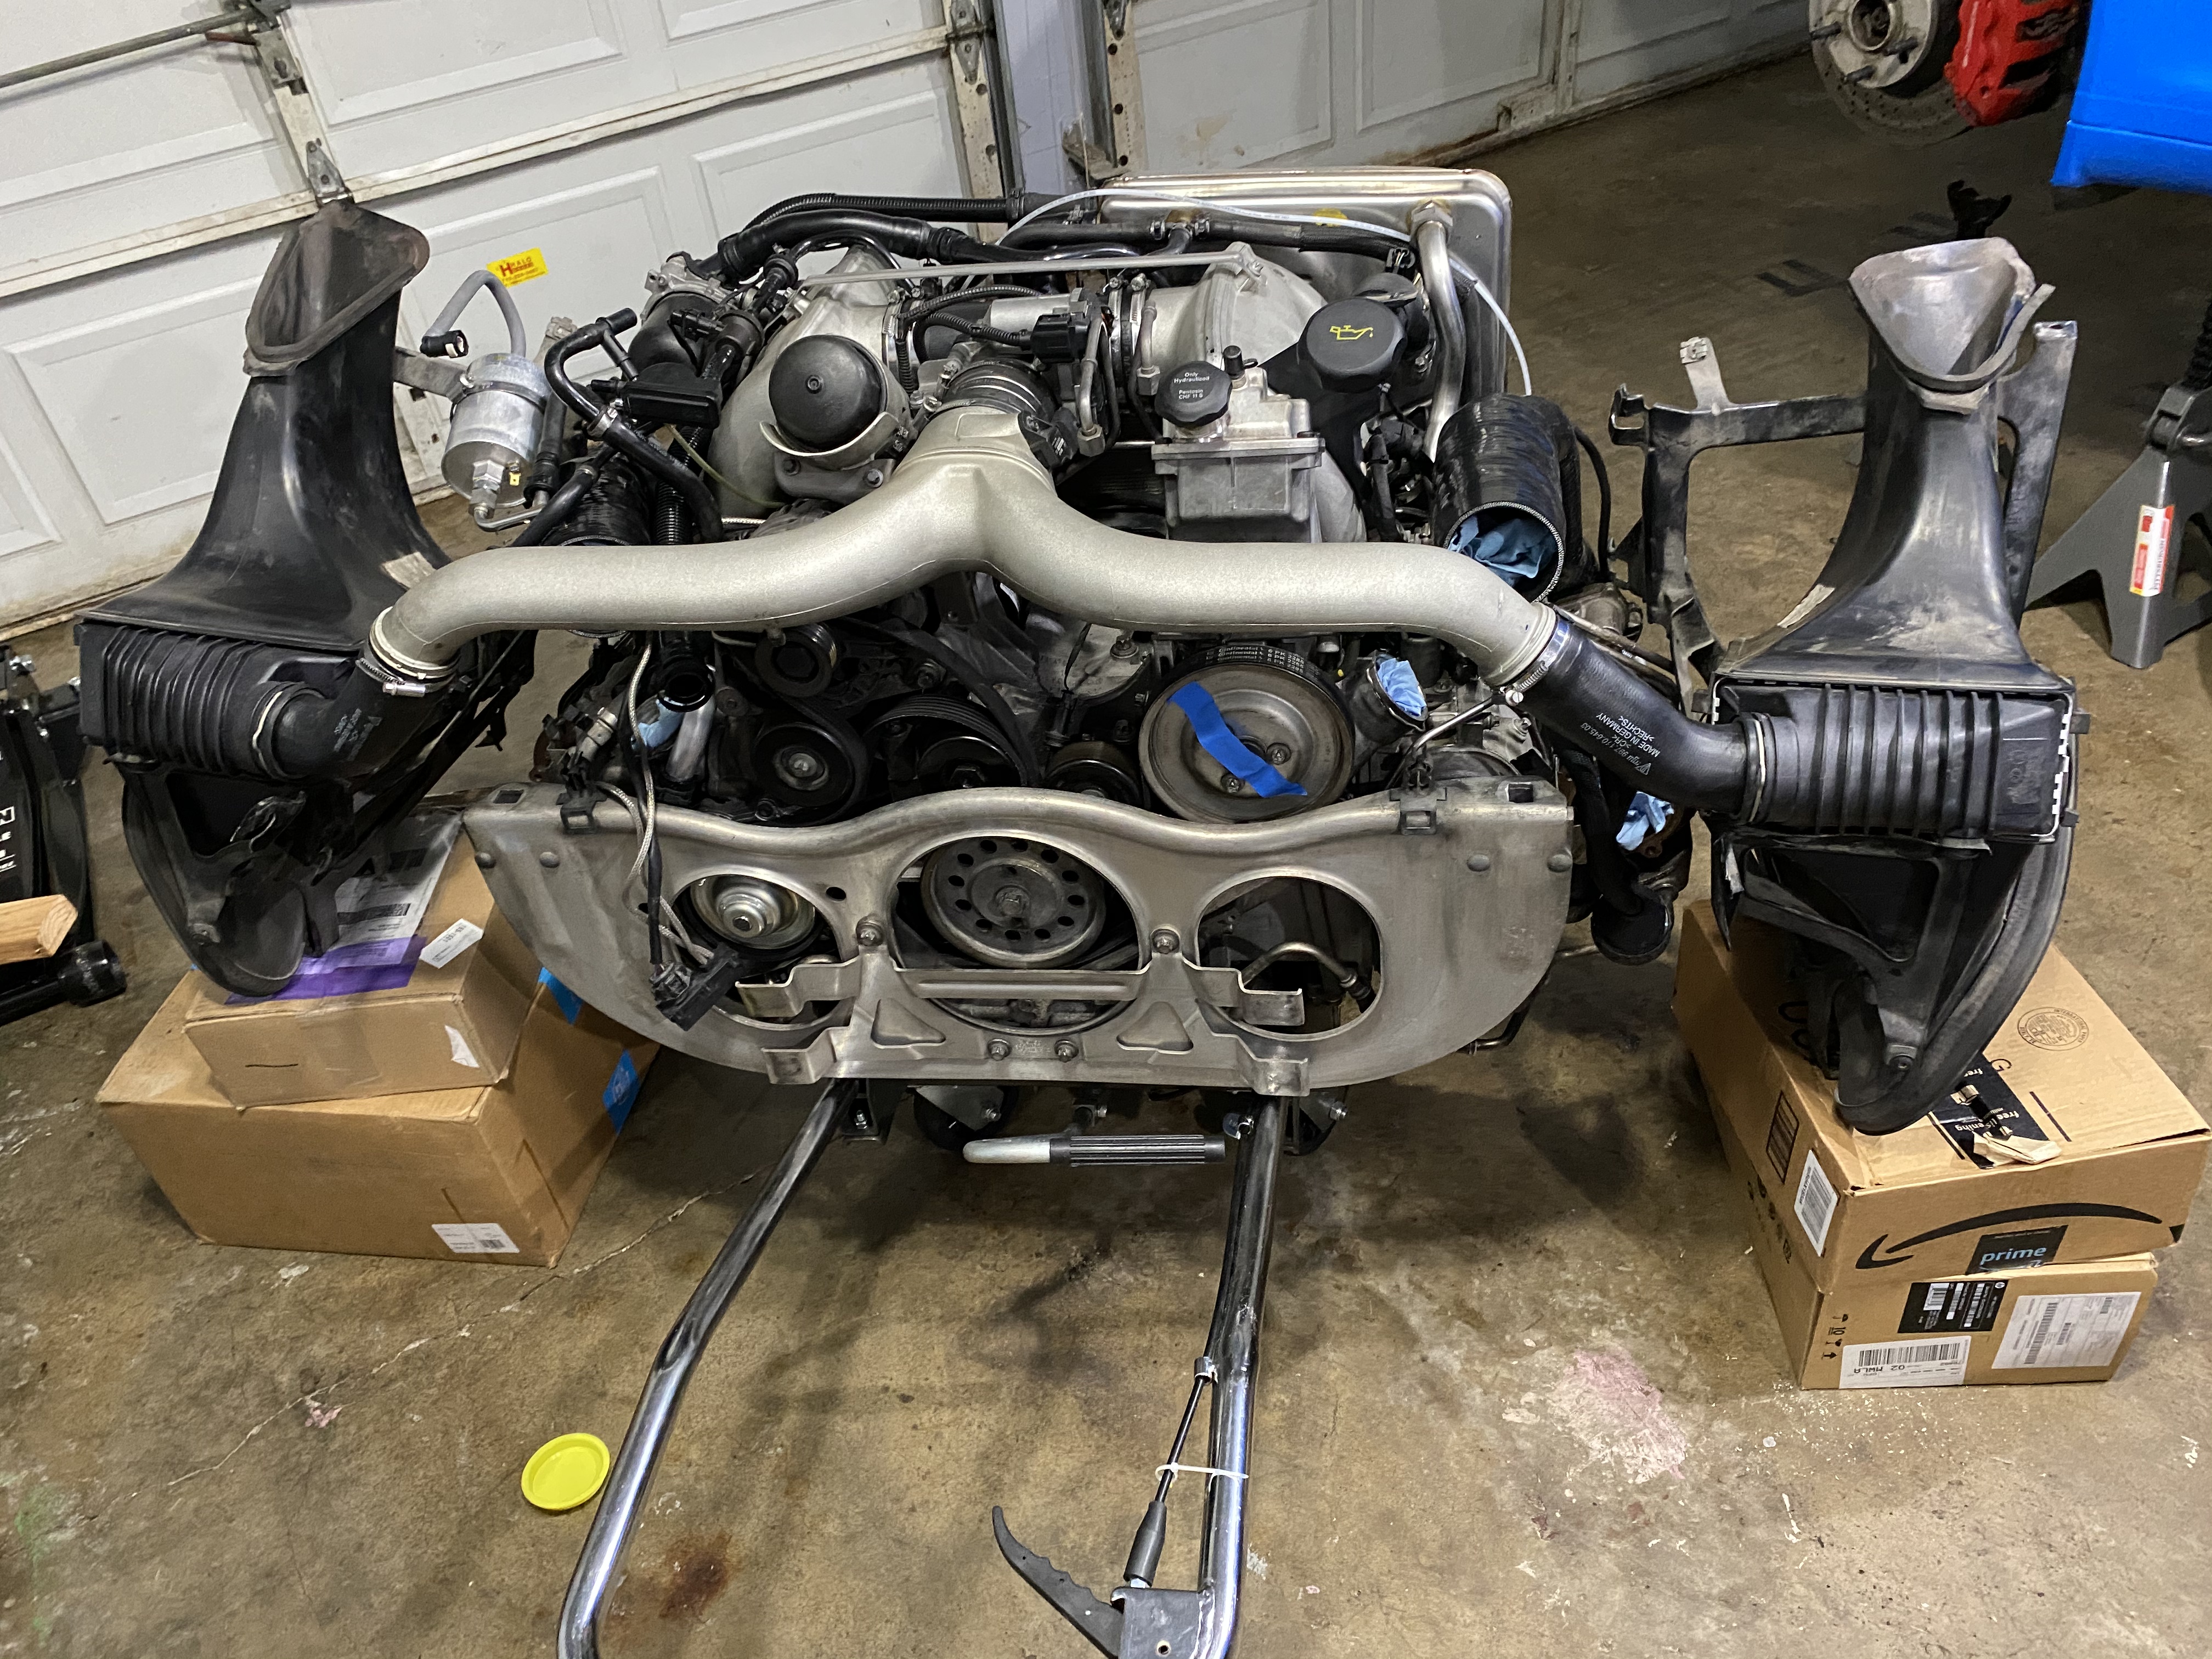
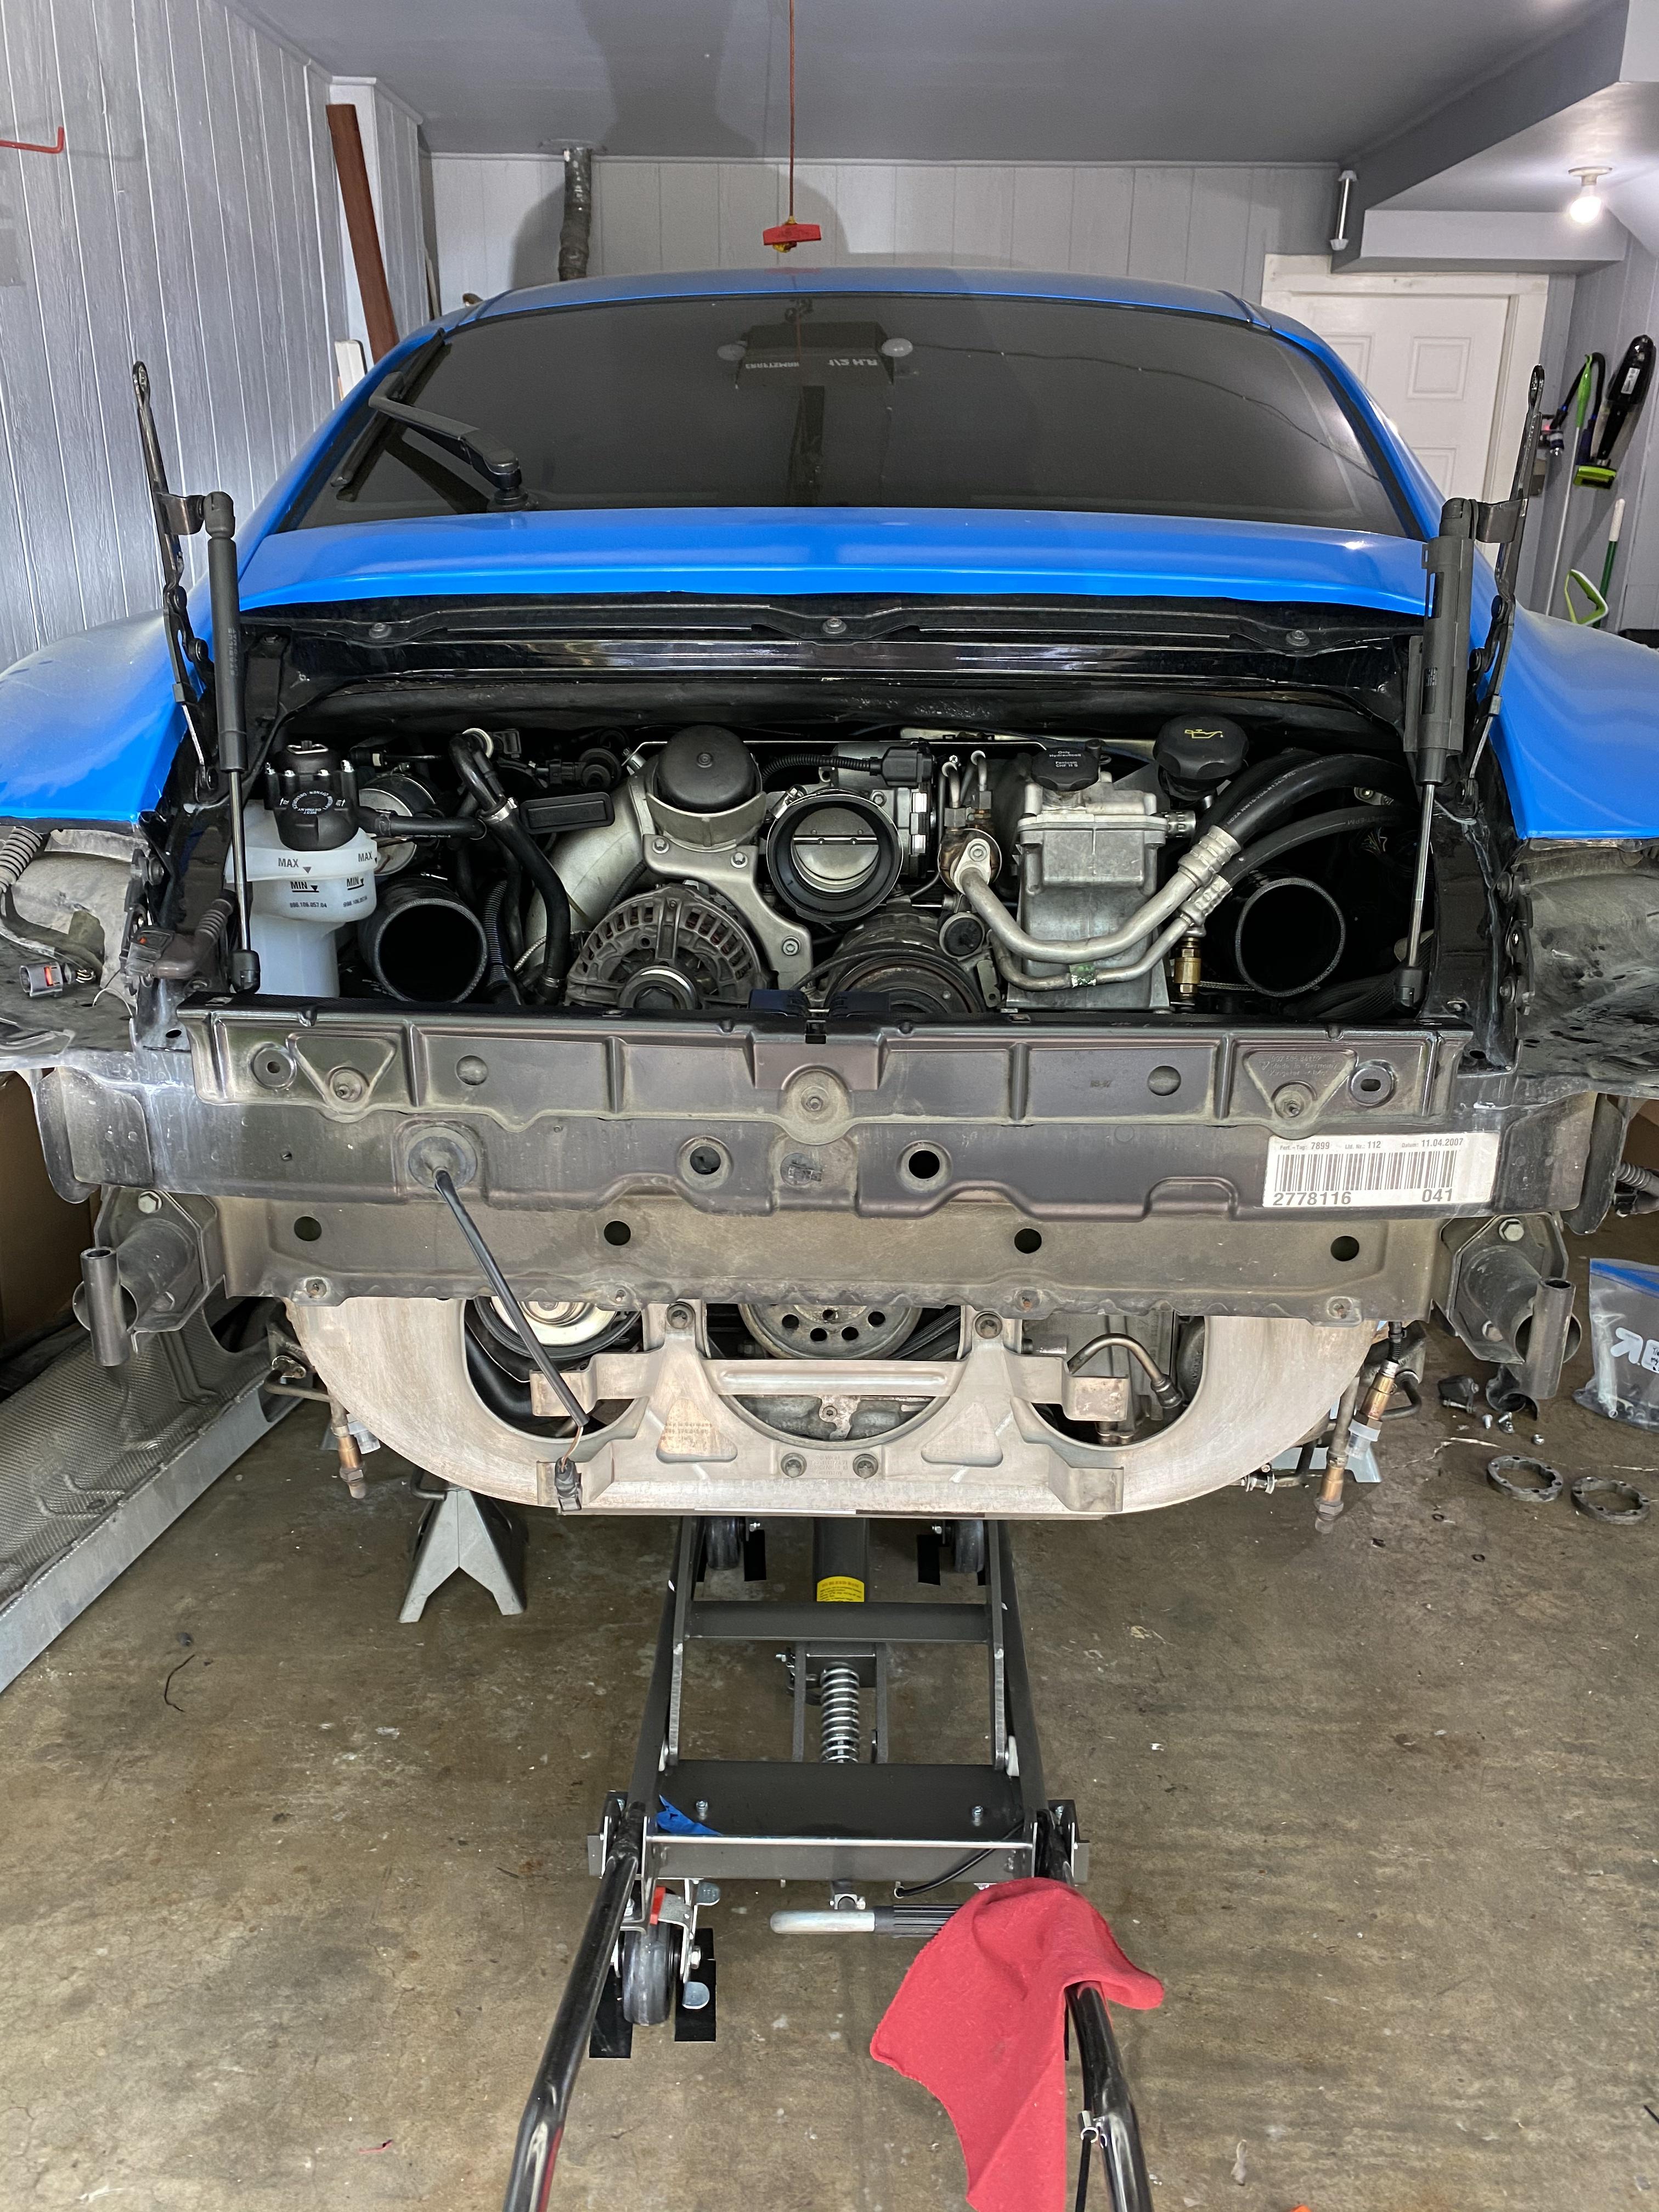
Ok it's all coming together now. PS turbo back on and piping is in place on both sides, new o-rings all around. Zip ties galore. I installed a couple new coolant hoses, the ones that run along the side of the transmission, so I had to deal with (hopefully) one last coolant shower. One thing I notice is that as I come close to completing any project my garage just gets messier and messier... apologies.
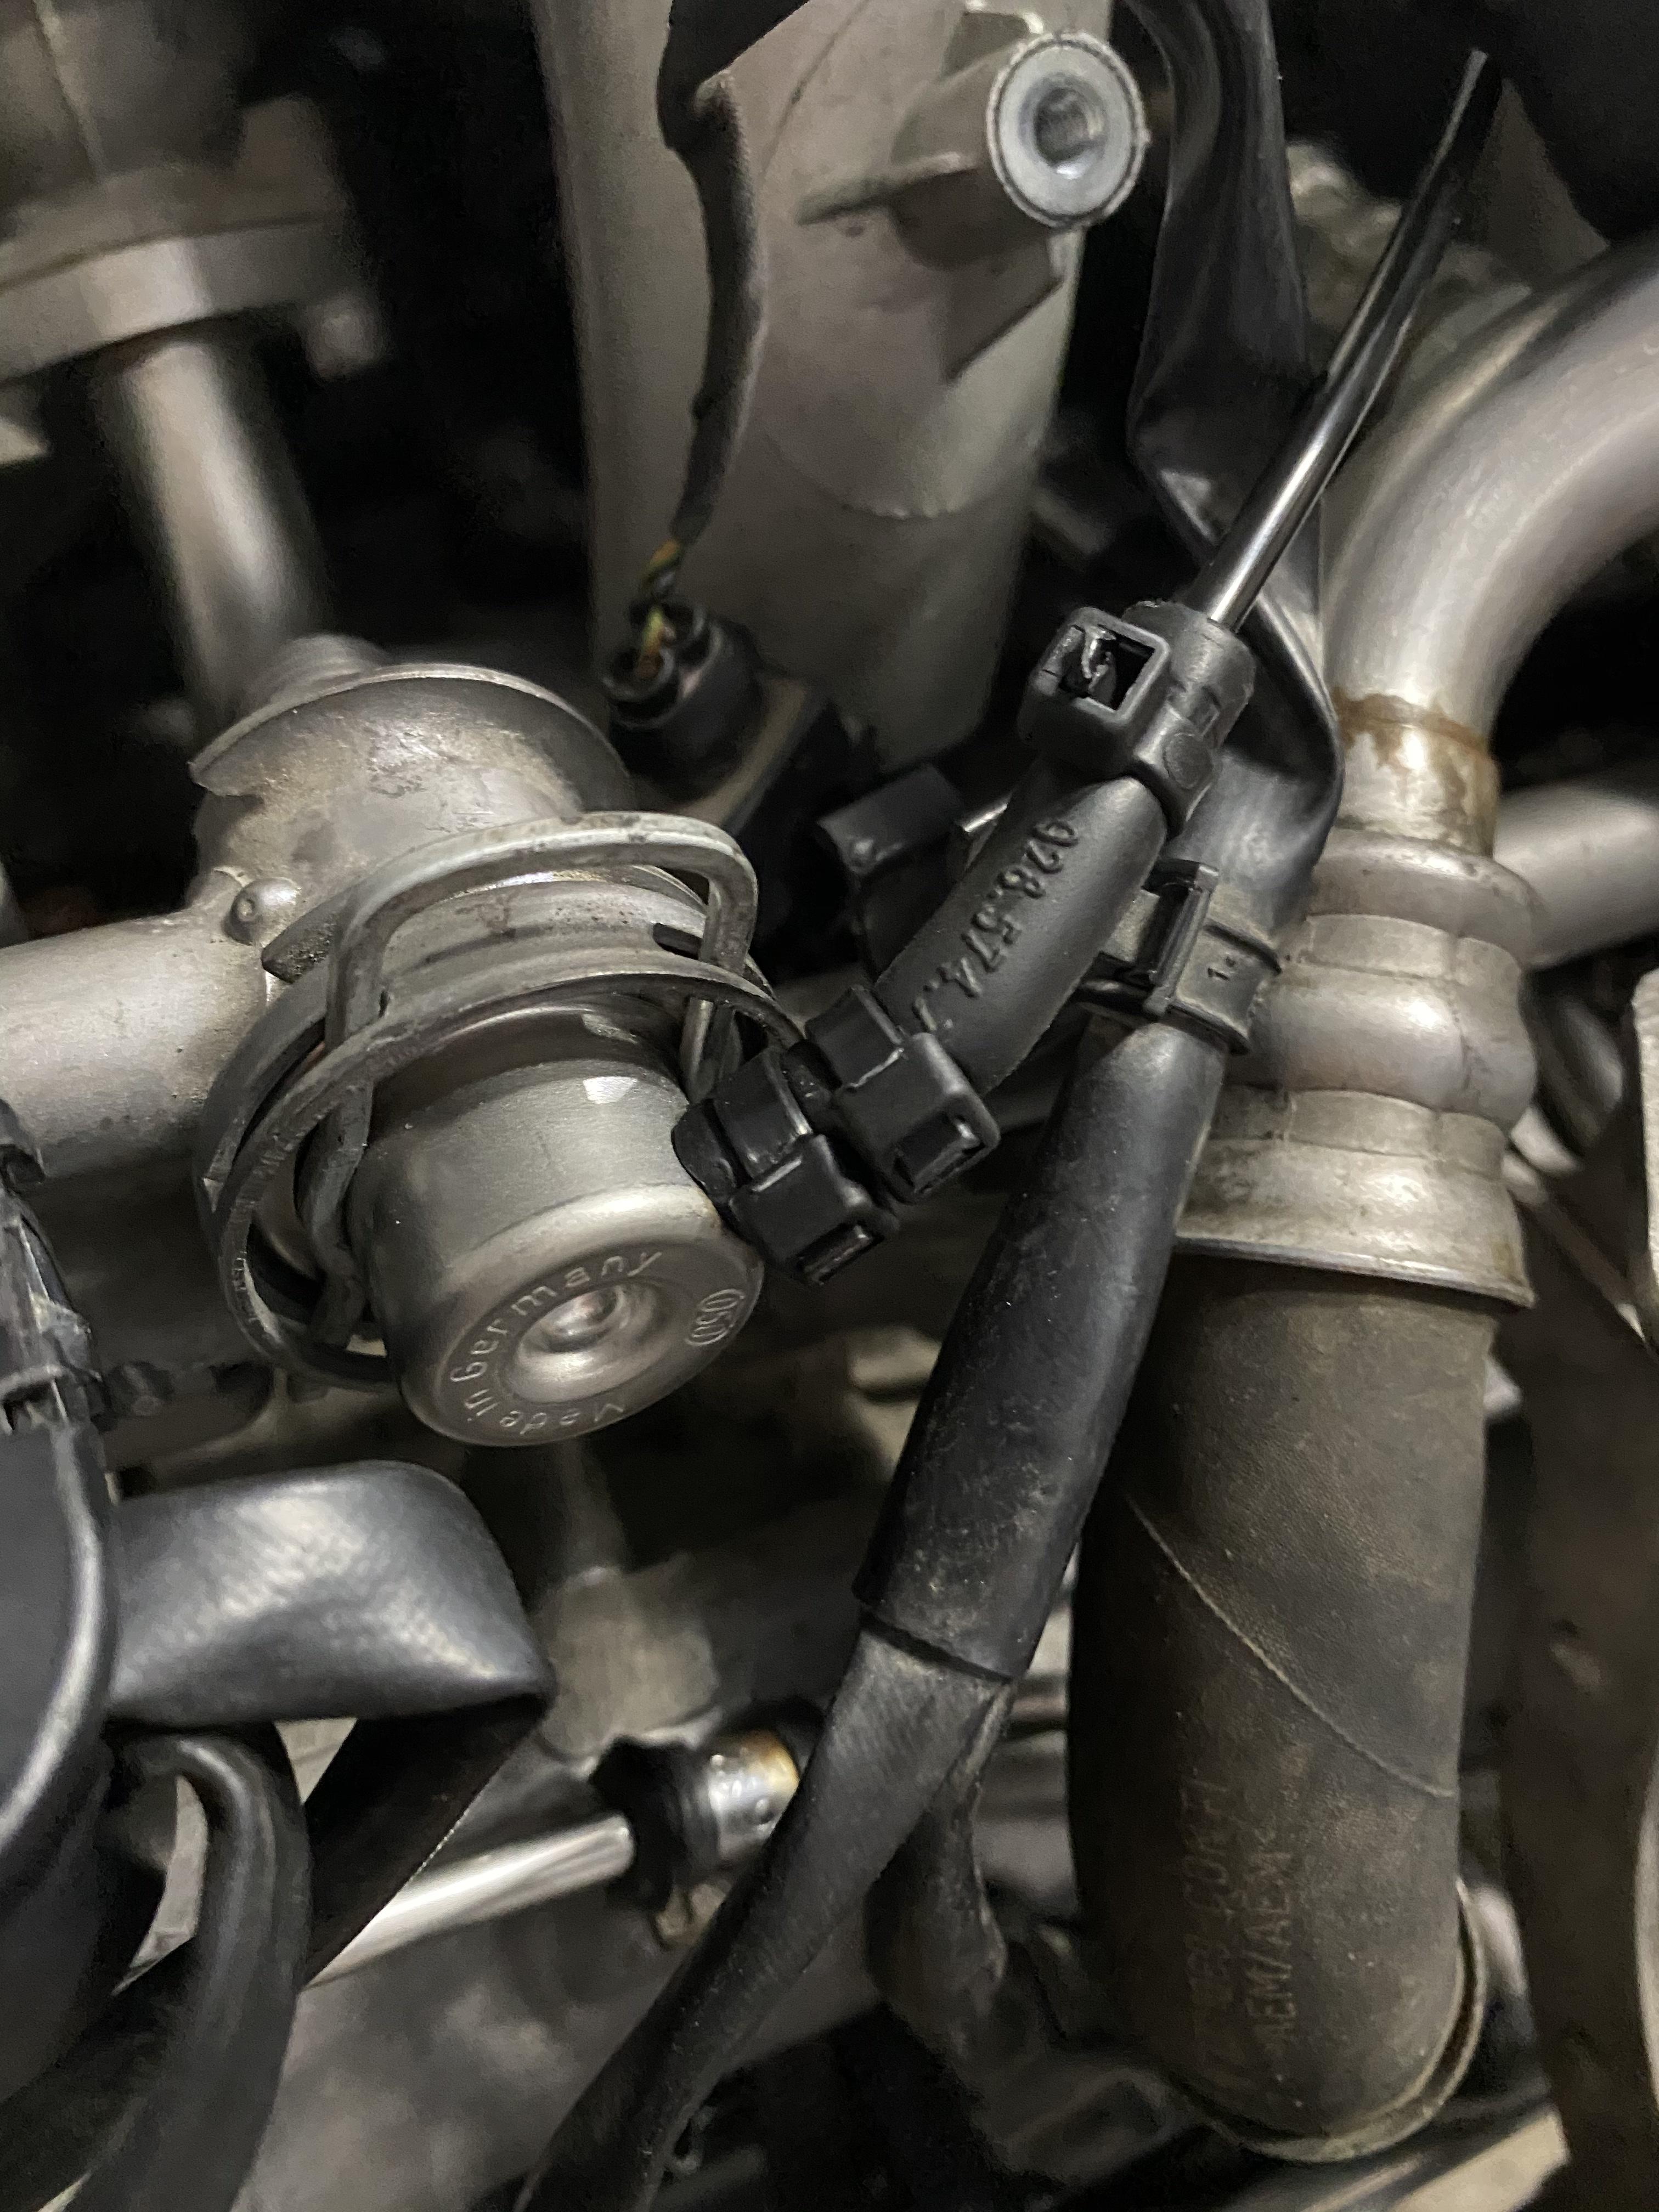
FPR hose is going nowhere
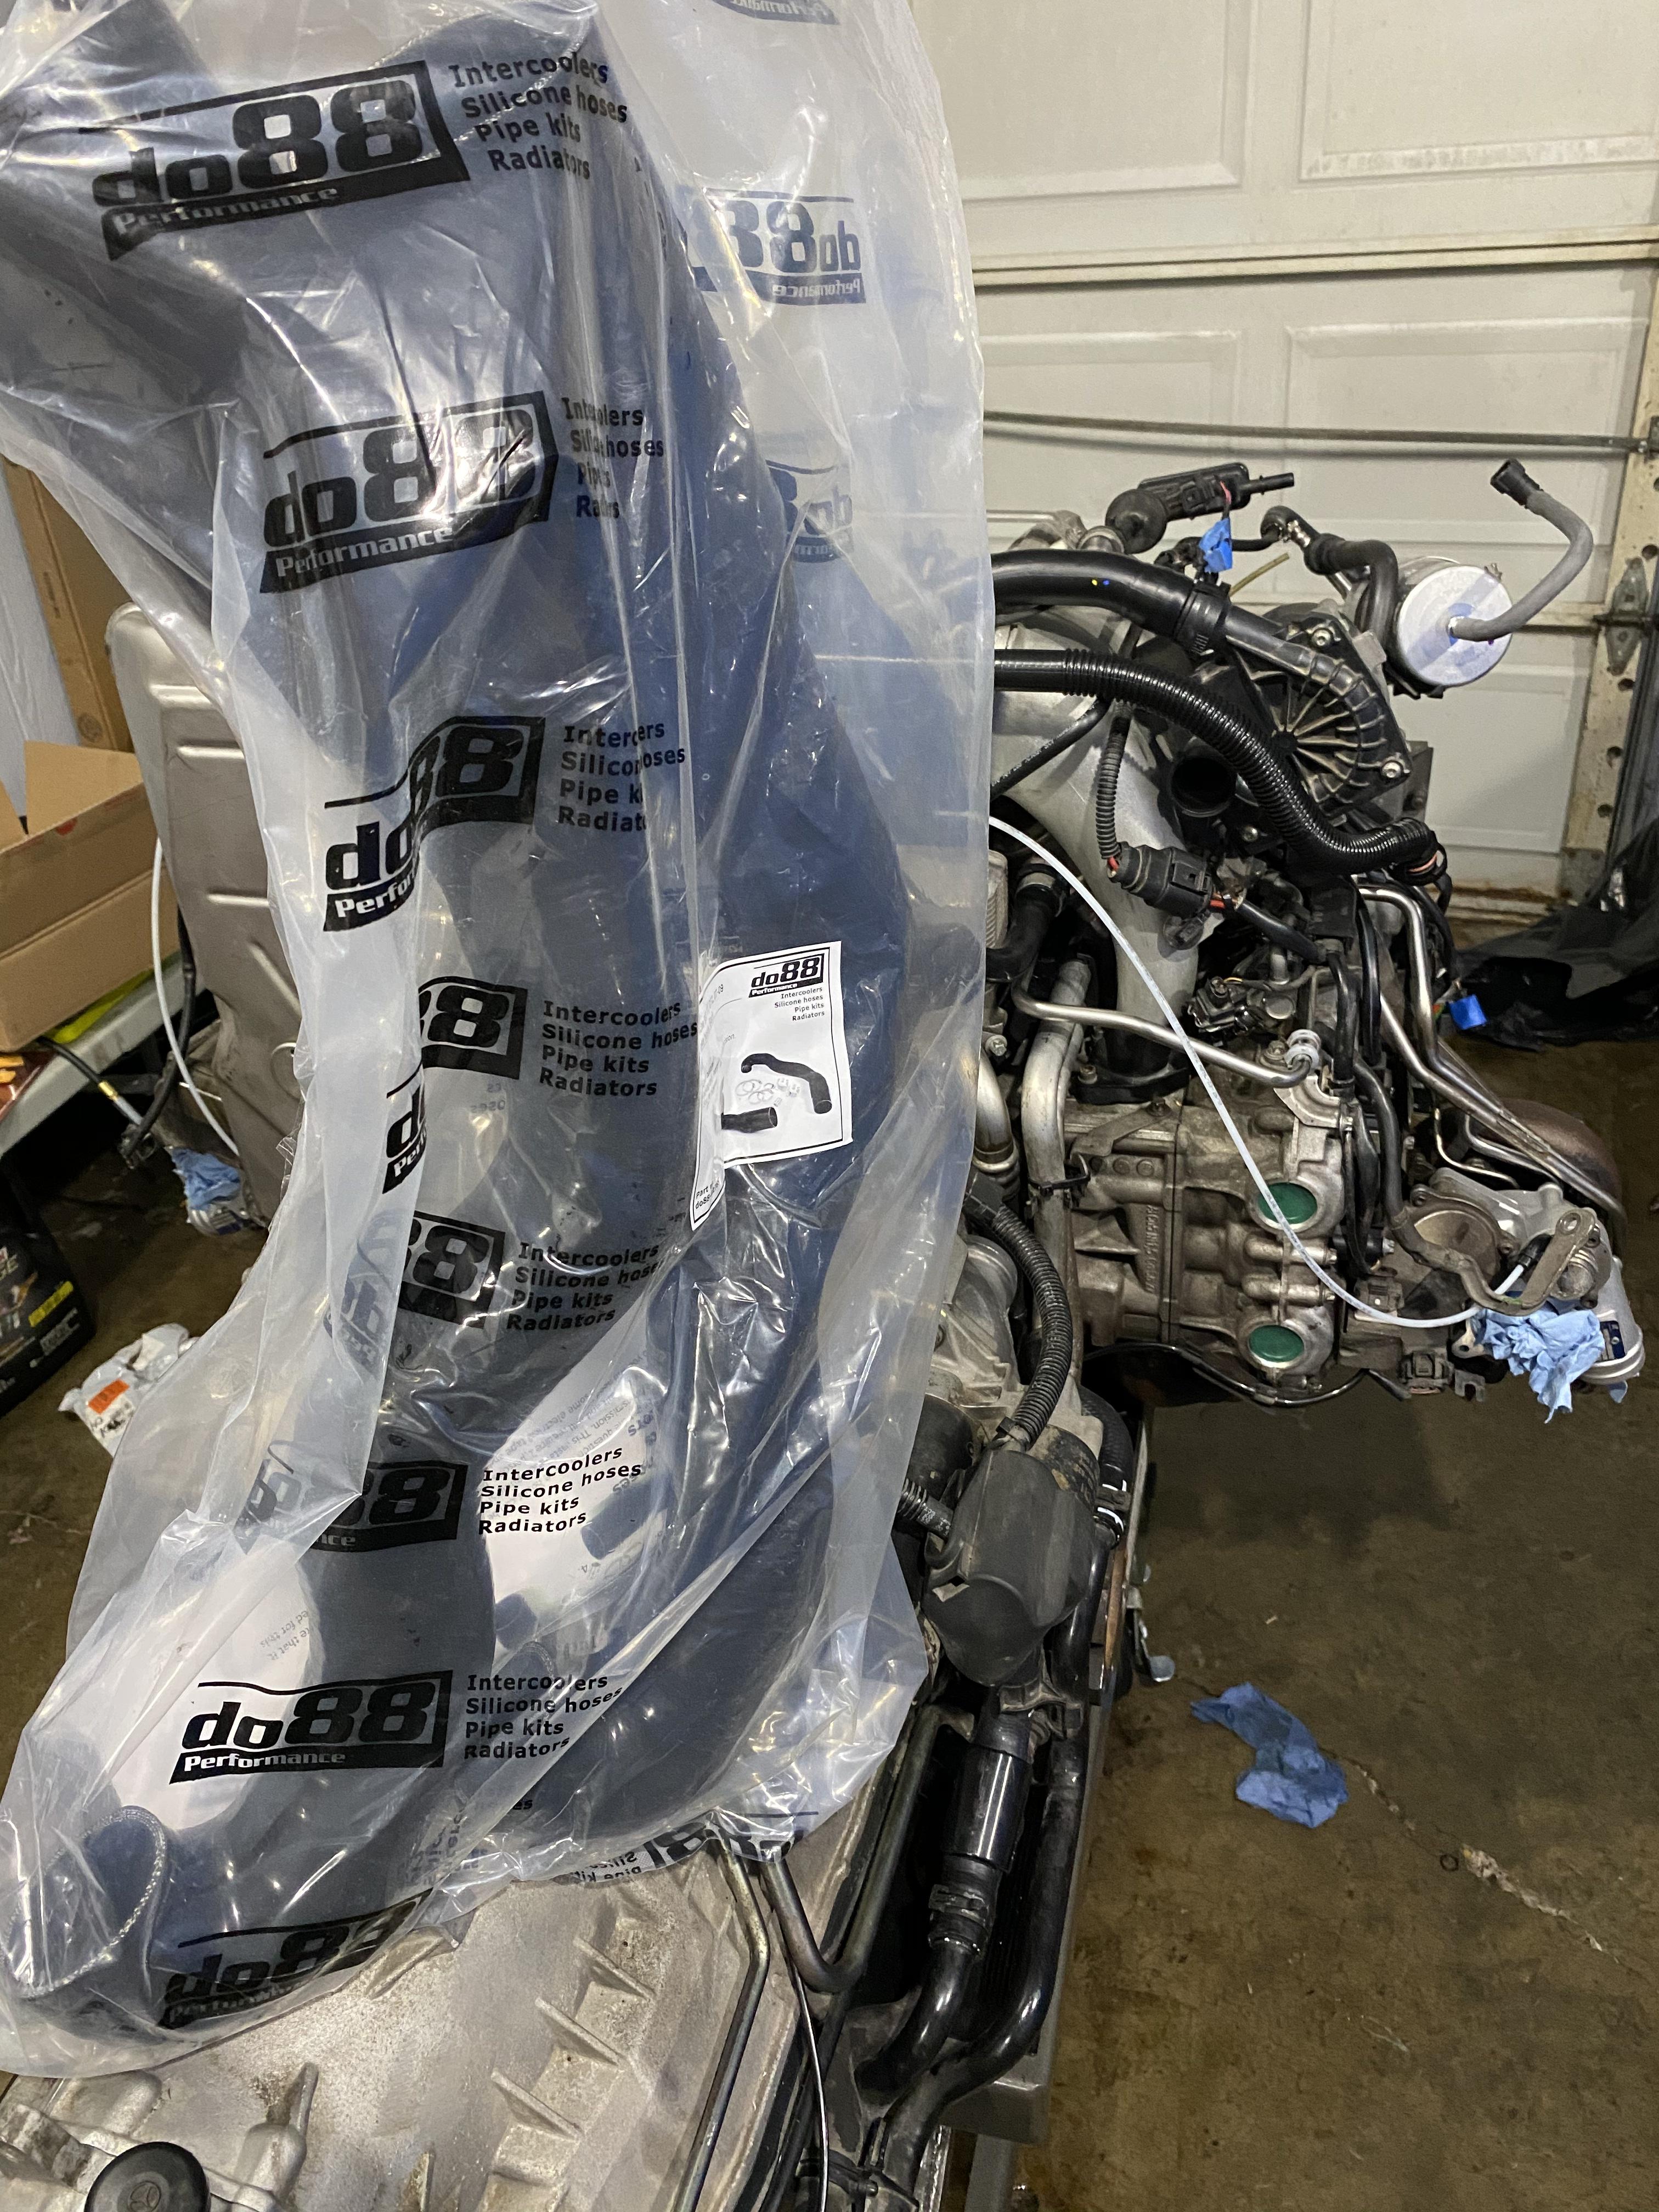
Installed new Do88 intake pipes. This is a nice product. Excellent fit, great packaging, and great instructions.
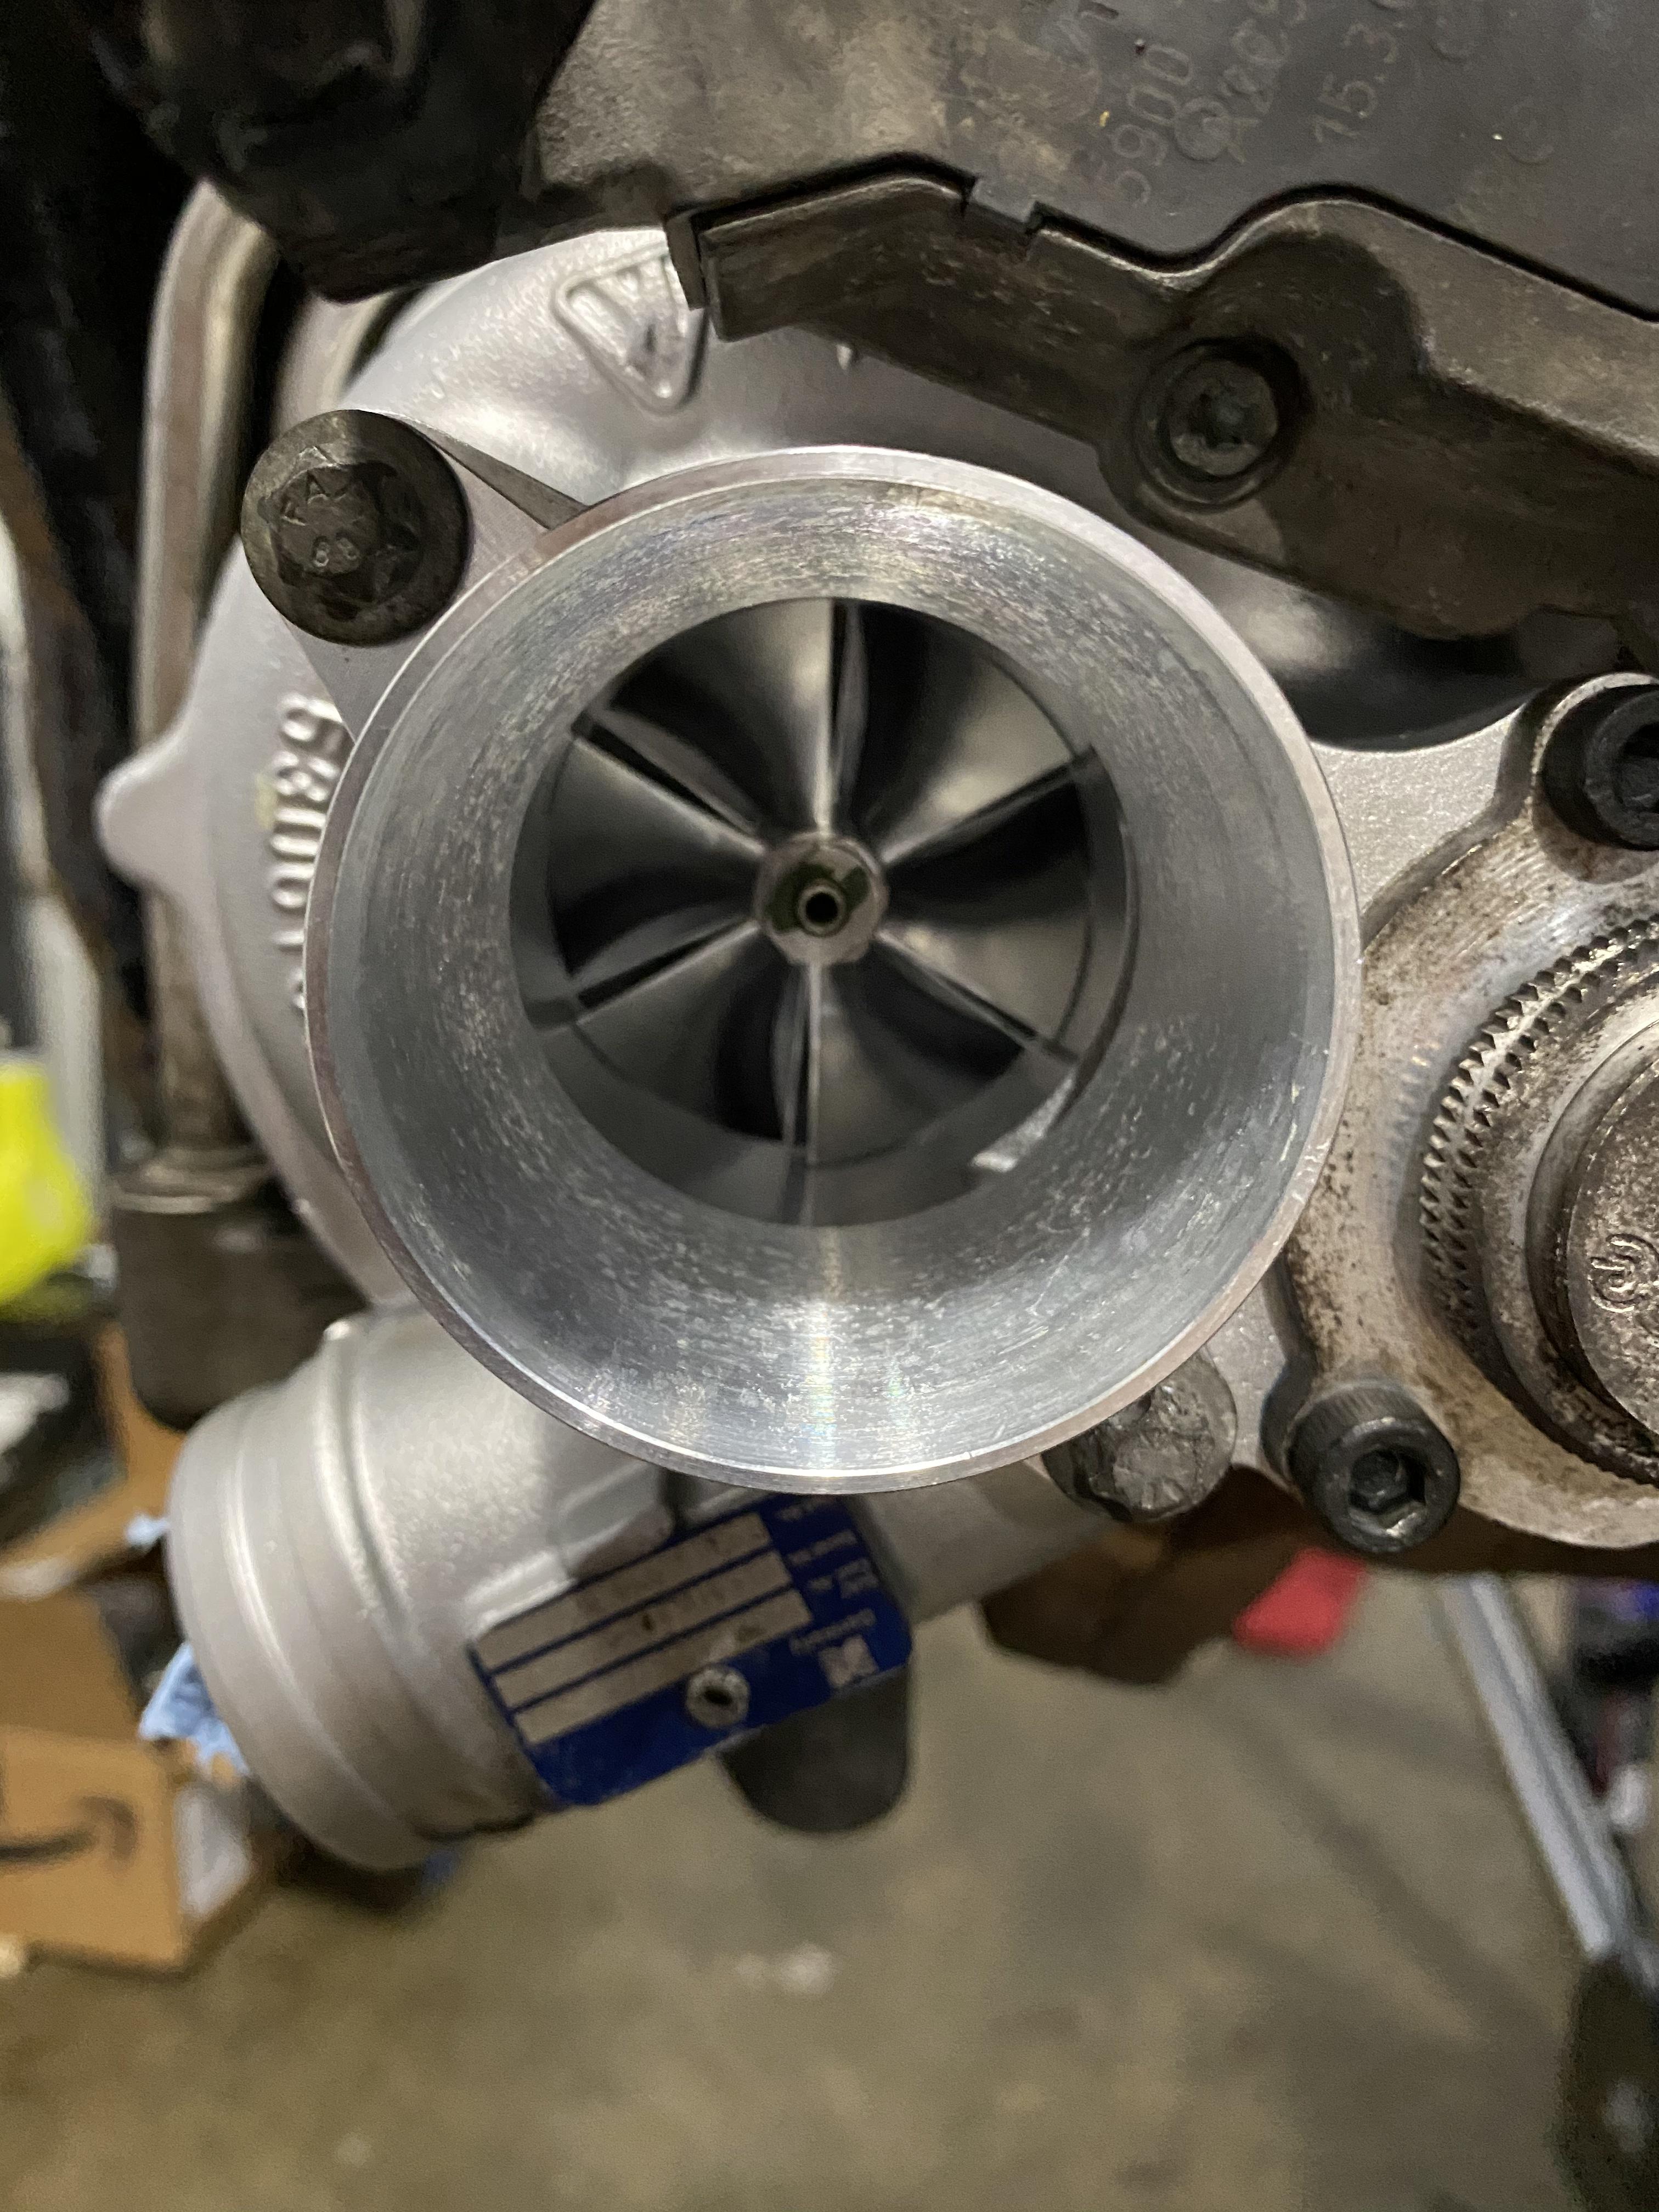
Nice lookin turbo

Belt tensioner and pulley are supposed to come in tomorrow. Once those are on, I'll put the TB and Y pipe back and do a pressure test. Hopefully it goes well and it'll be time to put it back in the car. Should I leave the front driveshaft off.... ? Hmm...
FPR hose is going nowhere
Installed new Do88 intake pipes. This is a nice product. Excellent fit, great packaging, and great instructions.
Nice lookin turbo
Belt tensioner and pulley are supposed to come in tomorrow. Once those are on, I'll put the TB and Y pipe back and do a pressure test. Hopefully it goes well and it'll be time to put it back in the car. Should I leave the front driveshaft off.... ? Hmm...
03-25-2020 | 02:44 AM
#72
Burning Brakes
Great idea on the pressure testing, What a pain chasing leaks blind.
Keep these updates coming, built quite a monster!
Keep these updates coming, built quite a monster!

The following users liked this post:
jayi836 (03-25-2020)
03-25-2020 | 09:22 AM
#74
Thread Starter
Three Wheelin'
The following users liked this post:
jayi836 (03-25-2020)
03-27-2020 | 07:31 PM
#75
Thread Starter
Three Wheelin'
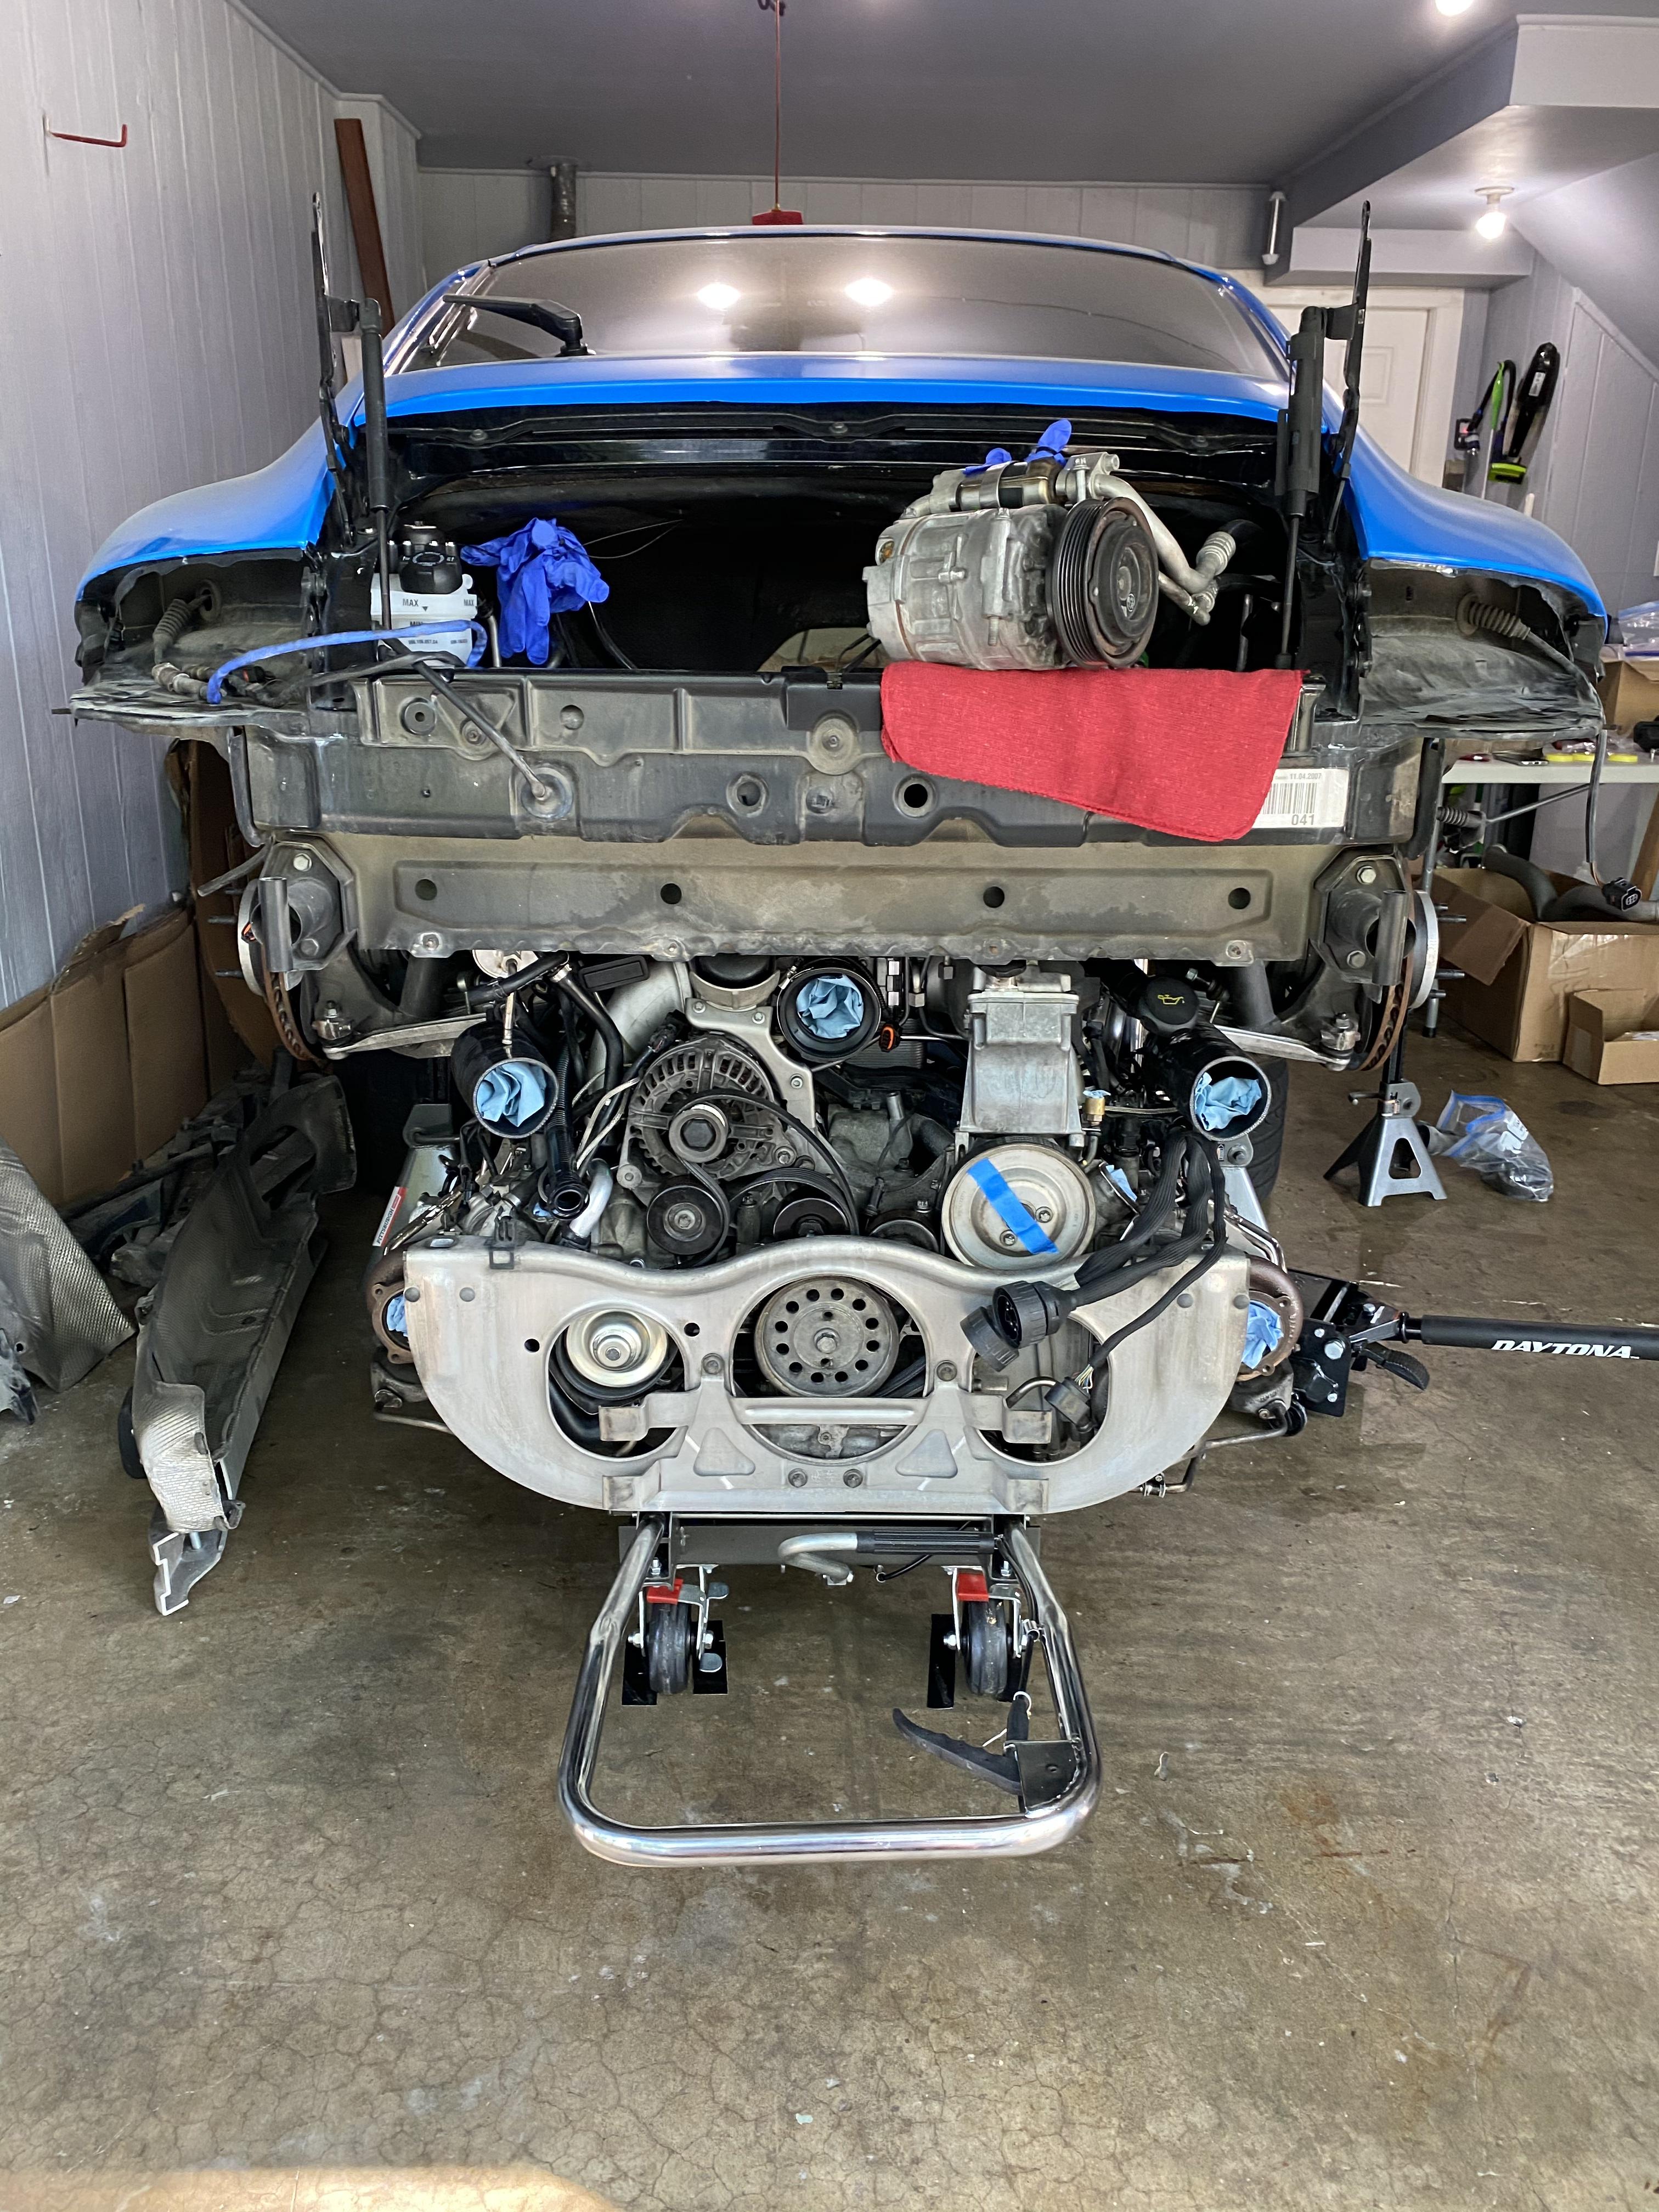
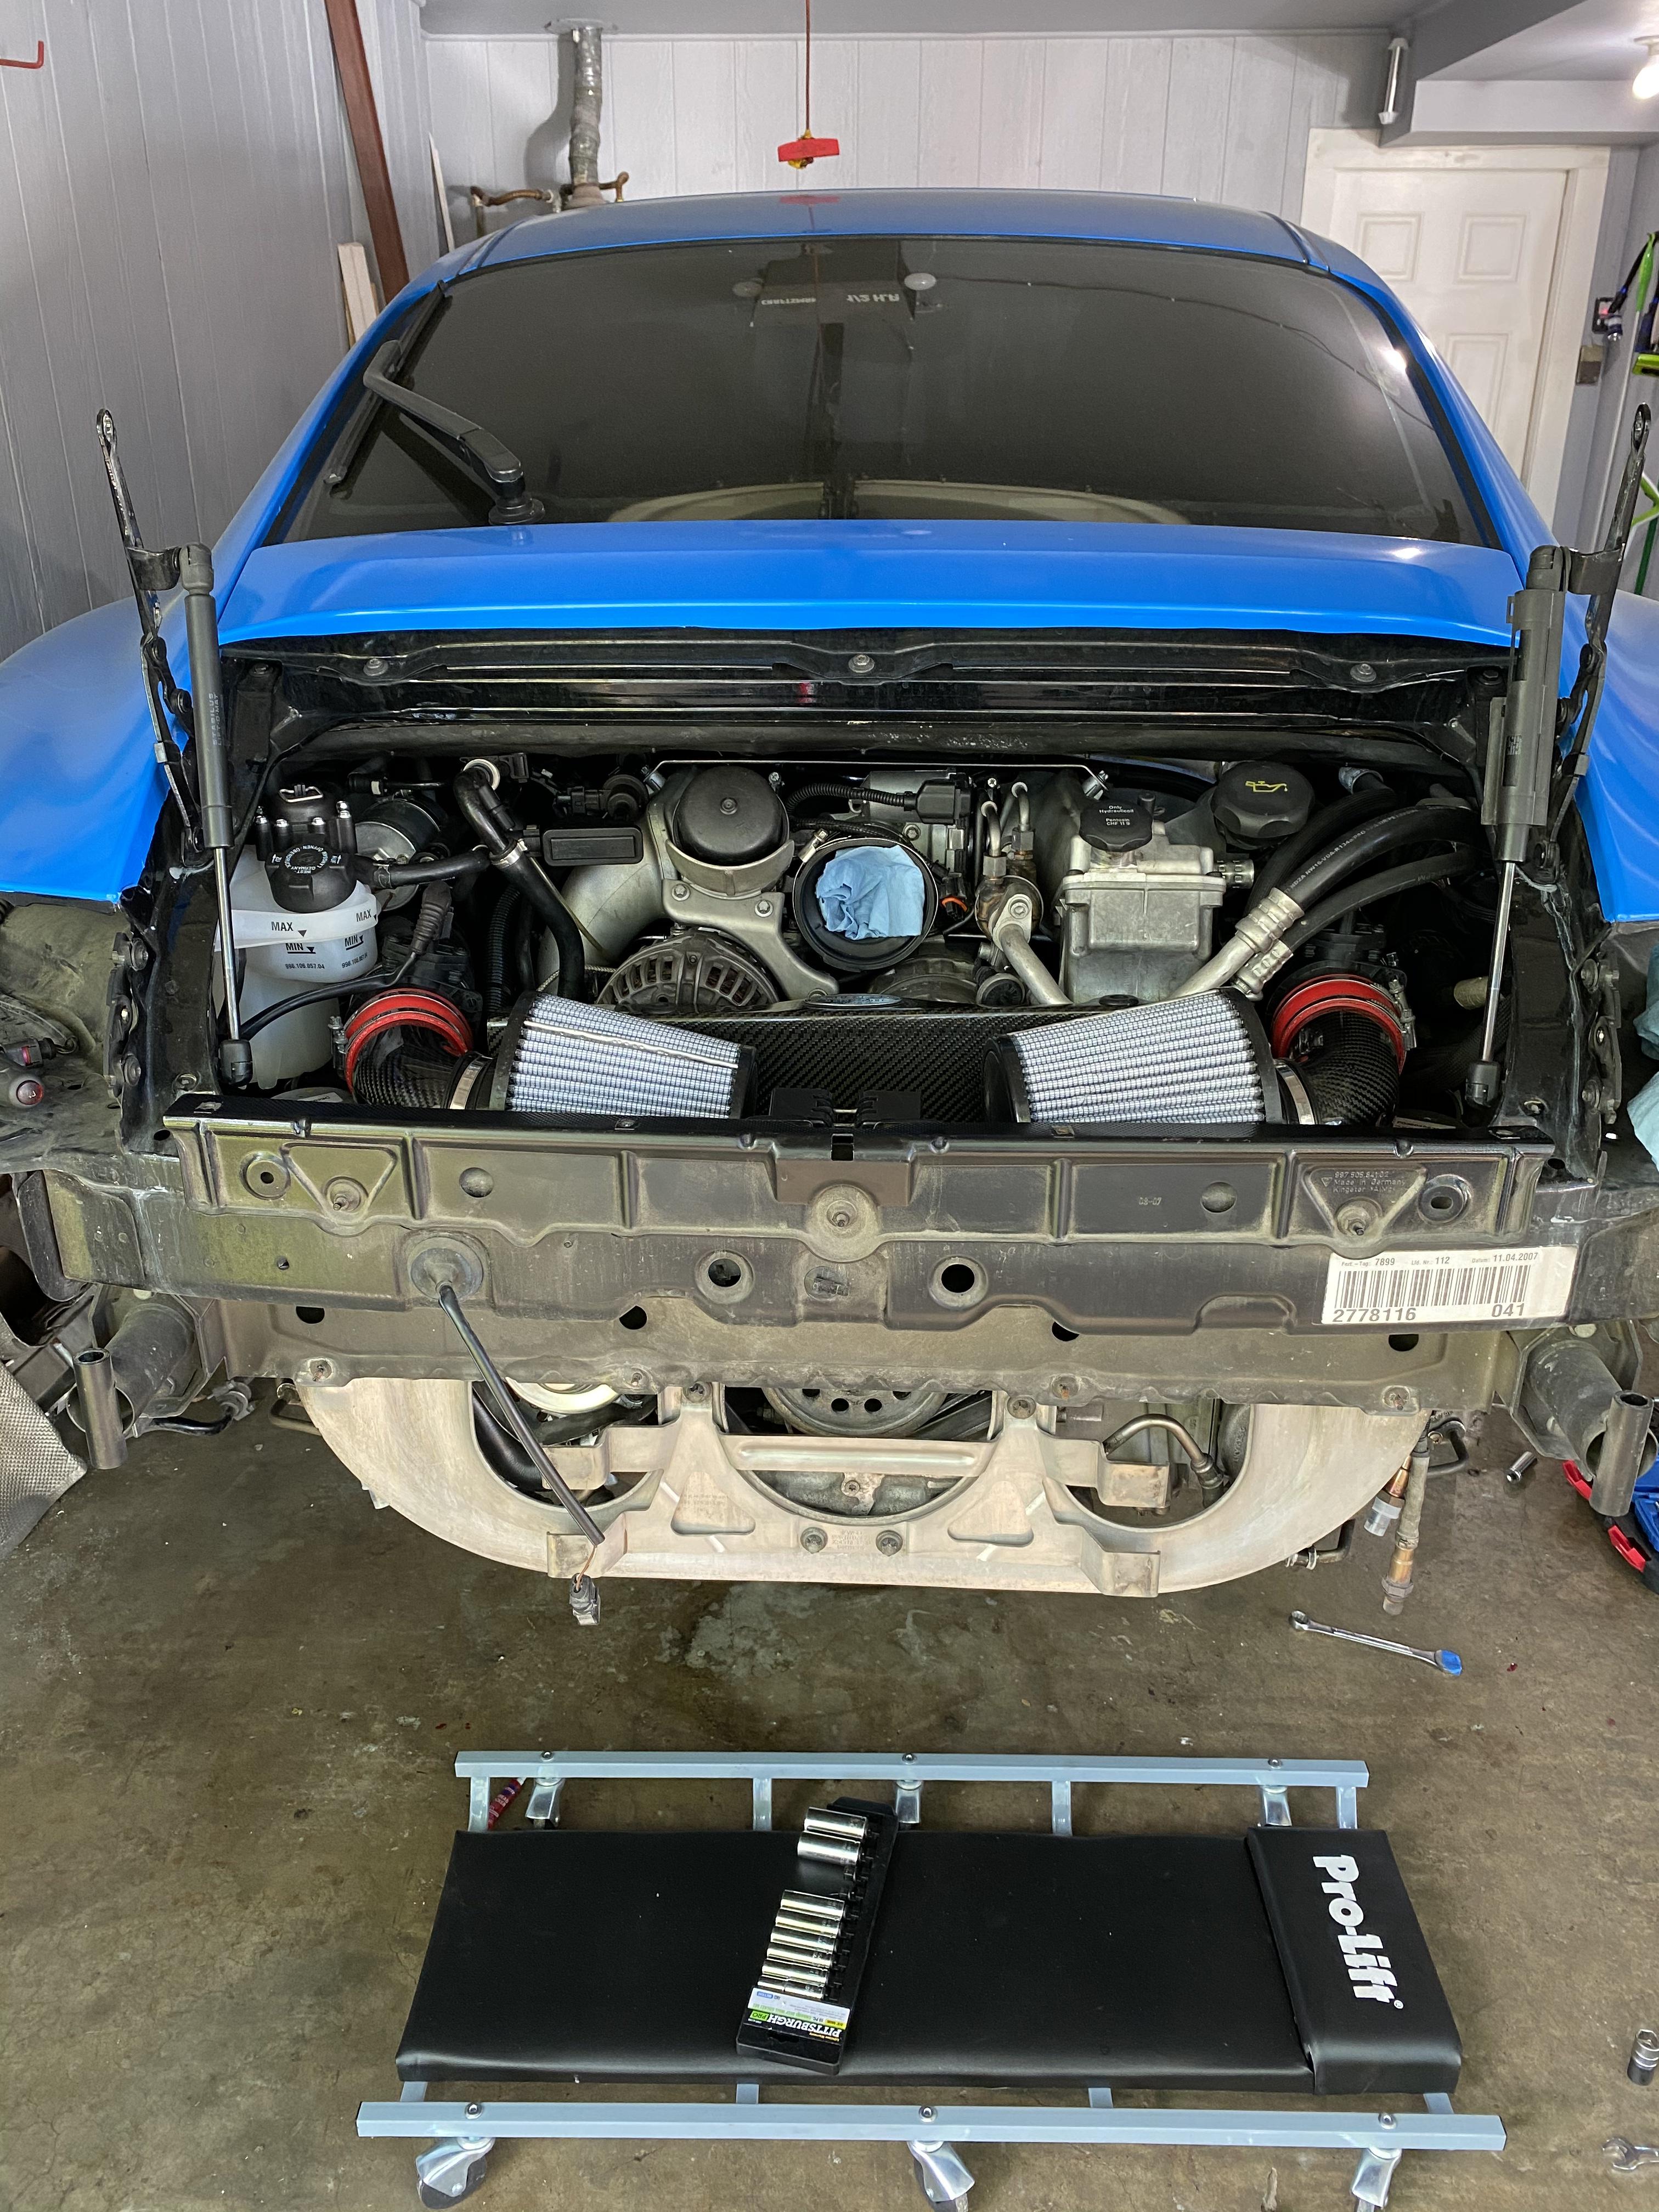
Got the belt tensioner and pulley on. Really wish I had just bought it right off the bat, it was a bit of a pain in the a$$ to install it with the pulley manifold attached to the engine.
I also did a boost leak test while I had the engine out by rigging up the intercoolers on a couple boxes. It holds pressure, but there is a tiny tiny leak coming from the intake manifold on the driver's side. It took me about 2 hours of testing to figure that one out. In 30 seconds in drops from 22 PSI to 18 PSI which is good enough. I'll replace the intake manifolds next time I drop the engine, maybe part of a bigger upgrade.
Then I spent all day marrying the engine back to the chassis. Lots of little things that have to be done behind the scenes but it's all torqued down now. Still need to put on the exhaust and the intercoolers, and then we'll start playing with fluids. Fun stuff.
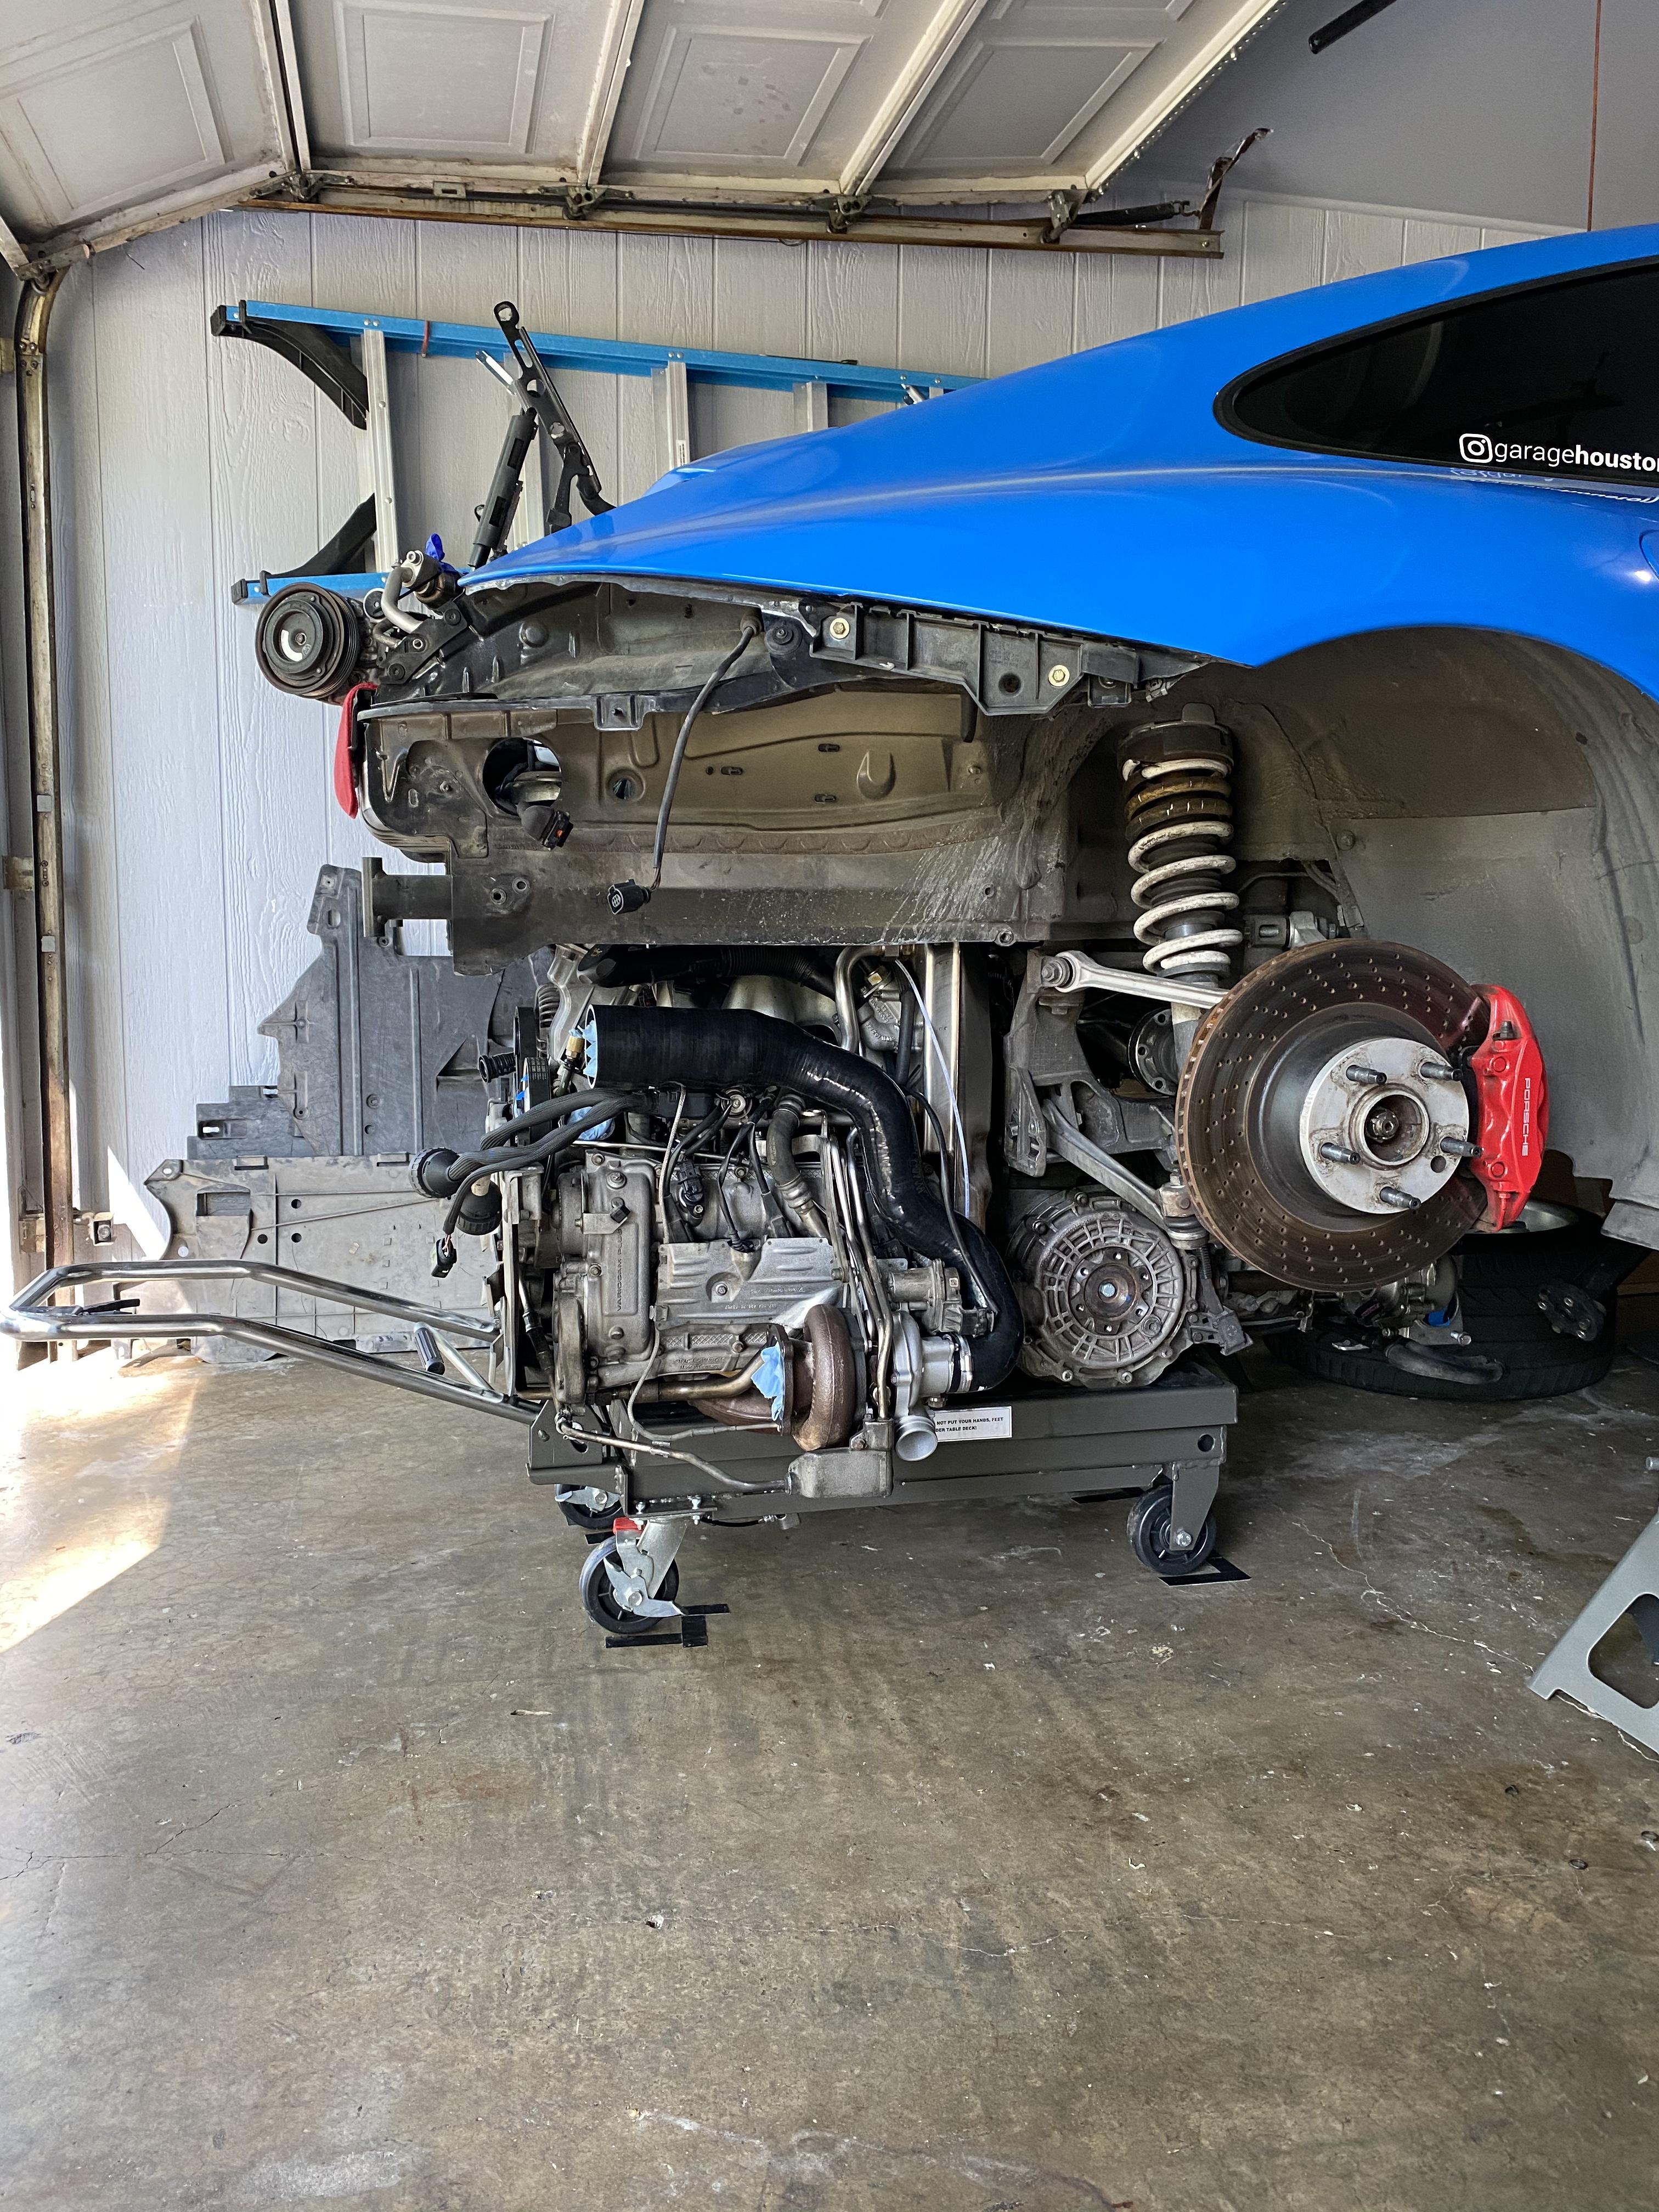