Nose lift, CPO, PCNA
#152
#153
Rennlist Member
bovien
I have similar problem with my GT3 lift system, once it was recommended by local Porsche dealer complete replacement of the system ( GT3 out of warranty )and I told them to forget it.
Can you email me the instructions from the workshop manual on how to remove the unit. Also did you had to drain/disconnect coolant tubes?
Thanks.
#154
Intermediate
Join Date: Sep 2009
Location: Woodside, CA
Posts: 40
Likes: 0
Received 0 Likes
on
0 Posts
Great Work Bovien!
Quick question - having done this now, do you think the valve could be replaced without removing the entire FAL from the car? it seems from the pictures that you should be able to remove just the valve body but maybe there's a catch...?
Also, did you see any numbers on the compressor on the FAL unit itself to discern the whole 'switch until compressor 00111', switch after compressor 00112' thing??
Many thanks!
#155
Rennlist Member
bovien
I have similar problem with my GT3 lift system, once it was recommended by local Porsche dealer complete replacement of the system ( GT3 out of warranty )and I told them to forget it.
Can you email me the instructions from the workshop manual on how to remove the unit. Also did you had to drain/disconnect coolant tubes?
Thanks.
I have similar problem with my GT3 lift system, once it was recommended by local Porsche dealer complete replacement of the system ( GT3 out of warranty )and I told them to forget it.
Can you email me the instructions from the workshop manual on how to remove the unit. Also did you had to drain/disconnect coolant tubes?
Thanks.

I do not believe that you have to drain the coolant lines ... but I will leave the definitive answer to the man who has actually performed the task!
#156
Rennlist Member
Great Work Bovien!
Quick question - having done this now, do you think the valve could be replaced without removing the entire FAL from the car? it seems from the pictures that you should be able to remove just the valve body but maybe there's a catch...?
Also, did you see any numbers on the compressor on the FAL unit itself to discern the whole 'switch until compressor 00111', switch after compressor 00112' thing??
Many thanks!
Quick question - having done this now, do you think the valve could be replaced without removing the entire FAL from the car? it seems from the pictures that you should be able to remove just the valve body but maybe there's a catch...?
Also, did you see any numbers on the compressor on the FAL unit itself to discern the whole 'switch until compressor 00111', switch after compressor 00112' thing??
Many thanks!
I guess it might be possible to replace the sensor in-situ if you remove the top containing the electrical connections 1st then unscrew it ... but its tight in there, and you may have to bleed the airlines from the struts to clear any fluid leakage from them
#157
Great Work Bovien!
Quick question - having done this now, do you think the valve could be replaced without removing the entire FAL from the car? it seems from the pictures that you should be able to remove just the valve body but maybe there's a catch...?
Also, did you see any numbers on the compressor on the FAL unit itself to discern the whole 'switch until compressor 00111', switch after compressor 00112' thing??
Many thanks!
Quick question - having done this now, do you think the valve could be replaced without removing the entire FAL from the car? it seems from the pictures that you should be able to remove just the valve body but maybe there's a catch...?
Also, did you see any numbers on the compressor on the FAL unit itself to discern the whole 'switch until compressor 00111', switch after compressor 00112' thing??
Many thanks!

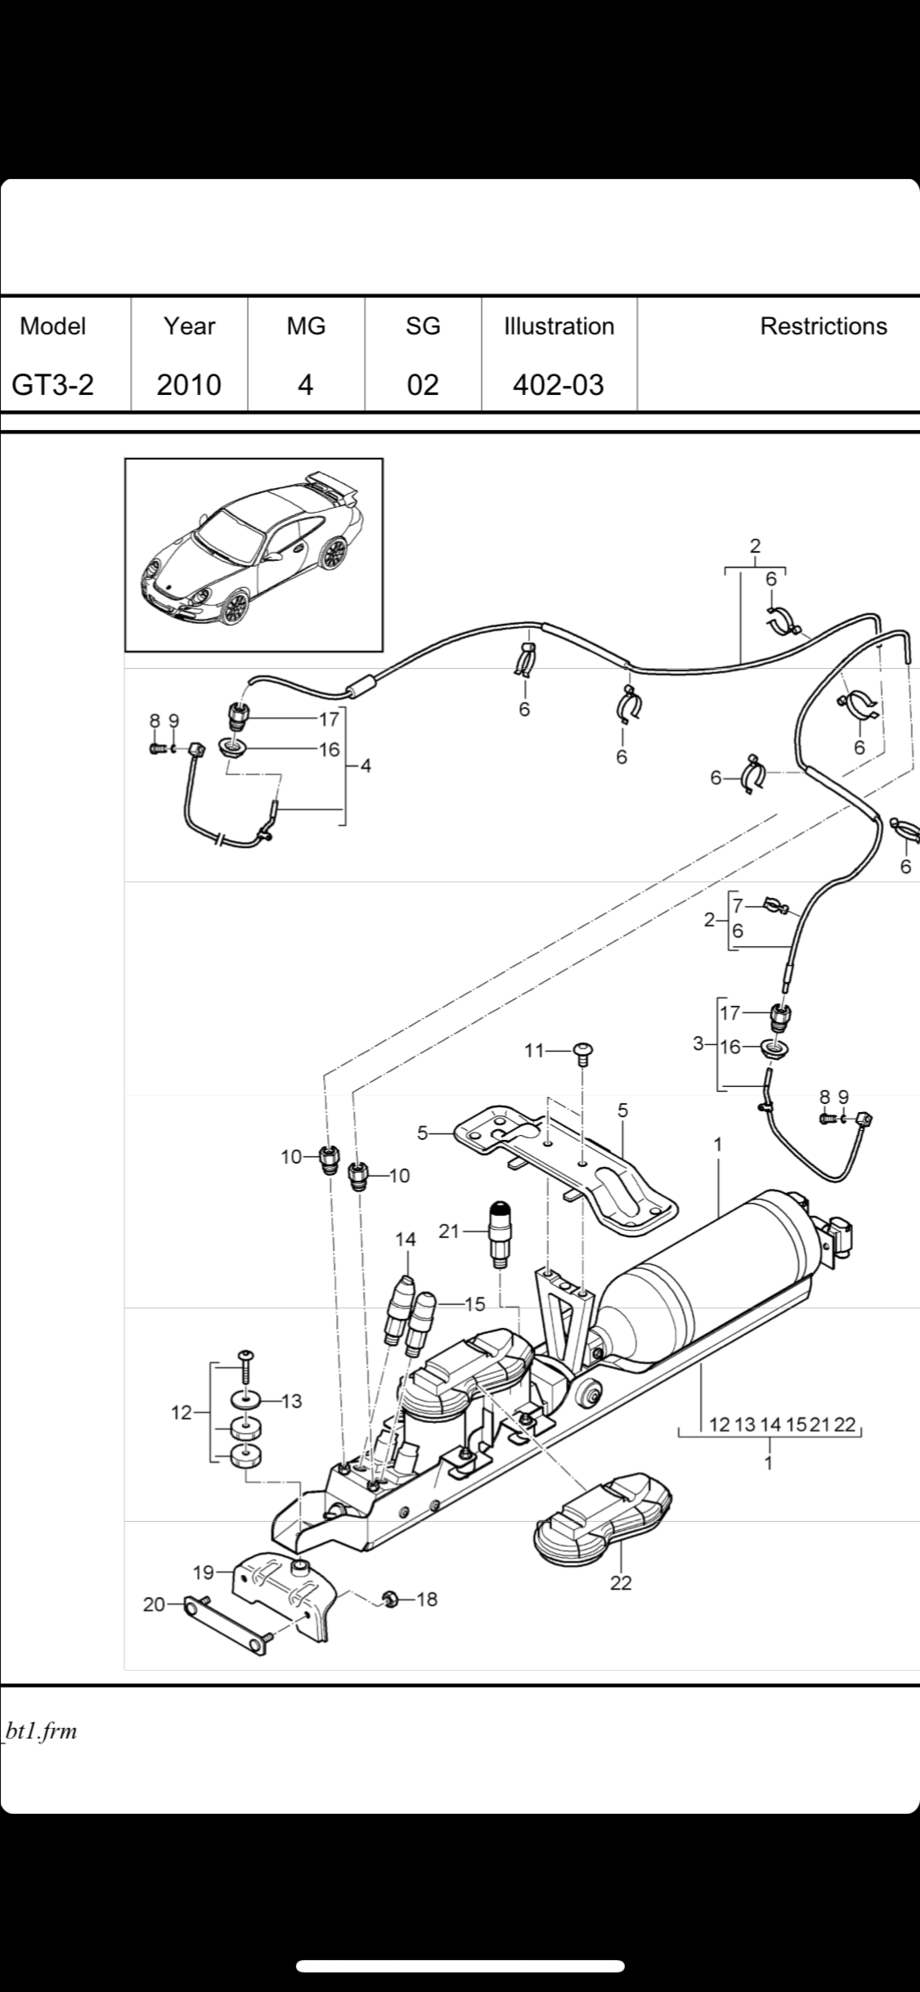
However, getting the system down in really not an issue, when you get to it. Only thing not described in the workshop manual (which really isn't needed, as it is a fairly straight forward job requiring basic tools), is that you need to unclip two black lines on the drives side of the car below the coolant pipes and then turn the mount of these 90 degrees. Else the coolant lines wont clear it and you can't separate them enough to get the FAL system down
You might have to subscribe to the online workshop manuals for the process https://techinfo2.porsche.com/PAGInf...?Type=GVOStart especially since the content on the manuals are copyright and cannot (should not) be copied to the forum 
I do not believe that you have to drain the coolant lines ... but I will leave the definitive answer to the man who has actually performed the task!

I do not believe that you have to drain the coolant lines ... but I will leave the definitive answer to the man who has actually performed the task!
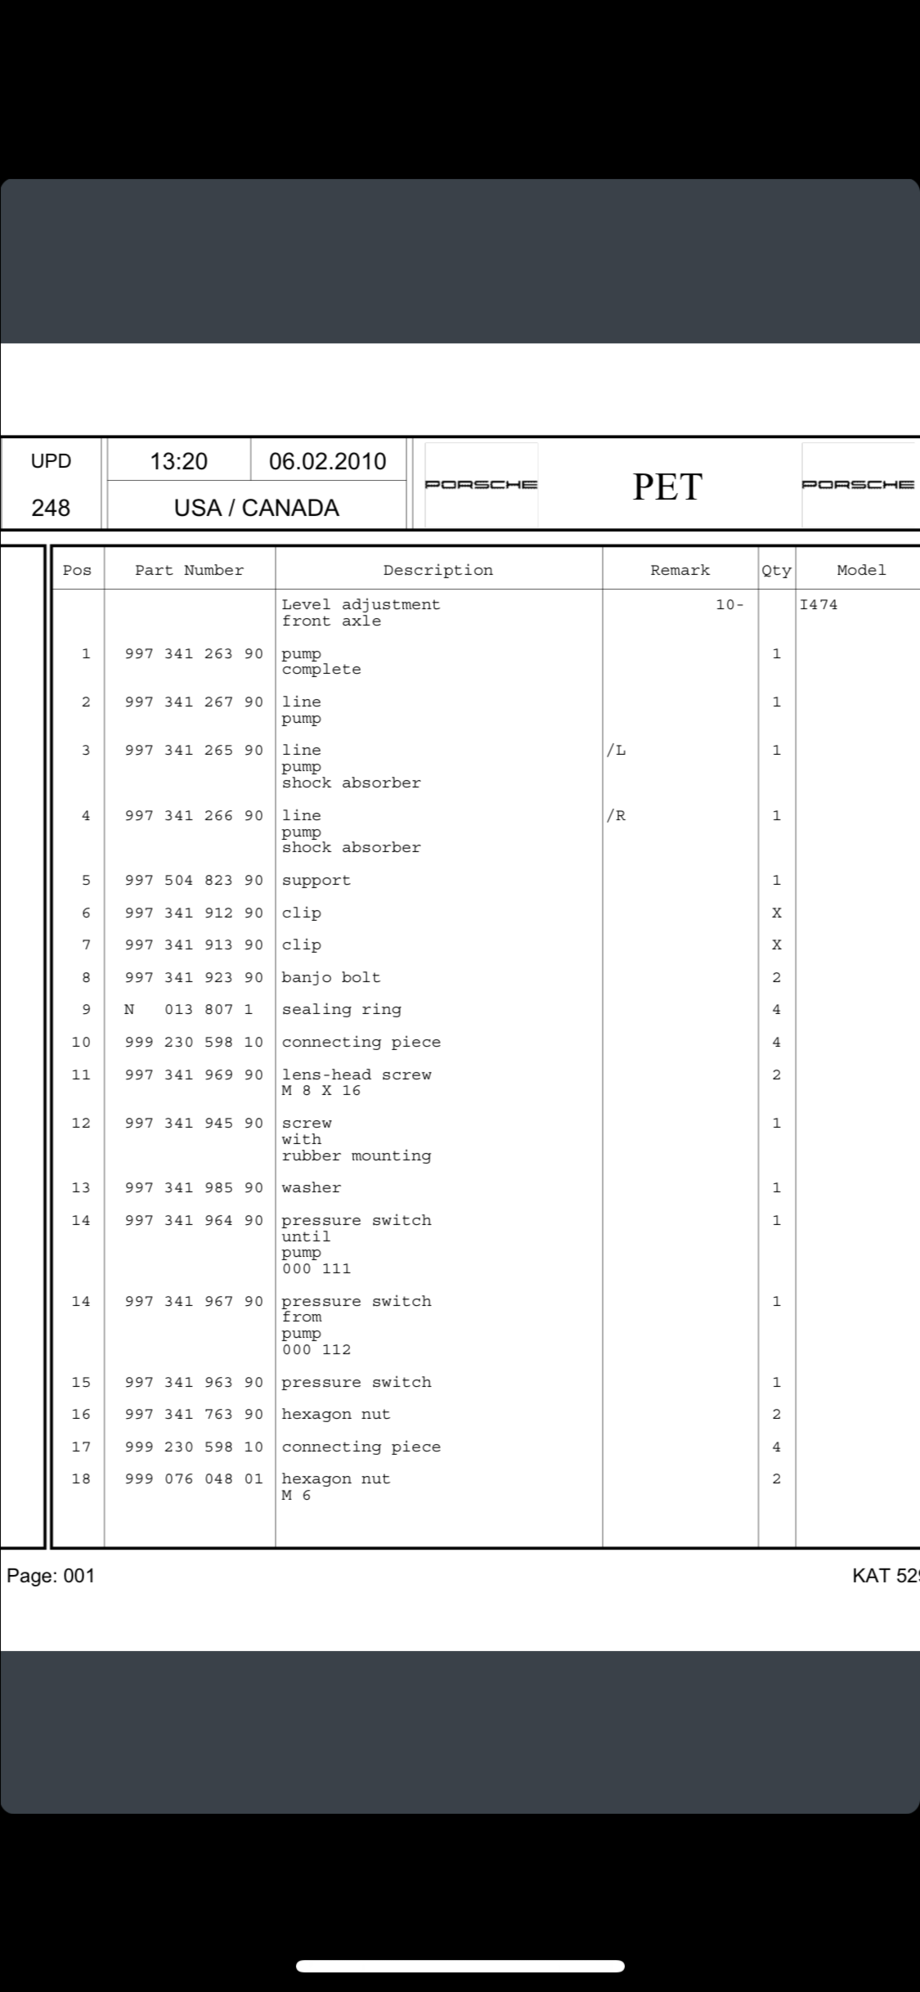
I wondered that myself, that would be ideal! - BTW I "suspect" that the compressor version *must* be located somewhere on the compressor itself and not the overall unit there is a label on the compressor side that may contain that #...
I guess it might be possible to replace the sensor in-situ if you remove the top containing the electrical connections 1st then unscrew it ... but its tight in there, and you may have to bleed the airlines from the struts to clear any fluid leakage from them
I guess it might be possible to replace the sensor in-situ if you remove the top containing the electrical connections 1st then unscrew it ... but its tight in there, and you may have to bleed the airlines from the struts to clear any fluid leakage from them
The difference between the two switches available are - according to Porsche - the male thread that it mounts on the FAL system with. There is apparently a 1/8" and an 1/4". I looked at the numbers on the switch itself (stamped on the side, but maybe not possible to see without removal of the system), and cross checked with suco (https://www.suco.de/en/pressure-moni...hes/m4/f1/146/). It gave me the info that mine had a thread called 'G 1/4' or the likes. So I just gambled as I was pressed for time to get the part home. Measuring the thread i have 12mm and a M12 nut fits over it (which in my mind makes no sense with 1/4", but hey, it fit.
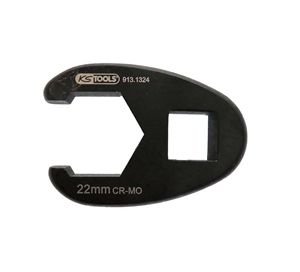
If you can get the wires off and you have an VERY thin sided 27mm socket, you could do it in theory. But I can't imagine how you will get the wires mounted again, but hey, people have smaller fingers than I do...
Important that you bleed the system before removing the airlines. There is a bleed valve on the FAL. It's the one with a black cap on it. Do you gloves, and other needed protection. Tip froze, when I did it, and it made a lot of noise. Kind of like bleeding your garage compressor..
#158
Rennlist Member
Thank you for doing the research,I have been living with mine intermittently not going down, but always going up since I got the car.I will now fix it myself thanks to you taking the initiative.
#159
bovien,
One more question, Have you tried to play a little bit with the pressure screw at your old switch to try to lower the pressure under 13bar ? Again thank you for all detailed descriptions.
One more question, Have you tried to play a little bit with the pressure screw at your old switch to try to lower the pressure under 13bar ? Again thank you for all detailed descriptions.
#160
As my new switch (expecting it to be set at exactly 13 bar, although Suco statest the actual reading can be +/- 10%) worked I assumed that the old was defect. However, I did not try to clean it completely for hydraulics fluid, which might have fixed the issue. At the time of me taking things apart, I was not thinking about the issue with leaking struts and just wondering if it was ment to be in there.
But one could try to adjust the screw a few rounds without removing the FAL system. That would be a bit fiddely but doable.
If someones issue would be an air leak some where, it might be a fix to run the system to at lower pressure, as the leaking air would be exponential leak in relation to adding pressure. Car might not lift full, but it's worth a try.
But if it turns out, that all have this issue due to leaking struts, we are out of luck and need to replace two front struts + clean out system AND probably replace the switch again.
#161
Rennlist Member
Thread Starter
Did anyone else get a "Lift Malfunction" light on like I did when mine failed? I was never told what the failure was, and that the unit would be sent to Germany to be examined-
#165
Thanks so much for this writeup Bovien. I decided to give this one a shot as I had the same symptoms as you. It is possible to replace the switch without pulling the whole system down, as you said. I used a socket, pulled the cap off the switch and undid the switch wires with a jewelers screw driver. To get the socket on I had to remove the cap on the switch next to it. The socket grabbed it enough to unscrew the switch. I had some oil in my switch as well. There was air in the system but not much due the to car sitting for about a week, did not need to bleed it.
Just came back from testing it out and it works! "Lift" lights up in the dash soon after the front end goes up. Now there is a satisfying swish once you push the button to bring it back down.
FYI, you can pickup the switch for about $230 shipped if you do a little googling.
Thanks again!
Just came back from testing it out and it works! "Lift" lights up in the dash soon after the front end goes up. Now there is a satisfying swish once you push the button to bring it back down.
FYI, you can pickup the switch for about $230 shipped if you do a little googling.
Thanks again!
Last edited by Pmafia; 06-04-2018 at 11:31 PM.


