When you click on links to various merchants on this site and make a purchase, this can result in this site earning a commission. Affiliate programs and affiliations include, but are not limited to, the eBay Partner Network.
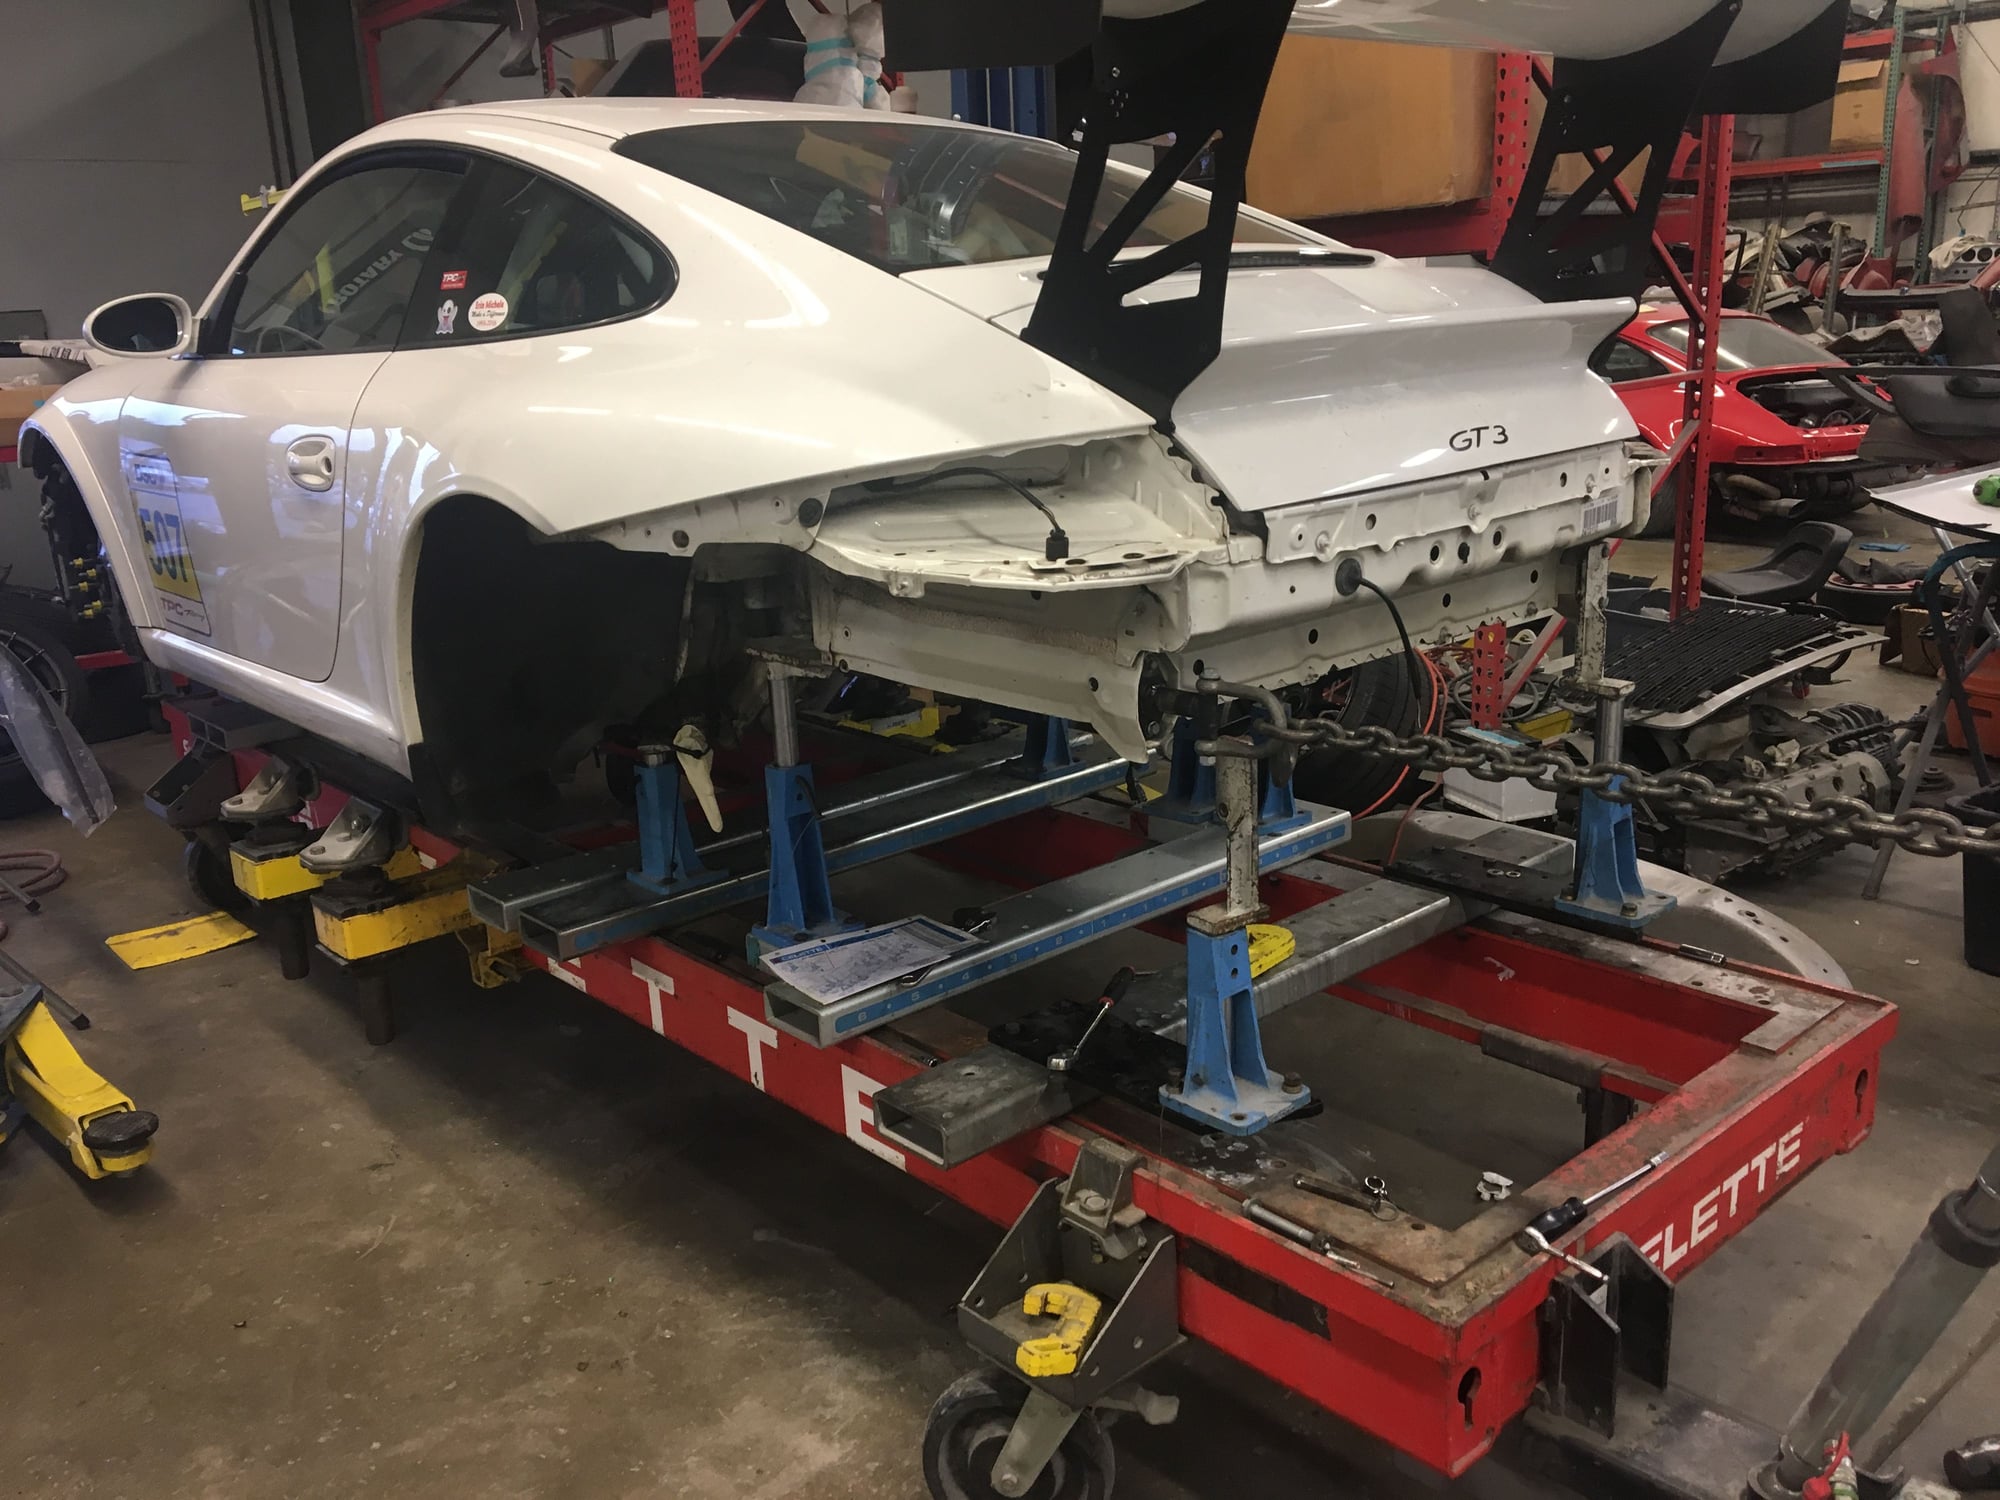
On the CELETTE bench at Euro Pros(Gaithersburg,MD) to measure and straighten the frame(aka the tub). Jack Ford is the owner and frame specialist at Euro Pros. Jack's superb work is well known in our region(and beyond).
For this procedure the drivetrain and the suspension including subframes must be removed so that the frame can be accurately measured at the connecting points. Its a lot of work to prepare a car for the bench, which is why insurance companies will total a lower value car as soon as they hear the words " frame work". This may be a frightening image to some people seeing their car on the bench, but this is a common sight for frame repair specialists and for race team crewmen.
Setting up the CELETTE fixtures to the blueprint for precise measurement before and after the repair.
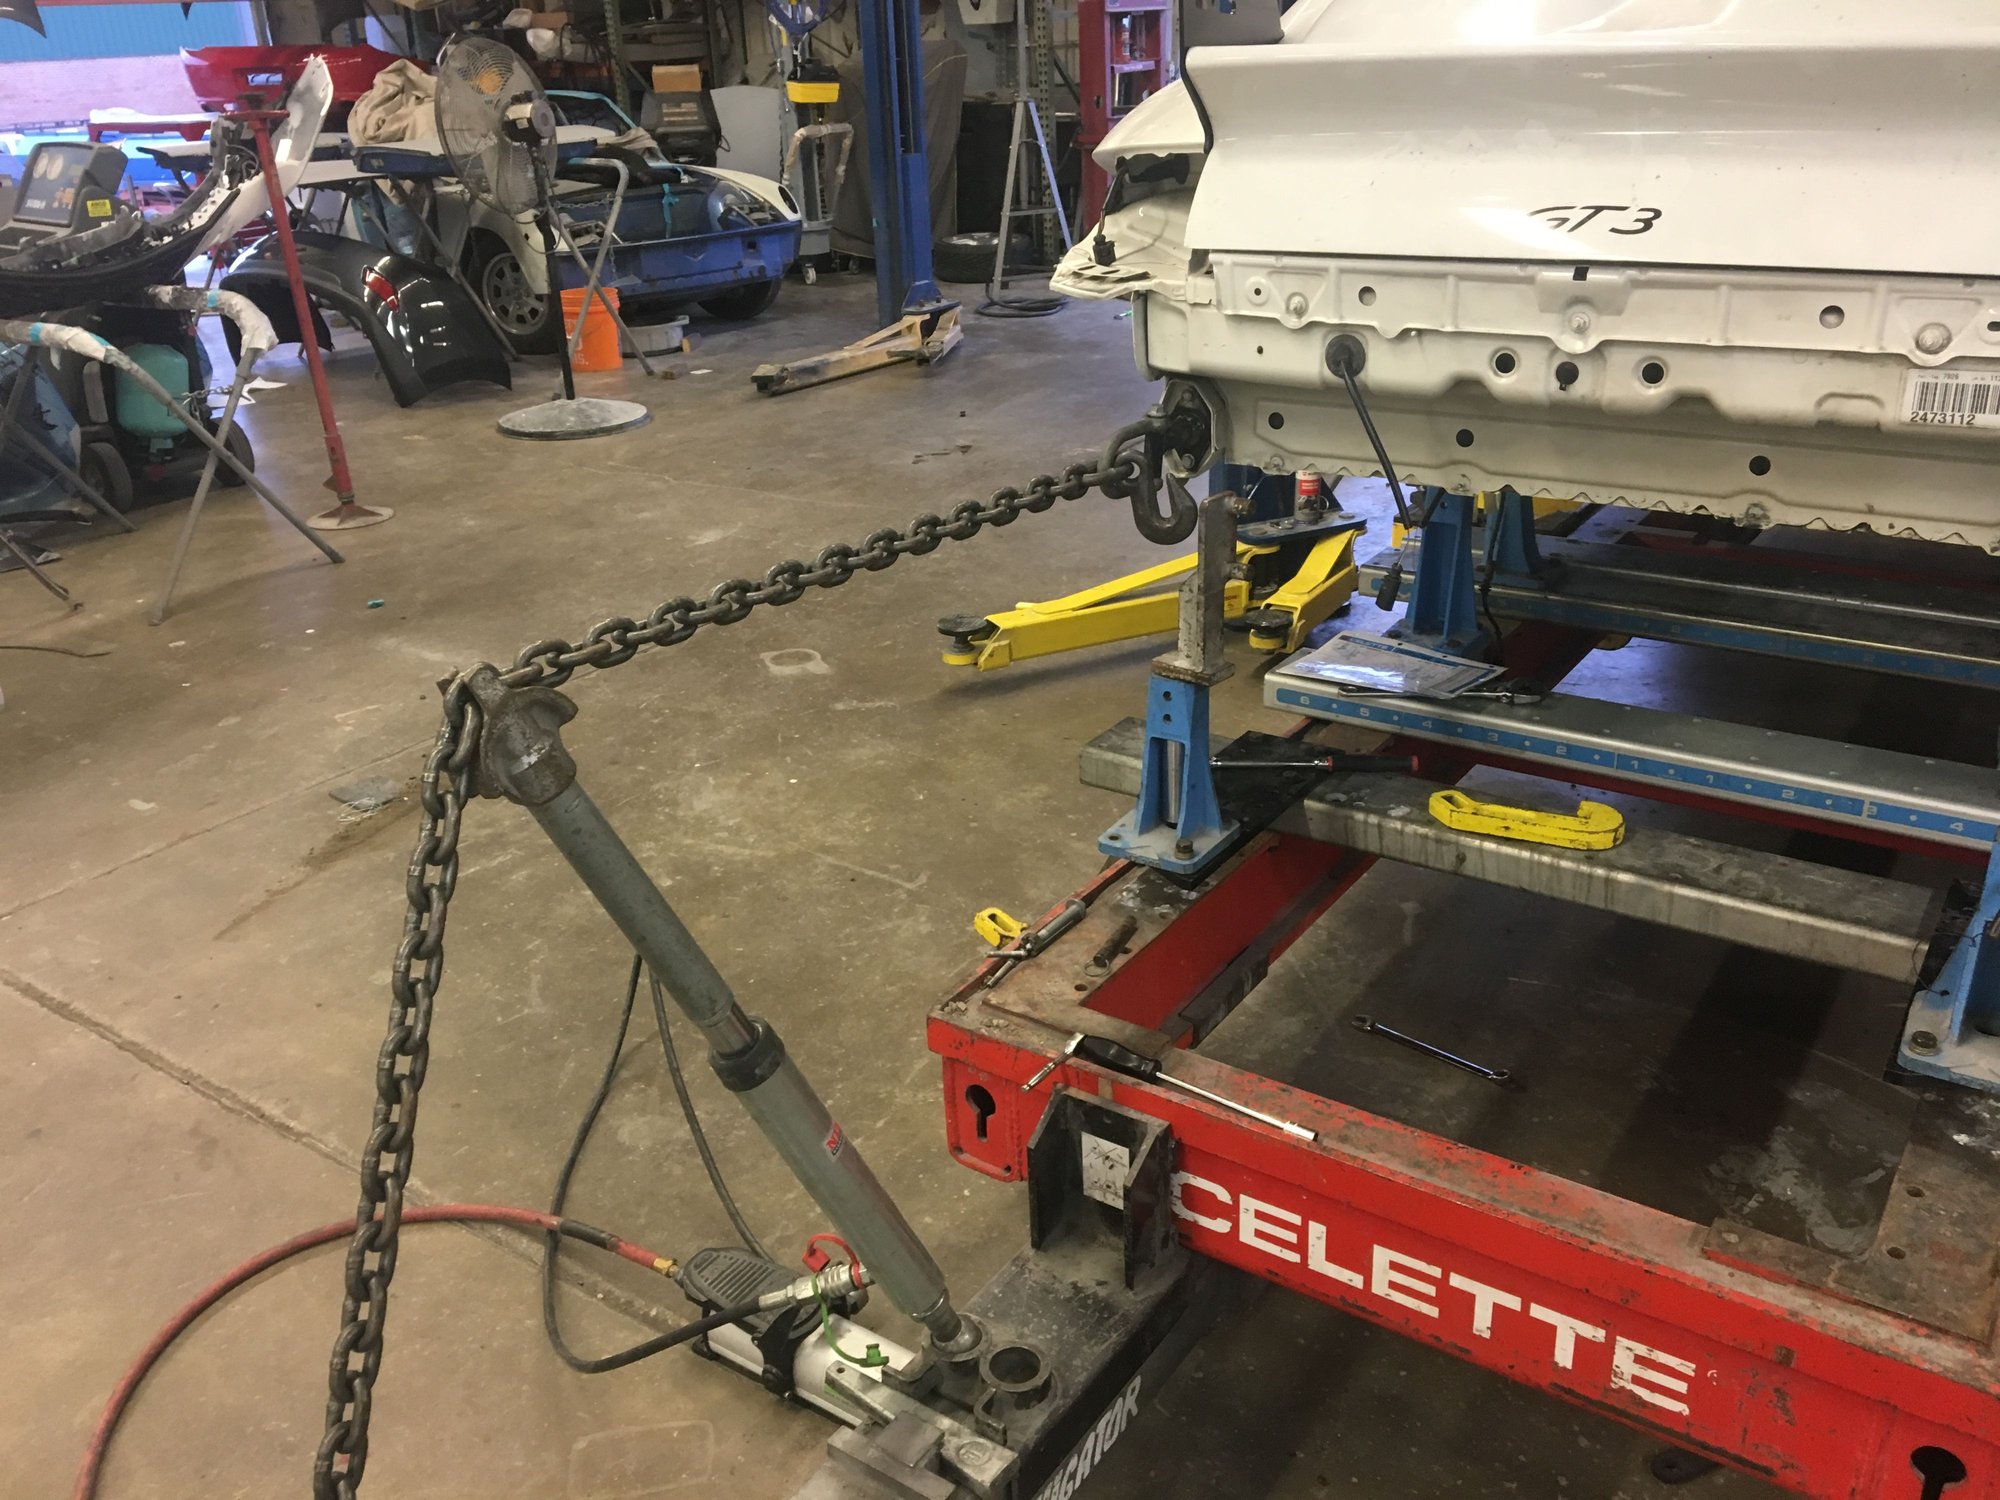
The rear hit shoved the frame forward and upward by 20mm. Using hydraulic power to pull the frame back to factory spec. Jack Ford of Euro Pros is The Specialist and he's got the magic touch.
Fun fact- TPC Racing has been working in alliance with Euro Pros for 15 years. Together we completed numerous projects from our team Cup cars to customers street cars, all with excellent results. When we were racing 996 Cup cars back in the GrandAm days we stripped them down to the tub to verify straightness on the bench prior to the 24-hour races. Even without major crashes a tub can be tweaked a little bit(a few millimeters here and there) from flexing during higher loads. The 997 Cups and 991 Cups tubs are much stiffer so we don't bench them like we did the 996 Cups.
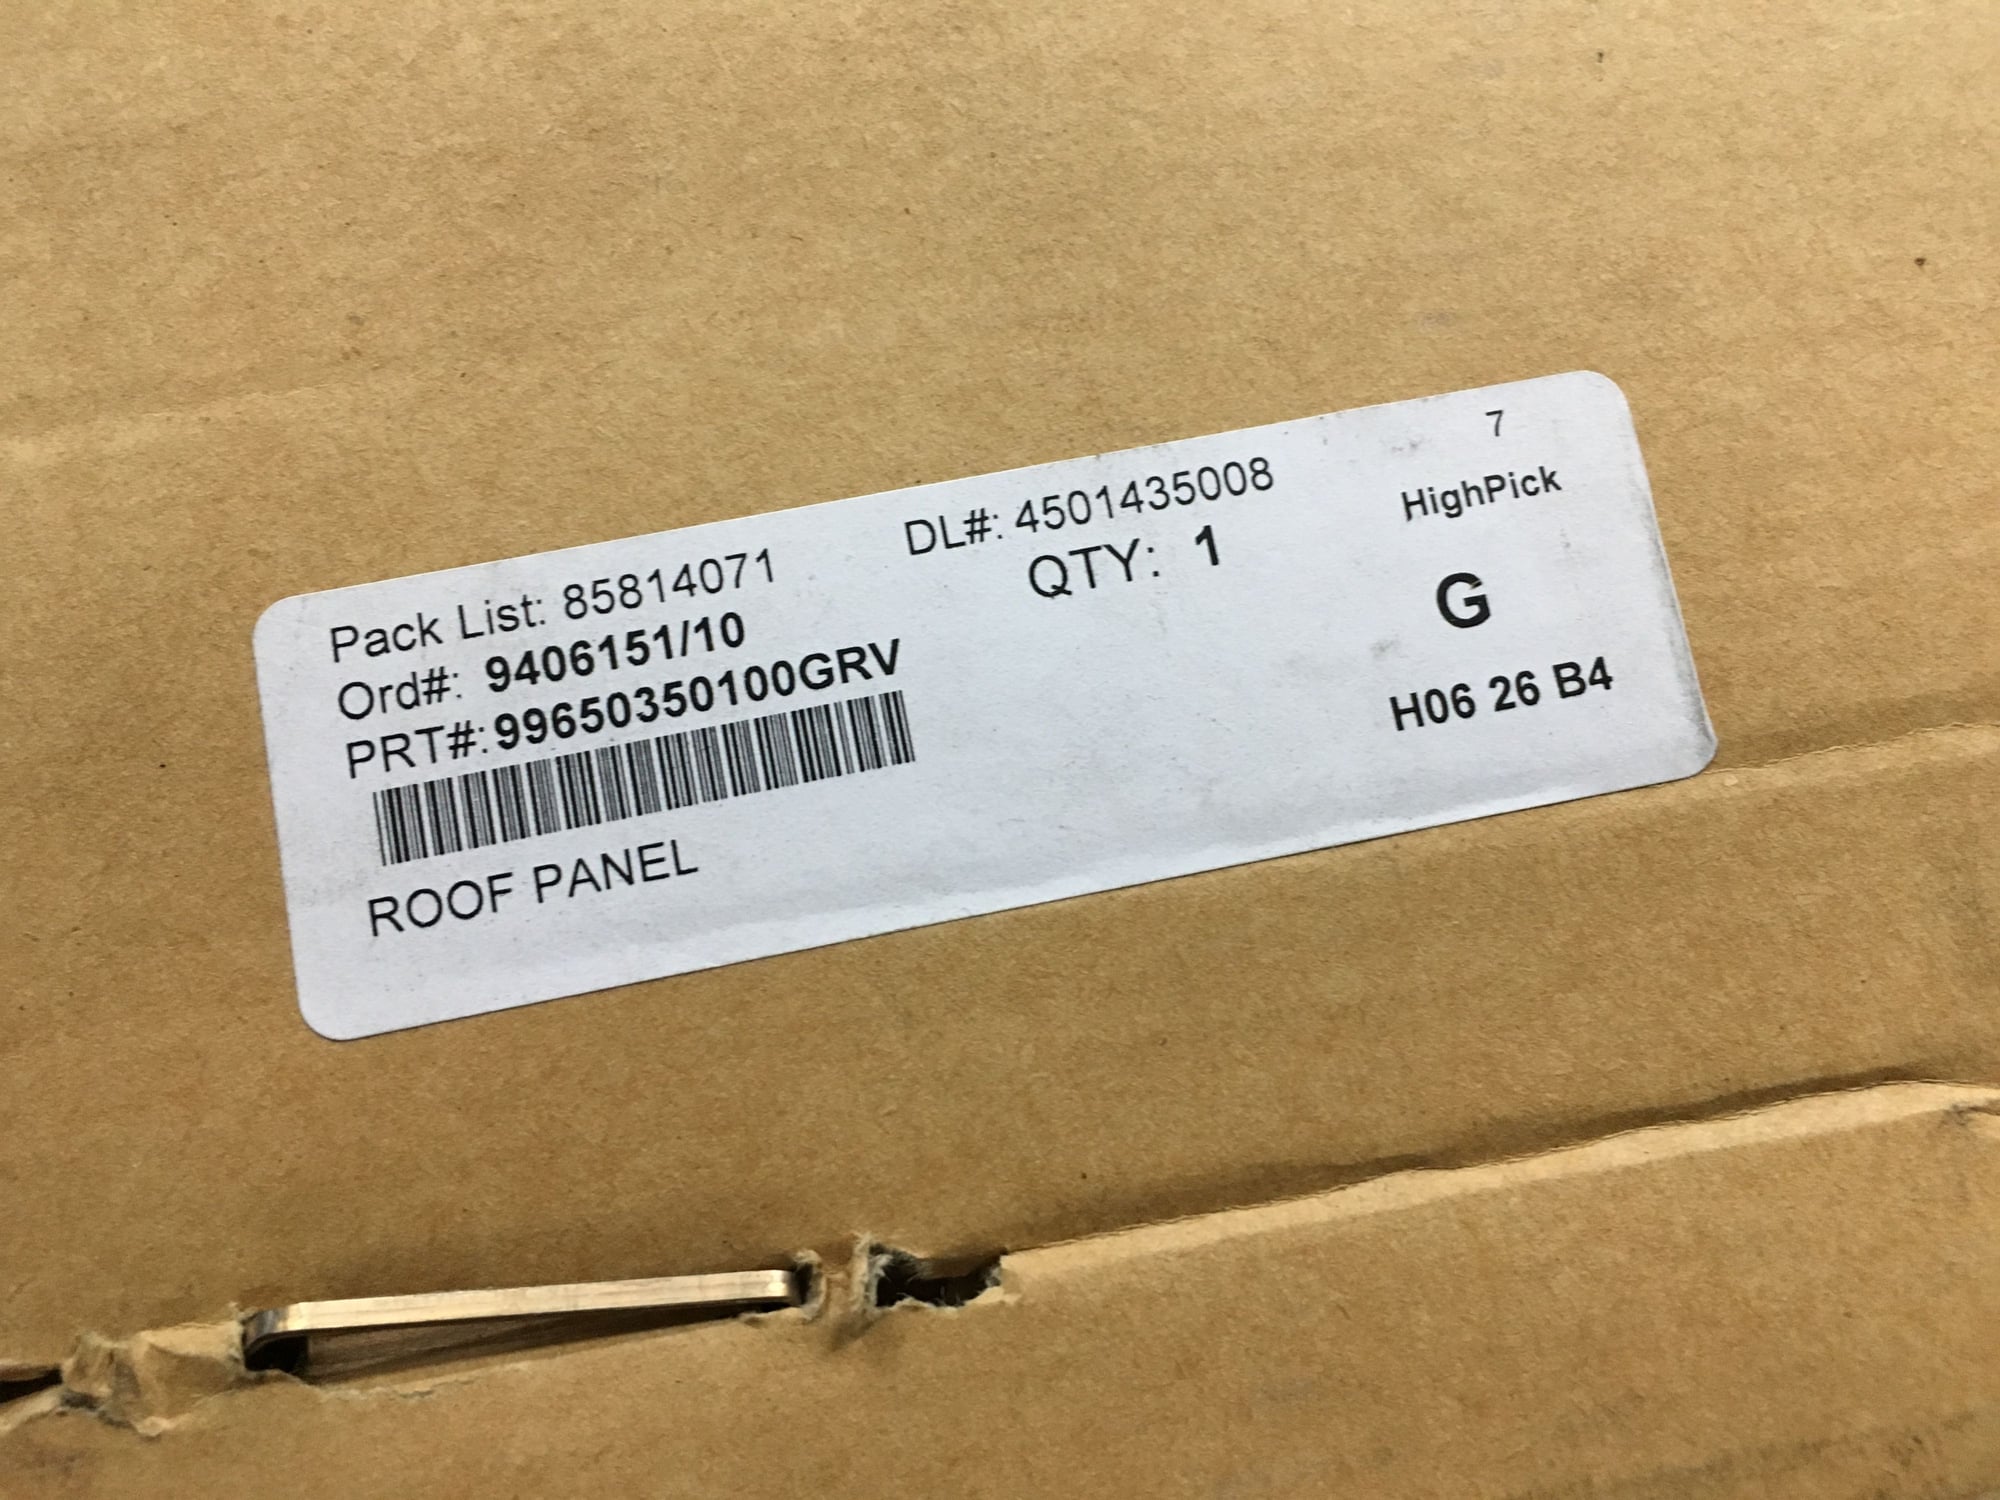
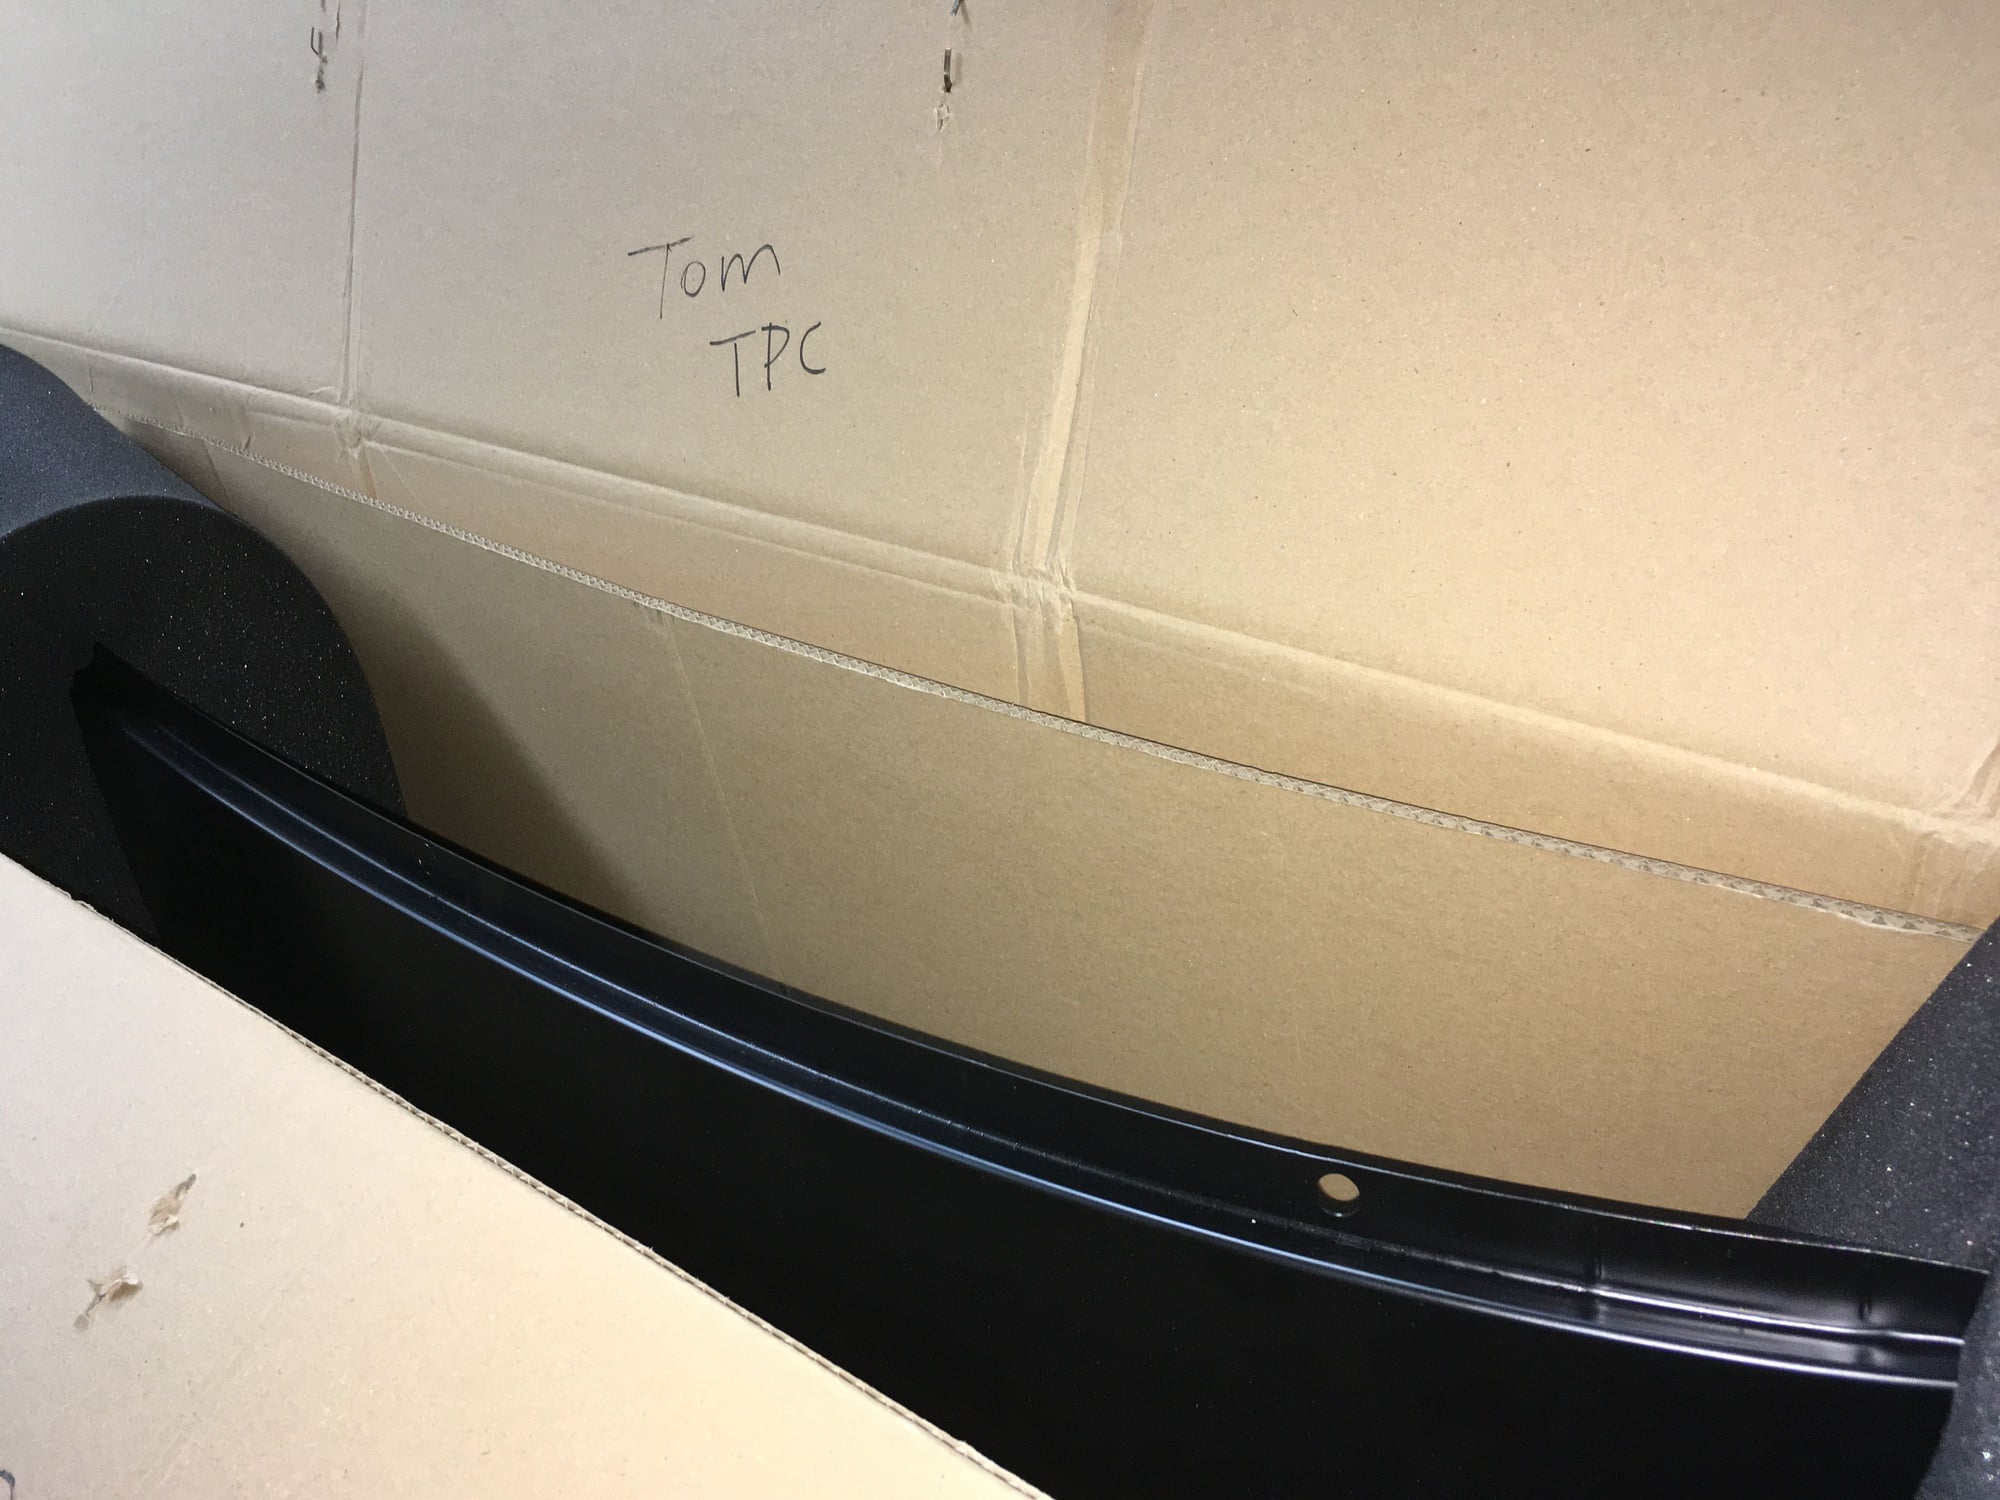
I am delighted to report the frame repair is completed- Its straight on the money! The tail light buckets(sheet metal, not frame) still needs to be aligned since they were tweaked from the rear impact. The sheet metal is pretty soft so I could've flex them back in place myself, but since this is crucial for proper tail light assembly alignment to the decklid and to the bumper it best to leave this task to the trained body experts at Euro Pros. Euro Pros presently also has one of our team's IMSA GT3 991 Cup Challenge cars there for repair, this car is to compete in the season finale at Road Atlanta. Naturally, the IMSA 991 Cup race car repair took priority over mine. Which is okay, because I haven't gotten all parts I need, plus my car is getting free storage there.
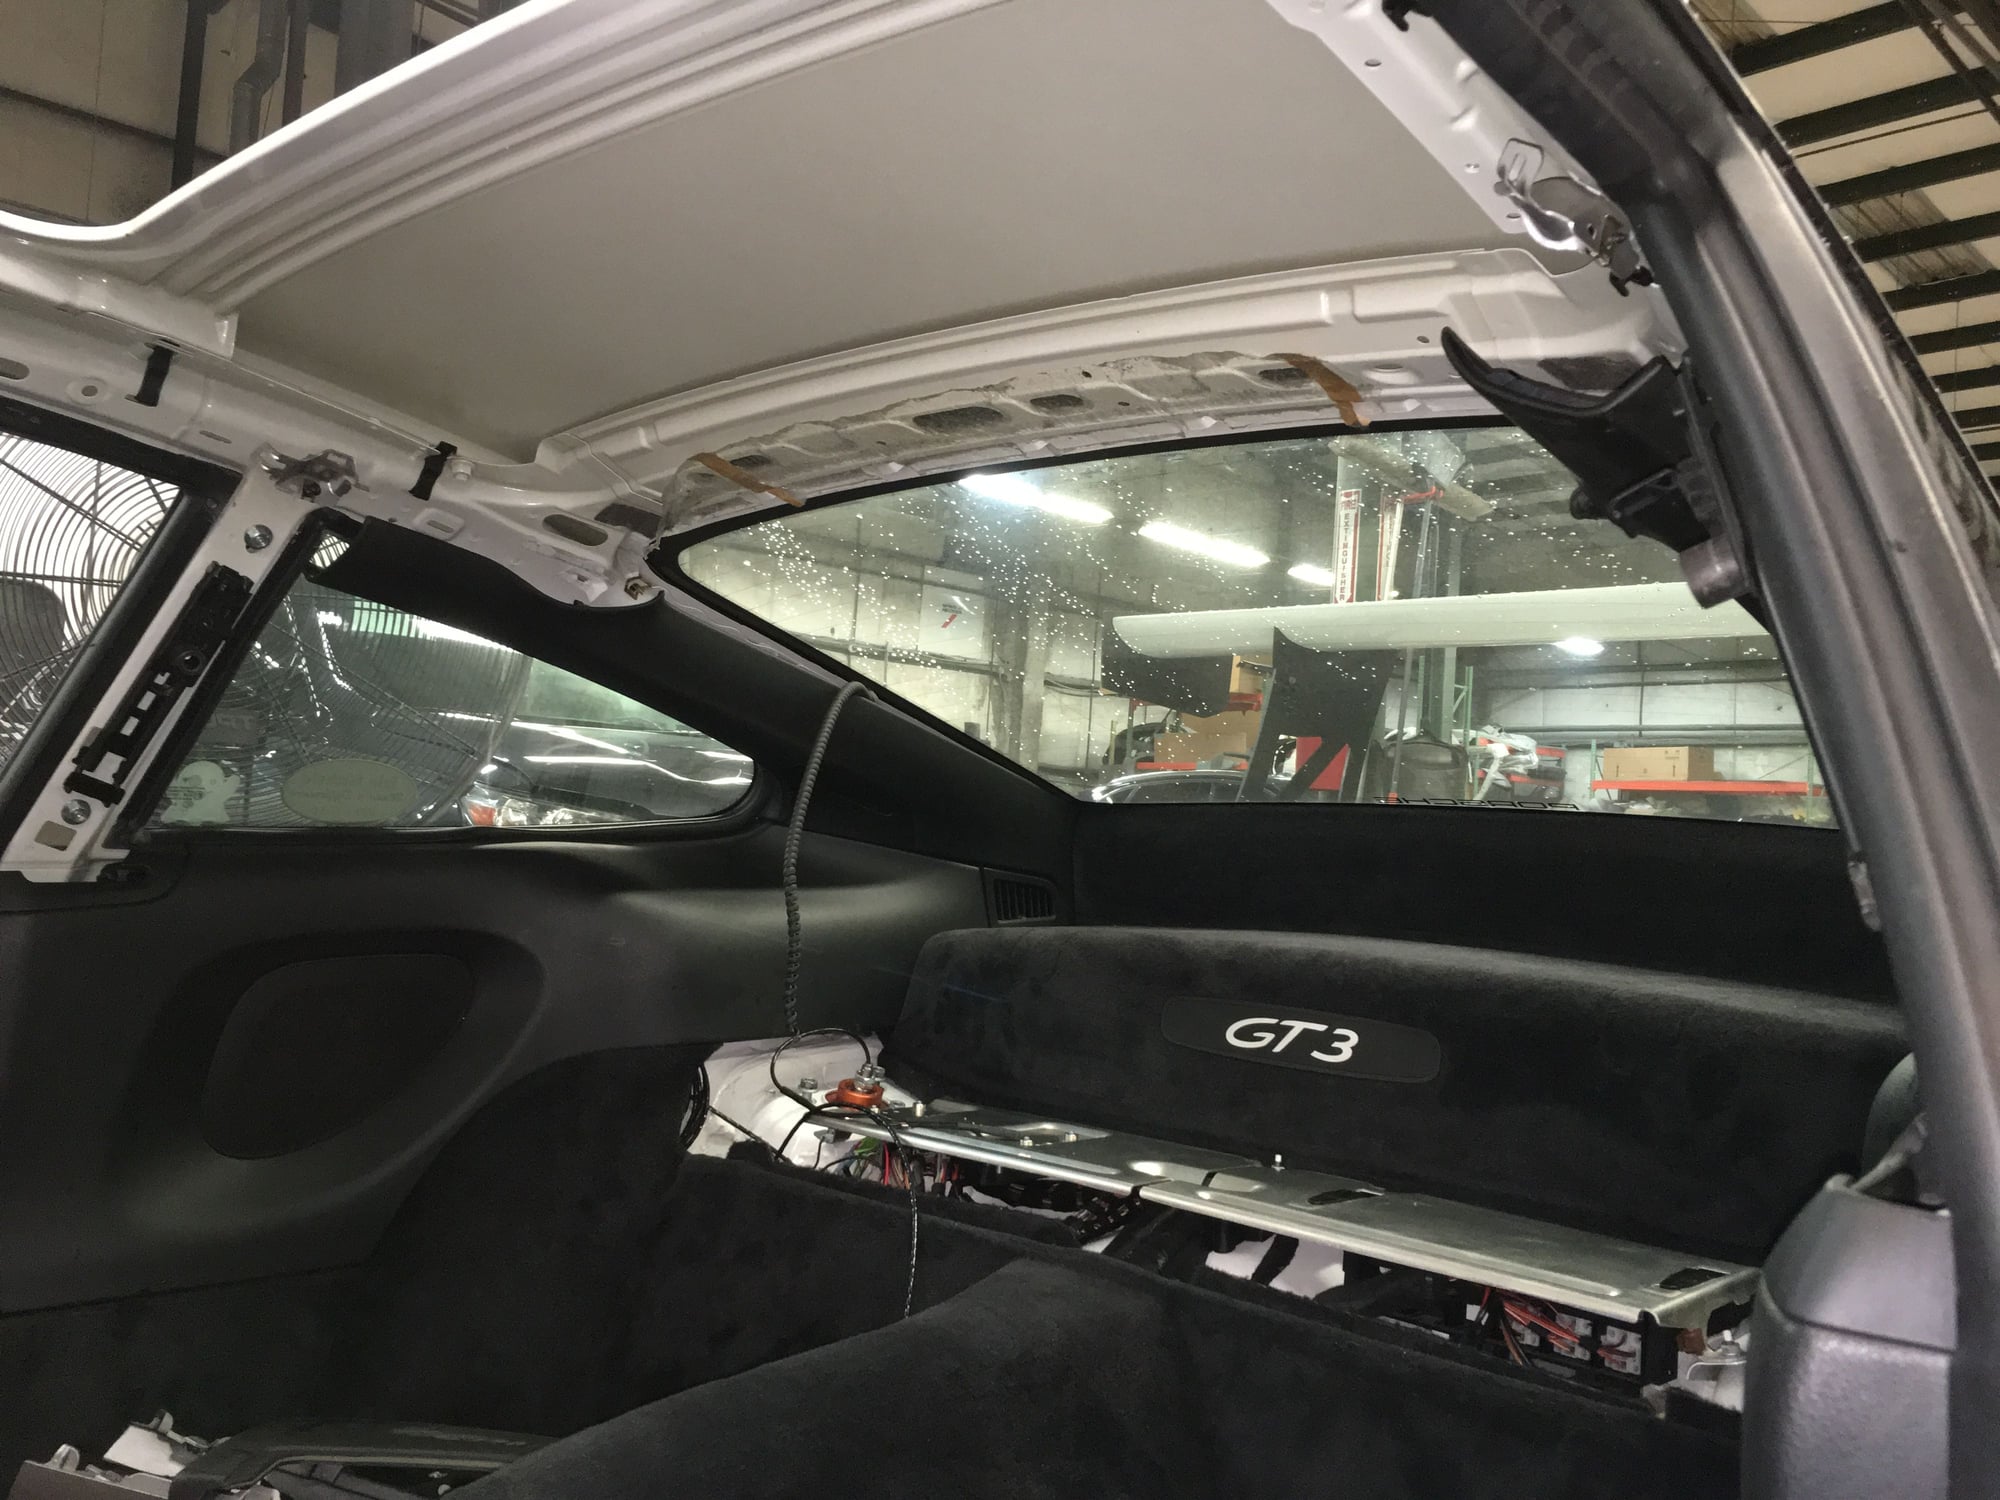
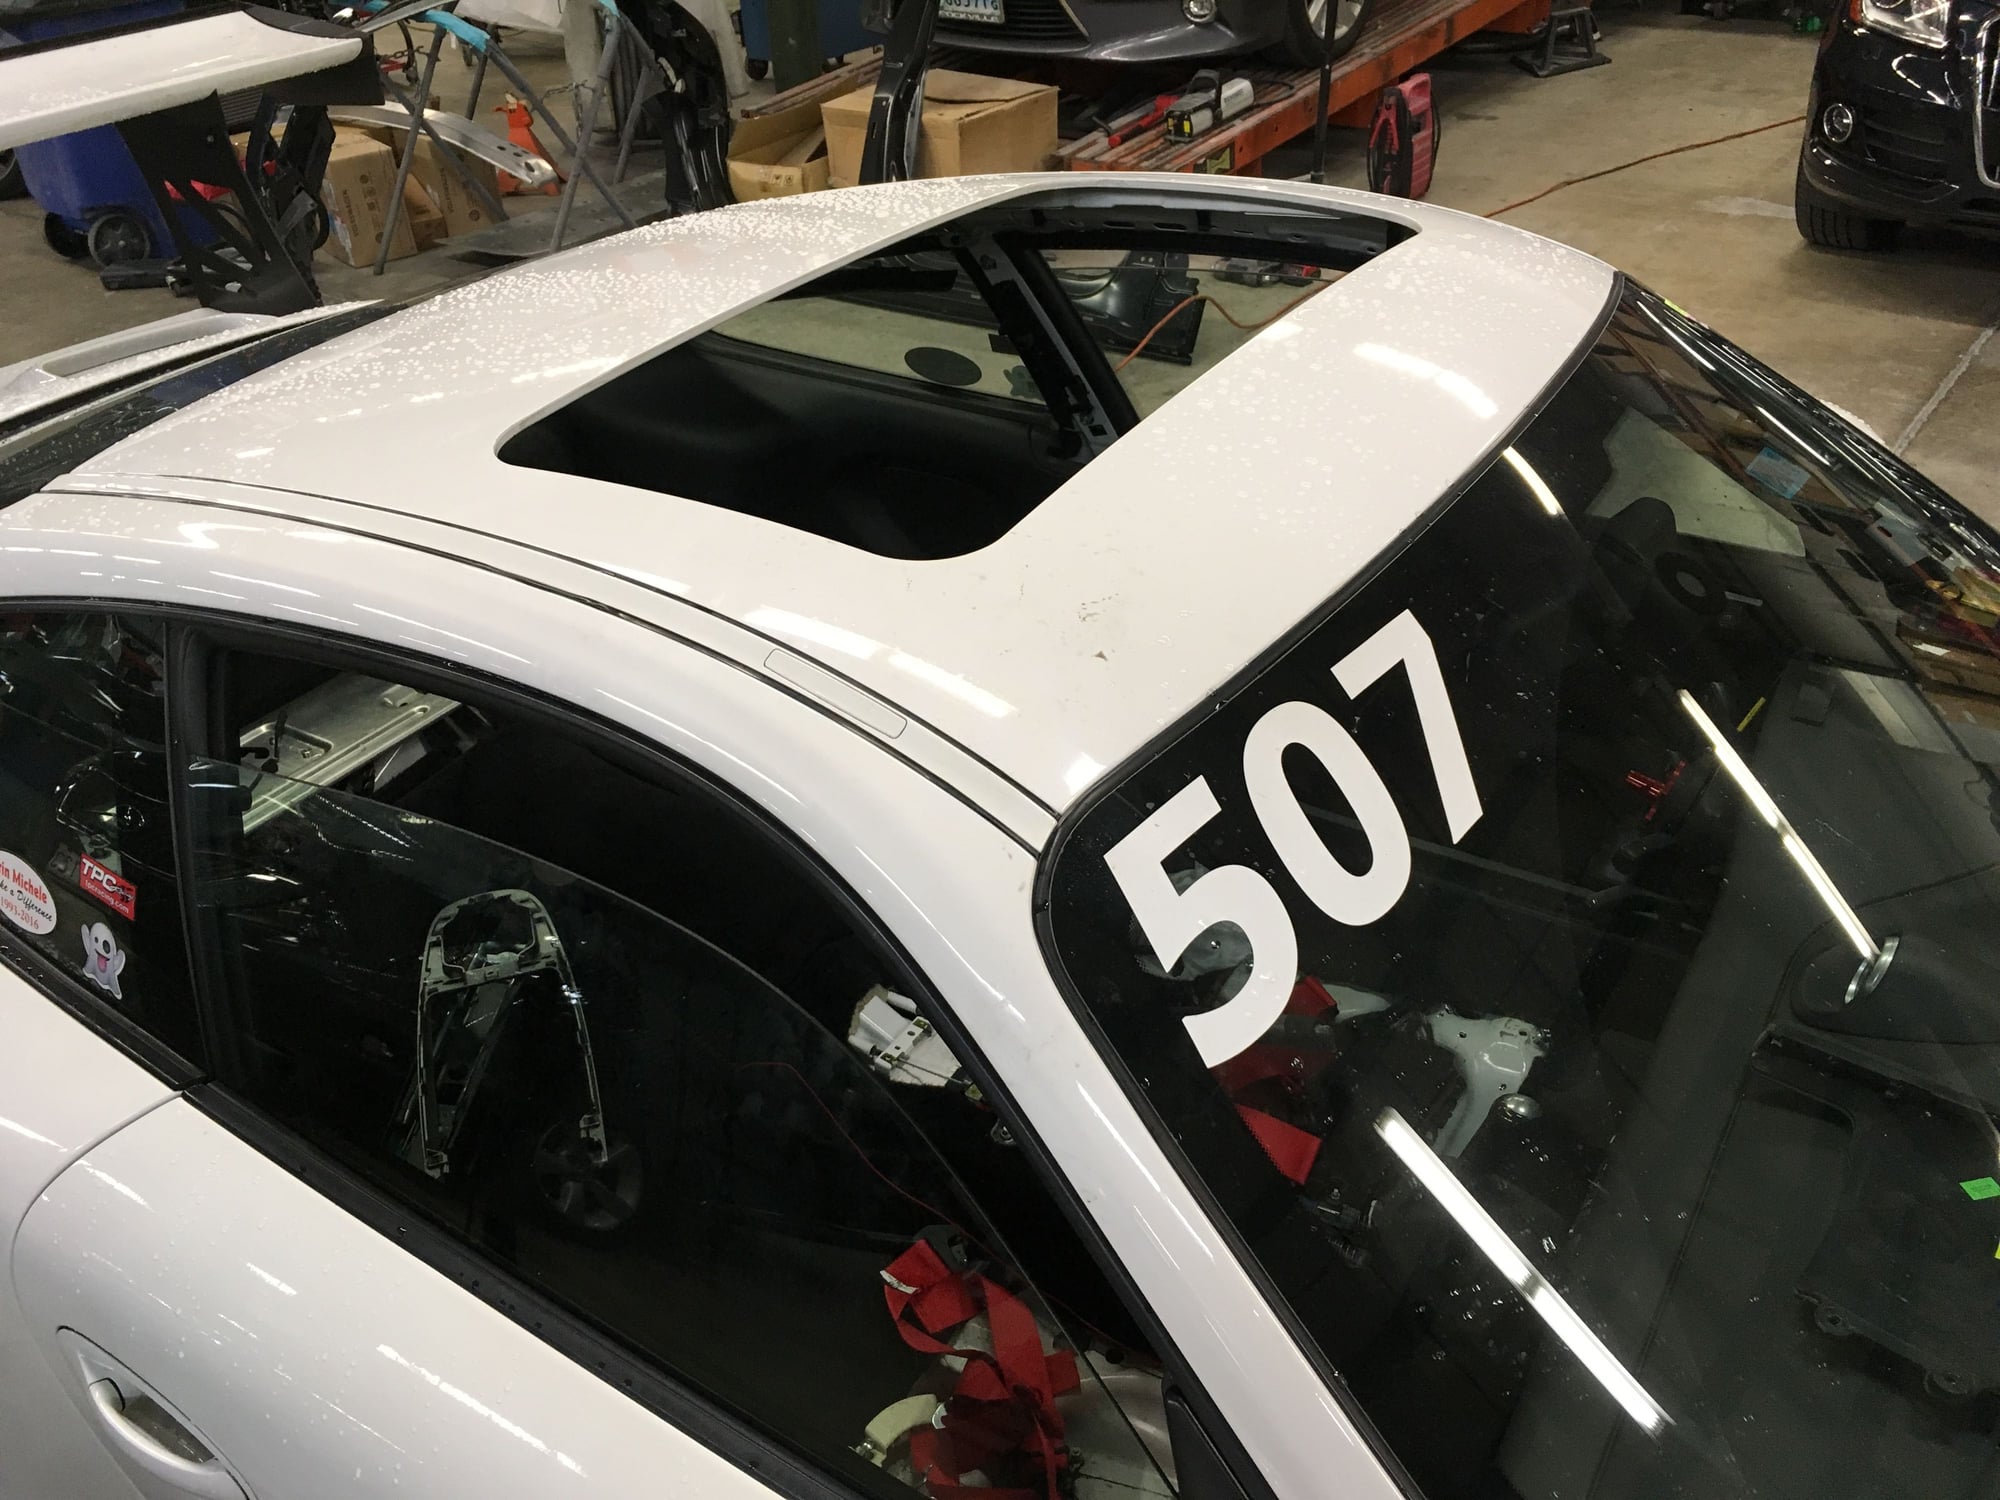
Since my car is down and at a body shop, I can't think of a better opportunity to do something that I've wanted to do for some time... And that is... Guess?
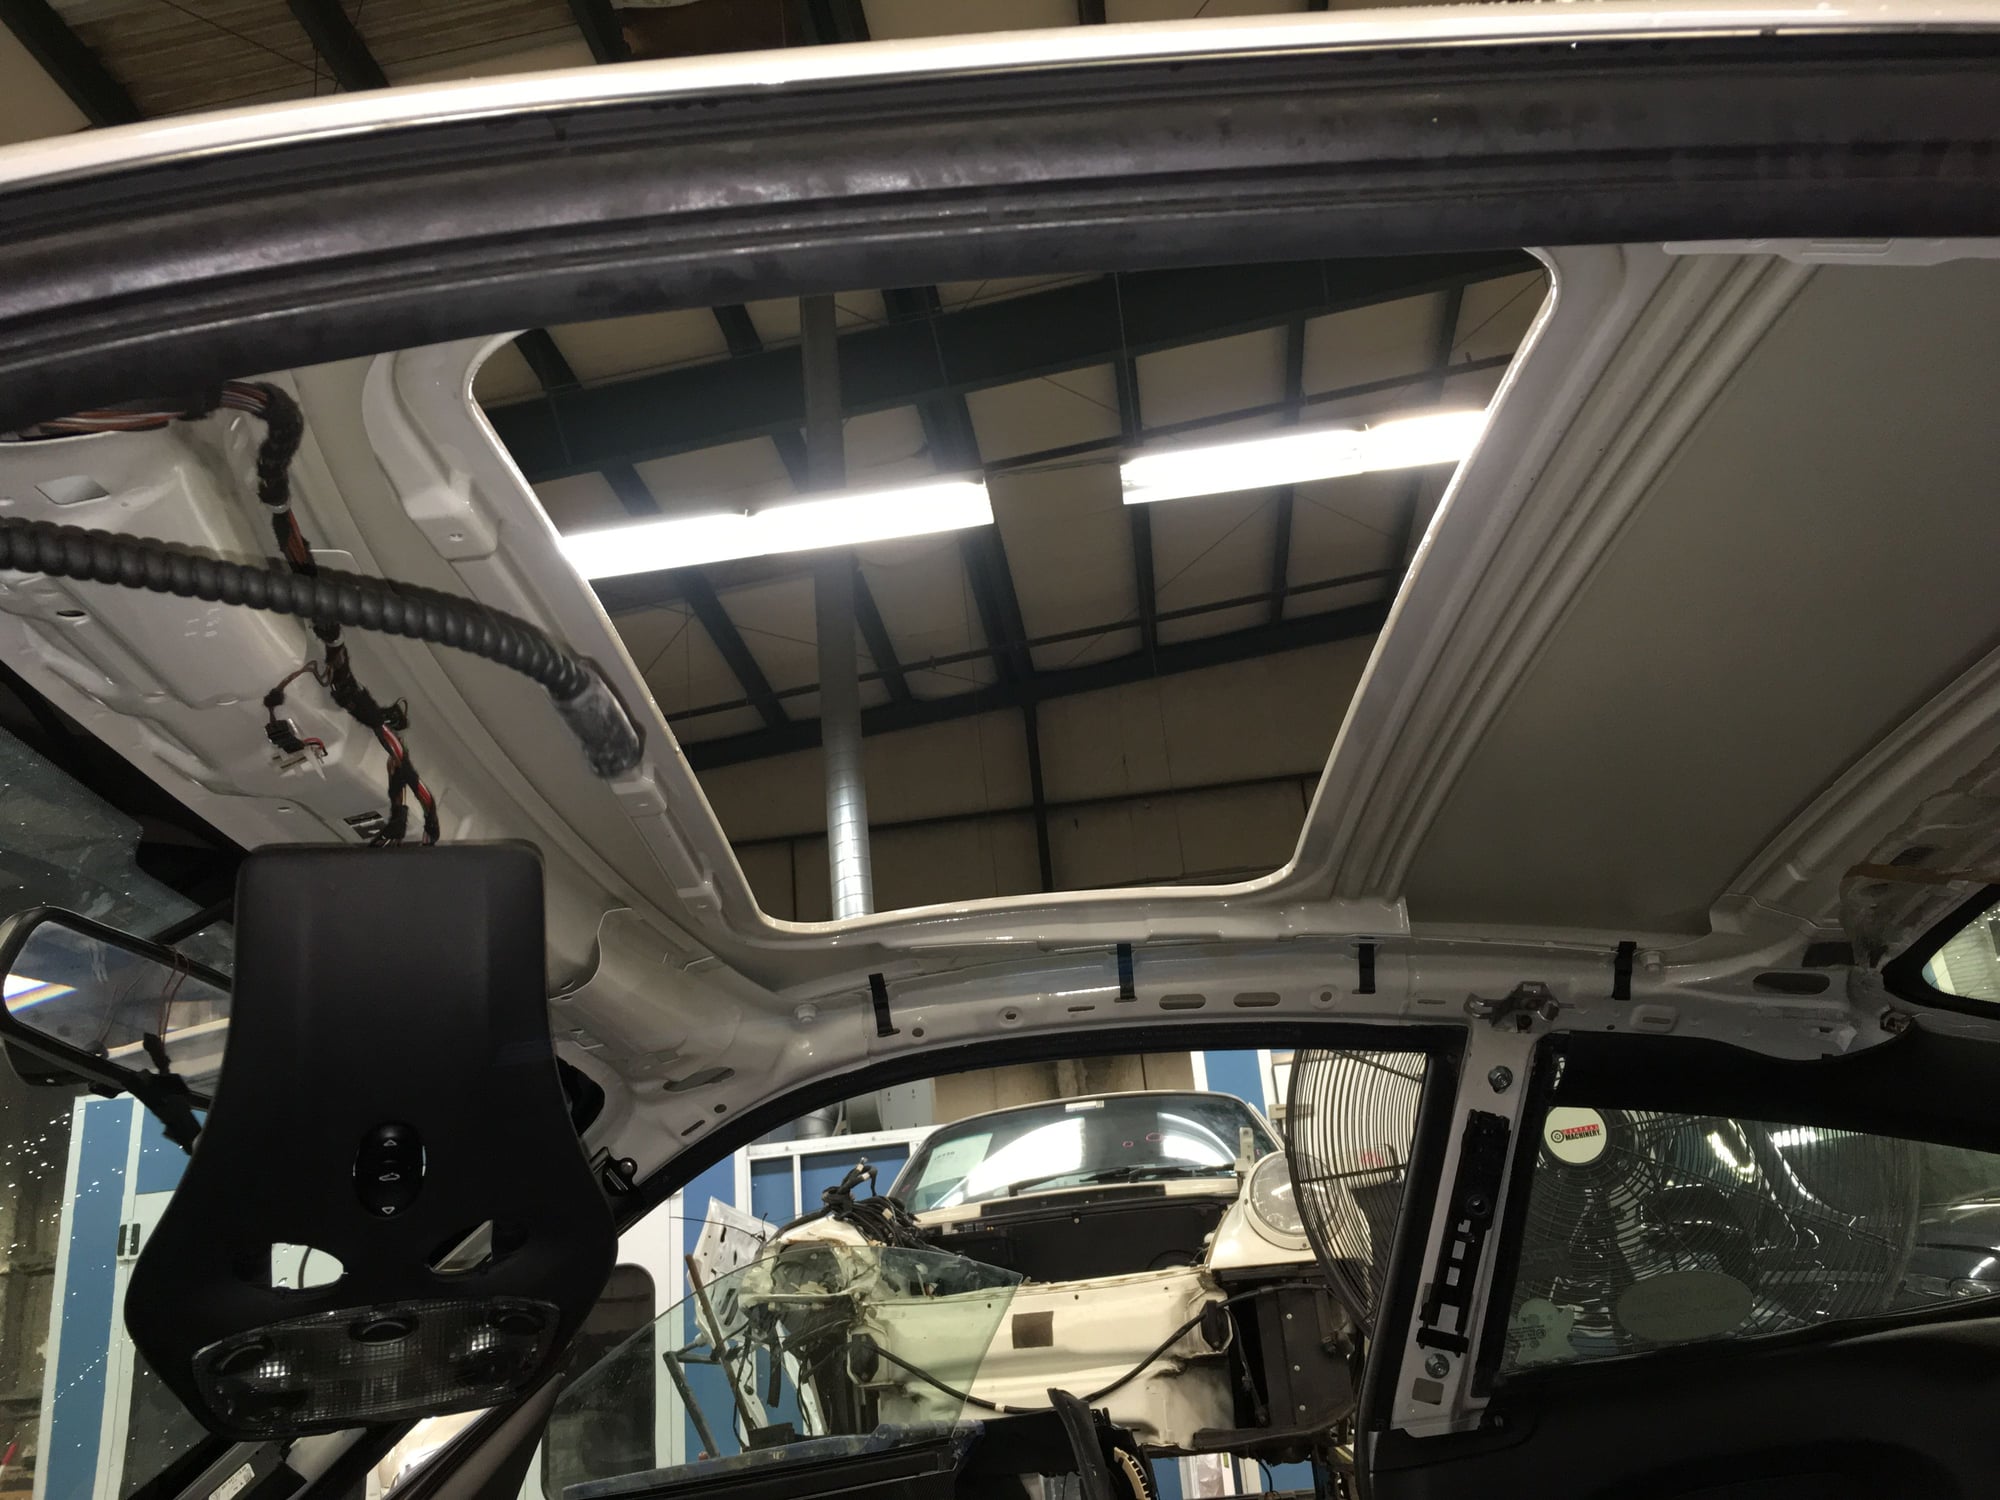
Sunroof delete!
Here I am removing the head liner and sunroof. They take over from here. If all goes well the next time I see my car it'll have a new lid on it!
Super jealous about the sunroof delete but super happy the car is straight and coming together. I can't wait to see what other updates you'll do while you're putting her back together. I'm glad to see she's shaping up. Thanks again for sharing. Best Josh
Super jealous about the sunroof delete but super happy the car is straight and coming together. I can't wait to see what other updates you'll do while you're putting her back together. I'm glad to see she's shaping up. Thanks again for sharing. Best Josh
Originally Posted by shadowz
WOWOWOW attention to detail on your car is amazing. Thanks for sharing with us
While waiting for parts to arrive and for the body shop I'll circle back to my obsession on engine mounts & bracket. I promise after this post I'll stop rambling about engine mounts & bracket.
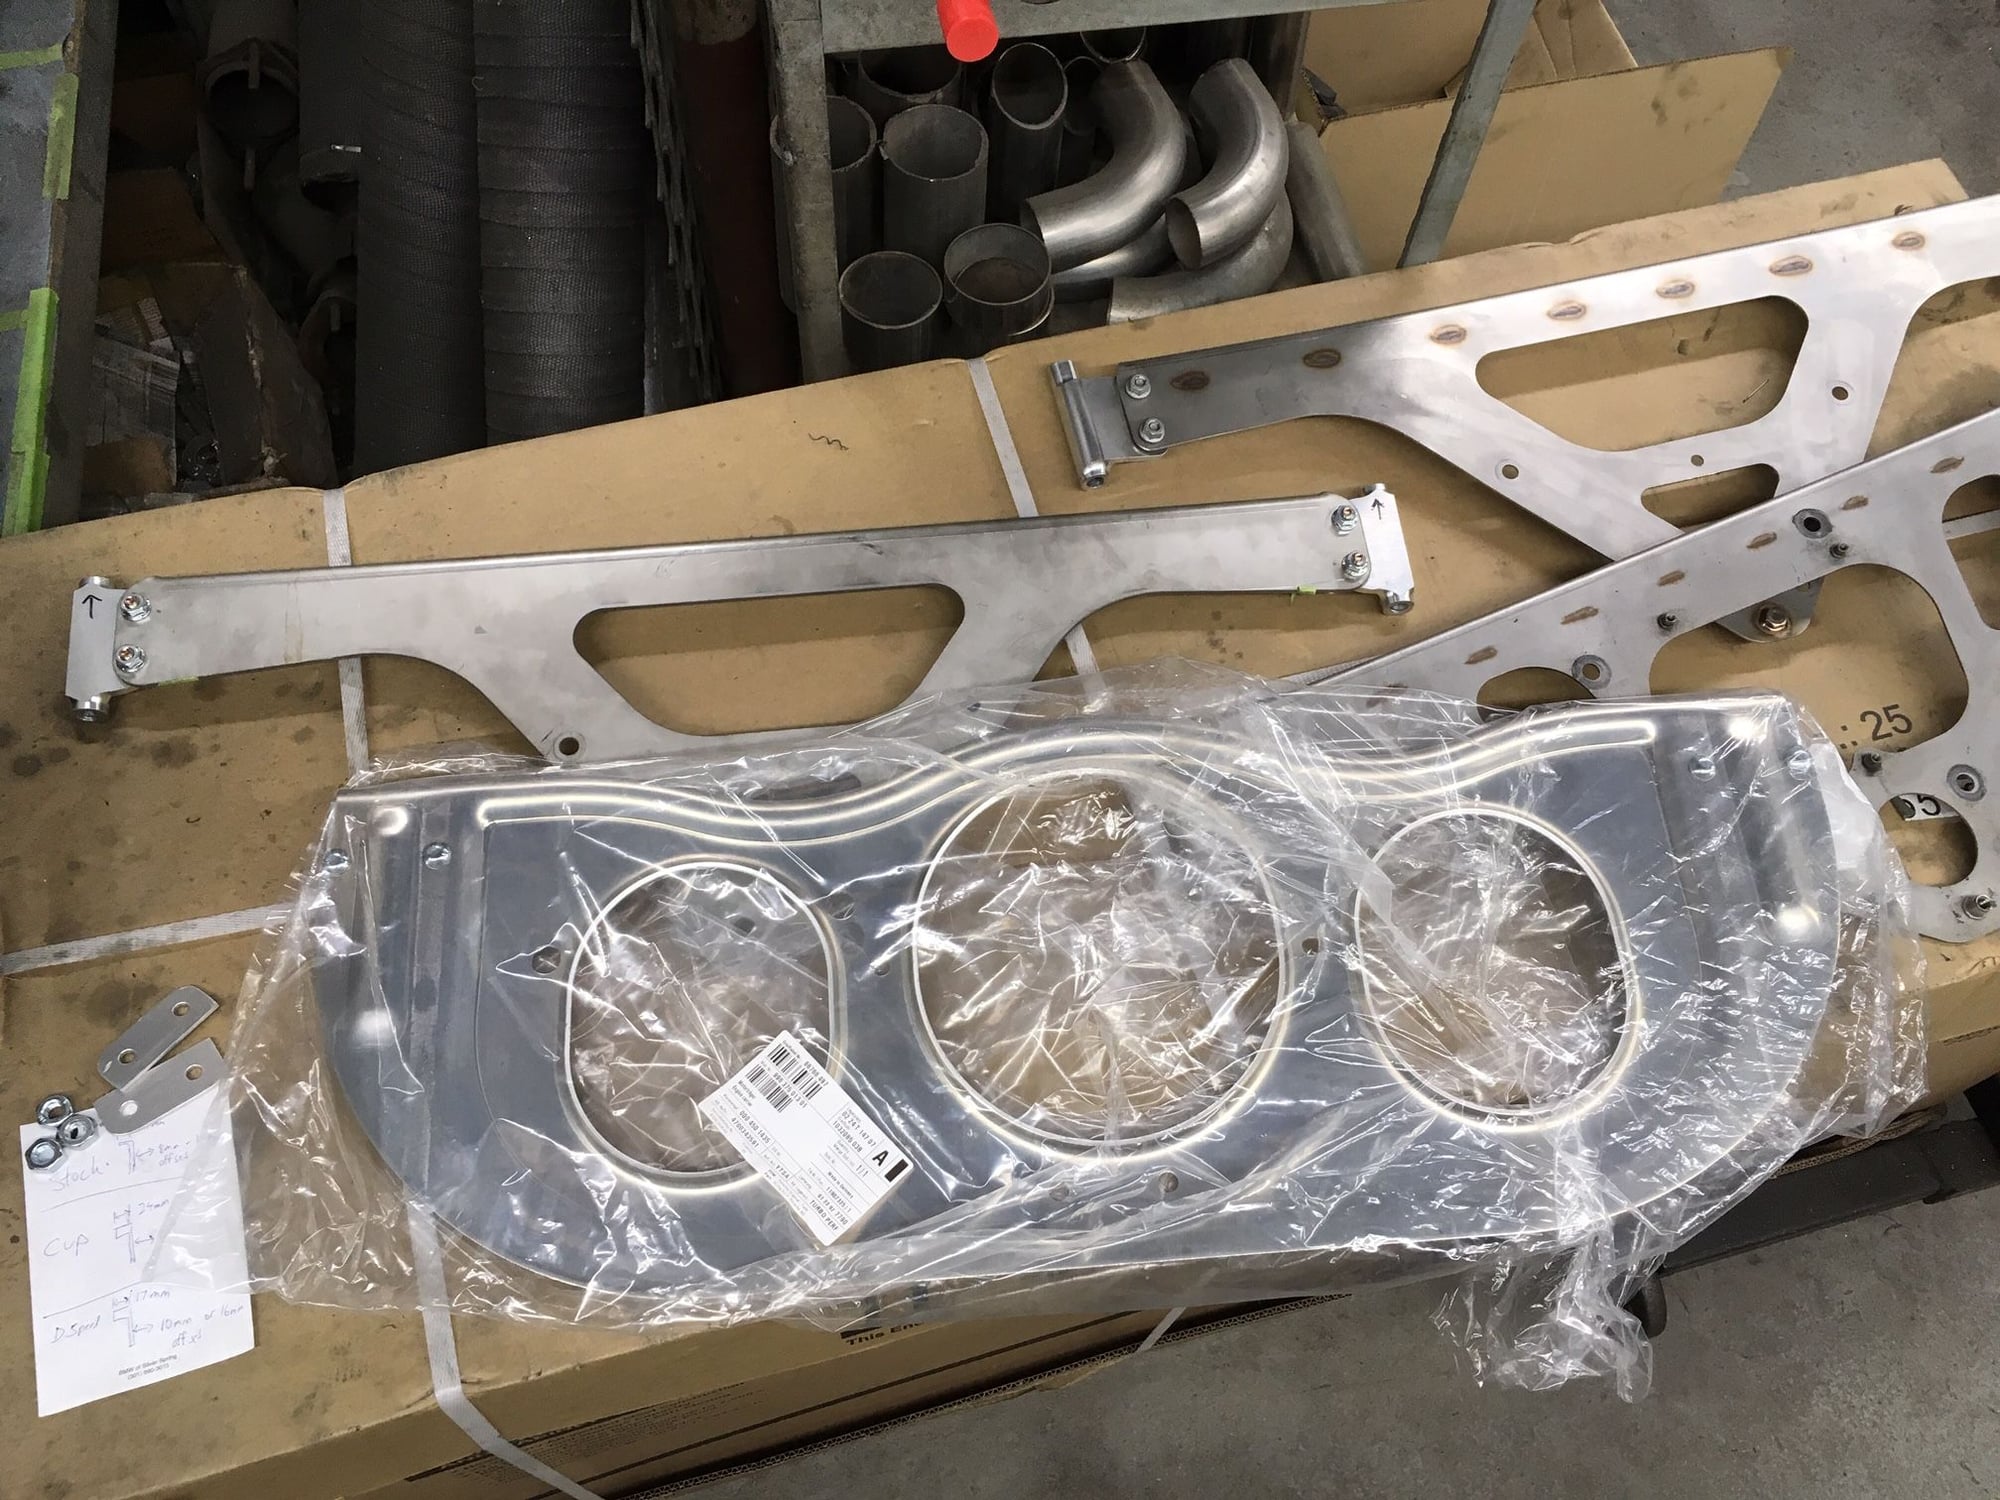
After a lot of messing about in previous posts(post # 891, 892, 895, and 897), I've decided the best solution for my application is to replace the bent engine bracket with a new OEM street car bracket.
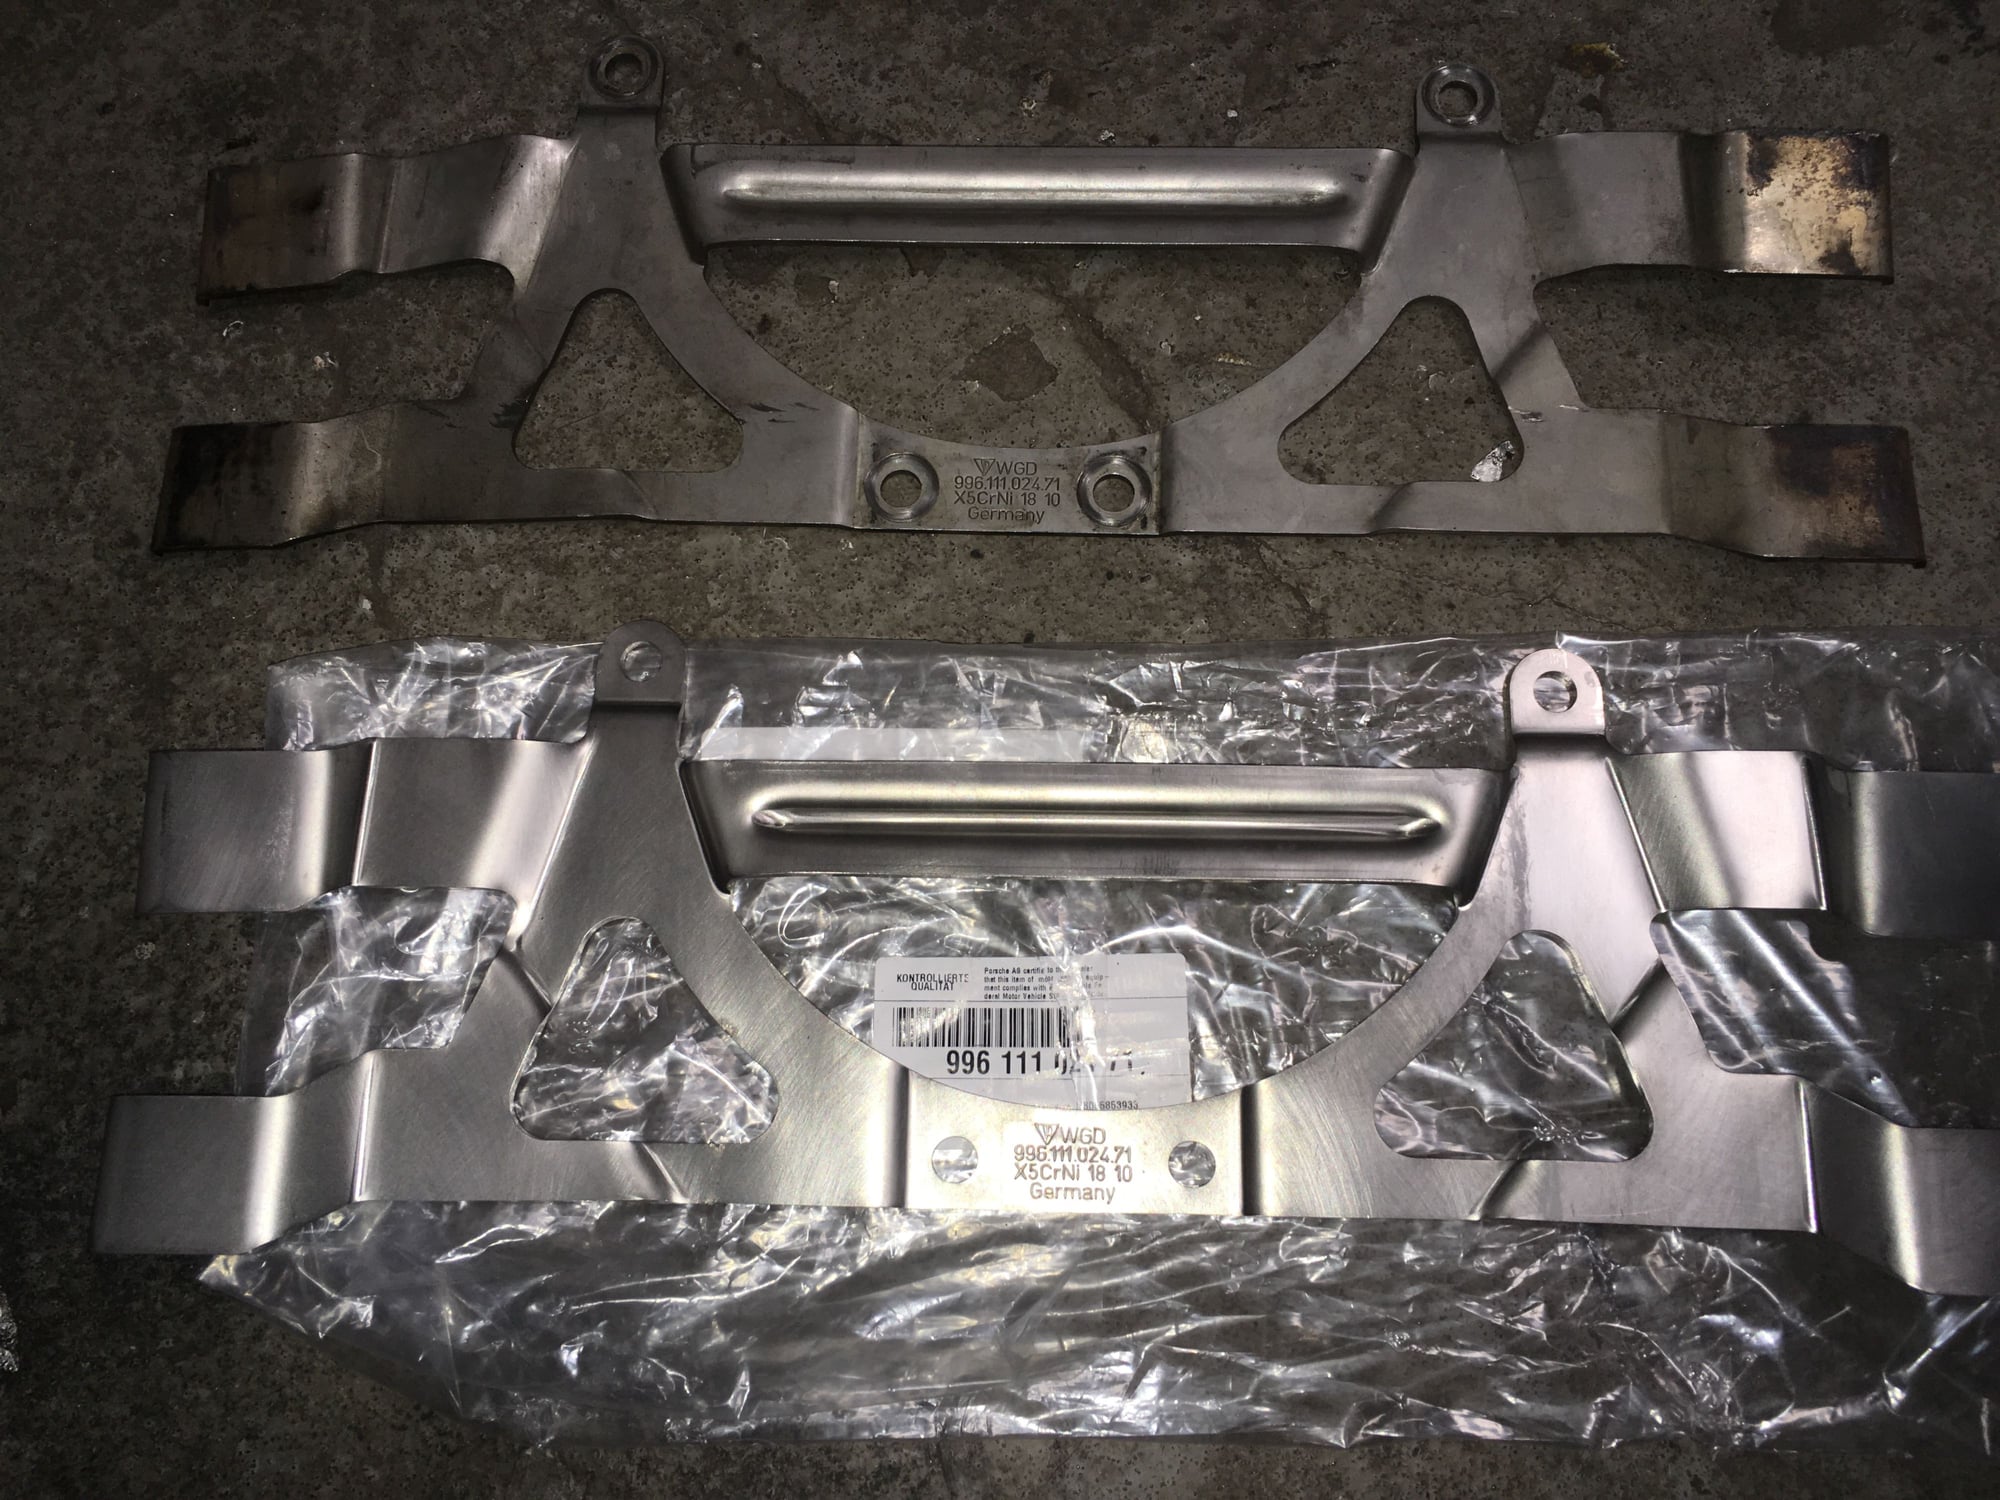
Here's comparison of the mounting tubes (OEM street car version is the square-shaped in bottom of image. Race car versions above).
The square tube of the OEM street car bracket is robust with a material wall thickness of 5.5mm, the bracket sheet metal is ribbed in flexible area and folded over 90-degrees at the top so I don't think I am making a bad choice here. "If" I were to modify this I'd add two more M6 fasteners to bolt the tube to the sheet metal but that'd be totally unnecessary. And in event of an extreme scenario the sheet metal will break before needing to have four bolts.
The folded over section is simple in itself but I am blown away by the factory engineering of the interlocking design to the square section of the OEM mounts.
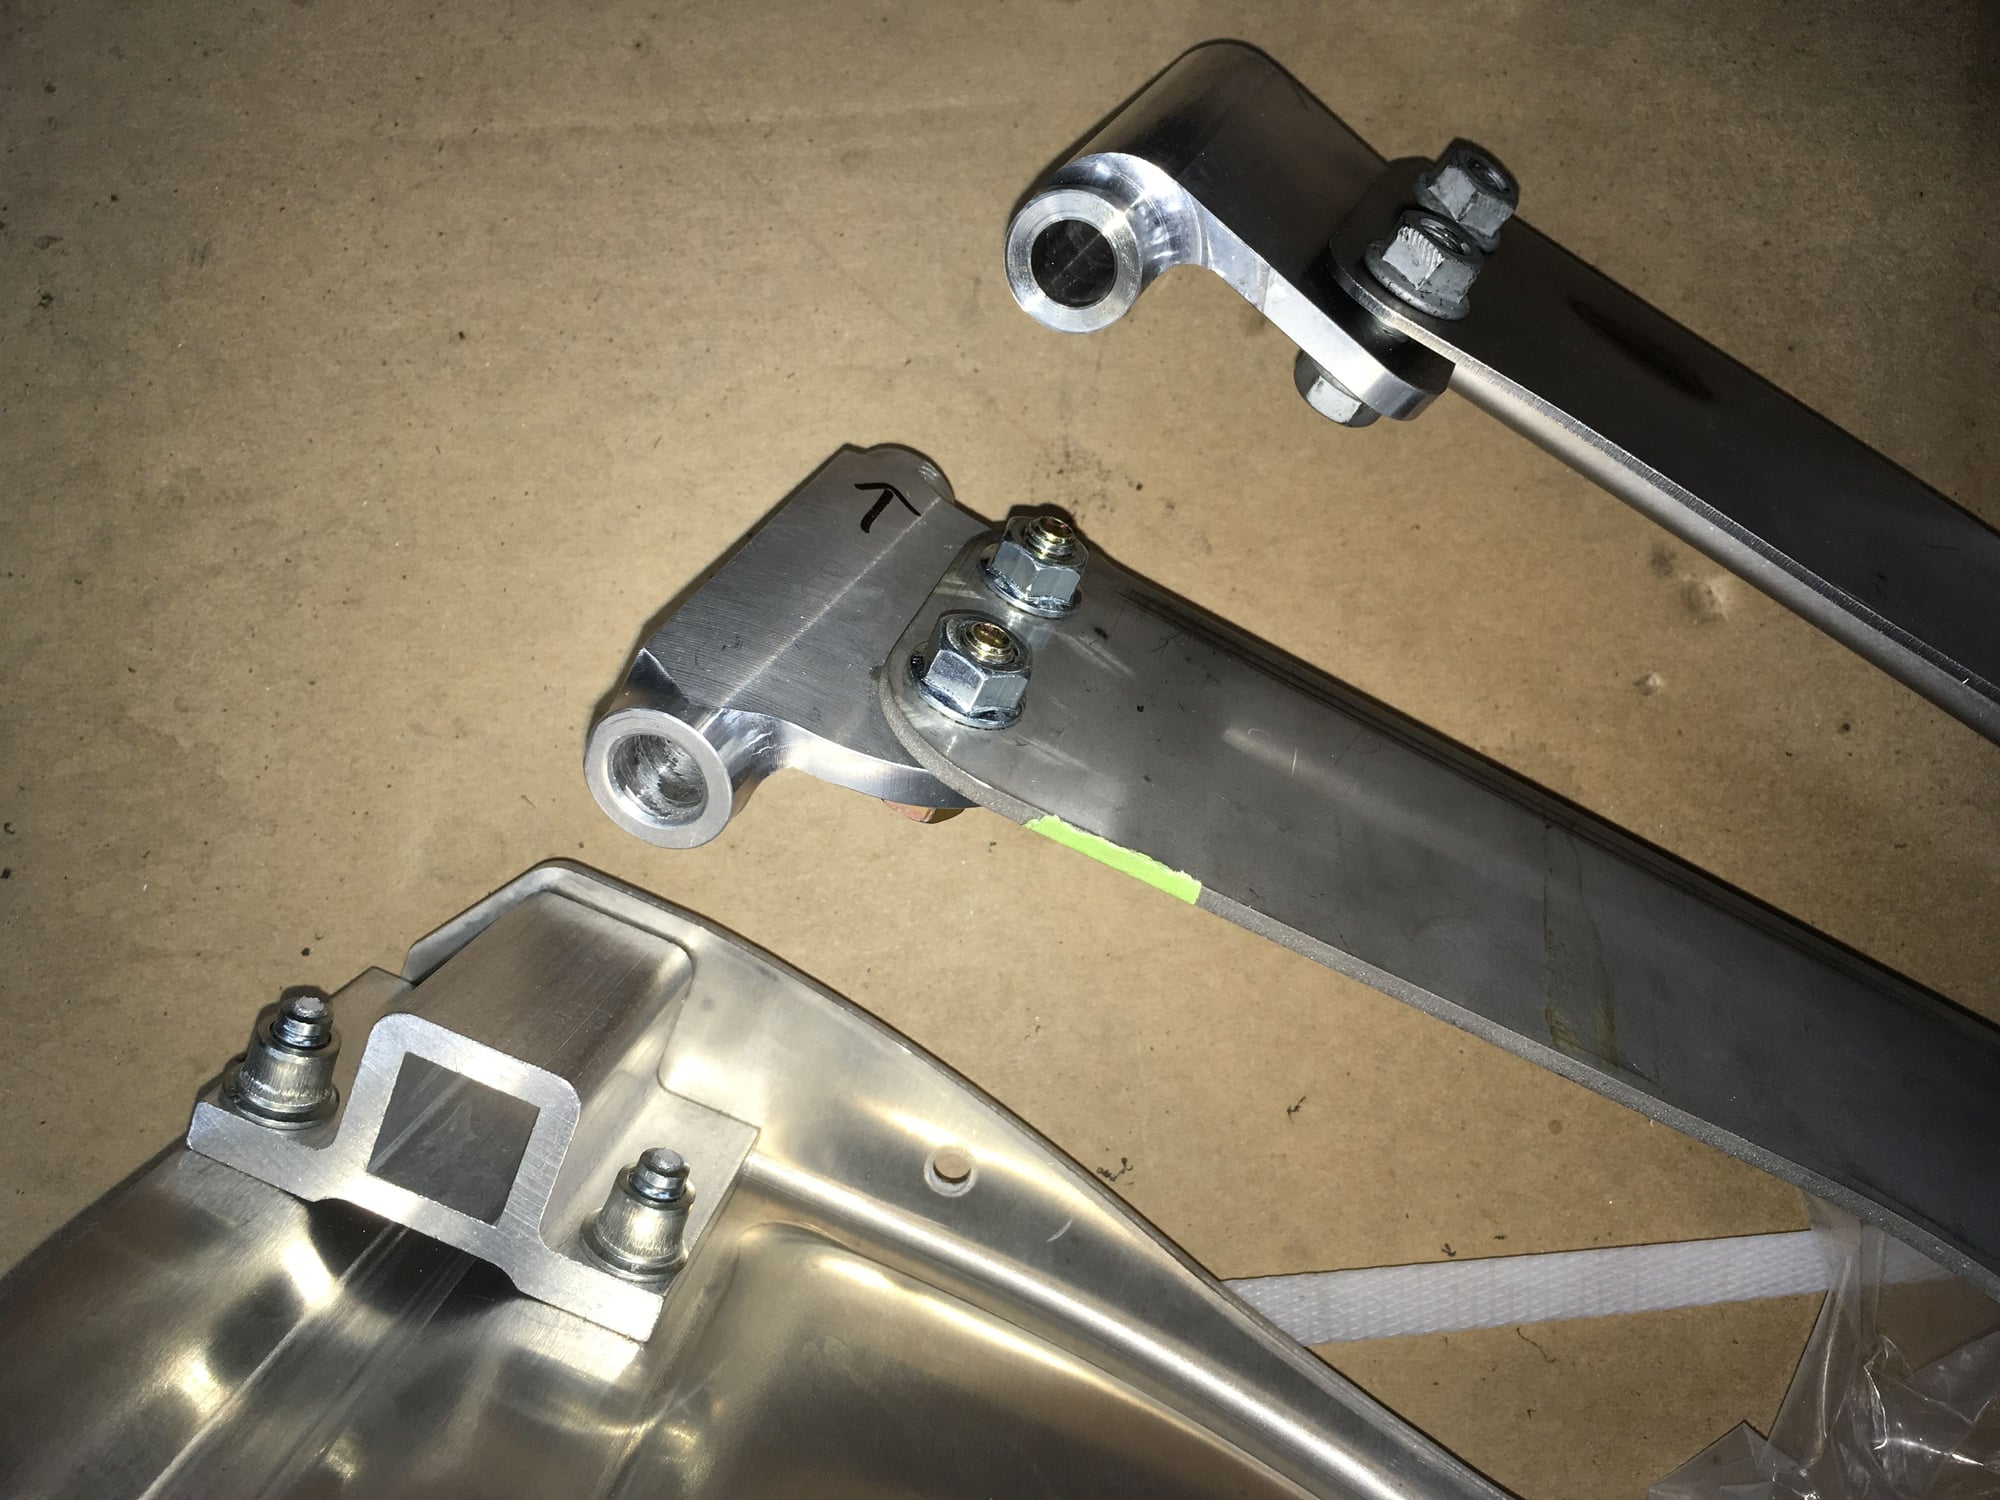
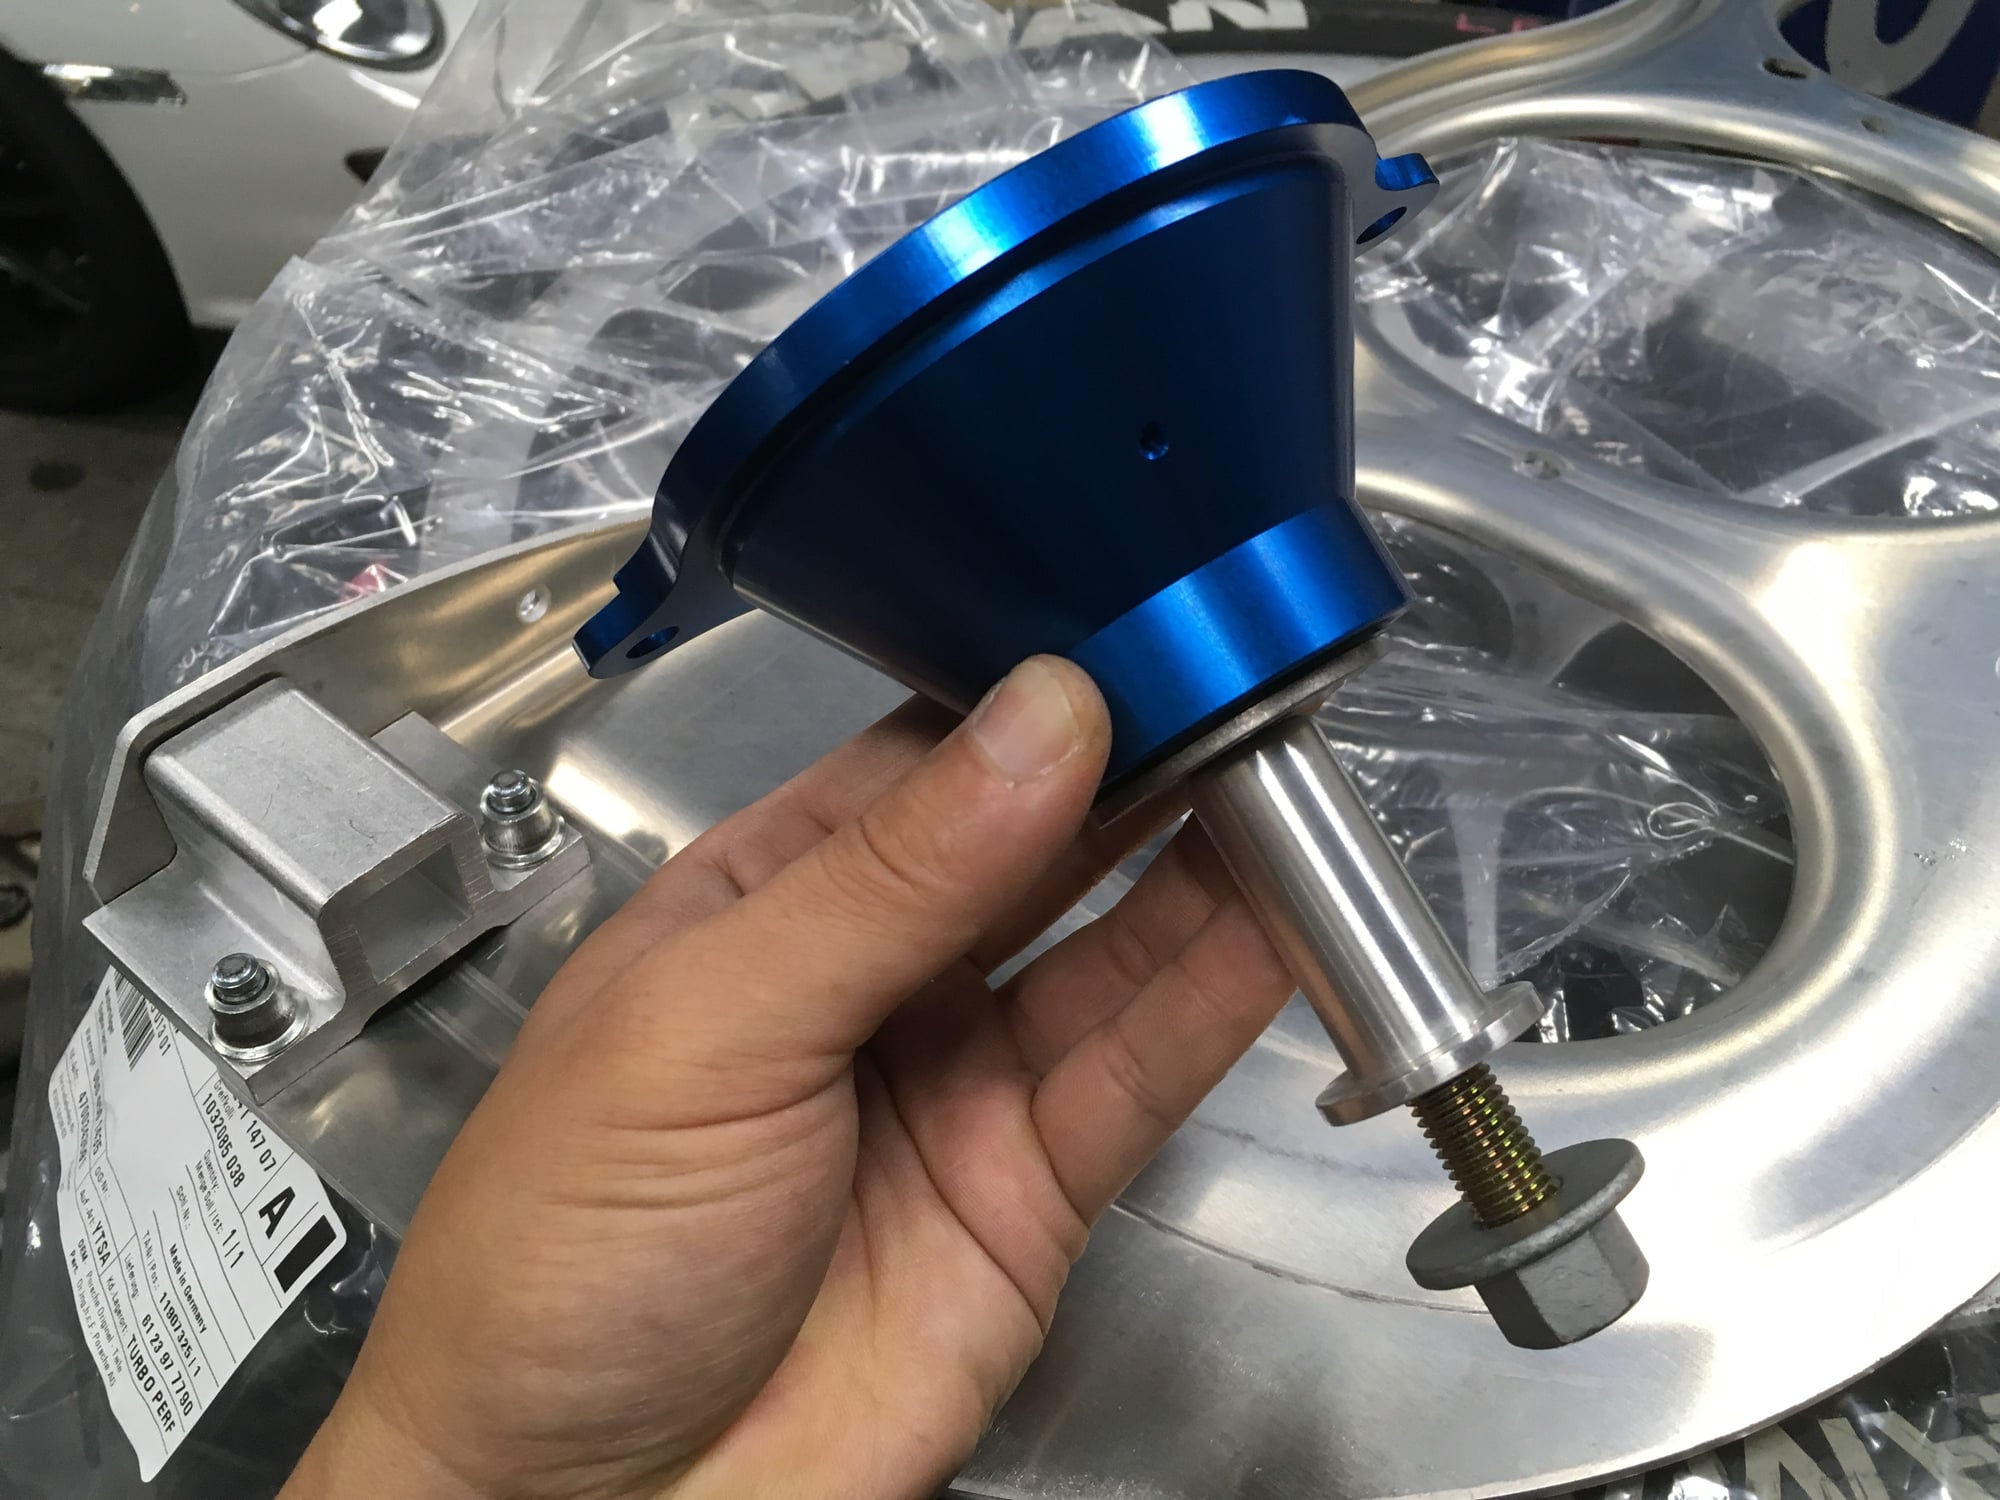
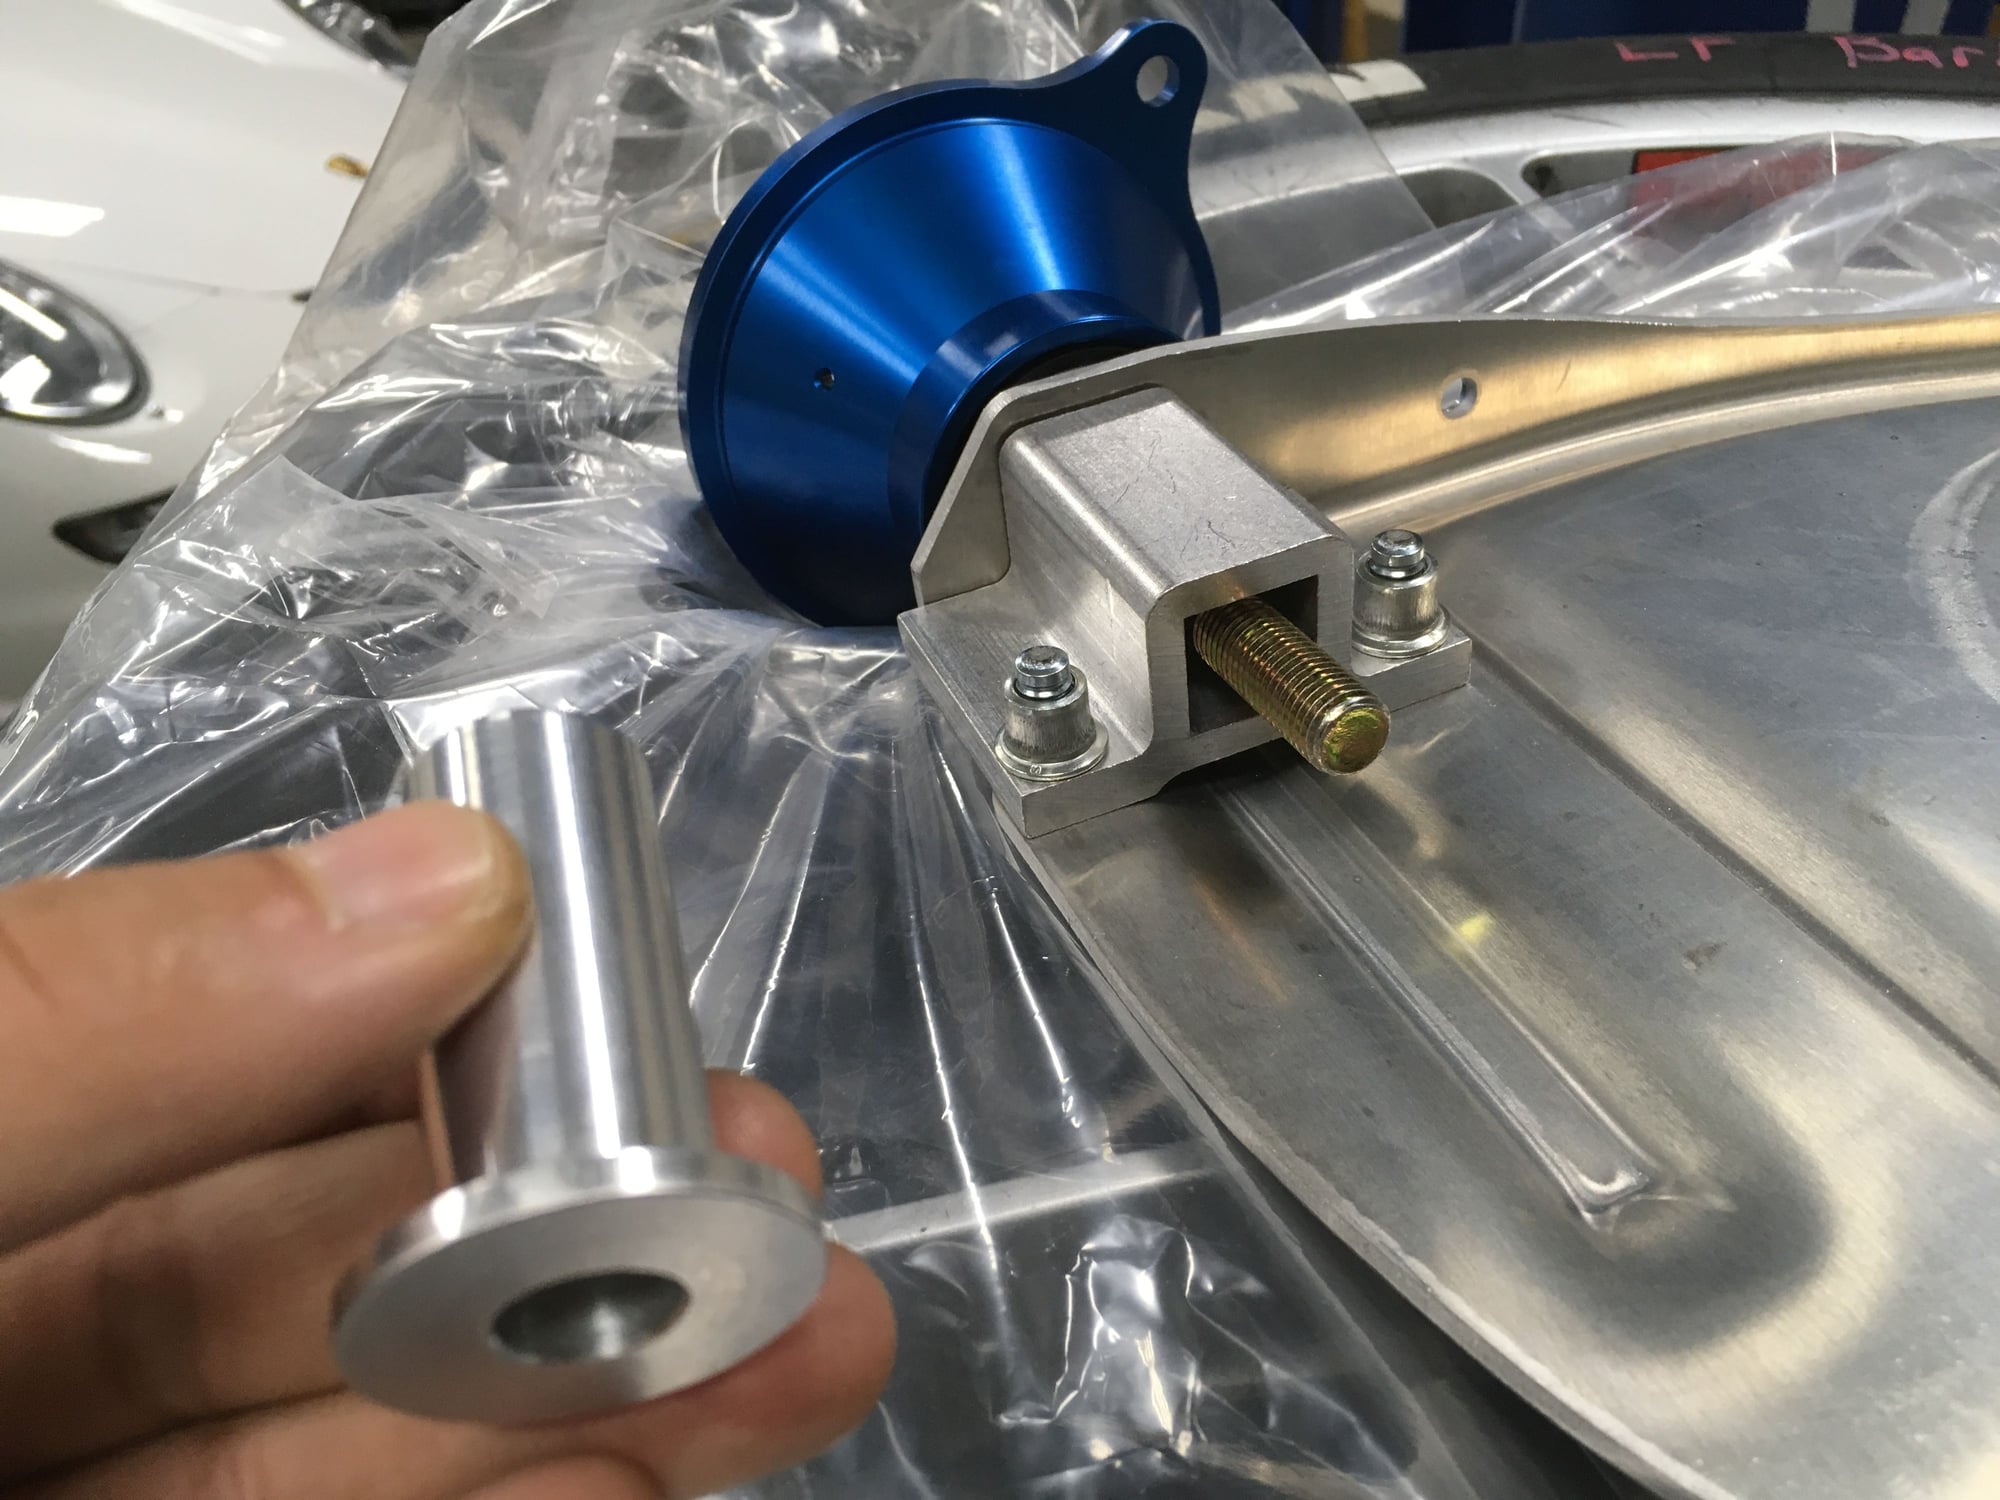
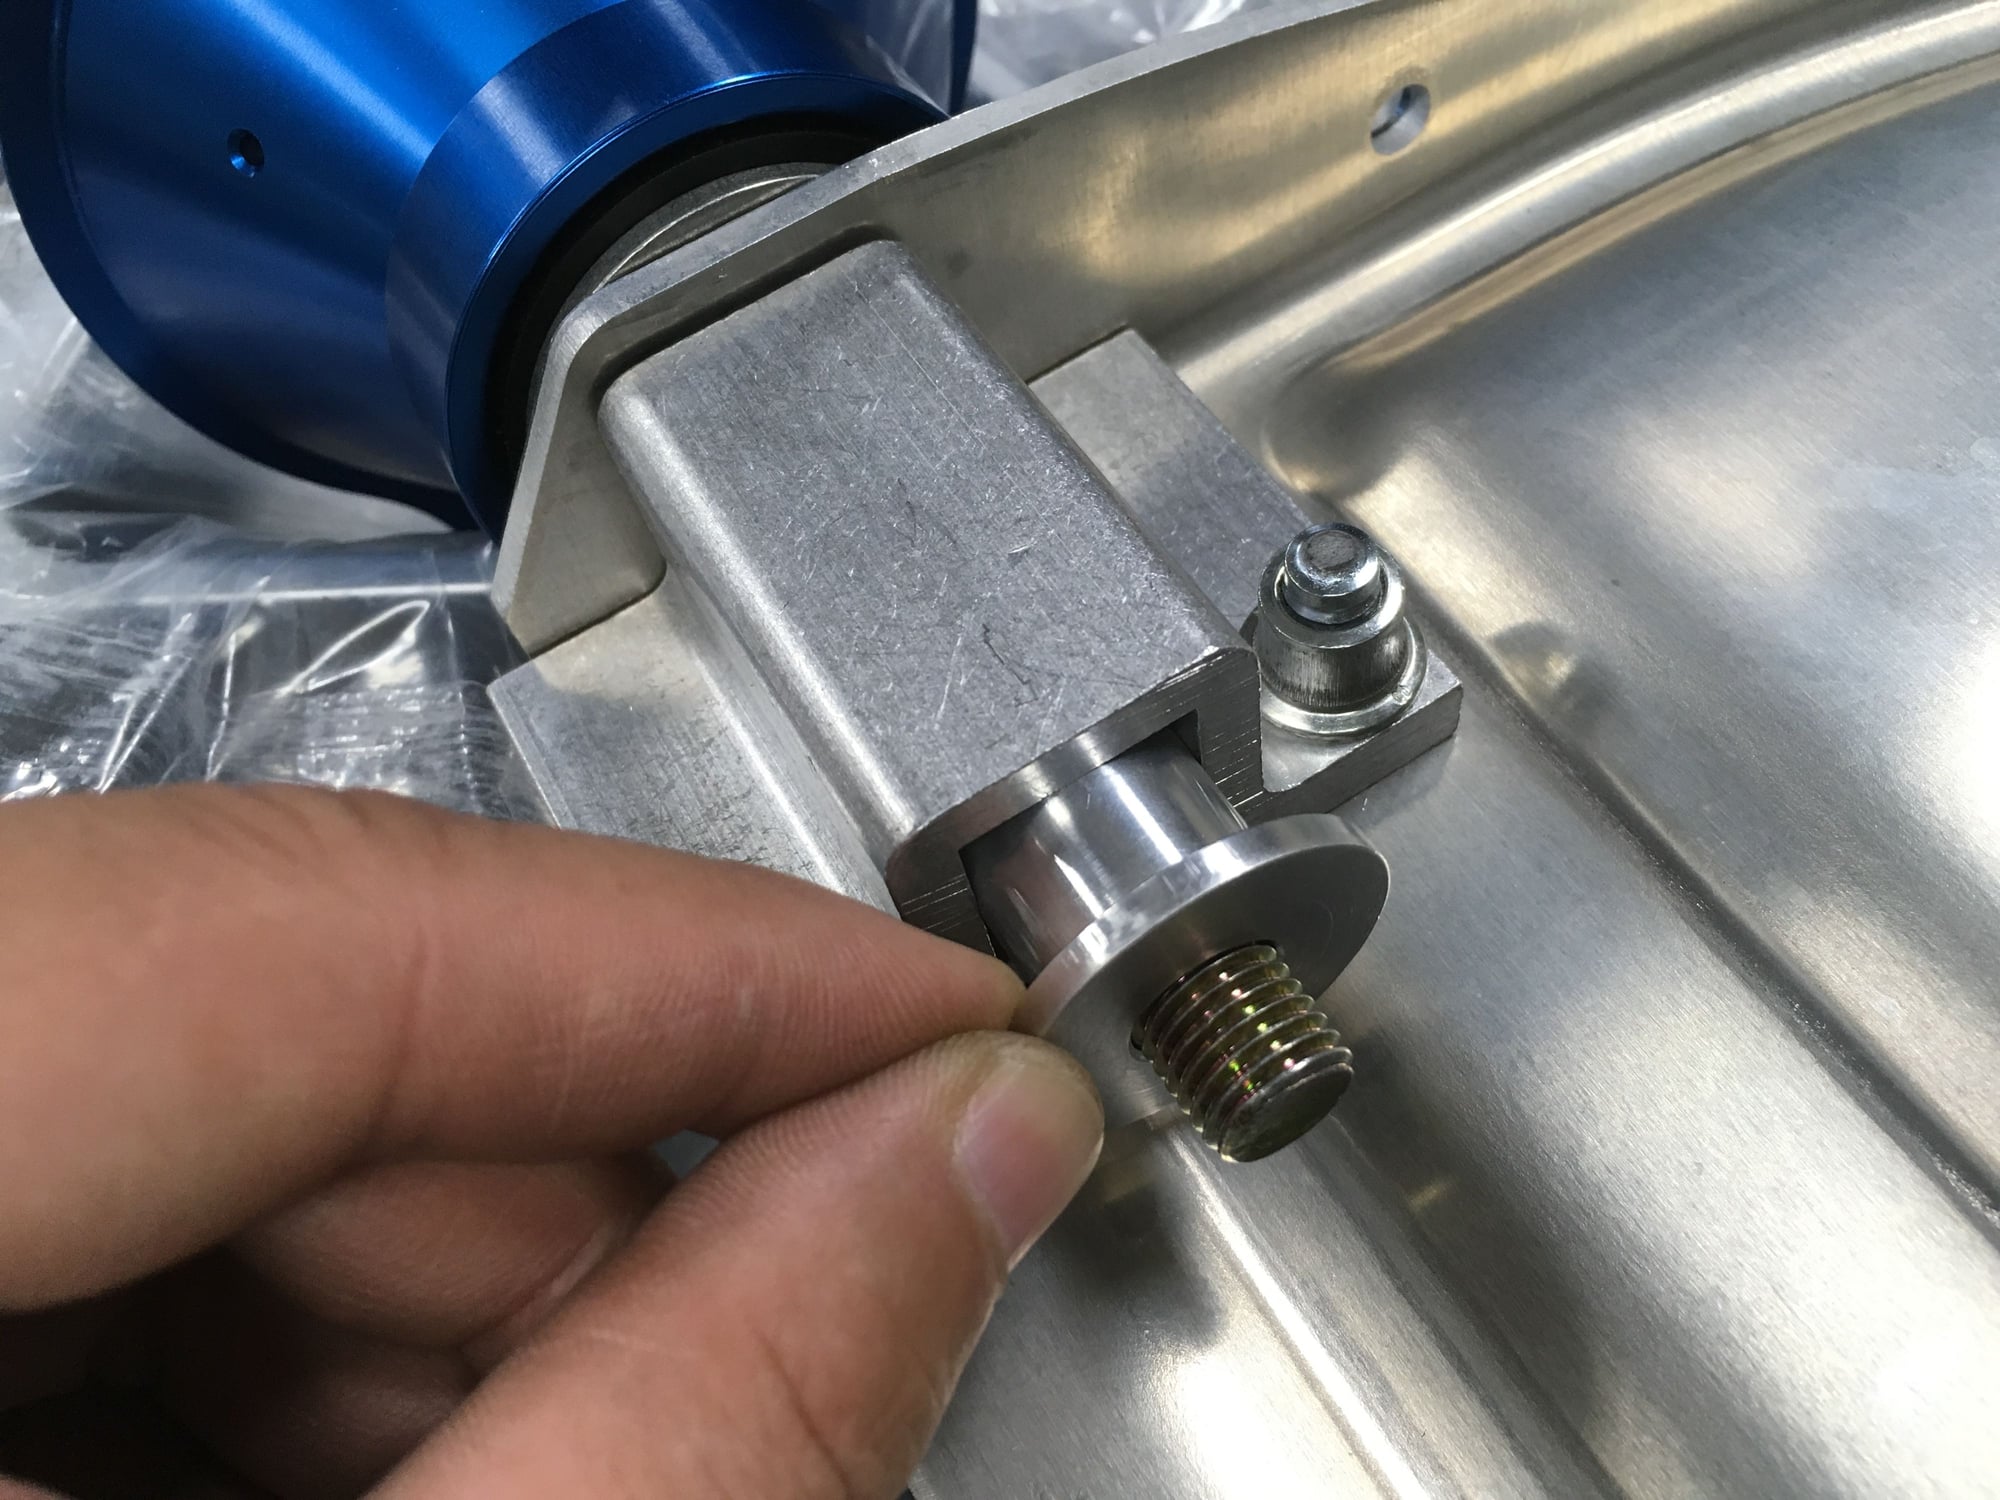
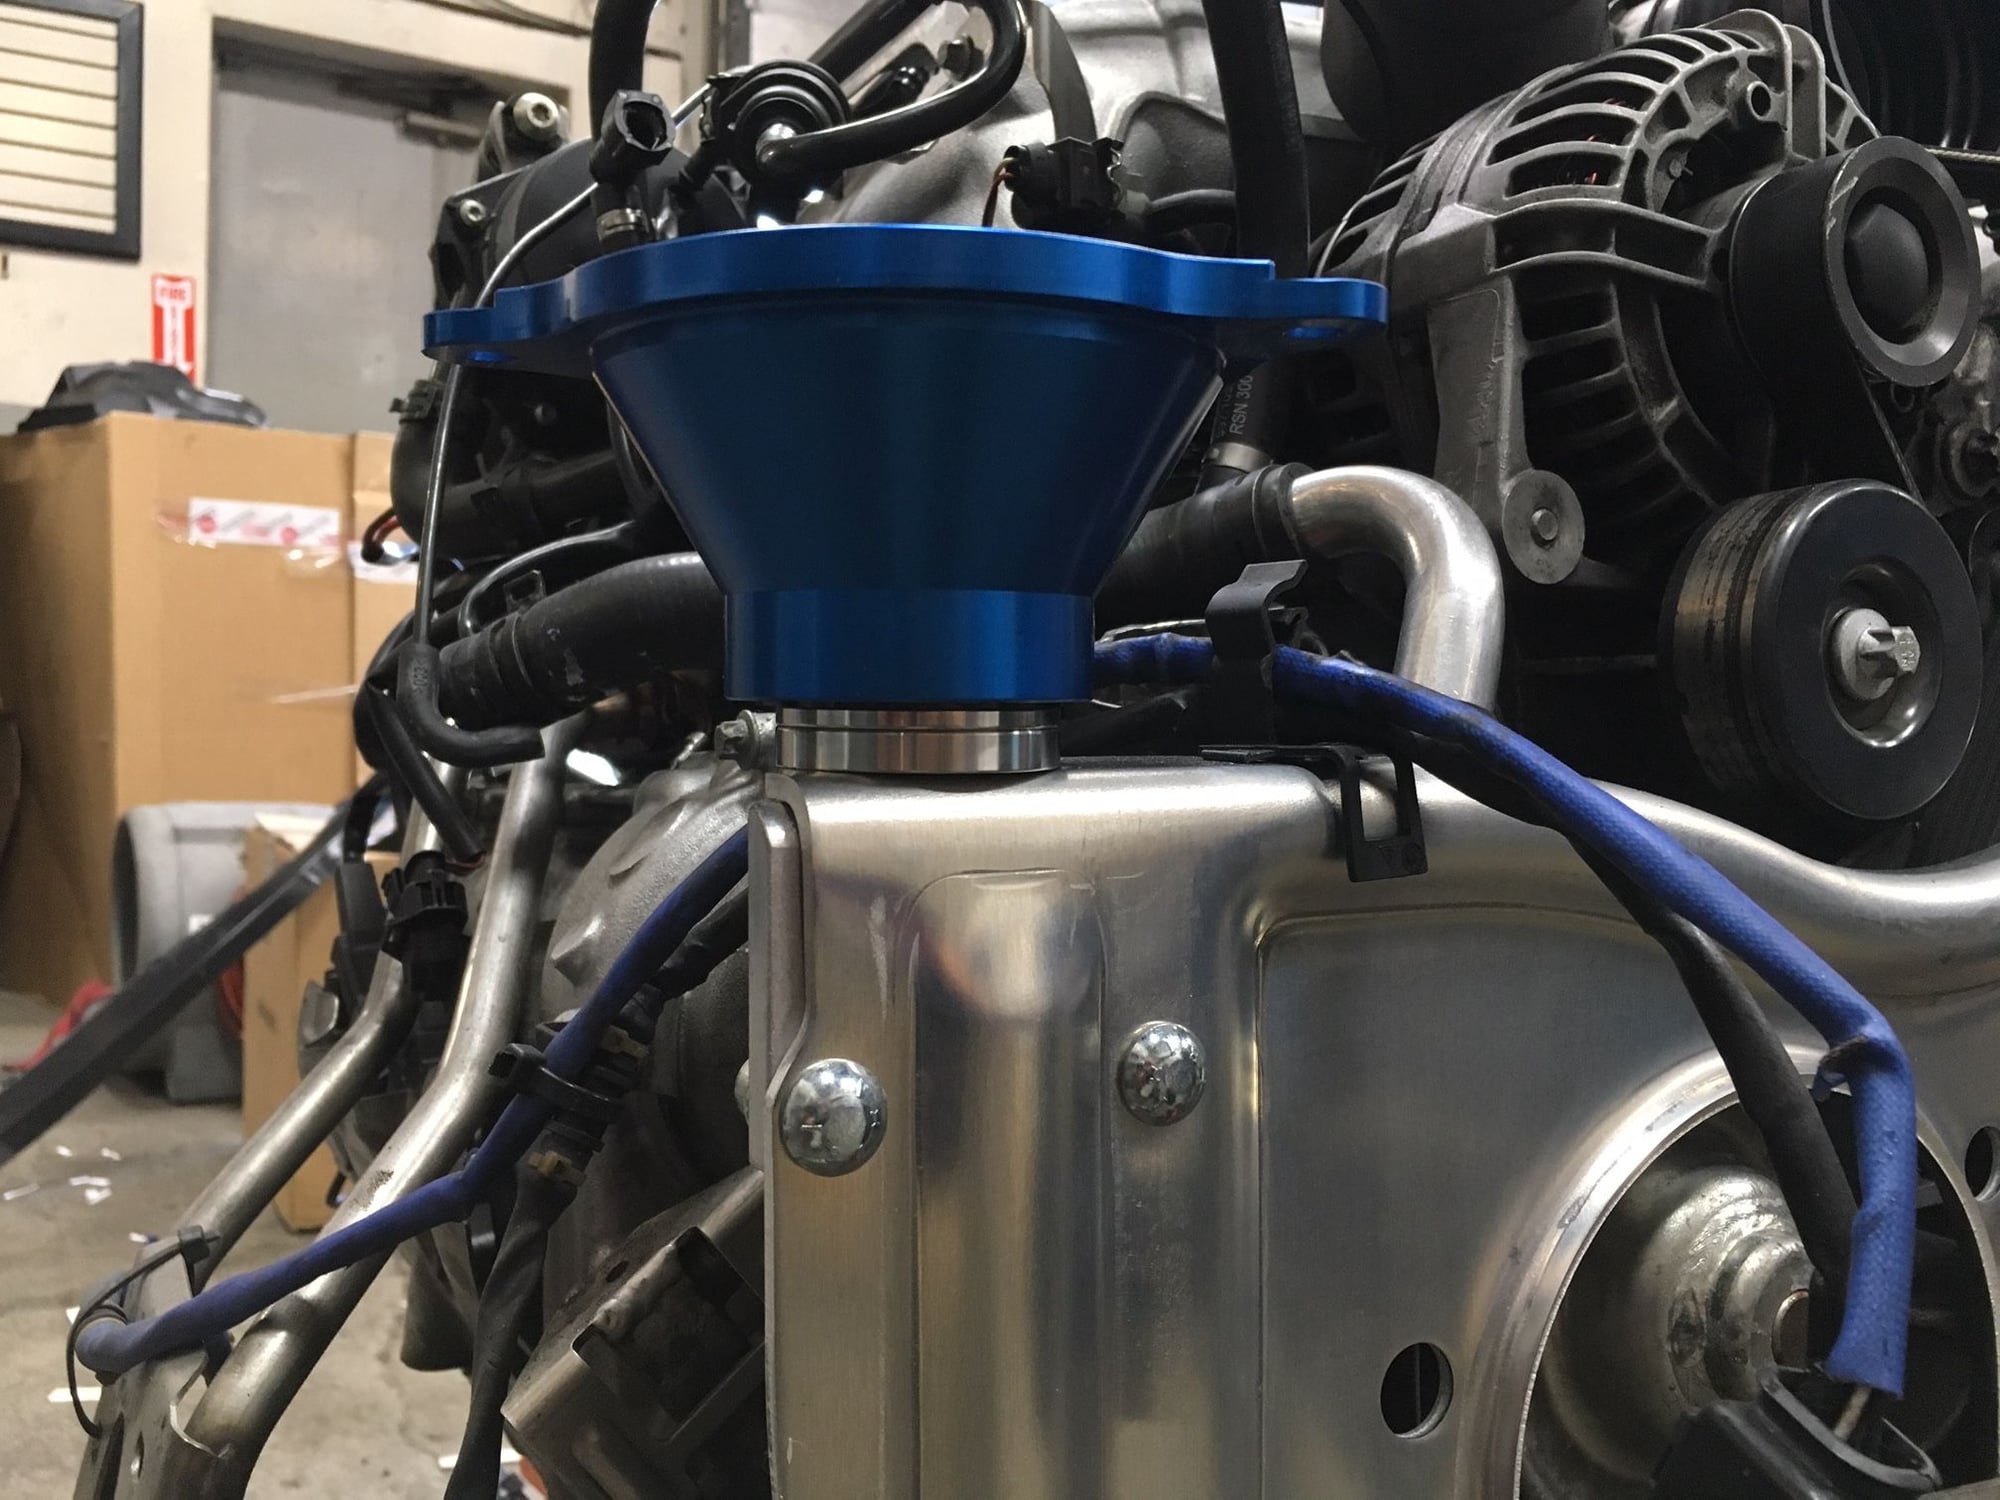
The engine mounts I am going to use are from Stomski Racing. I prefer the through-bolt design.
And it was yours truly's suggestion to integrate a centering guide tube at the bottom to replace the interlocking square at the top.
Using the centering guide tube design I can play with lowering the CG of the engine using the stainless steel spacers I made(in 3mm and 5mm increment).
Here's shown with 3mm + 5mm spacer for the total of 8mm drop.
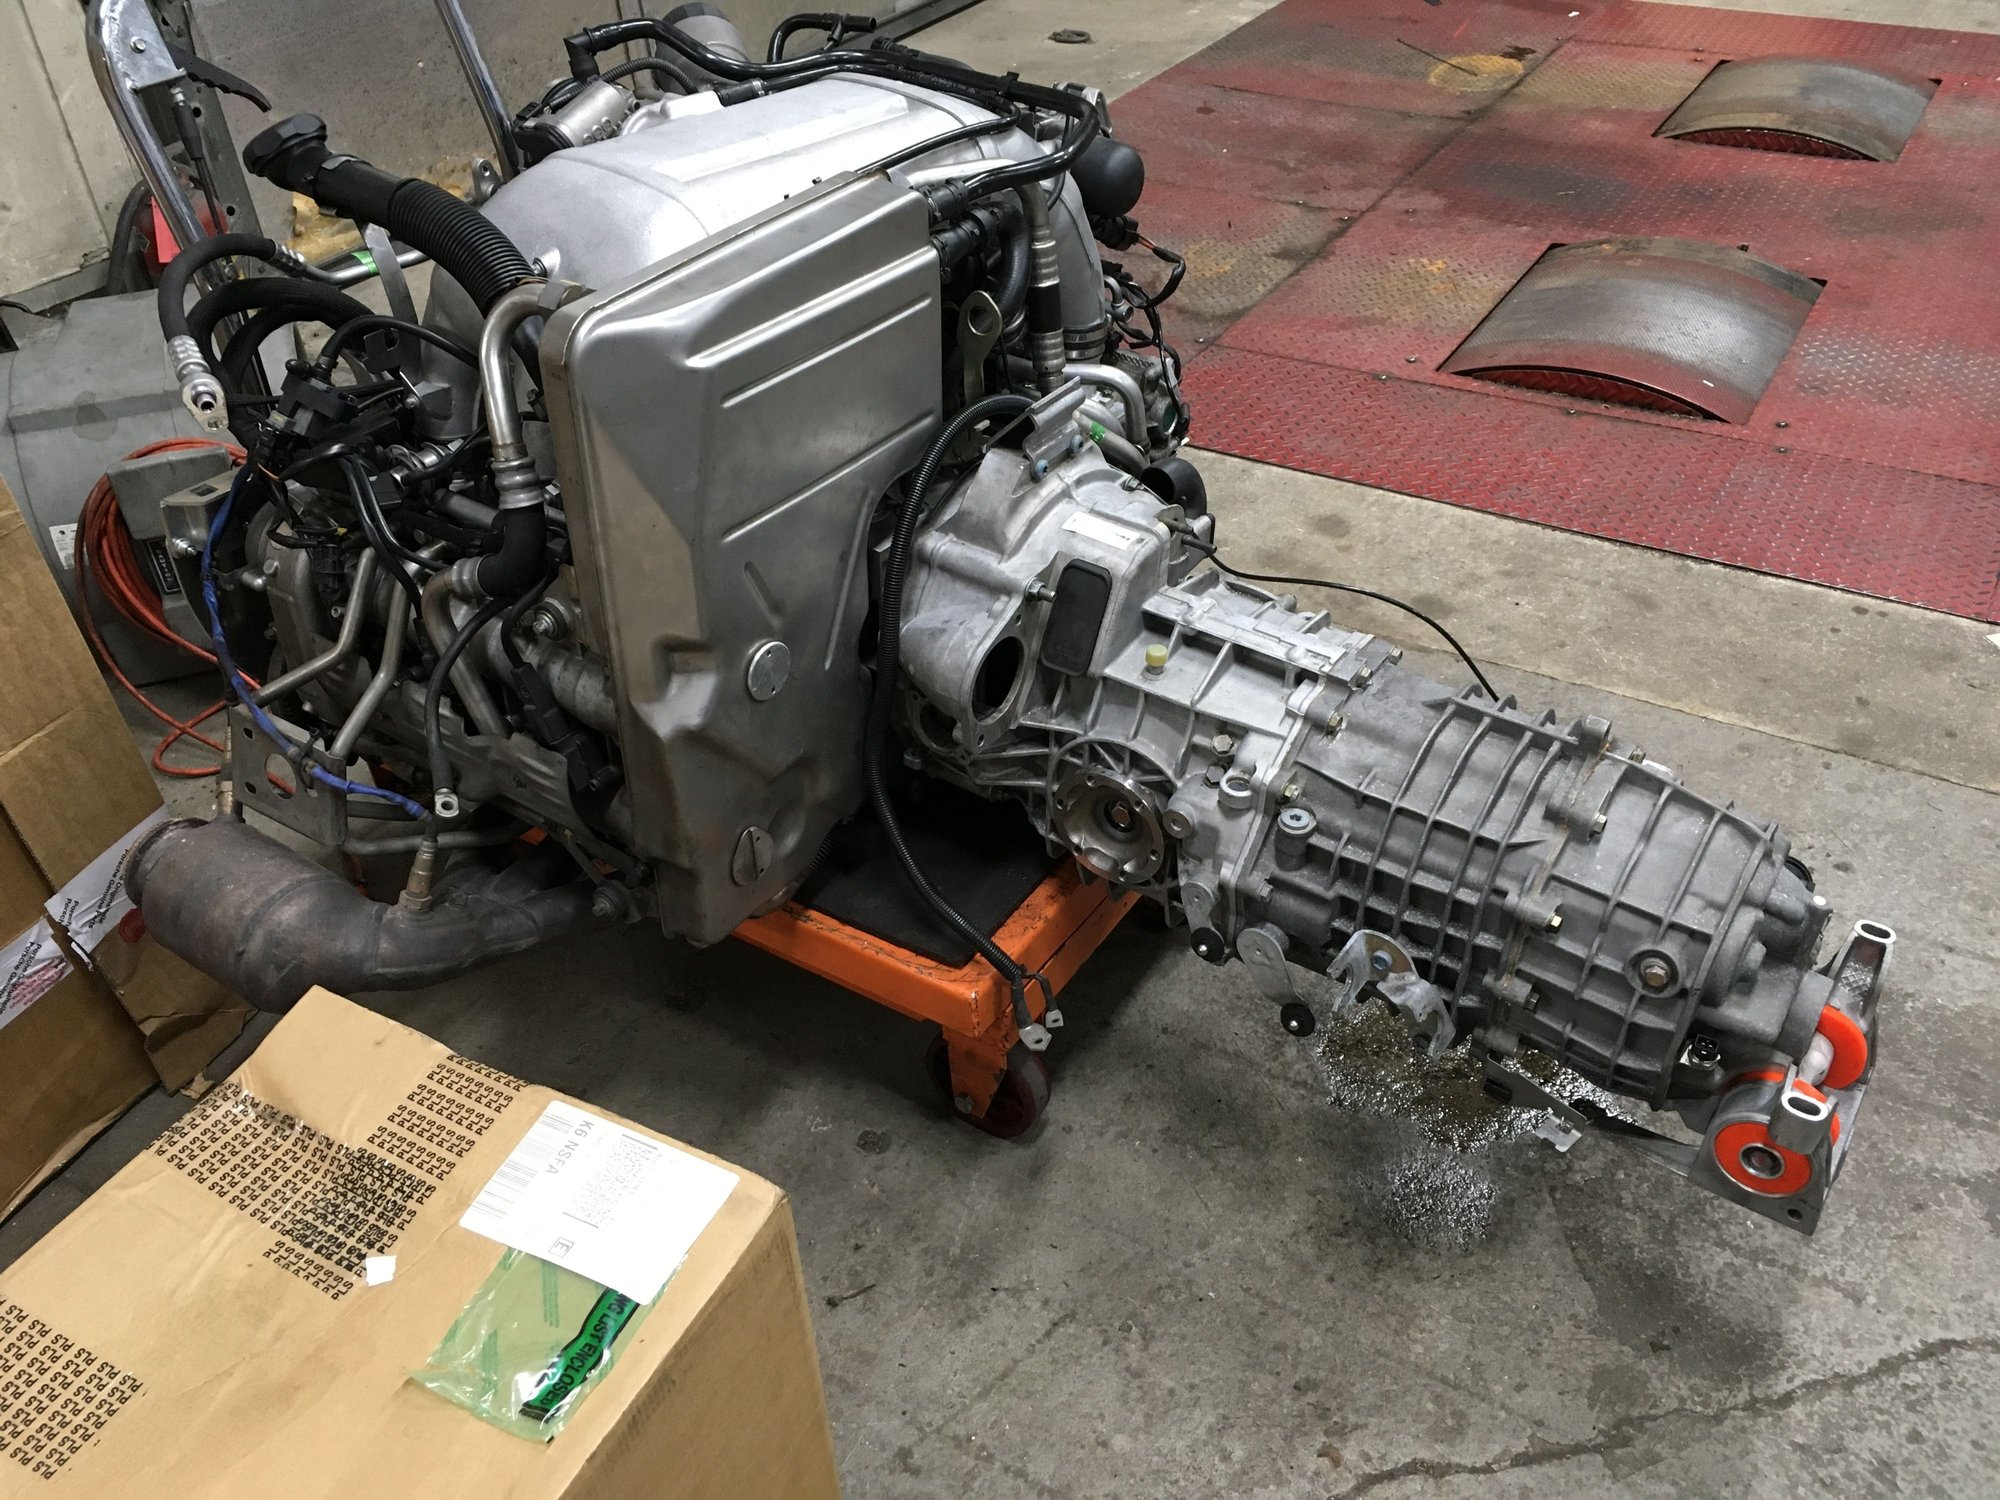
Got the gearbox back and on the engine. Brian Copans at BMC&G (G50 specialist for street, track, and race) refreshed my gearbox with new syncros, and roller bearings, and installed Cup 4.0:1 ring & pinion.
Made a little mess underneath filling the gearbox with oil. Oops.
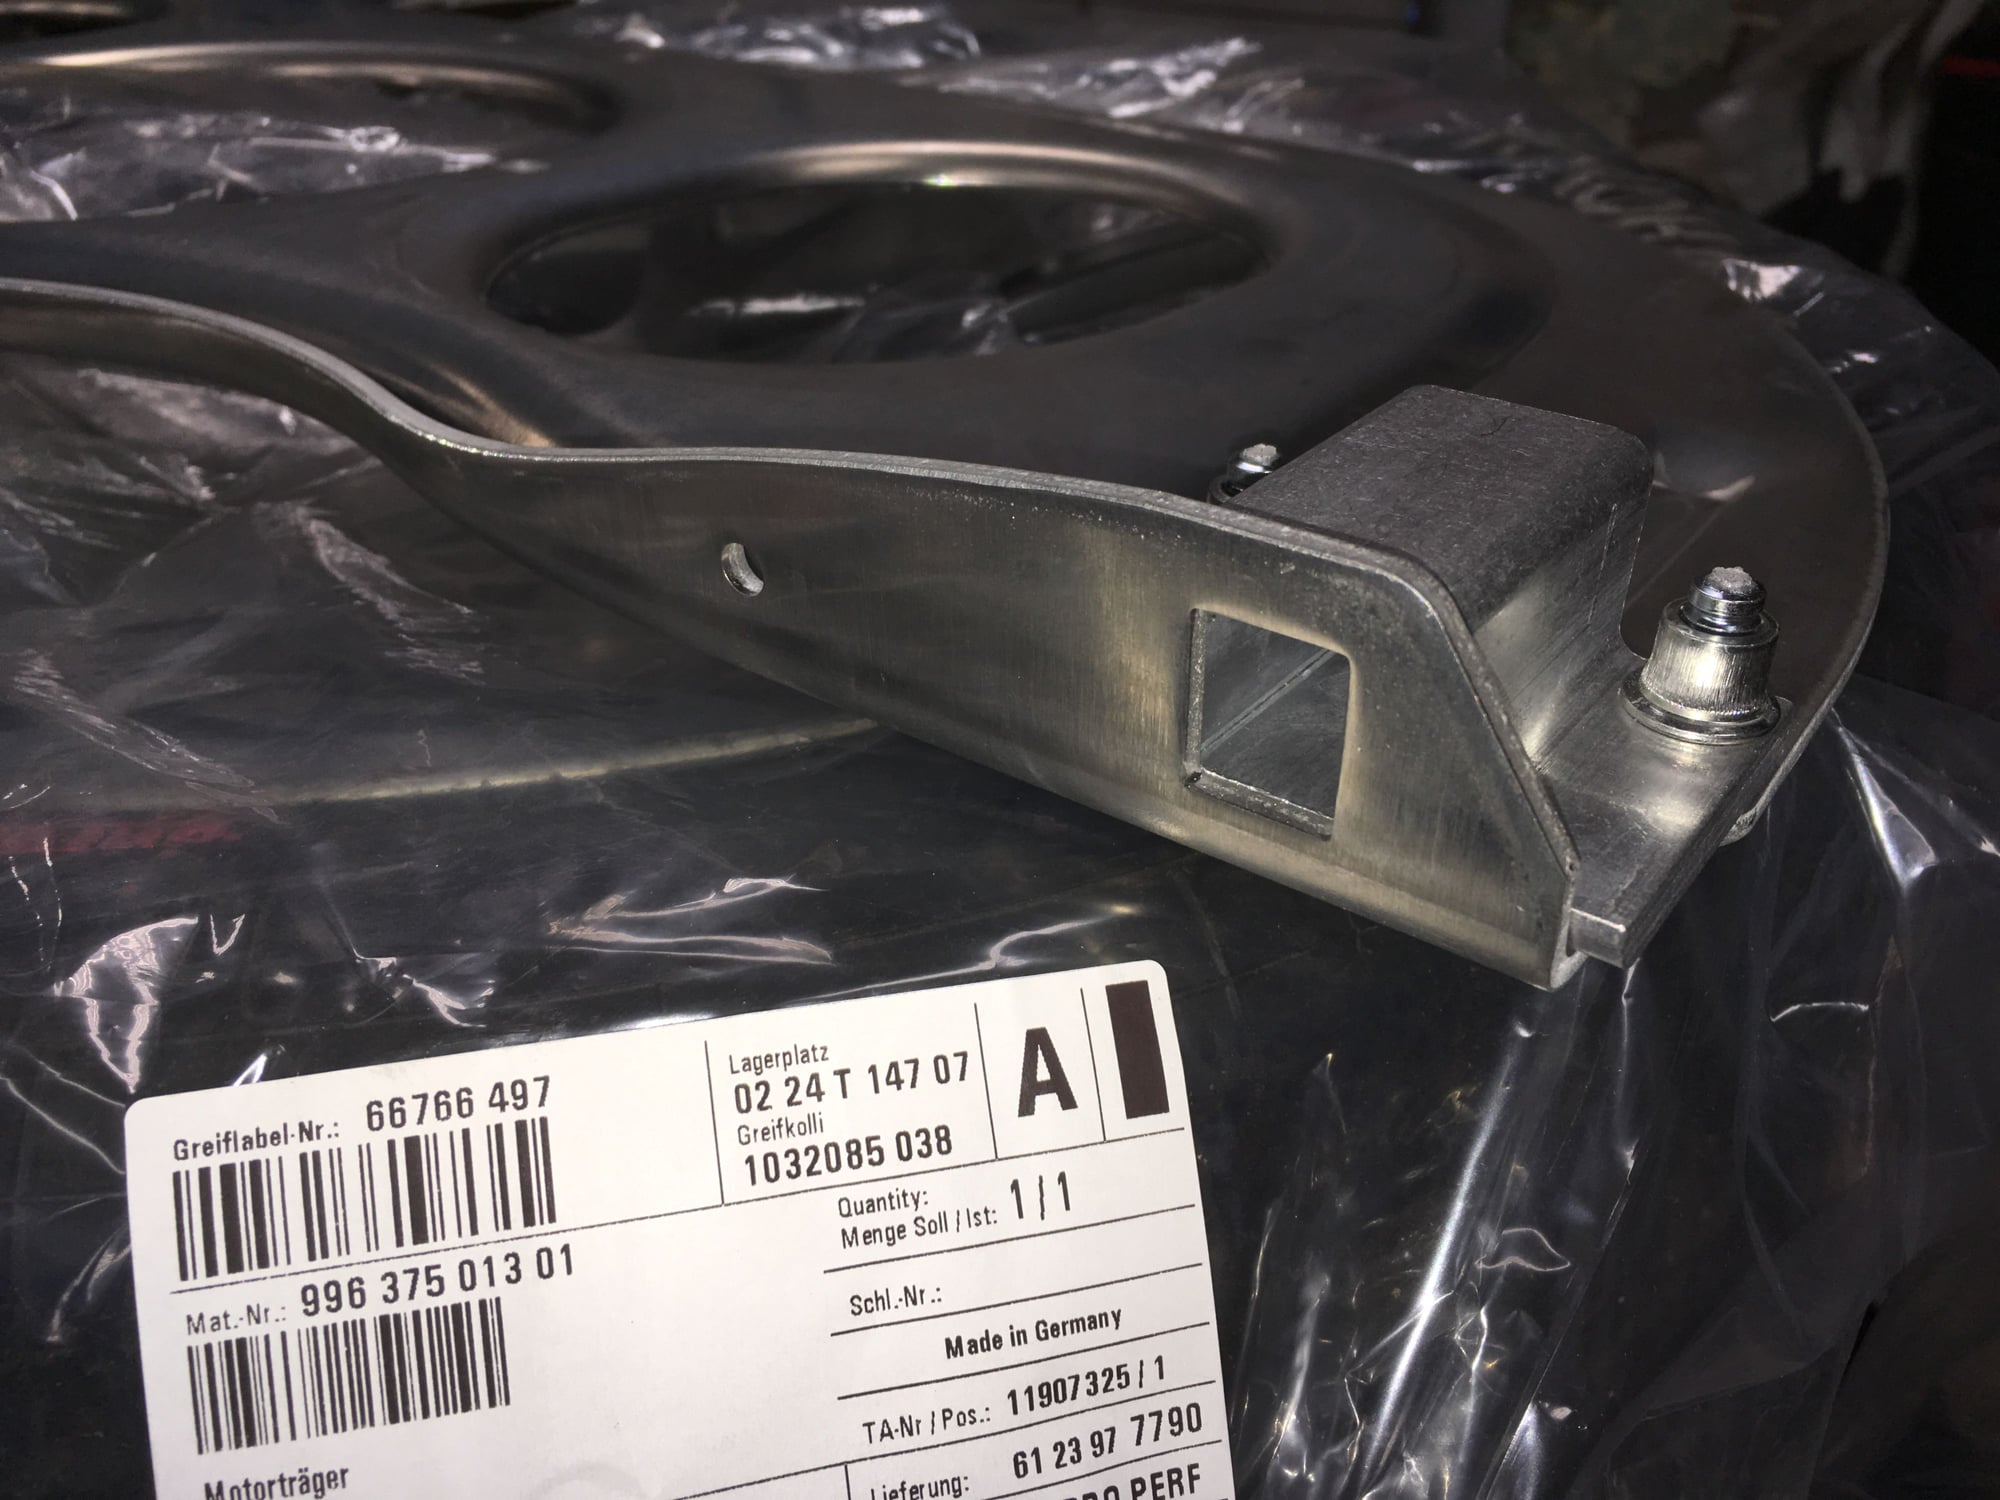
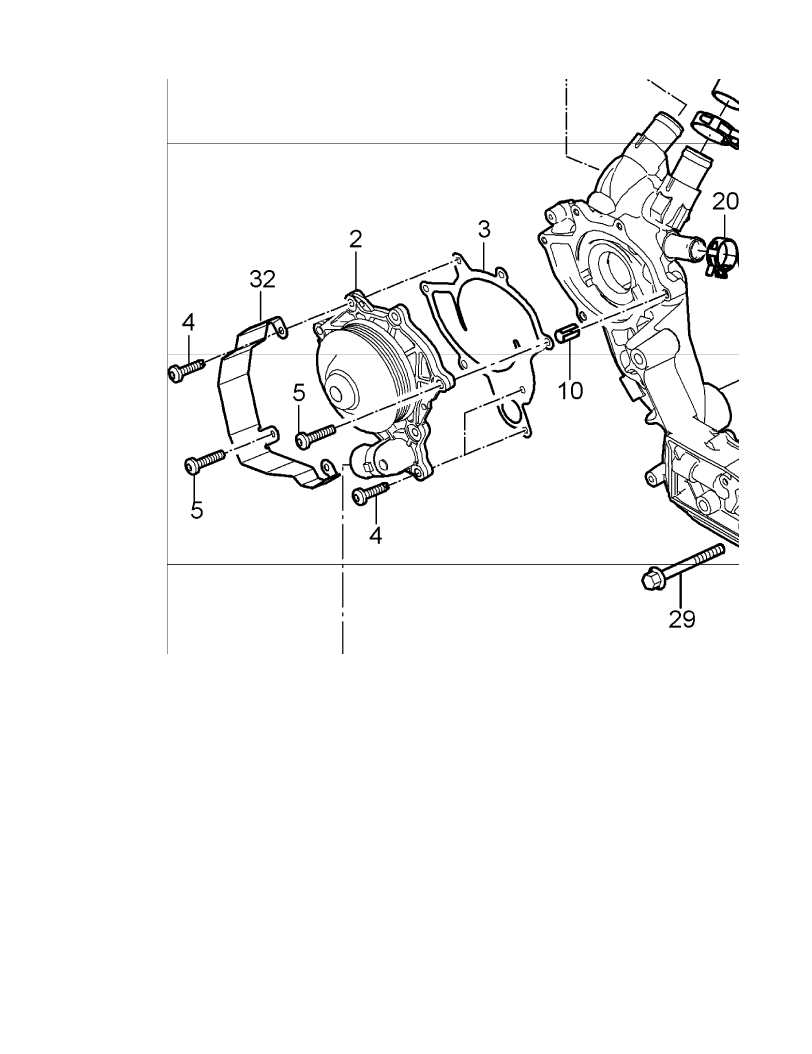
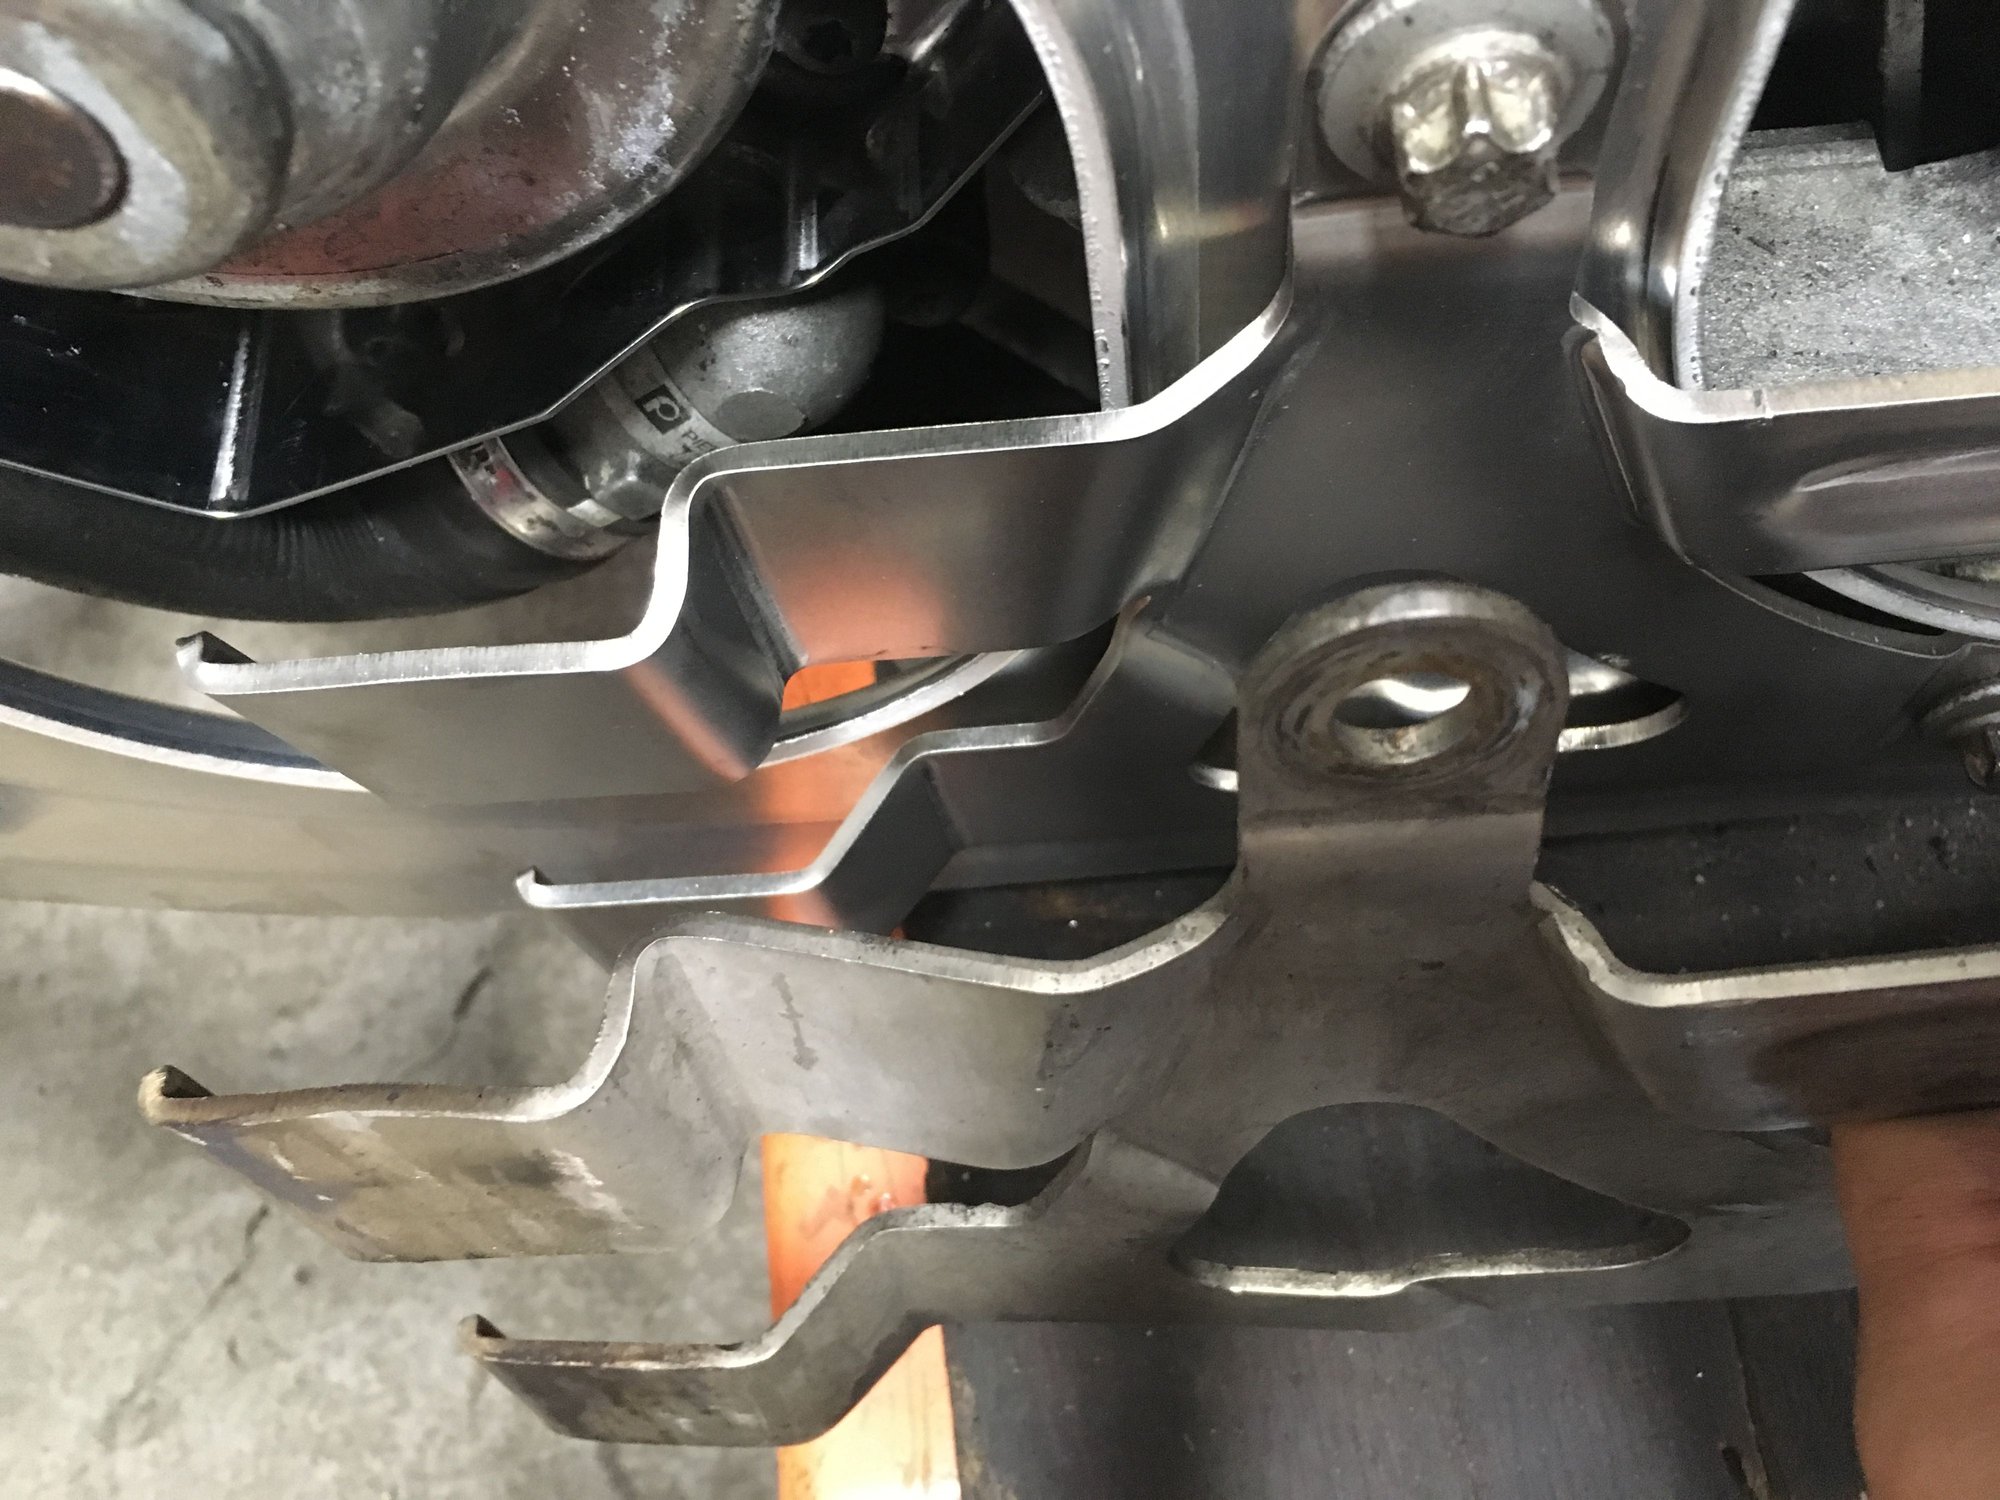
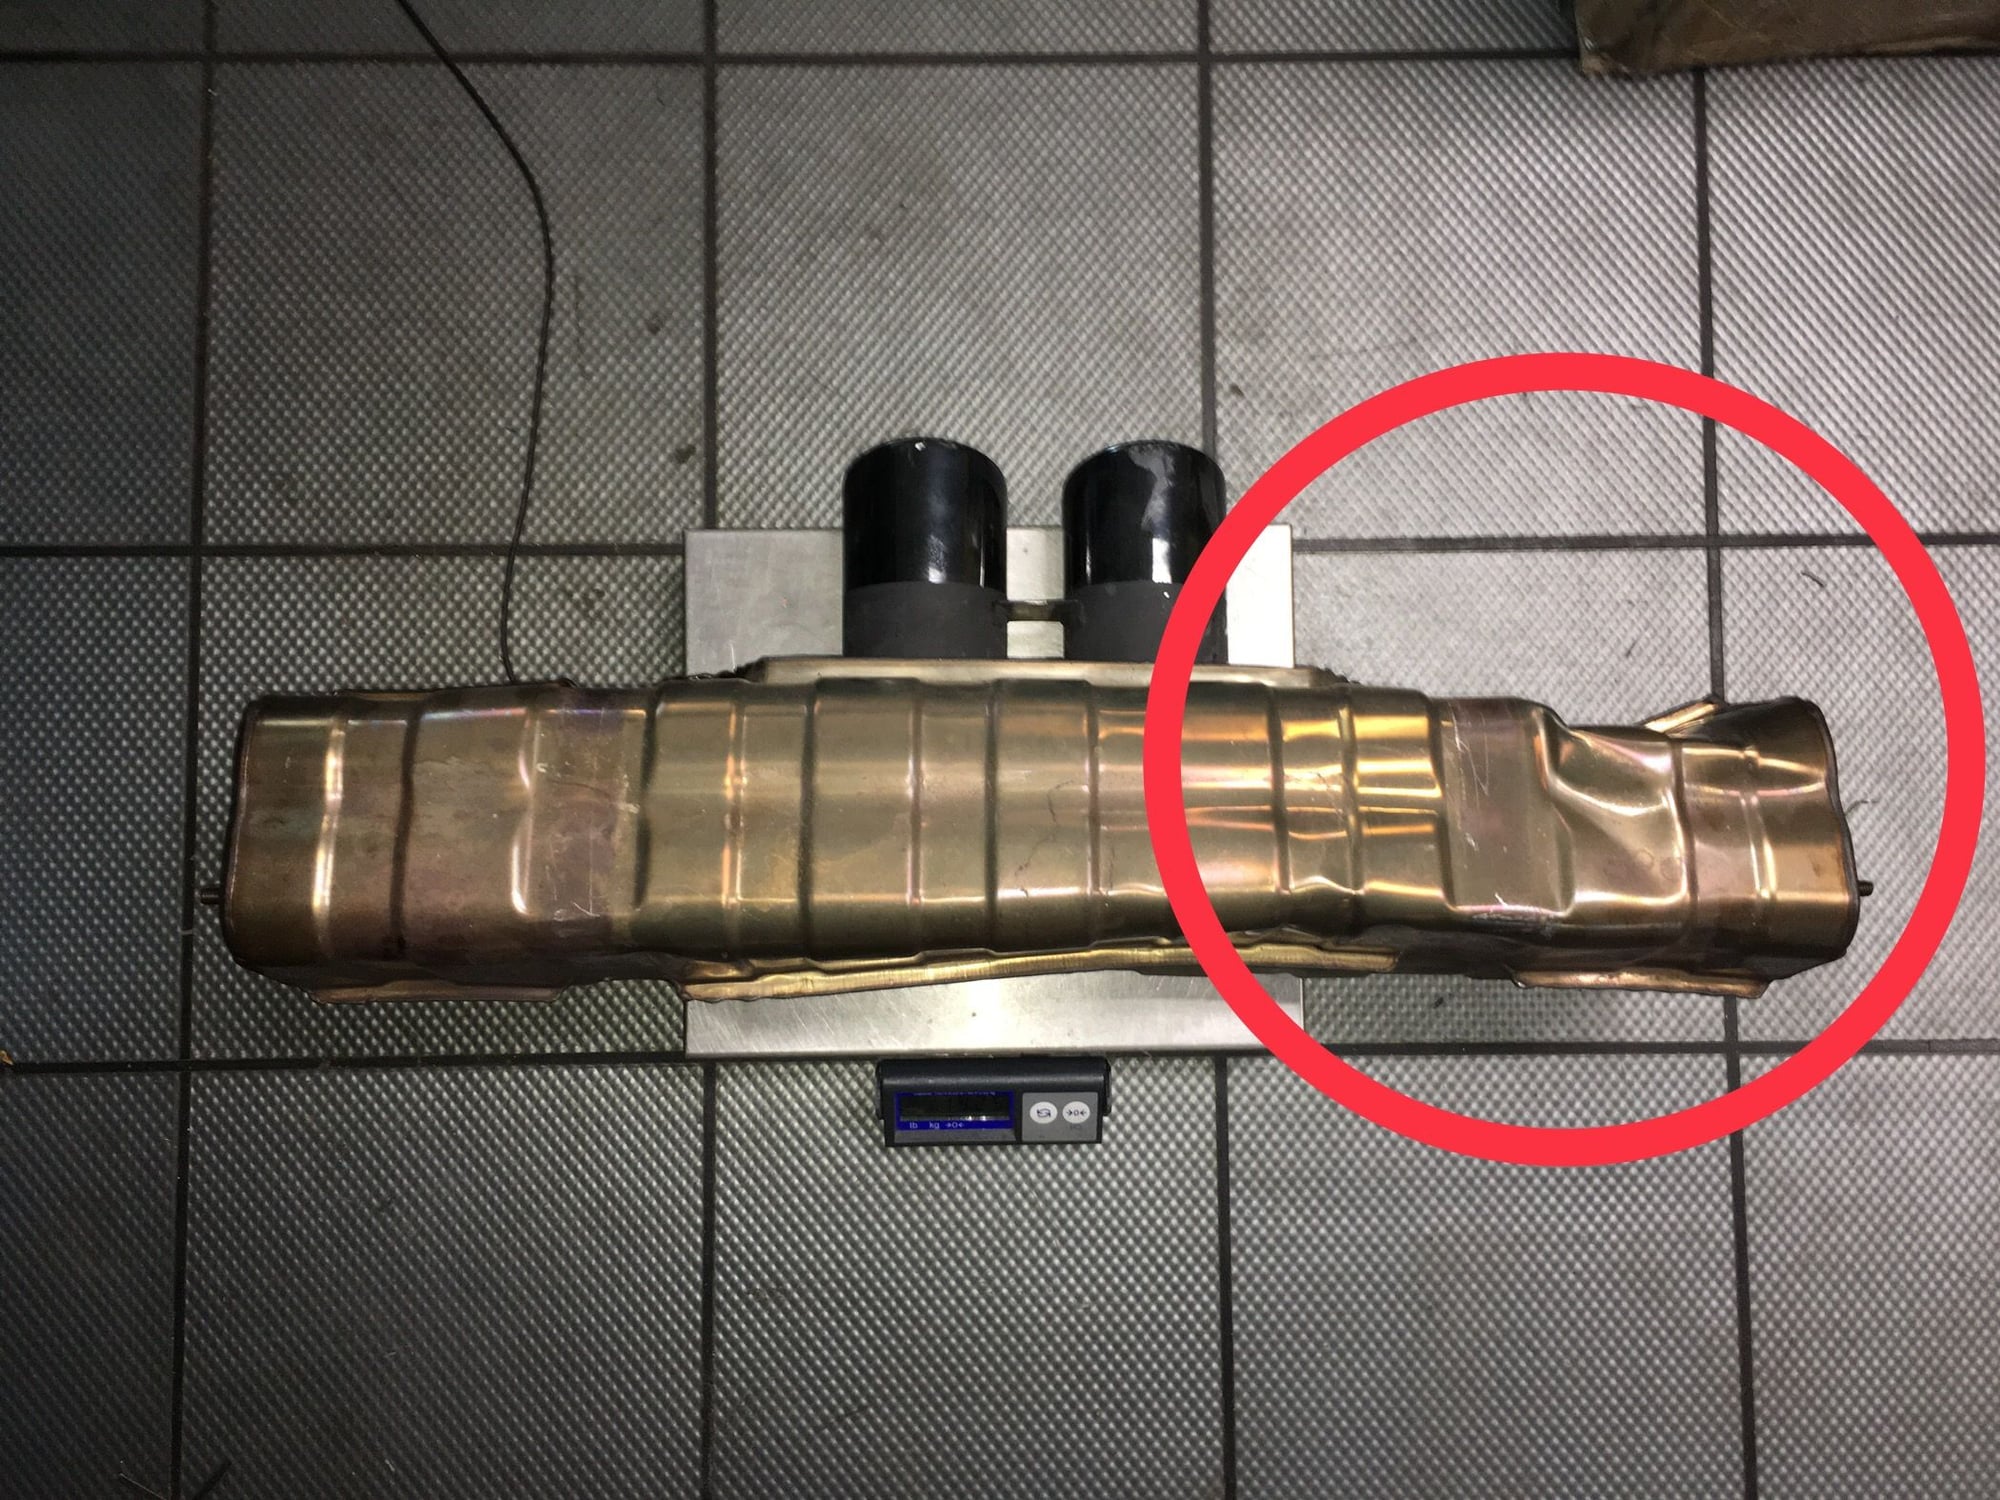
In process of replacing the engine bracket, the water pump protective plate, and muffler bracket are replaced as well.
The water pump protective plate is item #32 in the image below. I think this 25-dollar protective plate along with the muffler and brackets buckled to the impact to save my water pump housing and possibly even the engine block. Interestingly this protective plate is factory equipped on 997.1 GT3/RS/Turbo and GT2, but not on 997.2 GT3/RS nor GT3 Cup. I guess I lucked out with having this piece.
Pics of the buckled parts.
The engine and gearbox is ready. Now just waiting on the body.
Tom: If still convenient, how many inches high is the engine when on the lift table in the above pic (appears the oil filter is the high point)? I'm curious as someone who might one day attempt a DIY engine removal without a lift. Thanks!
Tom: If still convenient, how many inches high is the engine when on the lift table in the above pic (appears the oil filter is the high point)? I'm curious as someone who might one day attempt a DIY engine removal without a lift. Thanks!
The highest point is the oil filter at 25.5" from the table.
Did an engine swap before on a Cup car on jack stands in a paddock garage. Its not as convenient as having a lift but very do-able with the right people.

 09-13-2018, 01:18 PM


 The tail light buckets(sheet metal, not frame) still needs to be aligned since they were tweaked from the rear impact. The sheet metal is pretty soft so I could've flex them back in place myself, but since this is crucial for proper tail light assembly alignment to the decklid and to the bumper it best to leave this task to the trained body experts at Euro Pros. Euro Pros presently also has one of our team's IMSA GT3 991 Cup Challenge cars there for repair, this car is to compete in the season finale at Road Atlanta. Naturally, the IMSA 991 Cup race car repair took priority over mine. Which is okay, because I haven't gotten all parts I need, plus my car is getting free storage there.