

DIY - oil level sender / sensor - fixed>>
 05-31-2014, 03:17 PM
#1
Racer
Thread Starter
It wasn't fun, but it's done and the engine didn't have to come out.
#15 in the image below.

You'll need:
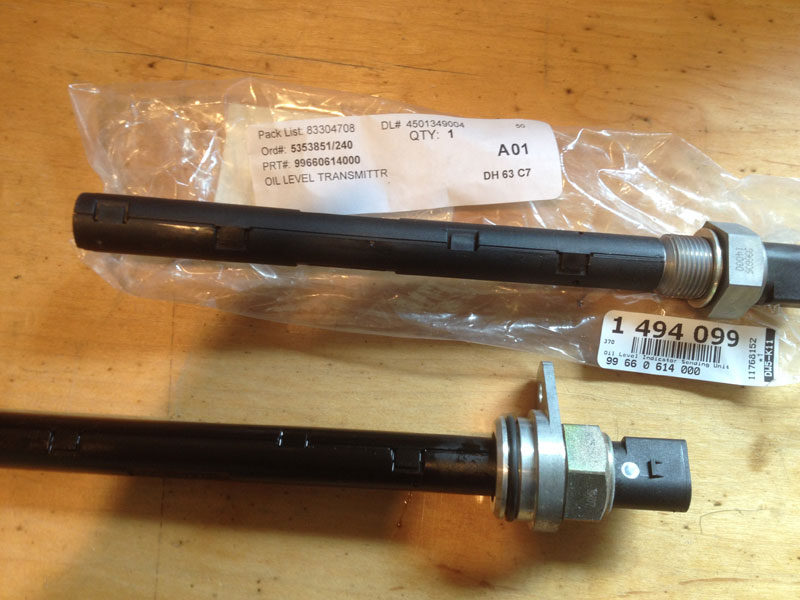
+ oil level transmitter - PRT# 99660614000 (~ $80 at the time of purchase)
+ 10mm socket or wrench
+ 8mm socket or wrench
+ skinny arms and a good back
Open the engine compartment. That's it with the wires plugged into it - way the hell back there.
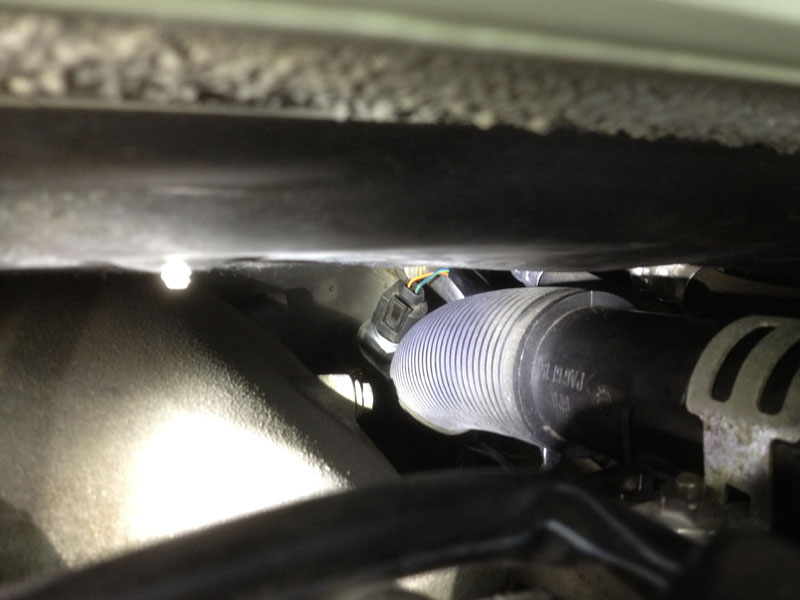
Start by unscrewing the bracket that holds the oil filler. Unscrew this nut - 10mm.
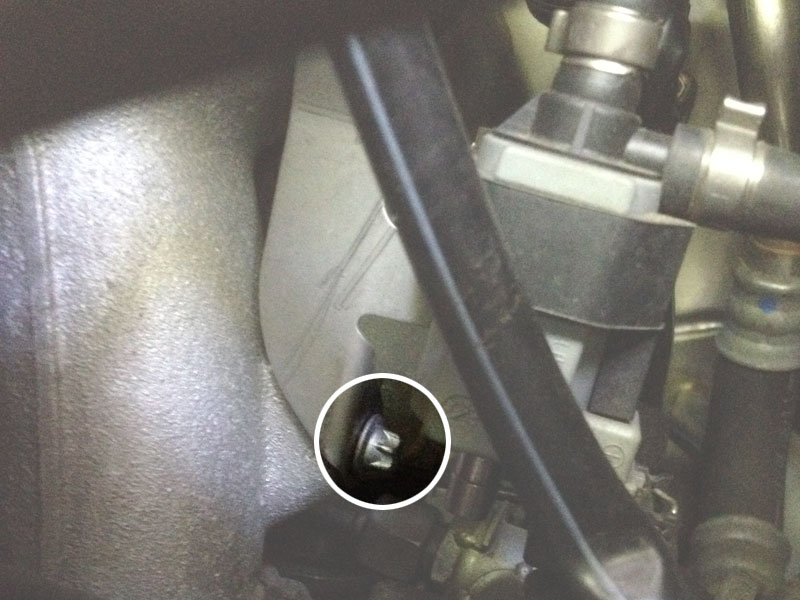
Unscrew two more bolts - 8mm. Shown below is the lower bolt. I couldn't get a good picture of the upper bolt, but it's there under the 10mm nut.
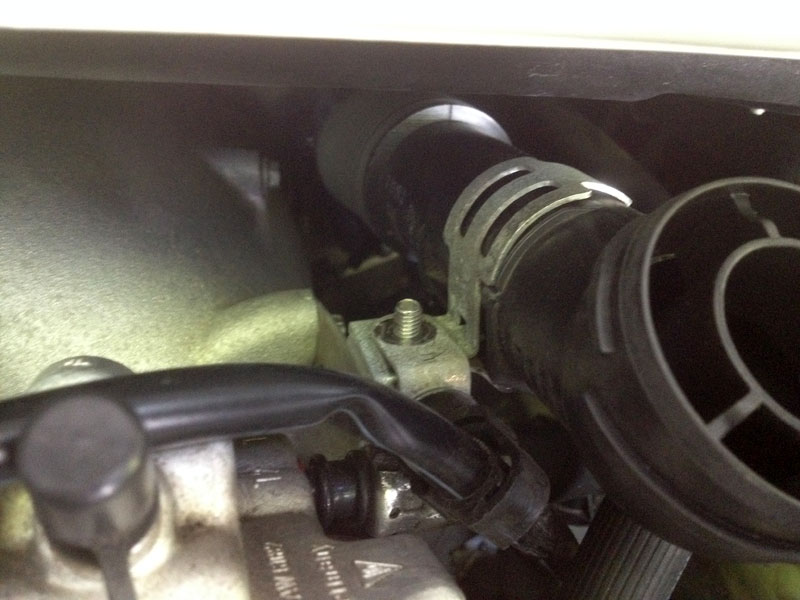
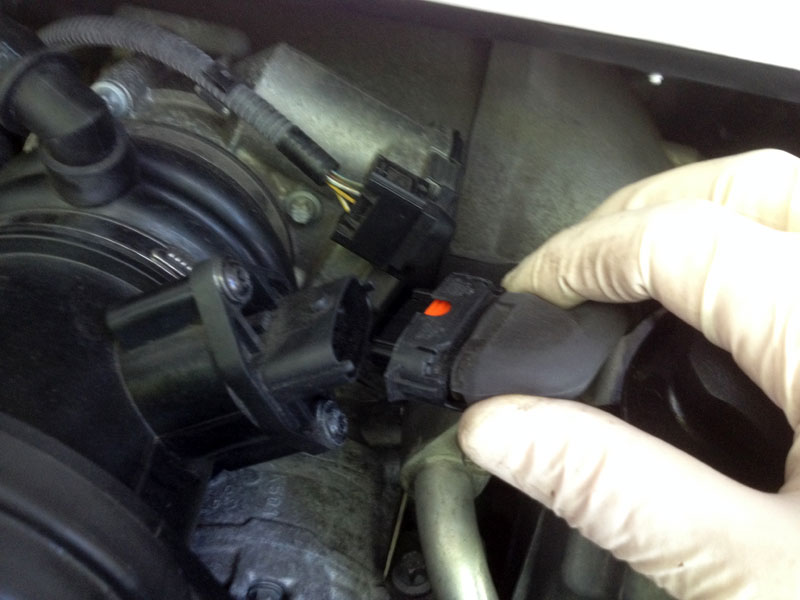
Unplug the MAF connector.
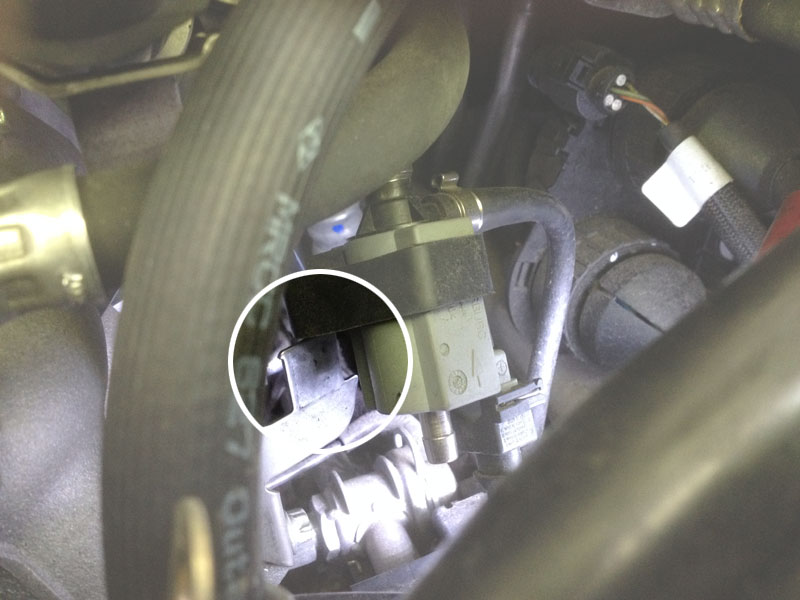
Pull up and slip off this solenoid that is connected to the bracket you're removing.
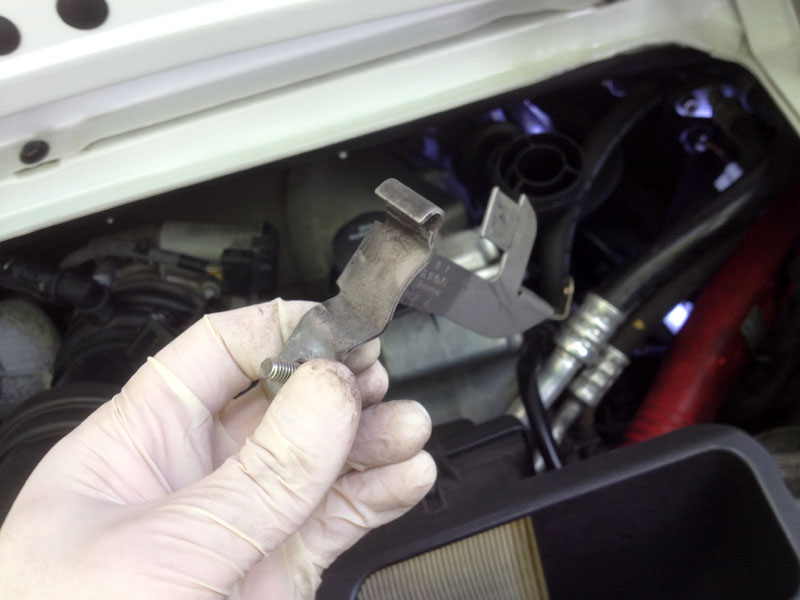
Pull the bracket out.
Now there's a little more room. This is the tricky part. Unscrew the bolts holding the oil filler and oil sender in place. There are two 8mm bolts (#28 and #24 in the diagram above). I used a small wrench and it took forever as there's not a lot of space. The oil filler and sensor will both come out at this point.
I disconnected the sensor from the connector and plugged the holes with a couple of towels.
Old on the bottom, new on top. #4 in the diagram needs to be removed from the old sensor and screwed on to the new one.
It was stubborn, so it got the rubber hammer.
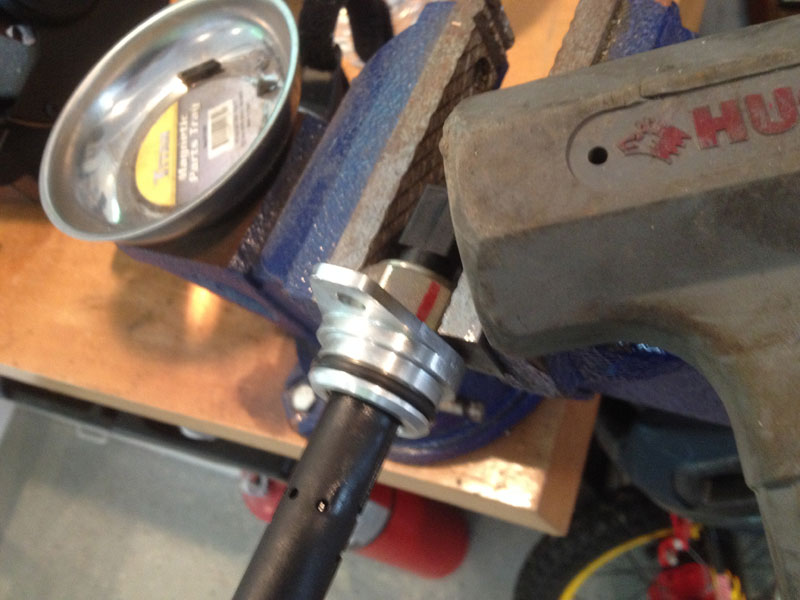
Swapped.

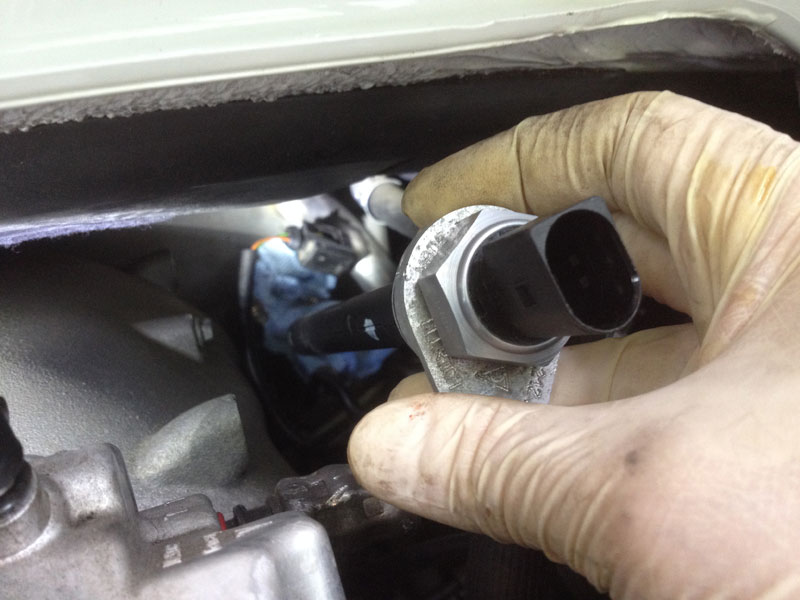
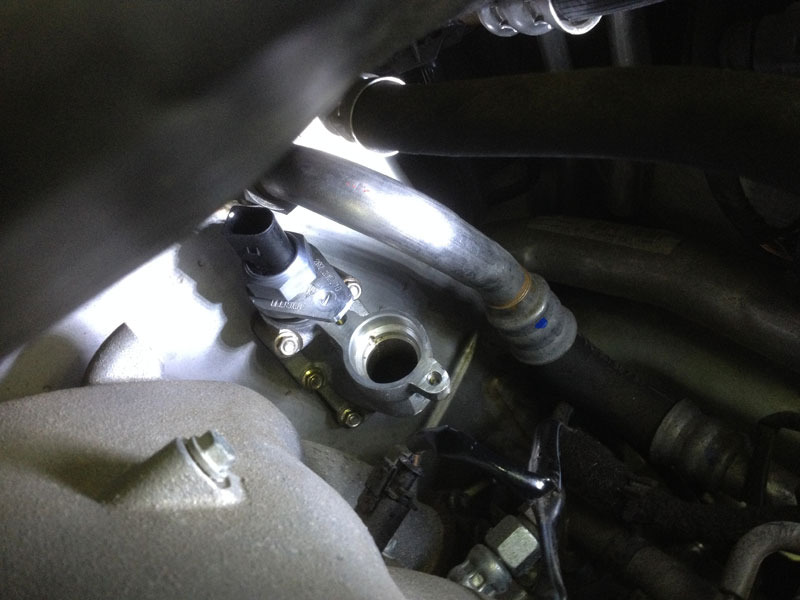
New sensor in place.
Reinstall in the reverse order.
Went for a quick drive to heat the car up. With the engine running on a level surface I tested the oil level and found it to be a little low. This is the first time the sensor has displayed anything but empty or full. I put half a quart in and now it's in range. Hope this helps those that have erratic oil levels.
#15 in the image below.
You'll need:
+ oil level transmitter - PRT# 99660614000 (~ $80 at the time of purchase)
+ 10mm socket or wrench
+ 8mm socket or wrench
+ skinny arms and a good back
Open the engine compartment. That's it with the wires plugged into it - way the hell back there.
Start by unscrewing the bracket that holds the oil filler. Unscrew this nut - 10mm.
Unscrew two more bolts - 8mm. Shown below is the lower bolt. I couldn't get a good picture of the upper bolt, but it's there under the 10mm nut.
Unplug the MAF connector.
Pull up and slip off this solenoid that is connected to the bracket you're removing.
Pull the bracket out.
Now there's a little more room. This is the tricky part. Unscrew the bolts holding the oil filler and oil sender in place. There are two 8mm bolts (#28 and #24 in the diagram above). I used a small wrench and it took forever as there's not a lot of space. The oil filler and sensor will both come out at this point.
I disconnected the sensor from the connector and plugged the holes with a couple of towels.
Old on the bottom, new on top. #4 in the diagram needs to be removed from the old sensor and screwed on to the new one.
It was stubborn, so it got the rubber hammer.
Swapped.
New sensor in place.
Reinstall in the reverse order.
Went for a quick drive to heat the car up. With the engine running on a level surface I tested the oil level and found it to be a little low. This is the first time the sensor has displayed anything but empty or full. I put half a quart in and now it's in range. Hope this helps those that have erratic oil levels.

The following users liked this post:
dak996 (08-02-2023)
05-31-2014, 07:08 PM
#2
Bravo! Thank you Andrew. 
06-03-2014, 11:27 AM
#6
Rennlist Member
Thanks for taking the time to post the photos and detailing the steps.

Trending Topics
 07-16-2016, 05:31 PM
#11
2nd Gear

Join Date: Jul 2016
Posts: 2
Likes: 0
Received 0 Likes
on
0 Posts
Is this the same procedure for a February 2005 997 C2S, or is the sender located in a different place? The oil temp needle is stuck at 60 degrees, and occasionally jumps up, but wont stay there - so assuming this is the faulty part.
I believe the part number I will need for my car is 996.606.150.01
There is not much info out there on replacing this sensor, and I was lucky to stumble across this!
Thanks
I believe the part number I will need for my car is 996.606.150.01
There is not much info out there on replacing this sensor, and I was lucky to stumble across this!
Thanks
03-14-2019, 11:44 AM
#13
Drifting
It wasn't fun, but it's done and the engine didn't have to come out.
#15 in the image below.
You'll need:
+ oil level transmitter - PRT# 99660614000 (~ $80 at the time of purchase)
+ 10mm socket or wrench
+ 8mm socket or wrench
+ skinny arms and a good back
Open the engine compartment. That's it with the wires plugged into it - way the hell back there.
Start by unscrewing the bracket that holds the oil filler. Unscrew this nut - 10mm.
Unscrew two more bolts - 8mm. Shown below is the lower bolt. I couldn't get a good picture of the upper bolt, but it's there under the 10mm nut.
Unplug the MAF connector.
Pull up and slip off this solenoid that is connected to the bracket you're removing.
Pull the bracket out.
Now there's a little more room. This is the tricky part. Unscrew the bolts holding the oil filler and oil sender in place. There are two 8mm bolts (#28 and #24 in the diagram above). I used a small wrench and it took forever as there's not a lot of space. The oil filler and sensor will both come out at this point.
I disconnected the sensor from the connector and plugged the holes with a couple of towels.
Old on the bottom, new on top. #4 in the diagram needs to be removed from the old sensor and screwed on to the new one.
It was stubborn, so it got the rubber hammer.
Swapped.
New sensor in place.
Reinstall in the reverse order.
Went for a quick drive to heat the car up. With the engine running on a level surface I tested the oil level and found it to be a little low. This is the first time the sensor has displayed anything but empty or full. I put half a quart in and now it's in range. Hope this helps those that have erratic oil levels.
Thanks!
The following users liked this post:
dak996 (08-02-2023)
The following users liked this post:
dak996 (08-02-2023)
The following users liked this post:
dak996 (08-02-2023)