When you click on links to various merchants on this site and make a purchase, this can result in this site earning a commission. Affiliate programs and affiliations include, but are not limited to, the eBay Partner Network.
This looks fantastic. I�m very tempted to do this, especially now that I�ve installed the aerokit bumper with a cup lip. The front is noticeably much lower than the rest of the car. Almost looks silly.
I cannot tell from the pictures here, does this lower the sides of the car by a bit?
I love how this turned out. I think it's finally time to give the side skirts a shot. Rear splitters are on the way and the gt3 front is ready for paint.
@EMC2 do you plan on productionalizing these side skirts for sale as wel
@RPL It is on the roadmap but with no firm date yet. At the moment we do offer the custom end-caps for the side skirts, to customers who are willing to do the rest of the DIY per this thread.
If this is something you are interested in, please drop us a mail at support@emc2desig.com for more info.
Originally Posted by monochrom3
For those that have done this, where did you find the long L-brackets? I've got everything else, just haven't found the right, long brackets. TIA!
*Edit: and of course right after i post, i found some... search "steel angle"
@monochrom3 Glad you found something. You can also use composite /plastic "L" trim typically available at Home Depot for example.
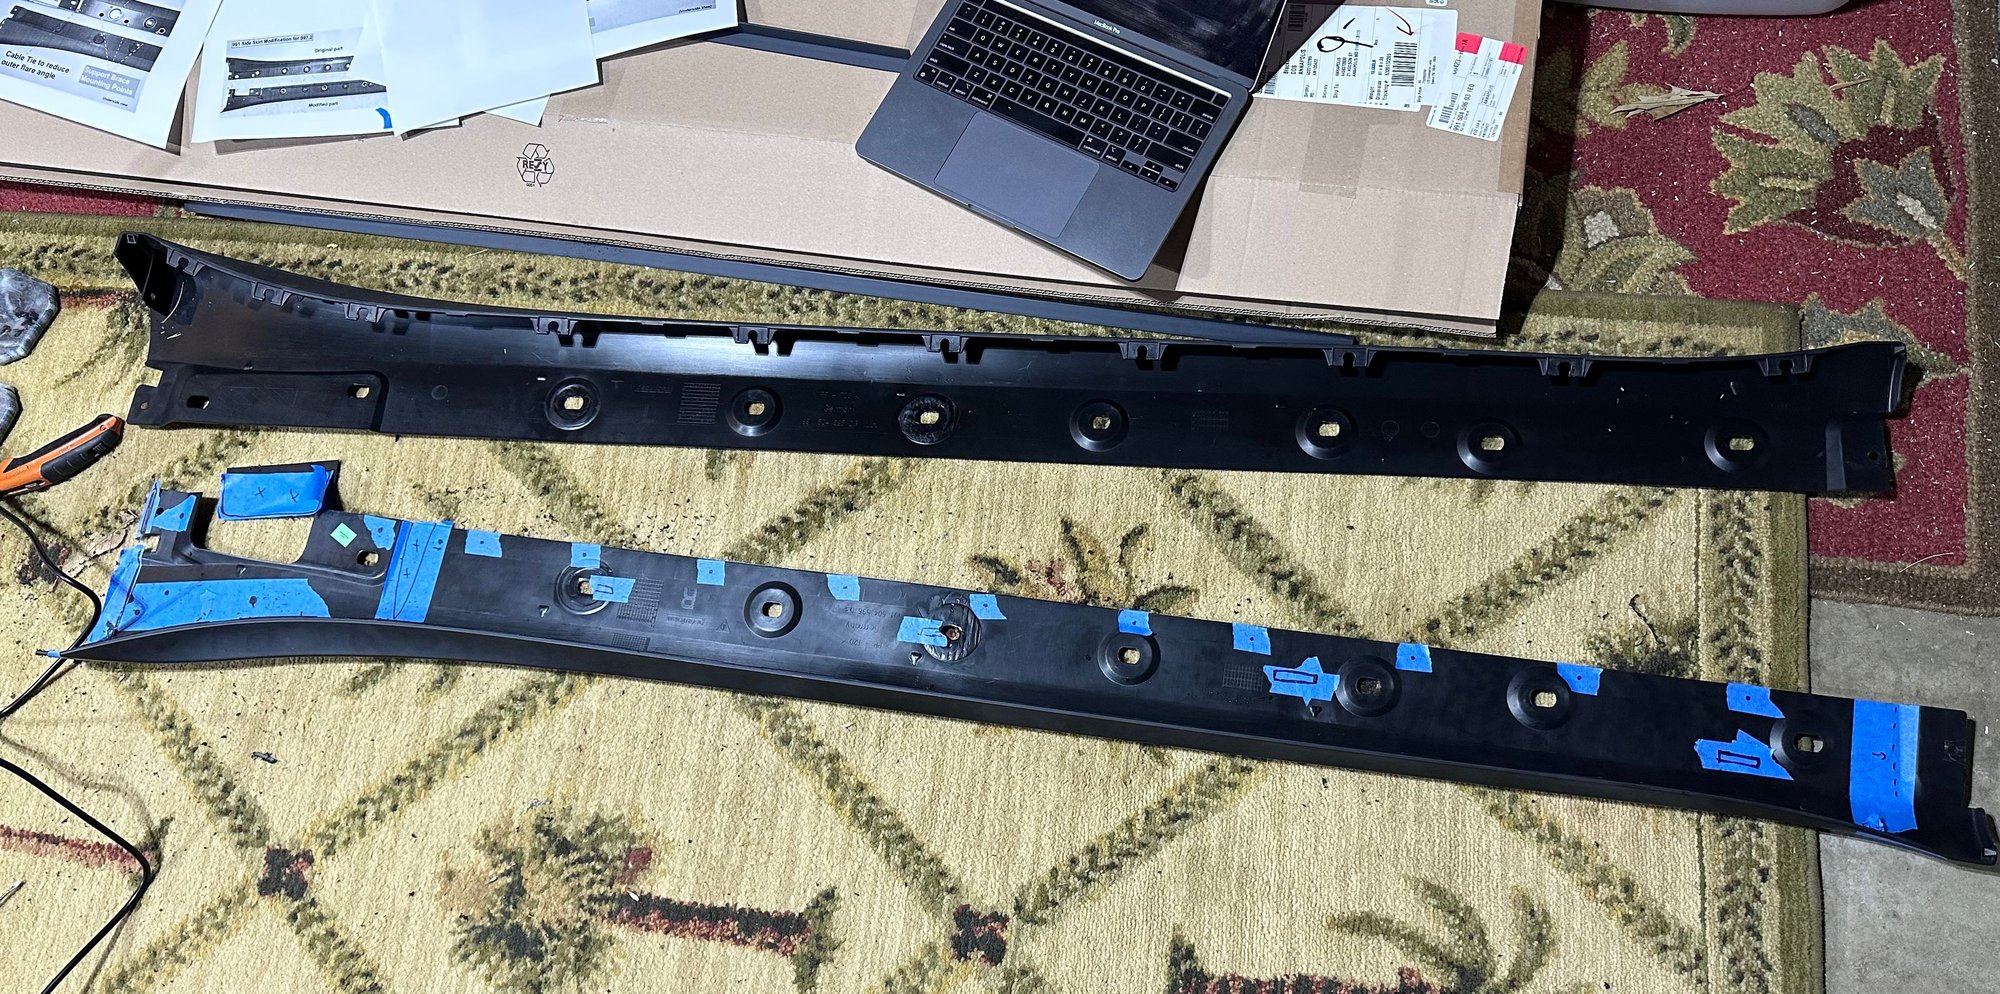
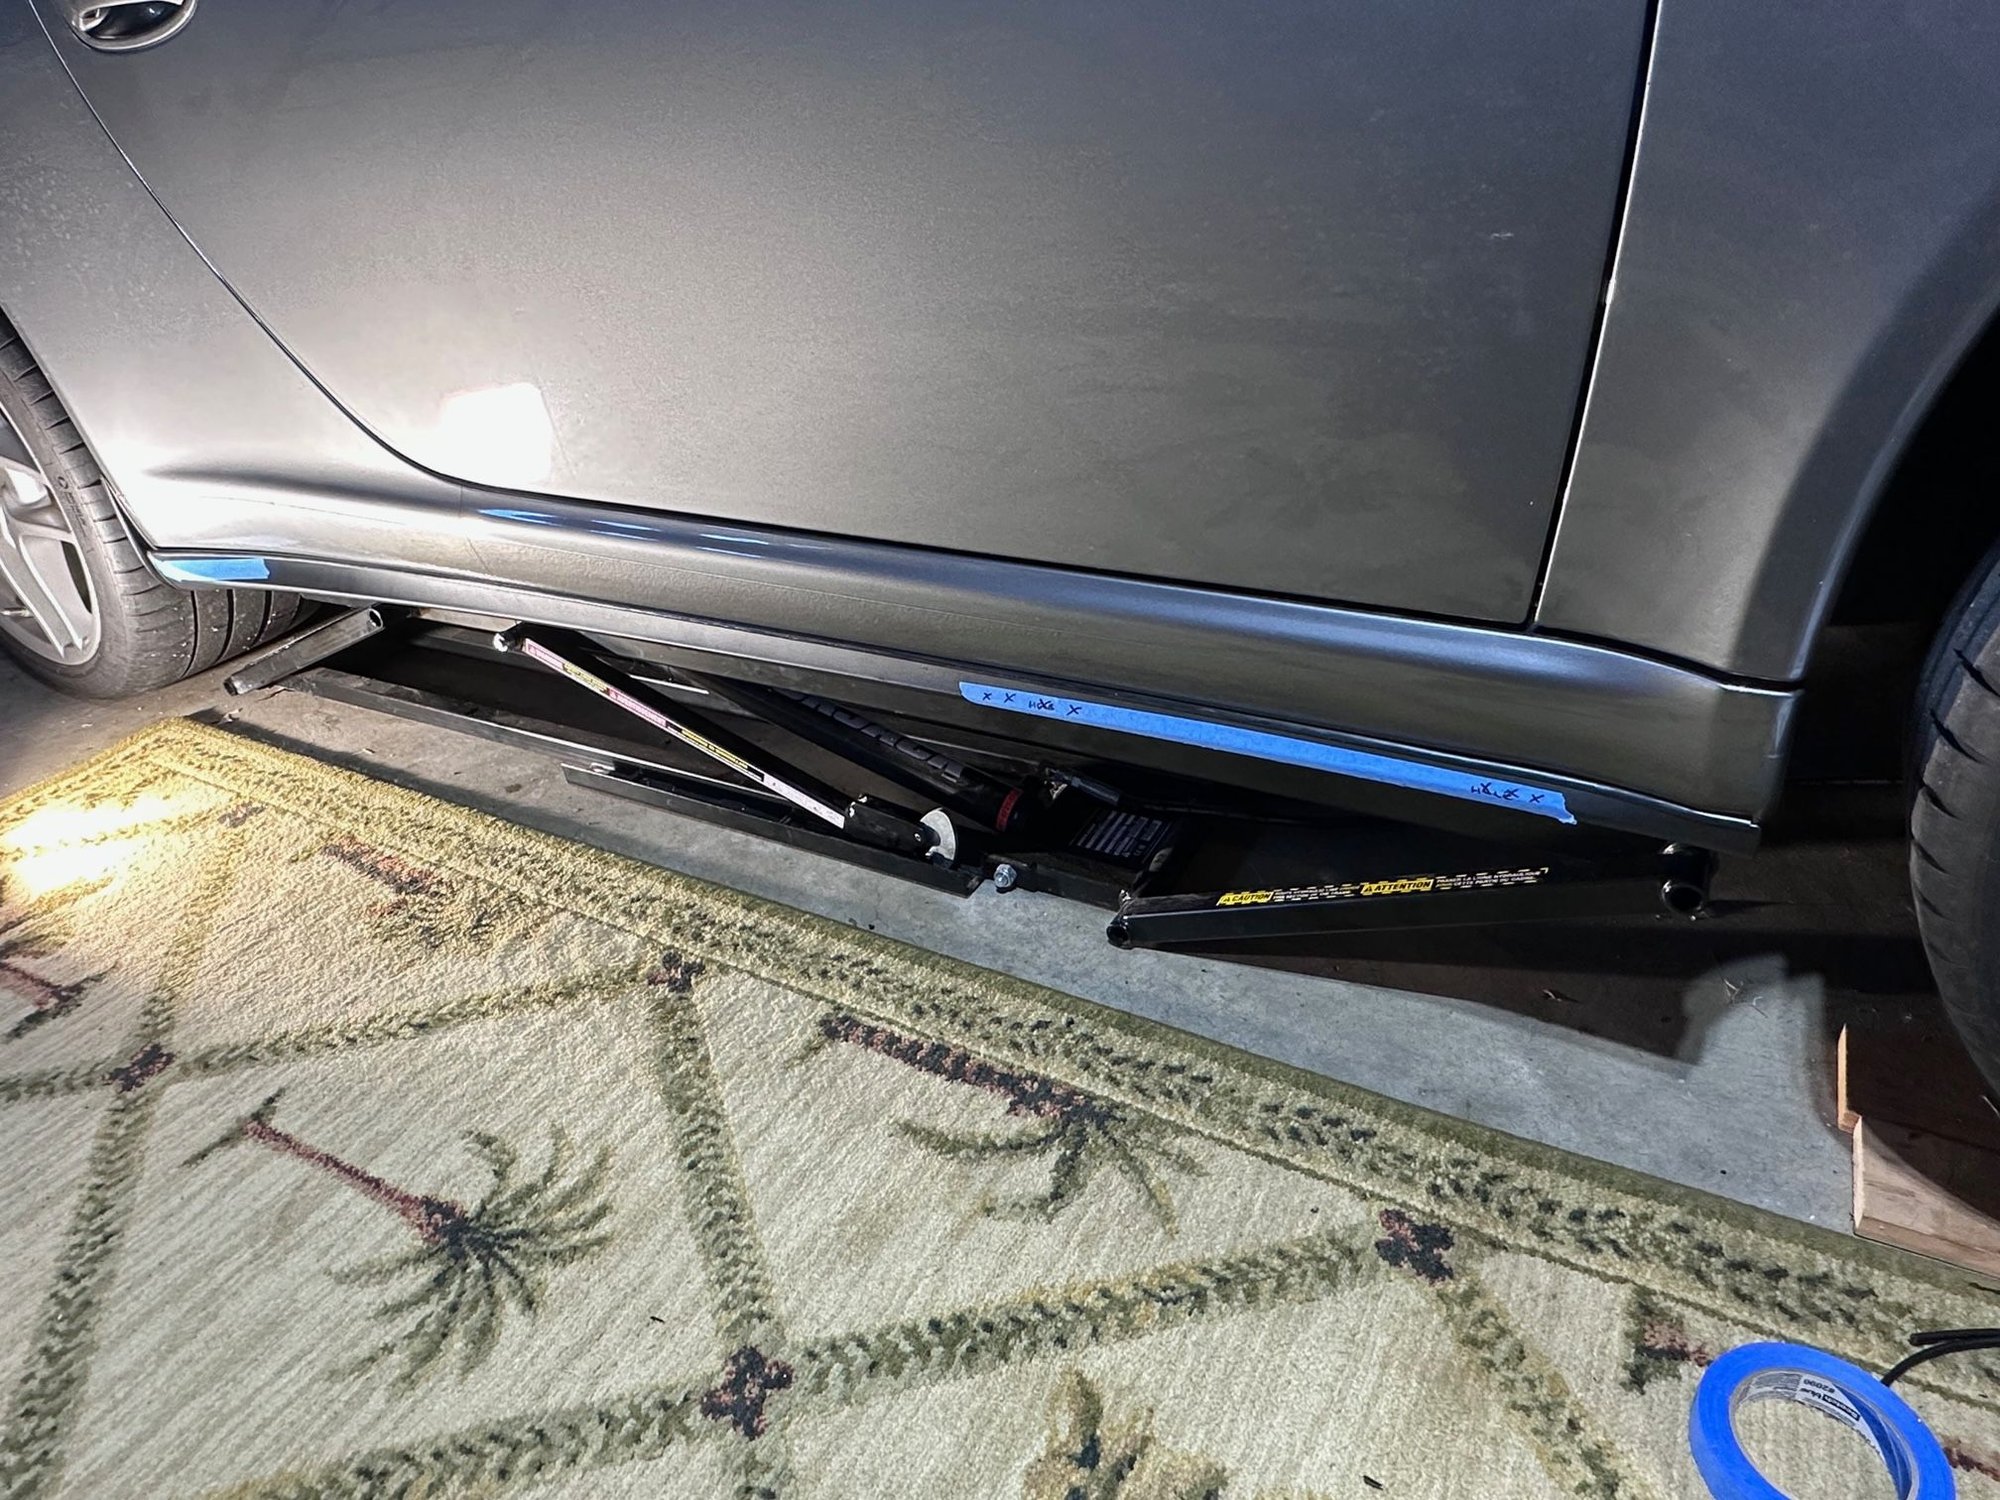
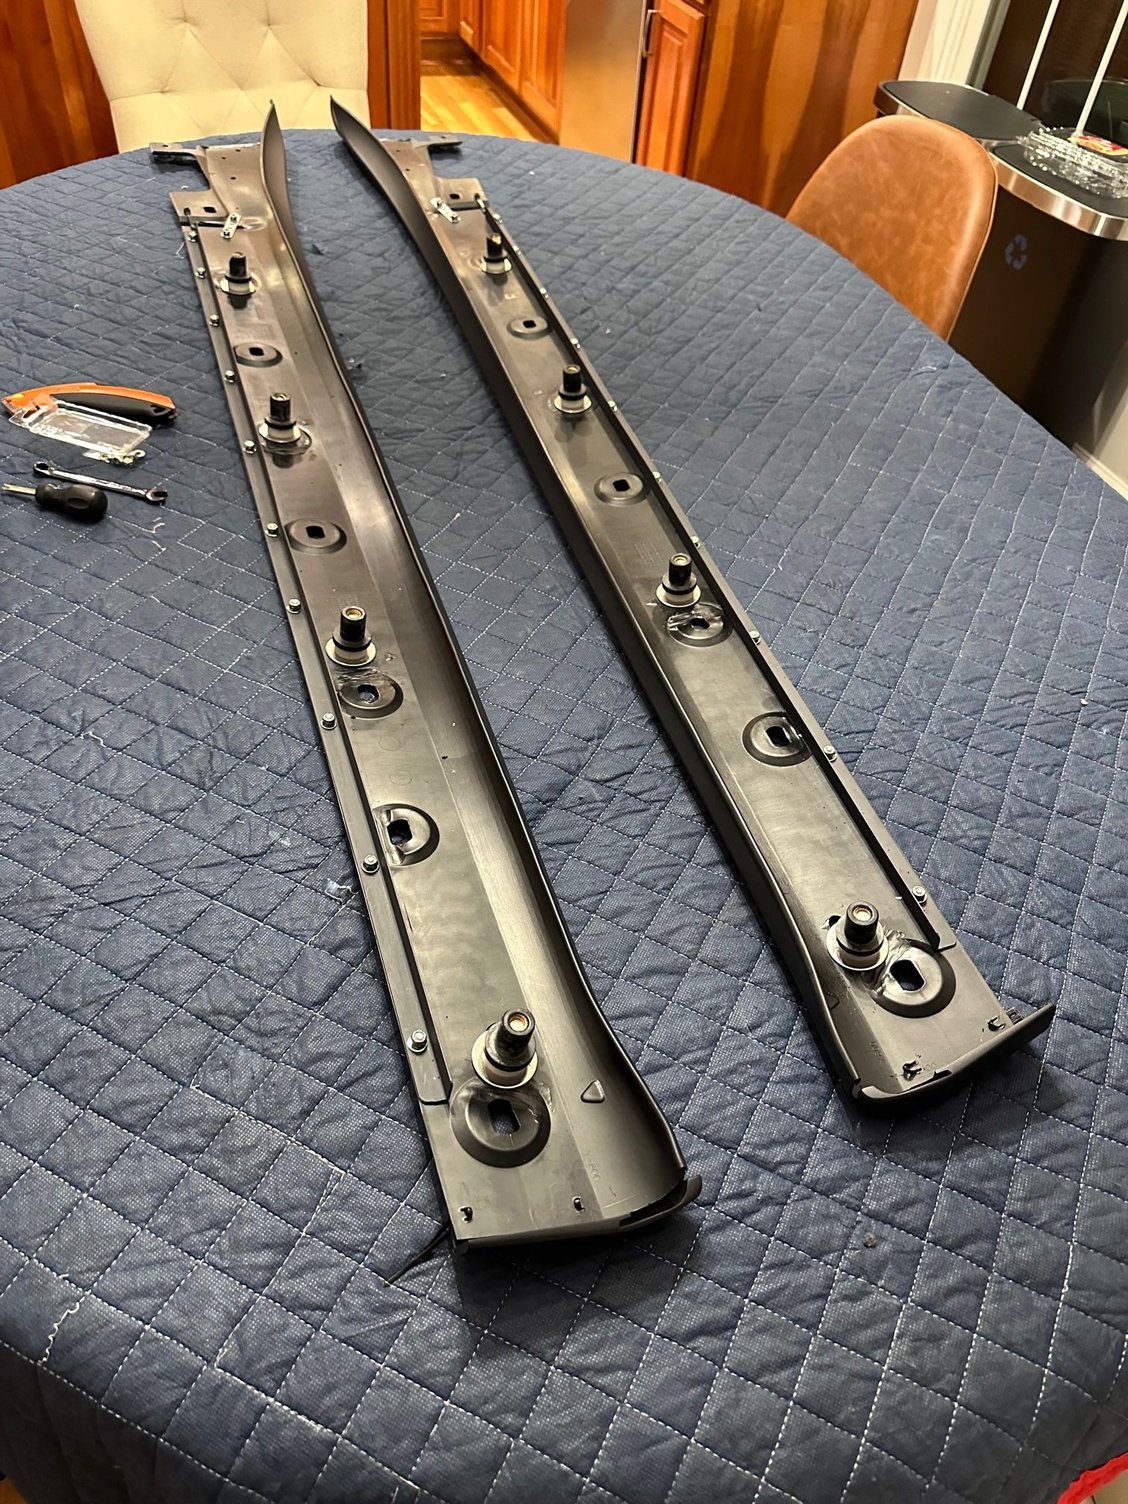
I started, patience is key, I have the passenger side about 90% complete and the drivers side is about 40% complete, lots of dremel sanding and cutting. Used painters tape to mark out the modifications and then fit it and mark the trimming. It is going to look great, just waiting for the temperature to go back up.
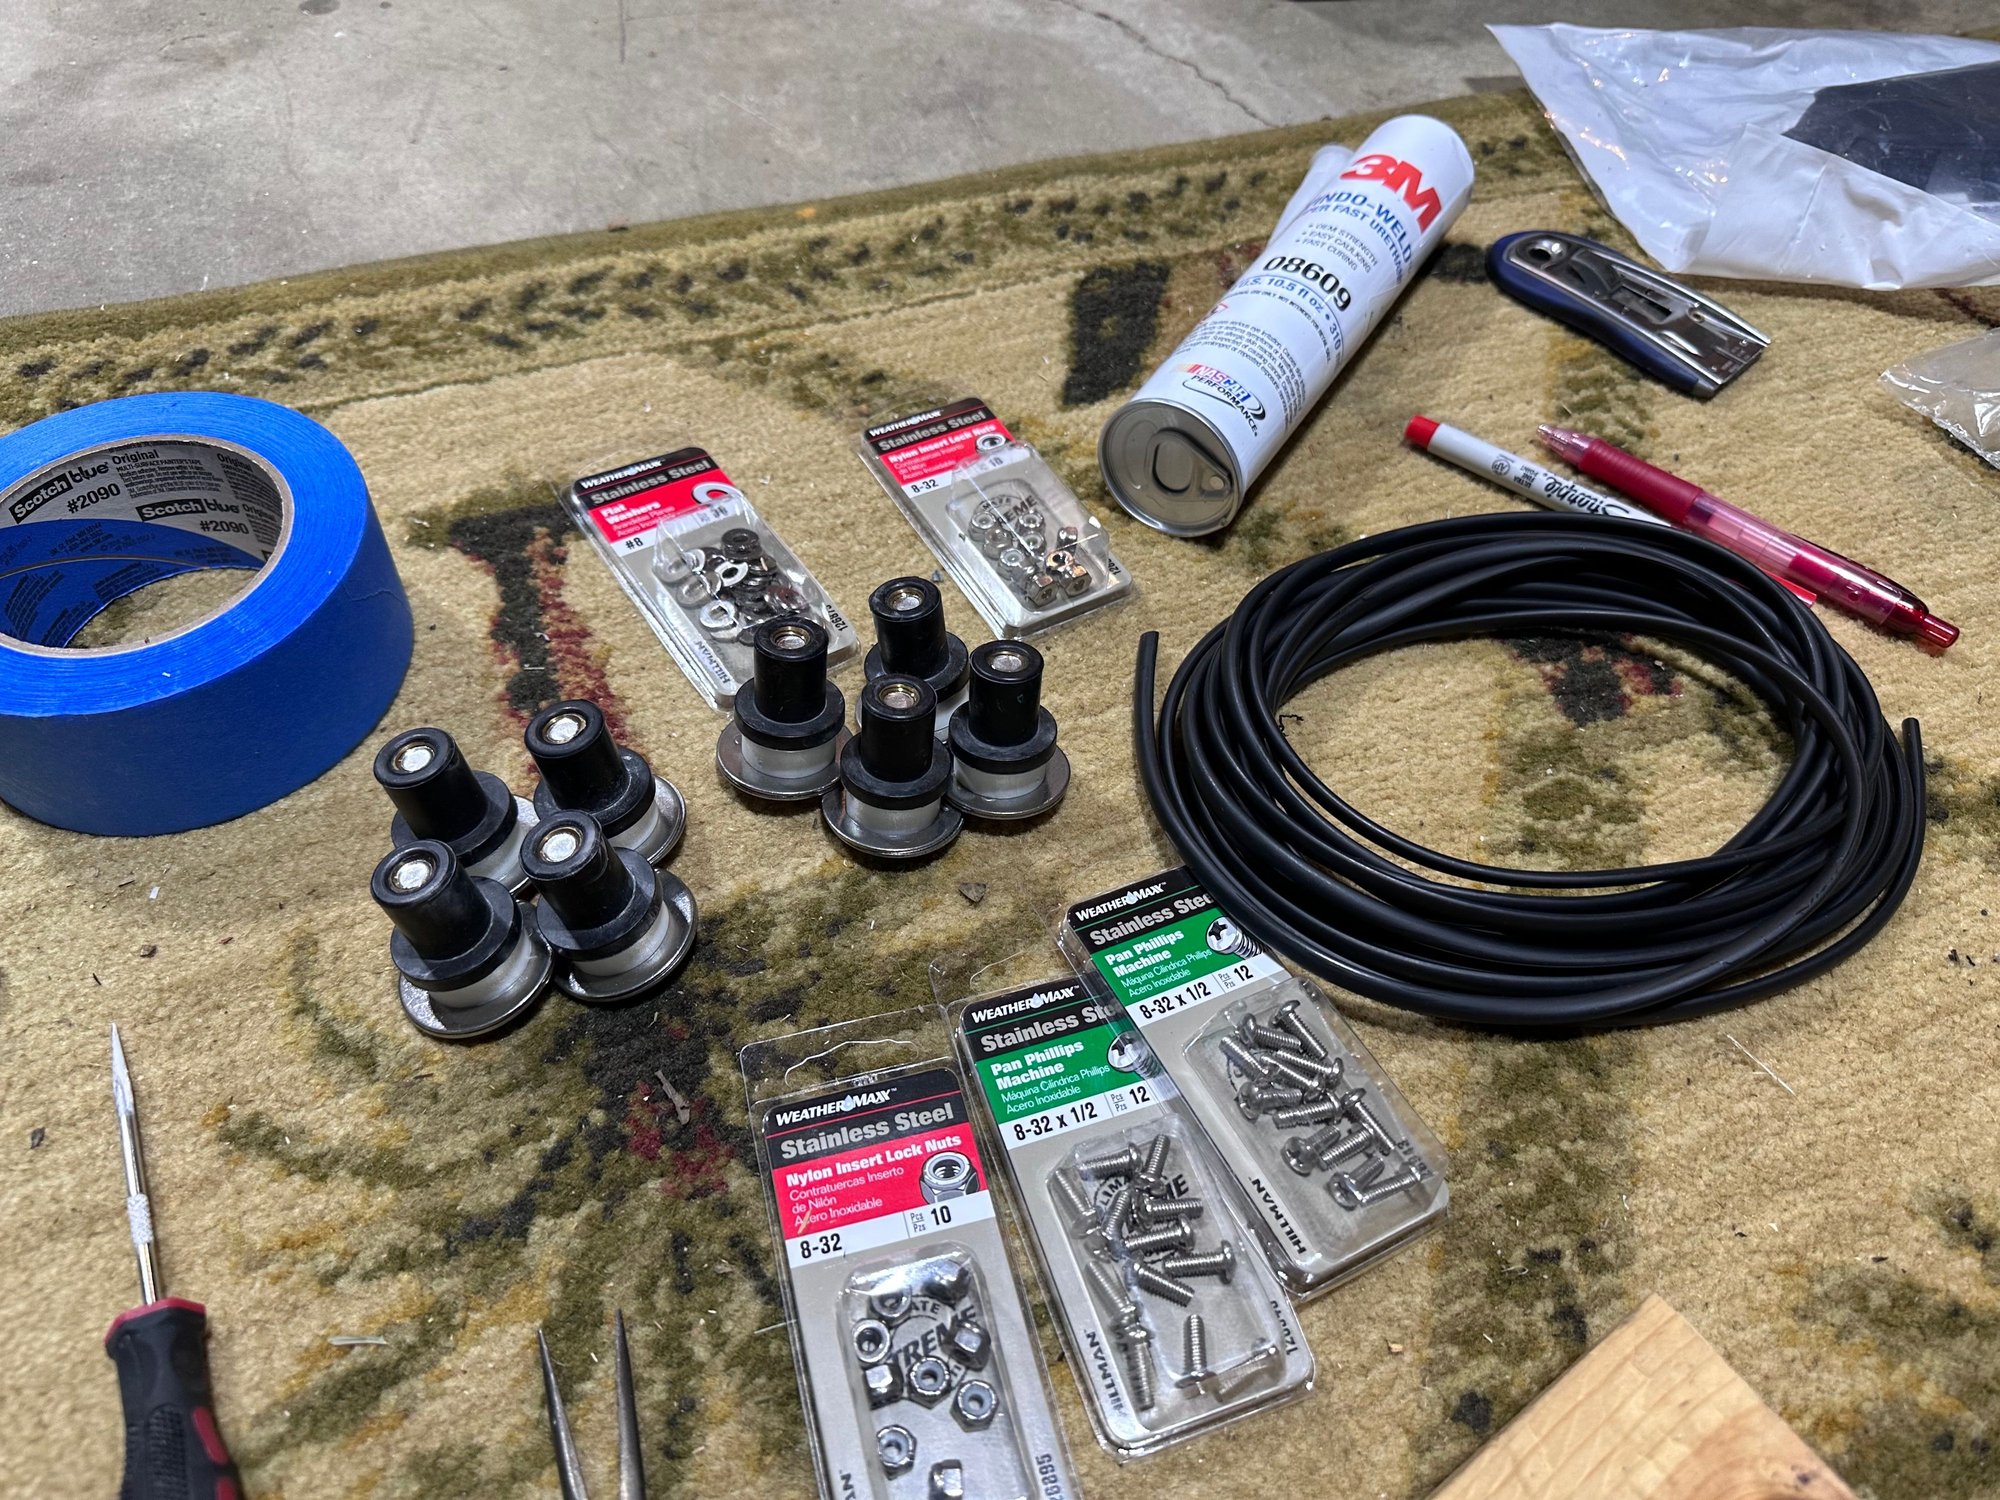
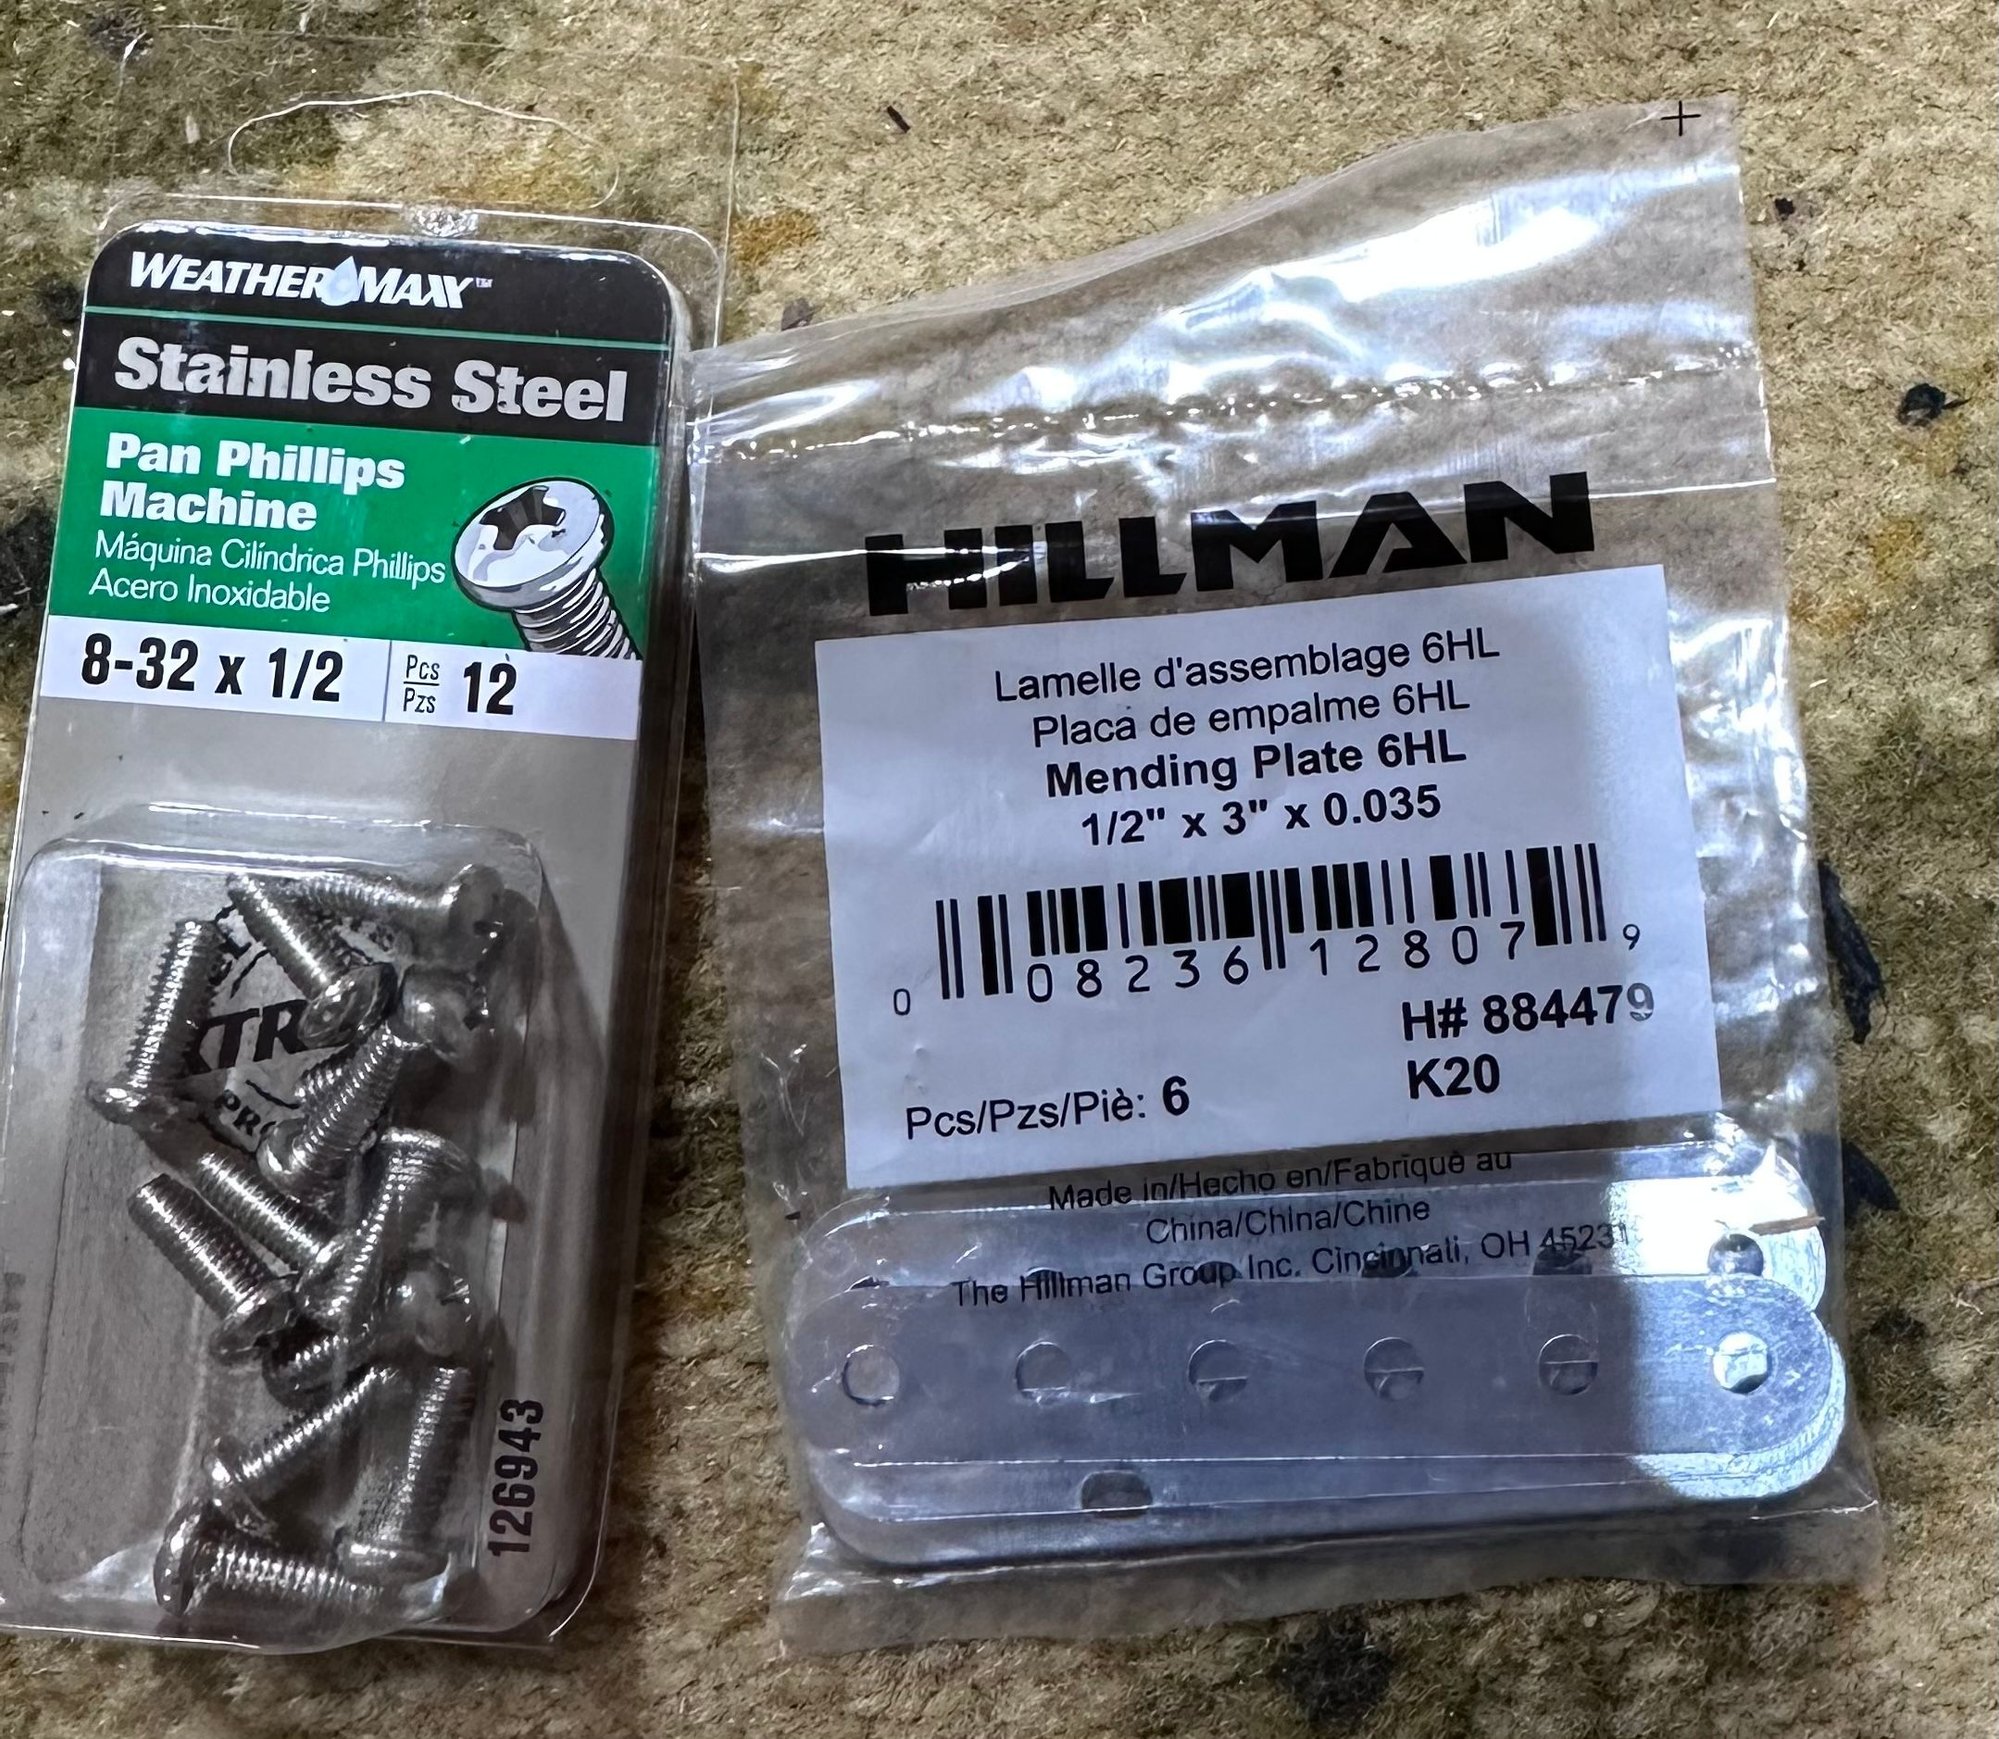
Found these mending plates at Lowe�s and they fit perfectly with the 8-32 bolts.
Made the final push this weekend to get them fitted, this did take longer than I thought, but was fun, I enjoy this sort of thing. I can see why this isn't something you can just order, it is a true DIY, as the labor adds up too much to make it economical!
Some recommendations:
I used an oscillating tool to do most of the cutting, worked well; and then a Dremel and drill for everything else.
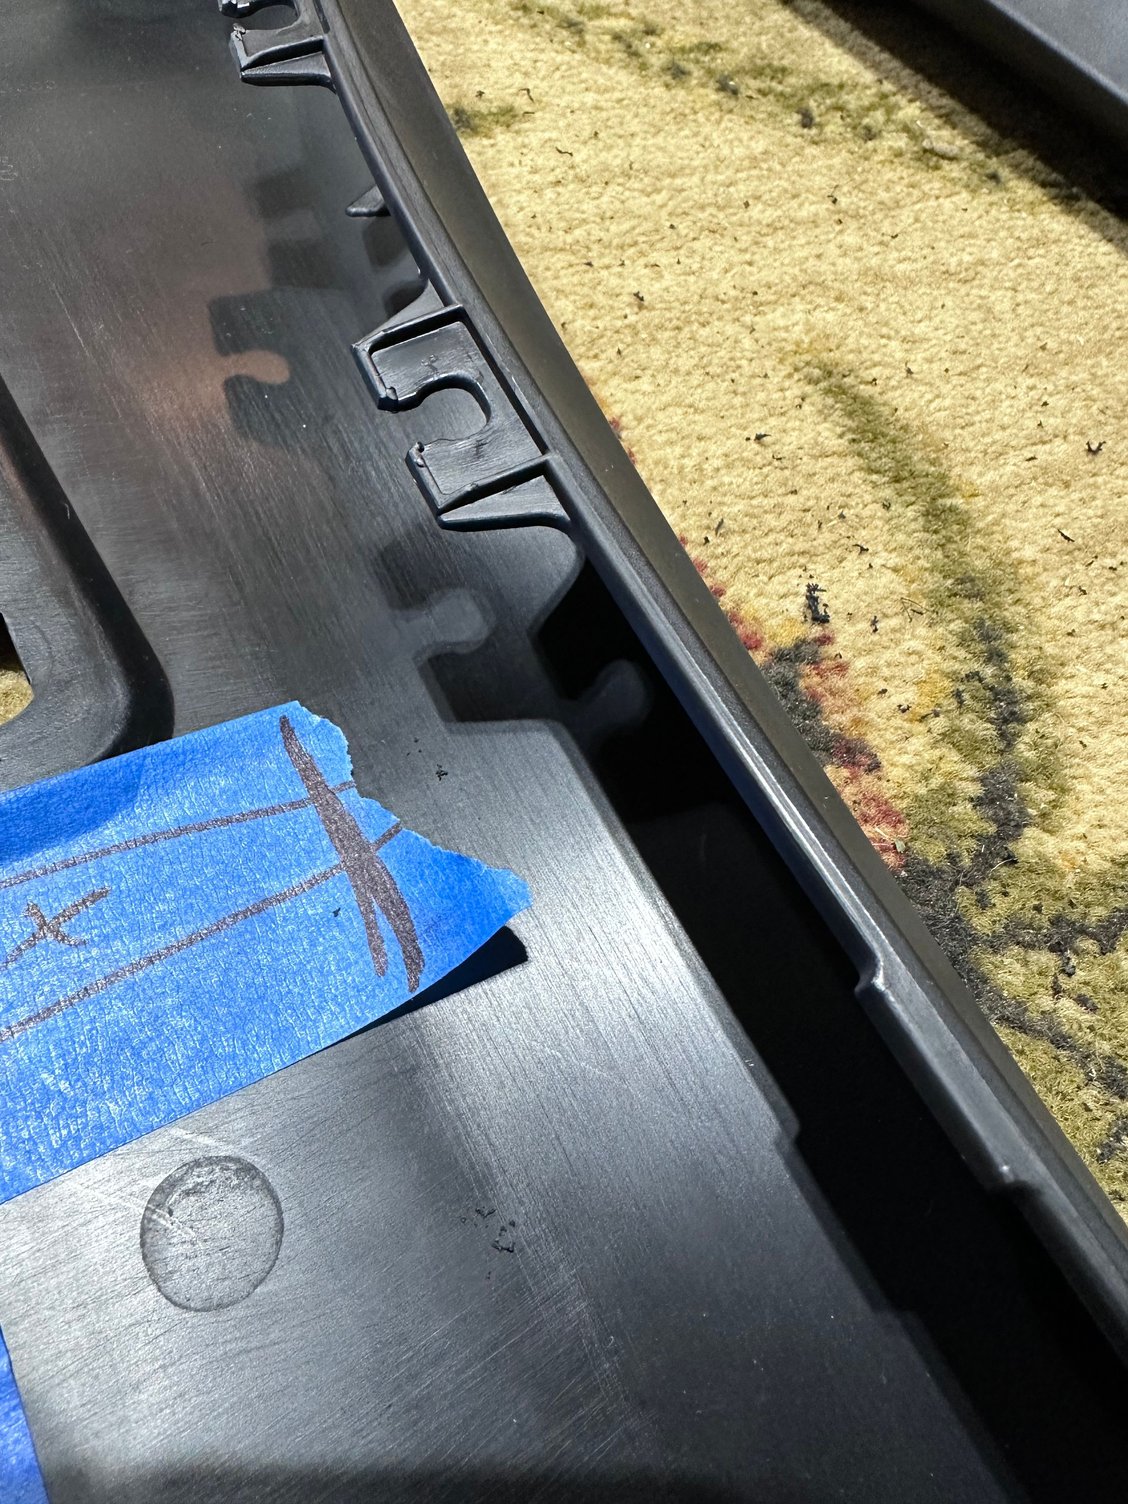
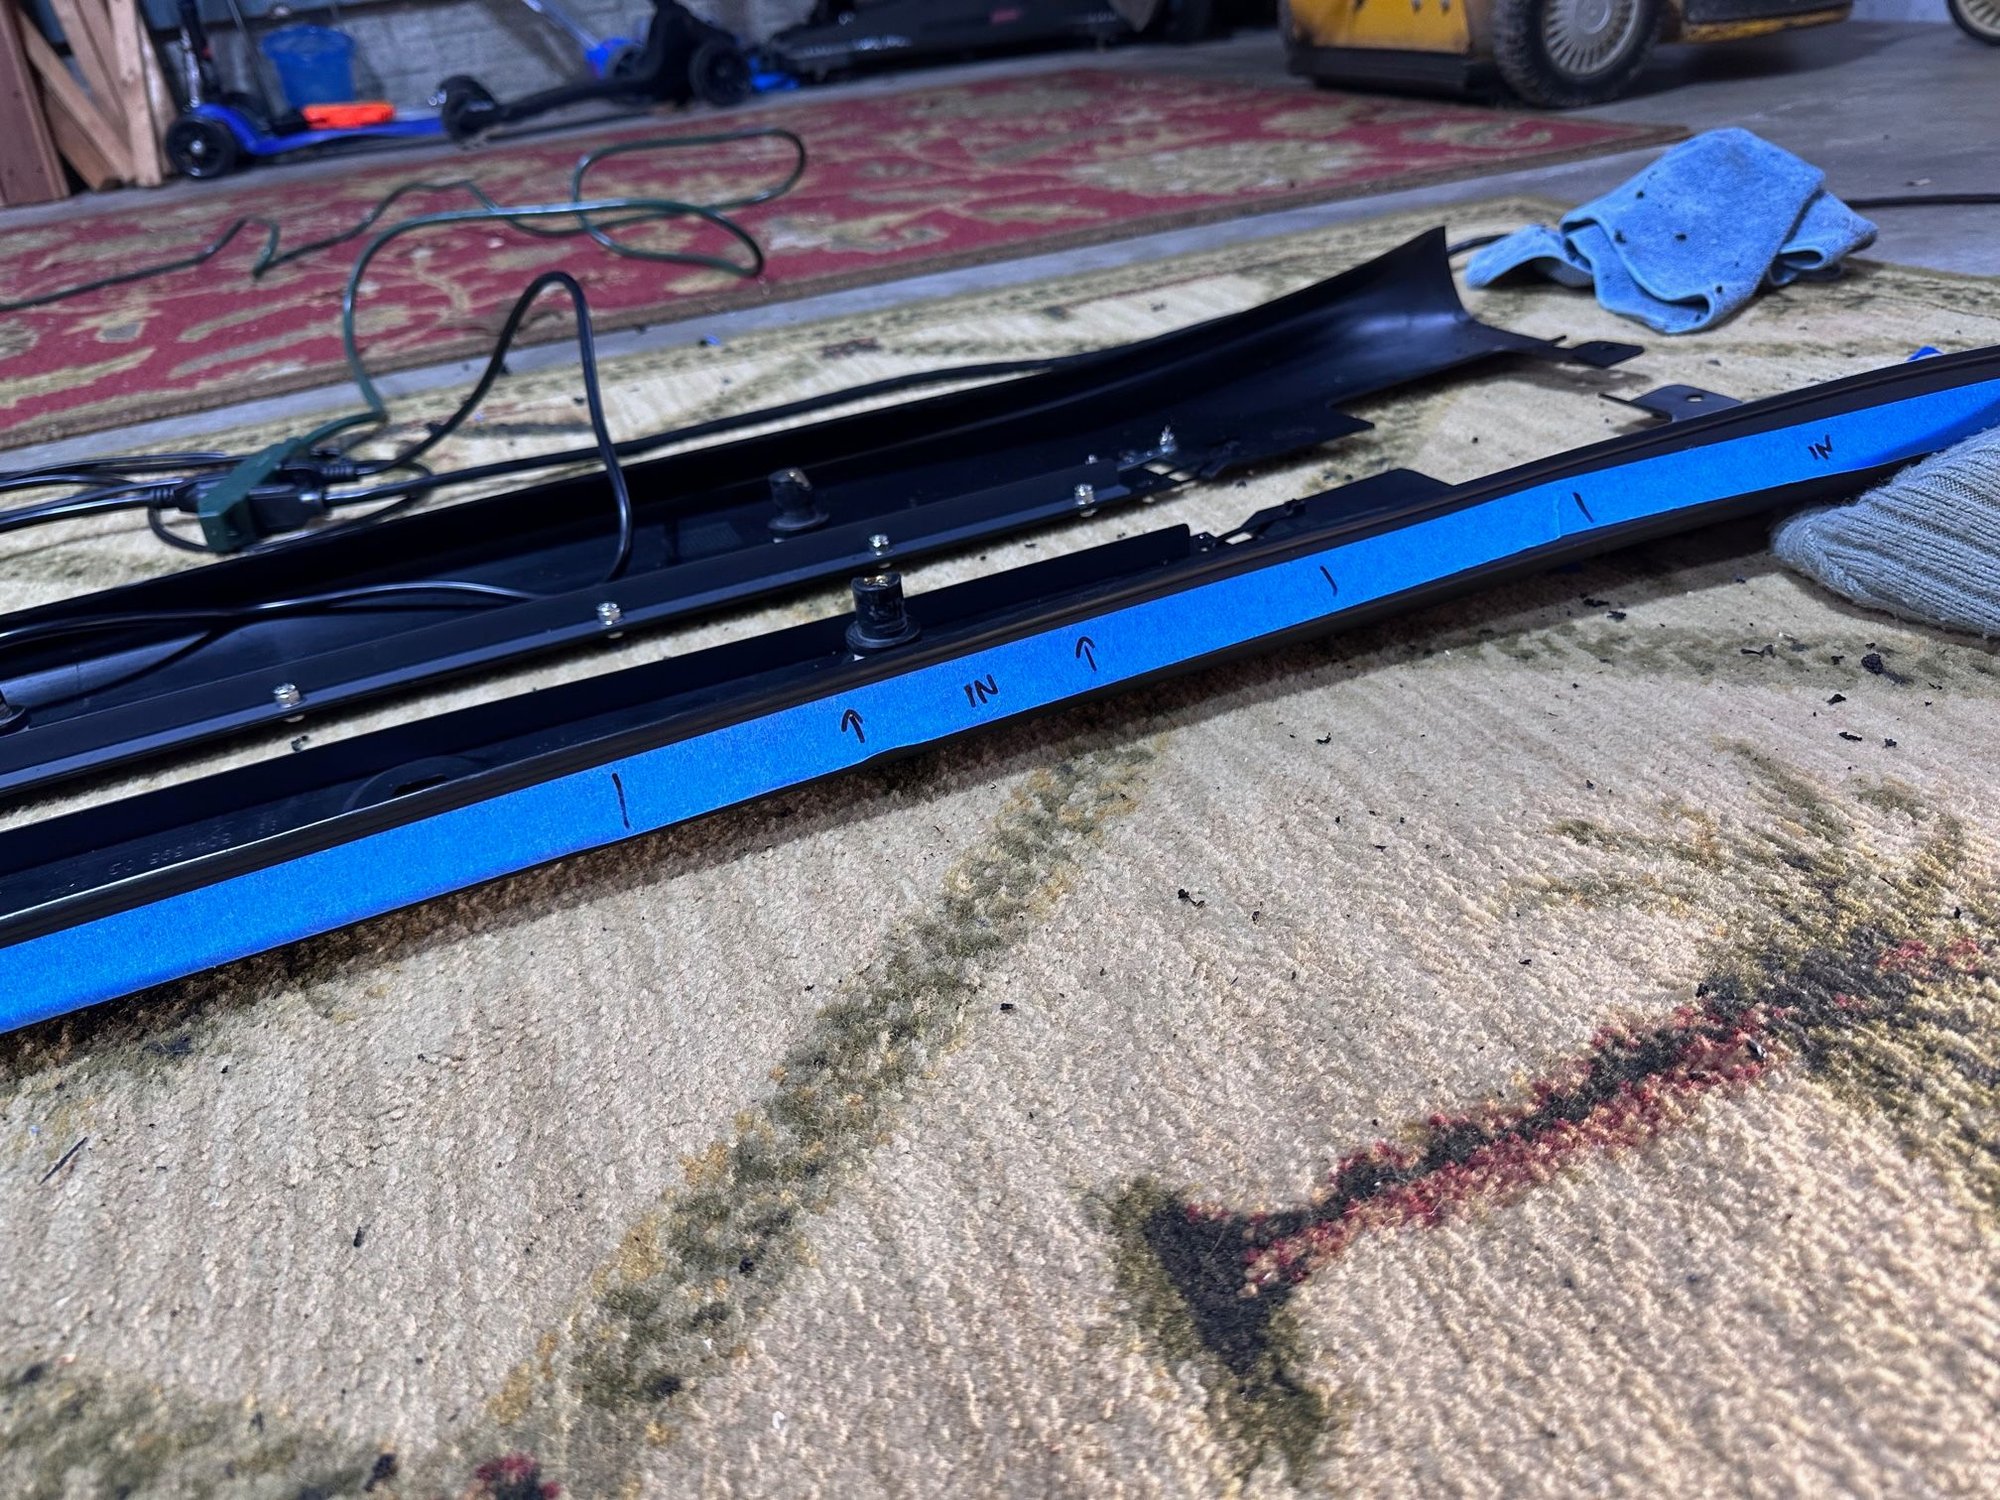
Use painters tape, see examples below, to mark out the cuts and to take notes one what to shape when you pull it away.
Heat gun from the back side only, and keep your cold water spray bottle close, wear some gloves so the heat doesn't burn you as you reshape things.
Shape and cut the rear of the skirt first, get it set and then work the front, use painters tape on the inside and outside of the skirt and you can draw the front cut lines.
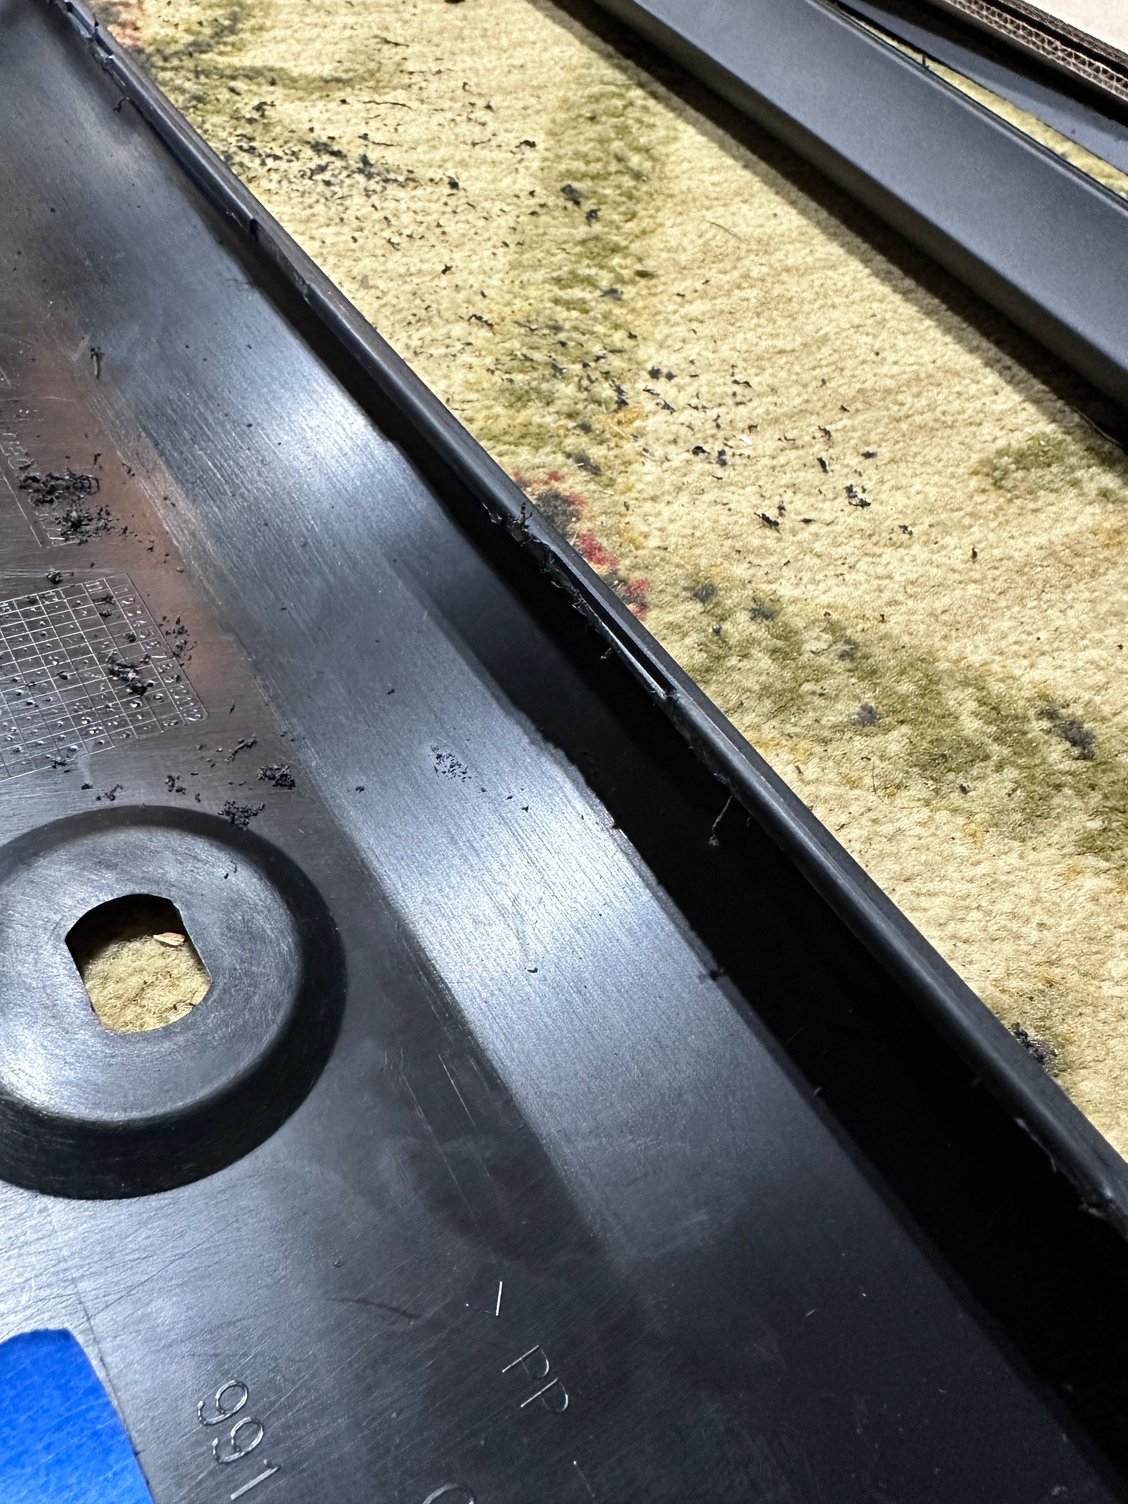
Use painters tape on the face when you add the window weld, this way when the window weld squeezes out it goes on the tape and not the finished surface of the skirts.
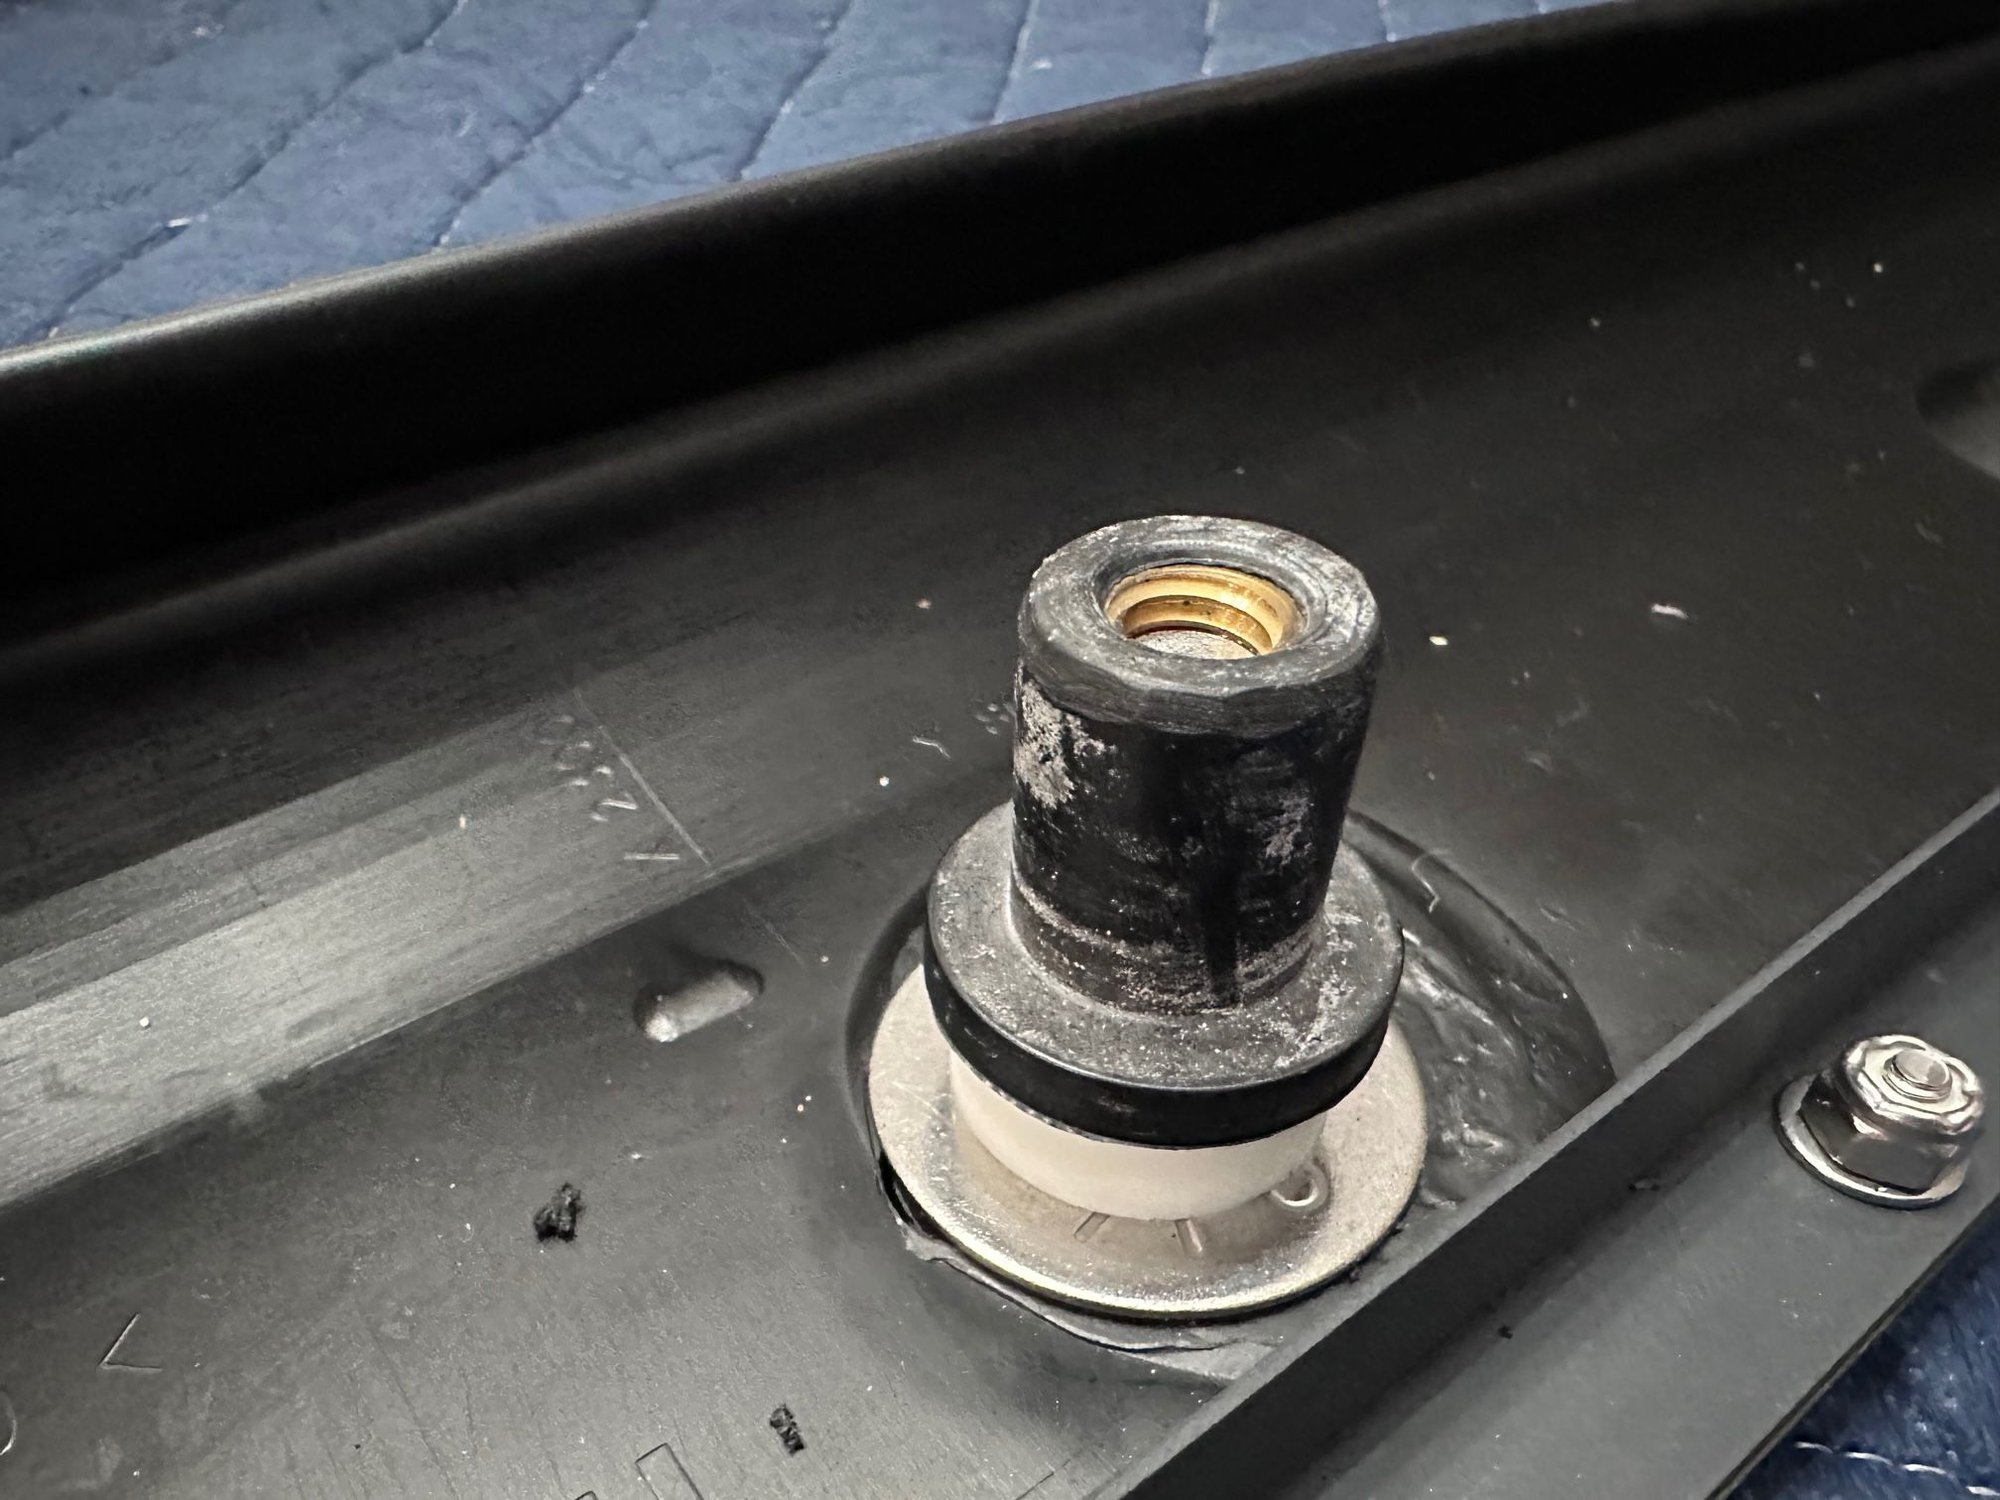
Round the top edge of the well nuts, makes it easier to insert...
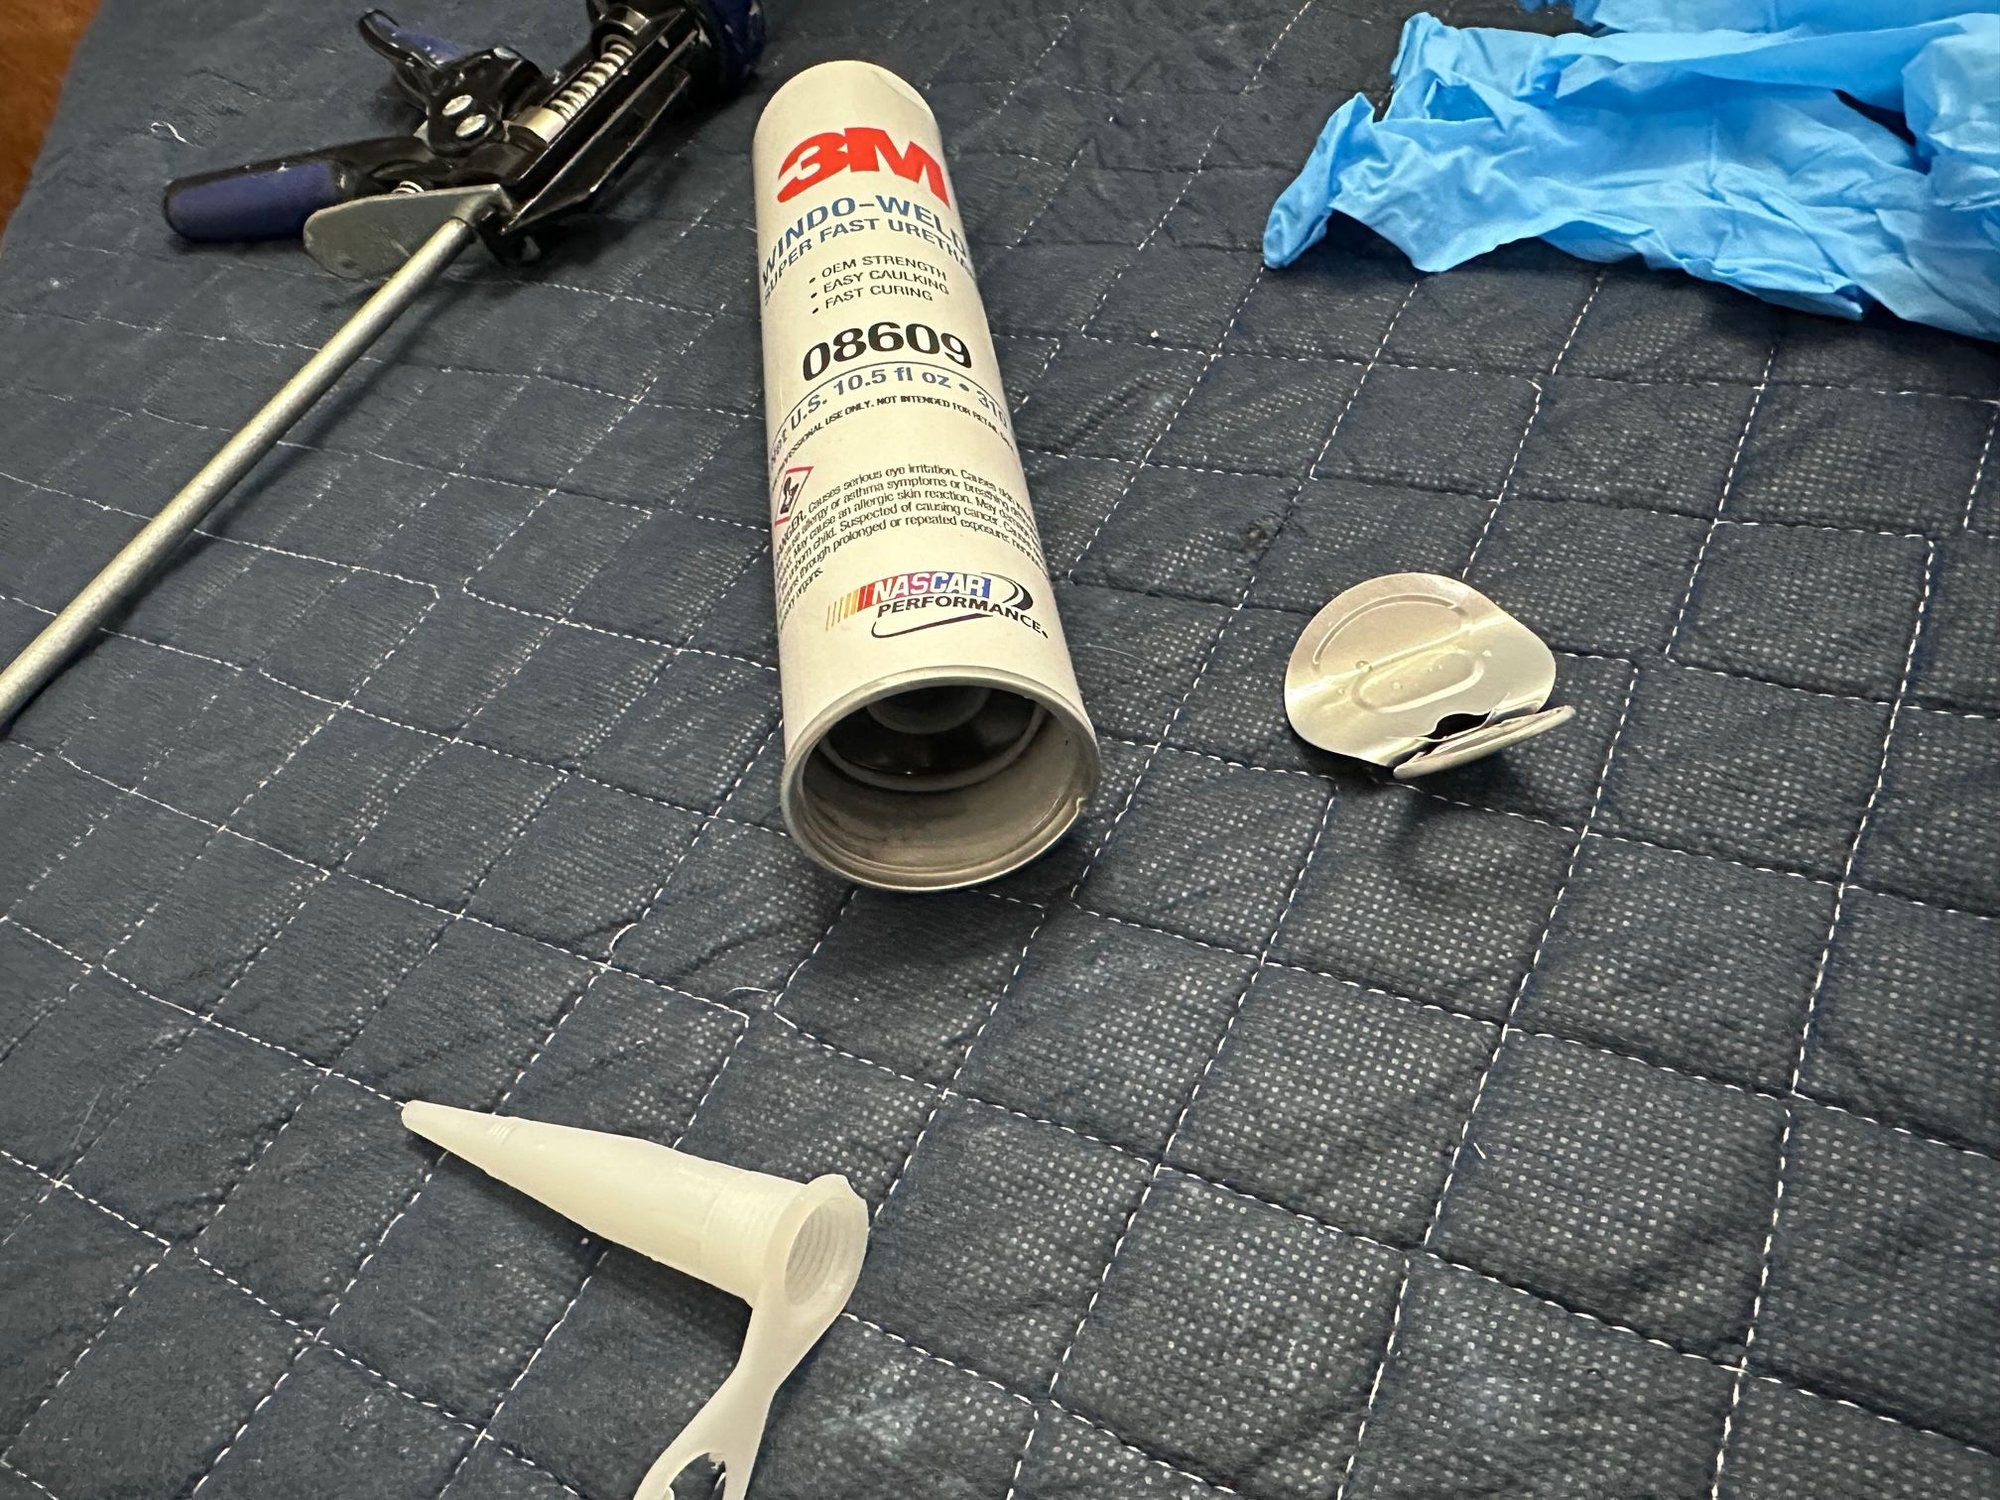
Warm up the window weld first, it is recommend you put it in a bath of hot water, the tube is metal.
Wear gloves with the window weld, it gets everywhere! I applied the window weld to the inside so I would limit the amount coming out onto the face of the skirts.
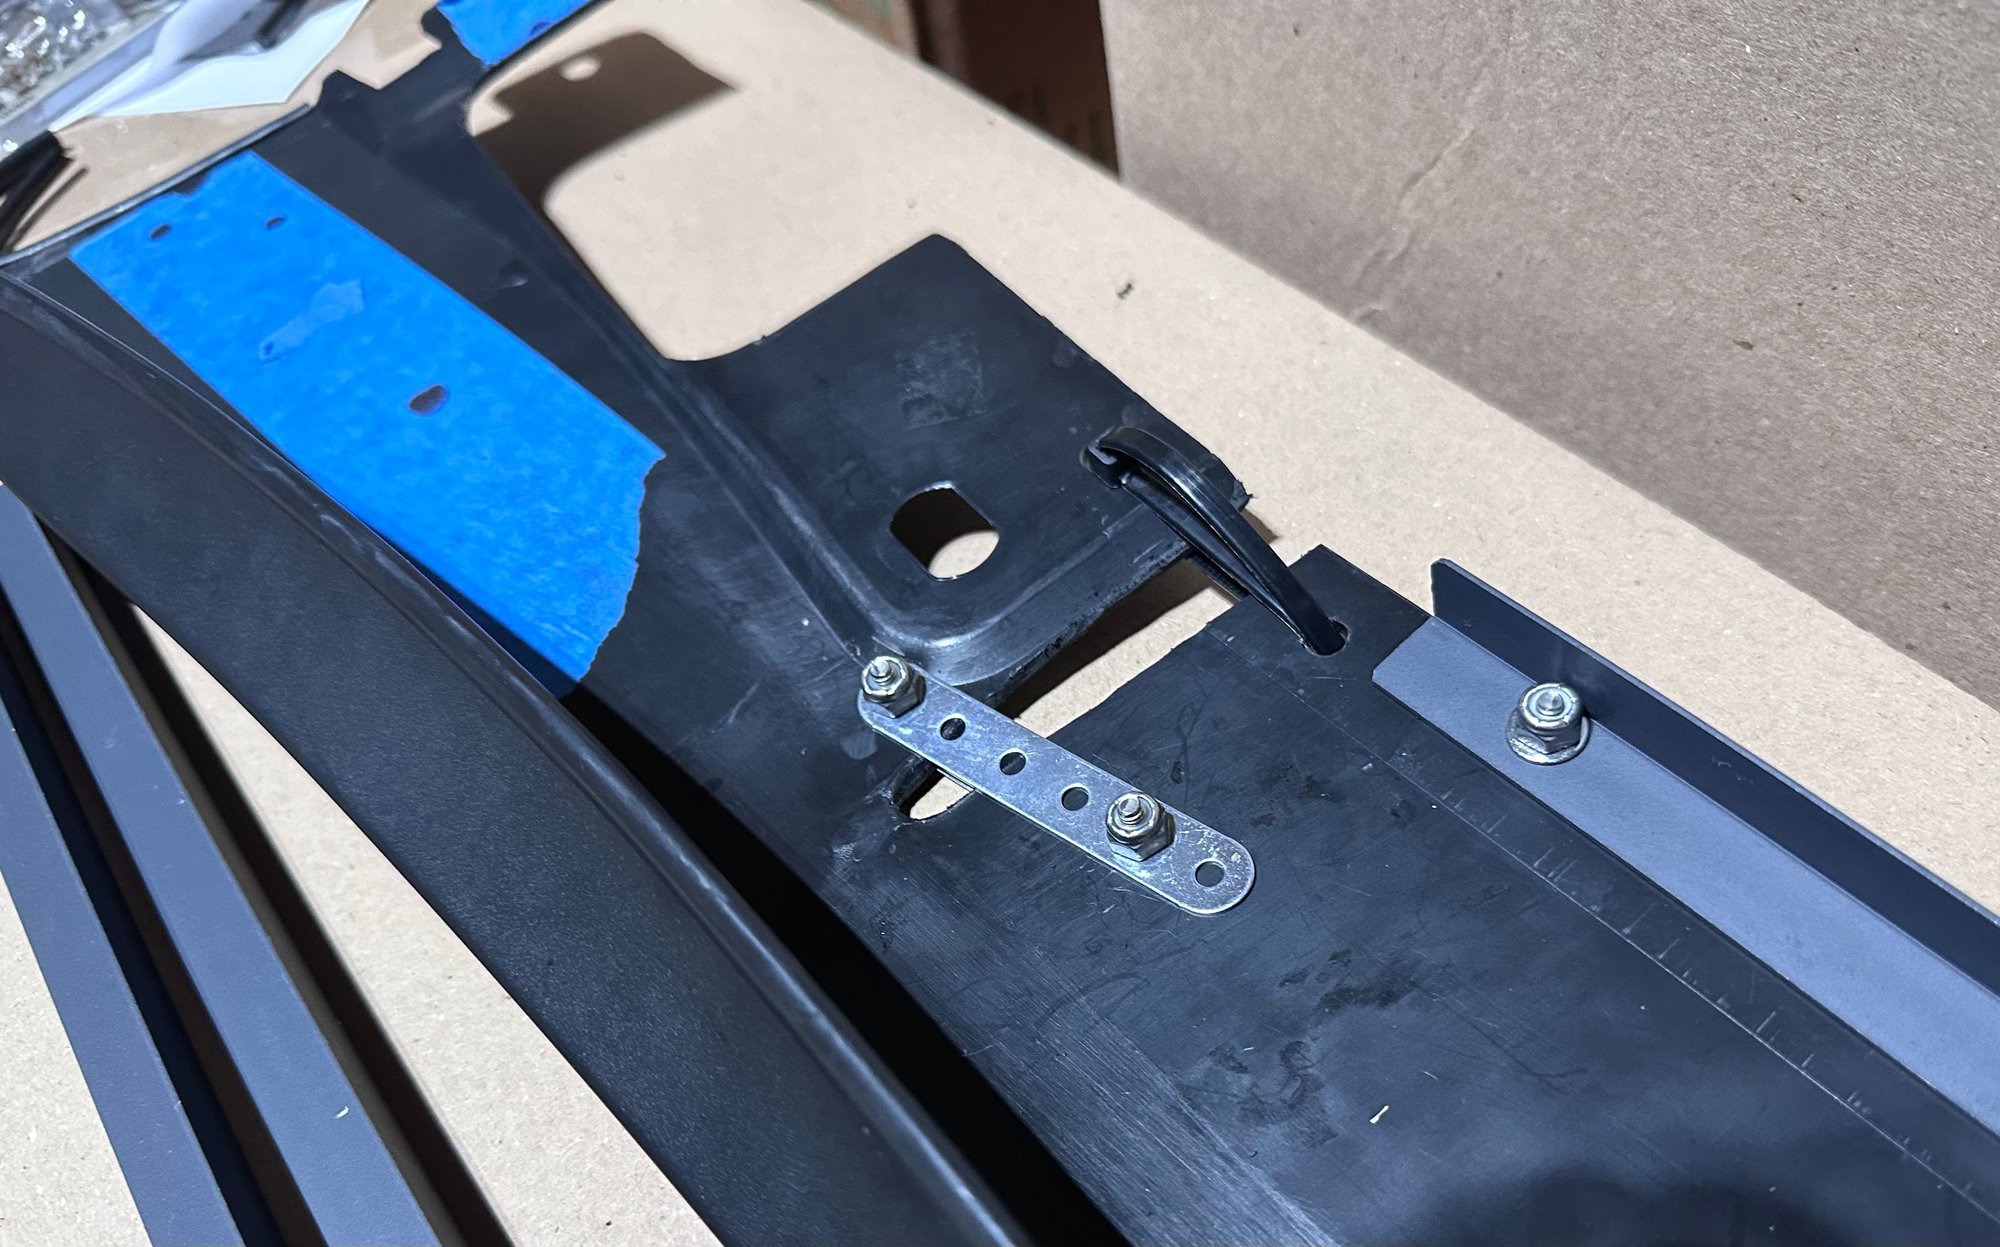
Make sure the stiffening "L" bracket matches how EMC2 did it, I did it backwards at first and it made it painful to install, flipped they interfere with the underside of the car. So I had to flip it, since I hadn't started the passenger side I simply moved it over to that one, nothing wasted.
I'll be back soon for the final installed product, thanks EMC2 for the original idea and walk through, this is really going to look great. I have a friend with a 991 who recently got the carbon fiber versions of these and they look fantastic. Also cant wait to go show the guys at my local P-car dealer in Annapolis, they have been great for parts and I told them what I was doing with these 991 parts on my 997 and they were intrigued for sure.
Next is the 3rd Radiator Install.
Test fitting the passenger side, used painters tape to mark what needed to be reshaped.
More marks to highlight what needed to be reshaped, this helped a lot.
More tape to mark the cut lines.
After struggling ti get all the well nuts in repeatedly during the fitting process I round the tip and removed the molding line, made it easier to get it in... haha... I am still a child.
The rear most well nut had to have more removed so it would fit all the way in, mine looked like this.
I used a hot flat head screwdriver to make 4x slits to match up with EMCs front caps, so I could zip tie the caps to the skirts.
Window weld stuff was weird, sealed for freshness, and so it doesn't dry out, but it fit in a standard caulk gun, wear gloves!
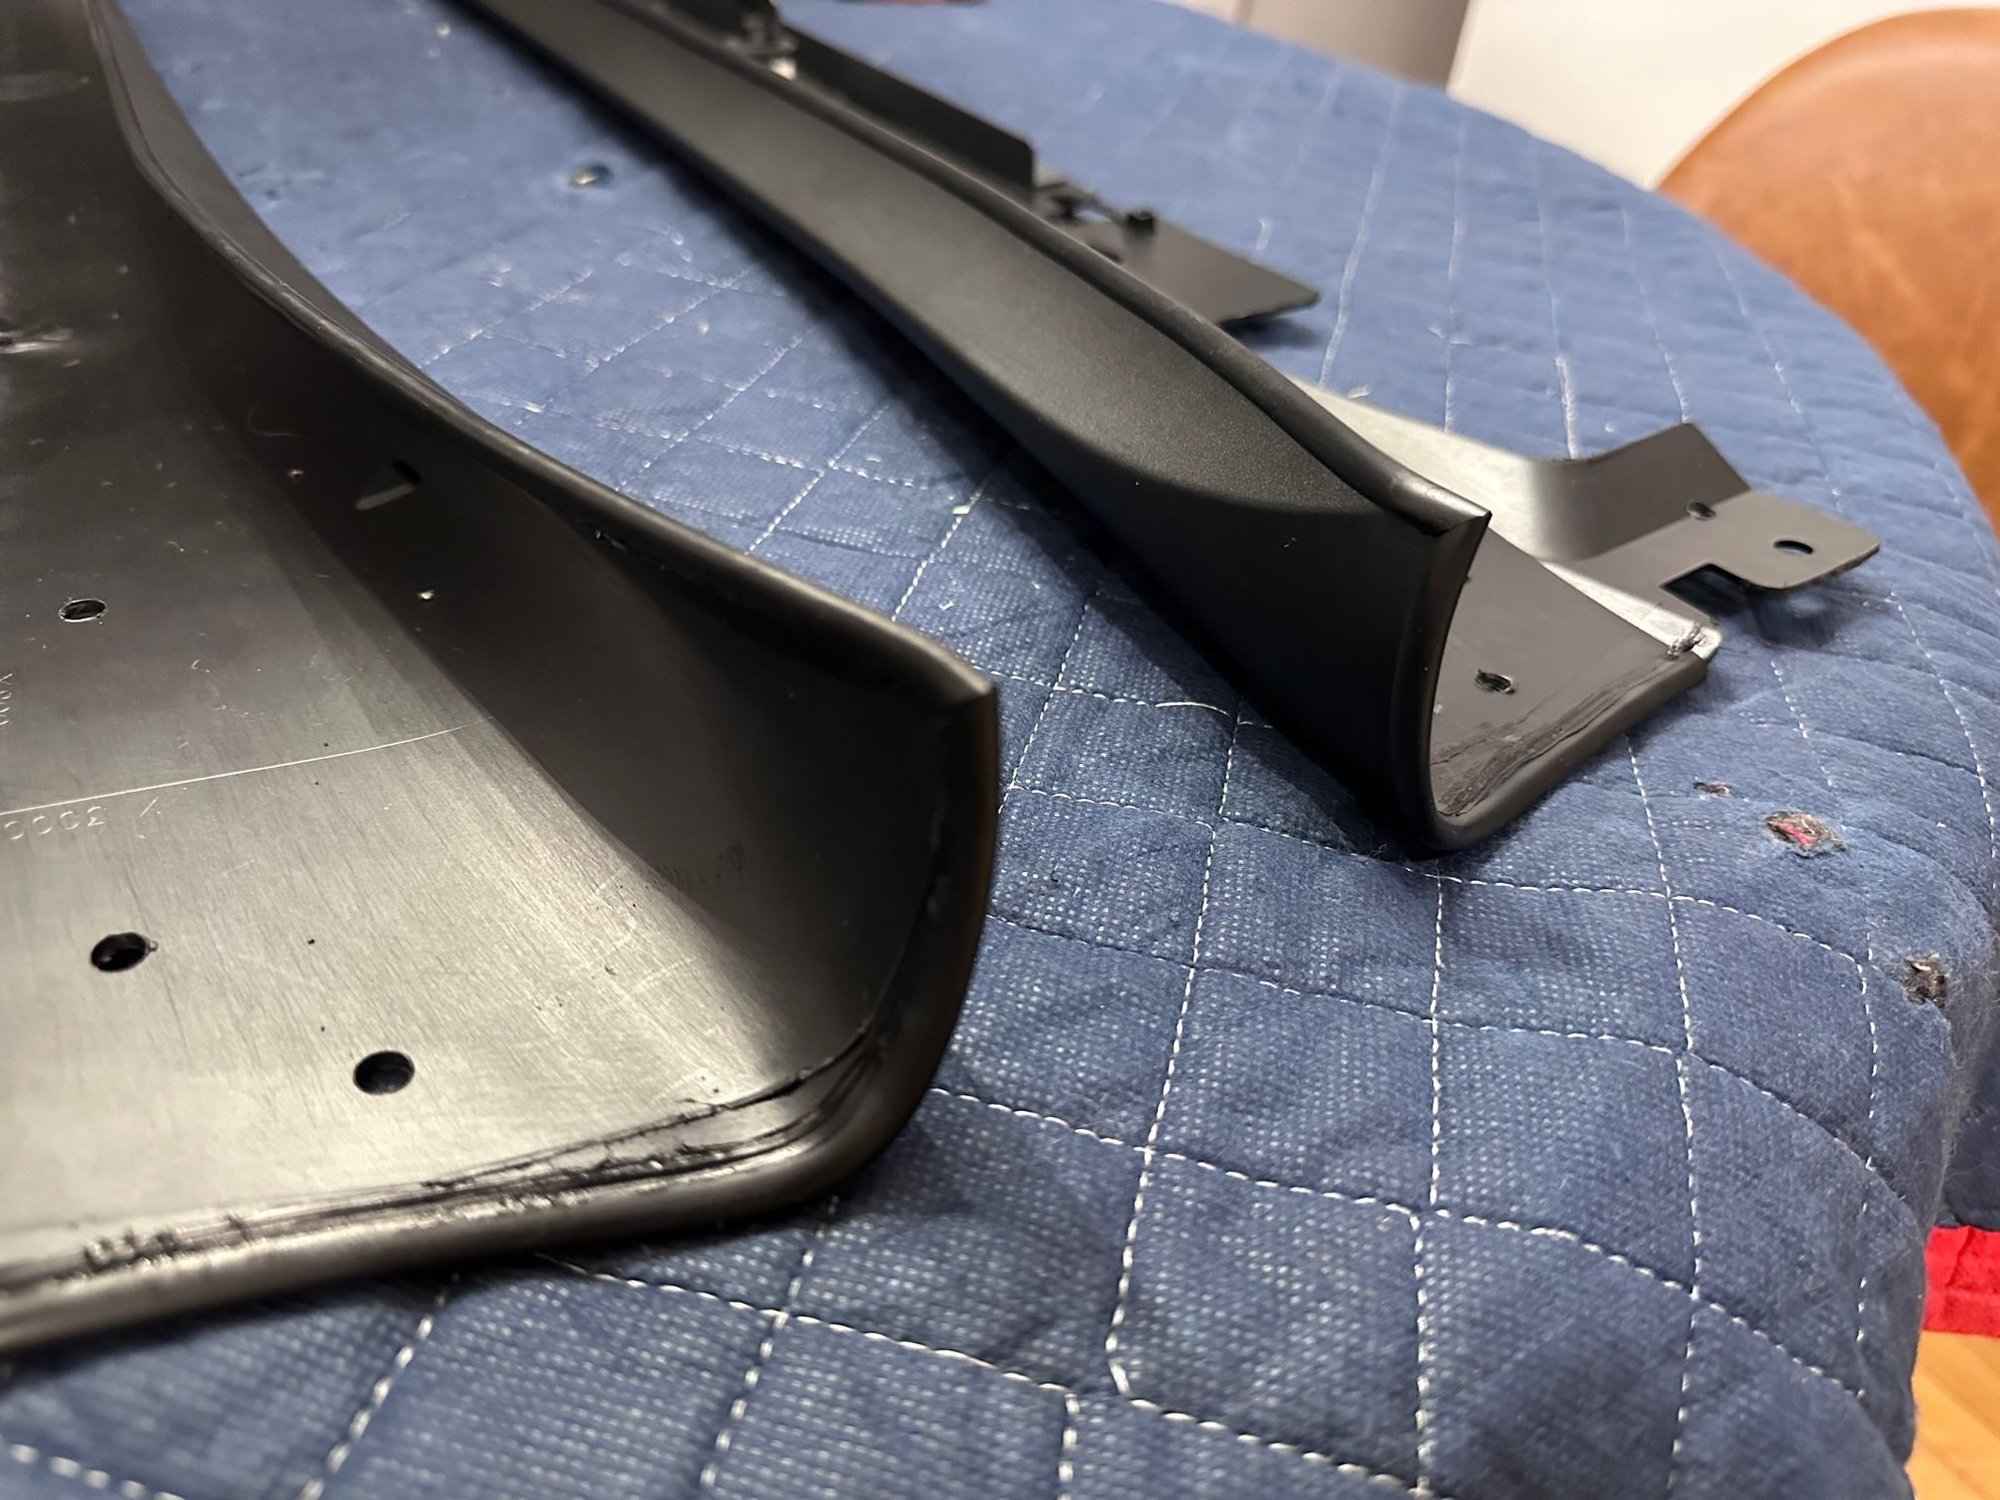
Finished rear ends; make sure you put some window weld between the mating surfaces of the two edge strips, I cut mine at 45s to get them to butt up nice.


 02-03-2021, 03:28 PM