When you click on links to various merchants on this site and make a purchase, this can result in this site earning a commission. Affiliate programs and affiliations include, but are not limited to, the eBay Partner Network.
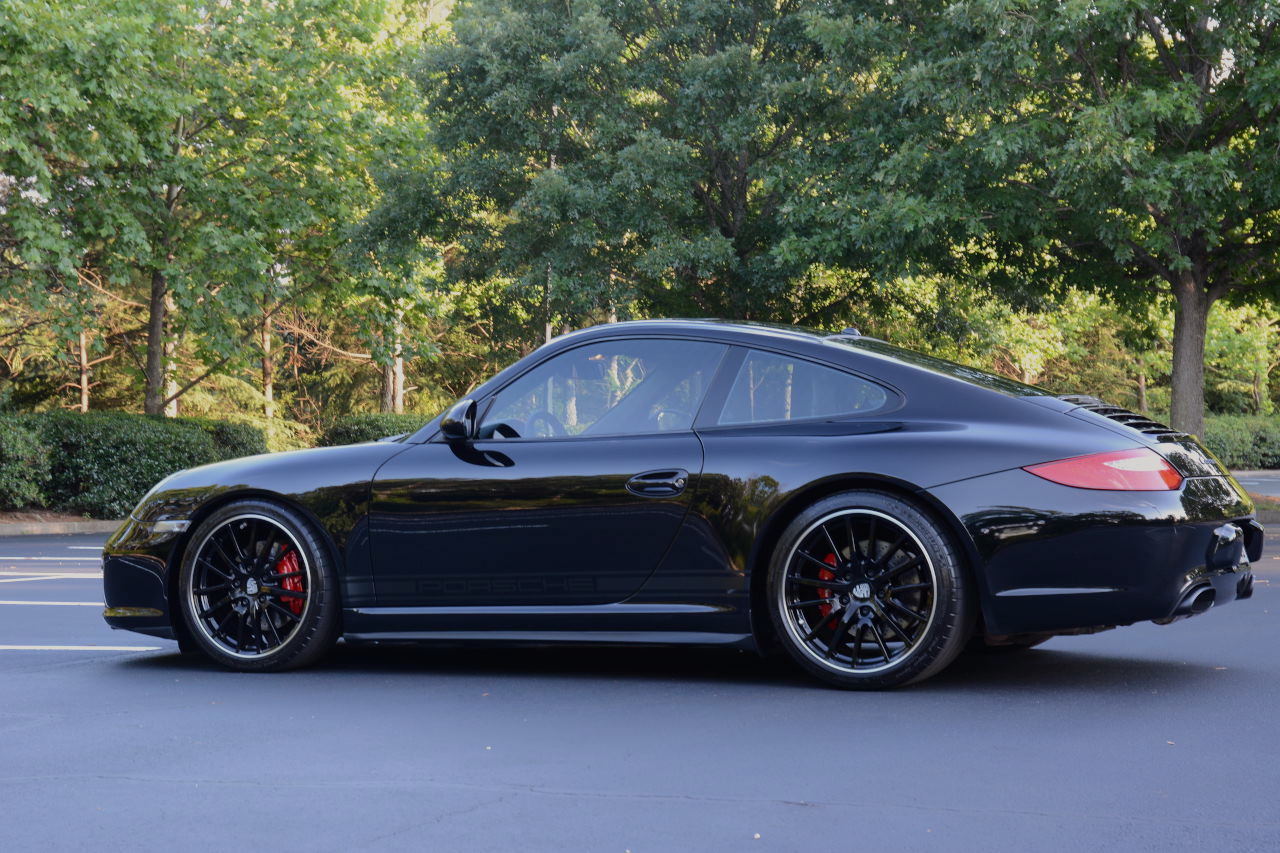
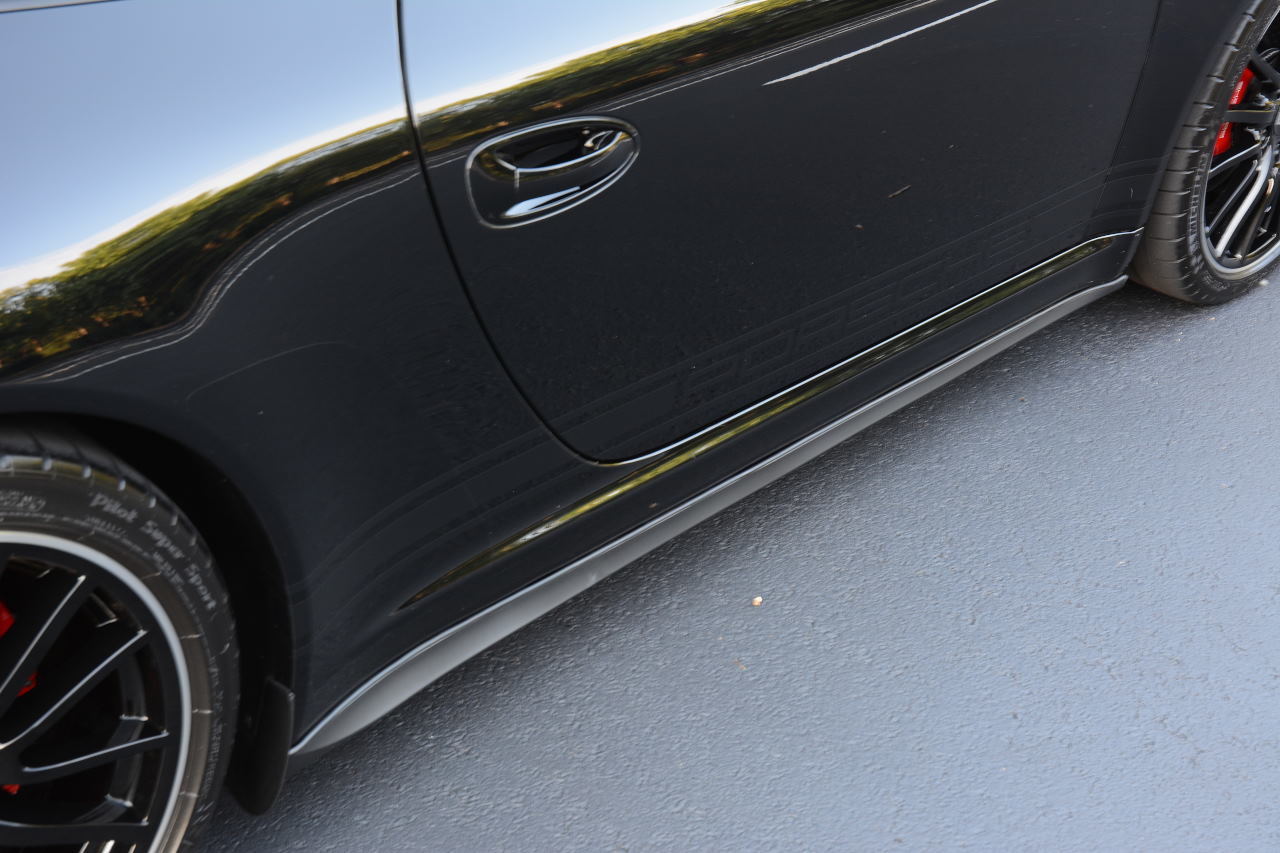
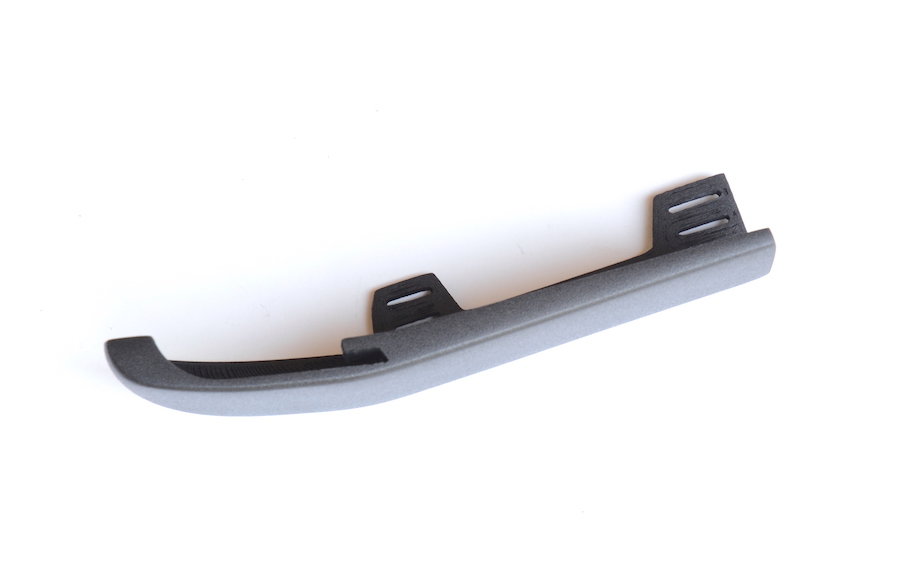
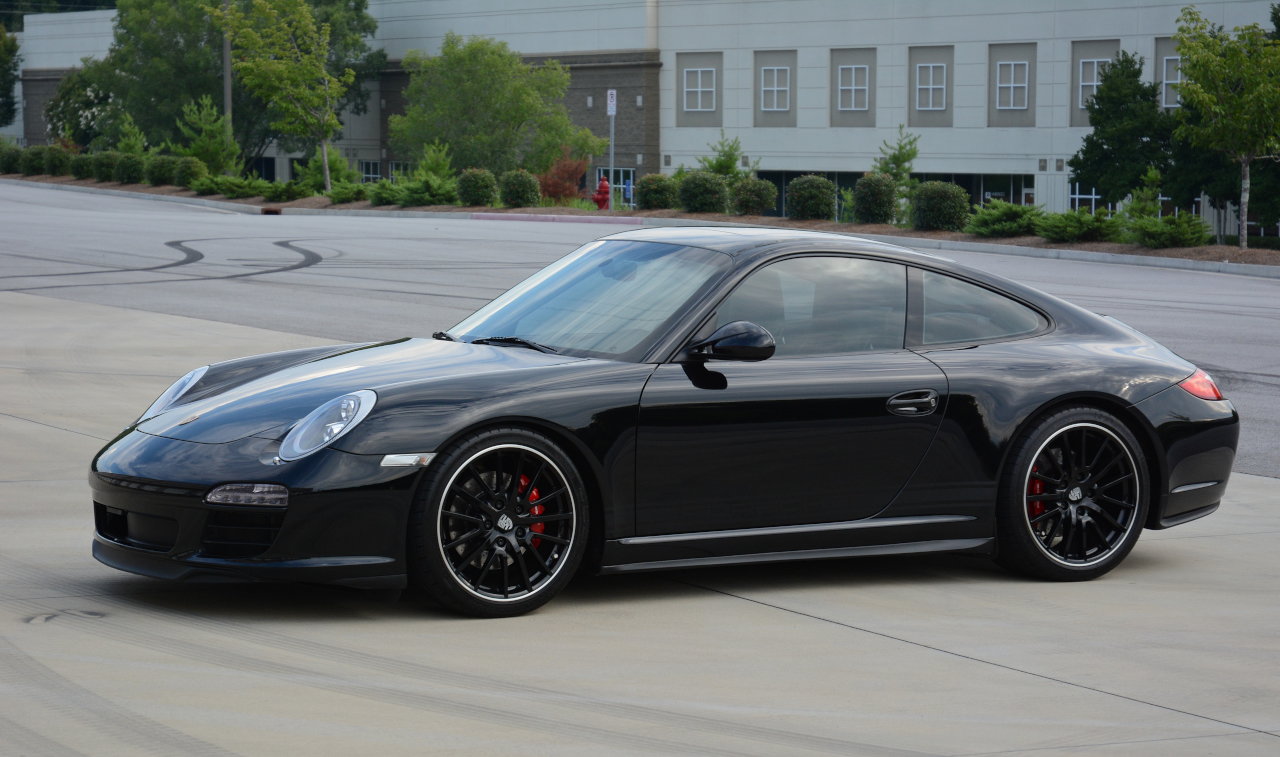
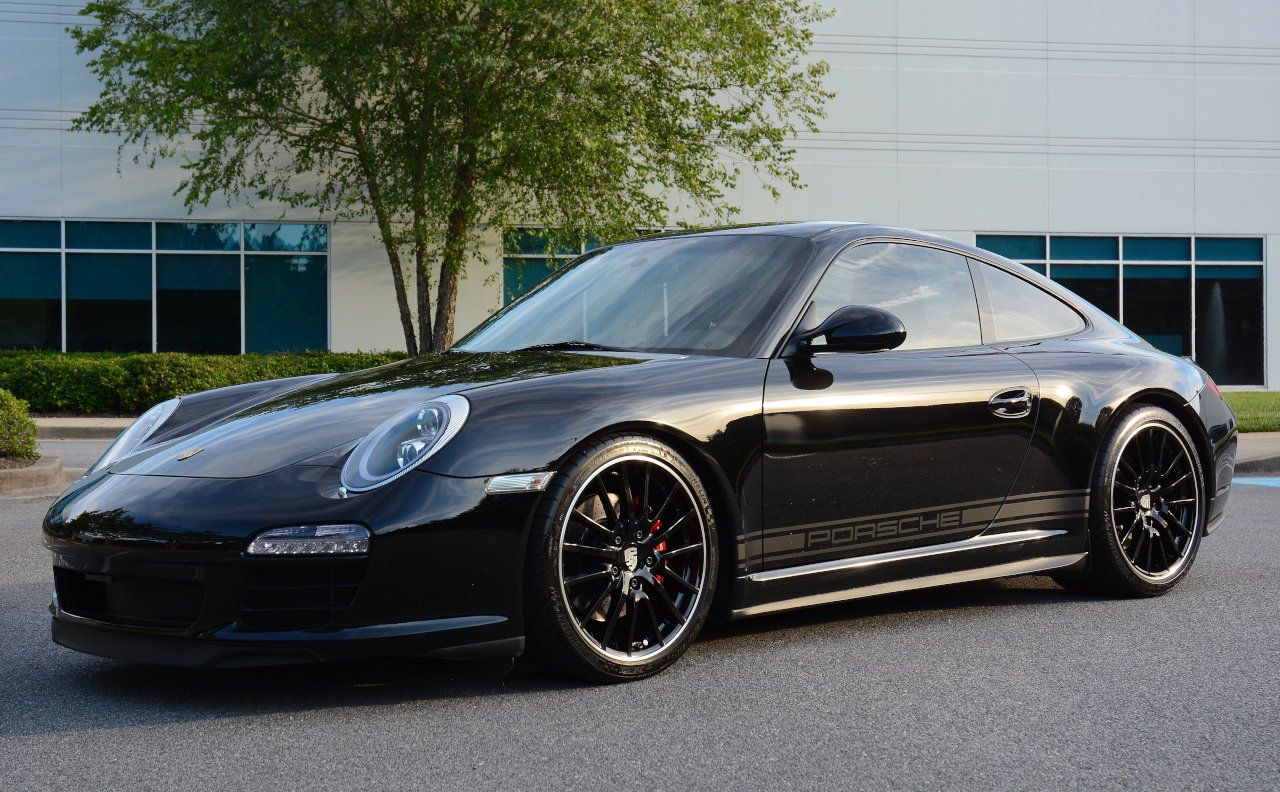
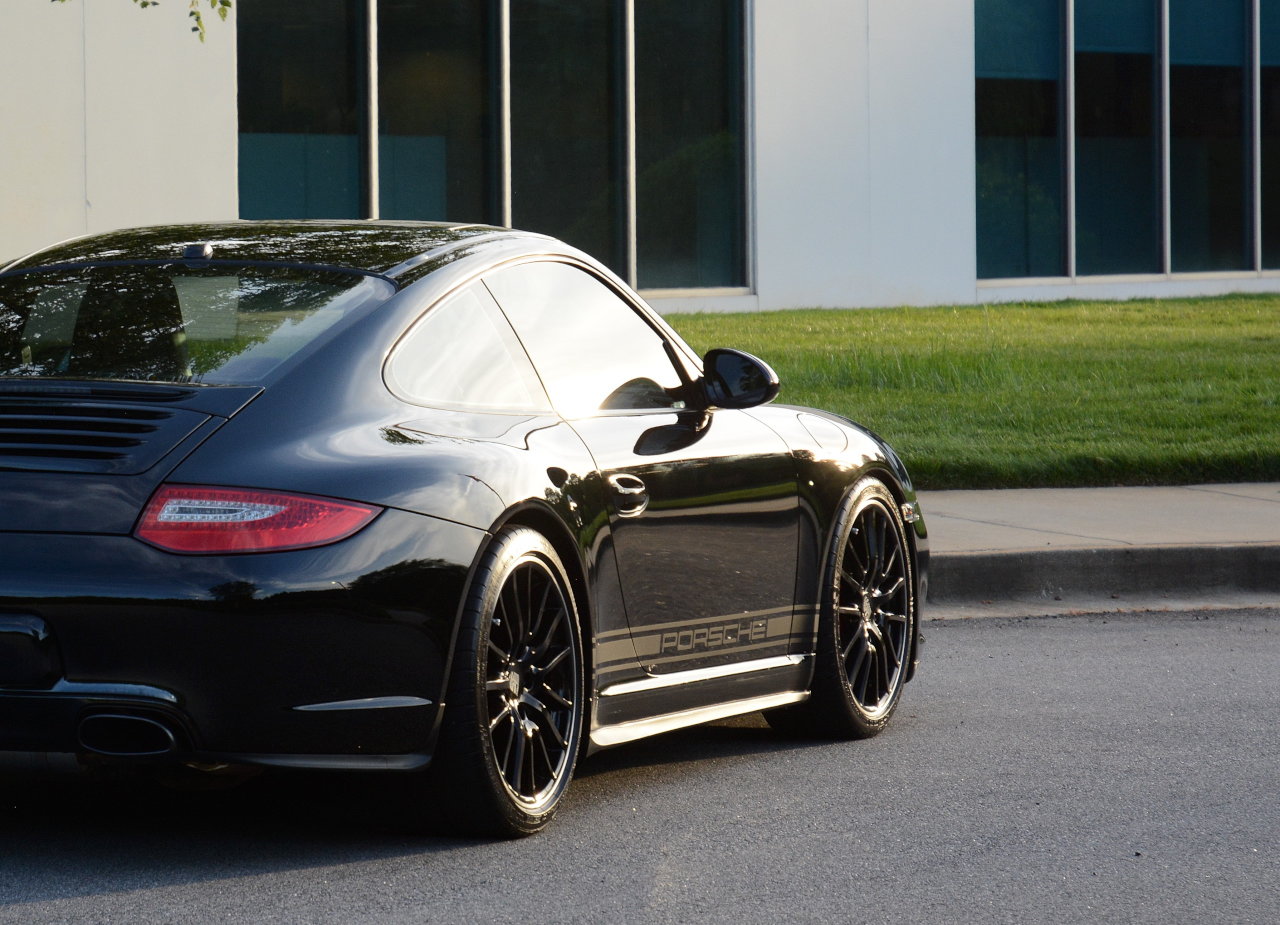
991 Side Skirt (Sill Cover) DIY Modification for 997.2 (Revision 2 - includes improved internal support bracing.) (Revision 3 - now includes custom end caps - see end of post)
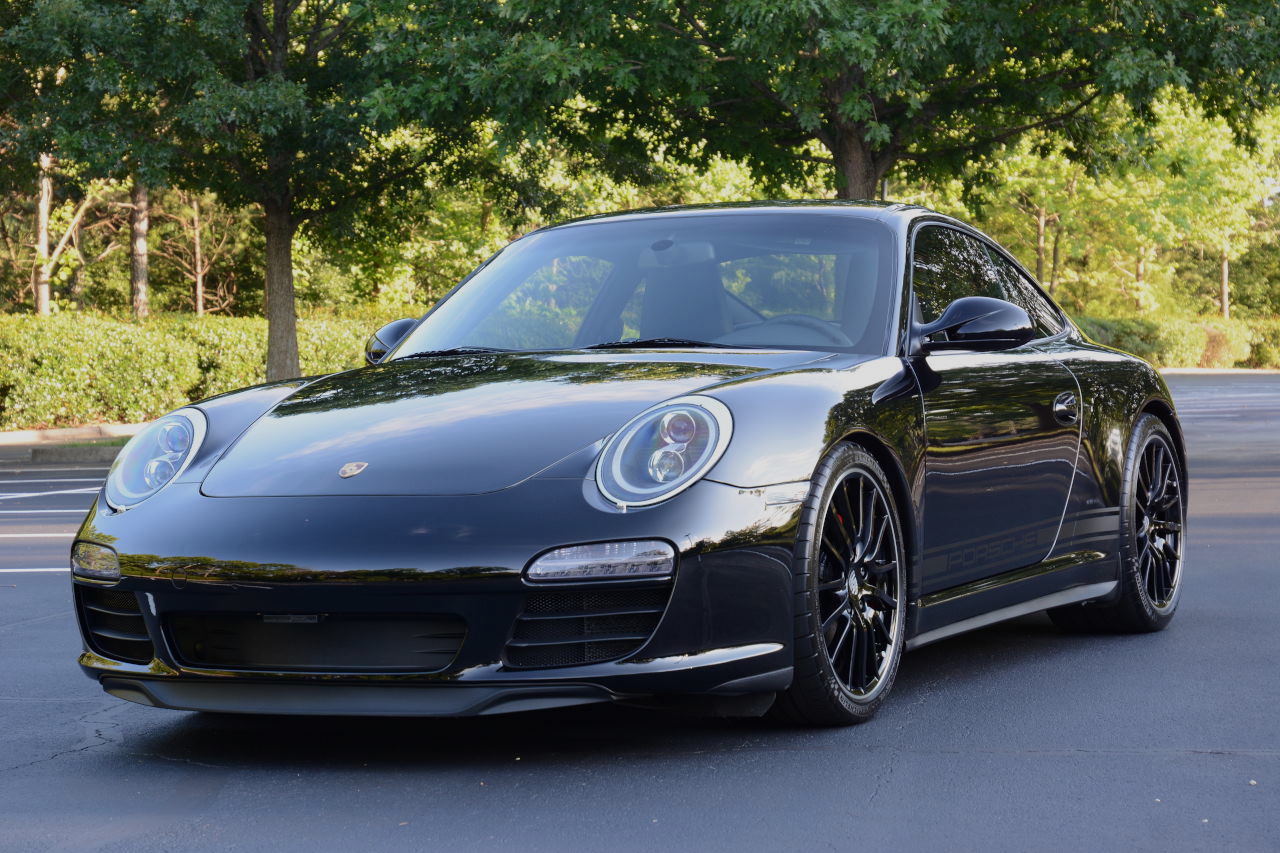
As many frustrated owners know, there are unfortunately no OEM side skirts available for the rear wheel drive versions of the 997.1 or 997.2 Carrera (C2 & C2S). There are tonnes of threads on the subject, and it is something that has been bugging me since I got the car.
The same issue exists on the 991.1 and 991.2 series (C2 & C2S).
I personally do not like any of the aftermarket side skirts available, and also spent a long time looking at the various 997 OEM side skirts to determine if they could be modified to fit the C2.
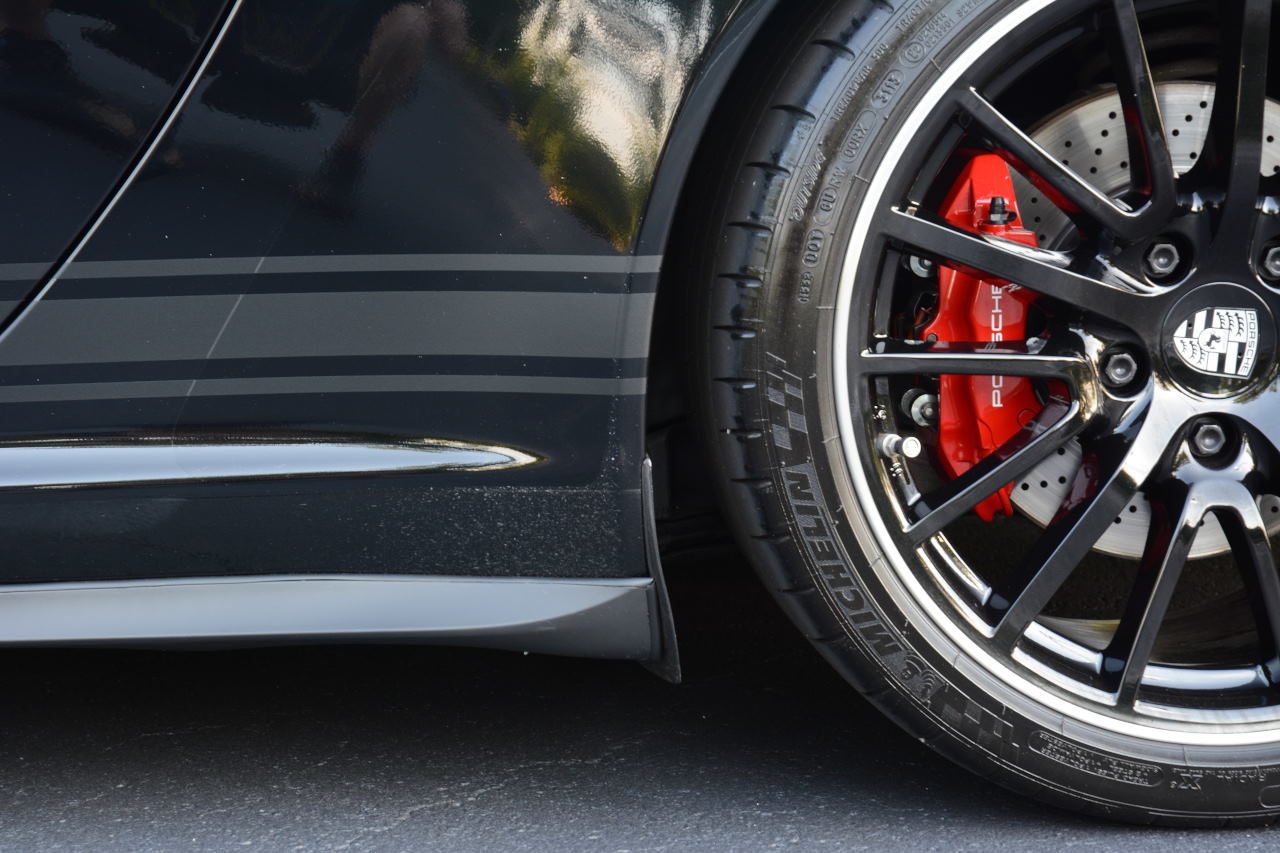
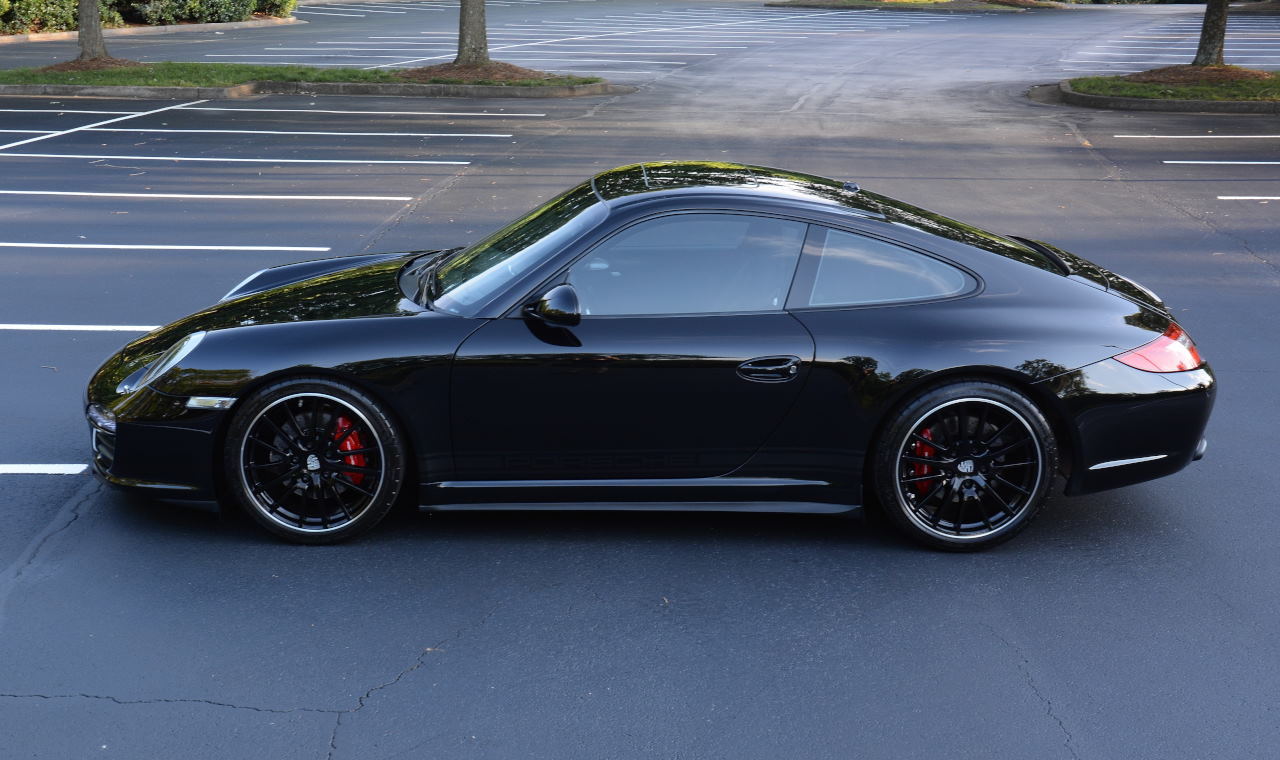
I do like the 997.2 GT3 RS side skirts but they (along with all 997.2 OEM skirts) sit higher up on the sill which make integration of a “non-compatible” part more difficult at the point where the top of the side skirt makes contact with the sill. I also prefer the look of the new 991 skirts.
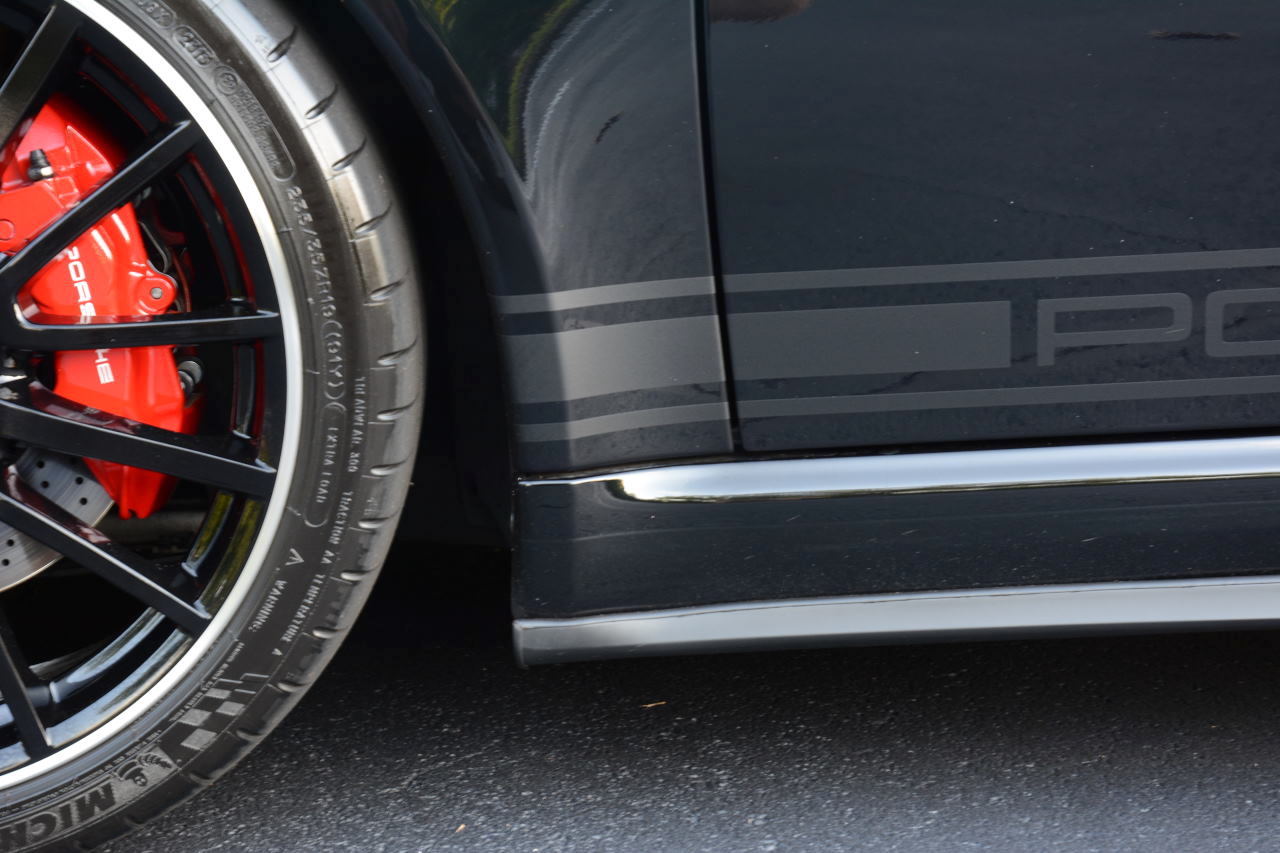
I also feel that the 991 skirts blend very well with the existing black trim under the sides of the 997.2 front bumper, and match the 991 SPASM front lip also.
After many visits to the dealership over the past few months, taking measurements and photos from every conceivable angle (and getting some strange looks in the process ), I finally convinced myself that the 991 skirts could be modified to fit on my 997.2 C2.
Warning: this modification requires a lot of patience and time…
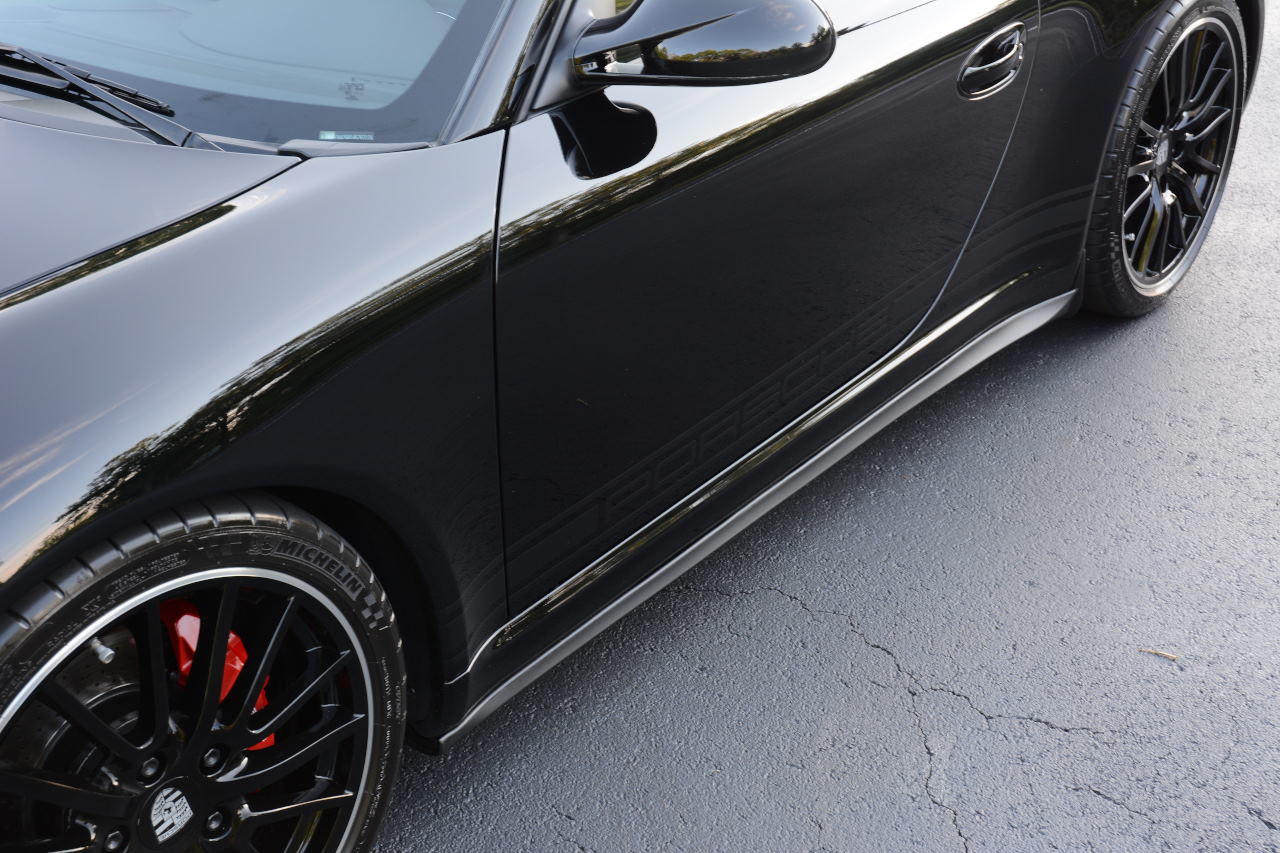
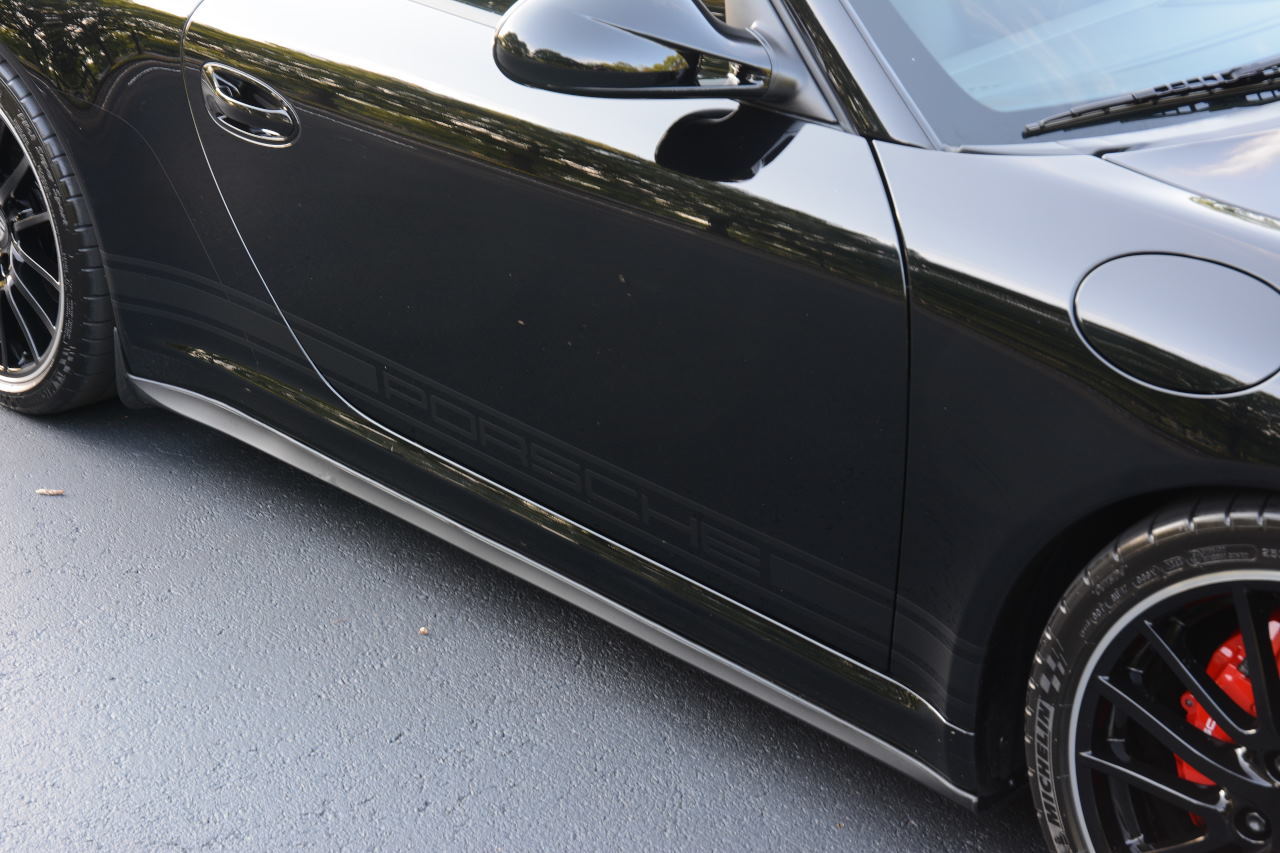
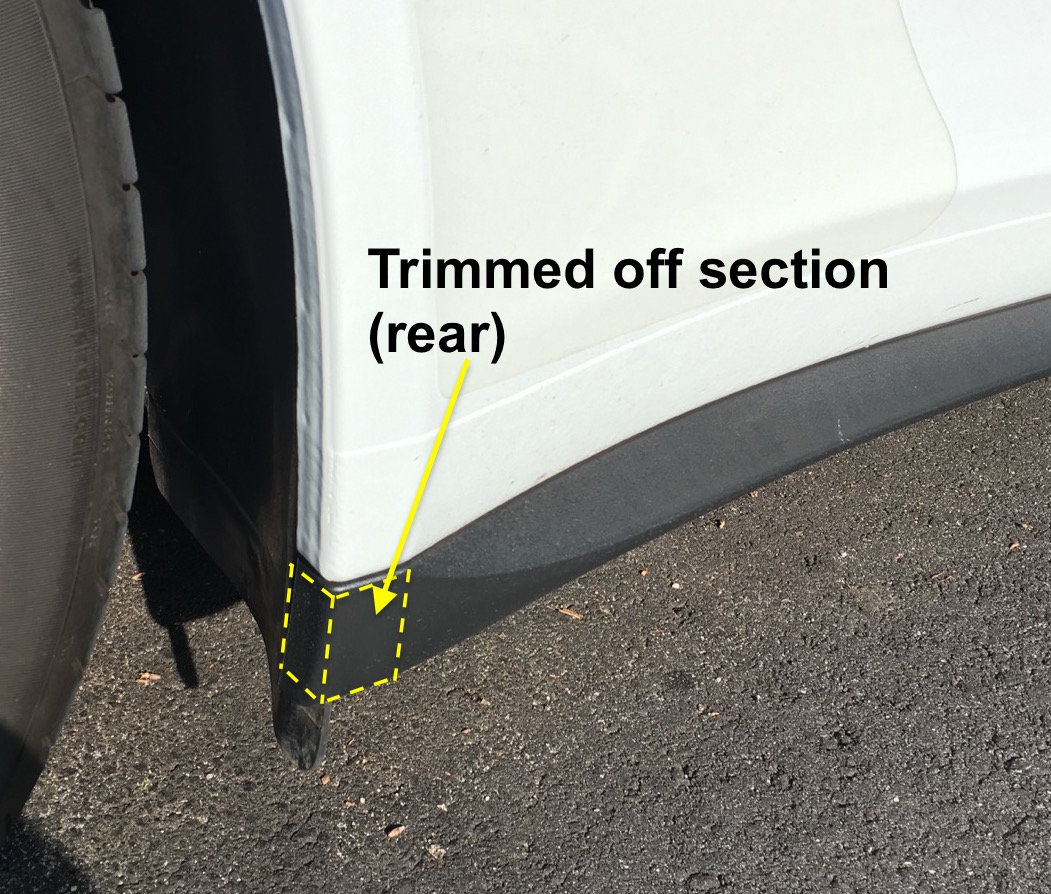
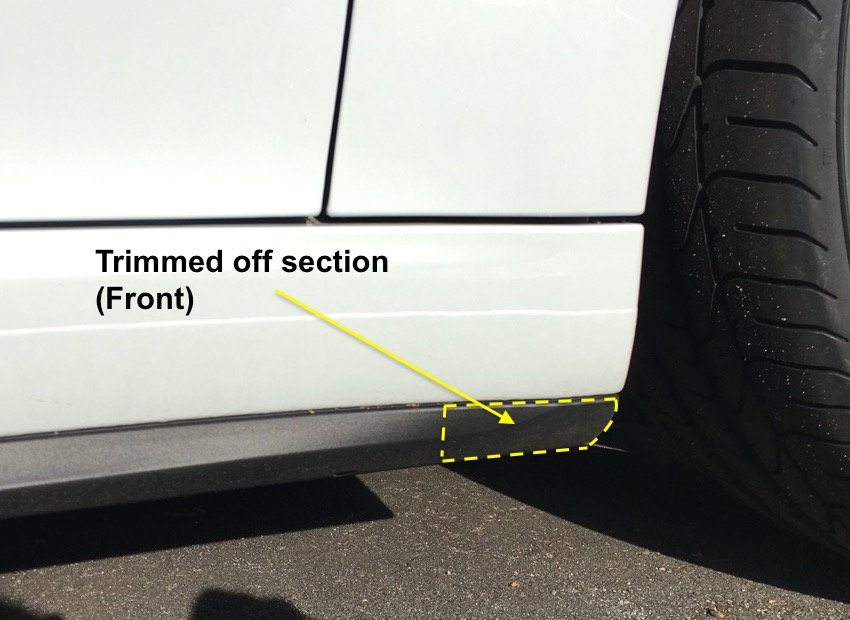
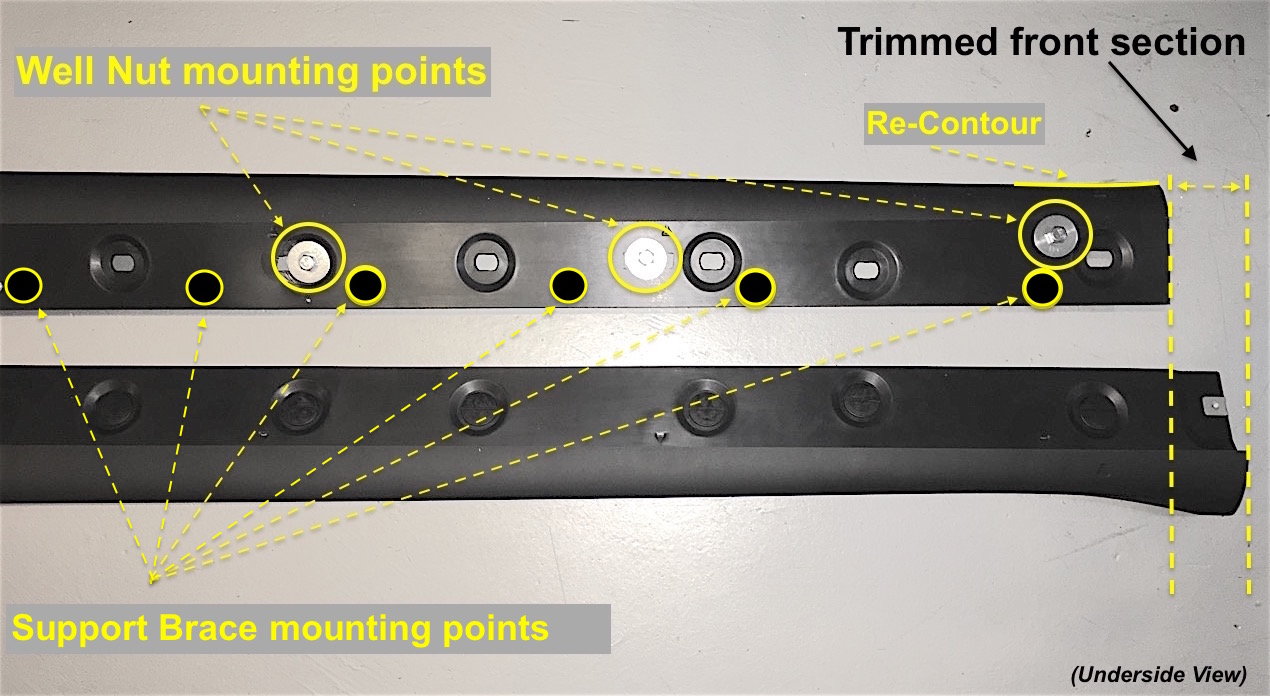
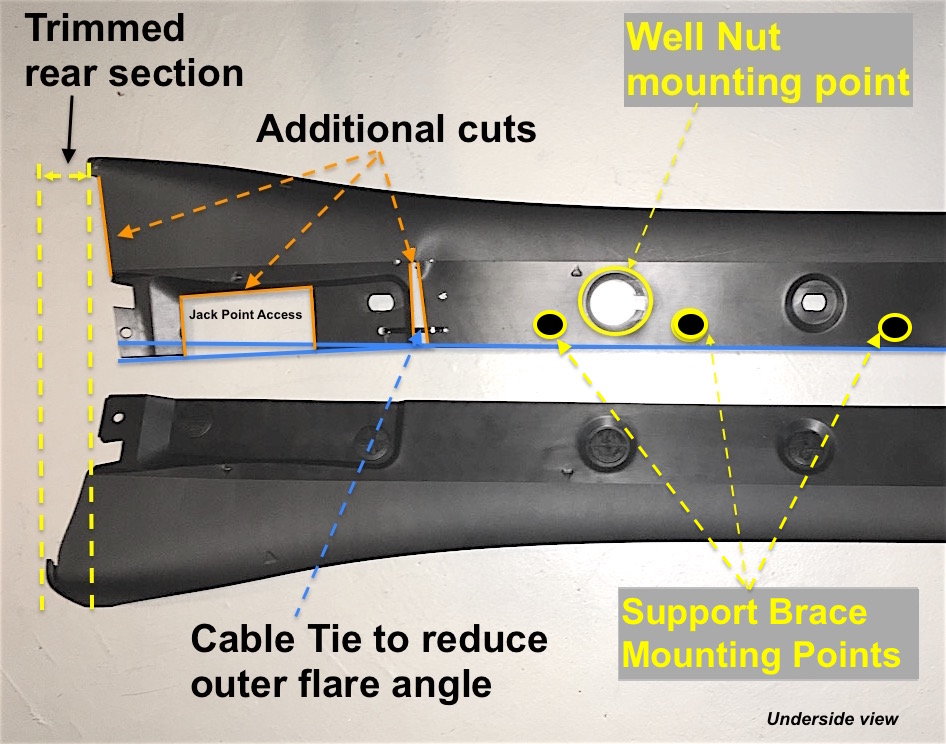
The first issue is that the 991 skirts are about 3 inches too long for the 997.2. This required trimming at the front and the rear of the skirt as shown in the pics below.
A heat gun is needed to re-contour the front trim section to follow the lines of the sill. This can be done relatively easily if you’ve had experience with this before. It helps to have a spray bottle with ice water available to quickly cool the part after re-shaping.
Toward the rear i had to cut a section out of the base of the skirt in order to bend the flare inward (this is because the skirt is designed for wide-body cars). This re-shaping was also done with a heat gun and then secured with a cable tie.
This is the only part of the project that I am not entirely happy with. Whilst it fits perfectly on the outside (visible areas), it causes a slight buckle/wave on the underside in this section.
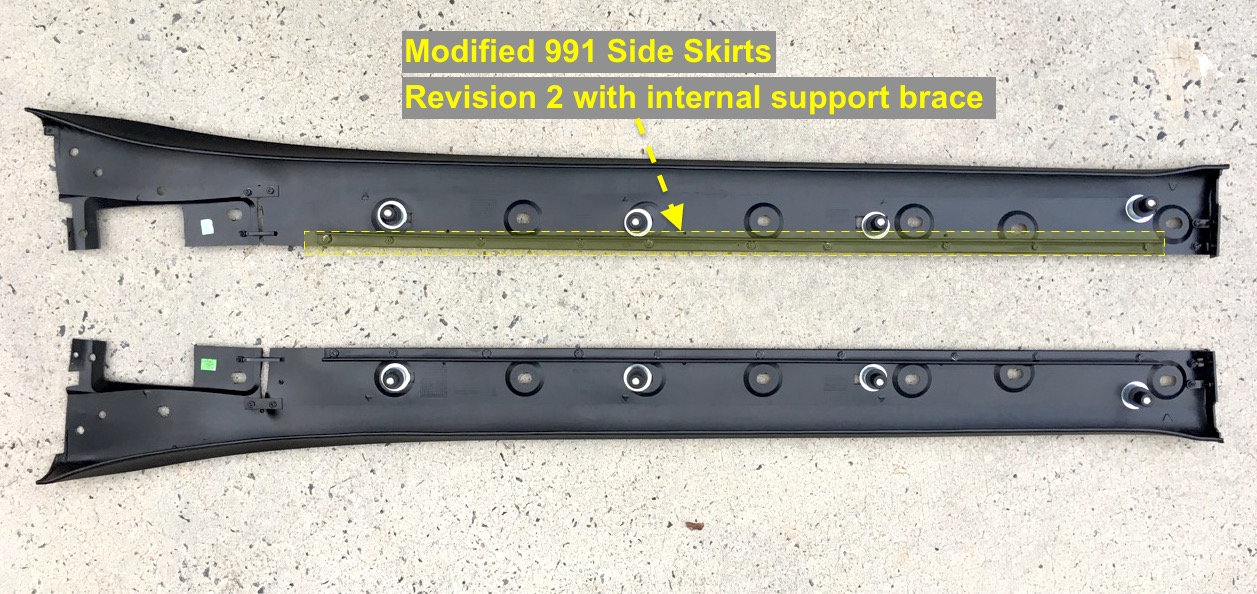
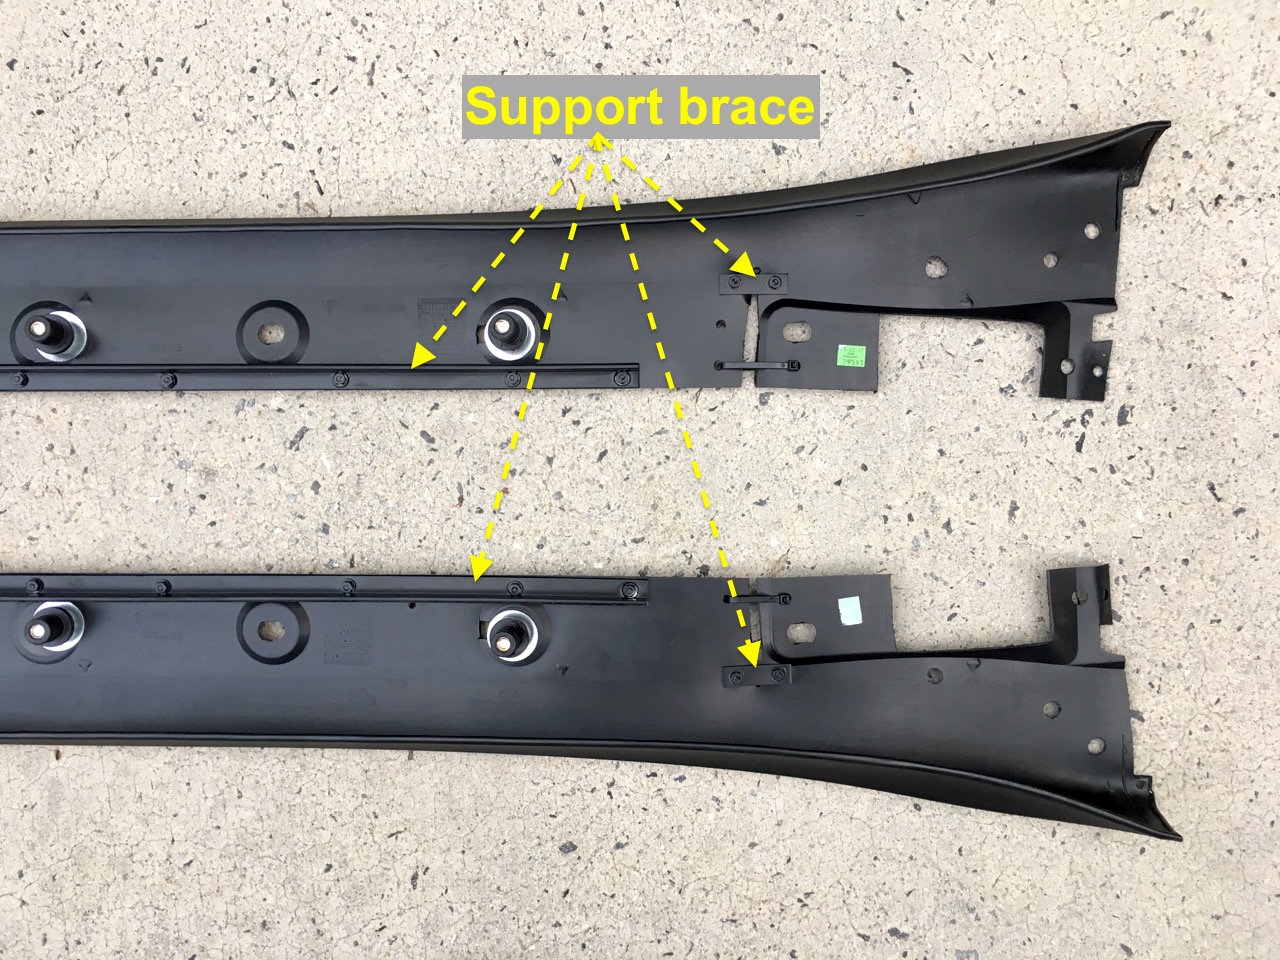
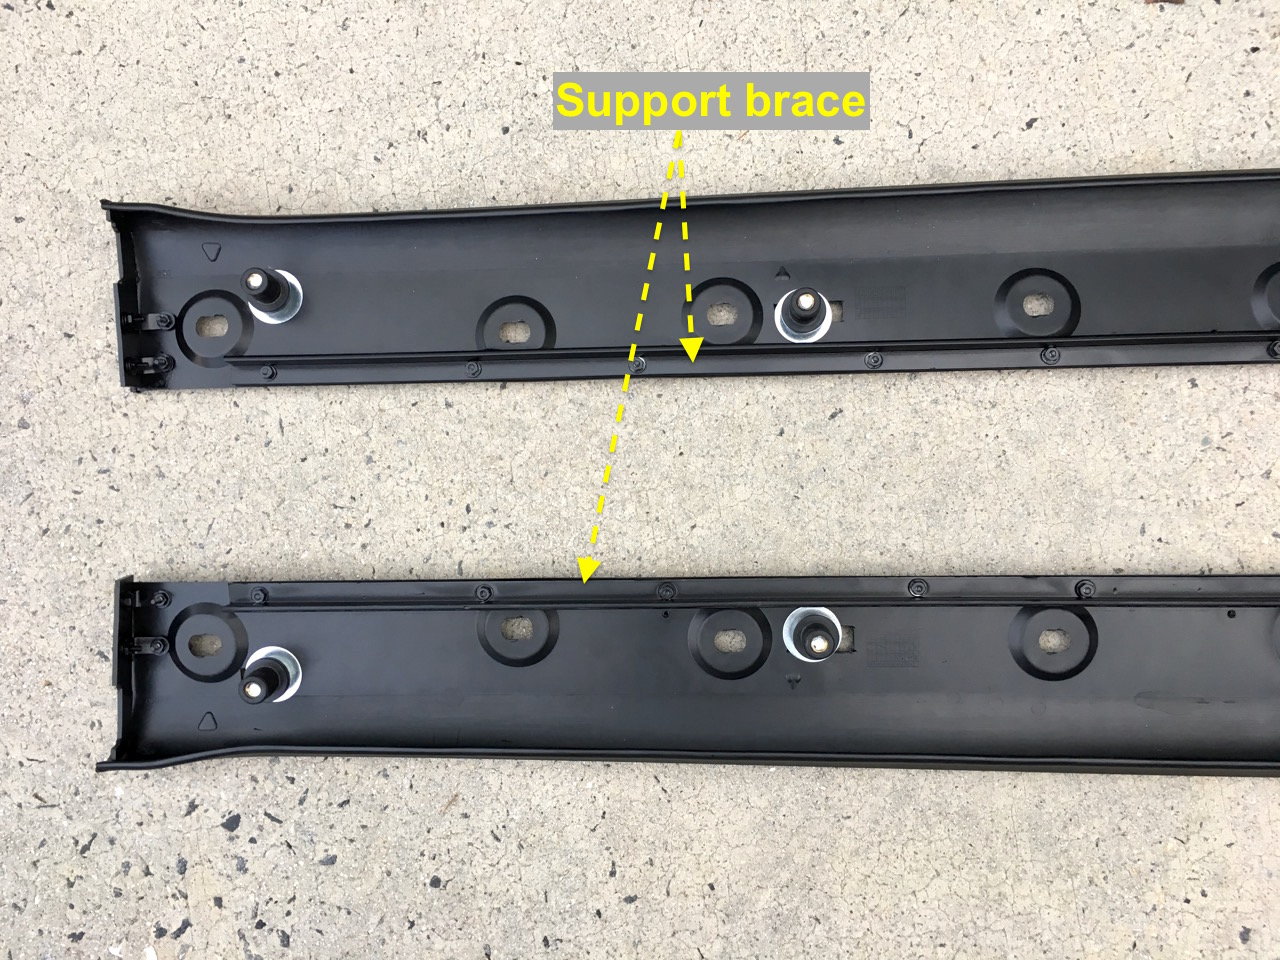
Edit - in the rev.2 I added a small steel brace approx 2' long to this section, and it helped straighten things out.
As you work these adjustments you will also see that in some places you need to do some minor tweaking to force the skirt to follow the line of the sill along the full length. This is fairly easy, again using a heat gun and simply bending the top edge of the skirt inward so it “hugs’ the sill.
Caution - test the heat gun process several times on the off cuts. This will give you an idea of how must heat is acceptable. Too much and you could mar the surface. Also ensure that you always apply the heat to the inside of the skirt and never the outer (visible) surfaces.
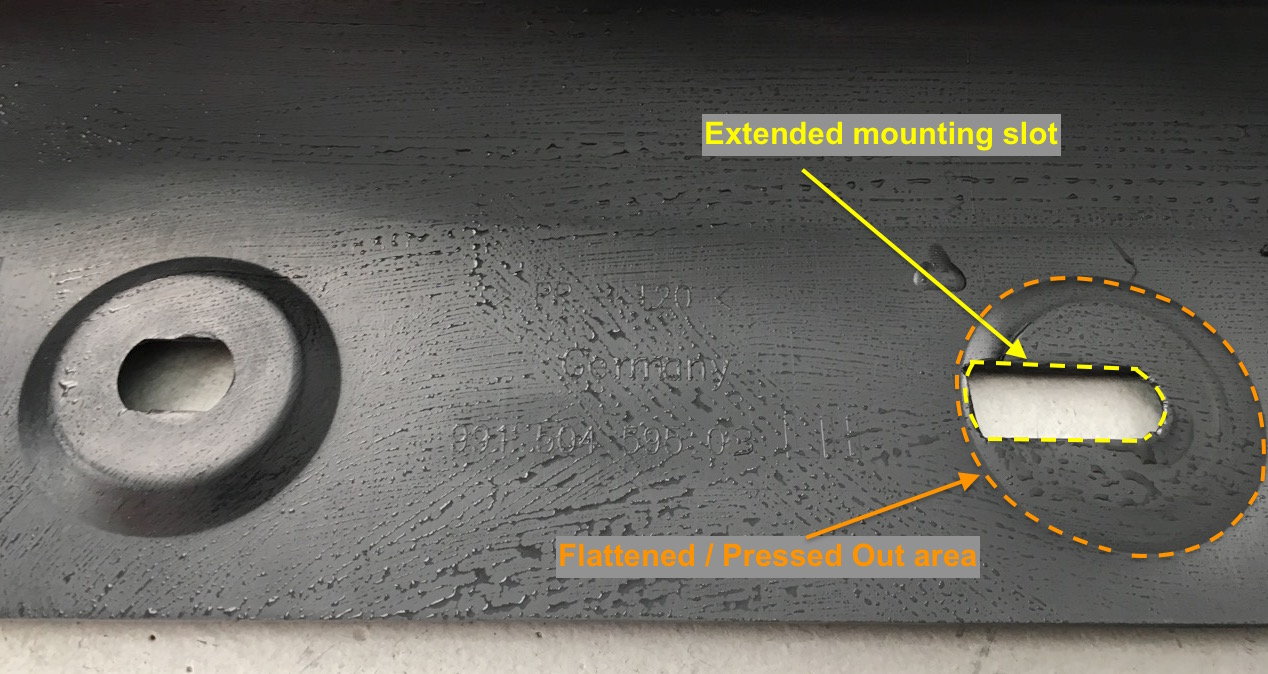
You will also need to press out the indentations in the mounting points to allow for a smooth surface for the washers to slide against when positioning, and to ensure the well nuts are square when they seat into the mounting holes.
You also need to create slots that allow some side to side adjustment, which helps with installation, and final alignment.
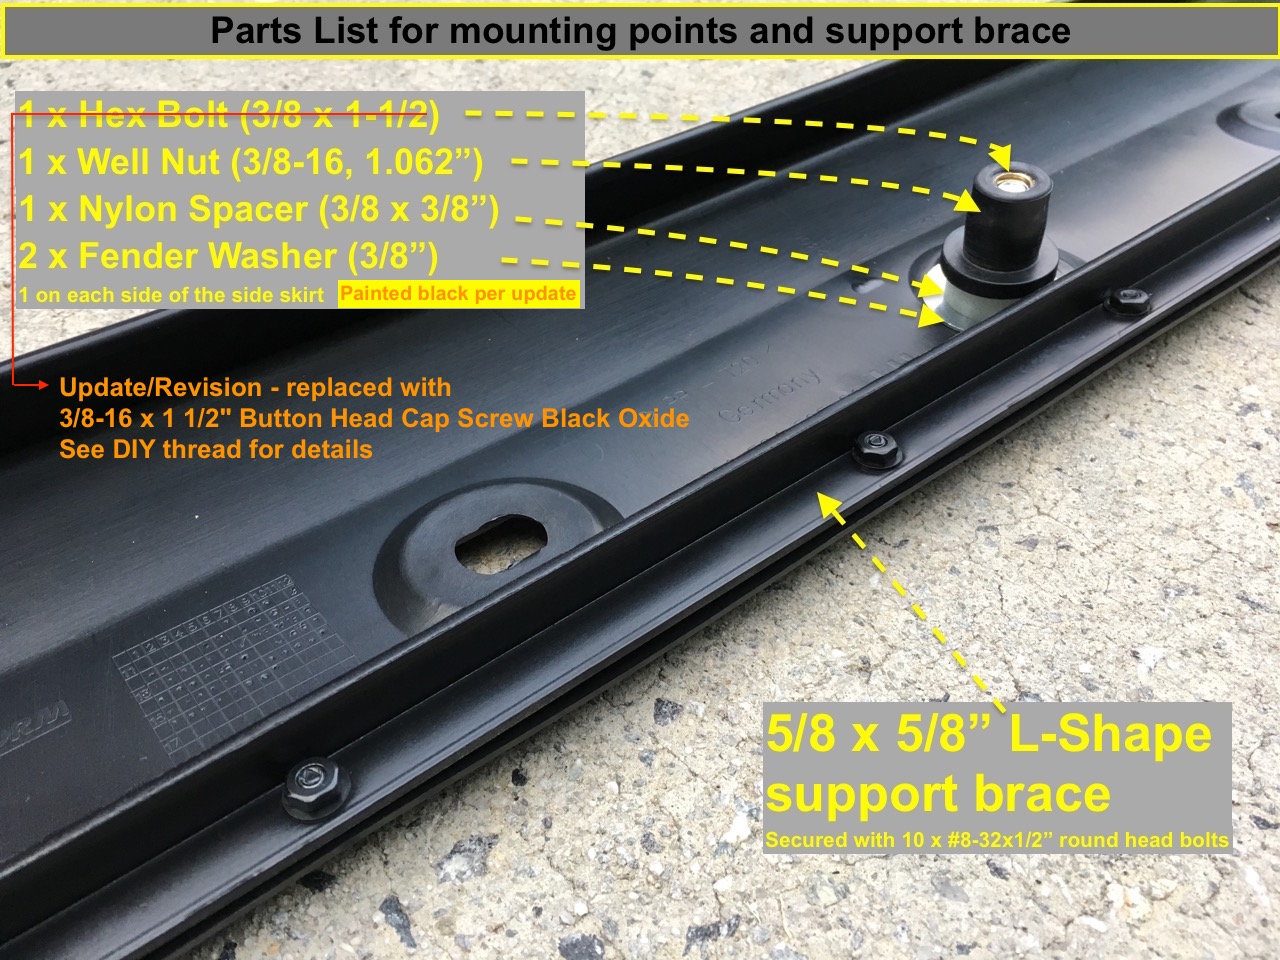
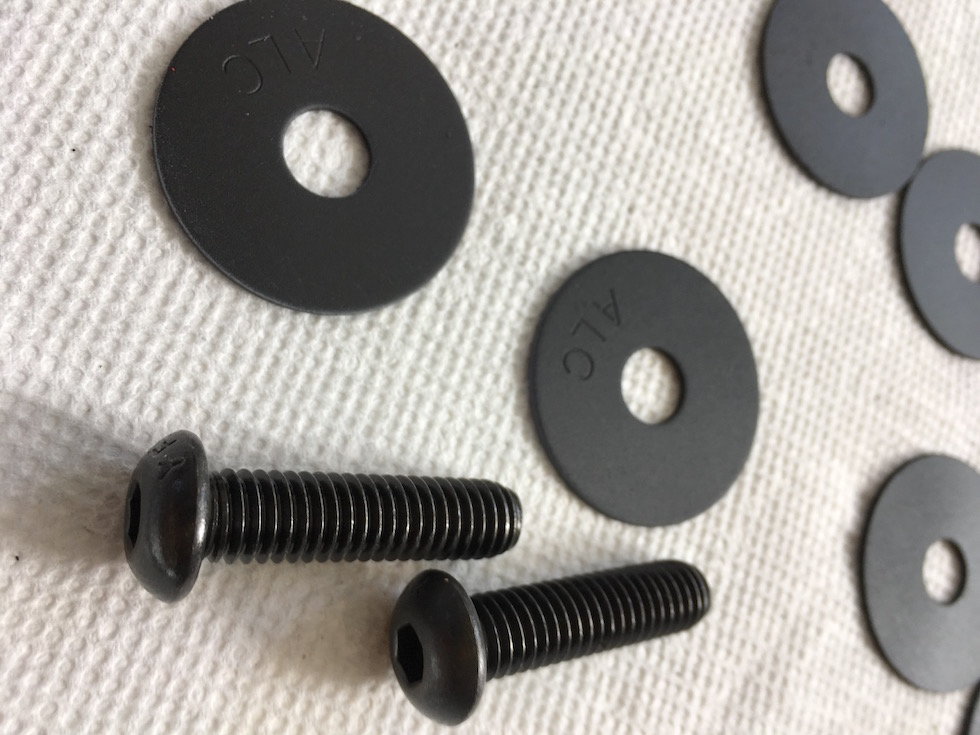
The Mounting hardware is pretty straightforward: NOTE: PLEASE SEE UPDATE/IMPROVEMENT AT END OF THREAD AND ALSO REFERENCED IN THE IMAGE BELOW (black washers and cap screws)
However I must thank fellow Rennlister “Platinum997” for the specs of the well nuts he used on his project. This saved me a lot of time in testing different lengths/options.
The nylon spacer used, ensures that the base of the skirt stays properly aligned with the under tray. After an initial trial with plastic bumpers to provide support on the inner edge of the skirt underside, I decided to look for something that would run the full length of the skirt.
This is the major change in revision 2 of the project, and it works much better than the bumpers.
This brace not only maintains stiffness of the inner edge of the skirt but also keeps the skirt perfectly flush and level under the car.
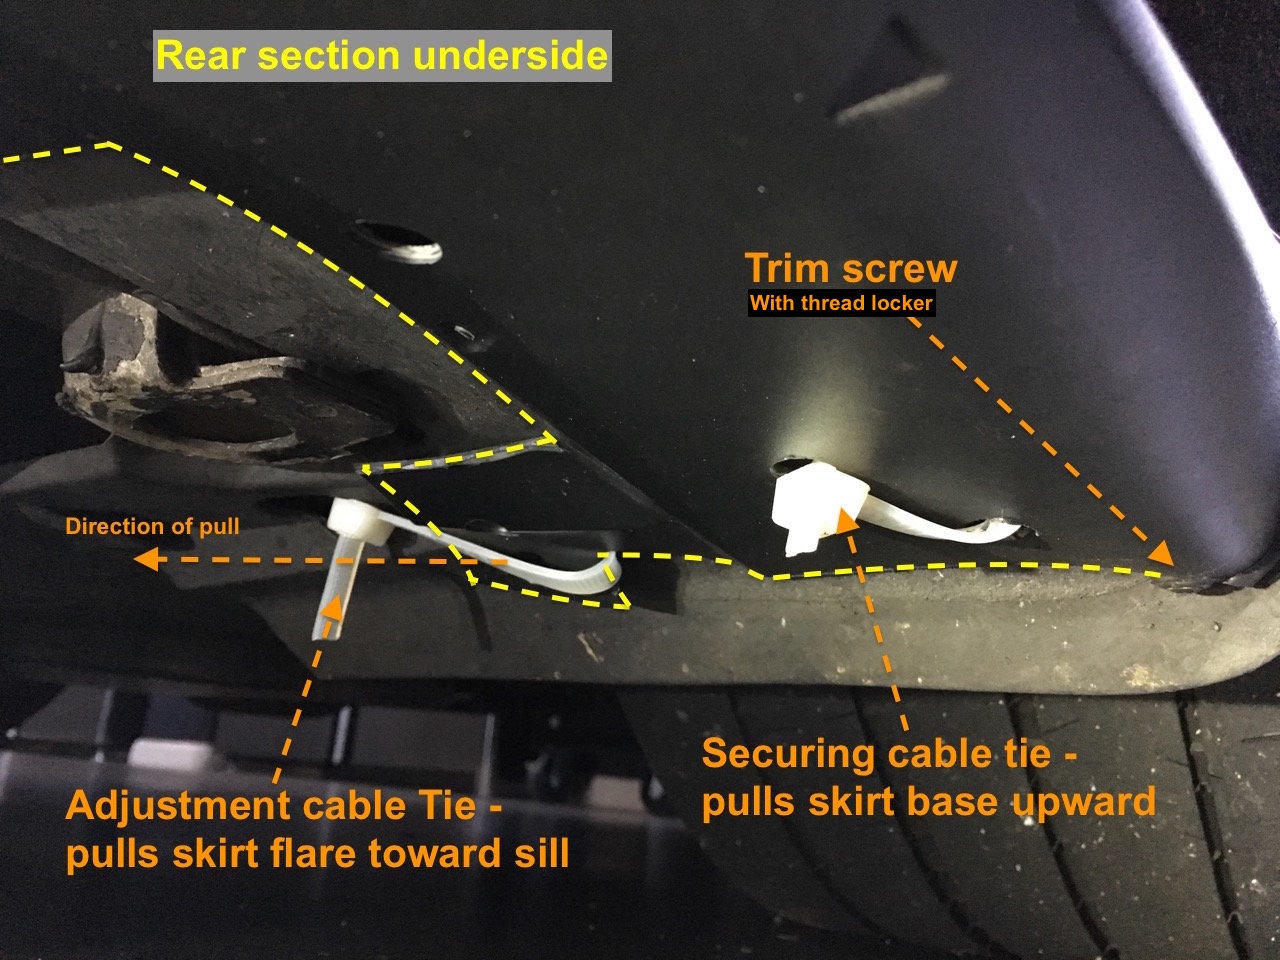
The rear section is attached with 1 high strength cable tie (which pulls it firmly up against the existing splash guard through pre drilled holes, as well as 1 Trim screw.
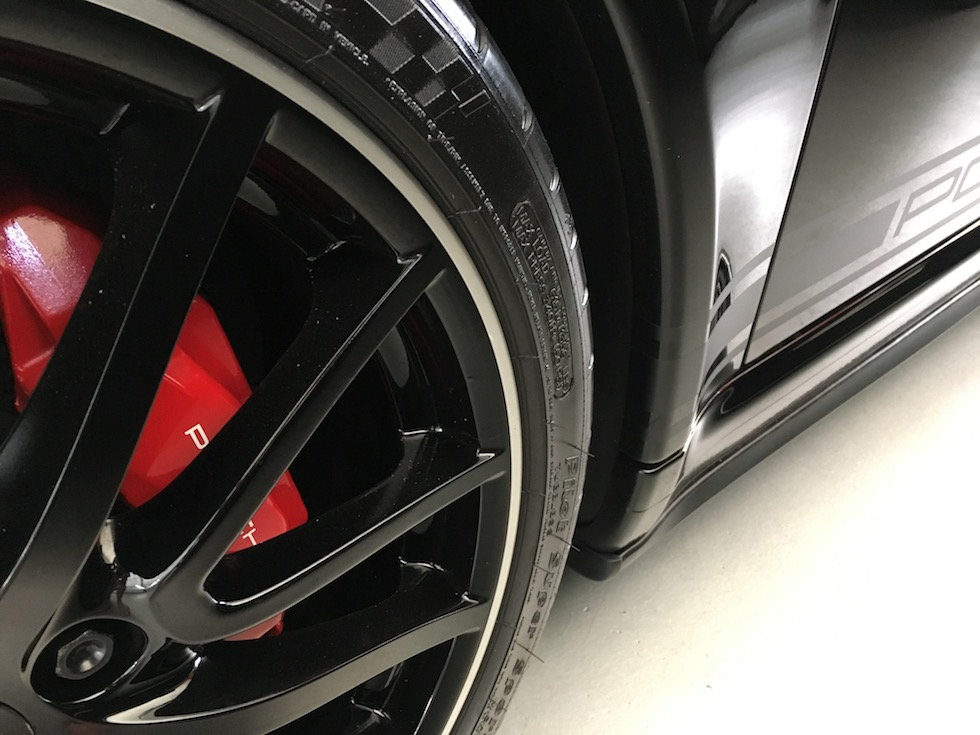
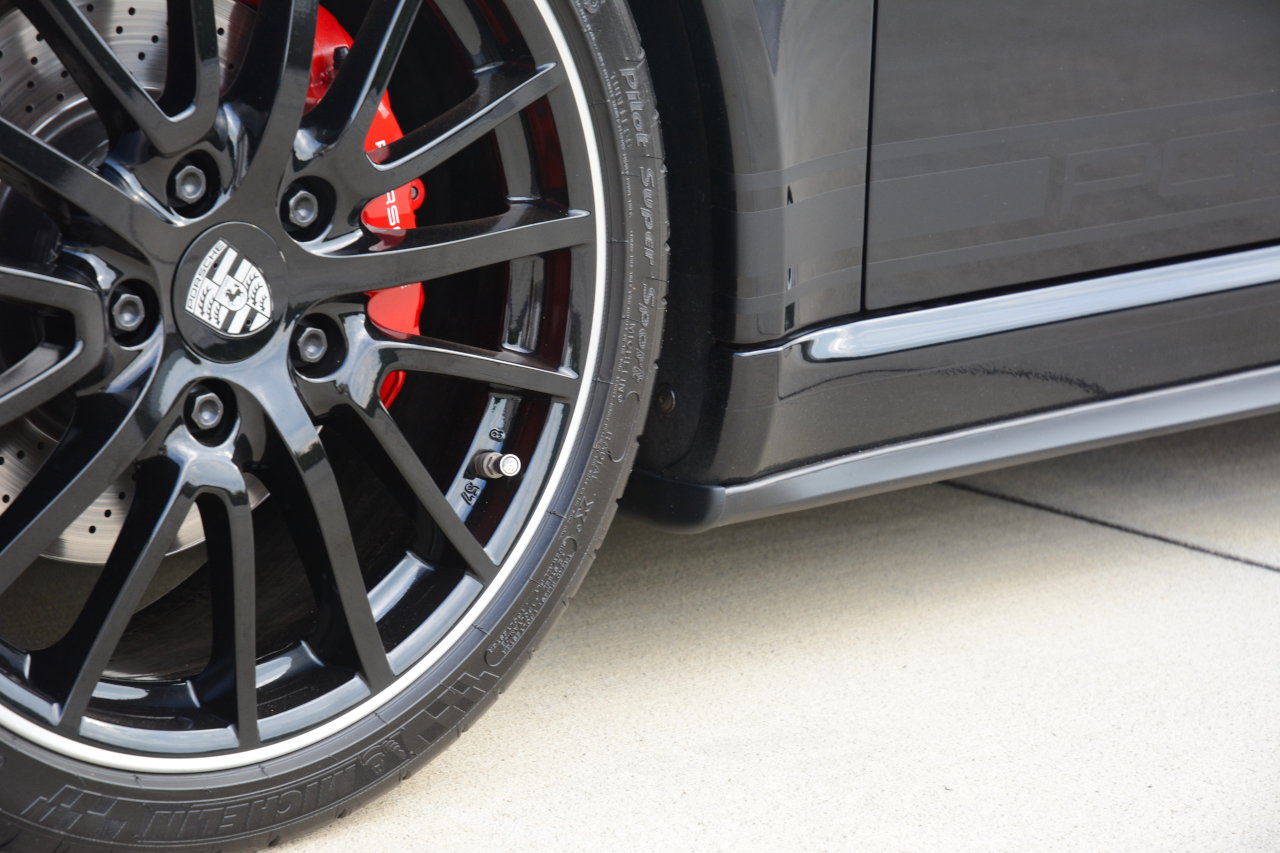
Most of the side skirt naturally fits snugly against the sill because the top side points inward (toward the sill).
However, at the rear it runs more parallel with the face of the sill and therefore a second cable tie is used to pull the rear section in toward the fender flare, in order to maintain a nice tight fit.
I also added Trim-Lok rubber edging over all the sill edges in order to finish it off nicely. Note this part requires a lot of effort as you need to shave off some material along all inner edges so that the trim can fit correctly. The trim is designed to cover edges that are 1/32” thick and the plastic is probably twice that without modification.
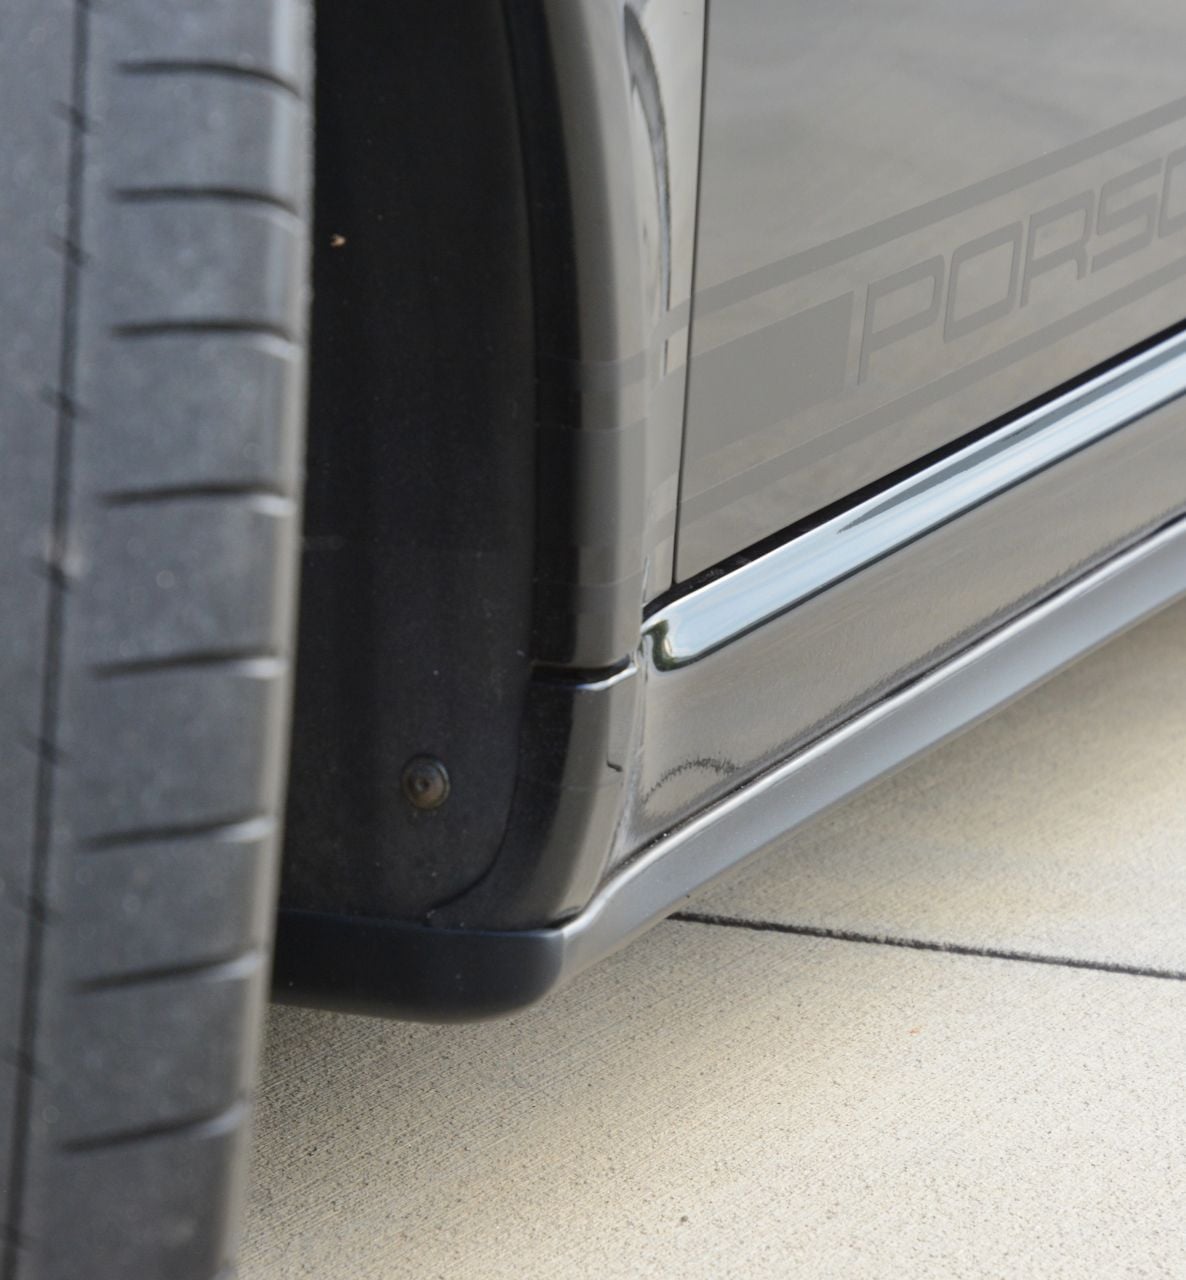
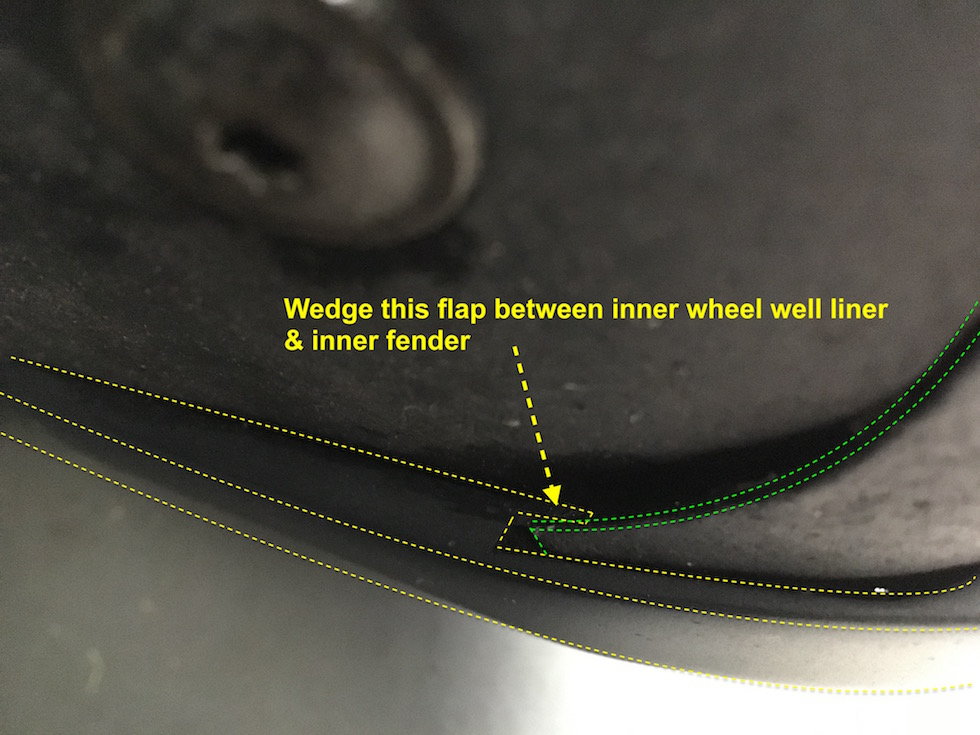
At the rear the skirt butts up against the splash guard (mud flap), which makes for a neat solution.
At the front, inside the wheel arch, you are left with a small gap (about 3/4”) between the bottom of the wheel arch and the inside of the skirt. UPDATE See end of thread for solution using custom end-caps.
As a final perfecting of this project I wanted the build to look as good from underneath the car as it does from the sides. I decided to replace the hex bolts with black oxide button head cap screws, because they have a lower profile rounded head, and would blend in nicely with the underside of the side skirts.
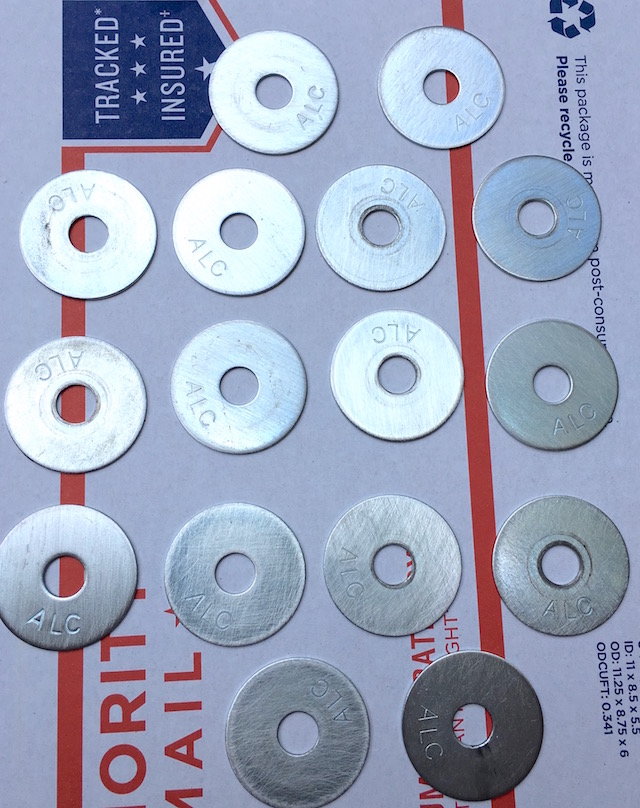
I also scuffed the fender washers and then applied some high temp engine primer and matt black paint, and baked at 250deg for 30 mins to cure.
Lastly I replaced the 2 white high strength cable ties with equivalent black ones.
having all black mounting hardware and connectors really finishes off the project nicely.
I have updated the parts list at the beginning of the thread accordingly.
Washers scuffed up:
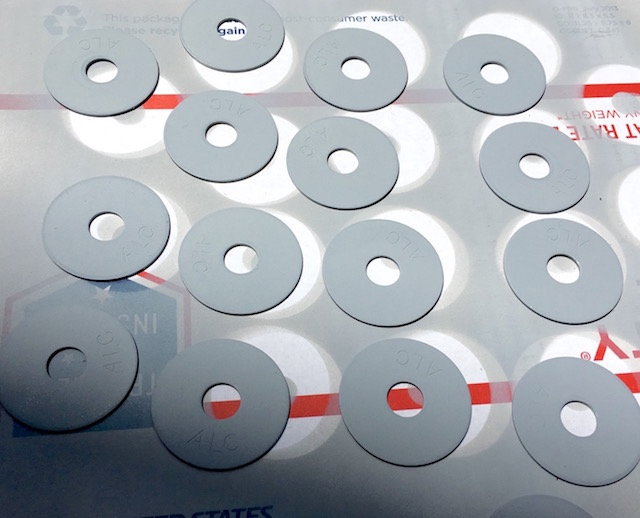
A few coats of primer
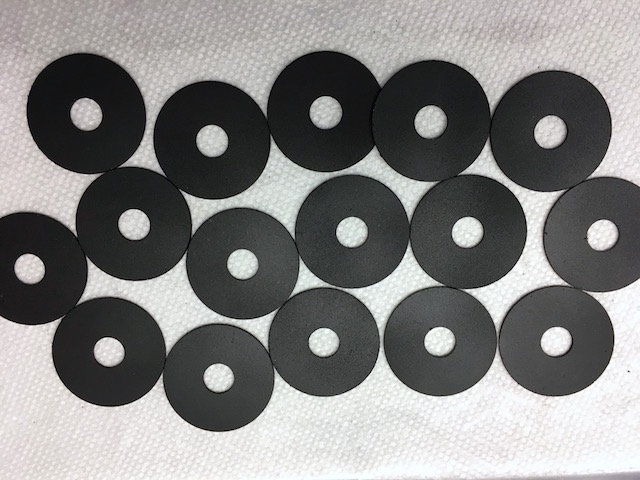
After a few coats of black and baking:
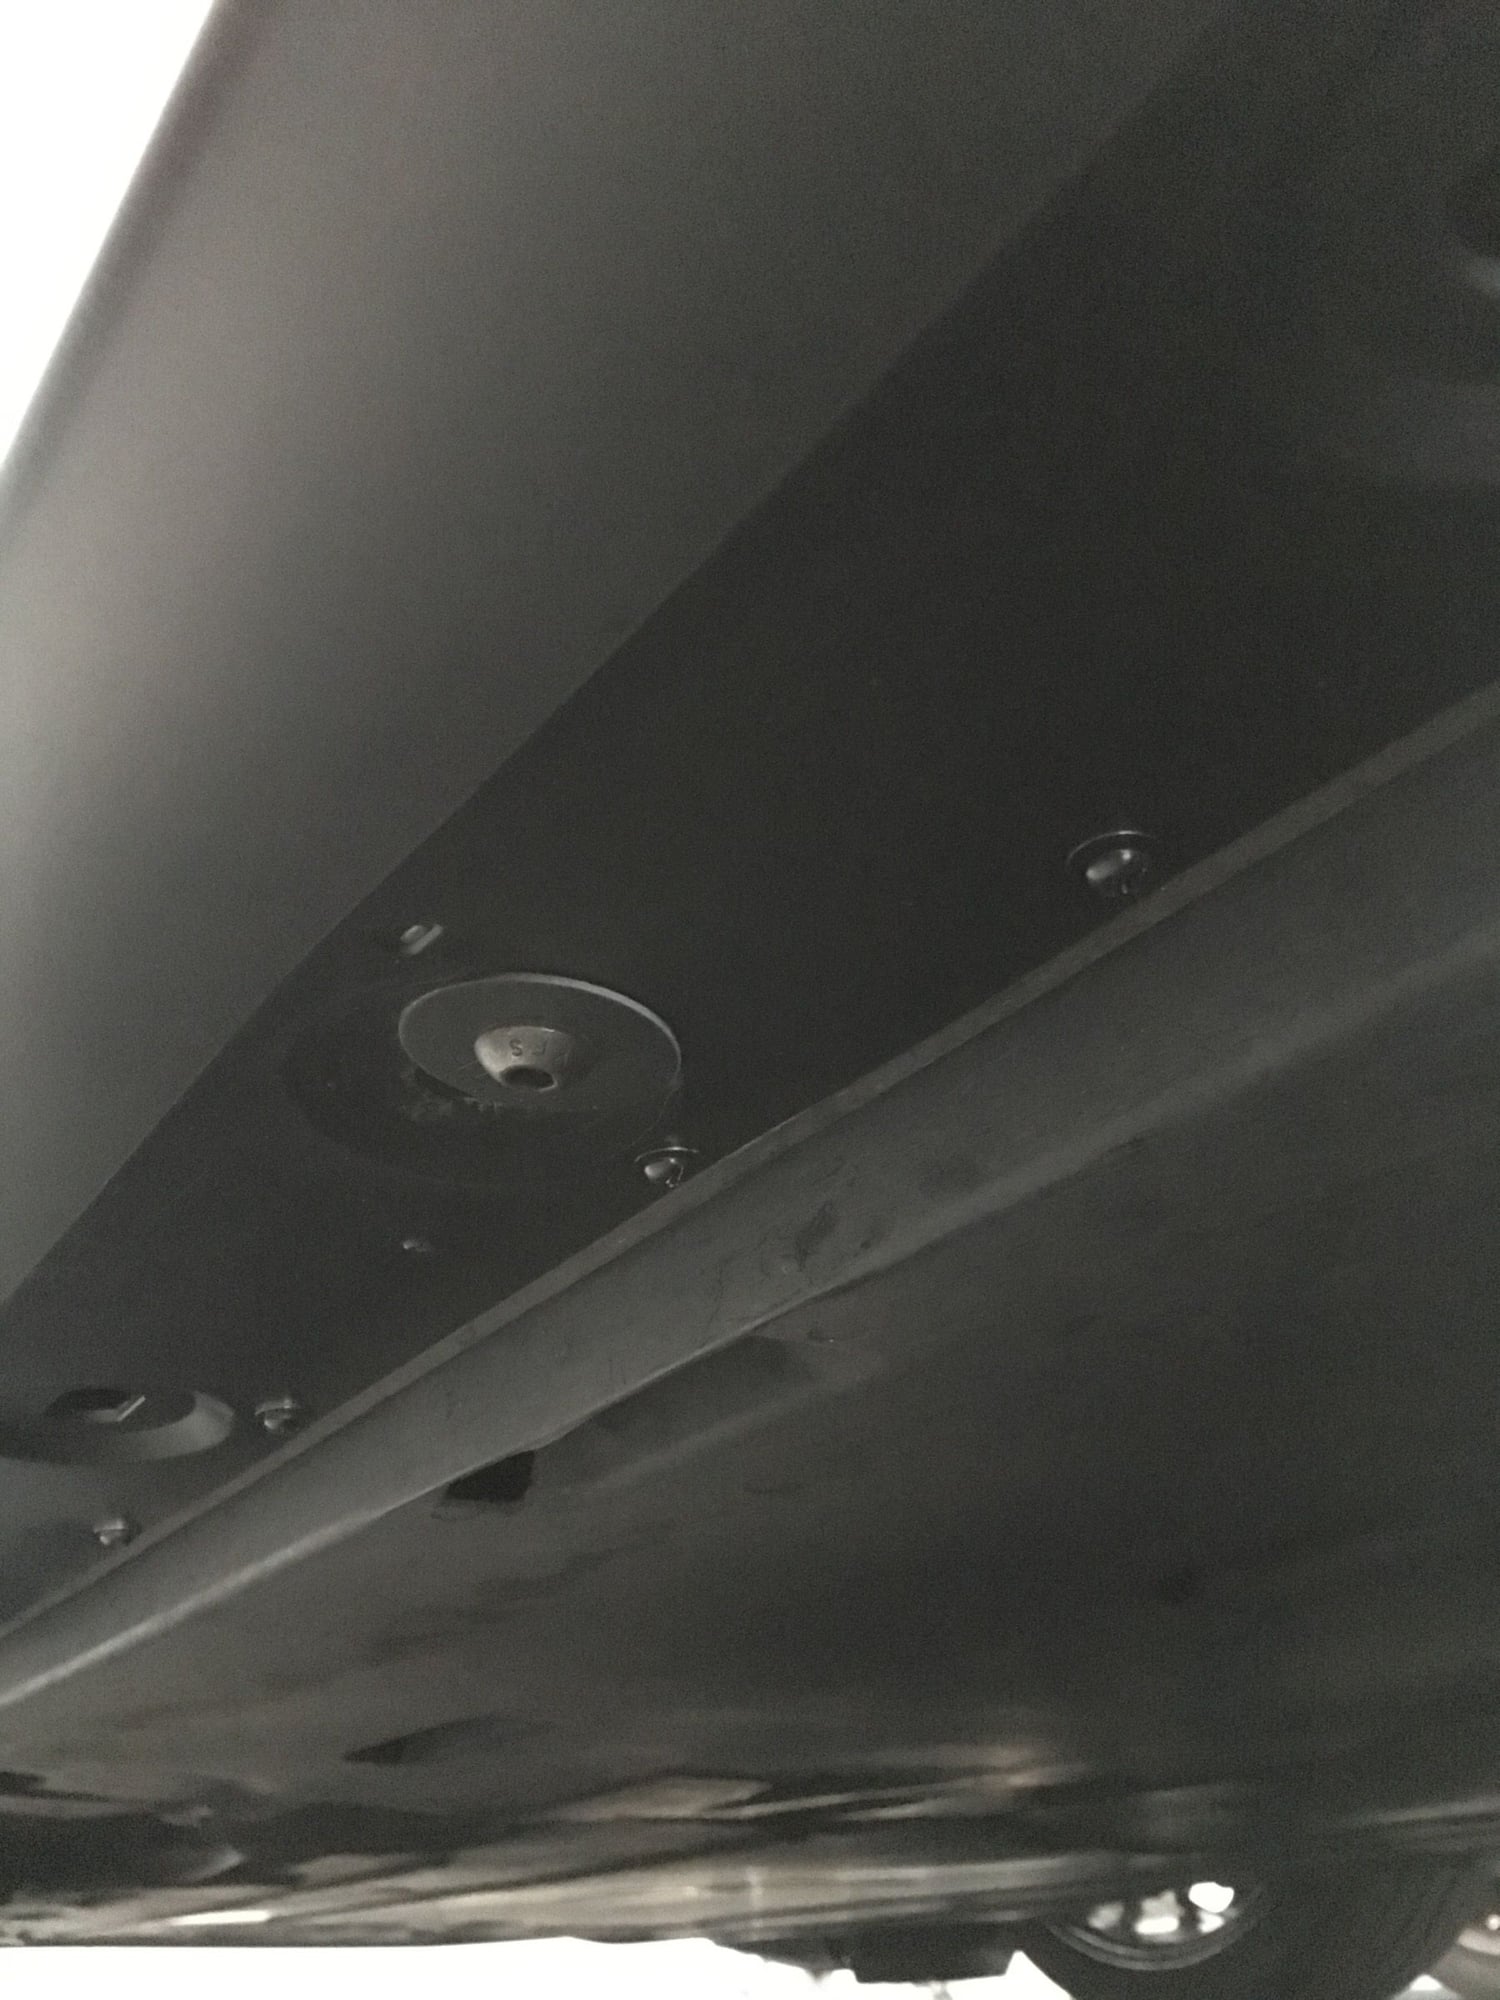
Pics from underneath the car:
(note my final step might be to fill in the unused mounting points with some plastic blanking plates)
Additional update REVISION 3
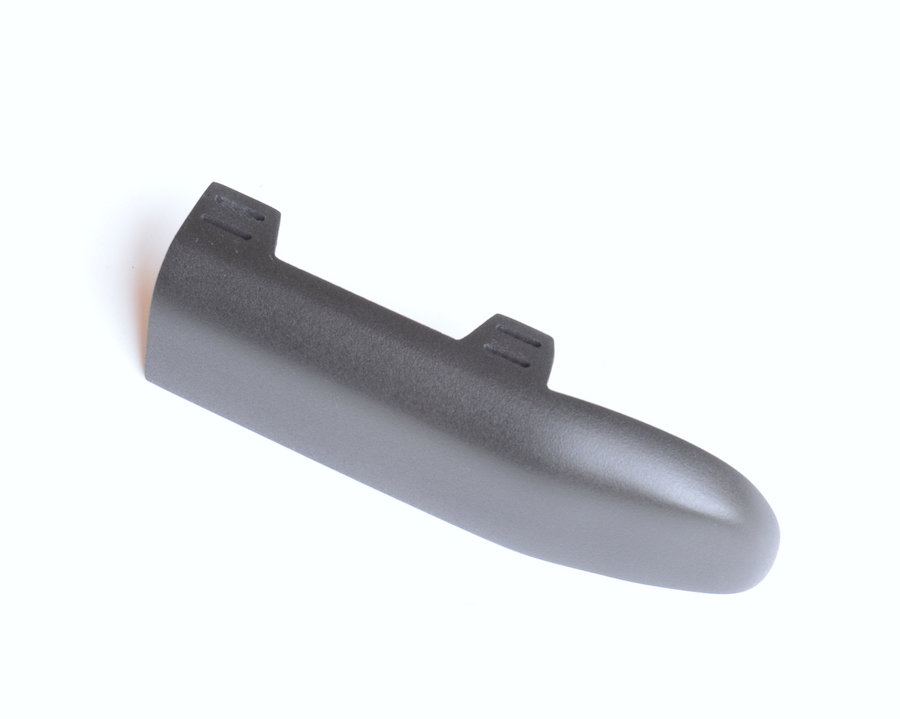
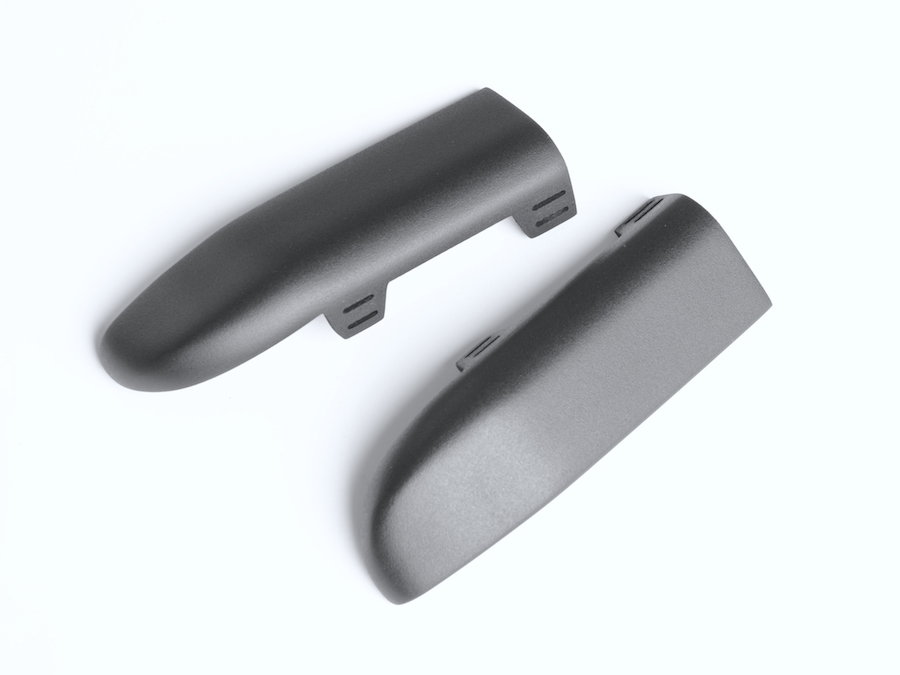
I'd been providing some tips to a fellow Rennlister who's about to undertake the same project, and realized that I had not updated the thread with the last modification I made. I had designed custom end-caps to fit at the front of the skirt, and close the gap between the base of the skirt and the underside of the sill. Initially I had used a trimmed rubber piece attached to some L brackets. It worked fine but I always wanted to do something more precise to get a true OEM look.
Here are some pics of the final parts below, and where they fit.
Looks great. Nice job tackling this type of project.
I'd been thinking of doing something similar but using the 997 widebody sil. I expect you explored this? Seems like it would at least be the correct length?
Looks great. You should start selling this modified side sill for the ones that cannot diy. Good job, it does not look easy by any means especially playing around with a heat gun. Nice work and the finish is very oem like.
You win the internet today Sir. Well done, very well done. I had a spoiler lip on my old Esprit that was under constant abuse. Turns out some garden edging from Home Depot and elbow grease saved me $300.
You win the internet today Sir. Well done, very well done. I had a spoiler lip on my old Esprit that was under constant abuse. Turns out some garden edging from Home Depot and elbow grease saved me $300.
I wonder how well this would work for a 4S.....
Good question...
I think with a 4S, you will have much less effort, if any, to manage the contour near the rear wheel arch.
My main concern would be the height of the skirt (as shown below on a 997.2)
I haven't done the measurements, but from everything I've seen, it looks like the 997.2 skirts are higher in comparison to the 991. Of course this may be an optical illusion.
If you'd like to send me the measurements of your 4S skirts, I'll be happy to compare with mine, and let you know.


 06-02-2017 | 10:42 PM
 ), I finally convinced myself that the 991 skirts could be modified to fit on my 997.2 C2.
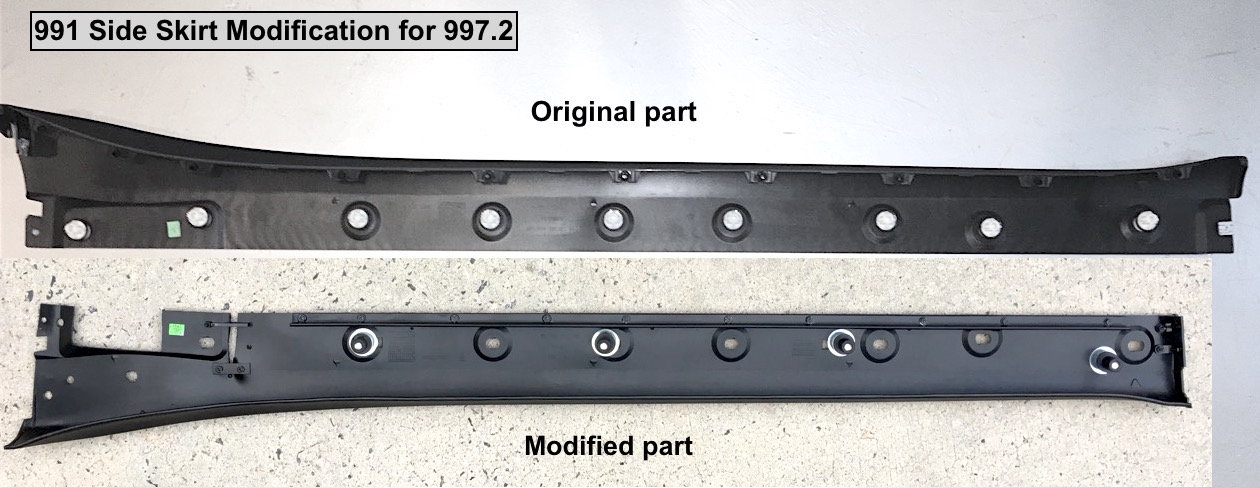

 for the specs of the well nuts he used on his project. This saved me a lot of time in testing different lengths/options.