When you click on links to various merchants on this site and make a purchase, this can result in this site earning a commission. Affiliate programs and affiliations include, but are not limited to, the eBay Partner Network.
Silicone is a viscoelastic, or a cross-linked polymer. It doesn't melt and re-flow.
Thanks Bill Nye! Yes, correct. I love explanations such as this.
Sorry, it was a year ago that I was researching this. Correction, you'd have to melt/cut the plastic the silicone bonded together, or cut the silicone, paint them and then melt them back together or silicone seal them. There's a video on YouTube of someone doing this with a 997 headlight.
Nice car and nice job. I envy you the lugged wheels! And the irony: delivered with it's grandfather above it on the carrier - a good omen; the license plate bearing E39 - sort of a contradiction.
Nice car and nice job. I envy you the lugged wheels! And the irony: delivered with it's grandfather above it on the carrier - a good omen; the license plate bearing E39 - sort of a contradiction.
Yes, the PO knew the pains of CLs. And I actually liked seeing E39 on my original plate. Arguably one of the best BMWs ever made and still the best sports sedan ever made. I'll have one in the garage someday.
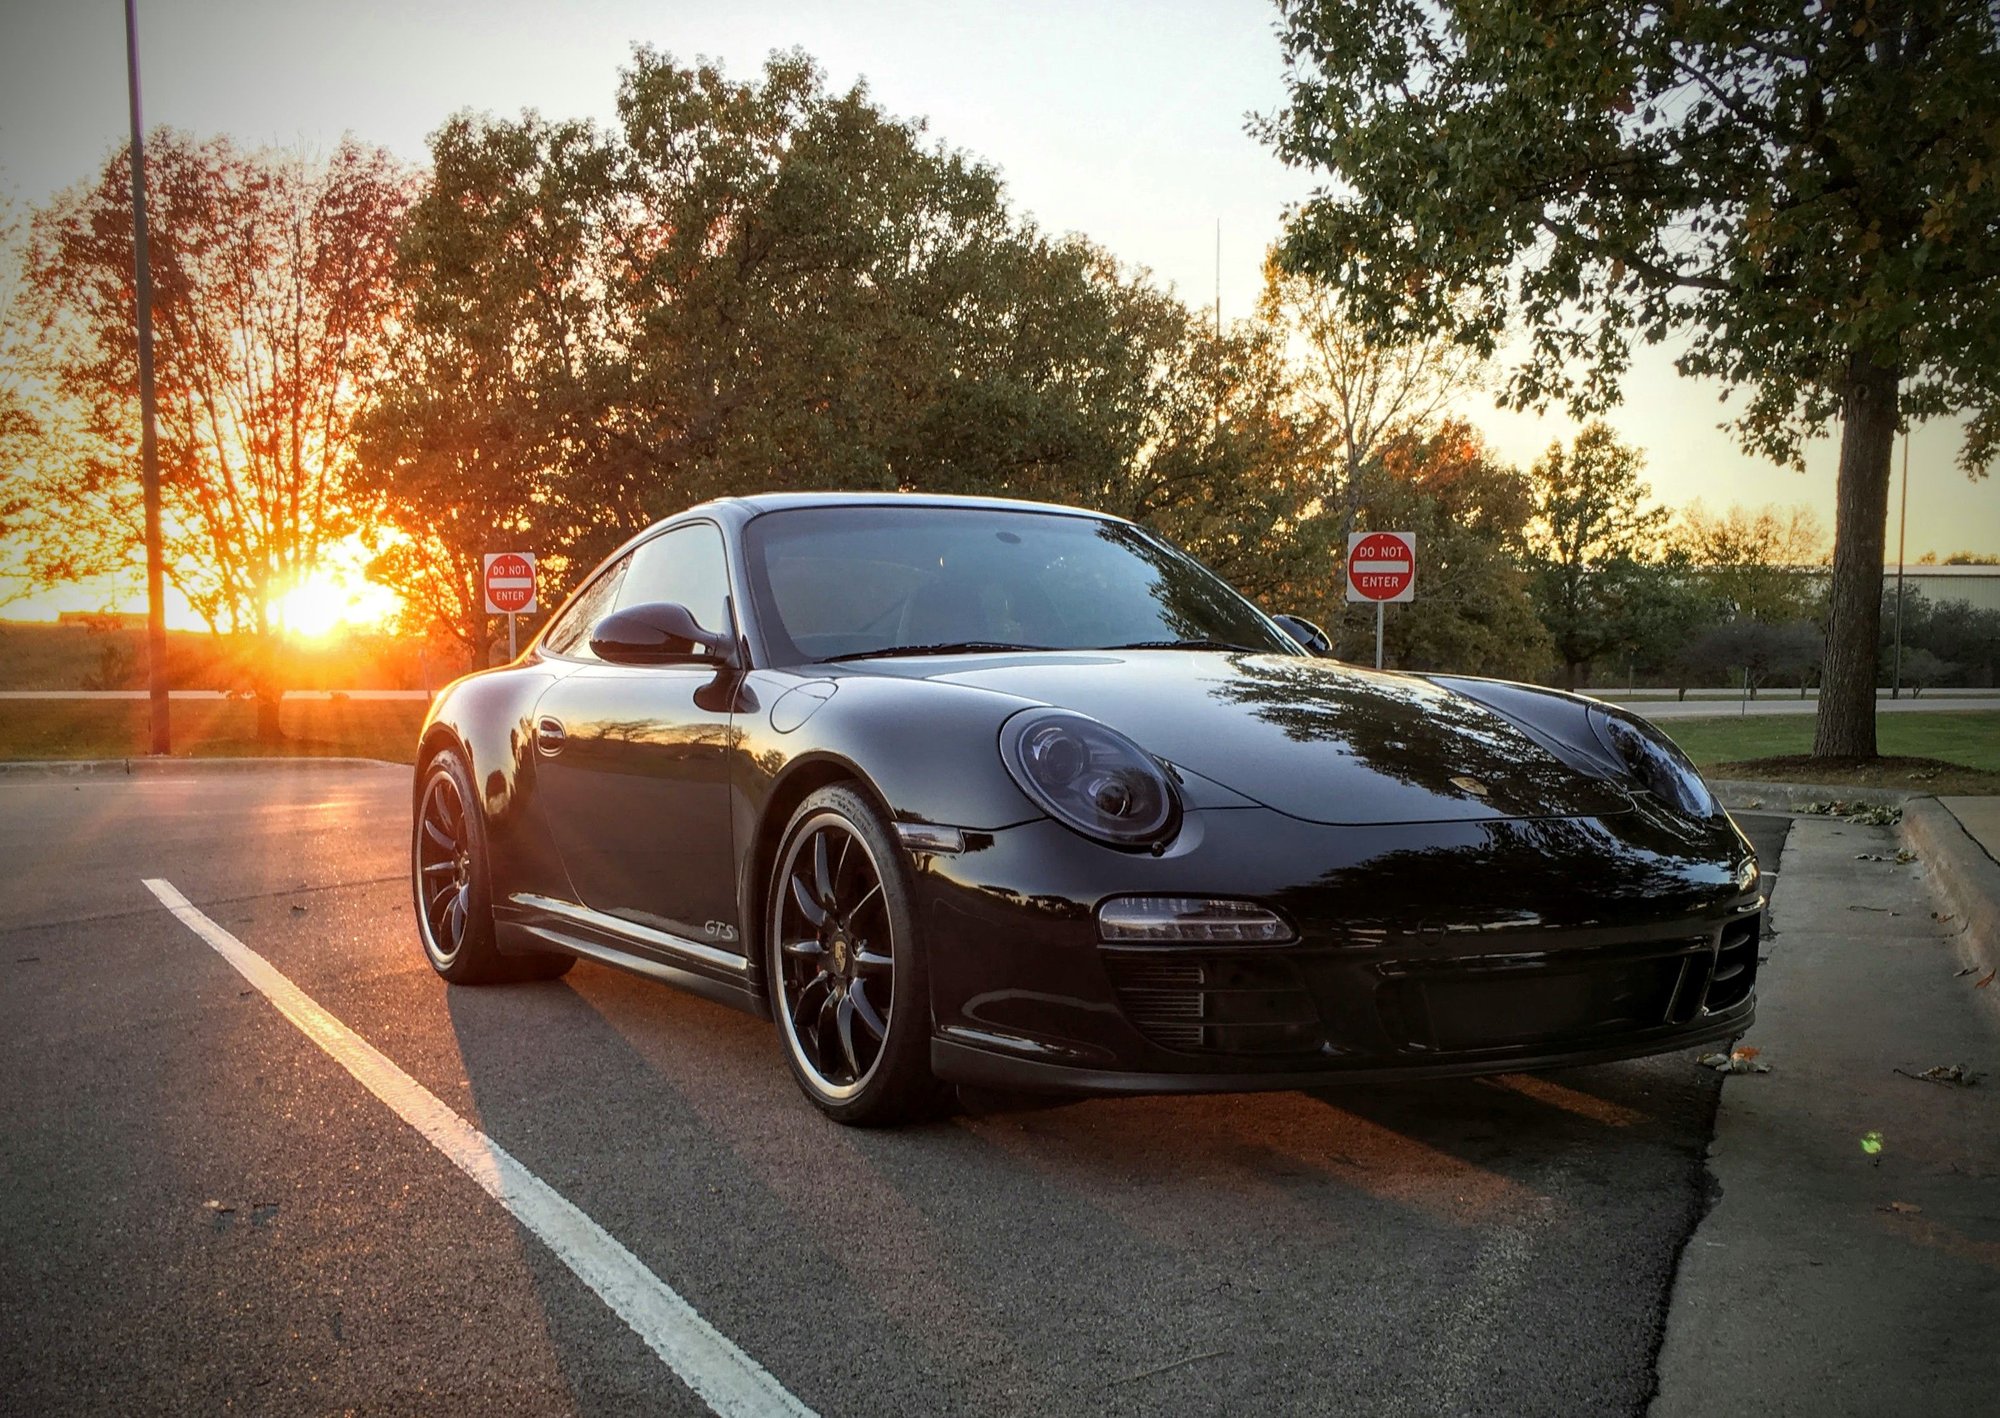
CL are a pain, dealer charges $50 just to torque them to spec. Gees. But they look Good tho. Here's some snapshots of my GTS. Not trying to steal your show. Your pics look amazing btw.
997 GTS OE CL Spec is for 19" RS Spyder wheels. Which are pictured above. Thats what mine came with, but I have some custom CL on order to fix the offset since you can't space CL wheels.
Fall 2015 On a trip from Chi to Madison for some UW Badger Football.
Steering Wheel
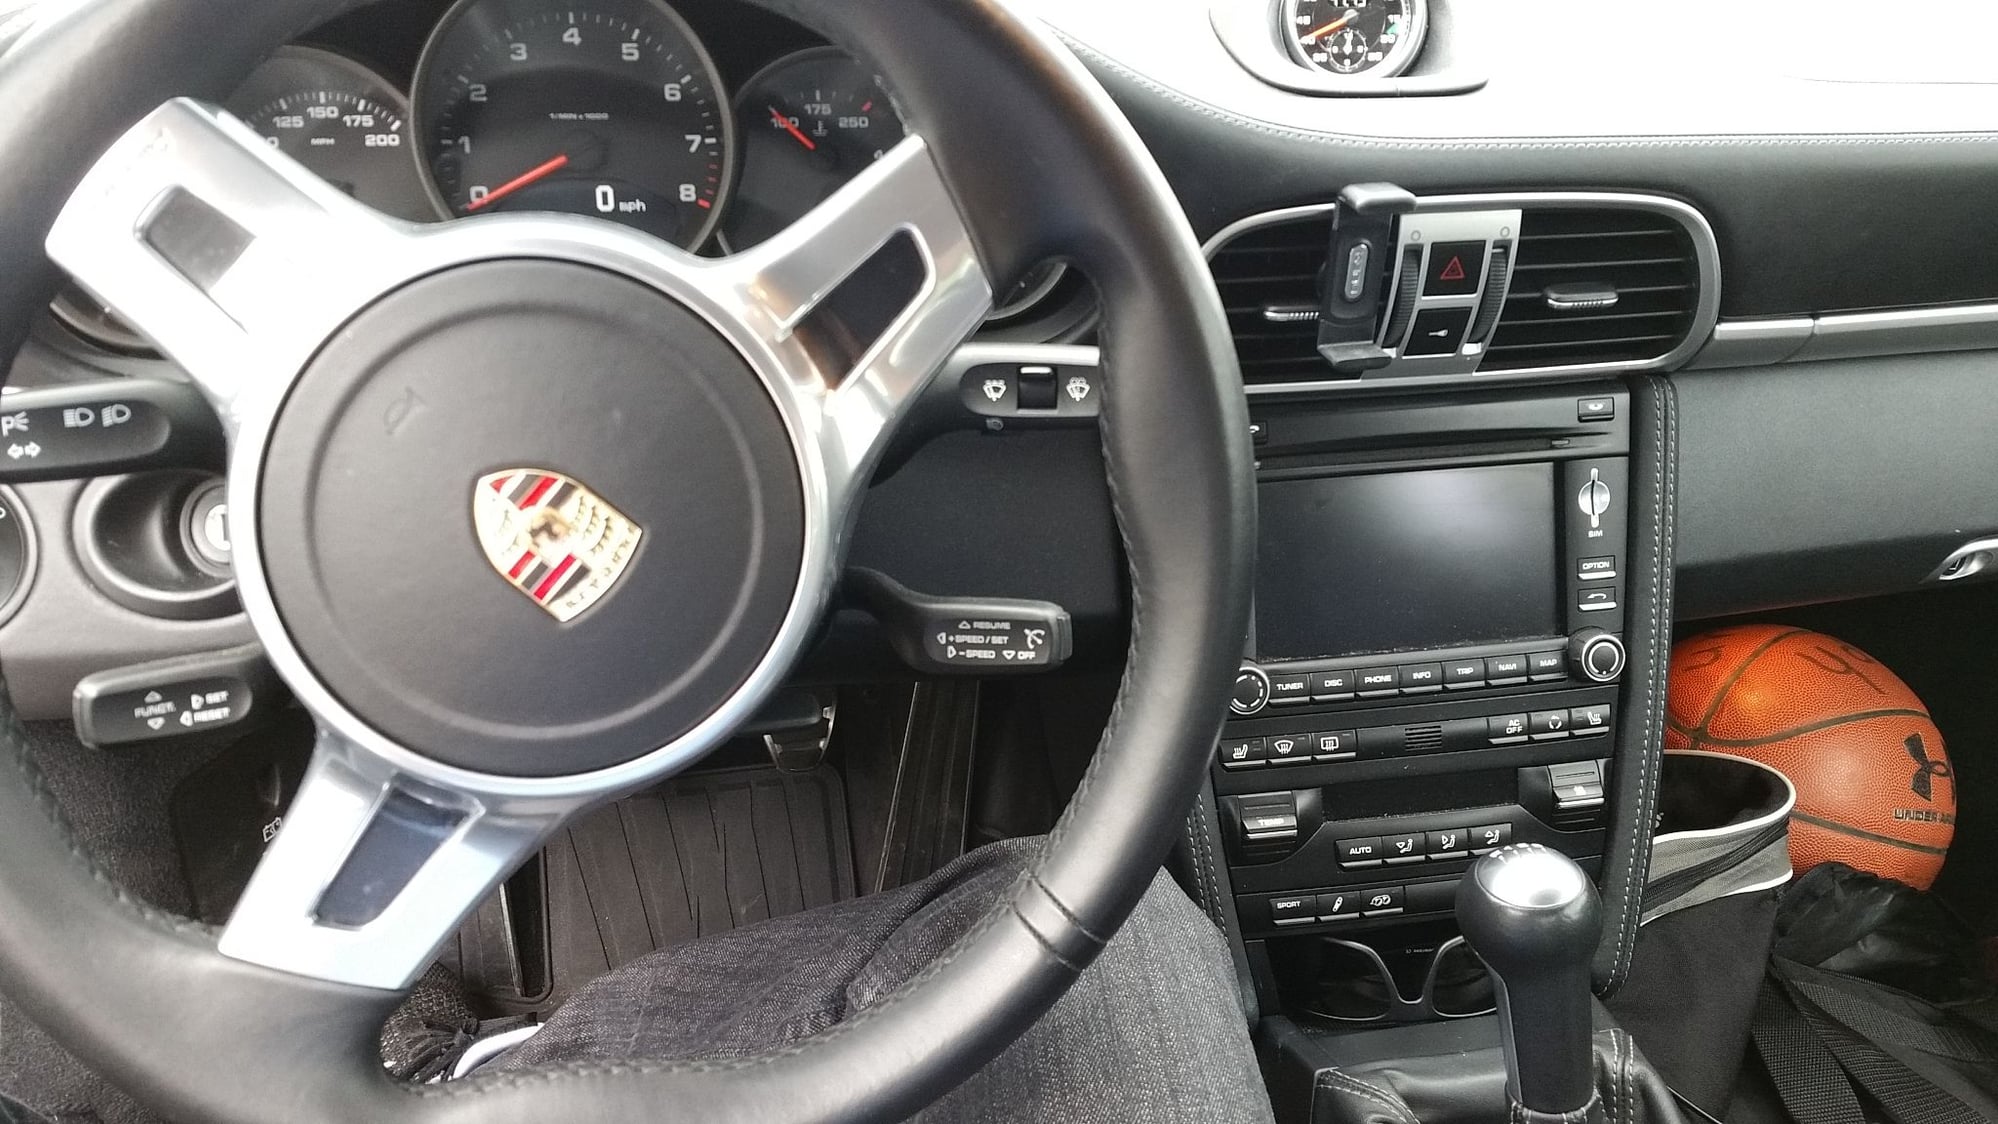
As mentioned before, I have long legs. Long enough to the point where I cannot move my knee enough to heal/toe effectively even at full extension of the OEM Sport Design steering wheel. This is a problem because I am a proud badass and need to be able to heal/toe properly to satisfy my insecurities. Also, it's a lot of fun to do in a weekend car that isn't a DD and a necessity on track if I want my clutch to last the weekend.
There were two options:
1) Buy the Carnewal extension that works with the OEM wheel but still left it ~1.5 in short for my taste (if i'm going to do this I'm going to do it exactly to my prefered spec).
2) Aftermarket wheel, boss kit, and extension.
I went with option (2) because while option (1) retained the OEM steering wheel it left the stalks farther away than is naturally ergonomic. I figured I could do better.
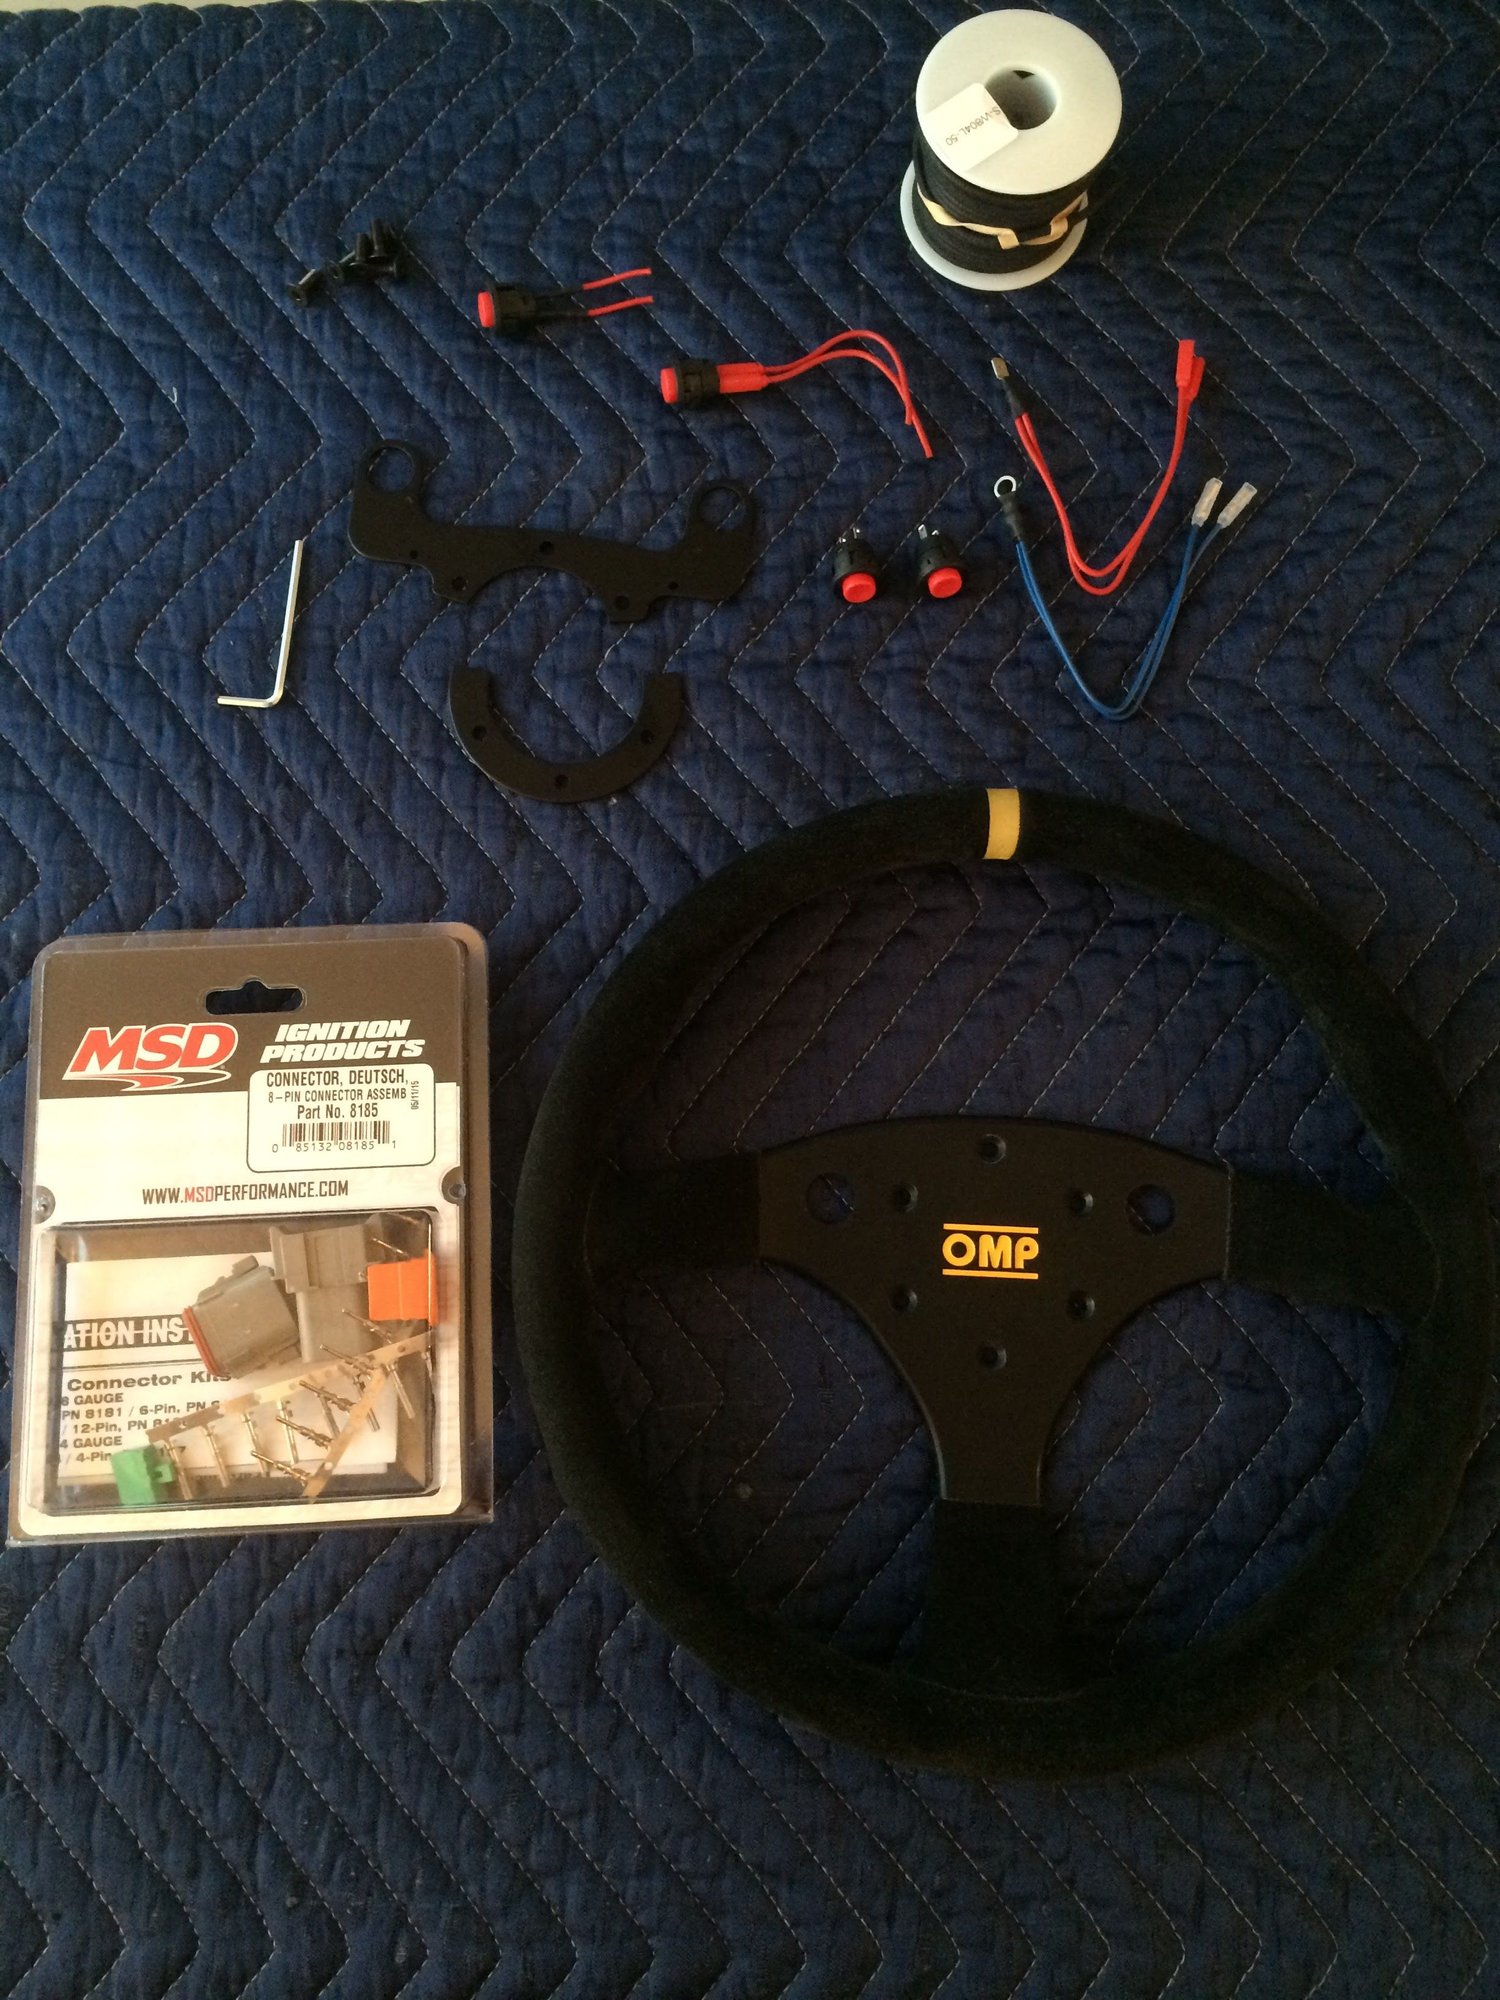
First I selected the parts:
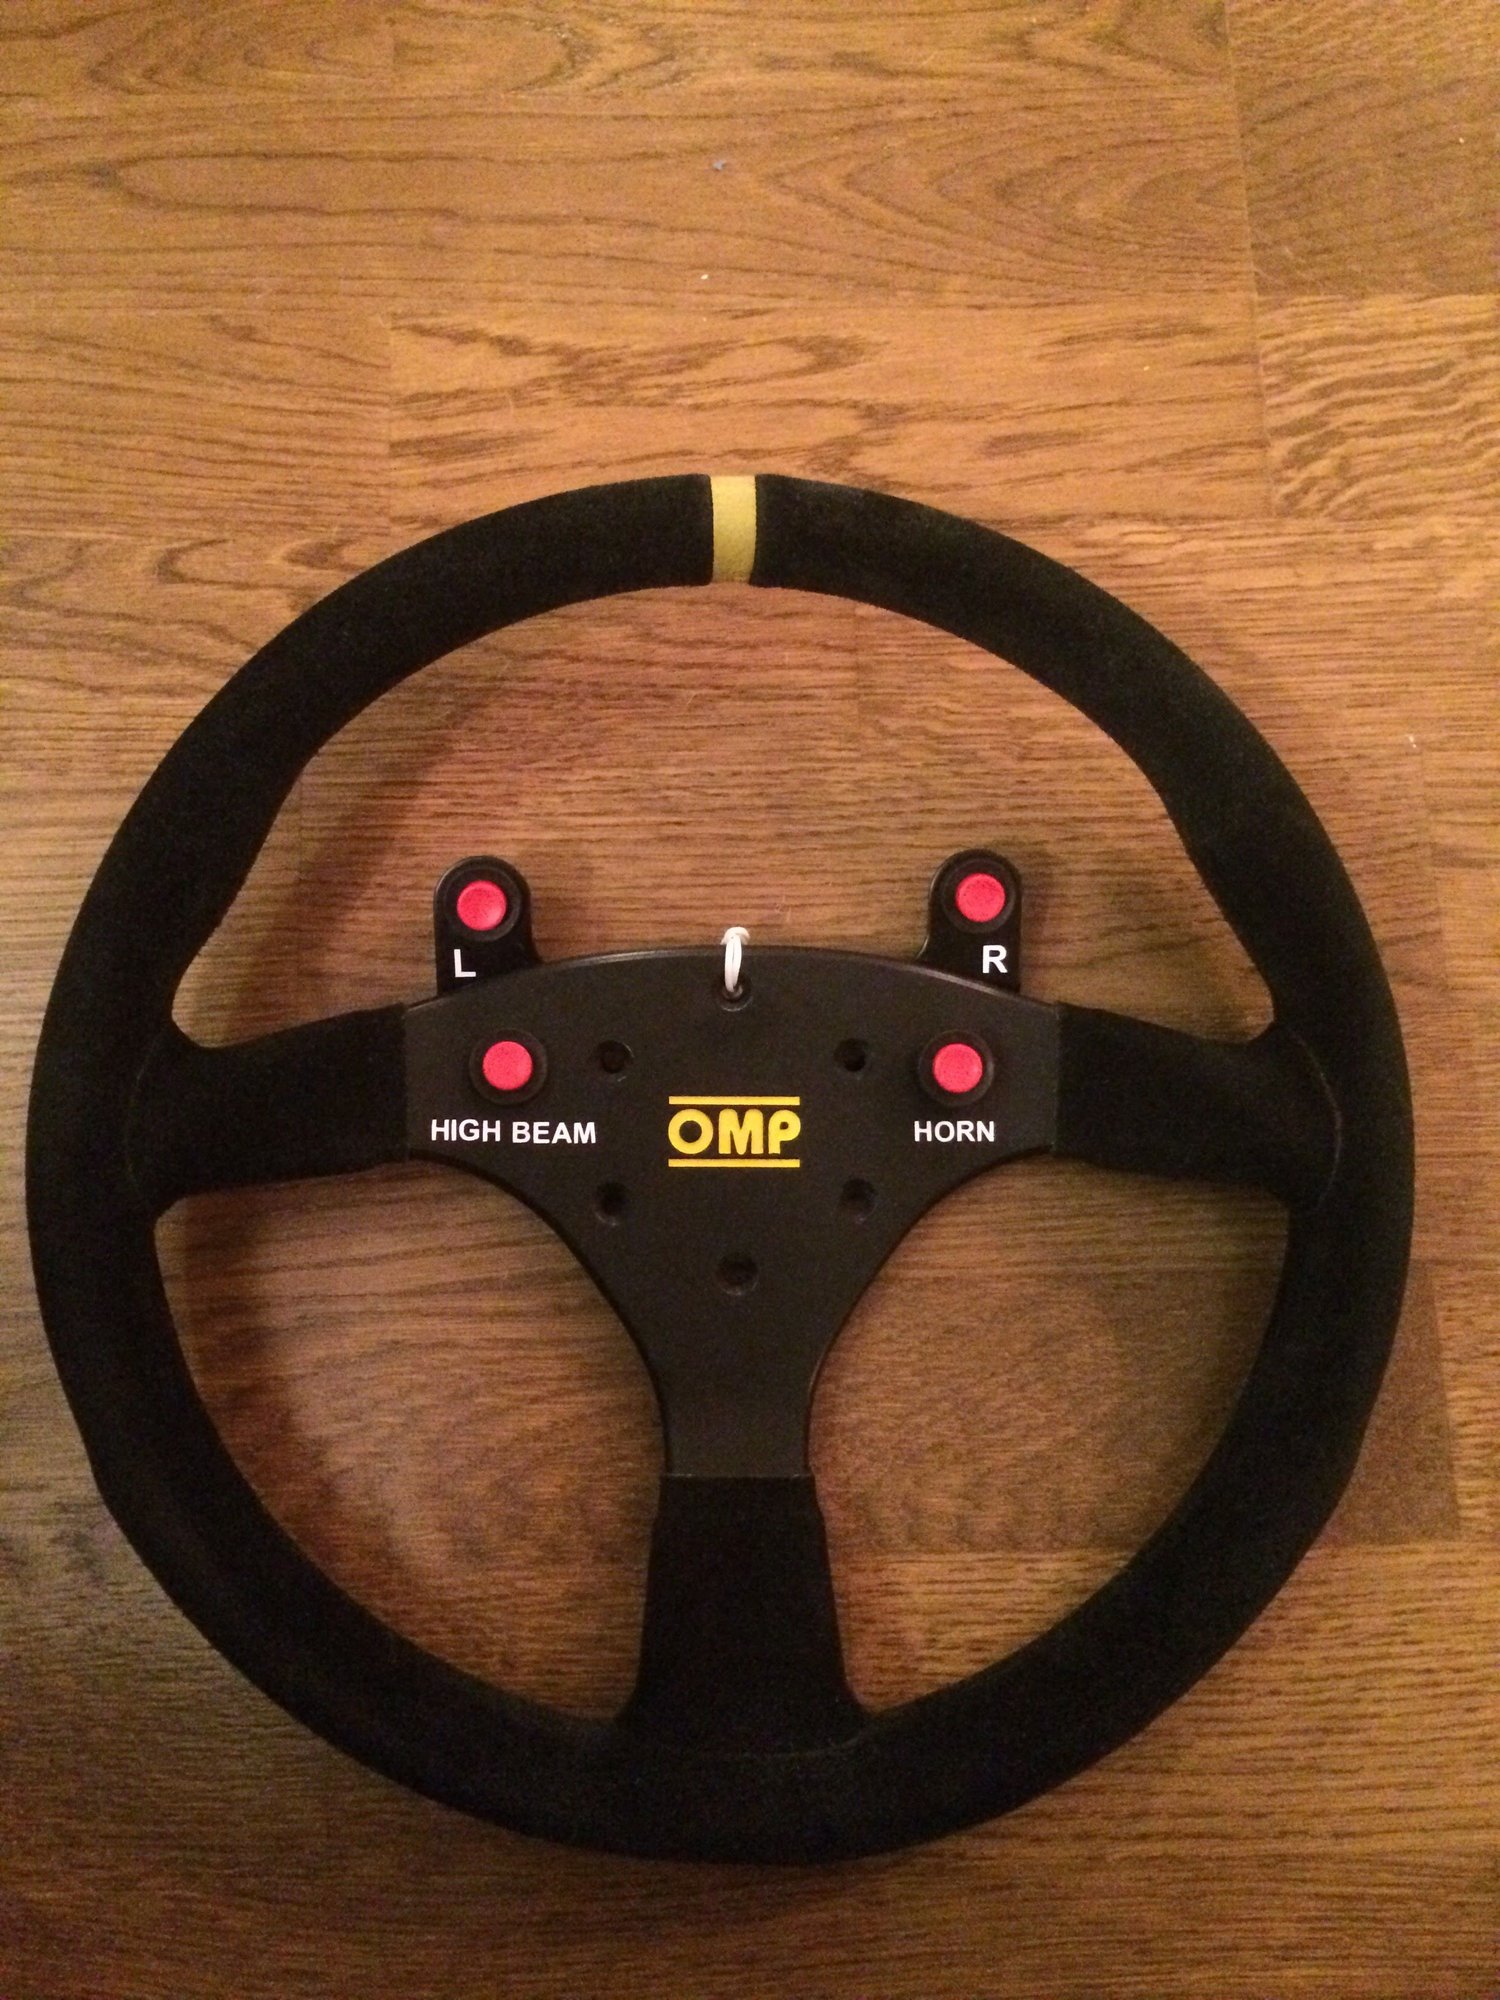
997 OMP Cup Car Steering Wheel (as close as I can get to OEM)
Rennline Boss Kit
OMP Extension
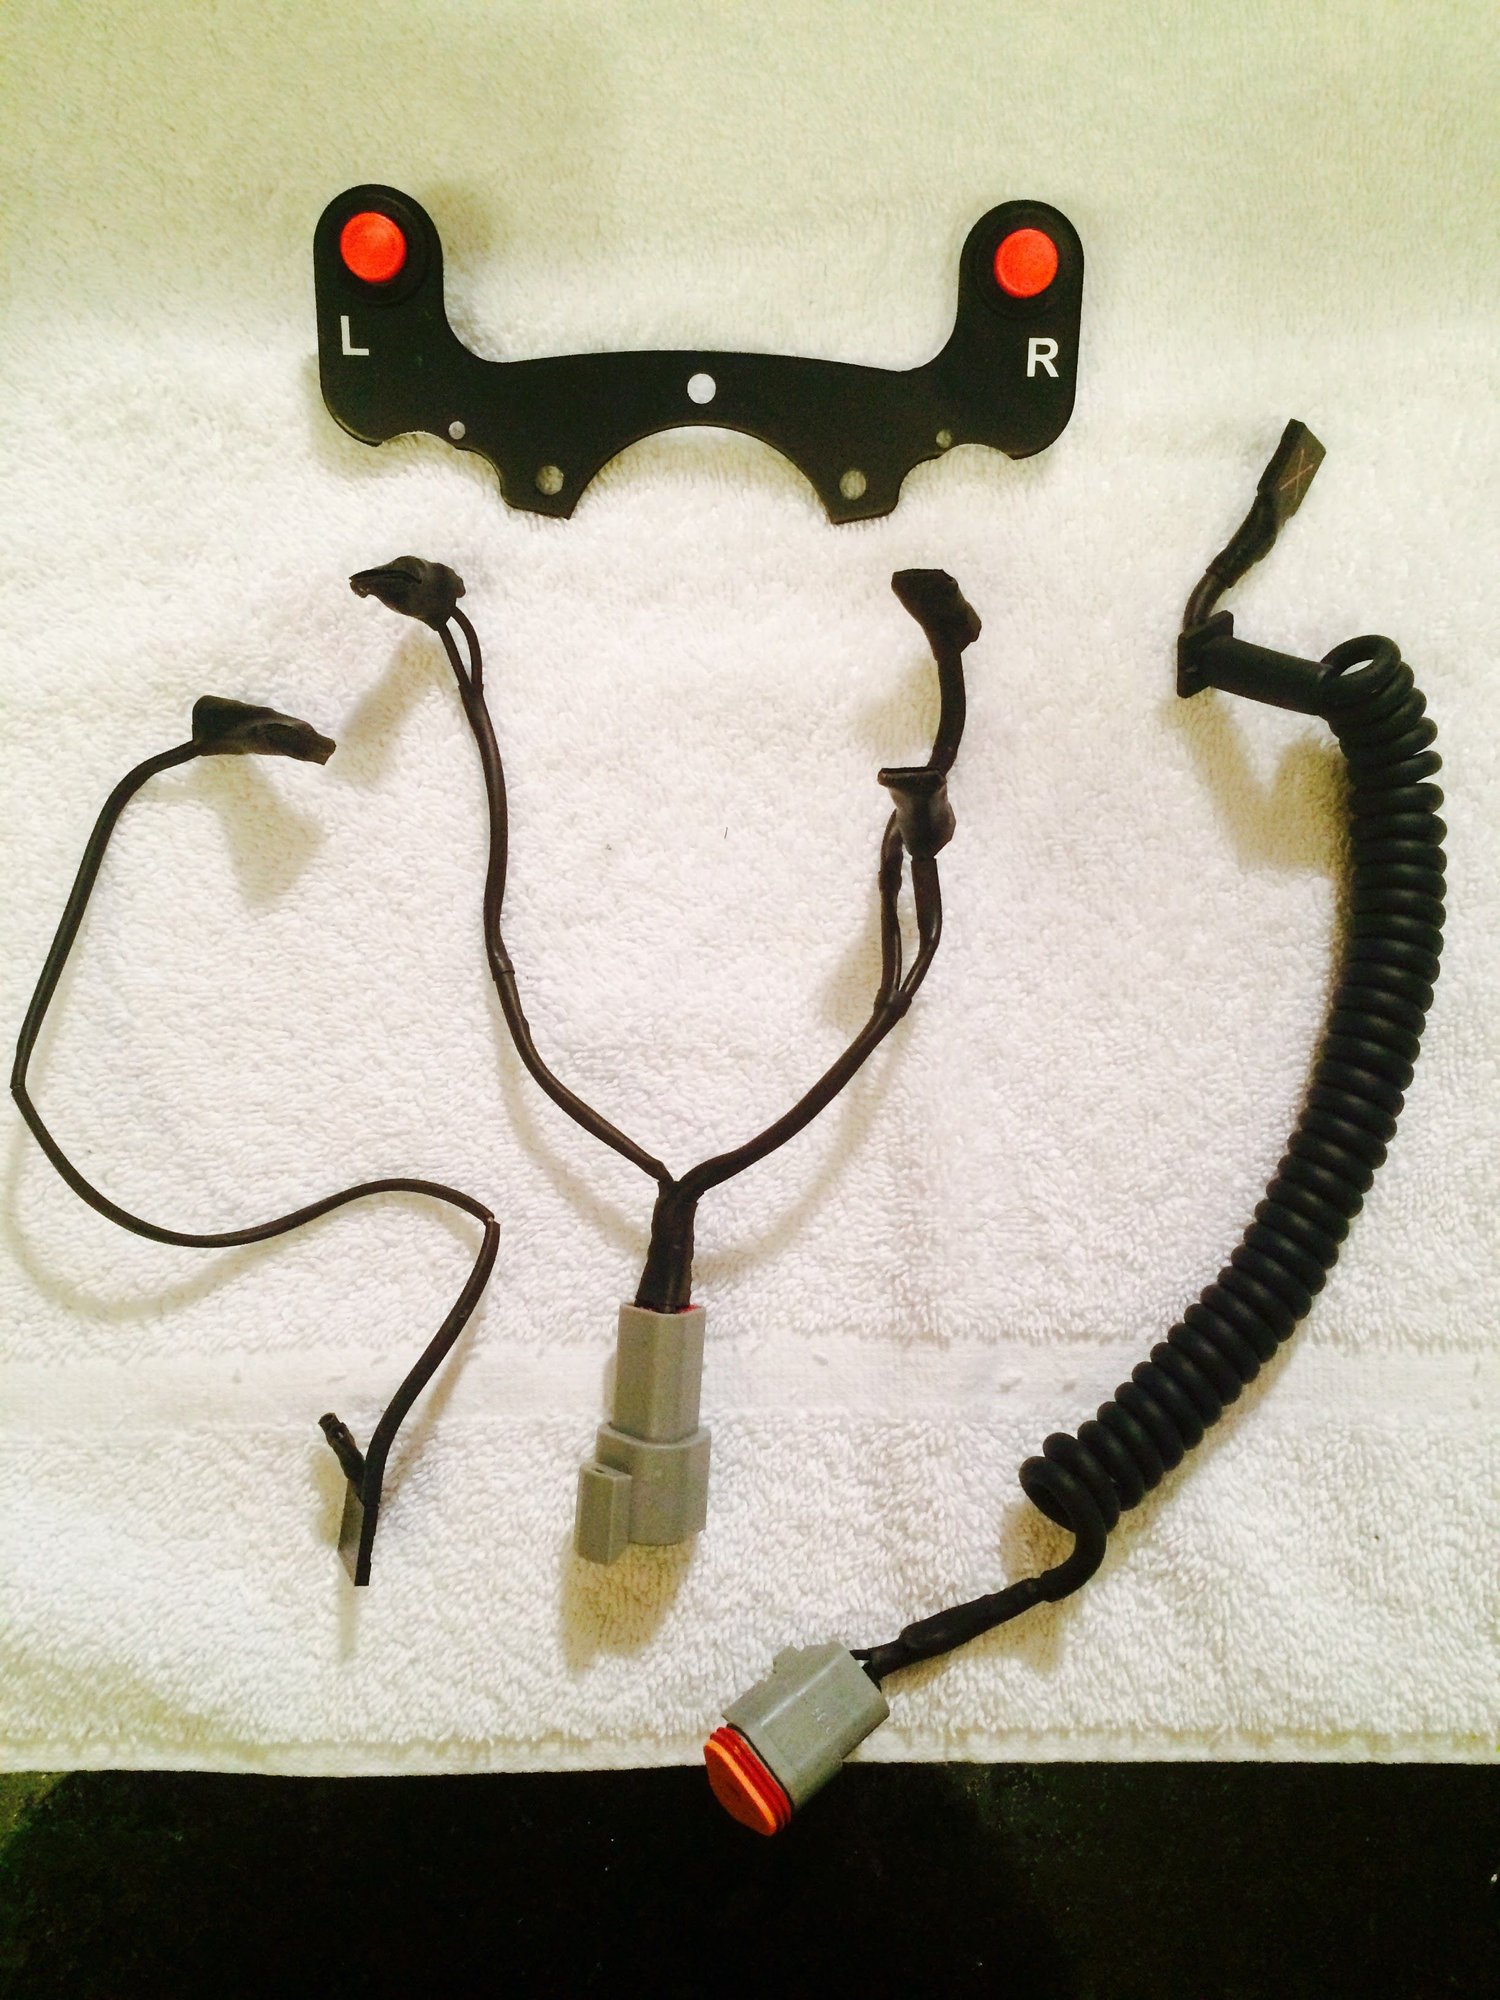
Sparco Switch Plate
3-pin Deutsch Connector
997.2 Wire Diagram
Various Wires, Switches, Shrink Tube, Connectors, Soldering Iron, etc etc
This isn't all that's above and I later switched from an 8-pin to a 3-pin Deutsch connector.
I knocked out jumping the SRS system and wiring for the horn first.
I had four buttons to work with. Based on ergonomics I chose the top two to be L and R indicator, the left to be High Beam and the right to be the horn. I think I will eventually add in the 'mist' wiper button too and I'll do that when I decide to put a radio in the car for track days.
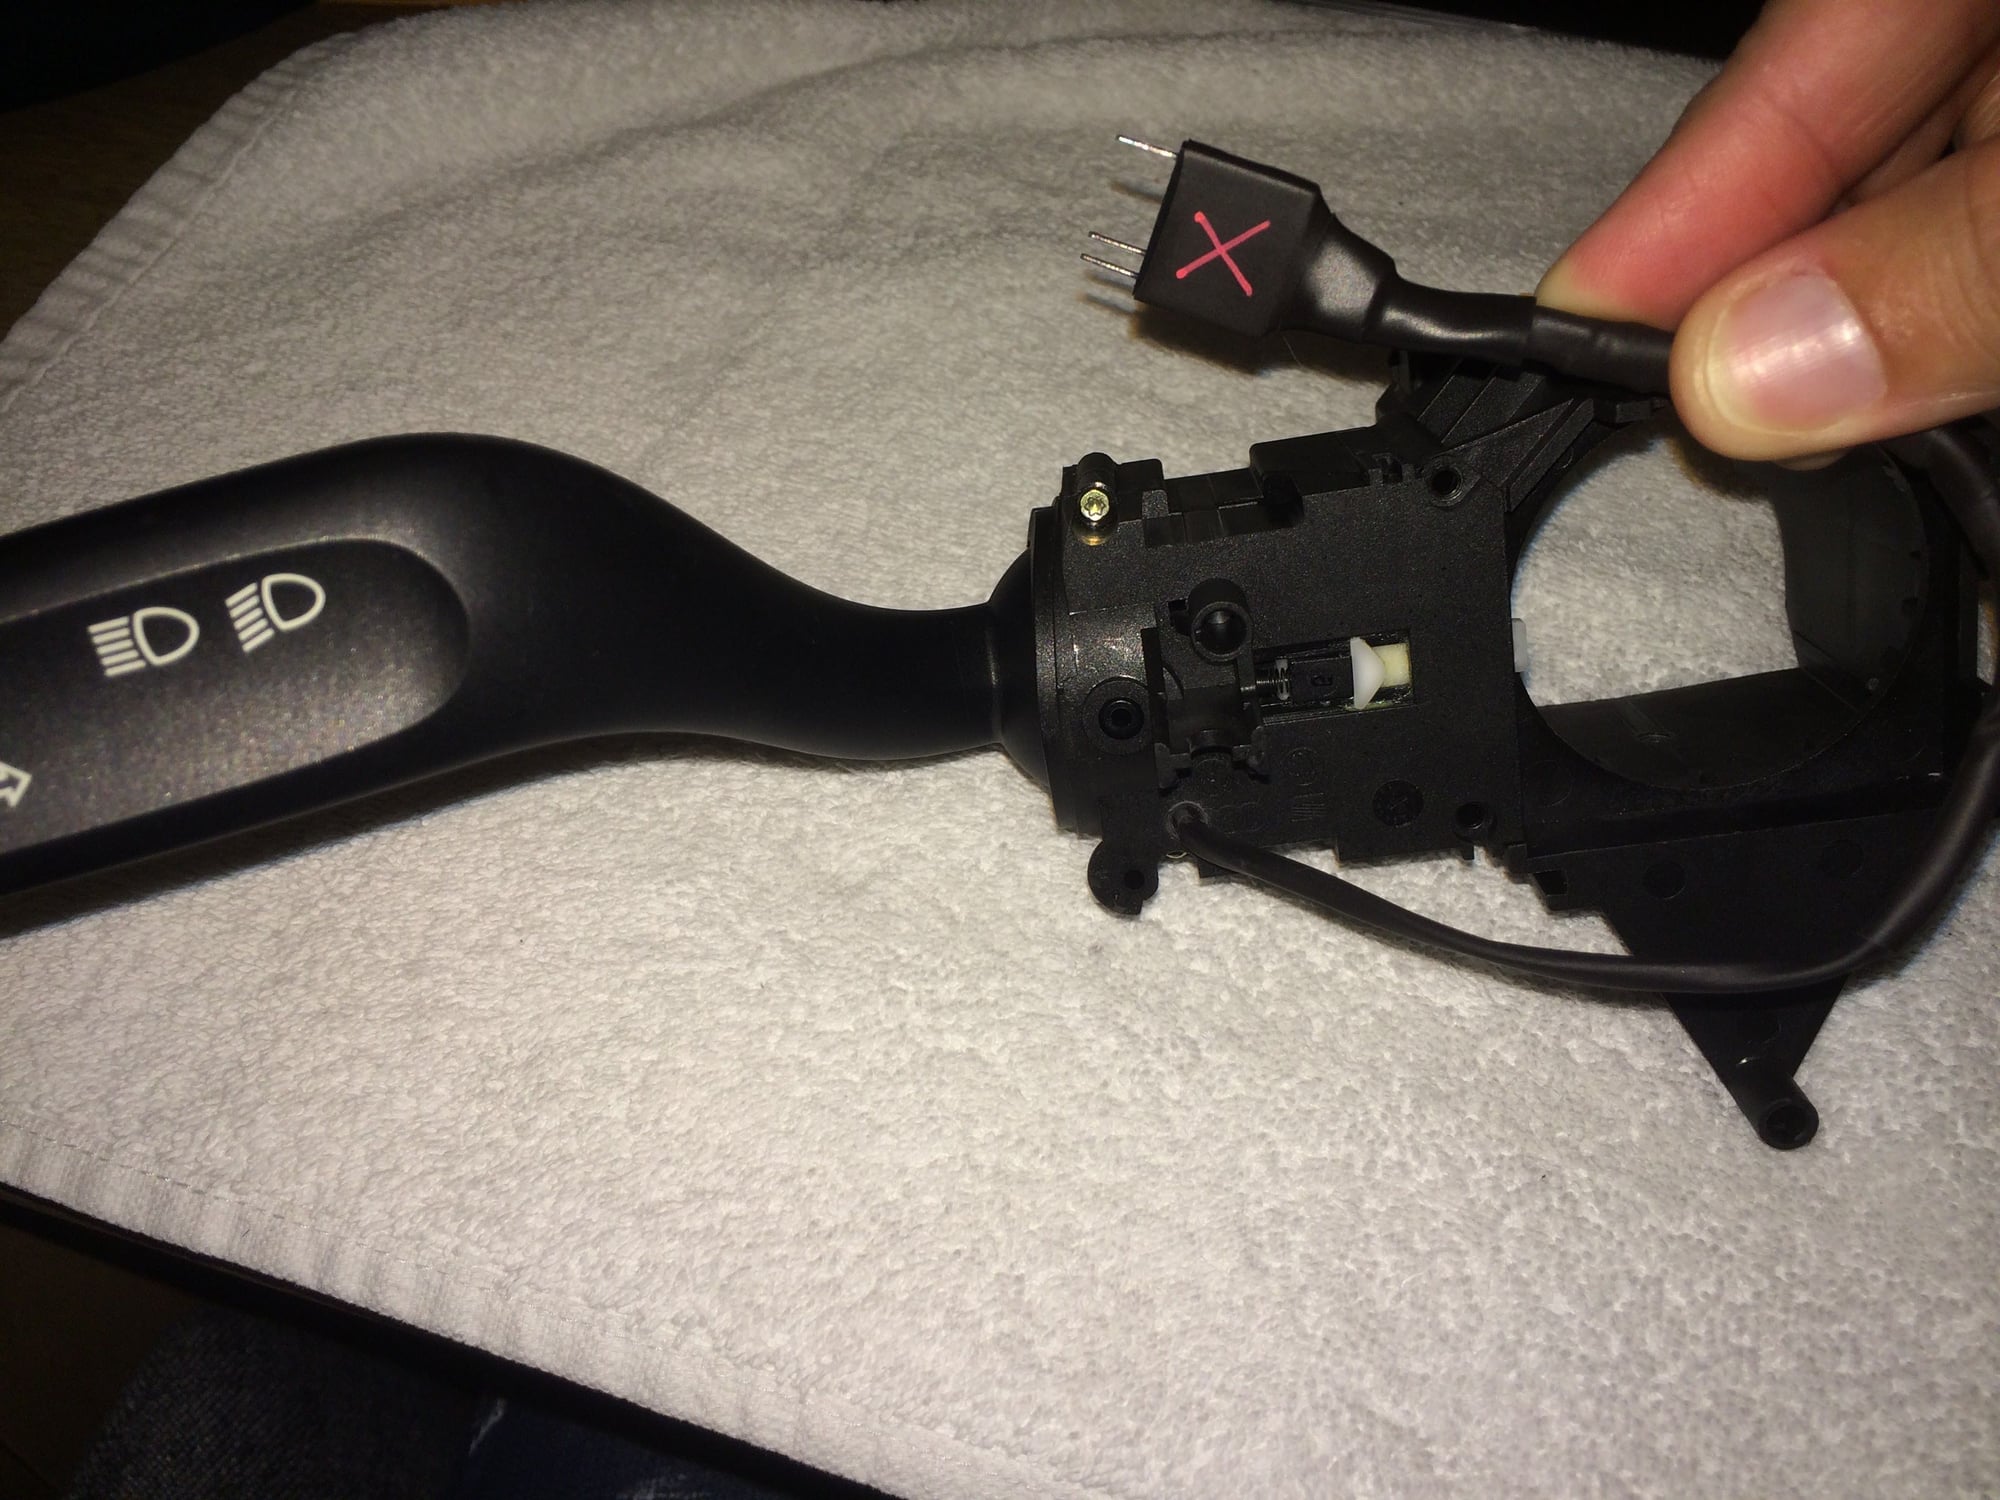
Secondly, I had to figure out how to wire the switches to the steering wheel and where to connect those to the car. I found in the wiring diagram that everything was neatly located in the indicator control module.
The detailed instructions for how I tapped that can be found here: https://rennlist.com/forums/997-foru...l-buttons.html
Here's an abridged version:
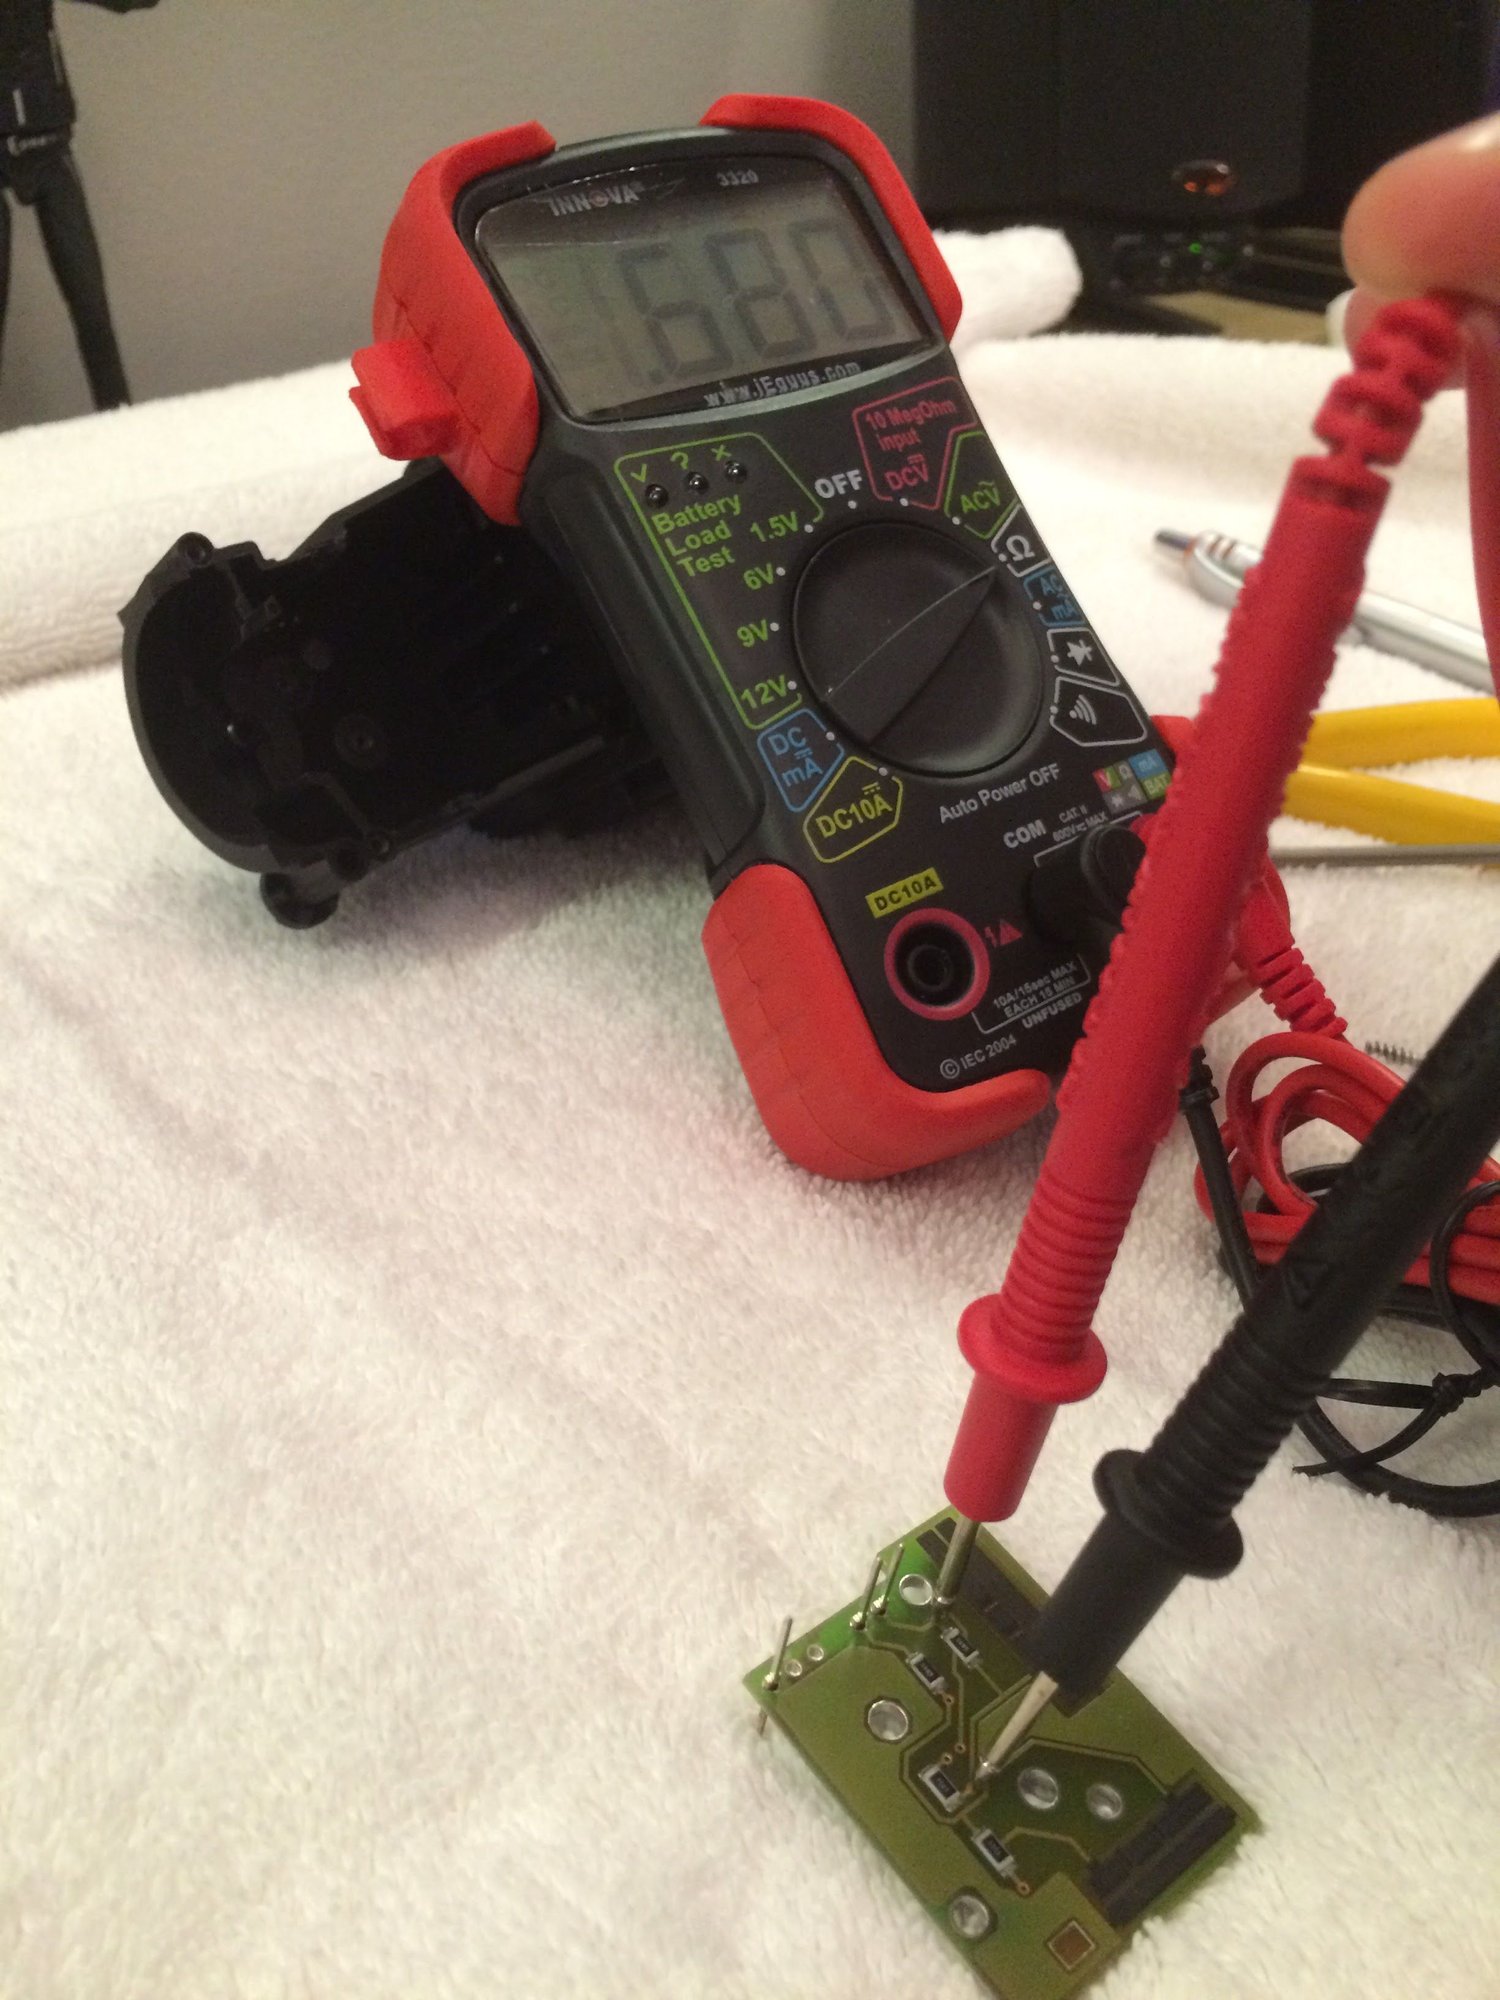
First I took apart the steering wheel, removed all the control modules, and disassembled the indicator control module. Then I tested/measured the PCB, recorded the resistance settings and drew a back of the envelope diagram for the board with the help of a friend.
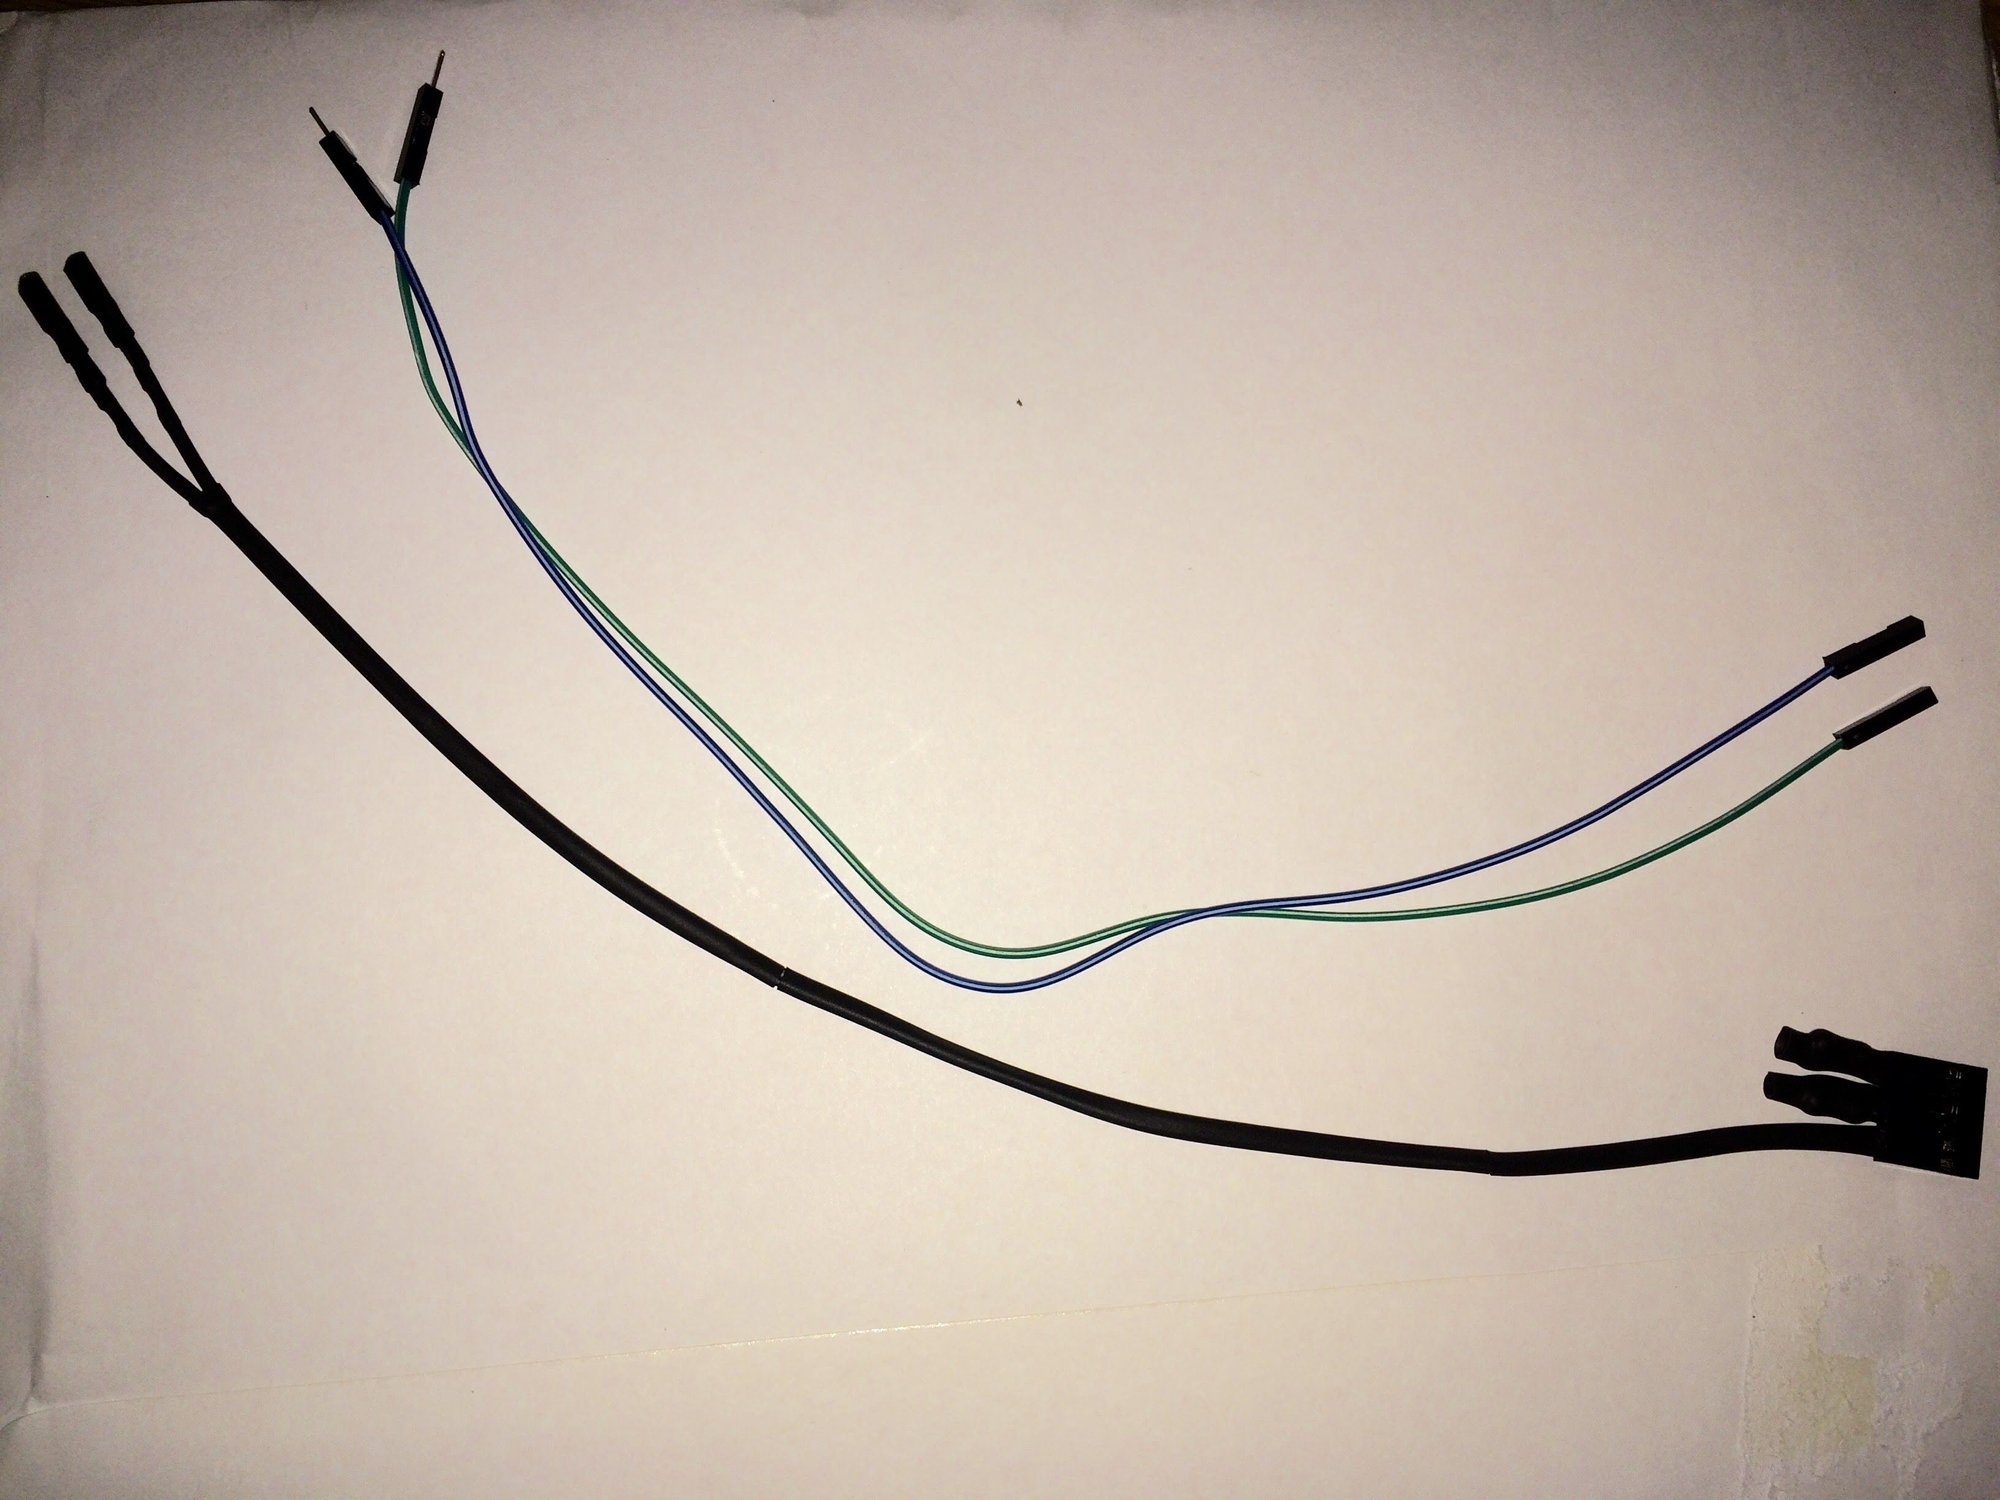
I then soldered leads to the board, routed the wires within the indicator control module, reassembled the module, tidied up the wiring and added a connector.
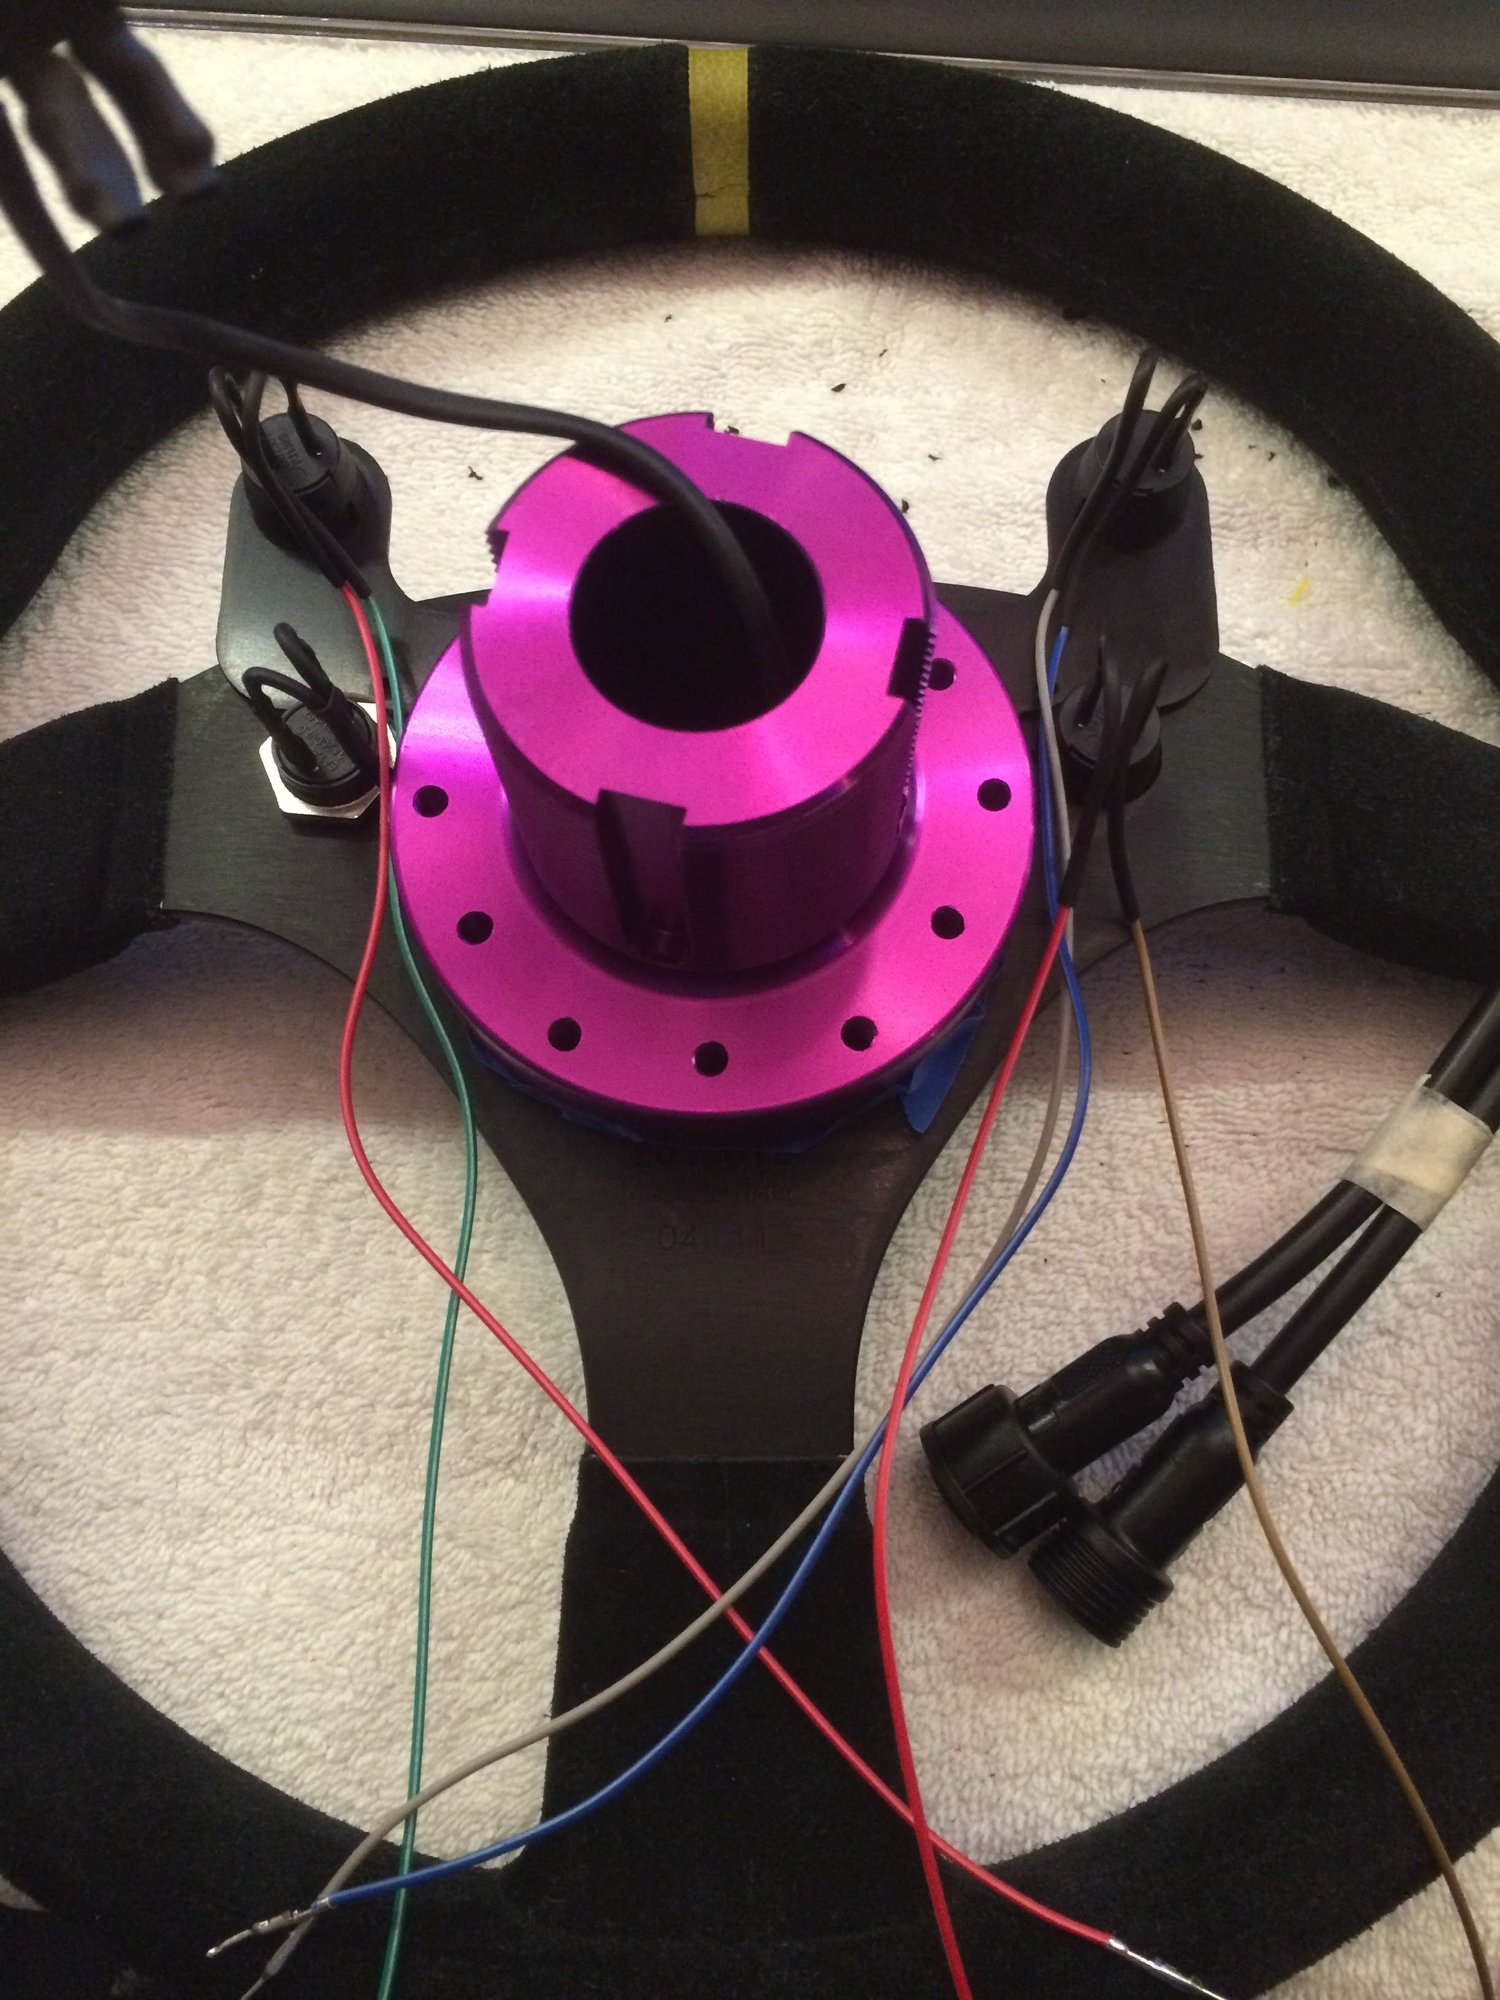
Next I tackled wiring for the steering wheel, added in-line resistors to match those within the indicator control module, tidied up the wiring and added connectors (purple hub was just a demo for mocking).
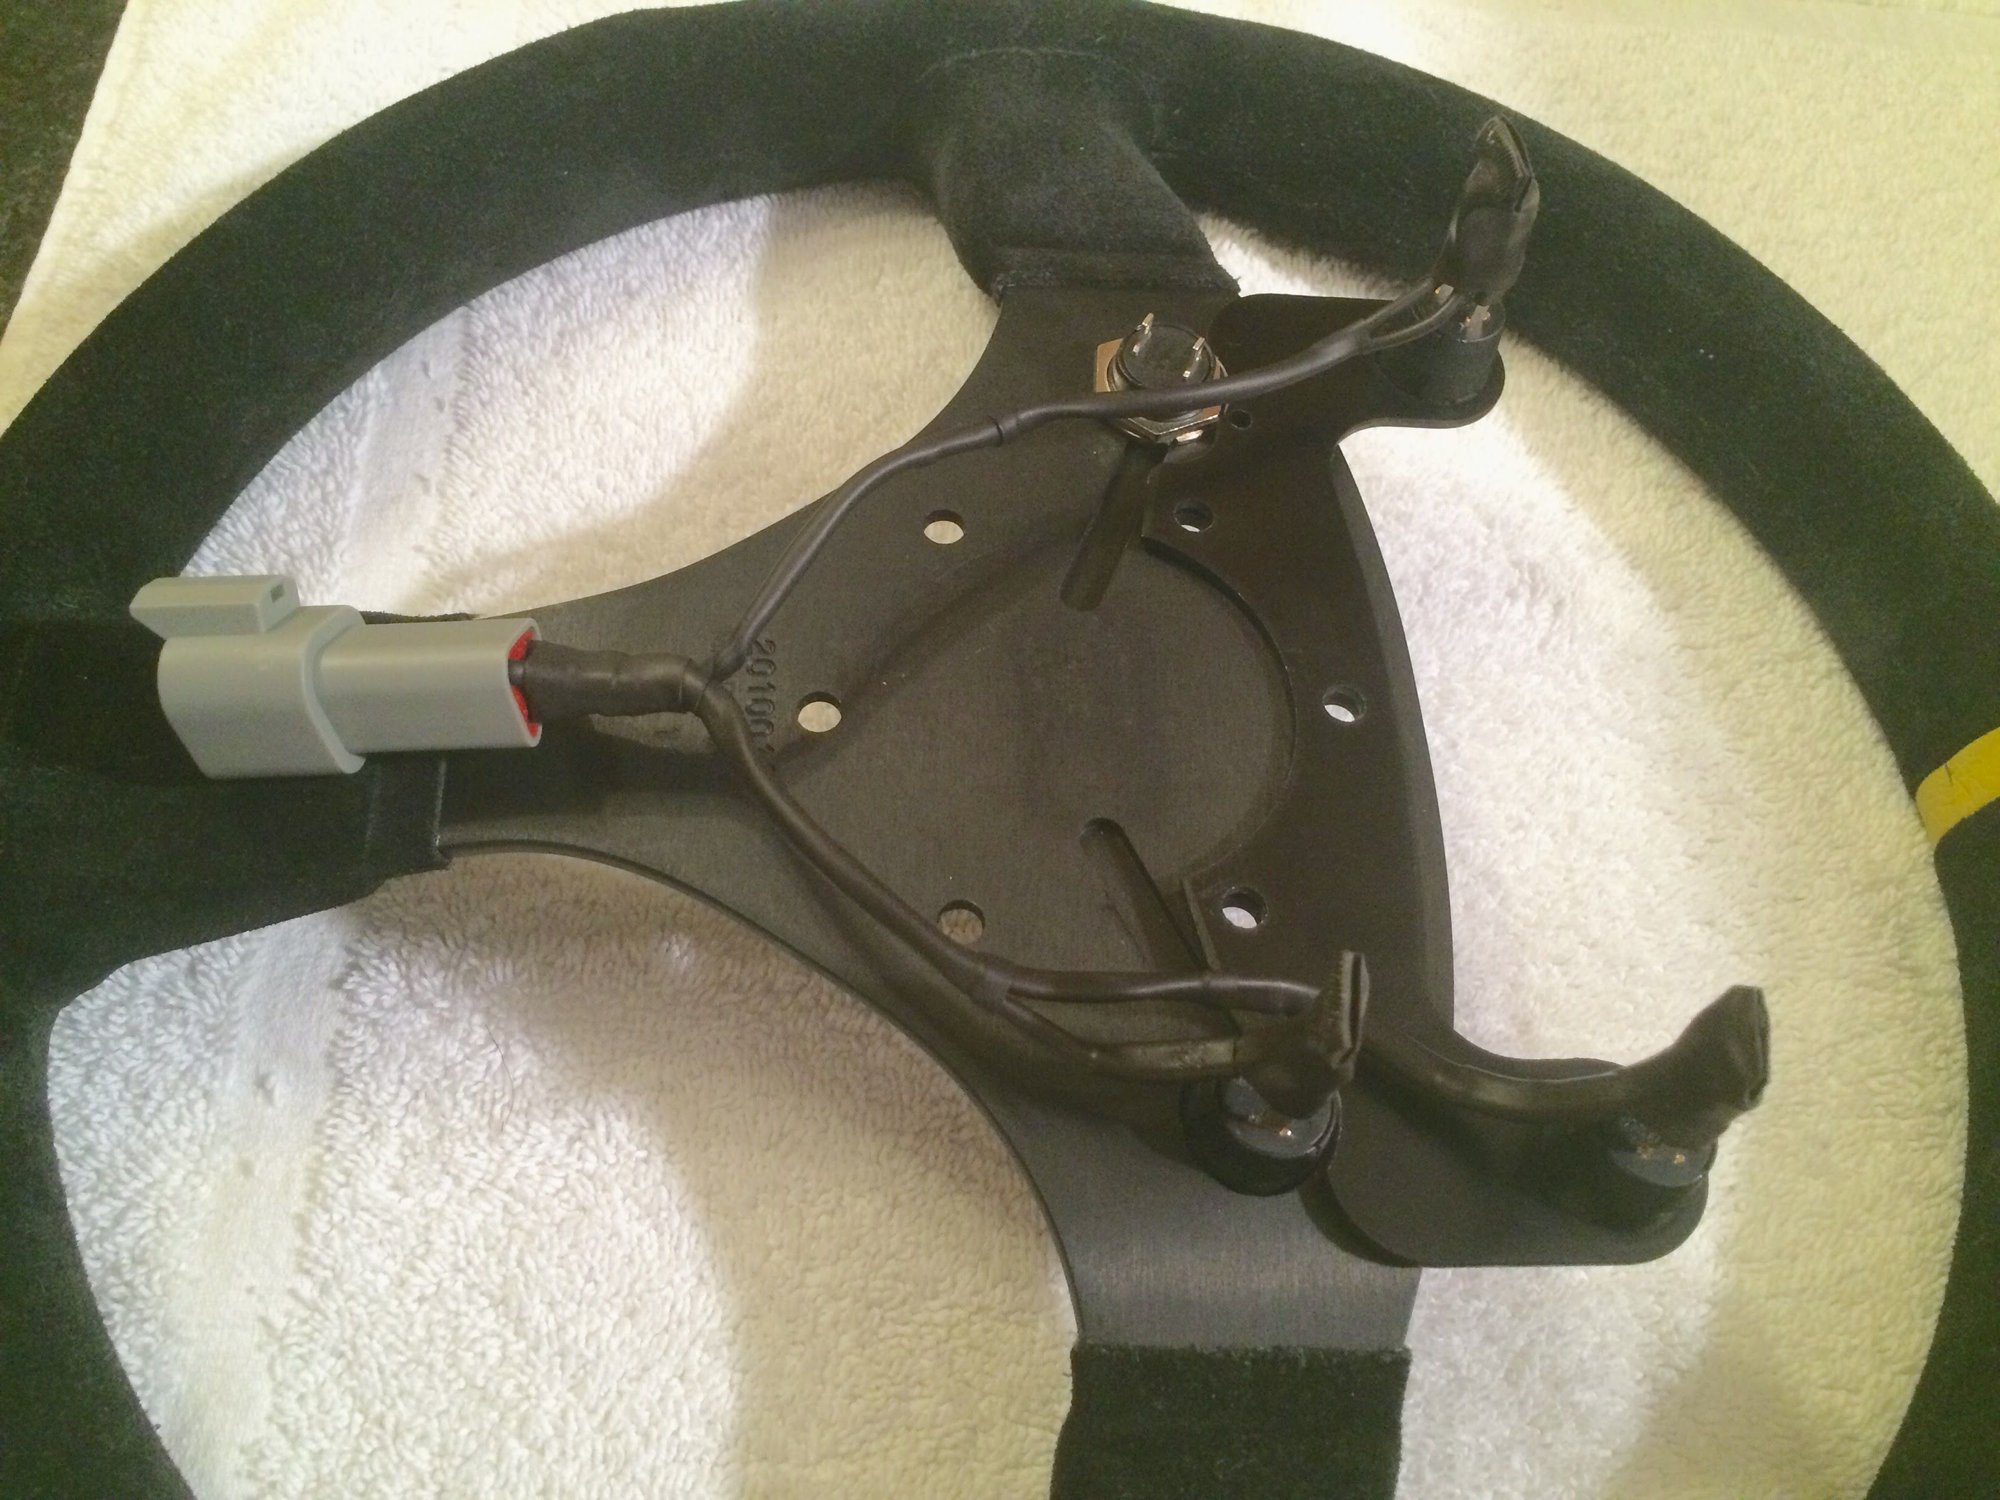
Finally, I reinstalled the control modules, steering wheel and connected all the wiring.
Verdict:
It continues to function flawlessly and the OEM stalks still function normally too.
However, I have done some adjustments to the curly wire just for peace of mind and to get it out of the way.
Otherwise, it still works great and allows more control on both street and track since my hands do not have to leave 9 and 3 anymore to signal, flash and honk at cars and drunk pedestrians in River North (there are so many... all the time... i don't understand).
Also, the wheel is closer to me allowing the perfect amount of Porsche proscribed elbow bend and yes it even allows me to heal/toe like a badass. Glory be.
DID YOU TINT THE OUTSIDE OF THE LENS OR REPLACE THE WHOLE ASSEMBLY WITH a tinted lens cover?
sorry about the cap locks being on.
great looking gets by the way
Ha. No worries. I simply tinted the outside of the lens. EMC2 and I had a nice long email convo about this before he did his DIY which is a great reference if you are looking to DIY: https://rennlist.com/forums/997-foru...ation-diy.html
Otherwise, it still works great and allows more control on both street and track since my hands do not have to leave 9 and 3 anymore to signal, flash and honk at cars and drunk pedestrians in River North (there are so many... all the time... i don't understand).
More to come...
I think there drunk because they dont have cars like ours. Yeah. Thats what i believe....
Seriously though, love your build thread, love your car, yes i have a little GTS envy, i looked for 6 months, then decided to go NB, so...... a little
Winter for many 911 owners is a reprieve; store it for a few months and turn our attention to other parts of our life.
For others, bagging them is counter to why we bought the cars in the first place.. to be driven!
For some it can still be both--hang up the keys but turn your eye to maintenance and upgrades.
That's me.
Before putting it down for the long sleep I did the standard yearly oil and filter change so it sat in fresh oil. Tires were pumped, windows cracked, battery on a tender and fuel stabilizer added.
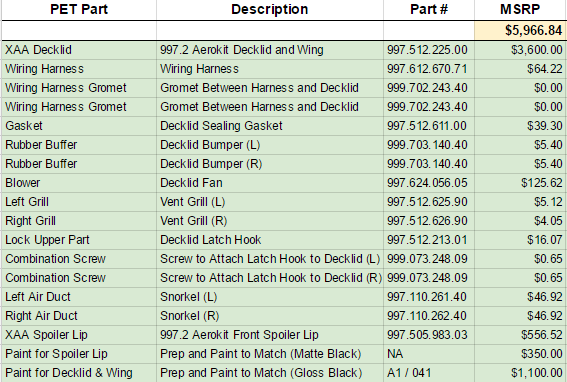
For the next couple months, fingers went to keyboard and ear to the phone as I finally decided to add the full 997 aero kit. Thankfully on the GTS this means only two parts are needed, the rear fixed wing/decklid and the front spoiler lip. I thought about an aftermarket wing and bought a pair for prices I couldn't turn down, only to turn around and sell them again after I made the decision to go OEM. I figured if a wing was available as OEM, I might as well go that route and avoid fitment headaches that can be avoided. I'd go aftermarket if I ever wanted something different like a ducktail.
So, I finally found a wing for a good price but needed just a bit of paint work and it was missing the interior light. It was otherwise in great shape. I came to learn A LOT about the various decklids available for the 997.1 and 997.2 Carrera both fixed and mechanical and I've advised a few of you here on them. Happy to pass the knowledge!
I completely disassembled the wing, categorized all the parts including the front spoiler lip and phoned my dealer parts contact for PCNA MSRP:
None of these prices include tax or shipping. Both the decklid and front spoiler lip have variable pricing depending on stock amount. These were the prices I was quoted at the time I purchased the wing on the secondary market. The paint was quoted by one of the most reputable shops in Chicagoland (happy to share final cost and name via PM). The decals were ordered from the motherland and added $33.41 to this total. Hopefully this helps anyone looking to do this mod too.
For what it's worth you shave about 3 lbs with the swap too.
The install took only a couple hours for a first timer (including reinstalling the battery). Four bolts and a wiring harness plug are the only parts that need to be messed with. The plug is really a PITA since it's hidden along the body behind the passenger light. Small hands help which I do not have. I coded out the spoiler warning with a rented ebay Dura Pro.
Back to sleep it went with a new cover that fits the rear wing.

 04-21-2016, 05:56 PM


 a little