When you click on links to various merchants on this site and make a purchase, this can result in this site earning a commission. Affiliate programs and affiliations include, but are not limited to, the eBay Partner Network.
997 Headlight restoration and Lamin-X installation DIY
A quick review of my experience cleaning up my headlights.
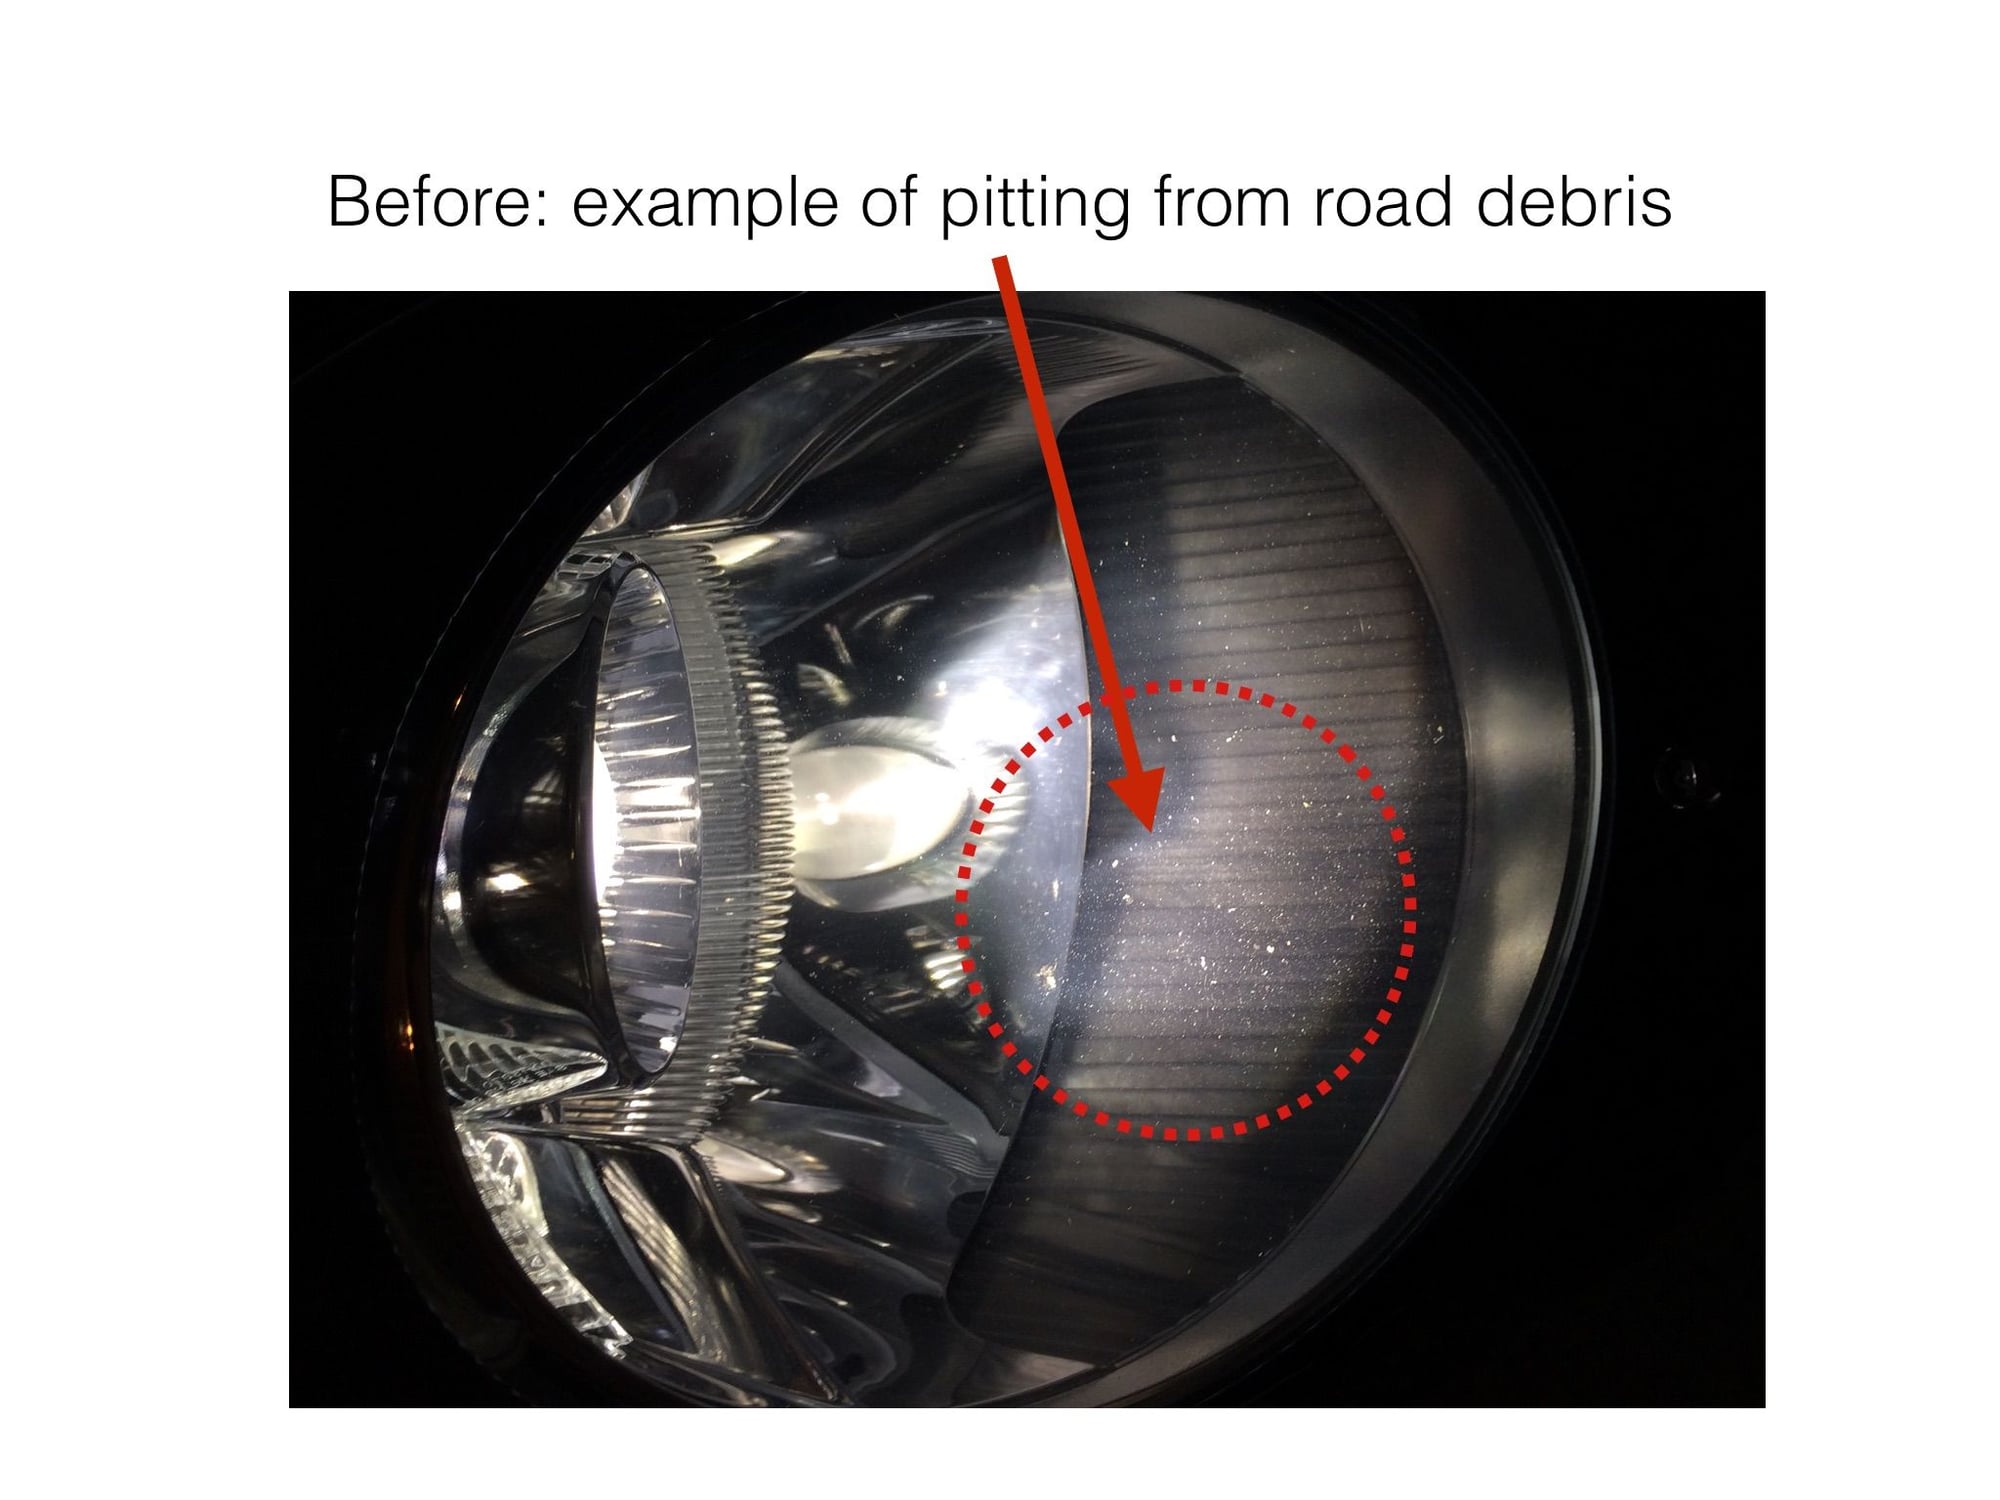
My headlights and DRL's were in decent but less than perfect condition. They had a few surface scratches and light pitting from road debris. They were not discolored or cloudy, but I wanted to get the surface much cleaner.
I had also been looking at options to paint the interior of the light housing black, similar to what is available on certain Porsche models. However I did not like the idea of breaking open the headlight assembly by cutting the seal.
Then I came accross a post by nwGTS who had used the Lamin-X headlight film (light tint) and could not believe how good the result was. After some very helpful advice from nwGTS I went ahead and ordered the film also. I should emphasize that there are two versions of the tint from Lamin-X; the darker one is for a true "smoked" appearance, which is not what I was after. The lighter version is much more subtle, but at the same time seems to give a more pleasing "to my eyes" and integrated appearance to the headlamps (especially on a black car).
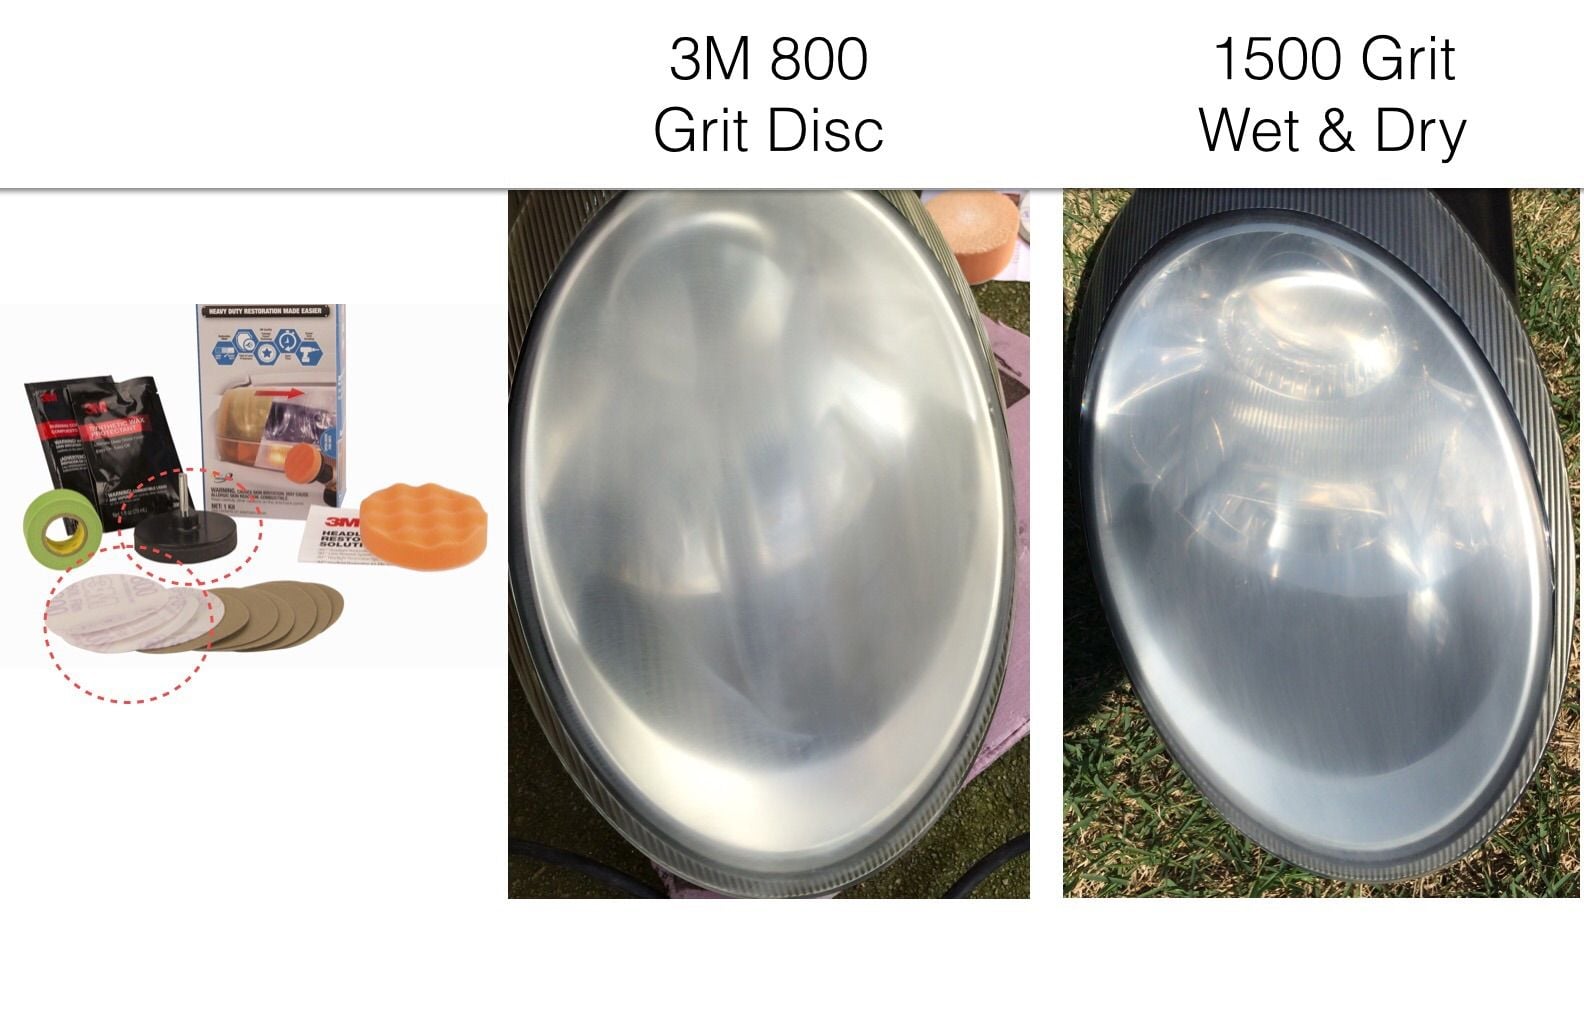
First step was to sand the headlights using the 3M white cutting disk (800 Grit) to get rid of the pitting. These discs cut quickly with a drill and the cushioned drill pad provided in the kit is great for this job. You just need to clean the sanding disc frequently to avoid build up, or you will not get a clean consistent surface and the subsequent sanding will be more time consuming.
Note I did not use the other parts of the kit as I did not like the gray trizact discs. I found using wet&dry paper by hand (wet sanding) to be much better and more controllable.
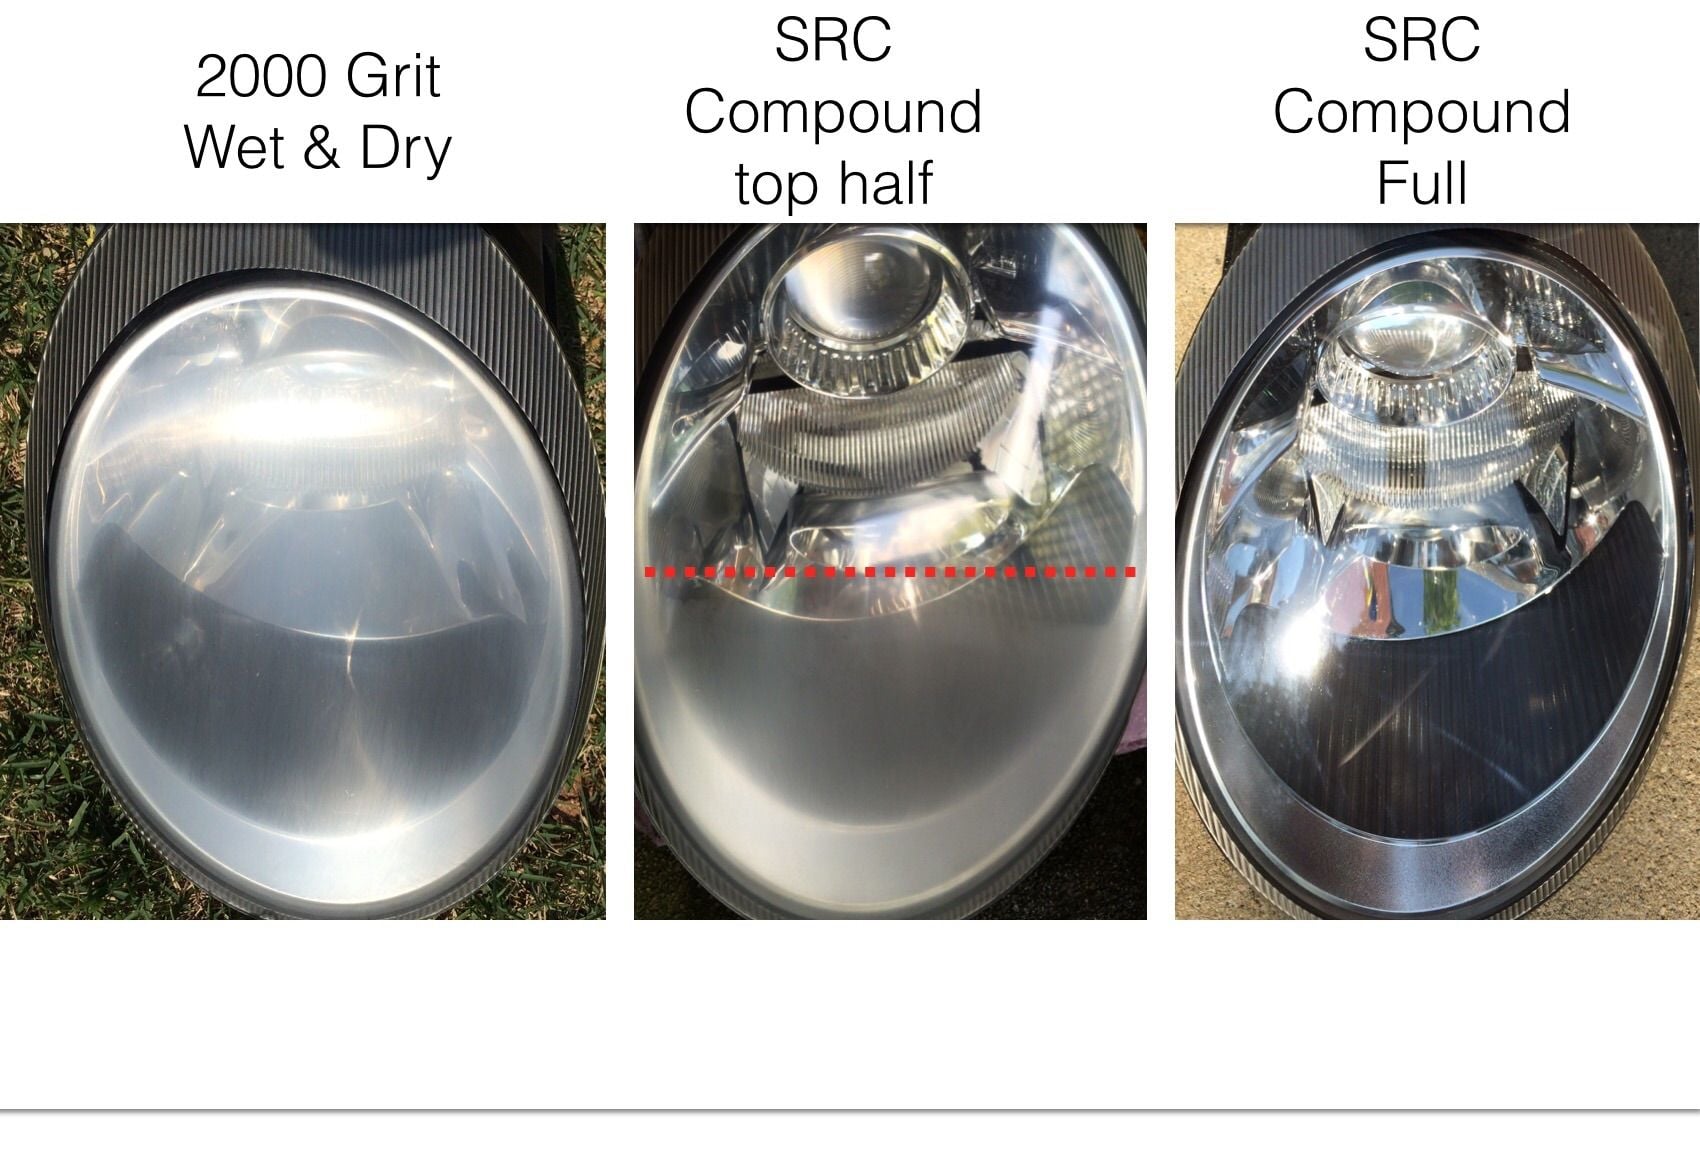
For the wetsanding I started with 1500 grit and then moved on to 2000 grit.
Next step was compounding with BlackFire SRC compound and an orange foam pad. Again using the 3M drill attachment and a variable speed drill. This got rid of all sanding marks.
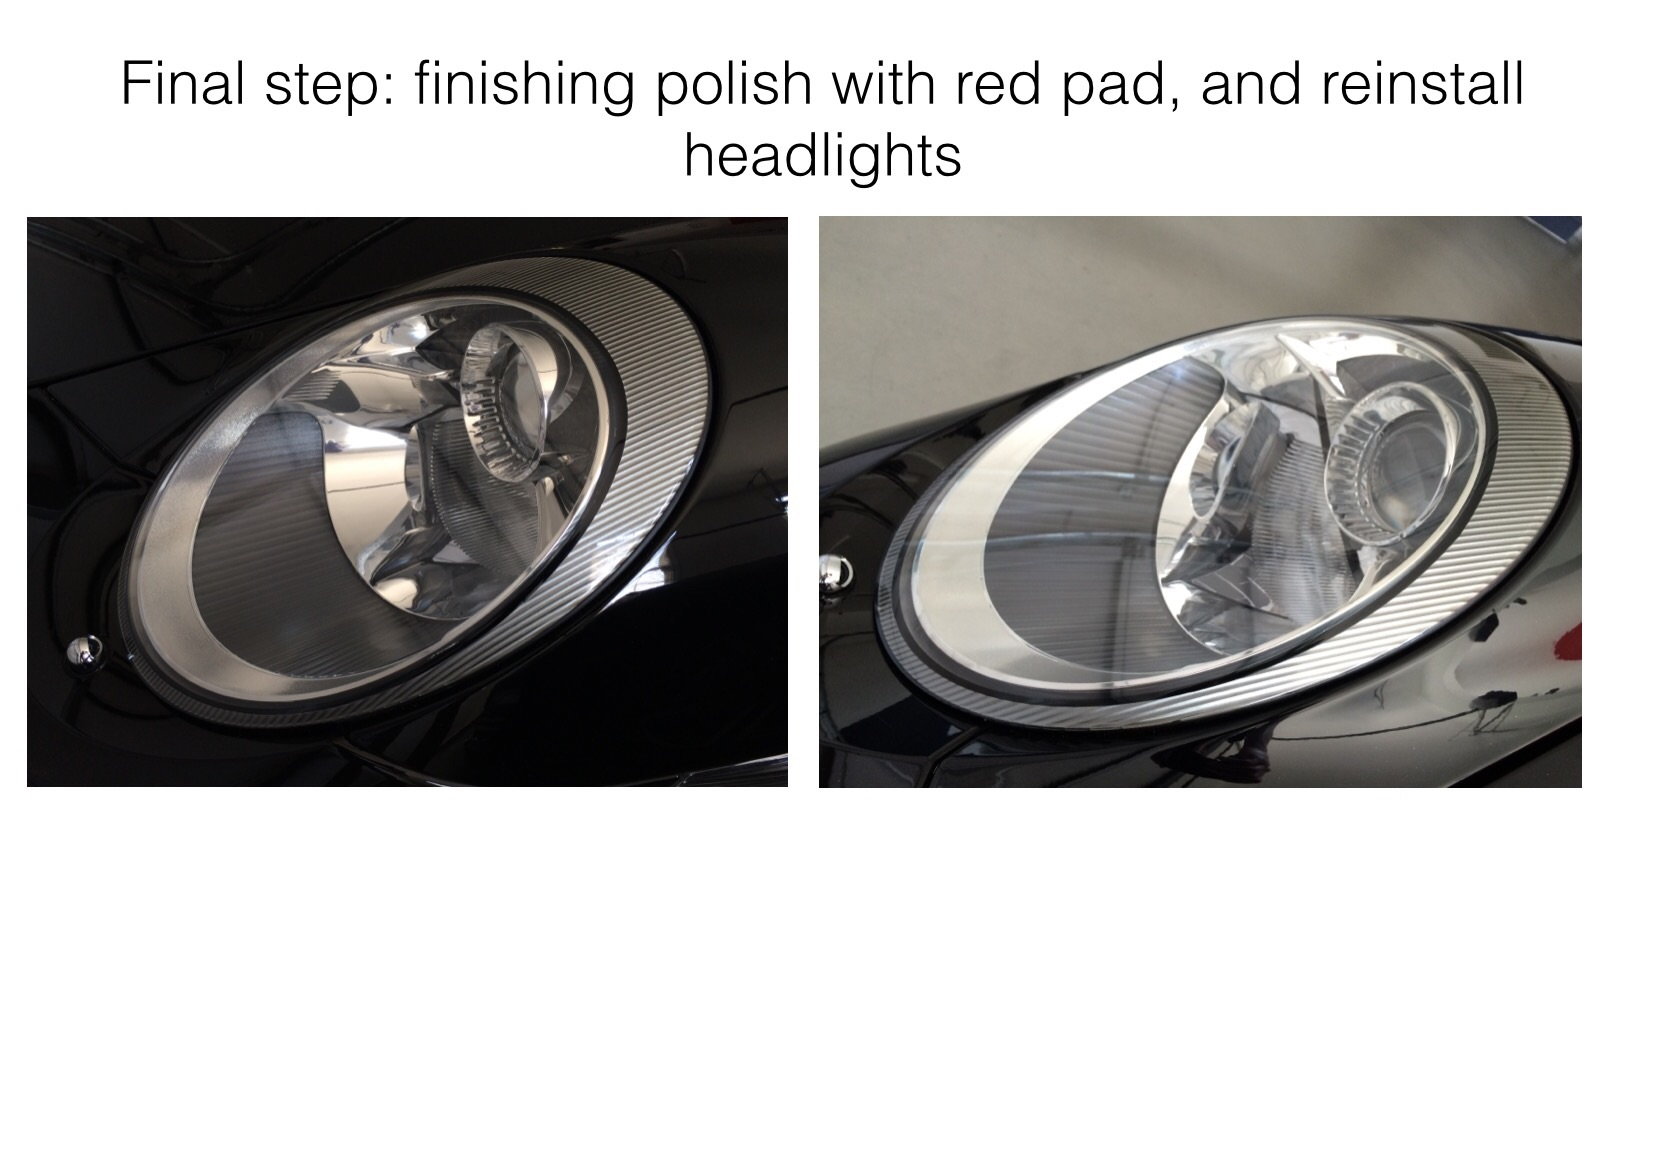
Next was a final step using Pinnacle Advanced Finishing polish and a red foam pad. This gave a very smooth clear finish to the surface.
Installing Lamin-X
The kit comes with pre-cut pieces.
I first cleaned the headlights with a soap solution and lots of water, to remove any residue/film from the polishing process.
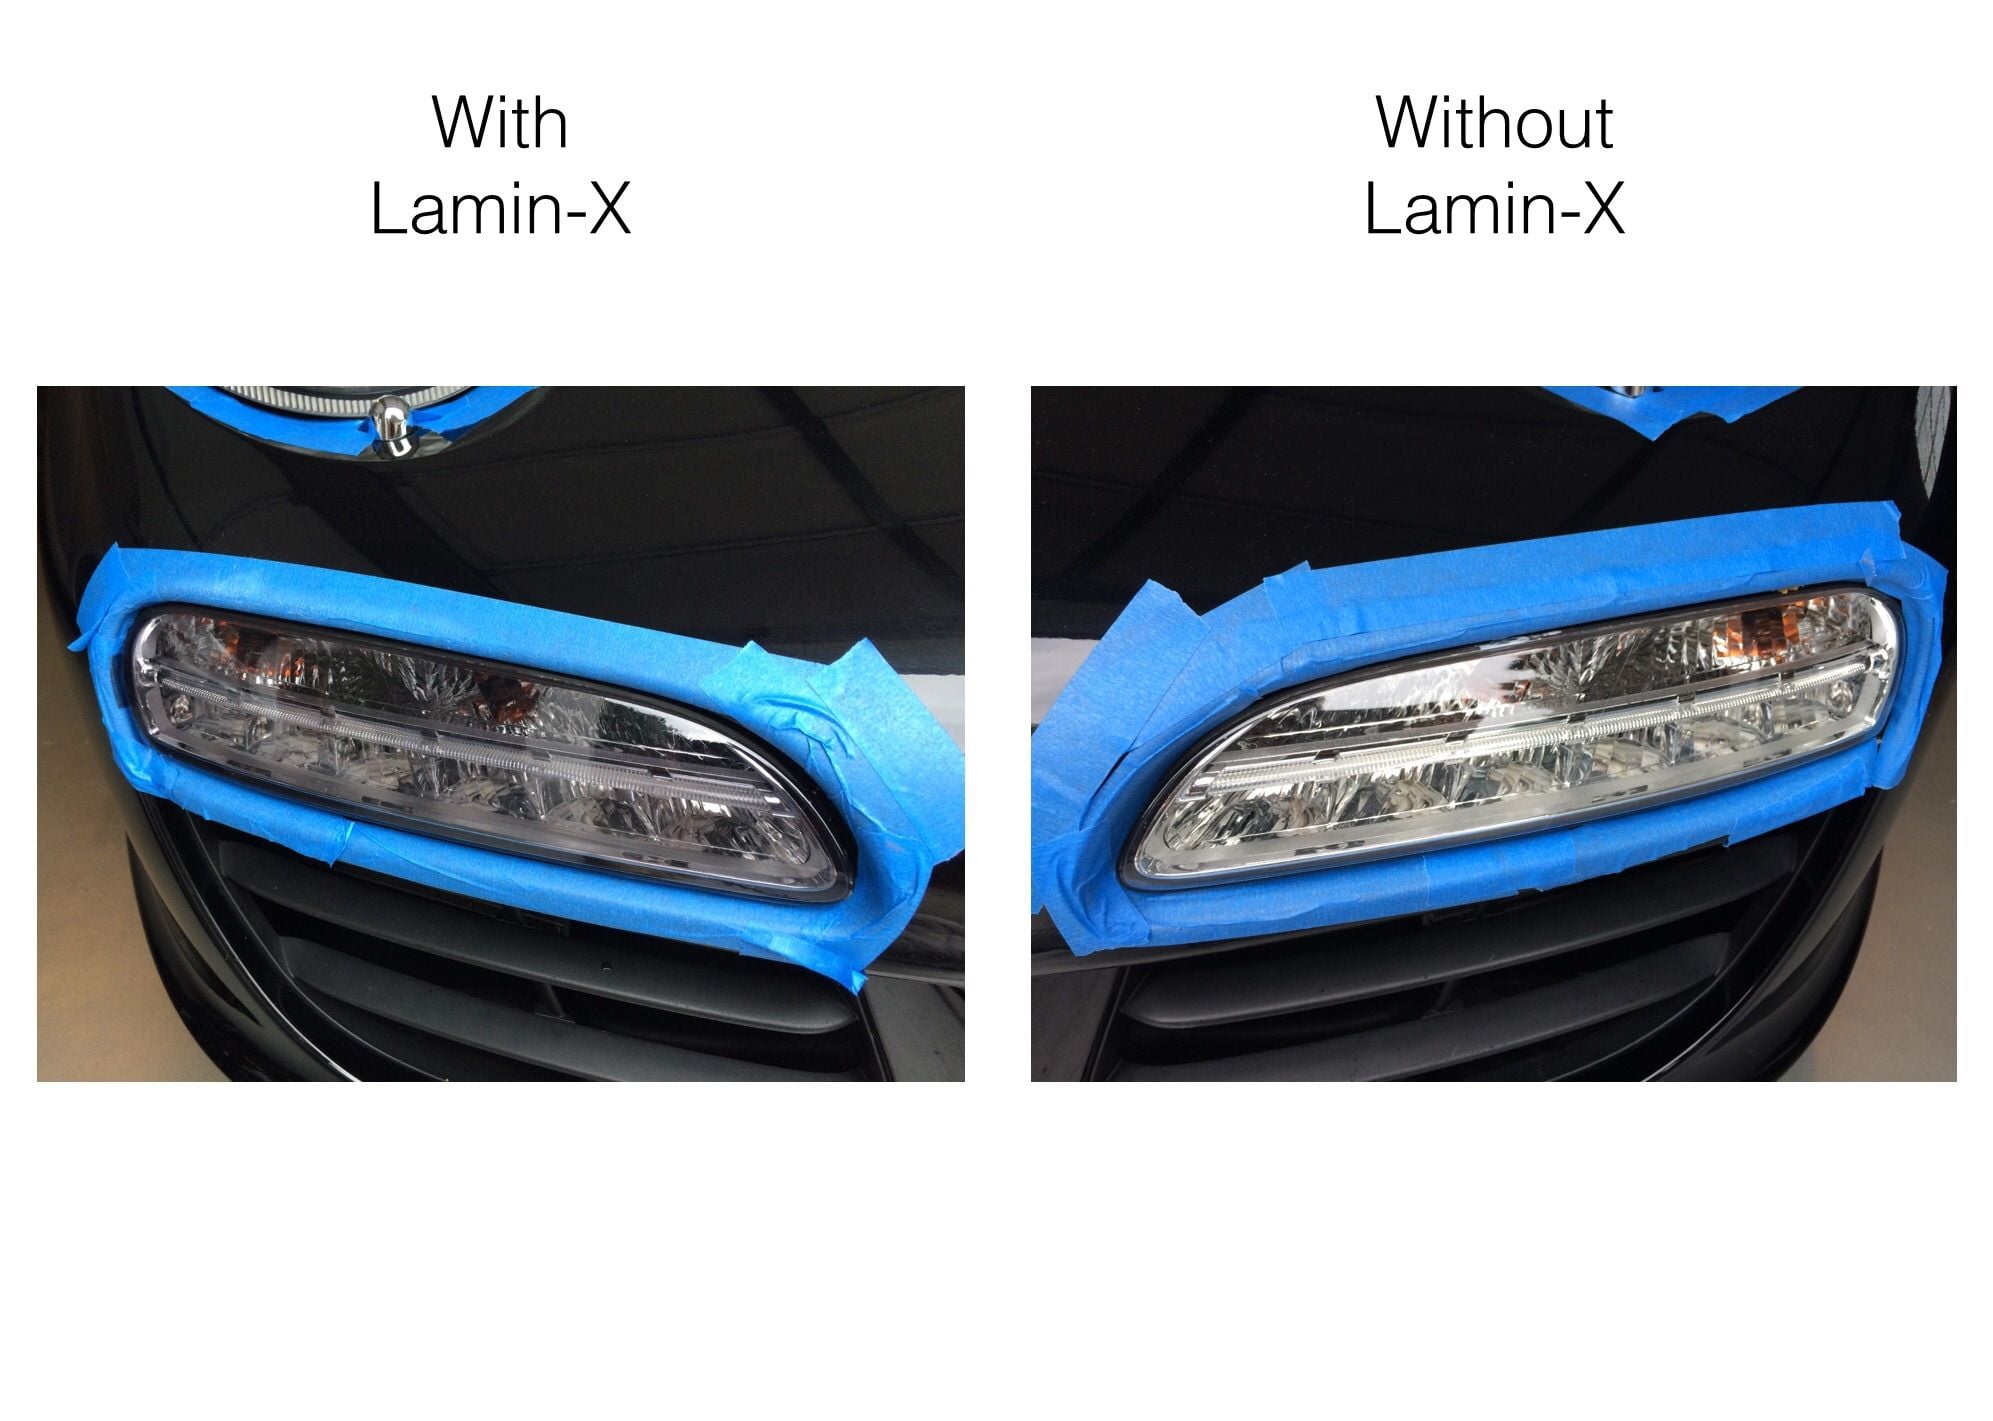
I started installation on the DRL's as I figured they would be the easiest to do, and I was right
I applied a light mist of water to the lights with the spray applicator provided in the kit. It is worth really taking your time to align the piece as accurately as possible first time around (but easier said than done). With the first DRL I got it positioned perfectly first time and it took less than 5 mins to install. The second one required some repositioning and probably took 10 minutes to get right.
When I saw the two DRL's side by side, one with and one without the Lamin-X it was really amazing to see how good the result was.
Next came the tricky part. Because of the shape of the headlights it is VERY difficult to get the film aligned correctly. This results in the need for a lot of lifting and repositioning.
When you watch the online video instructions it looks like the film lifts easily, but I can assure you that is not the case. I was actually worried that I would stretch it, because I had to pull so hard in some cases.
A useful tip is that when lifting an edge, use the plastic squeegee to lift the film and trap the film between your finger and the squeegee to ensure no fingerprints get on the adhesive side of the film.
Fortunately I got both headlight films aligned really well in the end. However on the right side light i needed to do a lot more repositioning.
(I did use a hairdryer (very carefully) to warm and soften the film around the edges and it did help. Note you should not stretch the material. )
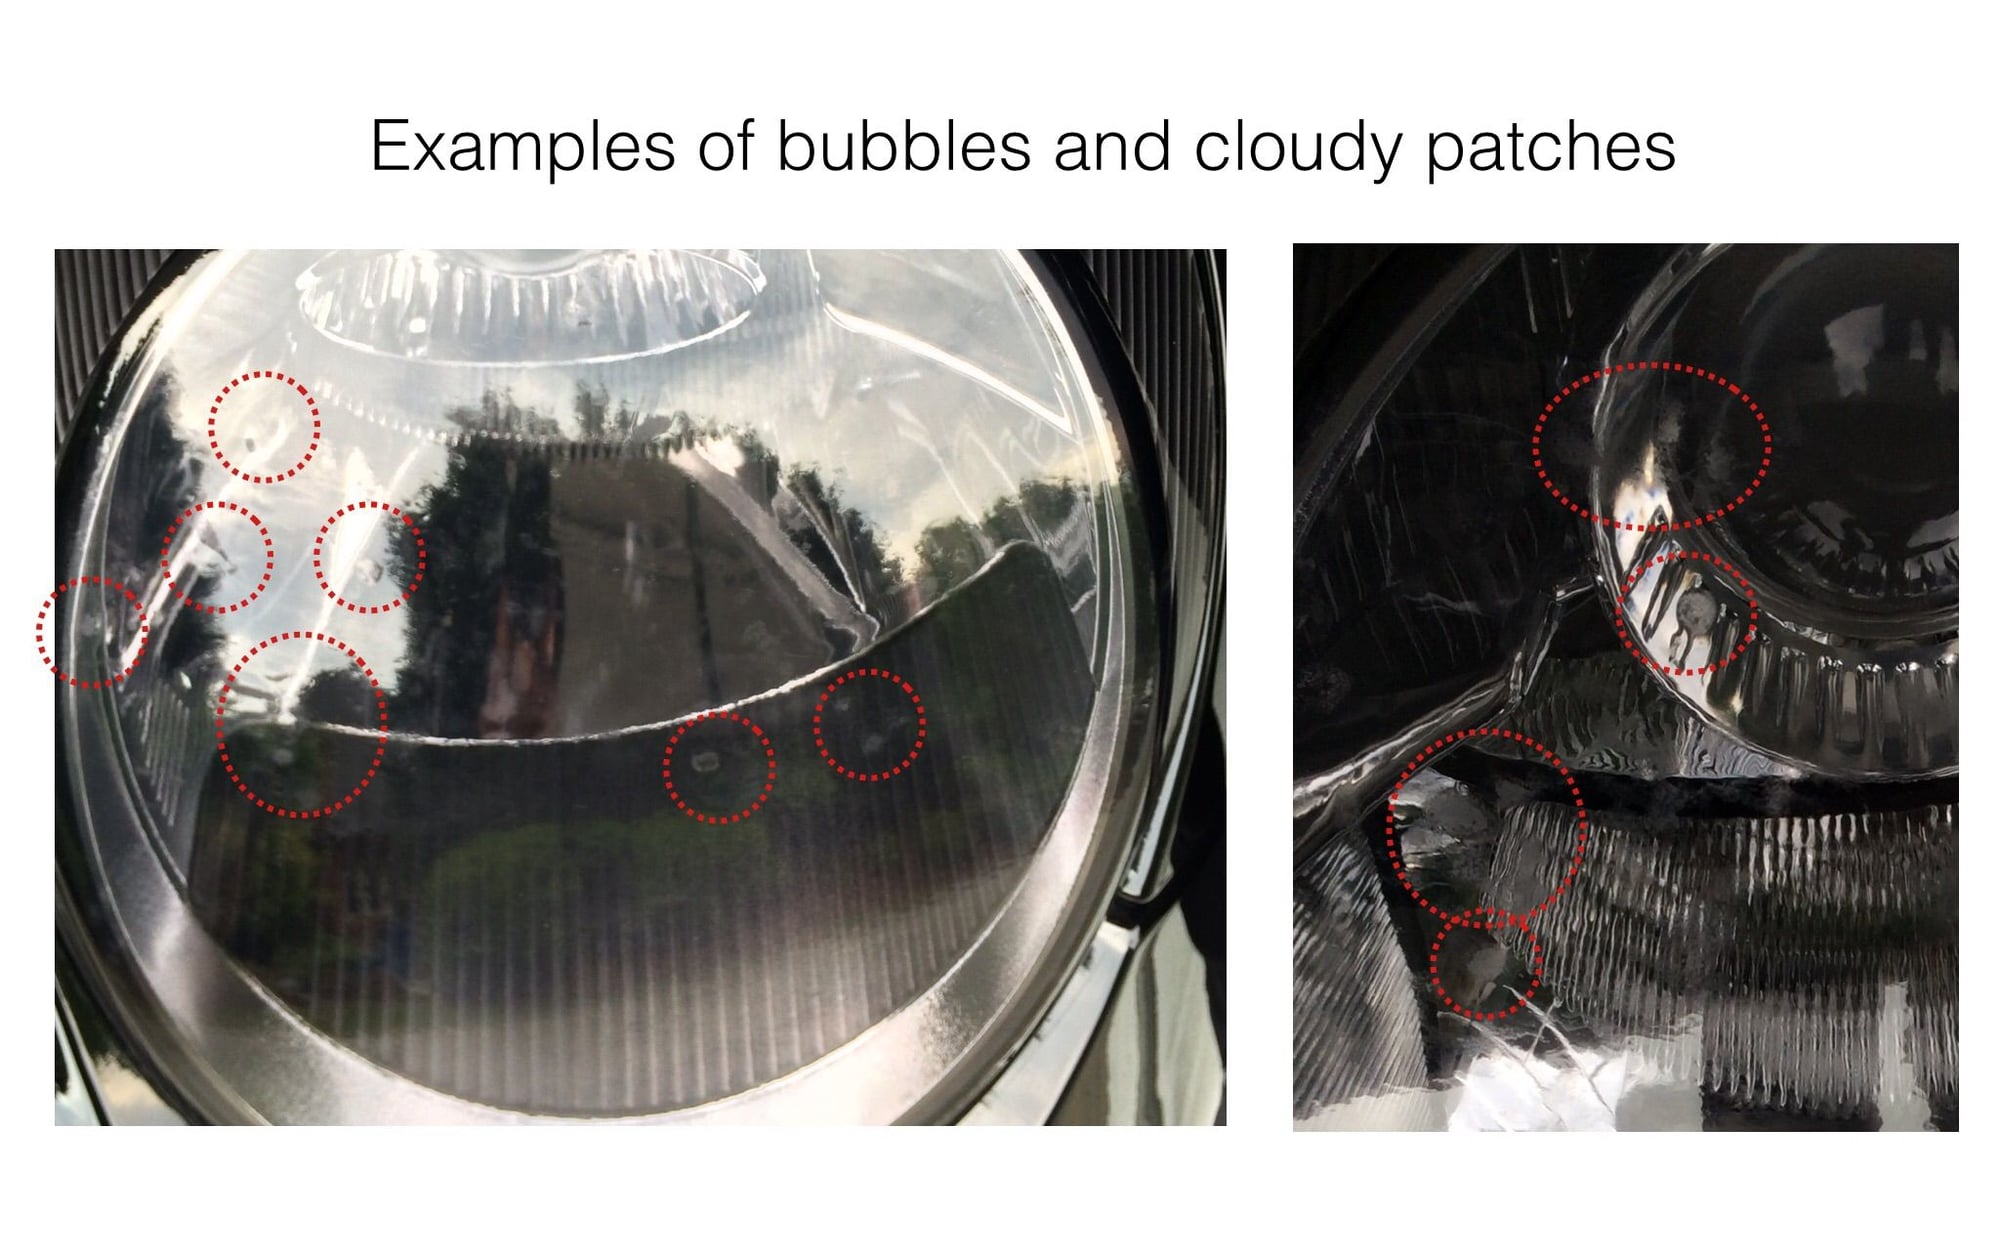
The result was a few bubbles and cloudy areas that I could not smooth out.
After feeling really pleased after the DRL install I was feeling somewhat disappointed after doing the headlights. I had read that with time and heat (having the car out in the sun) most bubbles and cloudy areas would disappear, but I'm not the patient type
Nonetheless good news prevails ...
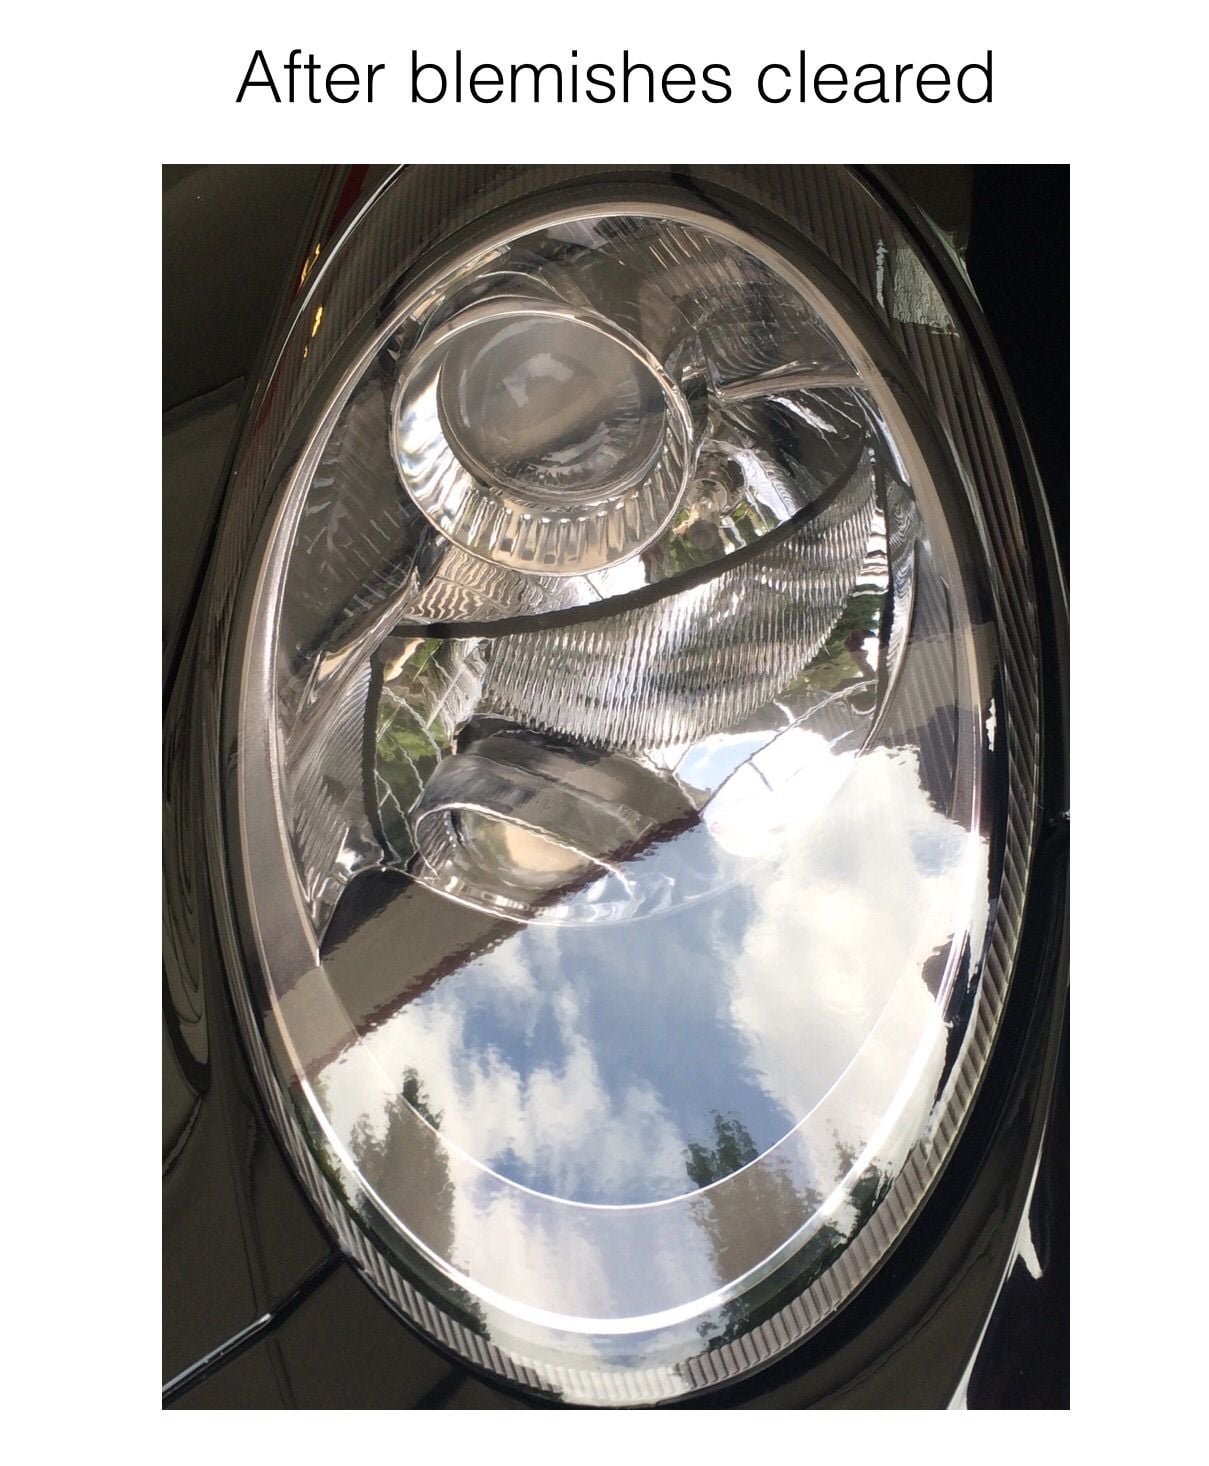
A week later and after only two sessions (about 4 hours each) in the hot Atlanta sun. The result is perfect. All cloudy areas and small bubbles completely disappeared. Three of the larger bubbles required a pin ***** to release the excess moisture after the first day, but they too "healed" perfectly after exposure to the sun.
I should mention that I am not talking about "from a distance" observations. Even with very close up deliberate inspection, no blemishes remain.
The result is excellent and I am very pleased I did this.
Now, for anyone contemplating this, here is what I would change if I had to do it again:
I would not buy the pre-cut film for the headlights. It really makes the job much more difficult than it needs to be.
I would buy a sheet, cut into rectangles to give me lots of overlap, so I could focus on getting good placement in the center of the headlight without fussing with alignment around the edges. Edge alignment with the pre-cut sheets is what will cause you to do a lot of lift and replace. So an oversized sheet would make it a lot easier to focus on getting a smooth bubble free application first time with minimal or no lifting. Trimming any excess with a blade is very easy.
It's been raining a lot lately so as soon as I get an opportunity, I'll take some better outdoor pics.
The only thing about the whole process I don't like is the "orange peal" in the Lamin-X film. That would drive me crazy!
About 3 months ago I did a similar process on the headlights of my daughters 2007 Mazda 6. The were very cloudy and had yellowed. I used the Sylvania headlight restore system. The last step in the process is a liquid clear coat. That came out really well. When I completed the project, the headlight covers looked like new.
Good write up and nice job! The only thing about the whole process I don't like is the "orange peal" in the Lamin-X film. That would drive me crazy! About 3 months ago I did a similar process on the headlights of my daughters 2007 Mazda 6. The were very cloudy and had yellowed. I used the Sylvania headlight restore system. The last step in the process is a liquid clear coat. That came out really well. When I completed the project, the headlight covers looked like new.
Thanks for the comments and feedback.
Regarding the "orange peel" effect on the film; good observation gota911.
This is certainly visible under certain lighting conditions, just as with paint orange peel. However in most outdoor lighting, the orange peel is very difficult to see.
The aesthetic gain from the very slight tint and the protection added by the film, for my personal needs, outweighs the orange peel issue. For reference, I am extremely fussy about my cars and detailing them and I say that to try and put into context the relevance/significance of the orange peel. I realize this is very subjective, and opinions will obviously vary. There is no right or wrong
So if you are on the fence about trying this out, I hope this info helps.
Finally, the film can be removed if you don't like it so it's not a huge gamble for a $60 kit.
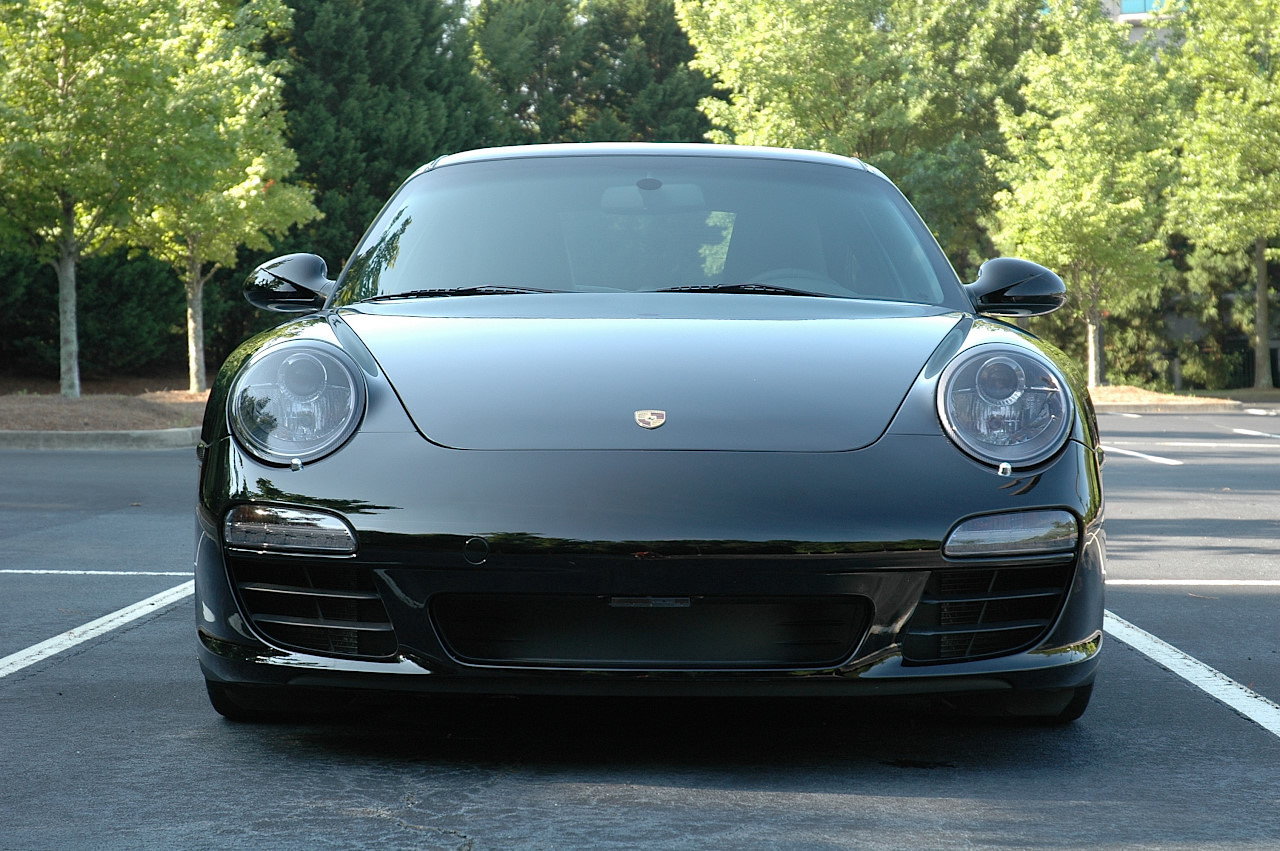
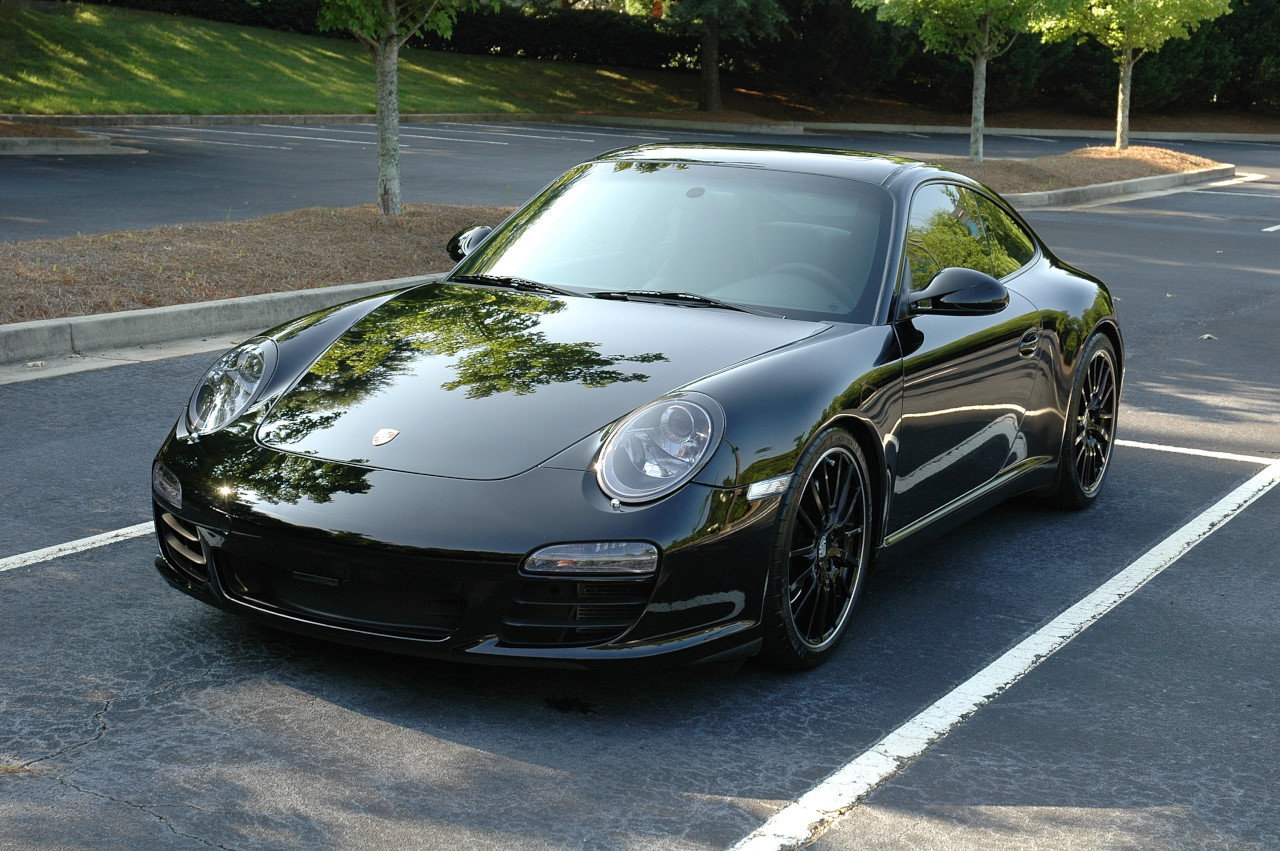
Below is a great comparison pic borrowed from a post by nwGTS showing his car on the left (hope you don't mind nwGTS ):
Great write-up, EMC2. I don't mind at all that you used the comparison pic but I will note that they look a bit darker in that pic than in person. I'll also second using a sheet instead of the kit for the headlights though the kit is great for the DRLs and side indicators. Terrific work. They look great!
Thanks nwGTS
You're right. It definitely is a more subtle effect in person - which is why I like it
I took a few quick pics next to the Panamera and the one in my first post was as close as I could get to a decent comparison.
Thanks again for all the helpful advice.
Originally Posted by nwGTS
Great write-up, EMC2. I don't mind at all that you used the comparison pic but I will note that they look a bit darker in that pic than in person. I'll also second using a sheet instead of the kit for the headlights though the kit is great for the DRLs and side indicators. Terrific work. They look great!
nice work, i've installed Lamin X on my Audi twice now and let it set like you would with window tint and any weird bubbling etc goes away after a few days out in the sun.
Excellent write-up EMC2! I am very glad that you are happy with the results. I'm actually the CEO of Lamin-x and fellow Rennlister.
Most of us here internally like to use universal sheets for our installations. Many customers, however, are uncomfortable taking the trim tool to their lights to trim the Lamin-x (even though you can just score the outside layers and not have to cut all the way through). If you are comfortable with doing so, universal sheets are the way to go.
BTW, we use about 3 mils of adhesive on our product. So if you have any rock chips and pitting on your lights, the adhesive actually molds into those imperfections and makes them "disappear". I had the same pitting on my 997 headlights. I did the restoration on one headlight, but left the other as is. Then I put the Lamin-x on to see if there was any visual difference between the two. There isn't any at all! So that's something to consider if anyone else here will go through the entire process. If your headlights are cloudy and yellow, then we recommend doing the restoration first. If you just have some pitting, the restoration isn't essential unless you like that peace of mind knowing its fixed before protecting it from happening again.
amazzzzzing job emc2!! now a part of me also wants to do the (slightly) darker lamin-X… i JUST had the led's 3m'd. also agree 100% re avoiding pre-cut kits when possible.
Originally Posted by Daohaus
nice work, i've installed Lamin X on my Audi twice now and let it set like you would with window tint and any weird bubbling etc goes away after a few days out in the sun.
Thanks guys.
Originally Posted by Kaiservon
Excellent write-up EMC2! I am very glad that you are happy with the results. I'm actually the CEO of Lamin-x and fellow Rennlister. Most of us here internally like to use universal sheets for our installations. Many customers, however, are uncomfortable taking the trim tool to their lights to trim the Lamin-x (even though you can just score the outside layers and not have to cut all the way through). If you are comfortable with doing so, universal sheets are the way to go. BTW, we use about 3 mils of adhesive on our product. So if you have any rock chips and pitting on your lights, the adhesive actually molds into those imperfections and makes them "disappear". I had the same pitting on my 997 headlights. I did the restoration on one headlight, but left the other as is. Then I put the Lamin-x on to see if there was any visual difference between the two. There isn't any at all! So that's something to consider if anyone else here will go through the entire process. If your headlights are cloudy and yellow, then we recommend doing the restoration first. If you just have some pitting, the restoration isn't essential unless you like that peace of mind knowing its fixed before protecting it from happening again. Thanks again! Chris
Hi Chris,
My pleasure. The forums have provided a lot of help to me, so it's always nice to be able to contribute back. Especially when there are good products out there, it only makes sense to spread the word
It's also great to know the CEO is a fellow Rennlister
One thing I'd like to take the opportunity to ask, and I'm sure other's will have the same question;
What is the % tint on the two tinted versions you have? I couldn't locate that info, but perhaps I missed it.
Our Tint film blocks about 8-10% of the light. A nice subtle tint that doesn't impede light output enough to really notice or be concerned about.
Our Gunsmoke film blocks about 20% of the light. Which is a medium smoked shade that some people really like. You'll notice a diminished light output, but still retain good outward visibility. Going any darker would just be dangerous IMO.
We also have Smoked and Charcoal shades, but those are primarily for tail lights. They have brown pigmentation that works best on red or amber. Smoked is a medium shade and Charcoal is the black-out. Yes, a lot of people love the black-out. However you can still see the light output from more than 1000 ft away when looking at it.

 05-30-2015, 10:03 PM


 ):
):