When you click on links to various merchants on this site and make a purchase, this can result in this site earning a commission. Affiliate programs and affiliations include, but are not limited to, the eBay Partner Network.
Why: Three reasons: 1) getting an odd clunk in the right rear since around 60K miles and changed out some control arms but still this clunk; 2) Conventional wisdom of Porsche owners say mounts don’t last this long and are wear items; and, 3) I am neurotic.
Issues: None, very easy to do with the correct tools. Note that there are differences from the 997.1. I highly recommend this for a beginner. However, I had an issue with OEM mounts and decided to return them and purchase Porsche original parts. See end of this instructions for more on this.
Cost: $435 for two Porsche mounts 997 375 049 08 from Pelican. ( Note: Corteco OEM mounts were $300 for two)
Performance: I will edit this later and add my thoughts. I want to put some miles on the car to give a good account.
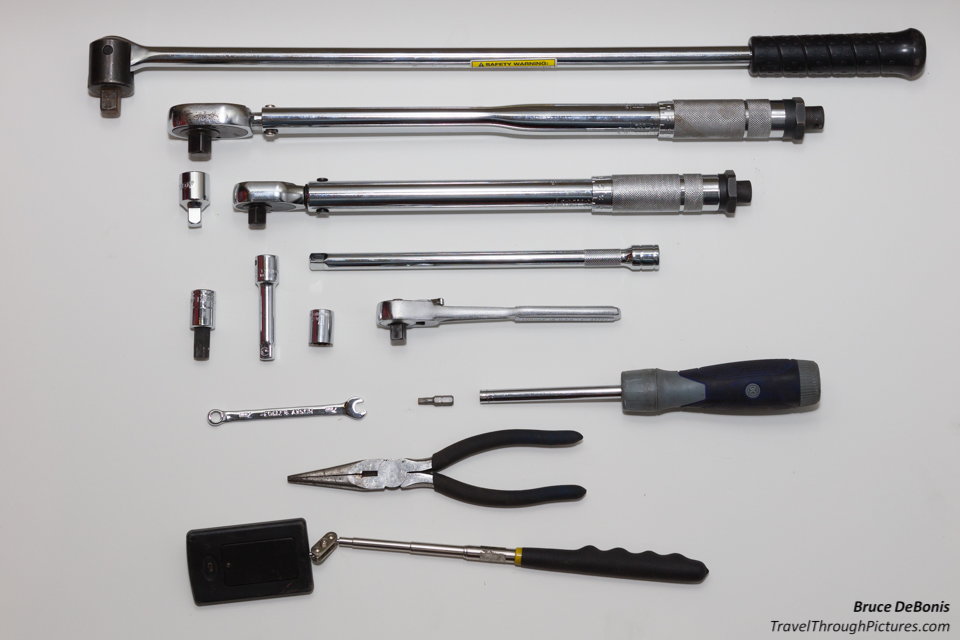
Tools:
Torx for airbox lid with magnet (to not drop screws)
Small wrench for band around throttle body
Jack with wood shelving
Breaker bar for big torx nut
Torque wrench (I used two, one for each large and small values)
Ratchet wrench with extensions (10" for underneath) and adapters (11 mm socket for top screws), I did not need a joint as it was a straight shot up... you may if you have a different model or exhaust.
T55 torx bit for torx nut lower mount
Needle nose pliers to remove air-thingy on side of airbox
Mirror to check alignment of mount into chassis (little square nut into engine brace)
Trouble light (to see!!)
Torque top bolts: 23 Nm / 17 ftlb
Torque torx nut: 85Nm / 63 ftlb
Tools (missing magnet pen):
Procedure:
1. Remove airbox
a. Remove eight screws using torx and magnet to not drop the screws and remove box lid
b. At this point, it may be possible to replace the mounts without removing the rest of the airbox… it is worth trying as this is annoying and you can remove the box later if you need to. I removed the box because I needed to check a power steering fluid leak back there. Skip to 2 or continue on to remove rest of airbox.
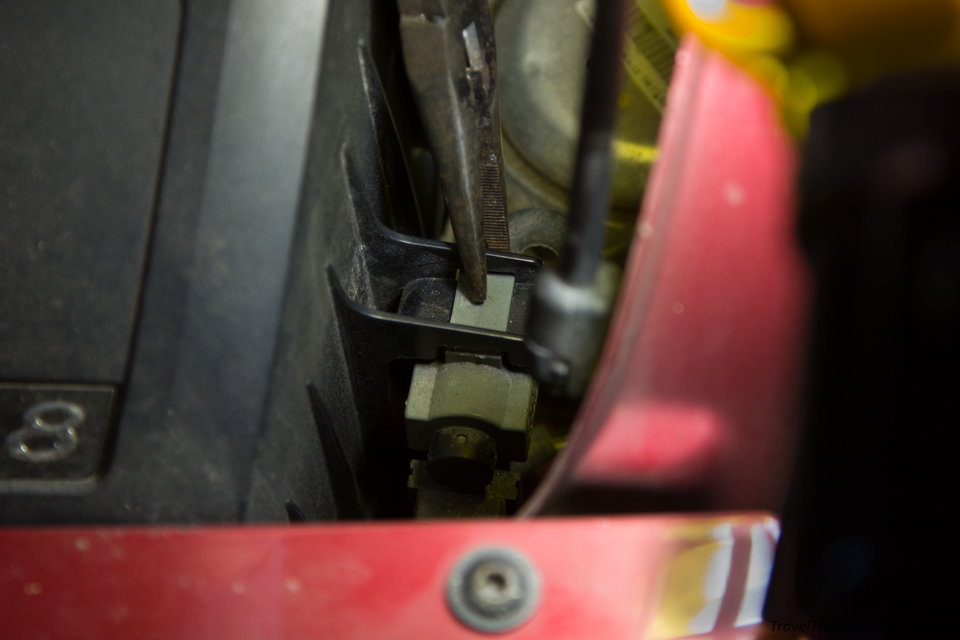
c. Remove the the little air valve thingy on the right side of the box using a pair of pliers to push the hooked, light gray part toward the back of the car. I did not remove the air hoses as they were real trouble and you can just swing the airbox away to do your work.
d. Loosen the band holding the air hose to the throttle body. Pull the hose off of the body, then just lift the entire box up and out. The box is not fastened to car but is held in place by simple rubber pins. Check to see if the pins/plugs are stuck to the bottom of the box, if so then pull them off and pop them back into the car chassis.
e. Swing the box out to the right. I supported the box with a small table placed next to my bumper. You can probably just maneuver it around inside the compartment to get access to the mounts.
How to remove that little air-valve thingy from the right side of airbox:
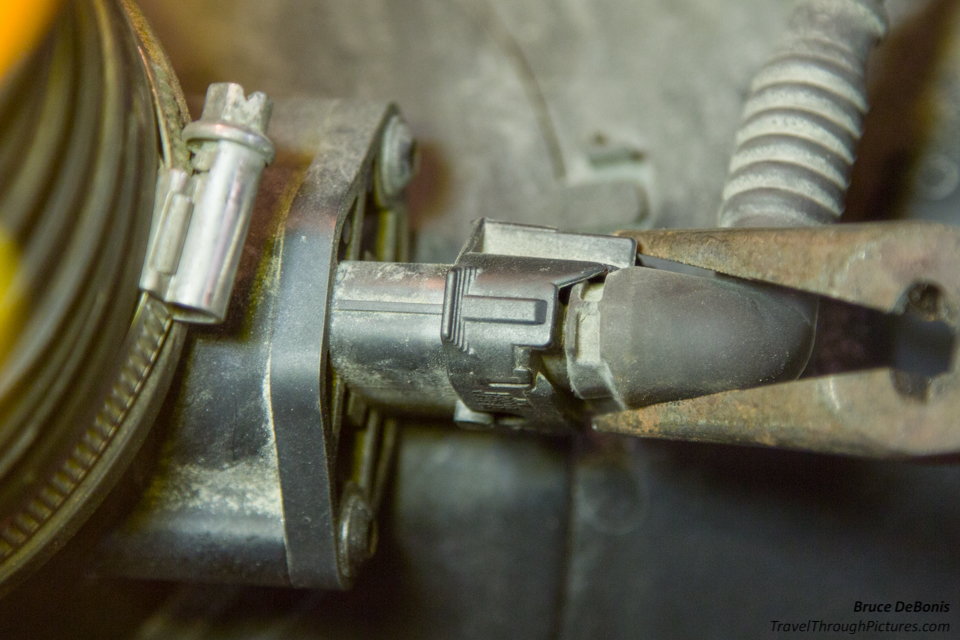
How to remove the Mass Air cable by pressing the hidden tab, note the airbox is twisted upside down here for access:
Remove the air hose from the throttle body here:
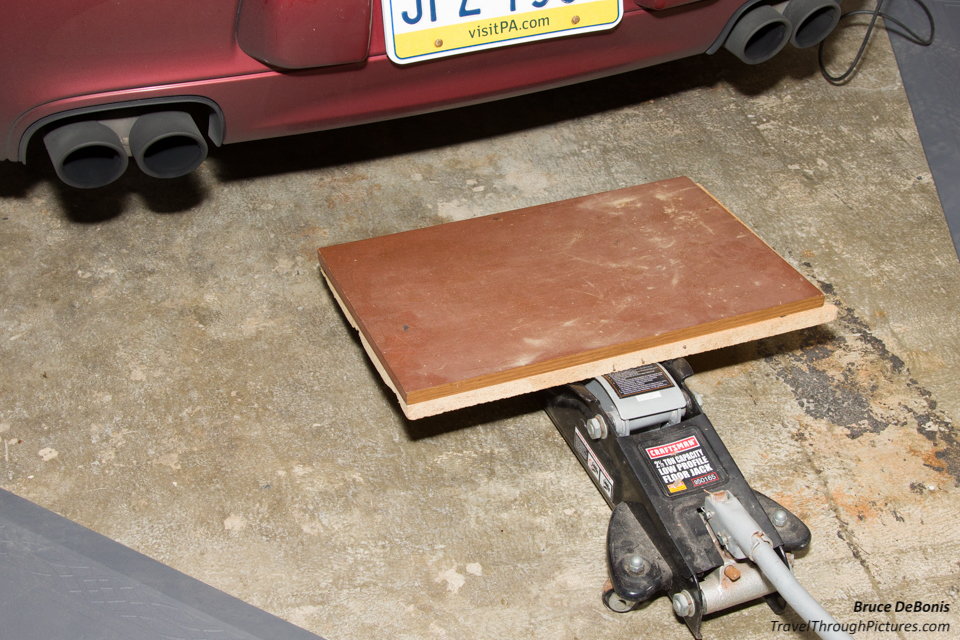
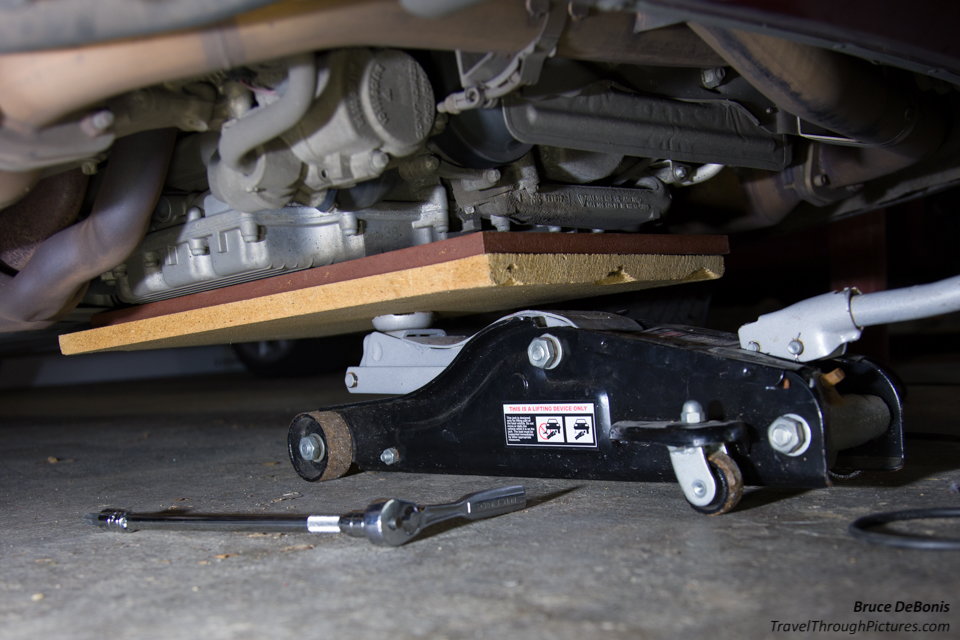
2. Place wood shelving on jack, and slide under oil pan. Picture is incorrect as I oriented the shelving along the length of the car. Side to side, the shelving hit the exhaust headers.
3. Start jacking the car ensuring the jack is “deep” into the oil pan to spread the forces and the shelving is not pressing against the exhaust headers. The big question I had is how far to jack as you don’t want the engine hanging on the nut you are to remove. The engine hangs from the mounts supported by that torx nut under the mount. The car is sitting on springs so you must really jack up the car. I jacked the car up maybe 6 to 8 inches to where I felt the jack was holding the weight of the car. If you jack too much, then the top bolts will be under stress.
3alt. Edit: added after work. Maybe a better approach is to put the car up on jack stands in the rear and get the wheels just off the ground therefore unloading the springs. Then, jack the engine to just to the point where you just start to move the chassis. This will show you have unloaded the engine from the mounts. Then remove the torx nut underneath, then lower the jack maybe about 1/2 inch to unload the top bolts and remove them. You can see both in jacking and lowering the relative movement of the engine brace against the underside of the mount. Place the mount, if not flush on the brace, lower the jack a tiny bit, bolt in from top, then pump the jack to press the engine against the underside of mount, and install torx bolt.
Jacking (Note the first pic has the wood oriented incorrectly as they hit the exhaust headers this way):
4. Complete removal and installation one side at a time. You do not want to remove both mounts and have the engine and chassis shift. Keeping one mount fully installed will keep everything aligned.
5. Remove the under-nut using the torx 55 bit on the end of a breaker bar with extension (a 10 inch extension was perfect). I did not need a joint on the extension as it was a very straight shot up to the nut on both sides… nice. You don’t have to stick your head under the car to remove the nuts as you can see the nut by peeking through the gap above the exhaust tips and bumper. To get the nut on to the bolt end when reinstalling, I did have to get my head under there to see.
6. Once the nut “cracked” loose, it came off very easily. If it still binds, then give your jack a pump or two as the engine may be still hanging and putting pressure on that nut.
7. Remove the top bolts. They are not torqued tight so they should come off easily. If they bind after you crack them, the jack maybe too high therefore putting pressure on these bolts. Try, very carefully, letting the jack down and inch or so.
8. Lift out the old mount
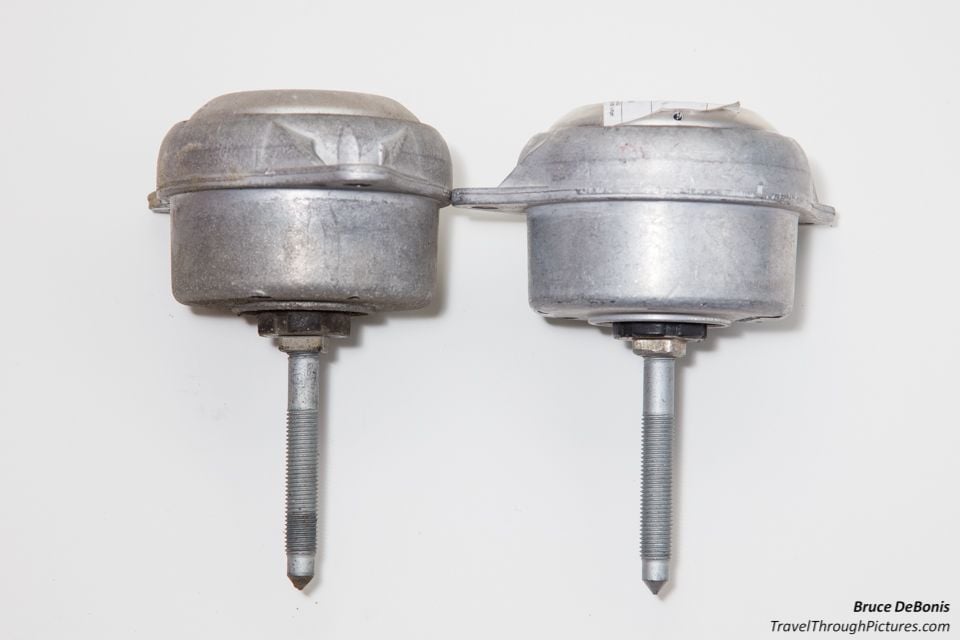
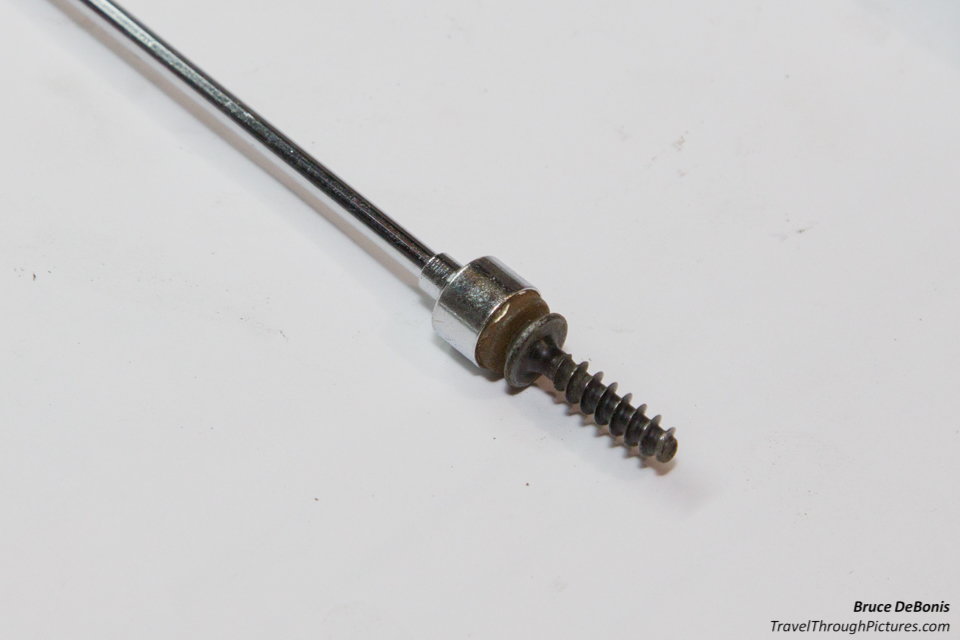
9. Visually compare the old and new mounts. My left mount looked fine but the right mount was sagging. I could not feel any difference when I tried to bend the bolt in the mount… appeared the same. I could not detect any leakage.
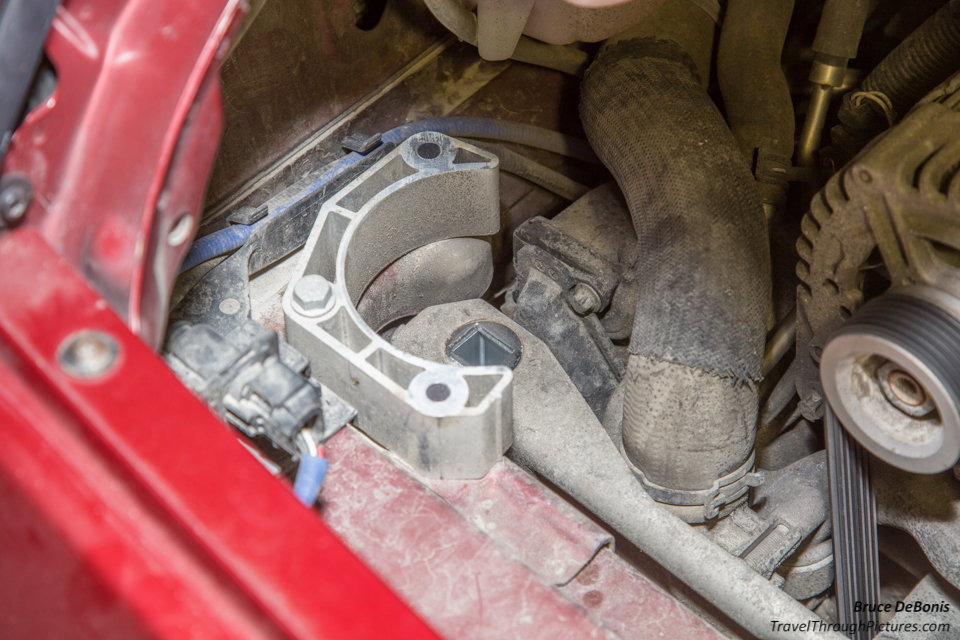
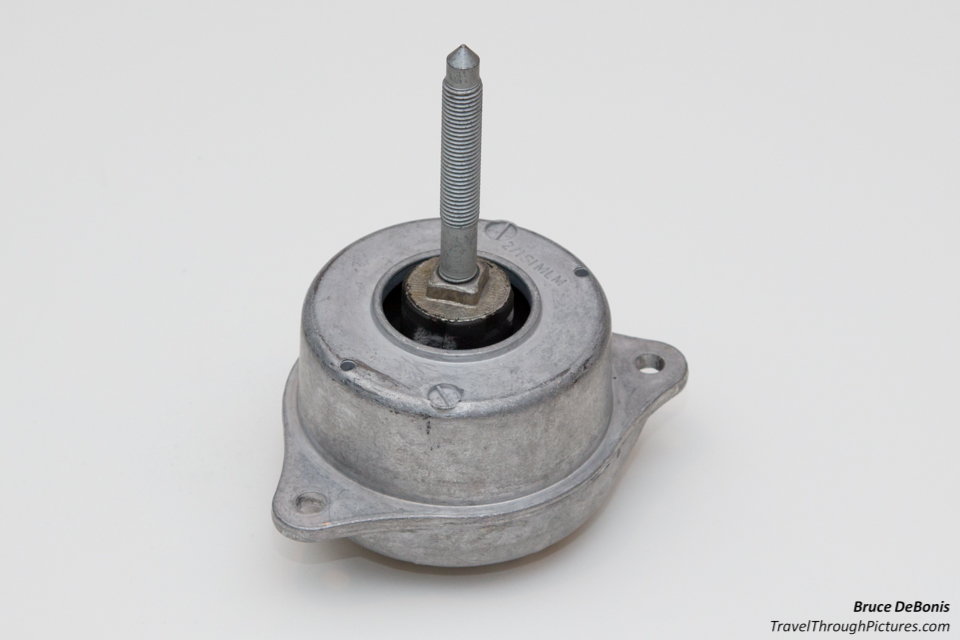
Removed mount (Note the square hole where the square mount "nut" fits):
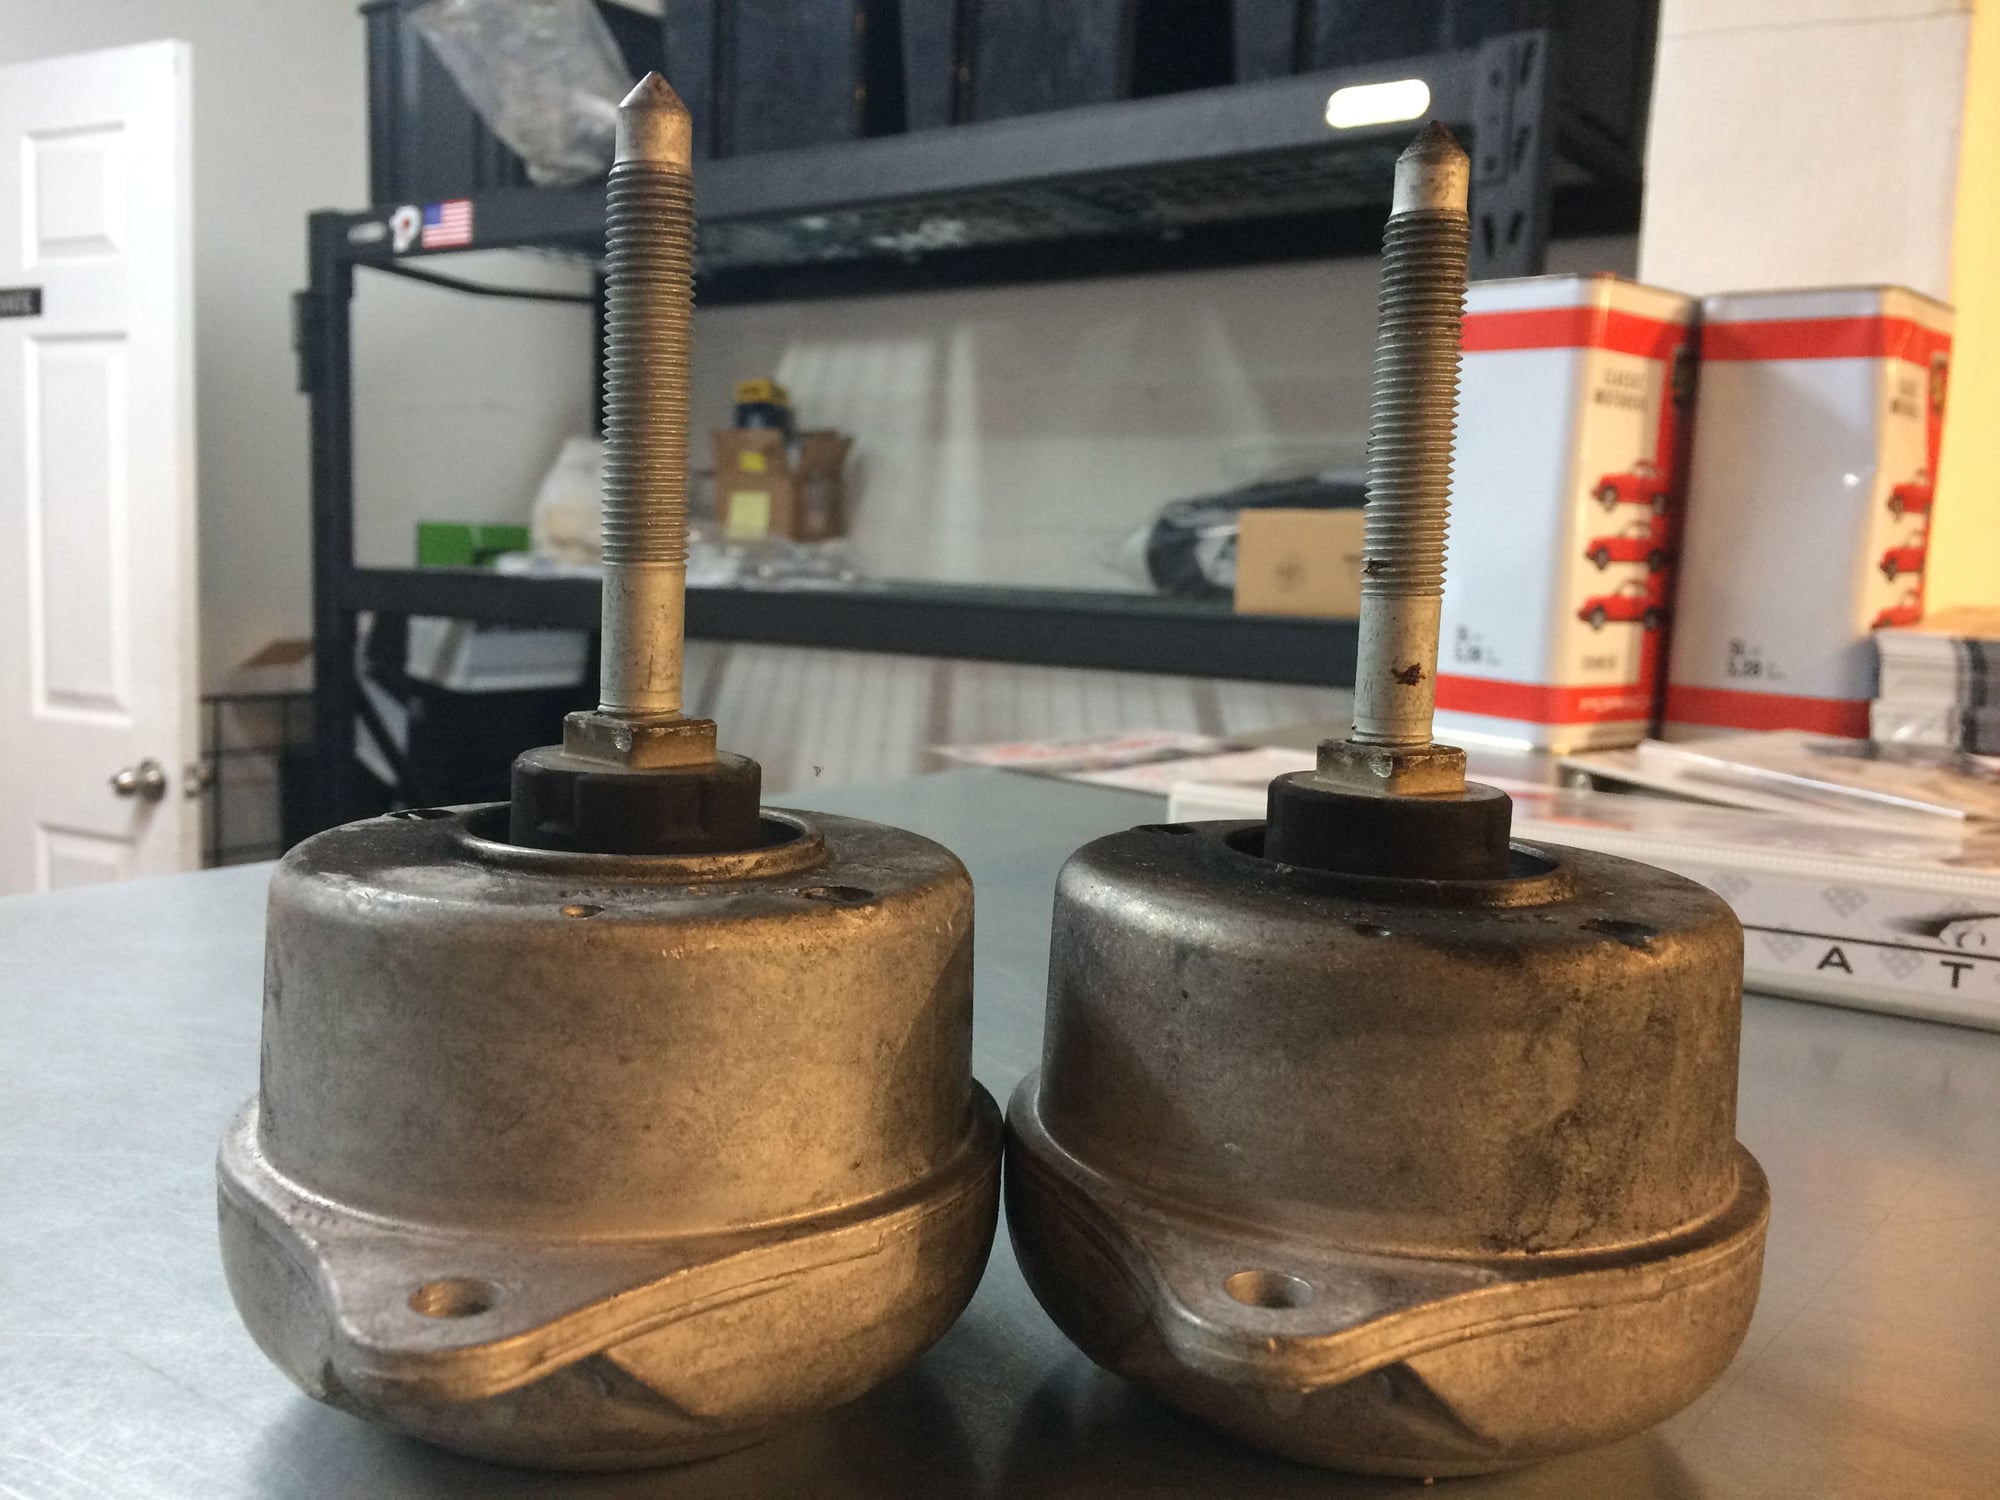
Removed and new rightside mounts.... old sagging one on left:
10. Install the new mount. Ensure the square nut under the mount fits into the square hole in the engine chassis. I used a small mirror to ensure it fit. The Porsche mounts were perfectly aligned to the square holes. If they are not aligned, then remove the mount and take a wrench and turn the square nut to align properly (I read this is the procedure somewhere on the ‘net but I did not have to do this).
11. The mount should sit flat on to the brace. If it is high, jiggle it around and ensure the square nut fits into the hole. If it is still high, let the jack down just a tiny bit.
12. Insert the bolts and tighten each to torque spec noted above.
13. Now give the jack a pump to ensure the engine is pressed firmly to the car chassis.
14. Put the torx nut on the end of torque wrench and extension. I had to get my head under there a bit to see the end of the bolt. Slide’er up the bung and tighten to torque spec noted above.
15. Lower the car from the jack.
16. Reinstall the airbox and attachments. Note: Careful getting that boot onto the throttle body as it is common to not get it slipped over the ridge on the bottom-side of the hole. This will result in a vacuum leak and could throw a code. A tip to get it correct: do not place the box first and then attach the hose…. Attach the hose first with the box not seated, the hose should be pressed up against a torx bolt on the lower right side of the throttle body. Only after you are sure the boot is seated properly, then lower the box down onto the rubber plugs. Now tighten the band.
17. Tip for seating the screws on the airbox lid without losing them: I put the screw on the end of my magnet and push the magnet and screw into the screw hole while turning. Then I pull the magnet straight up and pop it off. The screw is now partially threaded and now ready for your torx bit.
18. Crack a Pilsner Urquell…… you bet. Now walk around your car and look for the next project.
Corteco OEM mounts vs Porsche original
I originally ordered the Corteco mounts from Pelican but sent them back. They made me really nervous. There were some posts out there saying the Pelican source were used mounts…… sure enough, one of my mounts appeared used. Maybe it was a refurb… I dunno but I sent them both back. I usually have no problem with OEM parts but I dunno about these Corteco parts. Corteco is supposed to be the maker for Porsche and frankly, they looked exactly the same with the same casting marks (I checked the Corteco online cat part 80001417 and they show the part and Porsche number) but…… By the way, both the Corteco and Porsche parts showed very slight bolt marks at the mounting holes where I suspect they were held when made or tested. Wayne at Pelican addressed this issue here at this thread: https://rennlist.com/forums/993-foru...n-parts-2.html
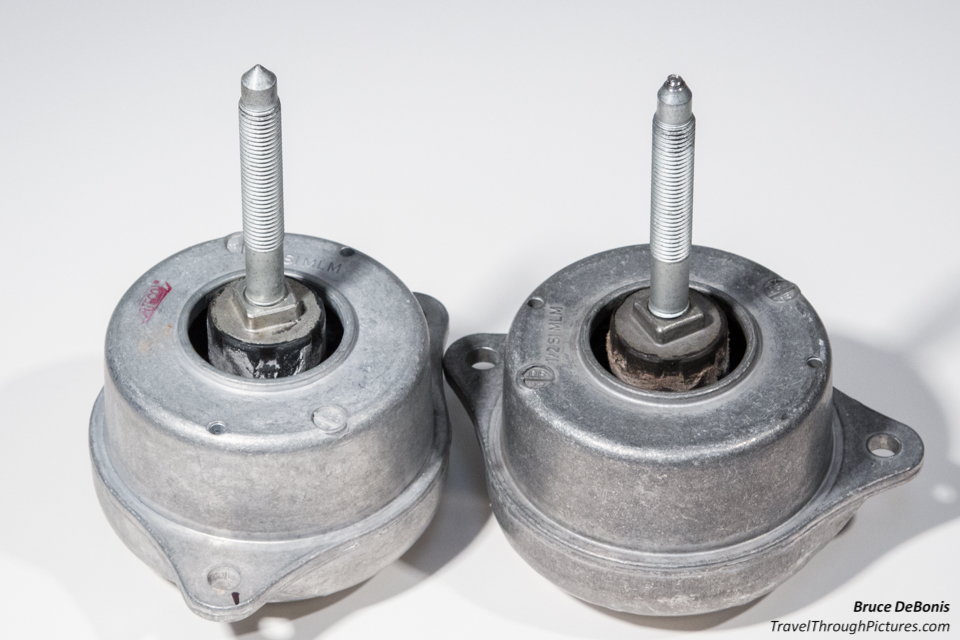
Once of the Corteco mounts looked fine, shiny and new… had a label removed. The other was dull, had a mashed tip, evidence of a nut on the bolt, and the “fuzz” on the rubber was brown. The fuzz on the other Corteco was white. There was a tiny bit of white fuzz on the Porsche part. I think Pelican should open the boxes of what they receive from their supplier and inspect… accept or reject to avoid this kind of bad press. I am very happy with Pelican…. But these Cortecos seem to give them a problem; they did me.
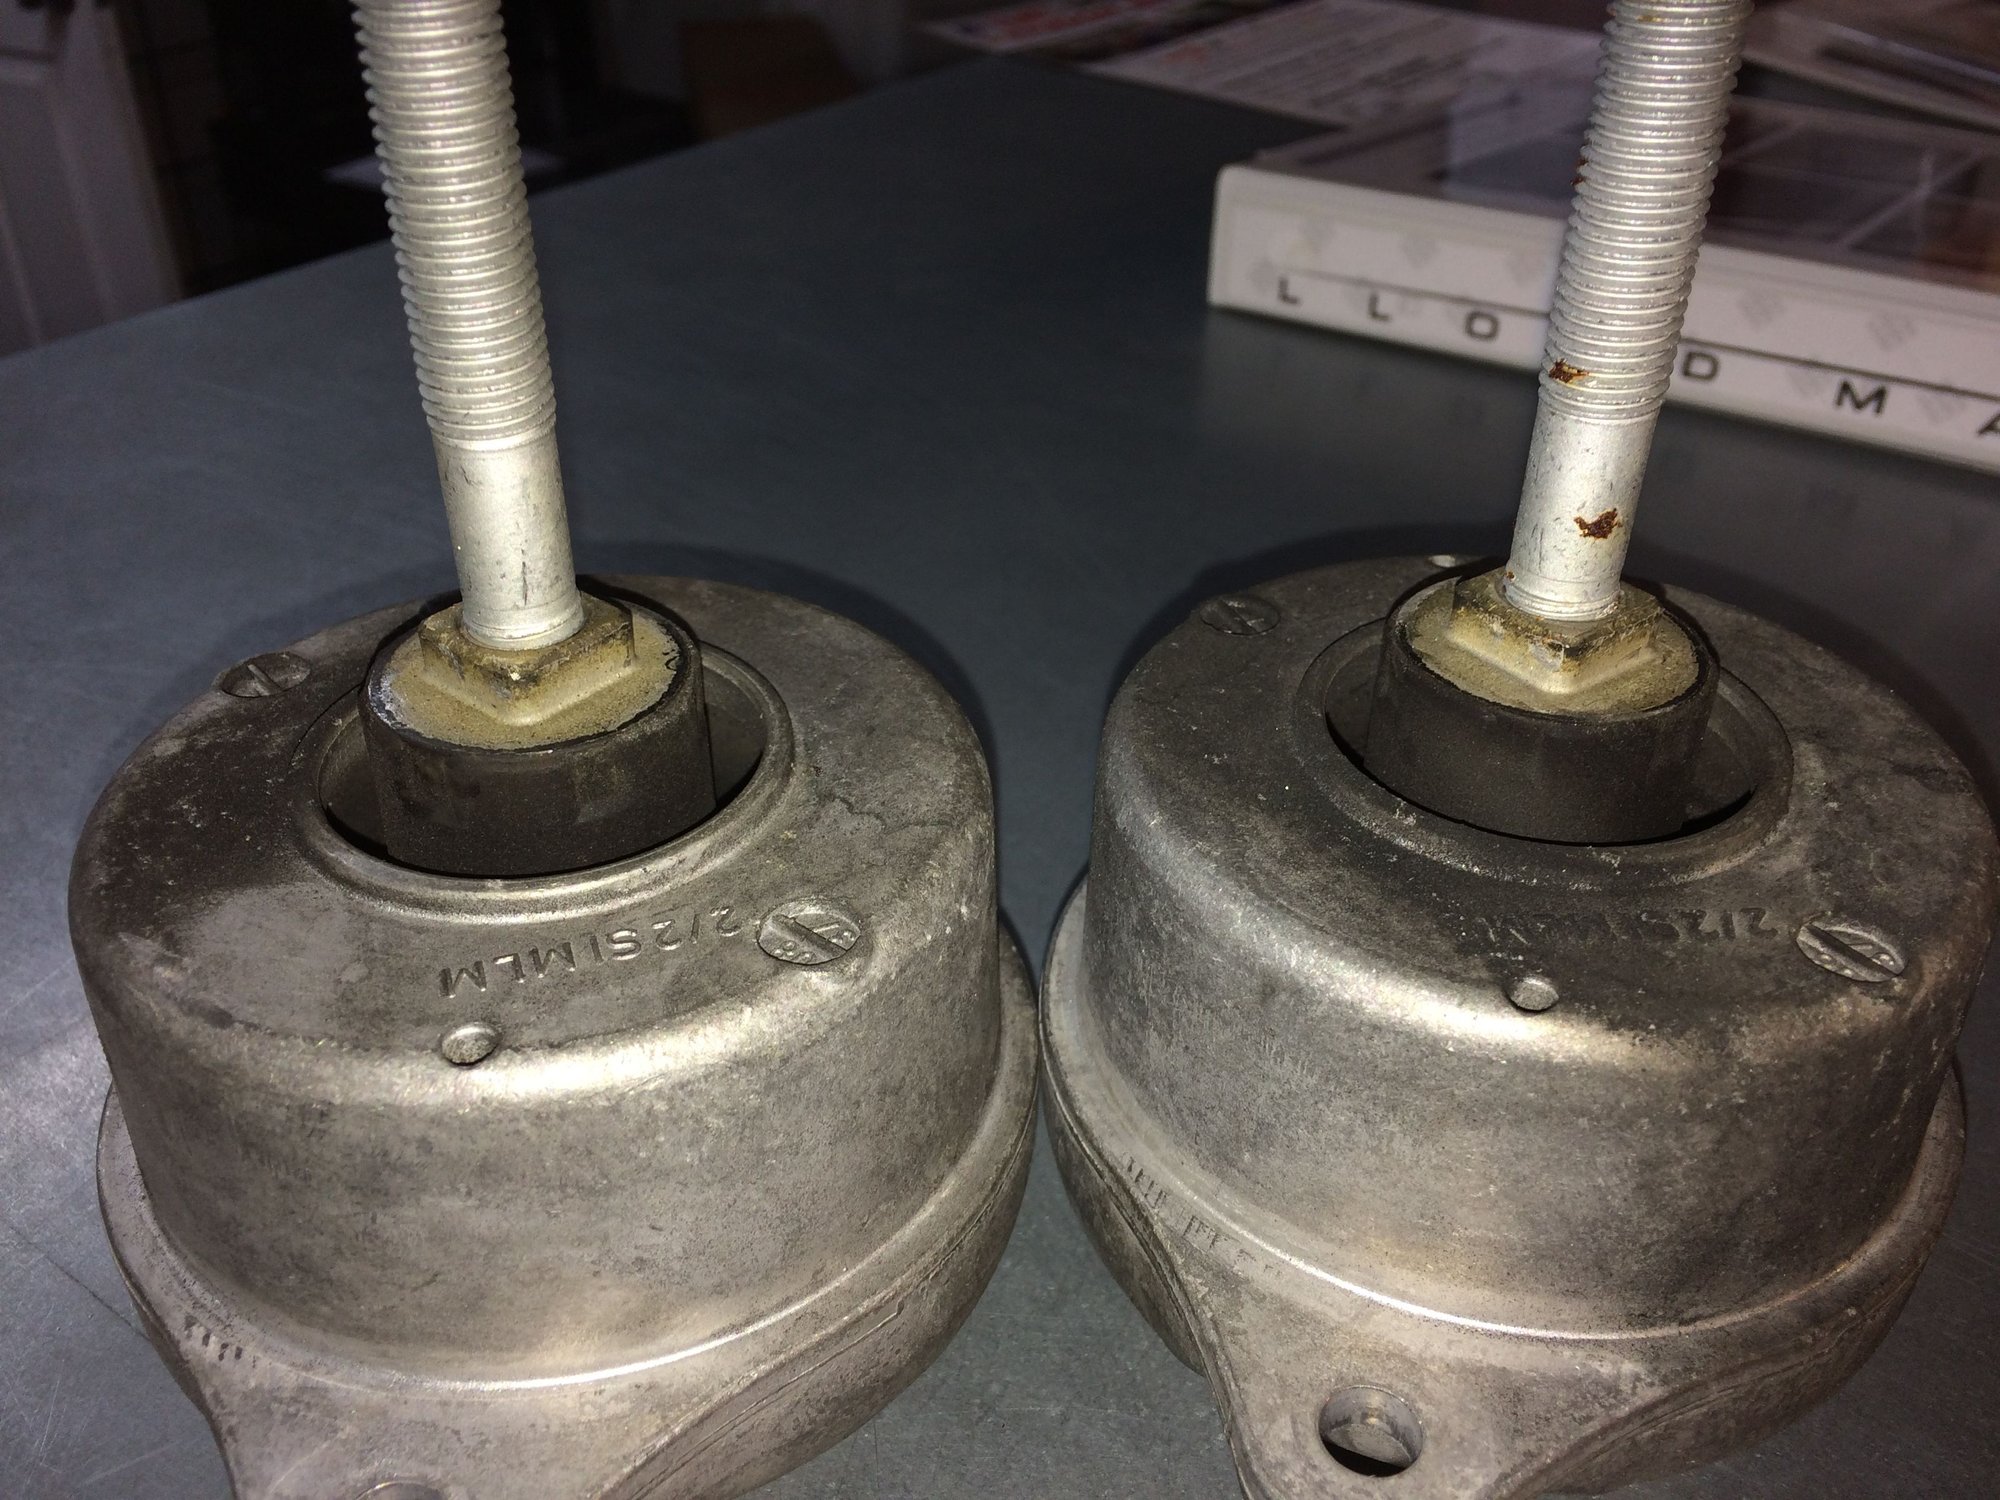
Original two Cortecos OEM from Pelican, note they are not alike and one looks used so I sent them back.
One of the Porsche Original parts from Pelican - they ordered from Porsche so it took a week or two:
Tip for installing airbox screws without dropping them, push the screw and turn the magnet to grab the threads, then pull straight up:
Peace
Bruce in Philly
Last edited by Bruce In Philly; 01-20-2016 at 11:15 AM.
Bruce, did you consider using aftemarket semi-solid mounts? I've read that they also help shifting smoothness when the body is under stress in turning and when accelerating.
Bruce, did you consider using aftemarket semi-solid mounts? I've read that they also help shifting smoothness when the body is under stress in turning and when accelerating.
I did, but a few folks noted to me that it increases vibration in the cabin causing them to replace them back to stock. Not for me. I want "performance" but this is also my daily driver. If I tracked the car as a hobby, I may have done that as I feel that when the chassis is under load, it squishes around way too much... way more than my 2000 Boxster S did (a car that I tracked).
If you go to Corteco's website, they have all kinds of words around vibration reduction technology.... that is OK by me. Despite my comments over the years that Porsche has softened the 911 for the mass "Look at me! I drive a Porsche!" market, I still tend to admire their ability to balance performance and usability. I do, however, like my Numeric shifter for its crisper, more mechanical feel.... but it doesn't drone, vibrate or annoy me (as I think aftermarket mounts would).
7b. Dirty engine compartment. Some readers have never seen one. Often associated with driving your car outside in the rain and dust.
How long did all this take?
Everything come apart easily?
Did you use any assembly anti seize?
I love DYI's. Appreciate your time to document.
About two hours.... but now that I did it, if the tools were out... maybe 1 hour or less.... it is that easy.
No issues with disassembly. The bolts gave me no problems.
I did not use anti seize. There was none on there when I removed it so I didn't use it.... but honestly, I am just a hack... I have no idea if I should have used it.
Regarding the dirty cabin: You betcha! I drive it. I did vacuum it out... pulled out dead leaves and such. I found two acorns jammed in there... I didn't recognize the nut so it must have come from the previous owner's storage. Wiring around it seemed fine.
Got my new mounts installed today. From the get go much less vibration in the cabin and less "jumpy" slow speed low gear changes from the PDK.
One question though. Which way should the MAF sensor cable run? Should have taken a picture before but forgot to do so. There is a whole of hot hoses and tubing back there and I want to make sure they don't melt the cable's cover.
From the box it now runs under the ledge of the box but I don't recall seeing it run over the right mount.
Thanks. Found the slot. Maybe did not run my fingers the length of the box the first time.
As for the results, much less vibration at idle and what feels like quicker reaction to throttle inputs. I guess there was a slight hesitation before as the old/stretched mounts flexed. From side by side I say there was 1/3 of an inch difference between old and new with the left one being a bit more stretched than the right one.
Also, there was a bit of a rocking action when on/off the gas while cruising. I say 80% gone.
I have an issue with the re-installation of my airbox and I thought you might be able to help since you had to do this step in this procedure. I have a 997.2 as well and I am really struggling to put back the airbox hose to the throttle body. It seems that either there is not enough room (i can't compress the hose enough to fit it at both ends), or the hose is not flexible enough for me to fit both ends.
Below are the steps I take:
-airbox top is removed.
-placed the bottom part of the airbox in its location (with the rubber pins at the bottom in their location)
-inserted the "air" part of the hose to the airbox
-can't get the "throttle" part of the hose to fit in the throttle body (i.e. the top part fit but then due to the angle and the stiffness of the hose, the bottom part of the hose is not close enough to the throttle body)
-Then I tried to fit the hose to the throttle body and the airbox with the airbox out, and tried to drop the airbox in its location but there is not enough room for the airbox to go down with this restrictive angle.
I was therefore wondering if you had a trick to do this procedure, or if you could provide any advice. What I find interesting is that I could not find anyone else online struggling with this, which means that I really suck with DIY!!!
I was only able to source a german video on youtube where the mechanic replace the airbox. After putting the bottom part of the airbox in its location with the hose on the airbox first, then the hose just fit to the throttle body without any effort, it slips right into it. Which make me think that maybe the hose of my airbox is not standard (which seems extremely unlikely since it does look like any other 997.2 airbox hose I saw online).
Anyway, if you could provide any advice, I would greatly appreciate it.
Thanks so much!
Try this:. Attach the hose to the throttle body before placing the airbox down on the pins. Then, with a bit of force, wrangle and shove the box down in there.
This worked for me on my 2009 C2S.
Peace
Bruce in Philly
Just changed mine in my 09 C2 PDK at 105k miles. Total transformation. I have been trying to get the PDK transmission software flashed, oil changed etc to troubleshoot rough shifts, heavy vibrations when in Drive at traffic lights etc. All of that has gone just by bolting in $250 worth of Corteco engine mounts.
I believe that they are actually the same part from the same factory as the original Porsche parts. They are precisely identical to the old ones, just with a Corteco sticker instead of a Porsche sticker. Usually you can detect minor differences with aftermarket parts, like stampings in different locations, but not in this case.


 01-17-2016, 07:00 PM