

Numeric Shifter Review and Installation - Part 1 of 5
 03-18-2014, 02:14 AM
#1
Drifting
Thread Starter
Background and Goals
My '08 C2S currently has 63.5K miles and 5.5+ yrs on the clock. I found the original stock shifter sloppy so I replaced it with a B&M SSK at ~48K miles. That was a big improvement. Gates were precise and shifts much shorter but I started to encounter difficulties shifting into 1st gear especially when downshifting. Although this has been reported as a common characteristic of our cars it still bothered me... a $100K car shouldn't behave like this! My p-tech, who installed the B&M, indicated that an SSK would make shifting into 1st more difficult plus have a notchy feel to it. So I've learned to live with the notchiness and 1st gear shift charms... shifting into 2nd then 1st has become 2nd nature. But then I read some positive reviews re the Numeric shifter. It looked well built so I gave it a try... what a difference. The notchiness is completely gone and so is the 1st gear issue... only problem left is the driver. Found myself shifting into 2nd then 1st at a stop light today out of habit. OK, it's only been two days since the Numeric install. This write-up will focus on the steps required to replace the stock shifter and/or B&M SSK with a Numeric shifter and how to adjust the Numeric shifter. I'll also provide a comparative review of the three shifters.
DIY Level
I consider this DIY project a level 2-3 out of 10. It's a fairly simple project to undertake and only requires a few tools. Here are some instructions and pics which may help others.
Time
45mins - 1.5 hrs... removal of the center console takes 15-20 minutes. I burnt some time, however, redoing the sequence of Numeric assembly to get it just right.
References
- Although this is for a Boxster it helped as a reference. http://billswebspace.com/Porsche987ShortShiftDIY
- Numeric also provides a nice install doc so some of what I'll have documented here is redundant but the pics should help some.
Tools Required:
- T20 and T27 torx drivers
- 10mm socket
- 3mm allen wrench
- interior panel/trim removal tool set
Optional Tools
- masking tape to protect trim pieces where necessary
Comparative Review: Porsche Stock Shifter vs. B&M SSK vs. Numeric Shifter
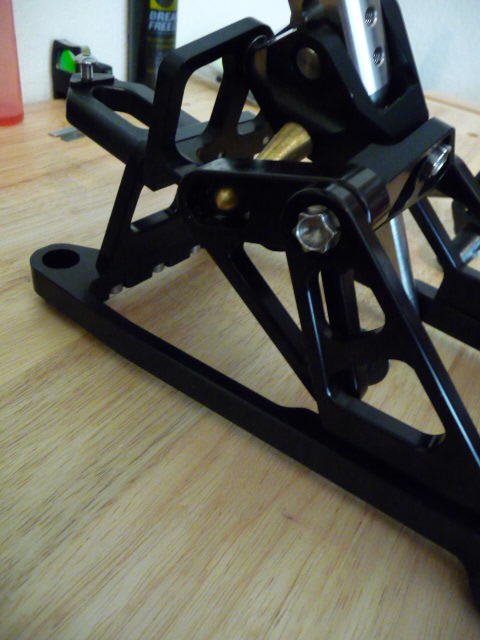
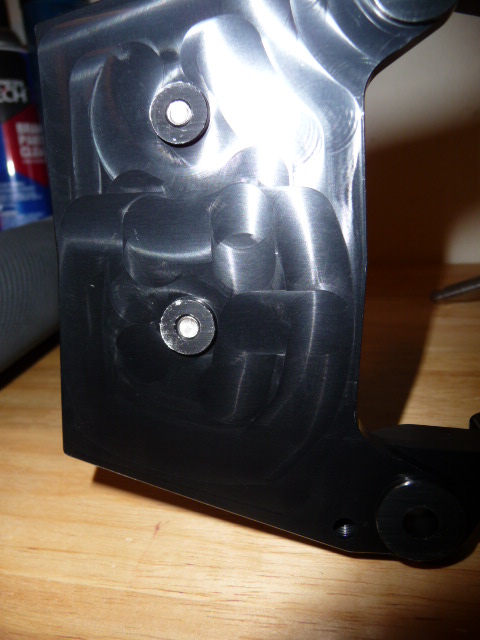
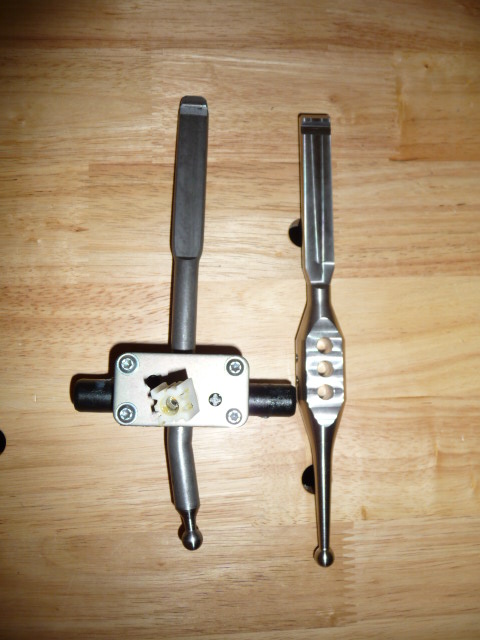
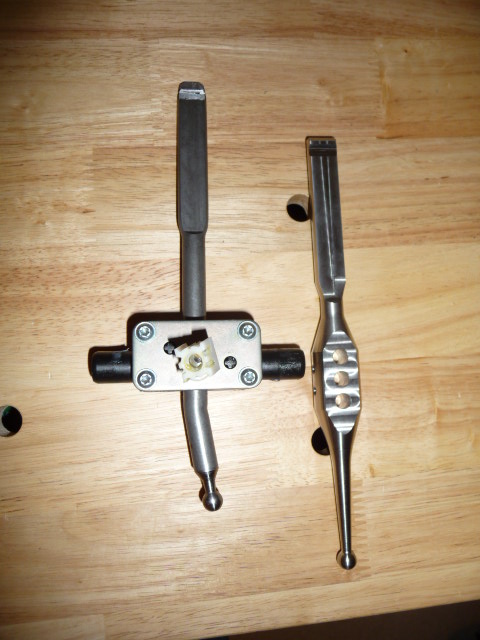
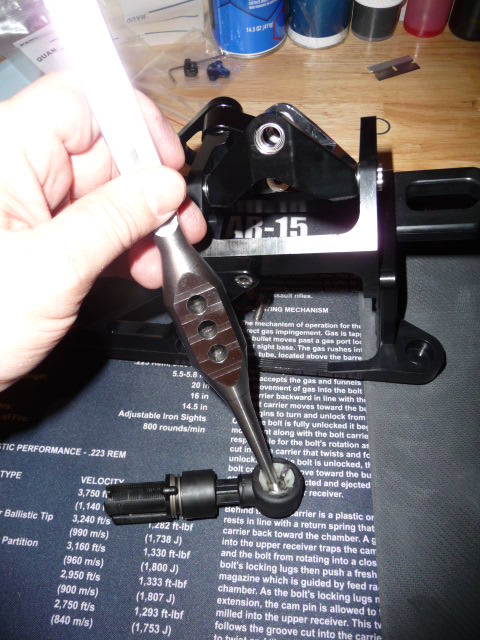
It's immediately apparent when I held these shifters that the Numeric was the gem of the lot from a build quality perspective. A jeweled/billeted mechanism built purely of aluminum and metal alloys. Even the machined screws are precise metric bits of stainless steel.
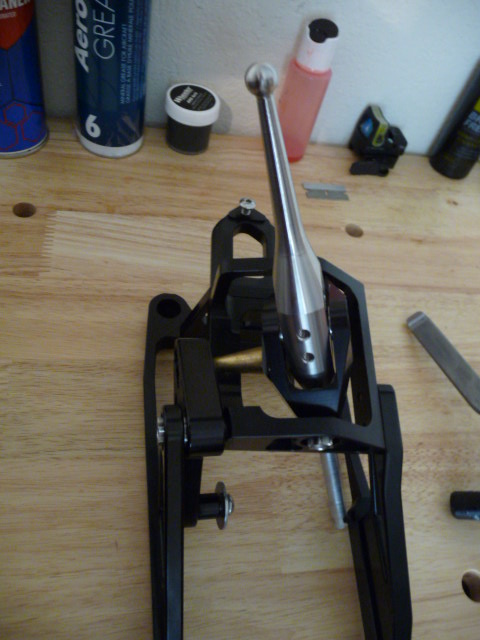
The CNC milling is clearly seen in this pic.
The B&M in comparison is a half step towards the mechanical beauty of the Numeric. It's also made of metal alloys and aluminum, however, it rests on a polymer foundation - the Porsche polymer shifter frame.
Last in the line up is the stock shifter. It would normally rest in place of the B&M shifter rod assembly within the Porsche shifter frame to form a nearly 100% polymer built unit except for the shift rod itself, a metal plate, and some metal screws. FWIW, the Porsche SSK is simply the stock unit with a shorter rod per my p-tech.
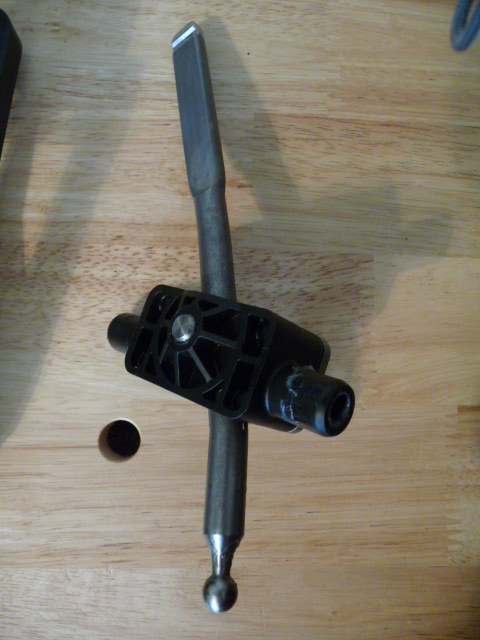
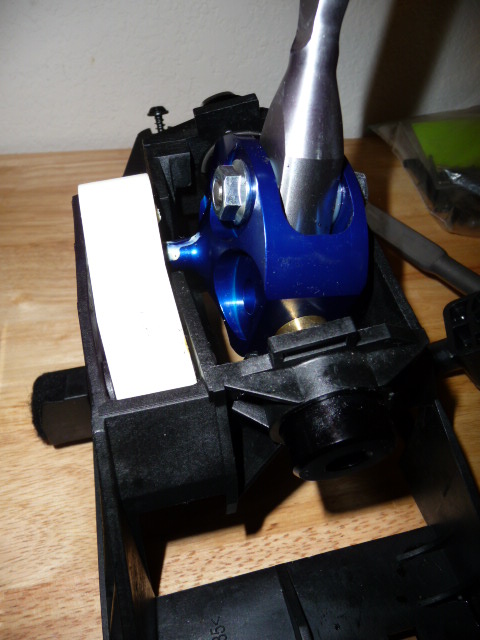
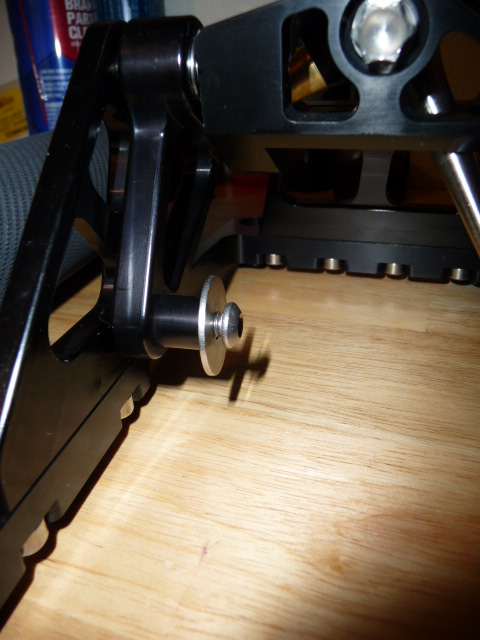
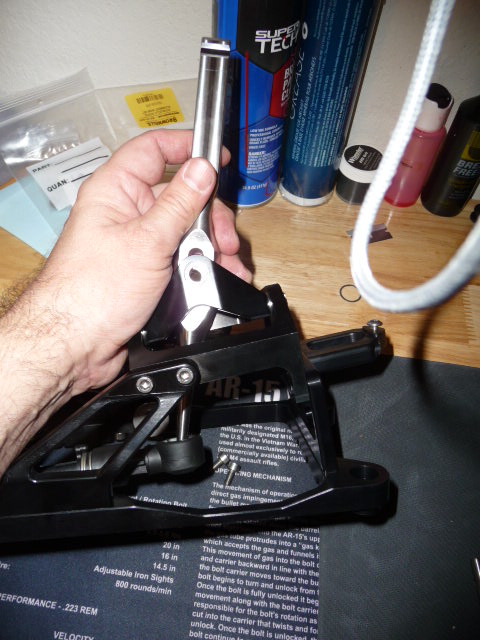
Here's a view of the stock vs. Numeric shift rod. They are both of similar lengths. The Numeric, however, allows the fulcrum point of the shift rod to be adjusted for multiple positions: the tallest point will provide for a shifting lever similar to the stock shifter, the mid level point allows for a shorter throw, and shortest point provides for the most aggressive short throw requiring more muscle. Note that to use the shortest throw position some of the carpet material beneath the shifter rod needs to be removed to allow room for the lowered shift rod to move without obstruction.
My '08 C2S currently has 63.5K miles and 5.5+ yrs on the clock. I found the original stock shifter sloppy so I replaced it with a B&M SSK at ~48K miles. That was a big improvement. Gates were precise and shifts much shorter but I started to encounter difficulties shifting into 1st gear especially when downshifting. Although this has been reported as a common characteristic of our cars it still bothered me... a $100K car shouldn't behave like this! My p-tech, who installed the B&M, indicated that an SSK would make shifting into 1st more difficult plus have a notchy feel to it. So I've learned to live with the notchiness and 1st gear shift charms... shifting into 2nd then 1st has become 2nd nature. But then I read some positive reviews re the Numeric shifter. It looked well built so I gave it a try... what a difference. The notchiness is completely gone and so is the 1st gear issue... only problem left is the driver. Found myself shifting into 2nd then 1st at a stop light today out of habit. OK, it's only been two days since the Numeric install. This write-up will focus on the steps required to replace the stock shifter and/or B&M SSK with a Numeric shifter and how to adjust the Numeric shifter. I'll also provide a comparative review of the three shifters.
DIY Level
I consider this DIY project a level 2-3 out of 10. It's a fairly simple project to undertake and only requires a few tools. Here are some instructions and pics which may help others.
Time
45mins - 1.5 hrs... removal of the center console takes 15-20 minutes. I burnt some time, however, redoing the sequence of Numeric assembly to get it just right.
References
- Although this is for a Boxster it helped as a reference. http://billswebspace.com/Porsche987ShortShiftDIY
- Numeric also provides a nice install doc so some of what I'll have documented here is redundant but the pics should help some.
Tools Required:
- T20 and T27 torx drivers
- 10mm socket
- 3mm allen wrench
- interior panel/trim removal tool set
Optional Tools
- masking tape to protect trim pieces where necessary
Comparative Review: Porsche Stock Shifter vs. B&M SSK vs. Numeric Shifter
It's immediately apparent when I held these shifters that the Numeric was the gem of the lot from a build quality perspective. A jeweled/billeted mechanism built purely of aluminum and metal alloys. Even the machined screws are precise metric bits of stainless steel.
The CNC milling is clearly seen in this pic.
The B&M in comparison is a half step towards the mechanical beauty of the Numeric. It's also made of metal alloys and aluminum, however, it rests on a polymer foundation - the Porsche polymer shifter frame.
Last in the line up is the stock shifter. It would normally rest in place of the B&M shifter rod assembly within the Porsche shifter frame to form a nearly 100% polymer built unit except for the shift rod itself, a metal plate, and some metal screws. FWIW, the Porsche SSK is simply the stock unit with a shorter rod per my p-tech.
Here's a view of the stock vs. Numeric shift rod. They are both of similar lengths. The Numeric, however, allows the fulcrum point of the shift rod to be adjusted for multiple positions: the tallest point will provide for a shifting lever similar to the stock shifter, the mid level point allows for a shorter throw, and shortest point provides for the most aggressive short throw requiring more muscle. Note that to use the shortest throw position some of the carpet material beneath the shifter rod needs to be removed to allow room for the lowered shift rod to move without obstruction.
Last edited by USMC_DS1; 03-20-2014 at 02:41 AM.
 03-18-2014, 02:36 AM
#2
Drifting
Thread Starter
Instructions
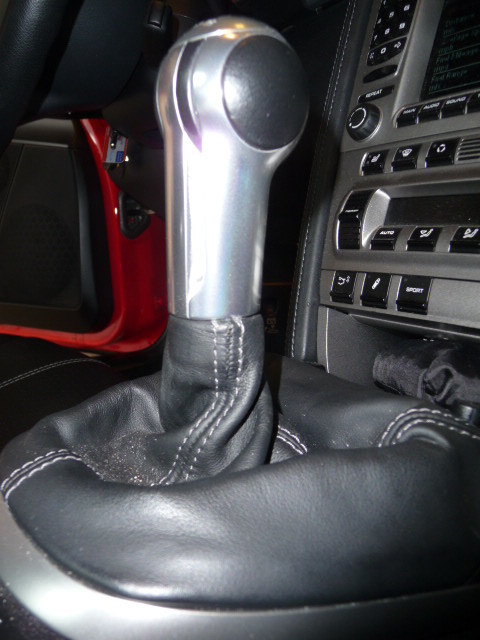
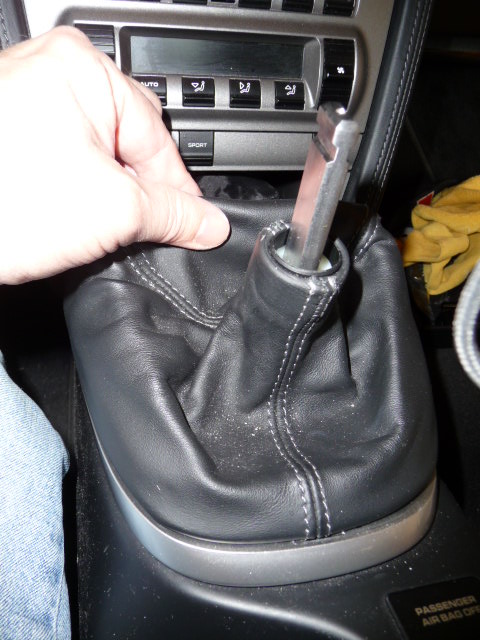
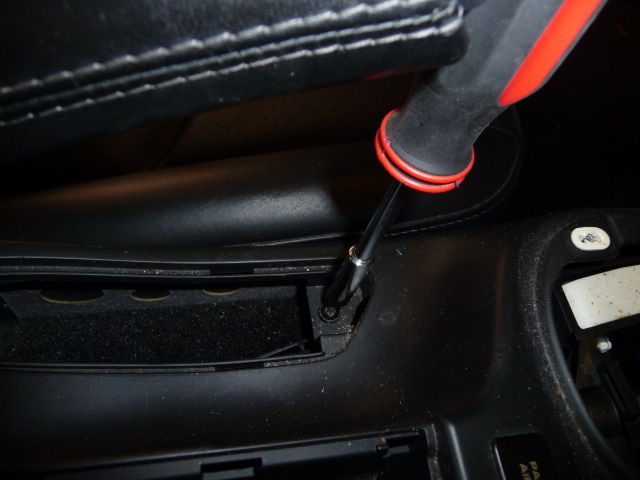
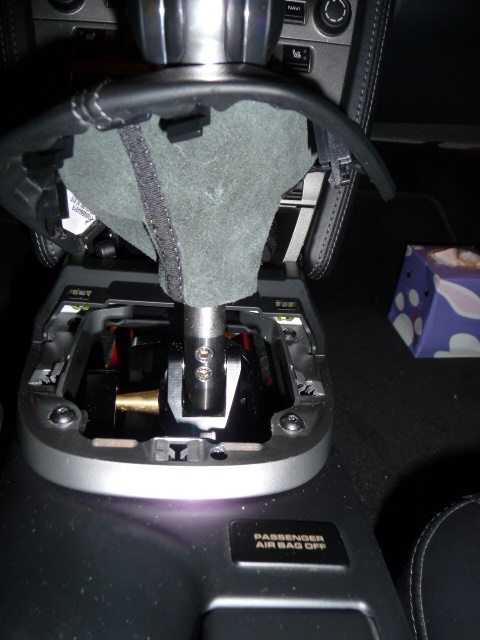
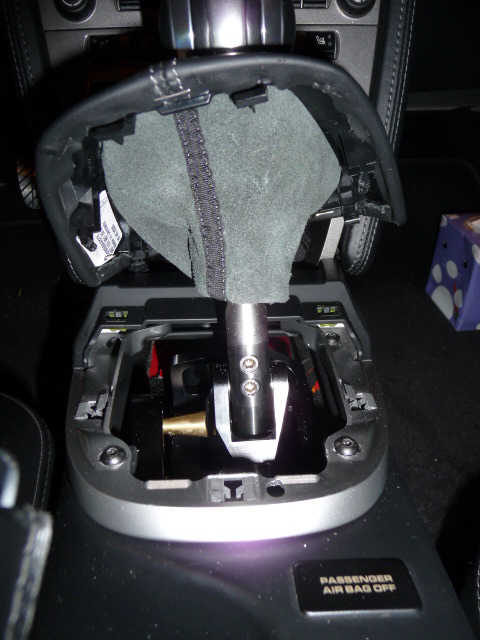
Remove the shifter **** by turning the locking collar at the top of the leather boot counter clockwise 90 deg. Once unlocked the leather boot collar will slide down. Now pull the shift **** up... don't be afraid to muscle it to pull the **** off.

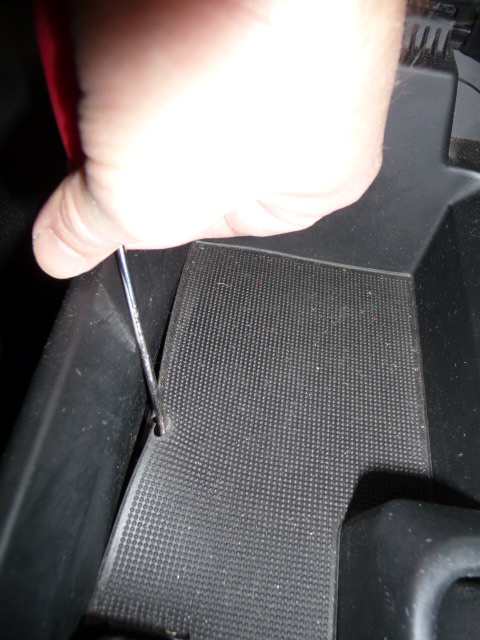
Remove the rubber mat from within the center console and the 4 screws underneath.
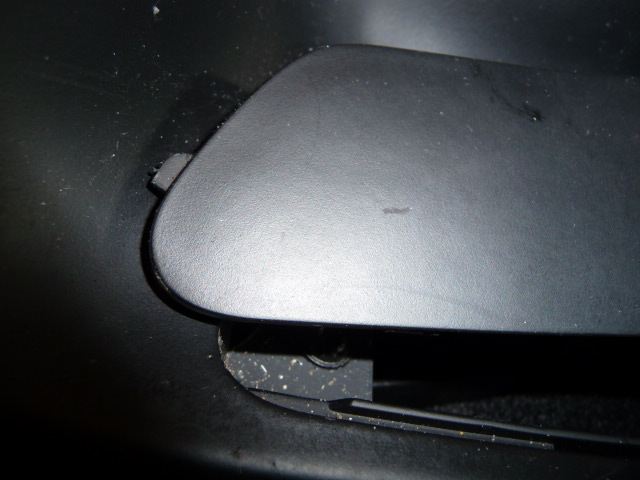
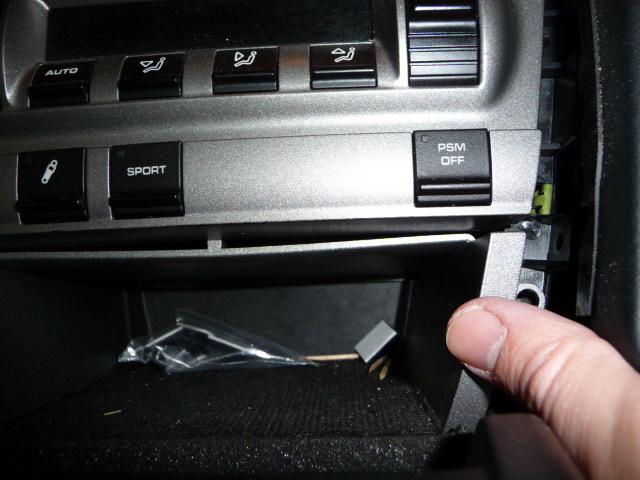
Remove the ash tray by opening it and pulling straight up.

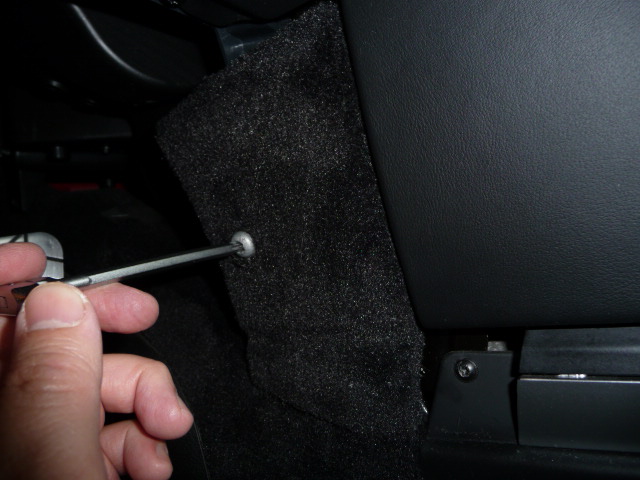
Remove the trim piece below the e-brake by pulling it up from the rear while pushing forward a bit. Be careful not to break the tab towards the front of this trim piece.
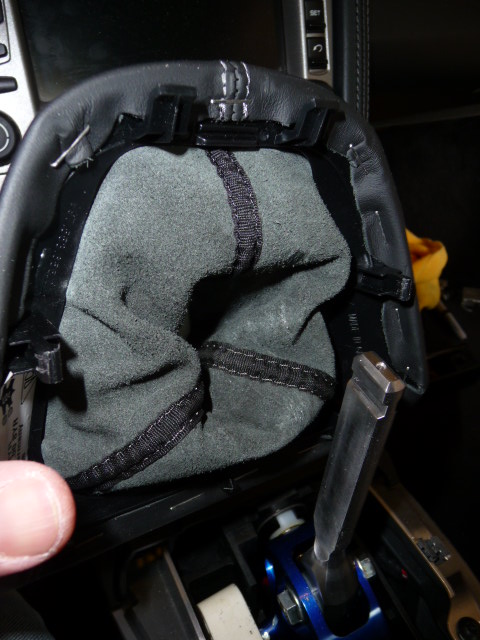
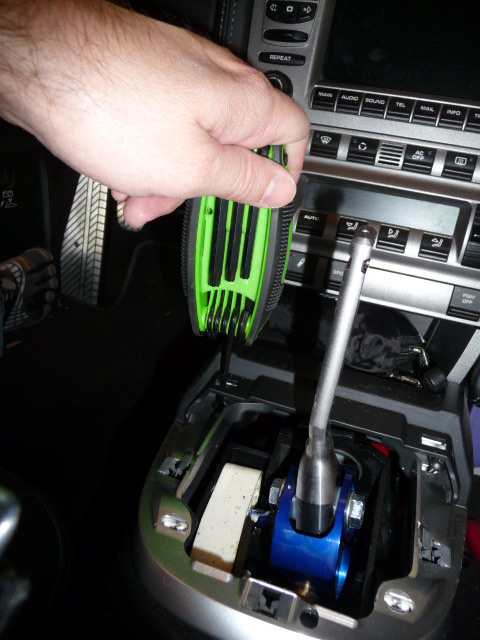
Remove the shifter boot by lifting up on the front of the leather boot. Take care not the break the secure tabs in the rear of the boot.
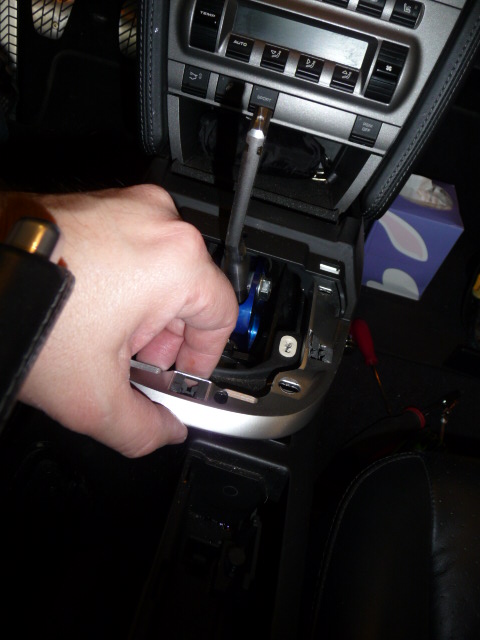
Remove 4 screws holding down the silver shifter boot surround trim piece. You'll need to pop up the 2 metal tabs at the front to access the 2 screws underneath. Then pull the trim piece up.
Remove the shifter **** by turning the locking collar at the top of the leather boot counter clockwise 90 deg. Once unlocked the leather boot collar will slide down. Now pull the shift **** up... don't be afraid to muscle it to pull the **** off.
Remove the rubber mat from within the center console and the 4 screws underneath.
Remove the ash tray by opening it and pulling straight up.
Remove the trim piece below the e-brake by pulling it up from the rear while pushing forward a bit. Be careful not to break the tab towards the front of this trim piece.
Remove the shifter boot by lifting up on the front of the leather boot. Take care not the break the secure tabs in the rear of the boot.
Remove 4 screws holding down the silver shifter boot surround trim piece. You'll need to pop up the 2 metal tabs at the front to access the 2 screws underneath. Then pull the trim piece up.
Last edited by USMC_DS1; 03-18-2014 at 03:55 PM.
03-18-2014, 03:17 AM
#3
Drifting
Thread Starter
Remove the 2 side panels(a carpet piece and a leather piece) covering the PCM center from the driver and passenger side. Note that the passenger side carpet piece has a power outlet.
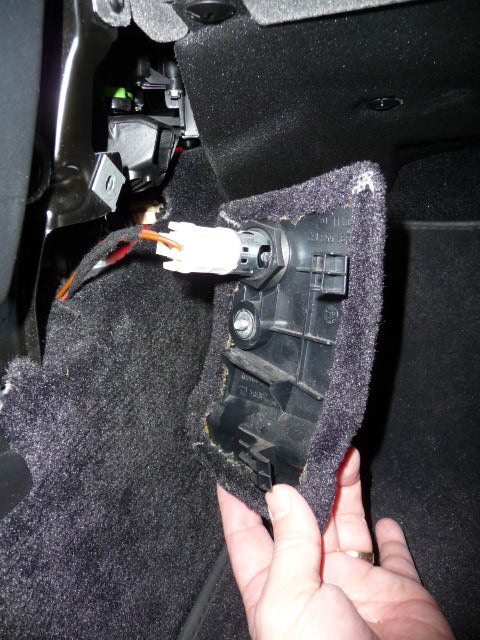
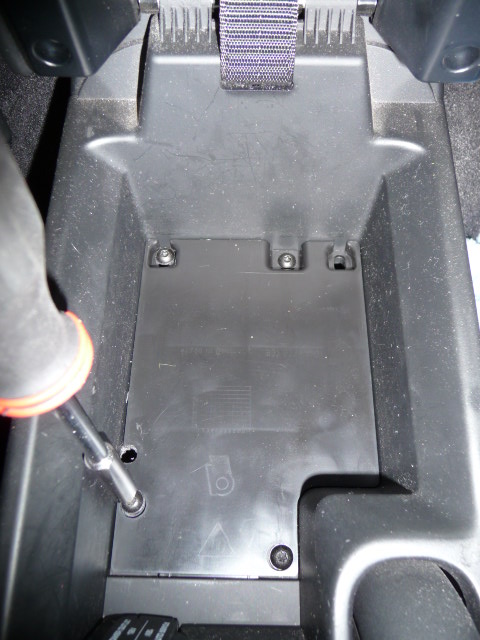
Now move the leather panel slightly away from the PCM center so that the screw holding the storage bin underneath is exposed. Remove the screws from both sides. Note that the storage bin has tab at the rear top area which need to be depressed to remove the bin.
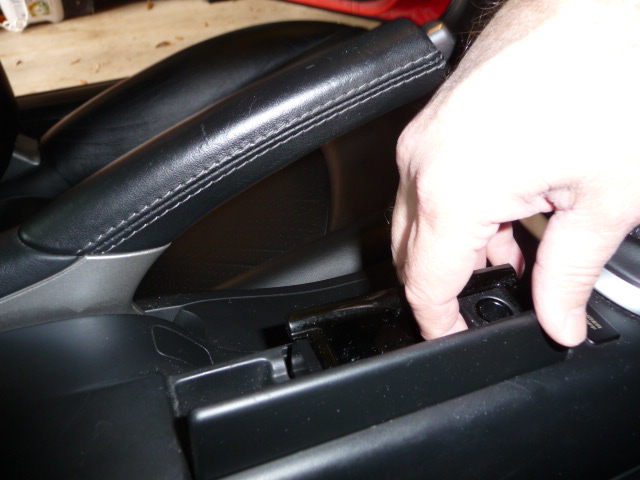
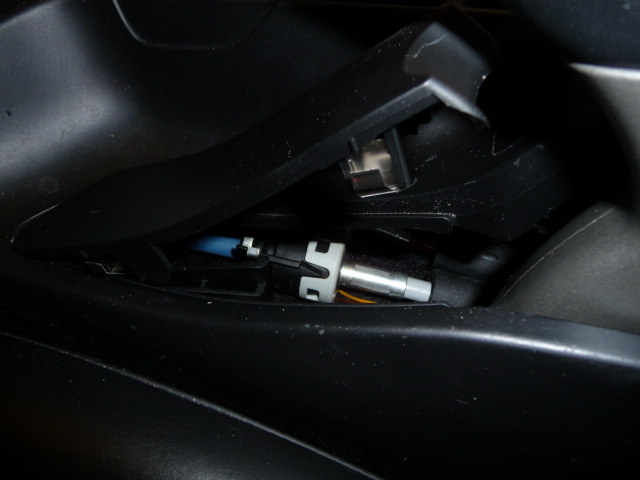
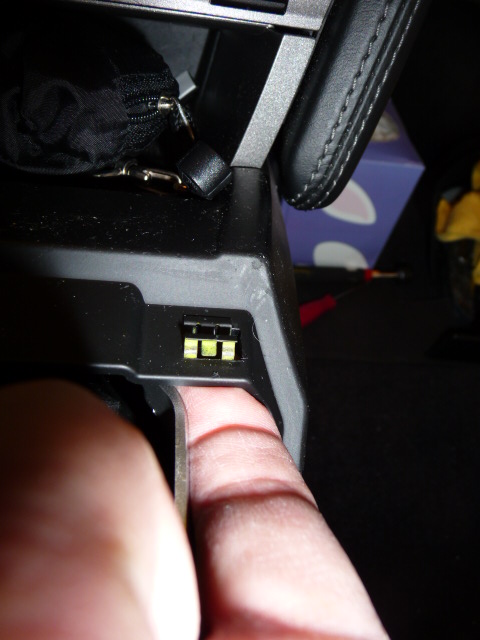
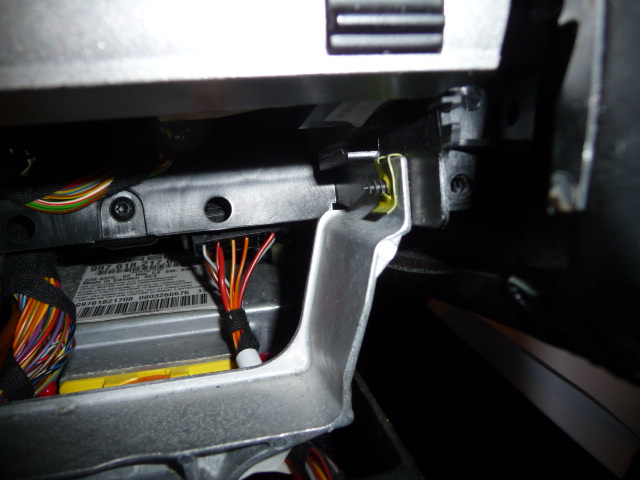
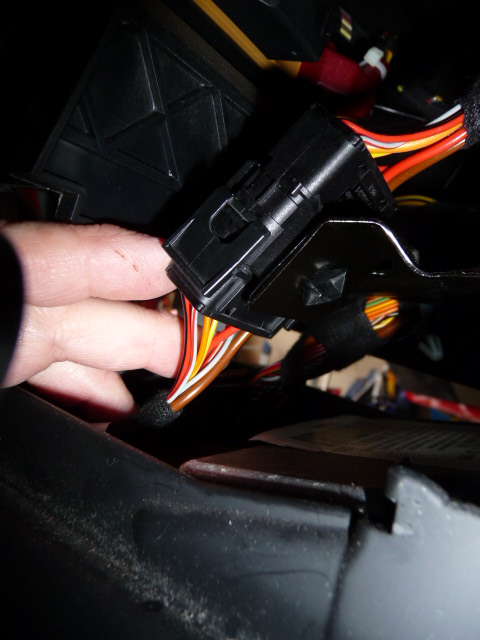
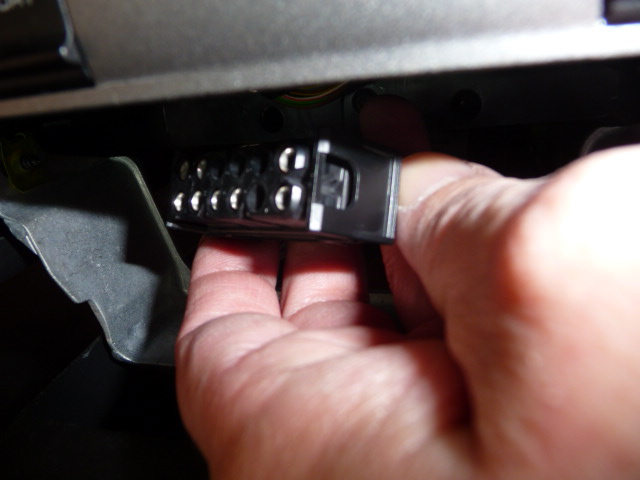
Once the storage bin has been removed then we'll be able to reach the center console electrical connector. Note that it's locked in place by two tabs on the sides... just press them in and pull the connector to release it.
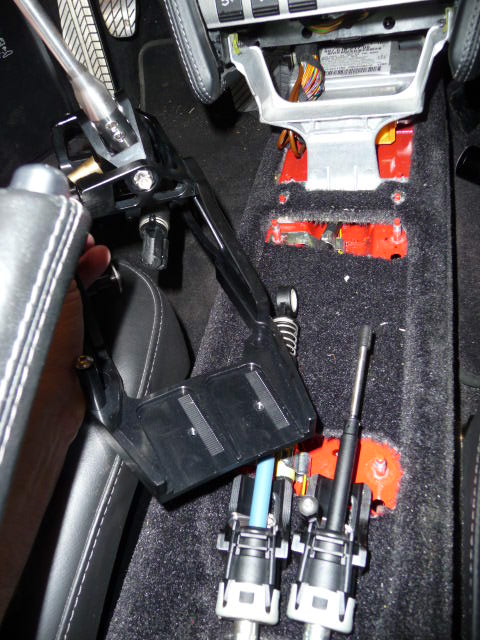
Remove the screws holding the center console in place. One under the e-brake handle and the other two are located at the very front of the center console... one on either side. Now lift the center console up from the rear and slide it out. You may have to manipulate the shifter rod into neutral or 3rd gear to allow room for the center console to be removed properly.
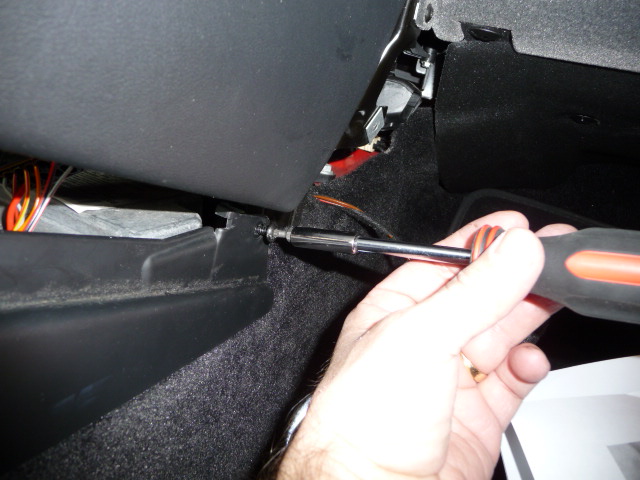
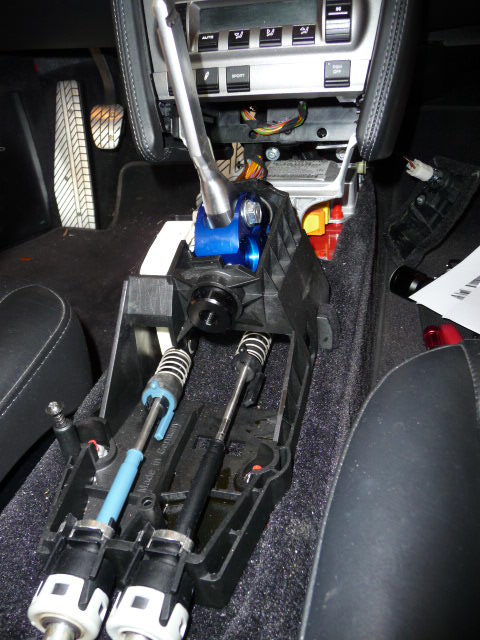
Place the shifter in neutral, mark the cables, and then remove these retaining clips. Push in the black taps to allow the retaining clips to slide out.
Now move the leather panel slightly away from the PCM center so that the screw holding the storage bin underneath is exposed. Remove the screws from both sides. Note that the storage bin has tab at the rear top area which need to be depressed to remove the bin.
Once the storage bin has been removed then we'll be able to reach the center console electrical connector. Note that it's locked in place by two tabs on the sides... just press them in and pull the connector to release it.
Remove the screws holding the center console in place. One under the e-brake handle and the other two are located at the very front of the center console... one on either side. Now lift the center console up from the rear and slide it out. You may have to manipulate the shifter rod into neutral or 3rd gear to allow room for the center console to be removed properly.
Place the shifter in neutral, mark the cables, and then remove these retaining clips. Push in the black taps to allow the retaining clips to slide out.
Last edited by USMC_DS1; 03-18-2014 at 09:20 AM.
03-18-2014, 04:15 AM
#4
Drifting
Thread Starter
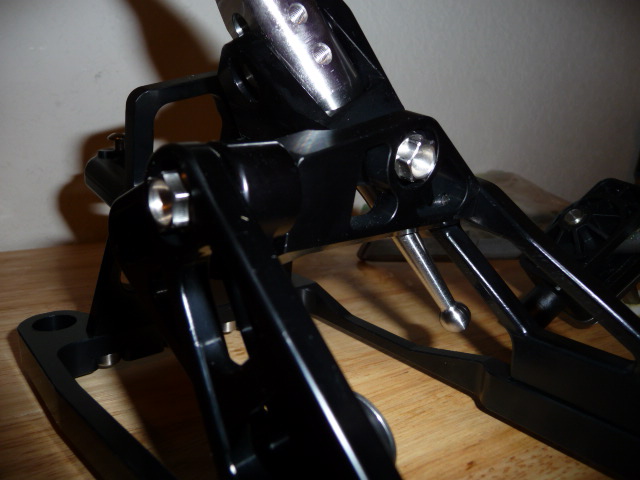
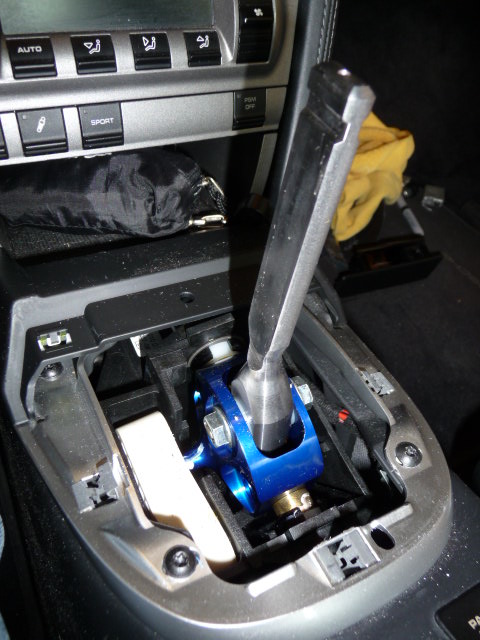
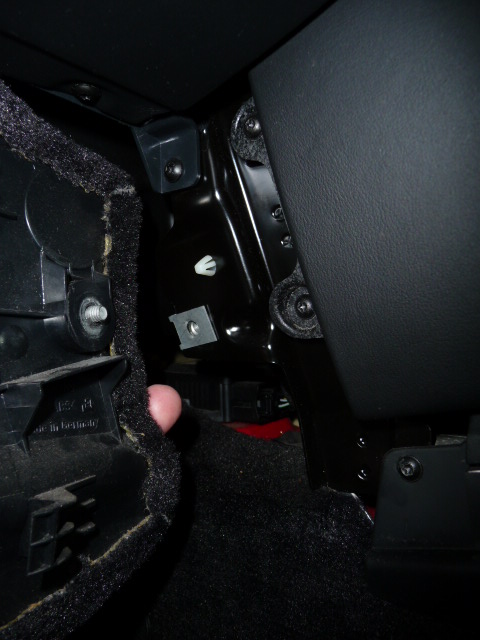
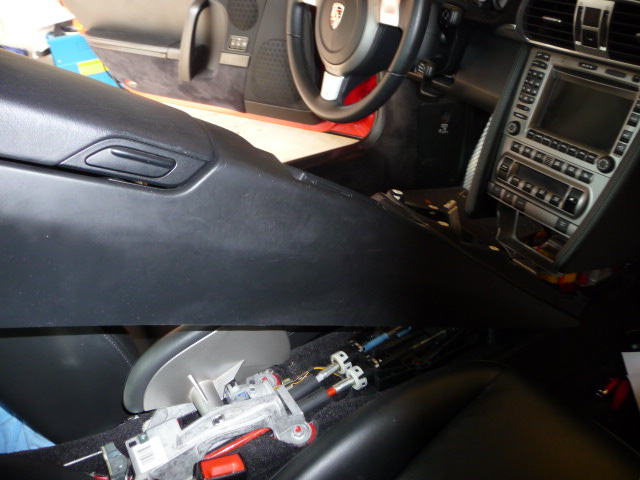
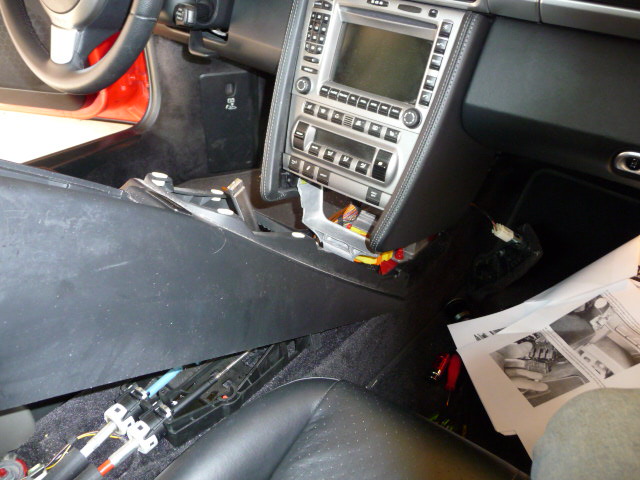
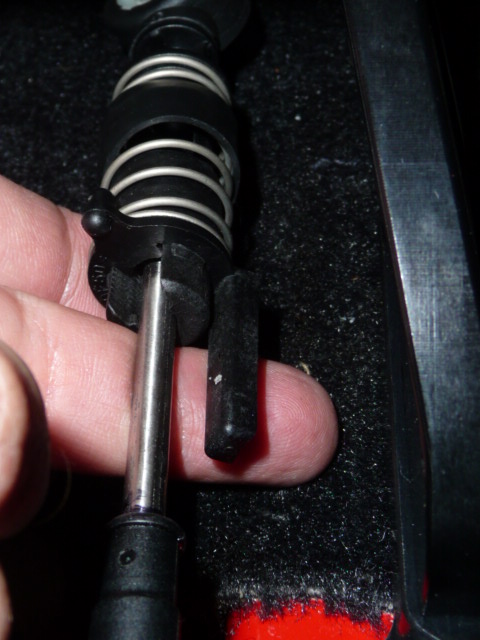
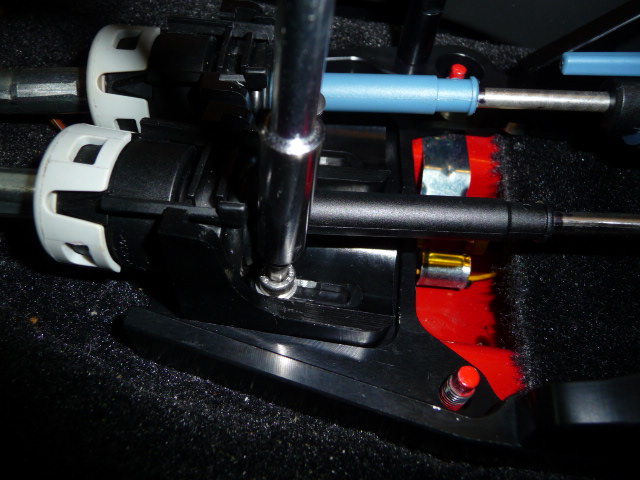
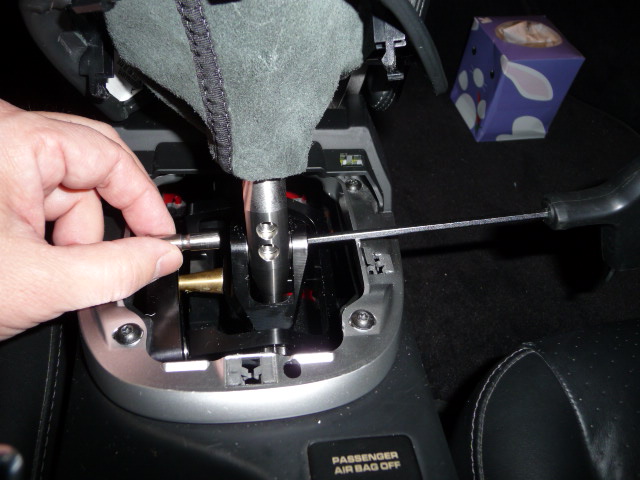
Remove the four 10mm bolts holding the shifter frame down.
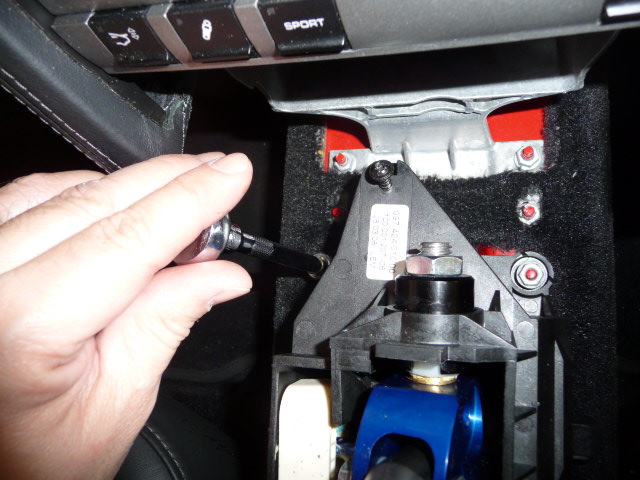
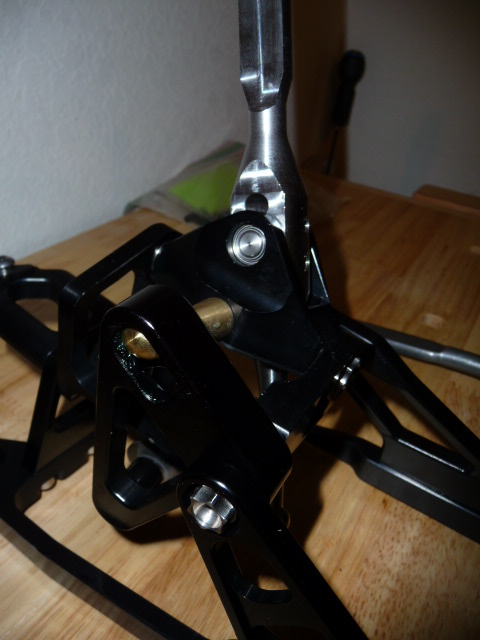
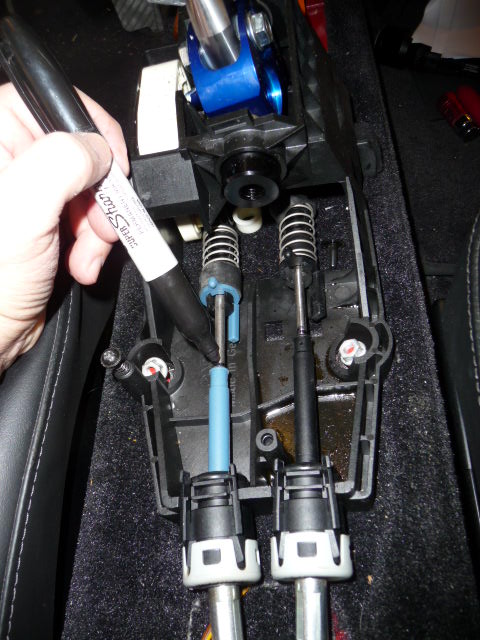
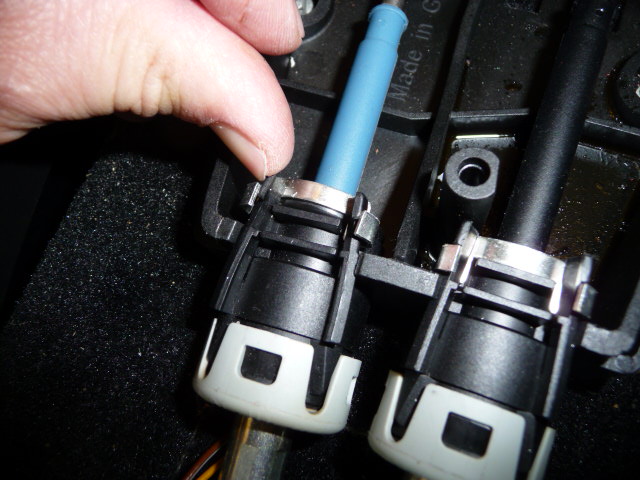
Pull out the black plastic retainer pin and sleeve holding the left shift cable to the left white collar sleeve beneath the shifter frame. FWIW, the black plastic retainer pin slipped out as I was moving the cables around without much encouragement... It's a very weak means by which to hold a shifter cable in place. The Numeric unit, in comparison, utilizes a stainless steel screw and washer to insure that the shifter cable is held in place properly. I'm a little surprised that my left shifter cable has not already slipped out of position. Makes me wonder if some of those broken shift cable reports were actually the left cable slipping out of it's location. Here's a preview of how securely the left shift cable is held in place when we install the Numeric later.
In contrast, the right shift cable was much more difficult to snap out. In fact, I ended up disconnecting the two halves of the right cable by pushing forward on the springed barrel part and then turning it right.
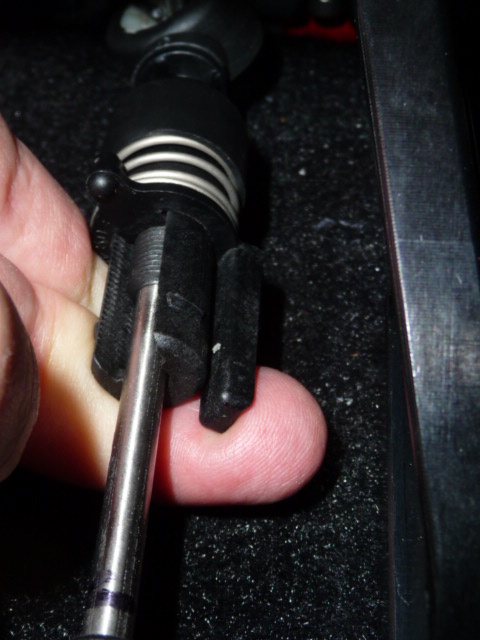
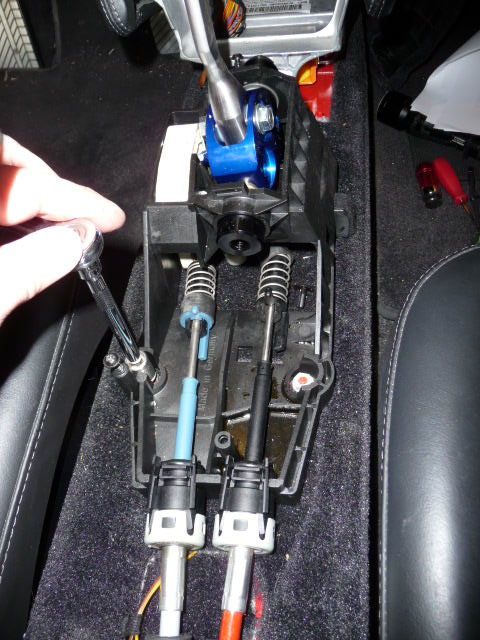
Now you can remove the entire shifter frame/tower. When it's out you will find it much easier to gain leverage to pull on the right cable socket off the shift rod itself. It's also easier to assembly/snap the right cable socket into the Numeric shift rod when it's outside from the Numeric frame. Just push the rod down onto the shifter socket unit it snaps into place.
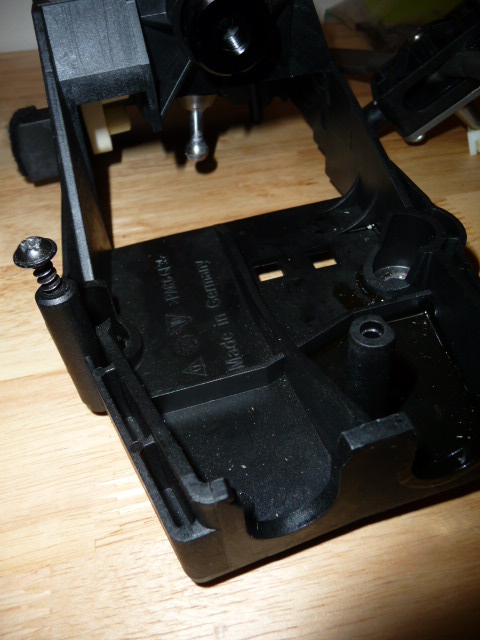
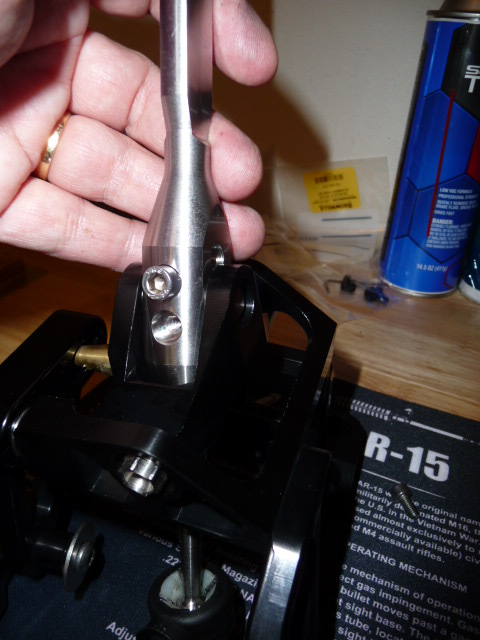
Feed the shift rod with tethered right cable socket up through the Numeric frame from underneath. Make sure that the two lock screws on the shift rod are facing towards the rear of the car. That way you can easily remove the screws and adjust the shift rod up or down later down the road.
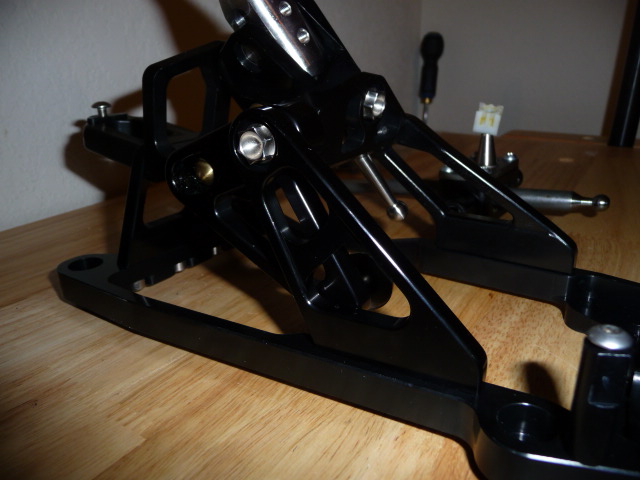
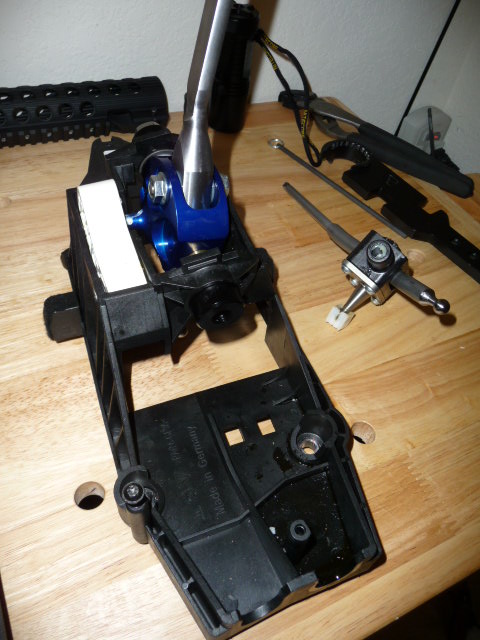
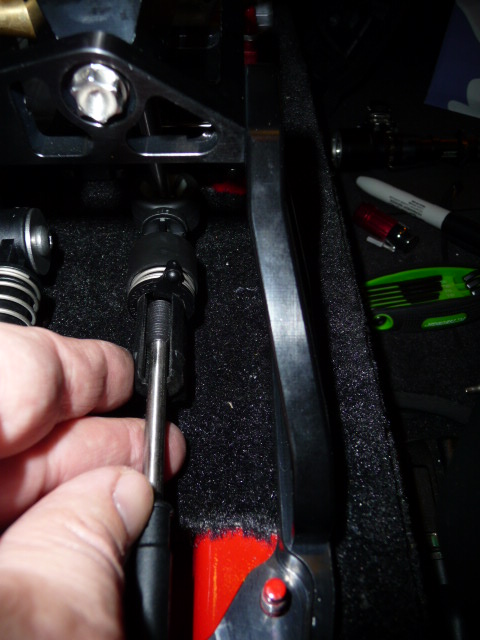
Remove the cable connector attachment sub-frame from the Numeric frame. Now place the Numeric shift frame back into place. Slide the two cable connector attachment sub-frame into place and snap both cable connectors down before screwing down the two sub-frame pieces. Insure that the retainer clips are in place before you screw down the sub-frame. The sub-frame may be moved slightly back and forth to gain perfect alignment. Attached the right and left shifter cables.
Now install the center console back into place using the reverse of the removal instructions.
Pull out the black plastic retainer pin and sleeve holding the left shift cable to the left white collar sleeve beneath the shifter frame. FWIW, the black plastic retainer pin slipped out as I was moving the cables around without much encouragement... It's a very weak means by which to hold a shifter cable in place. The Numeric unit, in comparison, utilizes a stainless steel screw and washer to insure that the shifter cable is held in place properly. I'm a little surprised that my left shifter cable has not already slipped out of position. Makes me wonder if some of those broken shift cable reports were actually the left cable slipping out of it's location. Here's a preview of how securely the left shift cable is held in place when we install the Numeric later.
In contrast, the right shift cable was much more difficult to snap out. In fact, I ended up disconnecting the two halves of the right cable by pushing forward on the springed barrel part and then turning it right.
Now you can remove the entire shifter frame/tower. When it's out you will find it much easier to gain leverage to pull on the right cable socket off the shift rod itself. It's also easier to assembly/snap the right cable socket into the Numeric shift rod when it's outside from the Numeric frame. Just push the rod down onto the shifter socket unit it snaps into place.
Feed the shift rod with tethered right cable socket up through the Numeric frame from underneath. Make sure that the two lock screws on the shift rod are facing towards the rear of the car. That way you can easily remove the screws and adjust the shift rod up or down later down the road.
Remove the cable connector attachment sub-frame from the Numeric frame. Now place the Numeric shift frame back into place. Slide the two cable connector attachment sub-frame into place and snap both cable connectors down before screwing down the two sub-frame pieces. Insure that the retainer clips are in place before you screw down the sub-frame. The sub-frame may be moved slightly back and forth to gain perfect alignment. Attached the right and left shifter cables.
Now install the center console back into place using the reverse of the removal instructions.
Last edited by USMC_DS1; 03-18-2014 at 09:22 AM.
03-18-2014, 04:48 AM
#5
Drifting
Thread Starter
Adjusting the Shifter After Installation
The Numeric is very easy to adjust so I initially set the shifter rod at it's highest position... similar to the Porsche stock position to get a feel for how it operates. I drove it for a day. My shifts were long throws but easy as butter requiring little effort/muscle to throw it into gear. Zero slop/play.
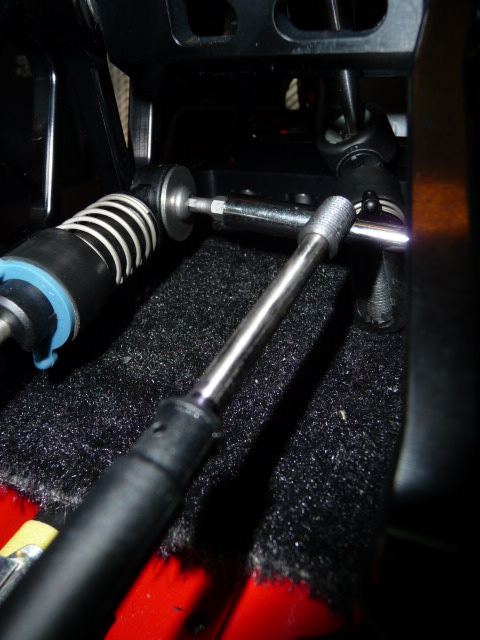
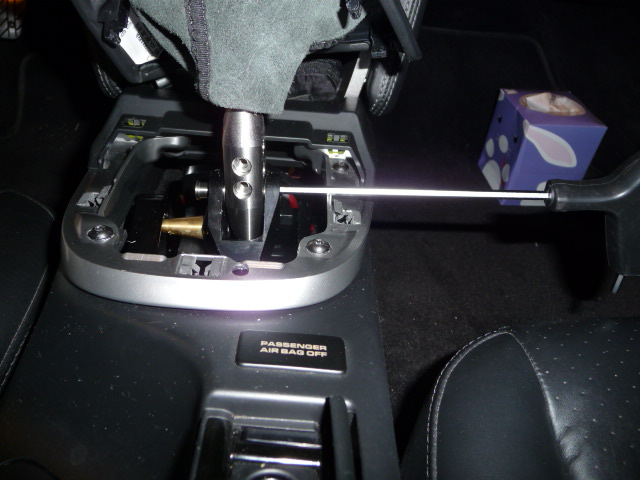
On day two I set the shifter rod at the mid position. Again shifts were buttery, zero play, but it require a little more muscle this time around. In both cases the car shifted into 1st gear without any issues. To adjust the shift rod position I simply lifted up the leather boot to remove the 2 locking bolts on the shift rod from the rear. Pull of the retaining metal pin on the side and move the shift rod down. Reverse the process to lock the shift rod in place. Note that the last position or shortest throw position is so low that it will rub against the carpet underneath the center console. To use this last position you will need to cut the carpet beneath the console.
Conclusion
In hindsight I should have procured the Numeric shifter from the beginning. It provides the perfect manual shifting experience I've been looking for in a Porsche Carrera... zero slop, precise shift gates, buttery throws and no issues shifting into 1st gear. I would have gladly paid Porsche to install this option/mod from the factory. FWIW, I have changed my clutch, gear oil, and flushed the brakes/clutch systems in my car last year in an attempt to make positive affects towards the shifter feel/characteristics. Glad I installed the Numeric.
The Numeric is very easy to adjust so I initially set the shifter rod at it's highest position... similar to the Porsche stock position to get a feel for how it operates. I drove it for a day. My shifts were long throws but easy as butter requiring little effort/muscle to throw it into gear. Zero slop/play.
On day two I set the shifter rod at the mid position. Again shifts were buttery, zero play, but it require a little more muscle this time around. In both cases the car shifted into 1st gear without any issues. To adjust the shift rod position I simply lifted up the leather boot to remove the 2 locking bolts on the shift rod from the rear. Pull of the retaining metal pin on the side and move the shift rod down. Reverse the process to lock the shift rod in place. Note that the last position or shortest throw position is so low that it will rub against the carpet underneath the center console. To use this last position you will need to cut the carpet beneath the console.
Conclusion
In hindsight I should have procured the Numeric shifter from the beginning. It provides the perfect manual shifting experience I've been looking for in a Porsche Carrera... zero slop, precise shift gates, buttery throws and no issues shifting into 1st gear. I would have gladly paid Porsche to install this option/mod from the factory. FWIW, I have changed my clutch, gear oil, and flushed the brakes/clutch systems in my car last year in an attempt to make positive affects towards the shifter feel/characteristics. Glad I installed the Numeric.
Last edited by USMC_DS1; 03-18-2014 at 08:31 PM.
The following 6 users liked this post by USMC_DS1:
billroth (05-27-2020),
hamishpotter (07-26-2020),
Jon Smedley (02-11-2020),
msequence (10-10-2020),
stevexjet (02-01-2021),
and 1 others liked this post.

Trending Topics
 03-18-2014, 01:20 PM
#11
Instructor
Fantastic write-up USMC, much appreciated. I was thinking about doing this and am now convinced it is on the short list. Any thoughts or knowledge of what would be gained from also adding Numeric cable set? Pretty easy to see the difference in build quality of the Numeric shifter over the stock unit, just wondering about cables.
03-18-2014, 01:53 PM
#12
Drifting
Thread Starter
Thanks folks... got back from an early AM airport run. Shifter has been in the mid position for almost two days now. Got caught up in the moment and launched from a stop light... a beautifully executed launch to 65mph. Oops, forgot that I had my wife in the passenger seat. "sooo... you seem to like that new shifter". At least she couldn't berate me that much as I was driving "Miss Daisy" to the airport at 5am.
LVT, I haven't tried the shortest position yet... debating if I should as it will require removal of the carpet just beneath the cable linkage connected to the shifter rod. I may run it in the mid fulcrum position for a bit and then try that next. It's really nice in the current setting.
dasdman, jkw911 had Numeric cables and shifter installed so may be able to provide better insight. I know that the earlier 997.1's had an issue with the Porsche cables snapping. Looks like the Numeric cables should be a remedy for that... just based on what I've seen with the shifter I'd assume that their design/production philosophy has more to do with function and quality build vs. cost. One observation - the Numeric shifter has zero play itself. Once installed there is a bit of give(left to right) when it's in gear and I force it to rock a bit. I don't believe that there is anything we can do about that has we don't have gated slots on top of the shifter itself. I wonder, however, if a more robust set of cables would help in this area. FWIW, the Numeric cables are on my to do list. May knock out both cables and carpet cut out for the shortest throw when I execute that project down the road.
Last edited by USMC_DS1; 03-18-2014 at 03:39 PM.
The following users liked this post:
Tsmith5150 (02-10-2020)
03-18-2014, 03:35 PM
#13
Instructor
Great post!
Well detailed and precise.
Did the same install on my car recently, and I concur with USMC re the quality of the piece, and the effect it has on shifts.
Nice positive endpoint to the shifts with no play.
Easy to adjust shifting position with it in the car, as stated above.
The word from Numeric on the cables are that they are great ,just tend to be a bit more noisy.
03-18-2014, 03:59 PM
#14
I changed out the cables as a preemptive move. When I placed the OEM cables next to the Numeric cables the Numeric ones were much more stout with metal ends and no plastic bits. Since the cables went in with the shifter I cannot tell what impact the cables alone would have had.
03-18-2014, 04:11 PM
#15
Drifting
Thread Starter
JKW and JB, would you happen to know which position your shifter is set for(shortest, mid-length, or tallest)? thoughts on how the shifter operates at that setting? TIA
Last edited by USMC_DS1; 03-18-2014 at 04:36 PM.