When you click on links to various merchants on this site and make a purchase, this can result in this site earning a commission. Affiliate programs and affiliations include, but are not limited to, the eBay Partner Network.
Well, after a few months of the project stalling, we're back on track.
Unfortunately after the last prototype testing I was unable to get the calibration done when I reinstalled the OEM sensor. During that testing I used the 'calibration with part replacement' for the first time ever, as the 'calibration without part replacement' didn't work. It was due to the sensor outputs being out of limits, so neither cal would have worked.
As it turns out, from what I've observed the 'with part replacement' procedure isn't required if it's a simple distance sensor replacement. The problem with this more extensive procedure is that it calibrates the valve body response, which isn't done in the 'no part replacement' procedure. This is where it was constantly failing, even though nothing had been done to the valve body and it was working perfectly before. It seems the VB response parameters are very tight, and it will fail easily. Unfortunately, once you do the first 'cal with part replacement', it wipes the numbers it previously had, so you need to complete it successfully before the the transmission will work. I literally did dozens of attempted calibrations, and one day it finally worked. The only thing I did differently was an oil fill procedure immediately before attempting the cal. Even though I hadn't done anything to the clutch section, the oil fill procedure does a bleeding procedure first. Maybe a coincidence that it worked, who knows. But enough said that I was dancing around my shed when it worked, as it had been a paperweight for a few months.
So with a working test platform, PV sent me over the latest prototype with some small programming adjustments to cater for what we'd learned from the last time. Worked a treat. I did the 'cal without part replacement' procedure and it passed without issue first time. Ran through all the gears in rolling test mode without a snag to see the sensor response from each channel. There are some minor tweaks on a couple of the channels to make it right on the money, but we are getting much closer.
With this info, PV is now preparing the sensor made specifically for the 911 transmission for Stjoh for testing in the 997 transmission he has on the bench.
Always amazed at the level of dedication put on this project
Thanks it's been quite the learning experience.
The first one we made almost worked right off the bat as it calibrated on the first shot and shifted properly in 6 out of 7 gears IIRC. Piece of cake we thought, just a minor tweak and we'll be there. Not quite. Turns out we just got kind of lucky on that first one and it made us cocky.
In reality, that's when we really started to learn about interactions from the other magnets, the effect of the ferrous metal in the shiftrods, and the seemingly random quirks of the TCU and the cal procedure. We are pretty confident we understand all that now, and jjrichar implemented a comprehensive test process that measures the distance sensor response with all the different permutations of adjacent magnet placement. There's also an issue where as the magnet moves further from the sensor the field drops quickly as the square of the distance. Then when ferrous metal comes into the picture (from the shift rod proximity) it drops even faster. However the TCU expects the signal output needs to change linearly, not exponentially like the magnetic field. That required a linearization algorithm to correct the signal to what the TCU expected. I made a mistake on that which further muddled the picture.
But we got there eventually. Now we need to replicate it on a 911 and we should be good to go soon. Our housing cavity needs some updates to accommodate the new circuit board and we'll need to send the housing out for quotes again but there's and end in sight.
Adding too that at one point during when we were stuck when the PDK wouldn't calibrate (that jjrichar describes above) we though we might have bricked the TCU. We were pretty desperate as we didn't want to pay a dealership for a new one (more out of principle than the money). During the process we learned all kinds of stuff about the flash files available with the PIWIS clone (nearly all of them it turns out), where they are located in the PIWIS directory structure, how to flash the files, how "rules" are applied during the process based on model/country/etc., and how to use the PIWIS engineering mode. The last one is only in German which was quite the challenge. It's probably worthy of it's own post one of these days as it may be helpful to others.
Adding too that at one point during when we were stuck when the PDK wouldn't calibrate (that jjrichar describes above) we though we might have bricked the TCU. We were pretty desperate as we didn't want to pay a dealership for a new one (more out of principle than the money). During the process we learned all kinds of stuff about the flash files available with the PIWIS clone (nearly all of them it turns out), where they are located in the PIWIS directory structure, how to flash the files, how "rules" are applied during the process based on model/country/etc., and how to use the PIWIS engineering mode. The last one is only in German which was quite the challenge. It's probably worthy of it's own post one of these days as it may be helpful to others.
Most definitely! "Cracking the PIWIS Code" a whole new series. All this knowledge is essential to every DIY'er in the forum. 997s are getting pretty close to the 20-year mark, and maintenance is not going to get any cheaper.
I hope everyone is doing well! I have not forgotten about this thread, and just wanted to provide some feedback on my experiences thus far. I have done 2 sensors (third on personal vehicle), and have had positive success thus far. I�ve used both the Xem and the t-design sensors, both with positive results. So I wanted to thank those folks for their quality products. A couple of notes.
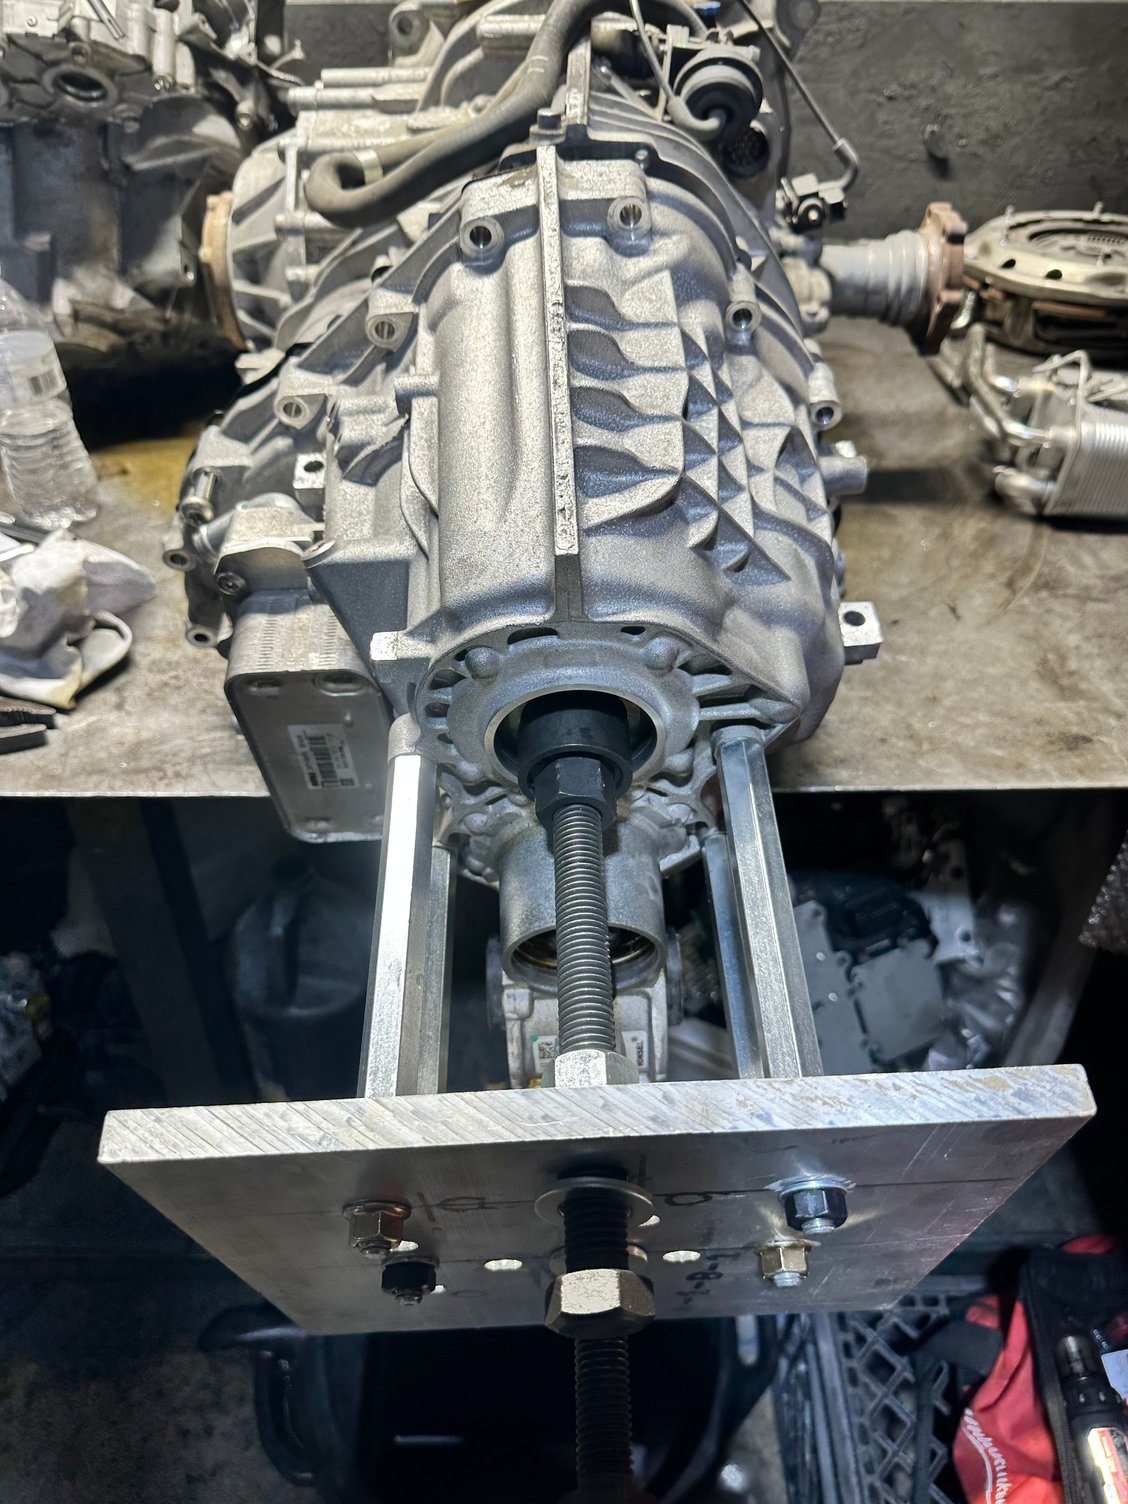
On the 991, an entirely different tool was needed to be able to separate the case and press it back together. The tail end of the 718, etc is different than the one on the 991. The housing of the 991 is staggered so to speak, and proved a challenge. The plate had to be completely different. The holes are spaced approximately 13cm x 25cm. With a diameter of 19mm to allow wiggle room. Pics below of the one I made. In America steel sheets right now are a headache, so I ended up having a 10 x 10 (inches) aluminum plate made. It needed to be 1/2 in thick (13mm) to withstand the force without bending.
The drive screws were another headache. Luckily I was able to mix and match different puller and extractor tools and cobble together the right sizes to help me separate the case evenly. I can�t stress how important this is on the 991. If the housing snags on the guide pins, you can be looking at additional headaches and parts that aren�t readily available.
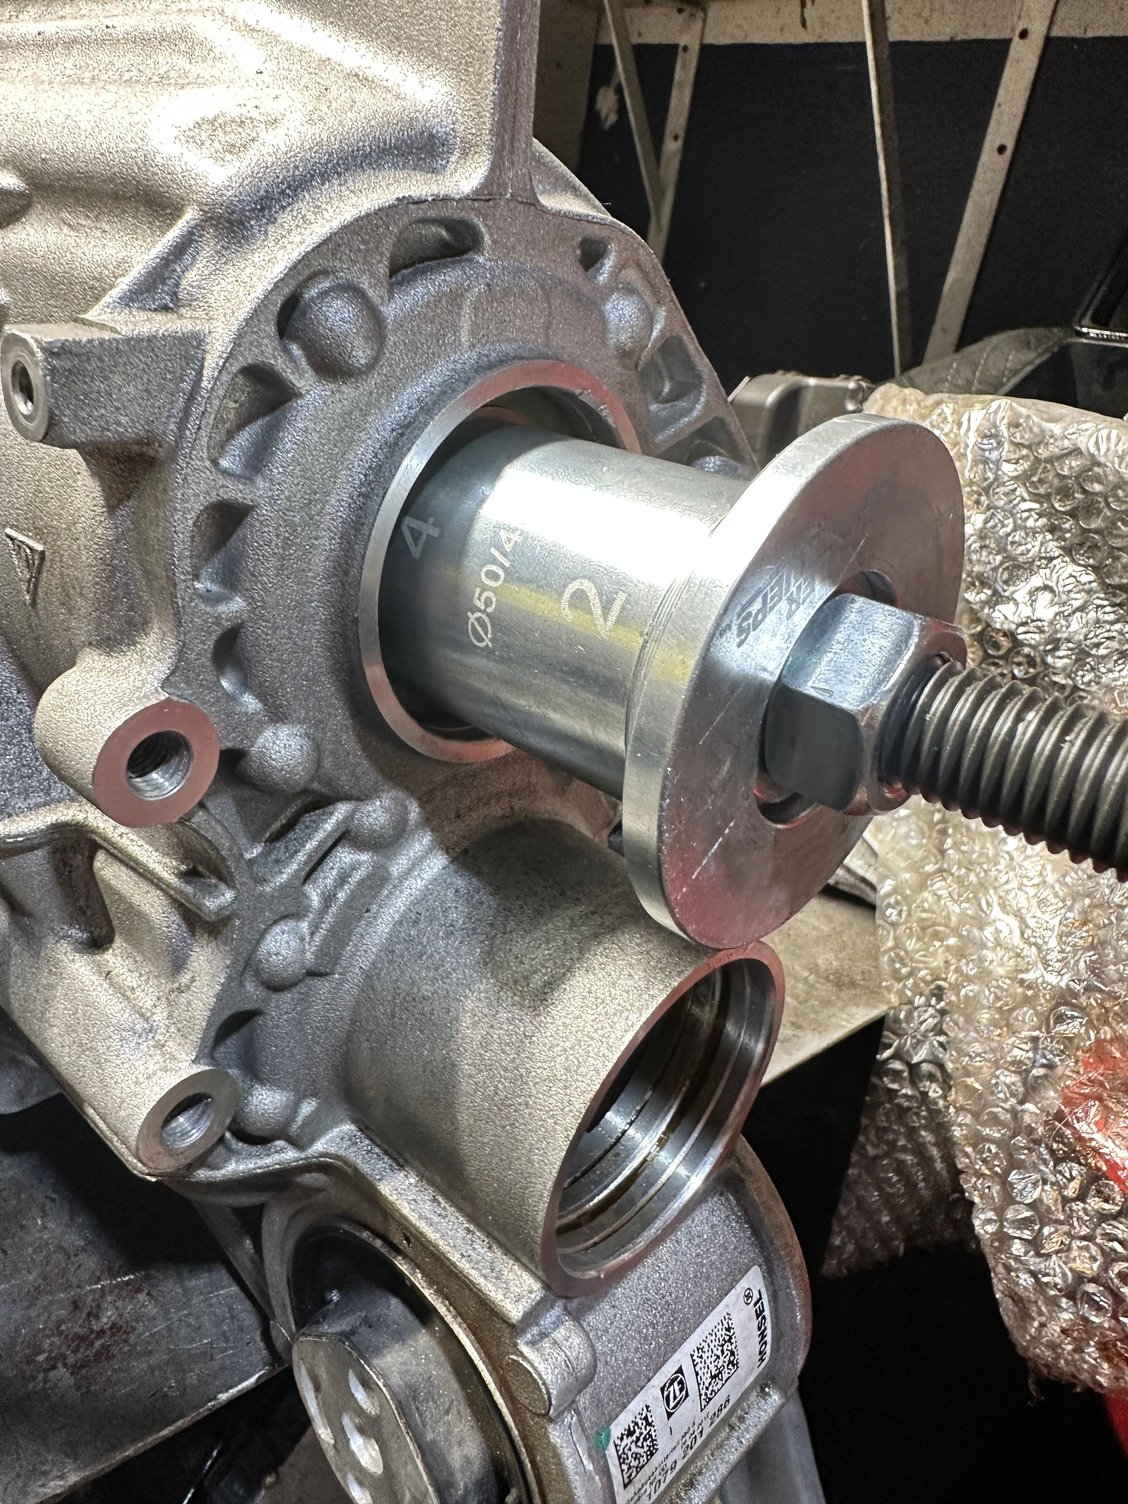
Putting it back together proved to be trickier on the 991. That extended housing made it tricky to see, and the thread size pitch was M24 x 1.50. This is very hard to come by here in America where freedom units rule. I had to have an extractor tool modified to the thread pitch of the shaft, so that I could properly press down the case.
The final notes I wanted to share was that I did not solder the connections. These units get hot (north of 80�C), I just don�t trust any heat shrink to withstand that heat range PLUS oil saturation for longevity. I alos feel like oil and heat plus solder combo is a recipe for disaster. Instead, I made the terminal ends myself. I have the special crimp tool, and the terminal ends are called Molex connector pins. I basically used the male pins, used the weatherpack grommets, and just remade the factory connection. It came out great, but the wiring harness of the sensor was just long enough to make the connection on one of the pins. If I screwed up crimping the molex pin, I wouldn�t have had enough wire to try redo. Making the harness maybe an extra 4 inches longer would be a huge pro. Finally, none of the two cars I did required a recal. However this may not always be the case for everyone. You can check in the scan data wether the calibration is valid. It will say adaptation status and depending on the tool will tell you ok, yes, or adapted.
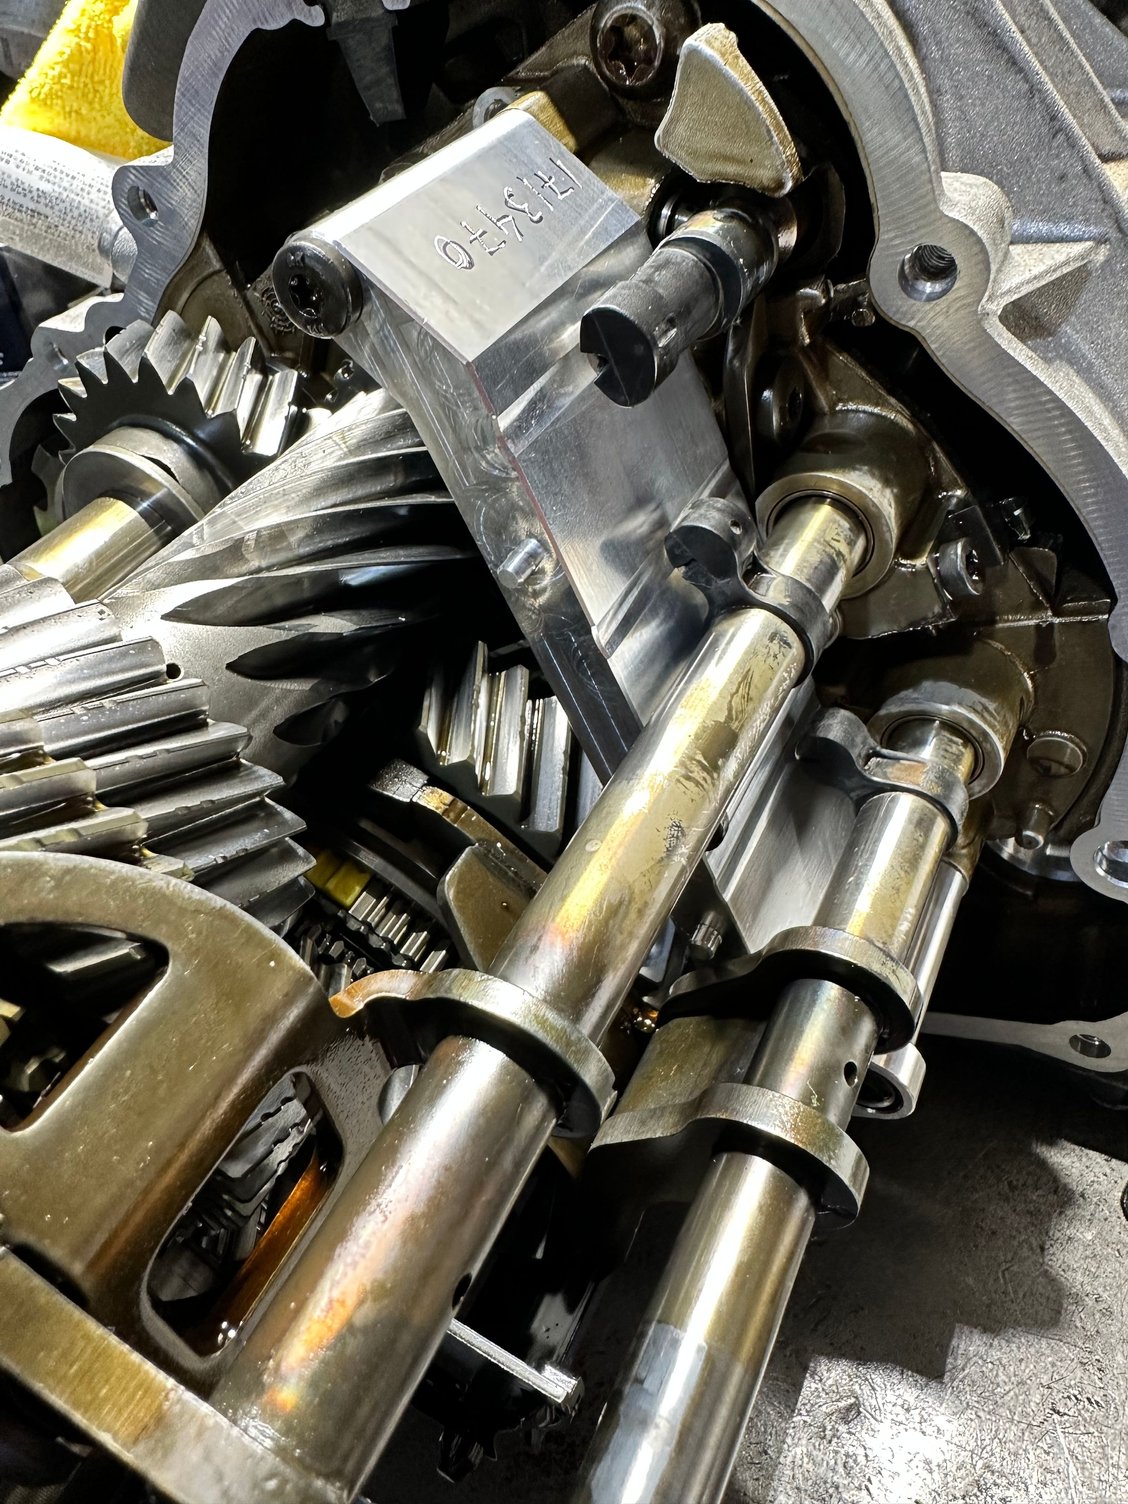
Now on to my personal vehicle. I wanted to share this info because it�s wise to know. I recently acquired a 991.2 (2016) and while it uses the same transmission, the housing is also slightly different on this one. LOL see the trend? On my car, the lower shaft (further protruding one) does not have as tight of a press fit. It rather has a counter nut and it was LEFT-HAND THREAD. I suppose they changed this for ease of assembly/disassembly, but that�s only a guess. This one was much easier to work with because that lower shaft has barely any drag at all. However, on assembly, it�s still very much recommended to use both drive screws to evenly press down the case. If you have the unit properly secured to a table or stand, I would say hand pressure on the bottom shaft, while using the drive screw on the upper shaft will suffice for an even clamp. Otherwise, you will press it down crooked, and the housing is aluminum. If the guides were to hang up on the bores, that�s no bueno!
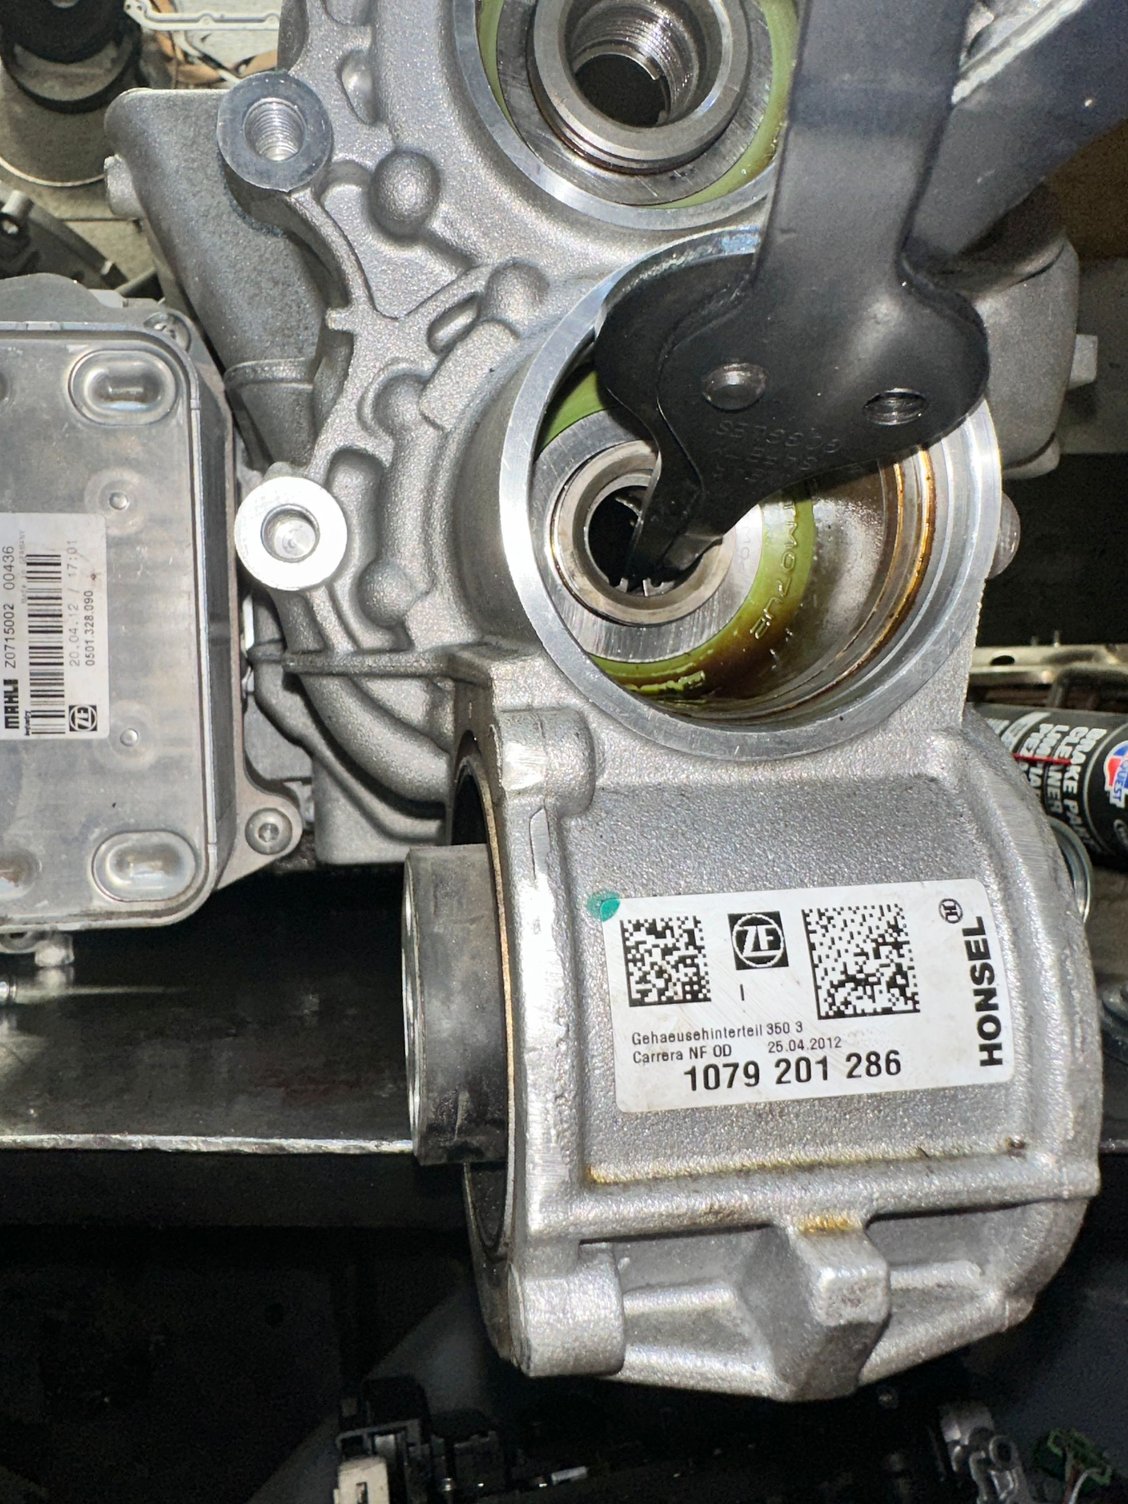
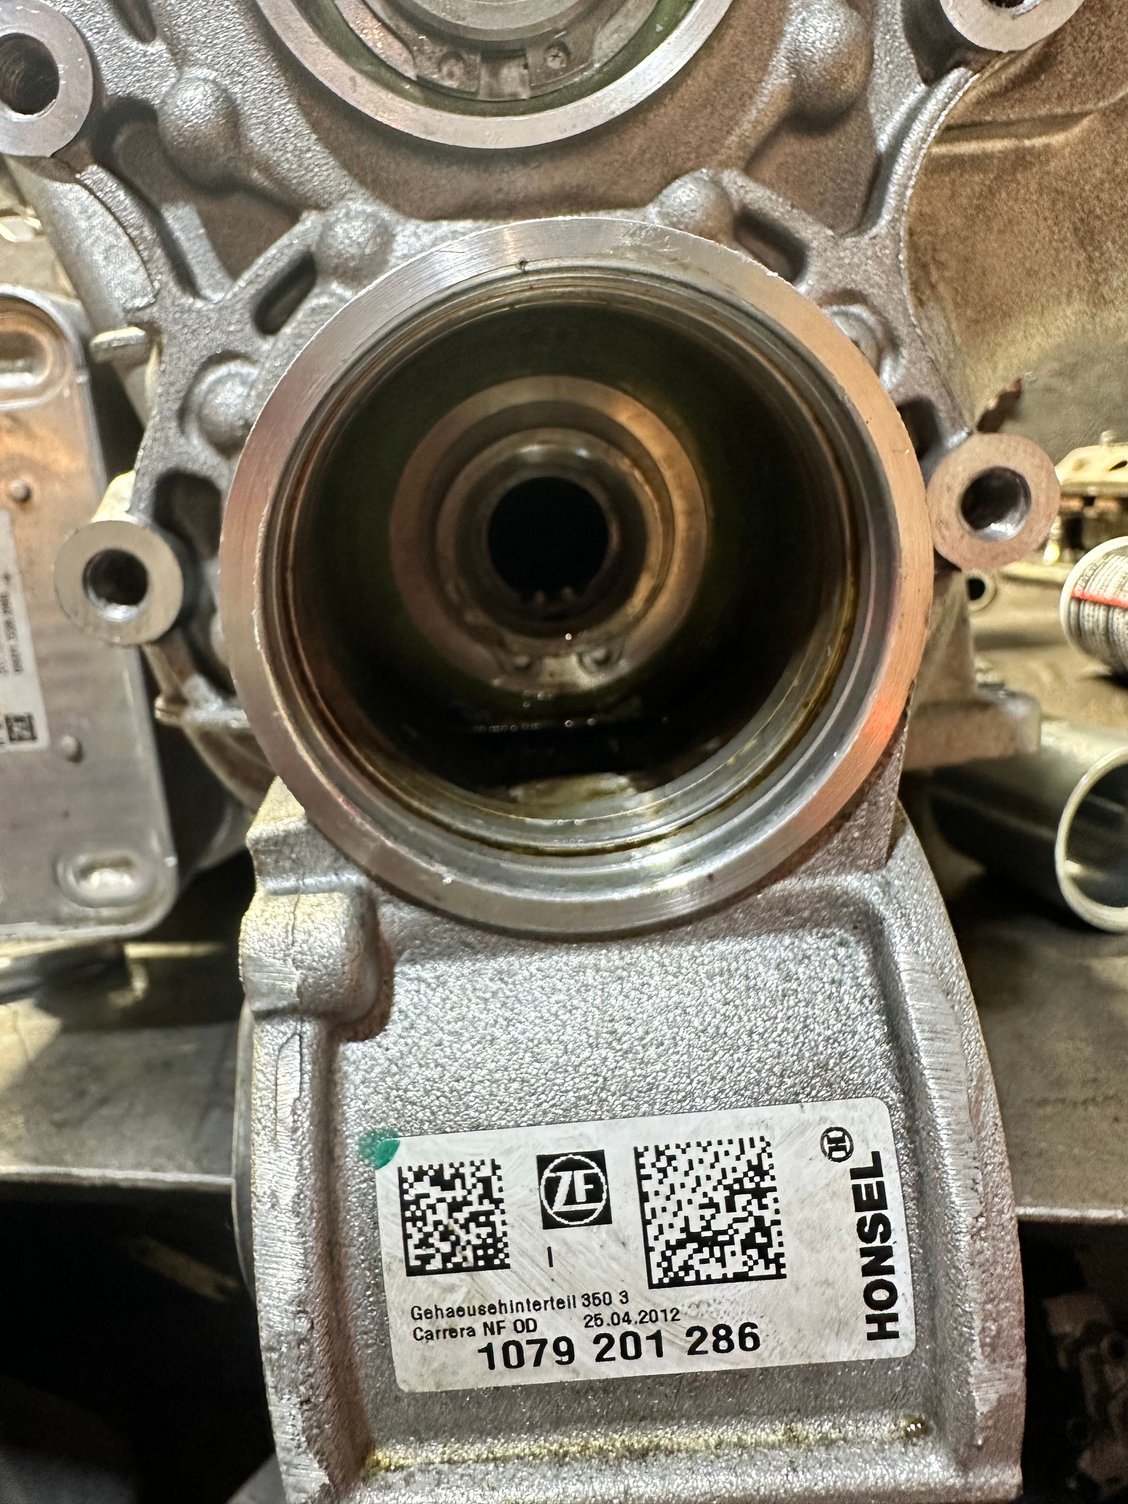
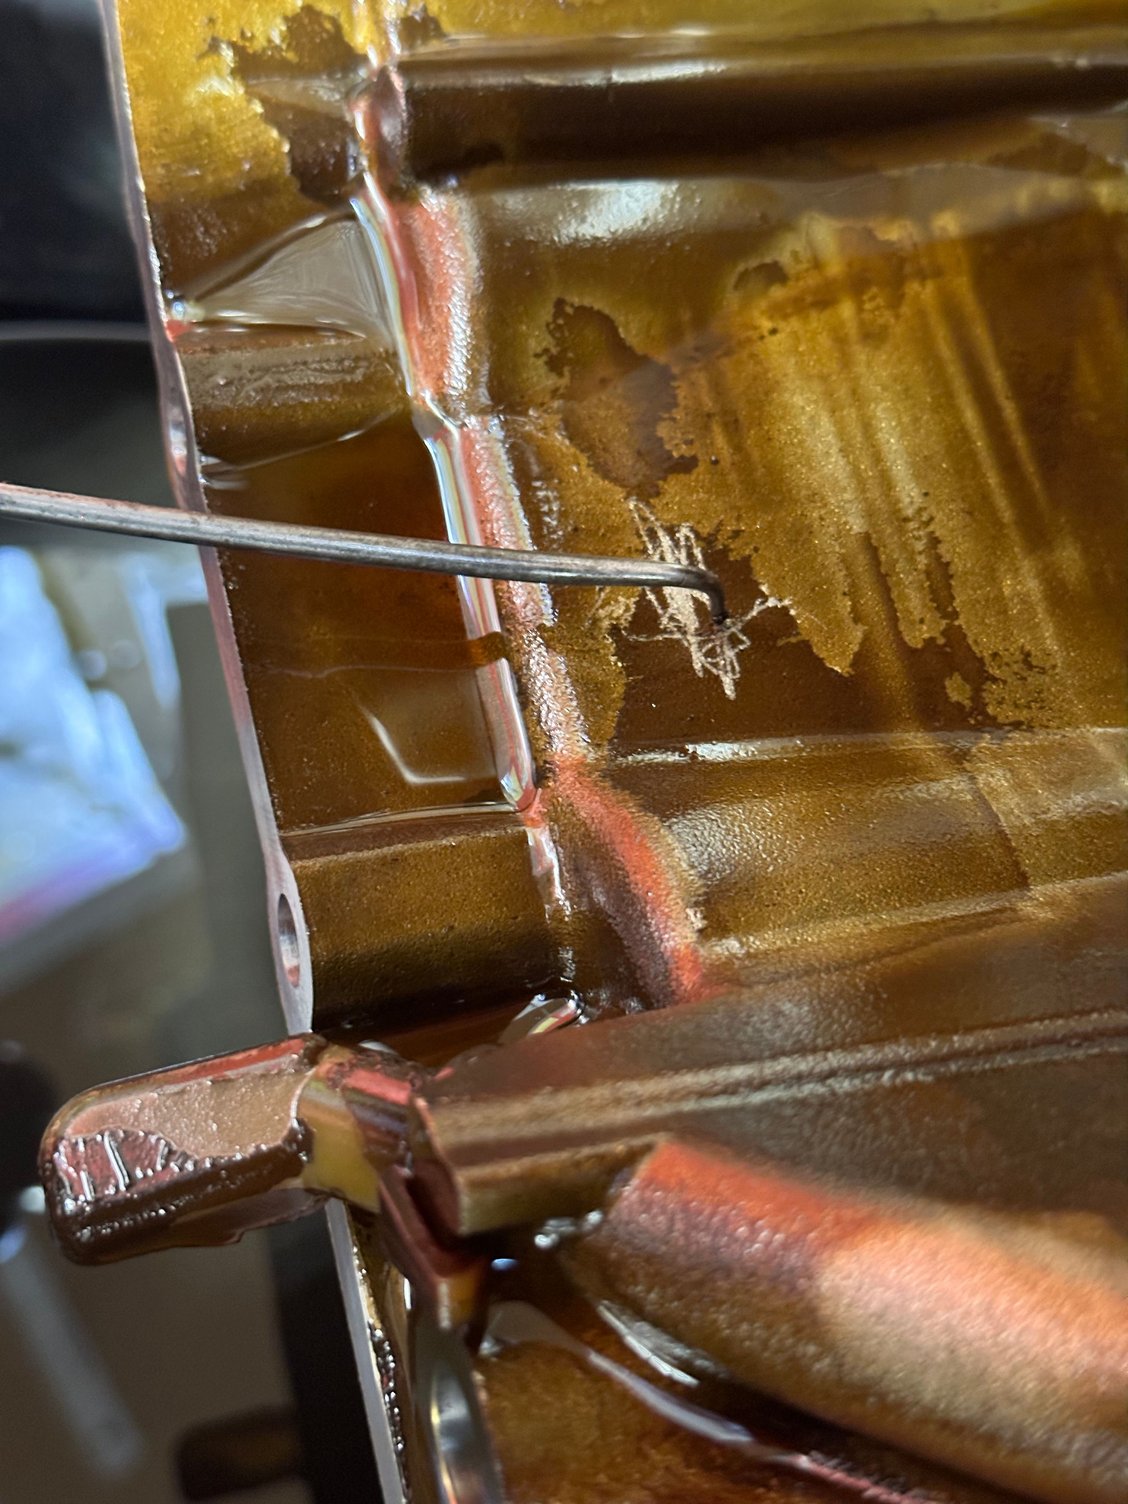
I got this car cheap through the auction due to the PDK malfunction. The car only has 36k miles, but the fluid was sludgy. Which is why I always push 20k max fluid intervals in these units. I�m going to attach pictures below of the inside of my case so you can see the staining. IMO, I think once a year fluid/filter changes is a plus. Especially if you live in a congested city like mine and spend a lot of time idling in traffic.
My car was setting distance error codes, but my shafts had a good 3-4mm of build up on them! I cleaned them up squeaky clean (mineral spirits does the trick), and decided to try my luck and see if it fixed the errors and low and behold it did. I have about 1200 miles out on it since then, and it has been trouble free. I remember back in the 90�s those GM cars that had the crank position sensor at the dampener pulley. When they would develop an oil leak from the front seal, the grime and dirt build up would result in a no start condition. Same concept here. Now I don�t think I would take the risk and perform a cleaning on a customer car. Think it�s not worth the risk. But for the tinkerer out there who wants to maybe try their luck, it has thus far worked for me.
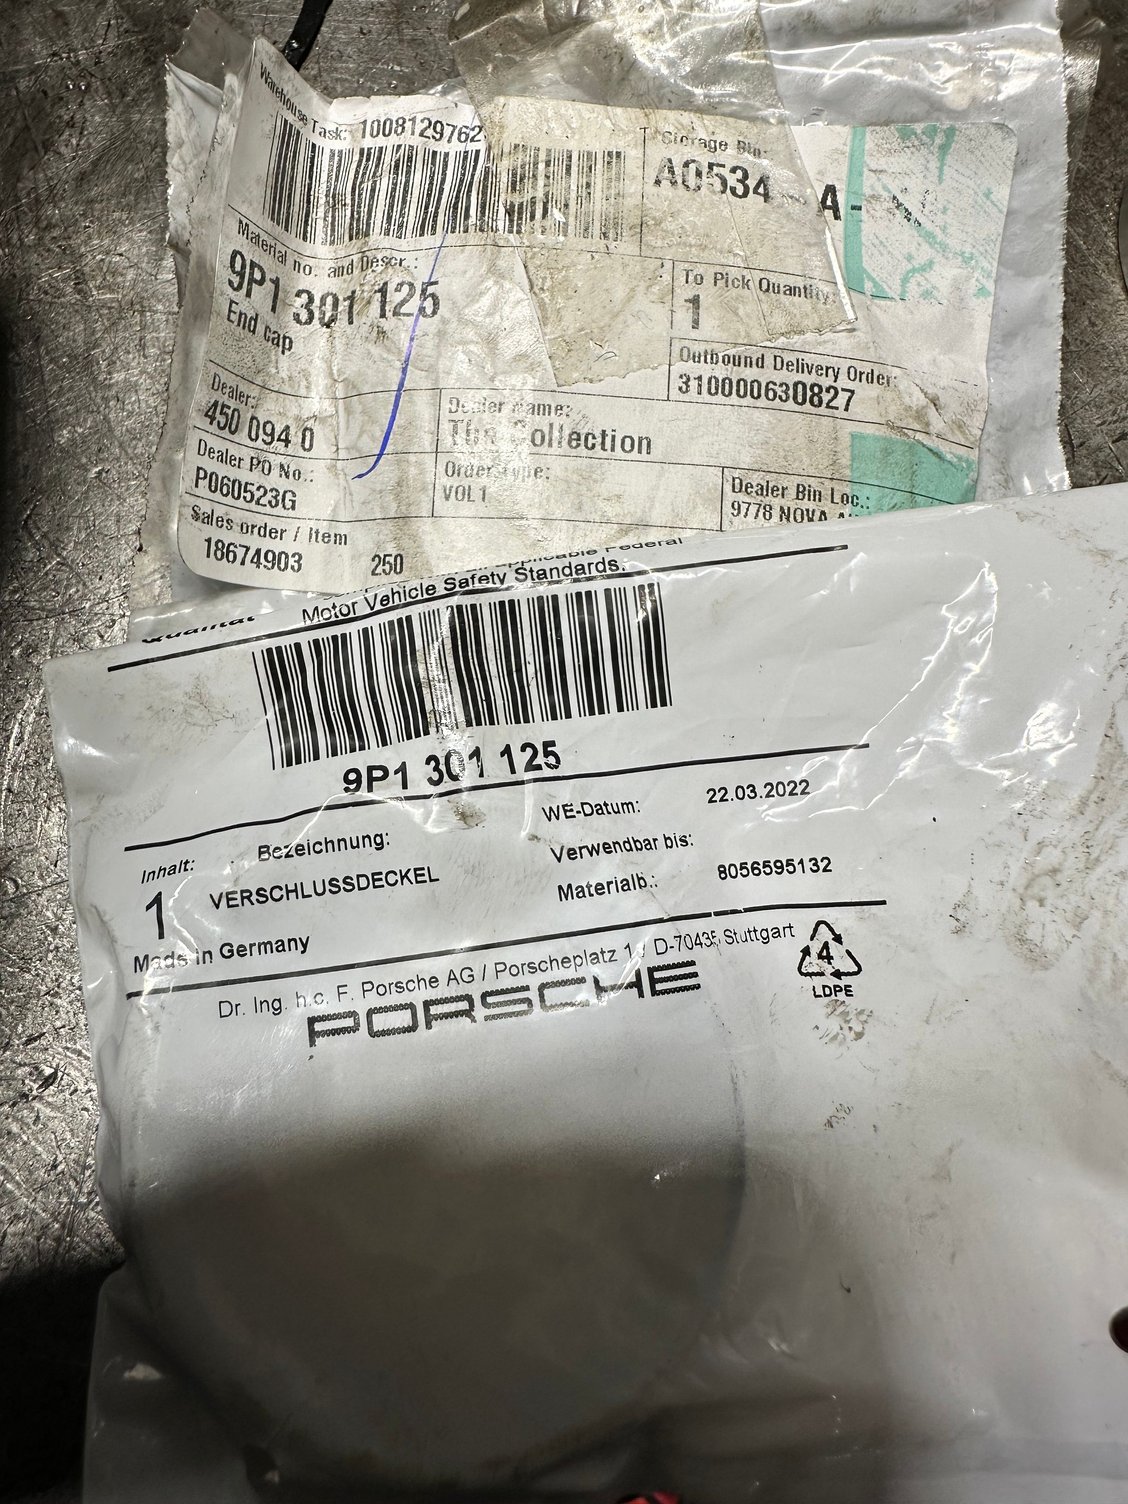
Ohh and before I forget, will attach a picture of the rubber plugs that seal the shaft bores. I would not reuse these. They have a plastic wedge inside, similar to the little stands they used to use in pizza boxes to protect the pizza, and those are not available for sale. Easiest way I�ve found to remove the plugs without damaging the plastic wedges is drilling a small hole in the middle, and using a slide hammer. Attached the pic of the plugs/part number. This is the latest part number the supersedes, and works on all transmissions I�ve encountered thus far.
Last edited by LynxStarAuto; 07-20-2023 at 10:03 PM.
I hope everyone is doing well! I have not forgotten about this thread, and just wanted to provide some feedback on my experiences thus far. I have done 2 sensors (third on personal vehicle), and have had positive success thus far. I�ve used both the Xem and the t-design sensors, both with positive results. So I wanted to thank those folks for their quality products. A couple of notes.
On the 991, an entirely different tool was needed to be able to separate the case and press it back together. The tail end of the 718, etc is different than the one on the 991. The housing of the 991 is staggered so to speak, and proved a challenge. The plate had to be completely different. The holes are spaced approximately 13cm x 25cm. With a diameter of 19mm to allow wiggle room. Pics below of the one I made. In America steel sheets right now are a headache, so I ended up having a 10 x 10 (inches) aluminum plate made. It needed to be 1/2 in thick (13mm) to withstand the force without bending.
The drive screws were another headache. Luckily I was able to mix and match different puller and extractor tools and cobble together the right sizes to help me separate the case evenly. I can�t stress how important this is on the 991. If the housing snags on the guide pins, you can be looking at additional headaches and parts that aren�t readily available.
Putting it back together proved to be trickier on the 991. That extended housing made it tricky to see, and the thread size pitch was M24 x 1.50. This is very hard to come by here in America where freedom units rule. I had to have an extractor tool modified to the thread pitch of the shaft, so that I could properly press down the case.
The final notes I wanted to share was that I did not solder the connections. These units get hot (north of 80�C), I just don�t trust any heat shrink to withstand that heat range PLUS oil saturation for longevity. I alos feel like oil and heat plus solder combo is a recipe for disaster. Instead, I made the terminal ends myself. I have the special crimp tool, and the terminal ends are called Molex connector pins. I basically used the male pins, used the weatherpack grommets, and just remade the factory connection. It came out great, but the wiring harness of the sensor was just long enough to make the connection on one of the pins. If I screwed up crimping the molex pin, I wouldn�t have had enough wire to try redo. Making the harness maybe an extra 4 inches longer would be a huge pro. Finally, none of the two cars I did required a recal. However this may not always be the case for everyone. You can check in the scan data wether the calibration is valid. It will say adaptation status and depending on the tool will tell you ok, yes, or adapted.
Here are some thoughts I have on not doing a cal after installing a new distance sensor. This comes from what we have observed during our testing.
If the response from the new sensor gives a distance more than the old it says this is OK. For example, old sensor response was 7.5mm, and the new gives 9.0mm, as long as it sees at least 7.5mm then it's happy, even though 9.0mm is the correct distance when correctly engaged. It's when it sees less than the required distance it skips. The problem is if it doesn't select the gear properly, and maybe gets 7.5mm for an incorrect selection, it may engage the clutch and apply power when the gear isn't engaged correctly. Clearly the distance numbers need to be accurate for this protection.
Also, it would be getting the 7.5mm response prior to it engaging correctly. Would this make it stop sending pressure to the actuator prior to the gear being fully selected? Don't know if it happens that quickly, but I personally wouldn't be taking the chance.
I understand there might be the temptation to see it work post install and think 'if it's not broken don't touch it', but there is a lot of protection mechanisms within the TCU. From what I've seen having good distances from a cal is an important part of this.
There is a lot of talk about failing cals, but having a bit of experience with this now I'm convinced that the cal with no part replacement is all that is required. If you attempt the cal with part replacement that is where it does a whole load more stuff that from what I've observed is where the calibration problems occur. The workshop manual talks about the cal with part replacement only being used when you do either a TCU, clutch or valve body change. It doesn't mention a distance sensor change because clearly this isn't an approved procedure. From what I've observed, if the response from the new distance sensor is within the prescribed limits, it will always pass if you do the 'no part' procedure. I have done dozens of them with zero failures if the sensor response was correct. The one time I did the 'part replacement' procedure it took me down the valley of hell for a few months attempting to get a perfectly serviceable transmission working again. Never again.
Have you�ve been able to identify exactly what the differences in procedures is between the two calibration methods? I suspect on the more basic calibration all it really does is just cycle the forks full range of motion and check the readings. If the readings check out, all is well. Of course this is just an ignorant guess. I haven�t delved as deep into it as you guys have. I didn�t run a calibration on the two vehicles just for feedback purposes when installing a new distance sensor. This was my first time installing a new sensor. Previously, all I had done was install a used sensor on a 987.
Random jump, but I once experienced a calibration hell on a ZF 6HP19 which are the 6 speed units found in a plethora of RWD European cars. Most commonly found in BMW. Those units have this sealing block that seals the mechatronics unit to the case. It fails with time and causes performance issues. Main symptom is a harsh down shift when coming to a stop. I�ve been to numerous trainings on the unit (held by ZF themselves) and they always claim that you should reset adaptations after any repair. But real world experience has taught me that maybe in the perfect world, but in the real world where these units have some wear and tear on them, best to not get ahead of yourself and leave it alone. I change all the seals, refresh the fluid and filter, and off it goes happy as pie. Before when I would reset adaptations, it would shift like crap for several thousand miles until it finally adapted. Which was always a headache with customers as even if you forewarn them, some of the symptoms are troubling to a person who doesn�t understand what�s going on. Plus I had a case where a unit never shifted as smoothly again after doing a reset, but that unit did have a lot of miles on it. About 170k (274km) on the clock.
The only time I will run a reset on those units is when I�m replacing the actual mechatronics, or if I�m doing internal work like replacing the clutches or the E-Clutch with drum. Just goes to show you that sometimes even the manufacturer is not taking into account all the variables. Or perhaps they get data tunnel vision as I call it and fail to see the reality of the situation.
Last edited by LynxStarAuto; 07-21-2023 at 10:01 AM.
Have you’ve been able to identify exactly what the differences in procedures is between the two calibration methods? .
Having done this stuff a lot and looked into the PIWIS code a bit to see what is happening, here's my understanding of the two cal procedures. This information is for the 9X1 as this is the platform I'm working on. I can't be 100% sure the process is identical for the 9X7.
The calibration consists of 5 separate routines, a-e below.
The calibration with part replacement carries out all 5 routines a-e. When I've had failures where the distance sensor response was fine, it fails in routine d, the hydraulic teach in (valve body cal).
The calibration without part replacement only carries out routines c and e, that being the shift distance (DS numbers) and the clutch cal. All the other routines are ignored, so there is no adaptation delete and no cal of the valve body. If the distance sensor response is within the prescribed limits set in the TCU, I've never had this fail.
Either routine will not begin until you have the clutch fluid temp above 60C. PIWIS will list a bunch of prerequisites like park brake on and the foot brake pressed. Same prerequisites for both.
Routines are as follows:
a. Reprogramming. I don’t know exactly what is happening here, but it seems like all the adaptations are wiped. Takes about a minute.
b. Pressure sensor calibration. Engine isn’t running. Key is turned off and on a few times. Progressive instructions given by PIWIS. Does it twice that take 30 secs each with about 10 secs between each one.
c. Shift distance calibration. This is where it tests the distance sensor response. Engine is running. Takes about 7 minutes, but sometimes takes a lot less if the numbers it has stored are similar to previously held. Will change through all gears and preselections to get the distances for any possible combination. It will sit there seemingly doing nothing for long periods. This is normal.
d. Hydraulic teach in. This is the valve body cal. You don’t really know what’s going on in the background, but if it fails it will give you the individual steps of the hyd teach in and tell you which it failed on. These are the 12 steps below. Below each is the English courtesy of google translate. A german speaker might give better translations so we can have a better understanding of what is actually happening.
Note that EDS 1 and 2 are the clutch controlling solenoids. EDS 3 and 4 control overall system pressure, cooling and lubrication. MV 1 & 2, and EDS 5 & 6 control gear shifting, and don’t seem to be checked at all in this procedure.
Note that steps 2 and 3 are for the two clutches, but it doesn’t do a clutch calibration like it will do next in routine e, which is much more comprehensive. It might be just doing a calibration of EDS 1 and 2.
1. �berpr�fung druckstellar beendet
pressure regulator test completed
12. einlernvorgang beedet
teach-in process finished
e. Clutch calibration. It increases engine RPM and gently applies each of the clutches over and over to get adaptations of how the clutches behave. Every time I do this it will stagnate at 24% and 74% complete for a few minutes. This seems to be normal.
So are you working with a PIWIS clone tool? If so, I misunderstood. I thought you were working with a developer tool. Like what they use at the factory when they assemble these cars.
In that regard, I can provide you some feedback as that�s been my window into these vehicles for a better part of two decades now. I mostly use Autologic on Porsches as it�s a licensed tool recognized by the manufacturer for use in aftermarket settings like us independent shops. So those procedures are the same on those tools as well. I haven�t really experienced failures doing either calibration. It may just be an interpolation error from using pirated software. I�m sure they didn�t get it all correct when they make these clones.
Now the reason I wanted to try not running a calibration for the distance sensor is because I have a sneaky suspicion developed from my years of servicing these cars, and coming from the VW family, that it�s just not necessary because (applying the k.i.s.s. principle), the distance sensor doesn�t really do anything intricate. It simply provides a reference point, that�s it. It doesn�t engage the forks or apply the clutches. That�s what the mechatronics does. The distance sensor is just the reference point for the TCU to monitor what the moving parts are doing. I also believe that those reference points are checked every time the ignition is cycled. Which would then make the calibration redundant.
I really believe that if your issue is just a failed distance sensor, and if the car was running fine up to that point, and the calibrations were not messed with (reset) previously, you can get away with a sensor swap plug and play, and nothing further necessary. Of course this is just conjecture on my behalf, and a burning curiosity that I cure through trial an error. So far both vehicles were put back into service without calibrations performed, and they are running great. I keep tabs on them, so if that changes I will definitely update here.


 07-19-2023, 07:19 PM