When you click on links to various merchants on this site and make a purchase, this can result in this site earning a commission. Affiliate programs and affiliations include, but are not limited to, the eBay Partner Network.
Do I feel your pain. I just recently did this job myself on my Cleveland car. For me, I found that soaking them in penetrating oil, the heat from cutting off excess length of the bolts and a good smack was enough for me to get the first turn. I was done in about 2 hours which feels lucky given your experience.
@93Jaffe, great news for you. Nice work! Yes, we have not been as fortunate, but we're not giving up, either. Really looking forward to the PSE/Sharkwerks combo.
As a 10-year resident of Rochester, NY, I send my apologies. The roads here are completely white/grey 6+ months out of the year from all the salt they put down.
@SmallJ92 , no apologies necessary. I grew up on the west side of Michigan and am more than familiar with the lake effect. Gotta' have salt -- it's a necessary evil there and in Rochester.
Rust is much worse today than many years ago for these cars' fasteners. Thanks to the tree-huggers, cadmium heavy metals are discouraged from use in keeping fasteners rust resistant. I know about rust--having lived in the Boston area for many years. Years ago I bought a Karmann Ghia out of New Mexico and drove it to Boston--and mentioned it to one of my secretaries. She had no idea what a Karmann Ghia is. (She was born in 1972). Those cars were rusted off the roads by the time she knew what a car was.
@Prairiedawg and other fine contributors, yes...an update.
The short of it: We finally got the center exhaust off and the Sharkwerks X-pipe on after more hours of Dremelling and drilling out bolts. As soon as it happened the clouds parted, a Grail appeared, the angels sang a chorus for our triumph, and a few adult beverages were consumed by all.
It would be remiss of me not to mention the enormous gratitude I have for all of the members of this forum who provided their experience and suggestions in this post, as well as past posts on the subject, and for my son and a great friend who soldiered on, providing the brains, finesse and muscle to get this completed.
The long of it, with lessons...
Even if your car has led a blissful life in SoCal or Arizona, rarely seeing rain or even a sniff of corrosion anywhere, just go ahead and assume the worst (read this thread) and you'll be best prepared...
IMO, the fastest, easiest and most efficient way to get this job done is to:
1. Remove the rear bumper cover (roughly 12 torx screws, give or take)
2. Remove the rear bumper (2 bolts)
3. Remove the side heat shields (4 items to loosen on each side, IIRC)
4. Remove the side exhausts (4 bolts)
Doing these removals provides free and unfettered access to the problematic 6 Bolts-from-Hell holding the center exhaust in place (particularly the top ones on each side). They are then easily accessed if you need to use a Dremel, punch, hydraulic hammer, whatever, and particularly if you have to drill out the bolts, as we had to do. There's simply no way to properly drill (in a straight line) the top bolts without this access. Honestly, there are some YouTube videos out there that stretch credibility with me after having done this...
Even if you have that unicorn car with zero corrosion on these bits, it will be faster and easier in the long-run to take everything off -- it really does not take much time at all to remove these components, and the improved access pays dividends in speed for the entire project -- we know we would have had this done in a small fraction of the time if we had taken everything off FIRST. Trust me, if I can remove these things, anyone can.
A Dremel is your best friend. Two attachments were enormously helpful 1. Metal cutting discs: Buy a couple packs so you have ~10 wheels...it's overkill, we did it with one pack of 5 (I think) but, hey, they're awesome and far more effective at cutting away the bolts than anything else we had, and 2. Tungsten carbide bits. These really helped take the edges off/smooth what the wheel cutters did, and provided a smoother, flatter surface for getting the drill bit seated. My son is now known as Dr. Dremel.
We did not have luck with the hydraulic hammer punch. Not sure why -- likely less skilled hands than @Prairiedawg and his friends -- so we stuck with the Dremel and drilling.
Anyone who says the OEM bolts are "soft" is crazy. Drilling those out required a lot of muscle, time and patience. As I learned from my mechanically inclined friend Dave, start with a narrower drill bit, then get a hole started and move up a notch as it helps seat the larger bits. We used three sizes of bits. Once we got far enough along, a punch and 4# sledge popped out what was left of the bolts.
I bought a bunch of 316 (marine) stainless steel M8 bolts, locking copper nuts and copper moly (thanks @Ironman88). While I'm glad I did that, replacing two of the exhaust bolts to attach to the X-pipe required slightly longer M8s than what had been there. Fortunately, Sharkwerks provides all of the hardware, including the longer SS bolts, so I used their's in those two spots.
Copper moly the hell out of every bolt or nut that abuts a surface or screws down. Once you go through a difficult removal process like this, it just becomes a Darwinian response to ensure you never, ever have to go through it again.
When removing the nuts and bolts, I put (most of) them in ziplocks and used a Sharpie to write a description, laying the bags next to/on the parts they were with. I bet this is fundamental to most everyone on here, but I thought I'd mention it anyway.
I'm sure I'll think of other things later, and will edit. But for now just know that, again, I am extremely grateful to each and every member here who provided insight from their experience and/or suggestions. You guys have no idea how much you've helped to get the job done, and for me to keep plugging away. I've belonged to a few marque forums and no other even comes close to the helpful/encouraging attitude and esprit de corps that this forum's members have. Seriously.
Oh, and the X-pipe? DAMN, it sounds AWESOME!! The PSE/X-pipe combination is exactly what I wanted. Deep, throaty and "real" without being over the top. No need for headers (for me) or any other changes/alterations. I cannot recommend it enough.
1,000 thanks to you all.
Bob
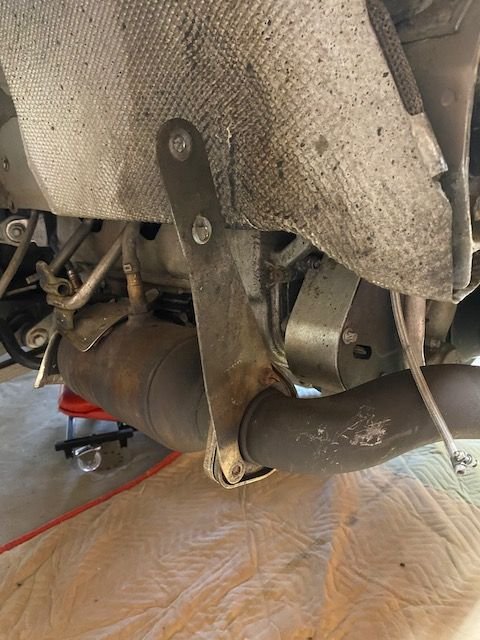
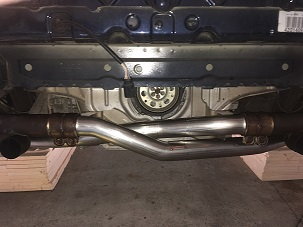
Clear and unfettered access to the 3 bolts on each flange with the removal of the rear bumper, side heat shields and exhaust. How we wish we had done this FIRST.
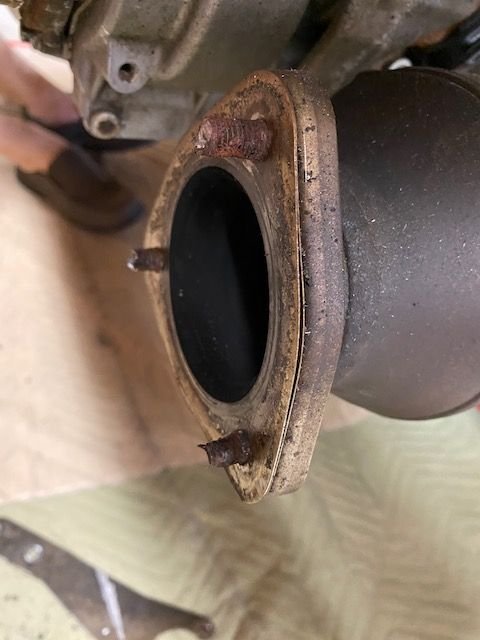
The offending bolts after getting off the center exhaust...then came more Dremelling to remove the studs, and drilling, the latter being -- by far -- the hardest, most time-consuming part of the entire project (especially in the heat of the northeast this past Sunday).
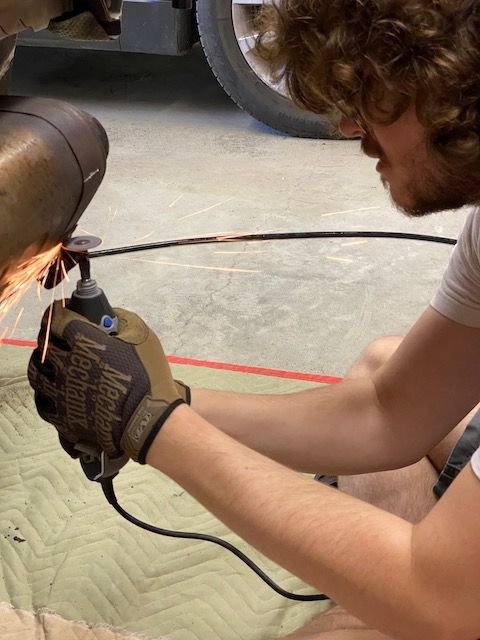
Dr. Dremel at work. We also used it to remove the straps holding on the center exhaust...the hex head bolts and the mechanism they used to close/hold together the strap could not be re-used anyway. Just cut them off if there's even a hint of corrosion.
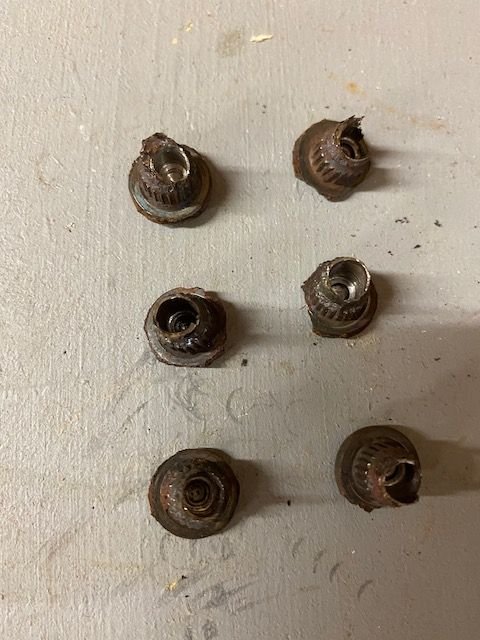
The remains of the 6 bolts after having been drilled out. They'll be in my nightmares...
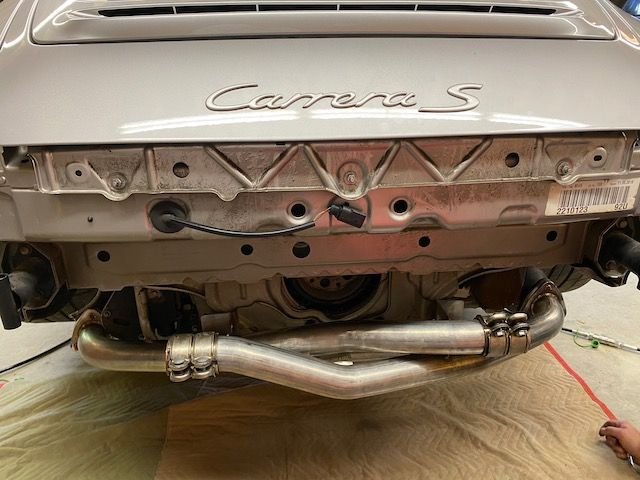
Installed. And as beautiful as it to look at, the sound -- mein Gott! -- is fantastic paired with PSEs. Just one guy's opinion, YMMV... � �
Thanks for all the great information in this thread. My 6 bolts on the catalytic converters didn't look too bad, however they all snapped. I also needed new clamps (sleeves) as they stripped while removing so I dremeled them off.
I thought I would add my 2 cents. I also went to Autozone and bought a Vaper air chisel, but while there picked up their loaner tie rod end removal tool to try to press them out. Using the tie rod end removal tool, it successfully pressed them out in about one minute each. Hopefully, this is another approach for others as they tackle this. Still awaiting new sleeves to be able to put it all back together.
Wow, I've been very close to ordering a sharkwerks bypass several times. Always been on the fence. After reading through this thread I'm no longer on the fence. Just another way this forum can be a huge help
Sorry to see how difficult this job can be when these bolts are rusted into place. I lucked out and all of mine came off with ease. My car was a one owner from Beverly Hills and had just a tiny bit of rust. My recommendation is to spray the bolts with a mix of acetone and transmission fluid. The acetone can pull the transmission fluid into the nooks and crannies and then evaporates leaving the transmission fluid behind. Learned this when I rebuilt the sub frame on 1994 Mercedes E500 with 200,000 miles of Pennsylvania driving. A couple days of soaking and I was able to wrench everything apart without breaking a single bolt.
I just took my Sharkwerks off to replace my water pump. The studs all broke off... and punched out easily. No issues for me. I replaced all with stainless steel... cheapies from Amazon.
Peace
Bruce in Philly
Last edited by Bruce In Philly; 06-03-2021 at 09:16 AM.
Nuts cut with dremel.
Getting off crimped bolts with torche and hammer ....
News stainless screws with high temp cupper grease, may be better to reassemble with brass nuts in place of stainless nuts.


 08-03-2020 | 11:24 AM