When you click on links to various merchants on this site and make a purchase, this can result in this site earning a commission. Affiliate programs and affiliations include, but are not limited to, the eBay Partner Network.
Telling from your past wheel history you really like Fuchs inspired styles. I would love to see a wheel like the Rotiform FUC be built specifically for your car in the diameter, widths, and specs that you need. If you'd be interested in working together give me a shout! David@WheelsBoutique.com
__________________
Wheels Boutique // 786 249 0127 //Sales@wheelsboutique.com
Follow us on YouTube: www.youtube.com/user/WheelsBoutique Largest Dealer In The World for HRE Wheels, ANRKY Wheels, Vorsteiner Wheels & Aero, Akrapovic Exhaust, & iPE Exhaust BBS, Forgeline, & TechArt Premium Dealer
Brembo / Rotiform / KW / H&R / Novitec / Brabus / Mansory and tons more...
I just bought a pair of these Moshammer side skirts for my silver car. They're the first ones I can remember seeing that I like the look of. I'm going to have them wrapped in CF vinyl to go with the other non painted trim on the exterior of my car (stone guards, mirrors)
I'd love to see the Moshammer skirts on your car. Please post pics (you're welcome to do so in this thread) when you have them installed. Their website doesn't have many pics of them on a 997.
Originally Posted by Knight
Jim didn�t know about the deer incident or even your 997 ownership!
That is one great looking SY 997, very tastefully done
Thanks, Baron! Looking forward to catching up with you soon. Mauricio and I are planning a drive up to Vancouver in March to visit Peter at Flatsix with some Seattle peeps. Maybe we can organize a drive with your crew as well. I'll keep you posted on dates when we have something nailed down.
Originally Posted by WheelsB
Telling from your past wheel history you really like Fuchs inspired styles. I would love to see a wheel like the Rotiform FUC be built specifically for your car in the diameter, widths, and specs that you need. If you'd be interested in working together give me a shout! David@WheelsBoutique.com
Thanks, for the offer, David. I might take you up on your offer this summer. I'll reach out if I decide to get a new set of wheels.
I'd love to see the Moshammer skirts on your car. Please post pics (you're welcome to do so in this thread) when you have them installed. Their website doesn't have many pics of them on a 997.
.
👍
Not sure yet when I'll get them installed, but certainly will do, as well as in my RUF thread.
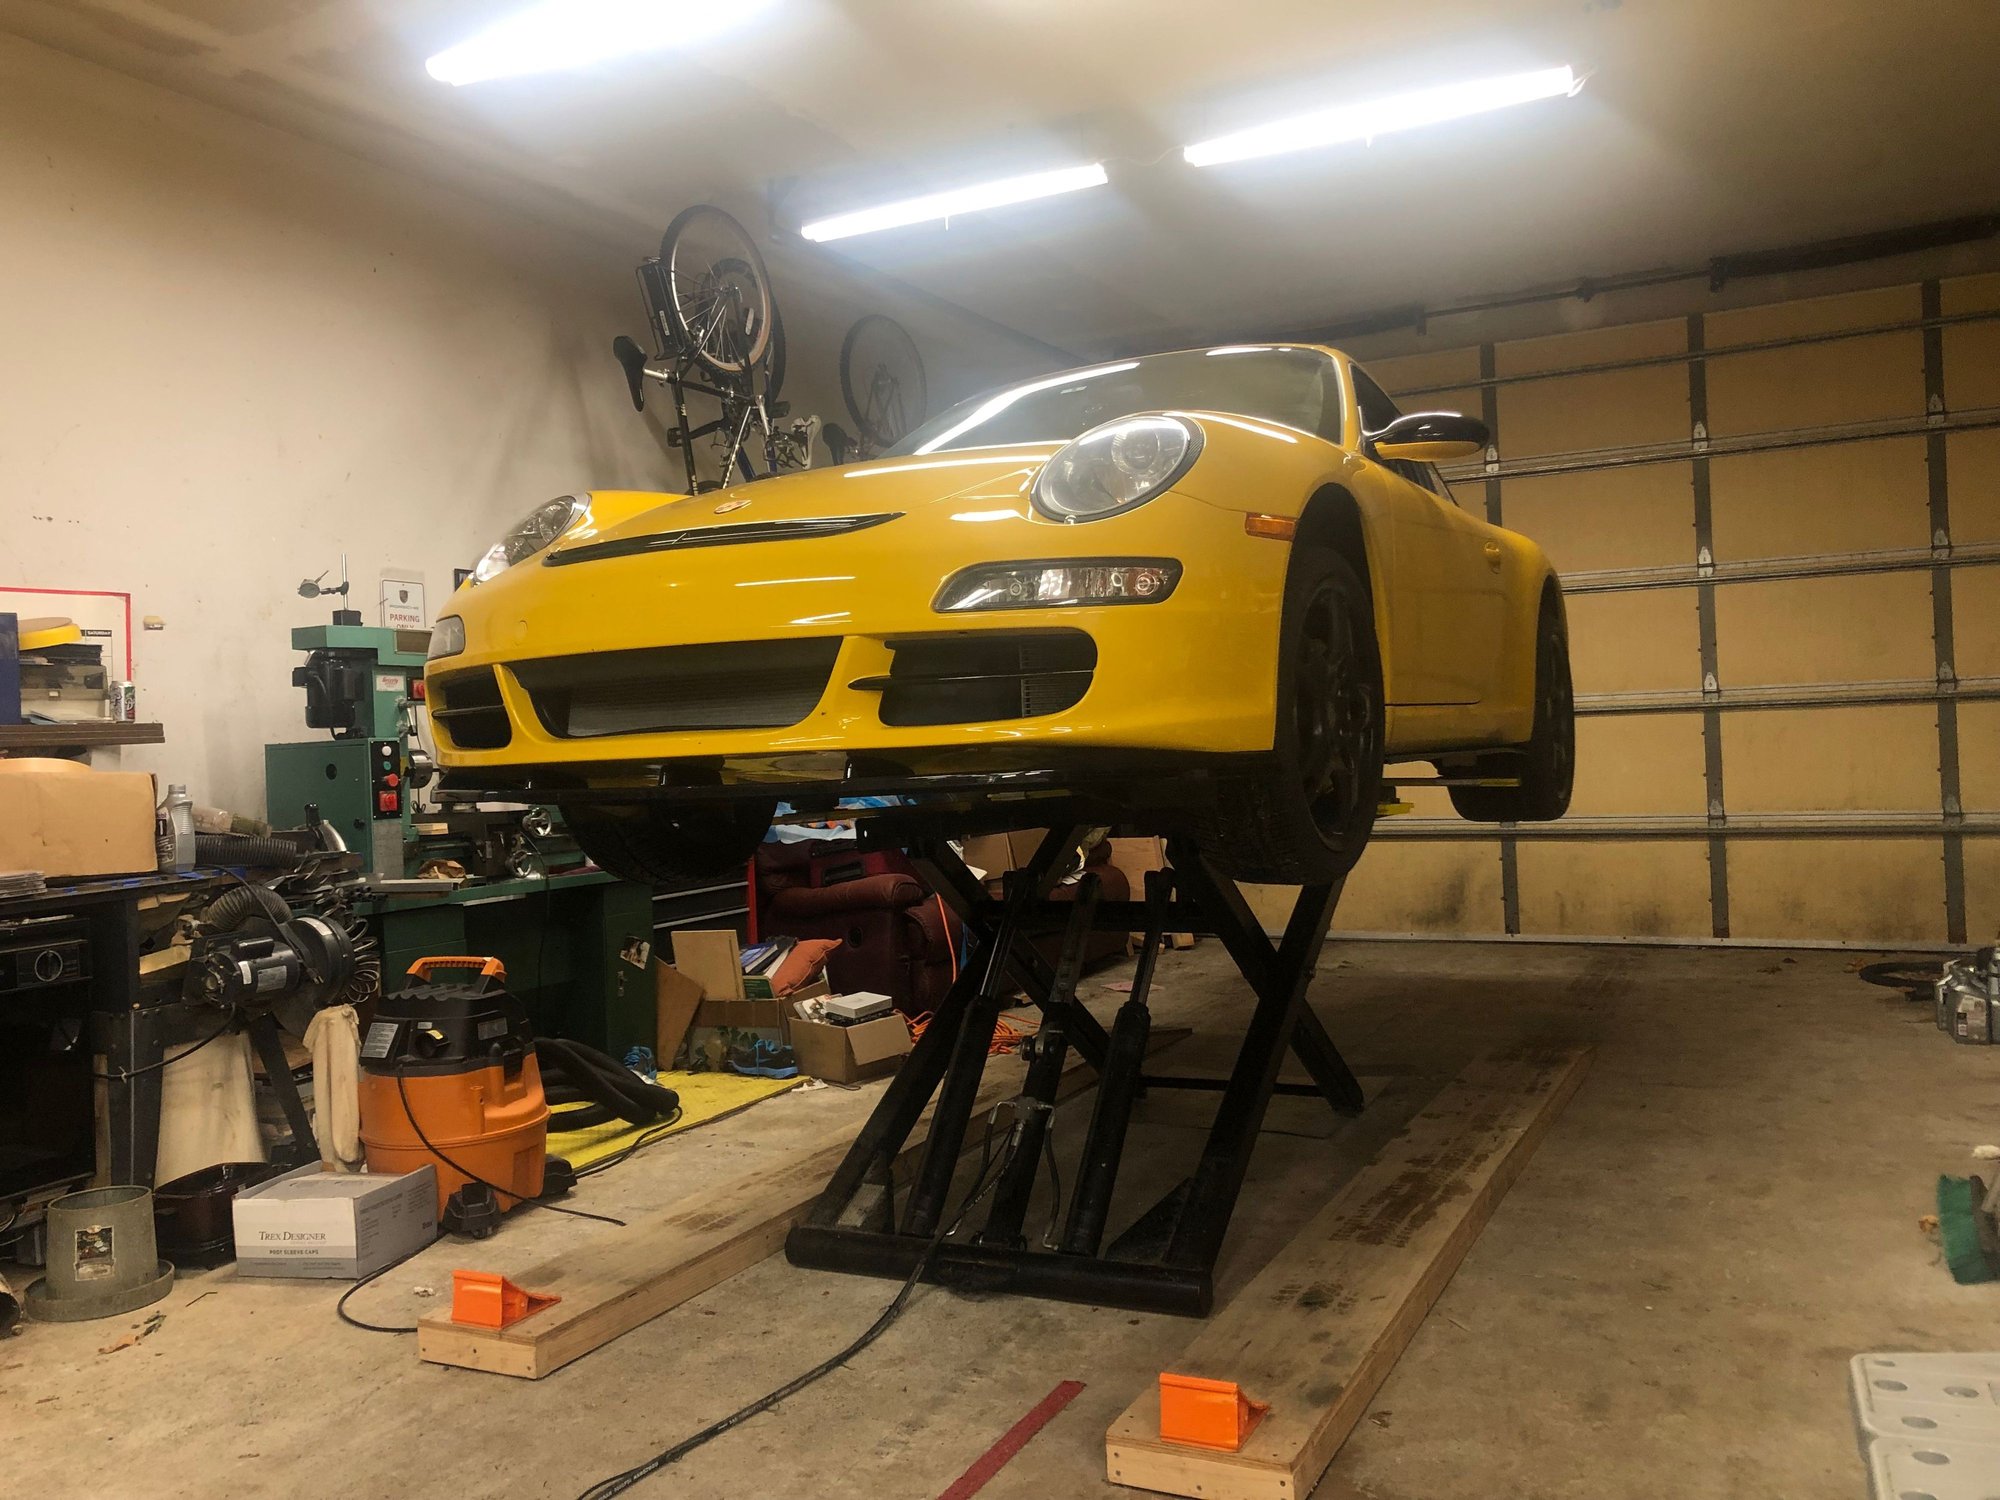
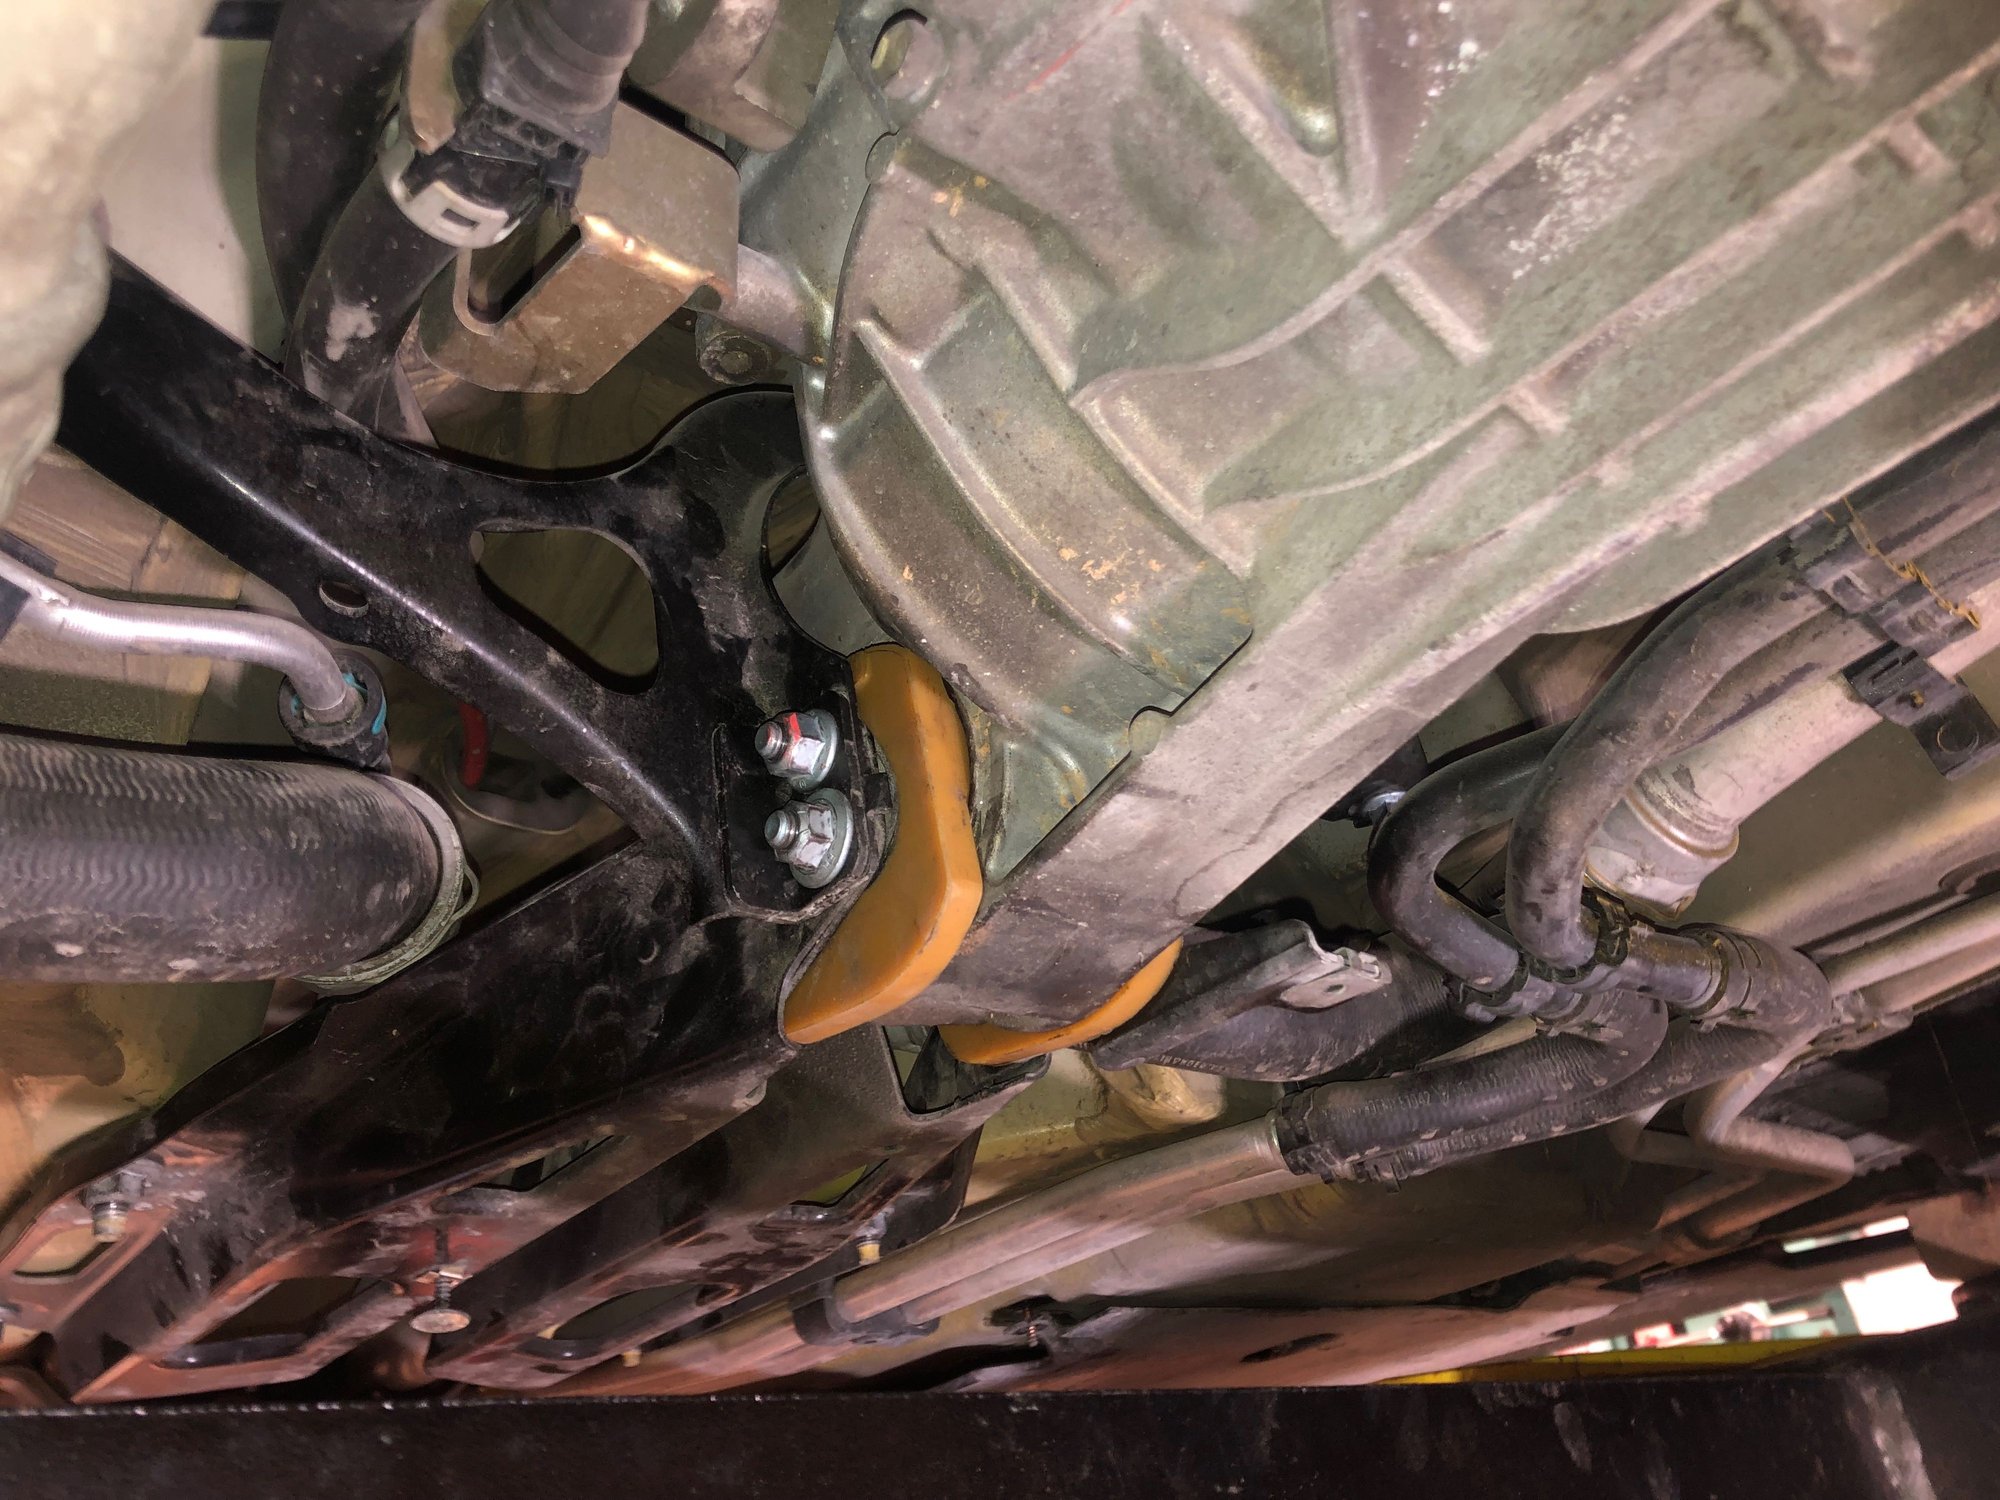
I got busy this weekend and tackled some maintenance and mod work on my 997. I installed new shifter cable ends and transmission inserts from Function First, and changed my oil. The shifter cable ends and transmission inserts require the underbody panels to be removed so I figured with them off, it would be easy to do the transmission fluid as well. Here is the patient awaiting the procedures:
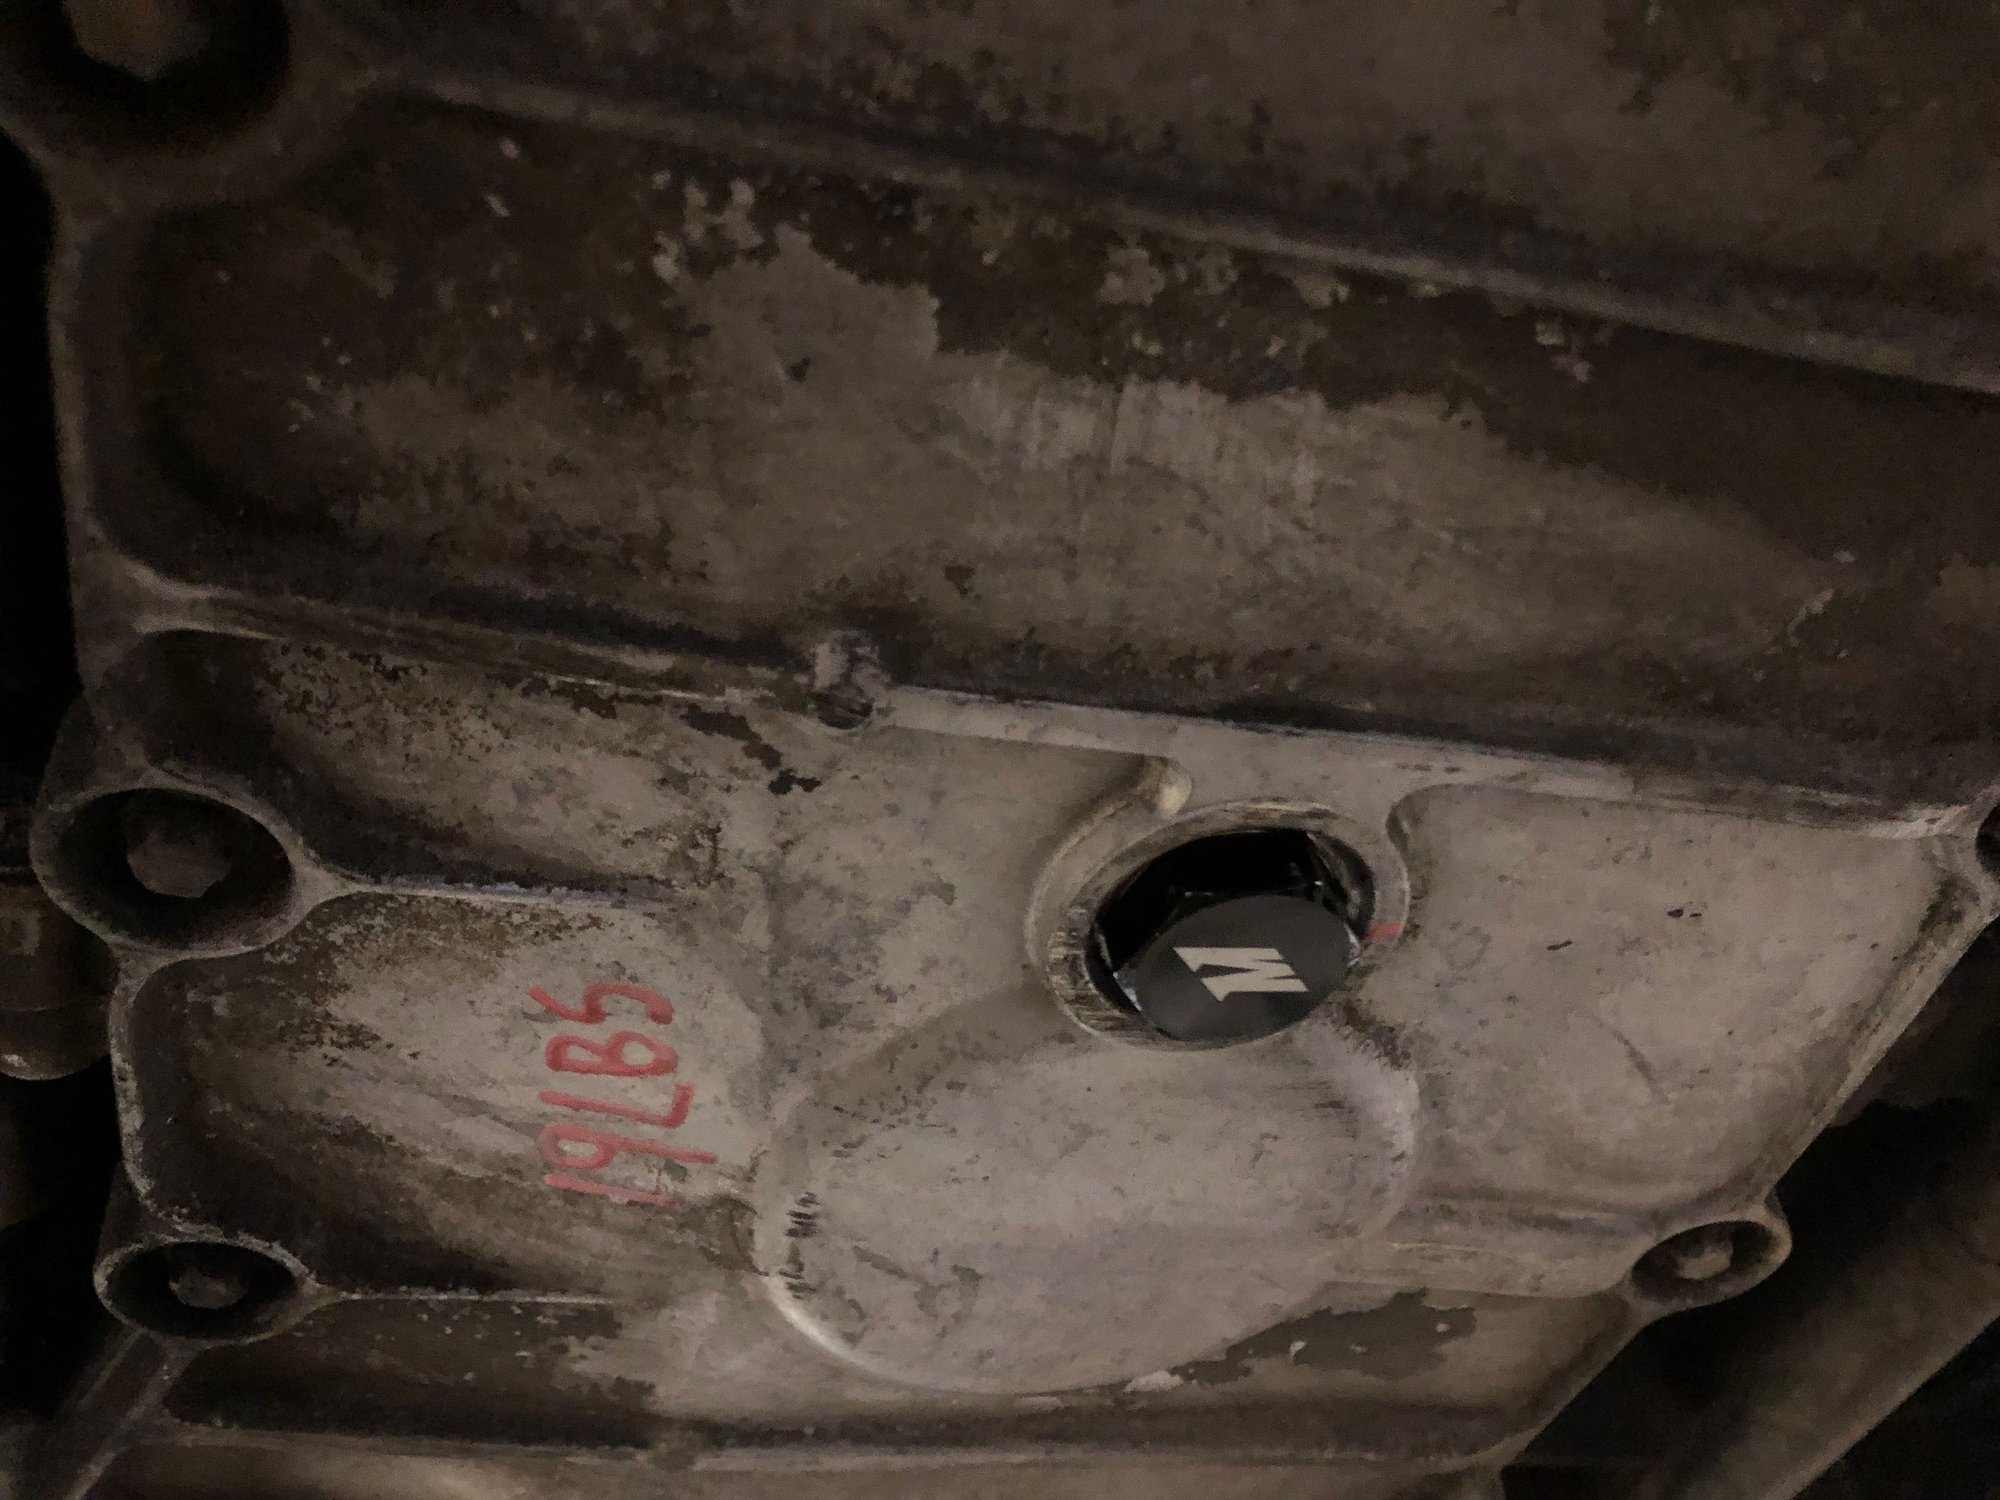
With the oil change, I installed LN Engineering's spin-on oil filter adapter, new magnetic drain plug from Mishimoto, as well as a FilterMag magnet. I chose the Mishimoto plug because it changes the drain plug from the hex key style to a 24 mm head and minimizes stripping the plug during future oil changes.
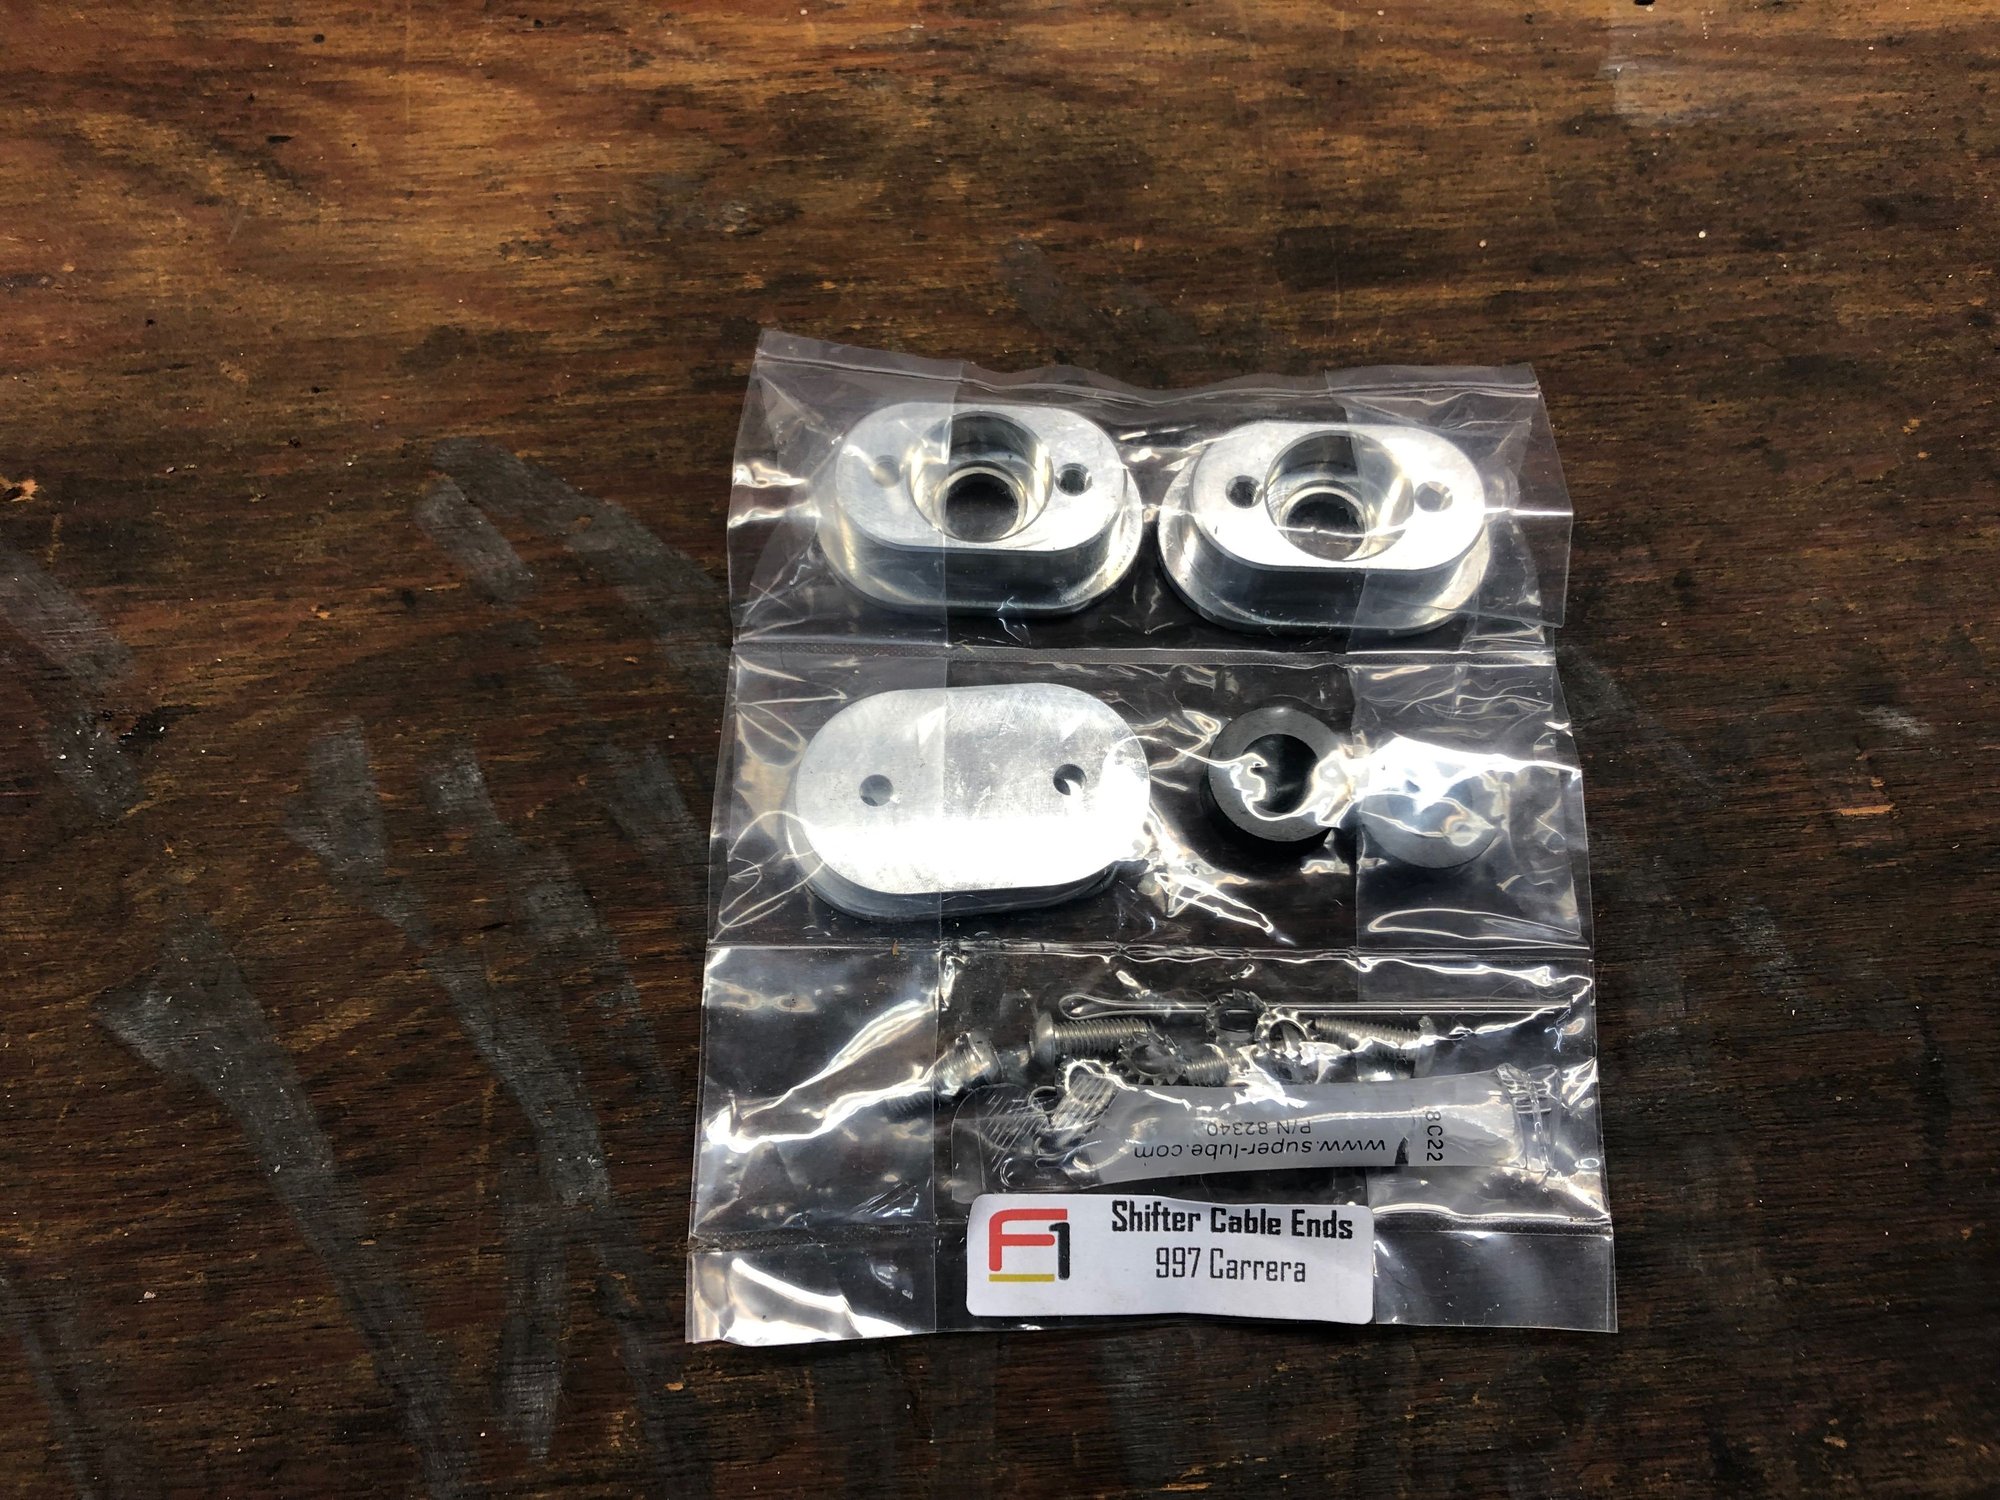
For the shifter upgrades, everything is pretty straightforward so I won't get into a DIY here as Function First provides detailed installation instructions on their site in downloadable PDF format. That said, here are some notes to help peeps out if you plan on doing these upgrades:
Shifter Cable Ends
It's a pretty pricey kit ($175) for basically new aluminum cable ends/plates, delrin bushings, and requisite hardware to replace the rubber/plastic ends from the factory. But for the peace of mind of knowing I won't have to worry about these ends failing due to old age, it was worth it. This is about a 1 out of 5 on the wrenching scale. Biggest hassle is getting the panels off and it is much easier with a lift. I would not want to do this job with jack stands. Follow the instructions and it will go fairly easy.
I made the mistake of installing the cotter pins before popping the cable ends back onto the transmission ball joints. No bueno. Was moving too fast and didn't read the instructions carefully. Proper install is to pop the ends on first and then push the cotter pins in. It was just more difficult to do after bending the ends of the pins and having to straighten them out and reinserting. Stupid mistake. Also, the photos in the instructions do NOT match the actual parts you receive but I assume that is because the install instructions are for another model (996 or 987).
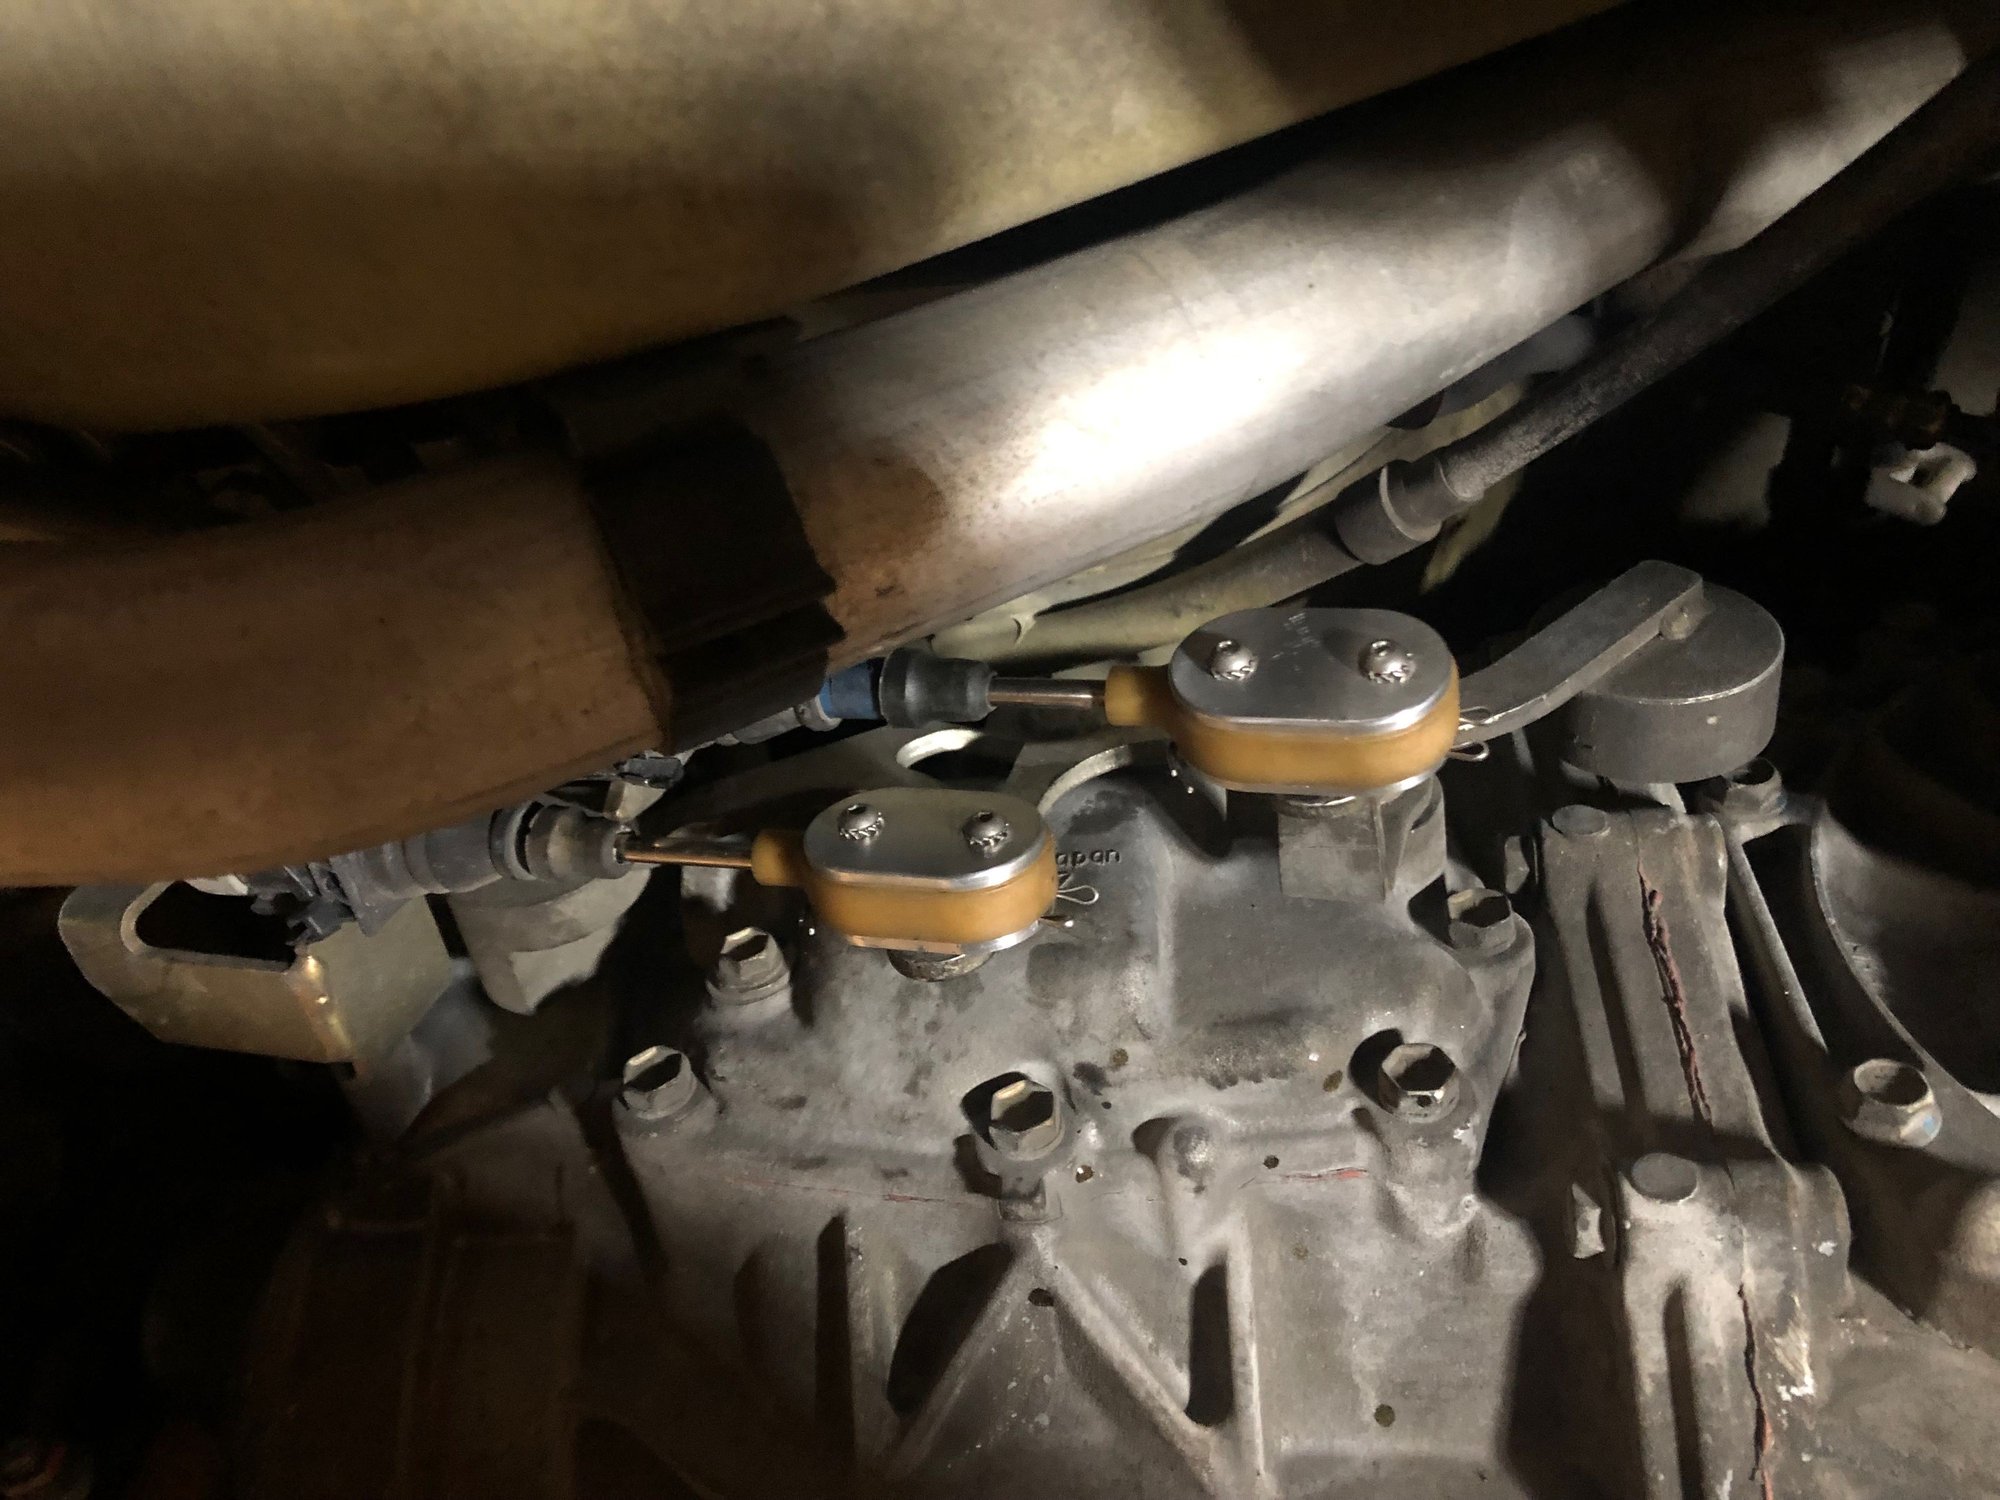
Transmission inserts
One thing to mention here is that the torque specs for the upper and lower transmission carriers and the through bolts for the transmission mounts are not included in the instructions. This is ridiculous, IMO. If I buy an aftermarket part specifically for my car, I would expect the manufacturer to include this simple information to make the install process easier as I assume they have probably answered this question numerous times. Doing a search on The Google surprisingly doesn't bring up 997-specific results but I was able to find the info doing a search on Rennlist. So for the benefit of those after me, the torque specs are below:
Upper/lower carriers: 48 lb-ft
Through bolts: 63 lb-ft
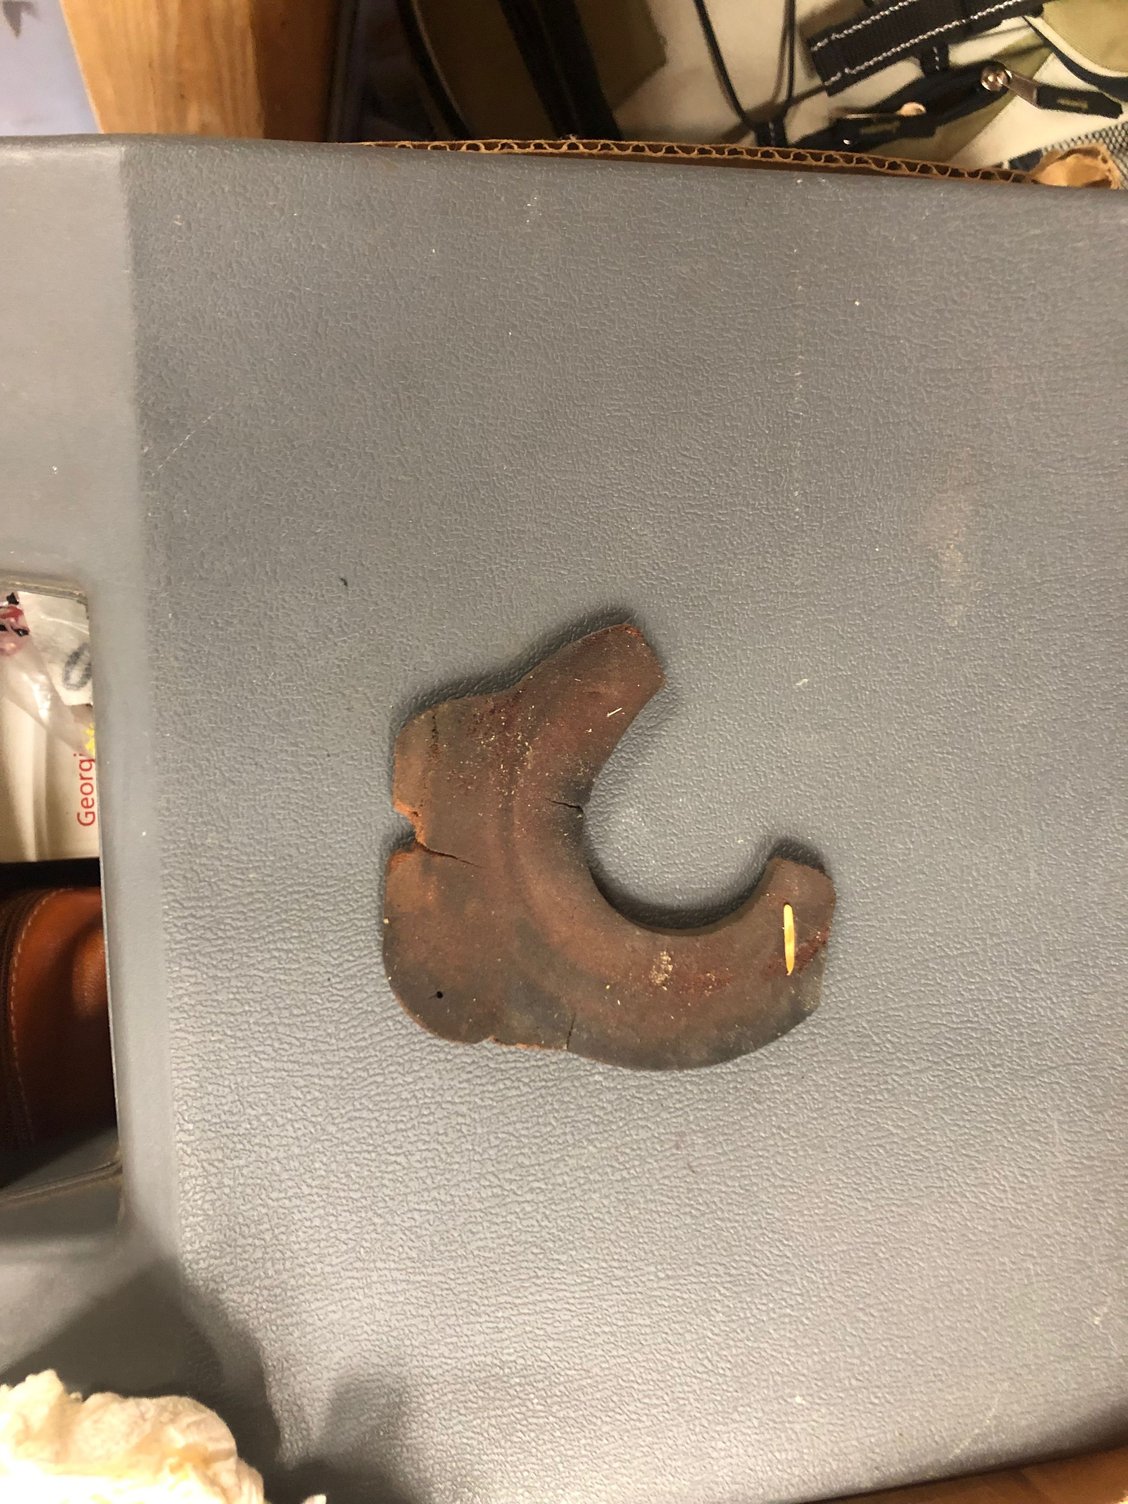
This install is about a 2.5 out of 5 wrenches with a lift. It is probably a 3.5 without. If you do it solo, difficulty goes up because removing and re-installing the underbody panels is a PITA because it is like origami to get them back into place and is easier with two people. Plus, you need to lower/raise the transmission in order to get tension off the through bolts to remove them. Finally, the top-side cavity of my passenger-side mount was slightly collapsed which made it difficult to install the mount for that side. If you run into this, use one of the through bolts to manipulate the stock mount to get the space you need to install the insert. I'm glad I installed these inserts because the driver-side spacer was missing and my passenger-side spacer was just hanging on by a thread and part of it was missing.
I chose the yellow (Sport 70A hardness) inserts and didn't really notice a difference in NVH or precision in shifts, but lash from shifting should be reduced now. I also have the OEM short shifter installed, so not sure if that matters. I plan on installing the Function First Shift Right next and will report on how that goes.
Overall, it took me and my friend Johnny about 5 hours to do the oil change, shifter cable ends, transmission inserts, and transmission fluid. Removing and re-installing the underbody panels probably ate up about 45 mins of that time. Total PITA, especially with the scissor lift getting in the way in places. Plus we took a couple breaks to shoot the sh*t. YMMV.
I installed a set of Apex Competition Systems bullet-nose wheel studs. I went with 80mm in front and 90mm in the rear. I am running 7mm spacers in front and 15mm rear. These required using the double-nut technique to install, but it wasn't too difficult. Makes wheel changes a lot easier. It was about $170 for the bullet-nose studs and a set of open nuts.
I installed a set of Apex Competition Systems bullet-nose wheel studs. I went with 80mm in front and 90mm in the rear. I am running 7mm spacers in front and 15mm rear. These required using the double-nut technique to install, but it wasn't too difficult. Makes wheel changes a lot easier. It was about $170 for the bullet-nose studs and a set of open nuts.
Totally misunderstood your post on instagram lol...
@Busta Rib you mentioned wanting to see the duck tail. Here is a pic I got after I had my Eibach springs installed (shop sent pics while I was in Europe. Can�t wait to get home and drive it).
@Busta Rib you mentioned wanting to see the duck tail. Here is a pic I got after I had my Eibach springs installed (shop sent pics while I was in Europe. Can�t wait to get home and drive it).
hope I�m not hijackiing your thread.
who makes that? Like the look, some ducktails are too big in my opinion.