Oil filler tube split
 08-10-2010, 04:43 PM
#1
Instructor
Thread Starter
Join Date: Feb 2010
Location: Jacksonville, FL
Posts: 105
Likes: 0
Received 0 Likes
on
0 Posts
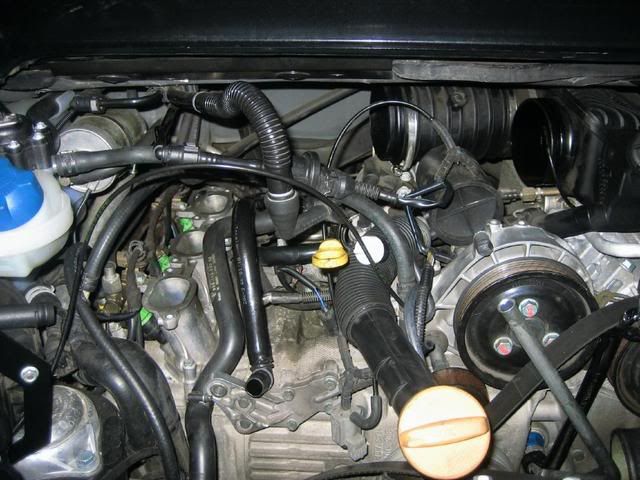
In pokeing around looking for my engine light trouble I noticed my oil filler tube has a big split in one of the flex pieces. So that may cause a check engine light, right?
I can't even see where the oil filler tube attaches to the engine. Don't tell me I have to pull the engine to replace this sucker!
Can you repair them? It is a clean split 1/3 of the way around the pipe in one of the flex pieces. I'm not talking duck tape, but maybe some sort of insert?
I can't even see where the oil filler tube attaches to the engine. Don't tell me I have to pull the engine to replace this sucker!
Can you repair them? It is a clean split 1/3 of the way around the pipe in one of the flex pieces. I'm not talking duck tape, but maybe some sort of insert?
 08-10-2010, 04:49 PM
#2
In pokeing around looking for my engine light trouble I noticed my oil filler tube has a big split in one of the flex pieces. So that may cause a check engine light, right?
I can't even see where the oil filler tube attaches to the engine. Don't tell me I have to pull the engine to replace this sucker!
Can you repair them? It is a clean split 1/3 of the way around the pipe in one of the flex pieces. I'm not talking duck tape, but maybe some sort of insert?
I can't even see where the oil filler tube attaches to the engine. Don't tell me I have to pull the engine to replace this sucker!
Can you repair them? It is a clean split 1/3 of the way around the pipe in one of the flex pieces. I'm not talking duck tape, but maybe some sort of insert?
 08-11-2010, 11:52 AM
#5
I have used something called "heat shrink tubing" to fix a similar problem. It was on a forklift, however. The problem is that you will have to keep the heat off the oil fill tube. Read about it on the net, maybe you can find a size that will work. The stuff is pretty cool.
check it out. http://cableorganizer.com/heat-shrin...1-heat-shrink/
I got mine for free from work. It is a little expensive!
check it out. http://cableorganizer.com/heat-shrin...1-heat-shrink/
I got mine for free from work. It is a little expensive!
Last edited by Hapich; 08-11-2010 at 11:57 AM. Reason: add link


Trending Topics
01-20-2015, 10:03 AM
#8
Its a cheap part to replace, just a ***** ache to do as in my case I had to remove the PS reservior, air con compressor and T body, not technically difficult just fiddly with very little space.
I have an X51 which I think has bigger intake manifolds so I couldnt get the alternator out, if you can remove that then it shodul be alot easier as you will have more room.
I have an X51 which I think has bigger intake manifolds so I couldnt get the alternator out, if you can remove that then it shodul be alot easier as you will have more room.
01-20-2015, 10:24 AM
#9
Rennlist Member
Join Date: Apr 2010
Location: Ormond Beach, FL
Posts: 5,920
Likes: 0
Received 1,176 Likes
on
752 Posts
Yes, it will throw a code and a CEL. Mine ran so bad with the tube split, bad idle, hesitation, rough running. Replaced the oil filler tube and it was like a miracle. I cannot imagine that any type of sealer will work on the flexible accordion section. Plus, it splits open because the plastic has age/heat deteriorated so the rest of the tube is suspect. It is not a hard DIY to replace. Order a new tube and the O-ring seal that goes on the bottom that seals it to the crankcase. I ordered a new cap and cap o-ring as well. Total for all was $80.52 from AutoAtlanta.
G99970728541 O-ring 51, 00x4, 5N $7.27
G99970734840 Rubber O-ring $4.83
G99610703550 Oil Filler Cap $11.19
G99610715061 Oil Filler Pipe $47.34
Disconnect battery, pull air box, remove serpentine belt, remove alternator and you will have access to the two small bolts at the base of the tube. You do not have to remove the throttle body and front plenum. Lube the tube O-ring with some engine oil before installing. Read up on alternator removal as it may prove to be the most difficult part of this job. You will bust the plastic hose connector running from the water pump to AOS so be prepared with brass hose bib to replace that, and, you probably will bust some of the plastic vacuum tubing so have some extra vacuum hose handy. It's a fifteen minute job once the alternator is cleared, total time about 1.5 hours if you fiddle around with stuff like I do once I'm in there.
01-20-2015, 04:36 PM
#10
Instructor

Join Date: Aug 2013
Location: Carlsbad, CA
Posts: 128
Likes: 0
Received 0 Likes
on
0 Posts
Make sure that you don't drop the screws that hold the filler tube in place into the engine. Take lots of pics at every step while you are disconnecting cable, hoses, tubing and everything else that is in your way. I had to remove the alternator which was not too hard. While the alternator was out check the cable that connect to it for damages.
01-20-2015, 04:51 PM
#11
Burning Brakes
In the mean time do not try to put duct tape or anything of that sort as temporary fix. It will come loose and get sucked right down the tube as there is quite an amount of suction under load.