When you click on links to various merchants on this site and make a purchase, this can result in this site earning a commission. Affiliate programs and affiliations include, but are not limited to, the eBay Partner Network.
I actually carried out the original posted suggestion in 2015 - has always gotten a lot of [slightly confused] attention - I'm now toying with adding the RS air ram duct as part of a refresh since fitting the genuine RUF mirrors and front end
I actually carried out the original posted suggestion in 2015 - has always gotten a lot of [slightly confused] attention - I'm now toying with adding the RS air ram duct as part of a refresh since fitting the genuine RUF mirrors and front end
Not that I'm pursuing this anymore, but what made you get rid of the "kink" near the edge of the original GT3 spoiler?
No further update from me yet, the large-format printer has been booked for some emergency medical device prints so I'm still waiting till the weekend.
First of all, the print went pretty badly, so I now know that we can't rely on 3D printing for production-quality frame production. I'm likely going to making one really good (expensive) master and then casting urethane from it. Nonetheless, the dimensions of the print are correct so we can proceed however we decide.
I made way more clearance for the brake light wire than needed, will fix that.
Probably not visible from this picture but these tabs ended up being 1-2mm off. Easy fix, but I'm not sure how it's not reflected in the scan.
Very tricky to print thin sections here where I basically ran out of clearance for teatray + mesh + frame + spoiler. At least you can see my tab presses nicely into the stock pentagonal holes, so I've got the dimensions and locations of these correct.
The tabs along this side of the teatray pressed in really nicely - for the real install, we just need to thread in some #10 screws from underneath to secure.
Lays flat enough I think I could glue a top skin on this for a functional pre-production proto.
Also figured out a quick fix for the clearance issue between the brake light wire and the mesh - it's easy to tuck the wire under the tray instead of over/through it. Just gotta push the plastic pins out of this retainer:
Release the grommet entirely and pull the connector through the hole:
And jam the grommet back into its original hole and reinstall the retainer. Not the prettiest thing on earth - I'm thinking to print a plug for cable management - but it stays and will now clear the mesh.
Welcome back to the show, I put a $$ order in with Shapeways last week so that I could verify critical dimensions (SLS >>> FDM) and have something functional to put a skin on. Got it in the mail yesterday!
Man, I wish I had an SLS printer at home, but at 996-997 prices I need to have customers before I can justify ordering one
Little details still need to ironed out, this is my fault for being too aggressive. I wanted to see how thin they could go, the answer is "pretty darn". Realistically I need to trim these back, it won't be visible anyways (underneath the cosmetic top skin).
Pretty little tabs. Fits just like OEM.
Meanwhile, my pentagonal inserts (replacing the stock hooks) don't exactly work like OEM, but they fit absolutely perfect.
Rudimentary clearance for brake light wire, done. I'm gonna give this whole section more meat next revision - there's room.
Overall, every single locating feature and critical dimension is perfect with this one, so I'm satisfied.
From here, I need to decide how to make a top skin quickly. My partner shop's dragging their feet with the vacuum former setup, so honestly I might just make a mold and fiberglass it. We can't just be looking at a frame for the next month, I need something to show people!
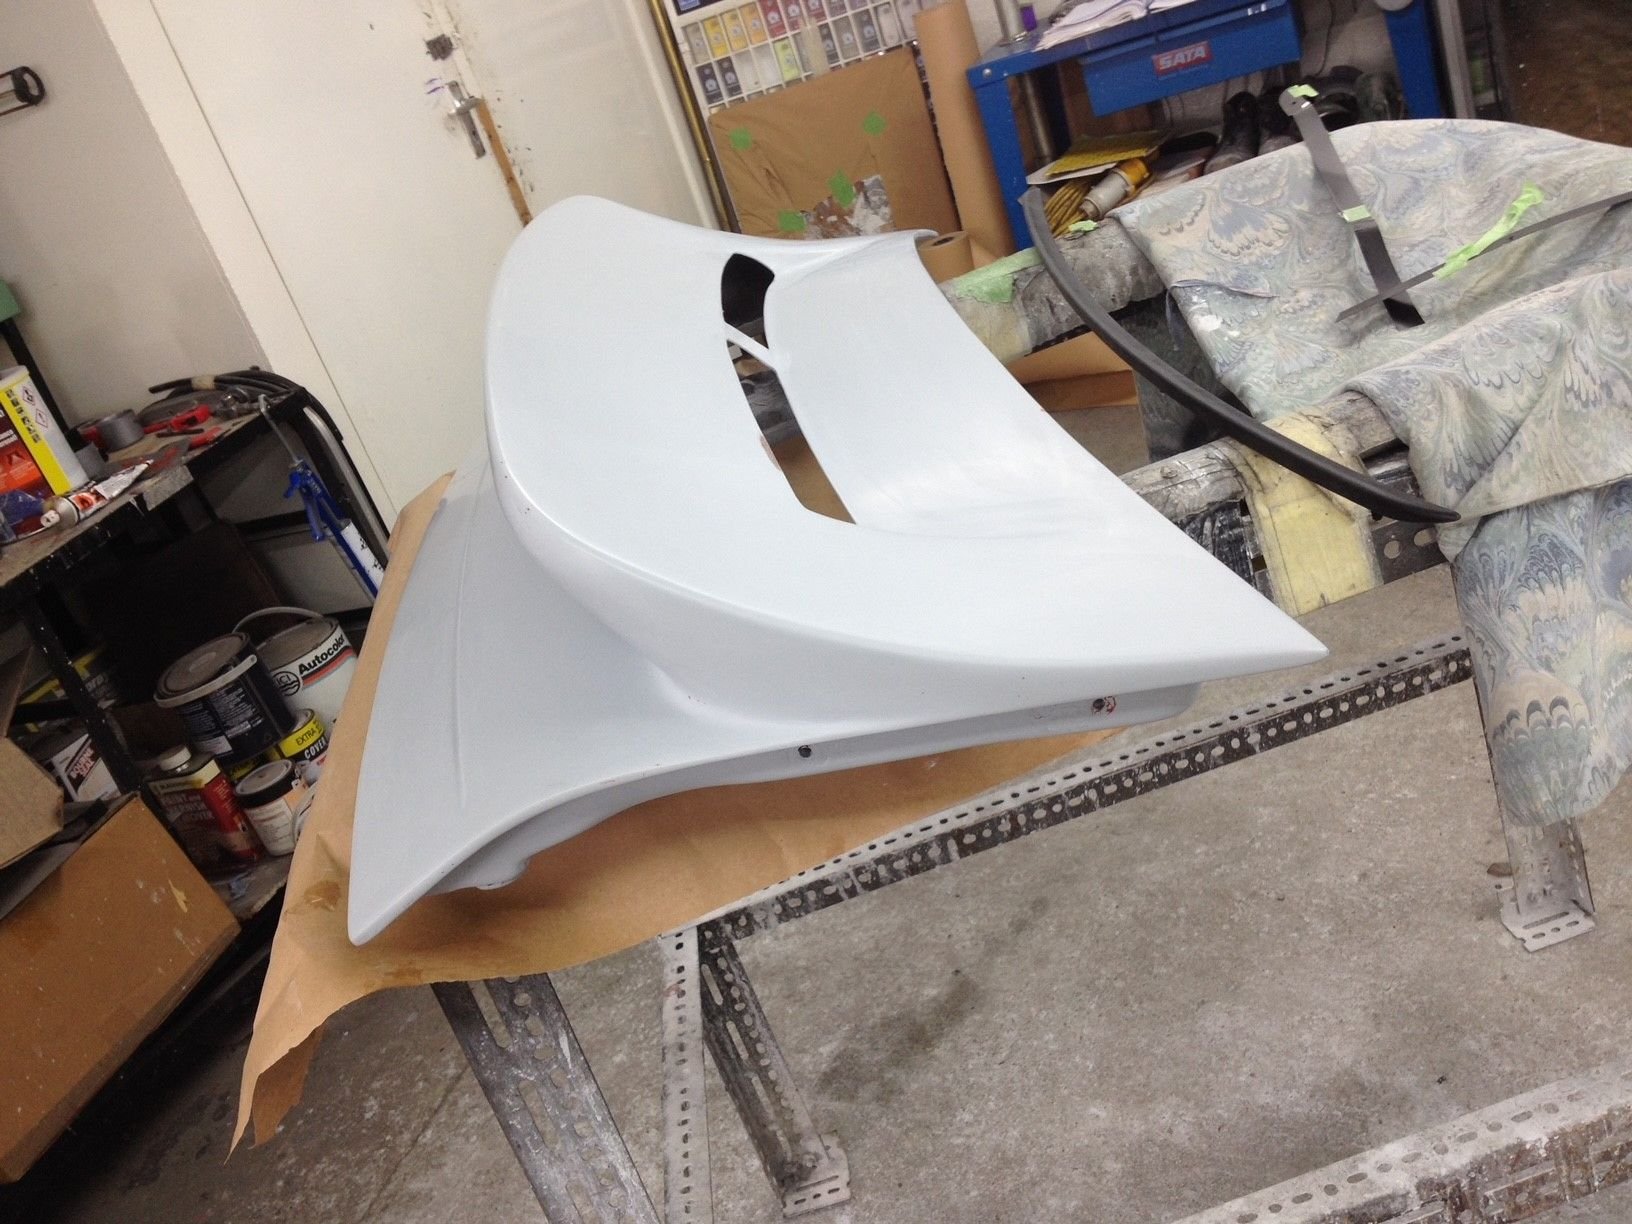
Another Shapeways order - this time, with the entire spoiler
All the mounting points were printed in one shot with this prototype, just had to split it in half because Shapeways' printers aren't that luxuriously big. At least, I can easily show you a cross-section view of the space under my lines lol. The fitment and clearances are super tight, just enough to play with to pull off this aesthetic that you guys responded so positively to.
No zipties this time - the spoiler is actually bolted up.
My idea with bolts replacing hooks is a little troublesome to install, but doable. I still think it's way safer than printing hooks so I think I'll stick to it. Thread the screws into the holes first, then get the spoiler in place, finally snug up the bolts to prevent the spoiler from flying away. Torque is not needed here, the screws wedge tightly into the plastic by design.
Clamp just for helping the JB Weld set properly.
Little bit of shrinkage and print warp resulting in this panel gap - caused by the sheer size and thinness of the print. Nothing that traditional bodywork can't fix, but goes to show that printing is still not as good as thermoforming or molding (cast or composite) the spoilers as a volume production method. I plan to get this proto perfect regardless - 1) to finally show you guys some real results 2) it can be used as a positive to pull a composite mold from. Would folks like a fiberglass or carbon fiber "GT3 Touring" ducktail? More expensive than vacuum forming, but especially carbon fiber could be fun as the "matte black" window I designed could be left in matte carbon weave.
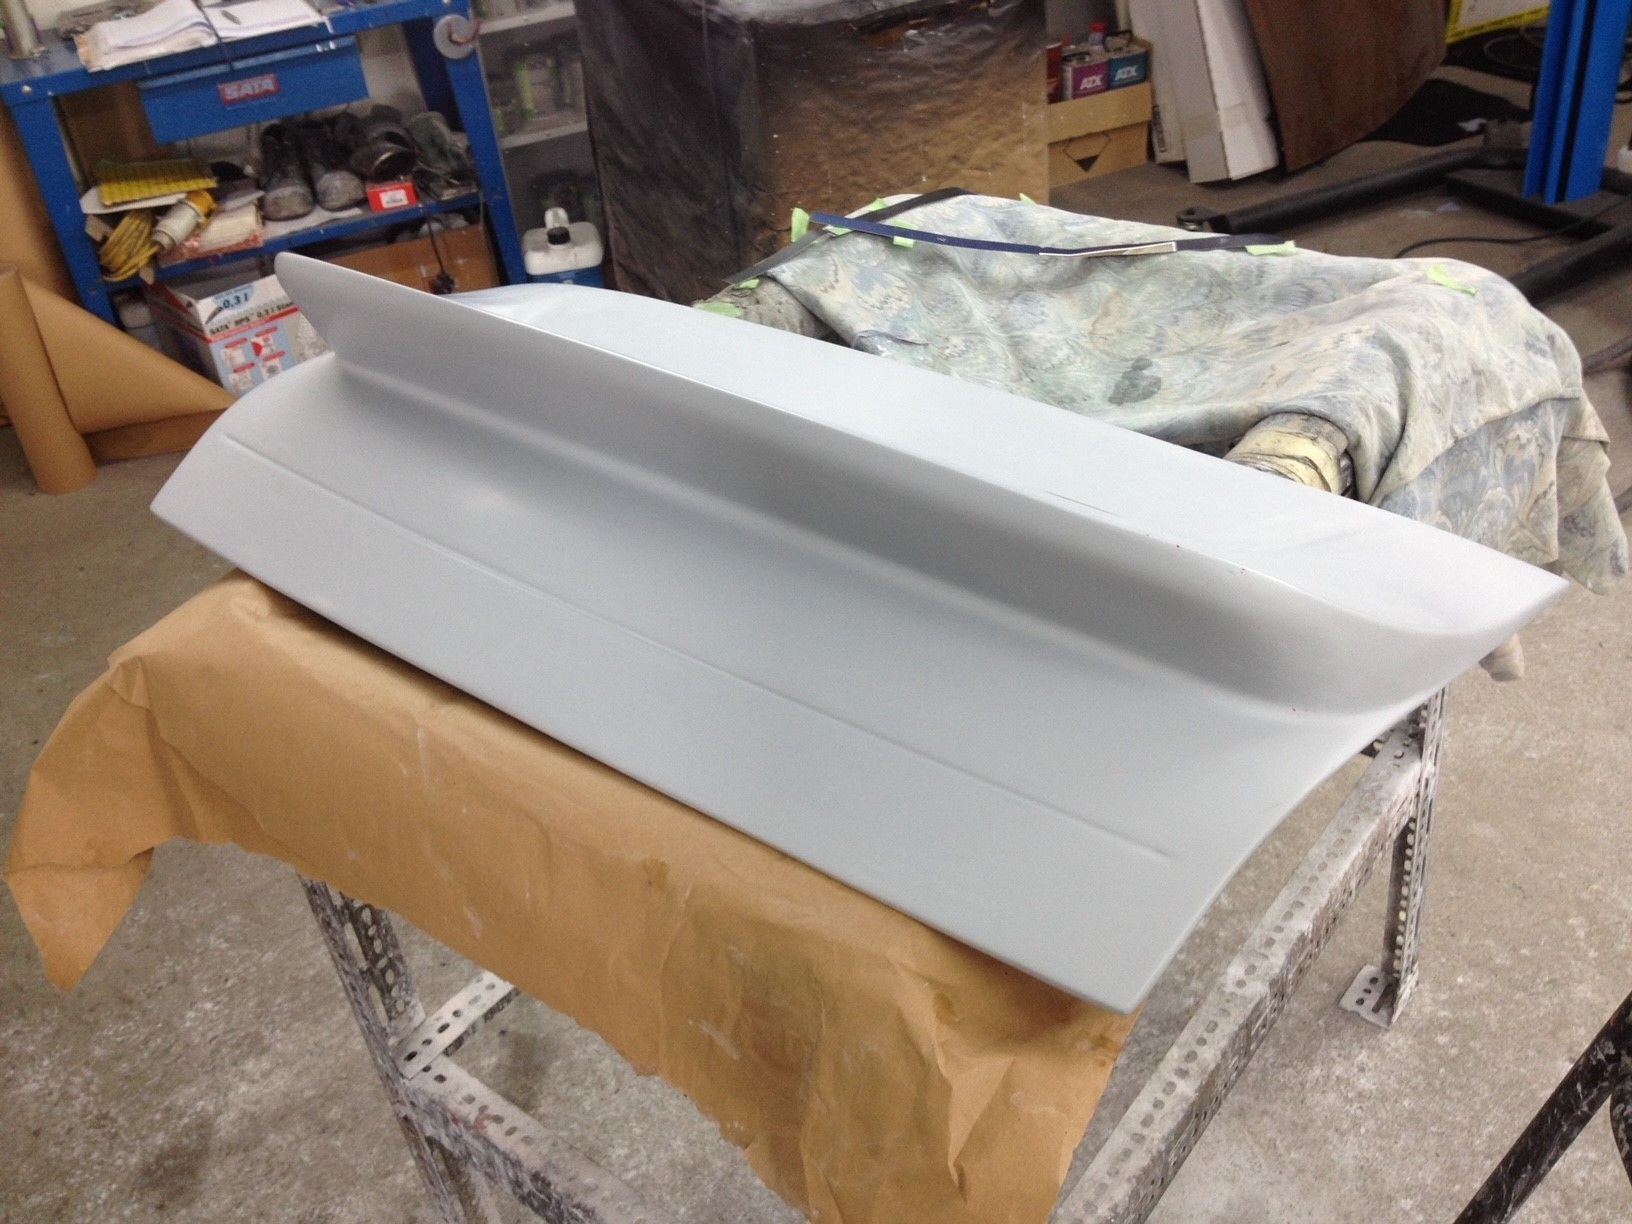
I've sent this spoiler over to my body man already for filler, smoothing, and a coat of Arctic Silver - he knows the timeline so I am super excited to see it come back soon! Time to source some square black mesh and print a grommet to clean up the brake light wire.
Big update! Didn't upload any pics of the fill/smoothing process on the print (may be a trade secret, my bodywork partner has been figuring out how to efficiently process prints), but it's painted and fitted for real now and I'm very proud of the result.
Originally Posted by plpete84
Awesome update! I think the octagonal black mesh would look great on there too. I believe that's what most of the GT cars use.
I got to look at various specs of GT2/GT3 cars on Sunday and interestingly enough, all of them used some form of expanded diamond mesh. But... I wound up using hex anyways because it's the thinnest one I can buy given a certain hole size. Vertical space is at such a premium with this design, my decisions were made for me. You're right, it's gorgeous.
The panel gaps are tight after I wrapped the edge of the piece around the teatray. I have to refine this idea a little bit; while I love it, it's also tight enough that anyone with a misaligned teatray could run into issues.
I think the stock louvre panel isn't very aesthetic when popped up, so for me it stayed down as much as possible. This, however, I would pop up just because it looks like an intentional spoiler. I love this. The peek of the teatray slats, engine intake and fan intake is everything I wanted it to be.
Checking for flaws in harsh artificial lighting. The leading edge on this prototype is up by a fraction of a degree due to how the mesh sits down on the teatray - we're literally out of space. I think I can fix it easily with two shims - assuming I'm right, I'll bundle said shims and instructions with each spoiler.
Besides that minor issue all that's left is some QoL updates to ease install, some redesign of how I want to clamp the mesh down, and mechanical testing to see how fast printed ABS can go before mechanical failure. I think we'll be okay on that front considering we're racing (W2W!) printed ABS bumpers, but we have to check.
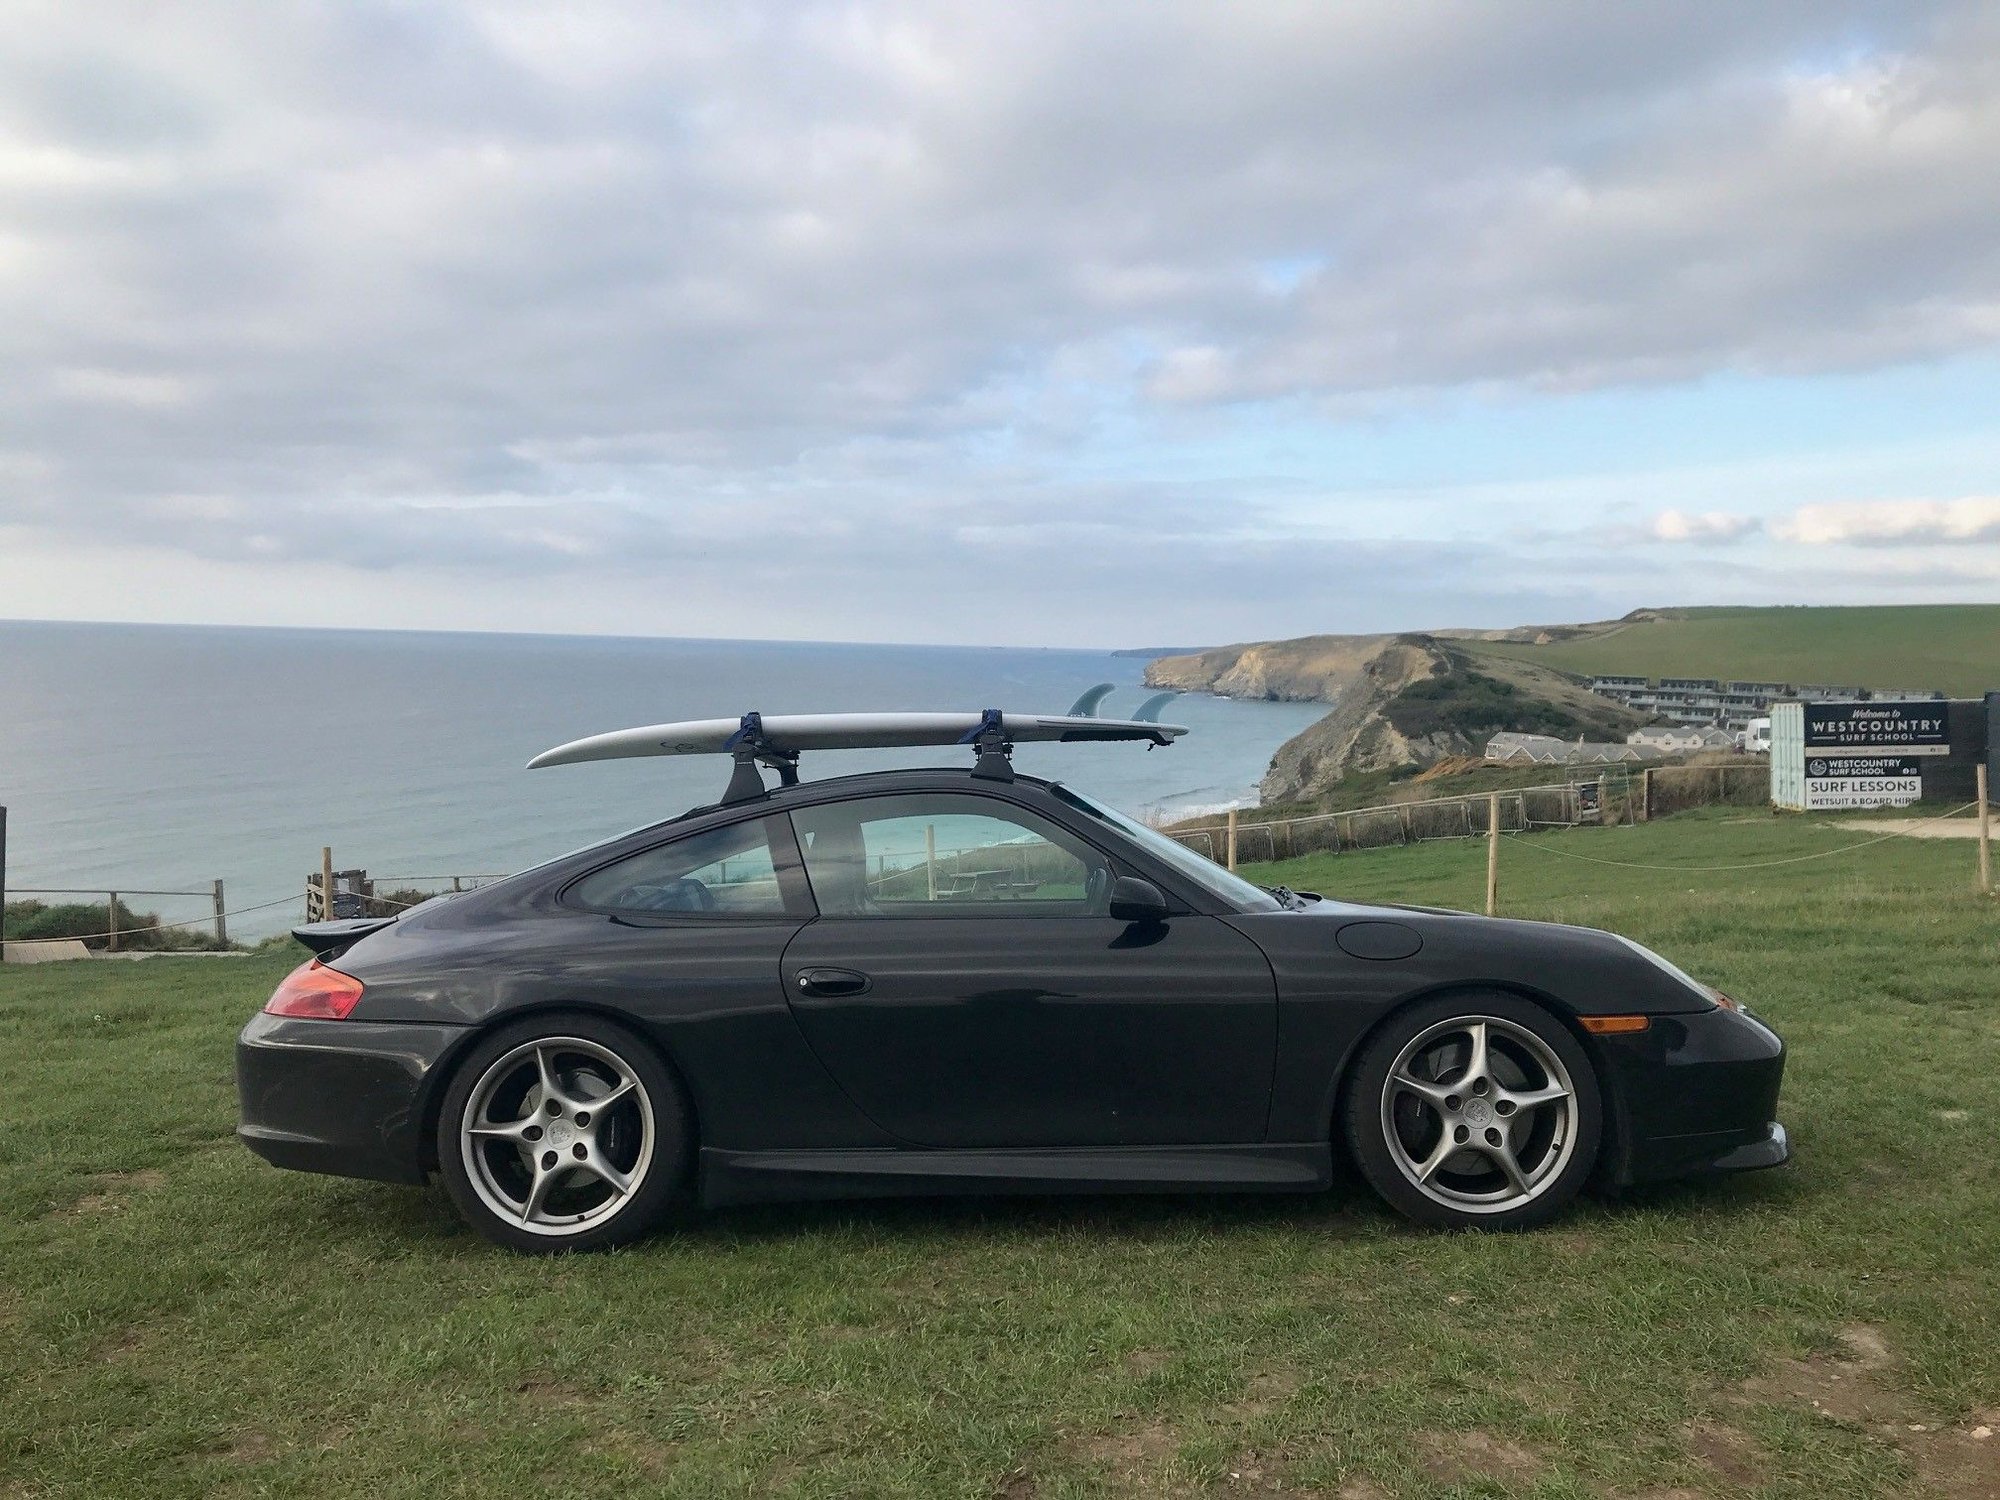
After the last few months of work and rework on what's effectively just seven lines, it's super rewarding to see stuff like this finally happen.
I got to look at various specs of GT2/GT3 cars on Sunday and interestingly enough, all of them used some form of expanded diamond mesh. But... I wound up using hex anyways because it's the thinnest one I can buy given a certain hole size. Vertical space is at such a premium with this design, my decisions were made for me. You're right, it's gorgeous.
So glad you went with the hexagonal mesh design! It looks perfect to me and brings that modern look to the car that fits. When I get my car back, I'll probably end up replacing the ones in my bumper with the same kind to eventually match this decklid. One question, how did you treat the black plastic underneath? Was it painted black or did you clean and treat it with a plastic protectant like CarPro Perl? I know the bare plastic will eventually fade so I was considering cleaning and painting it with matte black with a satin clear coat over the top.
 01-23-2024, 05:42 AM