When you click on links to various merchants on this site and make a purchase, this can result in this site earning a commission. Affiliate programs and affiliations include, but are not limited to, the eBay Partner Network.
Pin 14 is a ground with key on it will meter that way .Key off there is probably some residual voltage floating around .If compressor works with the porsche ac relay -then ok .3 good reasons to use the terminator: fans -with ac on fans need to run , compressor shut off on acceleration and idle kick up with ac on .
None of this should be that hard. I wish i had some more time to spend on this. Maybe u could find an analog hvac controler and it will be easier to set up?
I agree, shouldn�t be that hard. Something is amiss. Pin 14 should be giving ground signal. I�m going to look for a leak although the AC blows cold when manually triggering the compressor.
I found a $5 PWM to analog converter on Amazon. I was going to make one but this is too easy.
Originally Posted by dcdrechsel
Doesn't the terminator have provisions for a pwm signal and ac compressor output ? A simple pwm conversion will also work :diode 3k resistor 2uf capacitor to ground .Pick the signal off the resistor capacitor junction point .
yes, TermX has those provisions and I�ve programmed the inputs and outputs. They work fine, but kind of limited on converting the PWM signal input. I found a $5 pwm to analog converter on Amazon for wiring backup cameras to 18+ cars. I had looked up the schematic to make one, essentially a low pass filter. Thanks for your suggestion!
Originally Posted by dcdrechsel
Pin 14 is a ground with key on it will meter that way .Key off there is probably some residual voltage floating around .If compressor works with the porsche ac relay -then ok .3 good reasons to use the terminator: fans -with ac on fans need to run , compressor shut off on acceleration and idle kick up with ac on .
Yeah I see the residual voltage. Key on ground doesn�t happen though. Occasionally will get 9v at pin 14. This is strange. Pin 69 is labeled �69 - A/C compressor requirement� and I�m curious if this needs a ground or 12v/pwm signal too. Pin 14 is labeled medium pressure switch, curious if there�s another. Yes, I�ll be adding high fan kick on when AC snowflake button is pressed. Ac shutdown also to be added. I don�t think idle kick is needed due to idling at 850 and only dropped 20 rpm when compressor clutch engaged but it�s possible to add to output in TermX. It�s actually pretty easy to program the inputs and outputs. I�ll post how it�s done after this is all figured out.
I�m going to dig through the wiring diagram later on.
I agree, shouldn�t be that hard. Something is amiss. Pin 14 should be giving ground signal. I�m going to look for a leak although the AC blows cold when manually triggering the compressor.
I found a $5 PWM to analog converter on Amazon. I was going to make one but this is too easy.
yes, TermX has those provisions and I�ve programmed the inputs and outputs. They work fine, but kind of limited on converting the PWM signal input. I found a $5 pwm to analog converter on Amazon for wiring backup cameras to 18+ cars. I had looked up the schematic to make one, essentially a low pass filter. Thanks for your suggestion!
Yeah I see the residual voltage. Key on ground doesn�t happen though. Occasionally will get 9v at pin 14. This is strange. Pin 69 is labeled �69 - A/C compressor requirement� and I�m curious if this needs a ground or 12v/pwm signal too. Pin 14 is labeled medium pressure switch, curious if there�s another. Yes, I�ll be adding high fan kick on when AC snowflake button is pressed. Ac shutdown also to be added. I don�t think idle kick is needed due to idling at 850 and only dropped 20 rpm when compressor clutch engaged but it�s possible to add to output in TermX. It�s actually pretty easy to program the inputs and outputs. I�ll post how it�s done after this is all figured out.
I�m going to dig through the wiring diagram later on.
easy test pins 2 and 3 on switch closed with system pressurized .
Apologies the pics are so large!
Still working on the AC. I haven�t driven the car since July due to work and vacation. Fortunately I made notes and picked up where I left off. I�ll be finishing the AC wiring in the next couple weeks when I have some spare time.
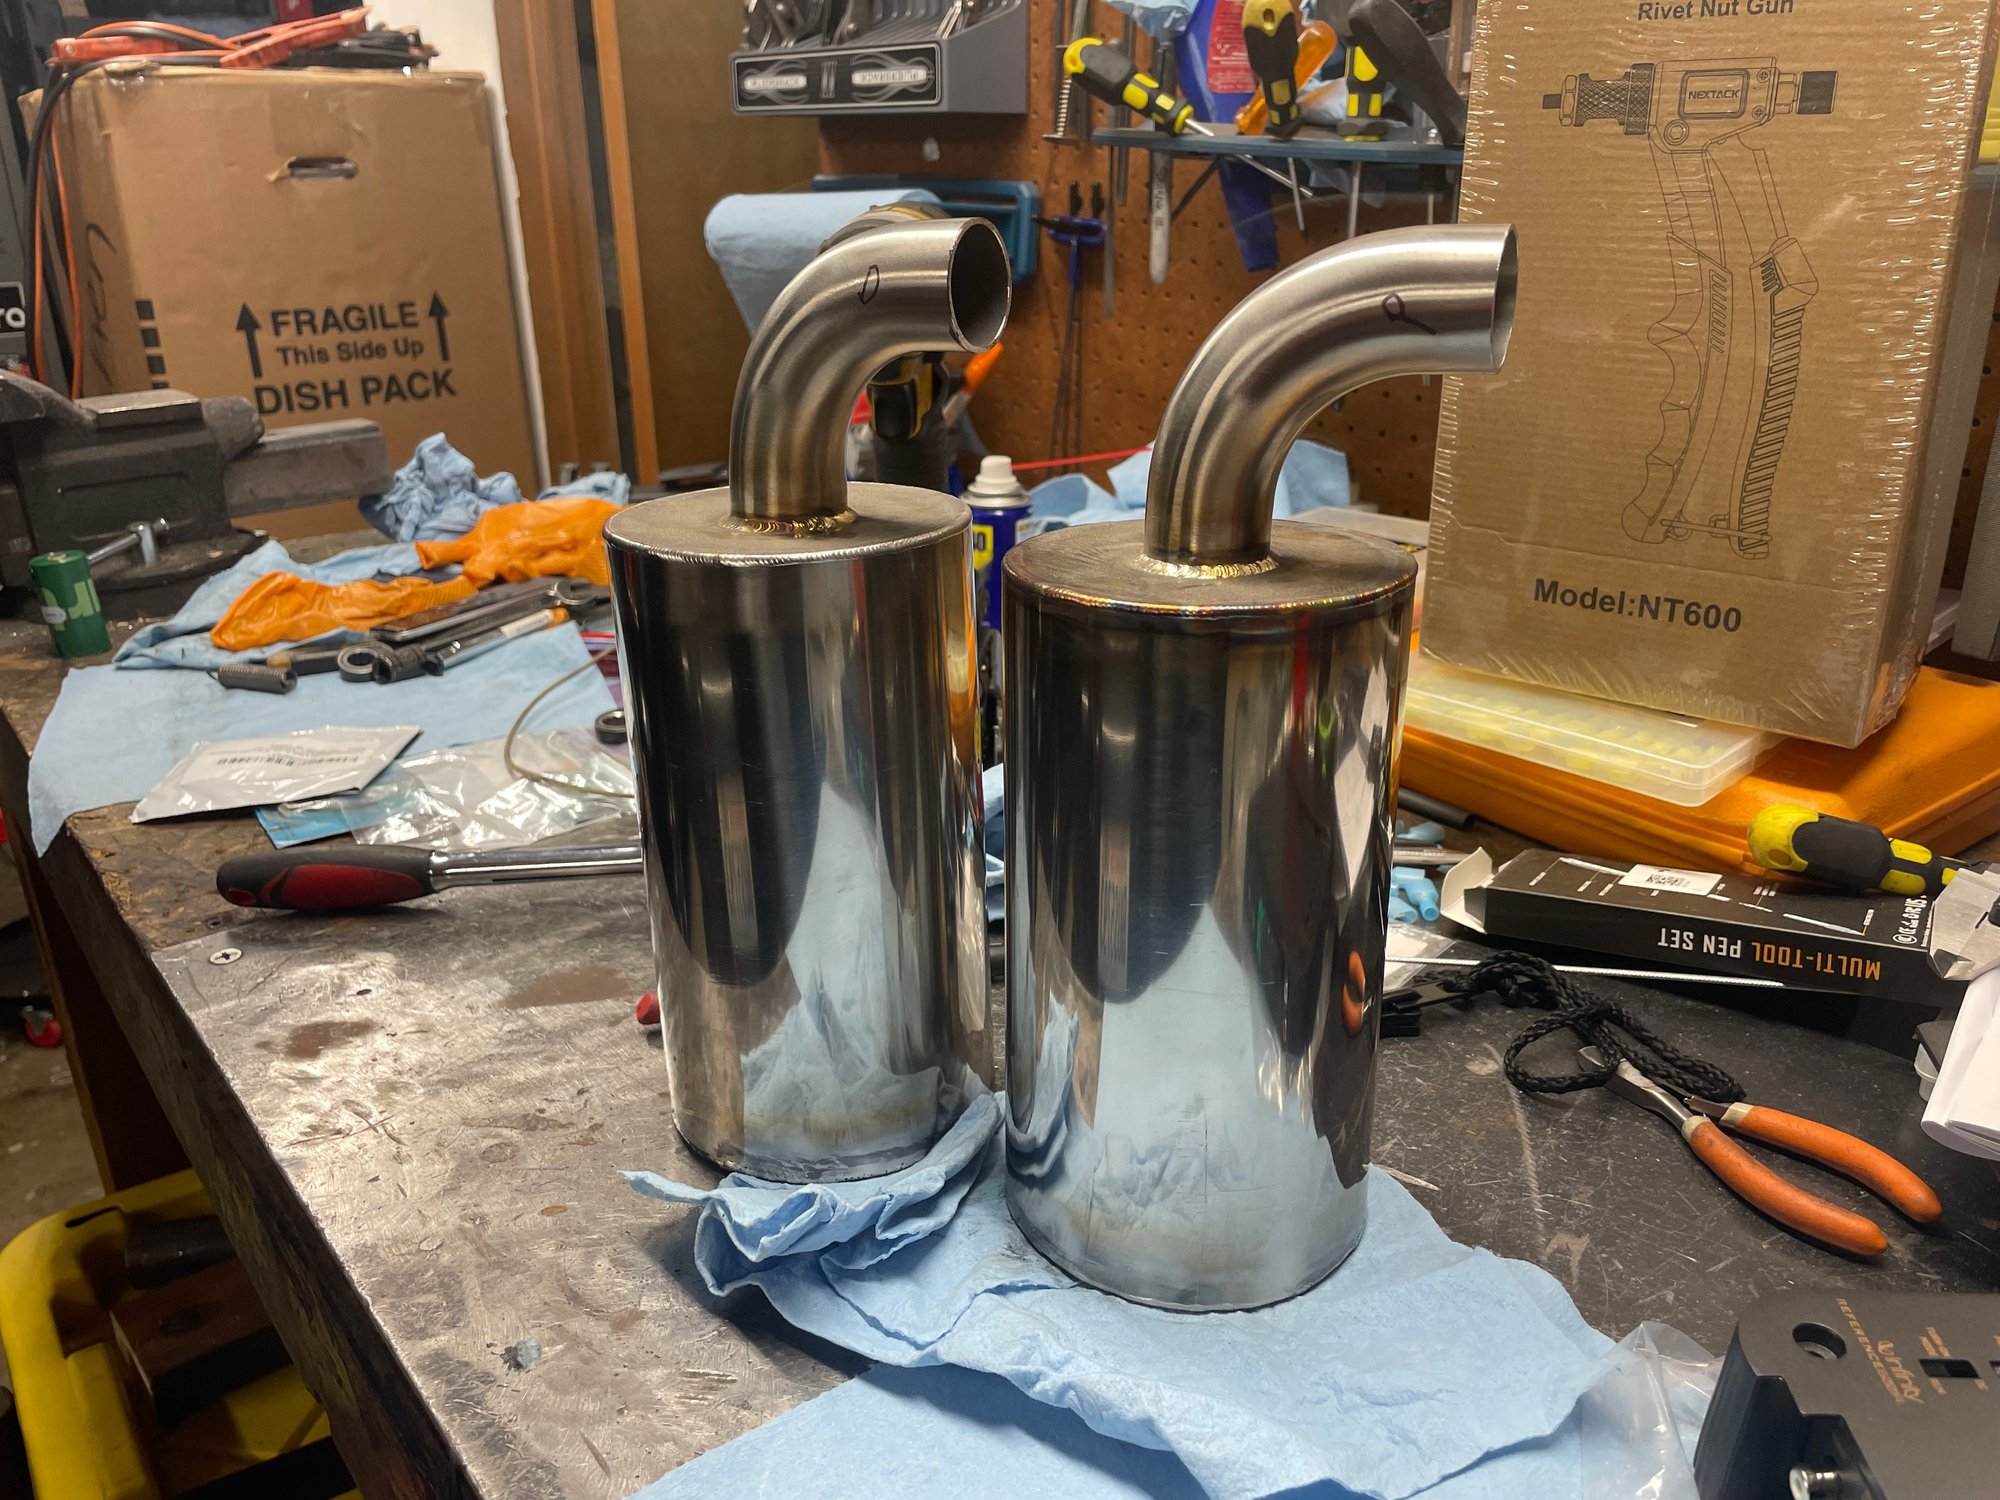
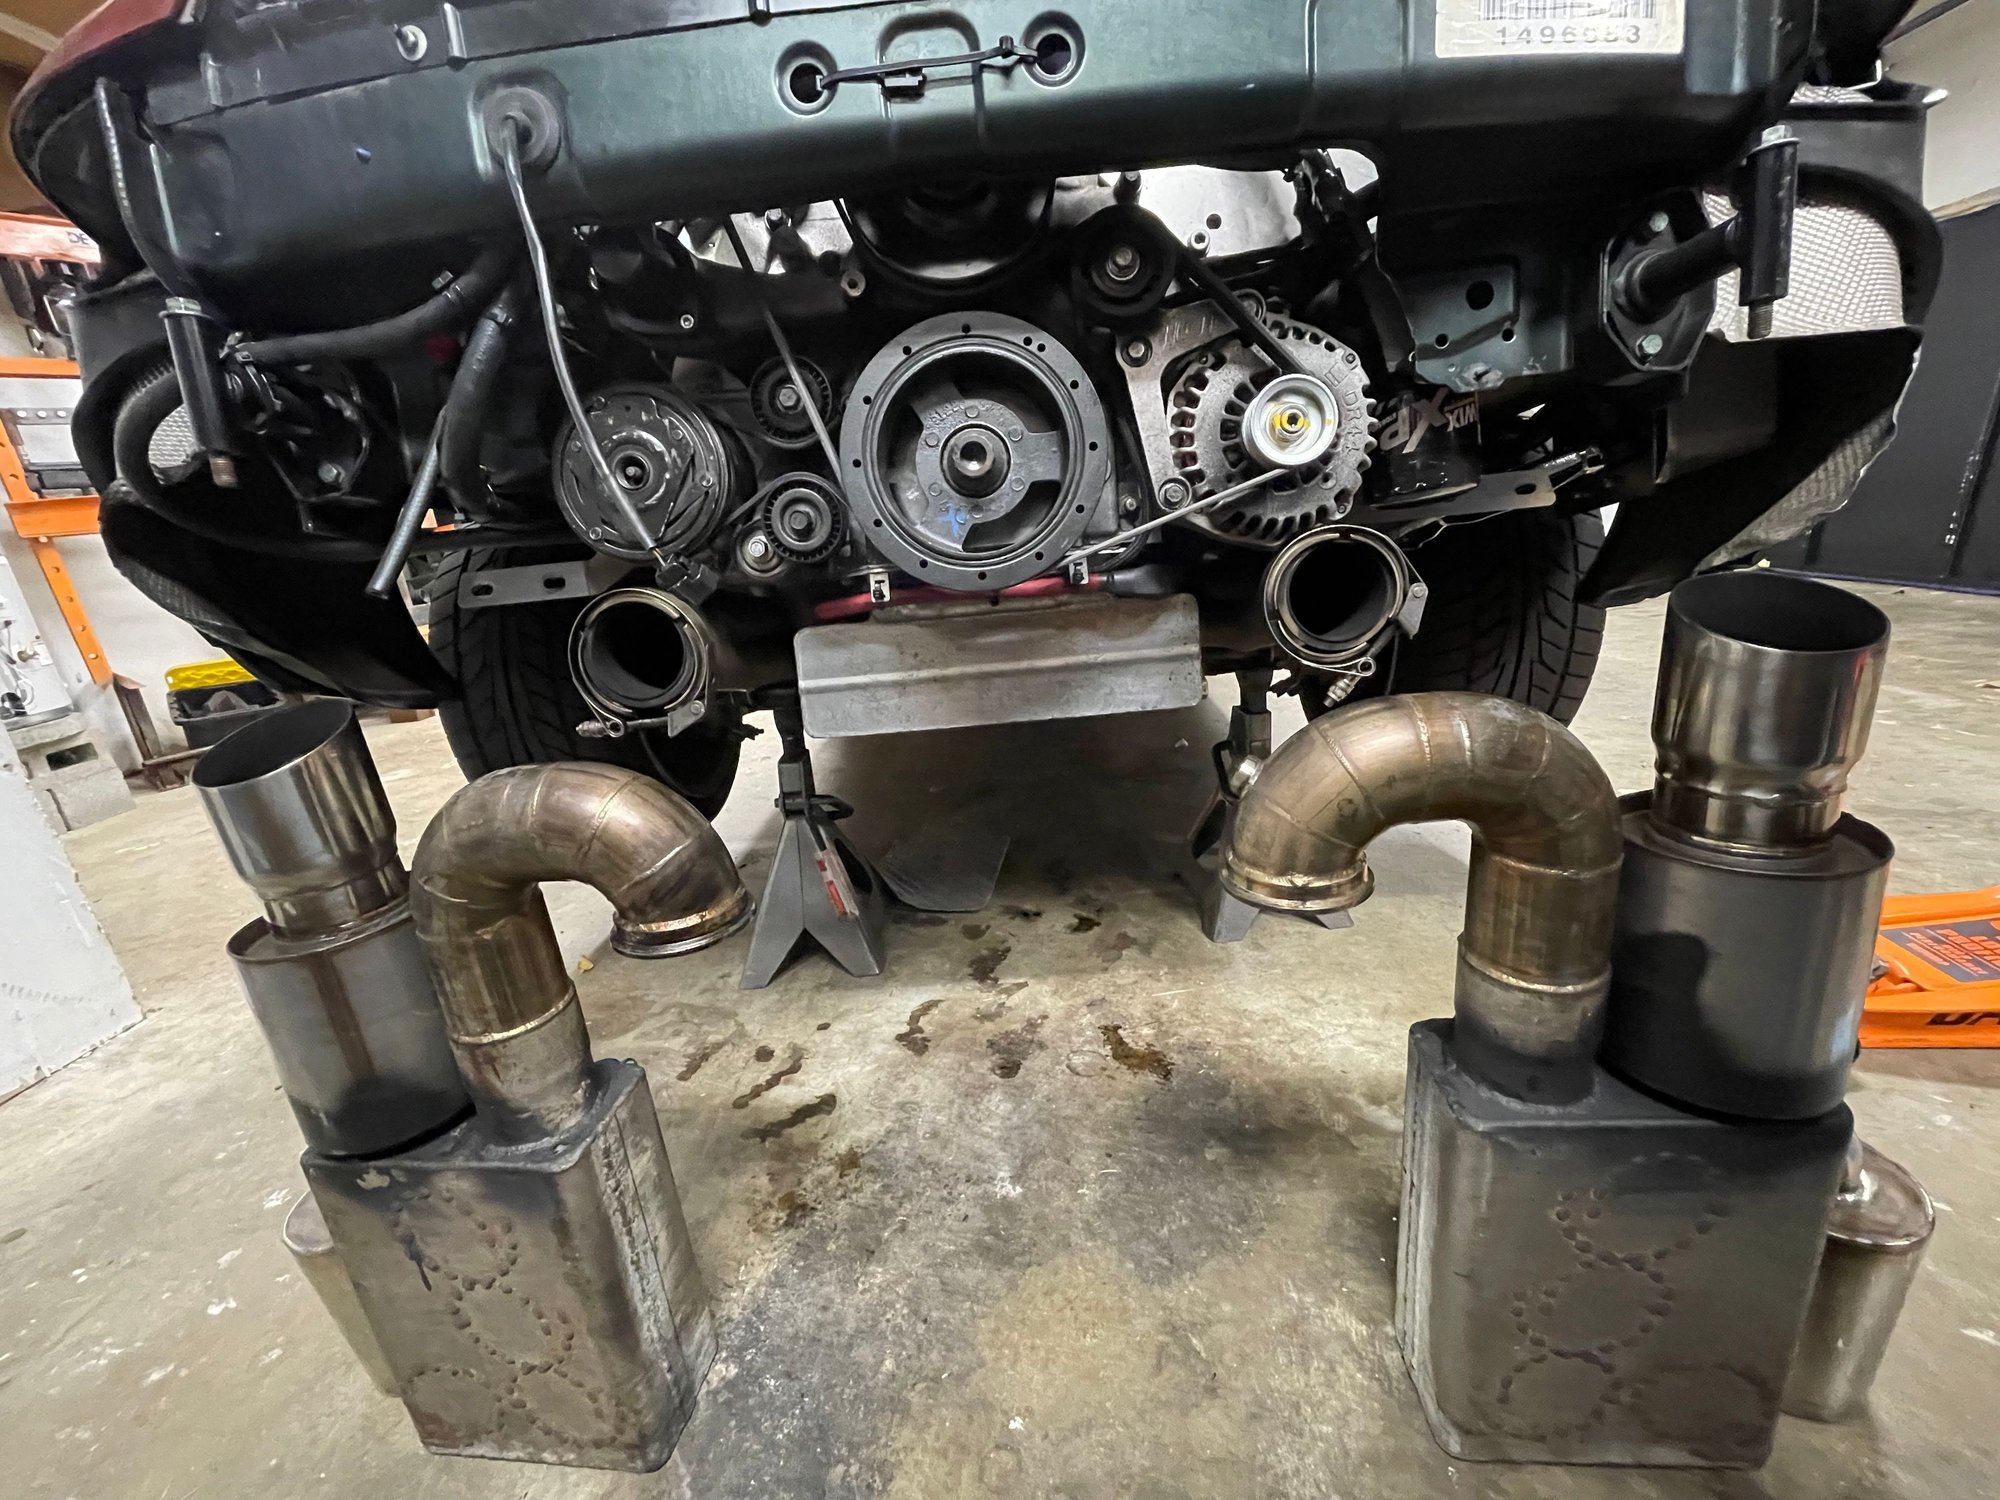
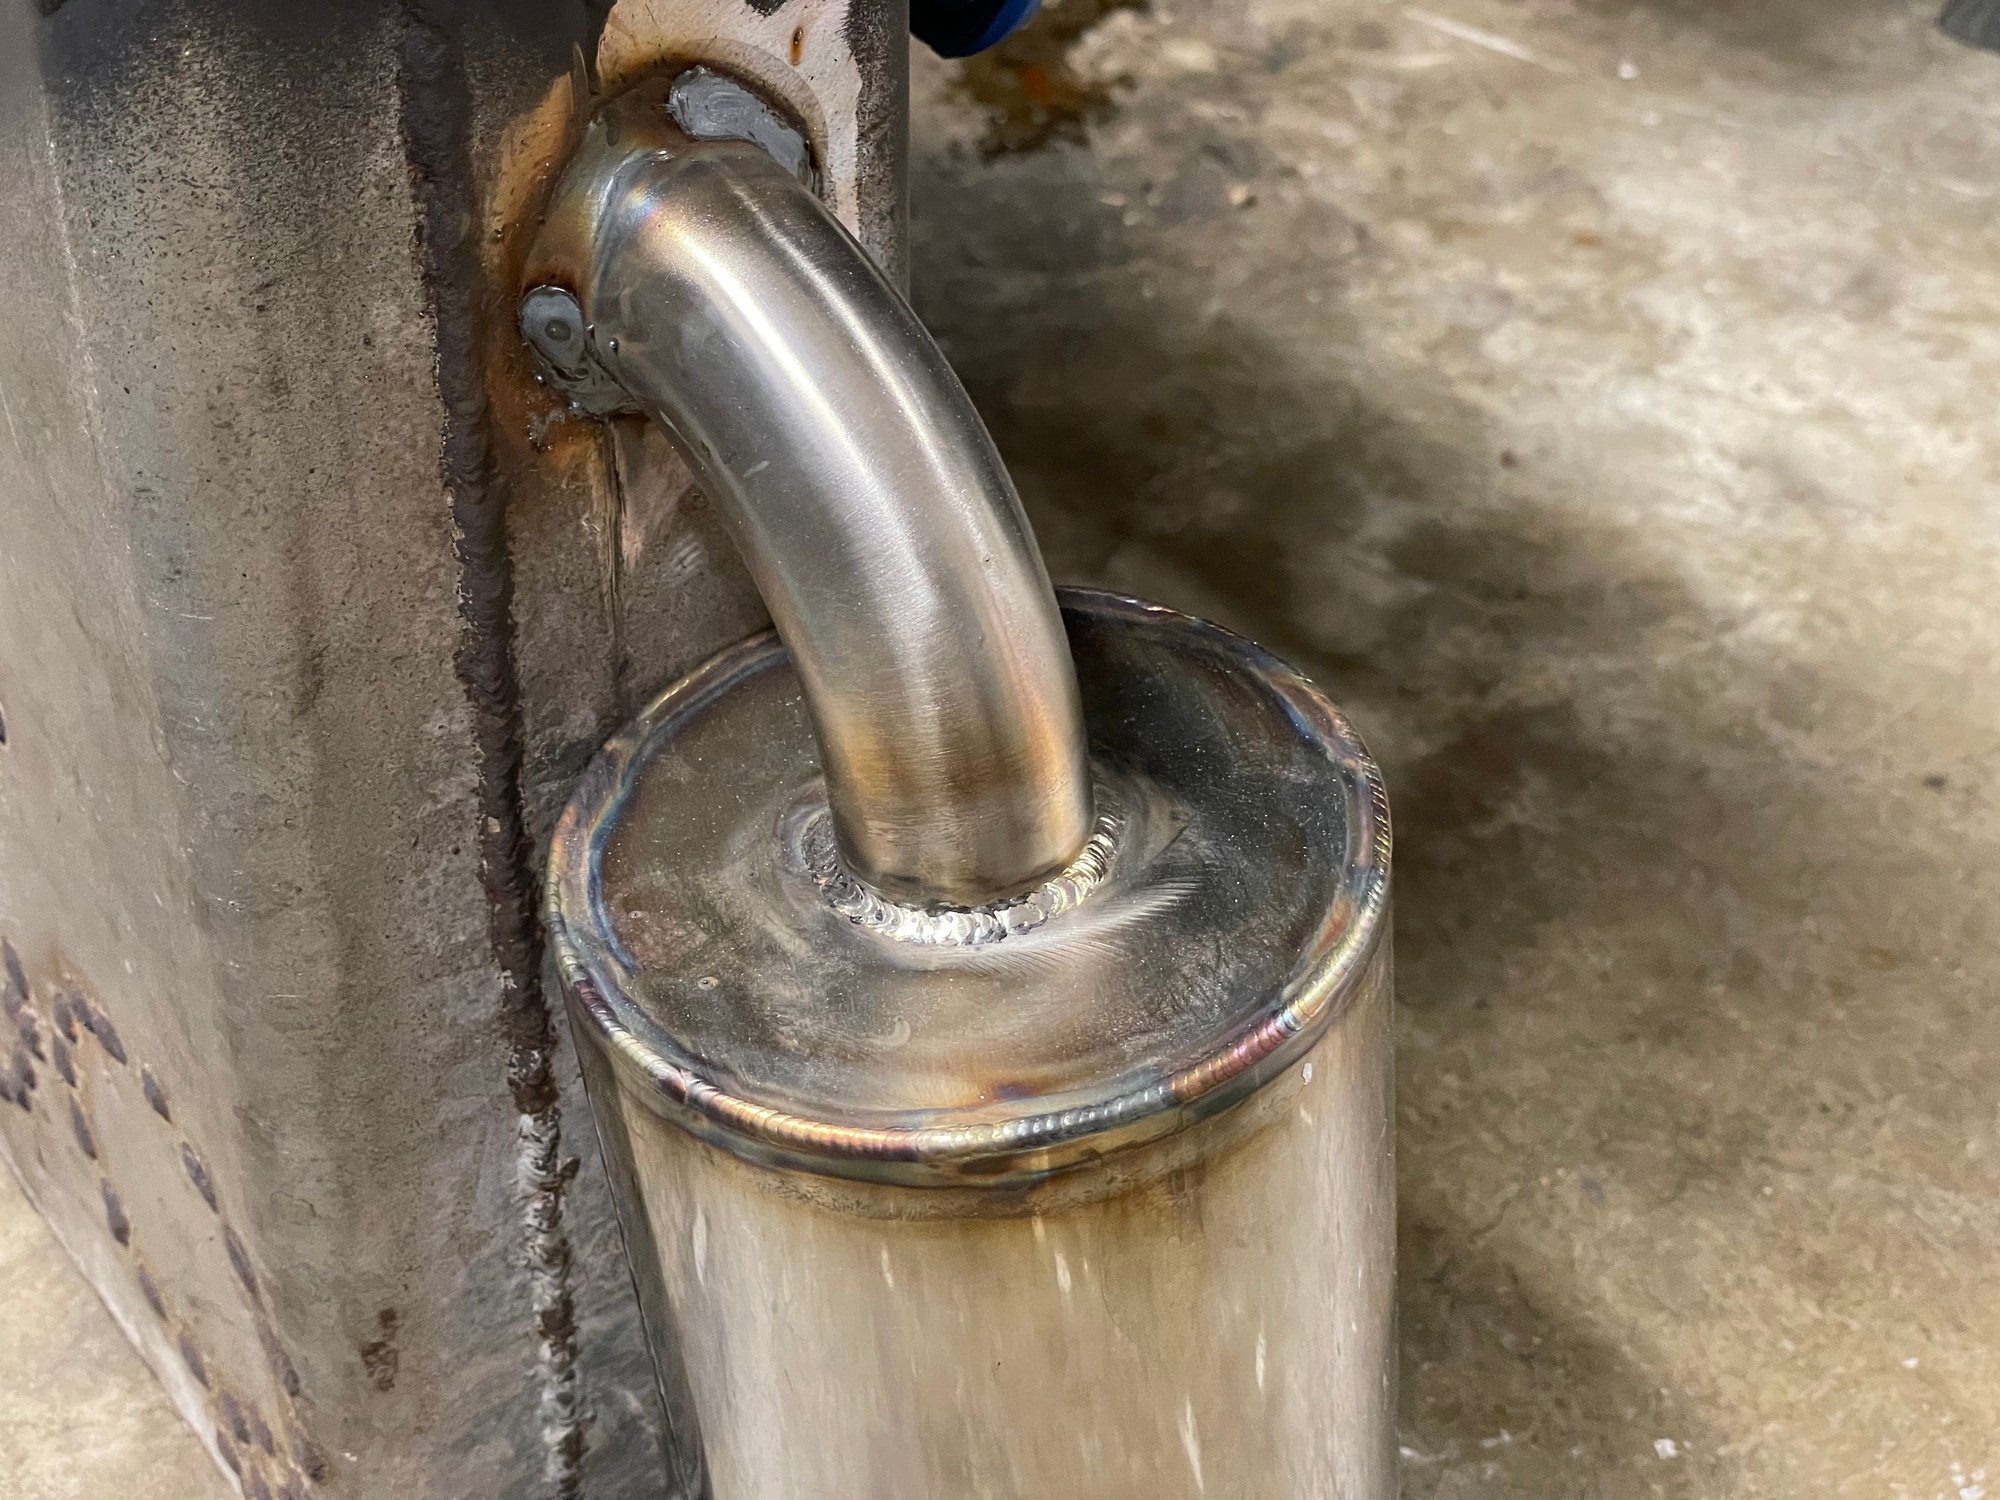
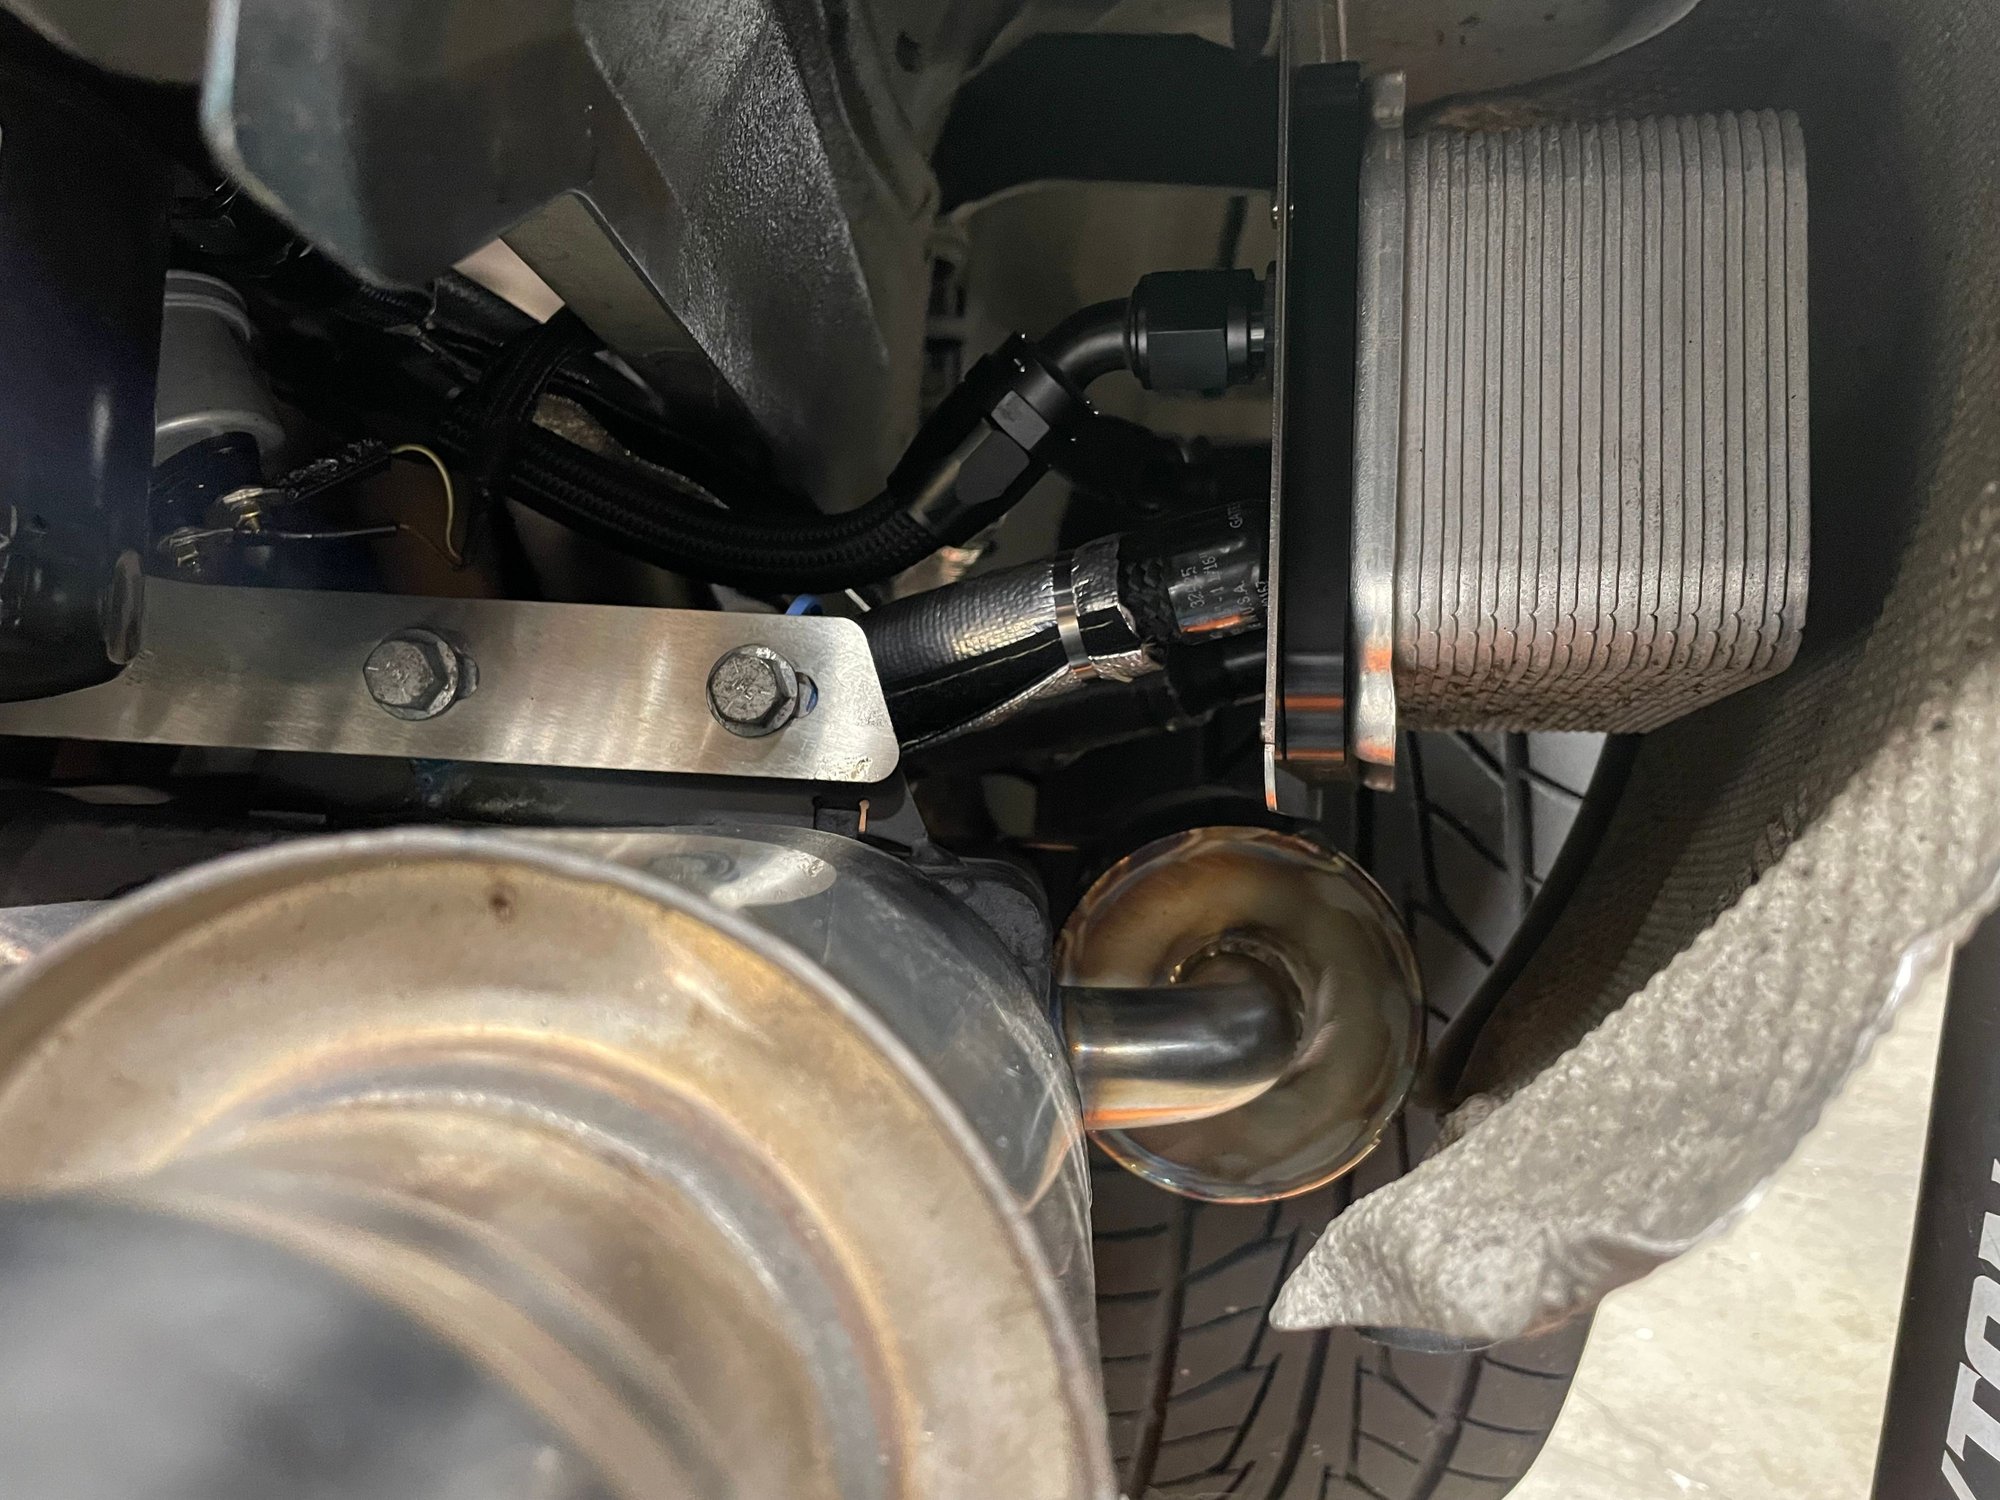
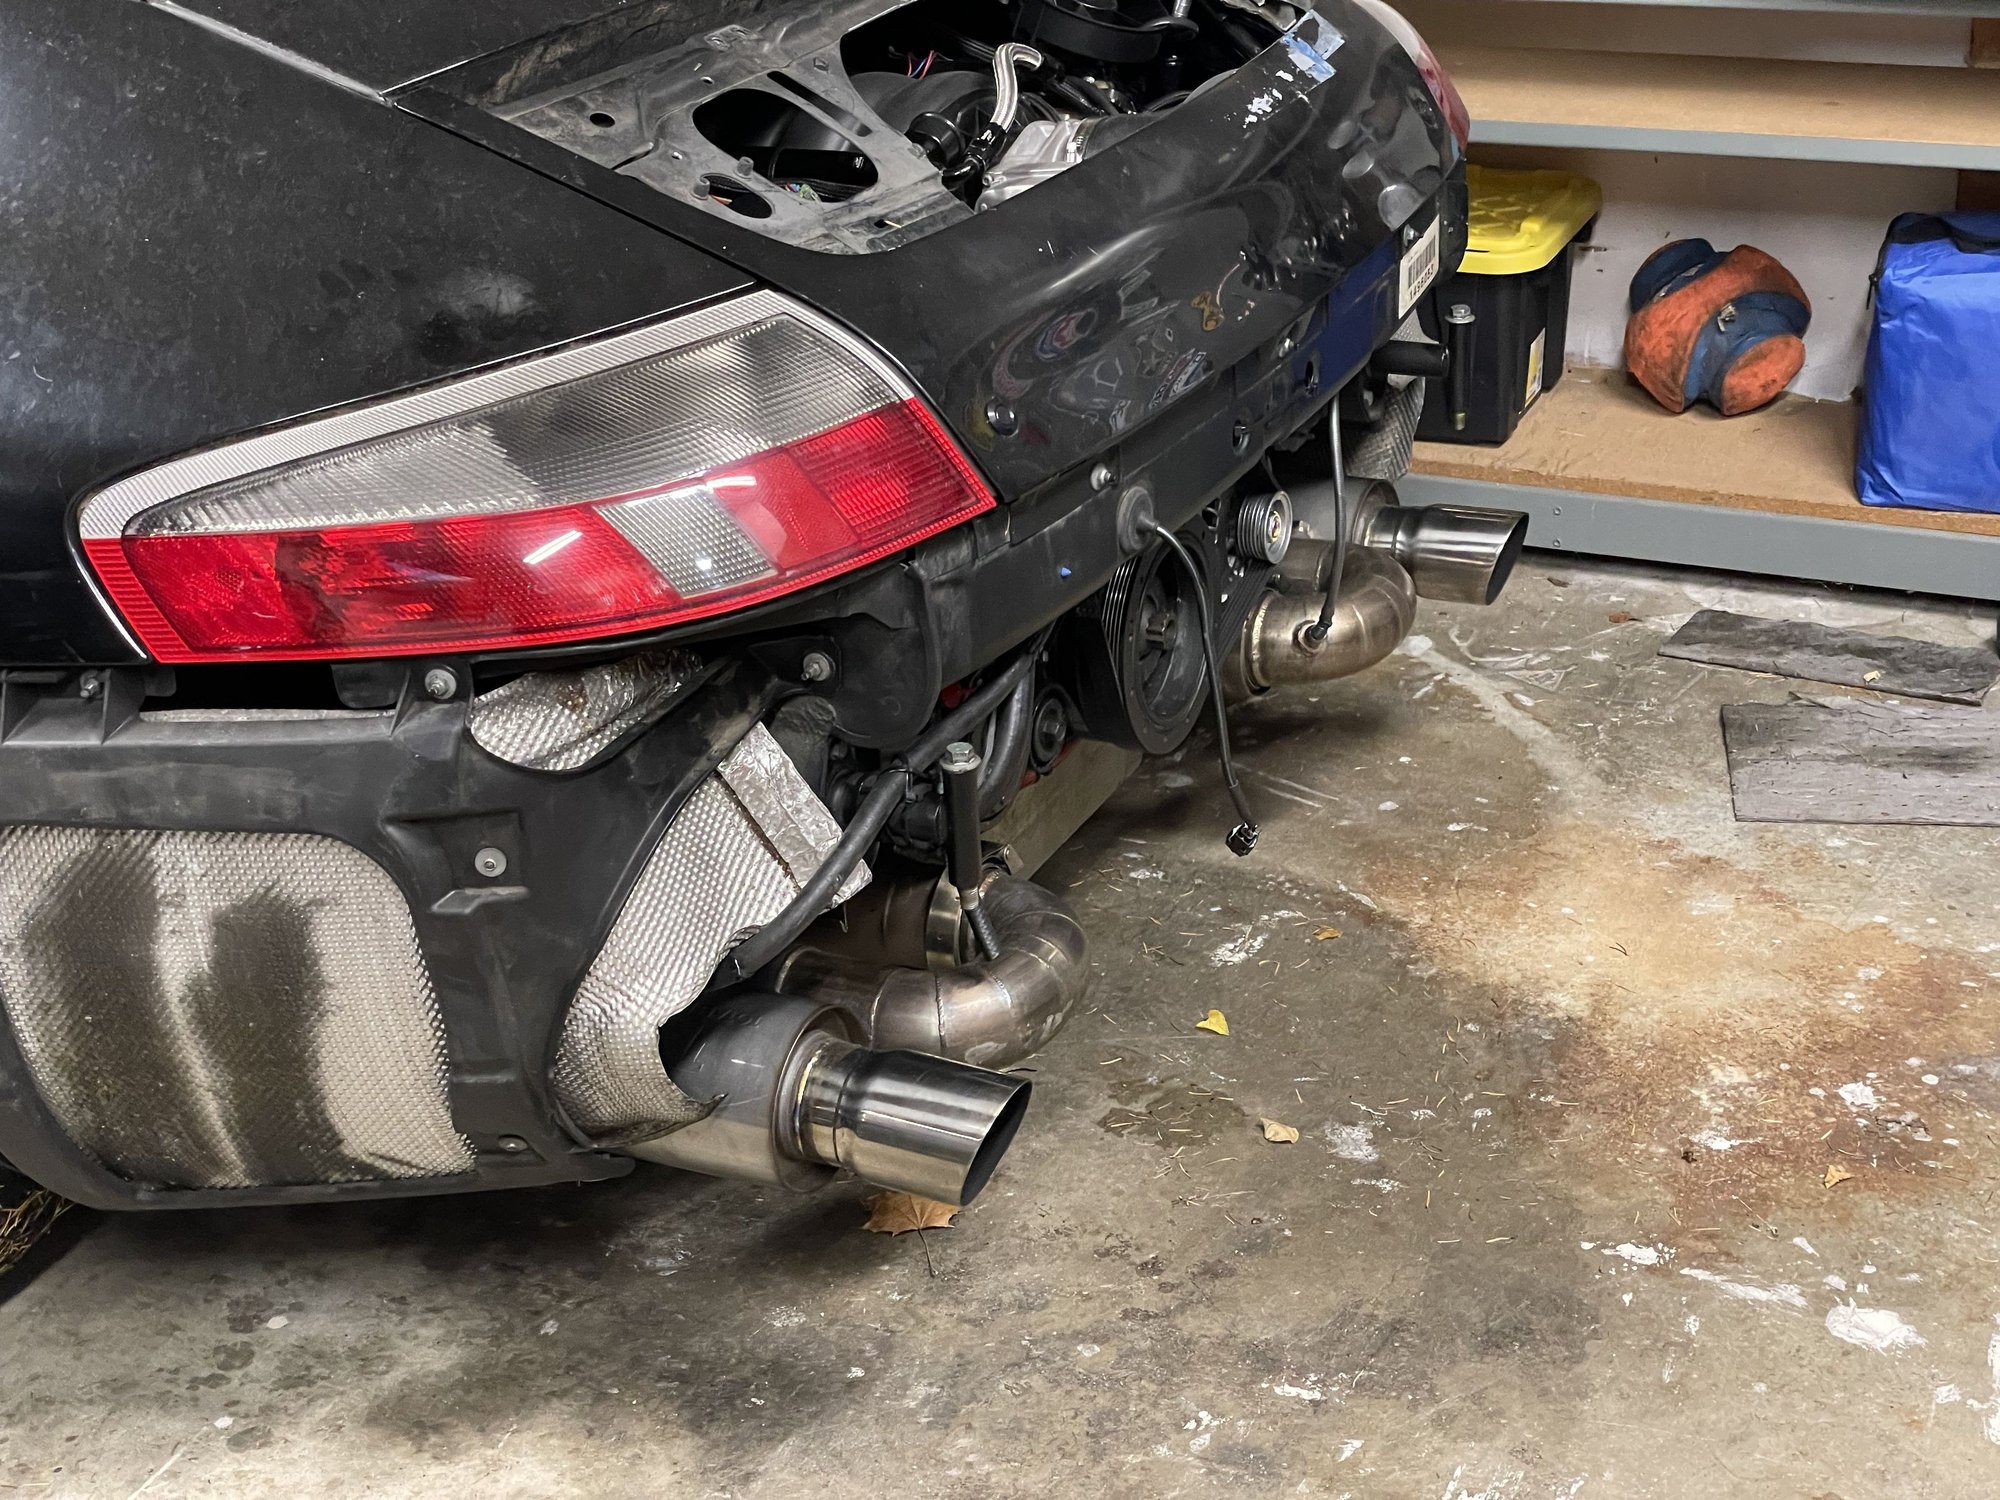
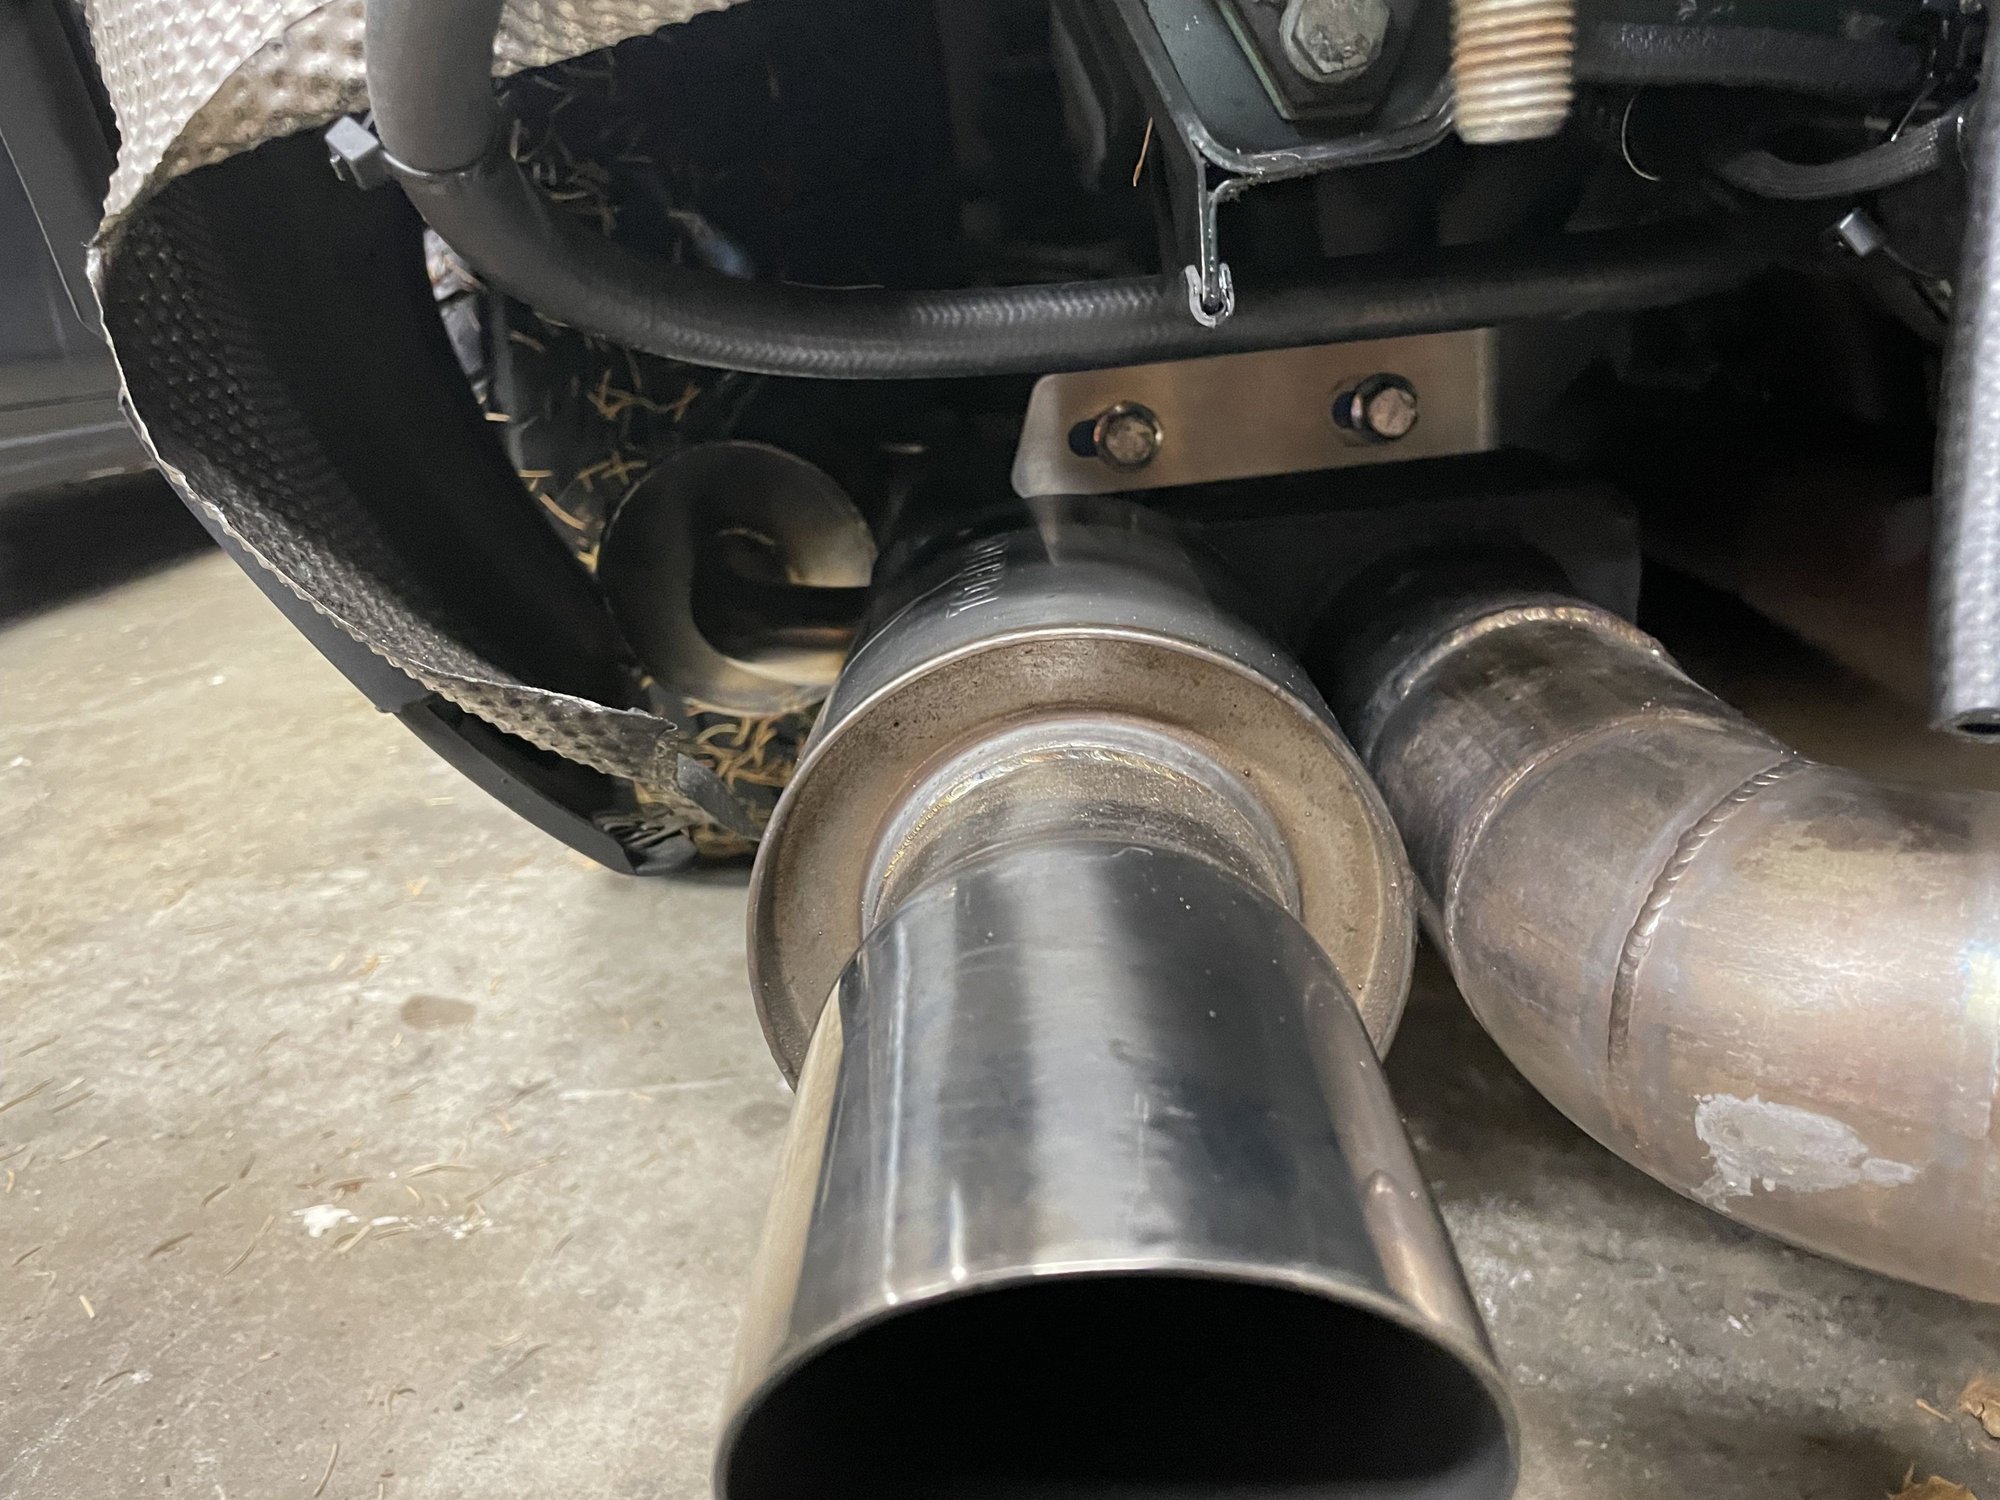
The big update is the exhaust. I�ve had a small drone at 1400-1800 rpm from the early design of the Dr Gas mufflers. He said this was a small design change and the new mufflers don�t have this issue. After looking at my options, I decided to design a set of Helmholtz resonators that would tuck behind the bumper covers. I wish my exhaust weighed less, but maybe I�ll make a shorty exhaust just for the track later on. After a quick test drive, the resonator works as intended for each bank and I no longer have a loud droning exhaust at low rpm.
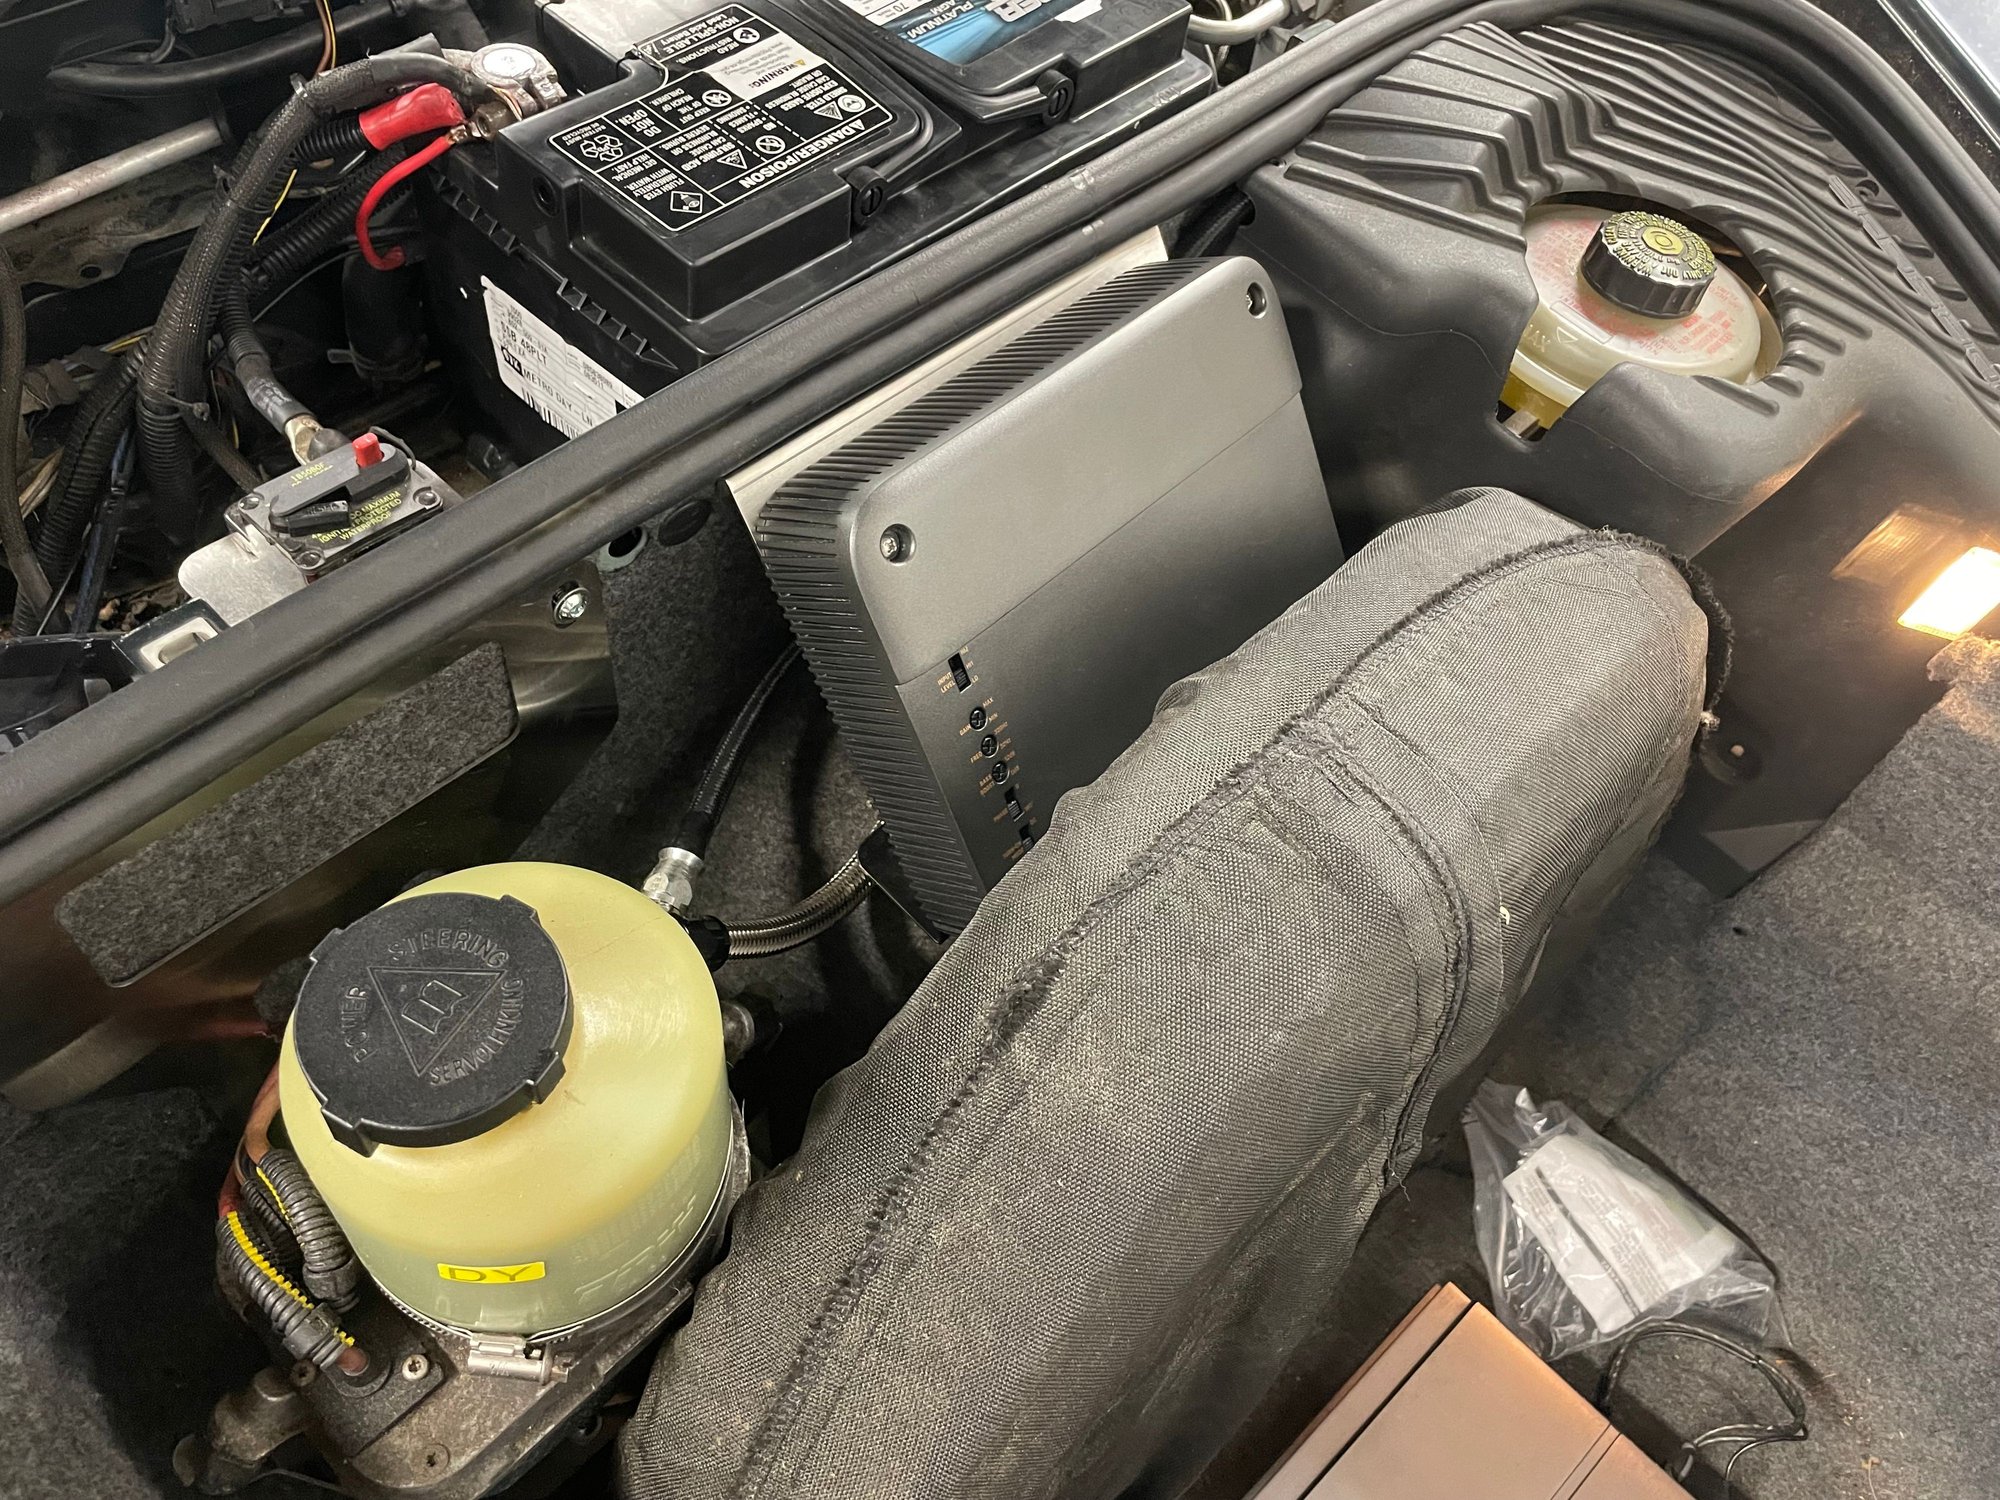
Lastly�in order to hit the track, all items in the car must be secured. My amp was just floating in the frunk, that�s where the previous owner left it�and that�s where I left it, knowing I wanted to fix it. Well, now is the time because I don�t wanna ditch my subwoofers just to hit the track. Sure, extra weight, but I�m lazy and I just wanna drive the car and enjoy it without much change.
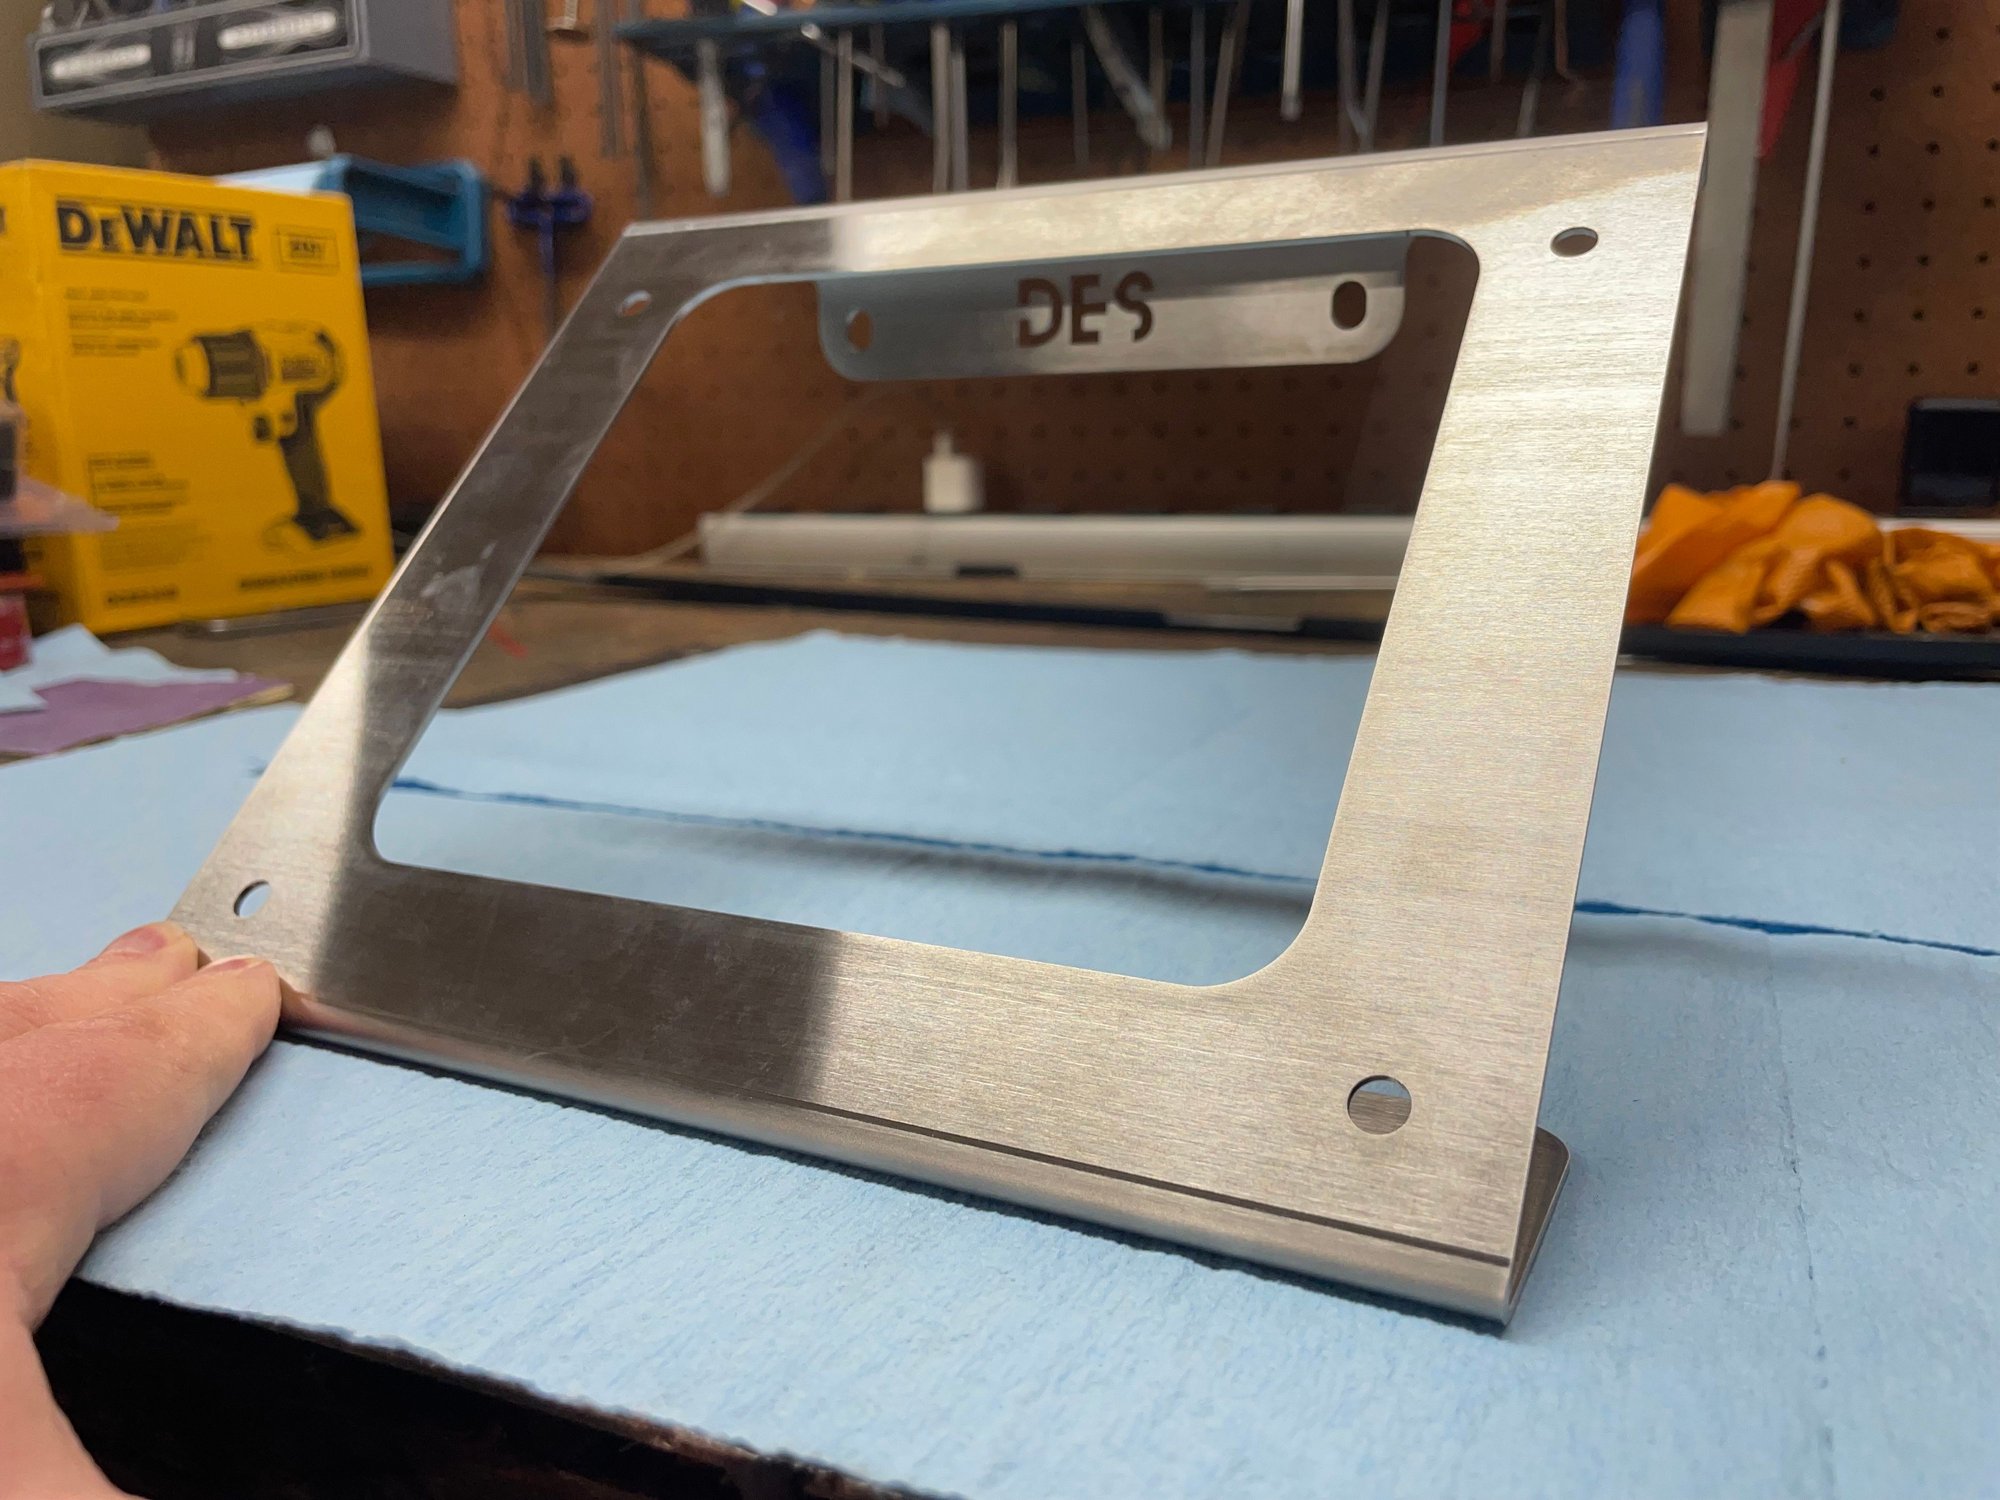
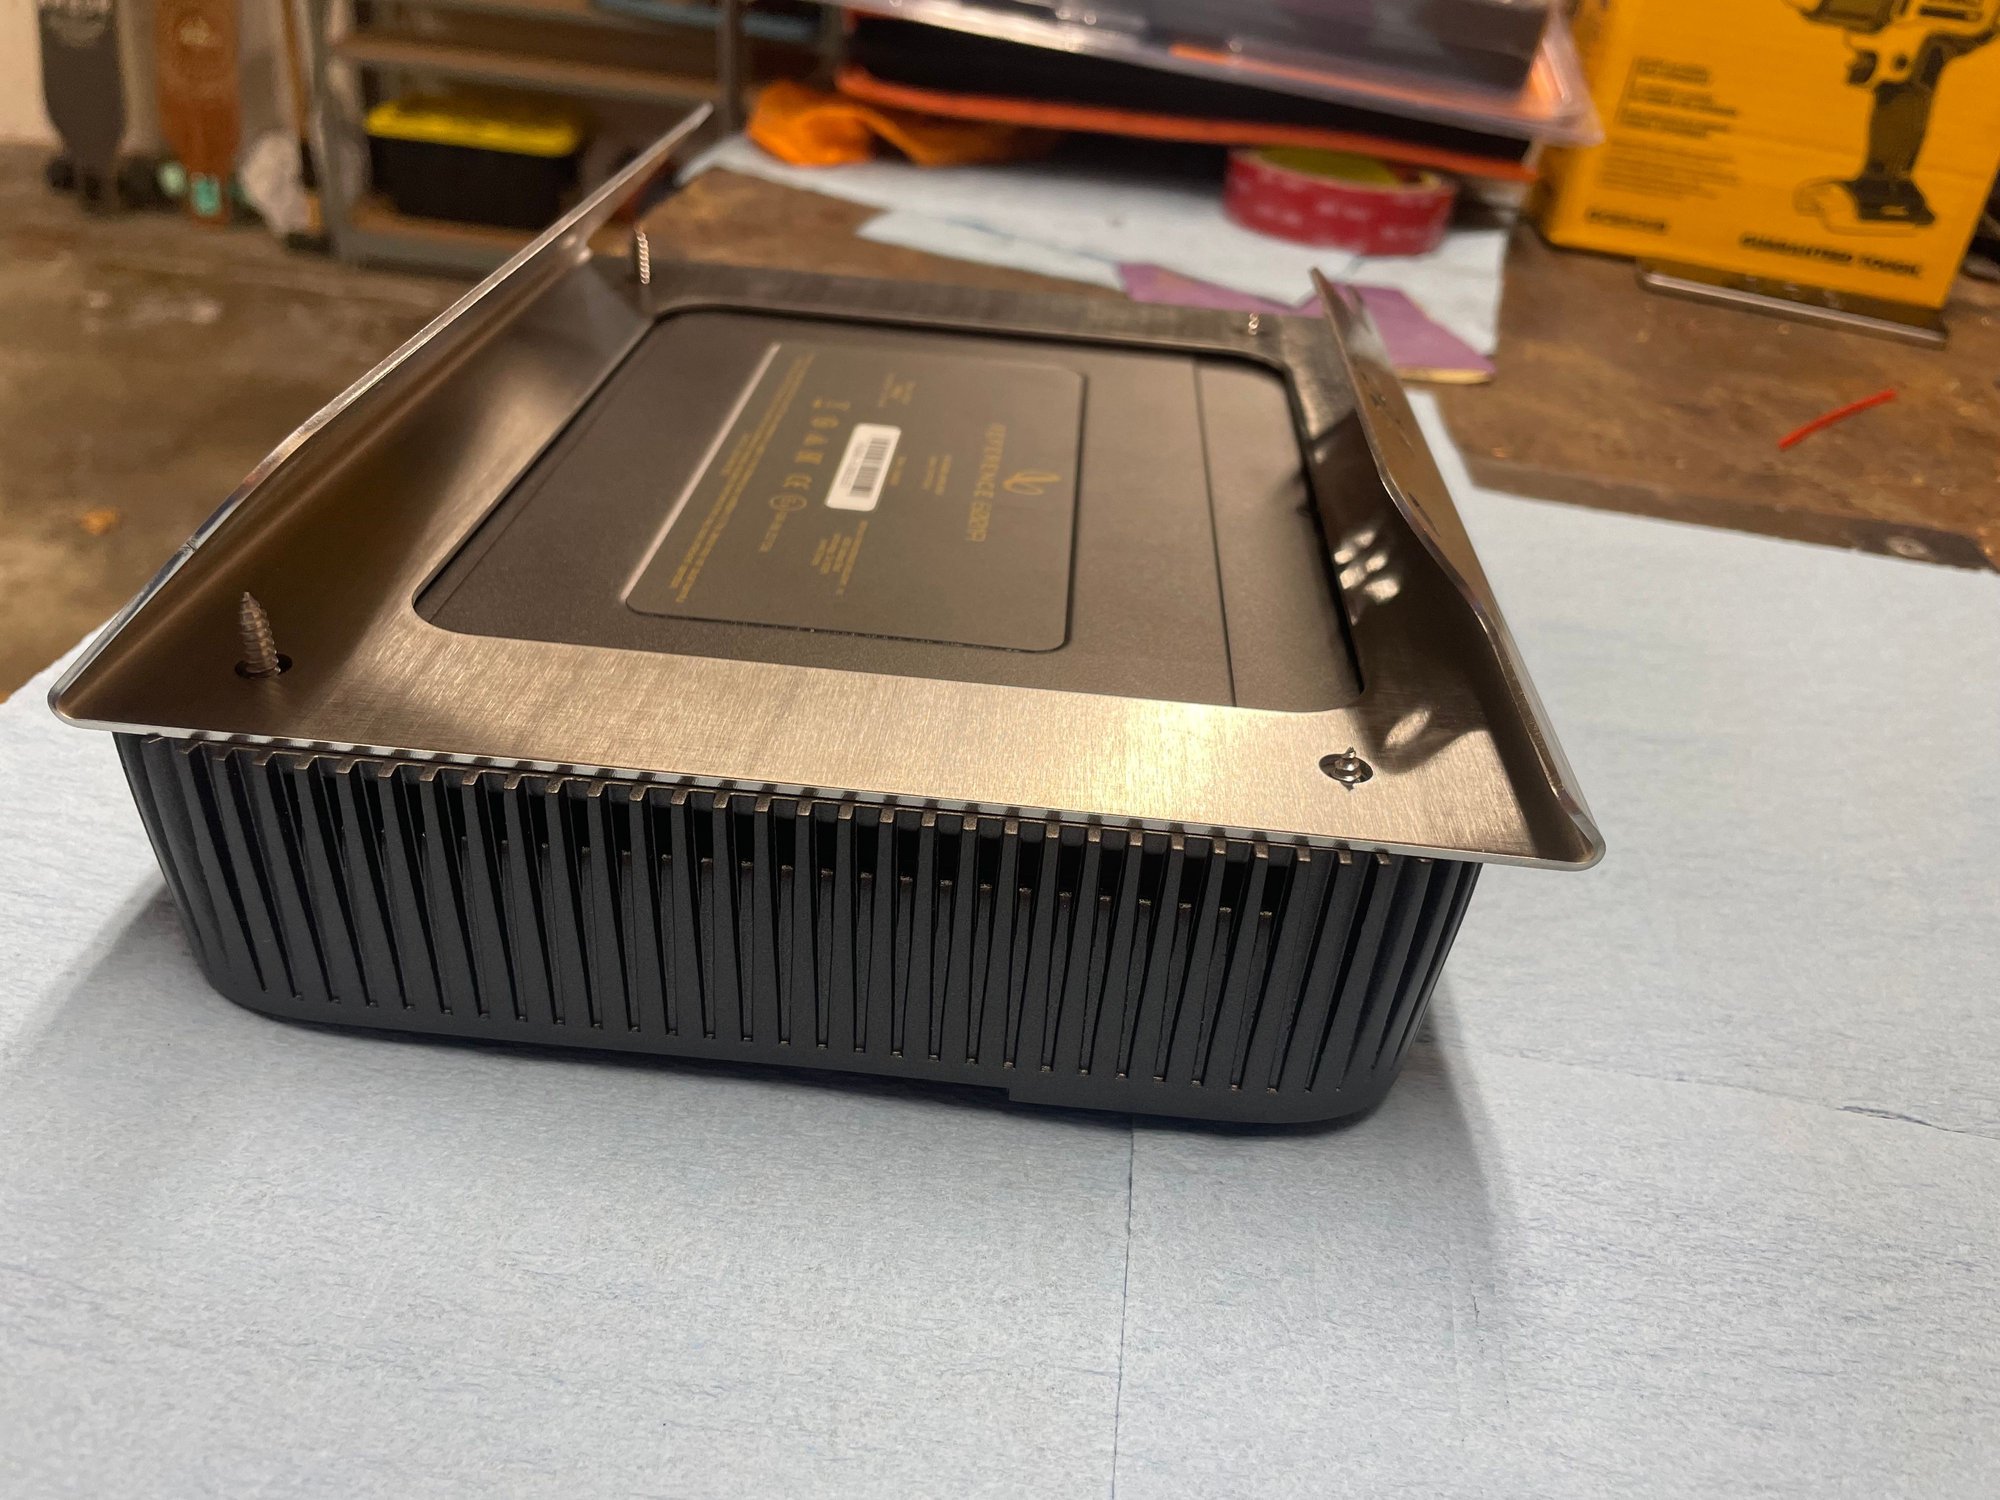
Amazon had a deal on an infinity 6001 amplifier for cheap-ish, it�s much smaller, and looks good. Problem is, it�s not quite small enough to stash behind the spare tire and there�s a tab raised off the shelf behind the tire. So, I designed a bracket that holds the amp at 45 degrees and points the wires to the cavity behind/under the spare. It�s a much cleaner mount and hides the wires. I had this laser cut and CNC formed in brushed stainless to match all the other brackets. I�d like to blacken all the brackets to match the interior soon. More on that later.
Like I said, I�m lazy, and I�ve now incorporated this laziness into my designs. Since this bracket is 45 degrees and I want the hardware to be hidden, plus there�s a small sheet metal shelf on the shelf for the OEM CD changer mount, I want the bottom of the bracket to rest on the shelf and the bracket will mount with two nutserts to the back wall of the frunk. I access the two nutserts before the amp is mounted through the large cutout in the center of the bracket, then the amp itself hides them. More nutserts mount the amp to the bracket and foam strips will isolate the amp for cushioning. Super easy to mount the bracket, super easy to mount the amplifier = ultimate lazy.
U want to make another one of those mounts? I used the factory mount for my kenwwod amp and it fits but it backward and i cant easily get to the adjustent *****.
U want to make another one of those mounts? I used the factory mount for my kenwwod amp and it fits but it backward and i cant easily get to the adjustent *****.
Yup, easy to do. Do you want brushed SS, mild steel, or blackened SS? I'll PM you.
If anyone else wants one, just post here or PM me and I'll do a small batch at my laser and CNC shop.
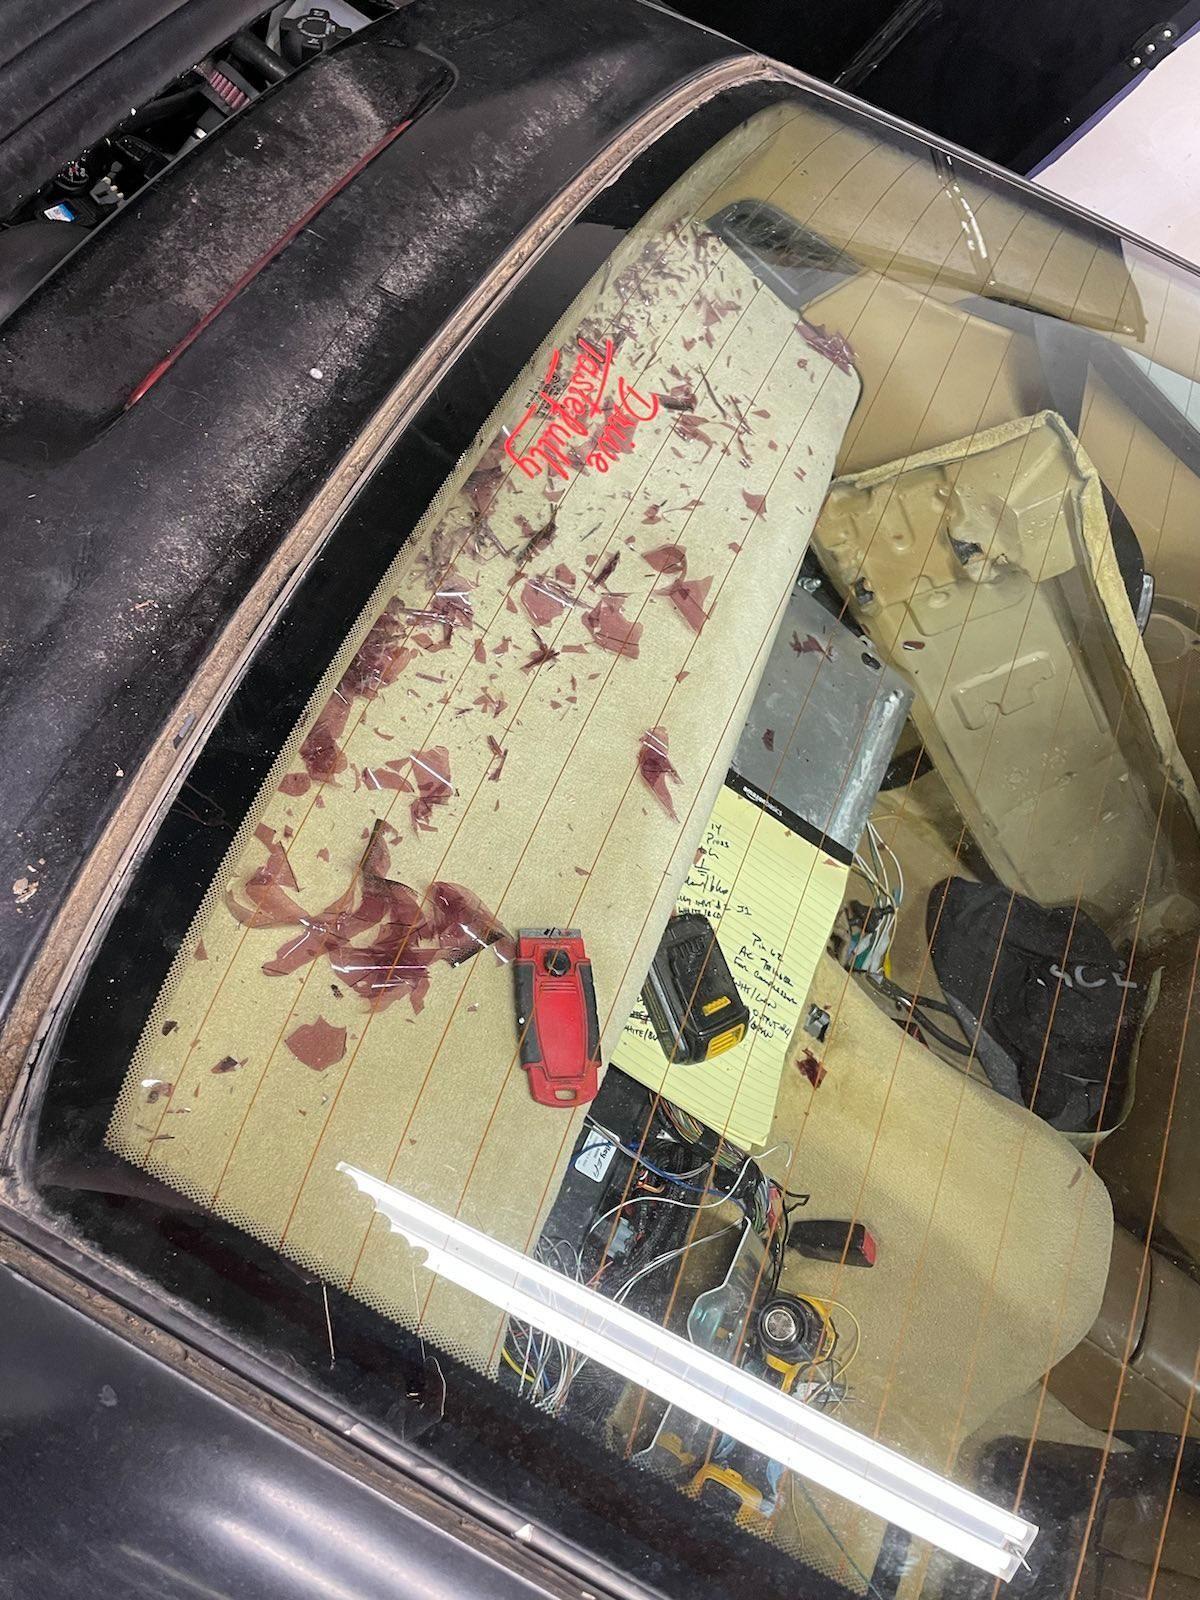
With the exhaust fixed, I turned to the interior again. I removed all the early 2000s era window tint....what a job. Cross "window tint installer" off my list of possible future careers. I had to lay inverted, Top Gun style, across the back seats with a heat gun and a razor blade to scrape off the rear window. It's all off, and I'm unsure if I'll put more in. This car does get kinda hot in the summer, but I want to be able to see my surroundings during night drives, so I'll need to weigh the options. At least I have AC (mostly) now.
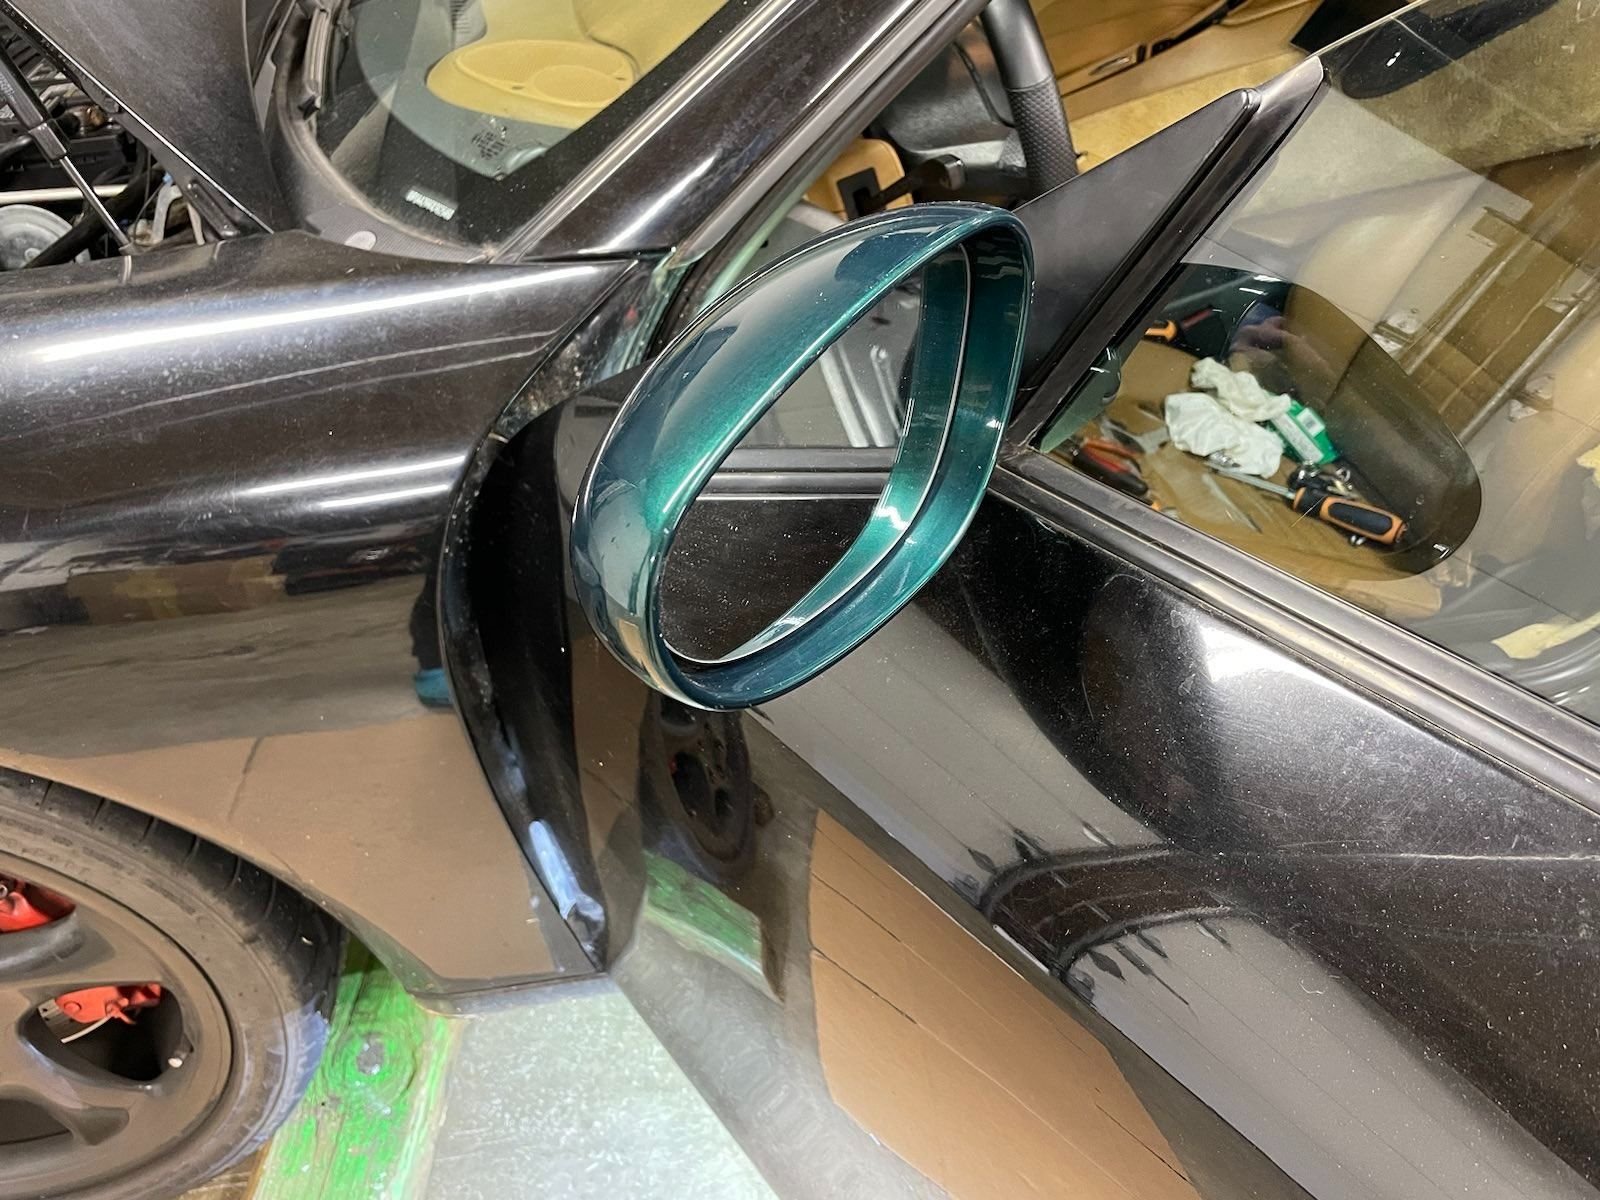
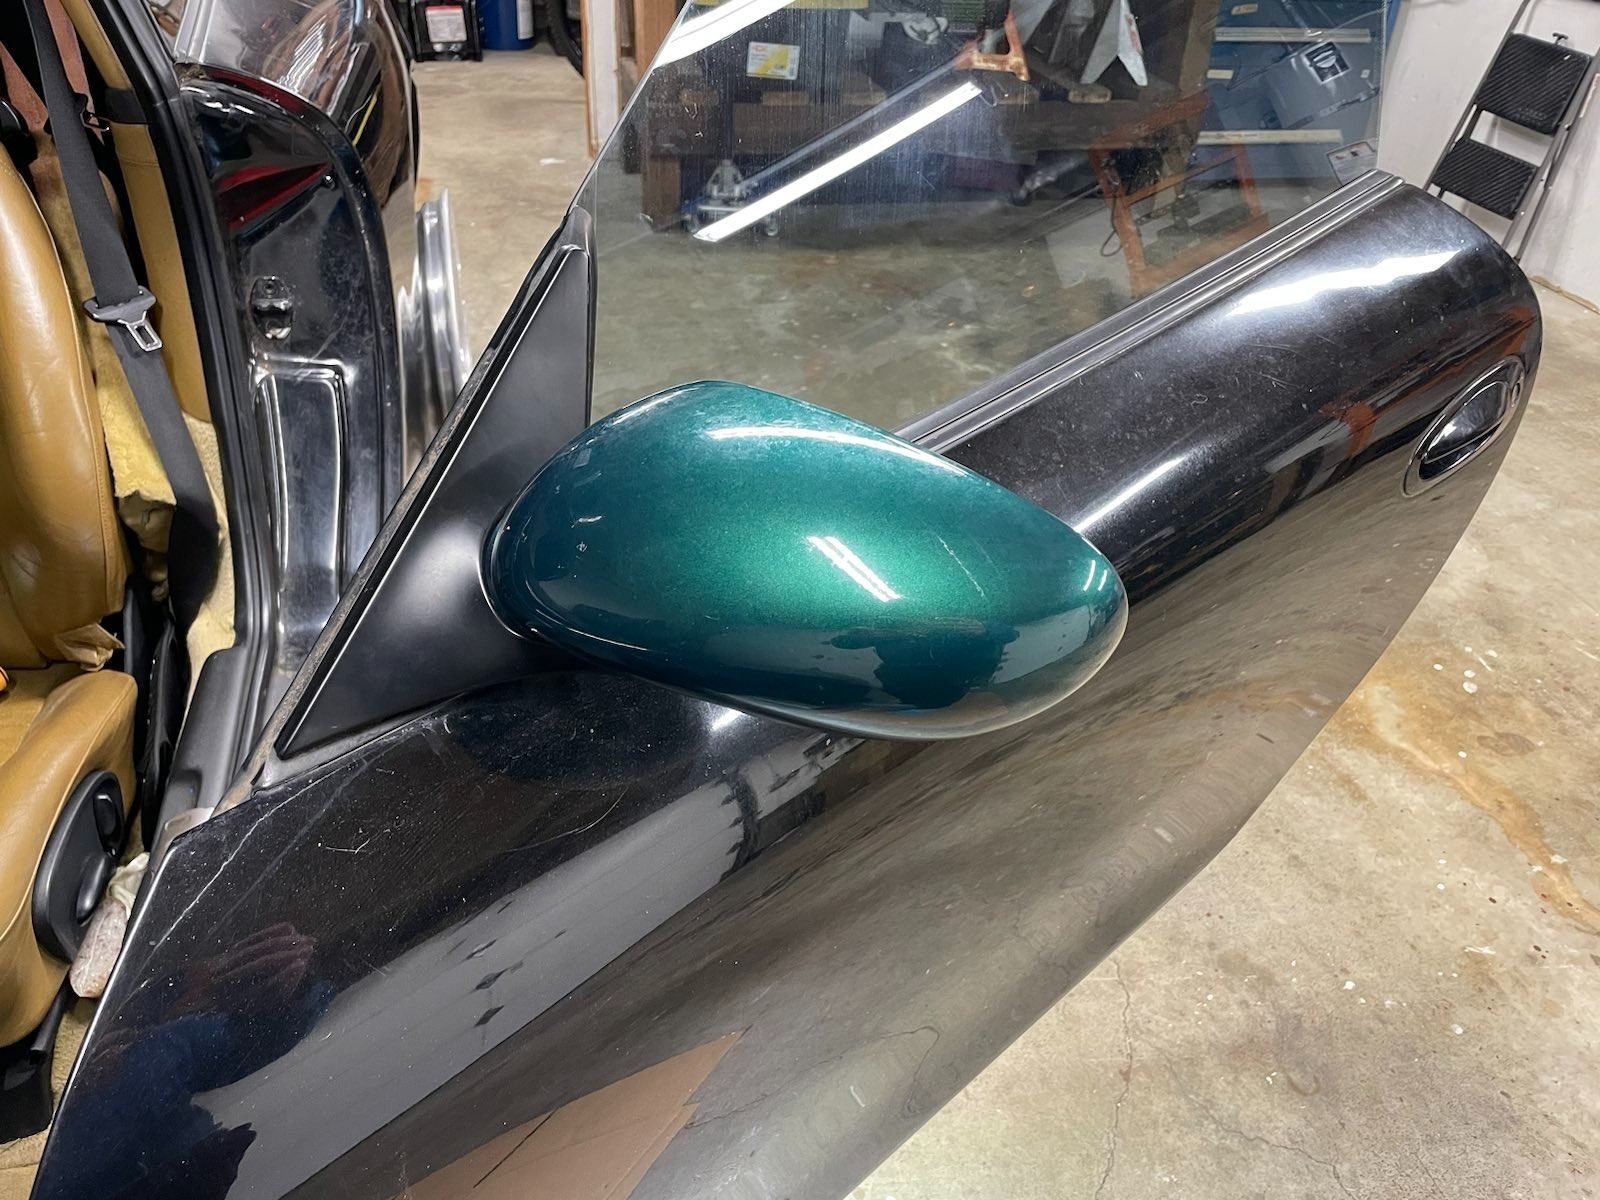
So...why remove the tint? Well, I'm returning the car to the original rainforest metallic green color! I found a pair of mirrors that are very close to the original green and bought them. The original mirrors were trashed and this is much easier. My plan is to use a vinyl wrap for most of the car and only paint the very difficult body panels/pieces, if I must. I already ordered the wrap and it's arrived, and started preparing the body.
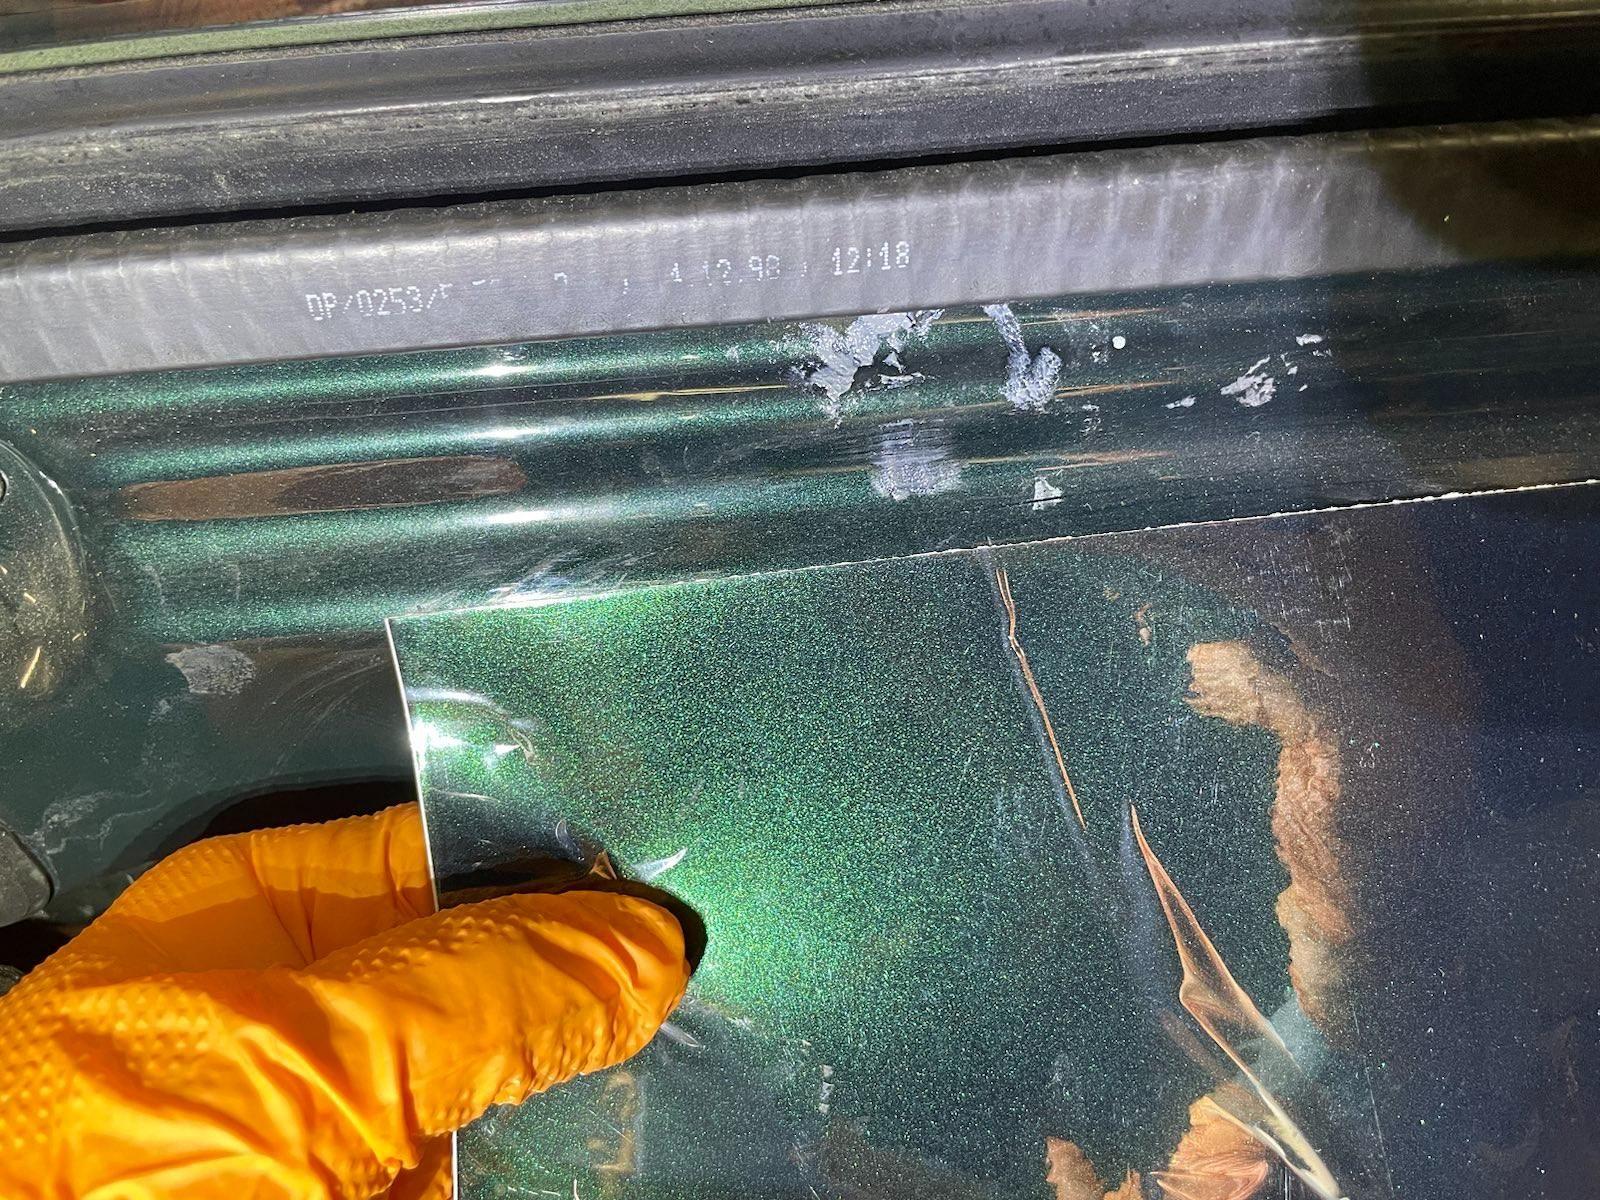
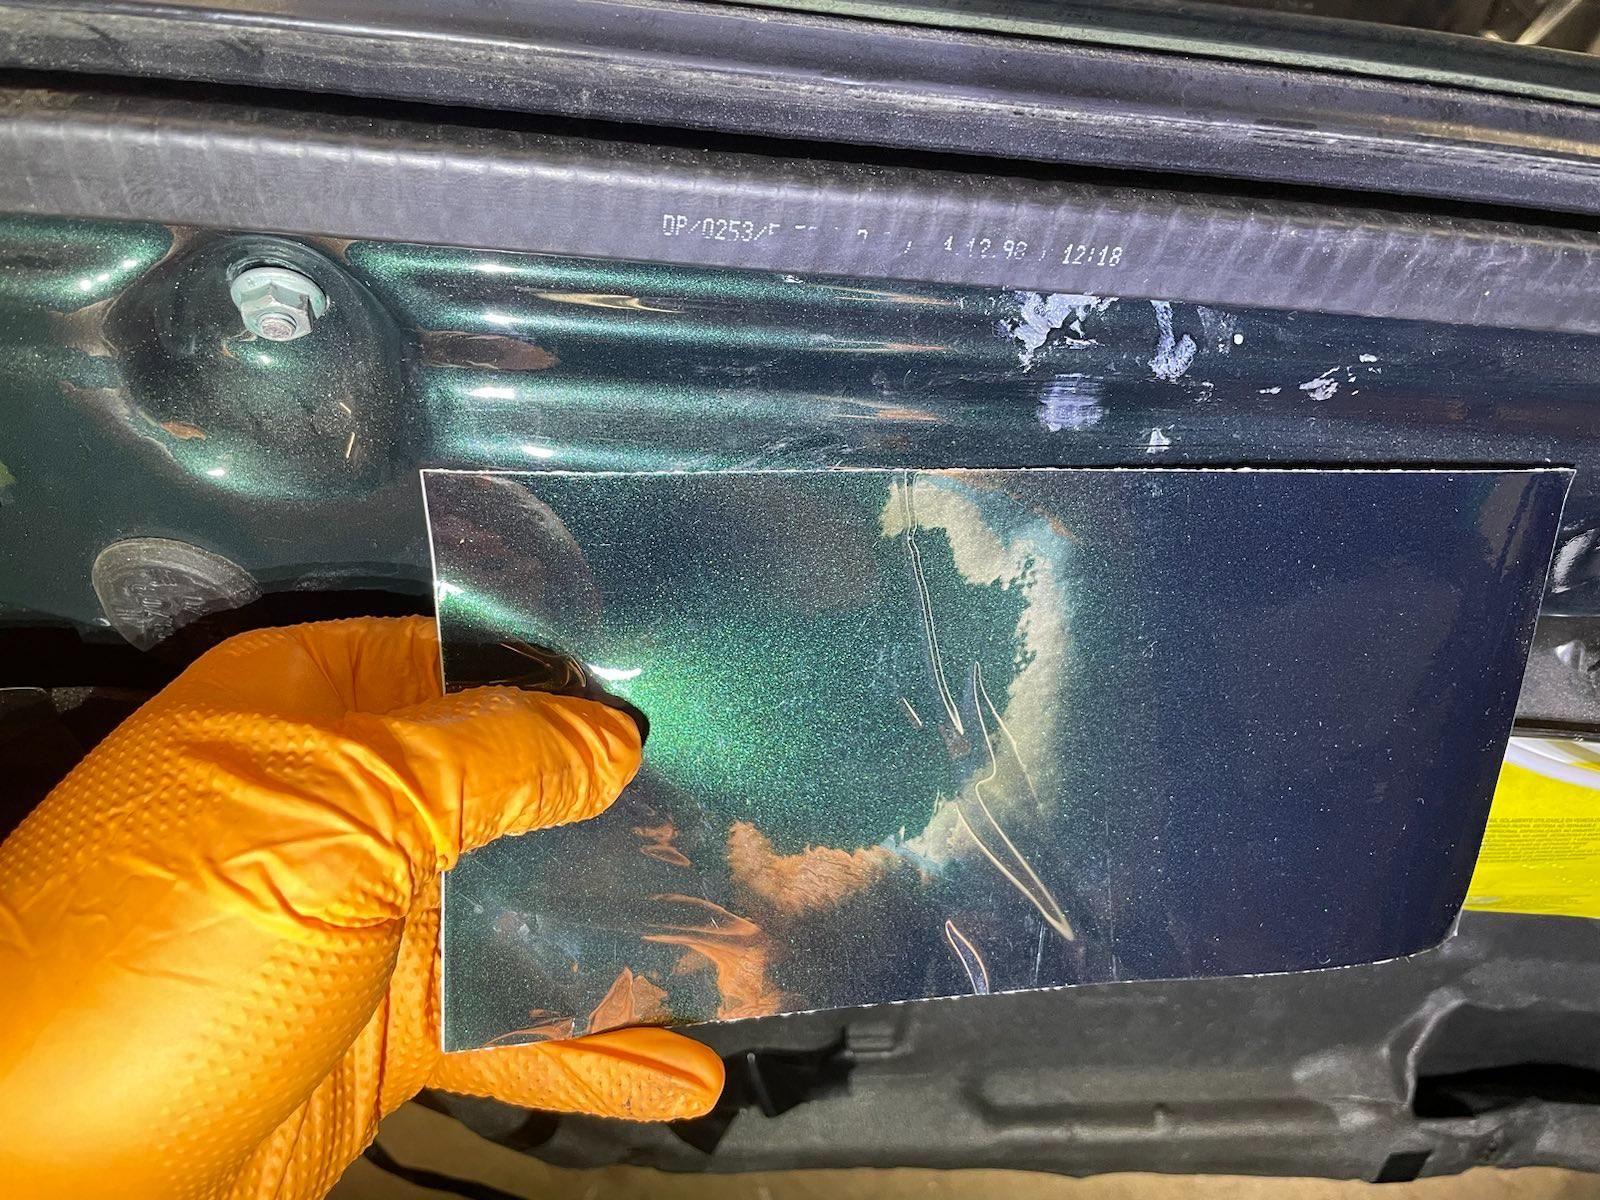
The other cool piece to this...the wrap is an EXACT match to the original color! I still had an issue with the colors of the replacement panels that the previous owner(s) installed. The car had clearly been in a small front end collision: the front bumper cover is yellow, passenger fender is silver, and the passenger side of the hood lip that follows the hood is raised 1/4" and the body line doesn't match. I found a green hood and fender to match the original color, and a black front bumper and they should arrive this week. This is important to me, as I don't want other colors besides black when viewing behind seams or opening doors/trunks/lids. So when I pop the hood, I'll see green underneath the hood. When I pop the fuel door, I'll see green underneath. These details matter to me and I want to feel like the car is one color, so this will accomplish that.
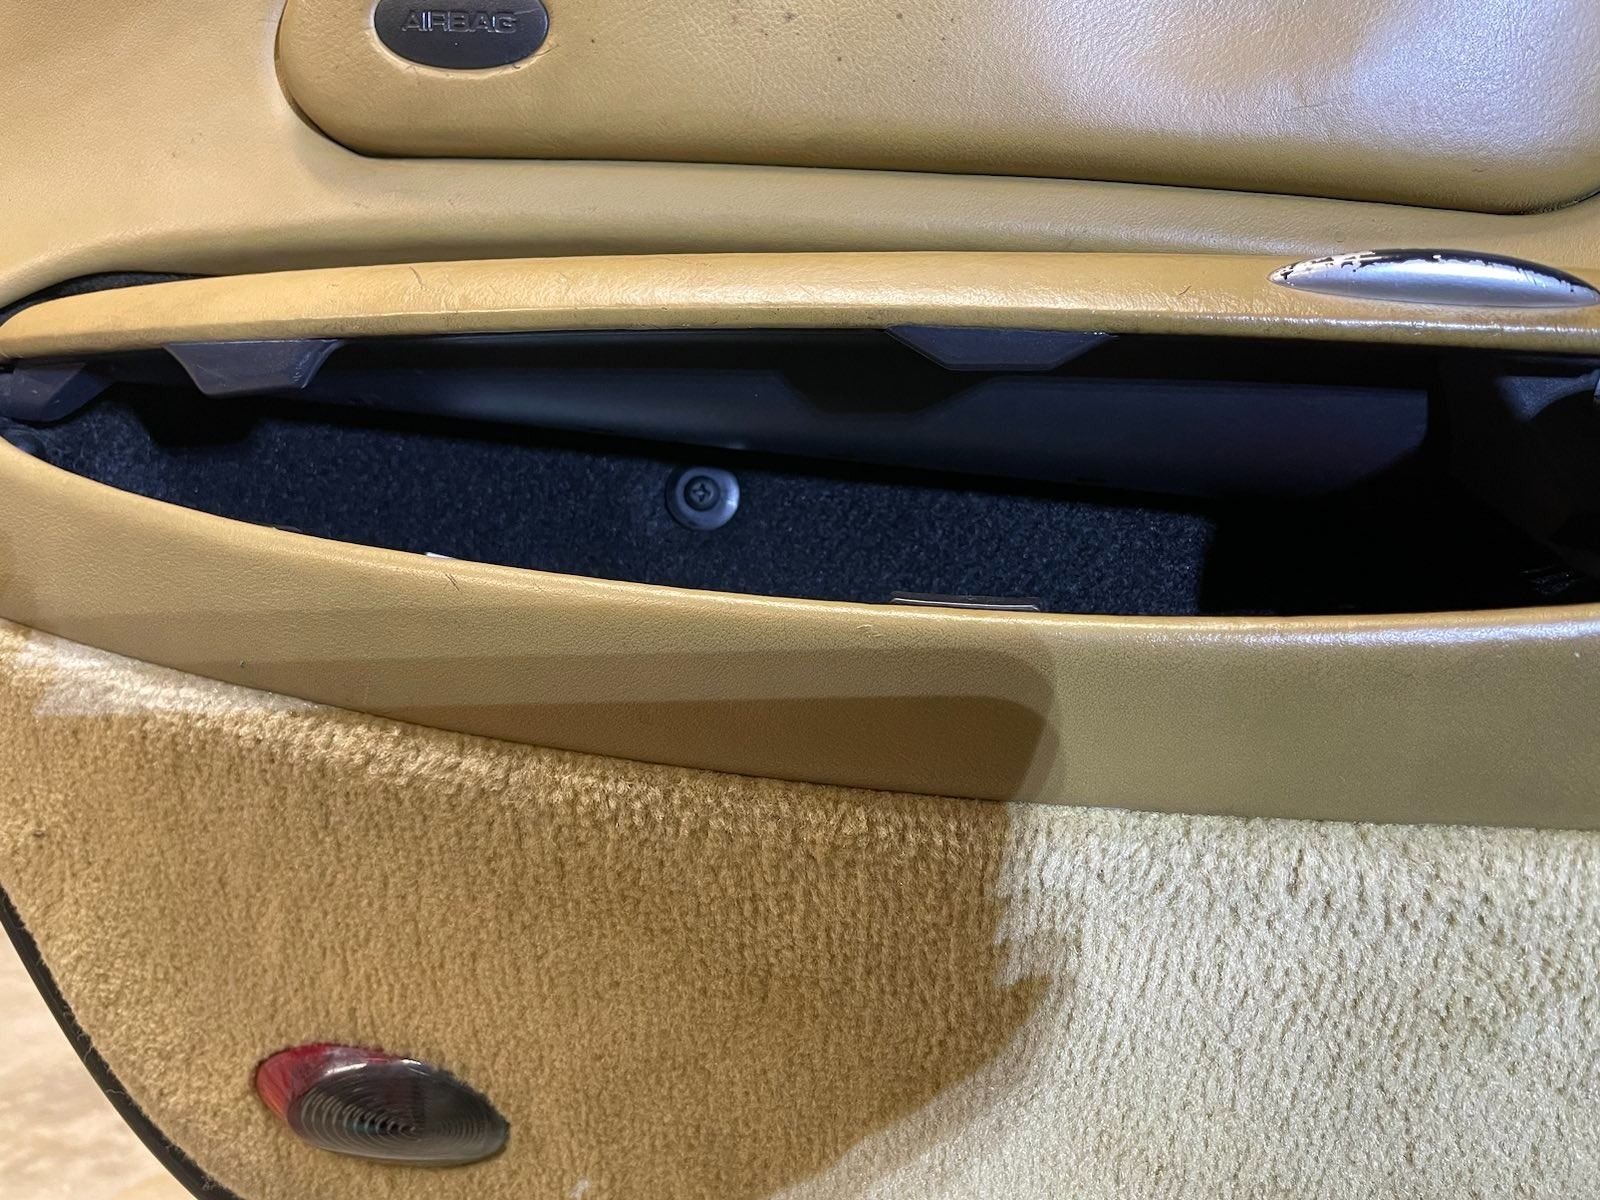
Inside of the door revealed brand new paint to compare with the wrap...I love the color!
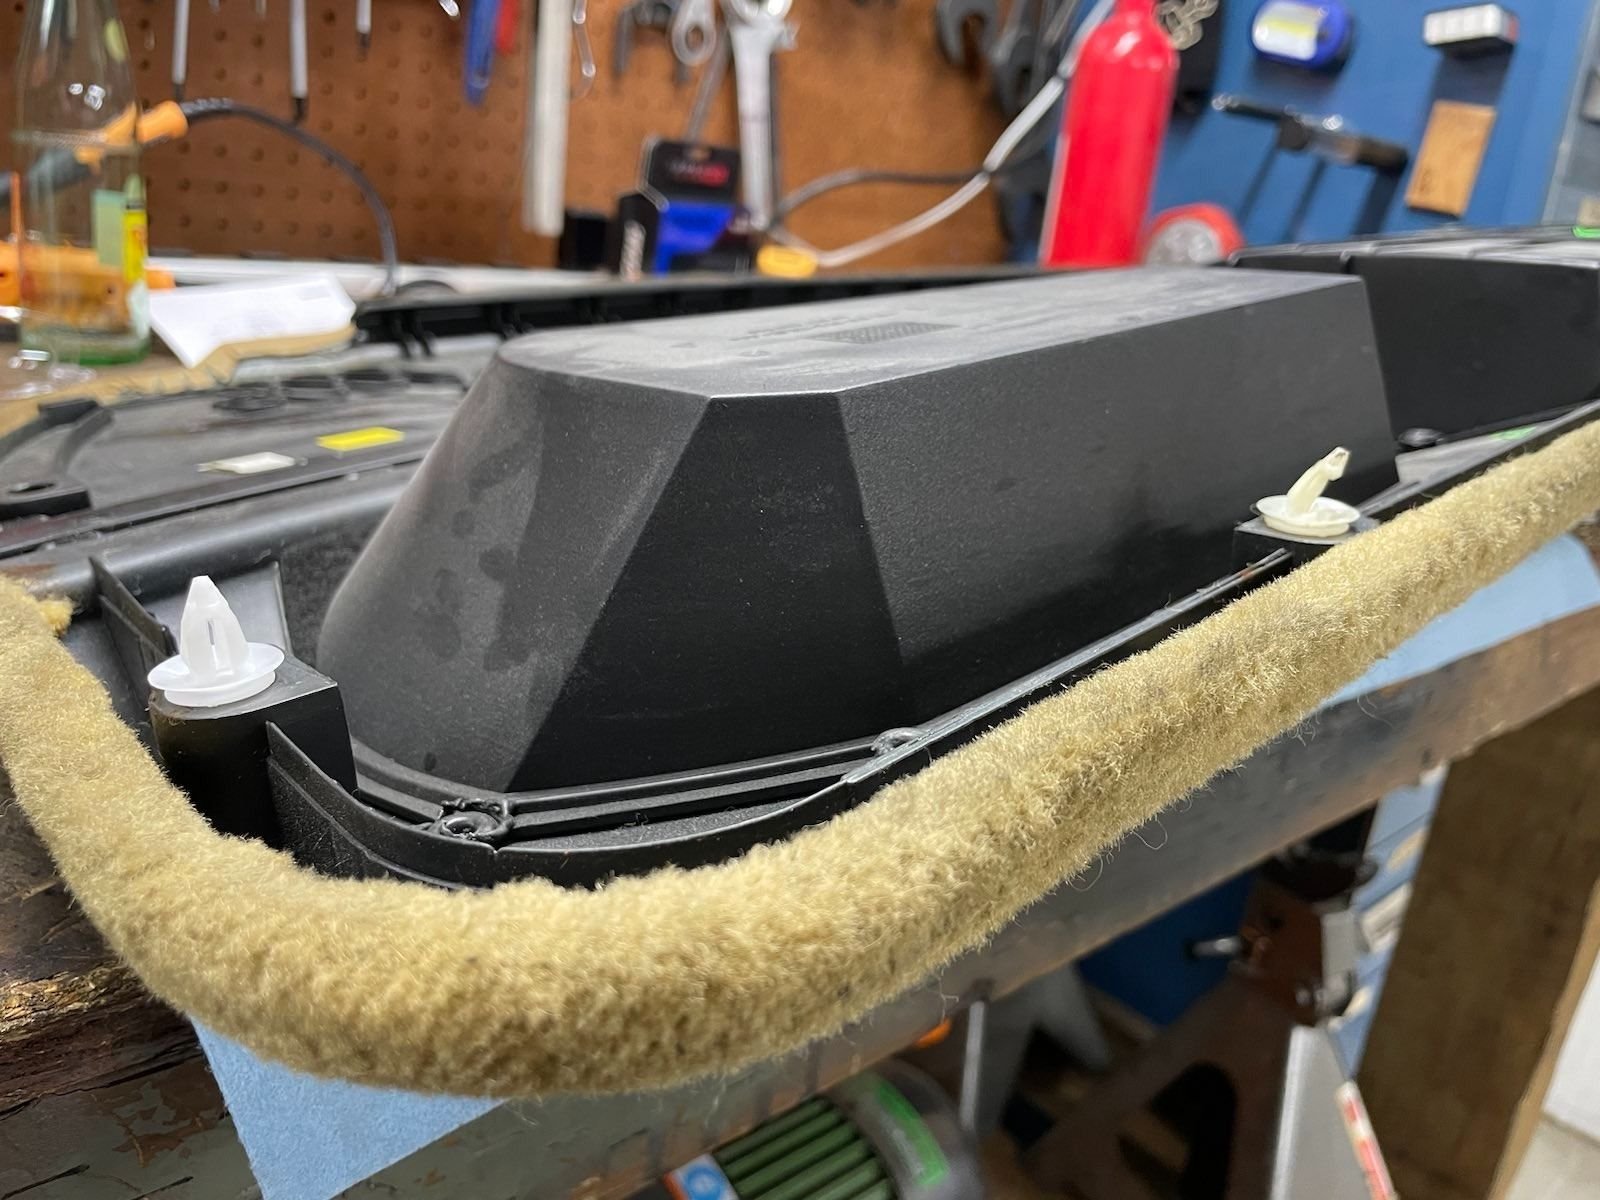
At the same time, I replaced ALL of the little snap fit plastic pieces in the door panels, replaced the driver's side window regulator motor, and all the little hardware, including seals and grommets. 2nd photo is a hidden plastic screw and grommet that most people don't install but I wanted this to match OEM as much as possible. I find those details fun to track down sometimes. Now I have much better fitment of the door panel and it doesn't wobble and flap anymore! I think this will help quiet the car a bit too.
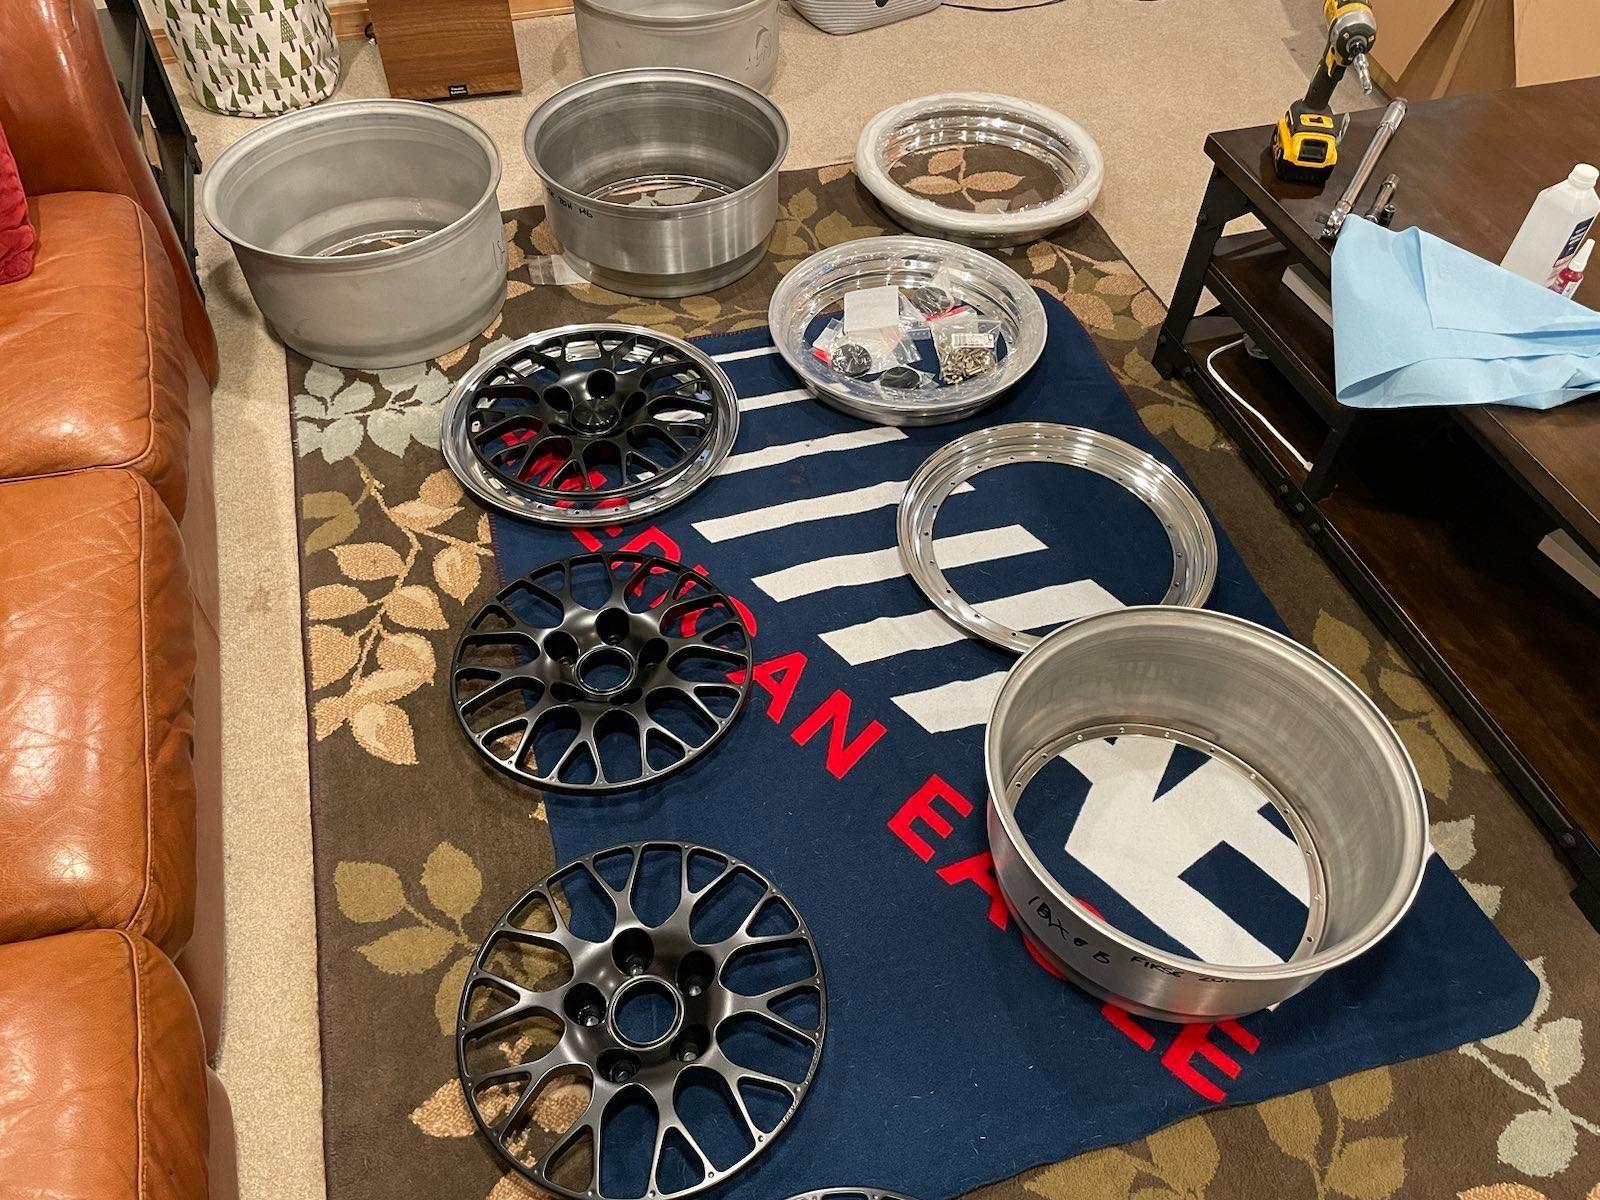
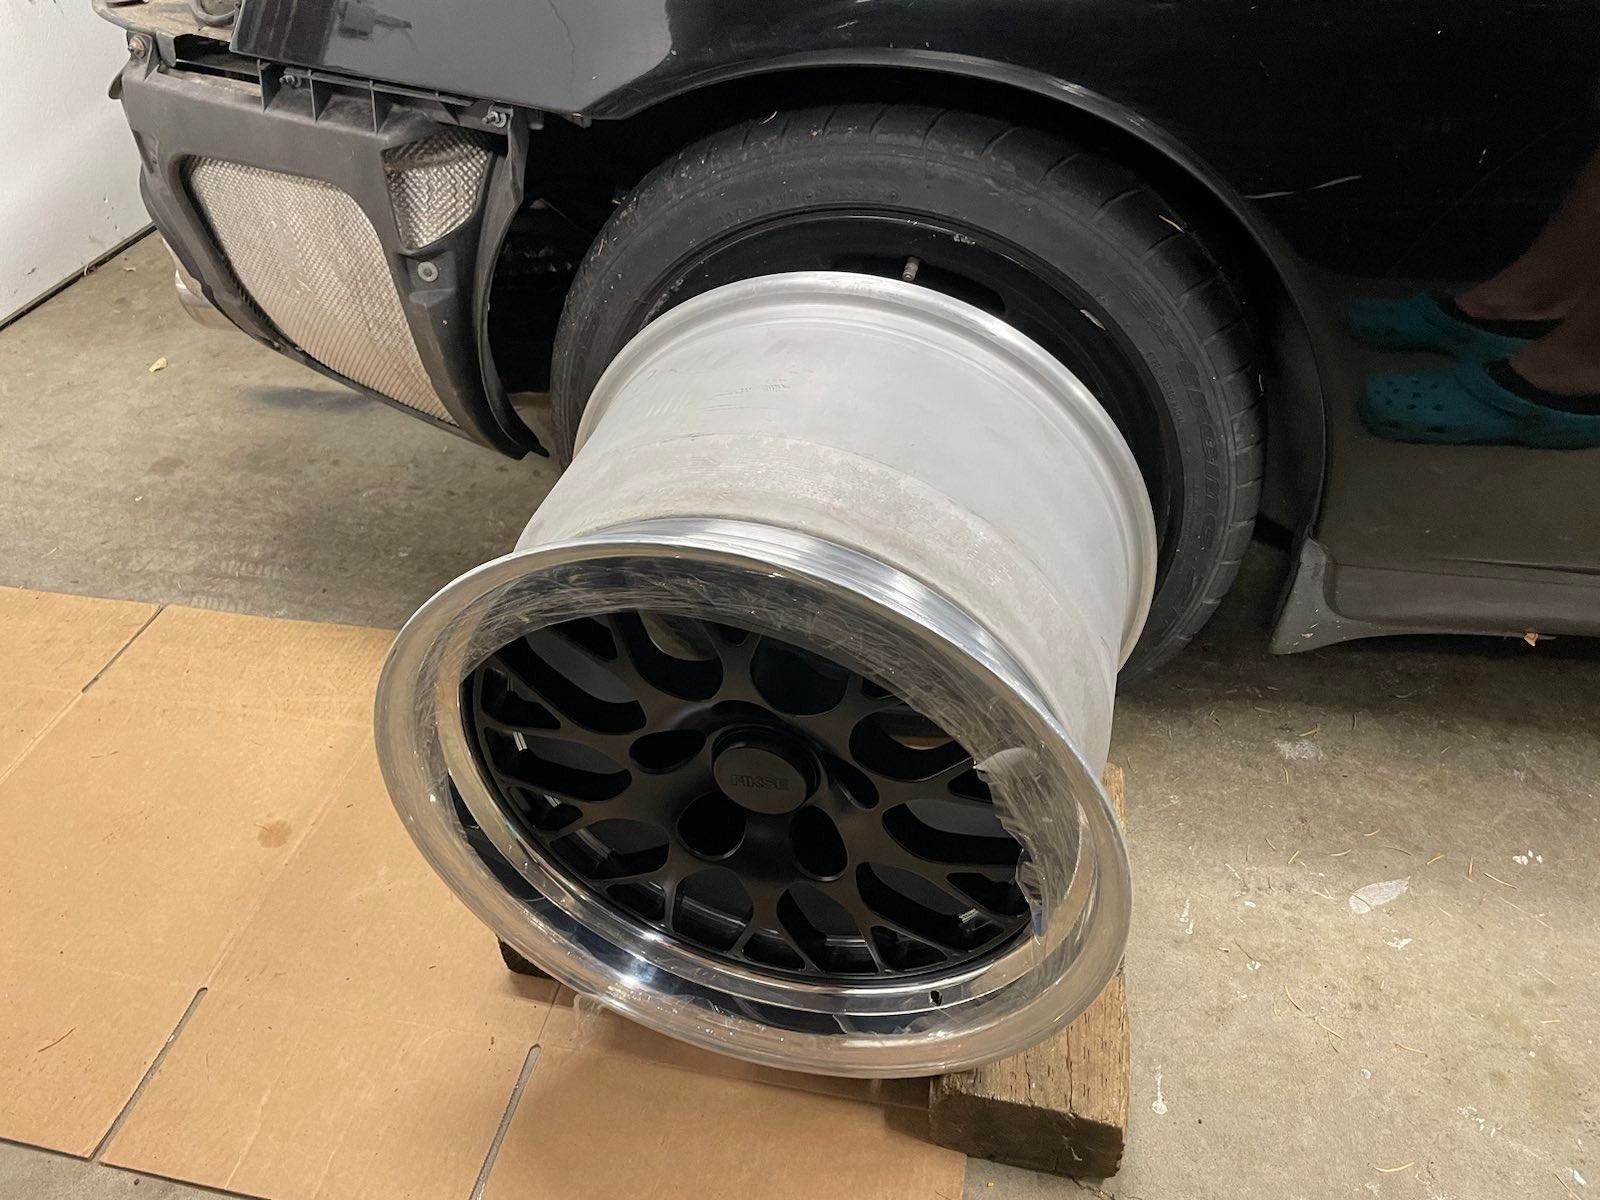
I have a buddy that owns a local P car maintenance and upgrade shop. Upon sorting through his stash of old racing parts for Porsches, I found a few Fikse FM10s centers that had been part of a PNW race team and has some heritage through the 996. Fikse is USA made, although now is owned by a Canadian company, it started near Seattle, then moved to CA, then eventually Canada. All of the parts I have are USA made and are originals from the 2000s era, which is an extra cool factor for me. This car is nostalgic to that 2000s theme, and although BBS e88s are the rage right now, these wheels hit the mark for me in a different way. The only issues were....these centers looked like someone dropped them out the back of a truck on the highway and let them skid to stop. Oh, and there weren't any barrels, and only 2 lips that would work for my 996.
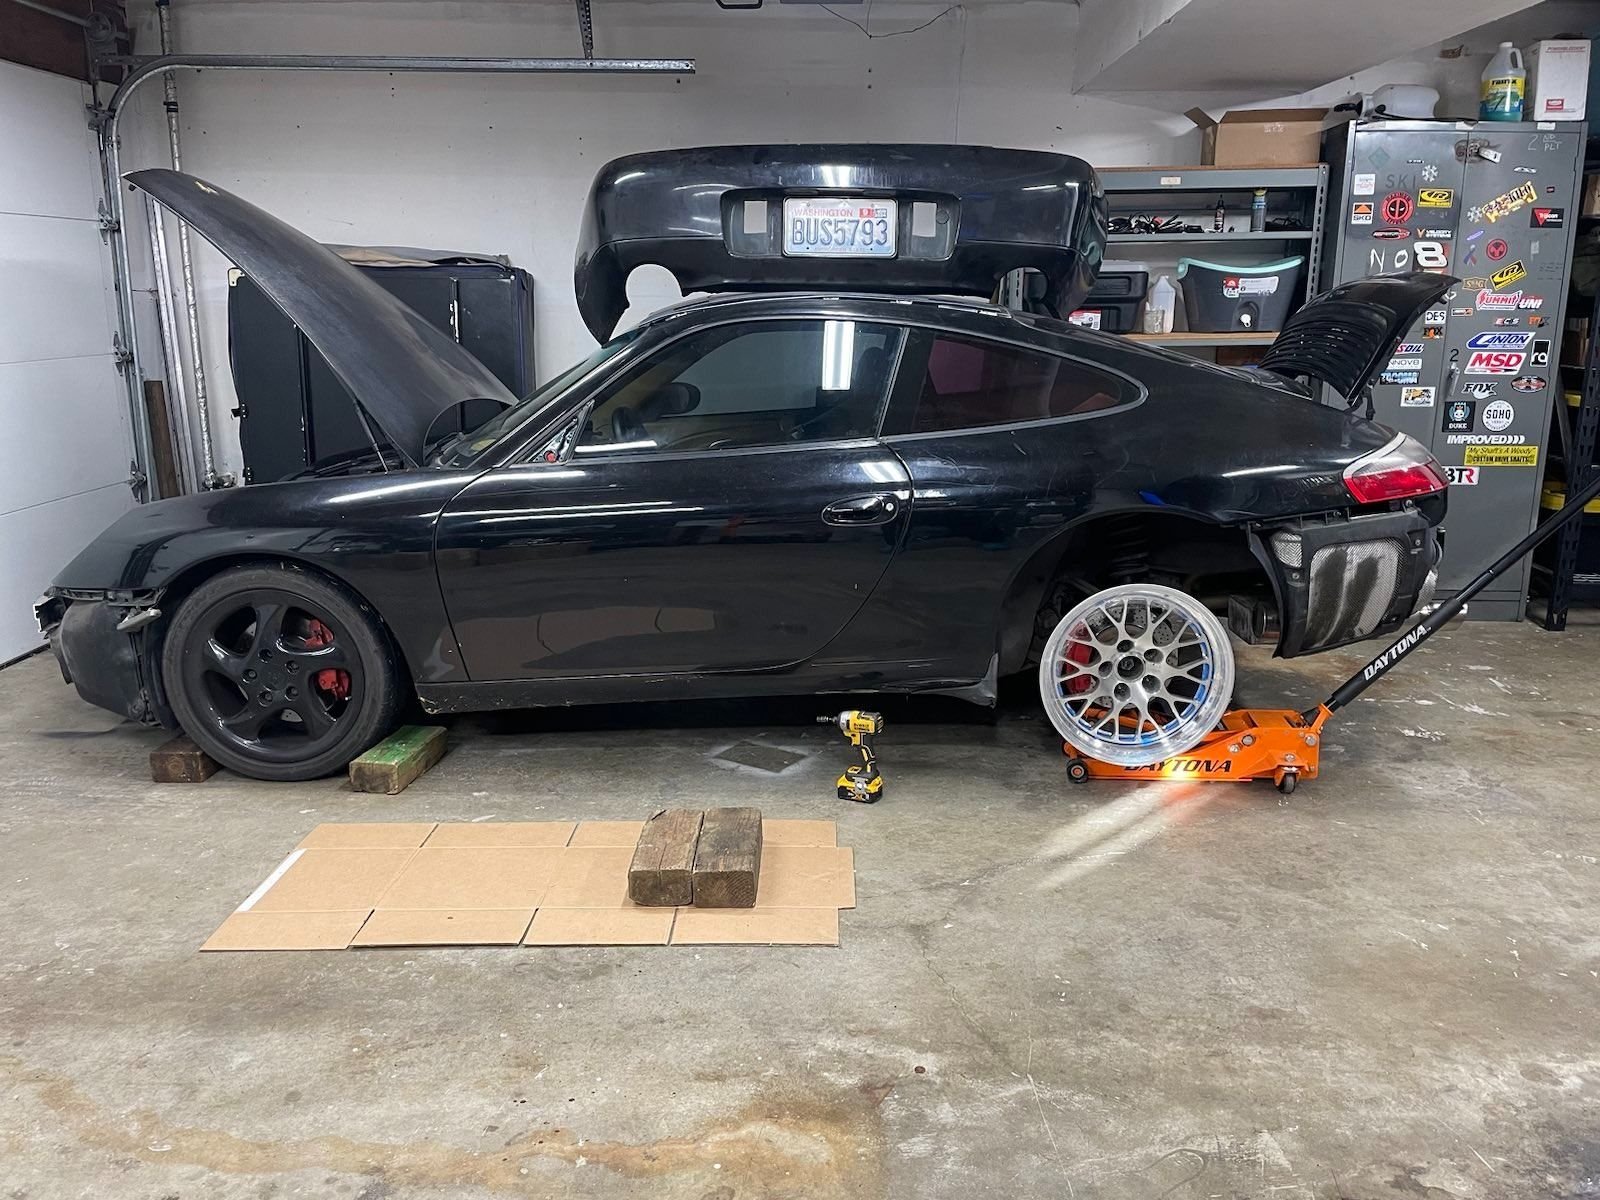
I started calling around to find shops that had the barrels and lips. I got 3 or 4 shops that would all recommend the next place, call that new place, and recommend another shop. Finally I got VR wheels on the phone and Phil helped me sort out what I needed. I chose an aggressive offset, because I like that look and plan to run 2.5+ degrees of camber anyway. Due to the torque of the LS1, I also need some FAT meat out back, and everybody loves a girl with thicc hips, so I'll roll the fenders as much as I can to fit some decent rubber in the fenders. All the parrotting on Rennlist claimed you can't fit a +50 ET on a 996, but it's been done many times and this shouldn't be an issue. Wheel specs below.
I sent one of the centers to Phil, they programmed their CNCs, and machined my barrels and lips. All in all, it took about 3-4 weeks with shipping and everything which is pretty fast IMO. It was all through email and everything is working as intended so far. Price was fair, and quality is quite good. I'd definitely do business with VR again.
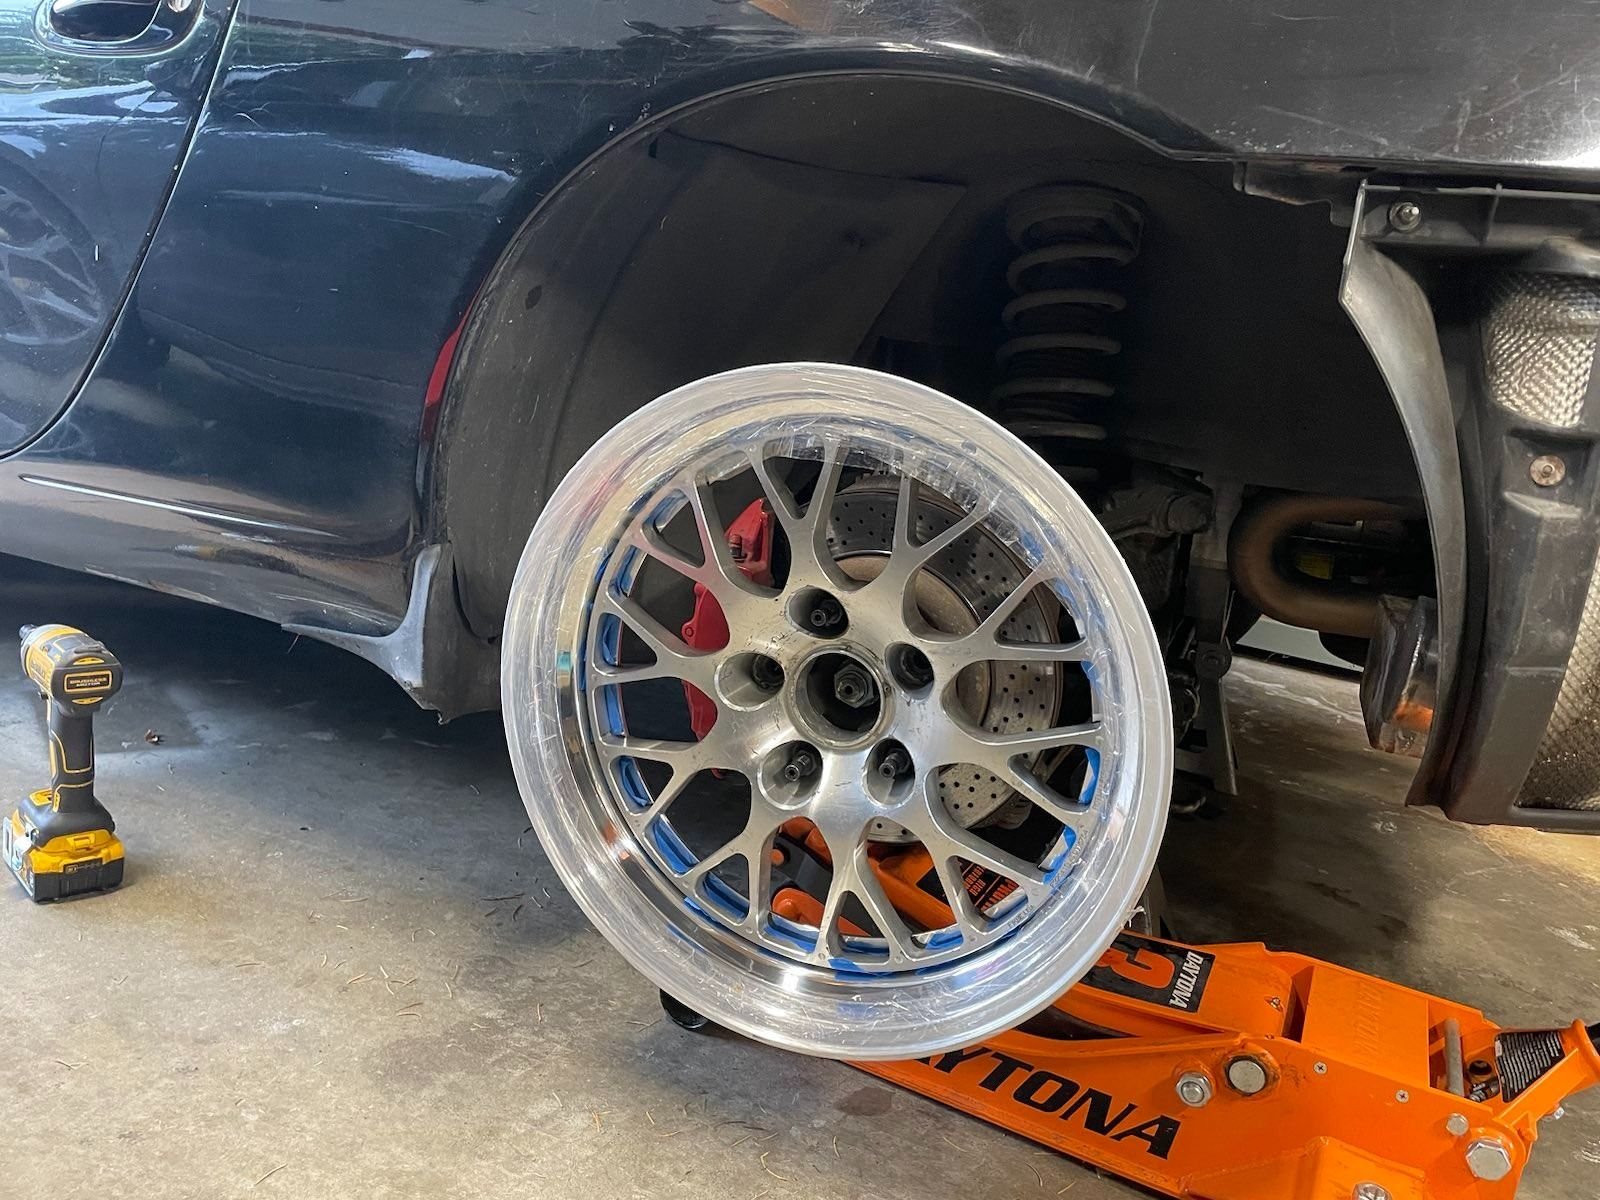
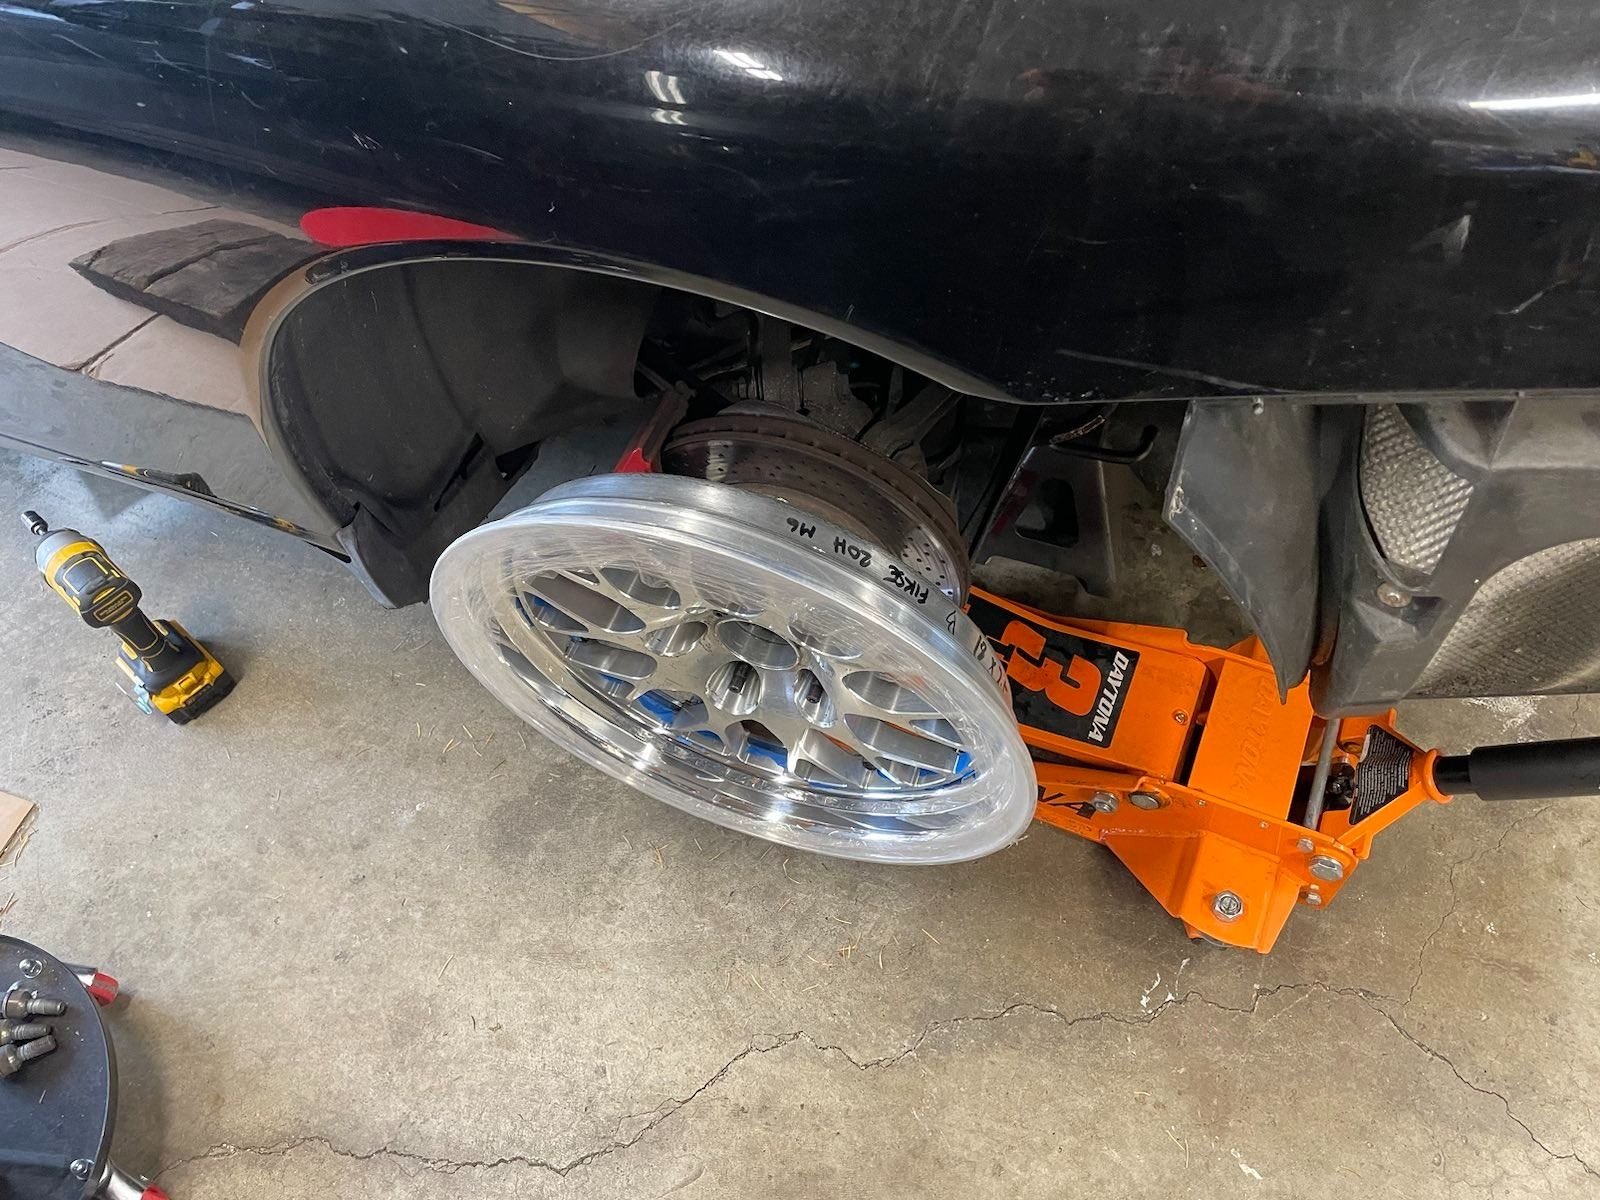
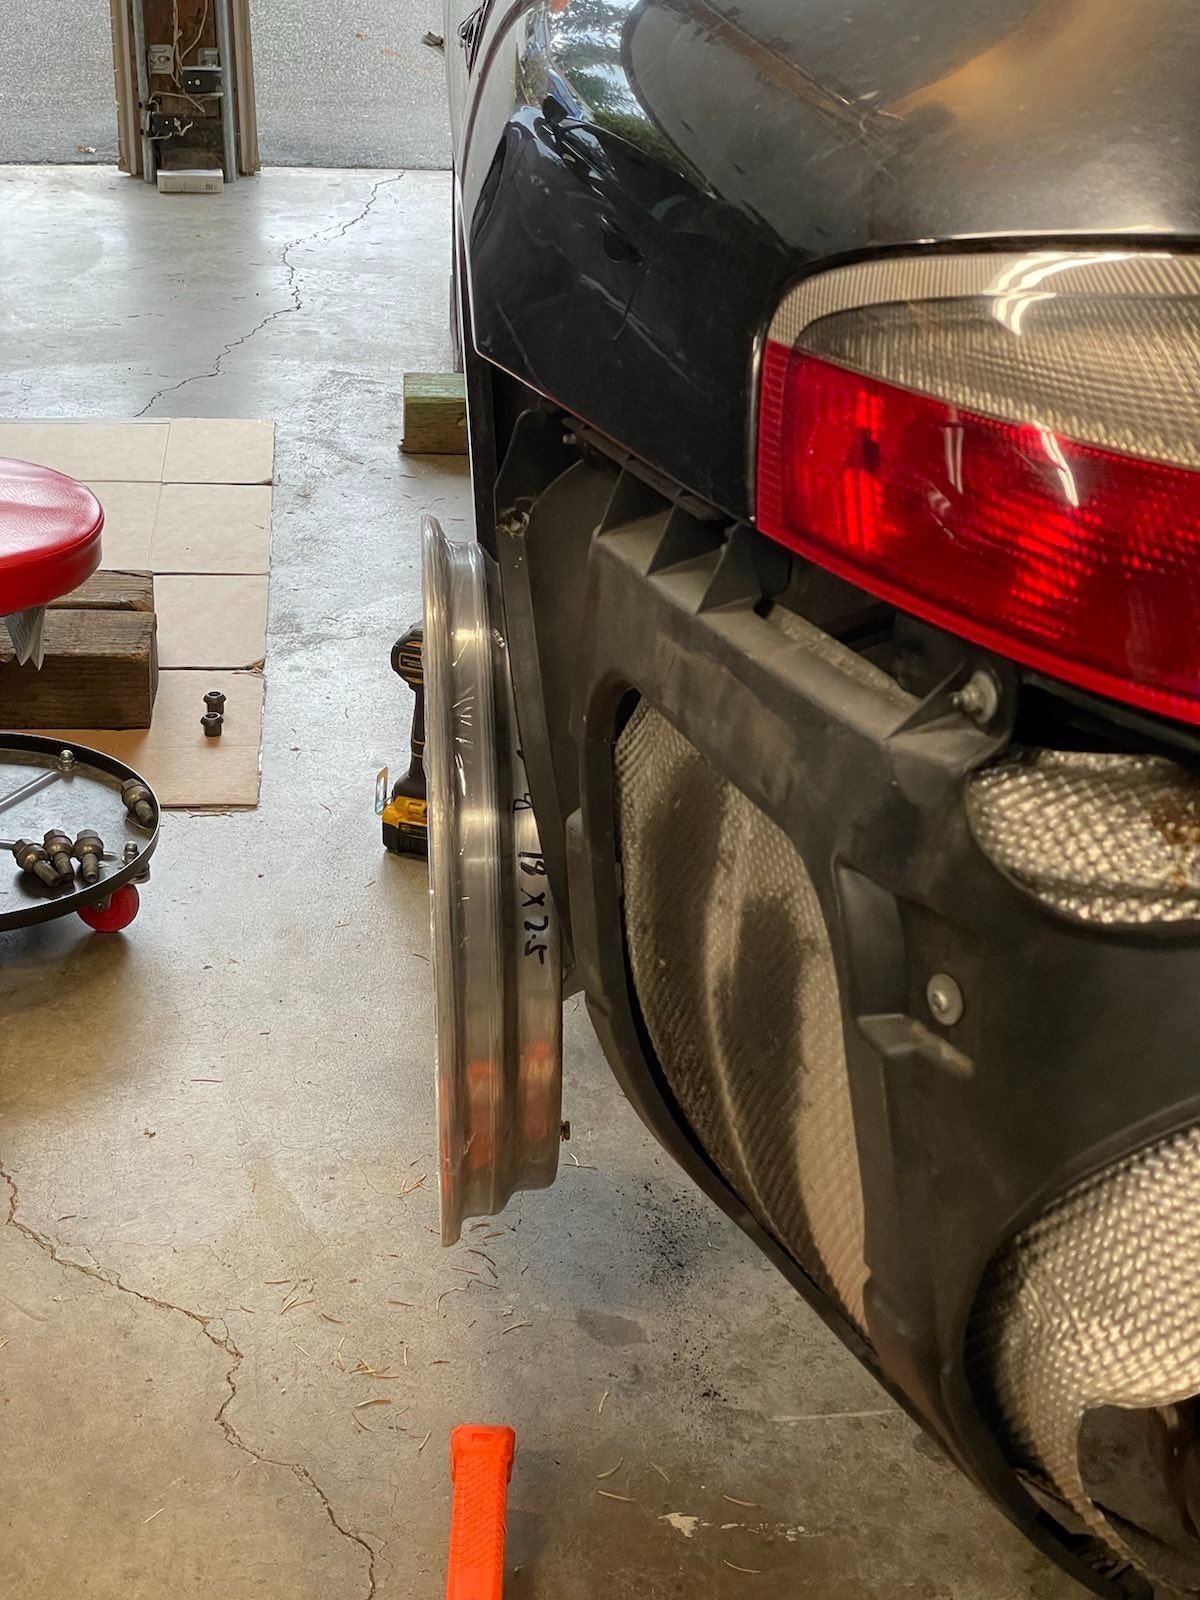
Mocked up the rear, just to see what I'm up against. You can see the aggressive offsets, but the camber was essentially at 0 in these pics and the suspension starts tucking the wheels upon uptravel. You can make out the marks and damage to the centers, but considering these were on a racecar, I can live with it. I still think its too cool that these wheels are getting a 2nd life on my weekend GT3ish LS1 996.
Don't mind my shop crocs, just trying to be as flashy as possible in case some hot dudes roll by and catch a glimpse
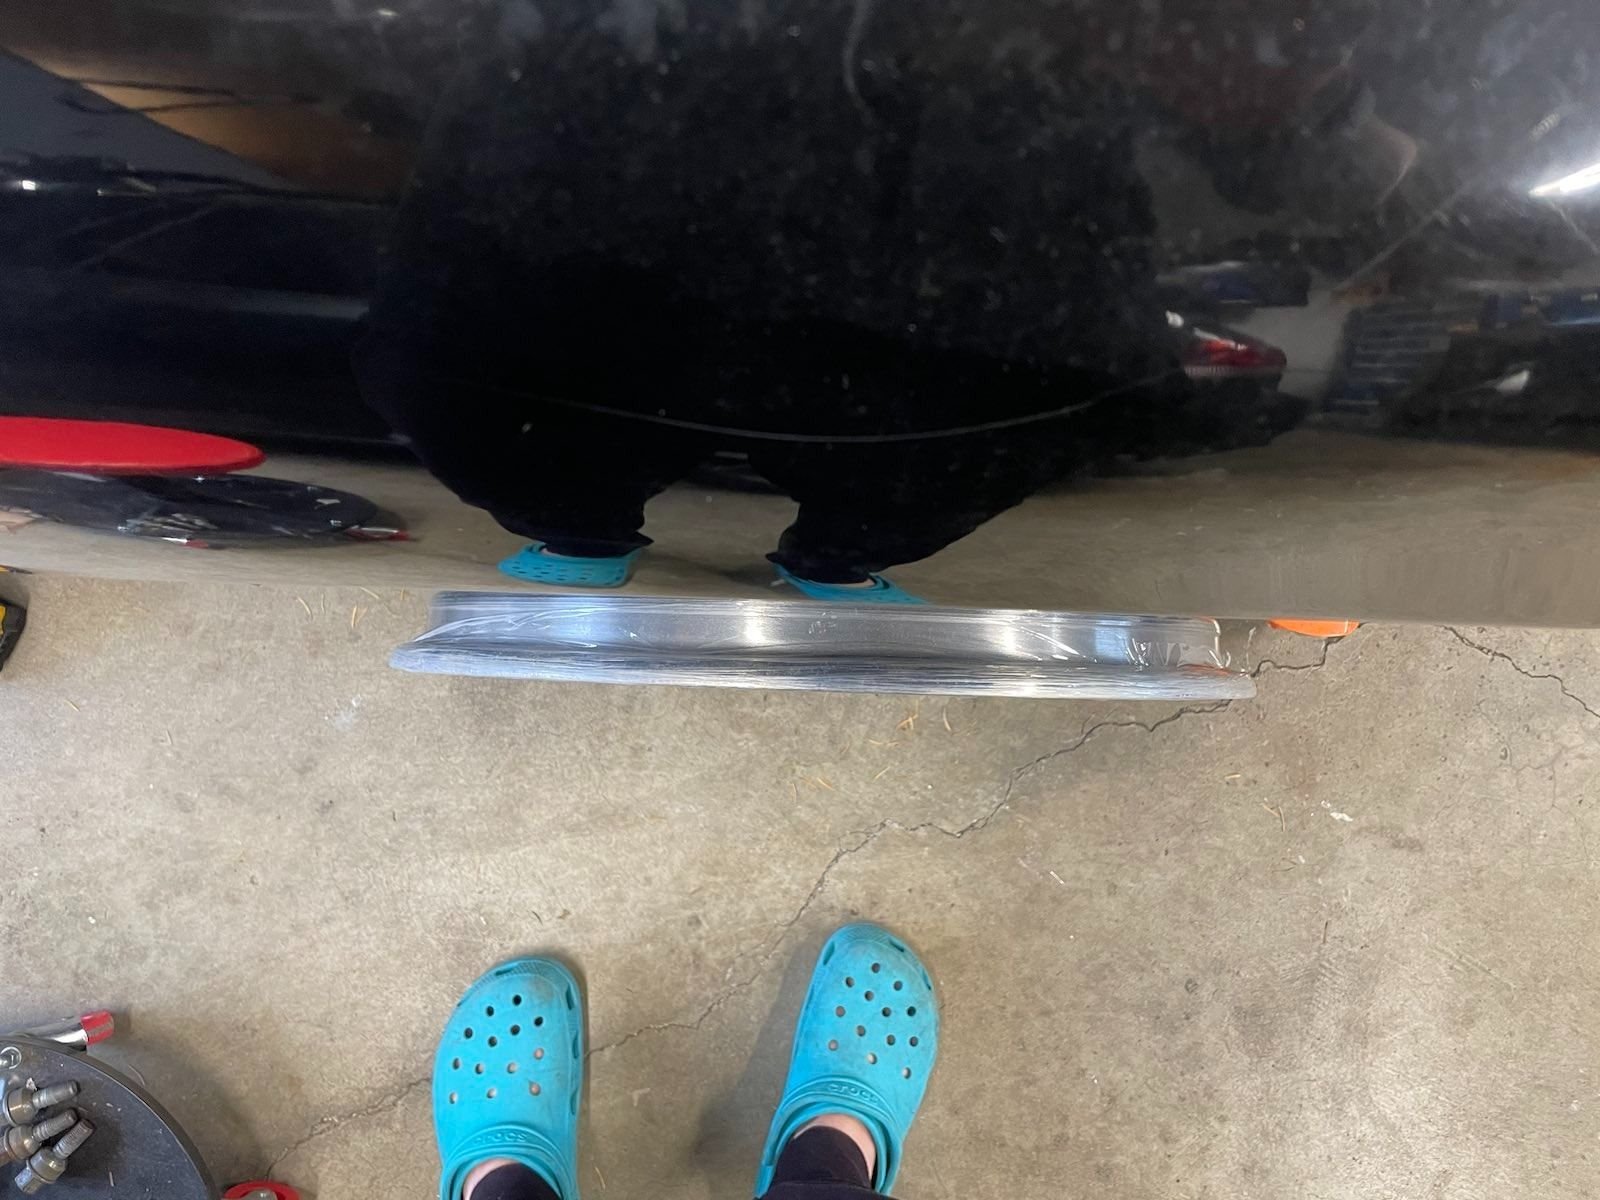
Side profile....yes, I'm diggin it
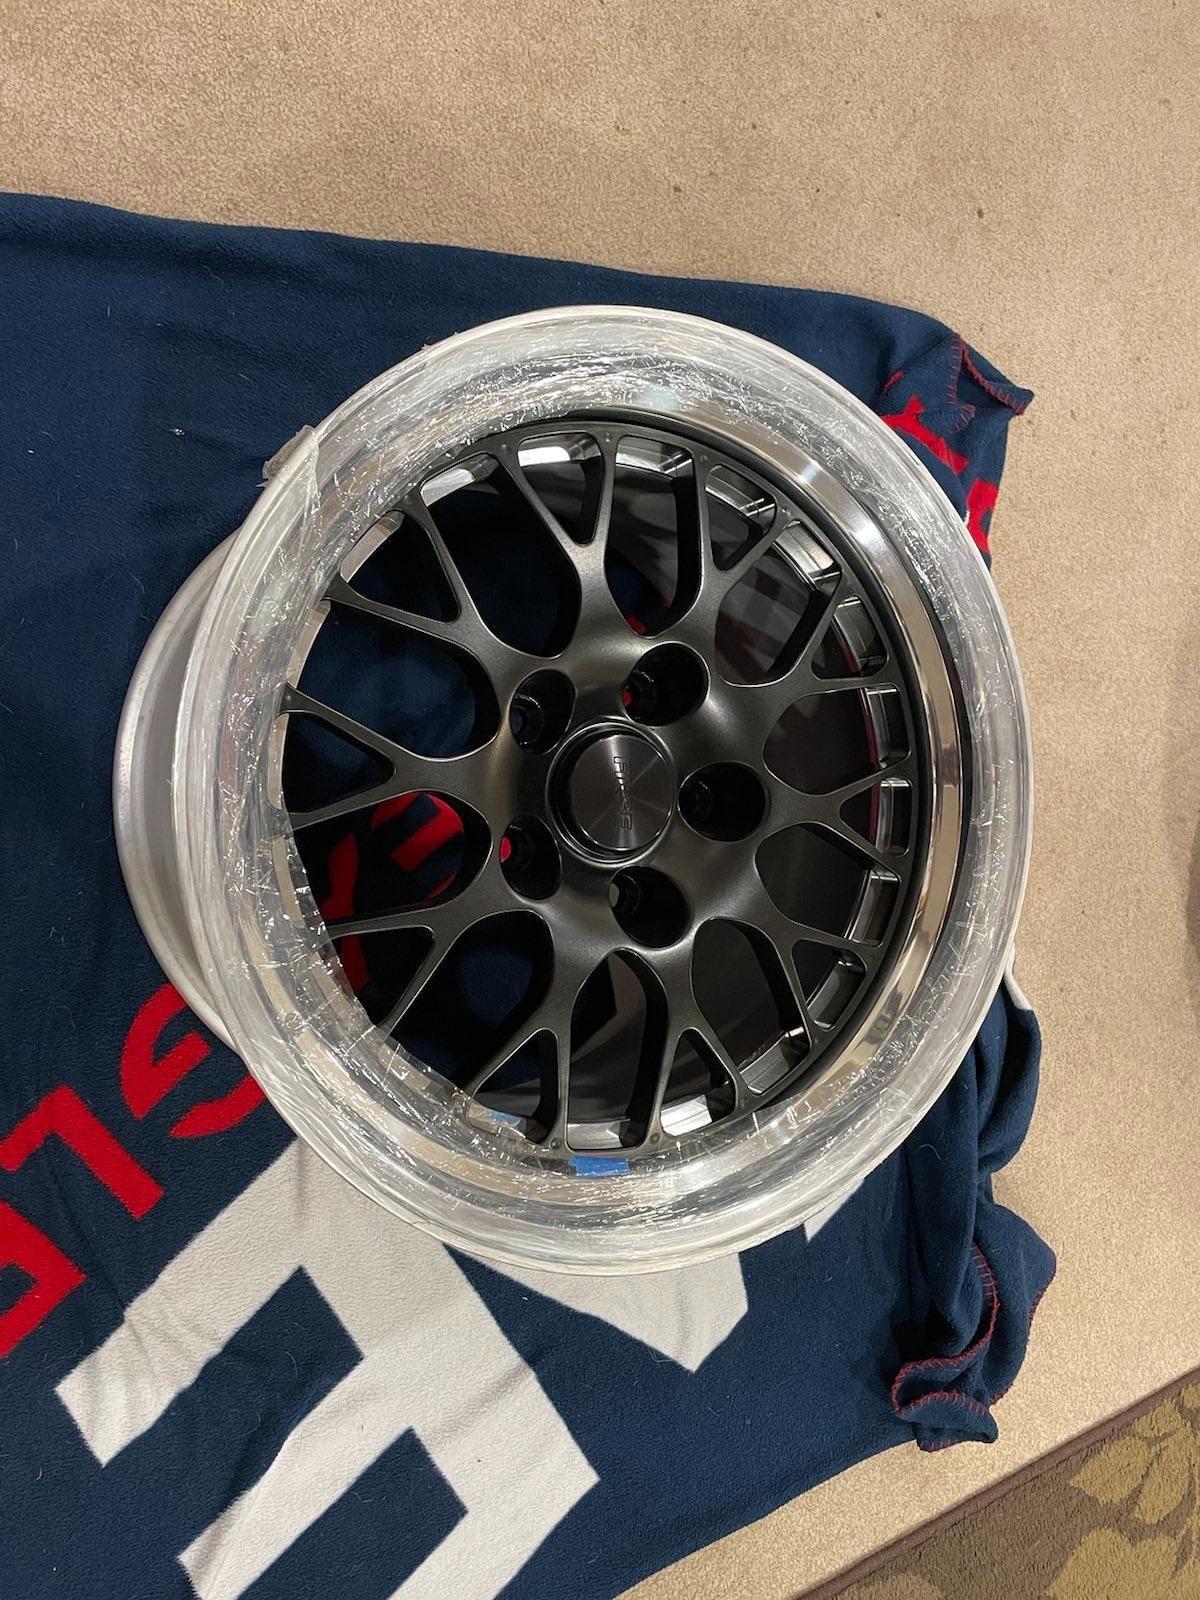
Onto the condition of the centers...these needed some help. A local wheel repair shop helped me sort out the centers and cleaned them up nicely. I love gold centers, but for this car, I wanted to differentiate from the e88 crowd with their gold centers. I chose a semi gloss black which matches the new Fikse center caps and valve stems. I'm very happy with the wheels and I still need to finish building them, but I couldn't wait, the excitement was too much. Anyway, here's a sneak peek!
The wife didn't mind me assembling the first few in the living room...I picked a good one
One of the rears assembled. These cleaned up nicely!
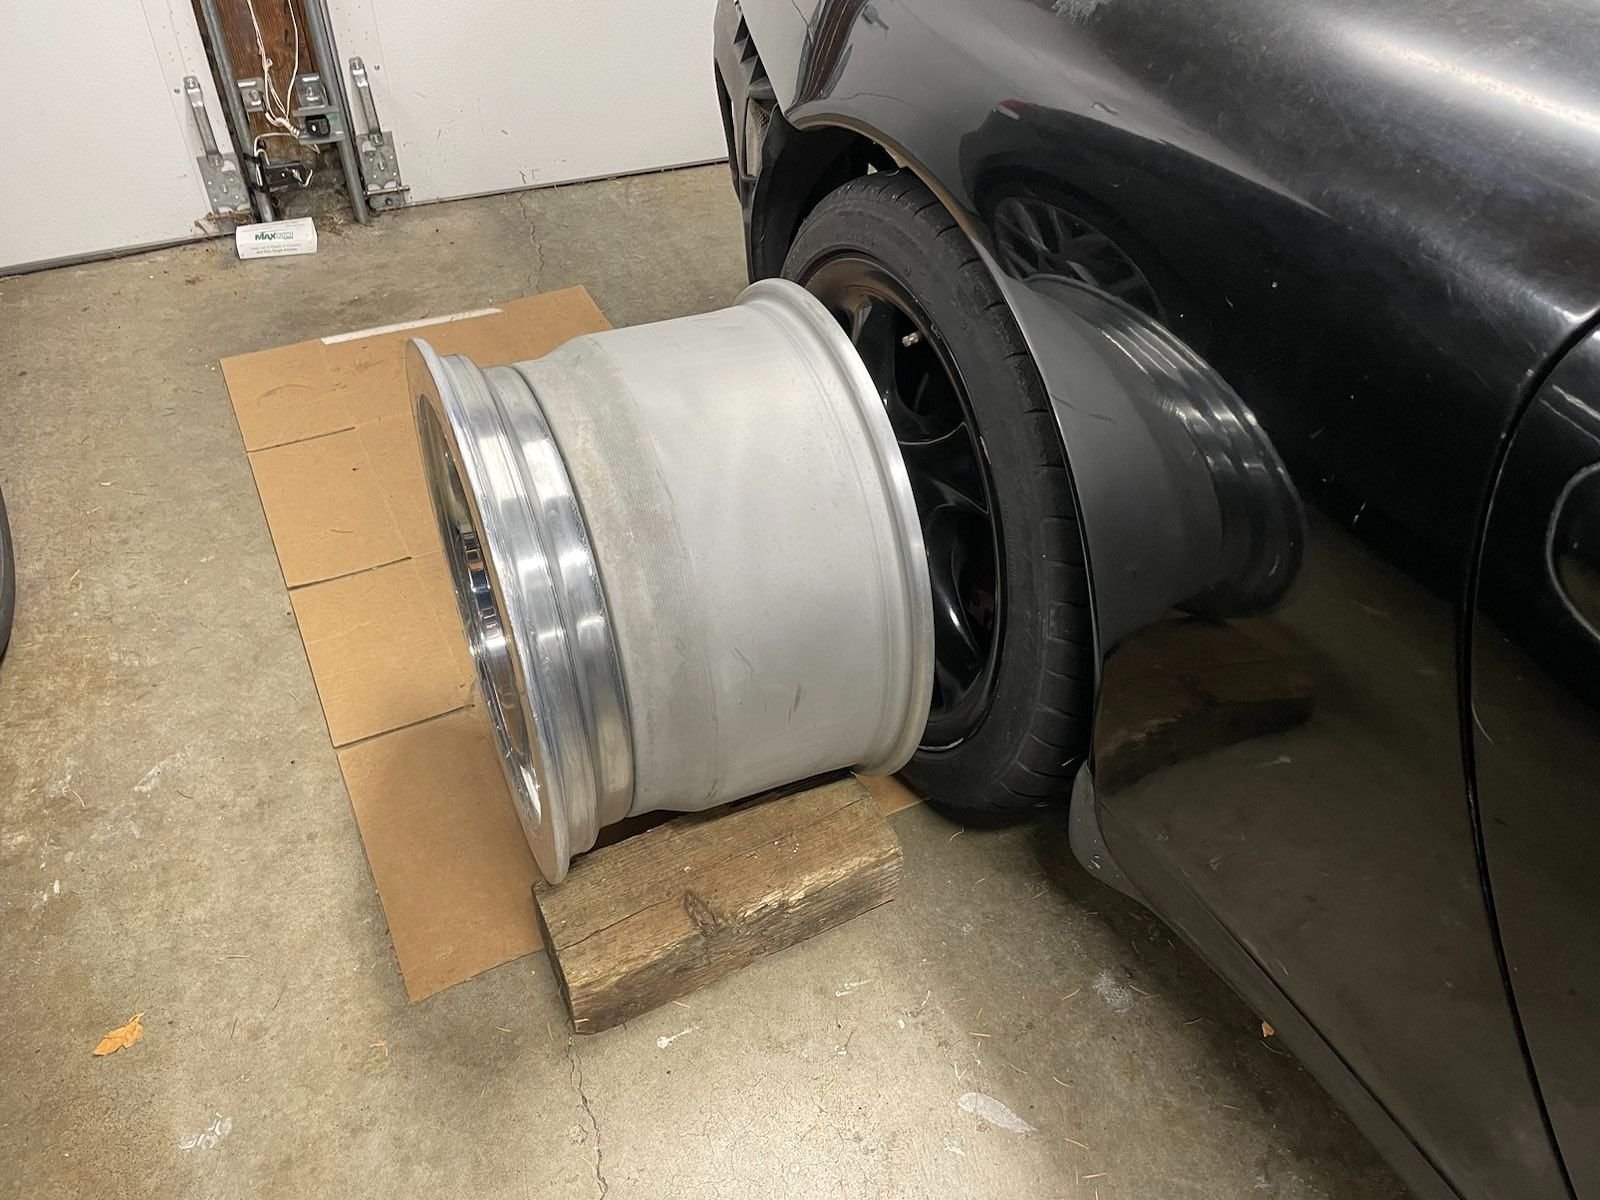
Next to the OE Turbo Twists...which will be getting a refresh as well.
Can't wait to get these mounted to some new rubber and set the camber. It'll probably take me over a month to get all that done, because I'll be busy wrapping the car and swapping the gauge cluster. This'll have to suffice for now, but at least I can see all that work finally coming to a close. These wheels took a LOT of coordination to get done, and because I wanted to meet the needs of my car with all this torque, I had to make my own set. All of the sets I found for $1500 weren't going to give me enough tire in the rear, so this was my only option. I have access to spare parts, which is great, because I don't want wheels that are too rare to go racing. I might swap a set of Apex just for abusive track days, we'll see.
The turbo twists will likely be refreshed in gray, with a polished ring out the outer lip. If you look back in this thread, there's a white 996 C2 with black turbo twists with a polished lip, and I really like that look. I'll run those wheels for daily driving and winter, with these Fikse as my track and show wheels.
Mmmmm.....get a load of those hot crocs + socks in the reflection. Usually you have to subscribe to my Onlyfans for that sweet sweet action. You lucky little perverts get a preview to my full frontal full fetish fornication feature that'll be on sale for $2.99 Christmas Eve to pay for these wheels. Don't wait, subscribe now! Only 700 spots left!
Nice crocs. I think Santa is bringing me some fancy new age colors for working on my 996 also.
Love that you're going with the wheels that way. I'd have to say that's a lot of lip. Pow! They look awesome and you're going to need a lot of rubber anyway so good on you. If you can make that work then my little project will be a relative chip shot. I'm leaning away from the gold centers too.
Plus, I'm with you on the tint thing. Just got done with peeling off all of mine and I'm still folded up like a pretzel. But that doesn't matter, my glass looks good and all the black border dots and defroster wires survived.
thanks, me too! It�s such a rich and beautiful color. It really pops in the sun.
Originally Posted by c didy
Nice crocs. I think Santa is bringing me some fancy new age colors for working on my 996 also.
Love that you're going with the wheels that way. I'd have to say that's a lot of lip. Pow! They look awesome and you're going to need a lot of rubber anyway so good on you. If you can make that work then my little project will be a relative chip shot. I'm leaning away from the gold centers too.
Can't believe how nice that wrap matches.
Originally Posted by c didy
Plus, I'm with you on the tint thing. Just got done with peeling off all of mine and I'm still folded up like a pretzel. But that doesn't matter, my glass looks good and all the black border dots and defroster wires survived.
thank you! lol yeah the crocs are pretty sweet, can�t say I hate em anymore. I wanted that deep offset dish look on the wheels, I think I got it. Yeah tint removal on a 911 should be an Olympic sport. I�ll probably put on a ceramic tint for uv protection and heat dissipation.
Yes x100 to ceramic tint. Heat's one thing, but keeping UV off 20yo leather will help preserve it.
This is also the first time I'm seeing 180deg headers on a 911 LS swap, that's absolutely sick. VR makes good wheel parts too, if you were on the original Fikse barrels I'd tell you to watch for cracking.
Ceramic tint is the plan now. You guys have convinced me!
Thank you! I�ve been designing another set of headers for the 911s but will wait until it�s almost done to reveal.
 10-19-2023, 12:56 PM


 This car is nostalgic to that 2000s theme, and although BBS e88s are the rage right now, these wheels hit the mark for me in a different way. The only issues were....these centers looked like someone dropped them out the back of a truck on the highway and let them skid to stop. Oh, and there weren't any barrels, and only 2 lips that would work for my 996.