When you click on links to various merchants on this site and make a purchase, this can result in this site earning a commission. Affiliate programs and affiliations include, but are not limited to, the eBay Partner Network.
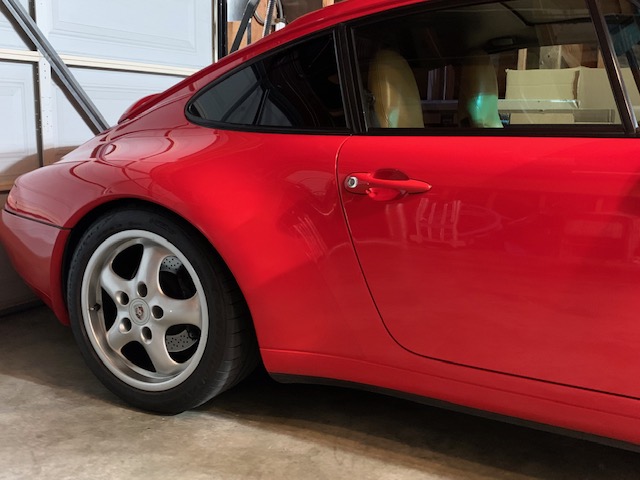
Took the mountain drive detour on the way to happy hour drinks with a friend today and snapped a few pictures on the way! Everything is so green after all the rain we have had.
Gorgeous car and pictures! Amazing that I can still stare endlessly at beautiful 993s and it still takes my breath away. Looks like Bay Area? skyline?
Open the engine lid, and then PUT IN A BIG BLANKET COVERING EVERYTHING, all the way across in one big piece, including the rear fenders and rear PU.
(Choose your glue and grease and make sure you have some before you start.)
Don't forget THE BLANKET.
Then follow the guide......
The two plastic halves of the gear housing have an interlocking seam - by that I mean one half has a groove in the plastic edge, and the other half protrudes (all the way around) into that groove.
So you ain't trying to cut through the join - you are trying to separate it. From factory, I had to put in a fat flat-bladed screwdriver and work my way all around the join... it was tricky, but it gave way eventually. My advice is NOT to use too much pulling-apart/shearing force, but instead put in a gentler 'separating force' all the way around the join..... if you follow me.
well, it started out as a simple install of new OE floor mats and retainers. 11 of 12 loosened fine...why is it always the simplest jobs??
on a side note, Grabit are the best extractors i've had so far
I'm quite relieved to hear I'm not the only one. I got one seat floor bolt stripped. Was going to try Dremel to cut a deep grove for using flat-head screw driver. I may have to try your extractor approach if that doesn't work.
well, it started out as a simple install of new OE floor mats and retainers.
Any chance you have the floor mat retainer part number handy?
Did new RS rear sway with Tarrett droplinks. Installed one of the door top trims to see how it looks. New door cards soon. Got the rest of the center console out. Gonna love how it looks when finished.
I'm quite relieved to hear I'm not the only one. I got one seat floor bolt stripped. Was going to try Dremel to cut a deep grove for using flat-head screw driver. I may have to try your extractor approach if that doesn't work.
Shouldn't have been so hard to install a couple floor mats.
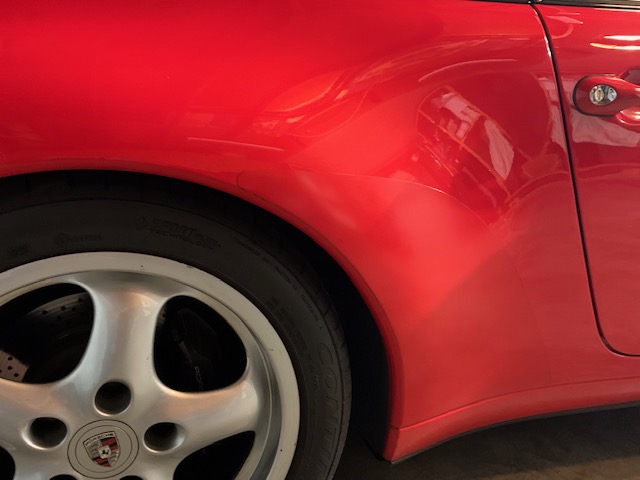
Dang it, I should have taken a "before" pic, but I didn't think of it since I was not expecting great results. See, my plastic stone guards were replaced in 2000 by the previous owner, and since I bought her it has been driven and mucked, wholly road assaulted to 184k miles since then. More than "dirty" they were baked-in grimy to the point that they almost looked painted a charcoal color. So I didn't expect much when I bought some tough "industrial" style cleaner and grabbed a rough shop rag ...maybe I can just take off some of the nastiness. Wow. Just wow! Why in blazes did I live with that ugliness for so stupid-long (well the answer is simple green didn't do much to improve it so I figured that was that). Anyway, here is what I did today. I waxed it up, of course.
Oh, and I tried to capture the reflections to see the edges of the stoneguard:
Suffice it to say, I no longer need to consider replacing em any time soon!
Shouldn't have been so hard to install a couple floor mats.
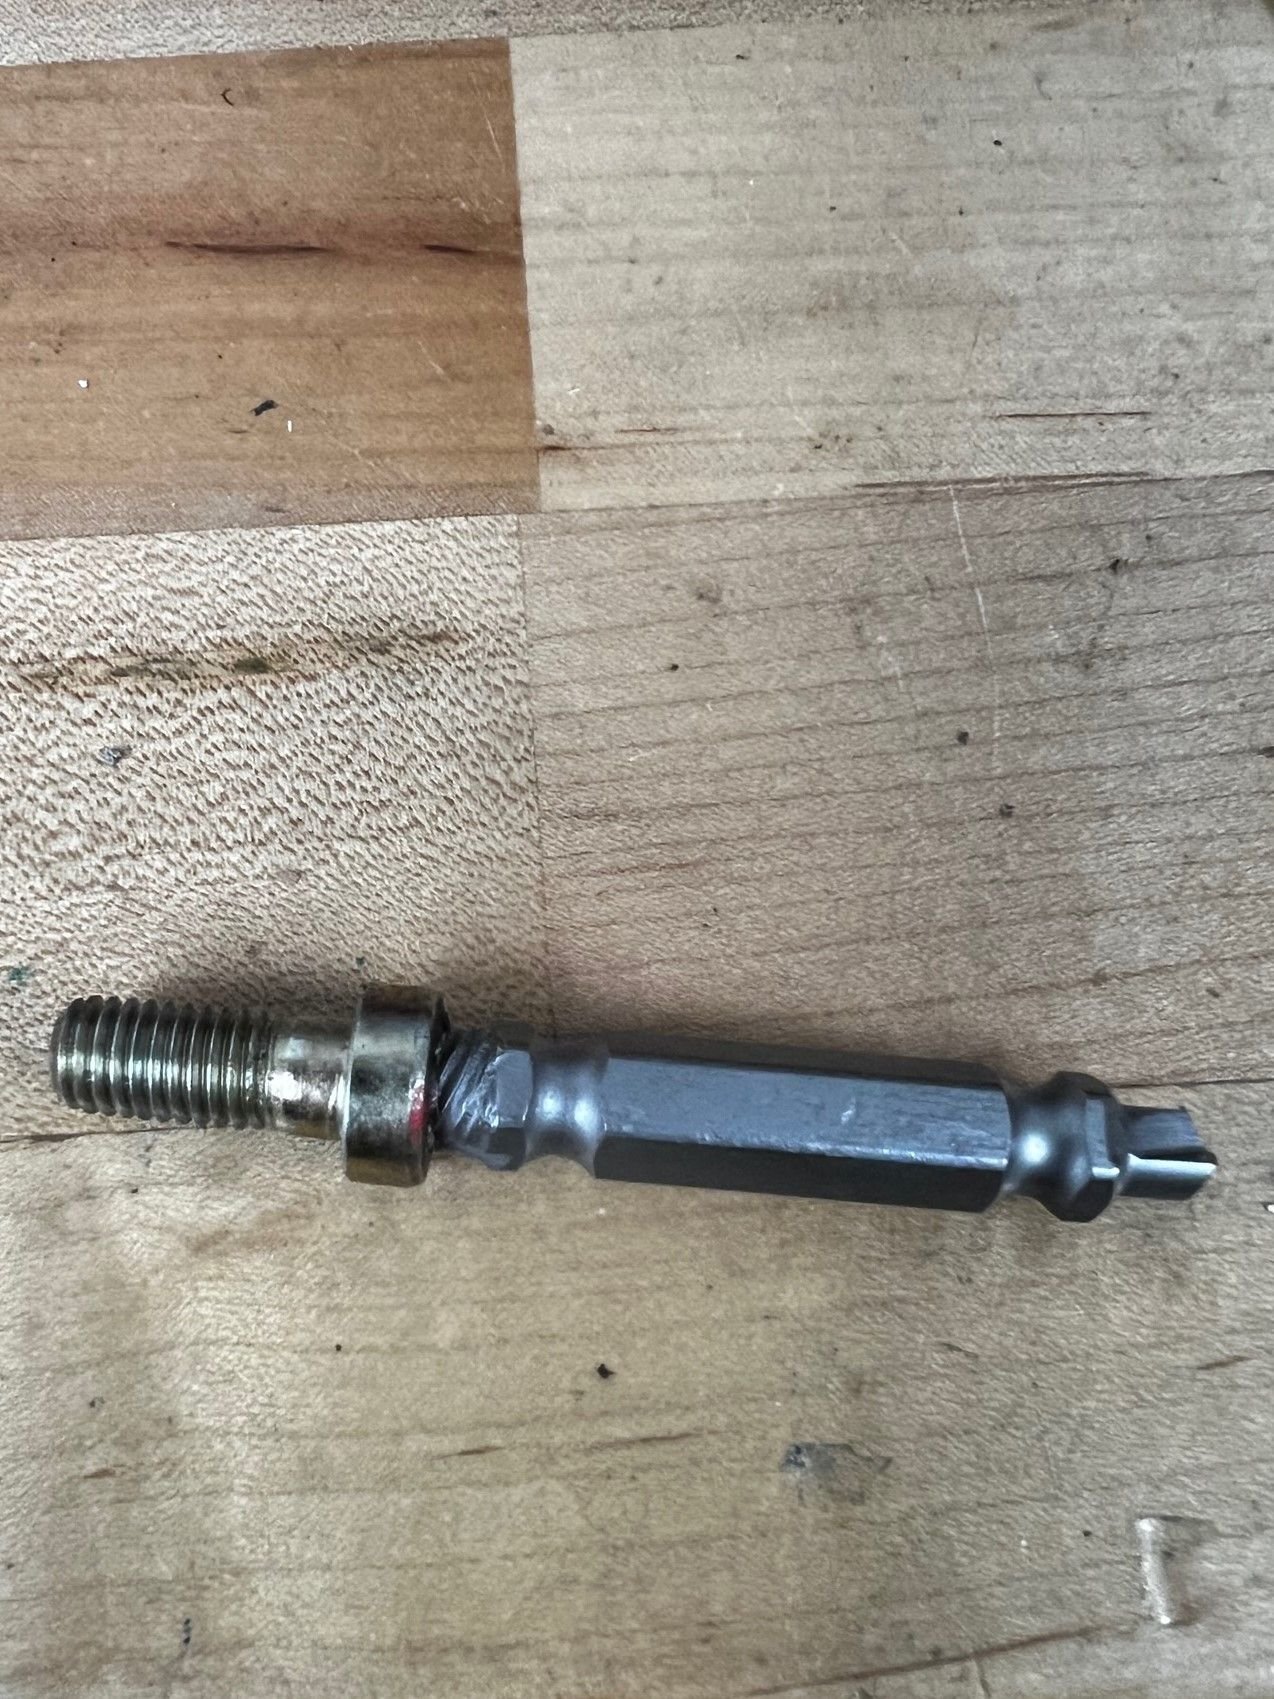
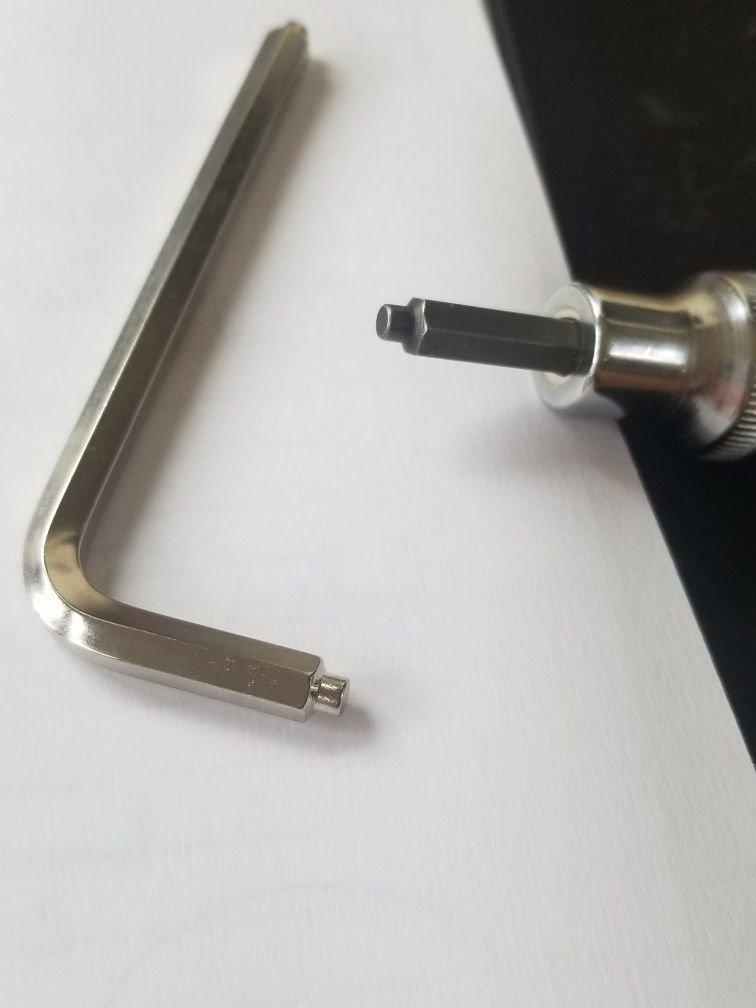
In case you haven't come across it, their is actually the proper bit for removing those buttery soft bolts. its essentially an allen hex with a short pin in the middle to mate up perfectly to assist in removing.
found in another thread by Ron/jrmdir
Part Numbers: (make sure you get 6 mm) Socket Version: Elora 3210-INZ Allen wrench version: Elora 159Z
Do a search for those numbers and you'll find a number of European sources. However I was lucky to find the US distributor for Elora and the prices and service were great (no affiliation.) BTR Distributors www.bloomertool.com
I bought both
rob
Thank you Rob. Really appreciate it. Just got both as well.
Had I known this, could have saved myself a lot of frustration and the cost (almost $200 on various tools to hack this problem). Well, these tools can be reused for future projects.
Thank you Rob. Really appreciate it. Just got both as well.
Had I known this, could have saved myself a lot of frustration and the cost (almost $200 on various tools to hack this problem). Well, these tools can be reused for future projects.
NP, just passing along info that someone else discovered that I also found useful

 02-17-2023, 11:47 AM