

Confessions of a Speedsterholic ...
 08-04-2011, 01:20 PM
#181
Nordschleife Master
Thread Starter
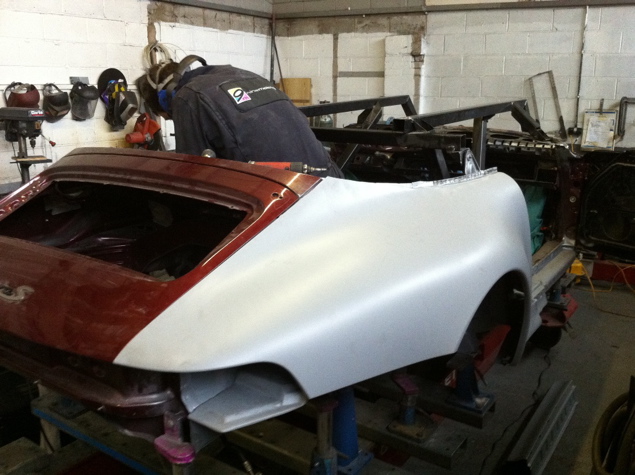
.... meanwhile, back at the ranch ...
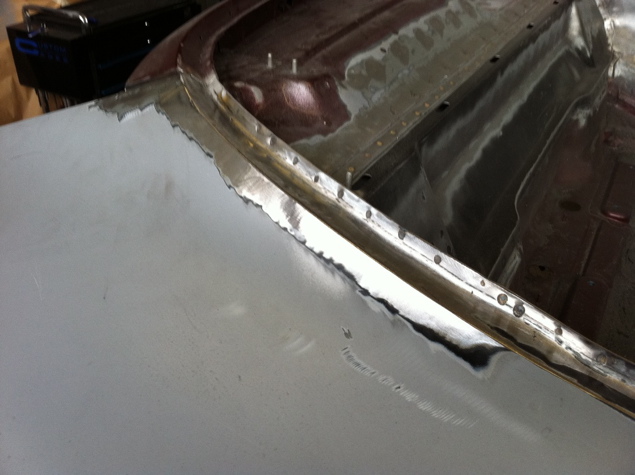
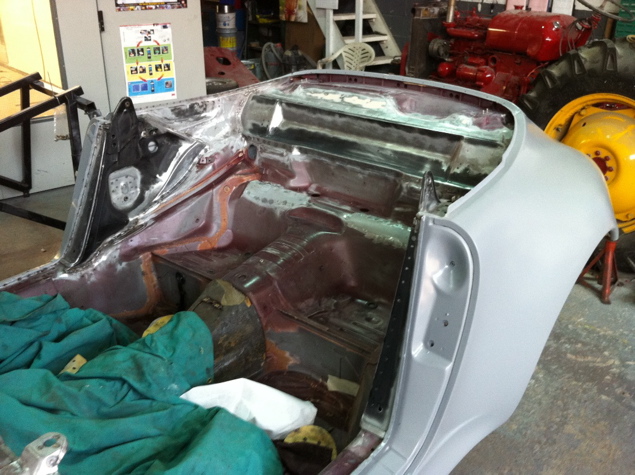
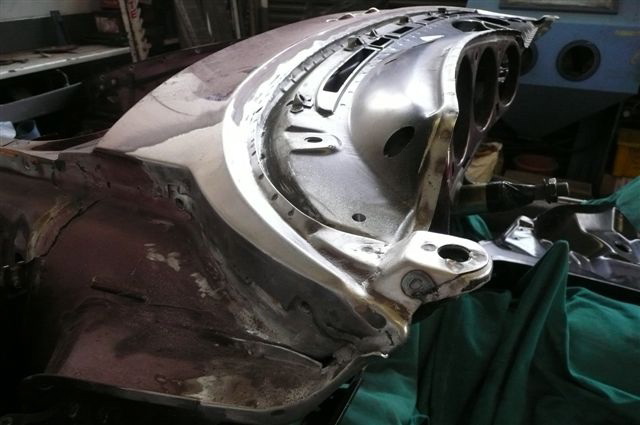
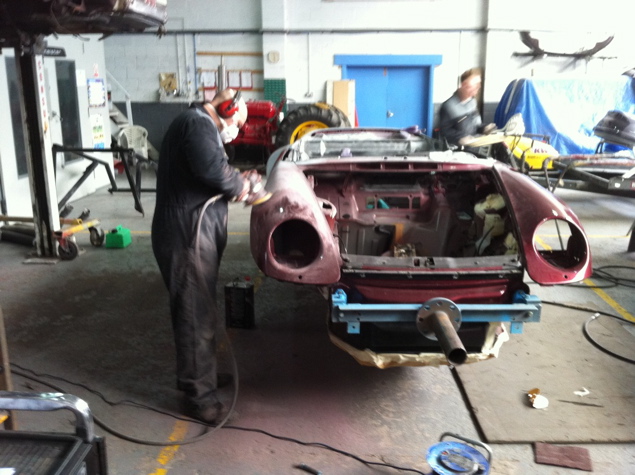
The boys are busy prepping the inner rear quarter metal so the new Turbo panels can be installed ..

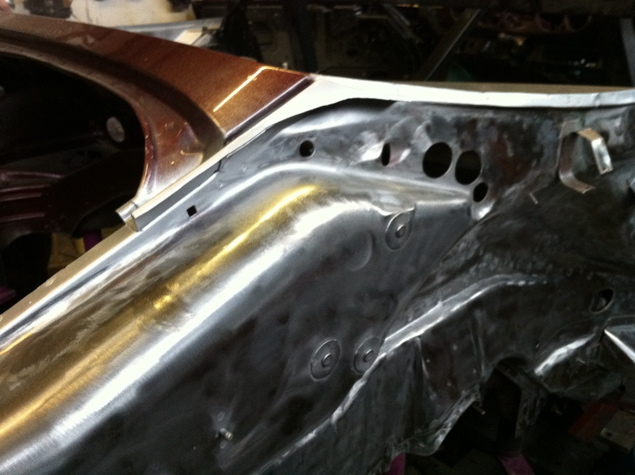
At this point, the car is masked off and all the new welds and exposed metal is etch primed with a primer that is activated by heat and bleeds through while they weld ..

The new rear Turbo quarters and Sills are prepped and ready ...
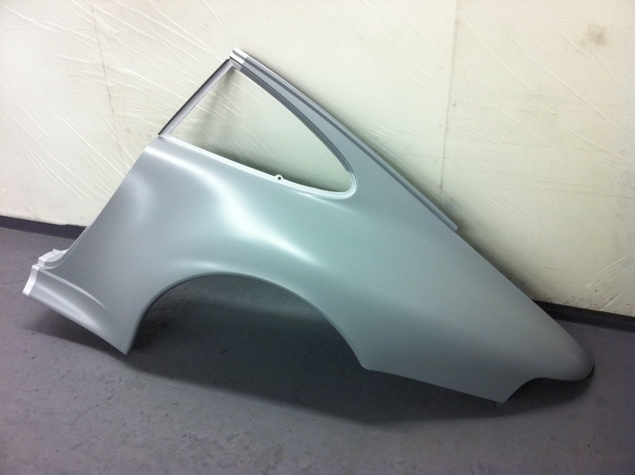
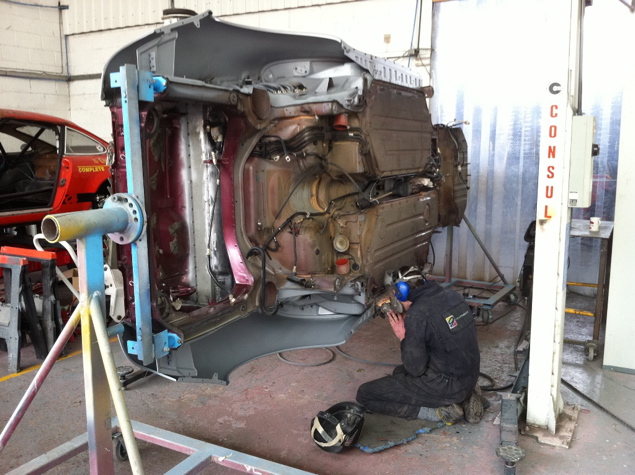
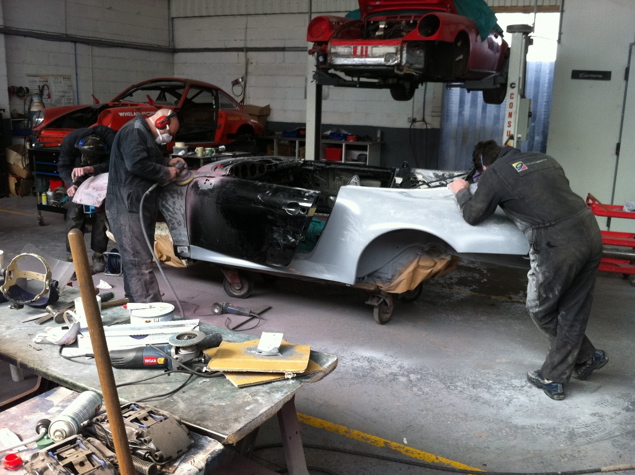
...and the re-construction begins! Note: The new Turbo Coupe rear quarters have to be carefully and precisely cut down and modified at this point to create an 'open car' fender and be able to mate them up to the chassis without deforming the new metal. This creates small gaps at the fender to bulkhead join that will have to be filled in with custom fabricated steel filler panels and the end product looks and functions exactly like a standard Cabriolet fender to bulkhead transition .. something the previous geniuses didn't do ..
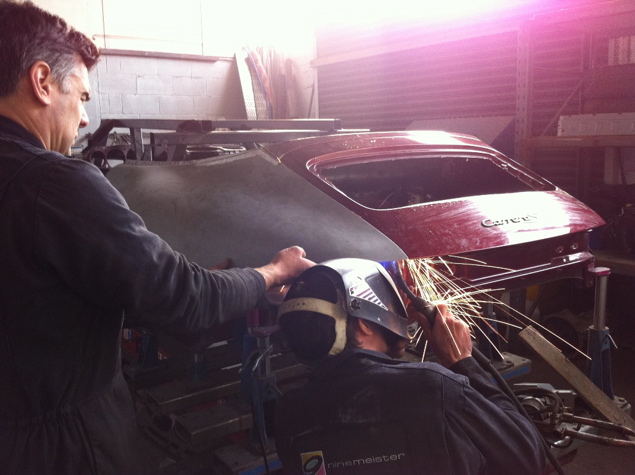

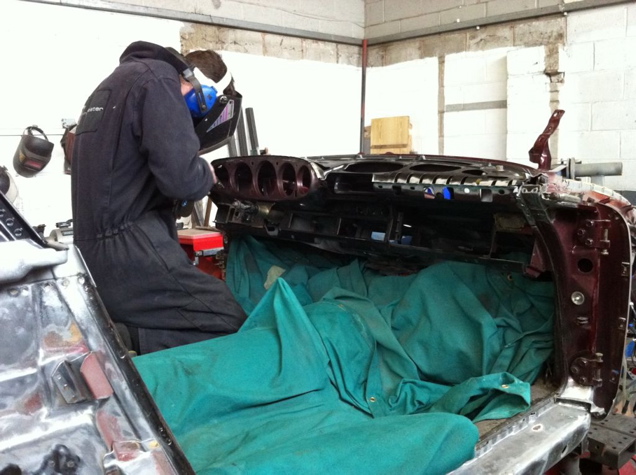
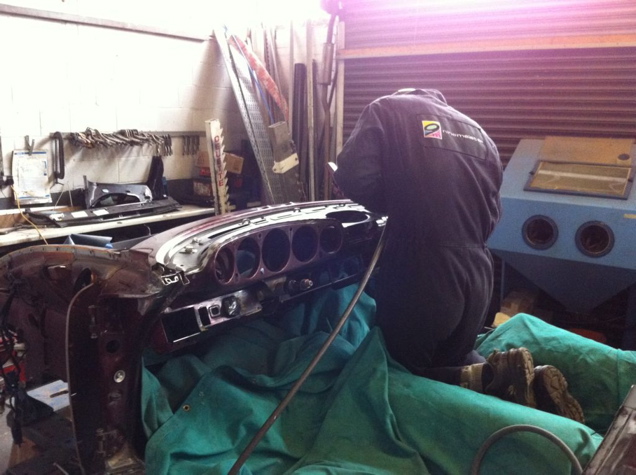
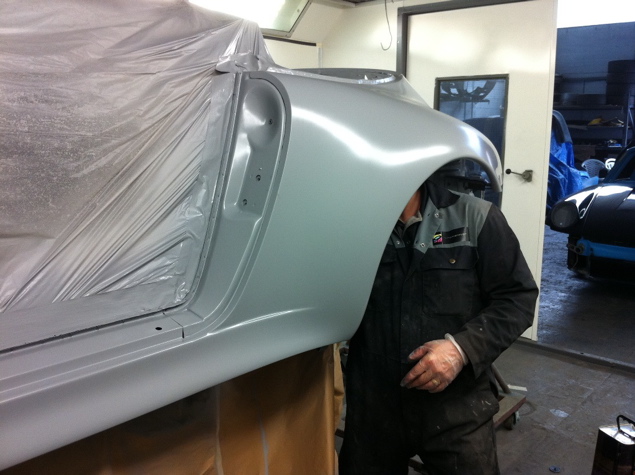
Here's Marc welding in the new Turbo sill covers .. note the doors are fitted to check all alignments and gaps as they work and as noted before, they are hinged to the main Datum, the 'A' pillar to ensure a factory perfect fit. Check the hand written 'warning' to the light fingered, scrawled on Marc's welding helmet ..
The boys are busy prepping the inner rear quarter metal so the new Turbo panels can be installed ..
At this point, the car is masked off and all the new welds and exposed metal is etch primed with a primer that is activated by heat and bleeds through while they weld ..
The new rear Turbo quarters and Sills are prepped and ready ...
...and the re-construction begins!
Note: The new Turbo Coupe rear quarters have to be carefully and precisely cut down and modified at this point to create an 'open car' fender and be able to mate them up to the chassis without deforming the new metal. This creates small gaps at the fender to bulkhead join that will have to be filled in with custom fabricated steel filler panels and the end product looks and functions exactly like a standard Cabriolet fender to bulkhead transition .. something the previous geniuses didn't do .. Here's Marc welding in the new Turbo sill covers .. note the doors are fitted to check all alignments and gaps as they work and as noted before, they are hinged to the main Datum, the 'A' pillar to ensure a factory perfect fit. Check the hand written 'warning' to the light fingered, scrawled on Marc's welding helmet ..
 08-04-2011, 01:47 PM
#182
Nordschleife Master
Thread Starter
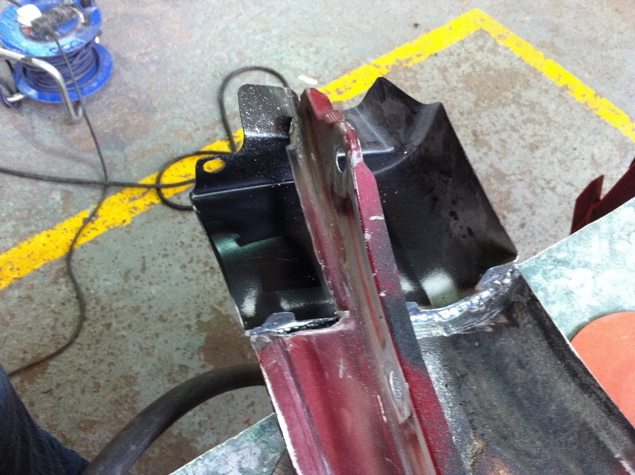
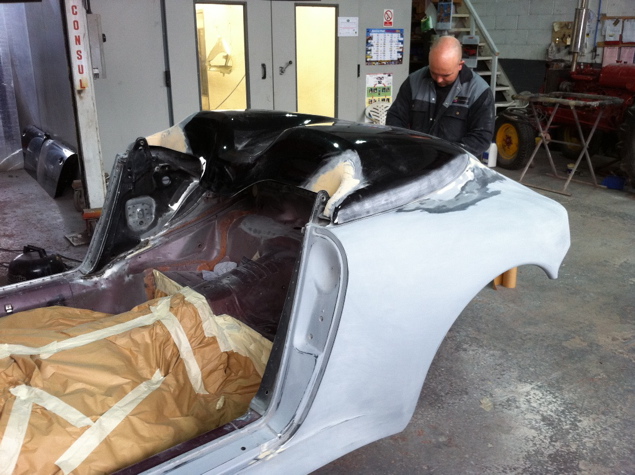
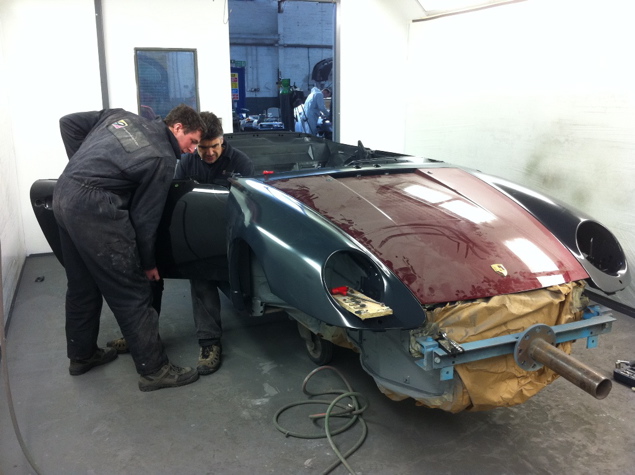
.. and the rear end of my new Speedster starts coming back together .. 
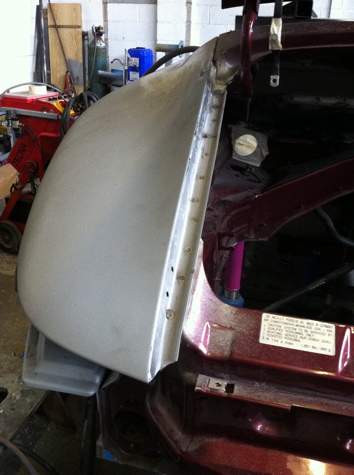
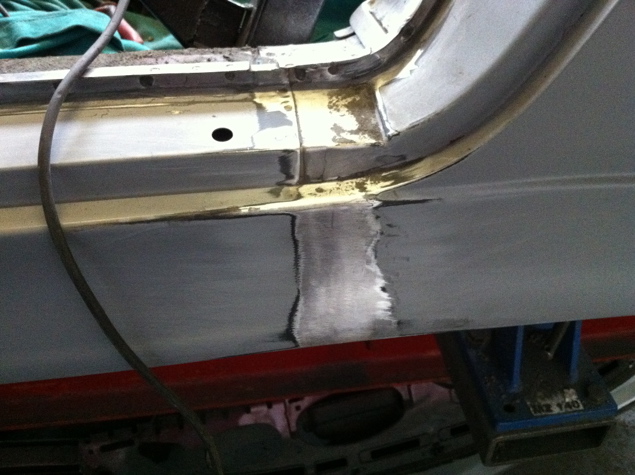
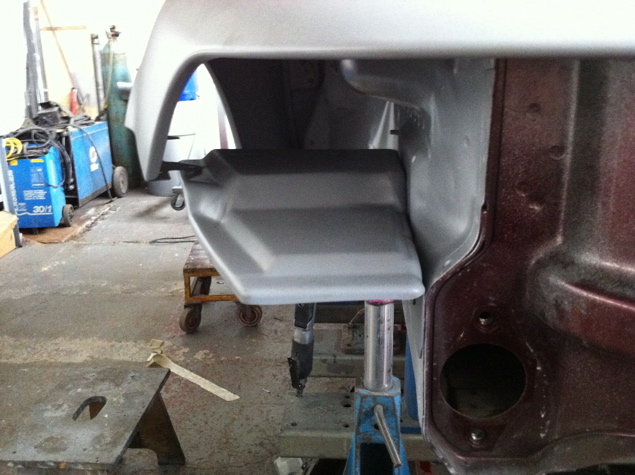
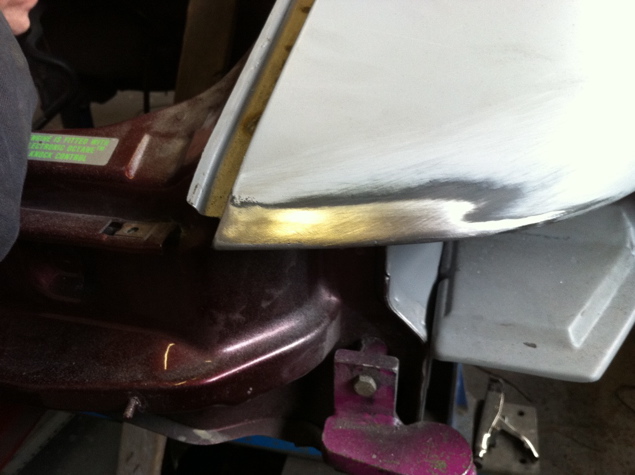
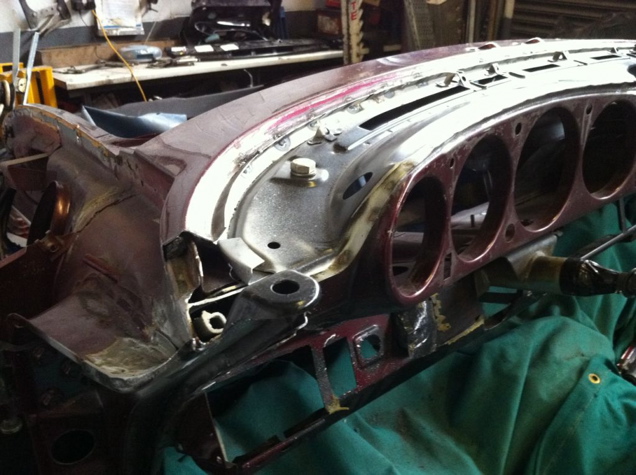
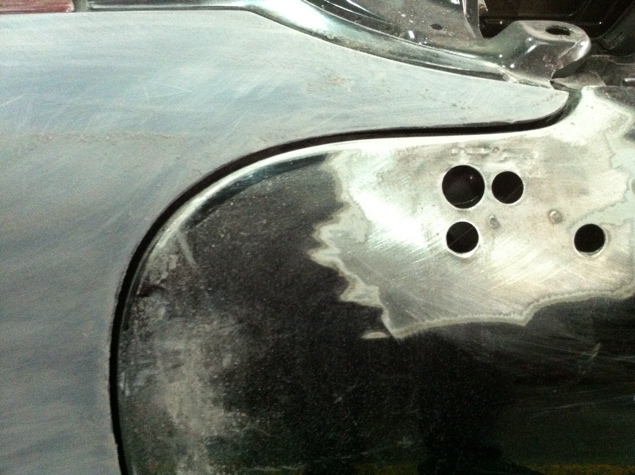
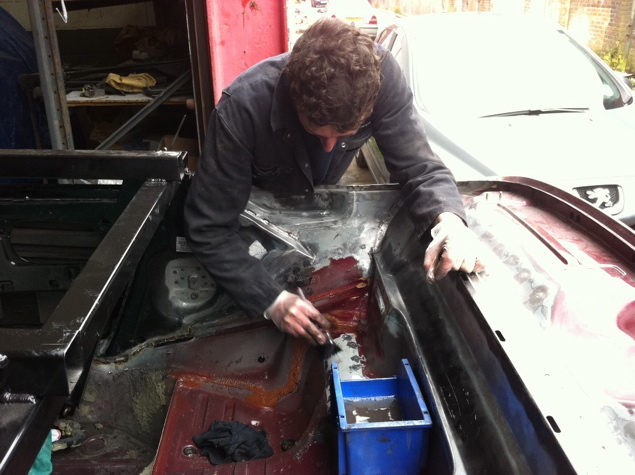
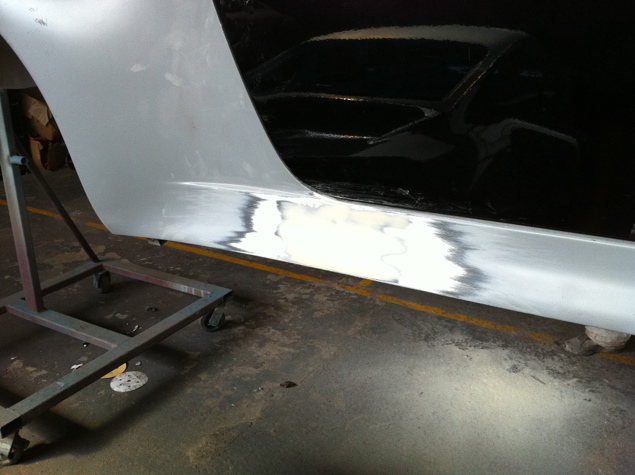
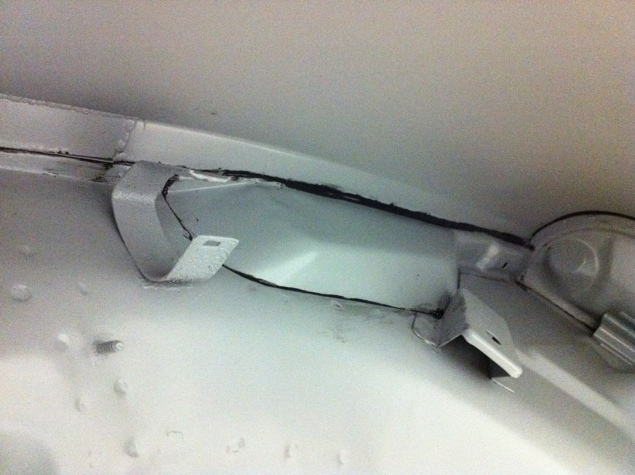
Here are the cuts to the coupe fender contours and the resulting 'gaps' I mentioned earlier that have to be closed up and re-contoured by hand ..
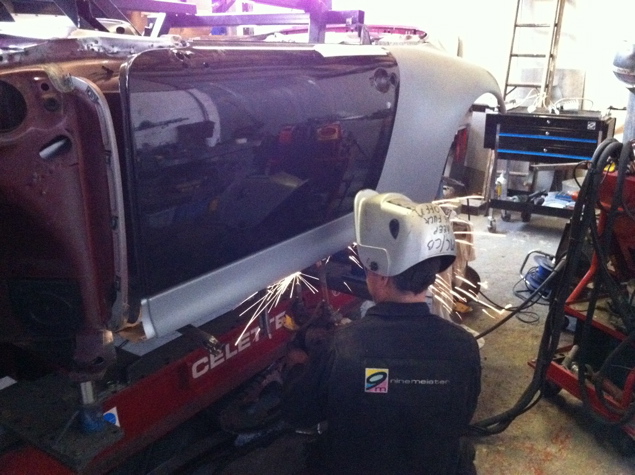
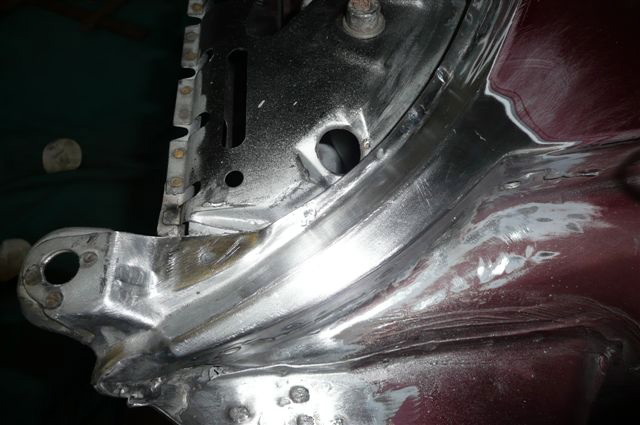
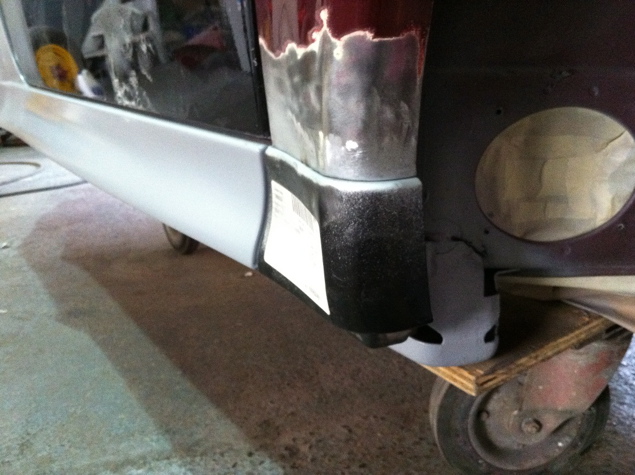
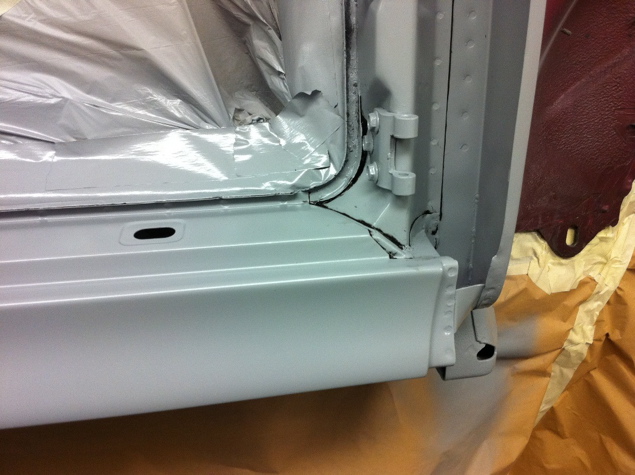
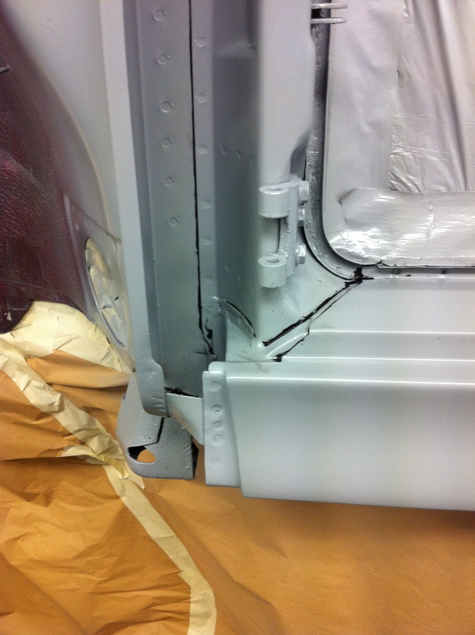
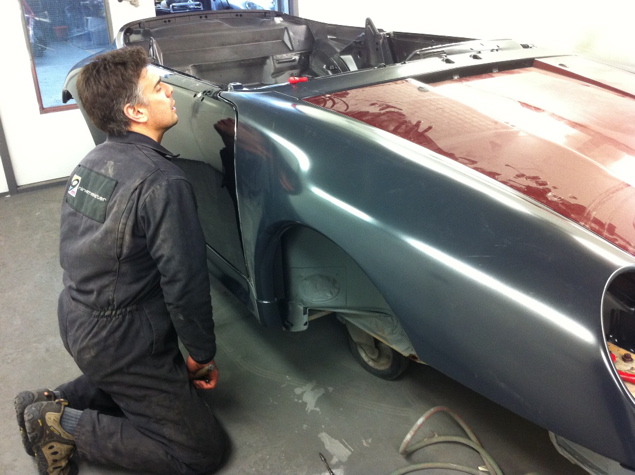
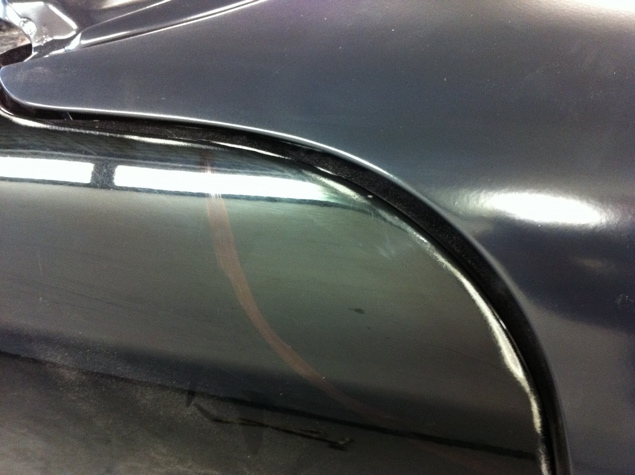
You can see Marc has cut and fitted a section of the closeout steel here .. everything is shaped and match spot welded then ground out to a perfect factory fit ..
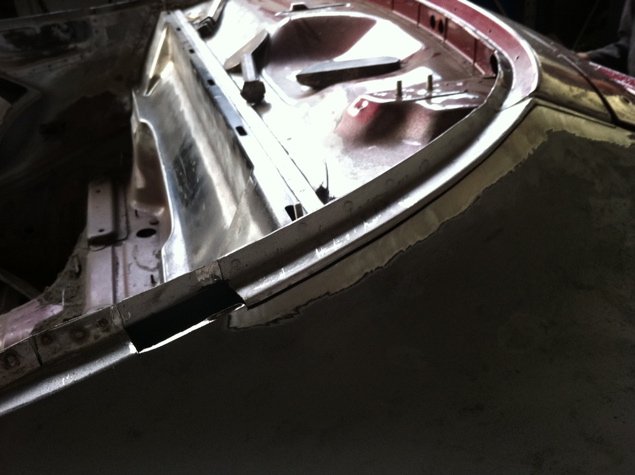
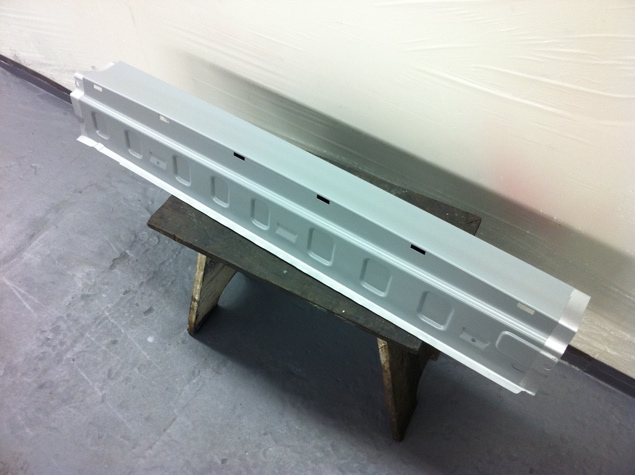
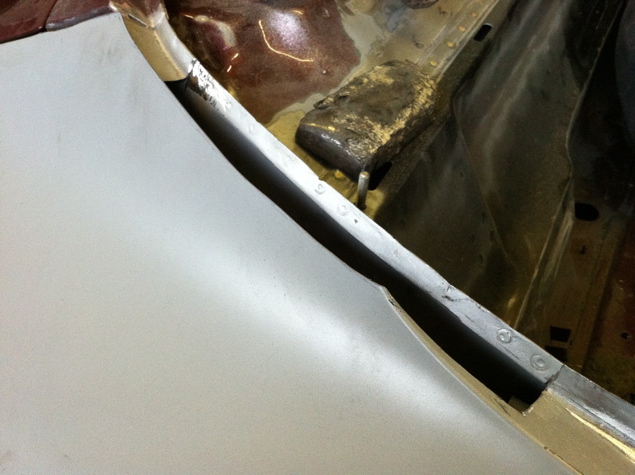
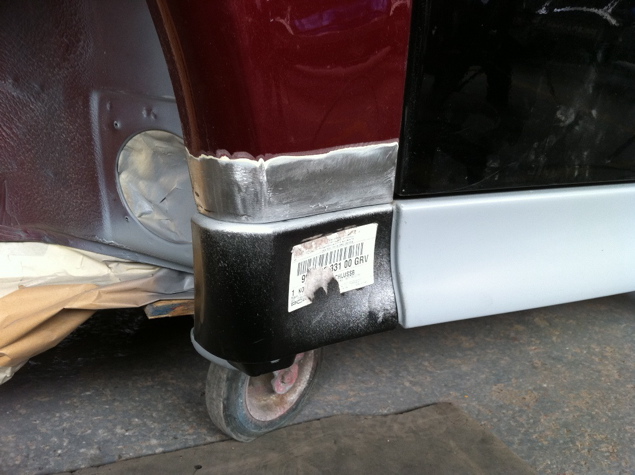
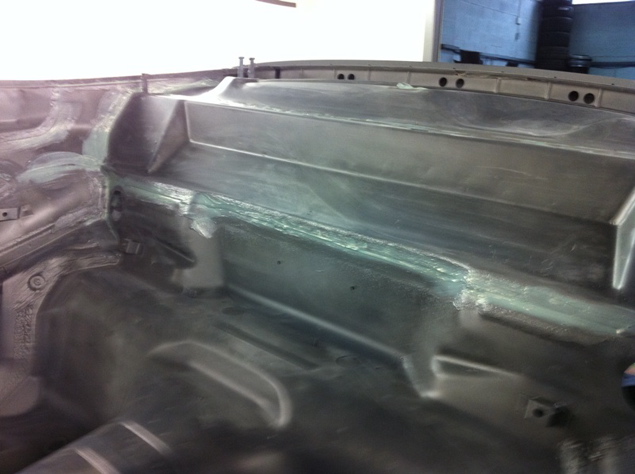
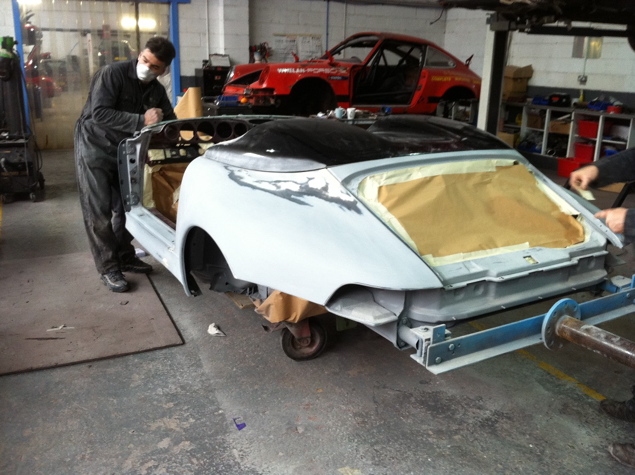
Here's the proper Turbo inner support/closeout fitted ... finally ... after 13 years and 30K miles ...
This completely blew me away ... seems even Porsche replacement stampings aren't always exactly perfect. The older the tools get, the more 'worn' and out of tolerance .. so sometimes contour 'adjustments' have to be made to get a perfect matching set .. Marc notices this kind of stuff routinely ... I think it's a gift (or a curse for him .. imagine all the flaws he sees in everyday observations .. I think I'd become a tad jaded .. )
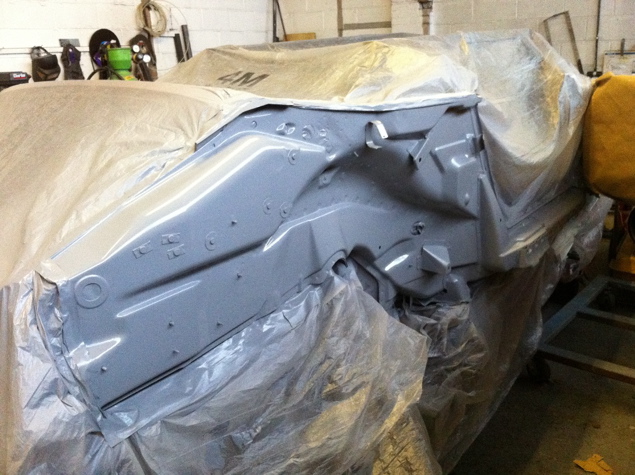
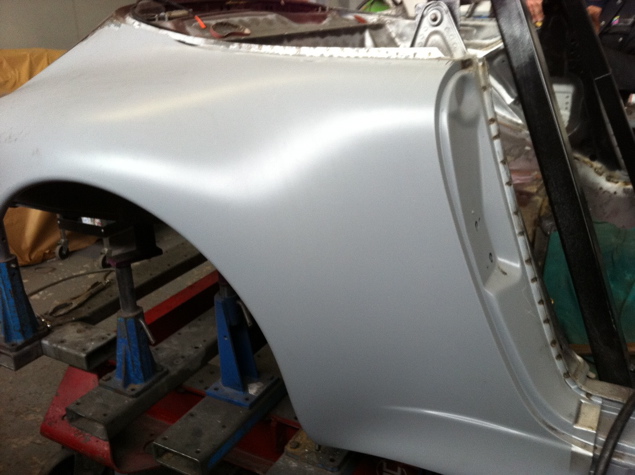
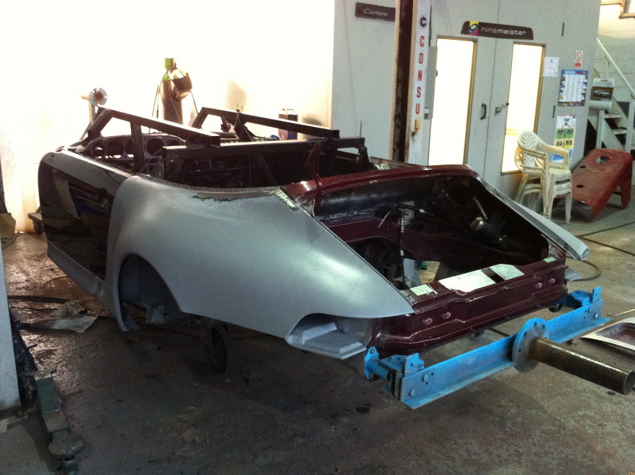
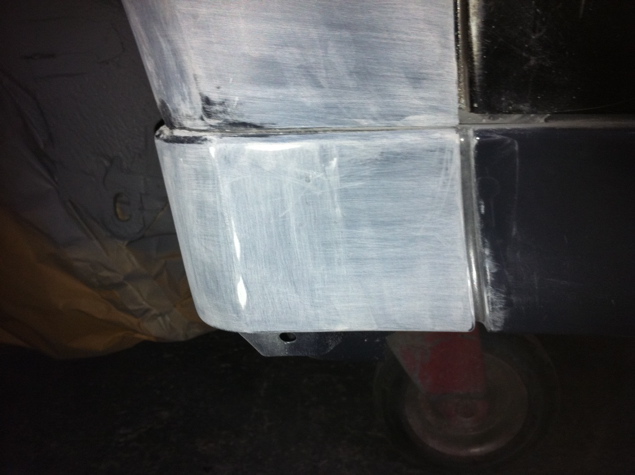
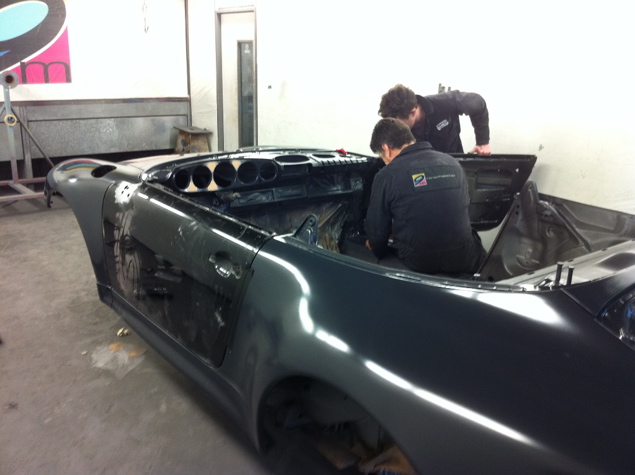
And finally, the rear Speedster unique and Turbo body work and new sills are in! .. You can see the chassis has been bolted up to the Rotisserie jigs so the boys can remove it from the Cellette bench and start hand sealing all the new welds and seams. They push all that sealer up into the cracks and crevices with long brushes and their fingers .. this is just the first of several coatings that are applied that meet and exceed factory practice. The result is .. well, bullet (and rust) proof :-)

Now, we can move on to the Dash and Cowl .. where the fun REALLY begins .. but I have to go to physical therapy and get my shoulder wrenched into oblivion .. so until next time ..
Here are the cuts to the coupe fender contours and the resulting 'gaps' I mentioned earlier that have to be closed up and re-contoured by hand ..
You can see Marc has cut and fitted a section of the closeout steel here .. everything is shaped and match spot welded then ground out to a perfect factory fit ..
Here's the proper Turbo inner support/closeout fitted ... finally ... after 13 years and 30K miles ...
This completely blew me away ... seems even Porsche replacement stampings aren't always exactly perfect. The older the tools get, the more 'worn' and out of tolerance .. so sometimes contour 'adjustments' have to be made to get a perfect matching set ..
Marc notices this kind of stuff routinely ... I think it's a gift (or a curse for him .. imagine all the flaws he sees in everyday observations .. I think I'd become a tad jaded .. )And finally, the rear Speedster unique and Turbo body work and new sills are in! .. You can see the chassis has been bolted up to the Rotisserie jigs so the boys can remove it from the Cellette bench and start hand sealing all the new welds and seams. They push all that sealer up into the cracks and crevices with long brushes and their fingers .. this is just the first of several coatings that are applied that meet and exceed factory practice. The result is .. well, bullet (and rust) proof :-)
Now, we can move on to the Dash and Cowl .. where the fun REALLY begins
.. but I have to go to physical therapy and get my shoulder wrenched into oblivion .. so until next time ..
Last edited by JPP; 08-04-2011 at 06:20 PM.
08-04-2011, 02:14 PM
#183
Pro
Join Date: Sep 2009
Location: Ottawa,Ontario
Posts: 658
Likes: 0
Received 0 Likes
on
0 Posts
Yes, yes, this is all very nice and everything - but aren't you worried that the fact it has been "repainted" and has "had some body work" might diminish it's resale value... 
08-04-2011, 03:16 PM
#184
Addict
Lifetime Rennlist
Member
Lifetime Rennlist
Member
I luvs me sum pitchers!
Jon Paul-- Photo help?  ^^ Reminds me of the ol' days when we first met on RL Jul '09, when Speedy had her first show, & you were yet to be Pope!
Easiest photo-hosting solution: e-mail me your photos & I'll upload / post as your papacy desires.
(Speaking of e-mail, check for one from me.)
Related, from "Photo hosting site of choice" thread:
Usual problem is that you can't share higher res stuff
It's because of Rennlist that I was forced to learn about this subject.
The RL photo server I used was always low-res, & the photos small. That always struck me as unfortunate. For convenience's sake, I used RL anyway. Then my pictures starting disappearing from their server & being a real hassle in other ways. I think I reached the limit in # of pix, but their webpages didn't behave logically when I tried to rectify. By necessity, I researched options on other sites.
(Unfortunate, especially for a site I pay $ to be a member on.)
When I saw Allill's delicious & high-resolution photos in his WIDEBODY 993 S CAB thread, I looked into what he uses: imageshack.us.
I was surprised to find you don't even need to create an account with them. They host virtually anything, even large files. All you need to do is save the hyperlink. Easy!
Now I have some photos on my own 993 Speedster thread that I sometimes wonder if a few are too large / hi-res.
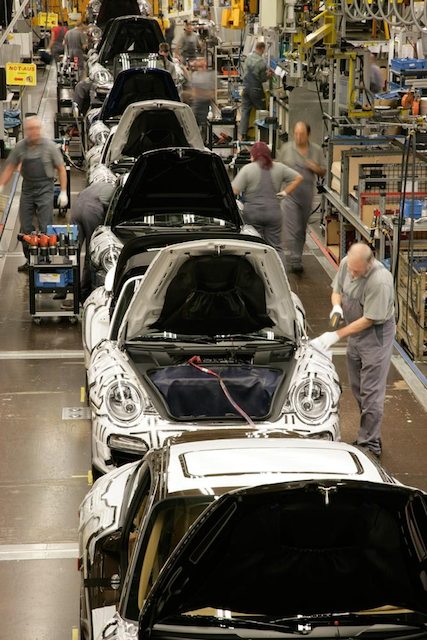
The bottom shot's the low-res version of Butzi (F.A. Porsche)'s family 993 Speedster. I felt guilty about posting the original high-res file. Nice to have that option.


") ^^ Reminds me of the ol' days when we first met on RL Jul '09, when Speedy had her first show, & you were yet to be Pope!
^^ Reminds me of the ol' days when we first met on RL Jul '09, when Speedy had her first show, & you were yet to be Pope!Easiest photo-hosting solution: e-mail me your photos & I'll upload / post as your papacy desires.
(Speaking of e-mail, check for one from me.)
Related, from "Photo hosting site of choice" thread:
Usual problem is that you can't share higher res stuff
It's because of Rennlist that I was forced to learn about this subject.
The RL photo server I used was always low-res, & the photos small. That always struck me as unfortunate. For convenience's sake, I used RL anyway. Then my pictures starting disappearing from their server & being a real hassle in other ways. I think I reached the limit in # of pix, but their webpages didn't behave logically when I tried to rectify. By necessity, I researched options on other sites.
(Unfortunate, especially for a site I pay $ to be a member on.)
When I saw Allill's delicious & high-resolution photos in his WIDEBODY 993 S CAB thread, I looked into what he uses: imageshack.us.
I was surprised to find you don't even need to create an account with them. They host virtually anything, even large files. All you need to do is save the hyperlink. Easy!
Now I have some photos on my own 993 Speedster thread that I sometimes wonder if a few are too large / hi-res.
The bottom shot's the low-res version of Butzi (F.A. Porsche)'s family 993 Speedster. I felt guilty about posting the original high-res file.
Nice to have that option.
08-04-2011, 04:21 PM
#185
Nordschleife Master
Thread Starter

If you mean, am I concerned that my car may be only worth 20% of what the only factory 'white body' based 993 Speedster is probably worth? Then the answer to that is an emphatic NO!

I luvs me sum pitchers!
Jon Paul-- Photo help? Reminds me of the ol' days when we first met on RL Jul '09, when Speedy had her first show, & you were yet to be Pope!
Related, from "Photo hosting site of choice" thread:
Jon Paul-- Photo help? Reminds me of the ol' days when we first met on RL Jul '09, when Speedy had her first show, & you were yet to be Pope!
Related, from "Photo hosting site of choice" thread:

Thanks for the photo tips... I'll look into that :-)
08-05-2011, 05:10 AM
#187
Addict
Rennlist
Site Sponsor
Rennlist
Site Sponsor
08-05-2011, 09:57 AM
#188
Rennlist Member
Haha, I knew that was coming... I was jokingly referring to you having them "in-stock", ready to ship... but that is how I would do it.. strip it and send it over to you, then you could do your magic and ship it back! Tub on ebay right now.... so tempting!
08-05-2011, 11:27 AM
#189
Addict
Rennlist
Site Sponsor
Rennlist
Site Sponsor
Cool.
Get bidding, we'll be ready when it arrives.
 08-05-2011, 02:23 PM
#191
Nordschleife Master
Thread Starter
... so, the Speedster unique bits in the A pillar/front cowl/dash area are very different from a Cabriolet but interestingly, what I thought would have been the most different, the A pillar, is actually the part that is most like a standard Cabriolet part with a Speedster unique 'cap' welded onto the upper outboard area. This fact makes replacing the entire factory A pillar unnecessary and since this is the main Datum that the rest of the chassis is indexed from, that is very good news ...
I don't have a good, clear photo of the factory Speedster A pillars so I've taken the liberty of lifting one from Graham's thread that shows a couple of interesting details .. Note in this photograph on the left side is the new Speedster unique Dash top .. at the lower edge are two support brackets with nutplates welded in at the top that have been strung onto the dash with a bit of wire to keep them from getting lost during shipping ... these aren't listed in the Porsche PET but come with the dash as part of that assembly and are welded into the bulkhead and under the dash where the left and right inboard windshield frame bolts down. These are critical. Also, take a look at the right side of the photo and you can see the Speedster unique A pillars with their unique 'caps' welded on to the tops that capture the outboard windshield frame attach points .. these need to be 'picked off' and will be re-attached to the standard Cabriolet A pillars after a bit of preparation.
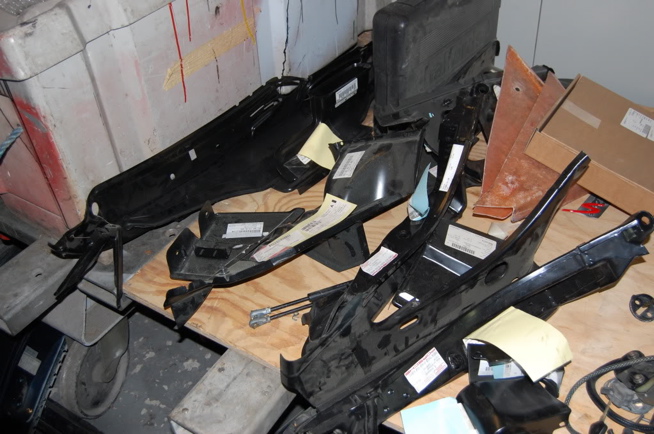
Here's a picture of my new factory 964 Speedster Dash and Cowl. You can see at either end of a Speedster cowl there are doubler caps that must be welded on top of the A pillar caps to tie the cowl assembly into the dash. The rest of the cowl can't be used because it's contour is flat to slightly convex v.s. the 993's unique concave cowl shape (something I didn't realize until Colin pointed it out to me ..) and also because of the wiper positions.
The Cabriolet dash top's factory welds are 'Picked' apart and just the top cap is removed .. and later, the windshield posts will be re-cut to a precise position so they can be used to weld to under the Speedster A pillar caps ..

Here, Owen is welding in the new 'picked apart' Speedster unique dash cap and the Speedster unique windshield frame to bulkhead supports I mentioned earlier .. you can see the bolts threaded and in place to check alignment in the second shot ...
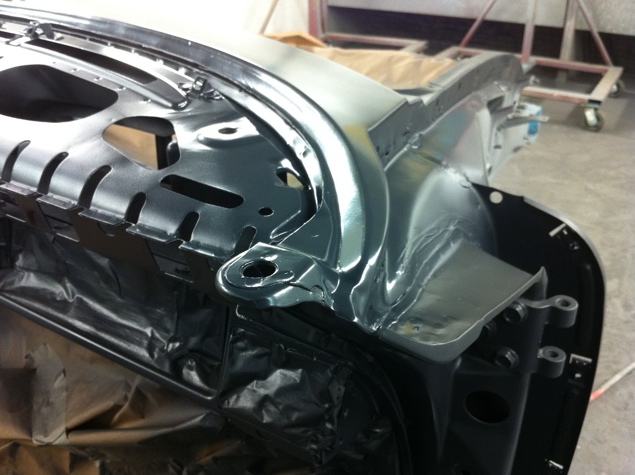
Here, the Cab cowl has been cut back to make room for the new Speedster cowl end pieces and the new Speedster A pillar cap has been 'picked' off, prepped and welded into place. Again, you can see the inboard windshield frame bolts threaded through the new dash cap and into the nutplates of the welded in supports underneath ...


And, here's the new Cowl end pieces being welded in.. also, you can see that heat activated e-coat etching primer has been applied at every step and level to ensure all welds are properly primed as the work progresses ..

The final welding is then ground flush ...
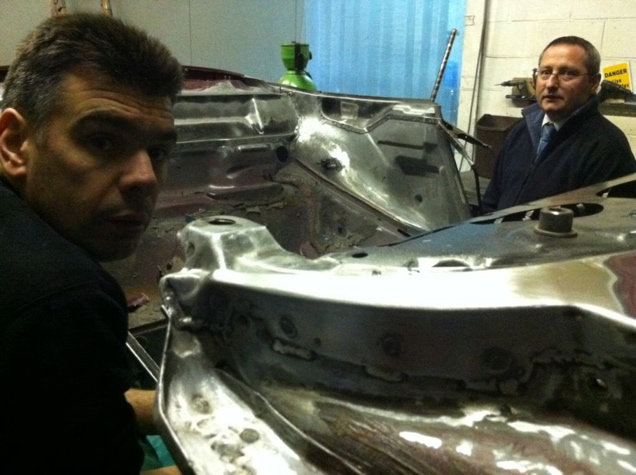
..and the Maestro does a final inspection before a panel fit is done .. I think Paul is there to ask Marc ... 'Doesn't this bloke owe us some more money now..??'
.. the final work in one of many primers coats ...
.. and the doors and fenders are re-fitted to check all gaps and alignments before moving on ..
I don't have a good, clear photo of the factory Speedster A pillars so I've taken the liberty of lifting one from Graham's thread that shows a couple of interesting details .. Note in this photograph on the left side is the new Speedster unique Dash top .. at the lower edge are two support brackets with nutplates welded in at the top that have been strung onto the dash with a bit of wire to keep them from getting lost during shipping ... these aren't listed in the Porsche PET but come with the dash as part of that assembly and are welded into the bulkhead and under the dash where the left and right inboard windshield frame bolts down. These are critical. Also, take a look at the right side of the photo and you can see the Speedster unique A pillars with their unique 'caps' welded on to the tops that capture the outboard windshield frame attach points .. these need to be 'picked off' and will be re-attached to the standard Cabriolet A pillars after a bit of preparation.
Here's a picture of my new factory 964 Speedster Dash and Cowl. You can see at either end of a Speedster cowl there are doubler caps that must be welded on top of the A pillar caps to tie the cowl assembly into the dash. The rest of the cowl can't be used because it's contour is flat to slightly convex v.s. the 993's unique concave cowl shape (something I didn't realize until Colin pointed it out to me ..) and also because of the wiper positions.
The Cabriolet dash top's factory welds are 'Picked' apart and just the top cap is removed .. and later, the windshield posts will be re-cut to a precise position so they can be used to weld to under the Speedster A pillar caps ..
Here, Owen is welding in the new 'picked apart' Speedster unique dash cap and the Speedster unique windshield frame to bulkhead supports I mentioned earlier .. you can see the bolts threaded and in place to check alignment in the second shot ...
Here, the Cab cowl has been cut back to make room for the new Speedster cowl end pieces and the new Speedster A pillar cap has been 'picked' off, prepped and welded into place. Again, you can see the inboard windshield frame bolts threaded through the new dash cap and into the nutplates of the welded in supports underneath ...
And, here's the new Cowl end pieces being welded in.. also, you can see that heat activated e-coat etching primer has been applied at every step and level to ensure all welds are properly primed as the work progresses ..
The final welding is then ground flush ...
..and the Maestro does a final inspection before a panel fit is done .. I think Paul is there to ask Marc ... 'Doesn't this bloke owe us some more money now..??'
.. the final work in one of many primers coats ...
.. and the doors and fenders are re-fitted to check all gaps and alignments before moving on ..
Last edited by JPP; 08-06-2011 at 10:49 AM.
08-07-2011, 09:25 PM
#193
Nordschleife Master
Thread Starter
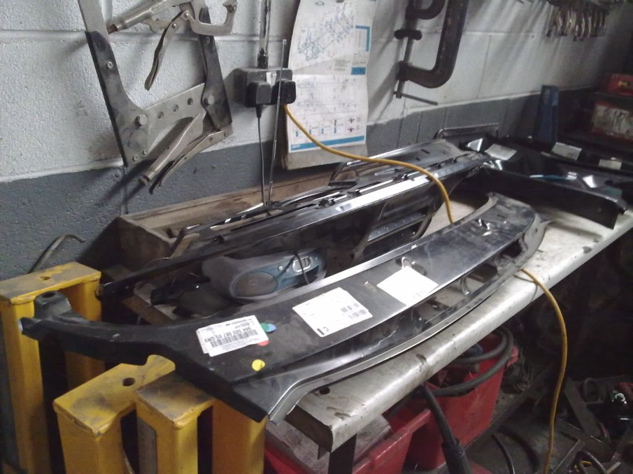
The last thing to be taken care of before seam sealing and primer stages are repairing the mangled welding on the bottoms of the front fenders and replacing the front Turbo fender extensions with new Porsche metal ... thankfully, Marc was able to save both of the fenders :-)
In the meantime, the chassis Rotisserie rolling jigs were bolted on and the completed chassis was removed from the Celette bench ..

..and Owen started cleaning up welds ..
.. and stripping and cleaning the rear bulkhead area ..
.. and then all of the welds were sealed by hand using fingers and brushes ..

The chassis is given a final prep before masking .. at this stage, the front fenders are fit checked and prepped along with the doors and also the clamshell is fit and gap checked and it and the rear quarters are adjusted ..
The clamshell had arrived to me damaged in the box from the seller, so we knew there was some work to be done .. but after some initial work, more previous accident damage was revealed as well... Evidently these glass lay-up clamshells almost always suffer damage in even the slightest accident, and this one had seen some bumps .. This is just the initial fit-check as Lee determines the envelope and gap edges he needs to achieve with the final shape. The gaps are critical for proper convertible top fit and I understand this is the same process Porsche used to hand-fit clamshells to each 964 Speedster ... As with all lay-up parts made in an Autoclave tool, each one is slightly unique and requires hand-shaping and finishing.
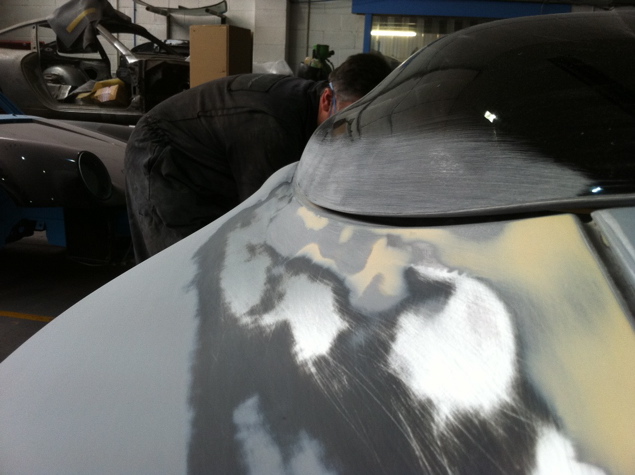
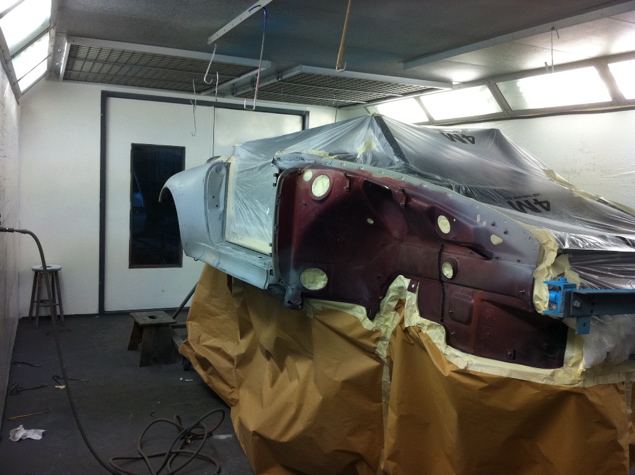
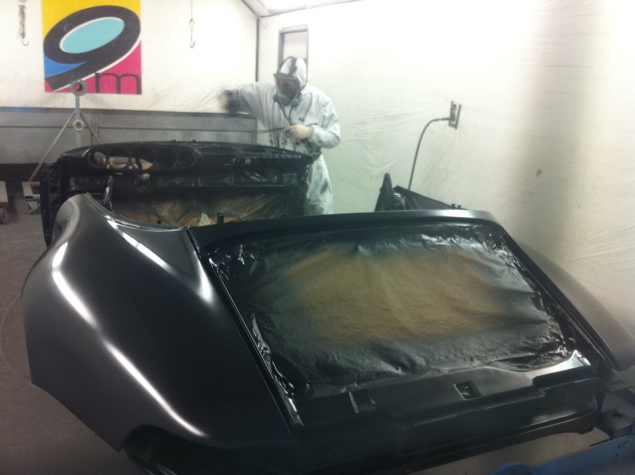
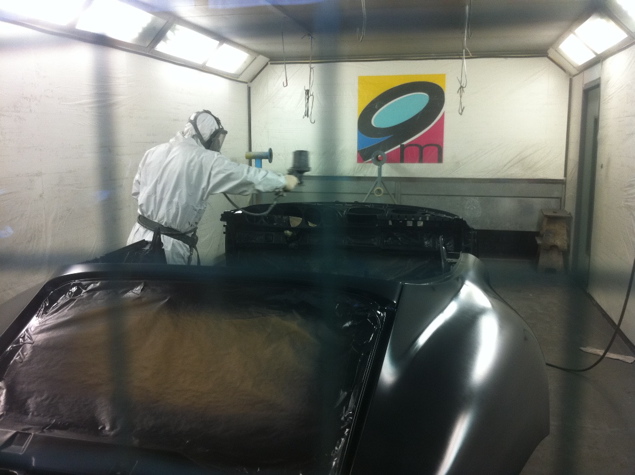
And, finally, the chassis is brought into the paintbooth for it's first prime coat which will make imperfections in the panels visible. The bodywork will then be adjusted as needed and re-sanded and a second prime undercoat coat in black will be applied to the entire chassis ...

First prime coat is applied to the chassis ..
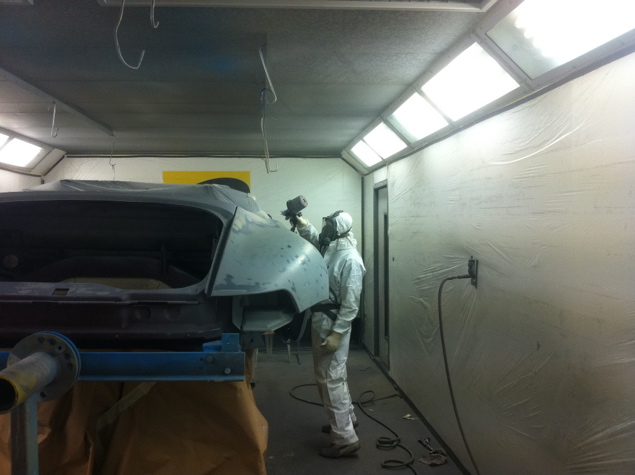
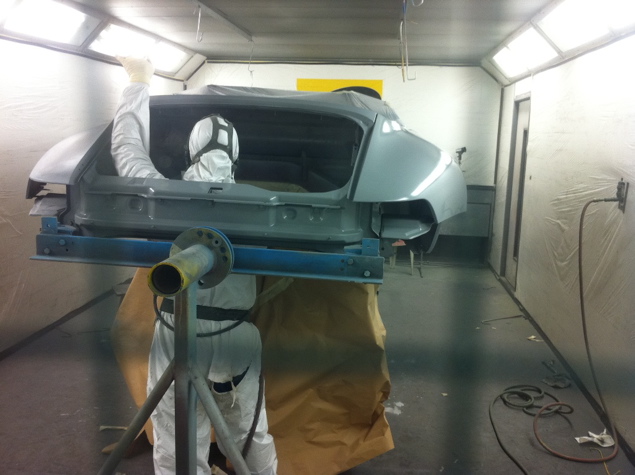
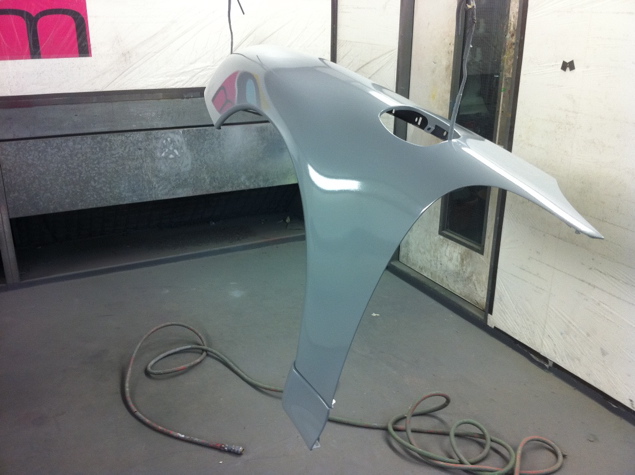
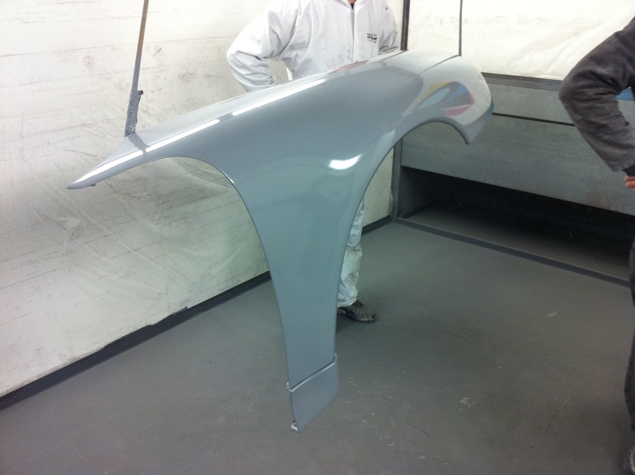
..and the fenders are shot separately so the inner mating surfaces get coated .... they will get mounted for the color coat.
..and as soon as that's baked, all the inner and outer seams that have been touched are sealed by hand
In the meantime, the chassis Rotisserie rolling jigs were bolted on and the completed chassis was removed from the Celette bench ..
..and Owen started cleaning up welds ..
.. and stripping and cleaning the rear bulkhead area ..
.. and then all of the welds were sealed by hand using fingers and brushes ..
The chassis is given a final prep before masking .. at this stage, the front fenders are fit checked and prepped along with the doors and also the clamshell is fit and gap checked and it and the rear quarters are adjusted ..
The clamshell had arrived to me damaged in the box from the seller, so we knew there was some work to be done .. but after some initial work, more previous accident damage was revealed as well... Evidently these glass lay-up clamshells almost always suffer damage in even the slightest accident, and this one had seen some bumps .. This is just the initial fit-check as Lee determines the envelope and gap edges he needs to achieve with the final shape. The gaps are critical for proper convertible top fit and I understand this is the same process Porsche used to hand-fit clamshells to each 964 Speedster ... As with all lay-up parts made in an Autoclave tool, each one is slightly unique and requires hand-shaping and finishing.
And, finally, the chassis is brought into the paintbooth for it's first prime coat which will make imperfections in the panels visible. The bodywork will then be adjusted as needed and re-sanded and a second prime undercoat coat in black will be applied to the entire chassis ...
First prime coat is applied to the chassis ..
..and the fenders are shot separately so the inner mating surfaces get coated .... they will get mounted for the color coat.
..and as soon as that's baked, all the inner and outer seams that have been touched are sealed by hand
Last edited by JPP; 08-08-2011 at 11:05 AM. Reason: added content
08-08-2011, 12:11 PM
#194
Nordschleife Master
Thread Starter
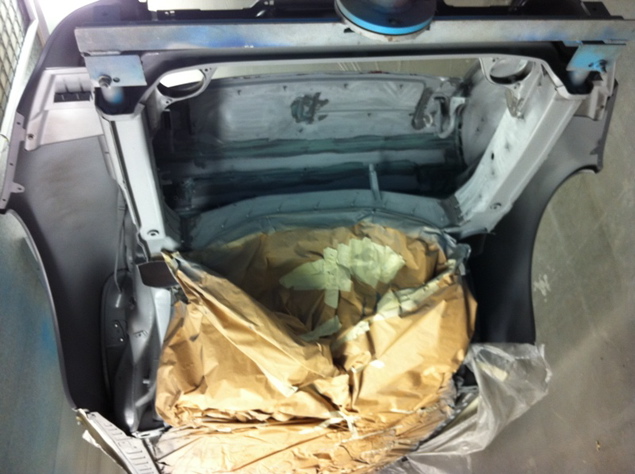
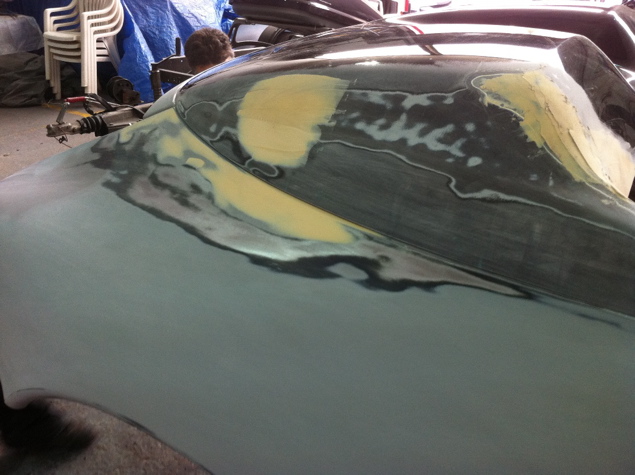
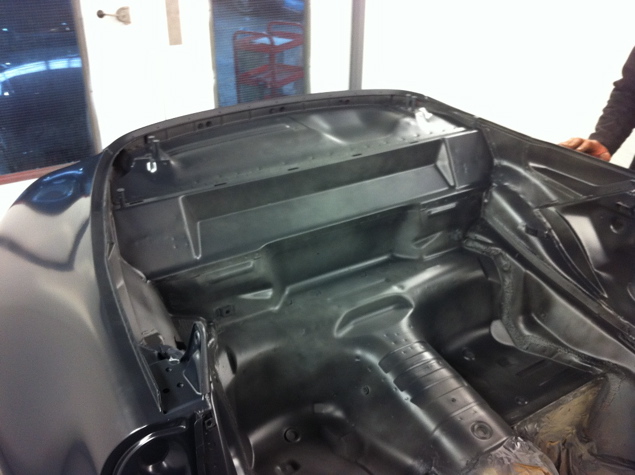
The chassis prep for paint process is now in full swing .. as soon as the first skip coat of grey has been inspected, the bodywork is gone over again and adjusted and the entire car is flatted off AGAIN in preparation for a second prime coat in black ... again to aid Marc in seeing defects and making adjustments in the panelwork as it's sanded ..

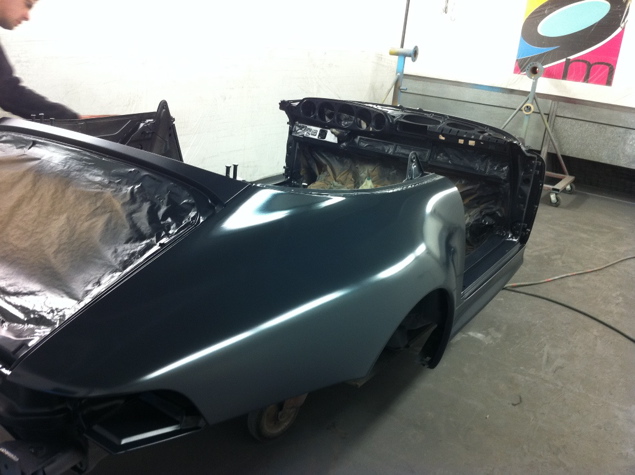
Here you will see that he has 'fogged' this coat in on the bulkhead to match the factory undercoat in the interior panels before the matt color coats ..
As soon as the black prime coat is dry ... the fenders, hood (bonnet :-) and doors are mounted to check fit and gaps ... BTW, this really IS how fast they work. At this point, only two months have gone by since they started the project .. as I'm posting this stuff I'm reminded that in any U.S. bodyshop that I've had experience with .. they would still be disassembling the car to work on it and charging me by the hour .. As it turns out ... I have a perfect hood 
Door gaps are checked and areas that will need adjustment are noted. Doors are hand fitted and hand shaped at the factory for each car .. so when you buy used doors, your getting parts that were custom fit to another vehicle and they need to be re-fitted and re-shaped accordingly ...
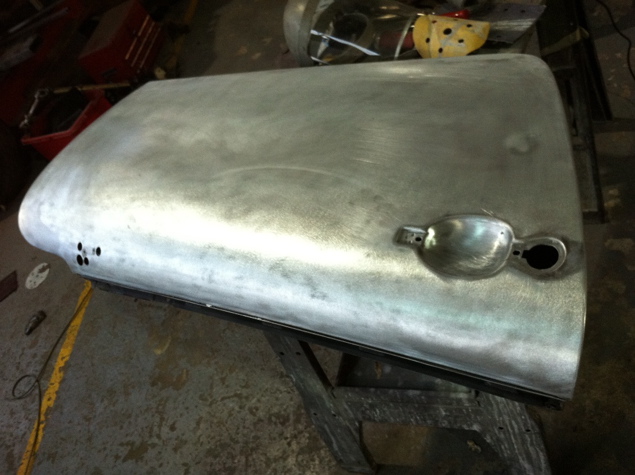
The doors are then removed and any panel work is done before they are prepped for their prime coat ..
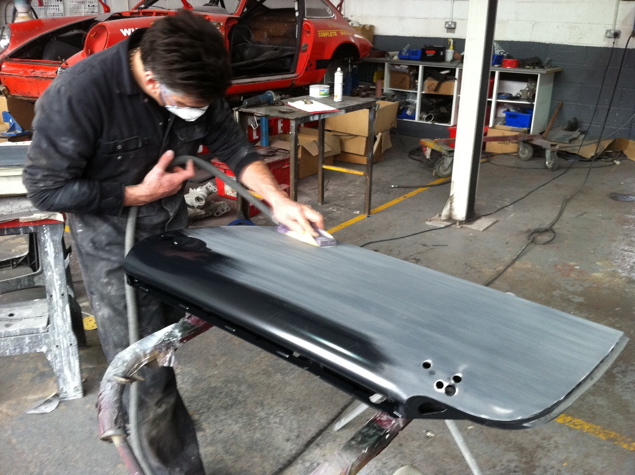
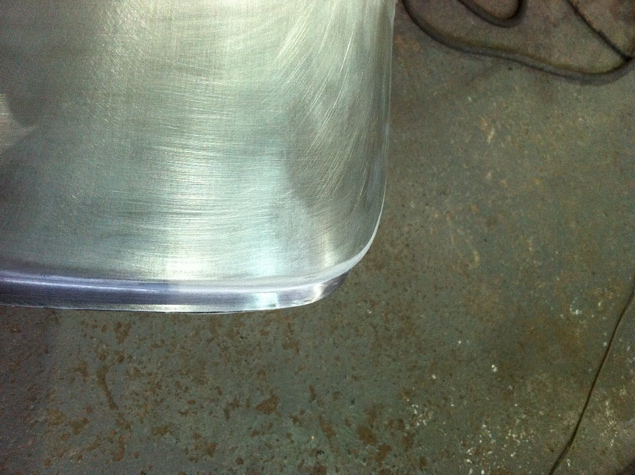
Once the factory paint and glazing is removed, the tooling marks and defects can be seen and dealt with .. yes, they are all like this right off the shelf ... even coupe doors. Tooling is always a little 'imperfect' .. it's the nature of tolerance, even at +/- .0010 ...
Here you will see that he has 'fogged' this coat in on the bulkhead to match the factory undercoat in the interior panels before the matt color coats ..
As soon as the black prime coat is dry ... the fenders, hood (bonnet :-) and doors are mounted to check fit and gaps ... BTW, this really IS how fast they work. At this point, only two months have gone by since they started the project .. as I'm posting this stuff I'm reminded that in any U.S. bodyshop that I've had experience with .. they would still be disassembling the car to work on it and charging me by the hour ..
As it turns out ... I have a perfect hood Door gaps are checked and areas that will need adjustment are noted. Doors are hand fitted and hand shaped at the factory for each car .. so when you buy used doors, your getting parts that were custom fit to another vehicle and they need to be re-fitted and re-shaped accordingly ...
The doors are then removed and any panel work is done before they are prepped for their prime coat ..
Once the factory paint and glazing is removed, the tooling marks and defects can be seen and dealt with .. yes, they are all like this right off the shelf ... even coupe doors. Tooling is always a little 'imperfect' .. it's the nature of tolerance, even at +/- .0010 ...
08-08-2011, 12:21 PM
#195
Rennlist Member
JP, as you gave had sent tidbits of info earlier this year, I thouhgt I "knew" the work that was done... but the more you share, the more I realize the depth of the project. I mean, I saw the shots of the shell and thought, wow, ground up project. But the devil is in the dtails, for sure.
As you noted, the speed that the project was done was very impressive. Over here, that sort of speed equates to cut corners. Clearly not the case at 9M.
Fantastic work!
I REALLY cannot wait to see it in person
As you noted, the speed that the project was done was very impressive. Over here, that sort of speed equates to cut corners. Clearly not the case at 9M.
Fantastic work!
I REALLY cannot wait to see it in person