When you click on links to various merchants on this site and make a purchase, this can result in this site earning a commission. Affiliate programs and affiliations include, but are not limited to, the eBay Partner Network.
I'm rebuilding my later rack (1997) and wondering if anyone has done a write up specifically for this one?
- Also wondering what grease to use on the gears ?
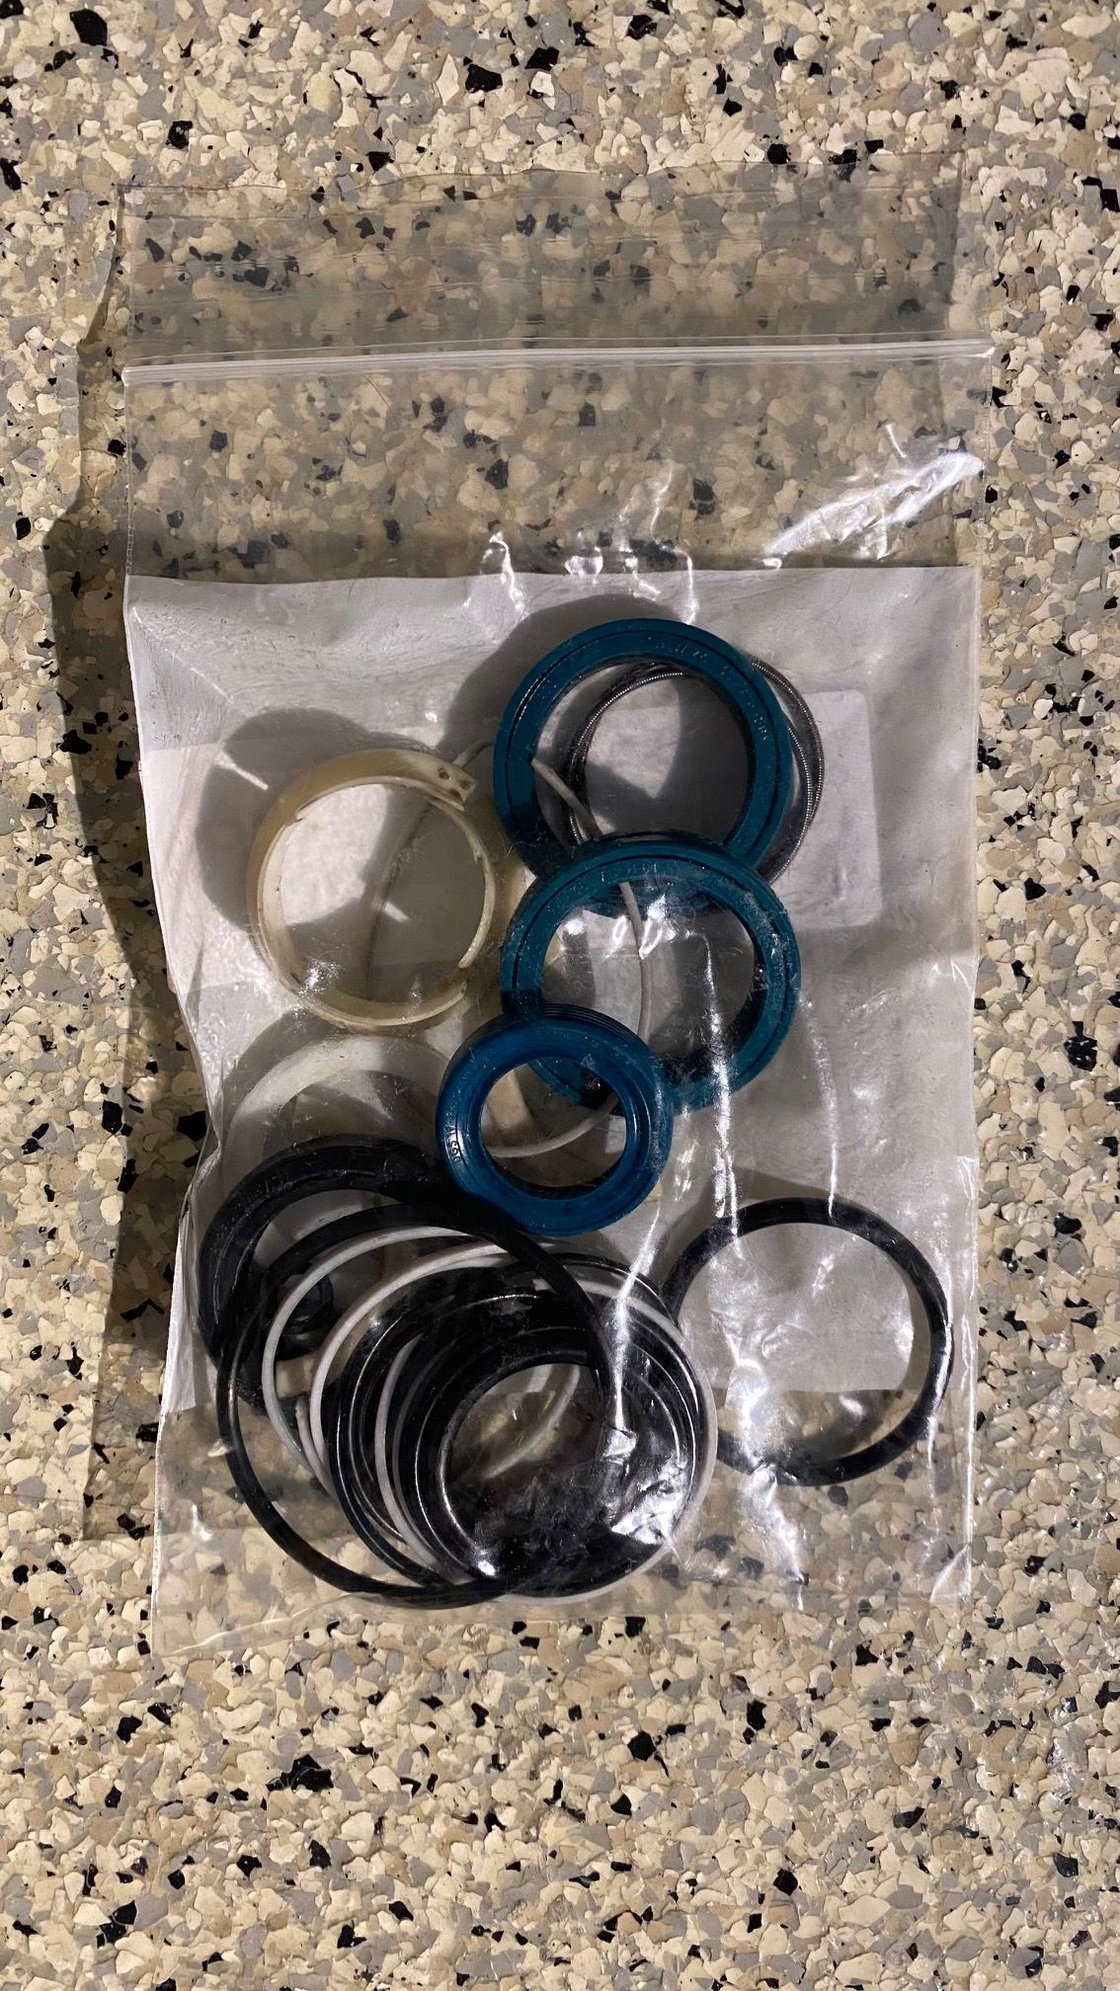
- And what part number for the o-rings on the hard lines... ?
I'm rebuilding my later rack (1997) and wondering if anyone has done a write up specifically for this one?
- Also wondering what grease to use on the gears ?
- And what part number for the o-rings on the hard lines... ?
Instructions should be the same for 95-98. An additional brace was added on 96+ but everything else should be good. Nothing special about 97-98.
Mine is a '97 and I found no differences from the write up (again do note the write up is for a RHD car). I just used a Lithium based grease when I put the rack back together. No O-rings as I recall on the hard lines. Only crush washers.
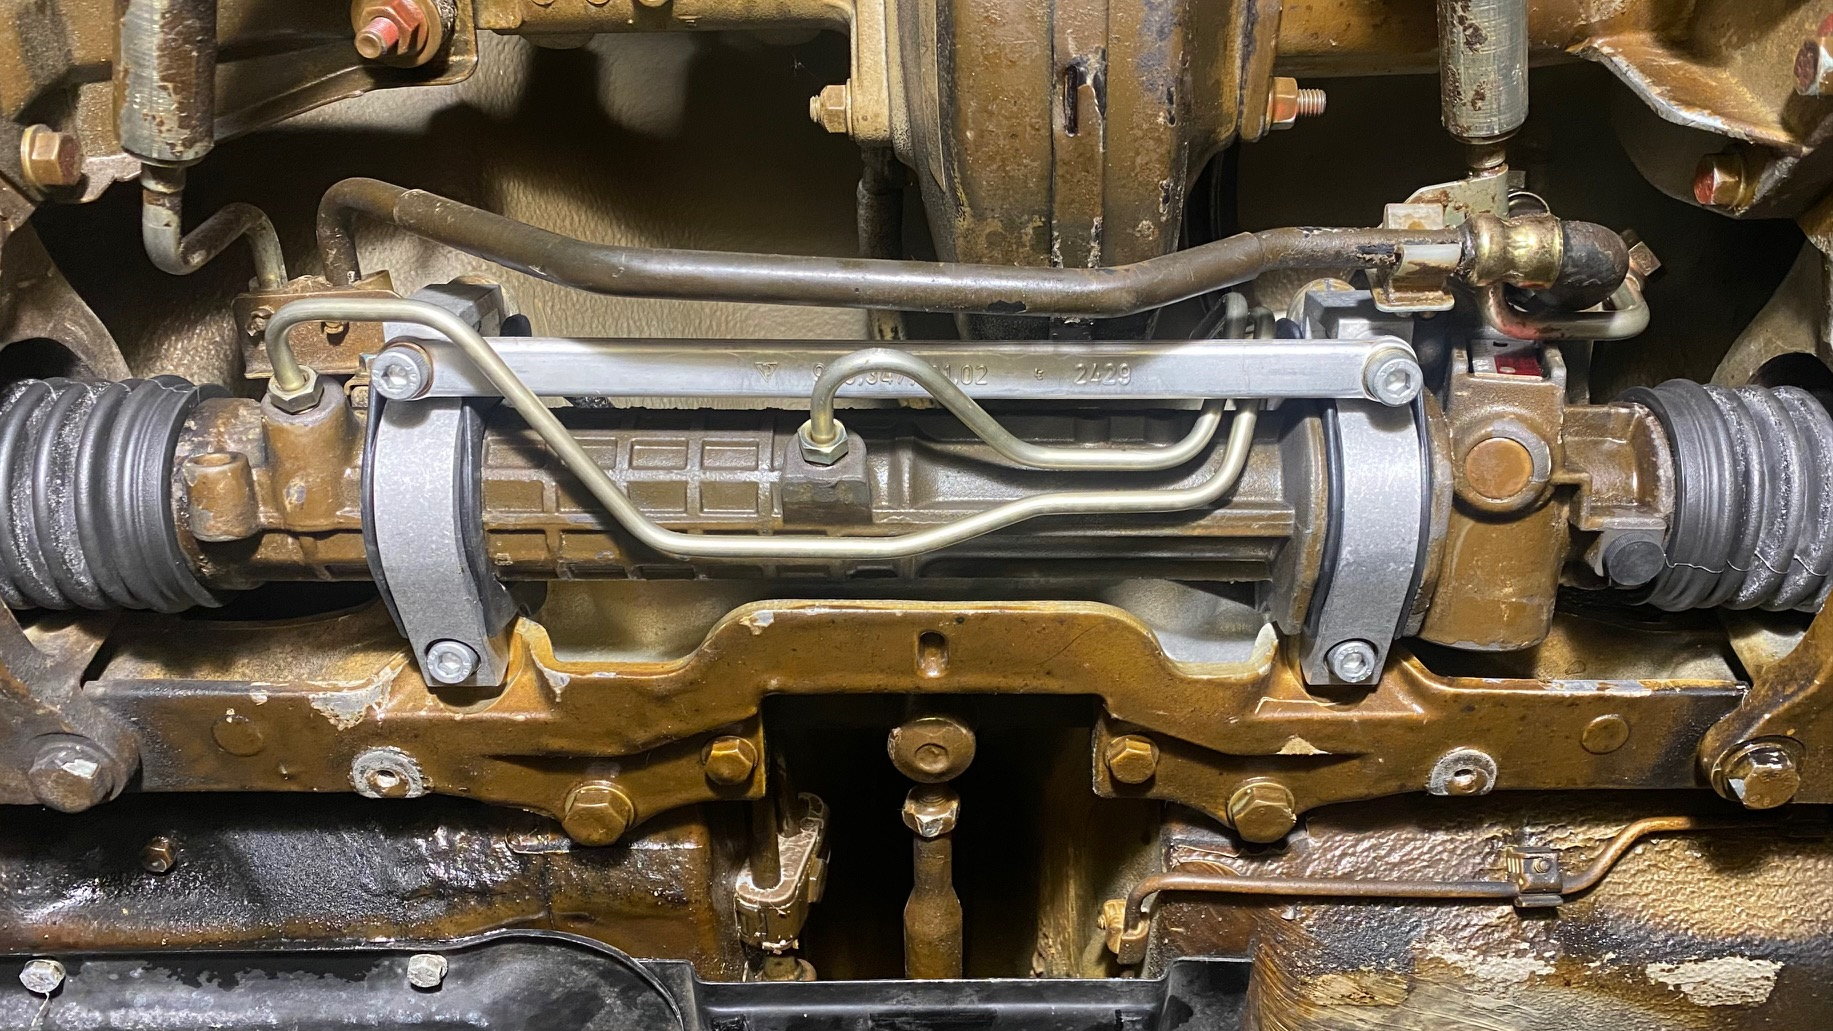
No it's actually a completely different unit. For example, the hard lines on the housing MUST come off to separate the input shaft housing from the main tube.
Originally Posted by 71-3.0-911
Instructions should be the same for 95-98. An additional brace was added on 96+ but everything else should be good. Nothing special about 97-98.
By hard lines on the housing I mean the smaller metal lines running from the input shaft housing the the two hydraulic pressure zones of the shaft, not talking about the crush seals on the pump lines.
Originally Posted by krish
Mine is a '97 and I found no differences from the write up (again do note the write up is for a RHD car). I just used a Lithium based grease when I put the rack back together. No O-rings as I recall on the hard lines. Only crush washers.
You do not need to separate the input shaft housing. You only need to remove the input shaft. Do study the write up. If you do need to remove the lines (to clean them out or whatever) I think they're flared/compression type fittings (similar to brake lines).
Clearly a lot of people have the earlier style rack - or is it just the RHD rack? I'm US, LHD rack. The housing must be removed in the later style rack in order to remove the input shaft. As well as to get at and replace the input spring seal.
TIP: When you're tapping out the old seals from the rack main shaft, if you find a socket that fits perfectly - it's too perfect. Get one that is a little loose because the shaft tapers tighter behind the plastic flange behind the seals. You'll be breaking up that plastic flange as you tap the seal out, no problem, there's new ones in the KLA kit. They were nice enough to send the hard line o-rings as well.
Originally Posted by krish
You do not need to separate the input shaft housing. You only need to remove the input shaft. Do study the write up. If you do need to remove the lines (to clean them out or whatever) I think they're flared/compression type fittings (similar to brake lines).
Finished up and all is dry and well - my experience with the boots wasn't that difficult. What I did was pull the boot all the way over the inside tie rod (pointed the right direction!) all the way, just yank it on and let it roll up/fold up as it will as it passed over the groove, it'll straighten back out later, with a little of something slippery applied, all the way over so it's just dangling on the rod waiting to go where it belongs later. Then connect your inner tie rods to the rack, and moving the steering to one side or the other as needed, just yank/drag the boot inboard until the outside end sets into its groove on the inner tie rod. Then after you've made sure there's fresh rack grease on the gear, turn the steering so the boot you're working on is pushed all the way toward the rack housing, and then apply something slippery to that end of the boot, and start shoving/pushing/smushing the end of the boot up and around the rack housing and it'll pop right in place. Then turn steering to other lock and and repeat.
I realize this is an old thread but best to post here to keep it all in one place.
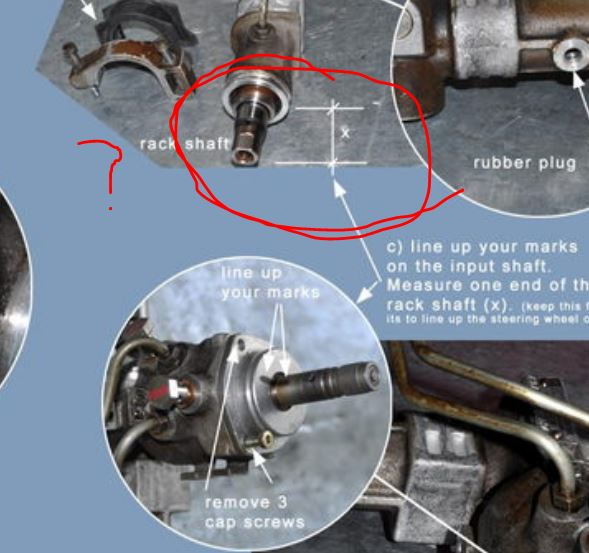
I neglected to mark my input shaft position on the cap so as to know the rack's straight-ahead position. Could someone please let me know what the distance "X" (see below) is?
That�s not rack centering, it�s the input shaft preload. If you didn�t mark it then you�ll need to guess and maybe disassemble later to correct. IIRC mine came out pretty tight but once you get the wheel on it�s easier. This nut is not torqued significantly so err on the light side.
rack centering is done by pulling a rubber plug off the rack housing and looking for a dimple to appear in the hole to indicate center.
OK, got it. Found the dimple; simple enough.
A more interesting problem is that of removing the input shaft seal in my 'alternate' rack version without a cover. The seal sits between the top of the sleeve (with a fixed end; no removable cover) and a bearing I can't locate anywhere online. I'm reluctant to mess with extracting the bearing if I don't have a replacement.
A couple of you @BesideTheBox and @996 GT2 have posted you have this type of rack. How did you remove the input shaft seal without buggering up the bearing? See pics below
"Torrington 308-365" bearing in the way of the seal... Input shaft seal: How to remove without messing up the bearing?
Tap both out make sure the bearing goes back the same way. My rack rebuild failed so the whole thing hurts to remember. Especially with the gashes and tears in my hands that took months to heal.
Tap both out make sure the bearing goes back the same way. My rack rebuild failed so the whole thing hurts to remember. Especially with the gashes and tears in my hands that took months to heal.
On the list of things to avoid DIYing.
Thanks for your reply.
They can't be tapped out, the bearing has no exposed edge to tap on.
I have no experience, and am just giving brain-storm considerations. Looking at the picture, could you pluck the seal out with needle nose pliers or pick at it to remove it. Once the seal is removed, it should leave enough of an exposed edge on the bearing to begin tapping it out. Also, does the bearing come out by tapping on the lettered side, or the seal side? In other words did the bearing go in last, or first. In other applications, I have seen where a seal or o-ring is what holds in the bearing or bushing.


 02-07-2022, 11:28 PM