When you click on links to various merchants on this site and make a purchase, this can result in this site earning a commission. Affiliate programs and affiliations include, but are not limited to, the eBay Partner Network.
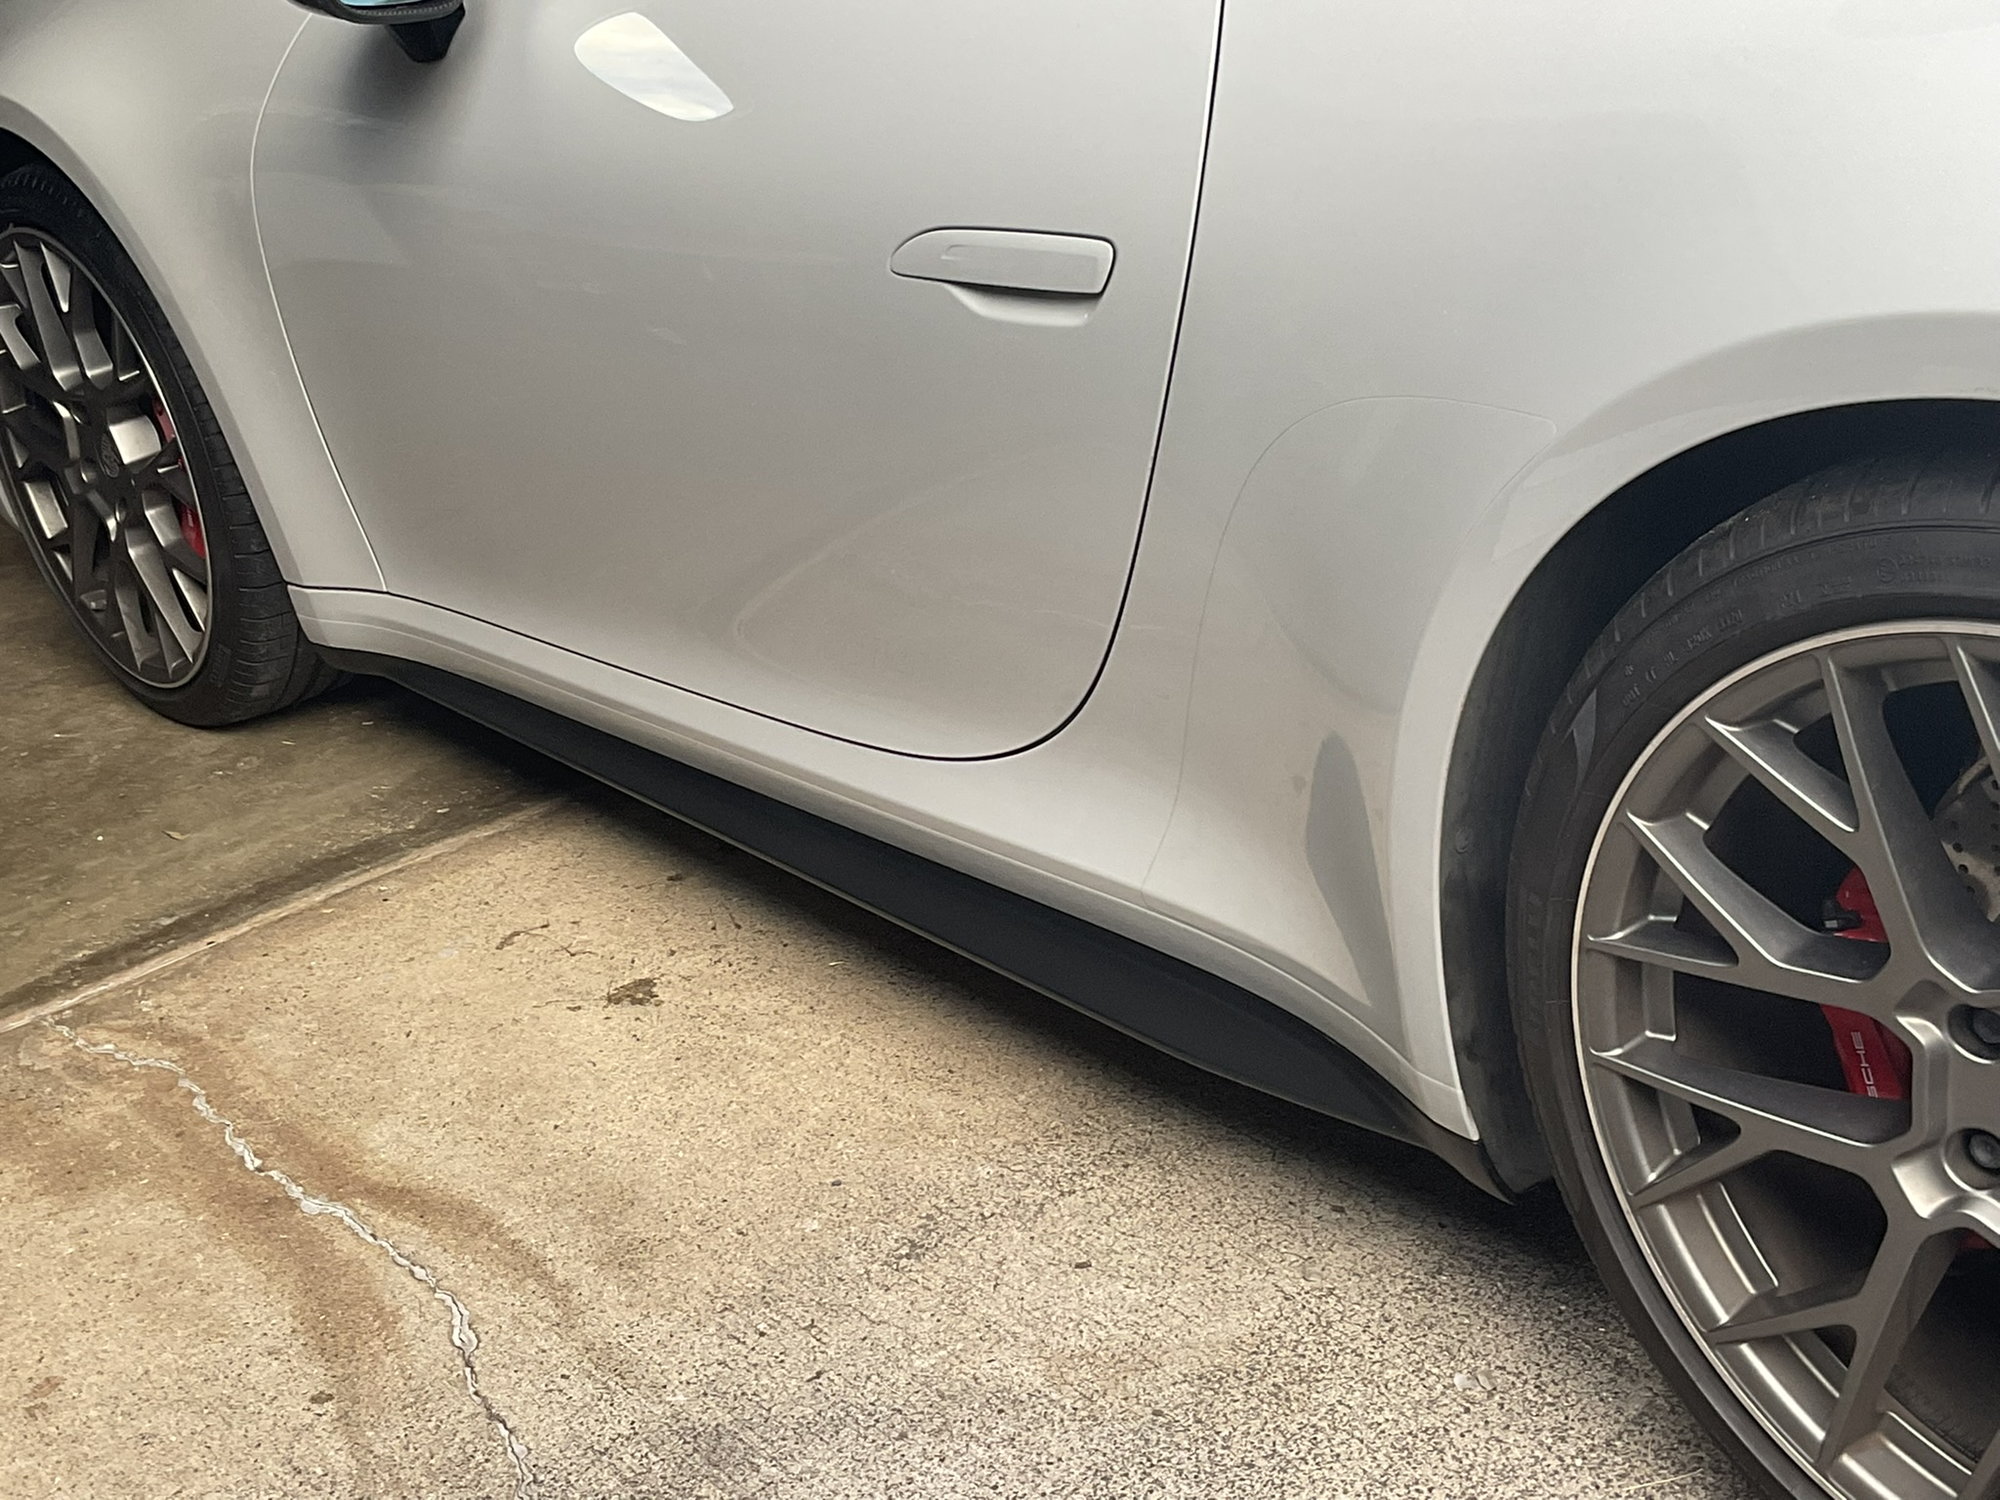
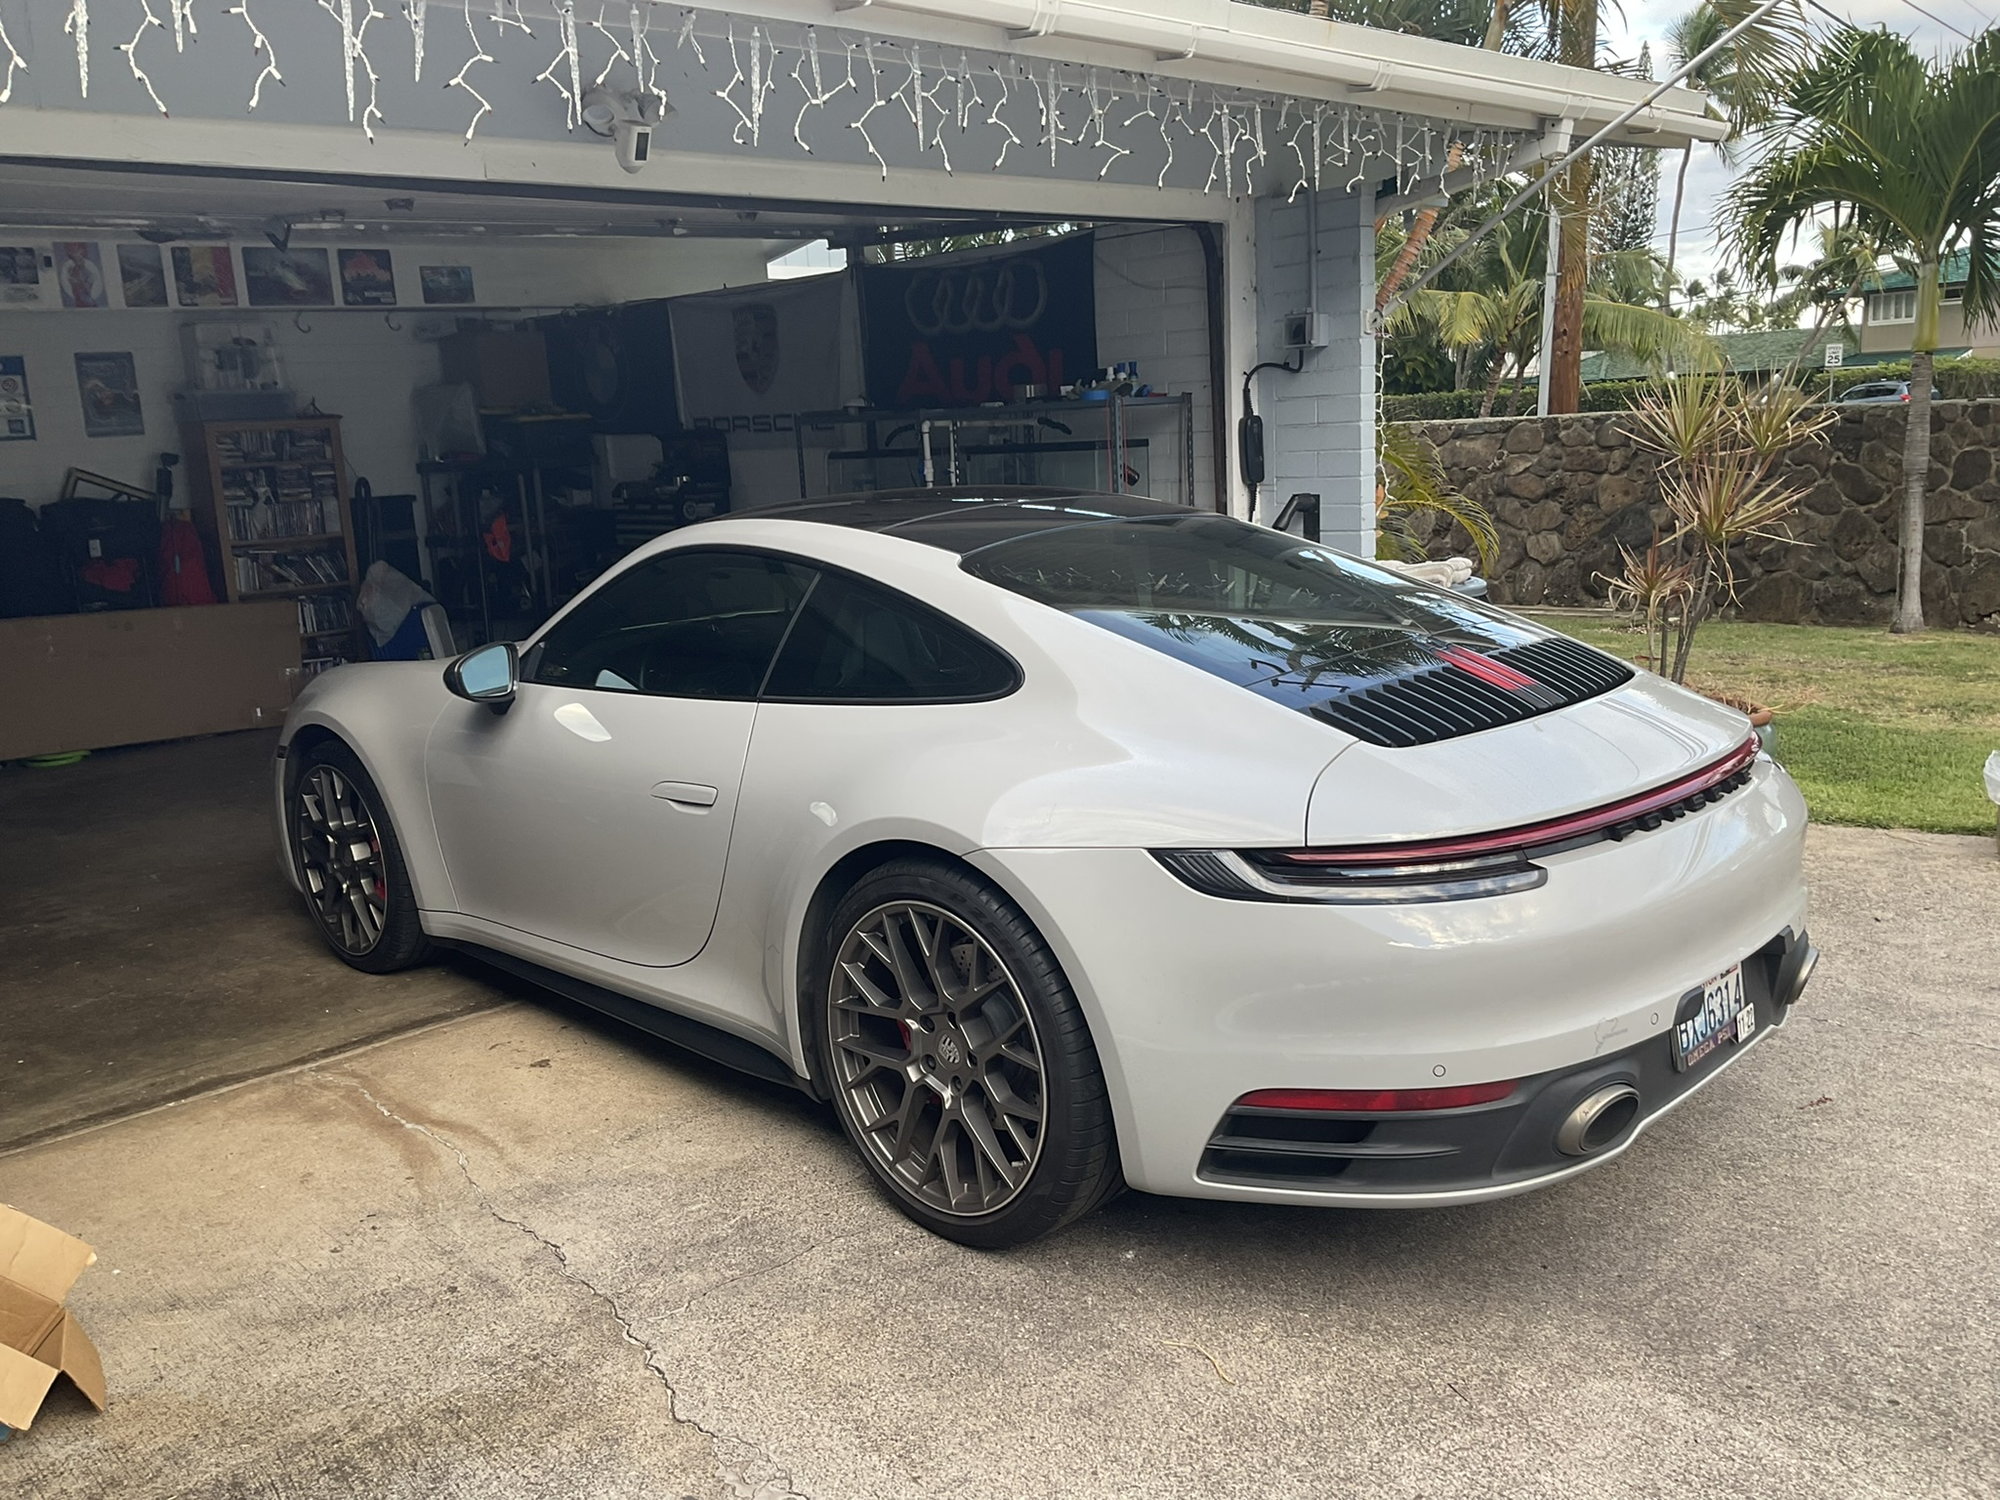
Okay just finished install on my 21� 992 in Chalk and must say nice constraint unpainted I think aa painted would kinda stick our way too much and without a full aero kit to supplement it would look odd. They are definitely more pronounced that the basic non-sport dynamic ones avail but cheaper too for some reason also. Would keep them as is like prior black ABS plastic ones I just removed tho. So far I like it unpainted. Definitely should protect a bit I think from rock chips given the flare as others have mentioned.
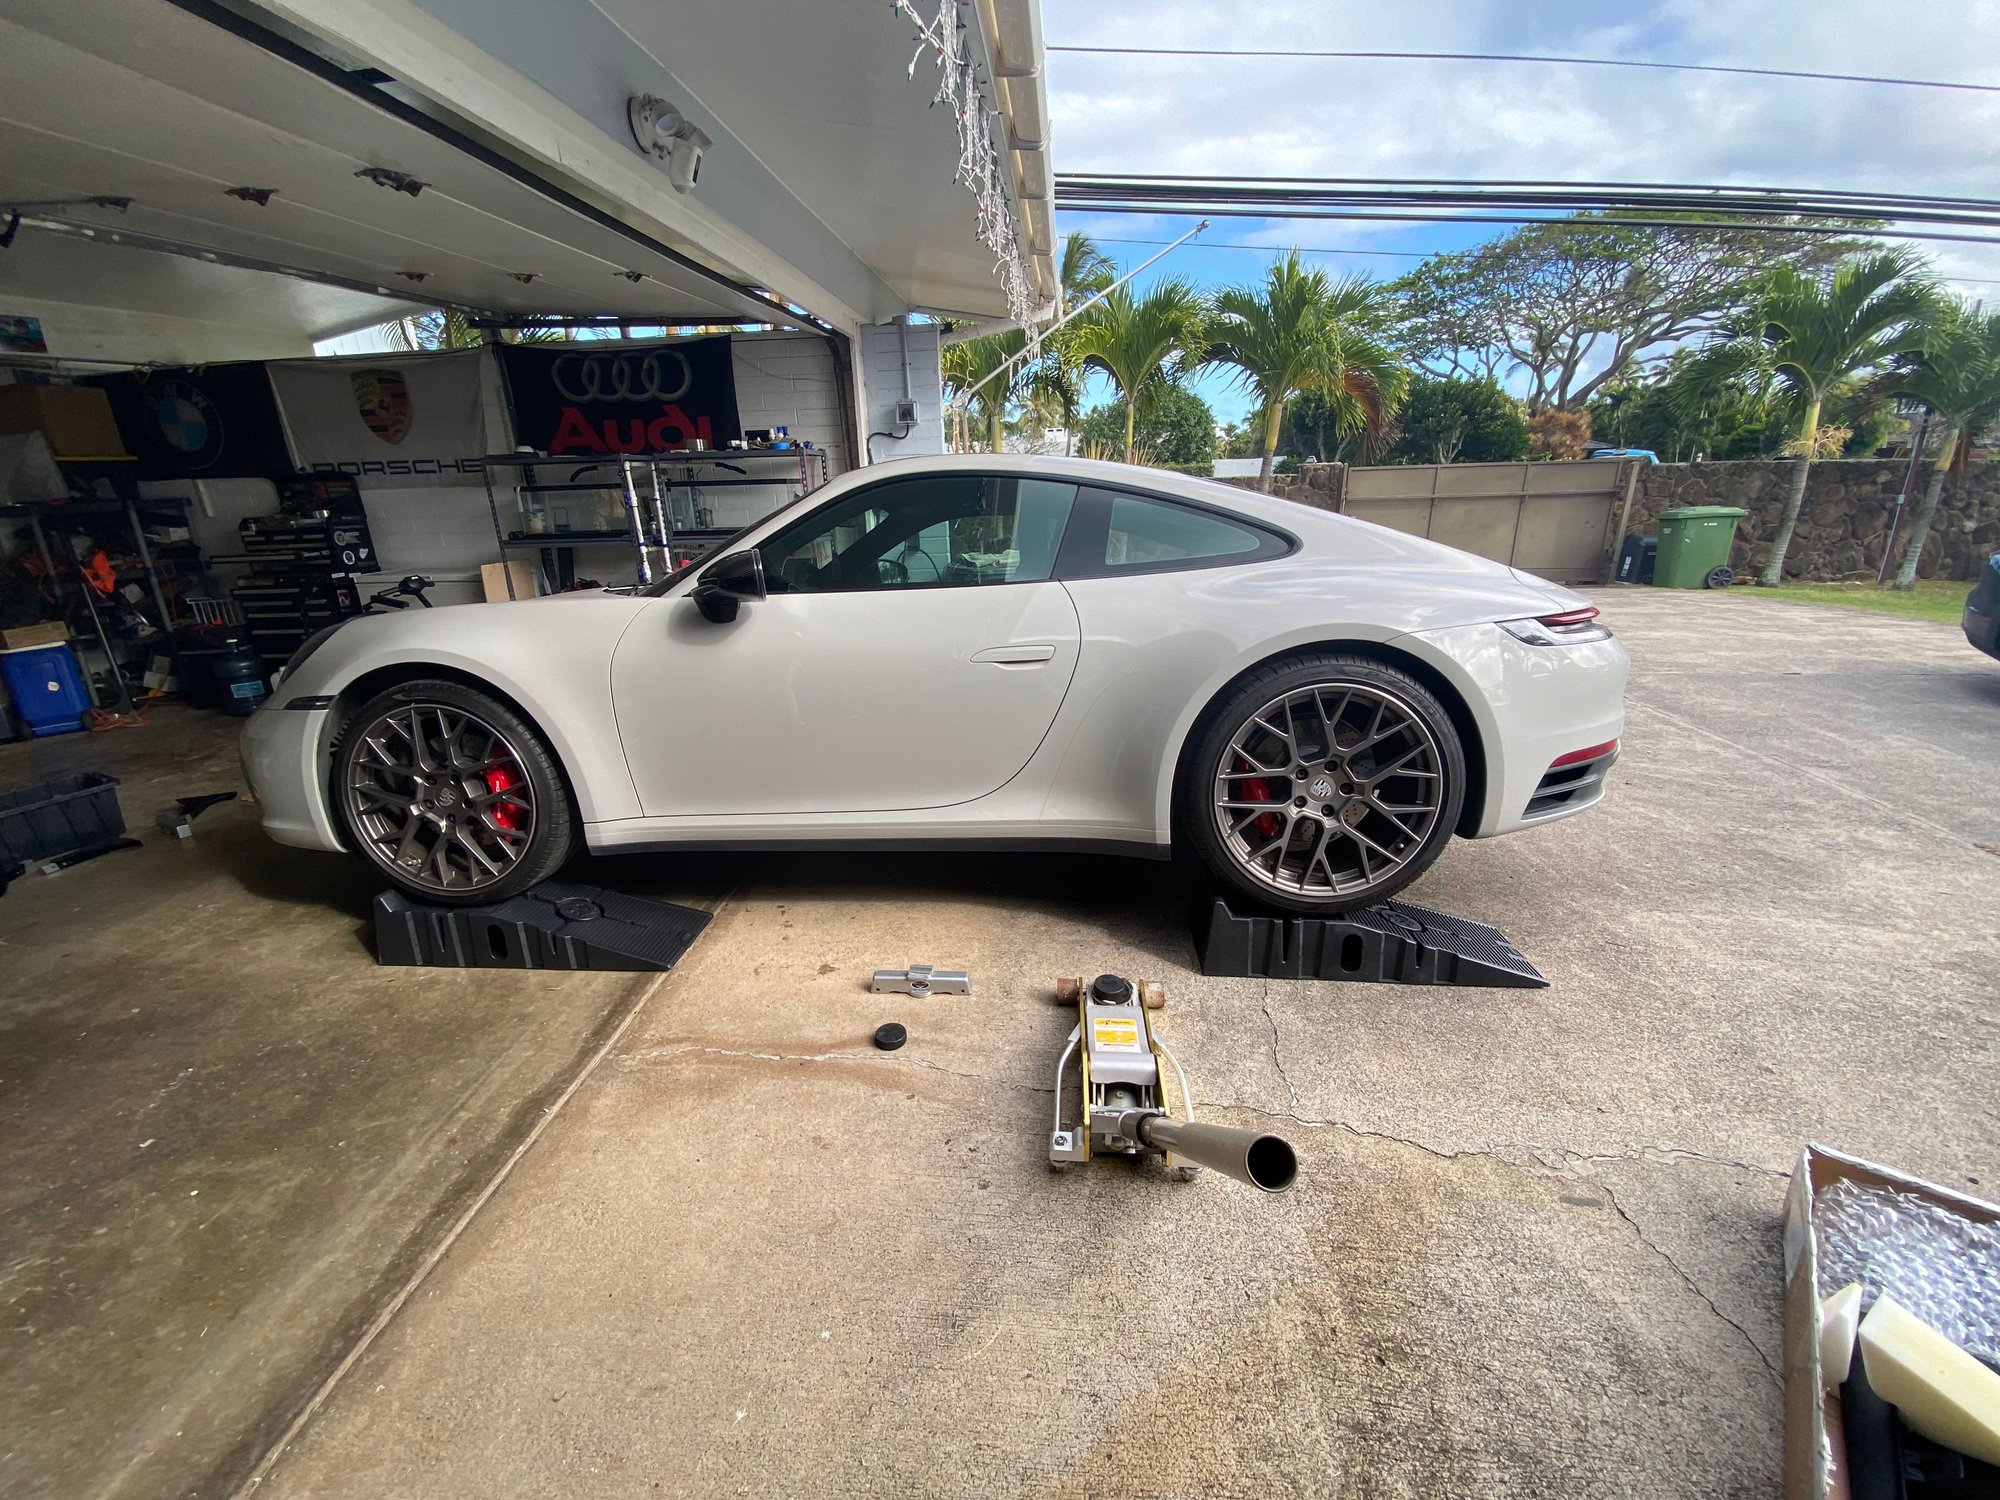
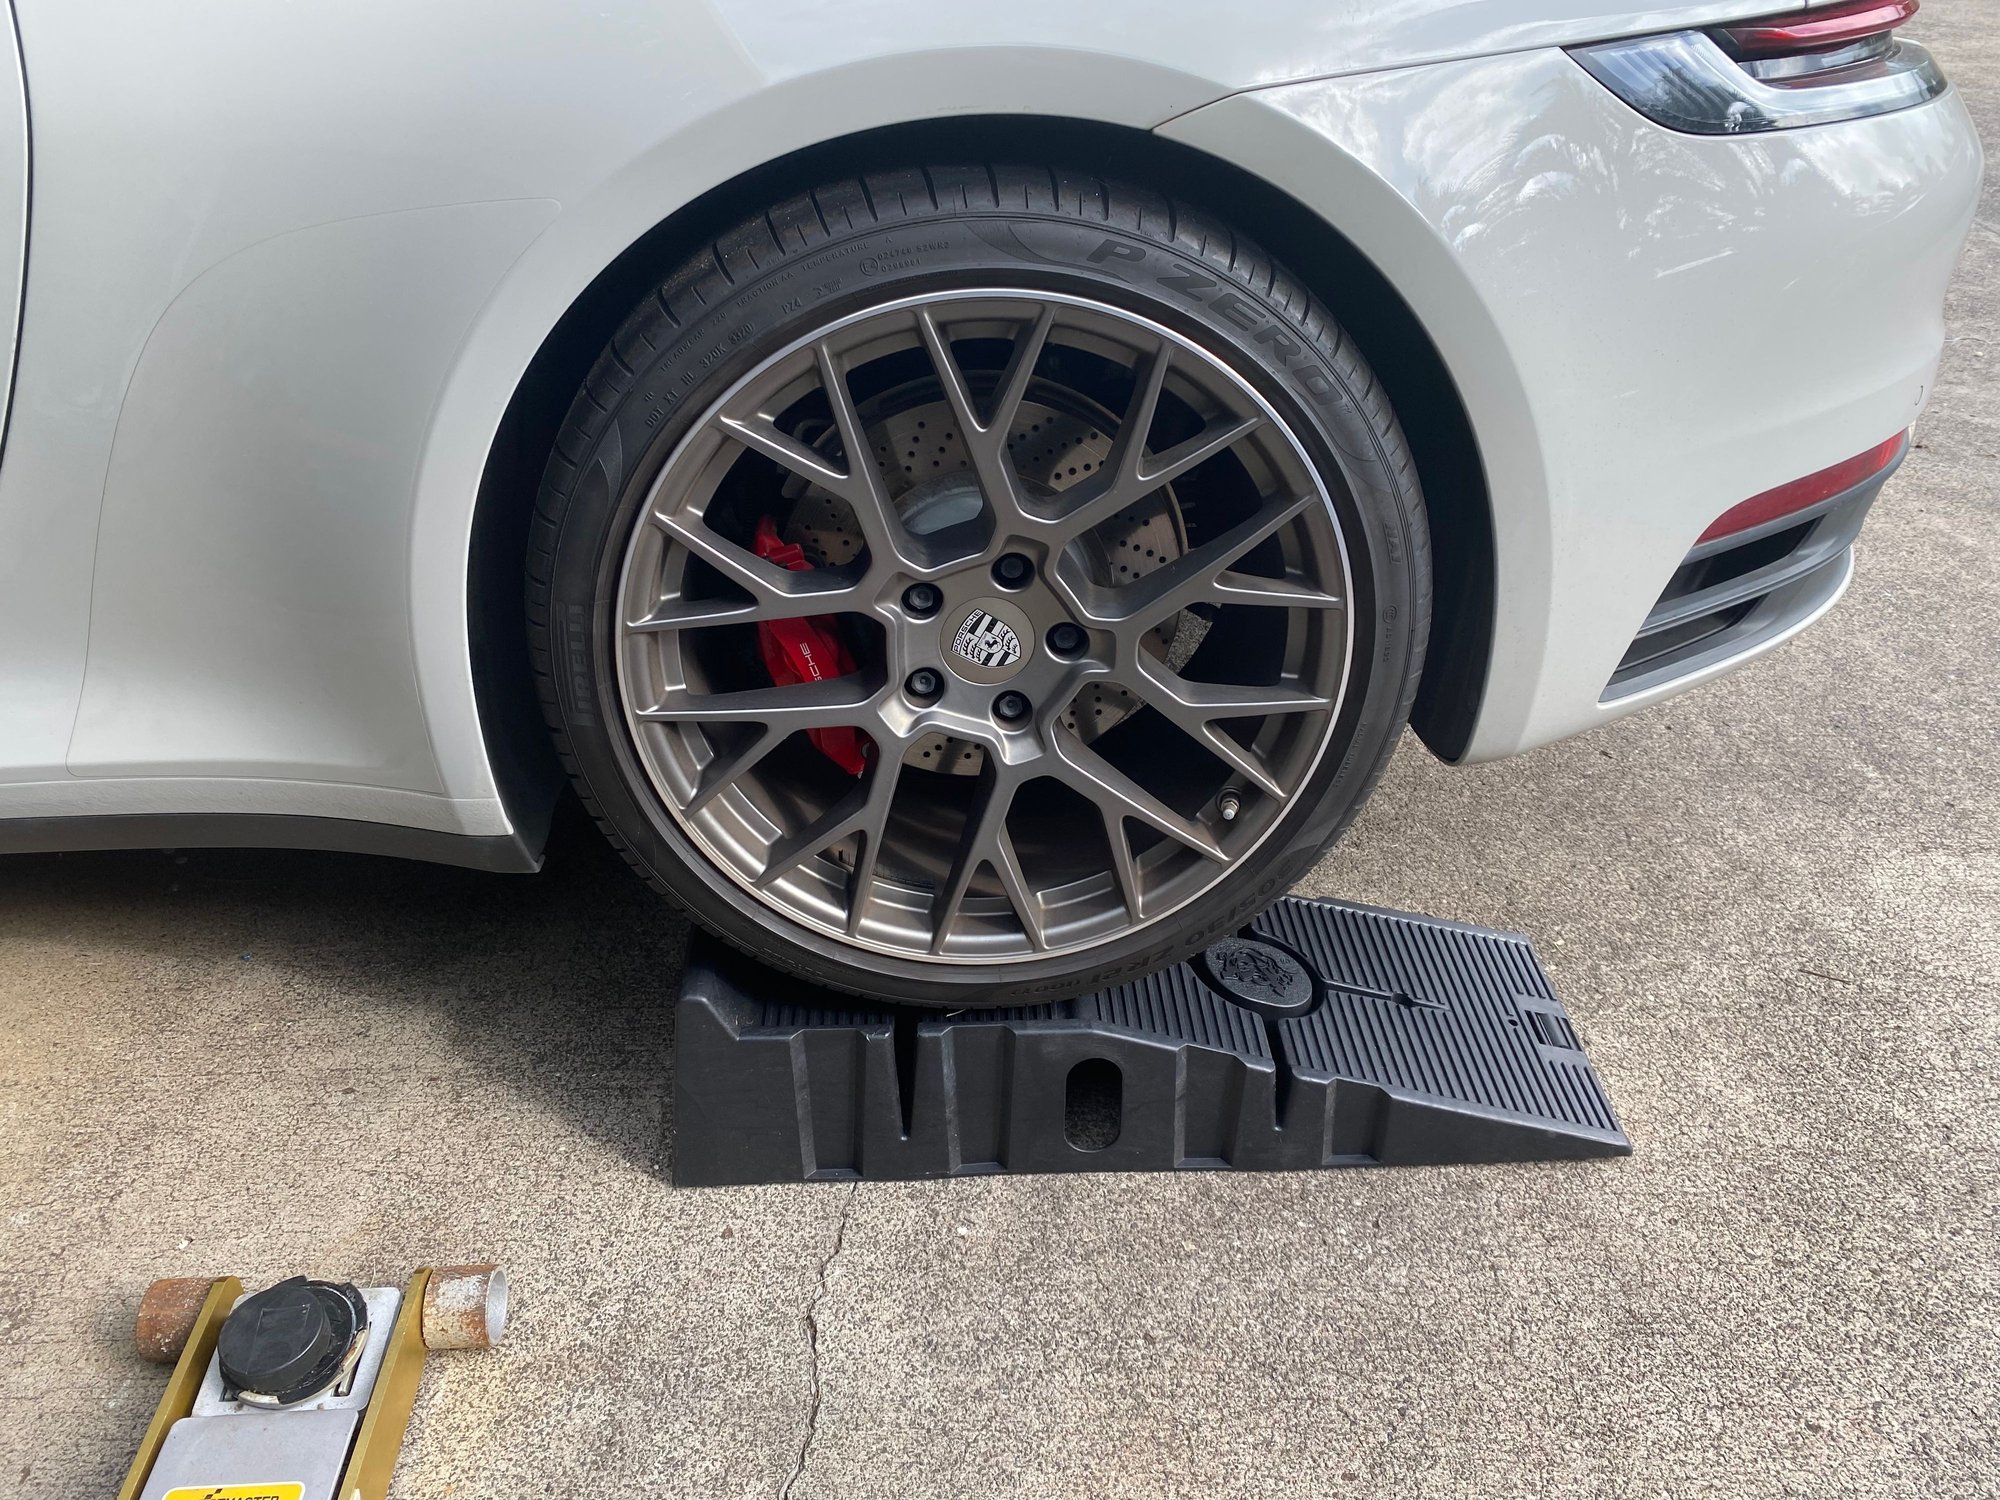
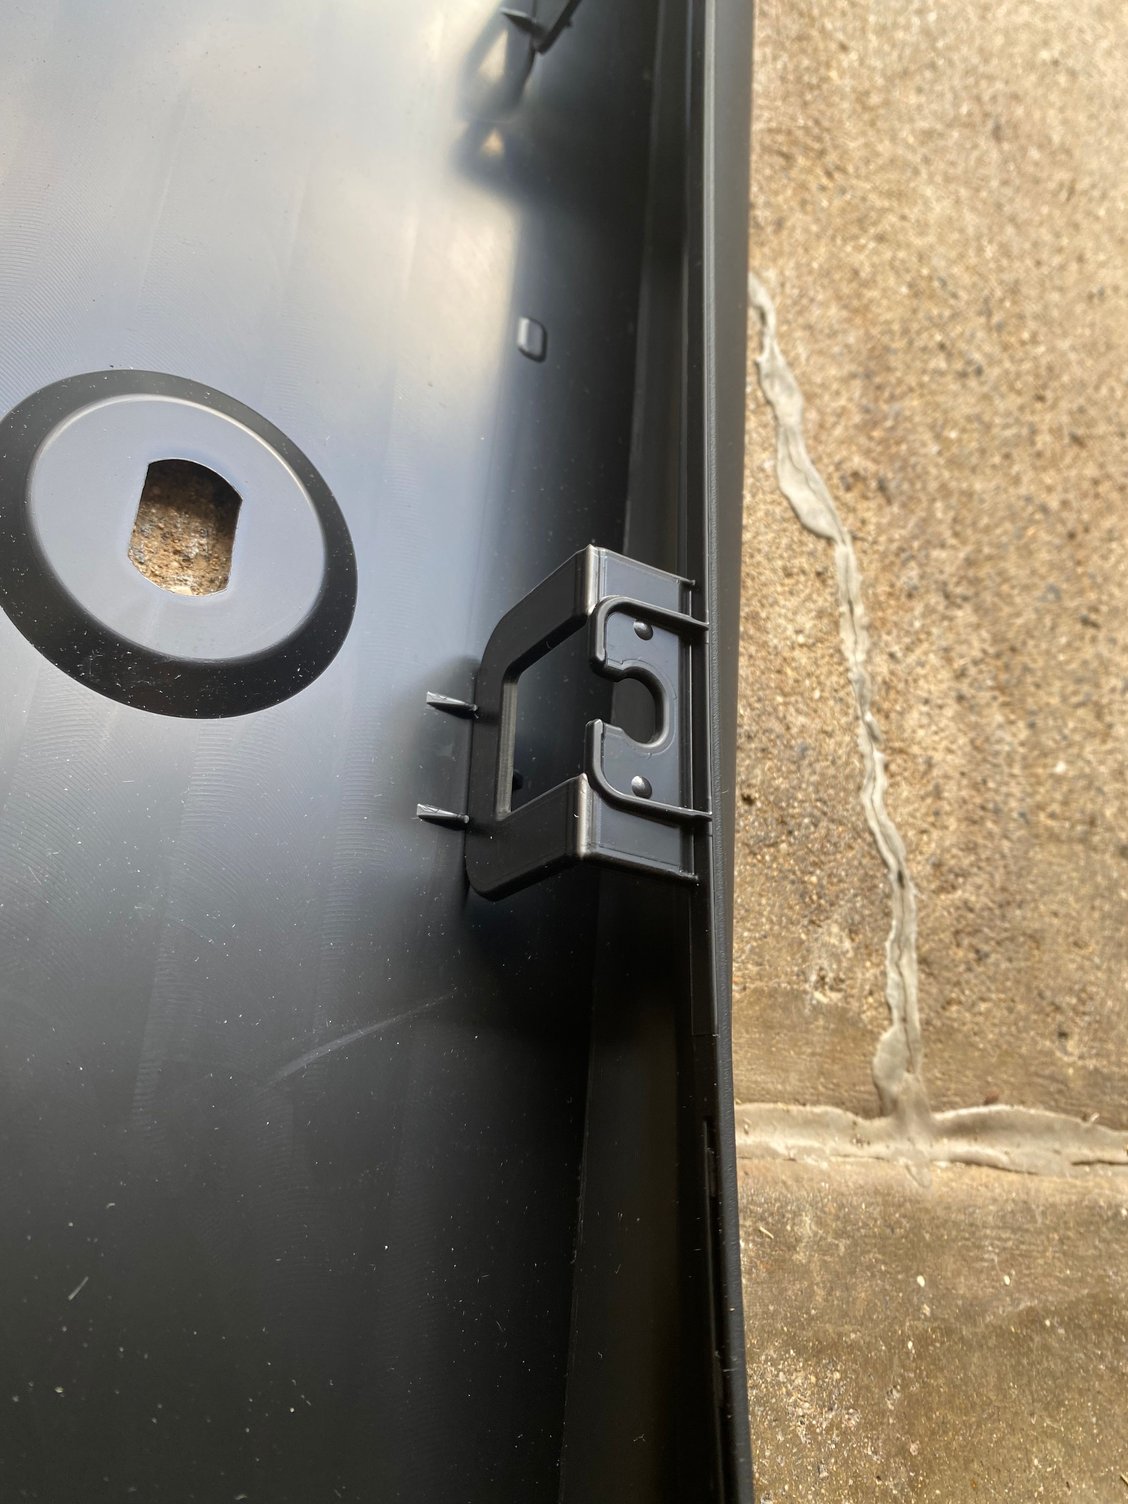
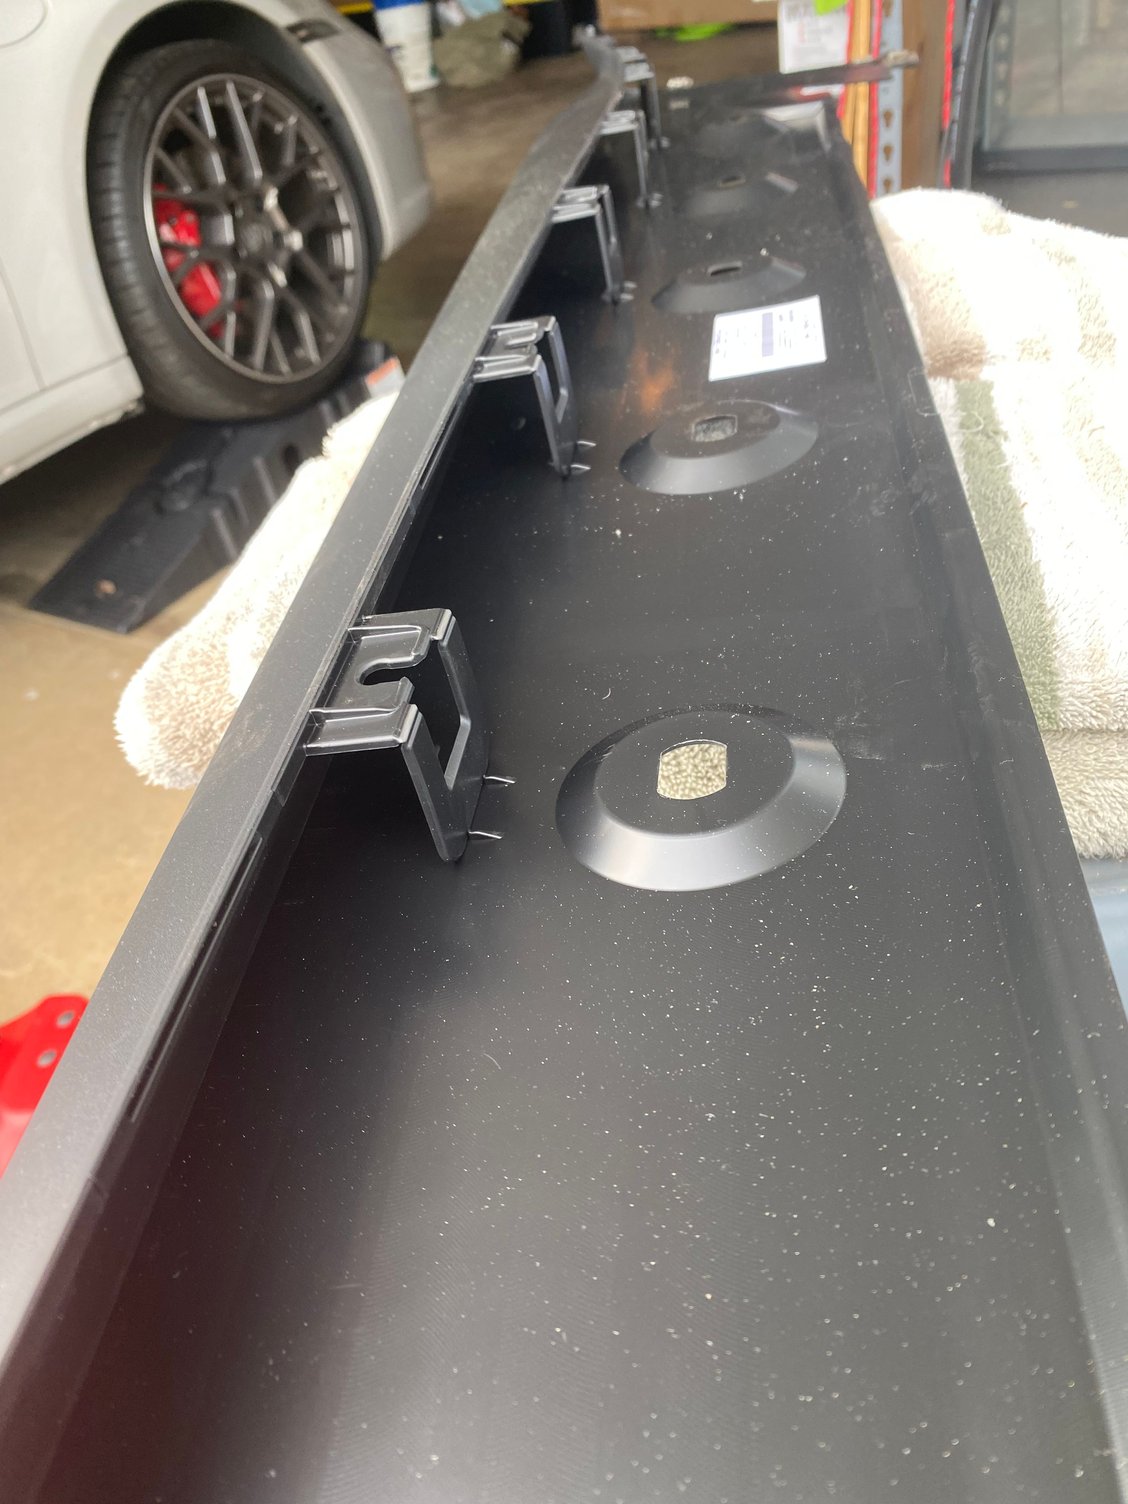
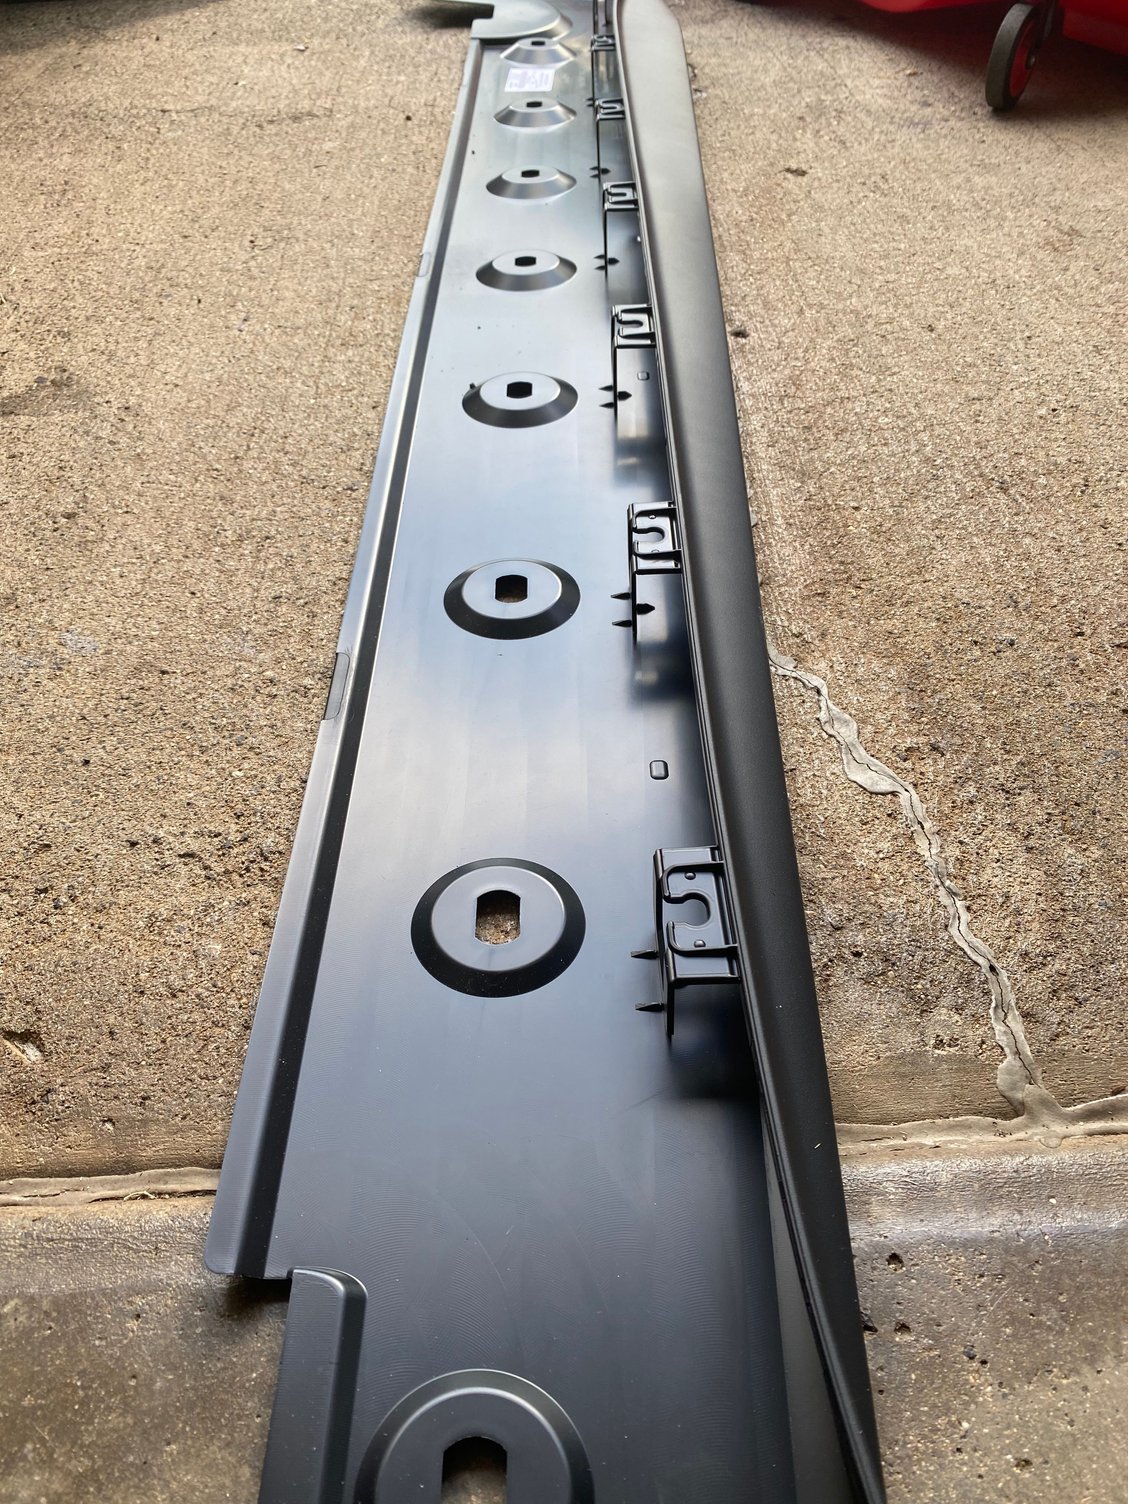
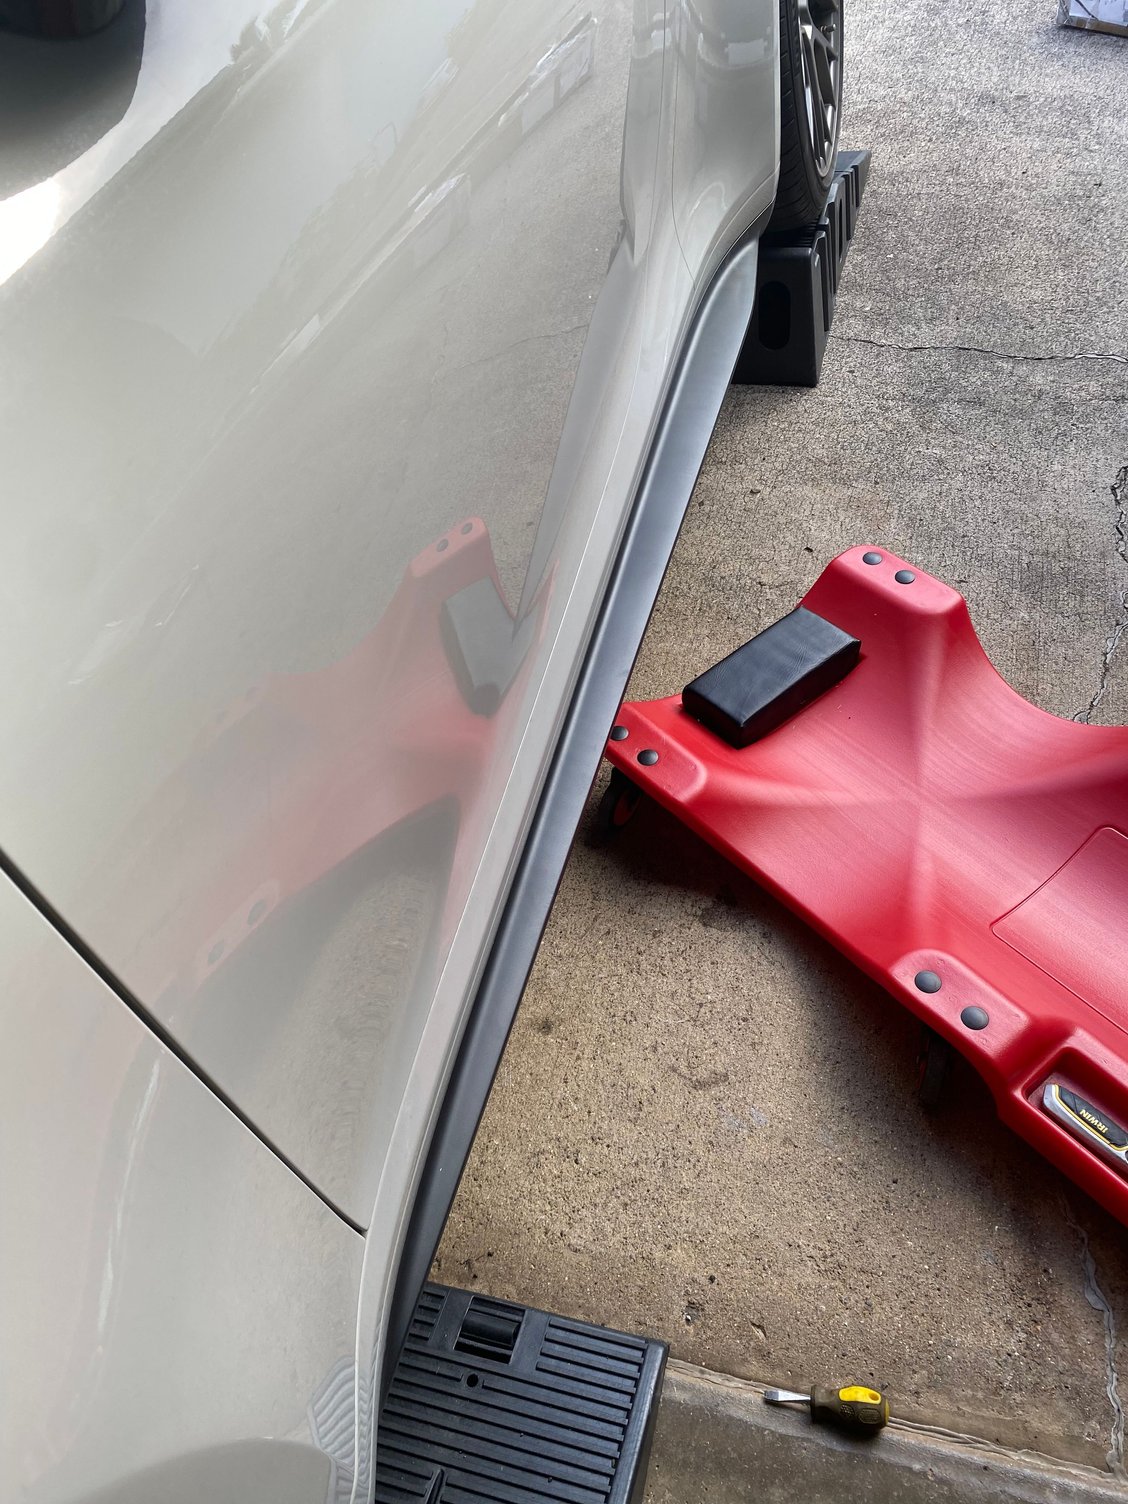
Overall Install was easy using prior posts and longest part is jacking the car up and placing it on ramps for me. Jack stands didn�t have proper mount posts so used ramps instead to no ill effect. Plenty of clearance to get to torx screw mounting points. Just pull hard and OEM skirts will detach as clips..gently and firmly not to break anything once all screws are removed and start front and work your way to the back. Only issue I had was installation of GT3 skirts as I didn�t do the same and go front to rear when pushing back in..so had one or two clips which were not fully aligned and had to remove and start over one or two times. Also make sure new skirt tucks into/under edge of body underpanels..if not then the large 7 mounting screws won�t full seat and when your try to put them in they�ll just fall out. That happened for about five mins before checking the alignment (should go in with slot perpendicular to the car and turn with slot of flat head screwdriver aligned with the car). If not fully tucked in though into the inner edge then those plastic slot attachment point won�t be flush to the bottom of the skirt and will just fall out at the inner flange won�t catch. Figured it out and got em all in fine�when alighned you actually will feel a bit of resistance as you push the plastic screws in prior to your rotating them to lock them in place. Other piece of advice is to do inner two torx screws on rear in 1st then do outter one (don�t confuse them either as they are slightly shorter than the other one) and make sure the fender liners on both front and rear are properly tucked in. Tightened up one or two only to have to loosen them to realign the liner and ensure it was properly tucked in.
Otherwise that is it..took me about 45 mins but they was taking my time and using a creeper (not needed) and drinking a flavored water with a break or two and also repacking the old skirts (they can both fit in one of the shipping boxes stacked and using foam from both for protection for storage BTW).
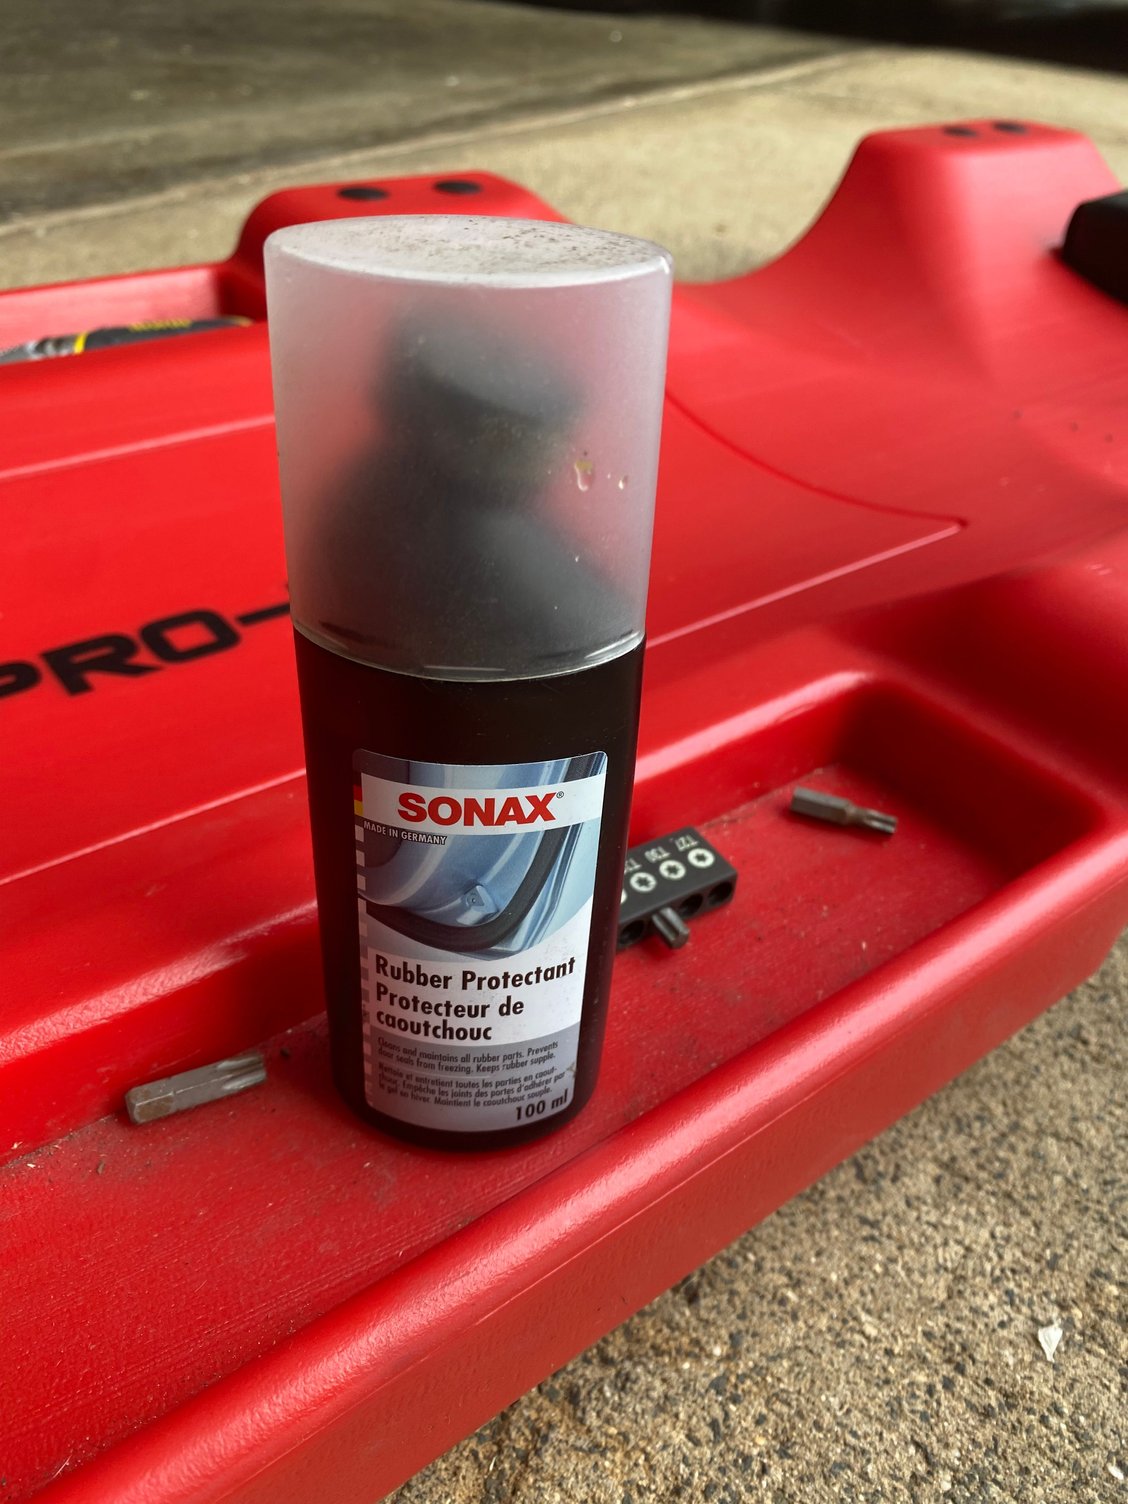
Only other thing I did do was to put a layer of Sonax Rubber Black Protector on each after install as I can see depending where you live and your cleaning washing habits that they will get that grayish/dirty look over time as you drive if not protected and cleaned just like the rear valence and other black plastic parts of the car I�ve noted. Probably a bit more so since they do protrude a bit more thus when dirty will be more visible to others. Subtle but a bit more aggressive! Now If U could get better then in CArbon Fiber to match my OEM mirrors man�but I�d worry bout chips and road damage for sure esp IF I had a SPASM car.
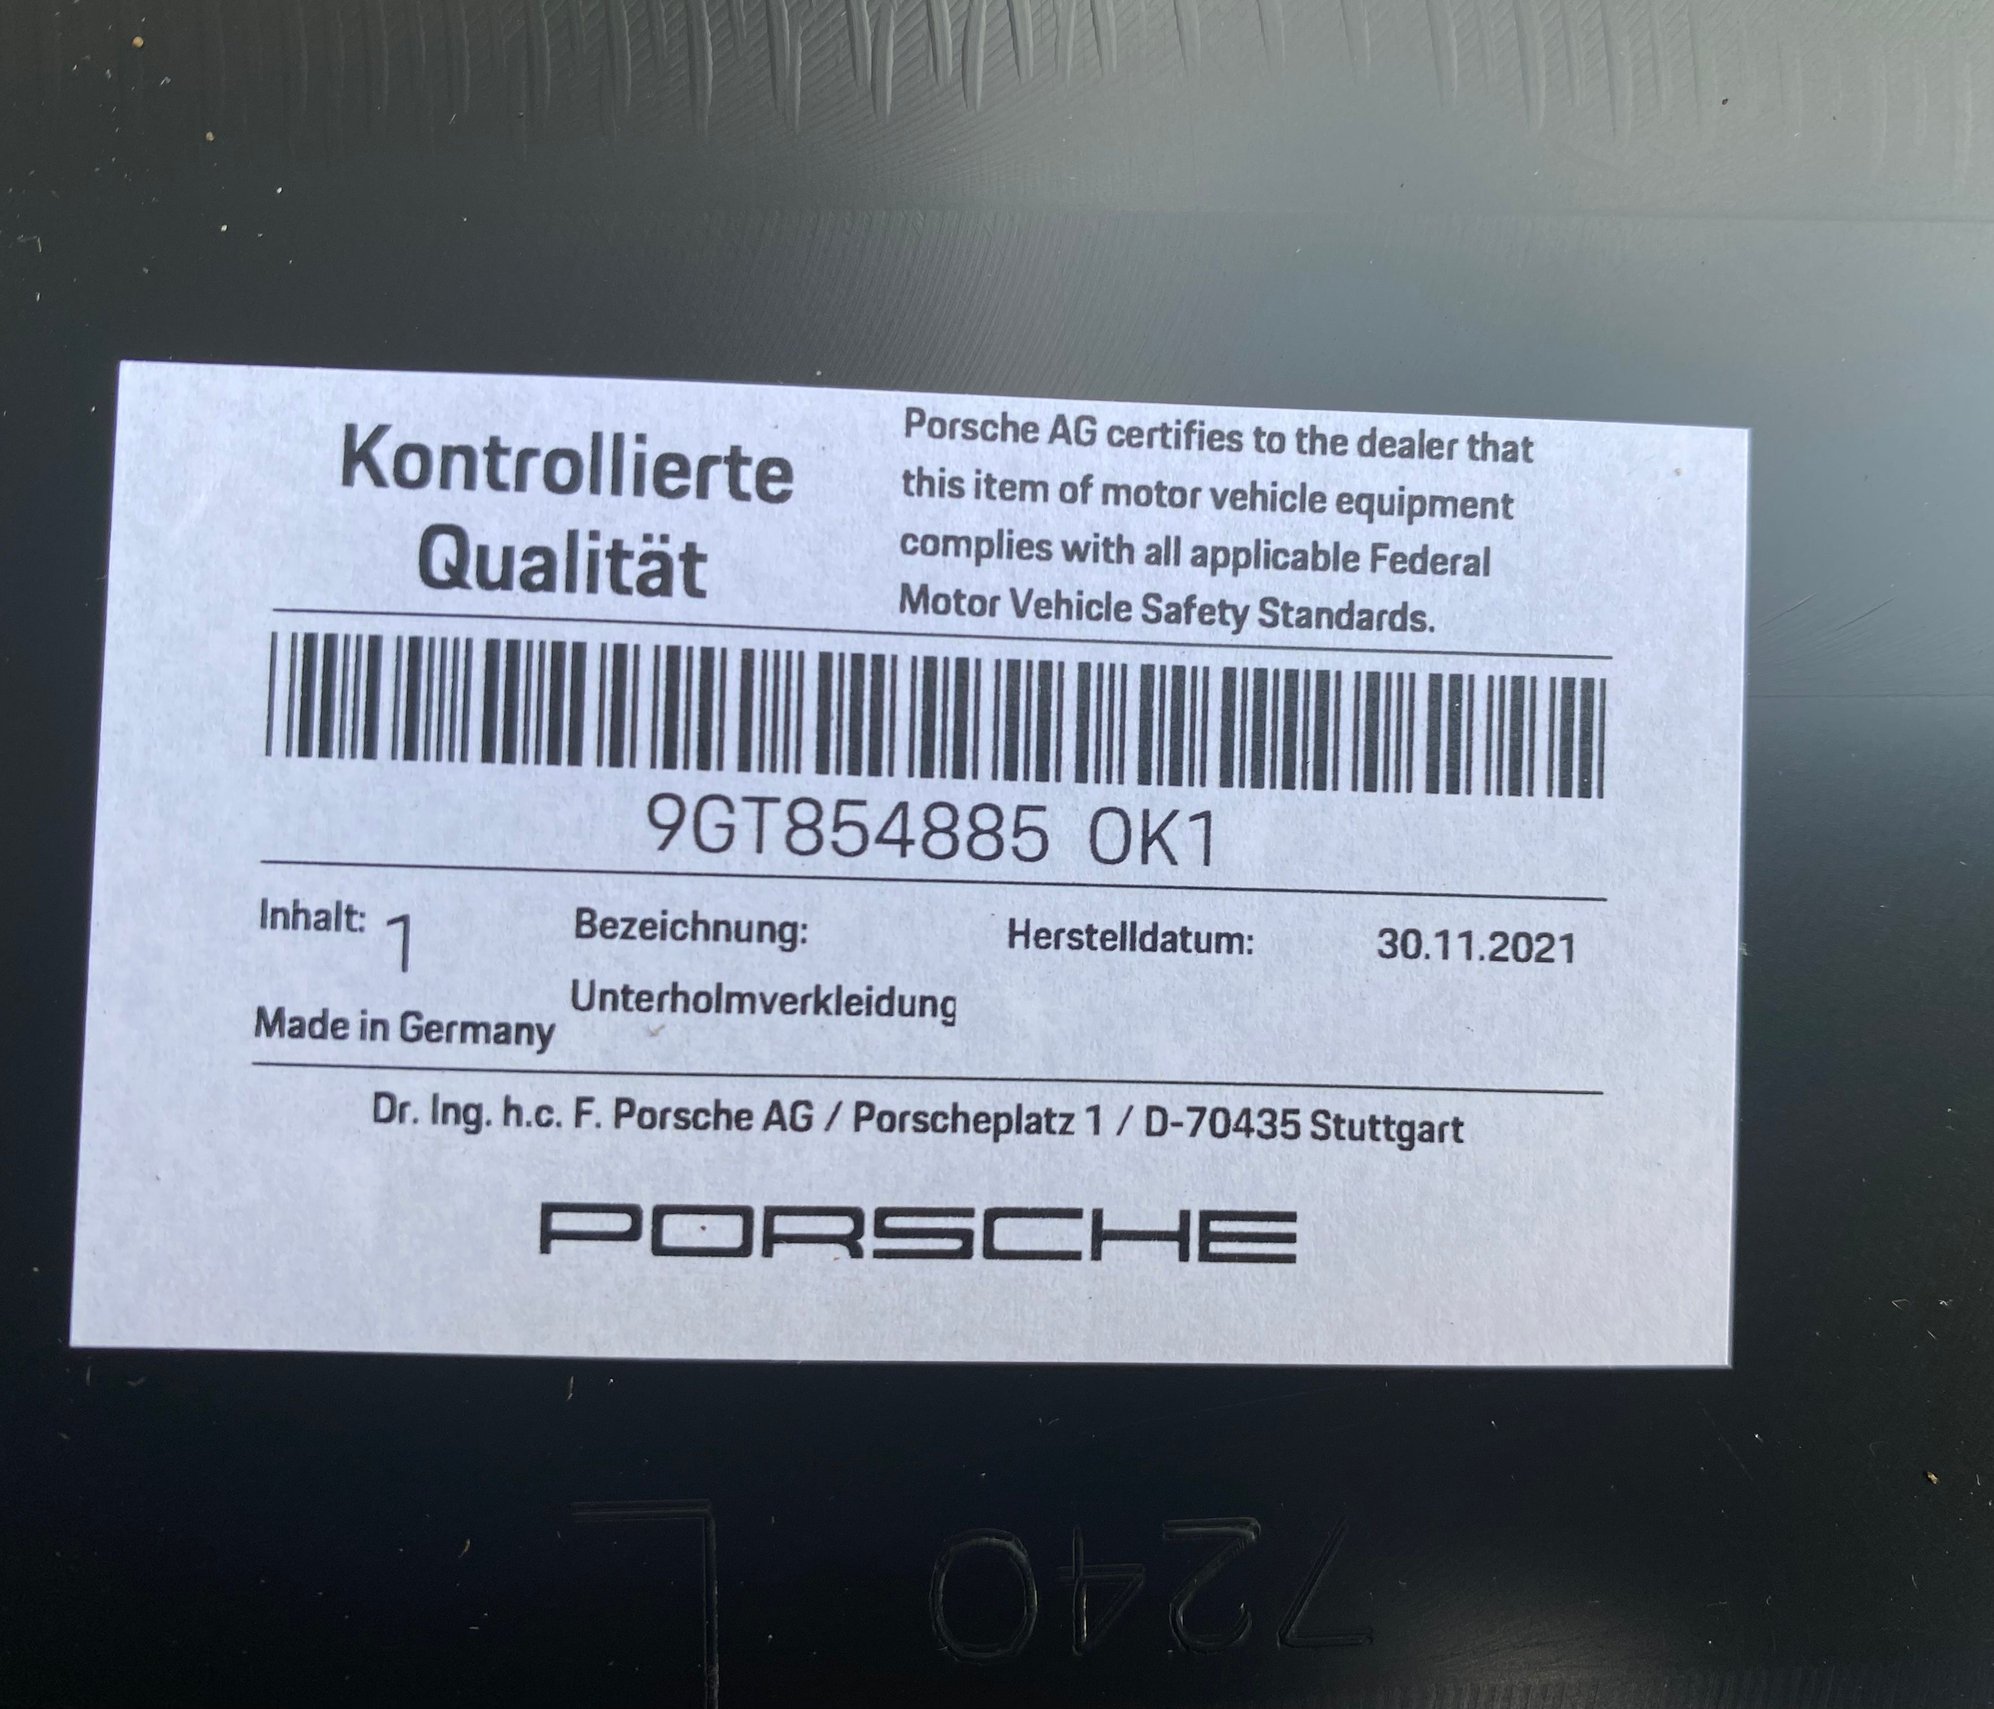
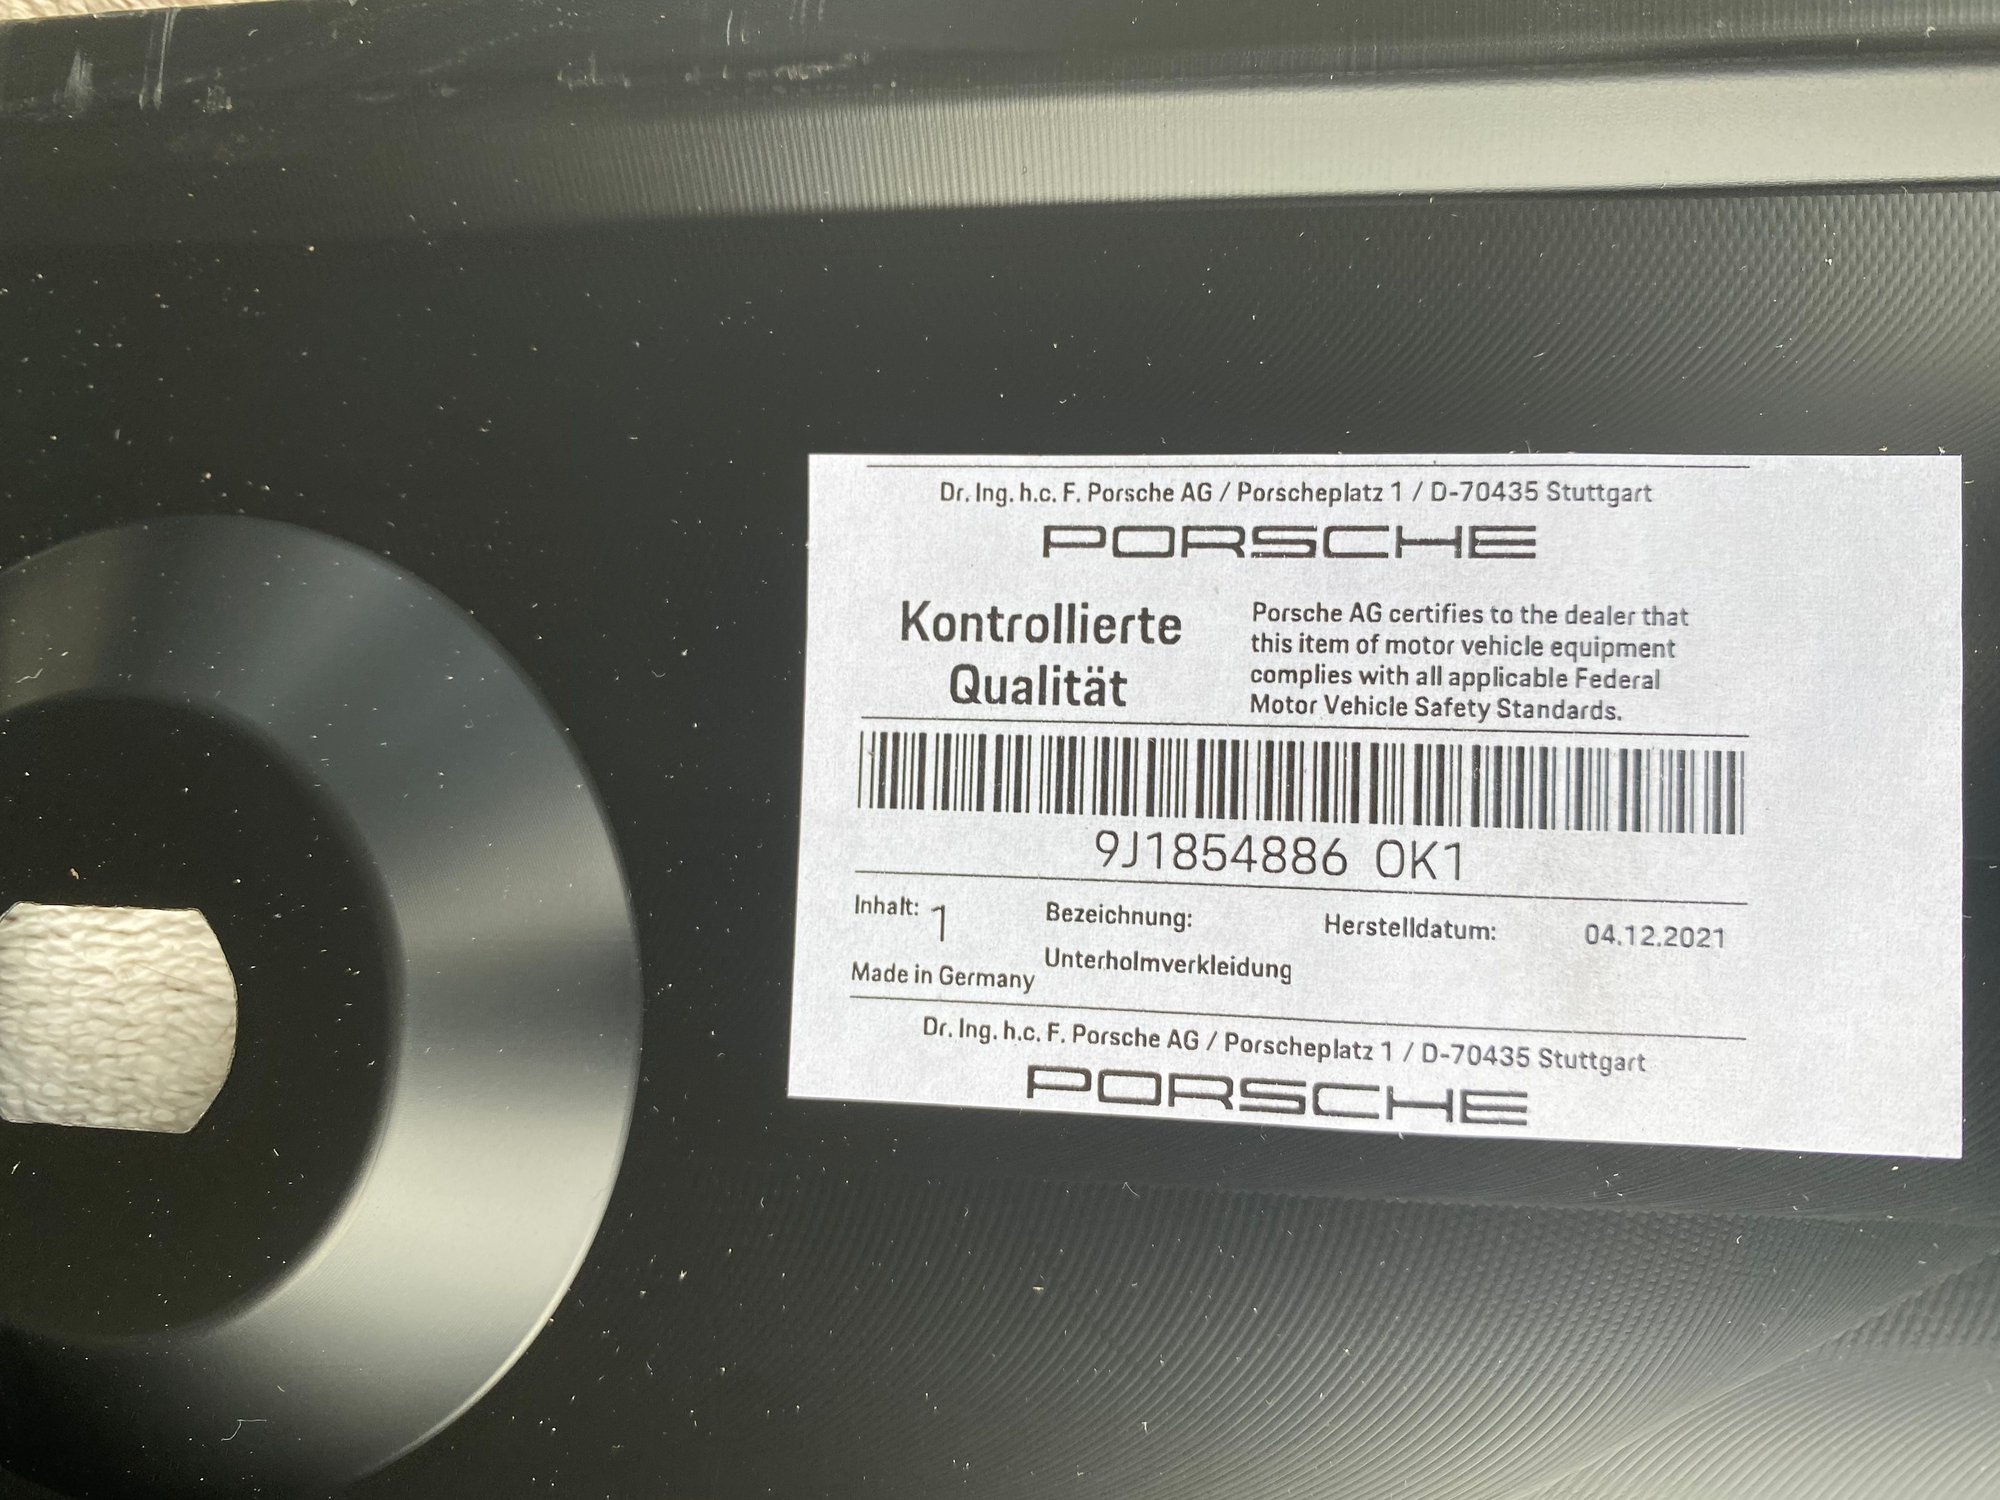
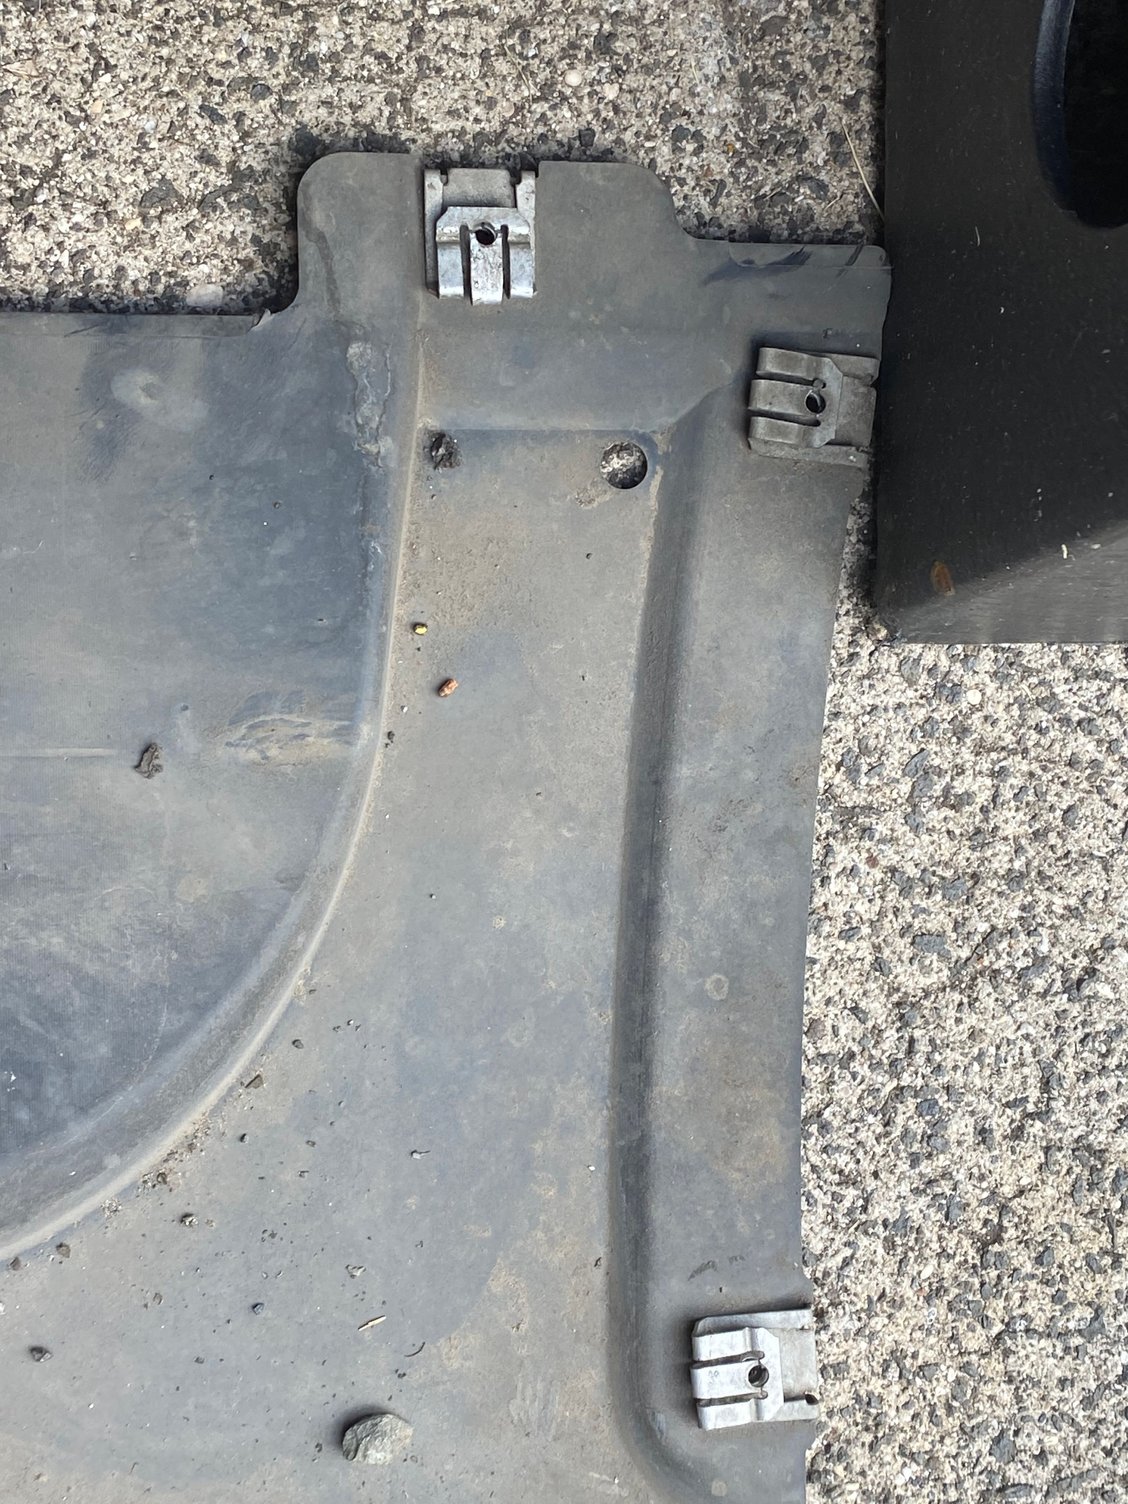
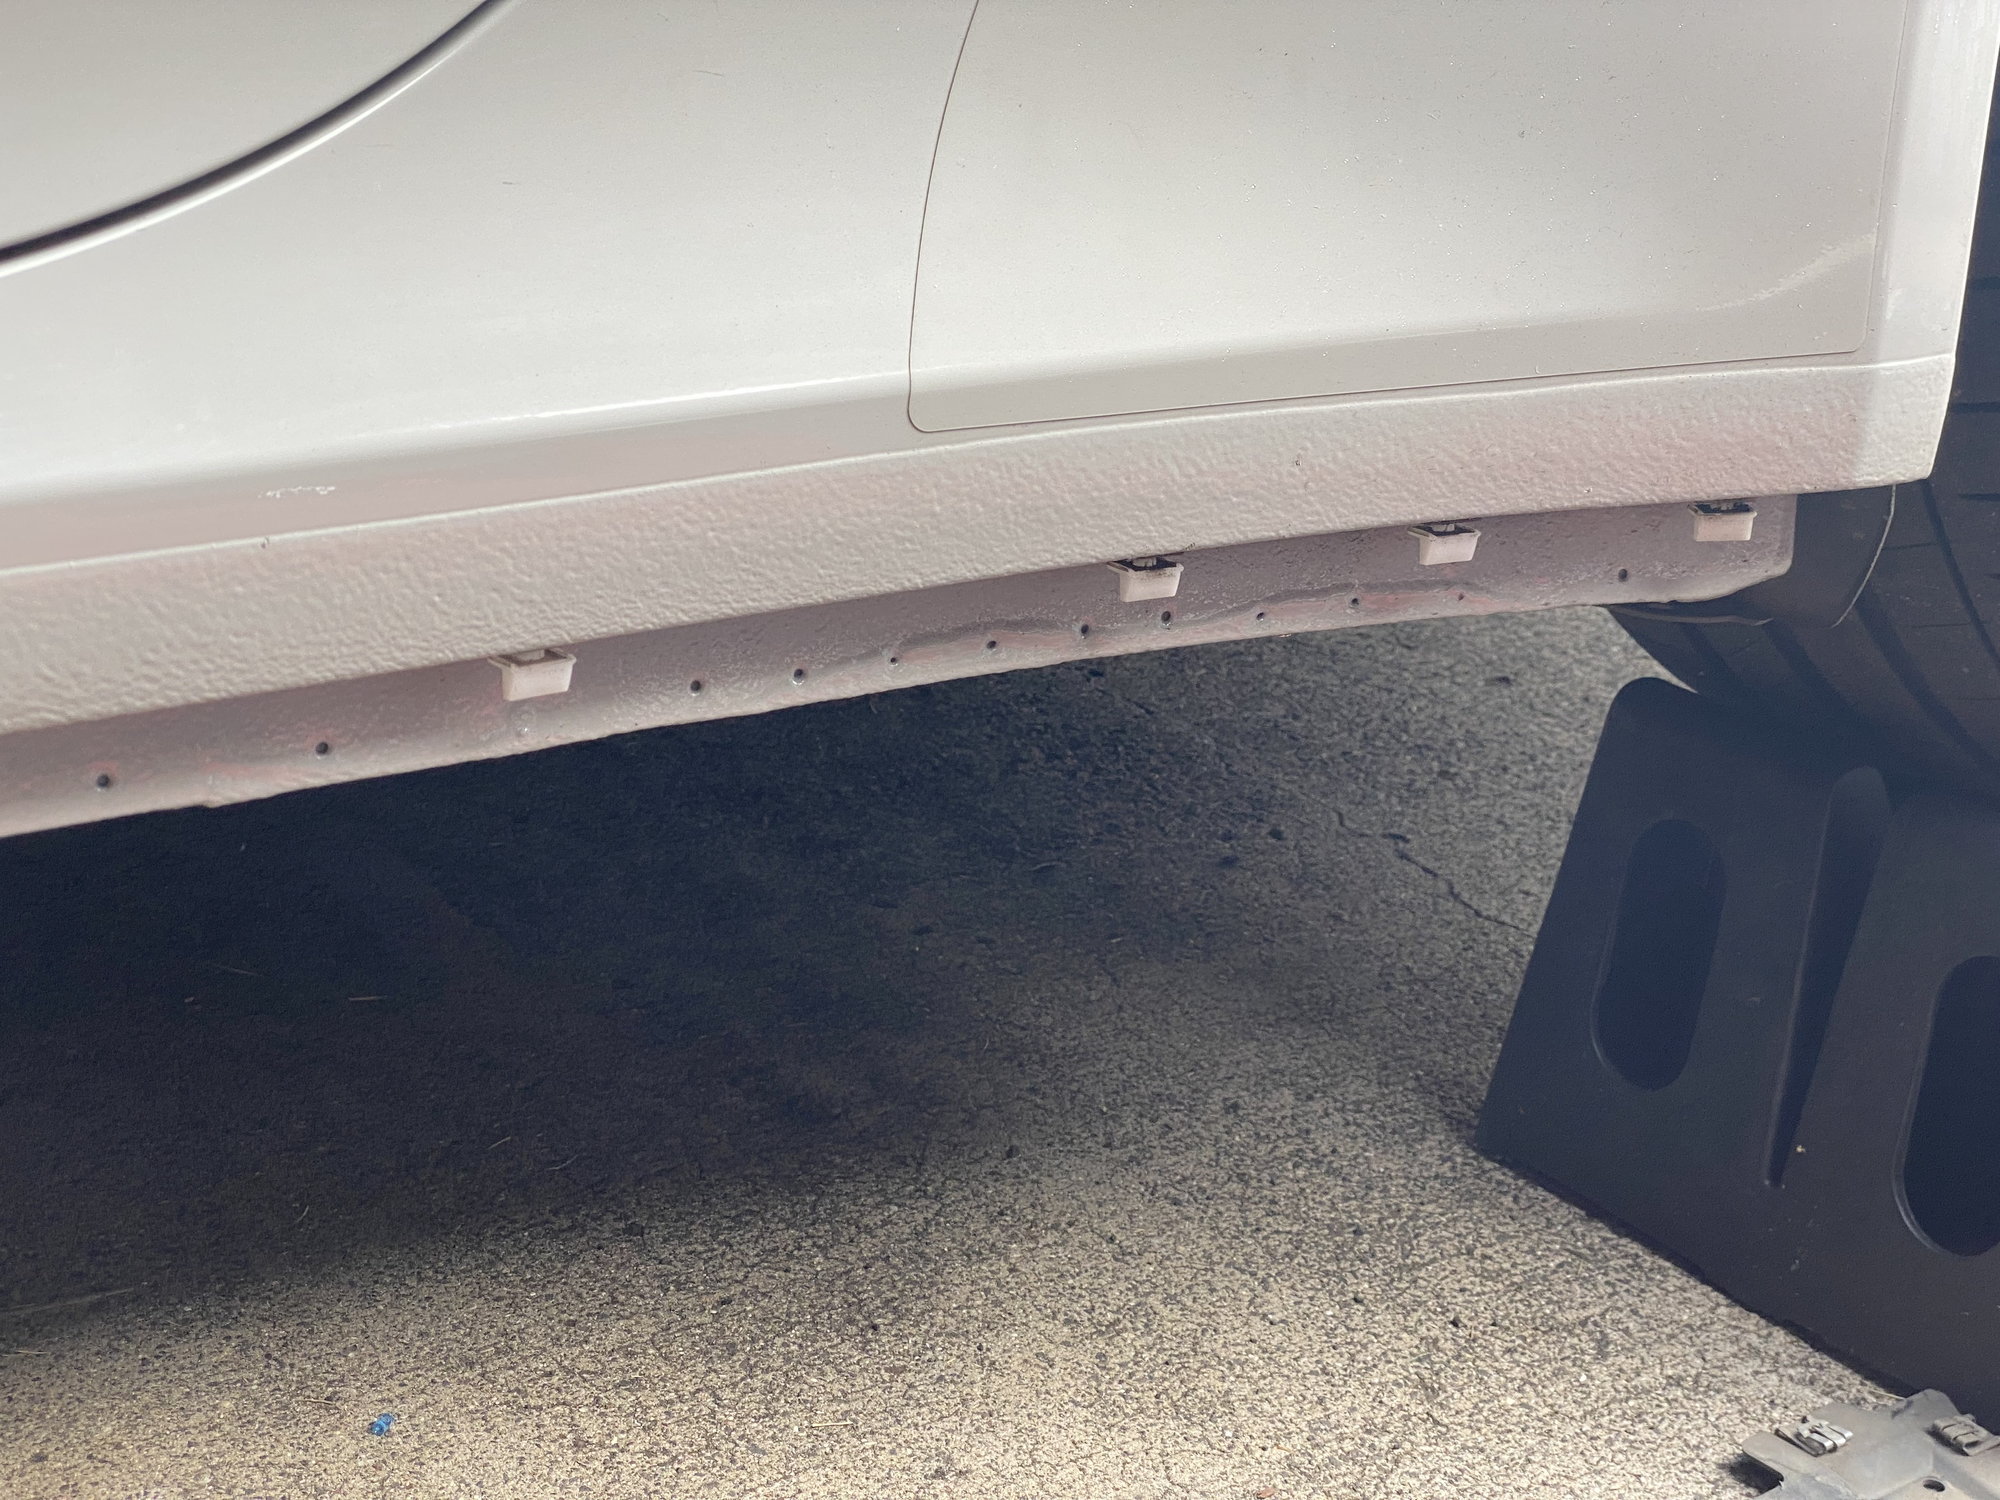
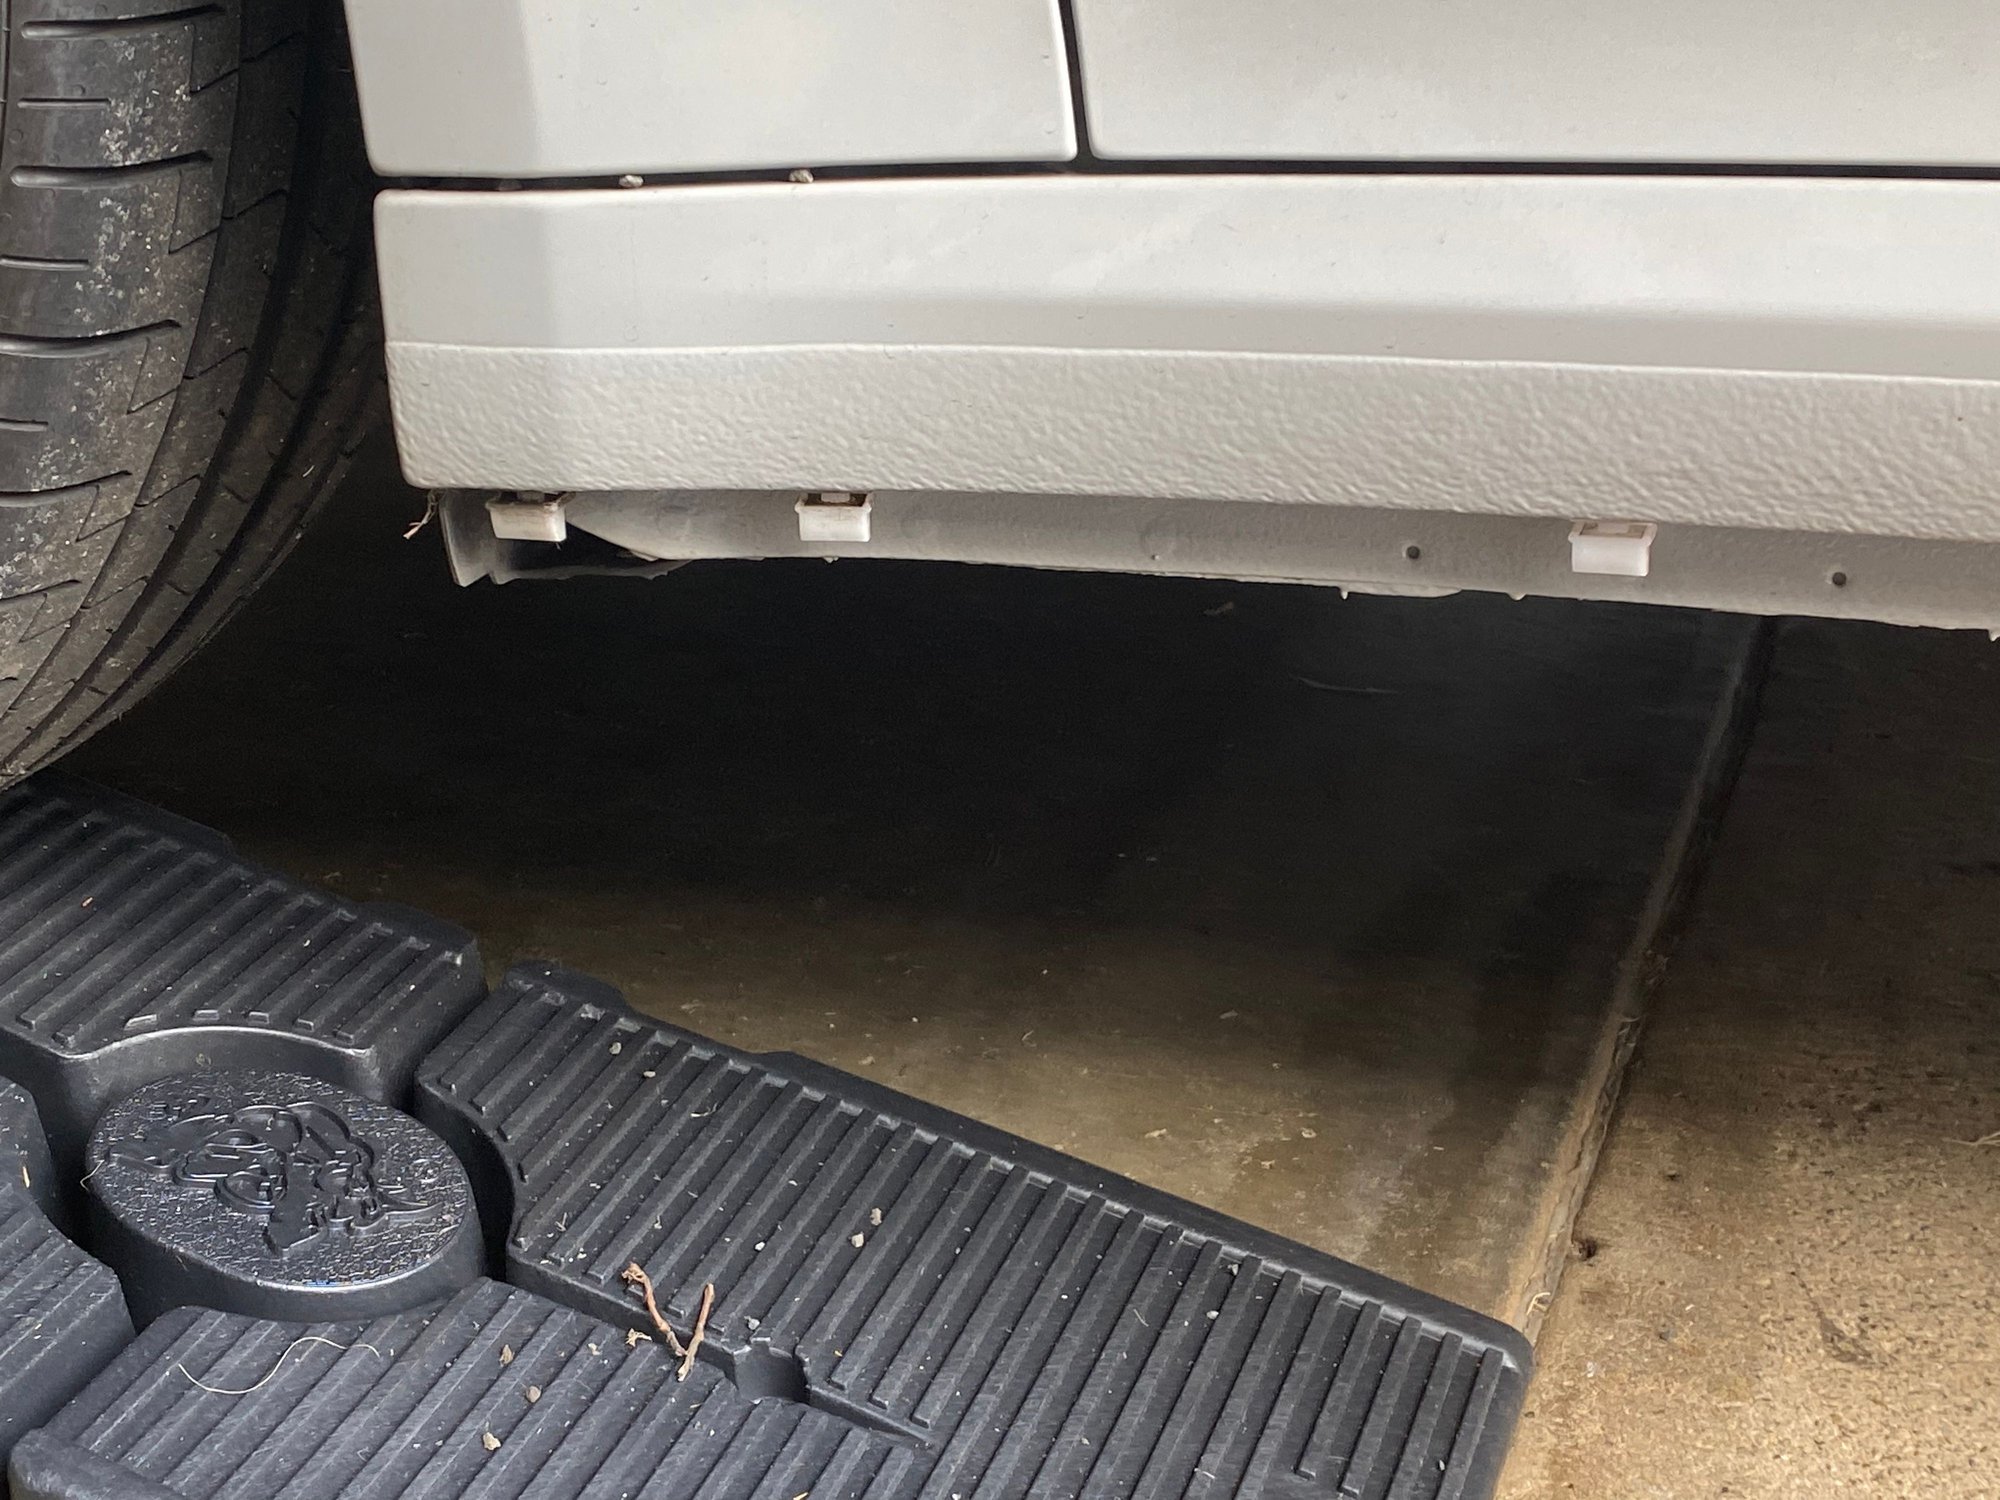
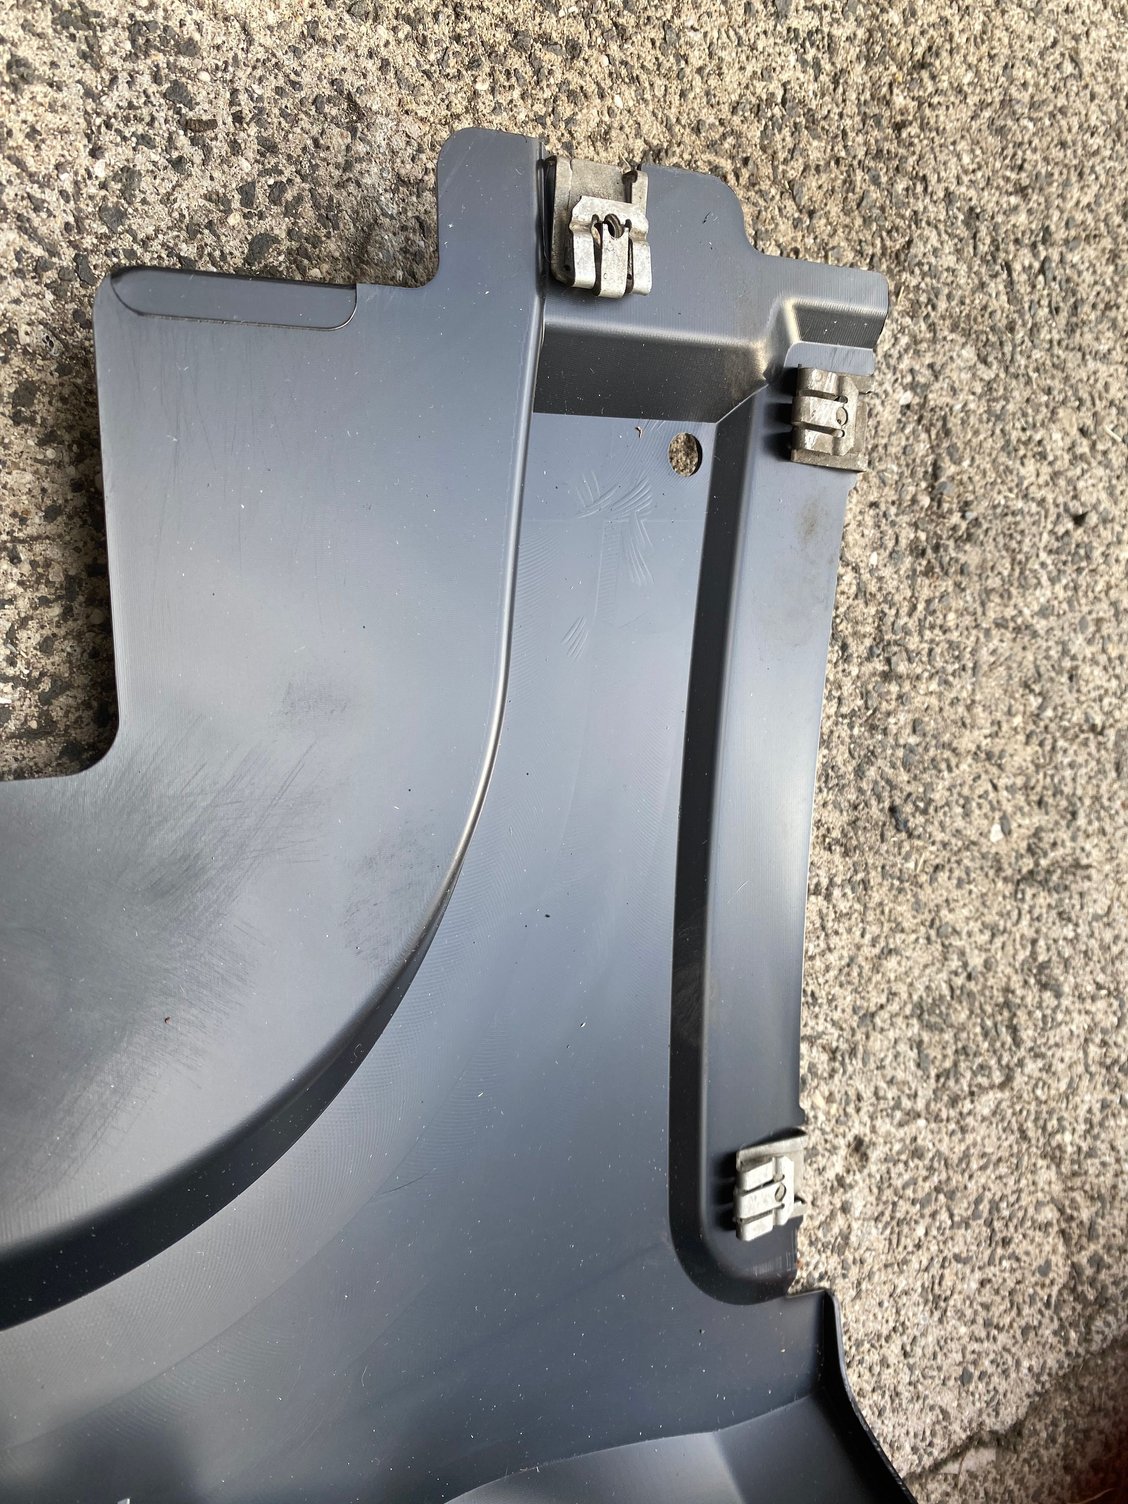
Great post otherwise and thanks to those who led the way for us with this GT3 OEM skirts shipping packaging opened Before install Part number left Part number right Jack to Wheel ramp=easy clearance to get to side skirt torx and attachment point/screws Detach from front. Note clips and mount screws visible OEM skirt screw holders. Push off with flat head or x-knife to remove. Side rear mounting/attachment points. Side front mounting/attachment points. Remounted screw clips on GT3 skirts. Do NOT break off these clips at the protruded part. Bend down like so. They provide structure to the GT3 skirts when installed at mounting points. See next pic. Mounting points bent down and snapped into bottom holder flange. Reinforces the GT3 side skirts at mount points. Fully aligned clip attachment points again. Small torx ratchet worked fine. Do inner ones first when reinstalling to help final alignment. Sonar Black Rubber Protector worked well. Driver side done. Does flare a bit. GT3 Side skirts Driver side oblique closer view. Final view - GT3 skirts. Matches black contrast on car w/Chalk exterior well IMHO.
cheap and easy DITY mod that should have come as an option from Porsche at delivery man! Now to get a short shifter in my manual! That is next..not that the one from Porsche is bad but has one done in my 2014 Cayman S from the GT4 and it was the BEST mod I did on that car I think! So far havent seen the GTS shifter avail at Suncoast tho! 😏
Just got notified that my GT3 Side skirts have been shipped through GetPorschesilverspringParts.com. It took about 1 week from ordering through their website and getting notified. Item should arrived by next Thursday! Finally!
Just got notified that my GT3 Side skirts have been shipped through GetPorschesilverspringParts.com. It took about 1 week from ordering through their website and getting notified. Item should arrived by next Thursday! Finally!
We appreciate your business - thank you for your order and enjoy those!
__________________
Evan Winstead | Internet Parts Director Shop & SAVE on Genuine OEM Porsche Parts, Accessories & Driver's Selection! Contact Us � Shop Audi & BMW Parts too!
Placed my order on a Tuesday and had the skirts by Friday. Earlier posts in this thread were really helpful with the install. I spent 15 mins per side and didn�t have to jack the car up. All I needed was a ratchet and a short screwdriver. The removal was pretty easy and the install wasn�t bad once you get the rear aligned and move towards the front from there.
I placed the order on April 21st, it said ETD June 2
Porsche's fulfillment has been a little all over the place with these, but orders are trickling in (some out of order) but we're filling them as soon as humanly possibly. Feel free to PM us your order number if you'd like and we'll check for an update.


 04-13-2022, 05:30 PM