Notices
991 2012-2019
Sponsored by:
Sponsored by:

DIY: AWE Switchpath install (GTS)

Thread Tools
 
Search this Thread
 
Old 04-17-2016, 12:02 PM
  #16  
Larry Cable
Rennlist Member
Thread Starter
 
Larry Cable's Avatar
 
Join Date: Oct 2002
Location: S.F Bay Area
Posts: 25,542
Received 3,446 Likes on 2,252 Posts
Default

^^^ yep, I stalled at pretty much the 1st step trying to safely disconnect the OEM PSE vacuum line from the engine, in later steps I am not sure I would have been any more successful, with the bumper
off it was pretty easy, I could even sit on a stool/ground to do the work!
Old 04-17-2016, 01:14 PM
  #17  
STG
Race Director
 
STG's Avatar
 
Join Date: Nov 2014
Location: FL
Posts: 13,800
Likes: 0
Received 193 Likes on 137 Posts
Default

Larry, looking forward to your review

Using your OEM PSE tips??
Old 04-17-2016, 03:55 PM
  #18  
Larry Cable
Rennlist Member
Thread Starter
 
Larry Cable's Avatar
 
Join Date: Oct 2002
Location: S.F Bay Area
Posts: 25,542
Received 3,446 Likes on 2,252 Posts
Default

Originally Posted by STG991
Larry, looking forward to your review

Using your OEM PSE tips??
Nope, got a sweet deal on a set of AWE diamond Black tips, which I think work *very* well with the black theme of the GTS!
Old 04-17-2016, 05:06 PM
  #19  
Larry Cable
Rennlist Member
Thread Starter
 
Larry Cable's Avatar
 
Join Date: Oct 2002
Location: S.F Bay Area
Posts: 25,542
Received 3,446 Likes on 2,252 Posts
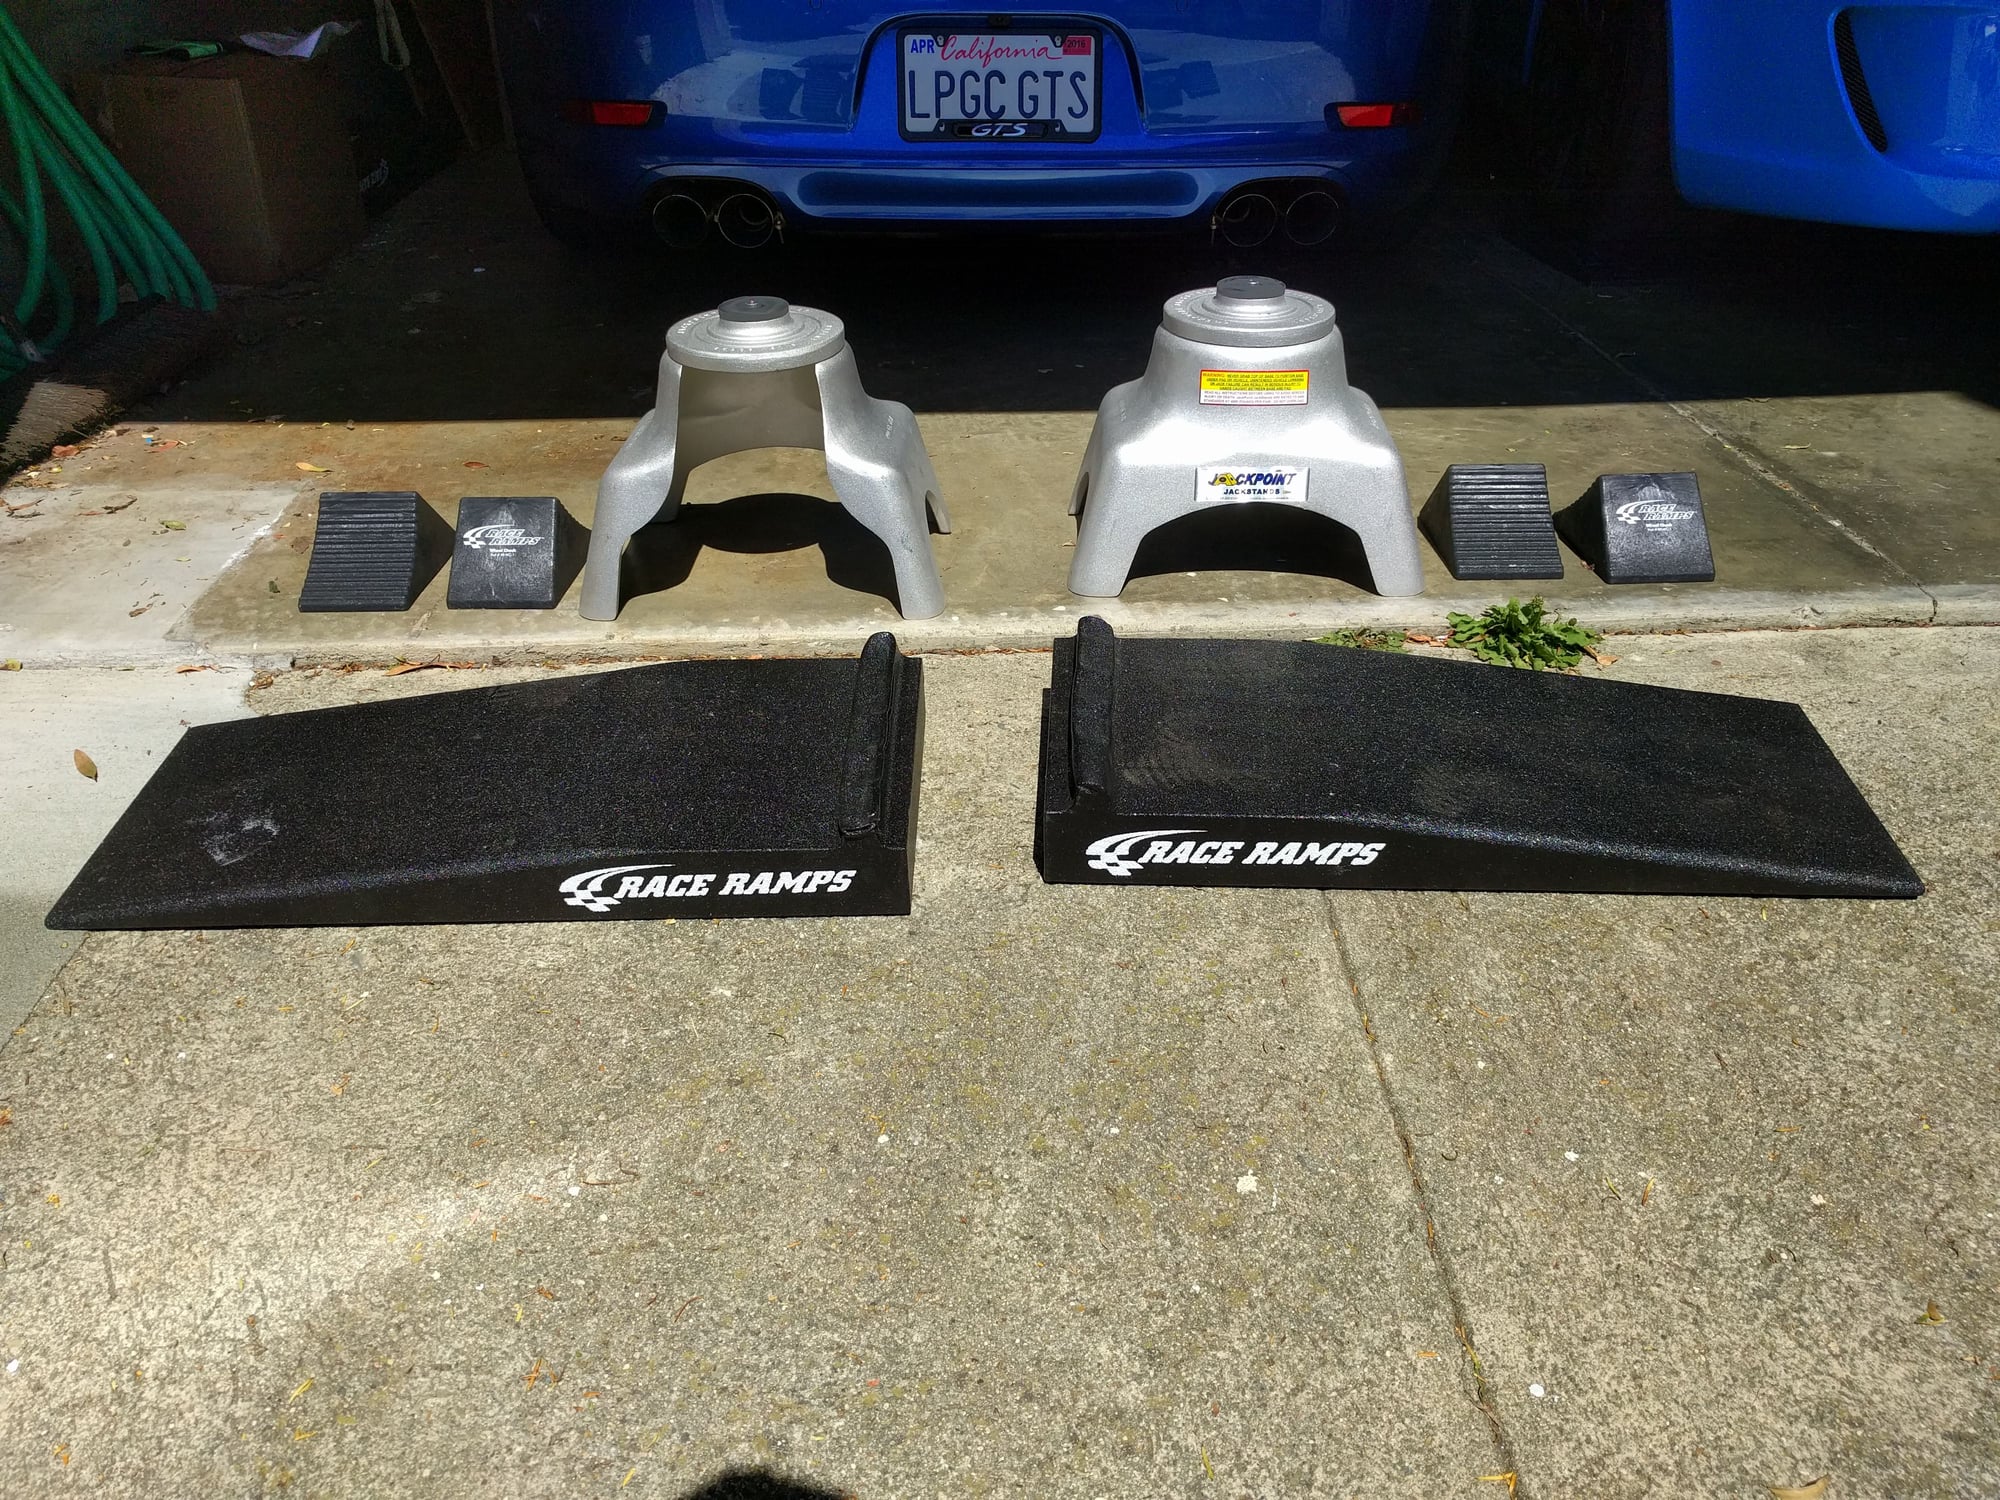
Default Step 0: jack the car up


I used a set of race ramps to elevate the back of the car... then I jacked each
side and inserted a pair of jackpoint jackstands (designed and sold by another
RLer - these are indispensible IMO), then I wedged both front wheels.

time to remove the rear bumper...
Old 04-17-2016, 05:07 PM
  #20  
Larry Cable
Rennlist Member
Thread Starter
 
Larry Cable's Avatar
 
Join Date: Oct 2002
Location: S.F Bay Area
Posts: 25,542
Received 3,446 Likes on 2,252 Posts
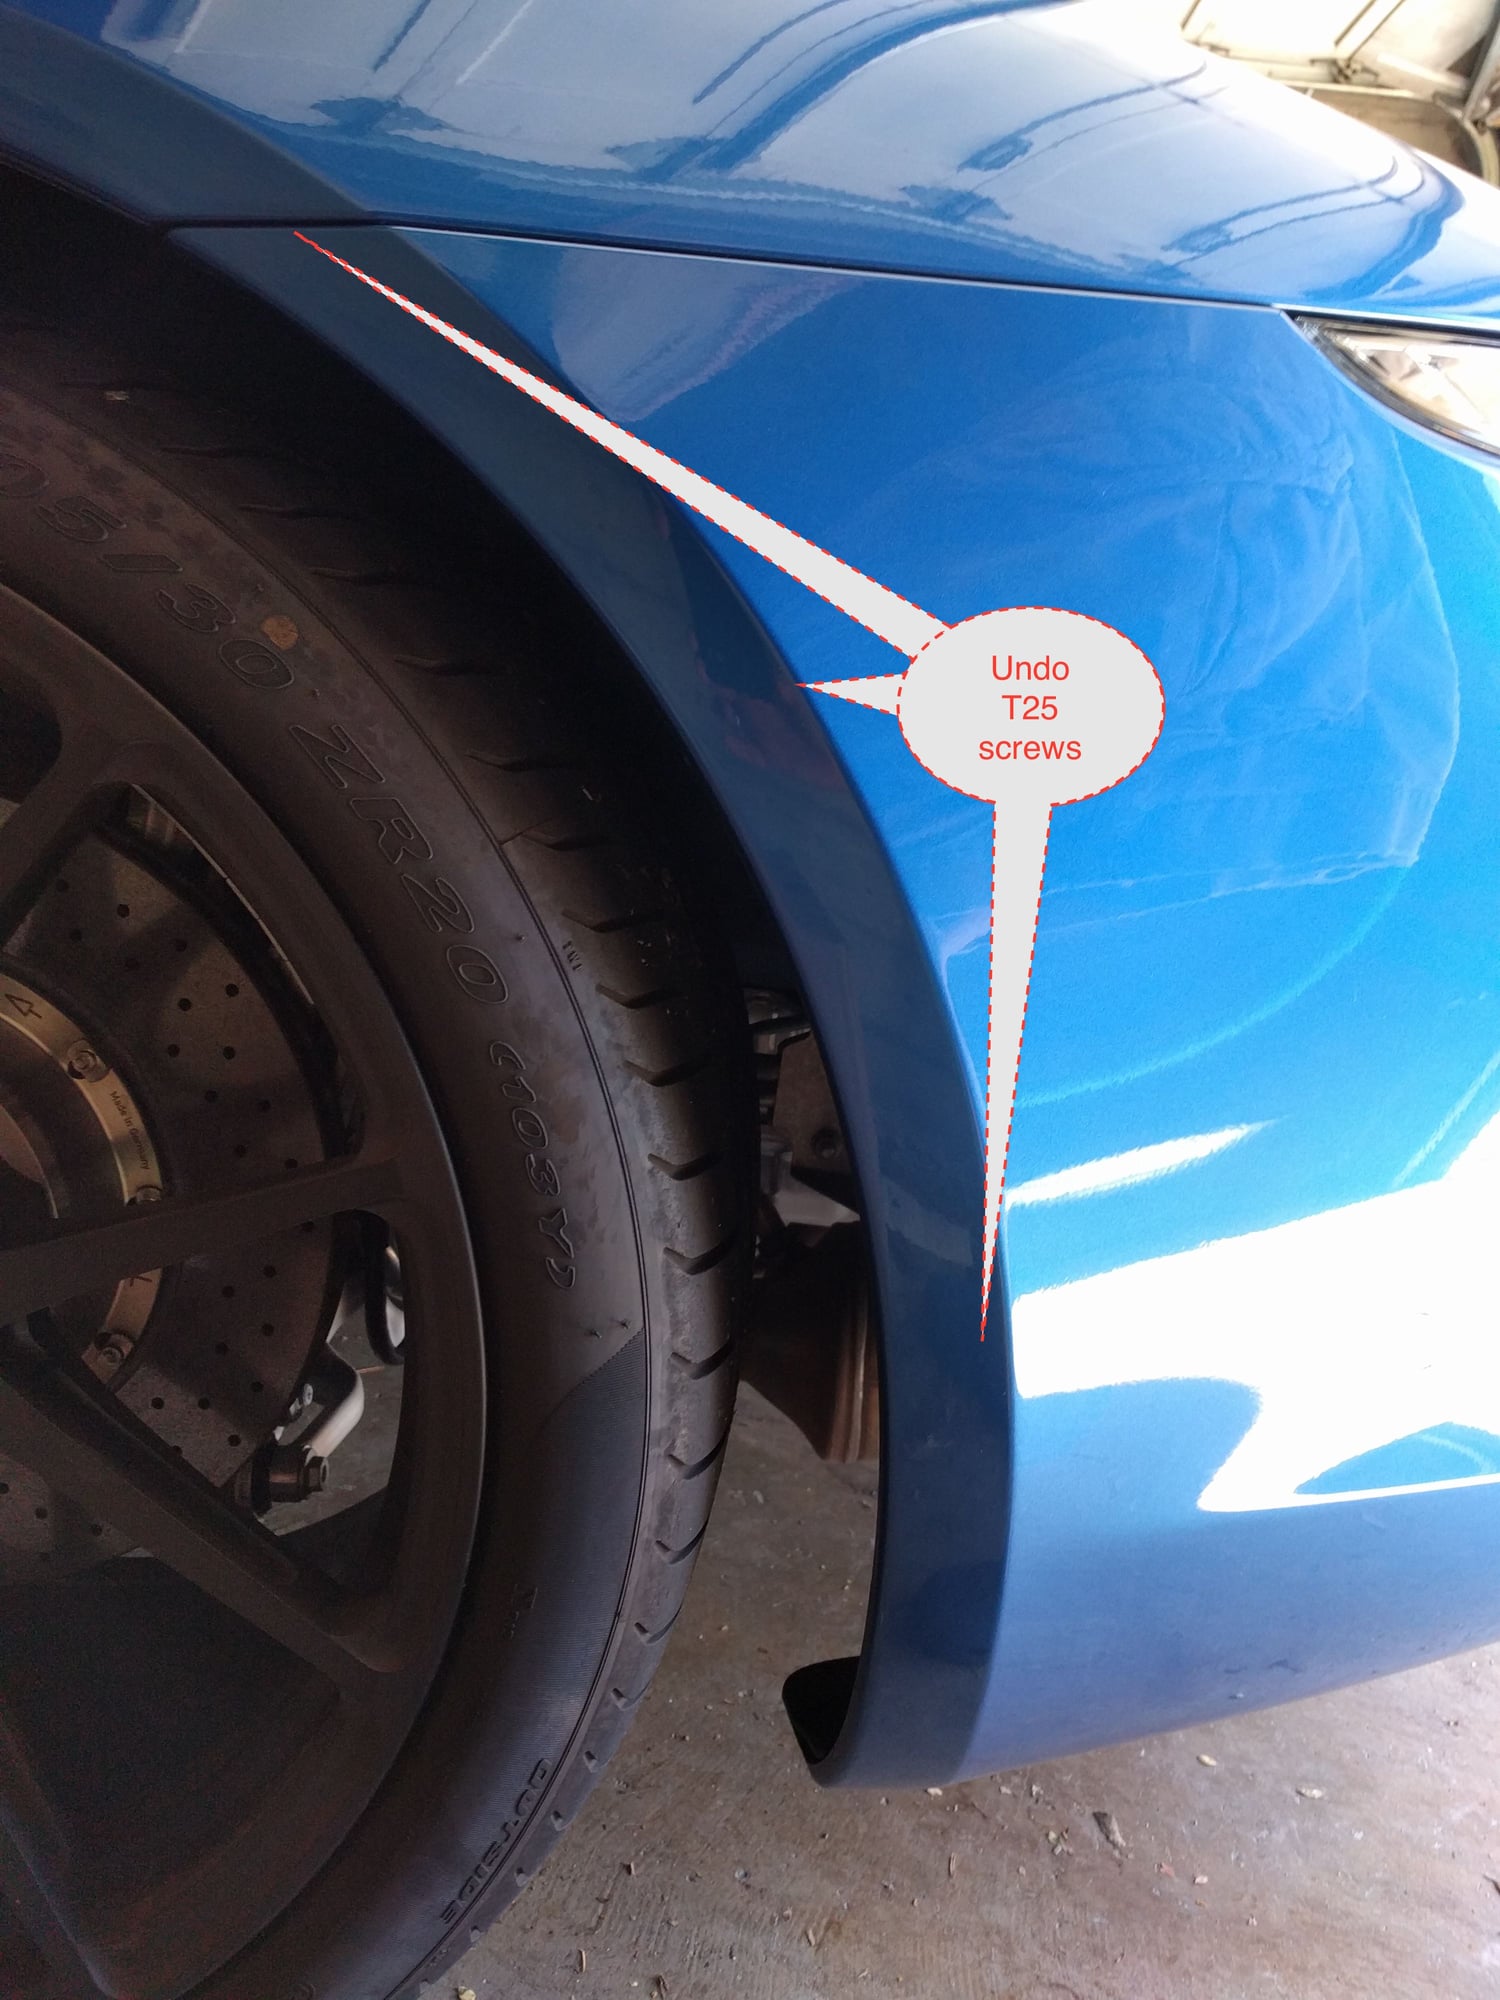
Default Step 2.1: bumper removal side


once jacked you can easily access the 3x T25 screws in the wheel well, repeat on opposite side
Old 04-17-2016, 05:09 PM
  #21  
Larry Cable
Rennlist Member
Thread Starter
 
Larry Cable's Avatar
 
Join Date: Oct 2002
Location: S.F Bay Area
Posts: 25,542
Received 3,446 Likes on 2,252 Posts
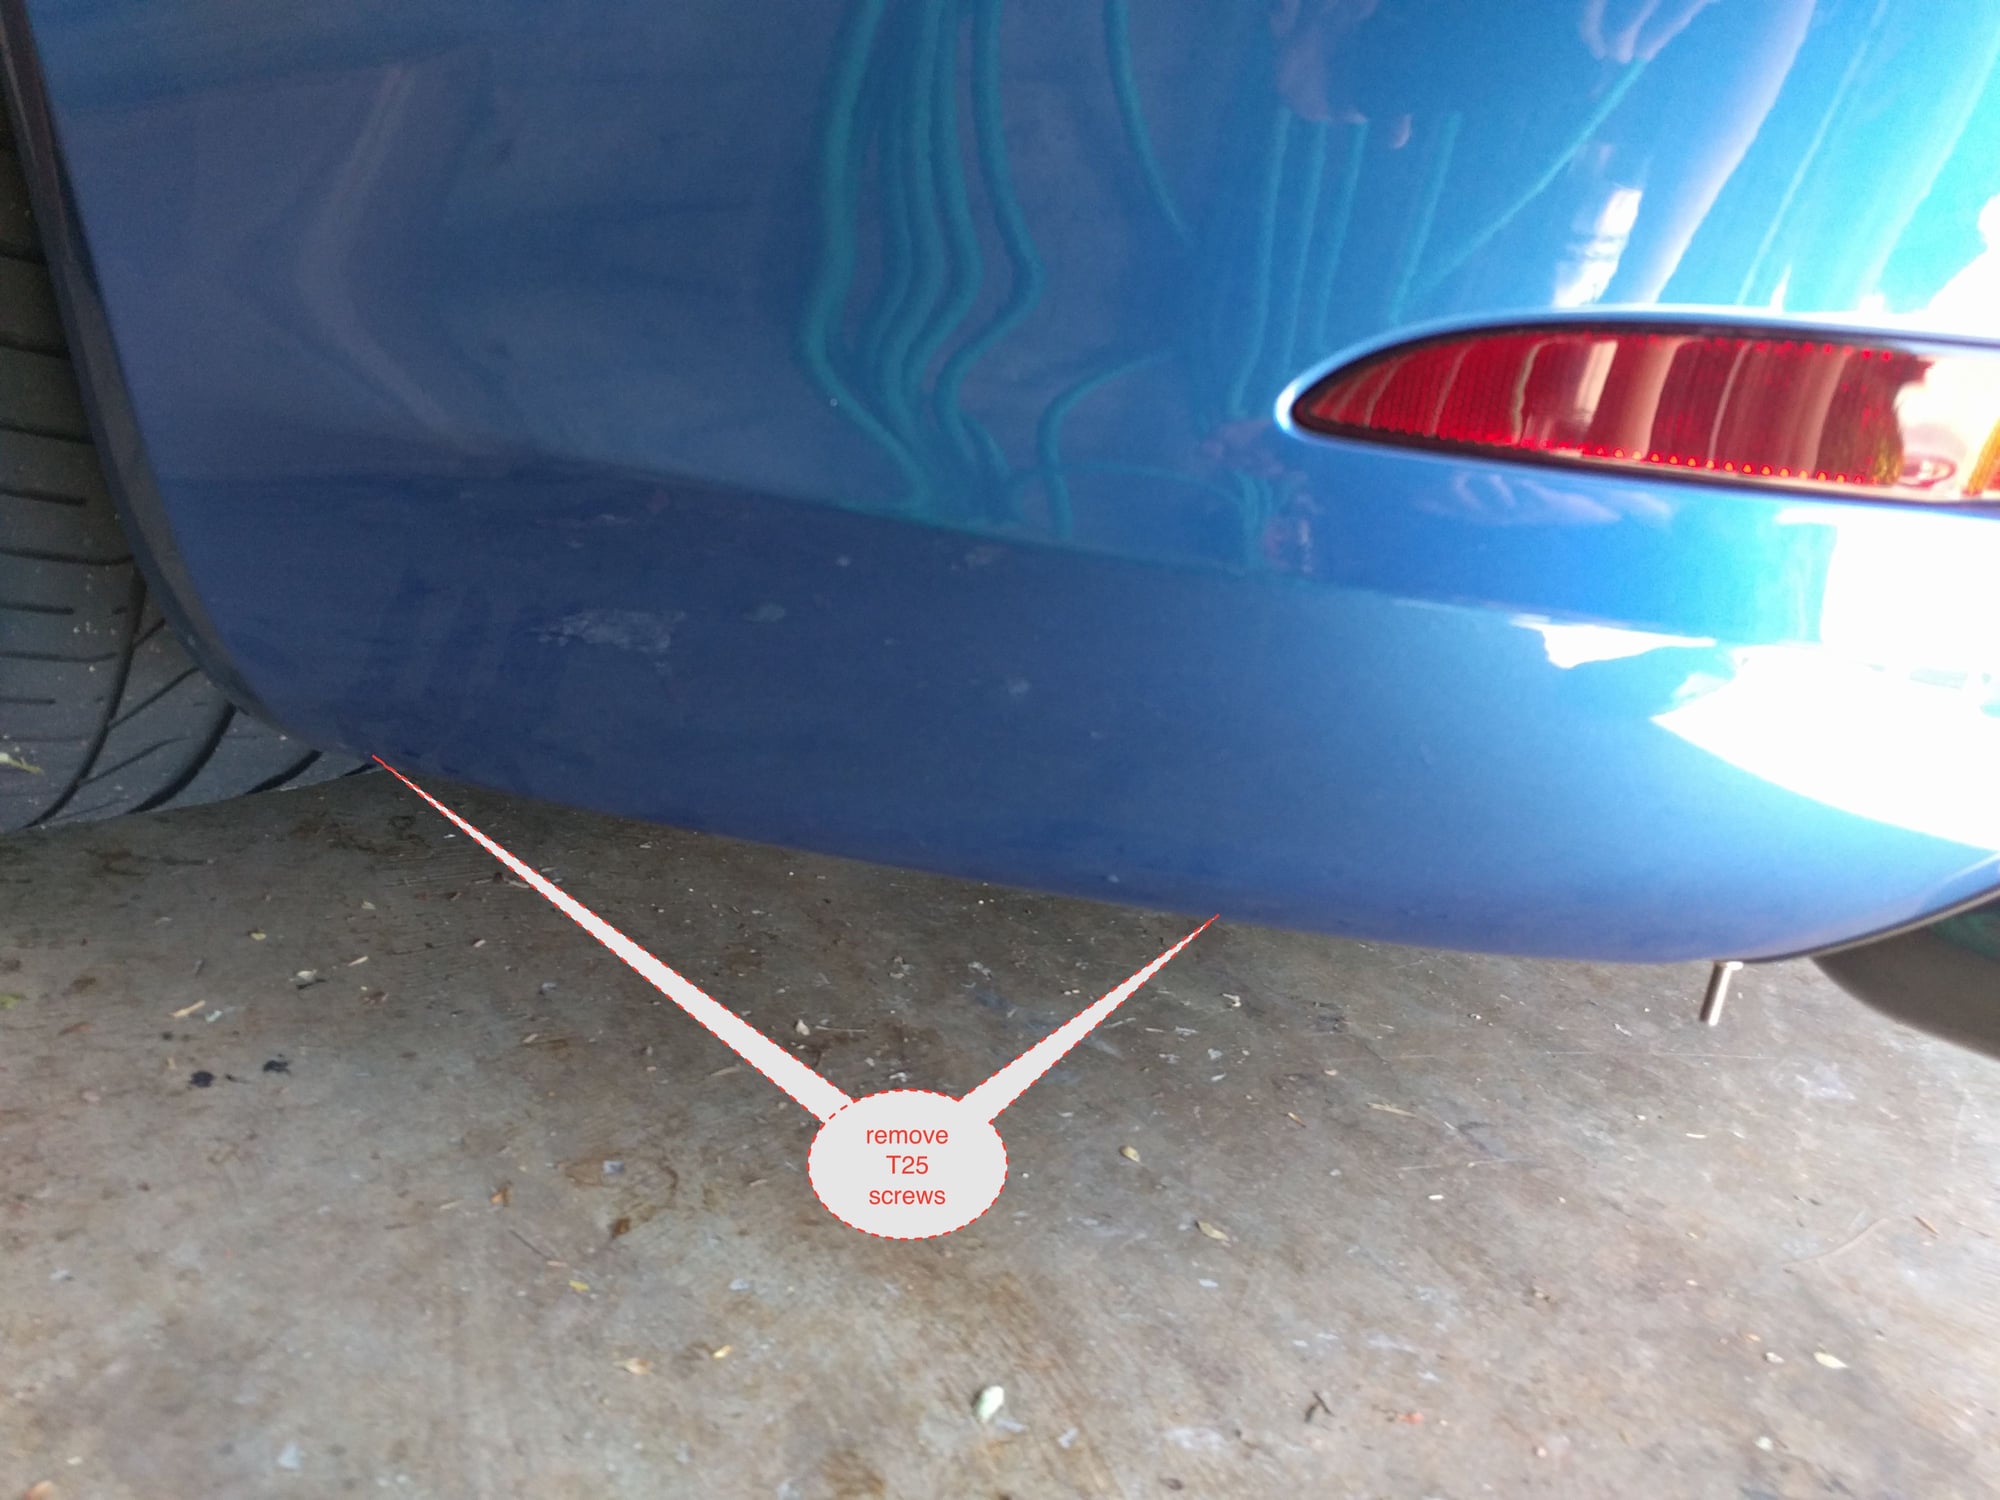
Default step 2.2: bumper removal, side (lower)


now remove the 2x T25 screws underneath, repeat on opposite side
Old 04-17-2016, 05:09 PM
  #22  
Larry Cable
Rennlist Member
Thread Starter
 
Larry Cable's Avatar
 
Join Date: Oct 2002
Location: S.F Bay Area
Posts: 25,542
Received 3,446 Likes on 2,252 Posts
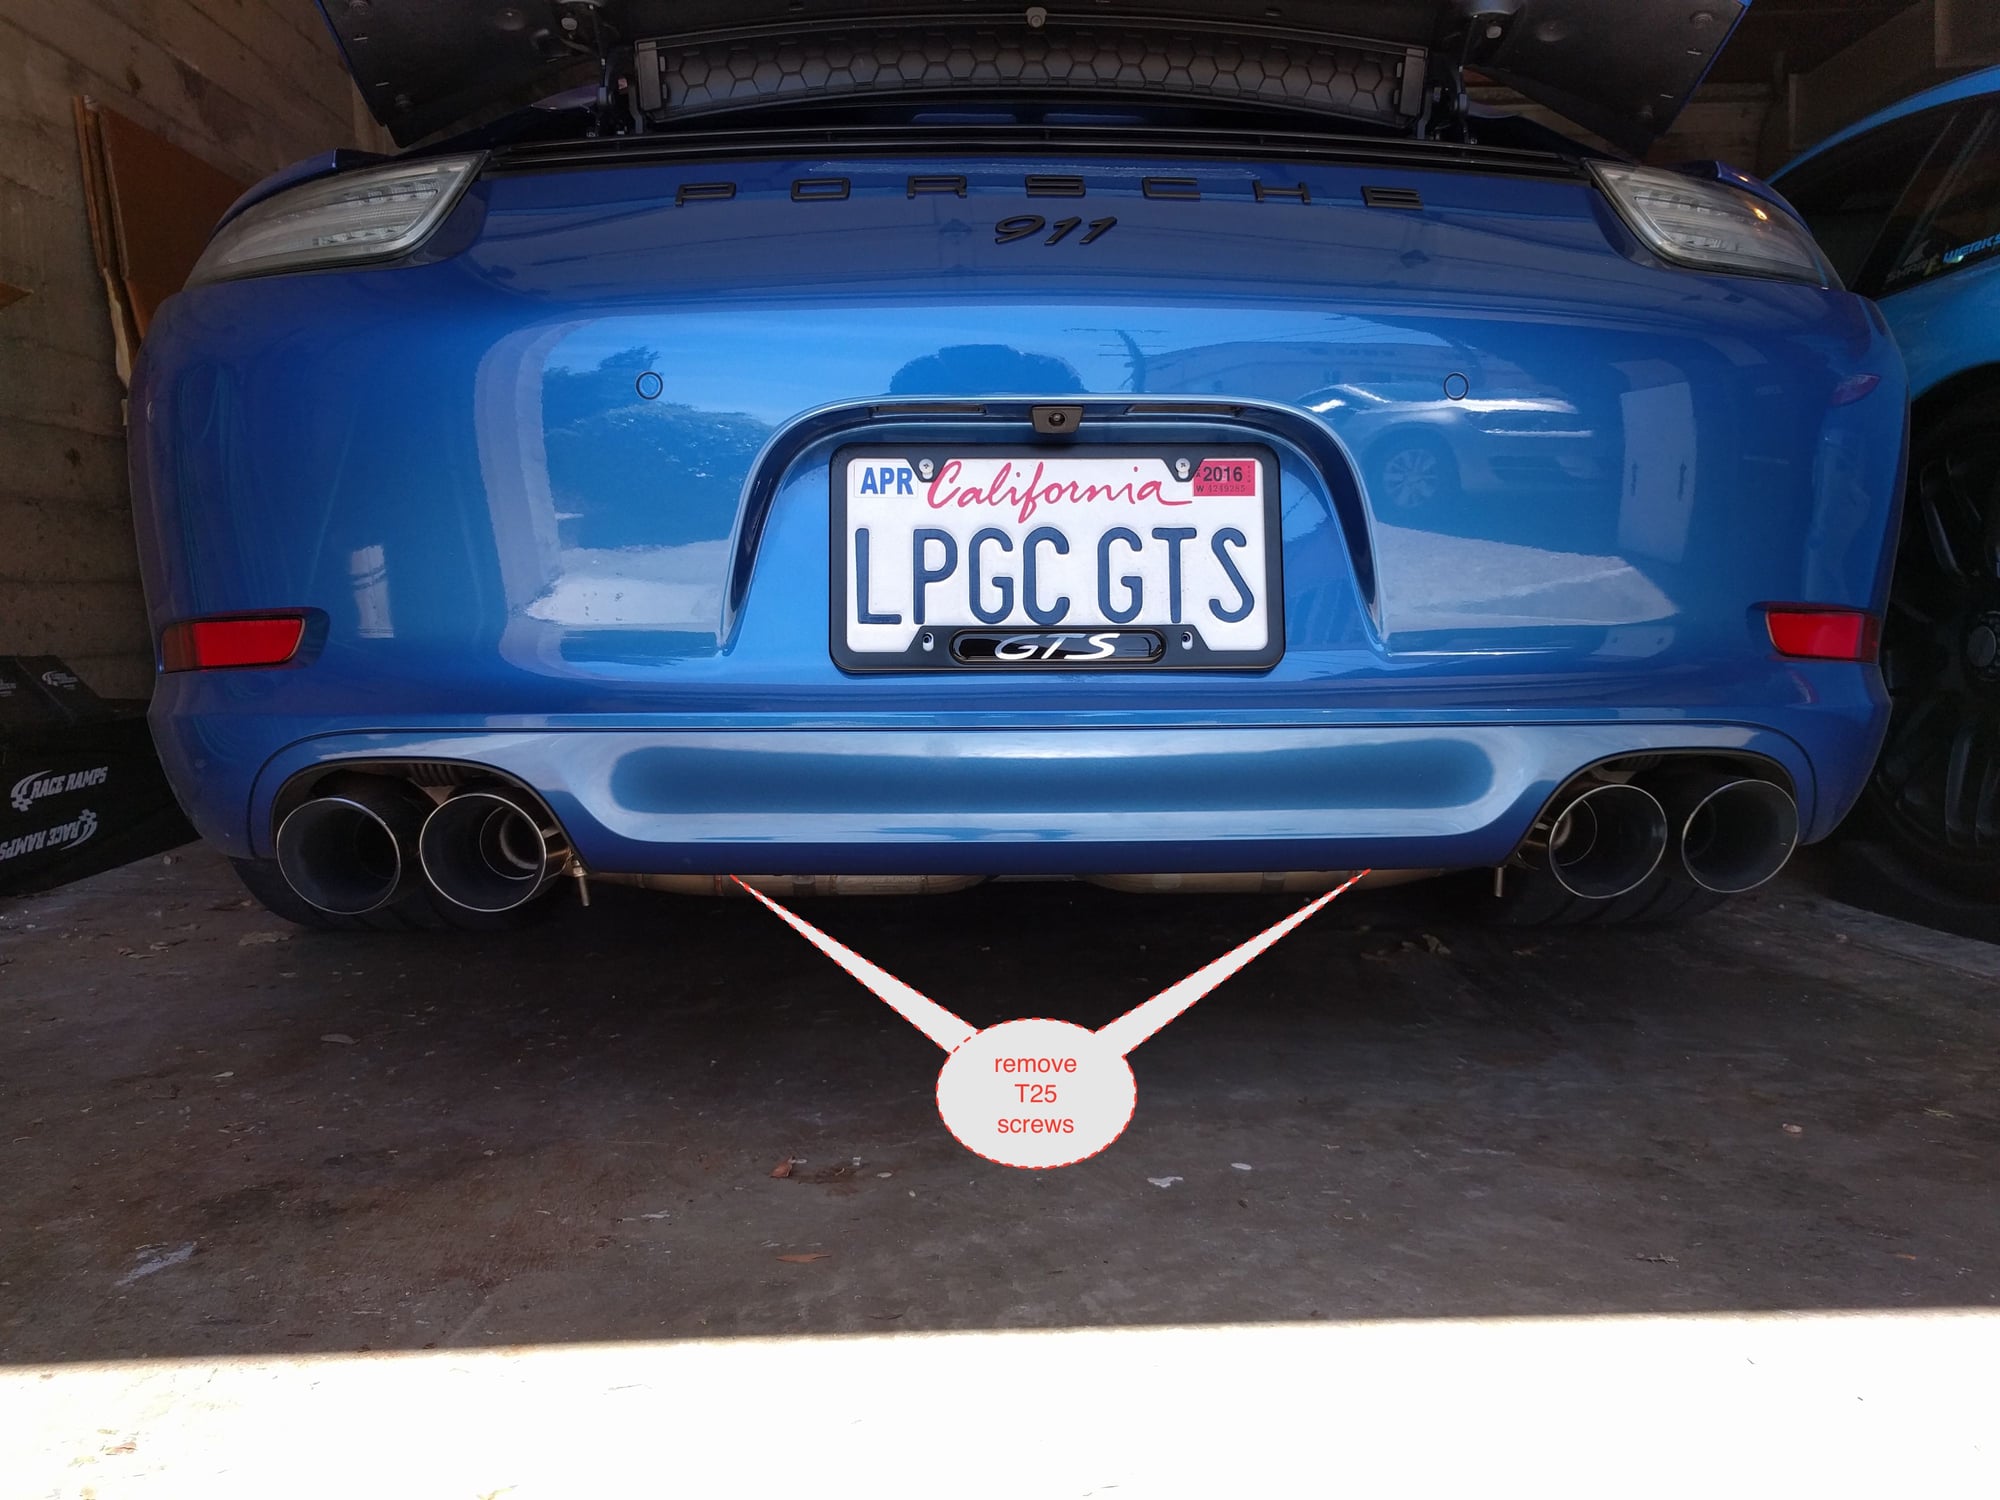
Default Step 2.3: bumper removal, lower rear


remove these 2x T25's also
Old 04-17-2016, 05:11 PM
  #23  
Larry Cable
Rennlist Member
Thread Starter
 
Larry Cable's Avatar
 
Join Date: Oct 2002
Location: S.F Bay Area
Posts: 25,542
Received 3,446 Likes on 2,252 Posts
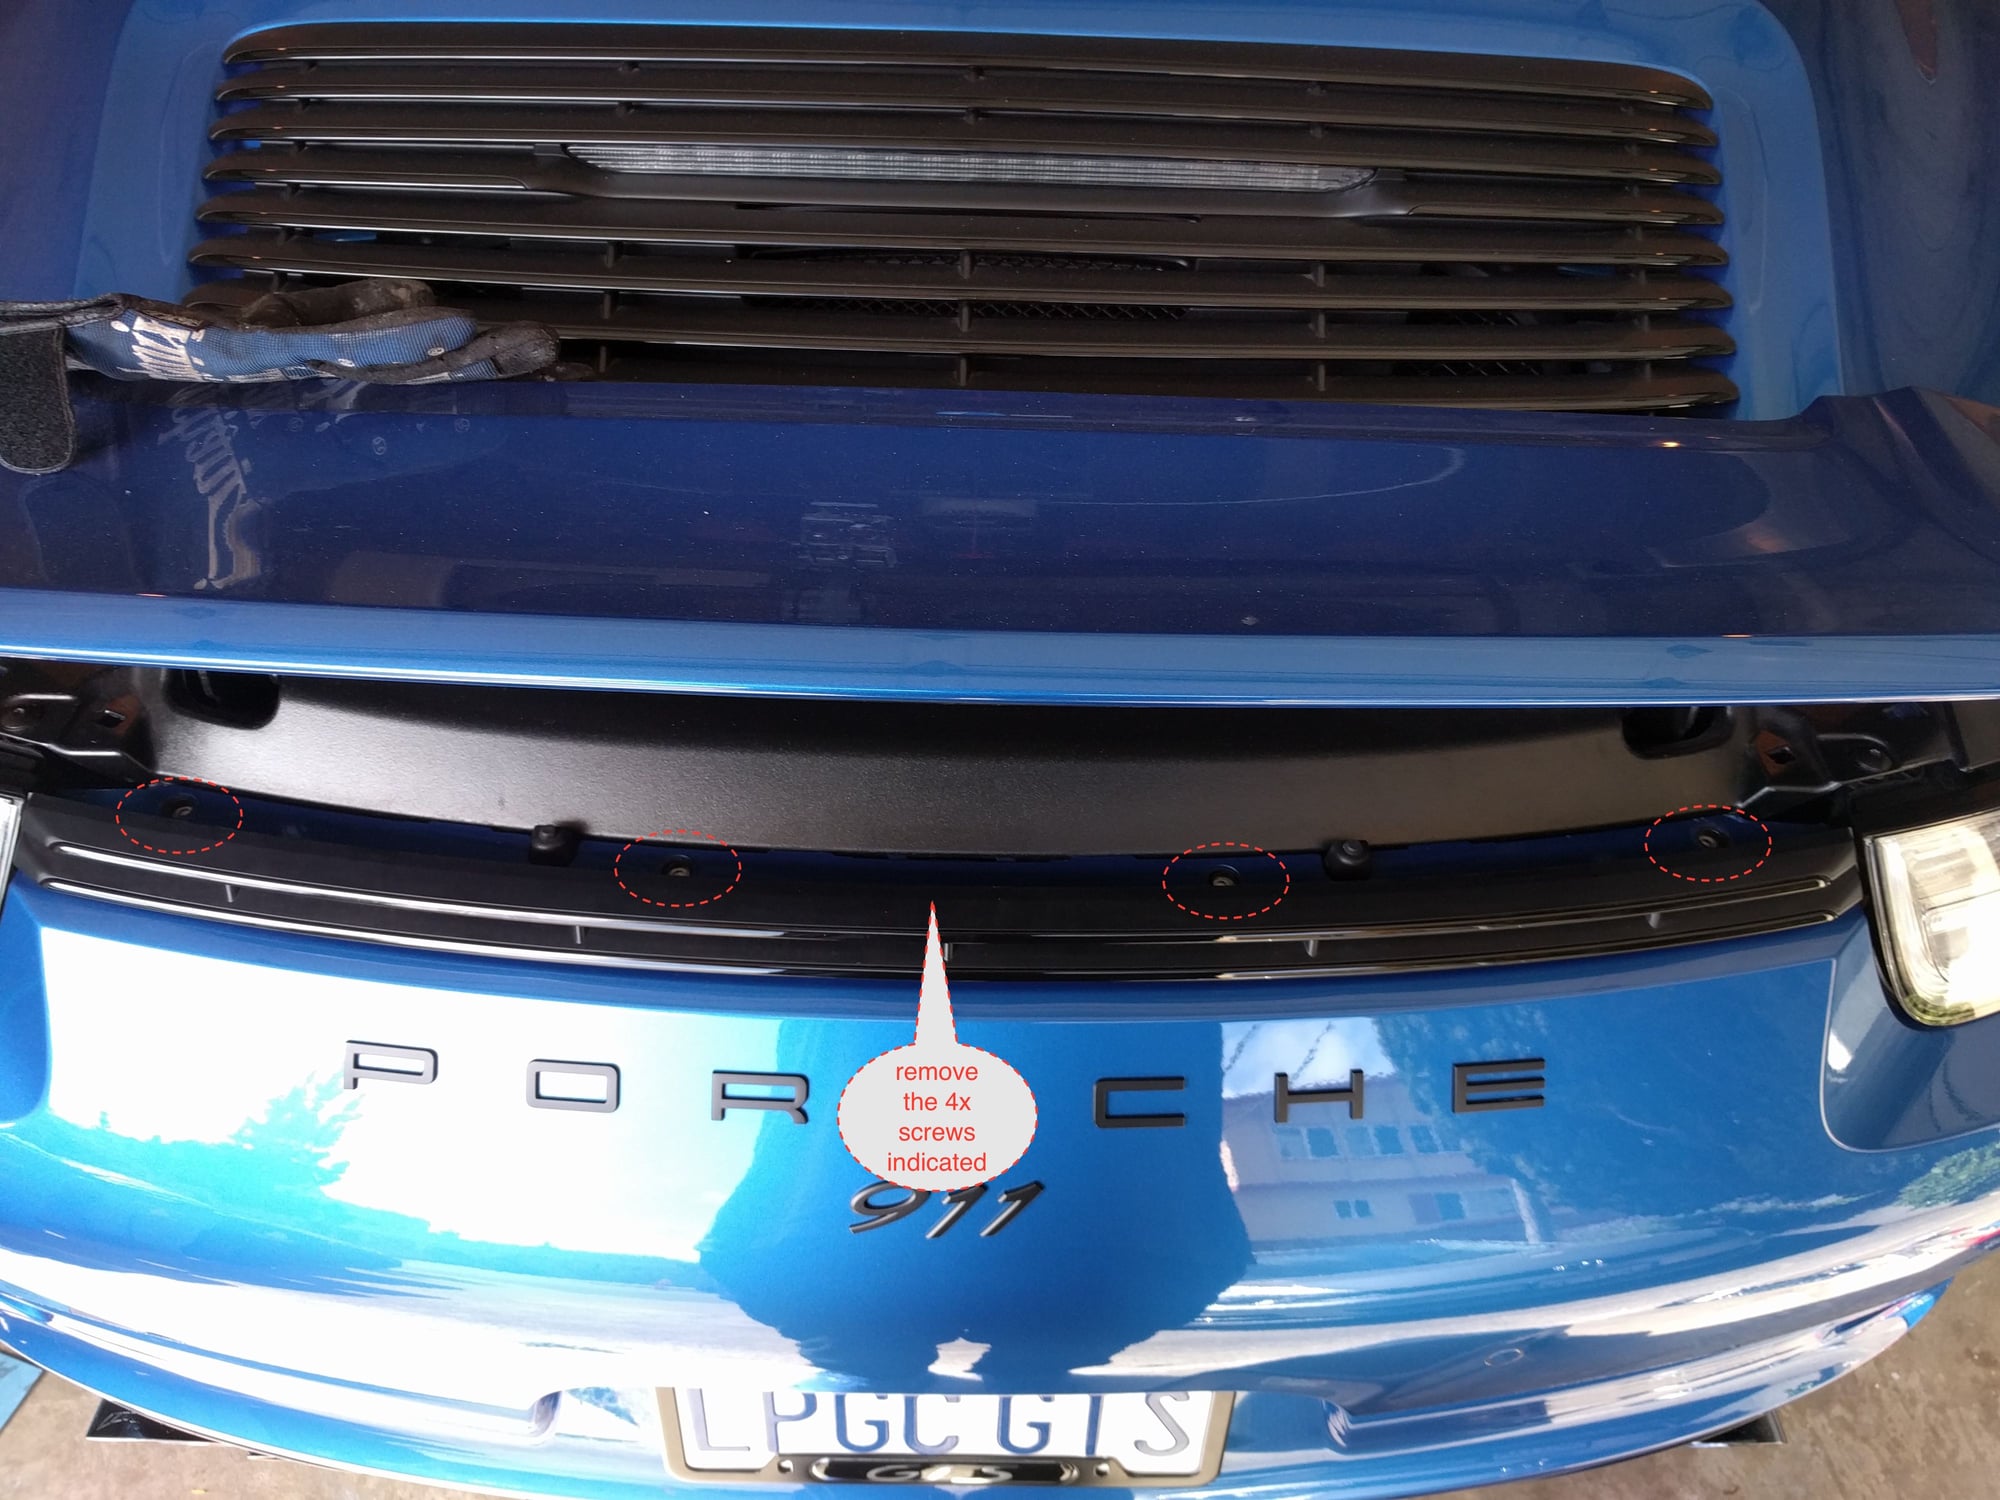
Default Step 2.4: bumper removal top


now (with wing deployed) remove these 4x T25 screws
Old 04-17-2016, 05:13 PM
  #24  
Larry Cable
Rennlist Member
Thread Starter
 
Larry Cable's Avatar
 
Join Date: Oct 2002
Location: S.F Bay Area
Posts: 25,542
Received 3,446 Likes on 2,252 Posts
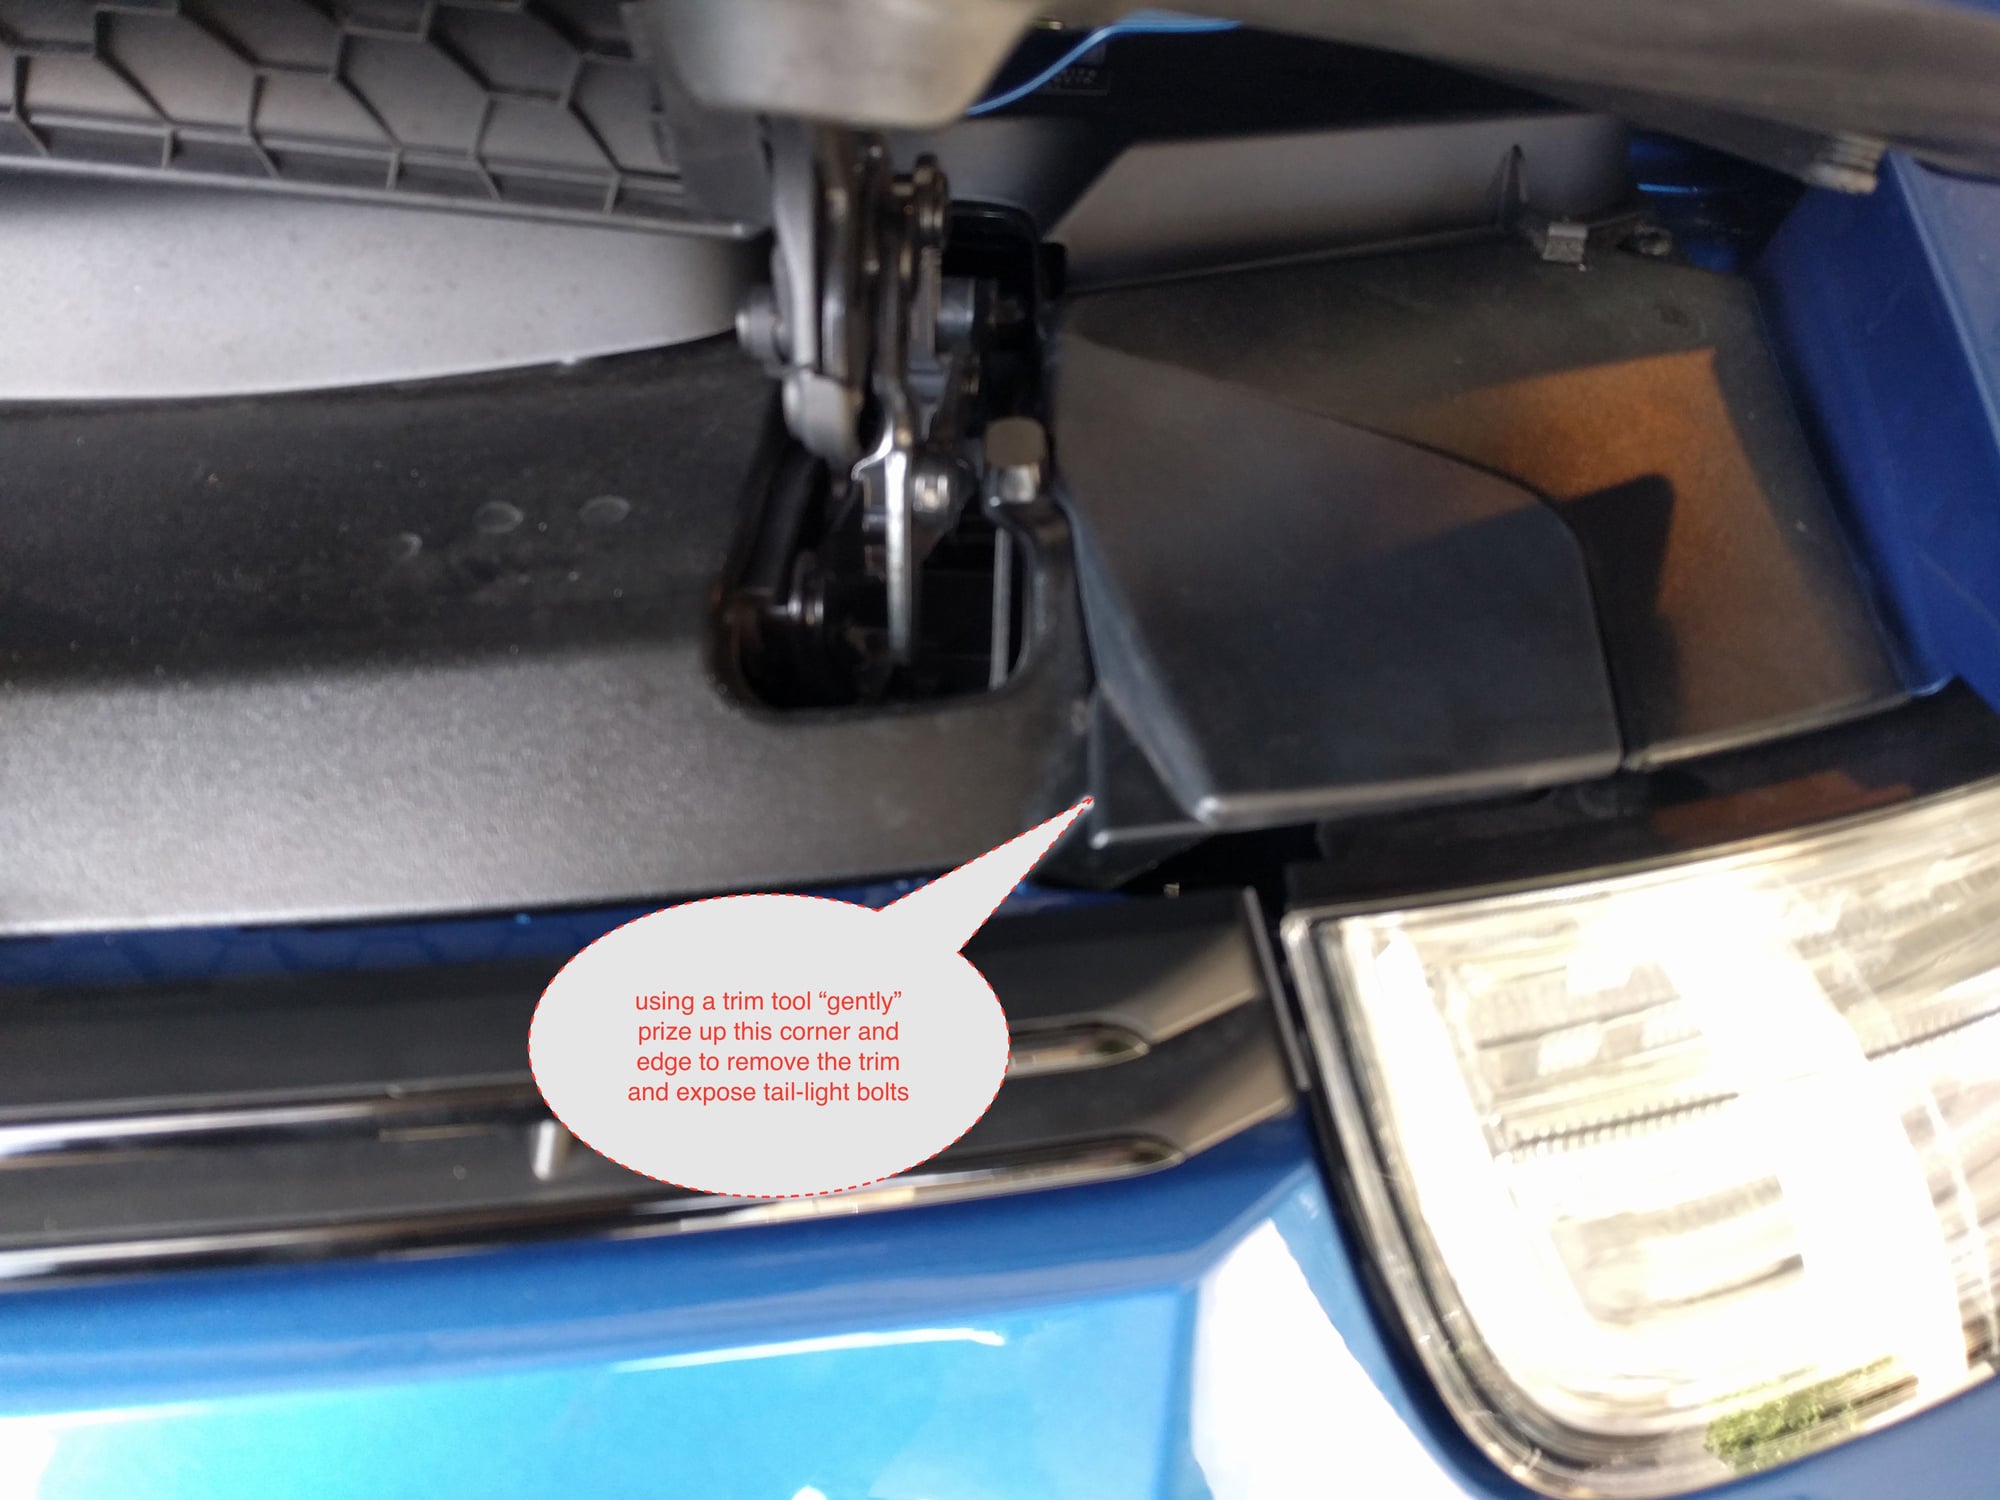
Default Step 2.5: bumper removal, tail light trim


using a trim tool (or your fingers) gently pry up <br/>the inside edge of the trim, pull up and then inwards to release (outside edge has clip - beware)
Old 04-17-2016, 05:14 PM
  #25  
Larry Cable
Rennlist Member
Thread Starter
 
Larry Cable's Avatar
 
Join Date: Oct 2002
Location: S.F Bay Area
Posts: 25,542
Received 3,446 Likes on 2,252 Posts
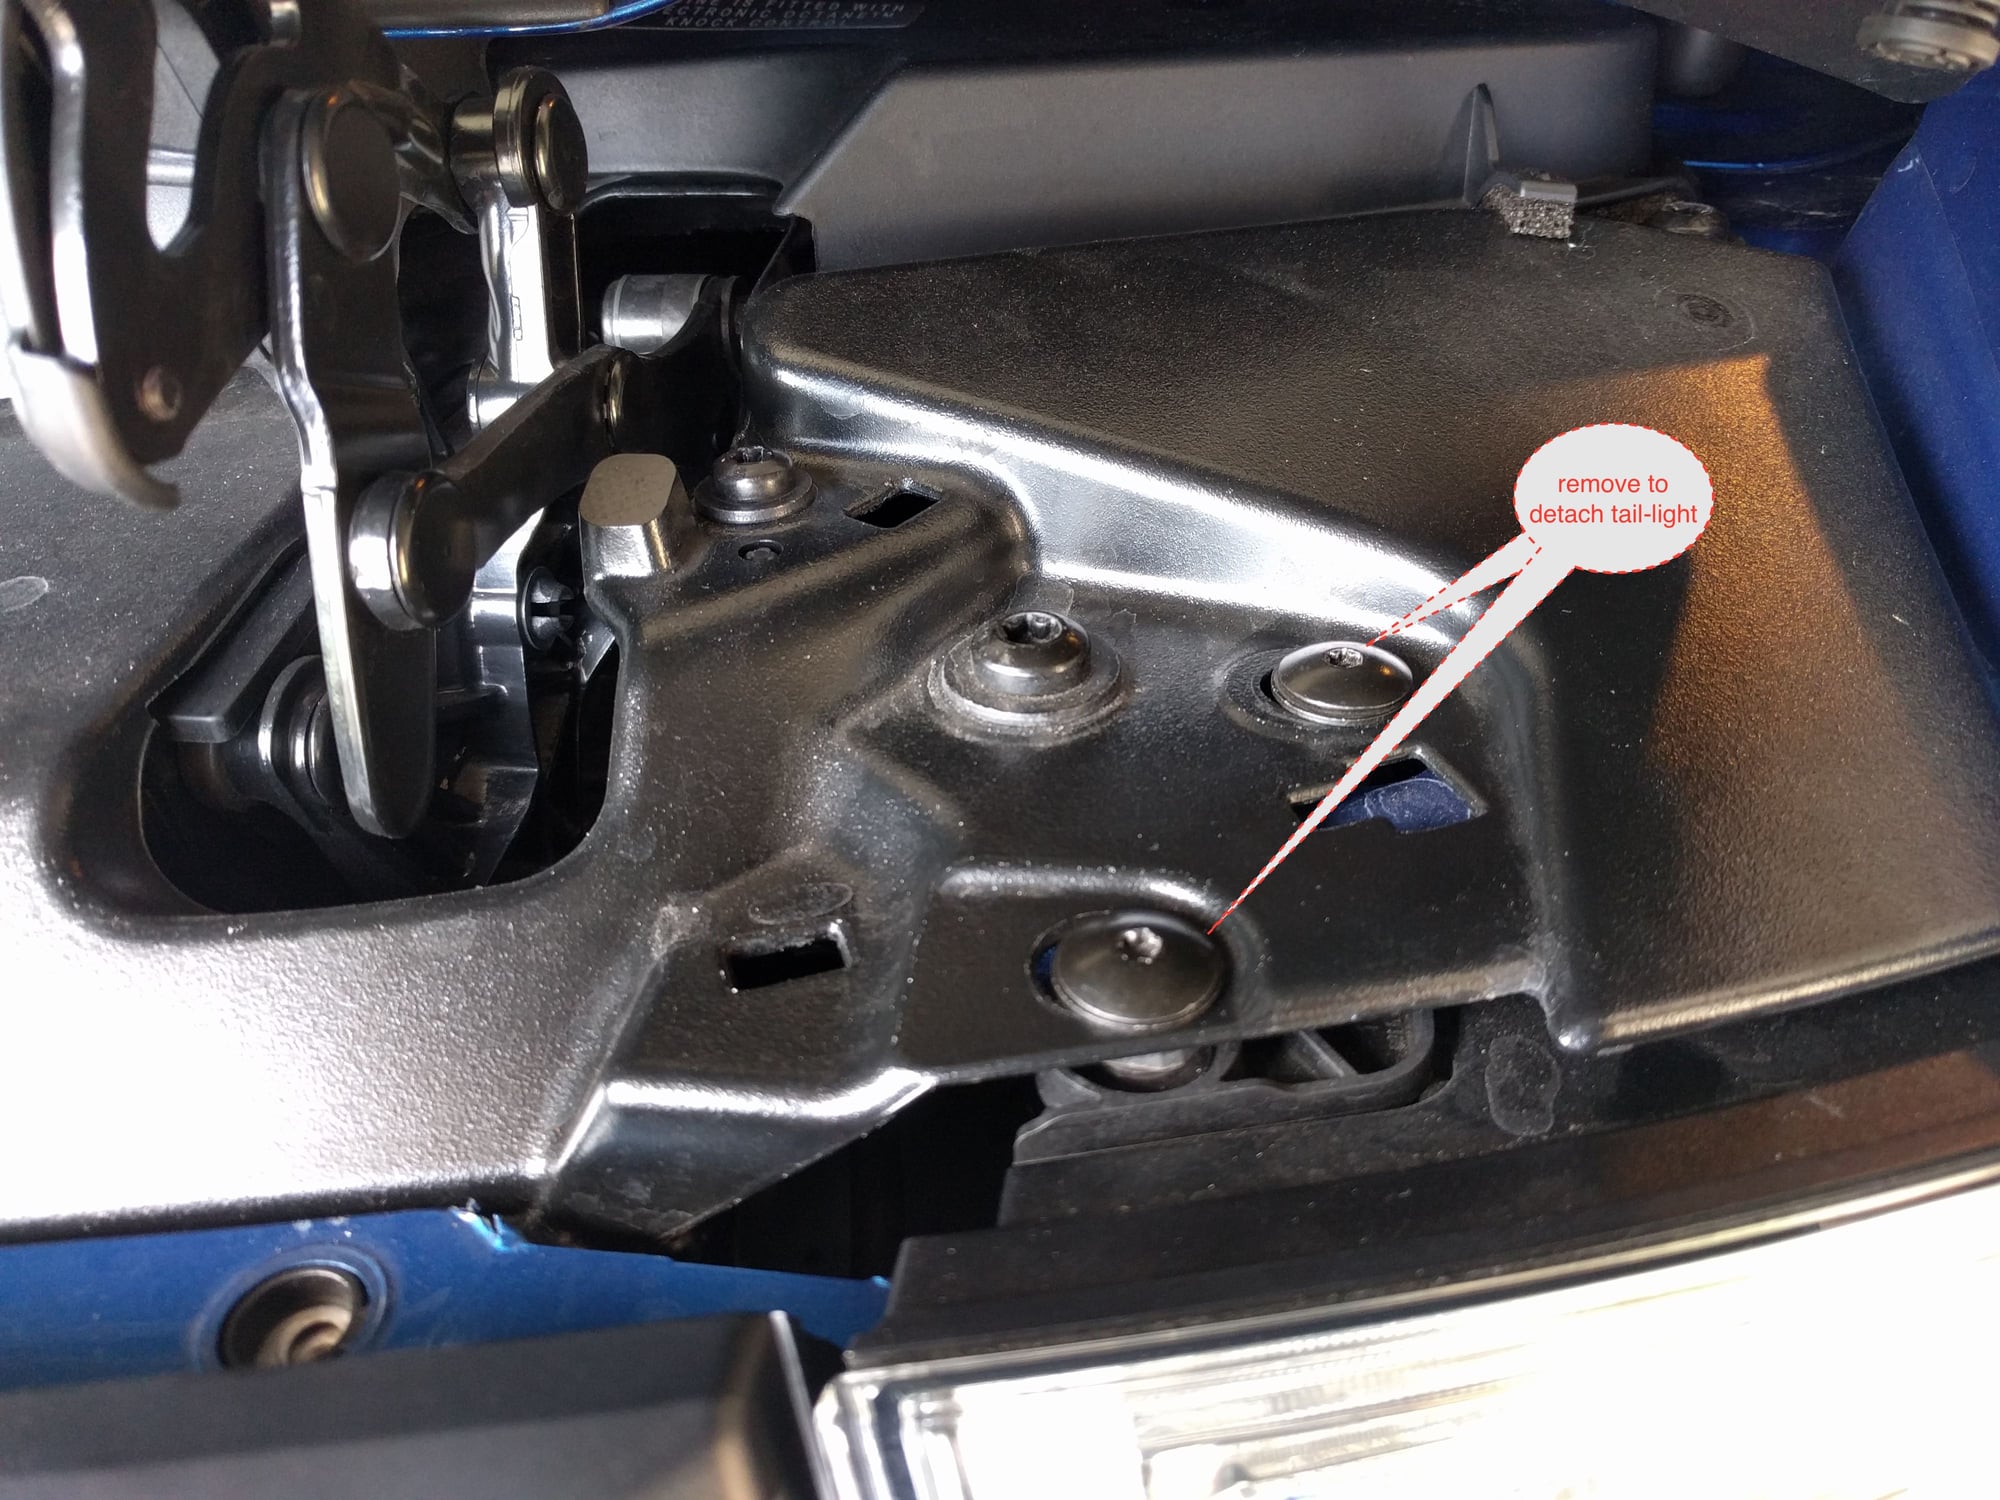
Default step 2.6: bumper removal, taillight bolts


remove 2x T25 bolts (long) and repeat on opposite side.
Old 04-17-2016, 05:15 PM
  #26  
Larry Cable
Rennlist Member
Thread Starter
 
Larry Cable's Avatar
 
Join Date: Oct 2002
Location: S.F Bay Area
Posts: 25,542
Received 3,446 Likes on 2,252 Posts
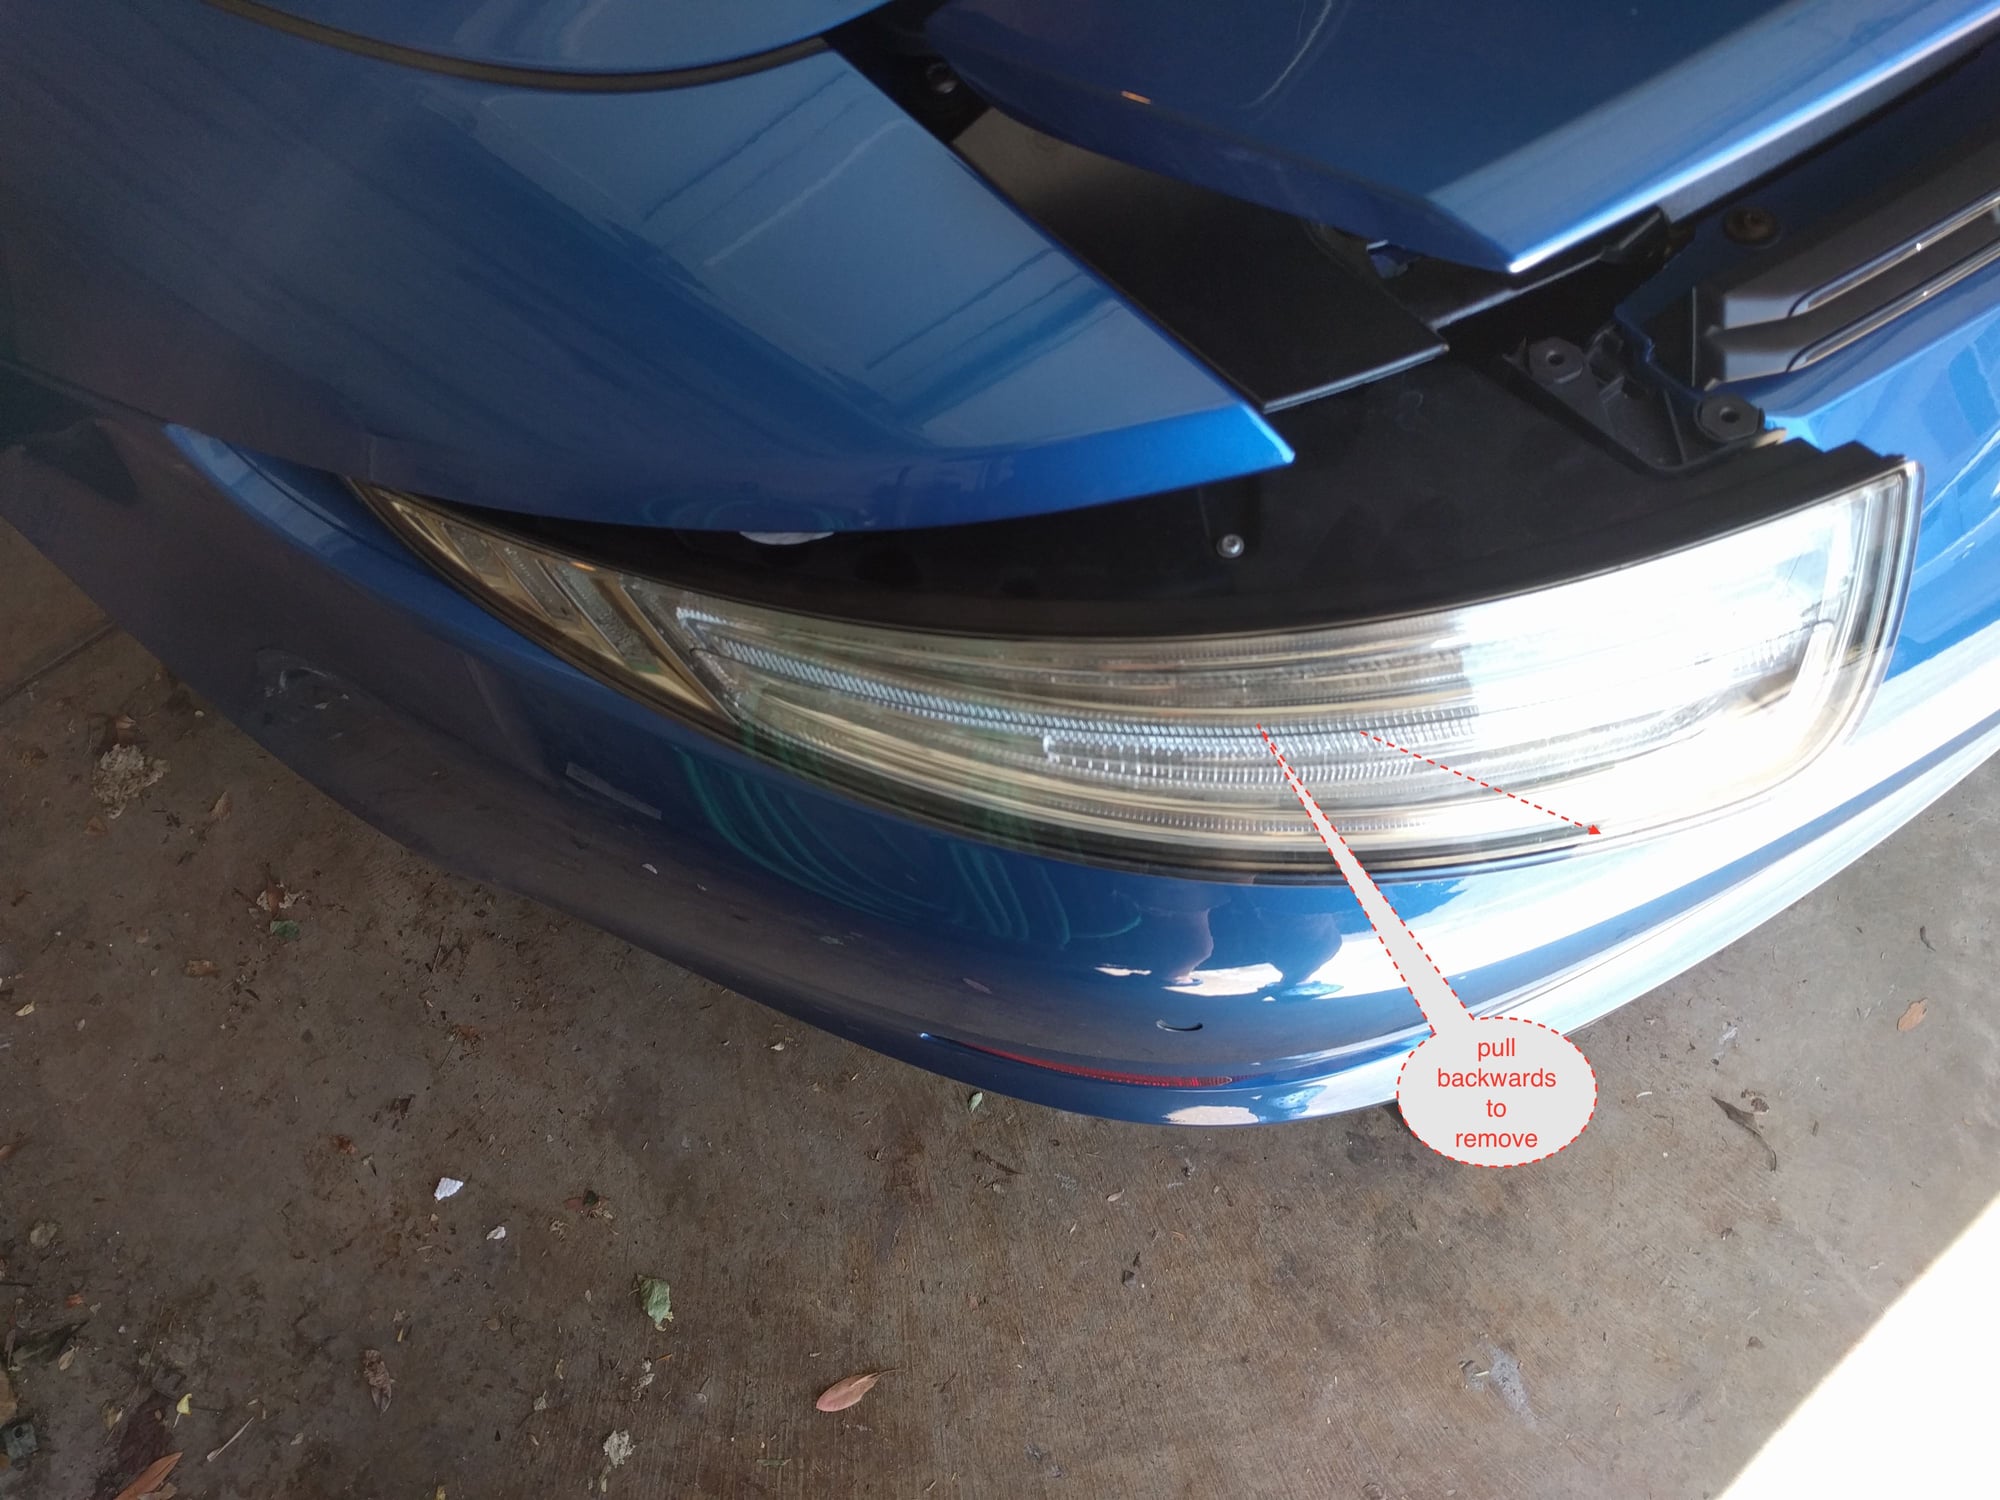
Default Step 2.7: bumper removal taillight assy


pull tail light towards back of car to remove, watch wiring harness, its short!
Old 04-17-2016, 05:16 PM
  #27  
Larry Cable
Rennlist Member
Thread Starter
 
Larry Cable's Avatar
 
Join Date: Oct 2002
Location: S.F Bay Area
Posts: 25,542
Received 3,446 Likes on 2,252 Posts
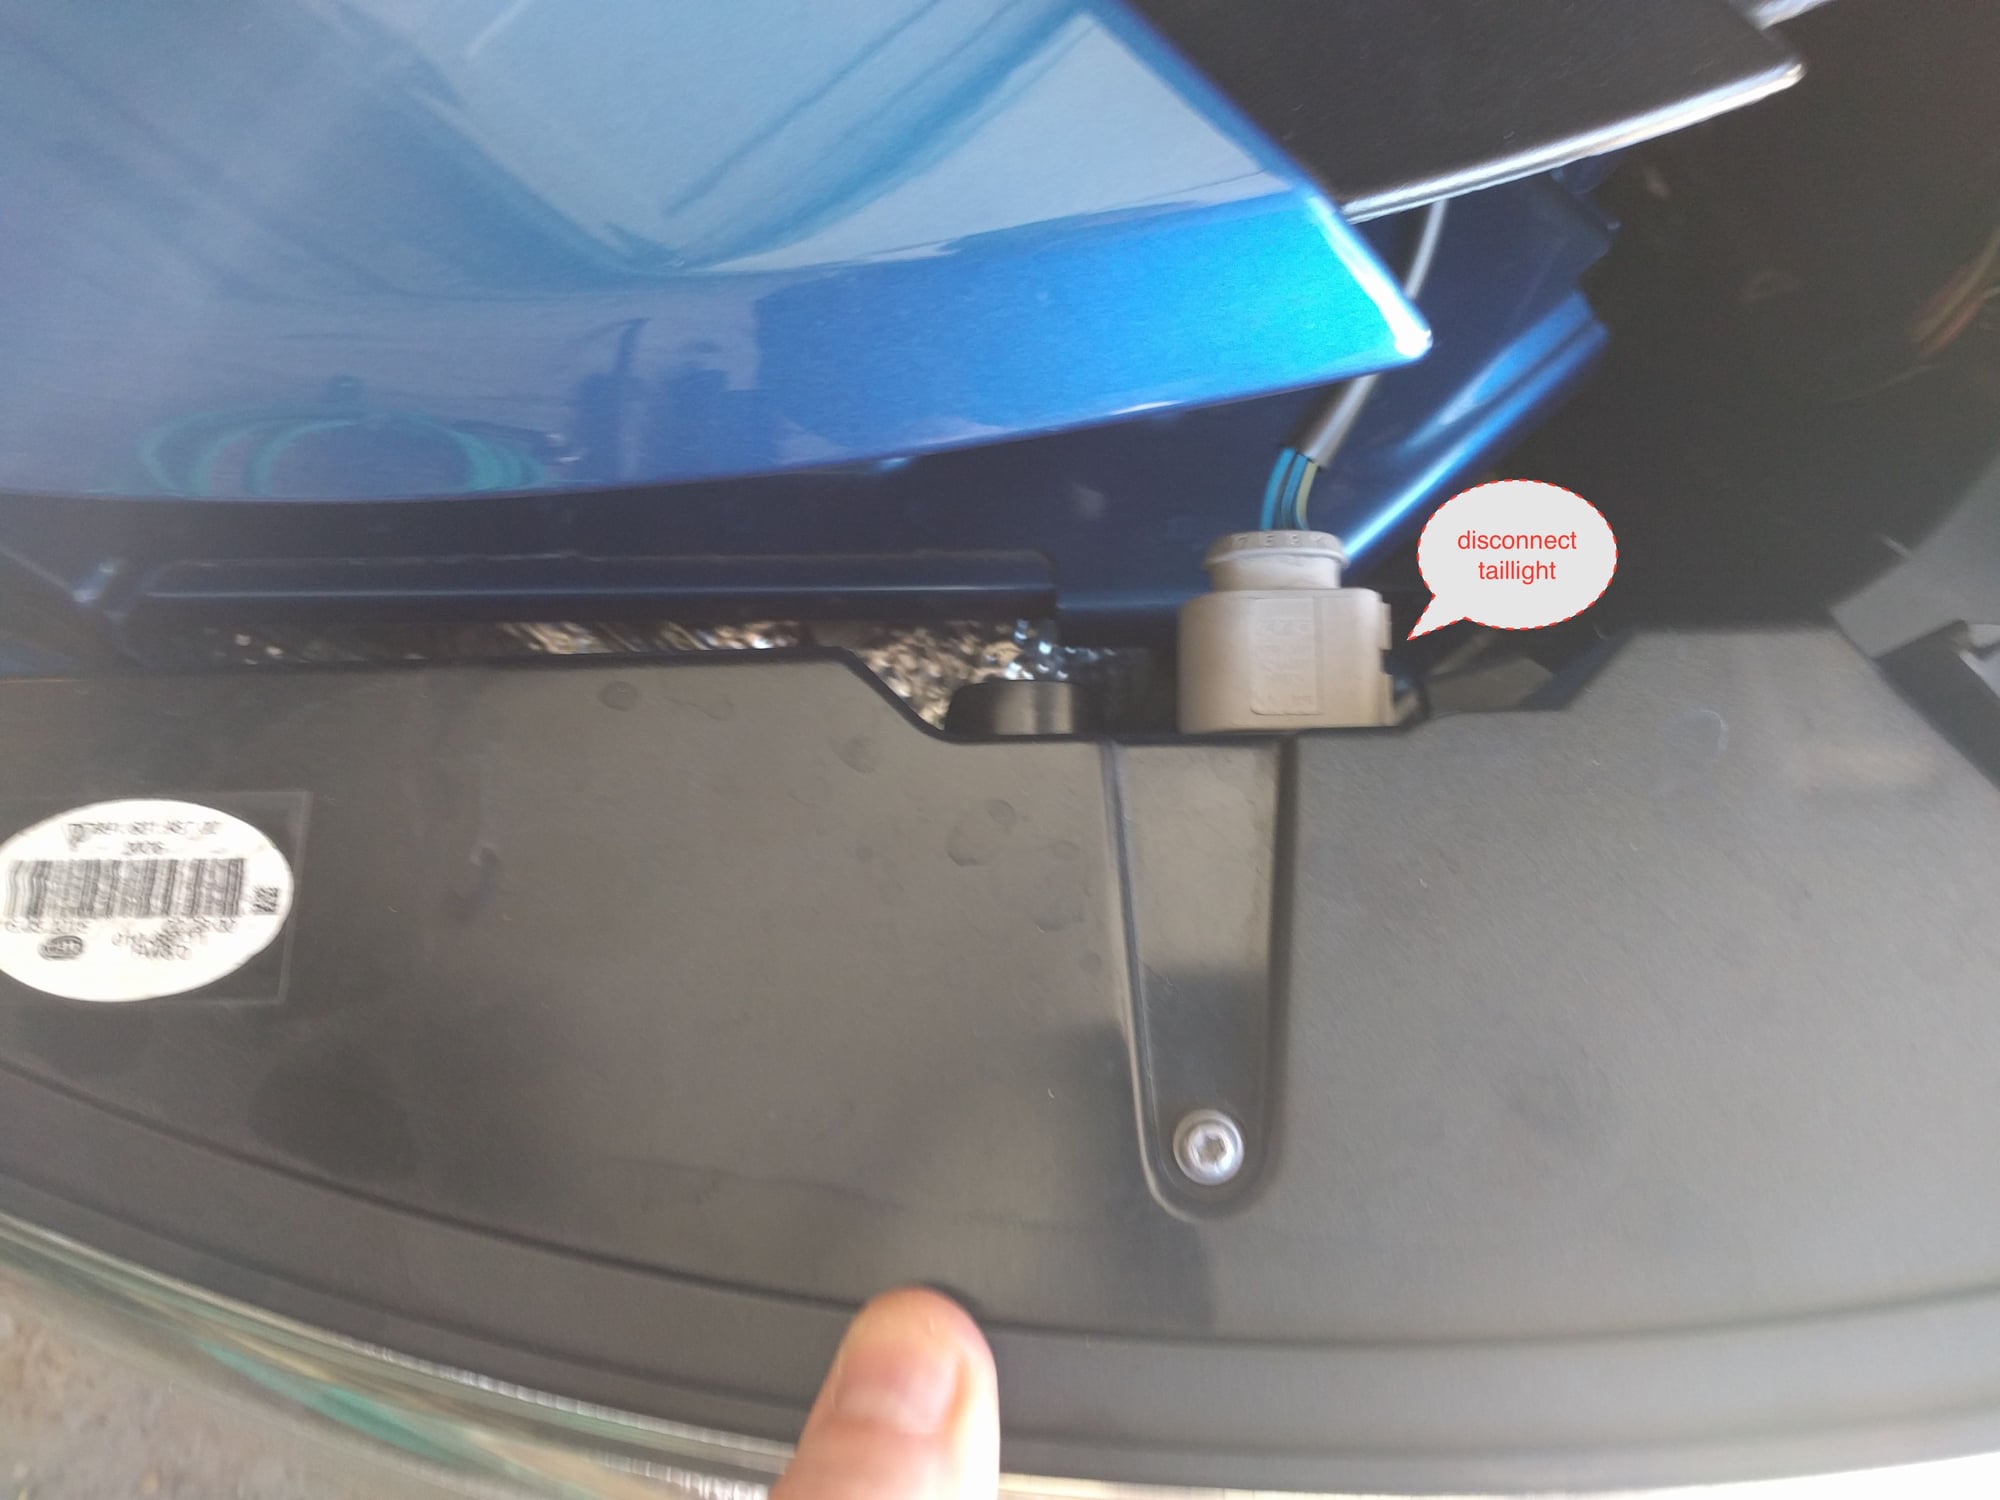
Default step 2.8: bumper removal, disconnect tail light


unplug tail light molex, repeat on passenger side
Old 04-17-2016, 05:20 PM
  #28  
Larry Cable
Rennlist Member
Thread Starter
 
Larry Cable's Avatar
 
Join Date: Oct 2002
Location: S.F Bay Area
Posts: 25,542
Received 3,446 Likes on 2,252 Posts
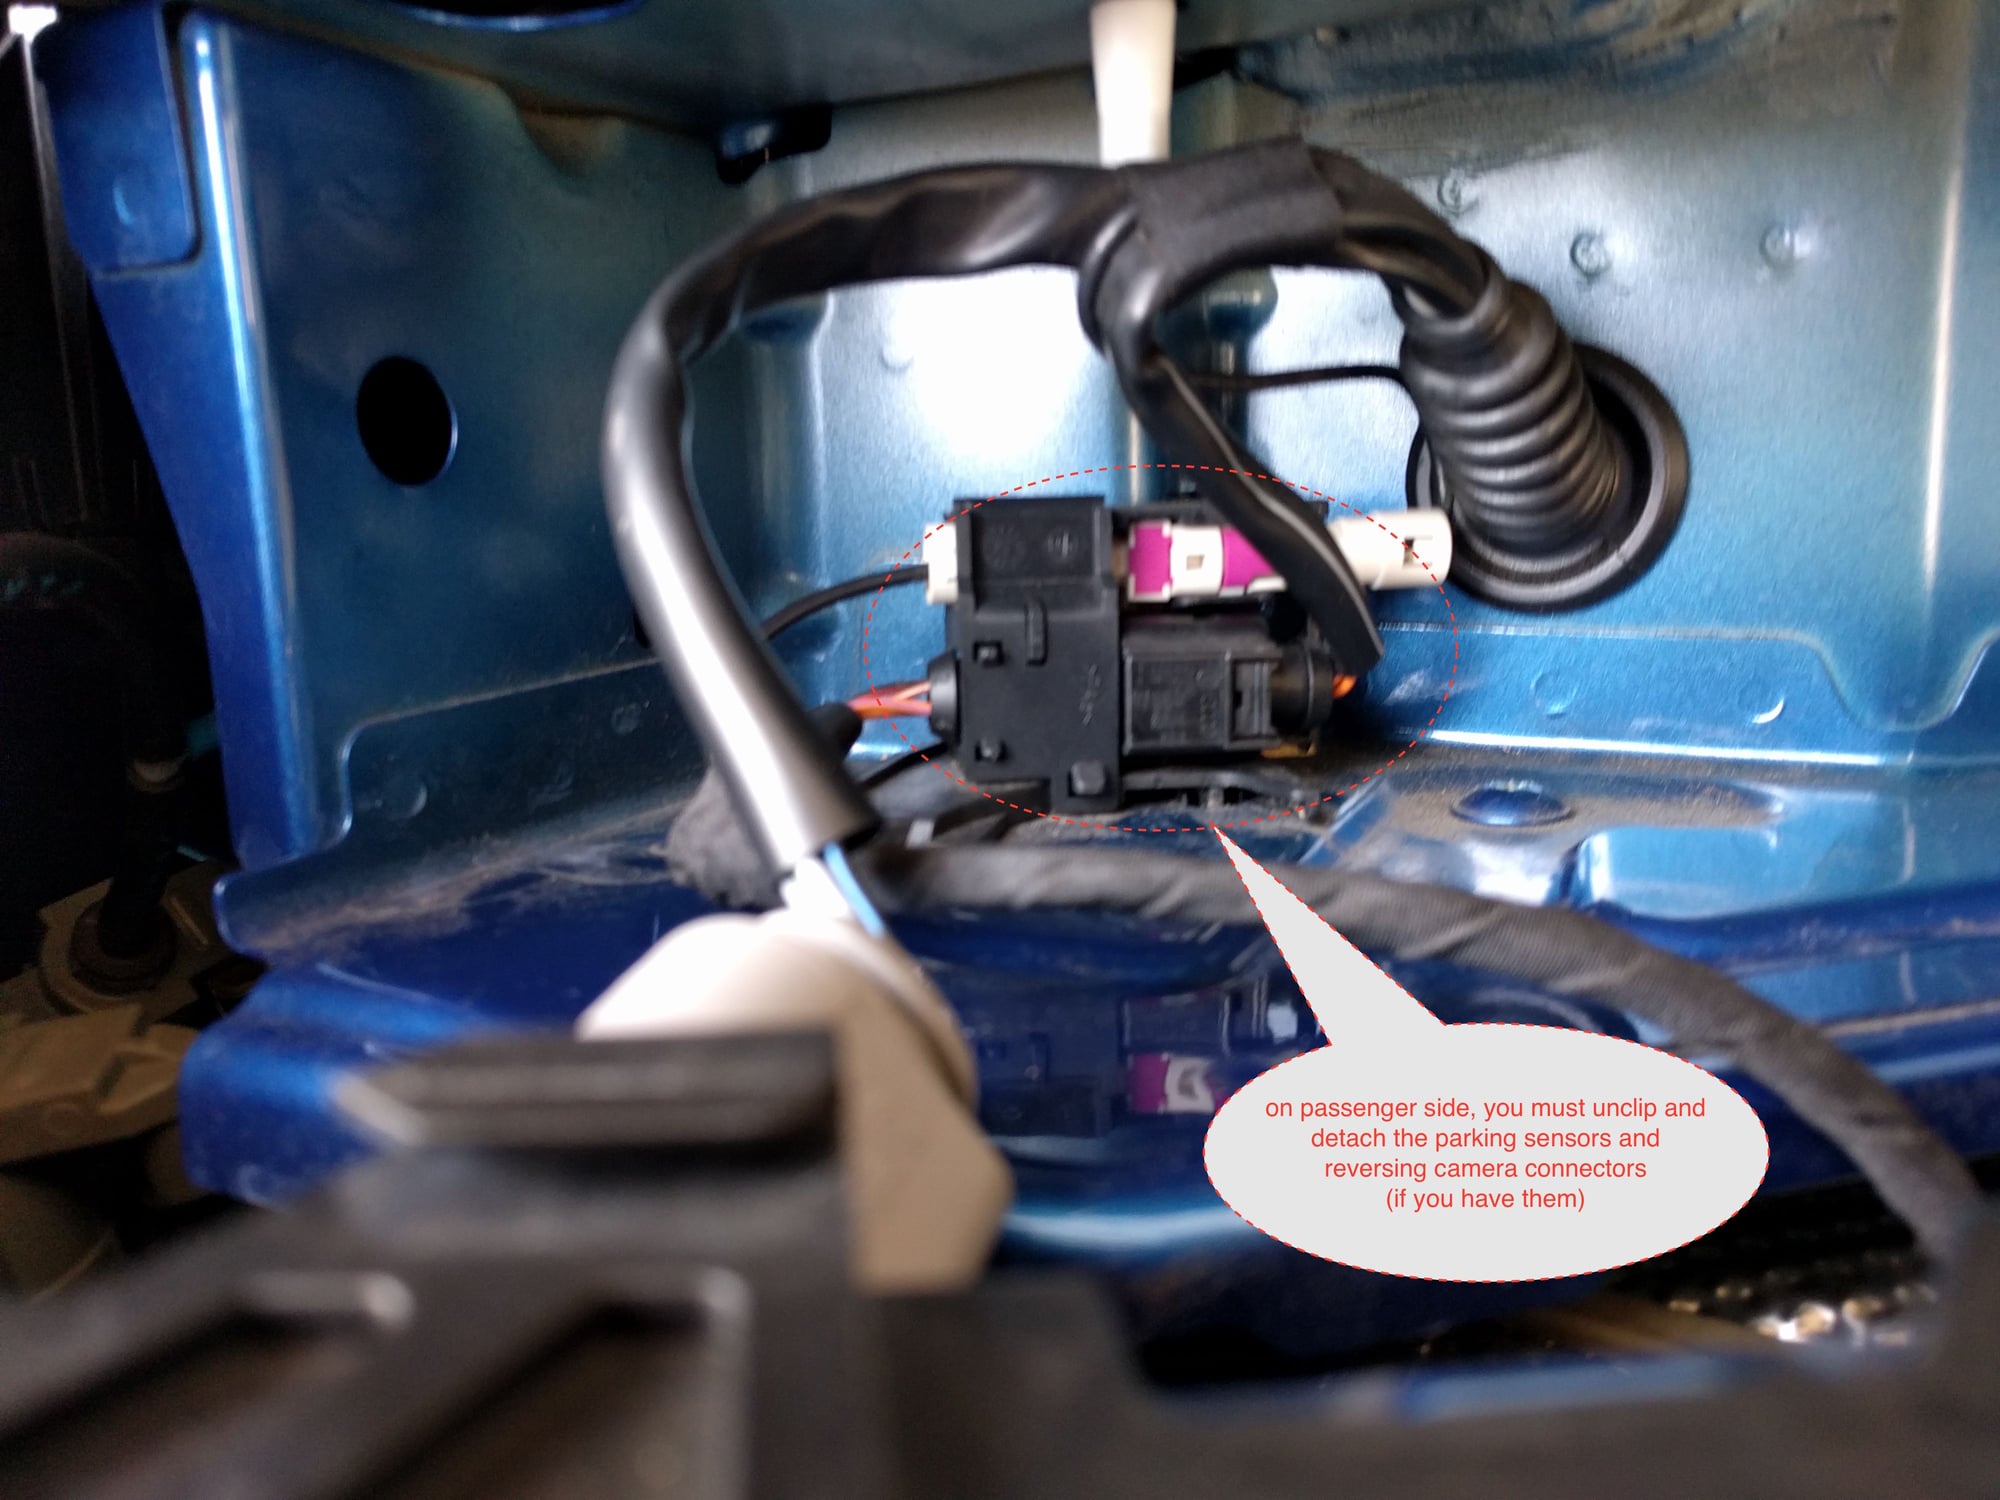
Default Step 2.9: bumper removal, disconnect parking sensors and reversing camera


If you have them, the reversing camera and parking sensors are located behind the passenger side taillight assy, unclip the retaining bracket then disconnect both molex connectors with care!
Old 04-17-2016, 05:21 PM
  #29  
Larry Cable
Rennlist Member
Thread Starter
 
Larry Cable's Avatar
 
Join Date: Oct 2002
Location: S.F Bay Area
Posts: 25,542
Received 3,446 Likes on 2,252 Posts
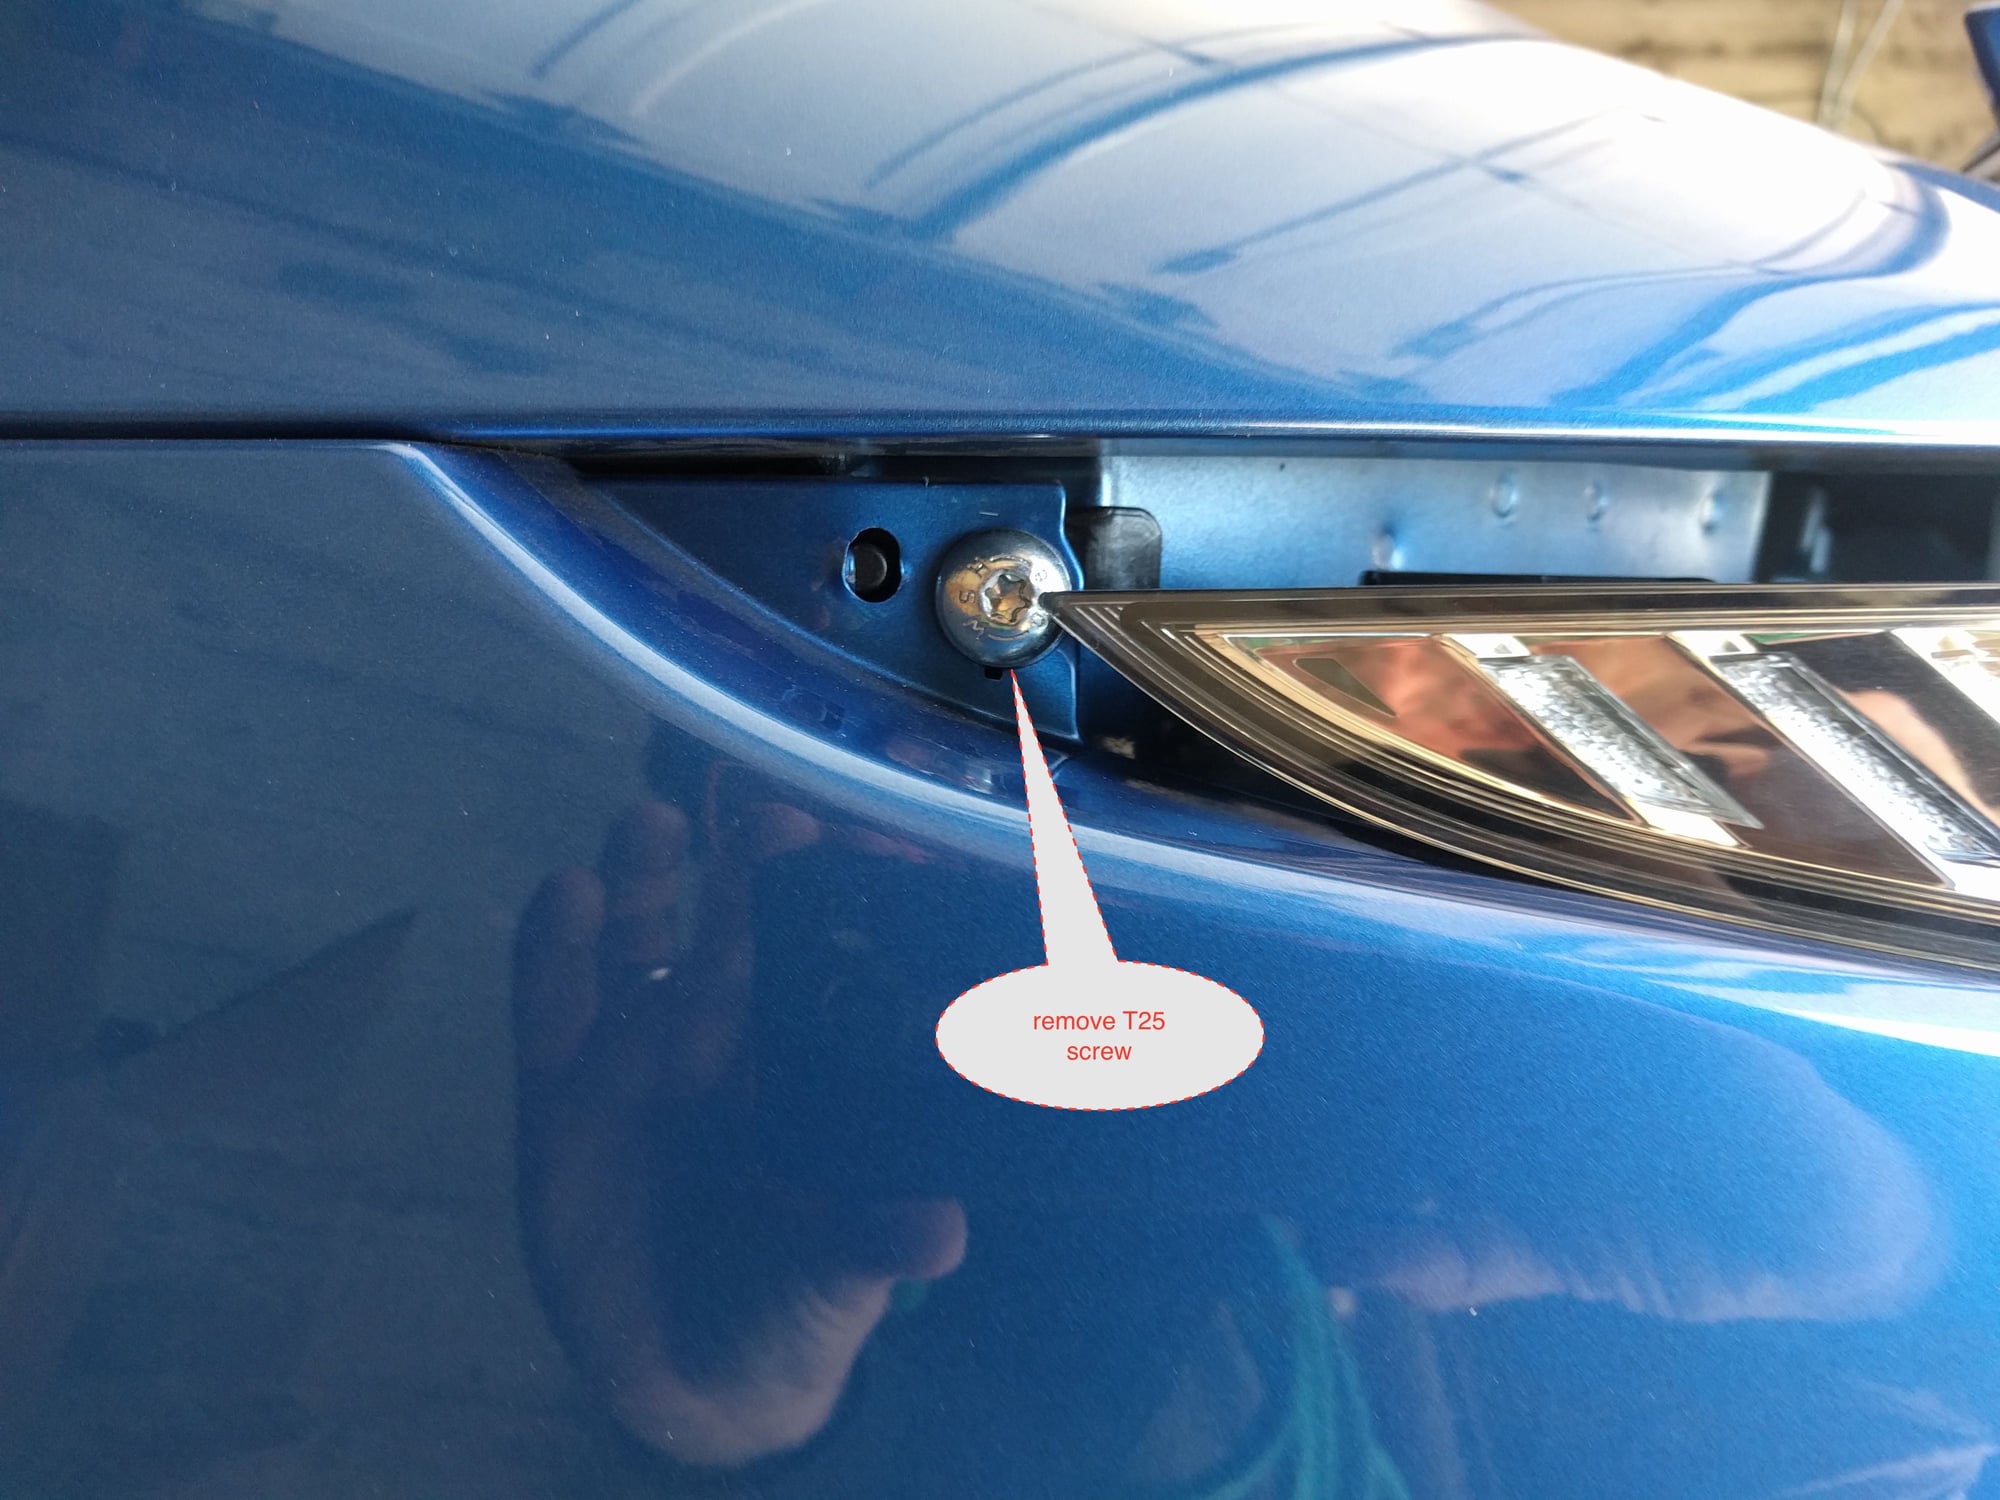
Default Step 2.10: bumper removal, side screws


remove 2xT25 screws located behind each of the taillights, AT THIS STAGE THE BUMPER IS COMPLETED DETACHED.
Old 04-17-2016, 05:24 PM
  #30  
Larry Cable
Rennlist Member
Thread Starter
 
Larry Cable's Avatar
 
Join Date: Oct 2002
Location: S.F Bay Area
Posts: 25,542
Received 3,446 Likes on 2,252 Posts
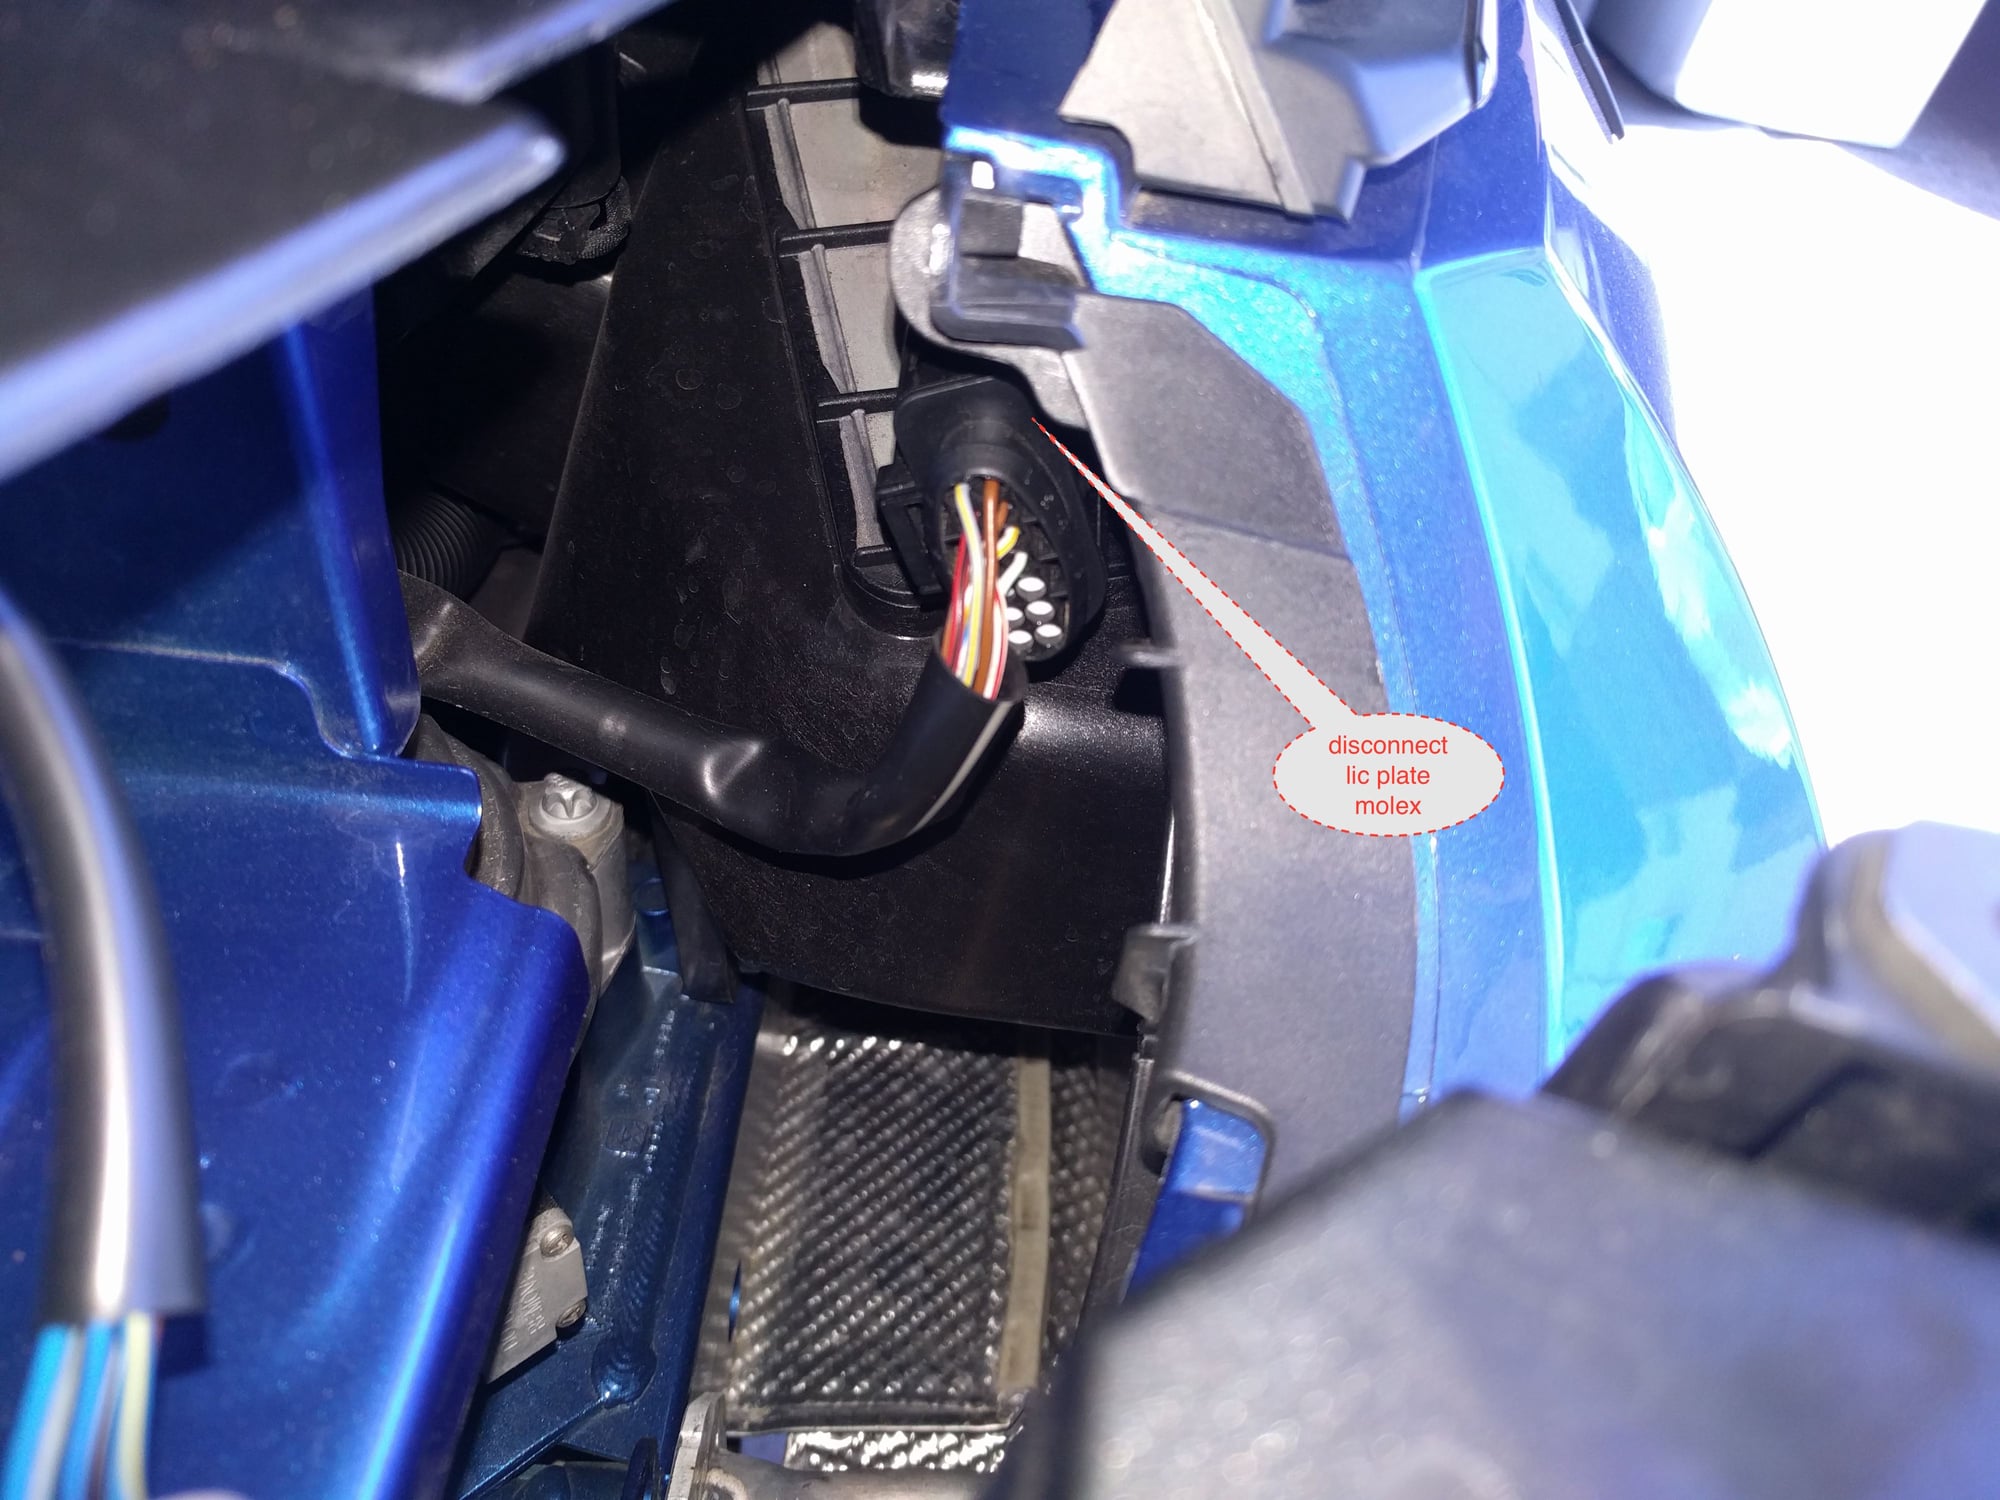
Default Step 2.11: bumper removal, license plate light molex


lastly, you must disconnect the license plate light molex connector, this can be tricky, you may want to partially pull the drivers side of the bumper assy off (but not completely) to better access the connector! (note: the female 1/2 of the connector is attached to the back of the bumper but it can be easily disconnected to aid in separating the molex)


Quick Reply: DIY: AWE Switchpath install (GTS)


All times are GMT -3. The time now is 11:53 PM.