When you click on links to various merchants on this site and make a purchase, this can result in this site earning a commission. Affiliate programs and affiliations include, but are not limited to, the eBay Partner Network.
911Idiot's C4S Journey - Keep out... Beware of Dog
Where do I start? Maybe I should do a origin's story - 911Idiot's humble beginnings as a auto aficionado who is gifted with the rare talent of telling the difference between a Harley and Ferrari using only his left ear.
Or perhaps I could just do what we all want to see. Cool **** I do to my car. So here we go!
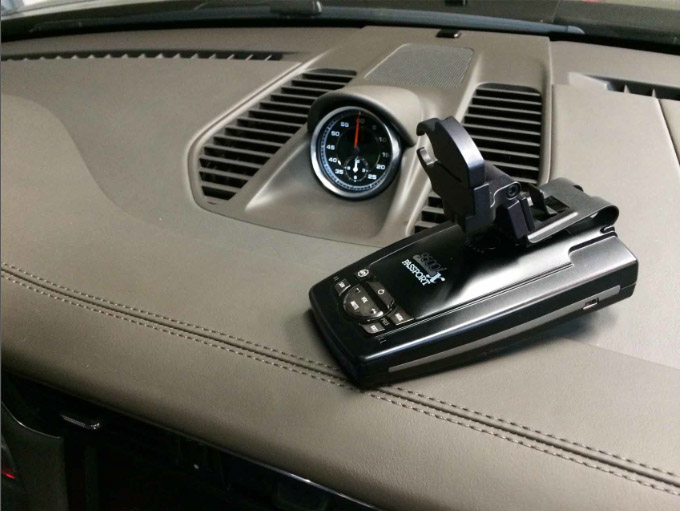
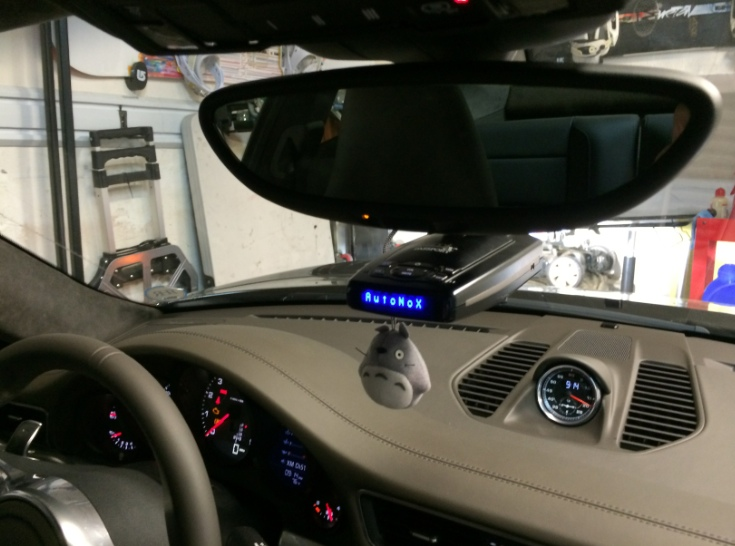
So I want to install this - a blendmount mount for the Escort 9500ix. The install of the blendmount is super simple but hardwireing it is a of a pain...
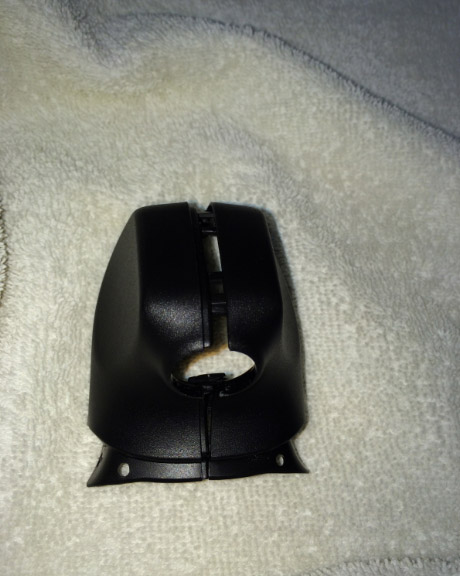
Start by removing the small plastic trim piece that covers the rear view mirror stalk.
This trim piece is easily removable and simply just comes apart if you pull it in opposite directions. If needed, you can use a plastic trim removal tool and pry near the locations marked with yellow arrows.
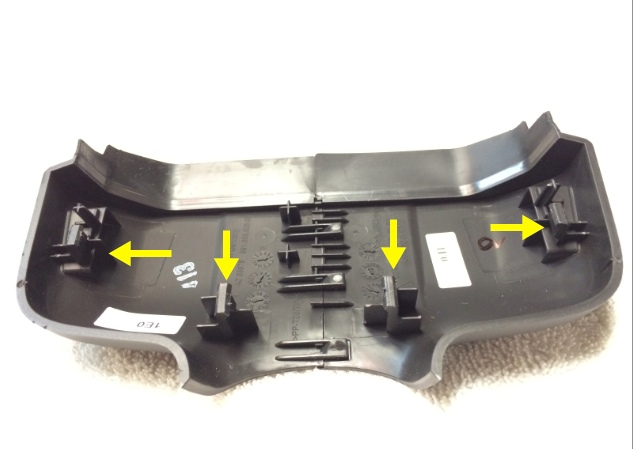
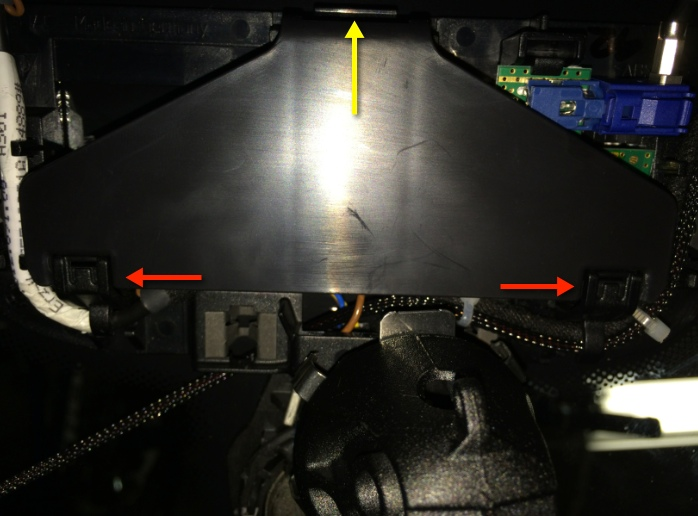
Now remove the larger trim piece. It is held in by 4 plastic anchors and can be removed by pulling away from the windshield near the the arrows shown in the pic.
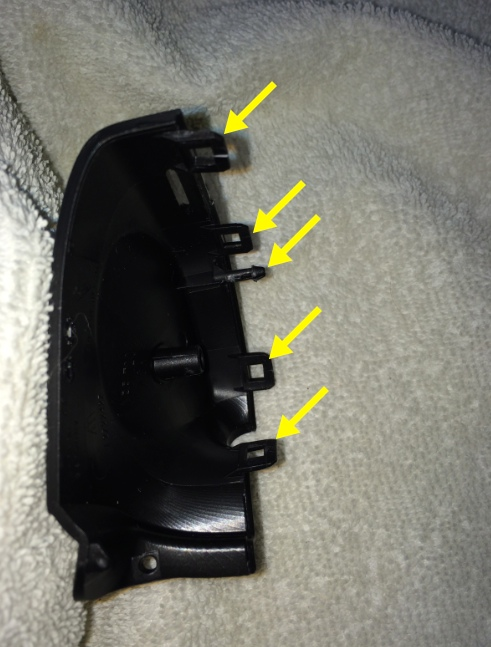
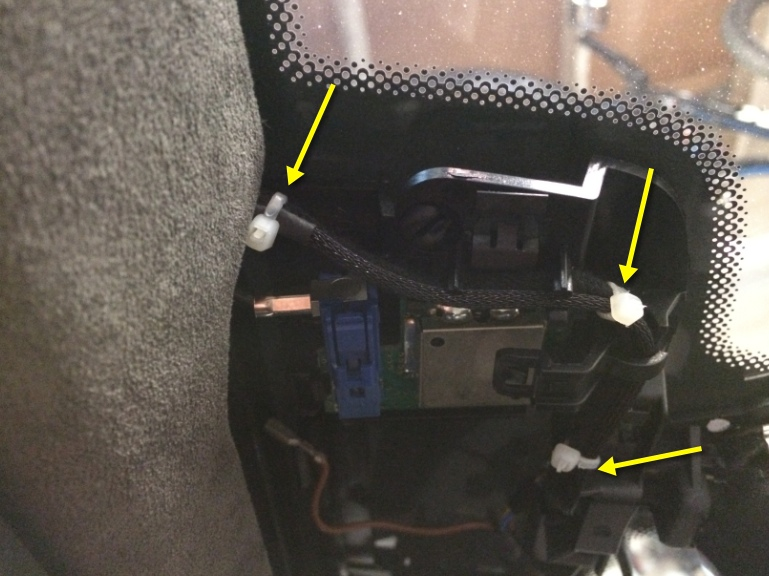
Under the large trim piece will be this B-2 Stealth Bomber plastic piece. Remove it by pulling on the clip shown by the yellow arrow and then slide it out away from the hinges shown by the red arrows.
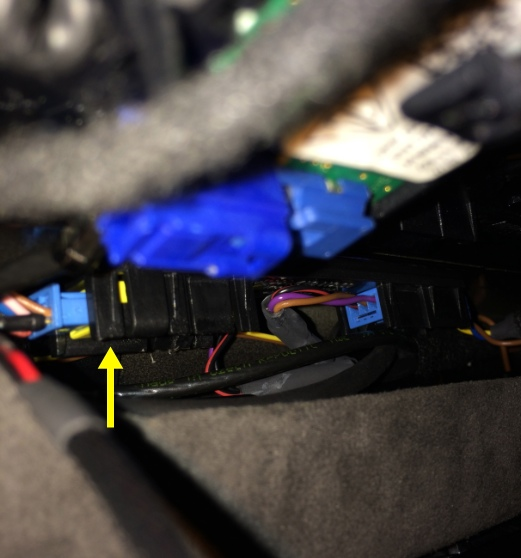
Looking directly into the headliner - above the map lights. Locate the Blue/Yellow plug which powers the rear dimming mirror and gently remove it from its plastic clip.
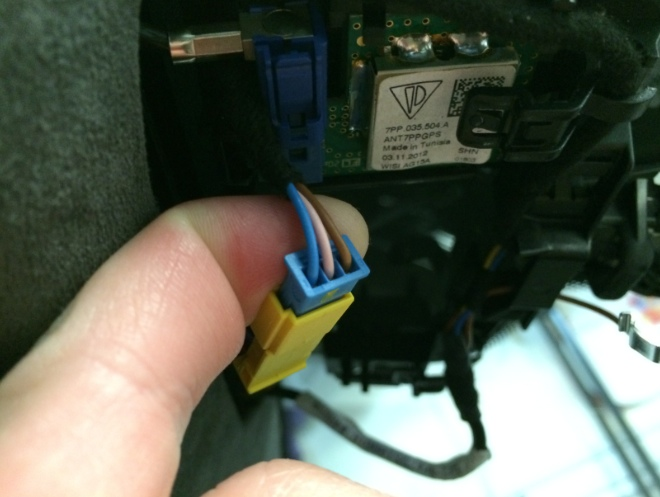
With the plug removed you will now have a 12V power source. The blue wire is 12V(+) and the brown wire is 12V(-). The pink wire will blow up your car - trust me - I've seen it on youtube.
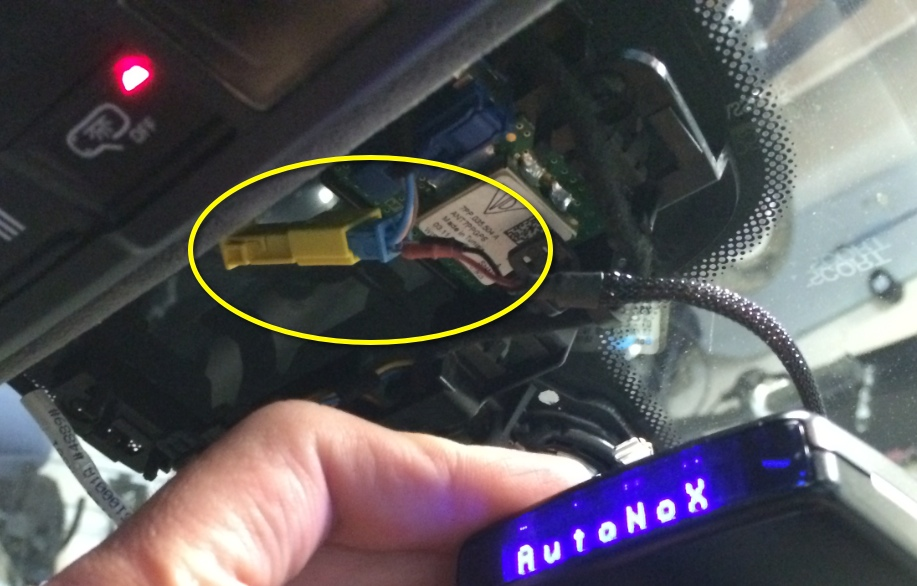
Using the mirror tap (Yes it's bloody expensive but makes the job easier and they provide these cool spades that slips right into the plug without having to modify anything) plug in the connectors. Remember the mirror tap's red wire plugs into the Porsche's blue wire and the tap's black wire plugs into the Porsche's brown wire. NOTE: Be sure to buy the 12" mirror tap http://www.mirrortap.com/mt2000.html#Micro If you search for it by vehicle they will try to hook you up with the hardwire kit.
Reinstall the yellow plug back into the original location and route the mirror tap wire along the same path as the rear view mirror's power cable and secure with zip ties. Note: as you follow the rear view mirror's power cable you will come to a point where it's nearly impossible to fit the phone jack through a passage way. You will have two options. 1) Jam it through or 2) reverse route the mirror tap and then plug it into the blue/yellow plug.
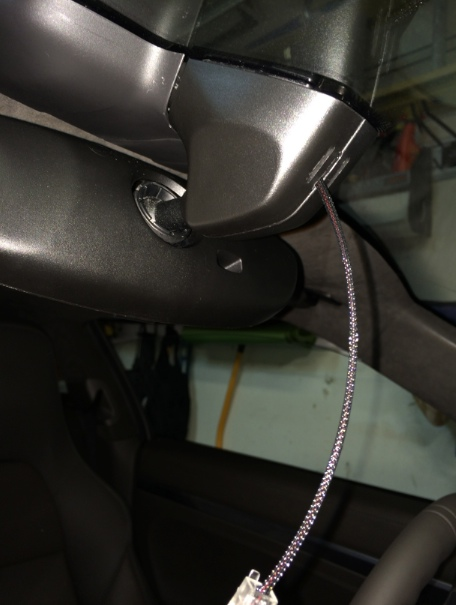
With all the wiring done reinstall all the trim pieces and don't forget the B-2 Bomber piece as well! Also a good place to route the mirror tap power cable is through the rear of the mirror stalk trim piece as shown.
Hang good luck charm to attract girls and beer.
Last edited by asellus; 08-20-2021 at 03:04 PM.
Reason: moving broken images from non-ssl external hosting to internal hosting. images still available at http://alumni.cs.ucr.edu/~lrichard/991/991R-xxx.jpg (xxx is 001 thru 011)
Yes, very nice. Would anyone know or have a wire key for a V1 cable? Would like to take the same approach for my V1, now that I know which wires (blue and brown) are hot and ground in the mirror assembly.
Thanks everyone! Just got an email from BlendMount so I updated my original post. They sell a 12" mirror tap that will work perfectly for this setup. I believe this will also work with V1 radar detectors too.
As for my detector it's a 9500ix. As for powering other systems using the rear view mirror as a power source I'd exercise caution. I don't think there is much room left to really power anything except small electronics.
[QUOTE
Hang good luck charm to attract girls and beer.[/QUOTE]
Thanks for posting; your pix and explanatory notes are great!
I have a question about detector location, however - do you not find it obstructs vision there?
I put my V1 right next to the mirror - out of my line of sight, also less visible from outside; the only down side is the sun visor, but it remains functional for 90% of situations.
I did the hard wire today with the V1. Thanks to 911Idiot for the tips on where to tap in. I made the mistake of trying to tap into the circuit for the auto-on for the headlights. When I switched on the V1 my headlights came on...LOL!
On the V1 cable the GREEN wire is Positive +12v and the RED wire is -12v Ground.


 03-13-2014 | 03:08 AM