When you click on links to various merchants on this site and make a purchase, this can result in this site earning a commission. Affiliate programs and affiliations include, but are not limited to, the eBay Partner Network.
yes, he's in the same power ballpark, but down on trap speed because he's in a heavier Targa. Plus that nice sub woofer setup he added still plenty fast though!
How did you manage to get the oil and coolant lines free without damaging them?
Well I carefully pulled them away from the turbo, slight bending on most of them. It's a little scary as you don't want to damage the other end of the lines, especially the coolant line as it feeds into a plastic manifold up on top of the engine near the flywheel top. If you damage that I can't see any way to repair it without dropping the engine.
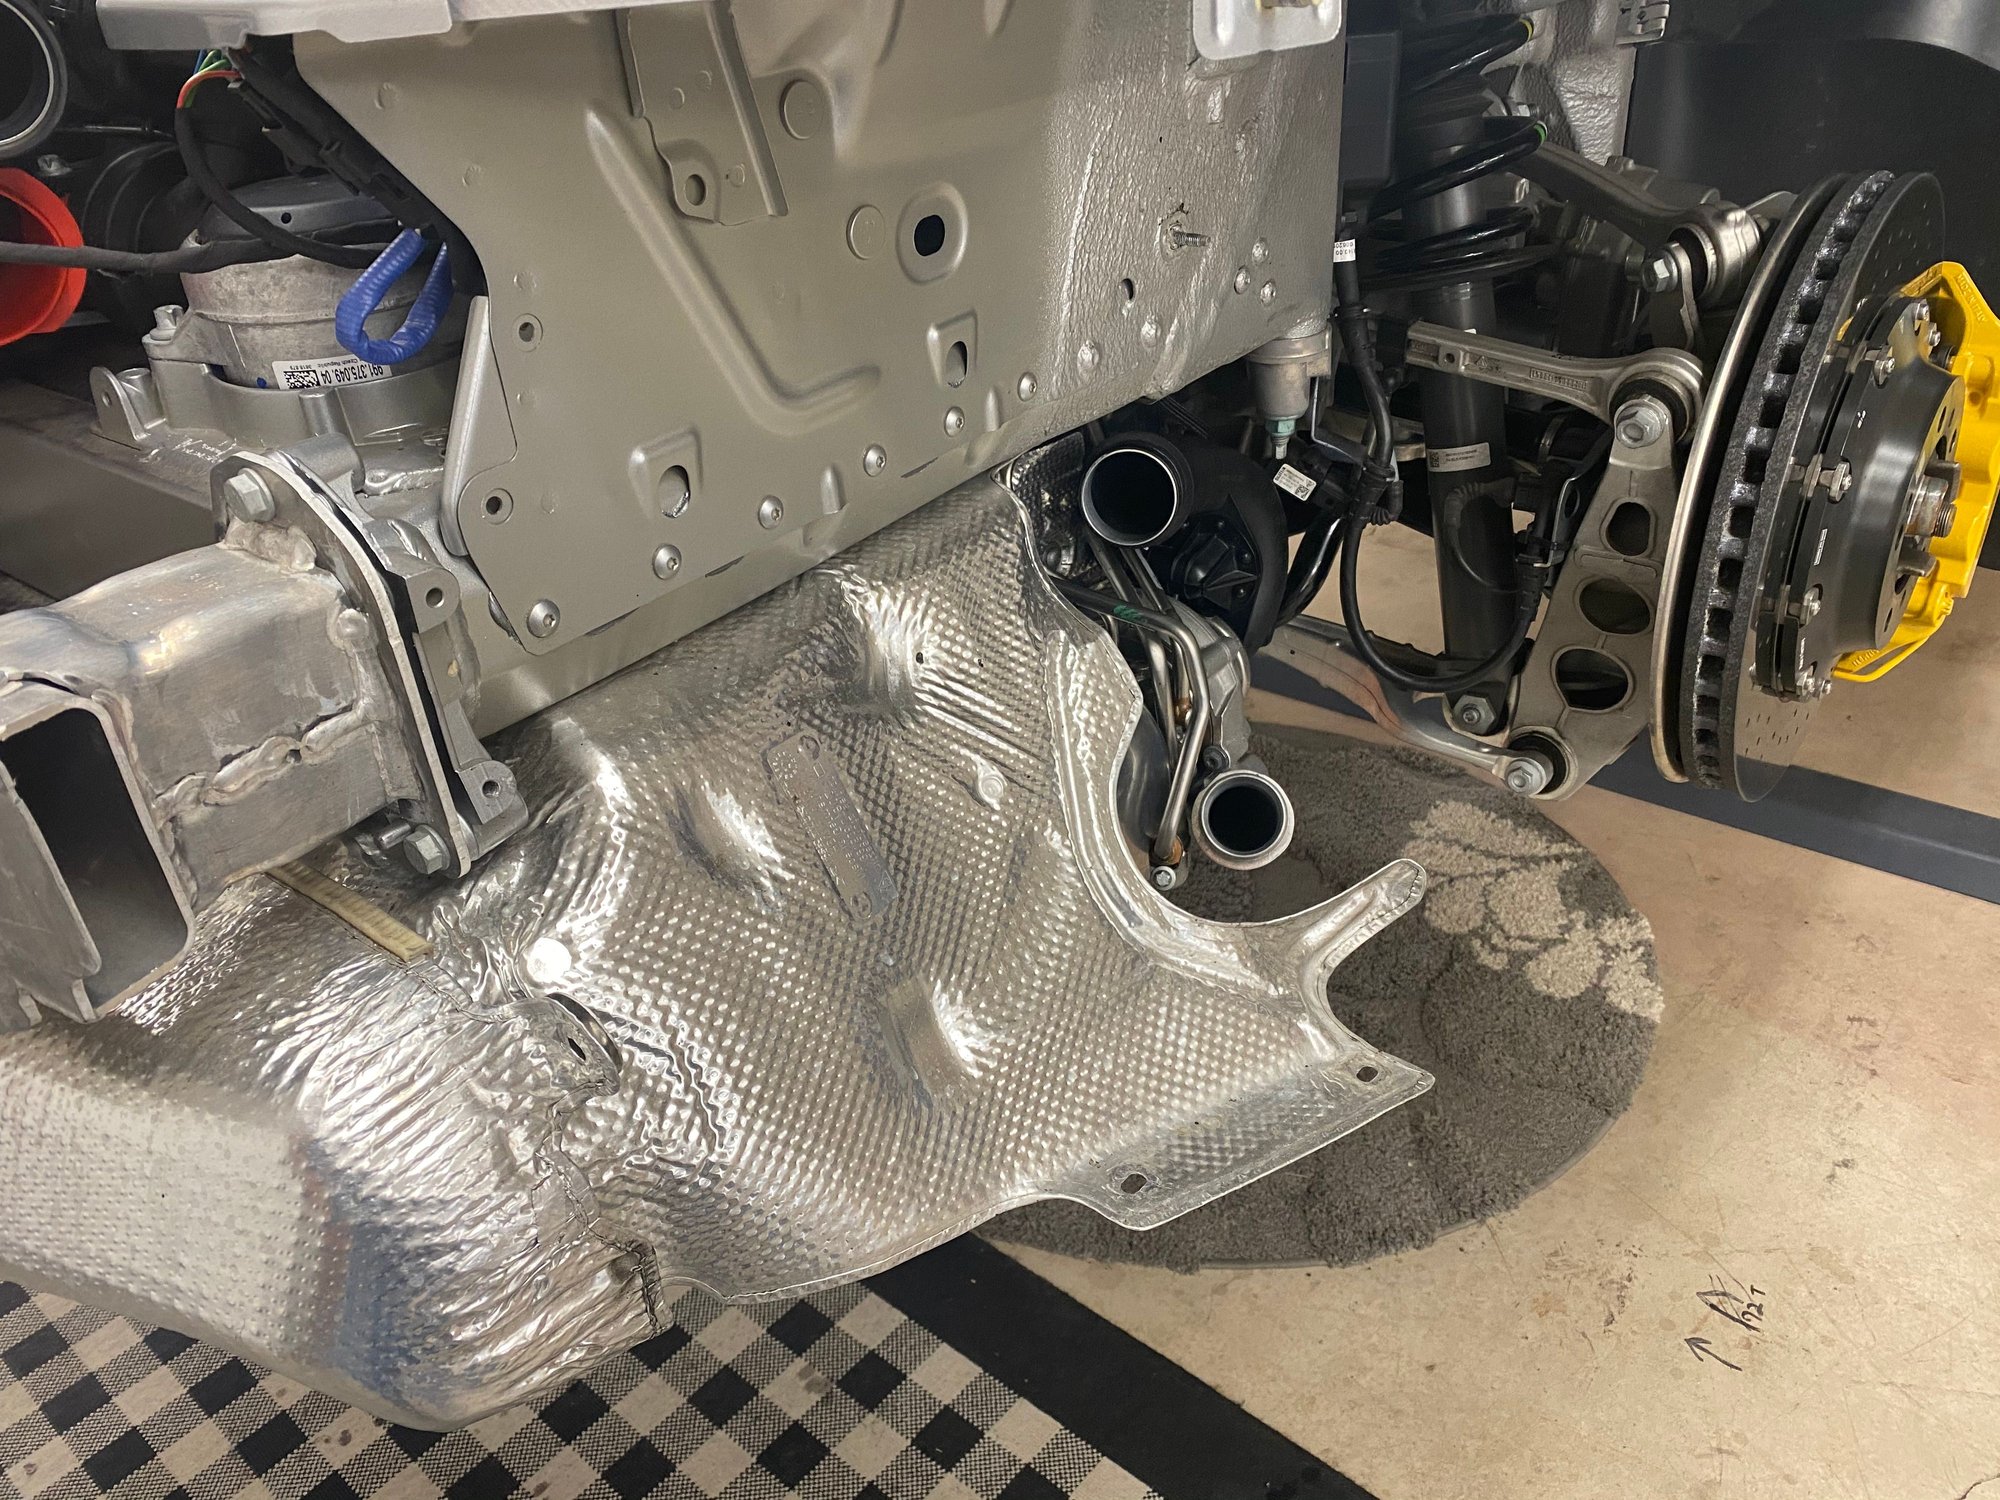
Right 4-5-6 side is easier than the left 1-2-3 side. I had to remove the Cat on that side along with the header to get to some of the oil lines on the turbo. The only way I will be able to install the new GST turbo on this side is to connect most all of the oil and coolant lines first (turbo will be just hanging there without Cat or header attached) because the header and Cat are in the way of getting to 2 of the connecting screw points. I will be attempting this today. I will have to remove the two studs off the turbo exhaust/header flange to install the header. This will be fun.....
Well I carefully pulled them away from the turbo, slight bending on most of them. It's a little scary as you don't want to damage the other end of the lines, especially the coolant line as it feeds into a plastic manifold up on top of the engine near the flywheel top. If you damage that I can't see any way to repair it without dropping the engine.
Right 4-5-6 side is easier than the left 1-2-3 side. I had to remove the Cat on that side along with the header to get to some of the oil lines on the turbo. The only way I will be able to install the new GST turbo on this side is to connect most all of the oil and coolant lines first (turbo will be just hanging there without Cat or header attached) because the header and Cat are in the way of getting to 2 of the connecting screw points. I will be attempting this today. I will have to remove the two studs off the turbo exhaust/header flange to install the header. This will be fun.....
I am a big DIY guy but you my friend are way more bold than I am. Respect.
I got a very very good price on the GTS turbos so I went with that. I did look into a few company's that were producing larger turbos but the one's I have should work well along with all the other upgrades I have done.
If you dont mind sharing where you got the GTS turbos from? Been looking around for a while and unable to find decent pricing..
If you dont mind sharing where you got the GTS turbos from? Been looking around for a while and unable to find decent pricing..
Just over a year ago Suncoast Porsche had a sale on the X51 kit for the 991.2 and I negotiated a deal for just the turbos and no software or installation. A few months later they put a hold on all X51 kits.
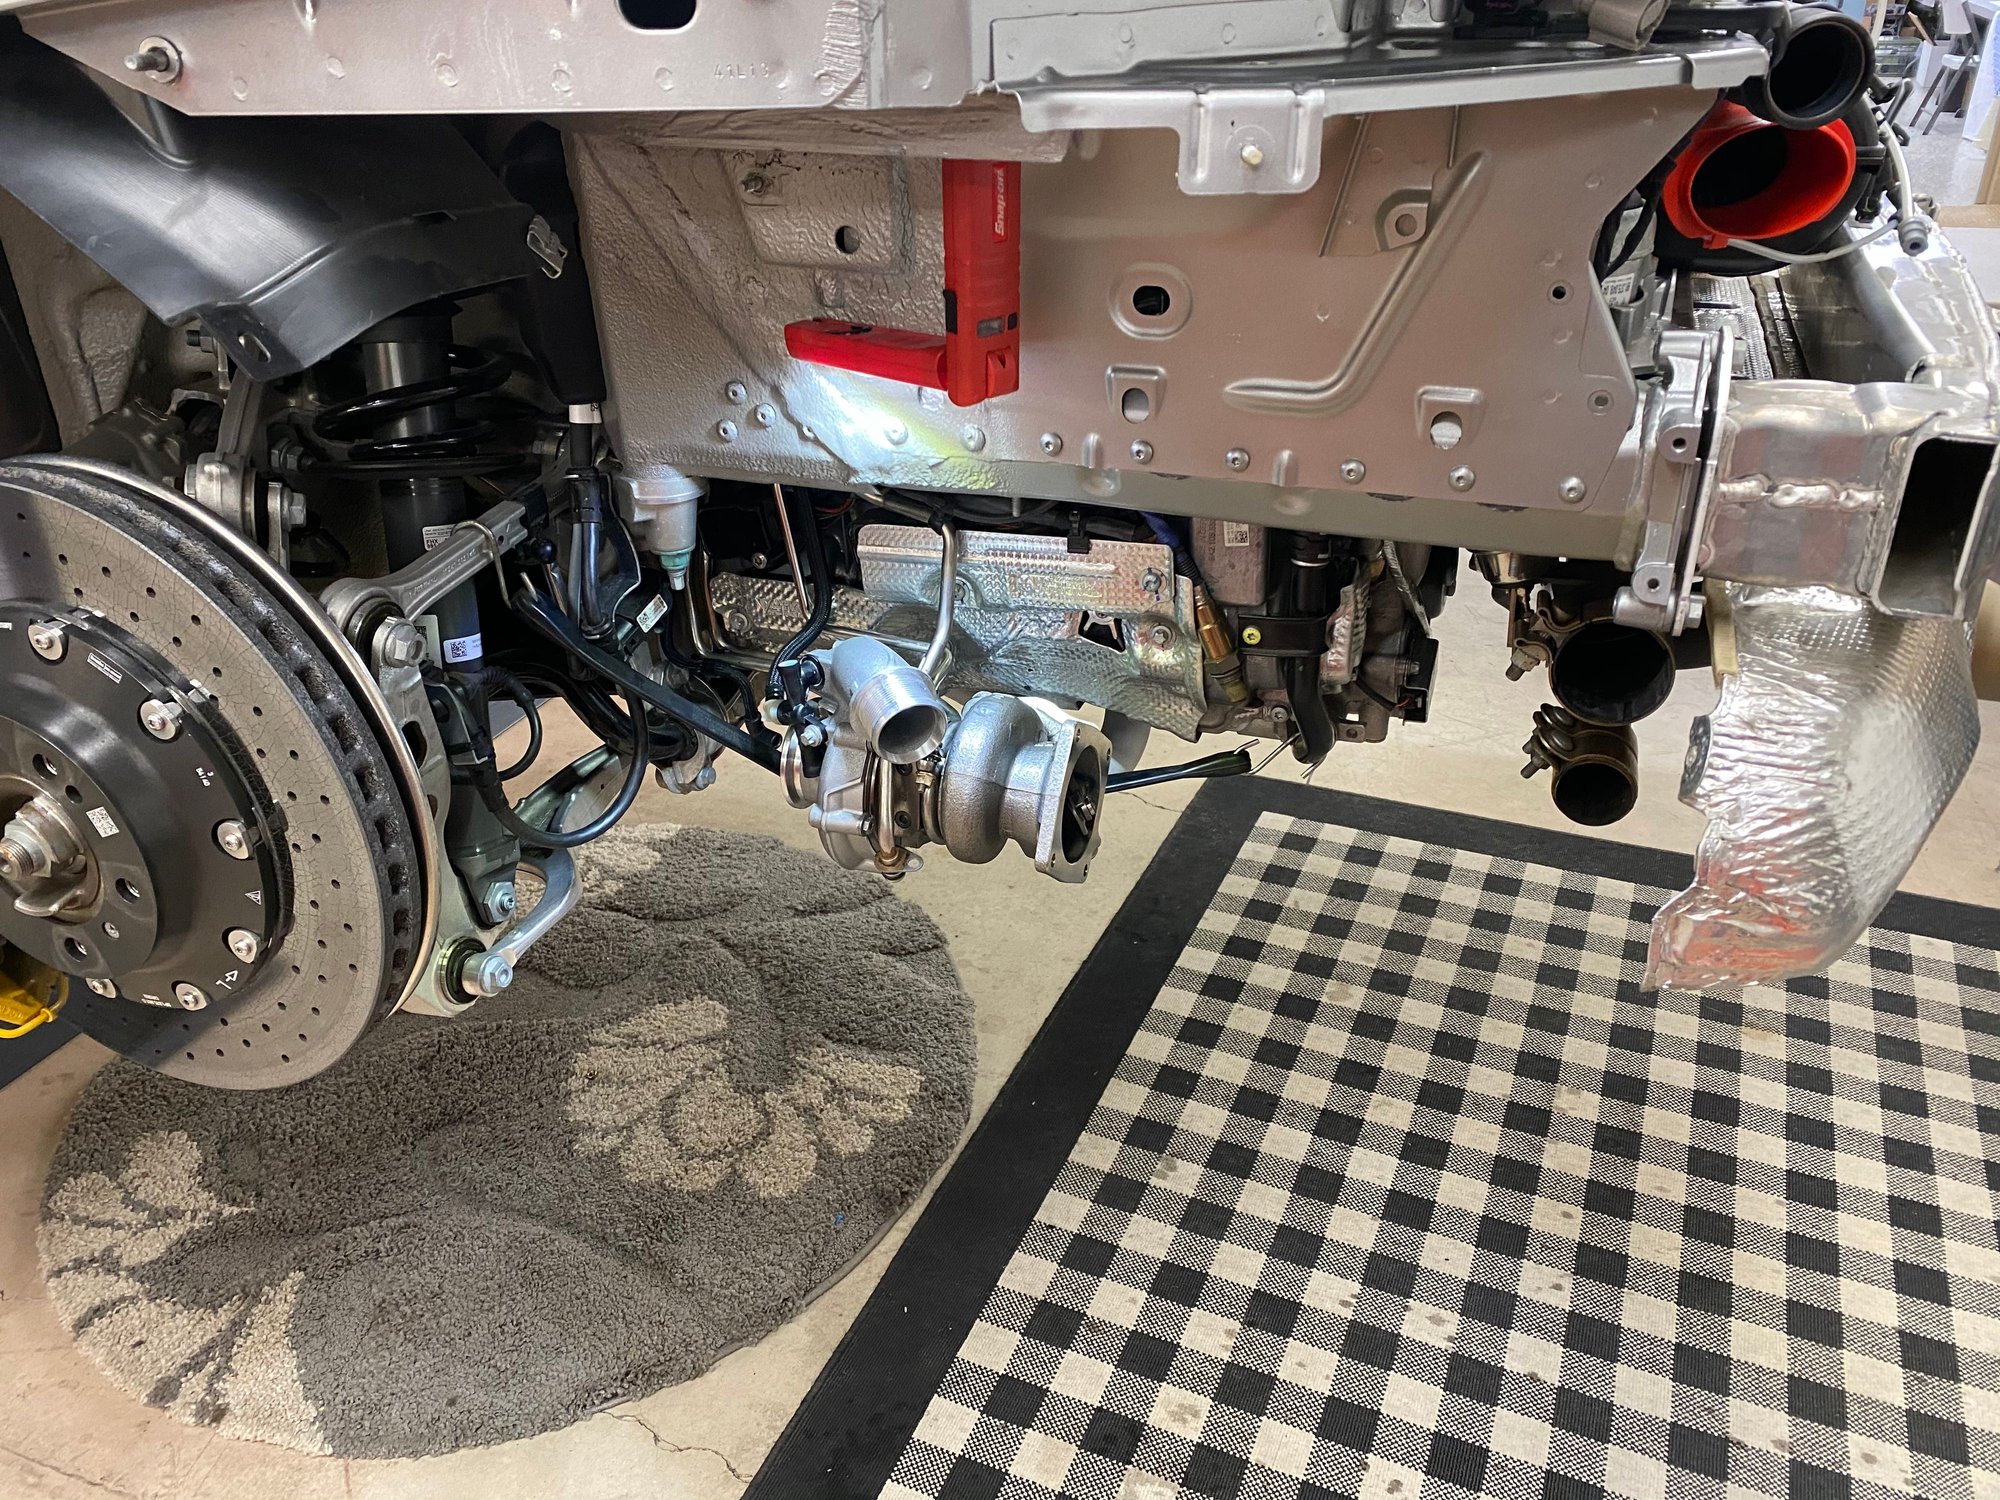
This is how I had to hang the 1-2-3 side turbo with just the oil & coolant lines. Because I had to bend out and away some of the lines they were harder to re-install. One of the oil line bends I did was not returning to it's original form and made it very difficult to get it back in place and flush. I removed the complete inner cooler to get a better working area. So 2 hours for one oil line install.
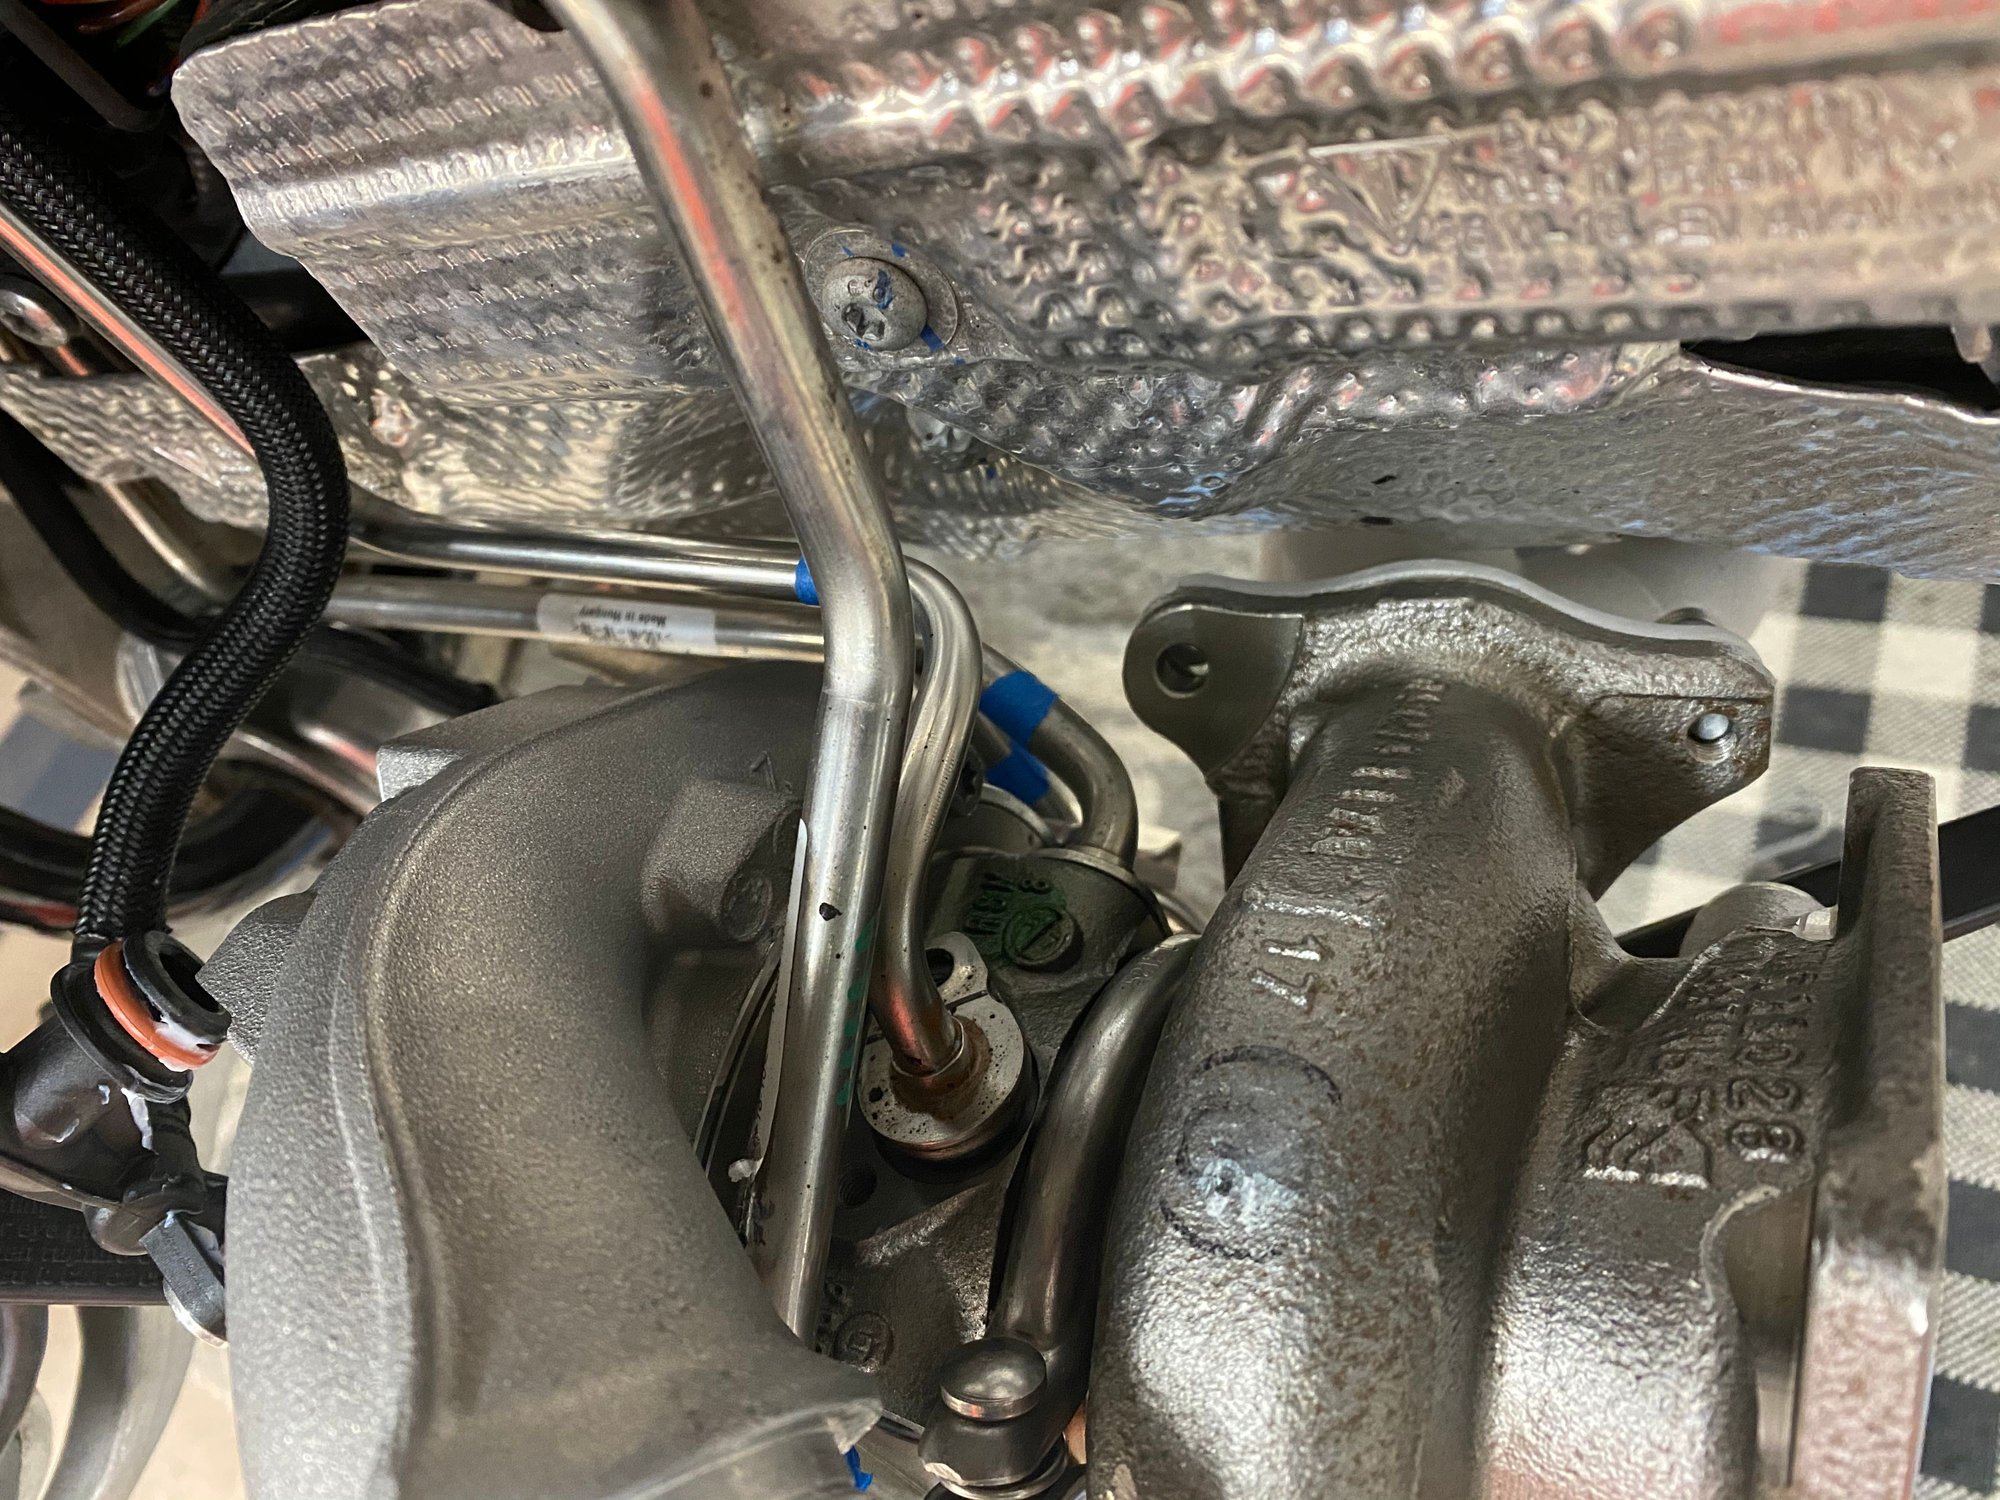
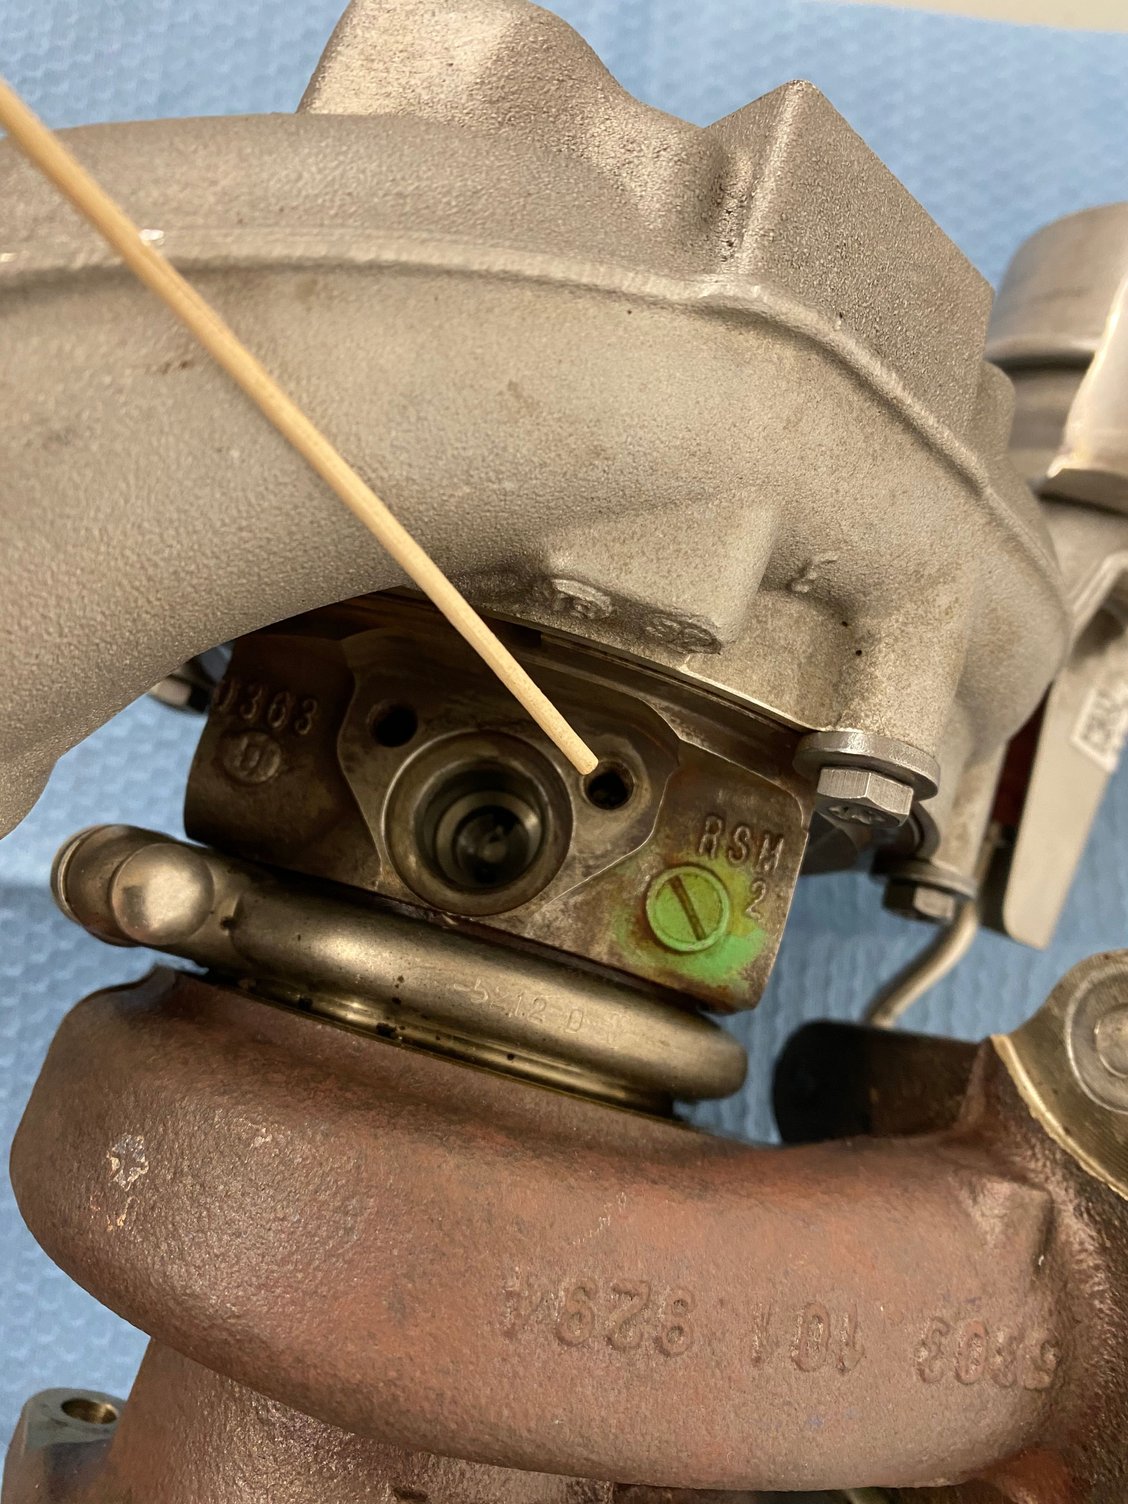
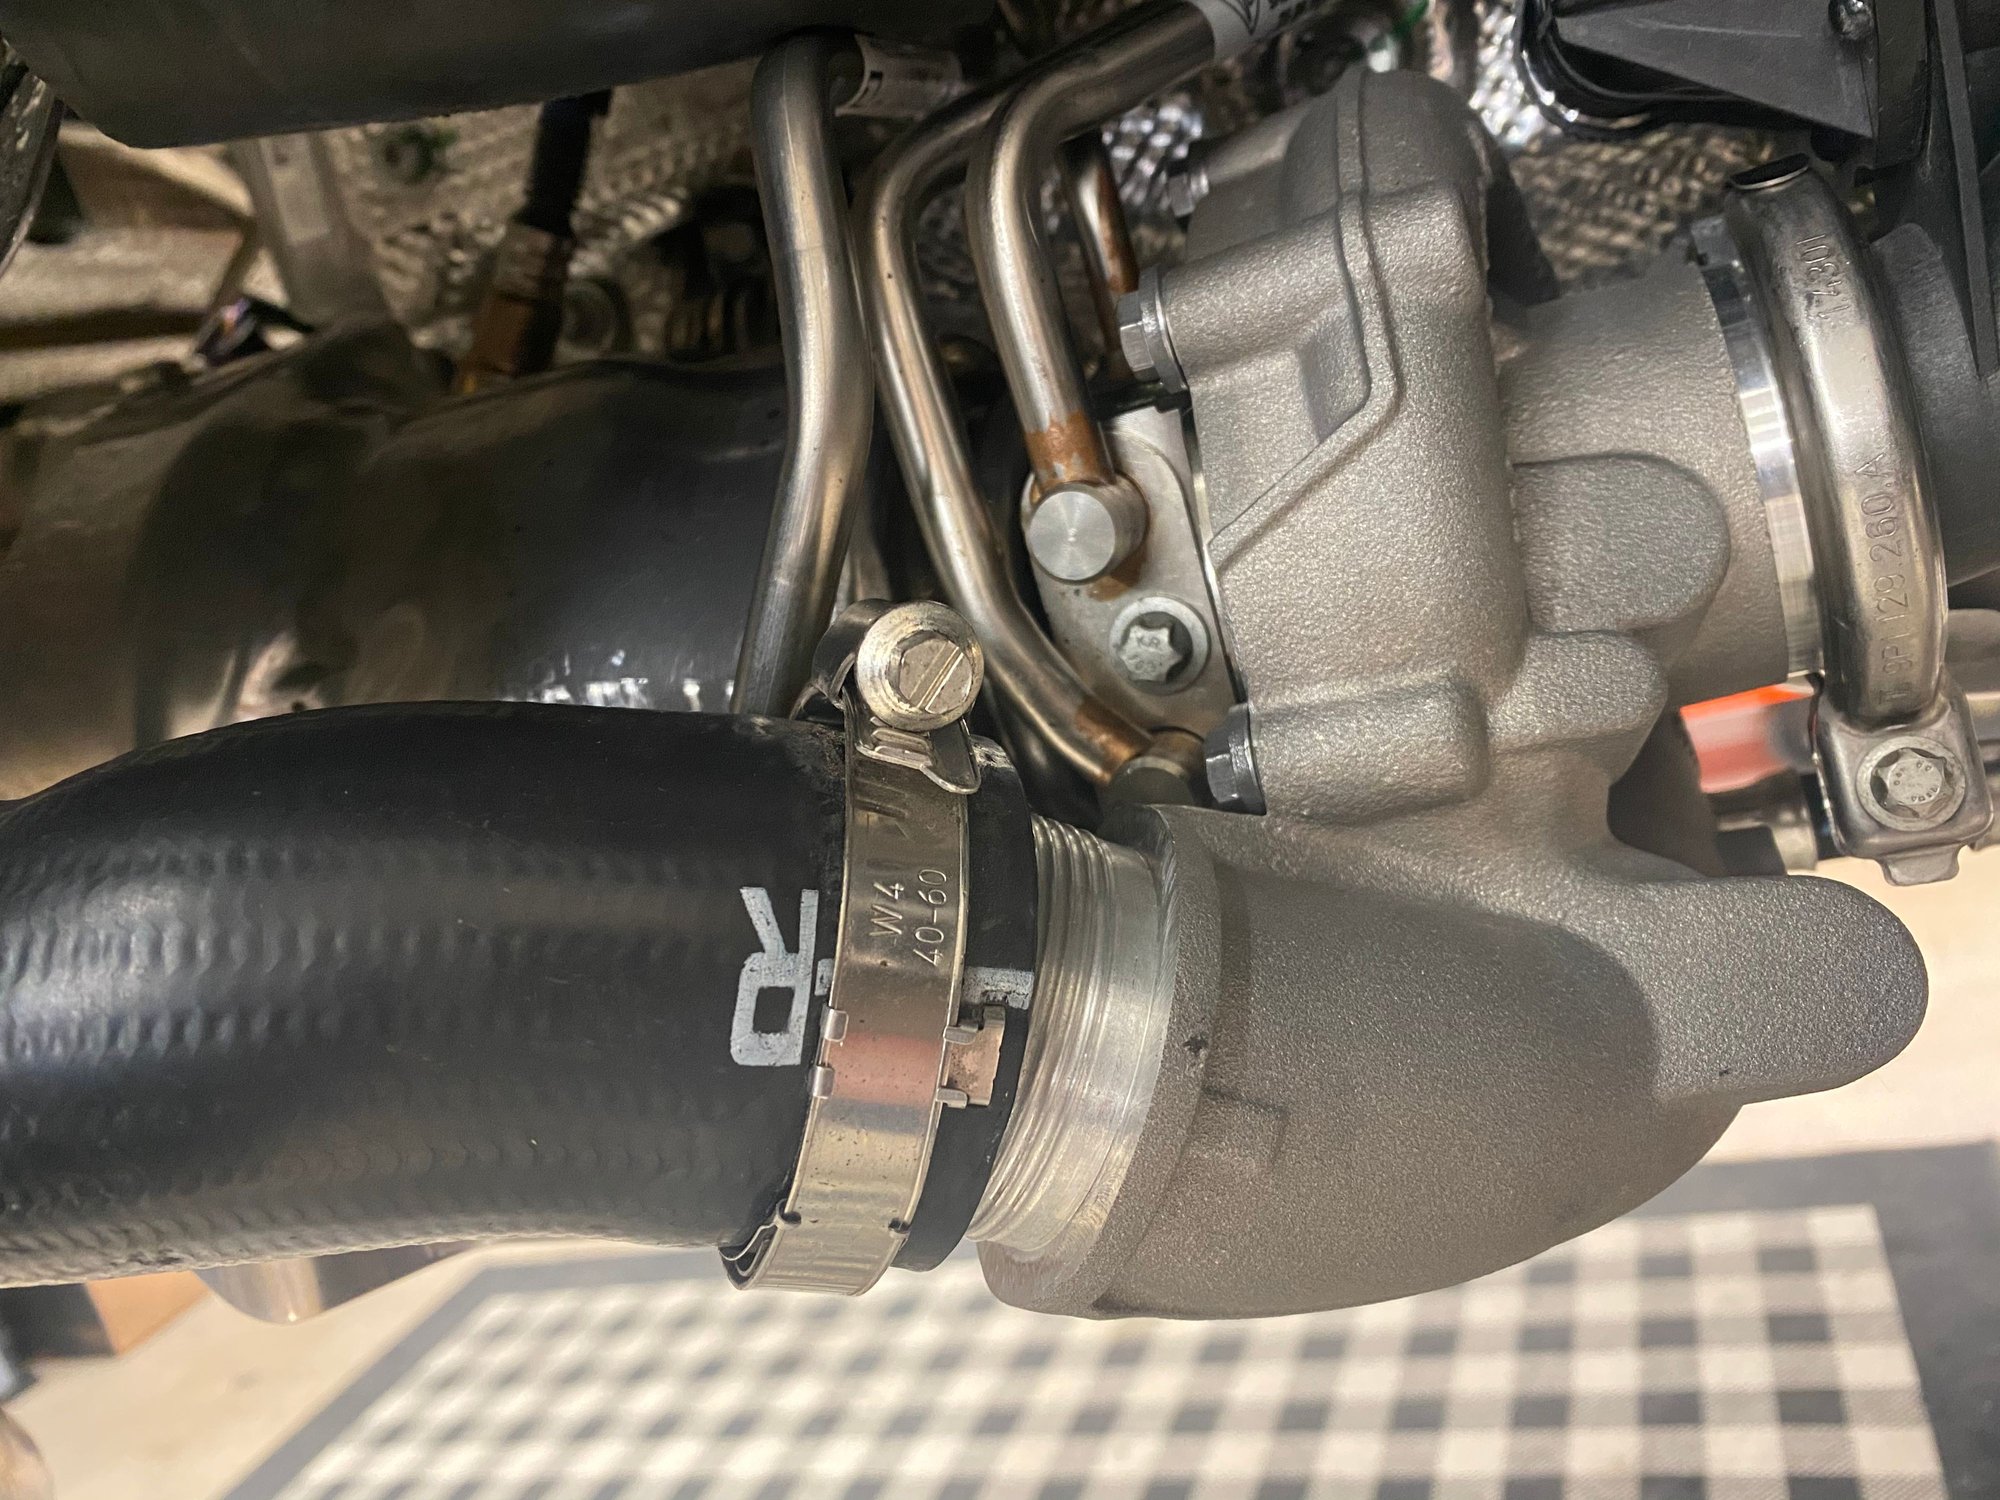
Oil lines made in France! Thats the hard one to get at ( T-30 Torx button head) when the intercooler hoses are above the turbo.
This is the take-off base turbo. Better photo of the hard one to get at. Oil line tube with o-ring fitting has to go in straight and I had put a bend in it so it was a bear.
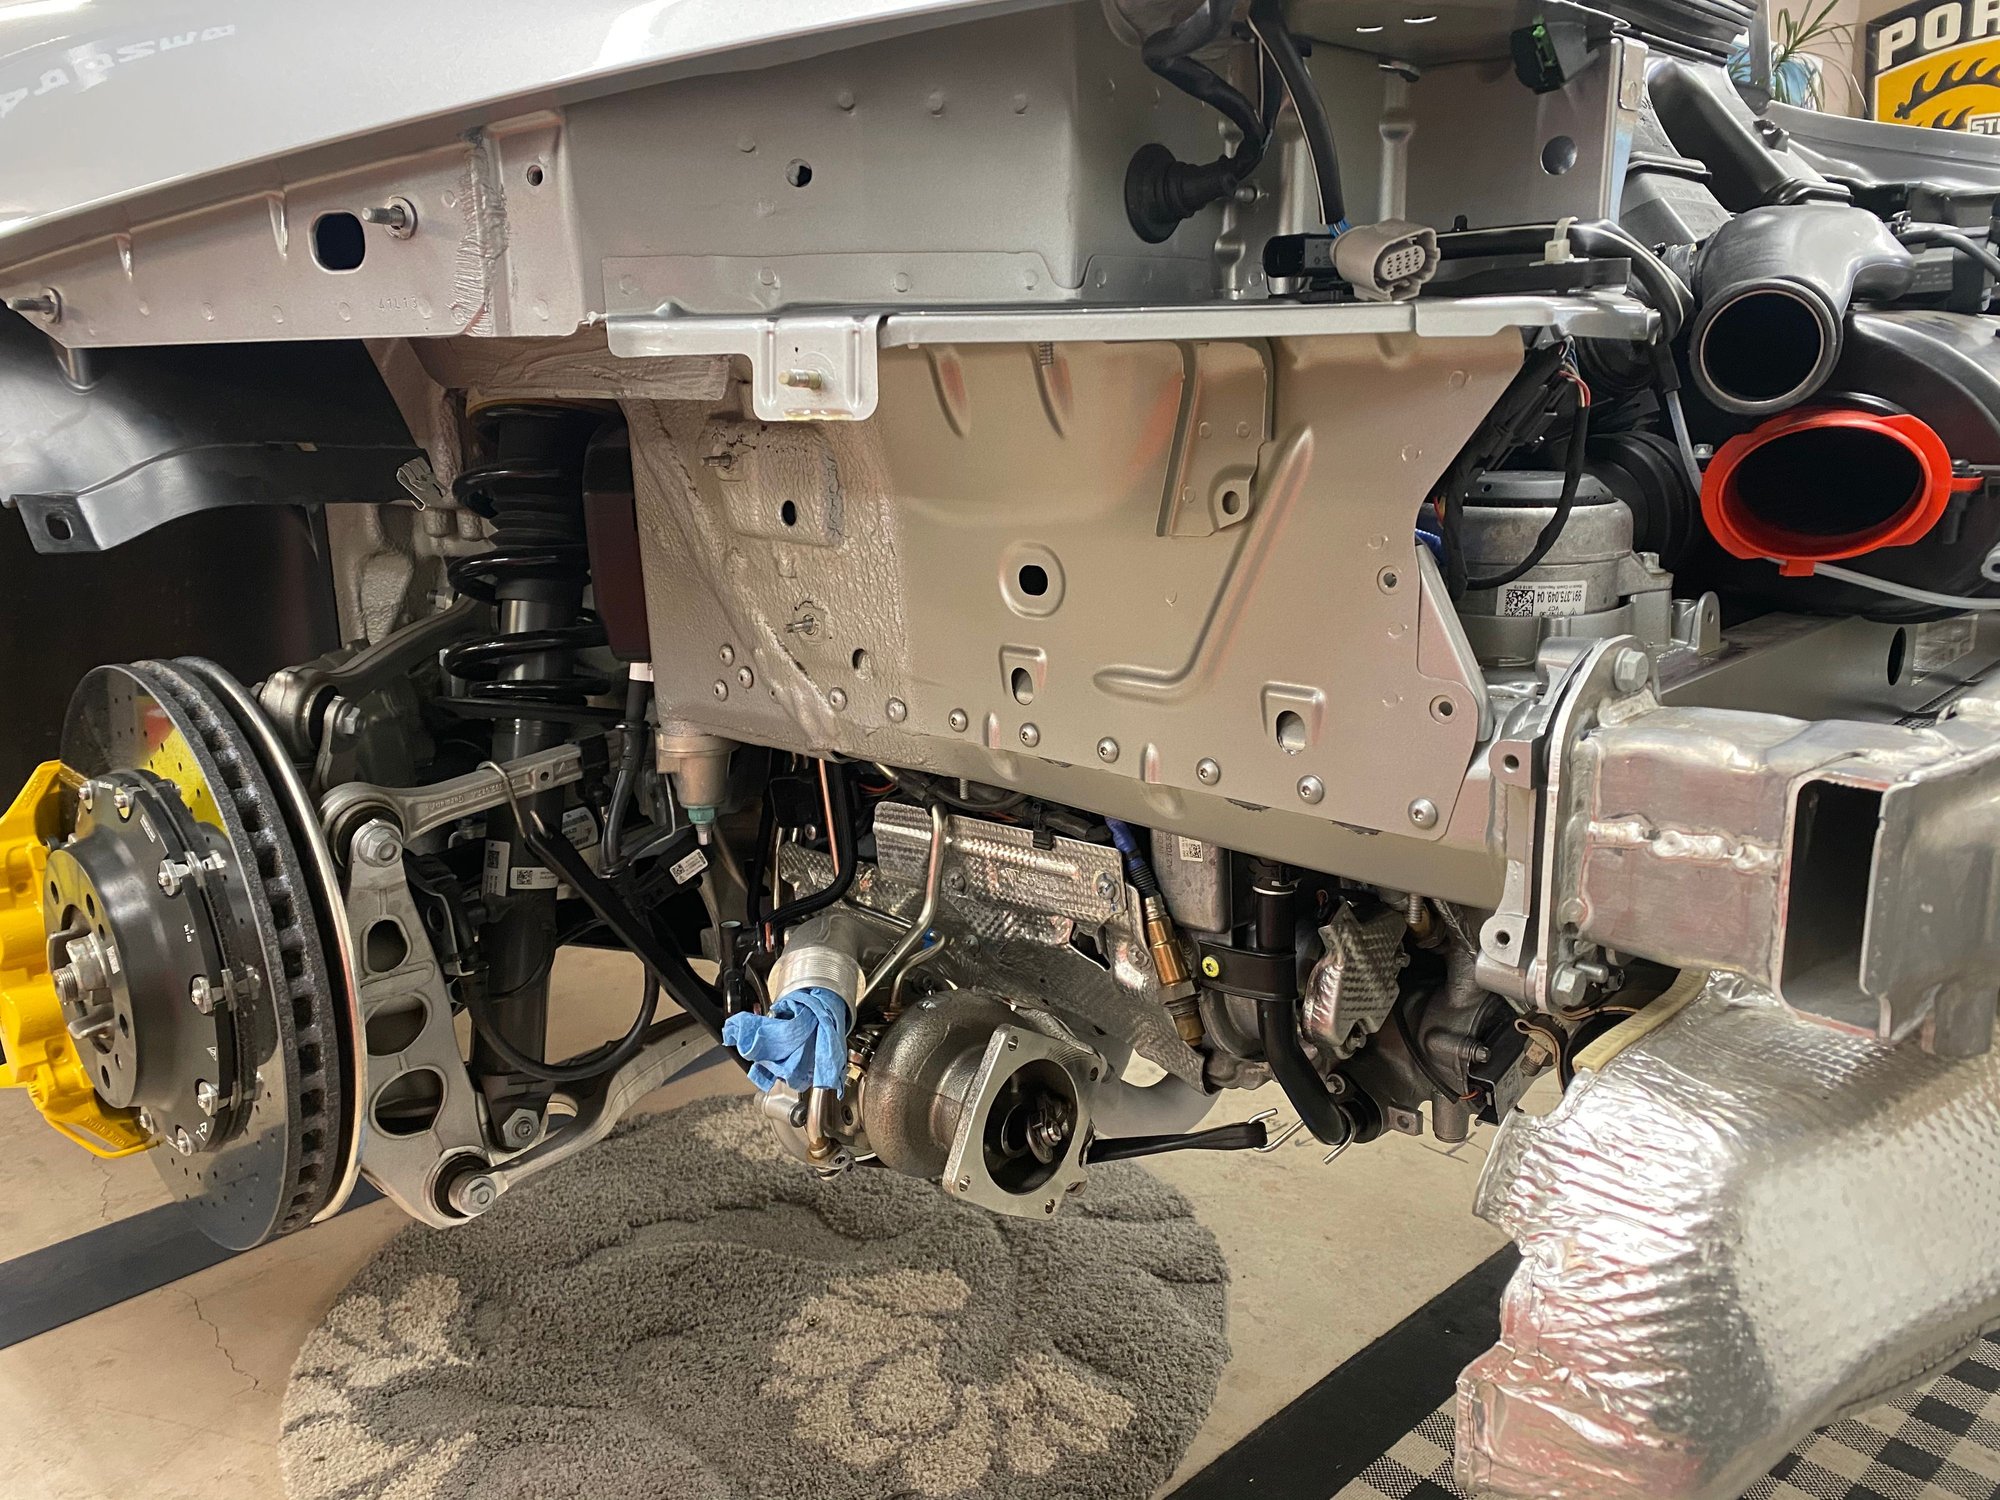
Yes I made lots of room for myself to finish this one up.
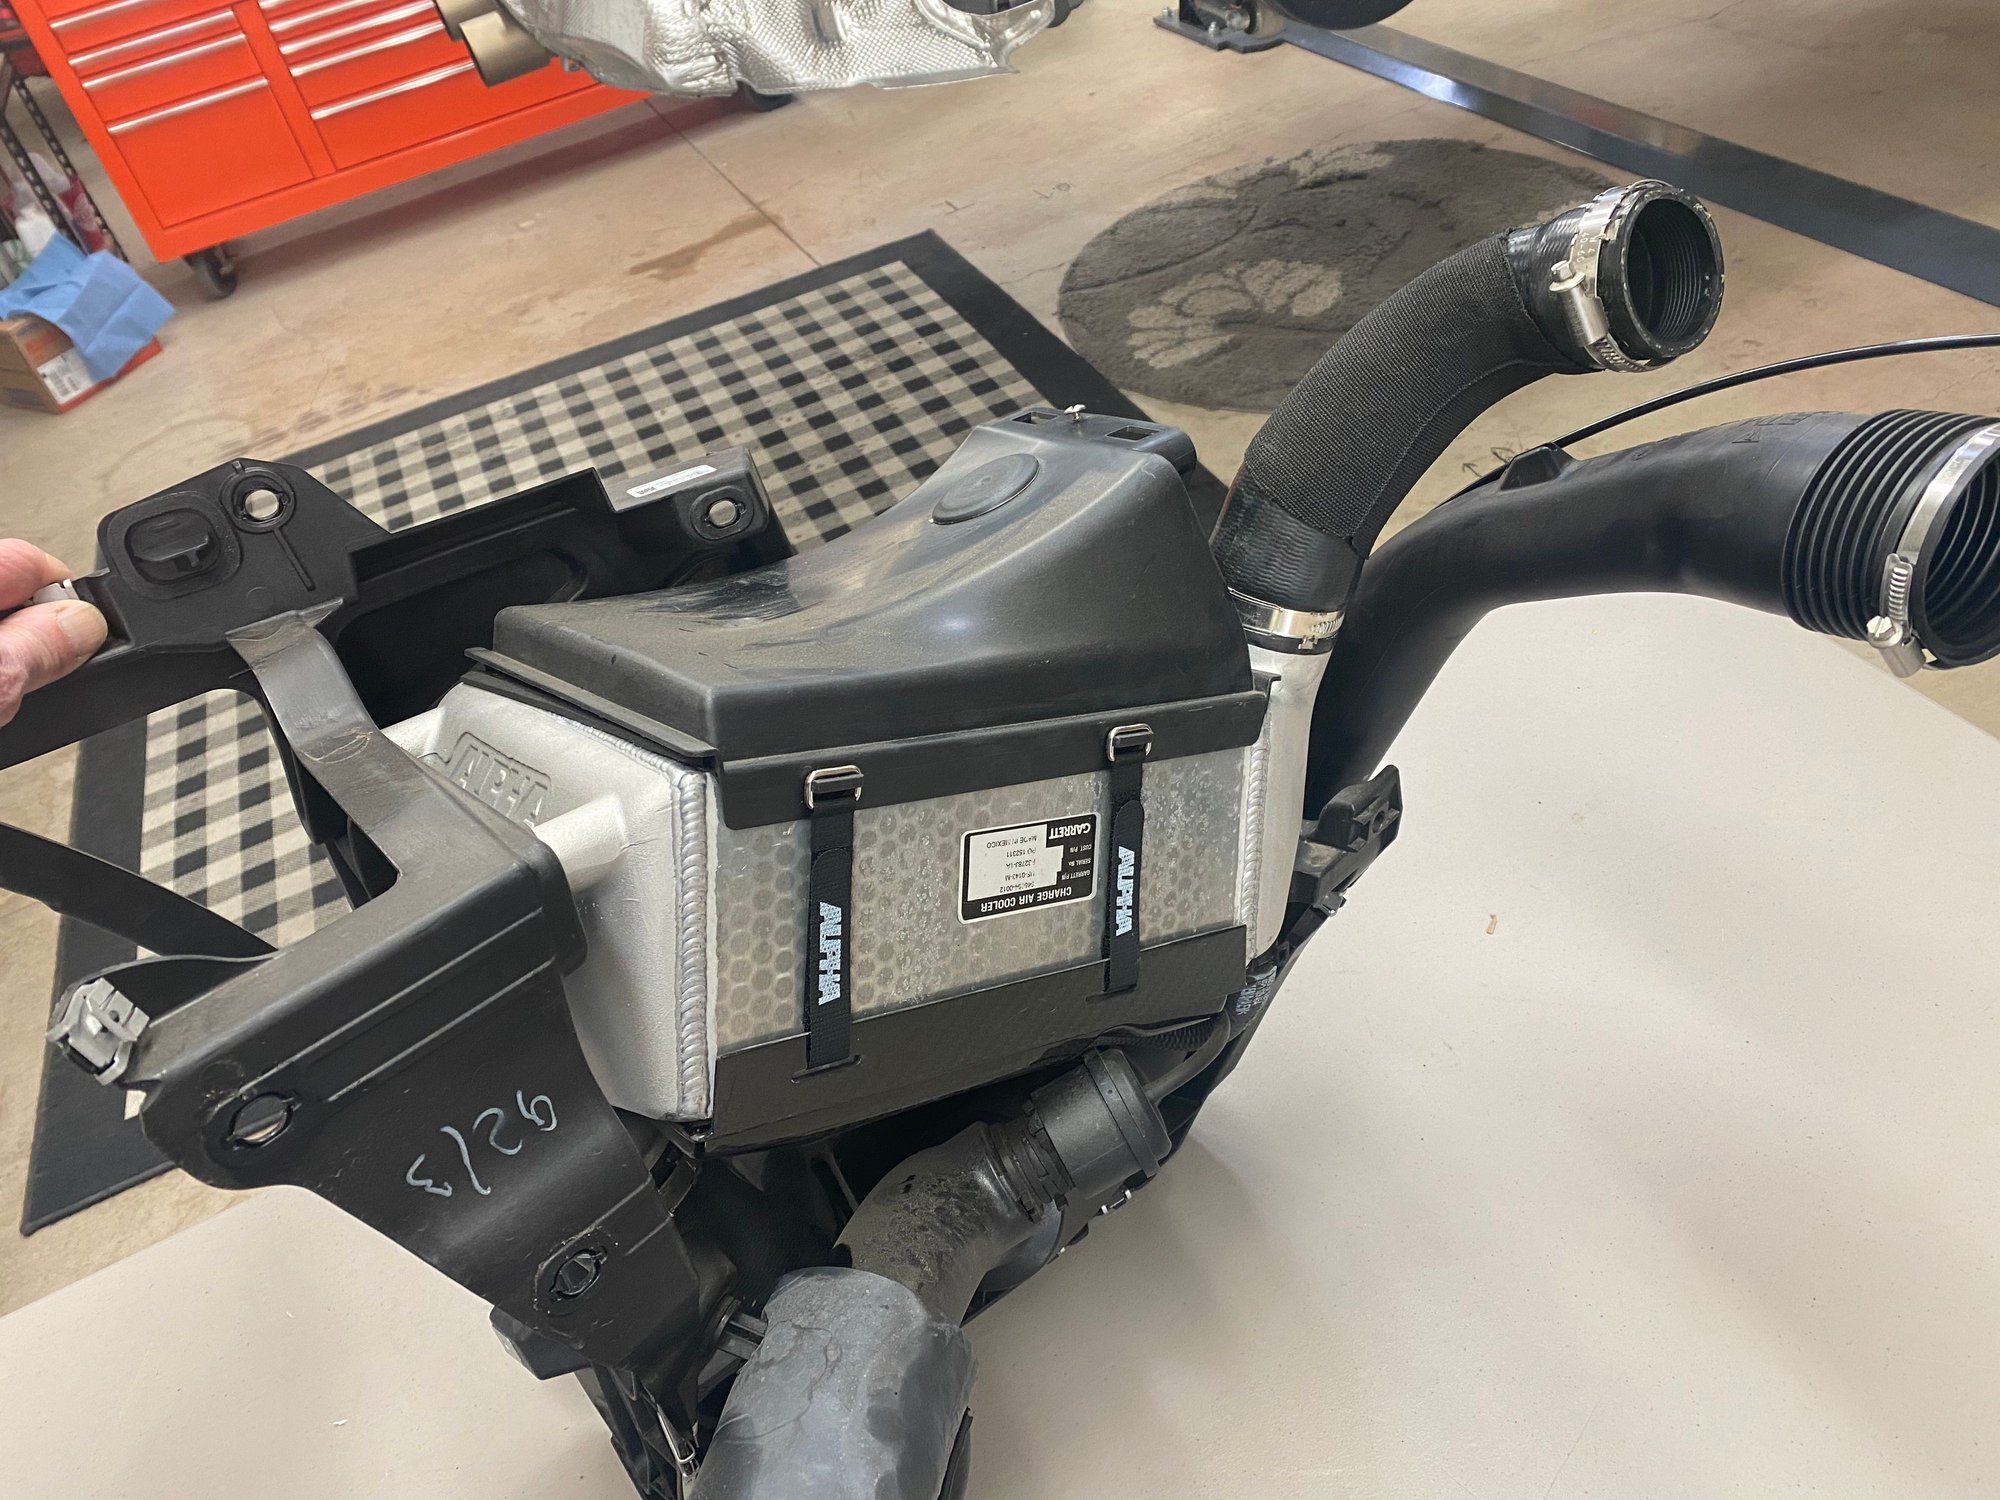
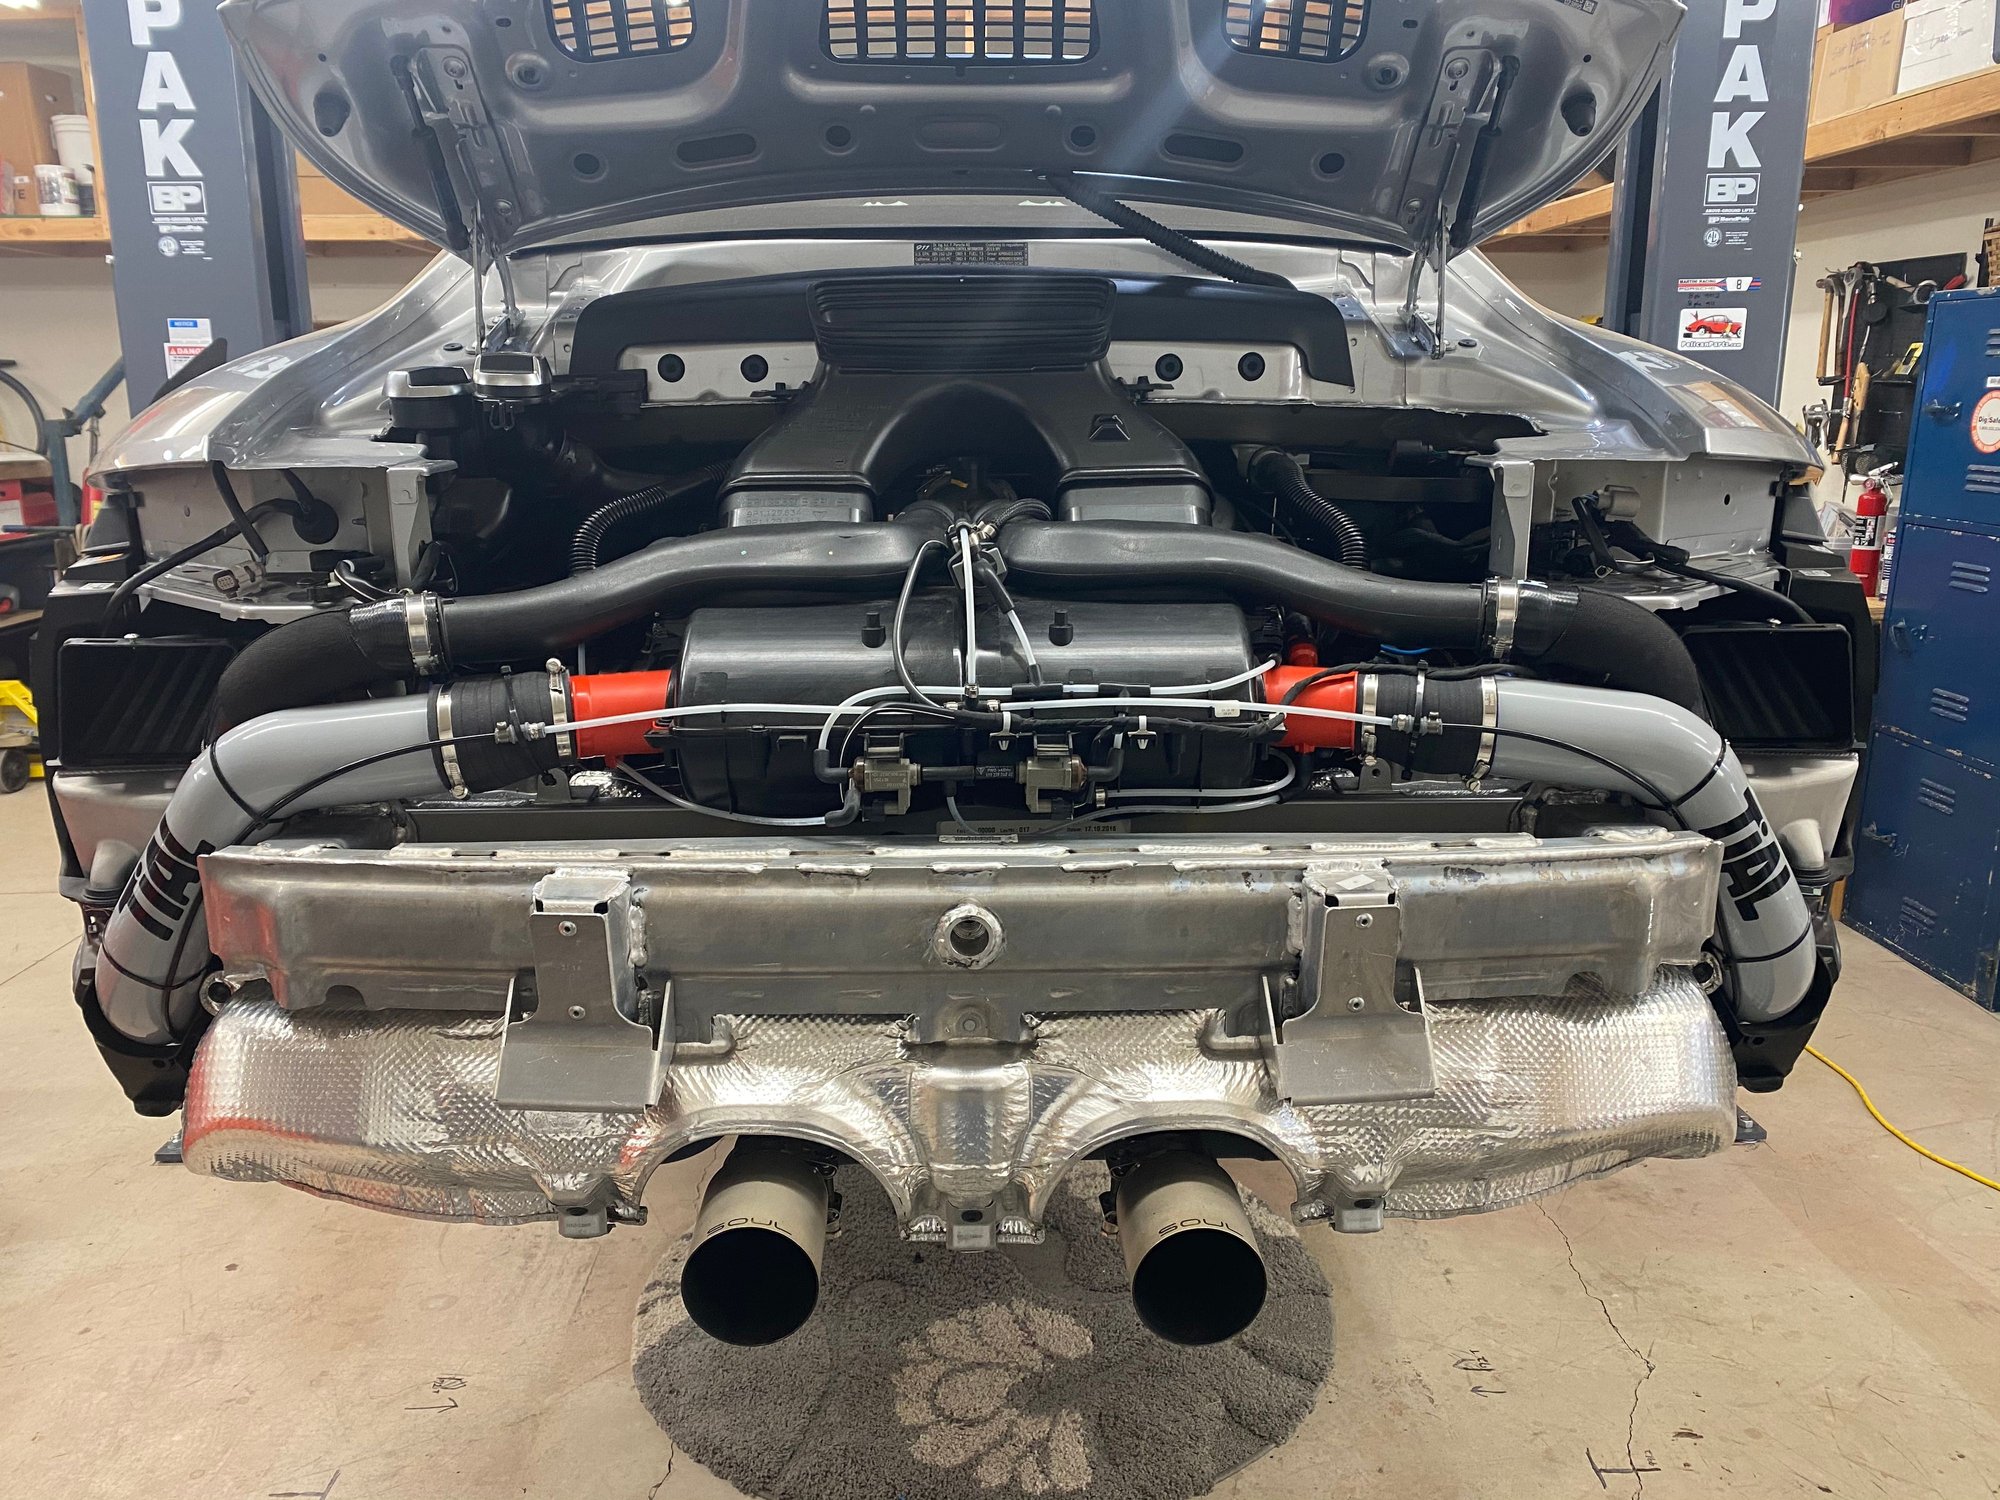
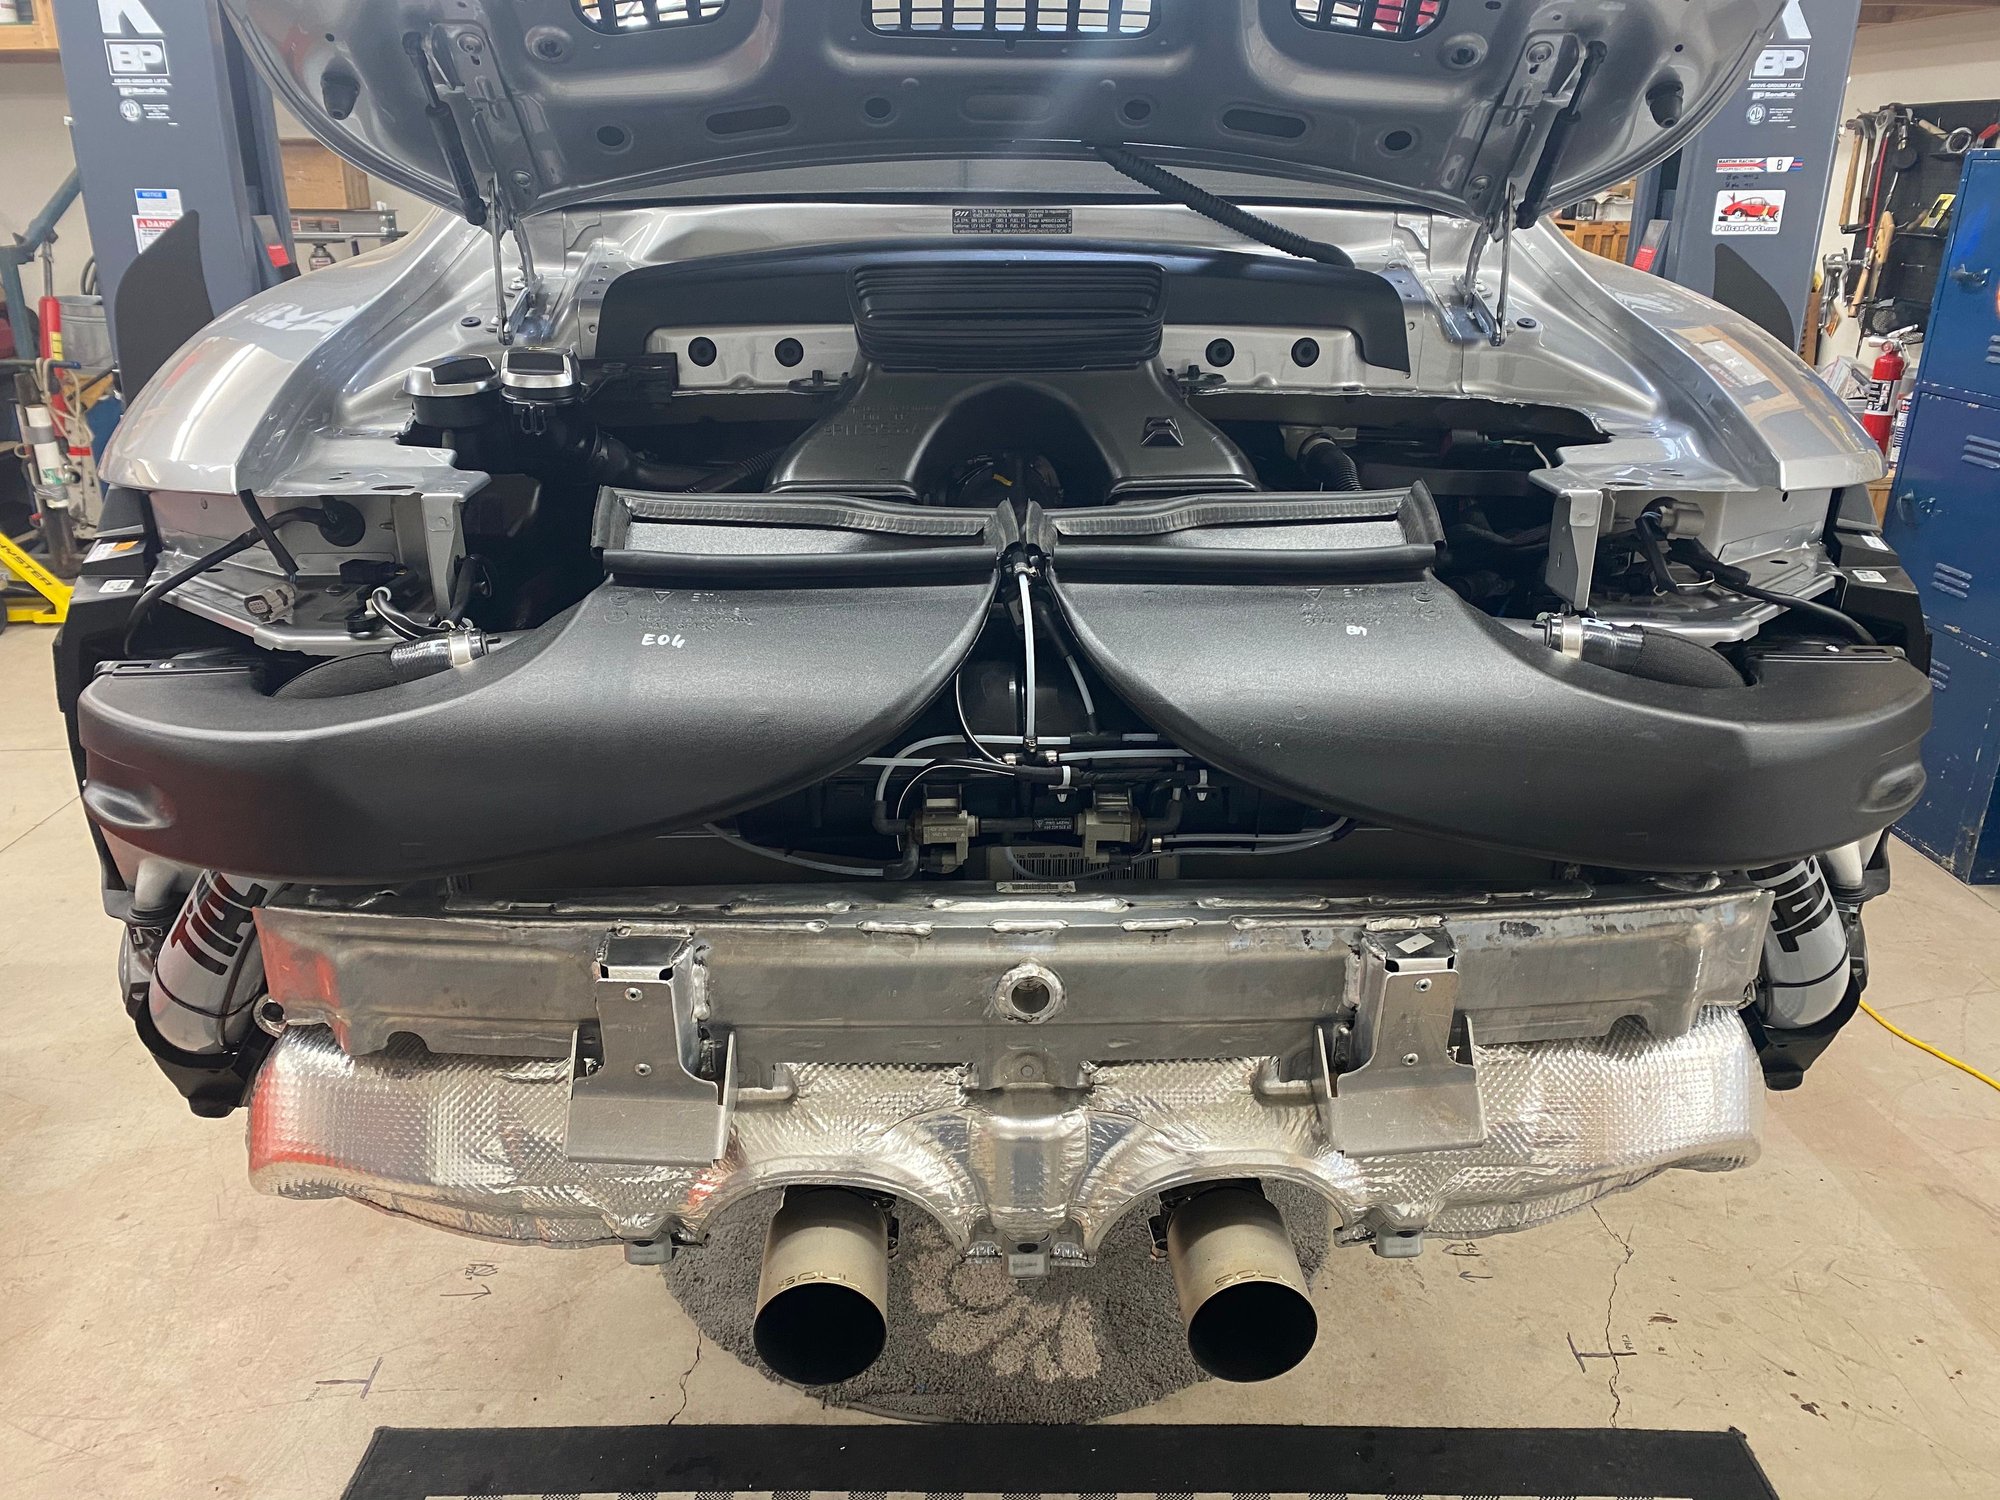
Cat back on and now waiting for the Tial Intake Tubes.
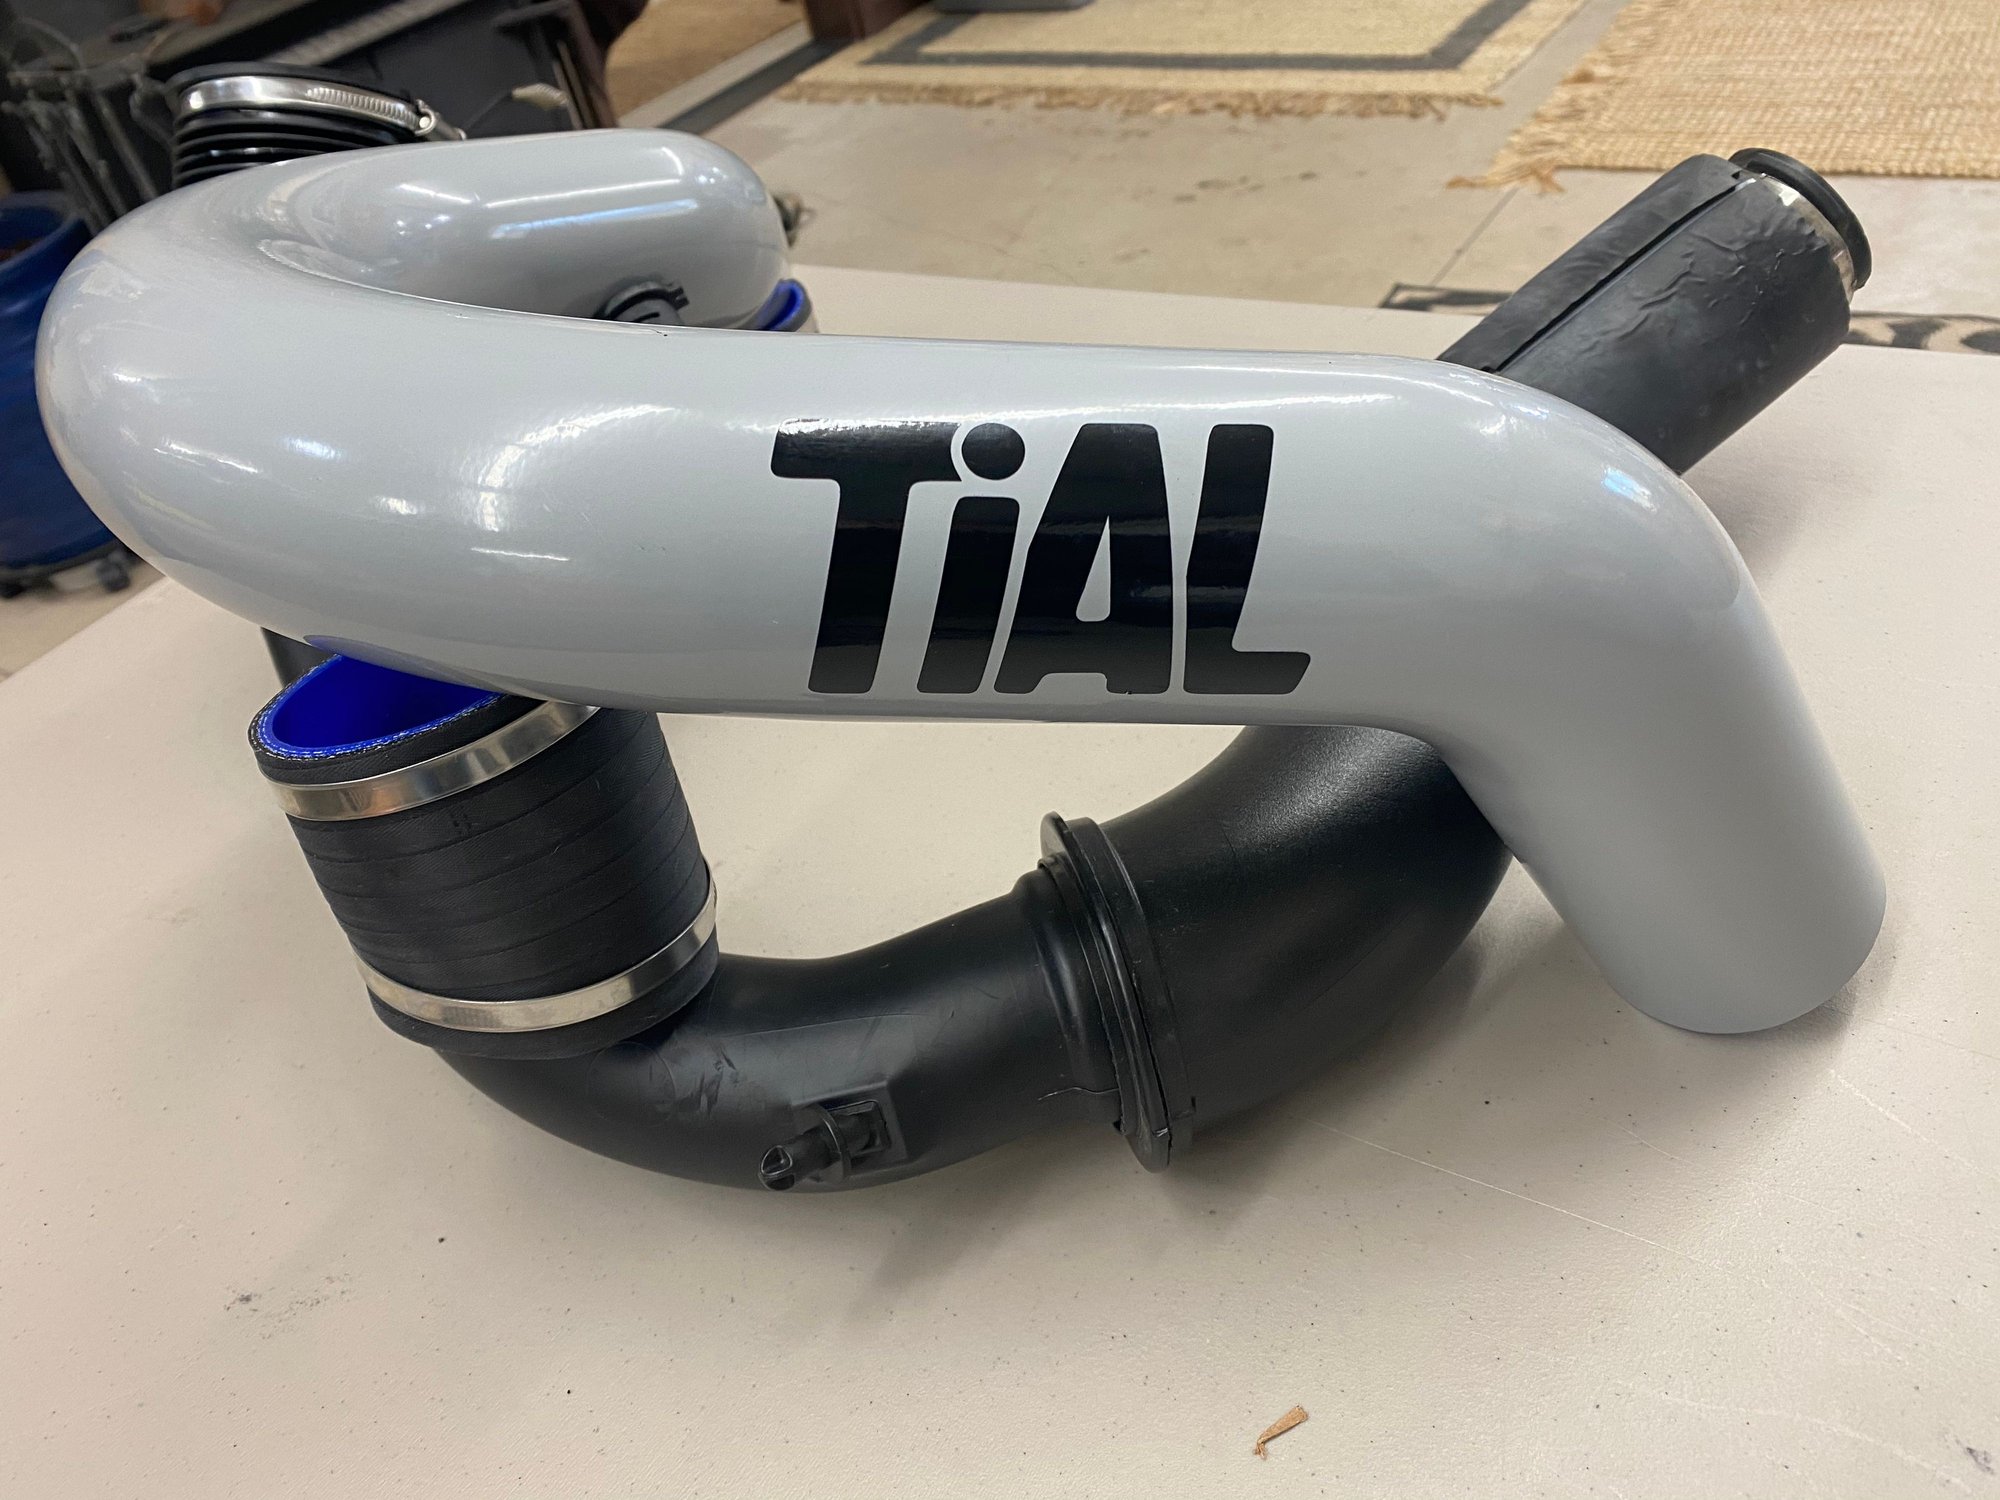
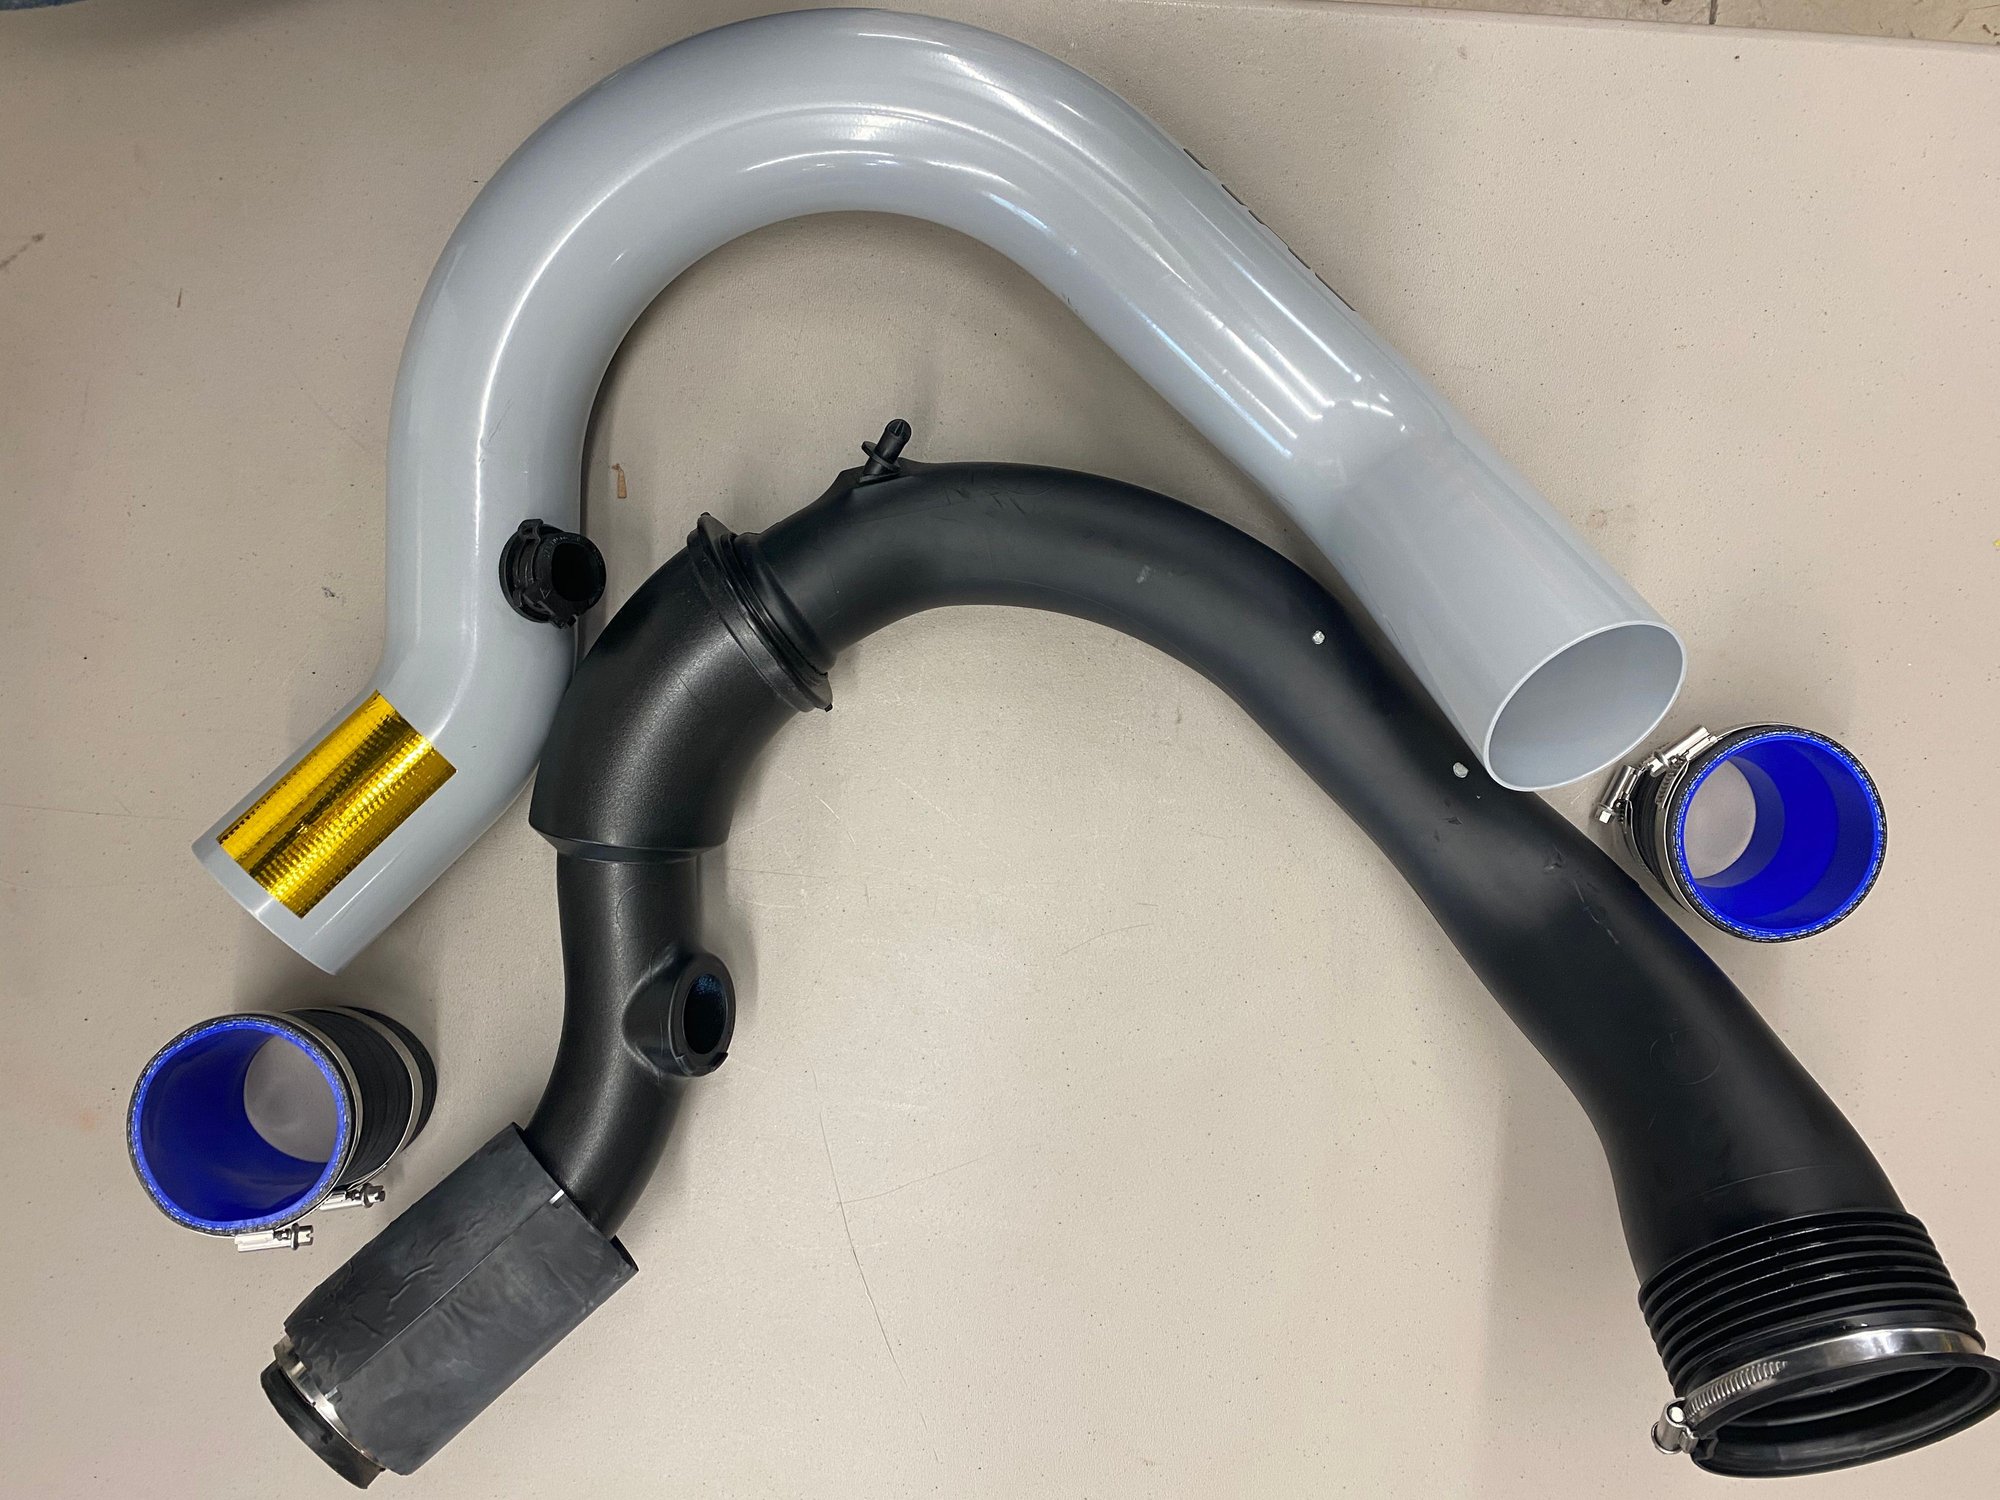
The Tial inlet tubes arrived Friday afternoon. Install looks straight forward. 6 basic parts, no instructions, no problem.
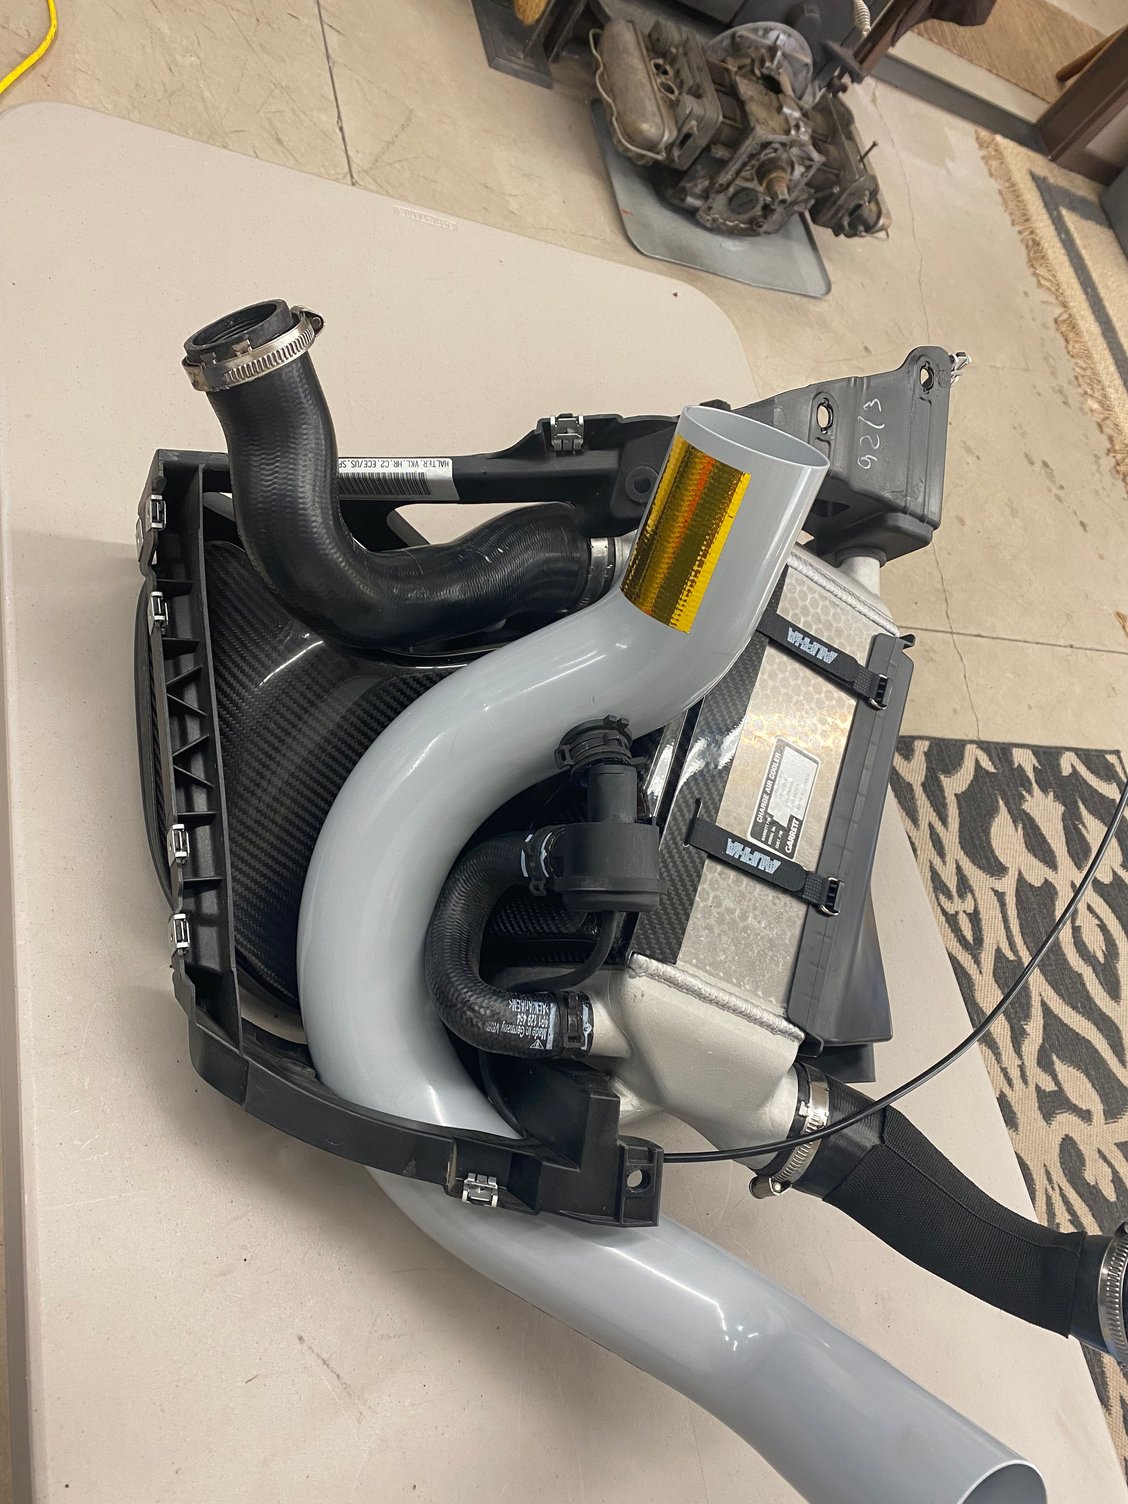
Comparing the size of the stock tube with the Tial tube: 58mm O.D. and 3mm thick for the stock tube; 77mm O.D. and 2mm thick for the Tial tube. Should flow better.
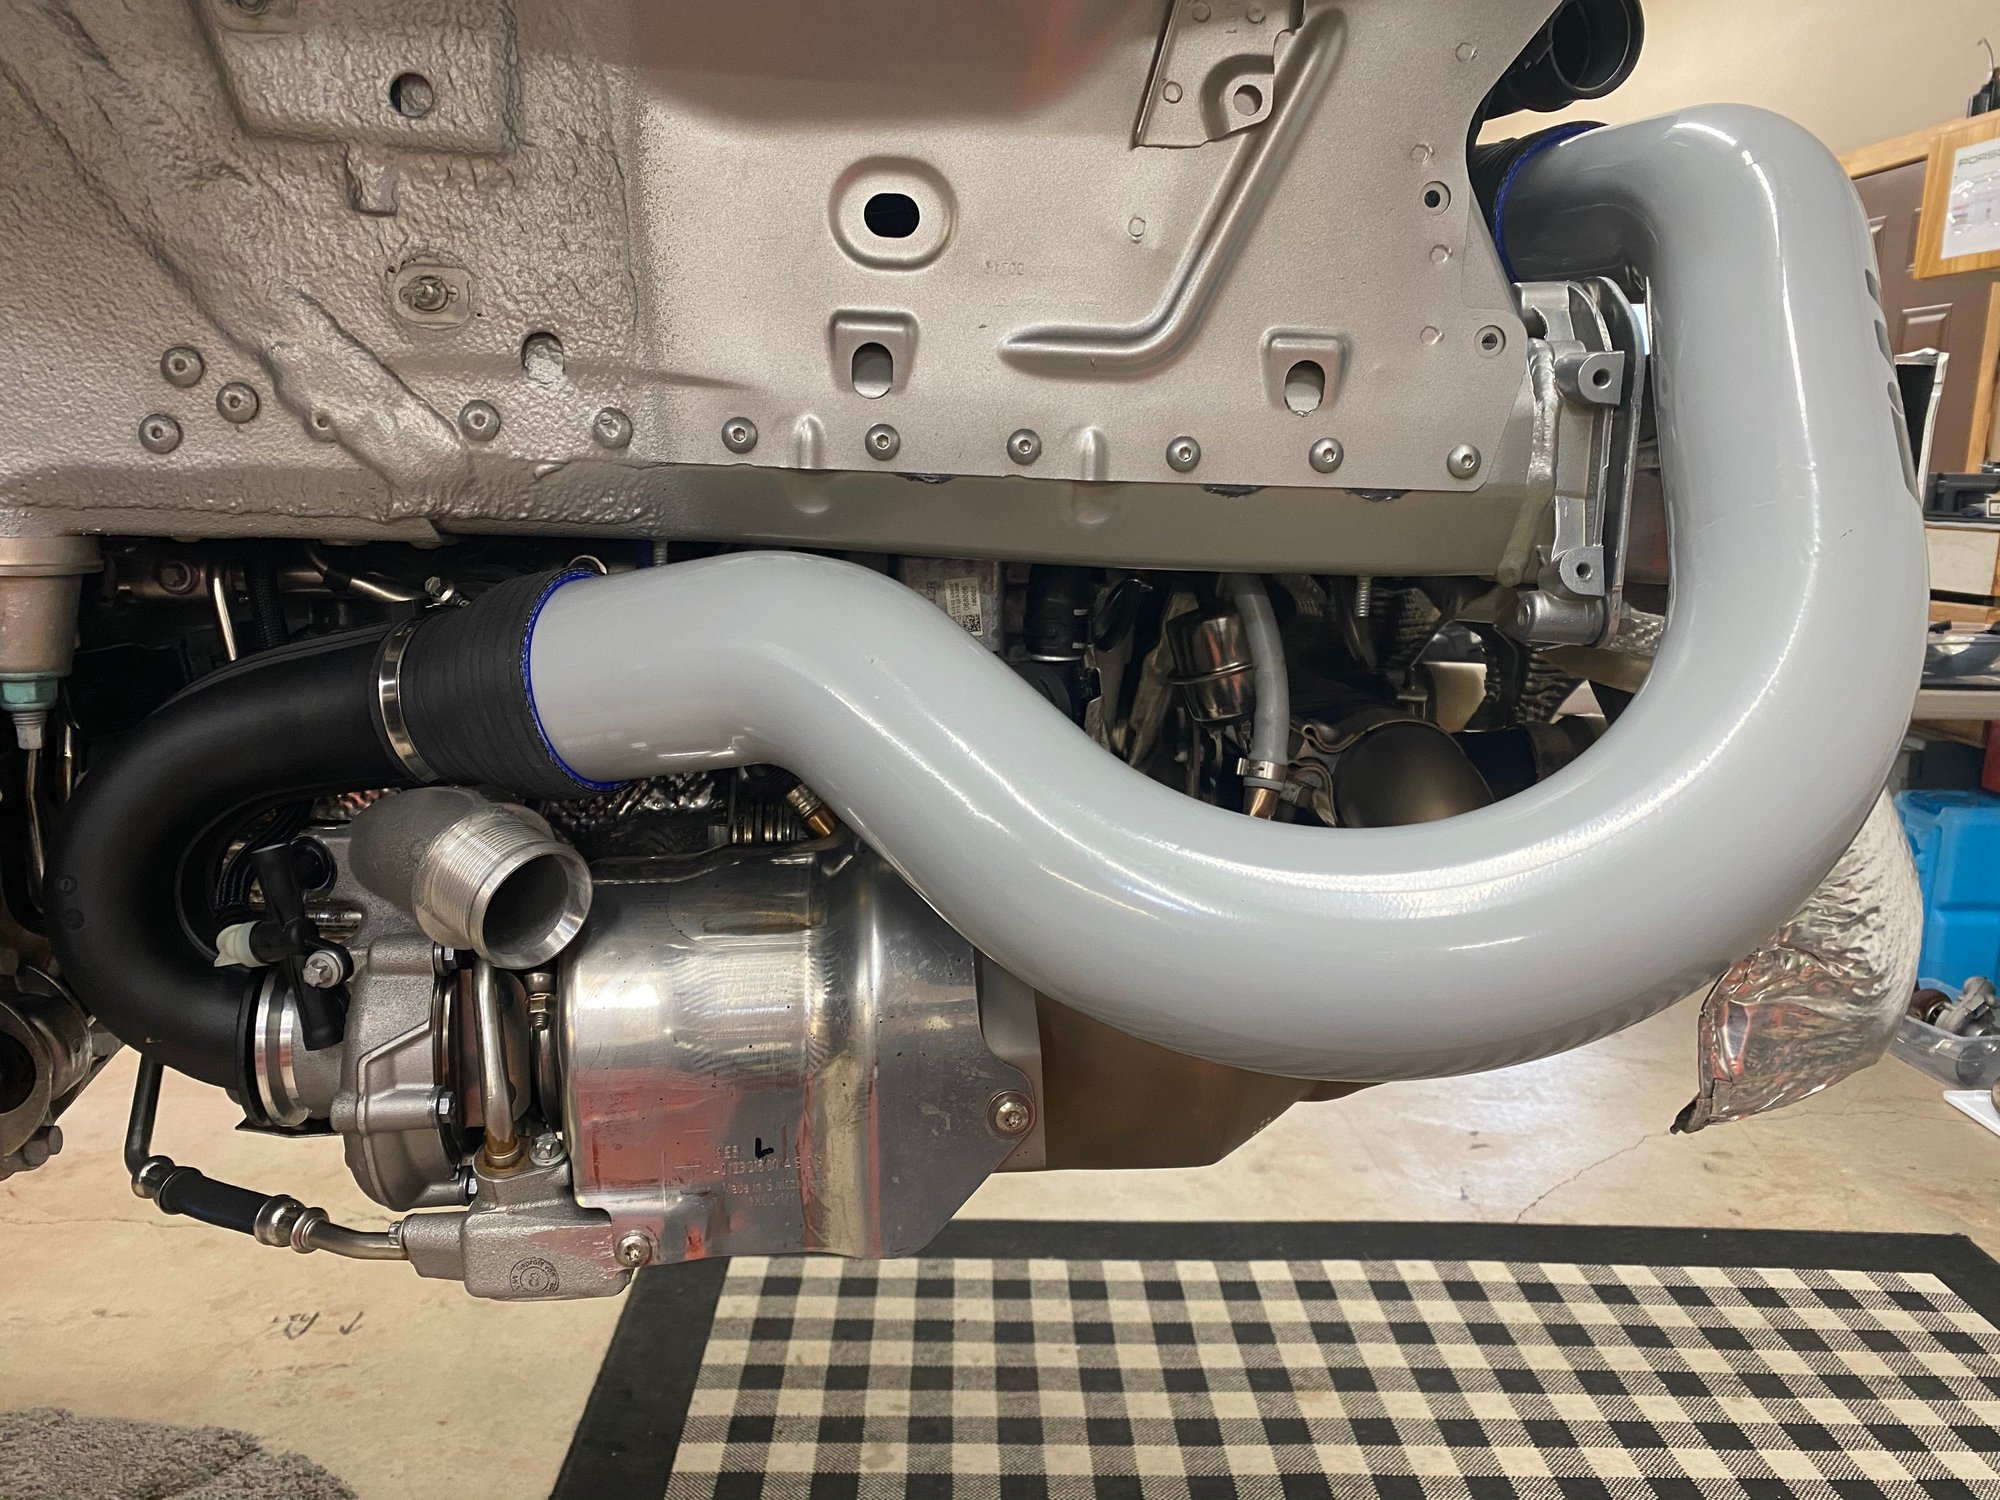
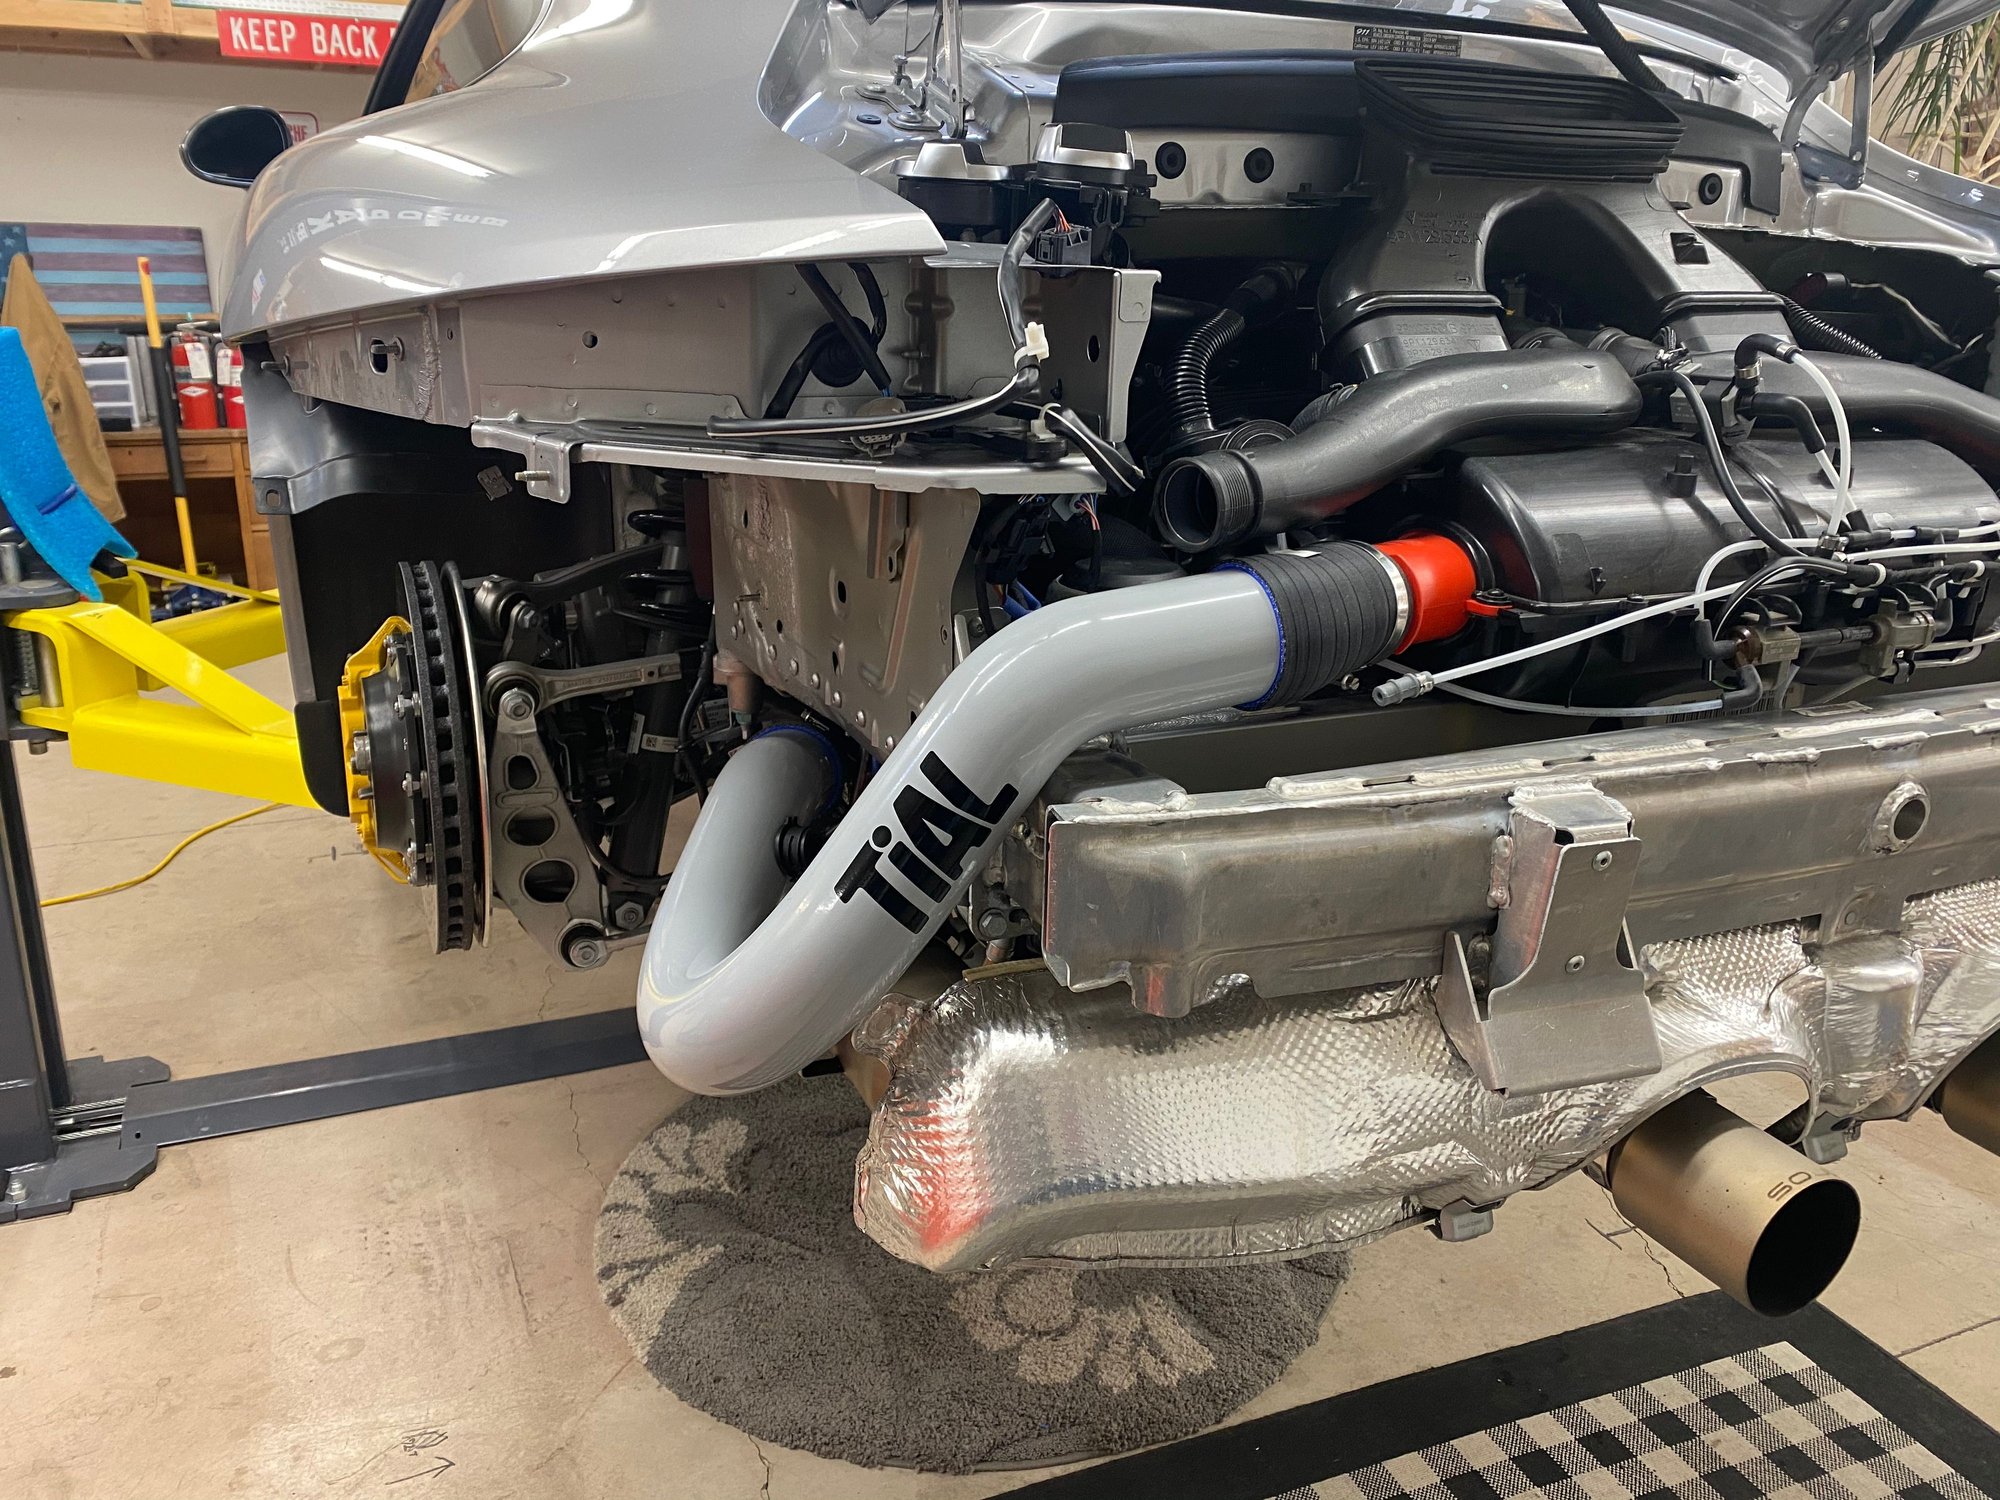
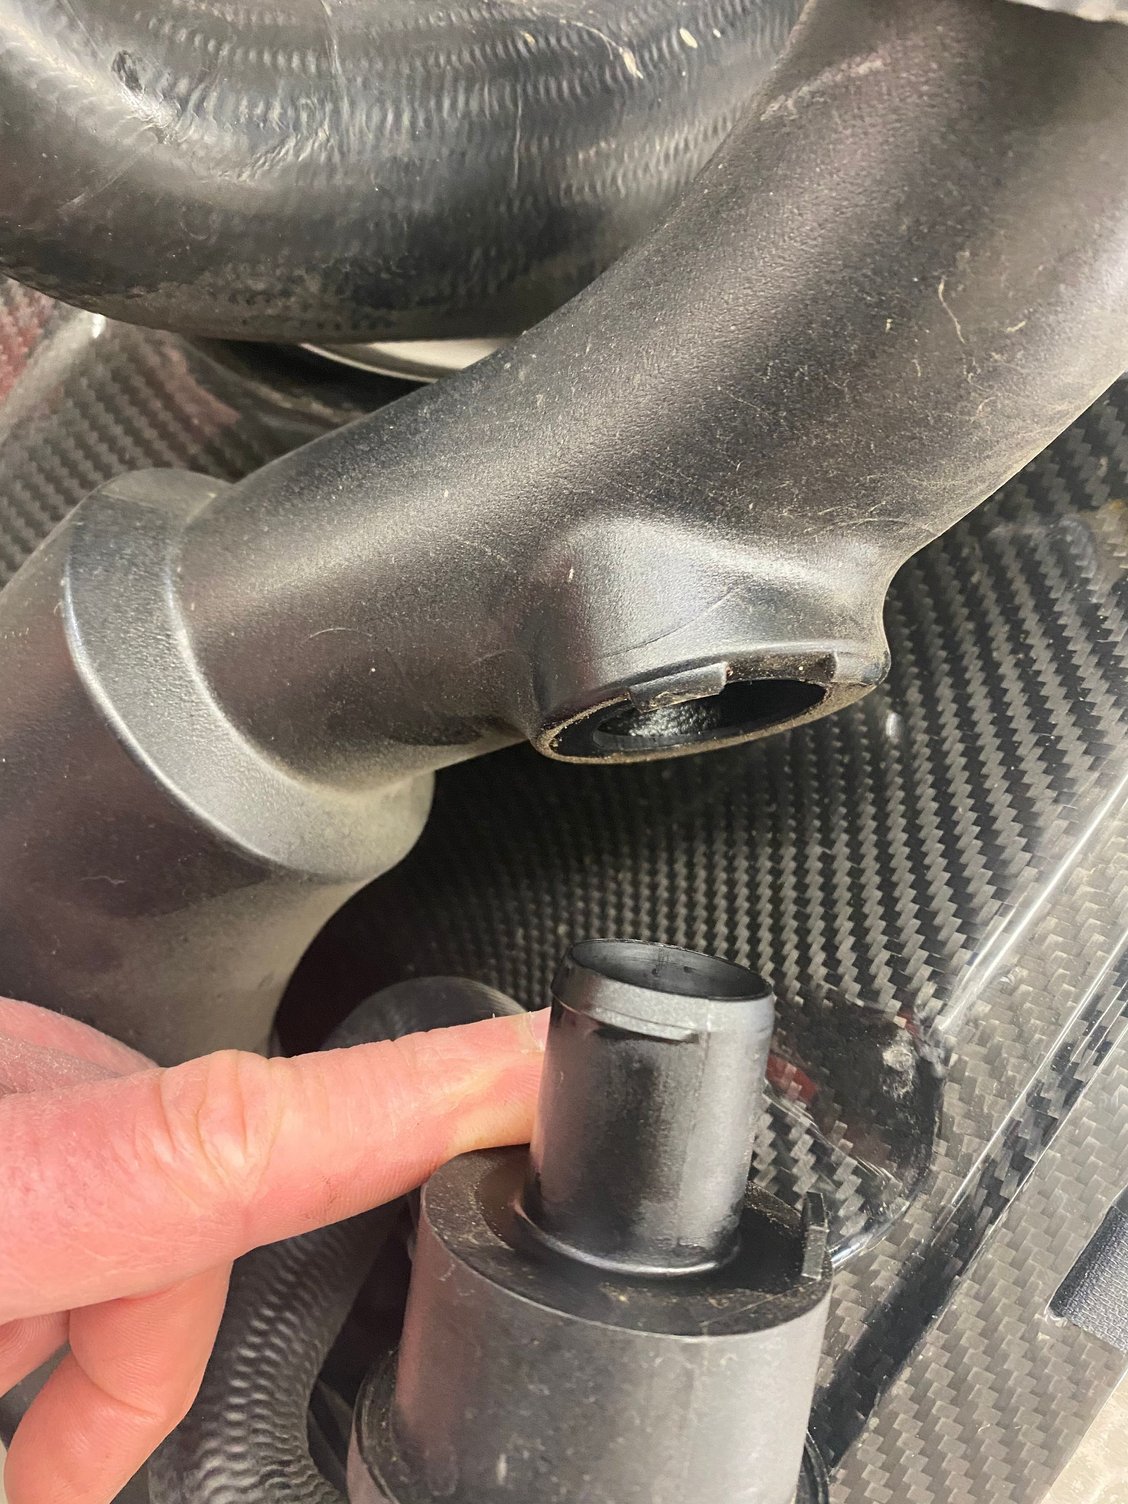
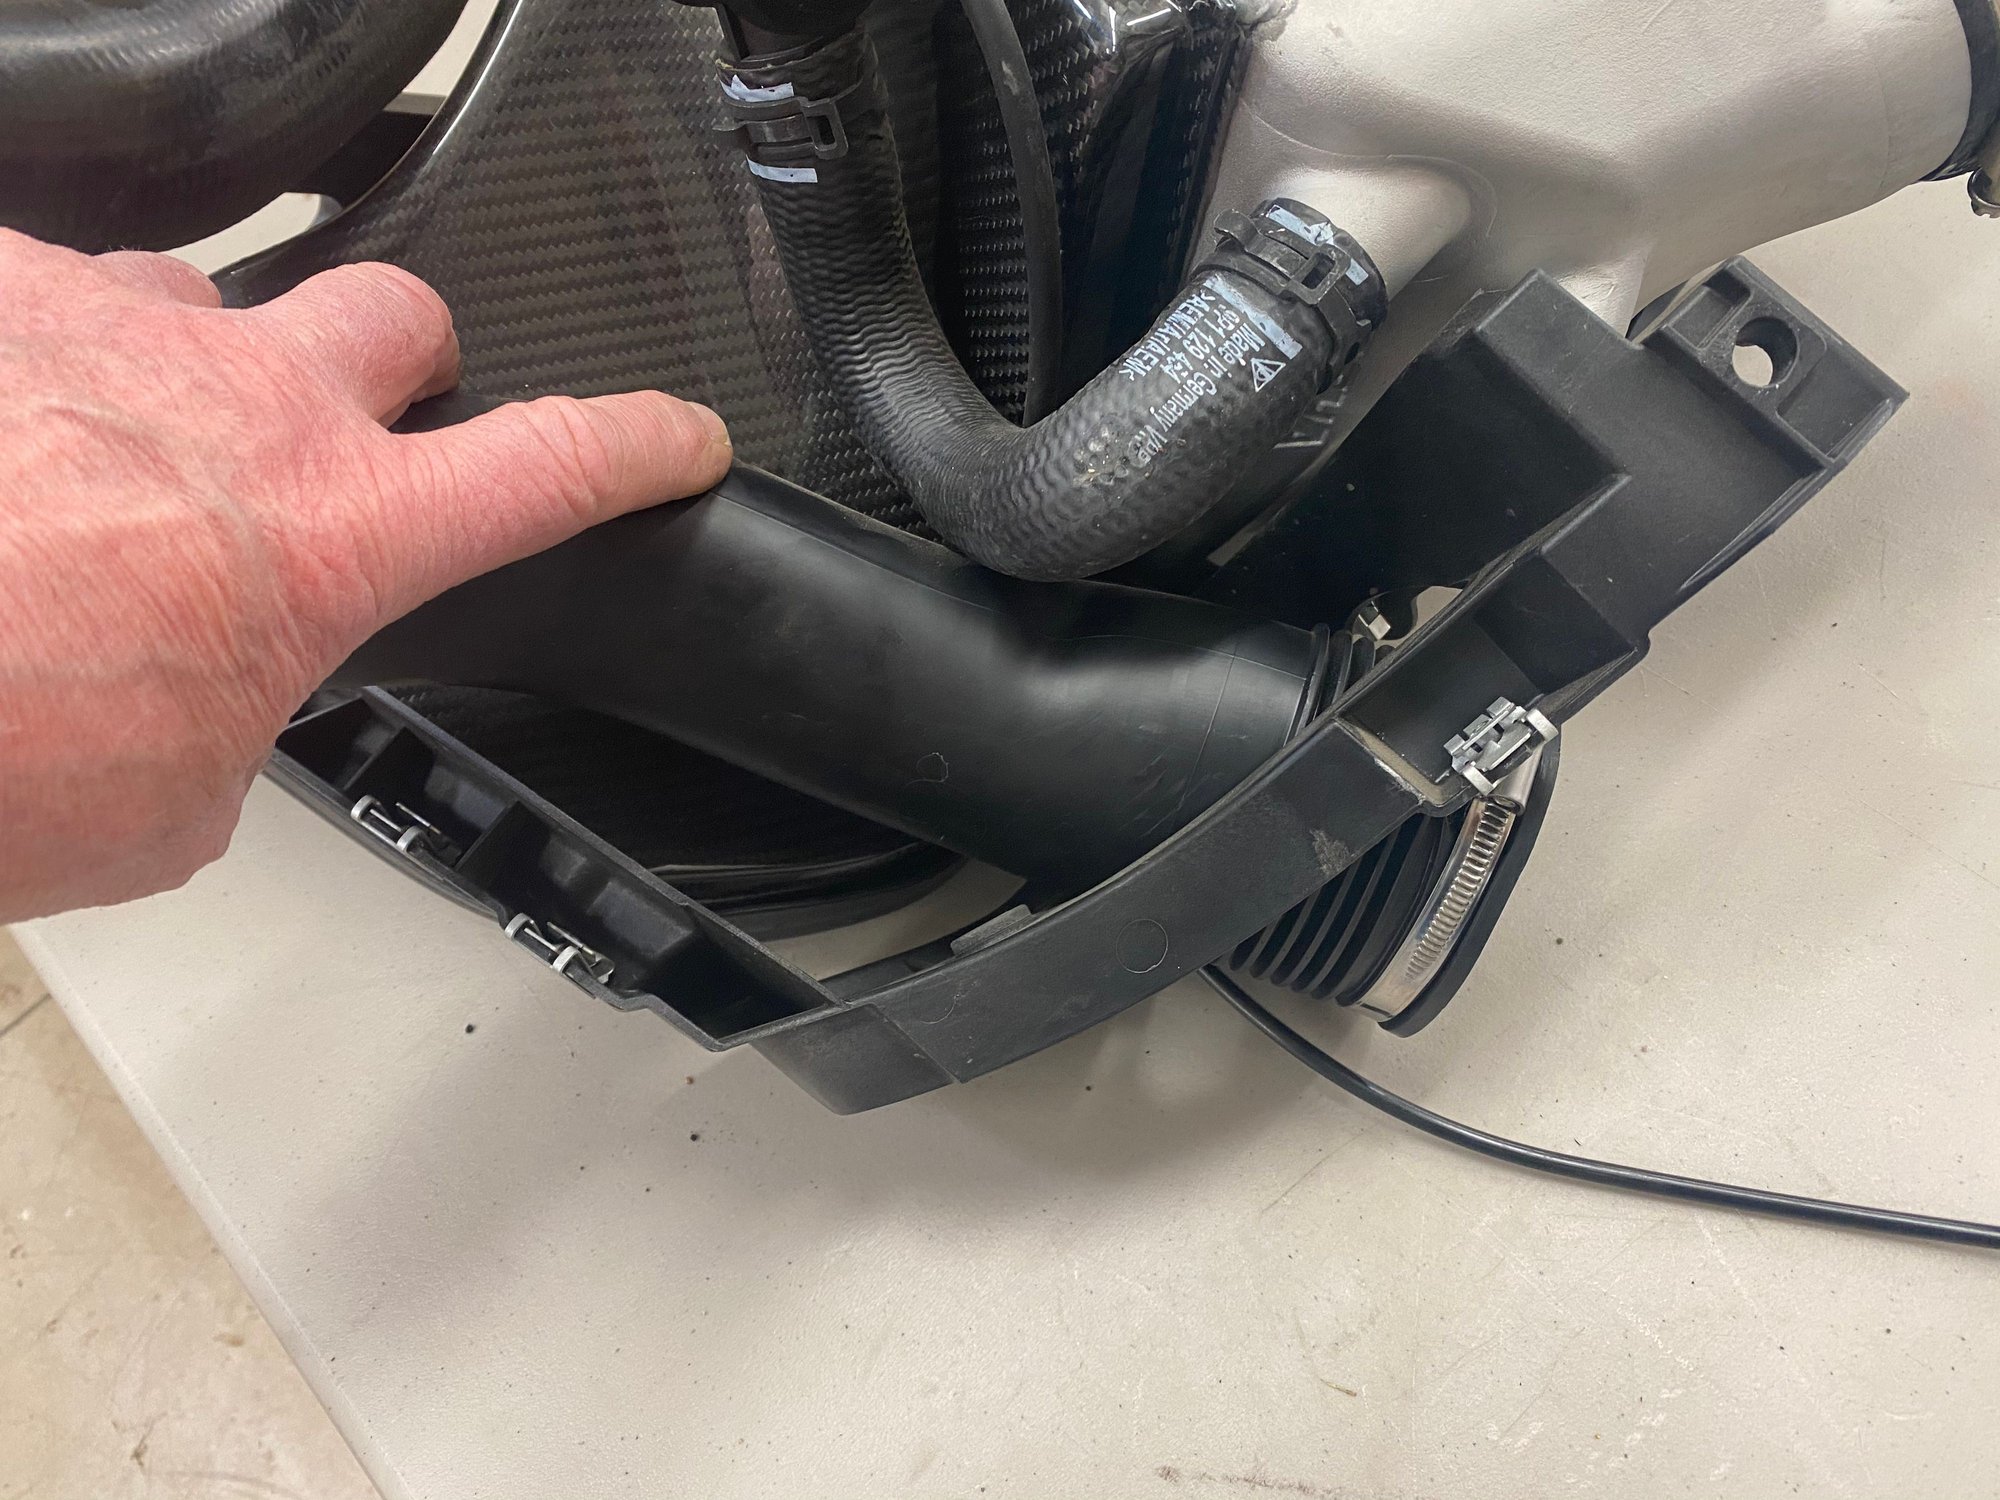
Test fit one of the Tial's without the intercooler & cage to see a better picture of the path.
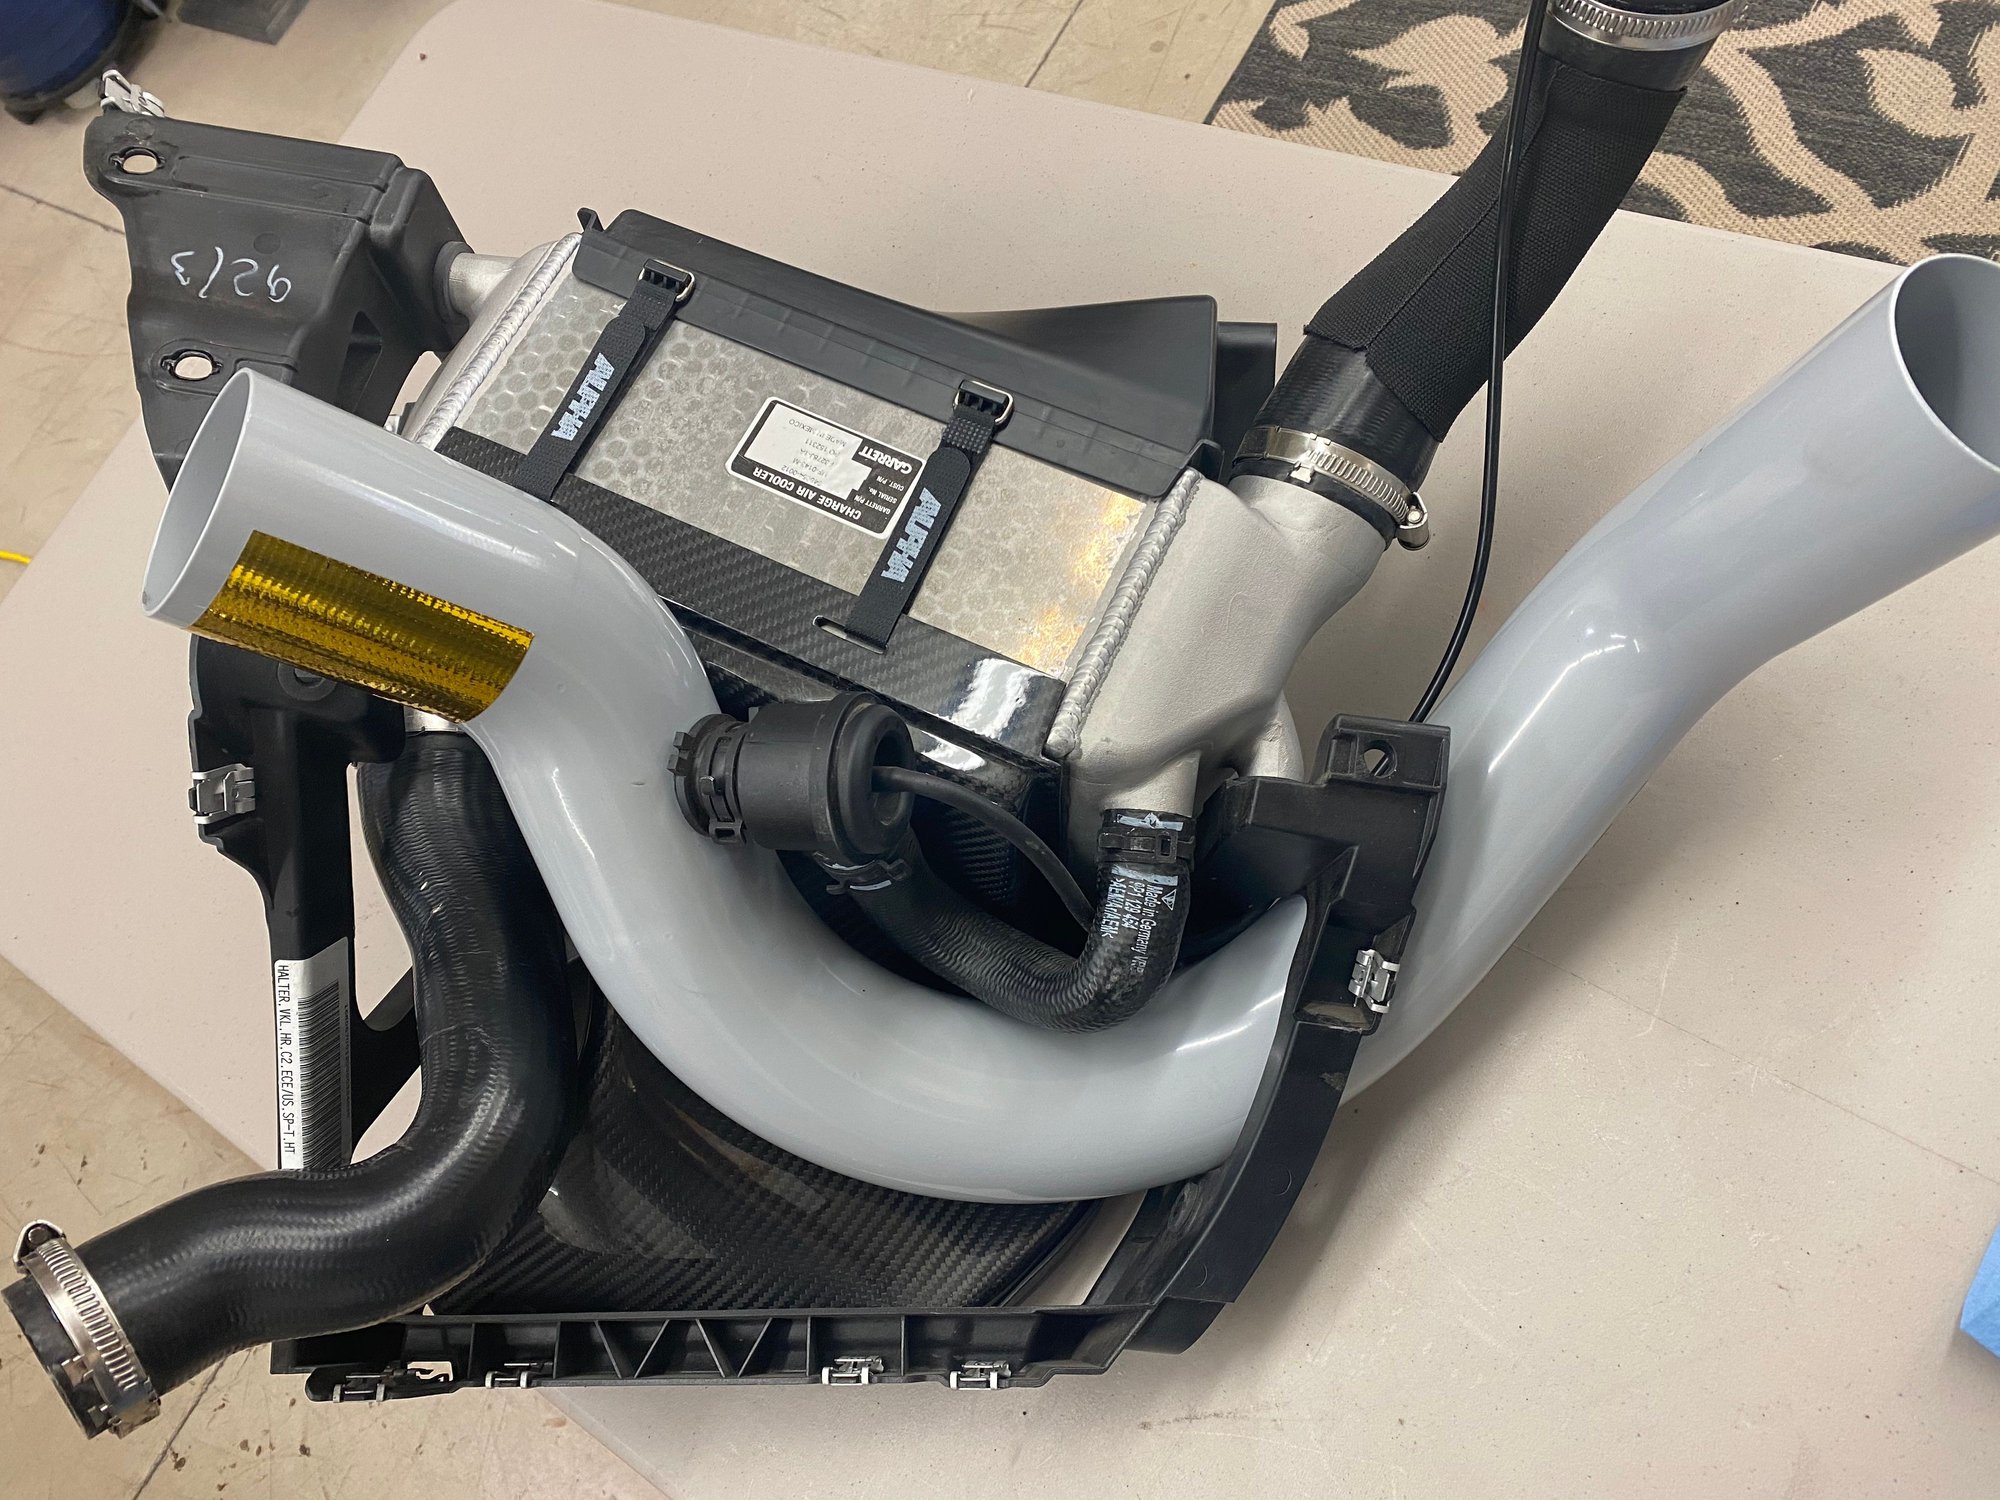
Removal of the intercooler cage with tubes is fairly simple. Loosening hose clamps at air filter and clamps on air pressure tube along with vacuum line from by-pass valve on inner cooler. A few nuts and screws around the cage.
Pull it off.
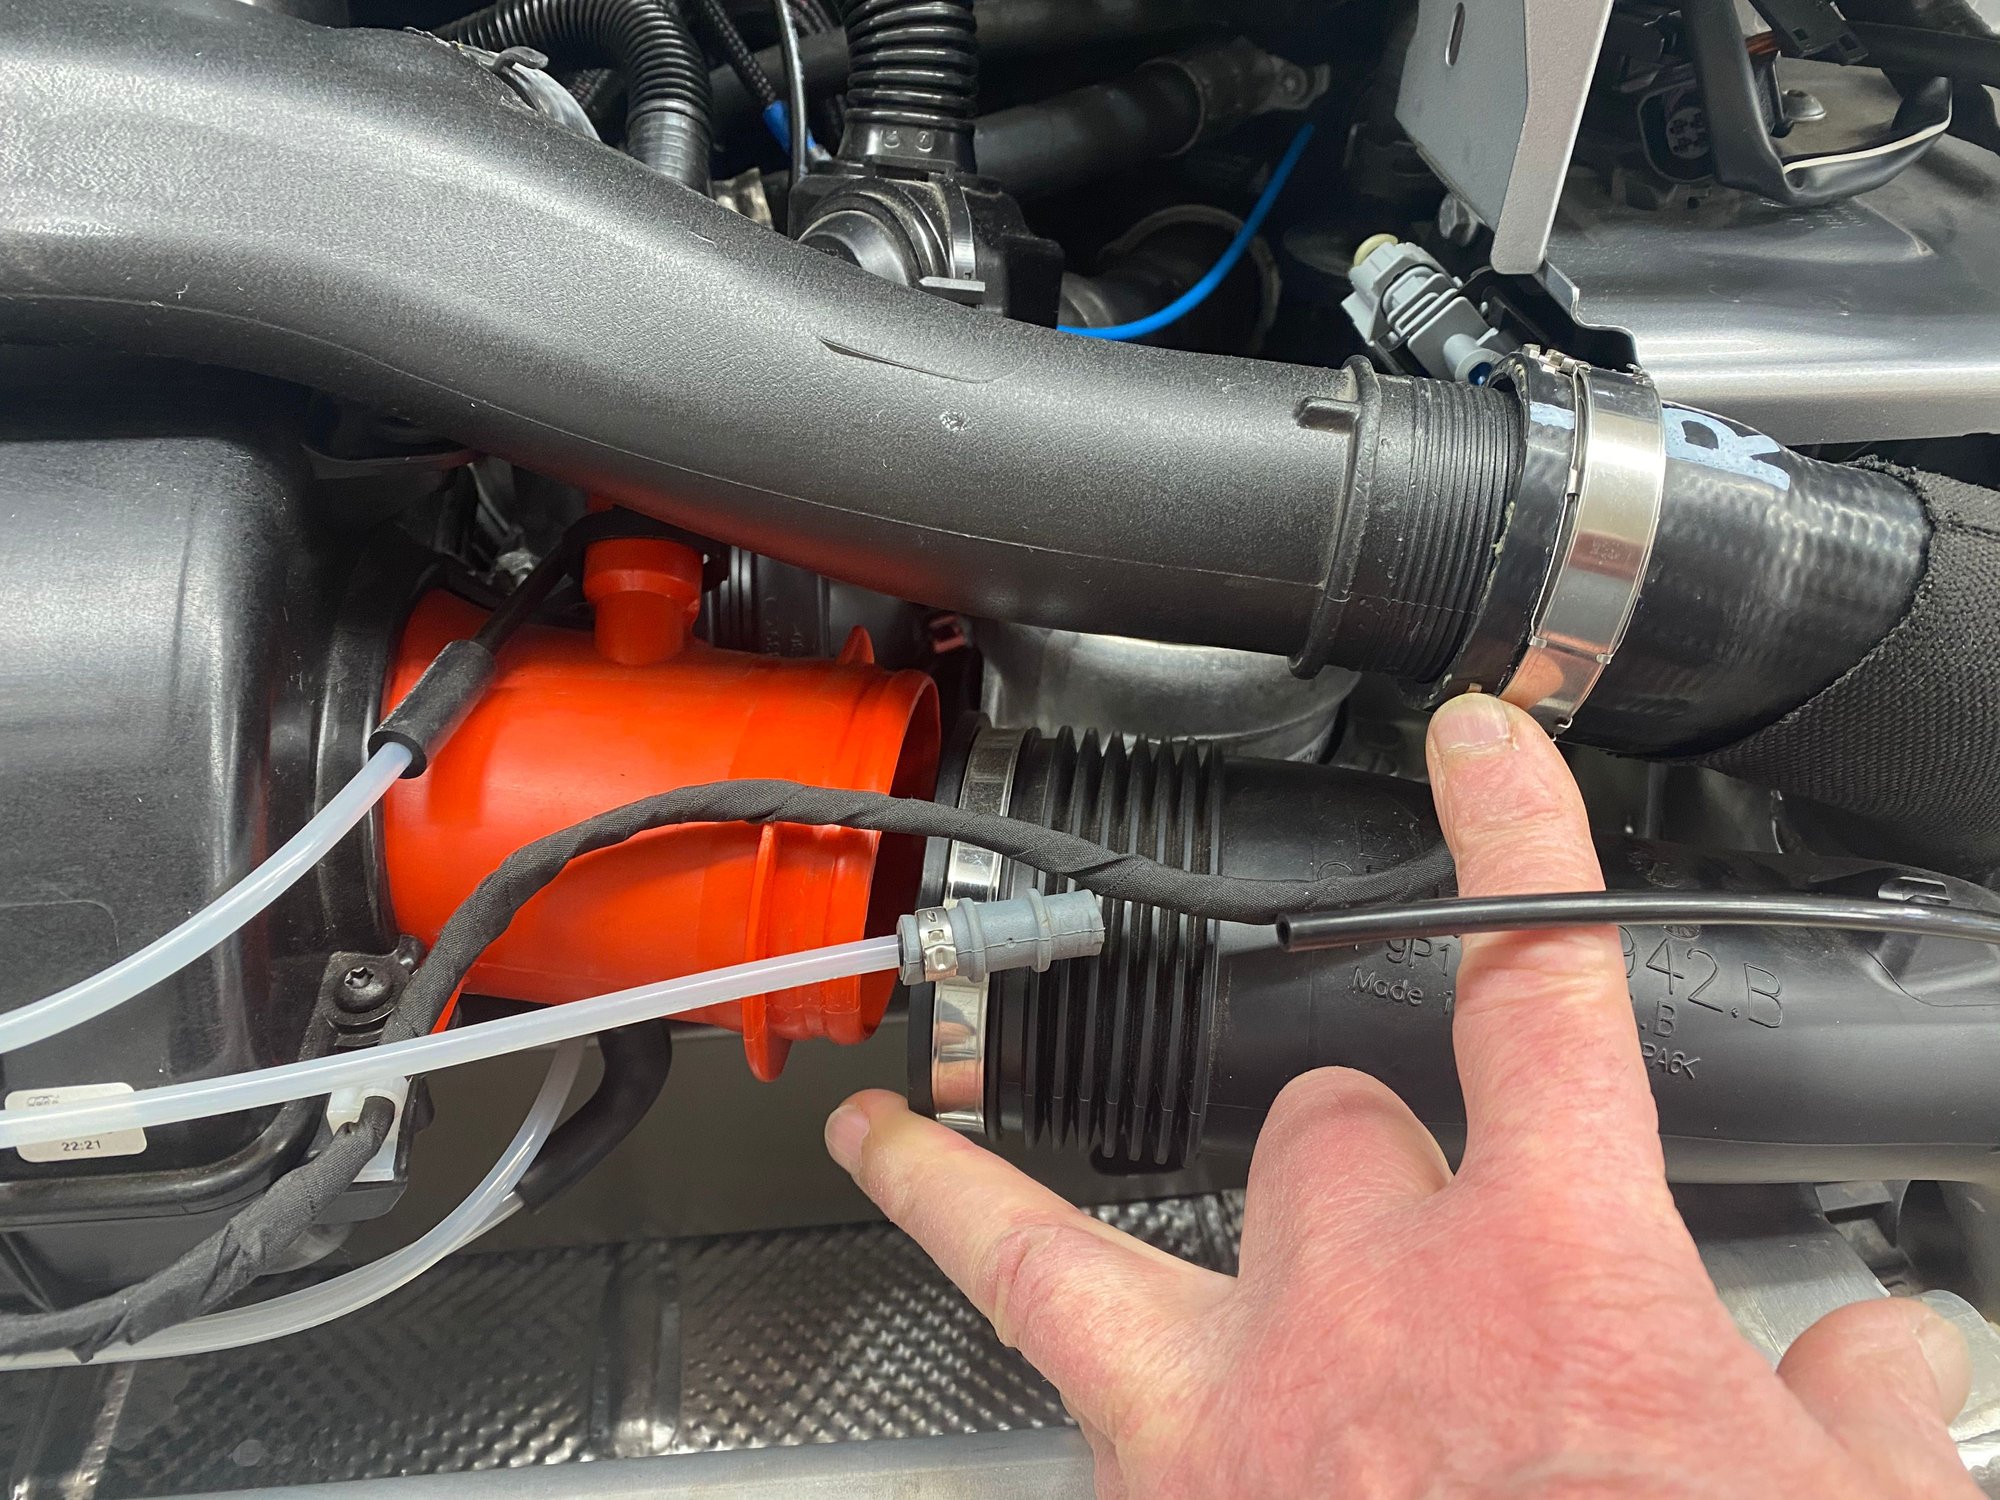
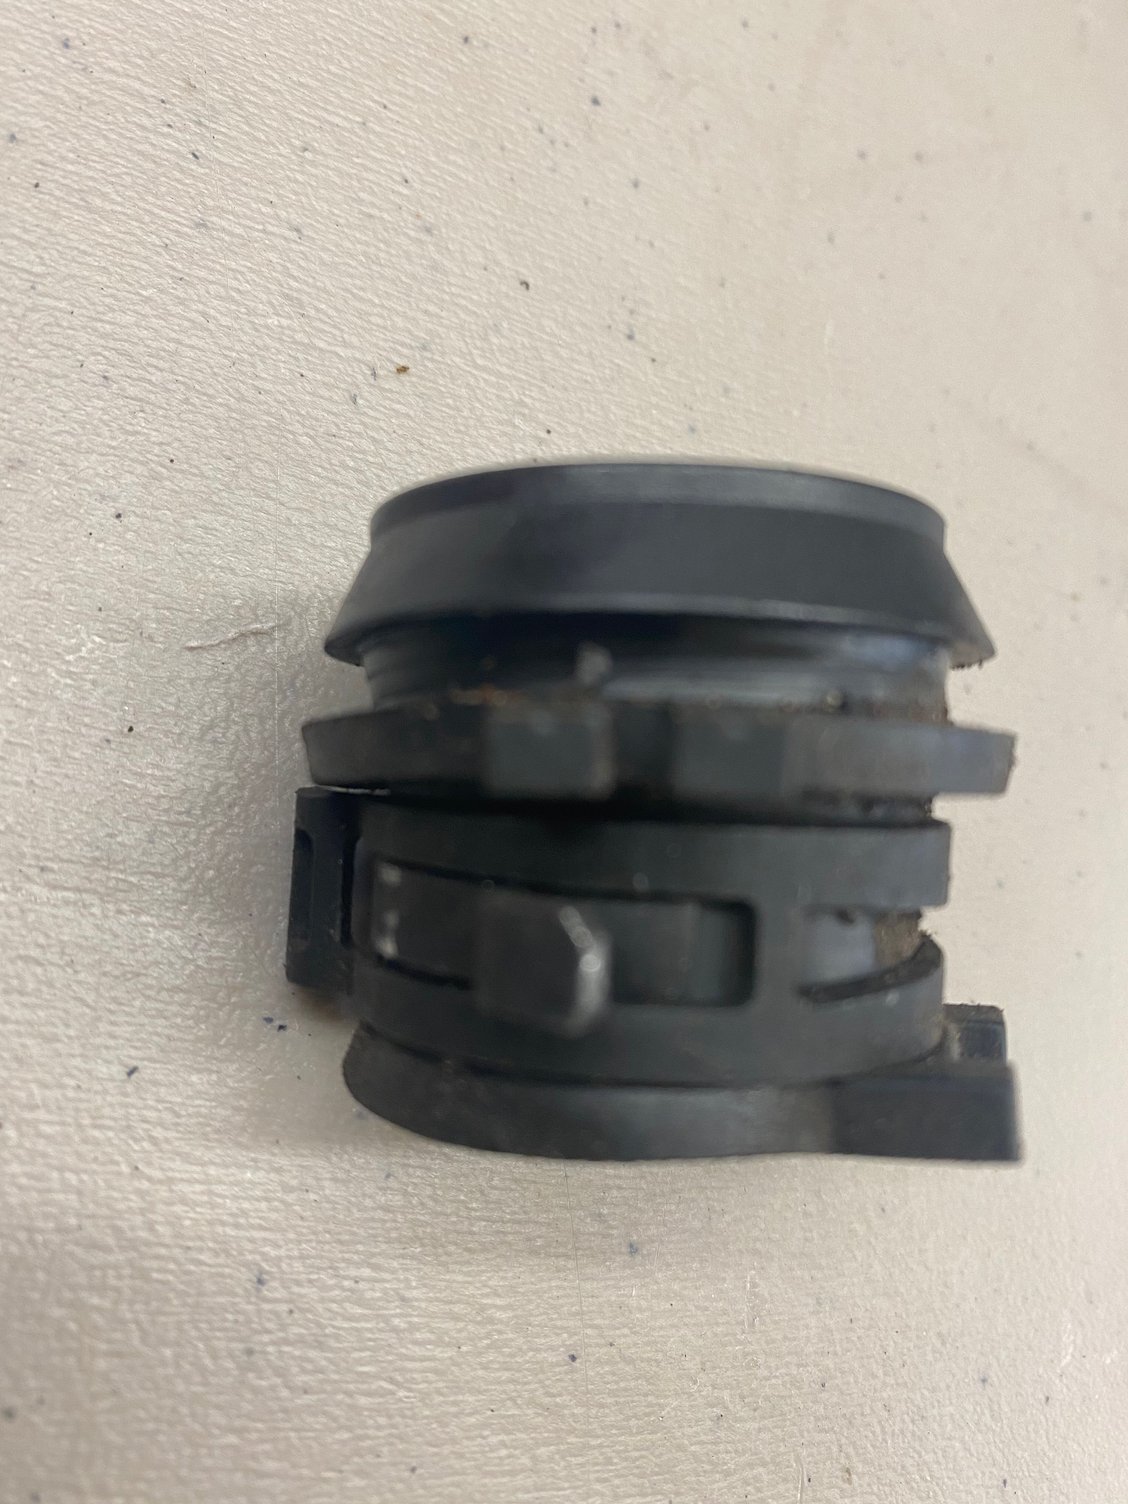
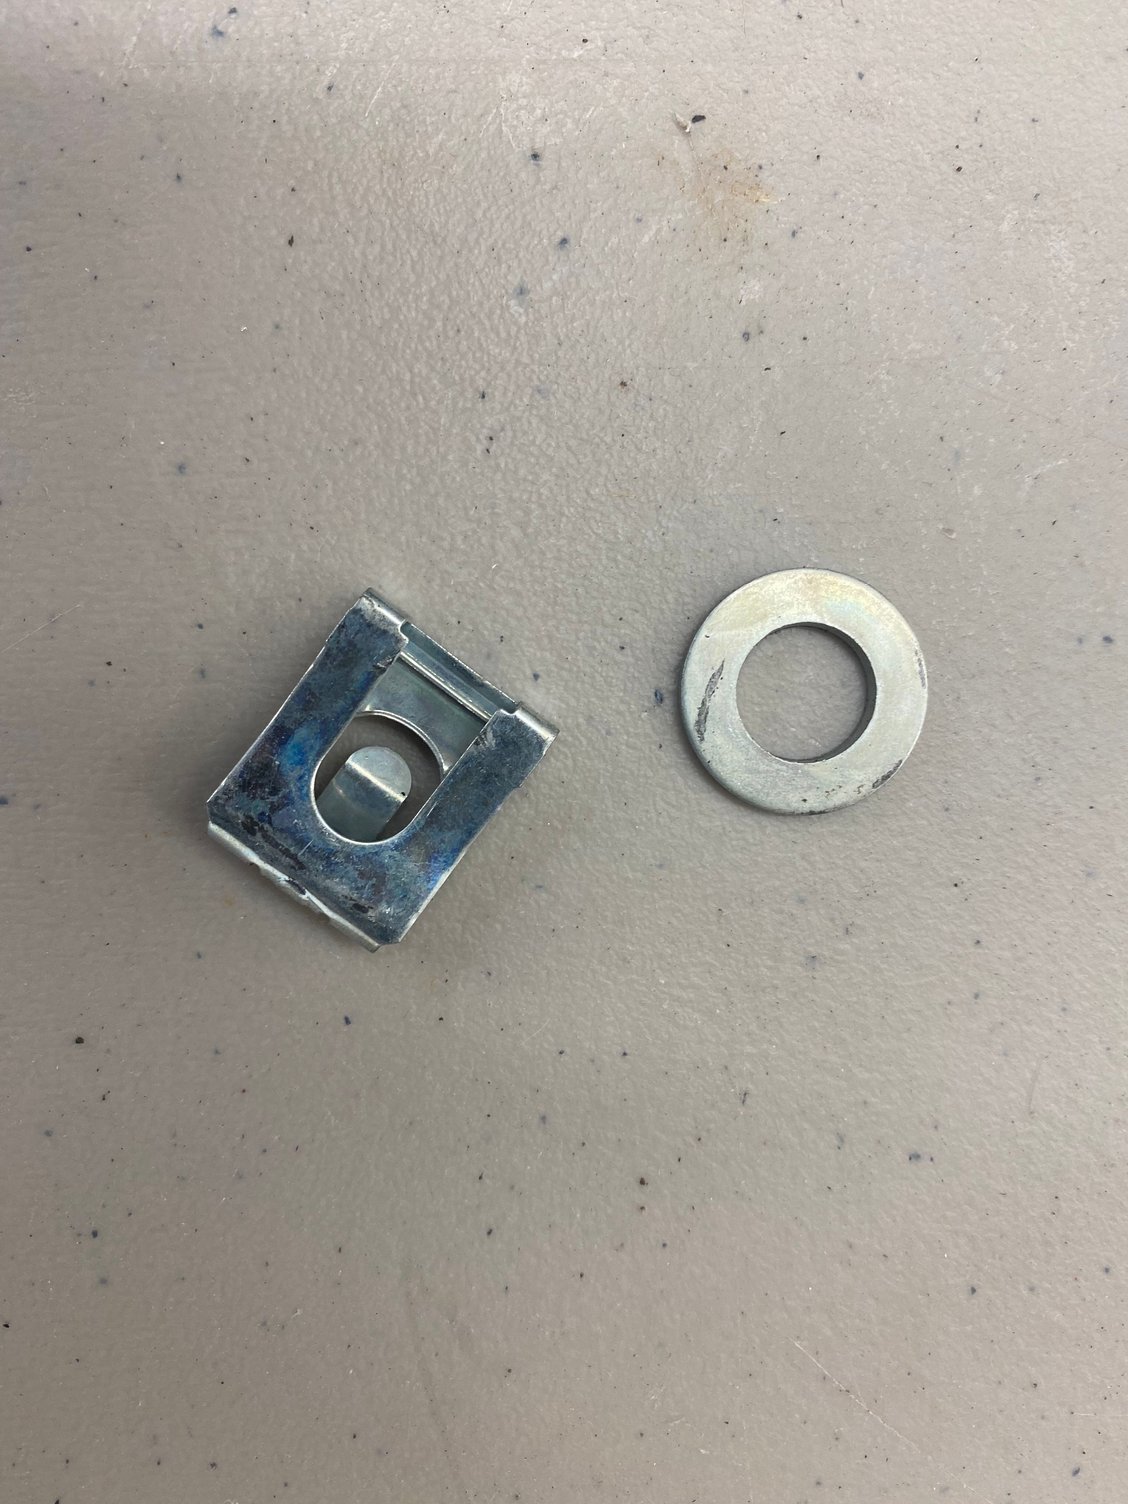
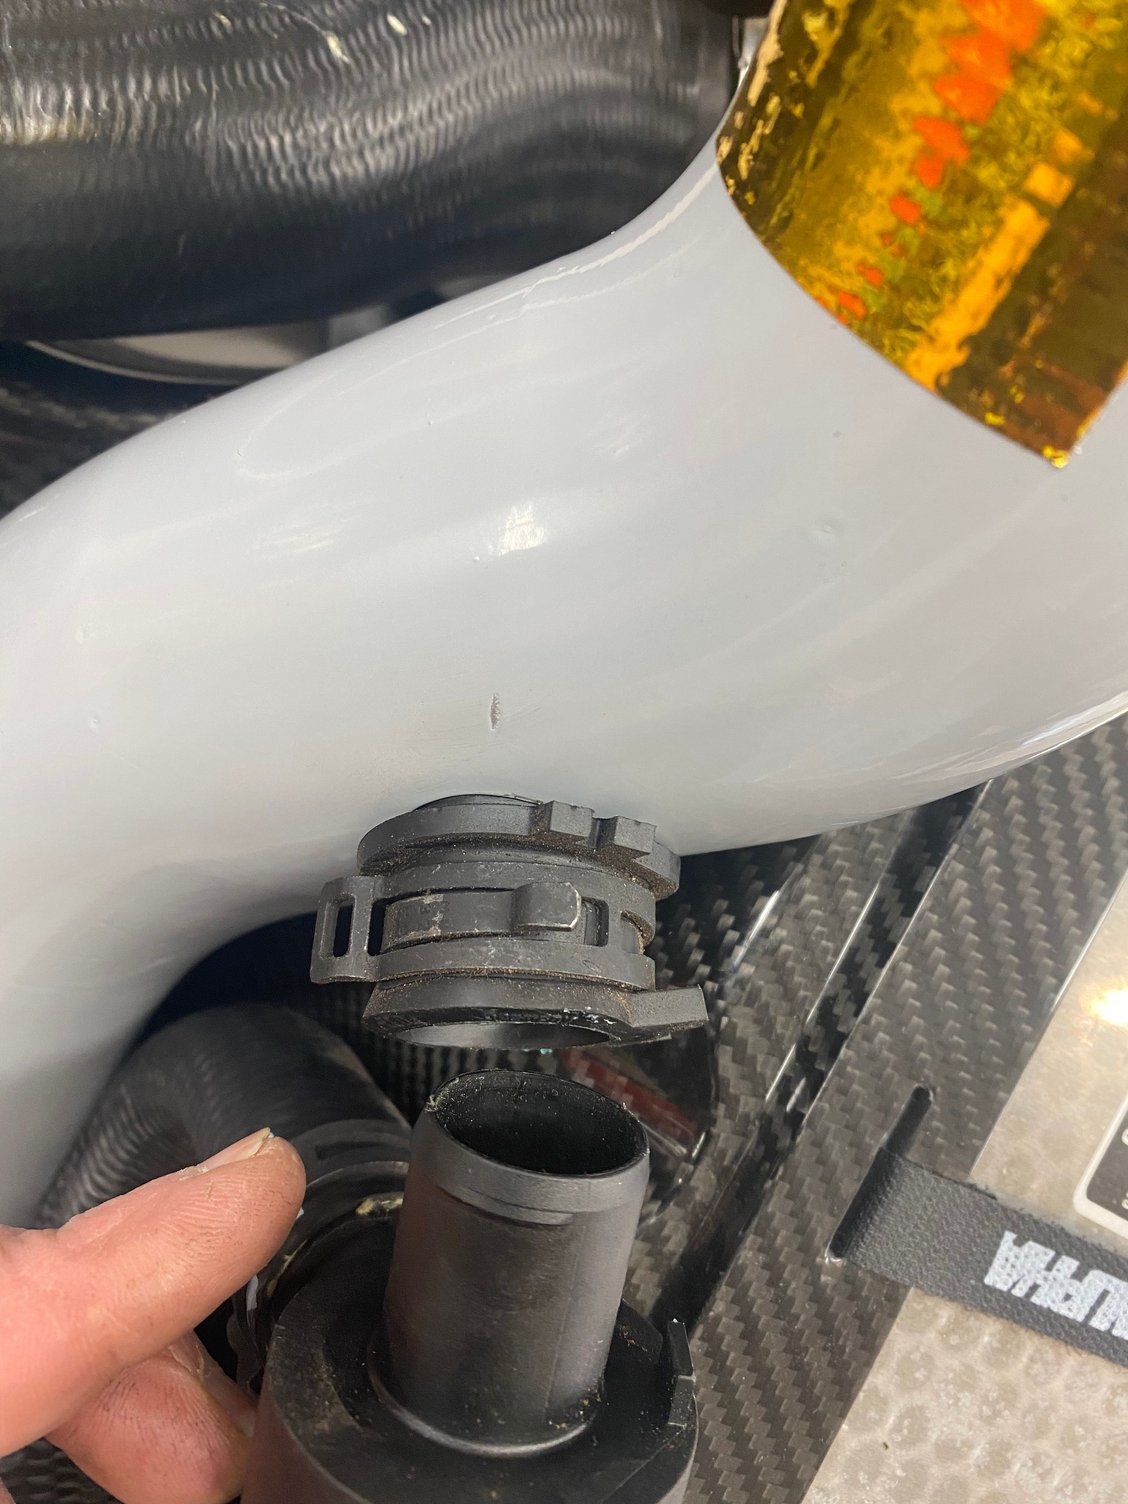
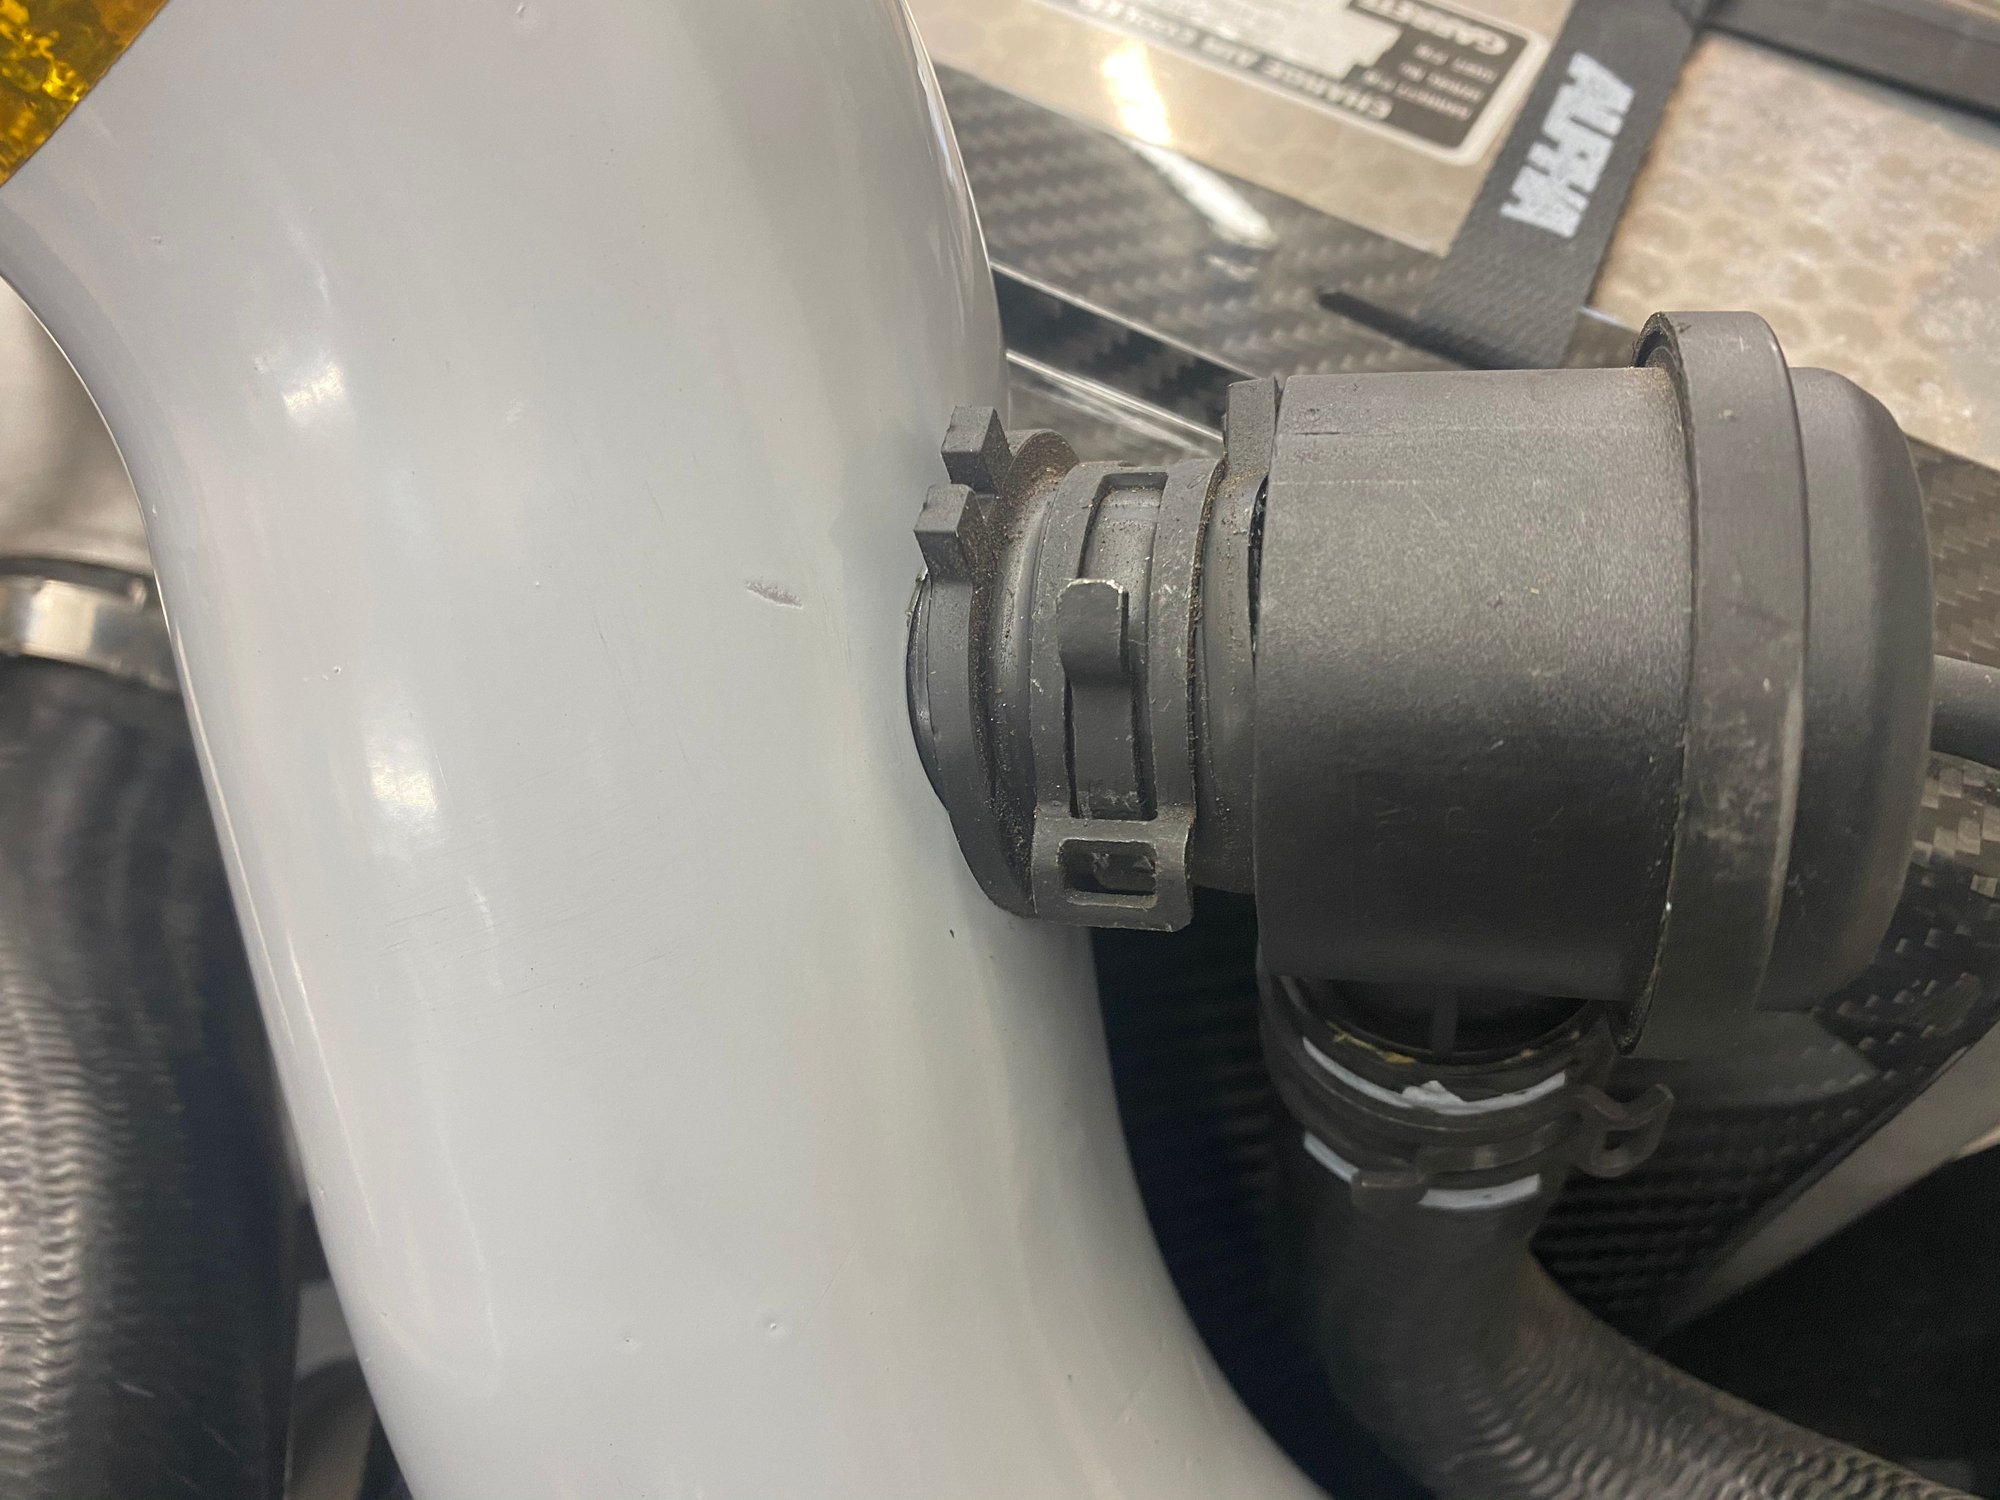
Removing the original tube fairly easy. Remove the by-pass valve from rubber grommet, then remove the grommet.
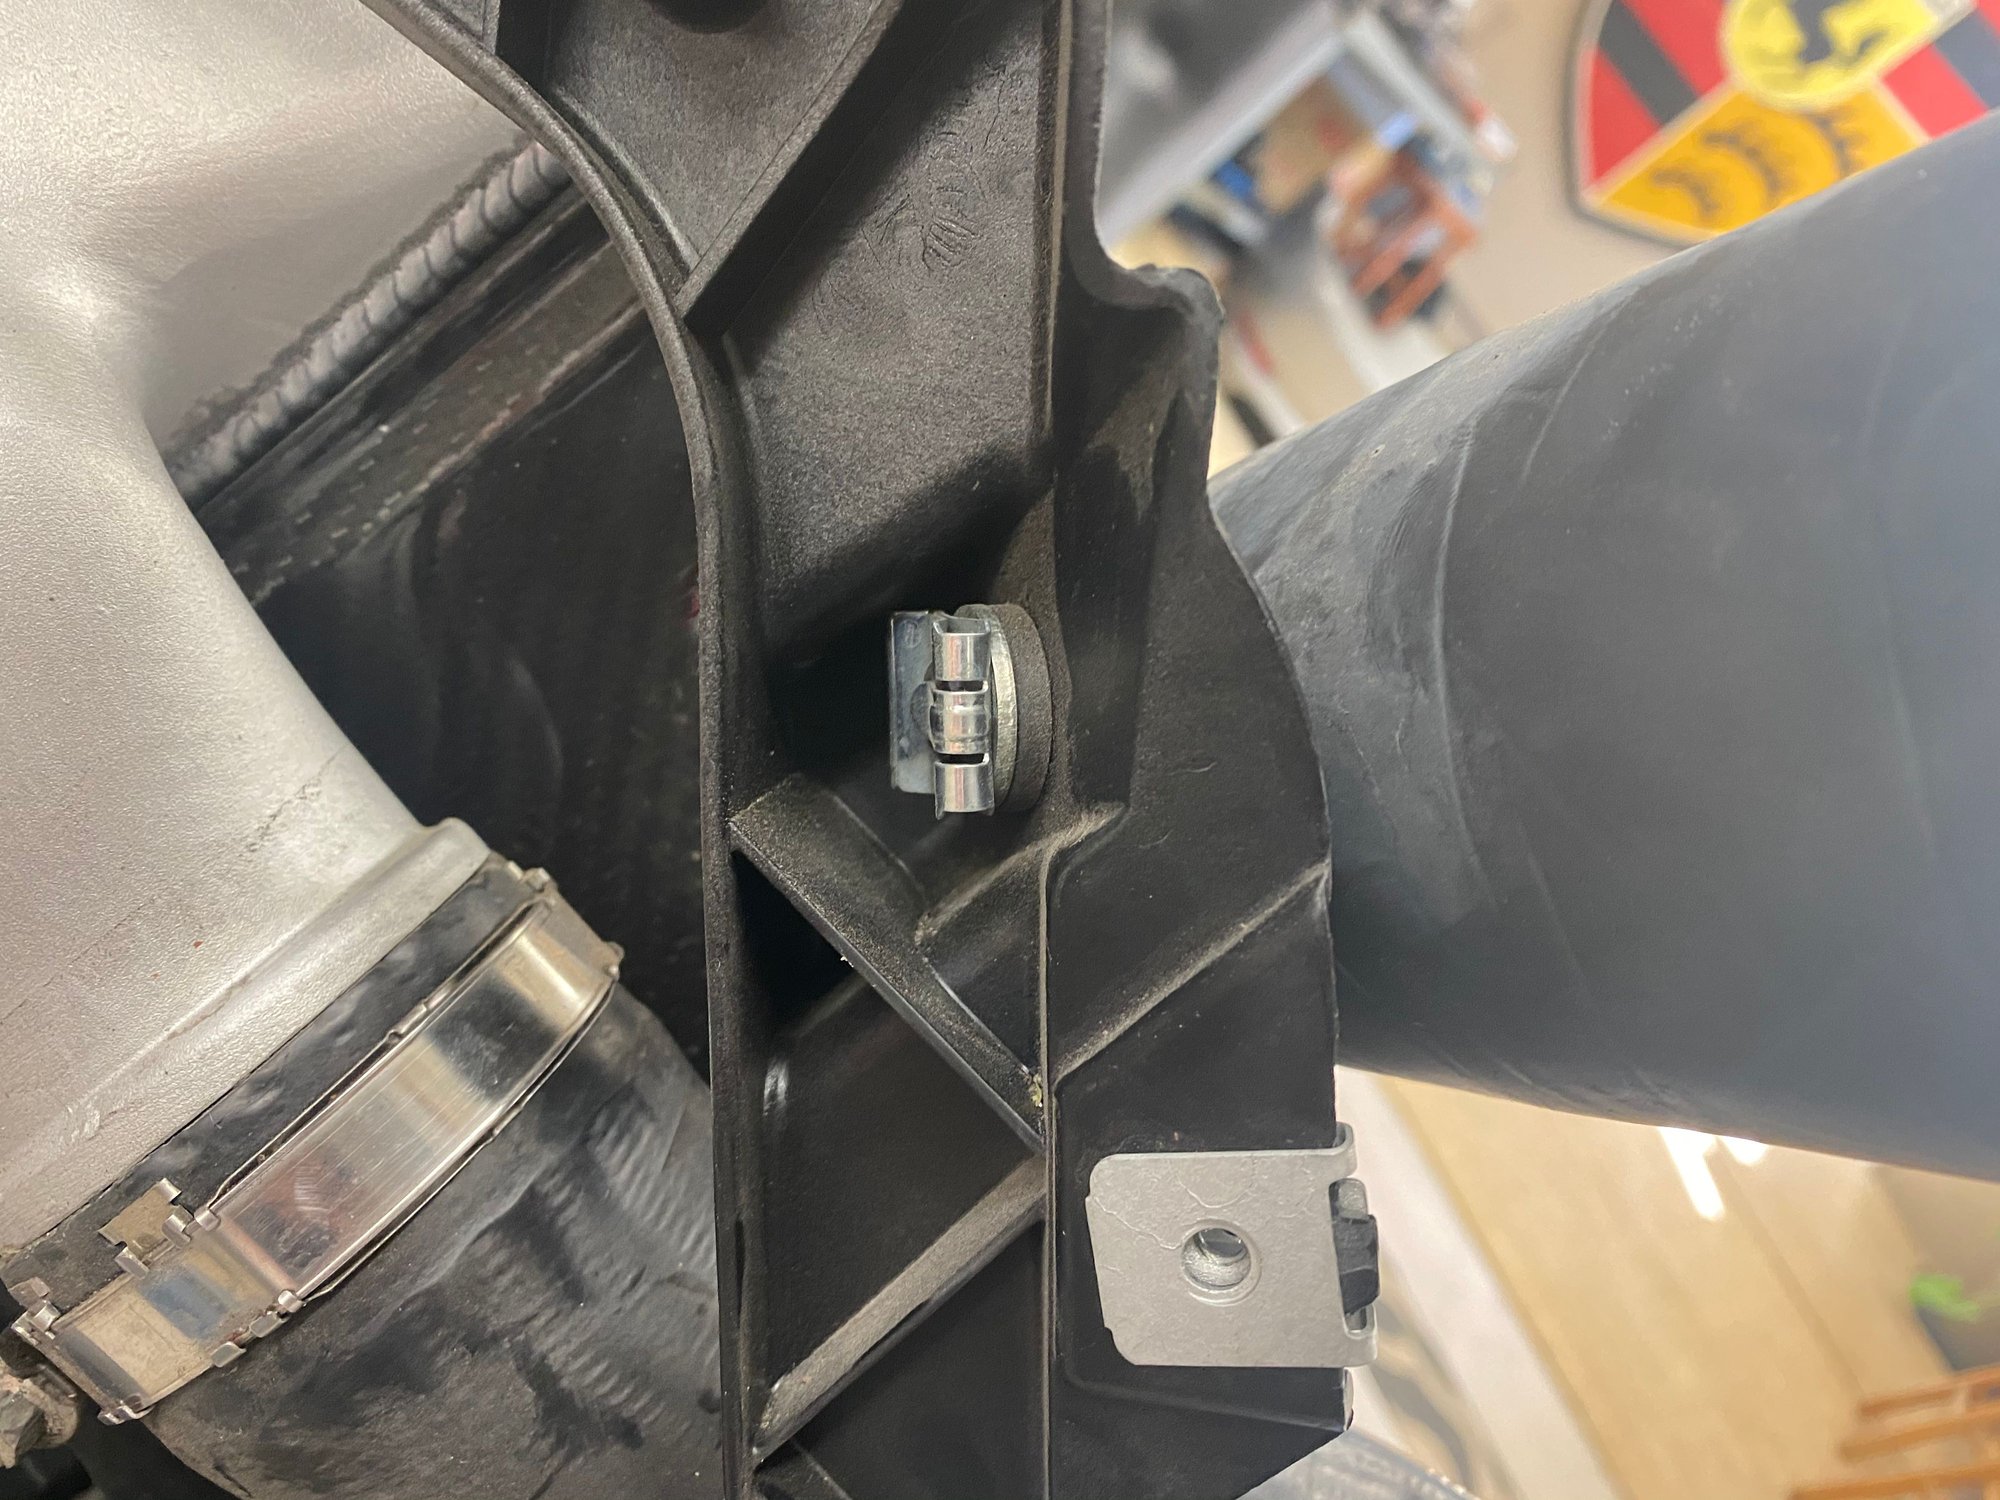
And the tube securing clip. You won't be using this clip with the new tube.
Now slide out the tube.
They look almost the same! Maybe not.
Last edited by 991.two; 03-25-2020 at 07:13 PM.
Reason: correction


 03-14-2020, 06:40 PM

 still plenty fast though!